40X AND 50X - Sunbelt Transport Refrigeration
40X AND 50X - Sunbelt Transport Refrigeration 40X AND 50X - Sunbelt Transport Refrigeration
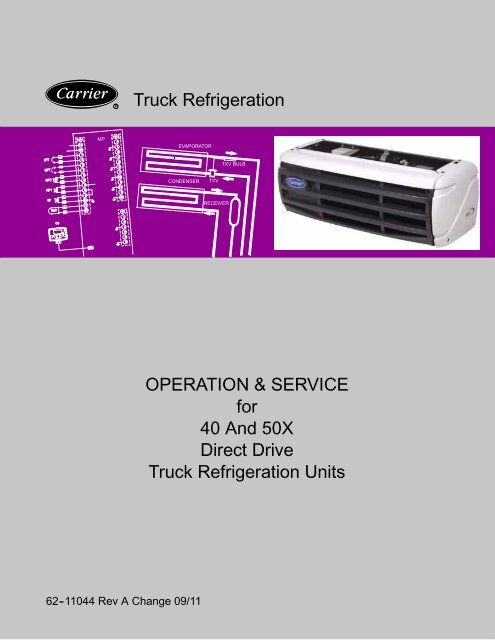
R Truck Refrigeration MP EVAPORATOR TXV BULB CONDENSER TXV RECEIVER OPERATION & SERVICE for 40 And 50X Direct Drive Truck Refrigeration Units 62--11044 Rev A Change 09/11
- Page 2 and 3: OPERATION AND SERVICE MANUAL 40X An
- Page 4 and 5: PARAGRAPH NUMBER TABLE OF CONTENTS
- Page 6 and 7: FIGURE NUMBER LIST OF ILLUSTRATIONS
- Page 8 and 9: SPECIFIC WARNING AND CAUTION STATEM
- Page 10 and 11: 1.1 INTRODUCTION WARNING Beware of
- Page 12 and 13: 3 4 1 2 13 14 15 5 12 11 10 9 8 7 6
- Page 14 and 15: START BOX LOCATION (SINGLE PHASE ON
- Page 16 and 17: 1.2.4 Condenser Pressure Control Va
- Page 18 and 19: l. Low Pressure Switch (LP) Opens o
- Page 20 and 21: 1.8 REFRIGERANT CIRCUIT 1.8.1 REFRI
- Page 22 and 23: TXV EQUALIZER LINE 26 24 23 DISCHAR
- Page 24 and 25: SECTION 2 OPERATION WARNING Beware
- Page 26 and 27: Additional Key Functions To access
- Page 28 and 29: Start -up on Road with cool setpoin
- Page 30 and 31: OPTIONAL STANDBY HEAT KIT hSOF : st
- Page 32 and 33: 2.7.3 Clearing Past Alarm Messages
- Page 34 and 35: 3.2 DEFROST CYCLE Defrost is an ind
- Page 36 and 37: 4.2 INSTALLING R-404a MANIFOLD GAUG
- Page 38 and 39: 4.3.3 Removing Complete Charge Conn
- Page 40 and 41: 4.6.2 Installing a Complete Charge
- Page 42 and 43: 4.7 CHECKING AND REPLACING FILTER-D
- Page 44 and 45: 4.11 ADJUSTING THE COMPRESSOR PRESS
- Page 46 and 47: Table 4-5. R-404a Temperature -Pres
- Page 48 and 49: Table 5-1 Alarm Indications - Conti
- Page 50 and 51: Table 5-2 Mechanical Indications -
R<br />
Truck <strong>Refrigeration</strong><br />
MP<br />
EVAPORATOR<br />
TXV BULB<br />
CONDENSER<br />
TXV<br />
RECEIVER<br />
OPERATION & SERVICE<br />
for<br />
40 And <strong>50X</strong><br />
Direct Drive<br />
Truck <strong>Refrigeration</strong> Units<br />
62--11044 Rev A Change 09/11
OPERATION <strong>AND</strong><br />
SERVICE MANUAL<br />
<strong>40X</strong> And <strong>50X</strong><br />
DIRECT DRIVE<br />
TRUCK REFRIGERATION UNITS
PARAGRAPH NUMBER<br />
TABLE OF CONTENTS<br />
GENERAL SAFETY NOTICES ............................................................<br />
FIRST AID<br />
.............................................................................<br />
OPERATING PRECAUTIONS<br />
............................................................<br />
MAINTENANCE PRECAUTIONS ..........................................................<br />
SPECIFIC WARNING <strong>AND</strong> CAUTION STATEMENTS ........................................<br />
Page<br />
Safety-1<br />
Safety-1<br />
Safety-1<br />
Safety-1<br />
Safety-1<br />
DESCRIPTION ............................................................................... 1-1<br />
1.1 INTRODUCTION ..................................................................... 1-1<br />
1.2 CONDENSING SECTION ............................................................. 1-1<br />
1.2.1 Condenser Coil ................................................................... 1-1<br />
1.2.2 Filter Drier ........................................................................ 1-1<br />
1.2.3 Hot Gas Solenoid Valve (HGS1) ..................................................... 1-1<br />
1.2.4 Condenser Pressure Control Valve (HGS2) ........................................... 1-7<br />
1.2.5 Compressor ...................................................................... 1-7<br />
1.2.6 Receiver ......................................................................... 1-7<br />
1.2.7 High Pressure Switch (HP1) ........................................................ 1-7<br />
1.2.8 Condenser Pressure Control Switch (HP2) ............................................ 1-7<br />
1.2.9 Standby High Pressure Switch (HP3) ................................................ 1-7<br />
1.2.10 Standby Motor .................................................................... 1-7<br />
1.3 EVAPORATOR SECTION ............................................................. 1-7<br />
1.3.1 Thermostatic Expansion Valve ...................................................... 1-7<br />
1.3.2 Bypass System ................................................................... 1-7<br />
1.3.3 Defrost Termination Thermostat (DTT) ............................................... 1-7<br />
1.3.4 Quench Valve (BPV) ............................................................... 1-7<br />
1.3.5 Evaporator Coil ................................................................... 1-7<br />
1.3.6 Low Pressure Switch (LP) .......................................................... 1-7<br />
1.4 SYSTEM OPERATING CONTROLS <strong>AND</strong> COMPONENTS ................................. 1-8<br />
1.5 UNIT SPECIFICATIONS ............................................................... 1-8<br />
1.5.1 COMPRESSOR REFERENCE DATA ................................................ 1-8<br />
1.5.2 REFRIGERATION SYSTEM DATA .................................................. 1-8<br />
1.5.3 ELECTRICAL DATA ............................................................... 1-9<br />
1.6 TORQUE VALUES .................................................................... 1-9<br />
1.7 SAFETY DEVICES ................................................................... 1-10<br />
1.8 REFRIGERANT CIRCUIT ............................................................. 1-11<br />
1.8.1 REFRIGERANT CIRCUIT DURING COOLING ........................................ 1-11<br />
1.8.2 REFRIGERANT CIRCUIT DURING HEAT <strong>AND</strong> DEFROST ............................. 1-11<br />
ix 62--11044
PARAGRAPH NUMBER<br />
TABLE OF CONTENTS<br />
OPERATION ................................................................................. 2-1<br />
2.1 CONTROL SYSTEM .................................................................. 2-1<br />
Page<br />
2.1.1 Introduction ...................................................................... 2-1<br />
2.1.2 Microprocessor ................................................................... 2-1<br />
2.1.3 Cab Command .................................................................... 2-1<br />
2.2 START--UP .......................................................................... 2-3<br />
2.2.1 Inspection ........................................................................ 2-3<br />
2.2.2 Starting .......................................................................... 2-3<br />
2.2.3 Start--up Process Prior to Software I.90 .............................................. 2-4<br />
2.2.4 Start--up Process Beginning with Software I.90 ........................................ 2-4<br />
2.2.5 Minimum Shut--Down Time on Standby .............................................. 2-5<br />
2.3 SETPOINT ADJUSTMENT ............................................................ 2-5<br />
2.4 DEFROST ........................................................................... 2-5<br />
2.5 MICROPROCESSOR CONFIGURATION ................................................ 2-6<br />
2.6 MODIFICATION OF PARAMETERS .................................................... 2-7<br />
2.7 ALARM DISPLAY ..................................................................... 2-8<br />
2.7.1 Low Battery Voltage Alarm ......................................................... 2-8<br />
2.7.2 Accessing Alarm Messages ........................................................ 2-8<br />
2.7.3 Clearing Past Alarm Messages ...................................................... 2-9<br />
2.8 STOPPING THE UNIT ................................................................ 2-9<br />
TEMPERATURE CONTROL ................................................................... 3-1<br />
3.1 SEQUENCE OF OPERATION .......................................................... 3-1<br />
3.1.1 Perishable Mode .................................................................. 3-1<br />
3.1.2 Frozen Mode ..................................................................... 3-1<br />
3.2 DEFROST CYCLE .................................................................... 3-2<br />
3.3 MINIMUM OFF TIME ................................................................. 3-2<br />
SERVICE .................................................................................... 4-1<br />
4.1 PREVENTATIVE MAINTENANCE ...................................................... 4-1<br />
4.2 INSTALLING R-404a MANIFOLD GAUGE SET ........................................... 4-2<br />
4.2.1 Preparing Manifold Gauge/Hose Set for Use .......................................... 4-2<br />
4.2.2 Connecting Manifold Gauge/Hose Set ................................................ 4-2<br />
4.2.3 Removing the Manifold Gauge Set .................................................. 4-3<br />
4.3 REMOVING THE REFRIGERANT CHARGE ............................................. 4-3<br />
4.3.1 Refrigerant Removal from a Non--operative Standby Compressor ........................ 4-3<br />
4.3.2 Pumping The Unit Down if Standby is Available ....................................... 4-3<br />
4.3.3 Removing Complete Charge ........................................................ 4-4<br />
4.4 REFRIGERANT LEAK CHECKING ..................................................... 4-4<br />
4.5 EVACUATION <strong>AND</strong> DEHYDRATION .................................................... 4-4<br />
4.5.1 General .......................................................................... 4-4<br />
4.5.2 Preparation ....................................................................... 4-4<br />
4.5.3 Evacuation and Dehydration -- Complete System. ..................................... 4-4<br />
4.5.4 Evacuation and Dehydration -- Partial System. ........................................ 4-5<br />
62--11044<br />
x
PARAGRAPH NUMBER<br />
TABLE OF CONTENTS<br />
4.6 CHARGING THE REFRIGERATION SYSTEM ........................................... 4-5<br />
Page<br />
4.6.1 Checking the Refrigerant Charge .................................................... 4-5<br />
4.6.2 Installing a Complete Charge (See Figure 4-3) ........................................ 4-6<br />
4.6.3 Adding a Partial Charge (See Figure 4-4) ............................................. 4-7<br />
4.7 CHECKING <strong>AND</strong> REPLACING FILTER-DRIER ........................................... 4-8<br />
4.7.1 Checking Filter-Drier ............................................................... 4-8<br />
4.7.2 Replacing The Filter-Drier .......................................................... 4-8<br />
4.8 HIGH PRESSURE (HP1), CONDENSER PRESSURE CONTROL (HP2), ST<strong>AND</strong>BY HIGH PRESSURE<br />
(HP3)(ST<strong>AND</strong>BY UNITS ONLY) SUCTION BYPASS PRESSURE (HP4) (<strong>50X</strong> UNITS ONLY), OR LOW PRES-<br />
SURE SWITCHES ......................................................................... 4-8<br />
4.8.1 Removing Switches ............................................................... 4-8<br />
4.8.2 Checking Switches ................................................................ 4-8<br />
4.9 CHECKING <strong>AND</strong> REPLACING CONDENSER FAN MOTOR BRUSHES ..................... 4-8<br />
4.10 HOT GAS SOLENOID VALVE (HGS1), CONDENSER PRESSURE CONTROL VALVE (HGS2) <strong>AND</strong><br />
QUENCH VALVE (BPV) ..................................................................... 4-9<br />
4.10.1 Replacing Solenoid Coil ........................................................... 4-9<br />
4.10.2 Replacing Valve Internal Parts ....................................................... 4-9<br />
4.11 ADJUSTING THE COMPRESSOR PRESSURE REGULATING VALVE (CPR) ................ 4-10<br />
4.12 THERMOSTATIC EXPANSION VALVE .................................................. 4-10<br />
4.12.1 Replacing Expansion Valve ......................................................... 4-10<br />
4.12.2 Measuring superheat .............................................................. 4-10<br />
4.12.3 Checking the TXV Orifice Strainer ................................................... 4-11<br />
4.13 COMPRESSOR OIL TYPE ............................................................ 4-11<br />
4.14 MICROPROCESSOR ................................................................. 4-11<br />
4.15 EVAPORATOR COIL CLEANING ....................................................... 4-11<br />
4.16 CONDENSER COIL CLEANING ........................................................ 4-11<br />
TROUBLESHOOTING ......................................................................... 5-1<br />
5.1 INTRODUCTION ..................................................................... 5-1<br />
5.2 REFRIGERATION .................................................................... 5-3<br />
5.2.1 Unit Will Not Cool ................................................................. 5-3<br />
5.2.2 Unit Runs But Has Insufficient Cooling ............................................... 5-3<br />
5.2.3 Unit Operates Long or Continuously in Cooling ....................................... 5-3<br />
5.2.4 Unit Will Not Heat or Heating Insufficient ............................................. 5-3<br />
5.2.5 Defrost Malfunction ............................................................... 5-3<br />
5.2.6 Abnormal Pressure ............................................................... 5-4<br />
5.2.6.1 Cooling ........................................................................ 5-4<br />
5.2.6.2 Heating ........................................................................ 5-4<br />
5.2.7 Abnormal Noise .................................................................. 5-4<br />
5.2.8 Cab Command Malfunction ........................................................ 5-4<br />
5.3 No Evaporator Air Flow or Restricted Air Flow ............................................ 5-4<br />
5.3.1 Expansion Valve .................................................................... 5-5<br />
5.3.2 Malfunction Hot Gas Solenoid or Condenser Pressure Regulating Valve .................... 5-5<br />
5.3.3 Standby Compressor Malfunction ..................................................... 5-5<br />
SCHEMATIC DIAGRAMS ...................................................................... 6-1<br />
6.1 INTRODUCTION ..................................................................... 6-1<br />
xi 62--11044
FIGURE NUMBER<br />
LIST OF ILLUSTRATIONS<br />
Figure 1-1 Main Unit Components ............................................................ 1-2<br />
Figure 1-2 Condenser ....................................................................... 1-3<br />
Figure 1-3 Control Box ........................................................................ 1-4<br />
Figure 1-4 Start Box (Single Phase Only) ...................................................... 1-5<br />
Figure 1-5 Evaporator (<strong>50X</strong> Shown) .......................................................... 1-6<br />
Figure 1-6 Cab Command Two ............................................................... 1-8<br />
Figure 1-7 <strong>Refrigeration</strong> Circuit Cooling Cycle .................................................. 1-12<br />
Figure 1-8 <strong>Refrigeration</strong> Circuit Heating and Defrost Cycle -- HGS2 Open .......................... 1-13<br />
Figure 1-9 <strong>Refrigeration</strong> Circuit Heating and Defrost Cycle -- HGS2 Closed ......................... 1-14<br />
Figure 2-1 Cab Command ................................................................... 2-1<br />
Figure 2-2 Green Light Status ................................................................ 2-2<br />
Figure 2-3 Configuration Button .............................................................. 2-6<br />
Figure 3-1 Operating Sequence -- Perishable Mode ............................................. 3-1<br />
Figure 3-2 Operating Sequence -- Frozen Mode ................................................ 3-1<br />
Figure 4-1 Manifold Gauge Set (R-404a) ....................................................... 4-3<br />
Figure 4-2 Vacuum Pump Connection ......................................................... 4-5<br />
Figure 4-3 Procedure for Adding A Complete Charge ............................................ 4-6<br />
Figure 4-4 Partial Charge Procedure .......................................................... 4-7<br />
Figure 4-5 Fan motor brushes ................................................................ 4-8<br />
Figure 4-6 Typical Setup For Testing Pressure Switches HP1, HP2, HP3 and HP4 .................. 4-8<br />
Figure 4-7 Hot Gas Valve, Condenser Pressure Control Valve, Quench Valve or Suction Bypass Valve (<strong>50X</strong> Only)<br />
(Hot Gas Valve Shown) ....................................................................... 4-9<br />
Figure 4-8 Compressor Pressure Regulating Valve (CPR) ........................................ 4-9<br />
Figure 4-9 Thermostatic Expansion Valve Bulb And Thermocouple ................................ 4-10<br />
Figure 6-1 Electrical Schematic Wiring Diagram - Based On Dwg. No. 62-61438 Rev C ............. 6-2<br />
Figure 6-2 Electrical Schematic Wiring Diagram - Based On Dwg. No. 62-61438 Rev C ............. 6-3<br />
Figure 6-3 Electrical Schematic Wiring Diagram - Based On Dwg. No. 62-61439 Rev C ............. 6-5<br />
Figure 6-4 Electrical Schematic Wiring Diagram - Based On Dwg. No. 62-61440 Rev D ............. 6-7<br />
LIST OF TABLES<br />
TABLE NUMBER<br />
Page<br />
Table 1-1 Model Chart ....................................................................... 1-1<br />
Table 1-2. Additional Support Manuals ......................................................... 1-1<br />
Table 1-3 Safety Devices .................................................................... 1-10<br />
Table 2-1 Error Messages .................................................................... 2-8<br />
Table 2-2 Alarm Messages ................................................................... 2-9<br />
Table 4-1 Preventative Maintenance After Start--up .............................................. 4-1<br />
Table 4-2 Preventative Maintenance After 15 minutes or more of operation ......................... 4-1<br />
Table 4-3 Preventive Maintenance schedule .................................................... 4-1<br />
Table 4-4 Service Category Descriptions ....................................................... 4-1<br />
Table 4-5. R-404a Temperature--Pressure Chart ................................................ 4-12<br />
Table 4-6. Sensor Resistance ................................................................. 4-12<br />
Table 5-1 Alarm Indications .................................................................. 5-1<br />
Table 5-1 Alarm Indications -- Continued ....................................................... 5-2<br />
Table 5-2 Mechanical Indications .............................................................. 5-3<br />
Page<br />
62--11044<br />
xii
SAFETY SUMMARY<br />
GENERAL SAFETY NOTICES<br />
The following general safety notices supplement the specific warnings and cautions appearing elsewhere in this<br />
manual. They are recommended precautions that must be understood and applied during operation and maintenance<br />
of the equipment covered herein. The general safety notices are presented in the following three sections labeled:<br />
First Aid, Operating Precautions and Maintenance Precautions. A listing of the specific warnings and cautions<br />
appearing elsewhere in the manual follows the general safety notices.<br />
Your Carrier Transicold refrigeration unit has been designed with the safety of the operator in mind. During normal<br />
operation, all moving parts are fully enclosed to help prevent injury. During all pre-trip inspections, daily inspections,<br />
and problem troubleshooting, you may be exposed to moving parts. Stay clear of all moving parts when the unit is in<br />
operation and when the ON/OFF switch is in the ON position.<br />
FIRST AID<br />
An injury, no matter how slight, should never go unattended. Always obtain first aid or medical attention immediately.<br />
OPERATING PRECAUTIONS<br />
Always wear safety glasses. Wear hearing protection as required.<br />
Keep hands, clothing and tools clear of the evaporator and condenser fans.<br />
No work should be performed on the unit until all circuit breakers and the Emergency Switch are turned off, and battery<br />
power supply is disconnected.<br />
Always work in pairs. Never work on the equipment alone.<br />
In case of severe vibration or unusual noise, stop the unit and investigate.<br />
MAINTENANCE PRECAUTIONS<br />
Beware of unannounced starting of the unit. This unit is equipped with Auto--Start in both the road and standby modes.<br />
The unit may start at any time. When performing any check of the system make certain the Emergency Switch is in the<br />
OFF position.<br />
Be sure power is turned off before working on motors, controllers, solenoid valves and electrical control switches. Tag<br />
circuit breaker and vehicle ignition to prevent accidental energizing of circuit.<br />
Do not bypass any electrical safety devices, e.g. bridging an overload, or using any sort of jumper wires. Problems with<br />
the system should be diagnosed, and any necessary repairs performed, by qualified service personnel.<br />
When performing any arc welding on the unit or container, disconnect all wire harness connectors from the<br />
microprocessor. Do not remove wire harness from the modules unless you are grounded to the unit frame with a static<br />
safe wrist strap.<br />
In case of electrical fire, open circuit switch and extinguish with CO 2 (never use water).<br />
REFRIGERANTS<br />
The refrigerant contained in your unit can cause frostbite, severe burns, or blindness when in direct contact with the<br />
skin or eyes. For this reason, and because of legislation regarding the handling of refrigerants during system service,<br />
we recommend that you contact your nearest Carrier Transicold authorized repair facility whenever your unit requires<br />
refrigeration system service .<br />
Safety-1<br />
62--11044
SPECIFIC WARNING <strong>AND</strong> CAUTION STATEMENTS<br />
To help identify the label hazards on the unit and explain the level of awareness each one carries, an explanation is<br />
given with the appropriate consequences:<br />
DANGER -- means an immediate hazard which WILL result in severe personal injury or death.<br />
WARNING -- means to warn against hazards or unsafe conditions which COULD result in severe personal injury or<br />
death.<br />
CAUTION -- means to warn against potential hazard or unsafe practice which could result in minor personal injury,<br />
product or property damage.<br />
The statements listed below are applicable to the refrigeration unit and appear elsewhere in this manual. These<br />
recommended precautions must be understood and applied during operation and maintenance of the equipment<br />
covered herein.<br />
WARNING<br />
Beware of unannounced starting of the unit. The unit may cycle the fans and operating compressor<br />
unexpectedly as control requirements dictate. To ensure unit will not start, place the EMERGENCY<br />
SWITCH (see Figure 1-1) in the OFF position. To ensure unit is without power, remove power plug<br />
and remove battery negative cable.<br />
WARNING<br />
Do not attempt to connect or remove power plug before ensuring the unit is OFF (press OFF key on<br />
Cab Command) and external power circuit breaker is open.<br />
WARNING<br />
Make sure the power plug is clean and dry before connecting to any power source<br />
WARNING<br />
Beware of V-belt and belt-driven components as the unit may start automatically.<br />
WARNING<br />
Do not use a nitrogen cylinder without a pressure regulator. (See Figure 4-6) Cylinder pressure is<br />
approximately 2350 psi (160 bar). Do not use oxygen in or near a refrigerant system as an explosion<br />
may occur.<br />
62--11044<br />
Safety-2
CAUTION<br />
Under no circumstances should anyone attempt to repair the microprocessor module or Cab Command!<br />
Should a problem develop with these components, contact your nearest Carrier Transicold<br />
dealer for replacement.<br />
CAUTION<br />
If starting unit for the first time after installation the compressor pressure regulating valve will need<br />
to be reset (refer to paragraph 4.11)<br />
CAUTION<br />
If starting unit for the first time after installation or starting after adding/removing an optional feature<br />
or if Owners operating parameters have changed the Configuration will need to be reset (refer to<br />
paragraph 2.5)<br />
CAUTION<br />
To prevent trapping liquid refrigerant in the manifold gauge set be sure set is brought to suction<br />
pressure before disconnecting.<br />
CAUTION<br />
When working with refrigerant use safety glasses and gloves to avoid burns. Hoses and copper tubing<br />
can be hot when unit is running.<br />
CAUTION<br />
Refrigerant R404a is a blend. Charging as a vapor will change the properties of the refrigerant. Only<br />
liquid charging through the king valve is acceptable.<br />
CAUTION<br />
Do not damage or over tighten the enclosing tube assembly. Also make sure all parts are placed in<br />
the enclosing tube in proper sequence to avoid premature coil burn-out.<br />
Safety-3<br />
62--11044
1.1 INTRODUCTION<br />
WARNING<br />
Beware of unannounced starting of the<br />
unit. The unit may cycle the fans and operating<br />
compressor unexpectedly as control requirements<br />
dictate. To ensure unit will not<br />
start, place the EMERGENCY SWITCH (see<br />
Figure 1-1) in the OFF position. To ensure<br />
unit is without power, remove power plug<br />
and remove battery negative cable.<br />
This manual contains Operating Data, Electrical Data<br />
and Service Instructions for the Carrier Transicold<br />
Model <strong>40X</strong> and <strong>50X</strong> truck refrigeration units listed in<br />
Table 1-1.<br />
The unit (Figure 1-1) is of the split system type with the<br />
condenser mounted outside the truck body, evaporator<br />
mounted in the body, and a CAB COMM<strong>AND</strong> control<br />
center mounted in the drivers compartment. Two types<br />
of compressor drive are available:<br />
The control system is a microprocessor controller. Once<br />
the controller is set at the desired temperature, the<br />
system automatically selects cooling and heating cycles<br />
as necessary to maintain the desired temperature within<br />
very close limits.<br />
D Road operation<br />
the compressor is driven by the engine of the vehicle<br />
when in operation over-the-road.<br />
D<br />
Road/Standby operation<br />
With the standby option a second compressor is<br />
mounted in the condenser section. This compressor<br />
is driven by 230 volt, single or three phase power.<br />
The model/serial nameplate is located inside the unit on<br />
the frame as shown in Figure 1-1.<br />
Model<br />
SECTION 1<br />
DESCRIPTION<br />
Table 1-1 Model Chart<br />
1.2 CONDENSING SECTION<br />
The condenser section (see Figure 1-2 & Figure 1-3)<br />
contains the condenser fan & coil, filter--drier, oil<br />
separator, receiver, condenser pressure control valve,<br />
condenser pressure control switch, hot gas valve, high<br />
pressure switch and microprocessor. On road/standby<br />
units the condenser also houses the standby<br />
compressor, control box and rectifier/transformer<br />
assembly. In addition, single phase units are fitted with a<br />
start box which contains the capacitors and relay.<br />
1.2.1 Condenser Coil<br />
The condenser is of the tube and fin type and acts as a<br />
heat exchanger in which the compressed refrigerant<br />
gas is condensed into a liquid and lowered in temperature.<br />
Air movement over the condenser is provided by a<br />
fan mounted in the condensing section.<br />
1.2.2 Filter Drier<br />
The drier is a cylindrical shell containing a drying agent<br />
and screen. It is installed in the liquid line and functions<br />
to keep the system clean and remove moisture from the<br />
refrigerant.<br />
1.2.3 Hot Gas Solenoid Valve (HGS1)<br />
HGS1 is normally closed and prevents discharge gas<br />
from entering the evaporator. The valve opens to allow<br />
hot gas refrigerant to be delivered from the compressor<br />
to the evaporator during heat or defrost modes.<br />
R-404a<br />
Condenser Weight<br />
Road<br />
Compressor<br />
Standby Compressor<br />
Road and<br />
LB KG Road<br />
Standby<br />
<strong>40X</strong> 6.6 3.0 TM 16 06VM306 (3 & 1 phase)<br />
<strong>50X</strong> 7.1 3.3 TM 16<br />
06VM307 (3 phase)<br />
06VM306 (1 phase)<br />
192 lb<br />
(87 kg)<br />
Table 1-2. Additional Support Manuals<br />
320 lb<br />
(145 kg)<br />
Evaporator Weight<br />
64 lb (29kg)<br />
86 lb (39 kg)<br />
Manual Number Equipment Covered Type of Manual<br />
62--11043 <strong>40X</strong>/<strong>50X</strong> Parts List<br />
62--11045 Direct Drive Truck Units With Cab Command Two Operator’s Manual<br />
62--11046 Direct Drive Truck Units With Cab Command Two Easy To Run Manual<br />
1--1 62-11044
NAMEPLATE<br />
EMERGENCY<br />
SWITCH<br />
CONDENSER<br />
CAB COMM<strong>AND</strong> TWO<br />
DRAIN HOSE WATER FITTINGS<br />
EVAPORATOR (<strong>40X</strong> SHOWN)<br />
Figure 1-1 MAIN UNIT COMPONENTS<br />
62-11044<br />
1--2
3 4<br />
1<br />
2<br />
13<br />
14<br />
15<br />
5<br />
12 11 10<br />
9<br />
8<br />
7<br />
6<br />
1.<br />
2.<br />
Standby Compressor<br />
Receiver<br />
3.<br />
4.<br />
Filter--Drier<br />
Sight Glass<br />
5.<br />
6.<br />
Condenser Coil<br />
Hot Gas Valve (HGS1) And Coil<br />
7. Condenser Pressure Control Valve (HGS2) And<br />
Coil<br />
8. Oil Separator<br />
9. Condenser Fan<br />
10. Fan Guard<br />
11. Transformer (TR)<br />
12. Frame Assembly<br />
13. Rectifier Bridge Assembly (RB)<br />
14. Heat Sink<br />
15. Condenser Fan Motor (CFM)<br />
Figure 1-2 Condenser<br />
1--3 62-11044
LOGIC BOARD<br />
5<br />
1<br />
2<br />
3<br />
4<br />
6 7<br />
9<br />
8<br />
9<br />
8<br />
THREE PHASE UNITS<br />
SINGLE PHASE UNITS<br />
7<br />
1.<br />
2.<br />
Microprocessor<br />
Standby Fuse (FS)<br />
3.<br />
4.<br />
Road Fuse (FR)<br />
Harness<br />
5 1A Field Replaceable Fuse (12--00526--88)<br />
(Starting with Controller S/N 1997)<br />
Figure 1-3 Control Box<br />
6.<br />
7.<br />
Fused Disconnect (FB) -- Three Phase Only<br />
Electronic Overload Relay (KR)<br />
8.<br />
9.<br />
Standby Contactor (MC)<br />
Primary Transformer Fuses<br />
(F1,2,3 Three Phase Units -- F1 Single Phase Units)<br />
62-11044<br />
1--4
START BOX LOCATION<br />
(SINGLE PHASE ONLY)<br />
3<br />
2<br />
1<br />
1<br />
4<br />
1. Start Capacitor<br />
2. Resistor, Start Capacitor Discharge<br />
3. Run Capacitor<br />
4. Start Relay<br />
Figure 1-4 Start Box (Single Phase Only)<br />
1--5 62-11044
1<br />
2<br />
3<br />
6<br />
7<br />
8<br />
9<br />
4<br />
10<br />
11<br />
14<br />
13<br />
12<br />
5<br />
15<br />
1.<br />
2.<br />
Evaporator Fan Motor & Blowers (EFM)<br />
Orifice<br />
3.<br />
4.<br />
Thermostatic Expansion Valve<br />
Evaporator Coil Assembly<br />
5.<br />
6.<br />
Compressor Pressure Regulating Valve (CPR)<br />
Defrost Termination Thermostat (DTT)<br />
7.<br />
8.<br />
Suction Bypass Valve (SBPV) (<strong>50X</strong> Only)<br />
Quench Valve (BPV)<br />
Figure 1-5 Evaporator (<strong>50X</strong> Shown)<br />
9.<br />
10.<br />
Low Pressure Switch (LP)<br />
High Ambient Pressure Switch (HP4) (<strong>50X</strong><br />
Only)<br />
11. Hot Gas Fitting<br />
12.<br />
13.<br />
Road Suction Line Fitting<br />
Standby Suction Line Fitting<br />
14.<br />
15.<br />
Liquid Line Fitting<br />
Liquid Line Check Valve<br />
62-11044<br />
1--6
1.2.4 Condenser Pressure Control Valve (HGS2)<br />
The condenser pressure control valve (or condenser<br />
closing valve) is a normally open valve that is powered<br />
when the condenser pressure control switch (HP2) is<br />
closed. With the solenoid coil de-energized, the valve is<br />
in the cool mode and the compressor discharge gas is<br />
delivered to the condenser. In the cool mode, heat is<br />
removed from the air inside the truck body and rejected<br />
to the surrounding air. With the solenoid coil energized,<br />
the valve is in the heat mode and the compressor discharge<br />
gas is diverted to the evaporator and rejected to<br />
the air inside the truck body.<br />
1.2.5 Compressor<br />
The compressor withdraws refrigerant gas from the<br />
evaporator and delivers it to the condenser at an increased<br />
pressure. The pressure is such that refrigerant<br />
heat can be absorbed by the surrounding air at ordinary<br />
temperatures.<br />
1.2.6 Receiver<br />
Liquid refrigerant from the condenser is delivered to the<br />
receiver. The receiver serves as a liquid reservoir when<br />
there are surges due to load changes in the system; as a<br />
storage space when pumping down the system and as a<br />
liquid seal against the entrance of refrigerant gas into<br />
the liquid line.<br />
1.2.7 High Pressure Switch (HP1)<br />
HP1 is a normally closed switch which monitors the<br />
system for high pressure and shuts down the unit when<br />
pressure rises above predetermined setting. For HP1<br />
settings see Section 1.5.2.<br />
1.2.8 Condenser Pressure Control Switch (HP2)<br />
HP2 is a normally open switch which closes to signal the<br />
microprocessor to activate the condenser fan. HP2 also<br />
cycles the condenser pressure control valve (HGS2)<br />
and the quench valve (BPV) in addition to the condenser<br />
fan in order to maintain discharge pressure for heating<br />
capacity. For HP2 settings see Section 1.5.2.<br />
1.2.9 Standby High Pressure Switch (HP3)<br />
HP3 is a normally closed switch mounted on the standby<br />
compressor which monitors the system for high pressure<br />
when in standby mode. It signals the microprocessor<br />
to shut down the unit when pressure rises above<br />
predetermined setting. For HP3 settings see Section<br />
1.5.2.<br />
1.2.10 Standby Motor<br />
The standby motor operates on nominal<br />
208/230v--1ph--60hz or 230v--3ph--60hz power. An<br />
overload and short cycle protection is provided along<br />
with automatic reset. Units are also equipped with a<br />
remote mounted power receptacle.<br />
1.3 EVAPORATOR SECTION<br />
The evaporator assembly (see Figure 1-1 and<br />
Figure 1-5) consists of the evaporator blowers (3 each<br />
for the <strong>50X</strong>, 2 each for the <strong>40X</strong>), the evaporator coil,<br />
thermostatic expansion valve, defrost termination<br />
thermostat, compressor pressure regulating valve, low<br />
pressure switch and quench valve. In addition, the <strong>50X</strong><br />
unit is fitted with a suction bypass valve and a high<br />
ambient pressure switch.<br />
1.3.1 Thermostatic Expansion Valve<br />
The thermostatic expansion valve is an automatic device<br />
which controls the flow of liquid to the evaporator<br />
according to changes in superheat of the refrigerant<br />
leaving the evaporator. The thermal expansion valve<br />
maintains a relatively constant degree of superheat in<br />
the gas leaving the evaporator regardless of suction<br />
pressure. Thus, the valve has a dual function; automatic<br />
expansion control and preventing liquid from returning<br />
to the compressor. For TXV superheat settings see<br />
Section 1.5.2. To adjust the TXV, refer to Section<br />
4.12.2.<br />
1.3.2 Bypass System<br />
a. Compressor Pressure Regulating Valve (CPR)<br />
The CPR valve is installed on the suction line to regulate<br />
the suction pressure entering the compressor. The CPR<br />
valve is set to limit the maximum suction pressure. For<br />
CPR settings refer to section 1.5.2.<br />
b. Suction Bypass (<strong>50X</strong> Only)<br />
During periods of high ambient operation, the high<br />
ambient pressure switch (HP4) opens to close the<br />
suction bypass valve (SBPV) and bring the compressor<br />
pressure regulating valve (CPR) into operation. On<br />
pressure fall, the switch closes to energize the suction<br />
bypass valve (SBPV), bypassing the compressor<br />
regulating valve. For HP4 settings refer to section 1.5.2.<br />
1.3.3 Defrost Termination Thermostat (DTT)<br />
Normally closed thermal switch which monitors setpoint.<br />
As evaporator cools to setpoint, the switch closes<br />
and signals microprocessor that defrost may be initiated.<br />
Switch terminates defrost by opening at predetermined<br />
setpoint. For DTT settings refer to section 1.5.2.<br />
1.3.4 Quench Valve (BPV)<br />
The quench valve is a normally closed solenoid valve<br />
controlled by the quench thermostat (BPT) mounted on<br />
the road compressor discharge line. The valve allows<br />
metered liquid refrigerant to enter the suction line in the<br />
evaporator in order to provide compressor cooling. For<br />
BPT settings refer to section 1.5.2.<br />
1.3.5 Evaporator Coil<br />
The evaporator is of the tube and fin type. The operation<br />
of the compressor maintains a reduced pressure within<br />
the coil. At this reduced pressure, the liquid refrigerant<br />
evaporates at a temperature sufficiently low enough to<br />
absorb heat from the air. Air movement over the evaporator<br />
is provided by an electric fan.<br />
1.3.6 Low Pressure Switch (LP)<br />
The low pressure switch is a normally closed switch<br />
which signals the microprocessor to shut down the unit<br />
when the system is outside the low pressure limit. For<br />
LP settings refer to section 1.5.2.<br />
1--7 62-11044
1.4 SYSTEM OPERATING CONTROLS <strong>AND</strong><br />
COMPONENTS<br />
The unit is furnished with a microprocessor control system.<br />
Once the setpoint is entered at the Cab Command,<br />
the unit will operate automatically to maintain the desired<br />
temperature within very close limits. See 2.1.1.<br />
WARNING<br />
Beware of unannounced starting of the<br />
evaporator or condenser fans. The unit may<br />
cycle fans unexpectedly as control requirements<br />
dictate.<br />
CAUTION<br />
Under no circumstances should anyone attempt<br />
to repair the microprocessor module<br />
or Cab Command! Should a problem develop<br />
with these components, contact your<br />
nearest Carrier Transicold dealer for replacement.<br />
Figure 1-6 Cab Command Two<br />
1.5 UNIT SPECIFICATIONS<br />
1.5.1 COMPRESSOR REFERENCE DATA<br />
Model TM 16<br />
06VM306Y TC6<br />
06V30660Y<br />
230/1/60 230/3/60<br />
Displacement 163 cc 6.9 cfm (11.8m3/h) 6.9 cfm (11.8m3/h)<br />
No. Cylinders 6 2<br />
Weight 7kg (88.2 lbs) 40 kg (88.2 lbs) 40 kg<br />
Oil Charge 250 cc (0.53 pt.) 1200 cc (2.5 pts.)<br />
Approved oil POE -- Mobil Arctic EAL 68 (Carrier Part Number 46-60002-02)<br />
1.5.2 REFRIGERATION SYSTEM DATA<br />
c. Defrost Timer<br />
Automatic triggering or at preset intervals :<br />
0, auto, 1h, 2h, 3h, 4h, 5h, 6h<br />
d. Defrost Termination Thermostat<br />
Opens on a temperature rise at: 50_ ¦ 5_F (10_ ¦<br />
3_C)<br />
Closes on a temperature fall at: 40_ ¦ 5_F(4.4_ ¦ 3_C)<br />
e. High Pressure Switch (HP1)<br />
Opens on a pressure rise at: 465 ¦ 10 psig (32 bar)<br />
Closes on a pressure fall at: 360 ¦ 10 psig (25 bar)<br />
f. Condenser Pressure Switch (HP2)<br />
Opens on a pressure fall at : 245 ¦ 10 psig1 (17 bar)<br />
Closes on a pressure rise at: 320 ¦ 10 psig (22 bar)<br />
g. Standby High Pressure Switch (HP3)<br />
Opens on a pressure rise at: 435 ¦ 10 psig (30 bar)<br />
Closes on a pressure fall at: 360 ¦ 10 psig (25 bar)<br />
h. High Ambient Pressure Switch (HP4) - <strong>50X</strong> Only<br />
Opens on a pressure rise at: 398 ¦ 10 psig (27.5 bar)<br />
Closes on a pressure fall at: 334 ¦ 10 psig (23 bar)<br />
i. Refrigerant charge<br />
RefertoTable1-1.<br />
j. Compressor Pressure Regulating Valve (CPR)<br />
<strong>40X</strong>: Setting; 36 ¦ 1 psig (2.3 bar) Adjust on road<br />
operation only.<br />
<strong>50X</strong>: Setting; 38 ¦ 1psig(2.6bar)<br />
k. Thermostatic Expansion Valve<br />
TES 2/ Orifice n_4/ MOP 75 psig (5.1 bar):<br />
Super heat: 13_ to 15_F (8_C) at 32_F (0_C)<br />
11_ to 12_F (7_C) at 0_F (--20_C)<br />
62-11044 1--8<br />
Change 09/11
l. Low Pressure Switch (LP)<br />
Opens on a pressure fall at: 6.0 inHg ¦ 6 (-0.2 bar)<br />
Closes on a pressure rise at: 14.5 psig ¦ 3psig(1bar)<br />
m. Quench Valve Thermostat (BPT)<br />
Opens on a temperature fall at: 220_ ¦ 7_F (105_ ¦<br />
4_C)<br />
Closes on a temperature rise at: 248_ ¦ 7_F (120_ ¦<br />
4_C)<br />
1.5.3 ELECTRICAL DATA<br />
a. Fan Motors<br />
Evaporator Fan Motor (EFM)<br />
Condenser Fan Motor (CFM)<br />
Bearing Lubrication Factory Lubricated Bearing Lubrication Factory Lubricated<br />
Horse Power 100w 70w<br />
Operating Amps 8.4 amps Operating Amps 7.5 amps<br />
Speed 2100 rpm (rated) Speed 2350/2600 rpm<br />
b. Standby Compressor Speed<br />
1740 rpm -- 60 hz<br />
c. Compressor Motor Ratings<br />
UNIT Voltage Frequency Phase kW HP<br />
Contactor Data<br />
MRA* LRA*<br />
40/<strong>50X</strong> 208 / 230 60 Hz 1 1.491 2 15.6 78.7<br />
40/<strong>50X</strong> 208 / 230 60 Hz 3 1.491 2 11.8 45.1<br />
* MRA = Maximum Rotor Amps LRA = Locked Rotor Amps<br />
d. Road Compressor Clutch (CLHR) Coil<br />
Amp Draw = 3.75A<br />
Resistance = 3.2Ω<br />
e. Hot Gas Solenoid Valve (HGS1 and HGS2) Coils<br />
Amp Draw = 1650 mAmp<br />
Resistance = 7.2Ω<br />
f. Suction Bypass Valve (SBPV) Coil<br />
Amp Draw = 1650 mAmp<br />
Resistance = 7.2Ω<br />
g. Quench Valve (BPV) Coil<br />
Amp Draw = 1160 mAmp<br />
Resistance = 10.3Ω<br />
1.6 TORQUE VALUES<br />
Assembly Ft--Lbs N.m Size<br />
Standby compressor 4.1 5.5 M10<br />
Evaporator Fan Motor -- Bracket 2.2 3 M4<br />
Condenser -- frame 7.4 10 M6<br />
Condenser Fan -- Blade 3.7 5 M6<br />
Mounting bolts 84.1 114 M12<br />
Change 09/11<br />
1--9 62-11044
1.7 SAFETY DEVICES<br />
System components are protected from damage caused by unsafe operating conditions by automatically shutting<br />
down the unit when such conditions occur. This is accomplished by the fuses and safety devices listed in the following<br />
table.<br />
Table 1-3 Safety Devices<br />
Unsafe Conditions<br />
Safety Device<br />
1 Excessive drop in pressure Automatic reset of low<br />
pressure switch<br />
2 Excessive current draw on all microprocessor<br />
outputs (evaporator<br />
and condenser fan)<br />
3 Excessive current draw motor<br />
compressor<br />
4 Excessive compressor discharge<br />
pressure<br />
5 Excessive current draw unit on<br />
standby<br />
6 Excessive current draw unit on<br />
road<br />
7 Excessive current draw unit on<br />
road<br />
8 Excessive current draw control<br />
circuit<br />
9<br />
Connection error on primary<br />
transformer<br />
10 Excessive compressor motor<br />
winding temperature<br />
11 Clutch malfunction - road (excessive<br />
current draw)<br />
12 Clutch malfunction - road (insufficient<br />
current draw)<br />
13<br />
Double power supply (road +<br />
standby)<br />
Automatic<br />
restart<br />
with fault<br />
cleared<br />
YES<br />
Device setting<br />
Cutout : --2.9 psig (-0.2 bar)<br />
Timer 5 mn<br />
Electronic relay YES Self-protected opening<br />
Overload relay<br />
Automatic reset of High<br />
pressure switch (HP1,<br />
HP3)<br />
YES<br />
YES<br />
Standby fuse (FS) (a) NO 50A<br />
Road fuse (FR) NO 50A<br />
Main Road fuse (FR1) (b) NO 60A<br />
See electrical wiring diagram<br />
Timer 5 mn<br />
Fuse on electronic board<br />
(Field Replaceable) (c) NO 1A (Time Delayed)<br />
F1 230/1/60<br />
5A (Time Delayed)<br />
NO<br />
F1, F2, F3 230/3/60 3.15A (Time Delayed)<br />
PTO (overload protector) YES Self-protected opening<br />
Electronic relay YES Self-protected opening<br />
Electronic relay<br />
Microprocessor<br />
YES<br />
YES<br />
Detection of min. threshold<br />
at 750 mA<br />
Display on Cab Command<br />
until one of the 2 power supplies<br />
have been disconnected.<br />
14 Low battery voltage Microprocessor YES Cutout/cut-in at 10 V<br />
15 Suction bypass coil shorted Suction Bypass Fuse<br />
(FSBP) (d) YES 3A<br />
16 Excess current draw of AC circuits<br />
Main Standby Fuse Block<br />
(FB) (e) YES 16A<br />
(a) On road / standby unit only<br />
(b) This fuse is located close to the vehicle battery (12 v).<br />
(c) This fuse is located on the logic board inside the microprocessor and protects the<br />
microprocessor against reverse polarity on the power supply. (See Figure 1-3).<br />
(d) <strong>50X</strong> units only<br />
(e) 230/3/60 units only<br />
62-11044<br />
1--10
1.8 REFRIGERANT CIRCUIT<br />
1.8.1 REFRIGERANT CIRCUIT DURING COOLING<br />
When cooling (See Figure 1-7), the unit operates as a<br />
vapor compression refrigeration system. The main<br />
components of the system are the reciprocating<br />
compressor, air-cooled condenser, thermostatic<br />
expansion valve, direct expansion evaporator and the<br />
hot gas solenoid.<br />
The compressor raises the pressure and temperature of<br />
the refrigerant and forces it through the discharge check<br />
valve and condenser pressure control valve into the<br />
condenser tubes. The discharge check valves prevent<br />
reverse flow through the non operating compressor.<br />
When operating on the road compressor, the flow also<br />
passes through an oil separator where oil is removed<br />
and returned to the compressor.<br />
The condenser fan circulates surrounding air over the<br />
outside of the condenser tubes. Heat transfer is thus<br />
established from the refrigerant gas (inside the tubes) to<br />
the condenser air (flowing over the tubes). The<br />
condenser tubes have fins designed to improve the<br />
transfer of heat. This removal of heat causes the<br />
refrigerant to liquefy. Liquid refrigerant flows from the<br />
condenser to the receiver.<br />
The receiver stores the additional charge necessary for<br />
low ambient operation and for heating and defrost<br />
modes.<br />
The refrigerant leaves the receiver and flows through a<br />
manual receiver shut-off valve (king valve).<br />
The refrigerant then flows through the filter-drier, where<br />
an absorbent keeps it dry and clean and then through a<br />
sight glass. The sight glass is fitted with an indicator that<br />
changes color to indicate moisture content of the<br />
refrigerant.<br />
The refrigerant then flows through the subcooler which<br />
removes additional heat from the liquid to improve<br />
system efficiency and then through the liquid line check<br />
valve. The check valve serves to prevent reverse flow of<br />
refrigerant during the heating/defrost cycle.<br />
The liquid than enters the thermostatic expansion valve<br />
(with external pressure equalizer) which regulates the<br />
flow rate of refrigerant towards the evaporator in order to<br />
obtain maximum use of the evaporator heat transfer<br />
surface.<br />
The evaporator tubes have aluminium fins to increase<br />
heat transfer; therefore heat is removed from the air<br />
circulated through the evaporator. This cold air is<br />
circulated throughout the truck to maintain the cargo at<br />
the desired temperature.<br />
The transfer of heat from the air to the low temperature<br />
liquid refrigerant causes the liquid to vaporize. The<br />
vapor at low temperature enters the compressor<br />
pressure regulating valve (CPR) which regulates<br />
refrigerant pressure entering the compressor to prevent<br />
overloading of the compressor. The refrigerant passes<br />
through the suction bypass valve (SBPV) and from this<br />
point the cycle starts over.<br />
During periods of high ambient operation, when liquid<br />
line pressure rises above the setting of the high ambient<br />
switch (HP4), the switch opens to de--energize (close)<br />
the suction bypass valve and bring the CPR into the<br />
circuit.<br />
The quench valve (BPV) opens as required to maintain<br />
a maximum discharge temperature of 127_C (260°F).<br />
1.8.2 REFRIGERANT CIRCUIT DURING HEAT <strong>AND</strong><br />
DEFROST<br />
When refrigerant vapor is compressed to a high<br />
pressure and temperature in a compressor, the<br />
mechanical energy necessary to operate the<br />
compressor is transferred to the gas as it is being<br />
compressed. This energy is referred to as the ”heat of<br />
compression ” and is used as the source of heat during<br />
the heating or defrost cycle (See Figure 1-8 and<br />
Figure 1-9).<br />
When the microprocessor activates heating or defrost,<br />
the hot gas solenoid valve (HGS1) energizes and the<br />
condenser pressure control valve (HGS2) energizes,<br />
closing the port to the condenser which allows heated<br />
refrigerant vapor to flow directly to the evaporator coil .<br />
The main difference between heating and defrosting is<br />
that, when in heating mode the evaporator fans continue<br />
to run circulating the air throughout the truck to heat the<br />
product. When defrosting, the evaporator fans stop,<br />
allowing the heated vapor to defrost any ice build-up on<br />
the coil.<br />
HGS2 closes when pressure is below the setting of the<br />
condenser pressure control switch (HP2)to prevent<br />
additional pressure rise in the system. When pressure is<br />
below the setting of the condenser pressure control<br />
switch, the HGS2 is closed to the condenser.<br />
Additionally the BPV is opened to allow additional<br />
refrigerant into the system and increase heating<br />
capacity.<br />
1--11 62-11044
TXV EQUALIZER LINE<br />
26<br />
24<br />
DISCHARGE<br />
LIQUID<br />
HOT GAS LINE<br />
SUCTION LINE<br />
23<br />
25<br />
27<br />
13<br />
21<br />
20<br />
22<br />
OR<br />
28<br />
29<br />
12<br />
19<br />
18<br />
17<br />
30<br />
5<br />
11<br />
14<br />
16<br />
4<br />
10<br />
15<br />
31<br />
2<br />
3<br />
9<br />
6<br />
8<br />
1<br />
7<br />
1<br />
2<br />
Road Compressor<br />
Quench Thermostat (BPT)<br />
3<br />
4<br />
Discharge Charging Port<br />
Oil Separator<br />
5<br />
6<br />
Road Discharge Check Valve<br />
Standby Discharge Service Valve<br />
7<br />
8<br />
Standby Compressor<br />
Standby Suction Service Valve<br />
9<br />
10<br />
Standby High Pressure Switch (HP3)<br />
Standby Discharge Check Valve<br />
11<br />
12<br />
Relief Valve<br />
Hot Gas Solenoid Valve (HGS1)<br />
13<br />
14<br />
Drain Pan Hot Gas Line<br />
High Pressure Switch (HP1)<br />
15<br />
16<br />
Condenser Pressure Control Switch (HP2)<br />
Condenser Pressure Control Valve (HGS2)<br />
Figure 1-7 <strong>Refrigeration</strong> Circuit Cooling Cycle<br />
17<br />
18<br />
Condenser Coil<br />
Receiver<br />
19<br />
20<br />
Manual Shut-off Valve (King Valve)<br />
Sight Glass<br />
21<br />
22<br />
Filter--Drier<br />
Subcooler<br />
23<br />
24<br />
Liquid Line Check Valve<br />
High Ambient Pressure Switch (HP4)<br />
(<strong>50X</strong> Only)<br />
25 Thermostatic Expansion Valve<br />
26<br />
27<br />
Quench Valve (BPV)<br />
Evaporator Coil<br />
28<br />
29<br />
Compressor Pressure Regulating Valve (CPR)<br />
Suction Bypass Valve (SBPV) (<strong>50X</strong> Only)<br />
30<br />
31<br />
Low Pressure Switch (LP)<br />
Suction Charging Port<br />
62-11044 1--12<br />
Change 09/11
TXV EQUALIZER LINE<br />
26<br />
24<br />
23<br />
DISCHARGE<br />
LIQUID<br />
HOT GAS LINE<br />
SUCTION LINE<br />
27<br />
25<br />
13<br />
21<br />
20<br />
22<br />
28<br />
29<br />
12<br />
19<br />
18<br />
17<br />
30<br />
3<br />
4<br />
5<br />
11<br />
10<br />
<strong>AND</strong><br />
14<br />
15<br />
16<br />
31<br />
2<br />
9<br />
6<br />
8<br />
1<br />
7<br />
1<br />
2<br />
Road Compressor<br />
Quench Thermostat (BPT)<br />
3<br />
4<br />
Discharge Charging Port<br />
Oil Separator<br />
5<br />
6<br />
Road Discharge Check Valve<br />
Standby Discharge Service Valve<br />
7<br />
8<br />
Standby Compressor<br />
Standby Suction Service Valve<br />
9<br />
10<br />
Standby High Pressure Switch (HP3)<br />
Standby Discharge Check Valve<br />
11<br />
12<br />
Relief Valve<br />
Hot Gas Solenoid Valve (HGS1)<br />
13<br />
14<br />
Drain Pan Hot Gas Line<br />
High Pressure Switch (HP1)<br />
15<br />
16<br />
Condenser Pressure Control Switch (HP2)<br />
Condenser Pressure Control Valve (HGS2)<br />
17<br />
18<br />
Condenser Coil<br />
Receiver<br />
19<br />
20<br />
Manual Shut-off Valve (King Valve)<br />
Sight Glass<br />
21<br />
22<br />
Filter--Drier<br />
Subcooler<br />
23<br />
24<br />
Liquid Line Check Valve<br />
High Ambient Pressure Switch (HP4)<br />
(<strong>50X</strong> Only)<br />
25 Thermostatic Expansion Valve<br />
26<br />
27<br />
Quench Valve (BPV)<br />
Evaporator Coil<br />
28<br />
29<br />
Compressor Pressure Regulating Valve (CPR)<br />
Suction Bypass Valve (SBPV) (<strong>50X</strong> Only)<br />
30<br />
31<br />
Low Pressure Switch (LP)<br />
Suction Charging Port<br />
Figure 1-8 <strong>Refrigeration</strong> Circuit Heating and Defrost Cycle - HGS2 Open<br />
Change 09/11<br />
1--13 62-11044
TXV EQUALIZER LINE<br />
26<br />
24<br />
23<br />
DISCHARGE<br />
LIQUID<br />
HOT GAS LINE<br />
SUCTION LINE<br />
25<br />
27<br />
13<br />
21<br />
20<br />
22<br />
28<br />
29<br />
12<br />
19<br />
18<br />
17<br />
30<br />
5<br />
11<br />
14<br />
16<br />
3<br />
4<br />
10<br />
15<br />
31<br />
2<br />
9<br />
6<br />
8<br />
1<br />
7<br />
1<br />
2<br />
Road Compressor<br />
Quench Thermostat (BPT)<br />
3<br />
4<br />
Discharge Charging Port<br />
Oil Separator<br />
5<br />
6<br />
Road Discharge Check Valve<br />
Standby Suction Service Valve<br />
7<br />
8<br />
Standby Compressor<br />
Standby Discharge Service Valve<br />
9<br />
10<br />
Standby High Pressure Switch (HP3)<br />
Standby Discharge Check Valve<br />
11<br />
12<br />
Relief Valve<br />
Hot Gas Solenoid Valve (HGS1)<br />
13<br />
14<br />
Drain Pan Hot Gas Line<br />
High Pressure Switch (HP1)<br />
15<br />
16<br />
Condenser Pressure Control Switch (HP2)<br />
Condenser Pressure Control Valve (HGS2)<br />
17<br />
18<br />
Condenser Coil<br />
Receiver<br />
19<br />
20<br />
Manual Shut-off Valve (King Valve)<br />
Sight Glass<br />
21<br />
22<br />
Filter--Drier<br />
Subcooler<br />
23<br />
24<br />
Liquid Line Check Valve<br />
High Ambient Pressure Switch (HP4)<br />
(<strong>50X</strong> Only)<br />
25 Thermostatic Expansion Valve<br />
26<br />
27<br />
Quench Valve (BPV)<br />
Evaporator Coil<br />
28<br />
29<br />
Compressor Pressure Regulating Valve (CPR)<br />
Suction Bypass Valve (SBPV) (<strong>50X</strong> Only)<br />
30<br />
31<br />
Low Pressure Switch (LP)<br />
Suction Charging Port<br />
Figure 1-9 <strong>Refrigeration</strong> Circuit Heating and Defrost Cycle - HGS2 Closed<br />
62-11044 1--14<br />
Change 09/11
SECTION 2<br />
OPERATION<br />
WARNING<br />
Beware of unannounced starting of the unit. The unit may cycle the fans and operating compressor<br />
unexpectedly as control requirements dictate.<br />
2.1 CONTROL SYSTEM<br />
The driver can display the box temperature, and see<br />
whether the setpoint is being maintained by checking<br />
2.1.1 Introduction<br />
the green indicator. The indicator lights up red in the<br />
event of a malfunction.<br />
CAUTION<br />
Under no circumstances should anyone attempt<br />
to service the microprocessor components<br />
or Cab Command. Should a problem<br />
develop with the control system,<br />
contact your nearest Carrier Transicold<br />
dealer for replacement components.<br />
When the battery voltage is too low, a fail-safe system<br />
shuts down the unit. Unit restart is automatic and<br />
time-delayed if the voltage rises to the normal level.<br />
The Control System consists of the microprocessor<br />
(Figure 1-3), Cab Command (Figure 2-1) and interconnecting<br />
wiring.<br />
a. The Microprocessor includes the temperature control<br />
software and necessary input/output circuitry to interface<br />
with the unit controls.<br />
b. The Cab Command is remotely mounted in the truck.<br />
The Cab Command includes the LCD display and<br />
keypad. The keypad and display serve to provide<br />
user access and readouts of microprocessor information.<br />
The information is accessed by keypad<br />
selections and viewed on the display.<br />
2.1.2 Microprocessor<br />
The microprocessor controls the following functions:<br />
a. Maintains the box temperature at setpoint by regulating<br />
the cooling, heat, off mode and automatic defrost<br />
cycles.<br />
b. Permanent displays the return air temperature and,<br />
on request, the setpoint temperature.<br />
c. Digital display and selection of data.<br />
For further details on digital message display, see<br />
section 2.7.<br />
2.1.3 Cab Command<br />
The Cab Command is mounted in the cab and allows the<br />
driver to carry out the control operations:<br />
• manual start up and shut-down of the unit<br />
• automatic start-up of the unit<br />
• adjust the setpoint<br />
• initiate manual defrost<br />
Figure 2-1 Cab Command<br />
a. Display<br />
The digital display consists of 4 alphanumeric<br />
characters. The default value displayed is the box<br />
temperature. The microprocessor enables selection of<br />
the display in degrees Celsius or Fahrenheit. The<br />
display also includes settings for defrost operation (dF)<br />
and three LEDs:<br />
Readout<br />
Standby operation LED<br />
Road operation LED<br />
Unit operating data LED<br />
D Green : cycling (left-hand side)<br />
D Red : malfunction (right-hand side)<br />
During start up the brightness of the display may be<br />
adjusted:<br />
Unit start-up<br />
Press during first 5 seconds<br />
the + or -- key to increase or<br />
decrease the display brightness.<br />
2--1 62-11044
Unit operating LEDs<br />
Green Light Status<br />
Under normal operation, the green LED will indicate the<br />
temperature control status as follows:<br />
b. Keypad<br />
The keypad consists of six keys that enable the operator<br />
to activate various functions, display operating data and<br />
modify operating parameters.<br />
Quick Flashing<br />
Green LED<br />
Setpoint +5_C<br />
Manual defrost control key<br />
NULL<br />
B<strong>AND</strong><br />
Slow Flashing<br />
Green LED<br />
Steady<br />
green LED<br />
Steady<br />
green LED<br />
Slow Flashing<br />
Green LED<br />
Quick Flashing<br />
Green LED<br />
Setpoint<br />
+1,2,or3_<br />
SETPOINT<br />
Setpoint<br />
-- 1, 2 or 3_<br />
Setpoint -- 5_C<br />
Unit start-up key<br />
Unit shut-down key in standby or road<br />
mode<br />
On road operation, the unit can also be<br />
shut down with the ignition key.<br />
Unit Data And Function Modification Keys<br />
The SET key, together with the + and --<br />
keys, enables display and modification<br />
of unit operating data.<br />
The display changes parameter each<br />
time the SET key is pressed.<br />
Decrease key for selected data<br />
Figure 2-2 Green Light Status<br />
Red Light Status<br />
For all alarms, except out--of--range alarms A12 and<br />
A13 (See Table 2-2), the steady red unit indicating LED<br />
will light until the alarm is cleared. At that point the<br />
steady green indicator LED will light and the alarm will<br />
become inactive.<br />
When the unit has been running for at least 15 minutes<br />
after setpoint has been reached and goes<br />
out--of--range, the red LED will flash according to the<br />
following chart:<br />
Increase key for selected data<br />
NOTE<br />
If no buttons are depressed within 5 seconds of<br />
pressing the ON key, the system reverts to box<br />
temperature.<br />
ALARM<br />
A12<br />
9°F (5°C)<br />
SETPOINT<br />
-1.8°F (-1°C)<br />
ALARM<br />
A13<br />
62-11044<br />
2--2
Additional Key Functions<br />
To access additional key functions, press and hold the<br />
SET key for 5 seconds. The microprocessor will provide<br />
a set of additional functions as the SET key is pressed<br />
additional times after the 5 second hold. The sequence<br />
for the additional functions is as follows:<br />
Press SET for 5 sec. : this enables<br />
access to the alarm codes<br />
Press to display the alarm list<br />
Press again to display software versions<br />
Press to display the cab command<br />
software version<br />
Press again to display road hourmeter<br />
(Road LED ON)<br />
Press again to display standby hourmeter<br />
(Standby LED ON)<br />
Press to display the present interval<br />
between defrosts (min) as calculated<br />
by the microprocessor.<br />
Press to display the elapsed time<br />
(min) since the last defrost<br />
Press to return to box temperature<br />
NOTE<br />
If no buttons are depressed within 5 seconds of<br />
pressing the ON key, the system reverts to box<br />
temperature.<br />
2.2 START -UP<br />
2.2.1 Inspection<br />
Before starting the truck engine or connecting standby<br />
power check the following<br />
a. Check condenser coil for cleanliness.<br />
b. Check condition of refrigerant hoses.<br />
c. Check condition and tension of compressor belt(s).<br />
d. Check condition of condenser fan blade, motor and<br />
brushes.<br />
e. Check truck battery fluid level.<br />
f. Check truck battery and terminal connections -- clean<br />
and tighten as necessary.<br />
g. Check defrost water drains from evaporator.<br />
h. Check evaporator coil for cleanliness.<br />
i. Check condition of evaporator blower wheels and<br />
motor.<br />
j. Check that oil is visible in standby compressor sight<br />
glass.<br />
2.2.2 Starting<br />
CAUTION<br />
If starting unit for the first time after installation<br />
the compressor pressure regulating<br />
valve will need to be set (refer to paragraph<br />
4.11)<br />
CAUTION<br />
If starting unit for the first time after installation<br />
or starting after adding/removing an<br />
optional feature or if owner’s operating parameters<br />
have changed the Configuration<br />
will need to be reset (refer to paragraph 2.5)<br />
Depending on desired mode of operation, either start<br />
the vehicle engine or connect the standby power plug.<br />
Press the ON key to start the unit<br />
(start-up is time-delayed for 40<br />
seconds).<br />
The digital display of the cab command<br />
displays the box temperature.<br />
Check that temperature set-point<br />
is correct by pressing the SET<br />
key; the set-point temperature is<br />
highlighted on the digital display.<br />
NOTE<br />
During start up, the evaporator motor speed increases<br />
continuously to selected speed over a<br />
30 seconds time period.<br />
2--3 62-11044
CONNECT POWER FOR ST<strong>AND</strong>BY<br />
If the unit is to be operated in the standby mode, connect<br />
power as follows:<br />
WARNING<br />
Do not attempt to connect or remove power<br />
plug before ensuring the unit is OFF (press<br />
OFF key on Cab Command) and external<br />
power circuit breaker is open.<br />
WARNING<br />
Make sure the power plug is clean and dry<br />
before connecting to any power source<br />
a. Check that the external power source corresponds to<br />
the characteristics of the unit (see paragraph 1.5.3<br />
step c.). Make sure external power source circuit<br />
breaker is open.<br />
b. Make sure unit is OFF by pressing the OFF button on<br />
the Cab Command.<br />
c. Plug the power cord into unit receptacle.<br />
d. Close external power source circuit breaker.<br />
2.2.3 Start -up Process Prior To Software I.90<br />
Start -up on Road with cool setpoint and box temp<br />
>-5°F ( -20.6°C):<br />
a. 0 time: ON key pushed<br />
b. 40 seconds: HGS1 ON (pressure equalization)<br />
c. 70 seconds: CLHR ON (Road clutch)<br />
d. 80 seconds: HGS1 OFF/ fans ON (unit in cool)<br />
Start -up on Standby with cool setpoint and box<br />
temp > -5°F ( -20.6°C):<br />
a. 0 time: ON key pushed<br />
b. 15 seconds: HGS1 ON (pressure equalization)<br />
c. 40 seconds: SCC ON (Standby contactor coil)<br />
d. 50 seconds: HGS1 OFF/ fans ON (unit in cool)<br />
Start -up on Road with heat setpoint and box temp<br />
>-5°F ( -20.6°C):<br />
a. 0 time: ON key pushed<br />
b. 40 seconds: HGS1/ HGS2/ CLHR ON<br />
c. 45 seconds: fans/ BPV ON (unit in heat)<br />
Start -up on Standby with heat setpoint and box<br />
temp > -5°F ( -20.6°C):<br />
a. 0 time: ON key pushed<br />
b. 10 seconds: HGS1/ HGS2 ON<br />
c. 20 seconds: SCC/ fans/ BPV ON (unit in heat)<br />
Start -up on Road with cool setpoint and box temp<br />
-5°F ( -20.6°C):<br />
a. 0 time: ON key pushed<br />
b. 15 seconds: HGS1 ON (pressure equalization)<br />
c. 40 seconds (Prior to Software I: SCC ON (Standby<br />
contactor coil)<br />
d. 50 seconds: HGS1 OFF/ fans ON (unit in cool)<br />
Start -up on Road with heat setpoint and box temp<br />
>-5°F ( -20.6°C):<br />
a. 0 time: ON key pushed<br />
b. 20 seconds: HGS1/ HGS2/ CLHR ON<br />
c. 45 seconds: fans/ BPV ON (unit in heat)<br />
Start -up on Standby with heat setpoint and box<br />
temp > -5°F ( -20.6°C):<br />
a. 0 time: ON key pushed<br />
b. 10 seconds: HGS1/ HGS2 ON<br />
c. 20 seconds: SCC/ fans/ BPV ON (unit in heat)<br />
62-11044<br />
2--4
Start -up on Road with cool setpoint and box temp<br />
2.5 MICROPROCESSOR CONFIGURATION<br />
CAUTION<br />
If starting unit for the first time after installation<br />
or starting after adding/removing an<br />
optional feature or if Owners operating parameters<br />
have changed, the Configuration<br />
will need to be reset.<br />
To access the configuration menu, press the<br />
configuration button (see Figure 2-3) located on the<br />
rear of Cab Command. Press the button only once to<br />
enter the menu. All changes are made with the keypad.<br />
Configuration<br />
button<br />
NUMBER OF EVAPORATOR FANS<br />
FAn1 : 1 fan<br />
FAn2 : 2 fans<br />
FAn3 : 3 fans<br />
Press the + and -- keys to change FAn1,<br />
FAn2 or FAn3.<br />
Press the SET key to validate and go to<br />
the next configuration.<br />
FAN SPEED<br />
SPd - : 1 st speed mini<br />
SPd= :2 nd speed medium<br />
SPd : 3 rd speed maxi<br />
Press the + and -- keys to change SPd--,<br />
SPd= or SPd<br />
Press the SET key to validate and go to<br />
the next configuration.<br />
Figure 2-3 Configuration Button<br />
TEMPERATURE UNIT<br />
Ut_C : Celsius degree display<br />
Ut_F : Fahrenheit degree display<br />
Press the + and -- keys to change Ut_C<br />
or Ut_F.<br />
Press the SET key to validate and go to<br />
the next configuration.<br />
UNIT VOLTAGE<br />
PS12 : unit voltage 12 V<br />
PS24 : unit voltage 24 V<br />
Press the + and -- keys to change PS12<br />
or PS24.<br />
Press the SET key to validate and go to<br />
the next configuration.<br />
2or3ETMODE<br />
2 Et : cool, null<br />
3 Et : cool, null, heat<br />
Press the + and -- keys to change<br />
2Etor3Et.<br />
Note : <strong>50X</strong> : 3 ET<br />
<strong>40X</strong> without condenser closing valve : 2<br />
ET<br />
<strong>40X</strong> with condenser closing valve :<br />
3ET<br />
Press the SET key to validate and go to<br />
the next configuration.<br />
OPTIONAL ROAD HEATING KIT<br />
hrOF : option road heating kit not<br />
installed<br />
hrOn : option road heating kit<br />
installed<br />
Press the + and -- keys to change hrOF<br />
or hrOn.<br />
Press the SET key to validate and go to<br />
the next configuration.<br />
62-11044<br />
2--6
OPTIONAL ST<strong>AND</strong>BY HEAT KIT<br />
hSOF : standby heating kit not<br />
installed<br />
hSOn : standby heating kit installed<br />
Press the + and -- keys to change hrOF<br />
or hrOn.<br />
Press the SET key to validate and go to<br />
the next configuration.<br />
DRAIN LINE HEATER<br />
drOF : drain heater (option) not<br />
installed<br />
drOn : drain heater (option) installed<br />
Press the + and -- keys to change drOF<br />
or drOn.<br />
Press the SET key to validate and go to<br />
the next configuration.<br />
DOOR SWITCH<br />
drOF : door switch (option) not<br />
installed<br />
drOn : door switch (option) installed<br />
Press the + and -- keys to change dOFF<br />
or d On.<br />
Press the SET key to validate and go to<br />
the next configuration.<br />
NOTE<br />
If no key is activated after validating a configuration,<br />
the system reverts to box temperature<br />
display and the configuration procedure is<br />
aborted. Only validated changes are recorded.<br />
2.6 MODIFICATION OF PARAMETERS<br />
The procedure to adjust the unit functional parameters<br />
is as follows:<br />
Press the ON key of the<br />
controller<br />
a.To Adjust The Brightness Of The Display:<br />
Press + or -- key. This step must be done within 5 seconds<br />
of pressing the ON key.<br />
b.To Continue With Parameters:<br />
Press and hold + and -- and Defrost<br />
keys in sequence.<br />
Modify parameters.<br />
Validate modified settings.<br />
Return to display of box temperature.<br />
1) The minimum setpoint parameter is displayed. The<br />
minimum setpoint can be selected by scrolling<br />
through available options [--20.2°F (--29°C), 68°F<br />
(20°C), 32°F(0°C)] using the (+) or (--) keys. Factory<br />
setting is --20°F. Selection MUST be validated by<br />
pressing the SET key.<br />
2) The maximum setpoint parameter is displayed. The<br />
maximum setpoint can be selected by scrolling<br />
through available options [68°F(20°C), 86°F(30°C)]<br />
using the (+) or (--) keys. Factory setting is 68°F.<br />
Selection MUST be validated by pressing the SET<br />
key.<br />
3) The null mode differential temperature is displayed<br />
next. This setting determines the temperature difference<br />
between box temperature and setpoint that controls<br />
compressor cycling. The differential can be selected<br />
by scrolling through available options [1.8°F<br />
(1°C), 3.6°F(2°C), or 5.4°F(3°C)] using the (+) or (--)<br />
keys. Factory setting is 3.6°F(2°C). Selection MUST<br />
be validated by pressing the SET key.<br />
4) The ON/OFF (Continuous airflow) parameter for the<br />
evaporator fans is displayed next. This feature determines<br />
whether the evaporator fan is on or off when<br />
the unit cycles off upon reaching setpoint. The factory<br />
setting is OFF. Change setting by using the (+) or (--)<br />
keys. Selection MUST be validated by pressing the<br />
SET key.<br />
5) The return air temperature will be displayed after the<br />
above sequence.<br />
2--7 62-11044
c.Defrost Parameters<br />
Shut-down unit.<br />
+ Display parameters.<br />
Modify parameters.<br />
Validate modified settings.<br />
Return to display of box temperature.<br />
NOTE<br />
If no buttons are depressed within 5 seconds of<br />
pressing the Defrost and On Keys (Step 2 of the<br />
above procedure) or modifying parameters, the<br />
Cab Command reverts to box temperature display<br />
and the procedure is aborted. Only validated<br />
changes are recorded<br />
Defrost Interval<br />
The defrost interval parameter is displayed next. This<br />
setting determines the length of time between defrosts:<br />
0 : complete deletion of defrost.<br />
AUT : The microprocessor calculates the time --<br />
factoring in length of last defrost, time between two<br />
defrost cycles in relation to setpoint and cargo.<br />
0.5 to 0.9 : decreases the microprocessor calculated<br />
time between defrosts by 1/2 normal (0.5) to 9/10 normal<br />
(0.9).<br />
1.1 to 1.5 : increases the microprocessor calculated<br />
time between defrosts by 1.1 times normal (1.1) to 1 1/2<br />
times normal (1/5).<br />
1 H, 2 H,... 6 H : Forced interval between each defrost<br />
expressed in hours.<br />
2.7 ALARM DISPLAY<br />
In the event of a malfunction the unit will be shut down<br />
and the Cab Command will immediately display an error<br />
message. See Section 2.7.2 for accessing alarm<br />
messages. The message will remain displayed until the<br />
malfunction is corrected. If standby power is connected<br />
and the malfunction is such that standby operation can<br />
be allowed, the unit will start in the standby mode. Error<br />
messages are provided in Table 2-1 while a listing of the<br />
alarm codes is provided in Table 2-2.<br />
Table 2-1 Error Messages<br />
Malfunction : evaporator temperature<br />
probe<br />
Low battery voltage low alarm<br />
(Refer to paragraph 2.7.1)<br />
Dual power supply (road and<br />
standby)<br />
Incorrect set-point setting<br />
Setpoint lower than maximum<br />
setpoint but in the range of --20°F to<br />
86°F (--29_C/+30_C)<br />
2.7.1 Low Battery Voltage Alarm<br />
If the battery voltage drops below 10 V the unit shuts<br />
down and the cab command displays the message<br />
“bAt”. Unit restart is automatic and time-delayed if the<br />
voltage rises to the normal level.<br />
2.7.2 Accessing Alarm Messages<br />
Current alarms will be displayed with an “A” preceding<br />
the alarm number while past alarms will be displayed<br />
with a “P” preceding the alarm number. To access the<br />
alarm messages:<br />
Press SET for 5 seconds : enables<br />
access to alarm messages.<br />
In the event of more than one alarm,<br />
press the + and -- keys to list them.<br />
62-11044<br />
2--8
2.7.3 Clearing Past Alarm Messages<br />
Press the ON, the + and<br />
The alarm list provides information on current alarms<br />
the -- keys at the same<br />
and past alarms which may be helpful in trouble<br />
time.<br />
shooting unit problems. Once all the alarm information<br />
has been noted and service is complete, the alarm list<br />
may be cleared.<br />
a. To clear the past alarm messages:<br />
a. To clear the active alarm messages:<br />
Turn unit OFF and then back ON.<br />
Table 2-2 Alarm Messages<br />
No malfunction.<br />
Unit in operation.<br />
Low pressure switch (LP) open<br />
High pressure switch (HP1) open<br />
Standby compressor thermal overload<br />
(PTO) open<br />
Road compressor clutch (CLHR) malfunction<br />
Standby contactor (MC) high amp draw<br />
Transformer/Rectifier thermal overload<br />
(RBT) open<br />
Control fault, electric heat (option)<br />
Low pressure switch jumper (microprocessor<br />
terminal 6 to SP2) open<br />
Compressor contactor (MC) open circuit<br />
Condenser fan motor (CFM) open circuit<br />
Hot water solenoid valve (HWV) open<br />
circuit (option)<br />
Hot gas valve (HGS1) open circuit<br />
Condenser fan motor (CFM) high amp<br />
draw<br />
Evaporator Fan low rotational speed<br />
Hot water solenoid valve (HWV) high<br />
amp draw (option)<br />
Hot gas valve (HGS1) high amp draw<br />
Quench valve (BPV) open circuit<br />
Condenser Pressure Control Valve<br />
(HGS2) open circuit<br />
Evaporator drain line heater (DWR)<br />
open circuit (option)<br />
Relay fault, electric heat (option)<br />
Quench valve (BPV) high amp draw<br />
Condenser pressure control valve<br />
(HGS2) high amp draw<br />
High temperature alarm<br />
2.8 STOPPING THE UNIT<br />
Press the OFF key or turn off the ignition<br />
key.<br />
Low temperature alarm<br />
Defrost cycle > 45 minutes<br />
Setpoint adjusted out of the range 20_F<br />
to 86_F (--29°C/+30°C)<br />
Evaporator drain line heater (DWR) malfunction<br />
(option)<br />
THEN<br />
OR<br />
Unit start-up<br />
Press the +, then -- then DEFROST<br />
keys. All keys should be held momentarily<br />
after pressing in the correct<br />
sequence.<br />
Modify parameters. (See 1), 3) and<br />
4) below)<br />
2--9 62-11044
SECTION 3<br />
TEMPERATURE CONTROL<br />
3.1 SEQUENCE OF OPERATION<br />
General operation sequences for cooling, null, and<br />
heating are provided in the following paragraphs. The<br />
microprocessor automatically selects the mode<br />
necessary to maintain box temperature at setpoint.<br />
3.1.1 Perishable Mode<br />
The unit operates in the perishable mode with set points<br />
above 10°F (--12°C)<br />
a. With return air temperature above setpoint and decreasing,<br />
the unit will be cooling with the compressor<br />
and evaporator fans operating. (See Section 1.8.1 for<br />
a description of the refrigeration circuit during cooling.)<br />
The condenser fan will operate under the control<br />
of the condenser pressure control switch (HP2). The<br />
green unit operating LED will operate in accordance<br />
with Figure 2-2.<br />
b. If discharge temperature increases to the setpoint of<br />
the quench thermostat (BPT), the thermostat will<br />
close, energizing the quench valve (BPV). This will allow<br />
liquid into the suction line in order to cool compressor.<br />
Once the discharge temperature decreases<br />
to the setpoint of the BPT, the thermostat will open,<br />
DE--energizing the BPV.<br />
c. If discharge pressure increases to the setting of the<br />
high ambient pressure switch (HP4), the thermostat<br />
will open, de--energizing (closing) the suction bypass<br />
valve (SBPV) and bringing the compressor regulating<br />
valve (CPR) into the circuit. Once the discharge pressure<br />
decreases to the setting of HP4, the thermostat<br />
will close, energizing the SBPV and the refrigerant will<br />
bypass the CPR.<br />
d. Once temperature decreases to the setpoint the unit<br />
will enter the null mode. If the continuous air flow parameter<br />
is set to ON, the evaporator fans will continue<br />
to operate with all other components OFF. If the continuous<br />
air flow parameter is OFF, the evaporator<br />
fans and all other components will be OFF. A 5 minute<br />
delay is required before restart is allowed.<br />
e. If temperature increases during the null mode, the<br />
unit will restart in cooling.<br />
f. If temperature continues to decrease the unit will enter<br />
the heating mode with the compressor and evaporator<br />
fans operating and the hot gas solenoid valve<br />
(HGS1) energized (opened). The condenser fan and<br />
condenser pressure control valve (HGS2) will operate<br />
under the control of the condenser pressure control<br />
switch (HP2). (See Section 1.8.2 for a description<br />
of the refrigeration circuit during heat and defrost.)<br />
COOL<br />
UNIT STOPPED<br />
HEAT<br />
+5.4_F (+3_C )<br />
or +3.6_F (+2_C )<br />
or +1.8_F (+1_C)<br />
SETPOINT<br />
-- 1.8_F (--1_C)<br />
or --3.6_F (--2_C)<br />
or --5.4_F (--3_C)<br />
(setting)<br />
Figure 3-1 Operating Sequence - Perishable<br />
Mode<br />
3.1.2 Frozen Mode<br />
The unit operates in the frozen mode with setpoints at or<br />
below 10°F(--12°C). Operation in the frozen mode is the<br />
same as in the perishable mode except no heating takes<br />
place.<br />
COOL<br />
UNIT STOPPED<br />
+5.4_F (+3_C )<br />
or +3.6_F (+2_C )<br />
or +1.8_F (+1_C )<br />
SETPOINT<br />
-- 1.8_F (--1_C)<br />
or --3.6_F (--2_C)<br />
or --5.4_F (--3_C)<br />
(setting)<br />
Figure 3-2 Operating Sequence - Frozen Mode<br />
3--1 62-11044
3.2 DEFROST CYCLE<br />
Defrost is an independent cycle overriding cooling and<br />
heating functions to melt frost and ice from the<br />
evaporator when necessary. Defrost may be initiated by<br />
the microprocessor or manually by the operator once<br />
the defrost termination thermostat has closed at<br />
approximately 38°F (3.3°C). In defrost mode, the<br />
microprocessor displays “dF” on the cab command and<br />
set-point is no longer displayed.<br />
During defrost, the evaporator fans shut down and<br />
operation of the condenser fan is controlled by the<br />
microprocessor. The end of the cycle is controlled by the<br />
opening of the defrost termination thermostat (See<br />
Section 1.5.2 for DTT settings. (See Section 1.8.2 for a<br />
description of the refrigeration circuit during heat and<br />
defrost.)<br />
3.3 MINIMUM OFF TIME<br />
Once the unit has cycled off, it will remain off for the<br />
minimum off time of 5 minutes. This prevents rapid<br />
cycling due to changes in air temperature. Air<br />
temperature in the box changes rapidly but it takes time<br />
for the product temperature to change.<br />
62-11044<br />
3--2
SECTION 4<br />
SERVICE<br />
WARNING<br />
Beware of unannounced starting of the unit. The unit may cycle the fans and operating compressor<br />
unexpectedly as control requirements dictate. To ensure unit will not start, place the EMERGENCY<br />
SWITCH (see Figure 1-1) in the OFF position. To ensure unit is without power, remove power plug<br />
and remove battery negative cable.<br />
4.1 PREVENTATIVE MAINTENANCE<br />
Regular servicing is required in order to optimize the life<br />
and reliability of your unit. The recommended scheduled<br />
maintenance intervals and categories are provided in<br />
Table 4-3 while descriptions of the service procedures<br />
to be carried out under each category are provided in<br />
Table 4-4<br />
Table 4-1 Preventative Maint. After Start -up<br />
Check condenser and evaporator fan rotation and<br />
for proper air flow.<br />
Check cab command for proper unit cycling and<br />
correct display of all indicator lights.<br />
Check for unusual noise or vibration<br />
Check that refrigerant is visible in liquid line sightglass.<br />
Table 4-2 Preventative Maint. After 15 minutes or<br />
more of operation<br />
Check that refrigerant is visible in liquid line sightglass.<br />
Check compressor oil level<br />
Check for proper temperature control<br />
Check temperature cycling operation<br />
Put unit into manual defrost mode.<br />
Verify unit terminates defrost mode.<br />
Table 4-3 Preventive Maintenance schedule<br />
Hours<br />
Service<br />
A<br />
Service<br />
B<br />
Service<br />
C<br />
Service<br />
D<br />
100 G<br />
1000 G G<br />
2000 G G G<br />
3000 G G<br />
4000 G G G G<br />
5000 G G<br />
6000 G G G<br />
7000 G G<br />
Table 4-4 Service Category Descriptions<br />
Service A<br />
Service B<br />
Service C<br />
Service D<br />
1. Check the tension of the alternator<br />
belt(s).<br />
2. Check that the vehicle engine runs<br />
correctly at low speed and that the<br />
compressor mounting kit is correctly<br />
tightened and that belt tension is correct.<br />
(Paragraph NO TAG)<br />
3.Check the tightness of bolts and<br />
screws and that the unit is correctly<br />
fastened onto the box.<br />
1. Clean condenser & the evaporator<br />
coils. (Paragraphs 4.15 & 4.16)<br />
2. Replace the road compressor belt.<br />
3. Check and, if required, replace the<br />
filter-drier. (Paragraph 4.7)<br />
4. Check standby compressor oil level.<br />
Level should be from 1/4 to 1/2 sight<br />
glass.<br />
5. Check the operation of cab command.<br />
6. Check the defrost:<br />
DCut-in<br />
DFan shut-down<br />
DCut-out<br />
DDefrost water drain(s)<br />
7 .Check the water tightness of the<br />
emergency switch boot.<br />
1 .Check the bearings of the belt tension<br />
pulley. If a spring is fitted, change<br />
spring.<br />
2. Change the shockmounts (if any)<br />
installed on the road compressor<br />
mounting kit.<br />
3. Check the operation of the evaporator<br />
and condenser fans. Change the<br />
condenser motor brushes. The<br />
evaporator of this unit is equipped with<br />
brushless fan motors therefore, brush<br />
maintenance is not required..<br />
4. Change the compressor oil. Use<br />
polyol ester oil (POE) approved by<br />
CARRIER. Refer to paragraph 1.5.1.<br />
1. Change the removable fuses and<br />
capacitor (if any) in the control box.<br />
4--1 62-11044
4.2 INSTALLING R-404a MANIFOLD GAUGE SET<br />
An R-404a manifold gauge/hose set with self-sealing<br />
hoses is required for service of models covered within<br />
this manual. The manifold gauge/hose set is available<br />
from Carrier Transicold. (Carrier Transicold P/N<br />
07-00294-00, which includes items 1 through 6,<br />
Figure 4-1). To perform service using the manifold<br />
gauge/hose set, do the following:<br />
4.2.1 Preparing Manifold Gauge/Hose Set For Use<br />
a. If the manifold gauge/hose set is new or was<br />
exposed to the atmosphere it will need to be evacuated<br />
to remove contaminants and air as follows:<br />
b. Back seat (turn counterclockwise ) both field service<br />
couplers (see Figure 4-1) and midseat both hand<br />
valves.<br />
c. Connect the yellow hose to a vacuum pump and an<br />
R-404a cylinder.<br />
d. Evacuate to 10 inHg (254mmHg) and then charge<br />
with R-404a to a slightly positive pressure of 1.0 psig<br />
(0.07 Bar).<br />
e. Front seat both manifold gauge set hand valves and<br />
disconnect from cylinder. The gauge set is now<br />
ready for use.<br />
4.2.2 Connecting Manifold Gauge/Hose Set<br />
To connect the manifold gauge/hose set for reading<br />
pressures, do the following:<br />
a. Remove service valve stem cap and check to make<br />
sure it is backseated. Remove access valve cap.<br />
b. Connect the field service coupler (see Figure 4-1) to<br />
the access valve.<br />
c. Turn the field service coupling knob clockwise, which<br />
will open the system to the gauge set.<br />
d. Read system pressures.<br />
e. Repeat the procedure to connect the other side of<br />
the gauge set.<br />
62-11044<br />
4--2
4.2.3 Removing the Manifold Gauge Set<br />
1. While the compressor is still ON, backseat the high<br />
side service valve.<br />
2. Midseat both hand valves on the manifold gauge set<br />
and allow the pressure in the manifold gauge set to<br />
be drawn down to low side pressure. This returns<br />
any liquid that may be in the high side hose to the<br />
system.<br />
CAUTION<br />
To prevent trapping liquid refrigerant in the<br />
manifold gauge set be sure set is brought to<br />
suction pressure before disconnecting.<br />
3. Backseat the low side service valve. Backseat both<br />
field service couplers and frontseat both manifold set<br />
hand valves. Remove the couplers from the access<br />
valves.<br />
4. Install both service valve stem caps and access<br />
valve caps (finger-tight only).<br />
Low Pressure<br />
Gauge<br />
Opened<br />
(Backseated )<br />
Hand Valve<br />
To Low Side<br />
Access Valve<br />
3<br />
BLUE<br />
4<br />
6<br />
(Blue Knob)<br />
2<br />
1<br />
2<br />
3<br />
RED<br />
3<br />
YELLOW<br />
1. Manifold Gauge Set<br />
2. Hose Fitting (0.5-16 Acme)<br />
3. <strong>Refrigeration</strong> and/or Evacuation Hose<br />
. (SAE J2196/R-134a)<br />
4. Hose Fitting w/O-ring (M14 x 1.5)<br />
5. High Side Field Service Coupler<br />
6. Low Side Field Service Coupler<br />
High Pressure<br />
Gauge<br />
Closed<br />
(Frontseated)<br />
Hand Valve<br />
To High Side<br />
Access Valve<br />
4<br />
5<br />
(Red Knob)<br />
Figure 4-1 Manifold Gauge Set (R-404a)<br />
4.3 REMOVING THE REFRIGERANT CHARGE<br />
CAUTION<br />
When working with refrigerant use safety<br />
glasses and gloves to avoid burns. Hoses<br />
and copper tubing can be hot when unit is<br />
running.<br />
NOTE<br />
Once the system is open, it must be evacuated<br />
and dehydrated. (See section 4.5)<br />
NOTE<br />
To avoid damage to the earth’s ozone layer, use<br />
a refrigerant recovery system whenever removing<br />
refrigerant.<br />
Connect a refrigerant recovery system (Carrier P/N<br />
MVS-- 115-- F -- L-- CT (115V) or MVS-- 240-- F -- L-- CT<br />
(240V) ) to the unit to remove refrigerant charge. Refer<br />
to instructions provided by the manufacturer of the refrigerant<br />
recovery system.<br />
4.3.1 Refrigerant Removal From a Non-operative<br />
Standby Compressor<br />
To remove the refrigerant from a standby compressor<br />
that is not operational, do the following:<br />
a. Attach a manifold gauge set to the standby compressor<br />
service valve access ports. Ensure both service<br />
valves are frontseated.<br />
b. Recover refrigerant with a refrigerant recovery system.<br />
c. Service or replace components as required and leak<br />
check the compressor. (See Section 4.4).<br />
4.3.2 Pumping the Unit Down if Standby is<br />
Available<br />
To service the filter-drier, moisture-liquid indicator, liquid<br />
line check valve, expansion valve, quench valve,<br />
evaporator coil, compressor pressure regulating valve,<br />
suction bypass valve, pump the refrigerant into the high<br />
side as follows:<br />
a. Attach manifold gauge set to standby compressor<br />
service valves.<br />
b. Start the unit and run in standby cooling mode for 10<br />
to 15 minutes. Frontseat the king valve. Place the<br />
emergency switch in the OFF position when the suction<br />
reaches a positive pressure of 1.0 psig (0.01 bar).<br />
c. Frontseat the standby suction service valve. The<br />
refrigerant will be trapped between the standby compressor<br />
suction service valve and the liquid line valve.<br />
d. Before opening up any part of the system, a slight<br />
positive pressure should be indicated on the pressure<br />
gauge. If a vacuum is indicated, emit refrigerant by<br />
cracking the liquid line valve momentarily to build up a<br />
slight positive pressure.<br />
e. When opening up the refrigerant system, certain<br />
parts may frost. Allow the part to warm to ambient<br />
temperature before dismantling. This avoids internal<br />
condensation which puts moisture in the system.<br />
f. After repairs have been made, be sure to perform a<br />
refrigerant leak check (refer to paragraph 4.4), and<br />
evacuate and dehydrate the low side (refer to paragraph<br />
4.5.4).<br />
g. Check refrigerant charge (refer to paragraph 4.6.1).<br />
4--3 62-11044
4.3.3 Removing Complete Charge<br />
Connect a refrigerant recovery system to the unit to<br />
remove refrigerant charge. Refer to instructions<br />
provided by the manufacturer of the refrigerant recovery<br />
system.<br />
4.4 REFRIGERANT LEAK CHECKING<br />
CAUTION<br />
Refrigerant R404a is a blend. Charging as a<br />
vapor will change the properties of the refrigerant.<br />
Only liquid charging through the<br />
king valve is acceptable.<br />
A refrigerant leak check should always be performed<br />
after the system has been opened to replace or repair a<br />
component. To check for leaks in the refrigeration<br />
system, perform the following procedure:<br />
NOTE<br />
Only refrigerant 404a should be used to pressurize<br />
the system. Any other gas or vapor will<br />
contaminate the system which will require additional<br />
purging and evacuation of the system.<br />
a. The recommended procedure for finding leaks in a<br />
system is with an electronic leak detector (Carrier<br />
Transicold P/N 07--00295--00). Testing joints with<br />
soapsuds is satisfactory only for locating large leaks.<br />
b. If system is without refrigerant or the low side has<br />
been pumped down, charge with refrigerant 404a to<br />
build up pressure between 30 and 50 psig (2 to 3.4<br />
bar). Remove refrigerant cylinder and leak check all<br />
connections.<br />
c. Remove test refrigerant using a refrigerant recovery<br />
system and repair any leaks. Evacuate and dehydrate<br />
the unit or low side as applicable. (Refer to paragraph<br />
4.5)<br />
4.5 EVACUATION <strong>AND</strong> DEHYDRATION<br />
4.5.1 General<br />
Moisture can seriously damage refrigerant systems.<br />
The presence of moisture in a refrigeration system can<br />
have many undesirable effects. The most common are<br />
copper plating, acid sludge formation, “freezing-up” of<br />
metering devices by free water, and formation of acids,<br />
resulting in metal corrosion.<br />
4.5.2 Preparation<br />
a. Evacuate and dehydrate only after pressure leak test.<br />
(Refer to paragraph 4.4).<br />
b. Essential tools to properly evacuate and dehydrate<br />
any system include a good vacuum pump (5 cfm =<br />
8m#H volume displacement, P/N 07-00176-01) and a<br />
good vacuum indicator such as a thermocouple vacuum<br />
gauge (vacuum indicator). (Carrier P/N<br />
0700414--00).<br />
NOTE<br />
Use of a compound gauge is not recommended<br />
because of its inherent inaccuracy.<br />
c. Keep the ambient temperature above 60°F (15.6°C)<br />
to speed evaporation of moisture. if ambient temperature<br />
is lower than 60°F (15.6°C), ice might form before<br />
moisture removal is complete. Heat lamps or alternate<br />
sources of heat may be used to raise system<br />
temperature.<br />
d. Additional time may be saved during a complete system<br />
pump down by replacing the filter--drier with a<br />
section of copper tubing and the appropriate fittings.<br />
Installation of a new filter--drier may be performed<br />
during the charging procedure.<br />
4.5.3 Evacuation and Dehydration - Complete<br />
System.<br />
a. Remove refrigerant using a refrigerant recovery system.<br />
b. The recommended method to evacuate and dehydrate<br />
the system is to connect three evacuation<br />
hoses to the vacuum pump and refrigeration unit as<br />
shown in Figure 4-2 (do not use standard service<br />
hoses as they are not suited for evacuation purposes).<br />
Connect an evacuation manifold with special<br />
evacuation hoses to the vacuum pump, to the electronic<br />
vacuum gauge and to the refrigerant recovery<br />
system.<br />
c. Test the evacuation system for leaks by backseating<br />
the unit service valves and drawing a deep vacuum<br />
with the vacuum pump and gauge valves open. Shut<br />
off the pump and check to see if the vacuum holds.<br />
Repair leaks if necessary.<br />
d. Midseat the refrigerant system service valves.<br />
e. Open the vacuum pump and electronic vacuum<br />
gauge valves, if they are not already open. Start the<br />
vacuum pump. Evacuate unit until the electronic vacuum<br />
gauge indicates 2000 microns. Close the electronic<br />
vacuum gauge and vacuum pump valves. Shut<br />
off the vacuum pump. Wait a few minutes to be sure<br />
the vacuum holds.<br />
f. Break the vacuum with refrigerant 404a. Raise system<br />
pressure to approximately 2 psig (0.14 bar).<br />
62-11044<br />
4--4
1<br />
2<br />
3<br />
4<br />
5<br />
6<br />
7<br />
8<br />
1<br />
2<br />
Refrigerant Recovery Unit<br />
Suction Valve (Low Side)<br />
3<br />
4<br />
Manifold Gauge Set<br />
Discharge Valve (High Side)<br />
5 Refrigerant Cylinder<br />
g. Remove refrigerant using a refrigerant recovery system.<br />
h. Repeat steps e. to g.<br />
i. If required, remove the copper tubing and install a<br />
new filter--drier. Evacuate unit to 500 microns. Close<br />
off vacuum pump valve and stop pump. Wait five minutes<br />
to see if vacuum holds. This checks for residual<br />
moisture and/or leaks.<br />
j. With a vacuum still in the unit, the refrigerant charge<br />
may be drawn into the system from a refrigerant container<br />
on weight scales. See Table 1-1 for correct<br />
charge. Continue to paragraph 4.6.2.<br />
4.5.4 Evacuation and Dehydration - Partial System.<br />
6 Electronic Vacuum Gauge<br />
7 Vacuum Pump Valve<br />
8 Vacuum Pump<br />
Figure 4-2 Vacuum Pump Connection<br />
b. If refrigerant charge has been removed from the low<br />
side only, evacuate the low side by connecting the<br />
evacuation set--up at the standby compressor suction<br />
service valve and king valve except leave the service<br />
valves frontseated until evacuation is completed.<br />
c. Once evacuation has been completed and the pump<br />
has been isolated, fully backseat the service valves to<br />
isolate the service connections and then continue<br />
with checking and, if required, adding refrigerant in<br />
accordance with normal procedures<br />
4.6 CHARGING THE REFRIGERATION SYSTEM<br />
CAUTION<br />
NOTE<br />
The following procedure applies to Standby<br />
units only. For units with only a road compressor<br />
follow procedure for complete system evacuation<br />
and dehydration (See Section 4.5.3)<br />
a. If the refrigerant charge has been removed from the<br />
standby compressor for service, evacuate only the<br />
compressor by connecting the evacuation set--up at<br />
the compressor service valves. Follow evacuation<br />
procedures of the preceding paragraph except leave<br />
compressor service valves frontseated until evacuation<br />
is completed.<br />
Refrigerant R404a is a blend. Charging as a<br />
vapor will change the properties of the refrigerant.<br />
Only liquid charging through the<br />
king valve is acceptable.<br />
4.6.1 Checking The Refrigerant Charge<br />
Start unit in cooling mode. Run approximately ten<br />
minutes. Partially block off air flow to condenser coil<br />
increase the area blocked until compressor discharge<br />
pressure is raised to approximately 325 psig (22 bars).<br />
The charge is correct if there are no bubbles at the liquid<br />
line sight glass.<br />
4--5 62-11044
4.6.2 Installing a Complete Charge (See<br />
Figure 4-3)<br />
NOTE<br />
The ambient (air entering the condenser) air<br />
temperature should be above 40°F (4.4°C)<br />
a. Evacuate the refrigeration circuit and leave in a deep<br />
vacuum (refer to paragraph 4.5).<br />
b. Place refrigerant 404a cylinder on scale. Connect the<br />
discharge gauge field coupler of the manifold test set<br />
to the king valve access port. Connect the suction<br />
pressure hose of the manifold gauge set to the manifold<br />
dead head port. Connect a charging line between<br />
the center tap of the second gauge set and the<br />
refrigerant drum. Midseat discharge knob. Open the<br />
liquid valve on the drum and purge all hoses. Frontseat<br />
discharge knob<br />
c. Note weight of refrigerant cylinder.<br />
d. Open liquid valve on refrigerant cylinder. Open king<br />
valve half way and allow the liquid refrigerant to flow<br />
into the unit until the correct weight of refrigerant has<br />
been added as indicated by scales. (See Section<br />
1.5.1 for correct charge.)<br />
NOTE<br />
It may be necessary to finish charging the unit<br />
using the partial charge method, due to pressure<br />
rise in the high side of the system. (Leave<br />
gauges and hoses in place and refer to paragraph<br />
4.6.3)<br />
e. If scale indicates the correct charge has been added,<br />
close liquid line valve on drum and manifold valves.<br />
f. Backseat the king valve, remove charging hoses and<br />
check charge in accordance with paragraph 4.6.1.<br />
g. Check for noncondensables.<br />
2<br />
1<br />
3<br />
5<br />
4<br />
1 Suction Valve (Low Side)<br />
2 Manifold Gauge Set<br />
3 Discharge Valve (High Side)<br />
4 Refrigerant Cylinder<br />
5 Dead Head Port<br />
Figure 4-3 Procedure for Adding A Complete Charge<br />
62-11044<br />
4--6
4.6.3 Adding a Partial Charge (See Figure 4-4)<br />
CAUTION<br />
Refrigerant R404a is a blend. Charging as a<br />
vapor will change the properties of the refrigerant.<br />
Only liquid charging through the<br />
king valve is acceptable.<br />
NOTE<br />
The ambient (air entering the condenser) air<br />
temperature should be above 40°F (4.4°C)<br />
a. Place drum of refrigerant on scale and note weight.<br />
Backseat discharge and suction service valves and<br />
install a manifold gauge set in order to monitor system.<br />
Purge lines. Connect the discharge gauge of a<br />
second manifold test set to the king valve. Connect<br />
the suction pressure hose to manifold dead head<br />
port. Connect a charging line between the center tap<br />
of the second gauge set and refrigerant drum. Midseat<br />
discharge knob. Open the liquid valve on drum<br />
and purge all hoses. Frontseat discharge knob. See<br />
Figure 4-4.<br />
b. Start the unit with the road compressor turning at<br />
2400 rpm.<br />
c. Check the sight glass to determine charge. See Section<br />
4.6.1. If undercharged, proceed with step d.<br />
d. Front seat the king valve. Monitor the second set of<br />
manifold gauges. When the king valve pressure<br />
drops below the pressure in the refrigerant drum, midseat<br />
the manifold gauge set discharge valve and allow<br />
liquid refrigerant to flow into the system.<br />
e. While monitoring the sight glass, carefully weigh refrigerant<br />
into the system. It is not possible to accurately<br />
determine when the system is full because unit<br />
is in discharge state; therefore, never allow more than<br />
1 lb. (0.45 kg) of refrigerant into system at a time.<br />
f. After monitoring 1 lb. (0.45 kg) of refrigerant into the<br />
system, close the valve of the manifold gauge set<br />
connected to the king valve. Open the king valve and<br />
allow the system to balance out to determine charge.<br />
g. Follow the procedures of paragraph 4.6.1 and repeat<br />
above procedure as required to clear the sight glass.<br />
h. Start unit and check for noncondensables.<br />
3<br />
1 2<br />
5<br />
4<br />
3<br />
2<br />
1<br />
1 Suction Valve (Low Side)<br />
2 Discharge Valve (High Side)<br />
3 Manifold Gauge Set<br />
4 Refrigerant Cylinder<br />
5 Dead Head Port<br />
Figure 4-4 Partial Charge Procedure<br />
4--7 62-11044
4.7 CHECKING <strong>AND</strong> REPLACING FILTER-DRIER<br />
4.7.1 Checking Filter-Drier<br />
Check for any obstruction of the filter-drier by feeling the<br />
inlet and outlet connections of the liquid line on the filter<br />
cartridge. If the temperature of the outlet connection<br />
seems lower than the temperature of the inlet<br />
connection, replace the filter-drier.<br />
4.7.2 Replacing Filter-Drier<br />
Remove refrigerant charge (See section 4.3). Remove<br />
the drier mounting clip, then replace the filter-drier.<br />
Following drier replacement, evacuate and recharge<br />
unit (refer to sections 4.5 & 4.6).<br />
4.8 HIGH PRESSURE (HP1), CONDENSER<br />
PRESSURE CONTROL (HP2), ST<strong>AND</strong>BY<br />
HIGH PRESSURE (HP3)(ST<strong>AND</strong>BY UNITS<br />
ONLY) SUCTION BYPASS PRESSURE (HP4)<br />
(<strong>50X</strong> UNITS ONLY), OR LOW PRESSURE<br />
SWITCHES<br />
4.8.1 Removing Switches<br />
a. A schraeder valve is located under each switch to allow<br />
removal and installation without removing the refrigerant<br />
charge.<br />
b. Remove switch and test in accordance with paragraph<br />
4.8.2.<br />
c. Replace or reinstall switch.<br />
4.8.2 Checking Switches<br />
WARNING<br />
Do not use a nitrogen cylinder without a<br />
pressure regulator. (See Figure 4-6) Cylinder<br />
pressure is approximately 2350 psi (160<br />
bar). Do not use oxygen in or near a refrigerant<br />
system as an explosion may occur.<br />
a. Remove switch as outlined in paragraph 4.8.1.<br />
b. For high pressure, condenser pressure control and<br />
high ambient pressure switches, connect switch to a<br />
cylinder of dry nitrogen (see Figure 4-6). For the low<br />
pressure switch, also connect to a vacuum pump and<br />
gauge. Test both low and high pressure switches using<br />
method described in the following steps.<br />
c. Set nitrogen pressure regulator or vacuum pump and<br />
gauge higher than cut-out or cut in point on switch being<br />
tested. Pressure switch settings points are provided<br />
in paragraph 1.5.2.<br />
d. Close valve on cylinder and open bleed-off valve.<br />
e. Open cylinder valve. While observing indicator (light<br />
or meter), slowly close bleed-off valve and increase<br />
pressure until the switch opens or closes. Slowly<br />
open bleed-off valve (to decrease pressure) until<br />
switch reverts to normal position.<br />
f. If switch does not activate within tolerances provided,<br />
replace switch. Test new switch before installation.<br />
4.9 CHECKING <strong>AND</strong> REPLACING CONDENSER<br />
FAN MOTOR BRUSHES<br />
To maintain proper operation of the fan motors, the fan<br />
motor brushes should be checked periodically for<br />
cleanliness and wear .<br />
1. Brush Cap 2. Brush<br />
Figure 4-5 Fan motor brushes<br />
To check brushes proceed as follows :<br />
a. With unit off and battery disconnected, remove brush<br />
cap (item 1, Figure 4-5; 2 per motor).<br />
b. Remove brushes (item 2; 2 per motor) and check the<br />
length of the brush. If the length is less than 1/4 inch (6<br />
mm) the brushes should be replaced.<br />
c. Blow out the brush holder with low pressure air to remove<br />
any carbon dust in the holder. This dust could<br />
prevent a good contact between the brushes and<br />
commutator.<br />
d. Remove the back cover of the motor and inspect the<br />
commutator. If the commutator is heavily grooved,<br />
polish it using fine sandpaper; do not use abrasive paper.<br />
Wipe out any accumulation of greasy material using<br />
a clean rag dampened with solvent. Reassemble<br />
the motor; install new brushes and replace cap.<br />
1<br />
2<br />
3<br />
1. Cylinder valve and gauge<br />
2. Pressure regulator<br />
3. Nitrogen cylinder<br />
4. Pressure gauge (0 to 400 psig = 0 to 28 bars)<br />
5. Bleed-off valve<br />
6. 1/4 inch connection<br />
Figure 4-6 Typical Setup For Testing Pressure<br />
Switches HP1, HP2, HP3 and HP4<br />
2<br />
4<br />
5<br />
1<br />
6<br />
62-11044<br />
4--8
4.10 HOT GAS SOLENOID VALVE (HGS1),<br />
CONDENSER PRESSURE CONTROL VALVE<br />
(HGS2) <strong>AND</strong> QUENCH VALVE (BPV)<br />
4.10.1 Replacing Solenoid Coil<br />
It is not necessary to remove the refrigerant charge<br />
when replace the coil (see Figure 4-7).<br />
a. Remove coil snap cap, voltage plate and coil assembly.<br />
Disconnect leads and remove coil junction box if<br />
necessary.<br />
b. Verify coil type, voltage and frequency. This information<br />
appears on the coil voltage plate and the coil<br />
housing.<br />
c. Place new coil over enclosing tube and then install<br />
voltage plate and snap cap.<br />
2<br />
1<br />
3<br />
4<br />
5<br />
a. Remove the refrigerant charge for high side components<br />
or pump down to receiver if servicing low side<br />
components. (Refer to paragraph 4.3).<br />
b. Remove coil snap cap, voltage cover and coil assembly.<br />
For SBPV valve, remove the head of the valve<br />
body. Remove the enclosing tube.<br />
c. Check for foreign material in valve body.<br />
d. Check for damaged plunger and O-ring. If O-ring is to<br />
be replaced, always put refrigerant oil on O-rings before<br />
installing.<br />
CAUTION<br />
Do not damage or over tighten the enclosing<br />
tube assembly. Also make sure all parts<br />
are placed in the enclosing tube in proper<br />
sequence to avoid premature coil burn-out.<br />
e. Tighten enclosing tube. If valve has been removed<br />
from the circuit, check for leaks.<br />
f. Install coil assembly, voltage cover and snap cap.<br />
g. Evacuate, dehydrate and recharge unit. Refer to<br />
paragraphs 4.5.3 and 4.6.2.<br />
h. Start unit and check operation.<br />
1 2 3<br />
1. Snap cap<br />
2. Voltage plate<br />
3. Coil assembly<br />
4. Enclosing tube<br />
6 7<br />
5. Plunger assembly<br />
6. Valve body assembly<br />
7. Direction of flow<br />
Figure 4-7 Hot Gas Valve, Condenser Pressure<br />
Control Valve, Quench Valve or Suction Bypass<br />
Valve (<strong>50X</strong> Only) (Hot Gas Valve Shown)<br />
4.10.2 Replacing Valve Internal Parts<br />
1. Cap<br />
2. Jam Nut<br />
3. Set Screw<br />
Figure 4-8 Compressor Pressure Regulating Valve<br />
(CPR)<br />
4--9 62-11044
4.11 ADJUSTING THE COMPRESSOR PRESSURE<br />
REGULATING VALVE (CPR)<br />
When adjusting the compressor pressure regulating<br />
valve (CPR) (see Figure 4-8), the unit must be running<br />
in heating or defrost mode. This will ensure a suction<br />
pressure above the proper CPR setting. To adjust the<br />
CPR valve, proceed as follows :<br />
NOTE<br />
In order to adjust the CPR on the <strong>50X</strong> units the high<br />
ambient pressure switch (HP4) inside the evaporator<br />
must be disconnected from the harness in order to<br />
de--energize the normally closed suction bypass valve<br />
(SBPV). The SBPV will close and the CPR may be<br />
adjusted.<br />
a. Install a gauge on the suction line .<br />
b. Remove cap from CPR valve.<br />
c. With an 8 mm Allen wrench, loosen the jam nut.<br />
d. Using the 8 mm Allen wrench, adjust the set screw. To<br />
raise the suction pressure turn the set screw clockwise;<br />
to lower the suction pressure, turn counterclockwise.<br />
Refer to paragraph 1.5.2 for CPR valve<br />
setting.<br />
e. When the setting has been adjusted, tighten the jam<br />
nut securely against the set screw. This will prevent<br />
any movement of the set screw due to vibrations in<br />
the unit. Replace the cap.<br />
4.12 THERMOSTATIC EXPANSION VALVE<br />
MOP expansion valve characteristics :<br />
SRule : in order to avoid compressor overcharge, a<br />
MOP expansion valve (expansion valve with limited<br />
flow) is used.<br />
SOperating : the expansion valve will not open more<br />
than the MOP setpoint. Any temperature increase at<br />
the bulb should not open the expansion valve further.<br />
The thermal expansion valve is an automatic device<br />
which maintains constant superheat of the refrigerant<br />
gas leaving the evaporator regardless of suction<br />
pressure. The valve functions are: (a) automatic<br />
response of refrigerant flow to match the evaporator<br />
load and (b) prevention of liquid refrigerant entering the<br />
compressor.<br />
Unless the valve is defective, it requires no adjustment,<br />
but maintenance must be done every year in order to<br />
clean the orifice strainer. Refer to paragraph 4.12.3.<br />
4.12.1 Replacing Expansion Valve<br />
a. Pump the unit down. Refer to paragraph 4.3.2.<br />
b. Remove insulation from expansion valve bulb and<br />
then remove bulb from suction line.<br />
c. Loosen inlet nut and unbraze equalizer line and outlet<br />
line from expansion valve.<br />
d. The thermal bulb is located below the center of the<br />
suction line. This area must be clean to ensure positive<br />
bulb contact. Strap thermal bulb to suction line<br />
and insulate both.<br />
e. Braze the equalizer tubes to expansion valve.<br />
f. Evacuate, dehydrate and recharge unit.<br />
g. Check superheat (refer to paragraph 1.5.2).<br />
4.12.2 Measuring superheat<br />
a. Remove insulation from expansion valve bulb and<br />
suction line. See Figure 4-9<br />
b. Loosen one TXV bulb clamp and make sure area under<br />
clamp (above TXV bulb) is clean.<br />
c. Place thermocouple above (parallel to) the TXV bulb<br />
and then secure loosened clamp making sure both<br />
bulbs are firmly secured to suction line as shown in<br />
Figure 4-9<br />
d. Connect an accurate gauge to the ¼” port on the suction<br />
service valve.<br />
e. Run unit until stabilized at --4_F (-20_C) box temperature.<br />
f. From the temperature/pressure chart (Table 4-5), determine<br />
the saturation temperature corresponding to<br />
the evaporator outlet pressure.<br />
g. Note the temperature of the suction gas at the expansion<br />
valve bulb.<br />
h. Subtract the saturation temperature determined in<br />
Step f. from the average temperature measured in<br />
Step g.. The difference is the superheat of the suction<br />
gas. Refer to paragraph 1.5.2 for superheat setting.<br />
i. If required adjust superheat by turning the adjusting<br />
screw located under the cap on the side of the valve.<br />
5<br />
1. Suction Line<br />
(end view)<br />
2. TXV Bulb Clamp<br />
1<br />
3. Thermocouple<br />
4. TXV Bulb<br />
5. Nut and Bolt (Clamp)<br />
Figure 4-9 Thermostatic Expansion Valve Bulb<br />
And Thermocouple<br />
4<br />
3<br />
2<br />
62-11044<br />
4--10
4.12.3 Checking the TXV Orifice Strainer<br />
Pump the unit down (refer to paragraph 4.3.2). Remove<br />
the bottom connection on the TXV. Remove the strainer<br />
and check for obstruction or damage. Clean or replace<br />
strainer assembly and tighten connection at bottom of<br />
valve. Evacuate unit (refer to paragraphs 4.5.4).<br />
4.13 COMPRESSOR OIL TYPE<br />
The compressor(s) are supplied with CARRIER<br />
POLYESTER (POE) oil. Ensure compressor is marked<br />
with a factory sticker indicating the correct oil has been<br />
installed. Oils of PAG type are strictly incompatible with<br />
the operation of this unit, never use an oil other than that<br />
approved by CARRIER.<br />
4.14 MICROPROCESSOR<br />
Although there is less danger of electrical static<br />
discharge (ESD) damage in the outdoor environment,<br />
where the processor is likely to be handled, proper<br />
board handling techniques should be stressed. Boards<br />
should always be handled by their edges, in much the<br />
same way one would handle a photograph. This not only<br />
precludes the possibility of ESD damage, but also<br />
lowers the possibility of physical damage to the<br />
electronic components. Although the microprocessor<br />
boards are fairly rugged when assembled, they are<br />
more fragile when separated and should always be<br />
handled carefully.<br />
When welding is required on the unit frame, or on the<br />
front area of the trailer, ALL wiring to the microprocessor<br />
MUST be disconnected. When welding is performed on<br />
other areas of the truck and van, the welder ground<br />
connection MUST be in close proximity to the area being<br />
welded. It is also a good practice to remove both battery<br />
cables before welding on either the unit frame or the<br />
truck to prevent possible damage to other components<br />
such as the alternator and voltage regulator.<br />
4.15 EVAPORATOR COIL CLEANING<br />
The use of recycled cardboard cartons is increasing.<br />
The recycled cardboard cartons create much more fiber<br />
dust during transport than ”new” cartons. The fiber dust<br />
and particles are drawn into the evaporator where they<br />
lodge between the evaporator fins. If the coil is not<br />
cleaned on a regular basis, sometimes as often as after<br />
each trip, the accumulation can be great enough to<br />
restrict air flow, cause coil icing, repetitive defrosts and<br />
loss of unit capacity. Due to the ”washing” action of<br />
normal defrost the fiber dust and particles may not be<br />
visible on the face of the coil but may accumulate deep<br />
within.<br />
It is recommended to clean an the evaporator coil on a<br />
regular basis, not only to remove cardboard dust, but to<br />
remove any grease oil film which sometimes coats the<br />
fins and prevents water from draining into the drain pan.<br />
Cardboard fiber particles after being wetted and dried<br />
several times can be very hard to remove. Therefore,<br />
several washings may be necessary.<br />
a. Spray coil with a mild detergent solution such as any<br />
good commercial-grade automatic dish washer detergent<br />
and let the solution stand for a few minutes.<br />
Reverse flush (opposite normal air flow) with clean<br />
water at mild pressure. A garden hose with spray<br />
nozzle is usually sufficient. Make sure drain lines are<br />
clean.<br />
b. Run unit until defrost mode be initiated to check for<br />
proper draining from drain pan.<br />
4.16 CONDENSER COIL CLEANING<br />
Remove all foreign material from the condenser coil by<br />
reversing the normal air flow. (Air is pulled in through the<br />
front.) Compressed air or water may be used as a<br />
cleaning agent. It may be necessary to use warm water<br />
mixed with any good commercial dishwasher detergent.<br />
Rinse coil with fresh water if a detergent is used.<br />
4--11 62-11044
Table 4-5. R-404a Temperature -Pressure Chart<br />
Temperature Pressure Temperature Pressure<br />
_F _C Psig Kg/cm 2 Bar _F _C Psig Kg/cm 2 Bar<br />
-- 40 -- 40 4.5 0.32 0.31 32 0 72.5 5.10 5.00<br />
-- 35 -- 37 7.1 0.50 0.49 34 1 75.6 5.32 5.21<br />
-- 30 -- 34 9.9 0.70 0.68 36 2 78.8 5.54 5.43<br />
-- 25 -- 32 12.9 0.91 0.89 38 3 82.1 5.77 5.66<br />
-- 20 -- 29 16.3 1.15 1.12 40 4 85.5 6.01 5.90<br />
-- 18 -- 28 17.7 1.24 1.22 42 6 89.0 6.26 6.14<br />
-- 16 -- 27 19.2 1.35 1.32 44 7 92.5 6.50 6.38<br />
-- 14 -- 26 20.7 1.46 1.43 46 8 96.2 6.76 6.63<br />
-- 12 -- 24 22.3 1.57 1.54 48 9 99.9 7.02 6.89<br />
-- 10 -- 23 23.9 1.68 1.65 50 10 103.7 7.29 7.15<br />
-- 8 -- 22 25.6 1.80 1.77 55 13 115.4 8.11 7.96<br />
-- 6 -- 21 27.3 1.92 1.88 60 16 126.1 8.87 8.69<br />
-- 4 -- 20 29.1 2.05 2.01 65 18 137.4 9.66 9.47<br />
-- 2 -- 19 30.9 2.17 2.13 70 21 149.4 10.50 10.30<br />
0 -- 18 32.8 2.31 2.26 75 24 162.1 11.40 11.18<br />
2 -- 17 34.8 2.45 2.40 80 27 175.5 12.34 12.10<br />
4 -- 16 36.8 2.59 2.54 85 29 189.6 13.33 13.07<br />
6 -- 14 38.9 2.73 2.68 90 32 204.5 14.38 14.10<br />
8 -- 13 41.1 2.89 2.83 95 35 220.2 15.48 15.18<br />
10 -- 12 43.3 3.04 2.99 100 38 236.8 16.65 16.33<br />
12 -- 11 45.6 3.21 3.14 105 41 254.2 17.87 17.53<br />
14 -- 10 48.0 3.37 3.31 110 43 272.4 19.15 18.78<br />
16 -- 9 50.4 3.54 3.47 115 46 291.6 20.50 20.11<br />
18 -- 8 52.9 3.72 3.65 120 49 311.8 21.92 21.50<br />
20 -- 7 55.5 3.90 3.83 125 52 332.9 23.41 22.95<br />
22 -- 6 58.1 4.08 4.01 130 54 355.0 24.96 24.48<br />
24 -- 4 60.9 4.28 4.20 135 57 378.1 26.58 26.07<br />
26 -- 3 63.7 4.48 4.39 140 60 402.3 28.28 27.74<br />
28 -- 2 66.5 4.68 4.59 145 63 427.6 30.06 29.48<br />
30 -- 1 69.5 4.89 4.79 150 66 454.0 31.92 31.30<br />
Table 4-6 Sensor Resistance (RAS)<br />
Temperature<br />
RAS<br />
_C _F Resistance In Ohms<br />
--28.9 -- 20 165,300<br />
--23.3 -- 10 117,800<br />
--17.8 0 85,500<br />
--12.2 10 62,400<br />
-- 6.7 20 46,300<br />
-- 1.1 30 34,500<br />
0 32 32,700<br />
4.4 40 26,200<br />
10.0 50 19,900<br />
15.6 60 15,300<br />
Temperature<br />
_C _F<br />
RAS<br />
Resistance In Ohms<br />
21.1 70 11,900<br />
25 77 10,000<br />
26.7 80 9,300<br />
32.2 90 7,300<br />
37.8 100 5,800<br />
43.3 110 4,700<br />
48.9 120 3,800<br />
90 194 915<br />
100 212 680<br />
130 266 301<br />
150 302 186<br />
62-11044<br />
4--12
SECTION 5<br />
TROUBLESHOOTING<br />
WARNING<br />
Beware of unannounced starting of the unit. The unit may cycle the fans and operating compressor<br />
unexpectedly as control requirements dictate. To ensure unit will not start, place the EMERGENCY<br />
SWITCH (see Figure 1-1) in the OFF position. To ensure unit is without power, remove power plug and<br />
remove battery negative cable.<br />
CAUTION<br />
Under no circumstances should anyone attempt to service the microprocessor (see section 4.14).<br />
Should a problem develop with the microprocessor, contact your nearest Carrier Transicold dealer for<br />
replacement.<br />
5.1 INTRODUCTION<br />
Under normal circumstances, unit problems will be indicated by an active or inactive alarm in the alarm list. Suggested<br />
troubleshooting actions for each alarm indication are provided in Table 5-1. Suggested corrective actions for<br />
mechanical type problems are listed under subject headings in Table 5-2.<br />
Table 5-1 Alarm Indications<br />
ALARM Description CORRECTIVE ACTION<br />
Reference<br />
Paragraph<br />
A00 No Malfunction All components functioning normally -- --<br />
A01 Low Pressure Switch (LP) Unit undercharged 4.6.1<br />
Open (Road)<br />
Liquid line filter--drier restricted 4.7<br />
TXV strainer plugged with foreign material/ice. 4.12.3<br />
TXV malfunction 4.12<br />
Verify operation of evaporator fans. -- --<br />
Failed switch 4.8.2<br />
A02<br />
A03<br />
A04<br />
A05<br />
A06<br />
A07<br />
A08<br />
High Pressure Switch (HP1)<br />
Open<br />
Standby Compressor Thermal<br />
Overload (PTO) open<br />
Road Compressor Clutch<br />
(CLHR) Malfunction<br />
Standby Contactor (MC)<br />
high amp draw<br />
Condenser Fan Motor (CFM)<br />
high amp draw<br />
Evaporator Fan Speed<br />
Hot Water Solenoid (HWV)<br />
high amp draw<br />
Unit overcharged 4.6.1<br />
Verify operation of condenser fan -- --<br />
Noncondensibles in system 4.3.3<br />
Discharge check valve failed closed (standby or Replace<br />
road)<br />
Failed switch 4.8.2<br />
Check liquid injection valve<br />
Electric line voltage low 1.5.3<br />
Current draw of road clutch coil either high or low Replace<br />
Current draw of contactor coil high or low<br />
(0.2 amps -- 3 phase; 0.5 amps -- 1 phase)<br />
-- --<br />
Verify plunger moves freely -- --<br />
Replace contactor -- --<br />
Verify motor rotates freely -- --<br />
Verify condition of brushes 4.9<br />
Replace motor -- --<br />
Verify microprocessor configuration<br />
2.5<br />
Check fan motor output wires<br />
Verify fan motor rotation.<br />
-- --<br />
Current draw of coil high or low -- --<br />
Replace coil -- --<br />
5--1<br />
62-11044
Table 5-1 Alarm Indications - Continued<br />
ALARM Description CORRECTIVE ACTION<br />
A09<br />
A10<br />
A11<br />
A12<br />
Hot Gas Valve (HGS1)<br />
high amp draw<br />
Quench Valve (BPV)<br />
high amp draw<br />
Condenser Pressure Control<br />
Valve (HGS2) high amp draw<br />
Out–of–Range -- High Temperature<br />
Reference<br />
Paragraph<br />
Current draw of coil high or low (approx 1.6 amp) -- --<br />
Replace coil 4.10.1<br />
Current draw of coil high or low (approx 1.2 amp) -- --<br />
Replace coil 4.10.1<br />
Current draw of coil high or low (approx 1.6 amp) -- --<br />
Replace coil 4.10.1<br />
Unit out of range for 15 minutes<br />
Verify Setting<br />
Verify cooling operation of unit -- --<br />
Hot gas solenoid open 4.10<br />
A13 Out–of–Range Low Temperature<br />
Verify heating operation of unit -- --<br />
Unit out of range for more than 15 minutes<br />
Heating option not active (Set Configuration) 2.5<br />
A14 Defrost Cycle >45 minutes Unit terminated defrost after 45 minutes -- --<br />
Verify HGS1/HGS2 valve operation 4.10<br />
A15 Setpoint out of range Operator entered invalid setpoint (outside of range) 2.3<br />
Verify configuration settings 2.5<br />
A16<br />
A17<br />
A18<br />
A21<br />
A22<br />
A23<br />
A24<br />
A25<br />
A26<br />
A27<br />
A28<br />
Evaporator drain line heater<br />
(DWR) malfunction<br />
Transformer/Rectifier Thermal<br />
Overload (RBT) Open<br />
Electrical Heating Relay<br />
(Future)<br />
Compressor Contactor (MC)<br />
Open Circuit<br />
Condenser Fan Motor (CFM)<br />
Open Circuit<br />
Hot Water Solenoid Valve<br />
(HWV) Open Circuit<br />
Hot Gas Valve (HGS1) Open<br />
Circuit<br />
Quench Valve (BPV) Open<br />
Circuit<br />
Condenser Pressure Control<br />
Valve (HGS2) Open Circuit<br />
Evaporator Drain Line Heater<br />
(DWR) Open Circuit<br />
Heating Relay (EHR) Open<br />
Circuit (Future)<br />
Verify Setting<br />
Replace heater<br />
High amp draw<br />
-- --<br />
Line voltage low<br />
Correct<br />
Transformer winding open<br />
Replace<br />
High load on rectification system<br />
Correct<br />
Relay shorted<br />
Replace<br />
Wiring shorted<br />
Correct<br />
Contactor coil open circuit<br />
Replace<br />
Wiring to coil open<br />
Check<br />
Condenser fan motor defective 4.9<br />
Wiring to motor open<br />
Check<br />
Valve coil shorted<br />
Replace<br />
Wiring to coil open<br />
Check<br />
Valve coil shorted 4.10.1<br />
Wiring to coil open<br />
Correct<br />
Valve coil shorted<br />
Replace<br />
Wiring to coil open<br />
Correct<br />
Valve coil shorted 4.10.1<br />
Wiring to coil open<br />
Correct<br />
Evaporator drain heater shorted<br />
Replace<br />
Verify wiring to heater<br />
Correct<br />
Relay open circuit<br />
Replace<br />
Wiring to coil open<br />
Correct<br />
62-11044 5--2
Table 5-1 Alarm Indications - Continued<br />
ALARM Description CORRECTIVE ACTION<br />
Reference<br />
Paragraph<br />
EE Return Air Sensor Return air sensor defective Replace<br />
bAt Low Battery Voltage Vehicle battery voltage low Correct<br />
-- -- -- Using Road & Standby operation<br />
at the same time. ply<br />
If operating on road, disconnect standby power sup-<br />
-- --<br />
-- -- --<br />
-- -- --<br />
If operating on standby, shut down vehicle engine. -- --<br />
Err Setpoint above maximum. Programming error, reset. 2.3<br />
-- -- -- Setpoint below minimum. Programming error, reset. 2.3<br />
INDICATION/TROUBLE<br />
5.2 REFRIGERATION<br />
5.2.1 Unit Will Not Cool<br />
Compressor malfunction<br />
<strong>Refrigeration</strong> system<br />
Table 5-2 Mechanical Indications<br />
POSSIBLE CAUSES<br />
Compressor drive (clutch) defective<br />
Compressor defective<br />
Defrost cycle has not terminated<br />
Abnormal pressure<br />
Hot gas solenoid malfunction (HGS1)<br />
REFERENCE<br />
SECTION<br />
Replace<br />
5.2.5<br />
5.2.6<br />
4.10<br />
5.2.2 Unit Runs But Has Insufficient Cooling<br />
Compressor Compressor defective Replace<br />
<strong>Refrigeration</strong> system<br />
Abnormal pressure<br />
Expansion valve malfunction<br />
No or restricted evaporator airflow<br />
5.2.3 Unit Operates Long or Continuously in Cooling<br />
Box<br />
Hot Load<br />
<strong>Refrigeration</strong> system<br />
Defective box insulation or air leak<br />
Abnormal pressure<br />
Temperature controller malfunction<br />
5.2.6<br />
5.3.1<br />
5.3<br />
Insufficient pull<br />
down time<br />
Correct<br />
5.2.6<br />
5.2.8<br />
Compressor Defective Replace<br />
5.2.4 Unit Will Not Heat or Heating Insufficient<br />
<strong>Refrigeration</strong><br />
Compressor<br />
5.2.5 Defrost Malfunction<br />
Automatic defrost will not initiate<br />
Manual defrost will not initiate<br />
Defrost cycle initiates but does<br />
not defrost<br />
Frequent defrost<br />
Does not terminate or cycles on<br />
defrost<br />
Abnormal pressure<br />
Temperature controller malfunction<br />
Hot gas solenoid malfunction (HGS1)<br />
Compressor drive (clutch) defective<br />
Compressor defective<br />
Defrost thermostat (DTT) open or defective<br />
Hot gas valve malfunction<br />
Defrost disabled through cab command<br />
Microprocessor defective<br />
Defrost thermostat (DTT) open or defective<br />
Hot gas solenoid malfunction (HGS1)<br />
Condenser Pressure Control valve malfunction (HGS2)<br />
Wet load<br />
Defrost settings set to low.<br />
Defrost thermostats (DTT) shorted closed<br />
5.2.6<br />
5.2.8<br />
4.10<br />
Check<br />
Replace<br />
Replace<br />
4.10<br />
2.4<br />
Replace<br />
Replace<br />
4.10<br />
4.10<br />
-- --<br />
2.4<br />
Replace<br />
5--3<br />
62-11044
Table 5-2 Mechanical Indications - Continued<br />
INDICATION/TROUBLE<br />
5.2.6 Abnormal Pressure<br />
5.2.6.1 Cooling<br />
High discharge pressure<br />
Low discharge pressure<br />
High suction pressure<br />
Low suction pressure<br />
Suction and discharge pressures<br />
tend to equalize when unit is<br />
operating<br />
5.2.6.2 Heating<br />
High discharge pressure<br />
Low discharge pressure<br />
Low suction pressure<br />
5.2.7 Abnormal Noise<br />
Compressor<br />
Condenser or evaporator fan<br />
5.2.8 Cab Command Malfunction<br />
Cab Command non–operational<br />
POSSIBLE CAUSES<br />
Condenser coil dirty<br />
Noncondensibles or refrigerant overcharge<br />
Condenser fan/motor defective<br />
Compressor defective<br />
Hot gas solenoid malfunction<br />
Low refrigerant charge<br />
Compressor defective<br />
Hot gas solenoid malfunction<br />
Compressor pressure regulator misadjusted (CPR)<br />
Filter–drier partially plugged<br />
Low refrigerant charge<br />
Expansion valve malfunction<br />
No evaporator air flow or restricted air flow<br />
Excessive frost on coil<br />
Compressor defective<br />
Hot gas solenoid malfunction<br />
Overcharged system<br />
Condenser fan or HP2 pressure switch defective<br />
Noncondensibles in system<br />
Condenser motor/fan defective<br />
HGS2 closed<br />
Compressor defective<br />
Hot gas valve malfunction<br />
Low refrigerant charge<br />
Compressor pressure regulating valve misadjusted (CPR)<br />
Condenser Pressure Regulating valve fault (HGS2)<br />
Loose mounting bolts<br />
Worn bearings<br />
Worn or broken valves<br />
Liquid slugging<br />
Insufficient oil<br />
Loose shroud<br />
Bearings defective<br />
Fanlooseonshaft<br />
Bent shaft<br />
Microprocessor fuse open<br />
Microprocessor malfunction<br />
Microprocessor/Cab command cable<br />
5.3 No Evaporator Air Flow or Restricted Air Flow<br />
Evaporator coil blocked<br />
Heavy frost on coil<br />
Coil dirty<br />
No or partial evaporator air flow<br />
Evaporator fan loose or defective<br />
Evaporator fan rotating backwards<br />
Evaporator air flow blocked in box<br />
Fan motor(s) malfunction<br />
REFERENCE<br />
SECTION<br />
4.16<br />
4.6.1<br />
4.9<br />
Replace<br />
4.10<br />
4.6.1<br />
Replace<br />
4.10<br />
4.11<br />
4.7<br />
4.6.1<br />
5.3.1<br />
5.3<br />
Check<br />
Replace<br />
4.10<br />
4.6.1<br />
4.8<br />
4.3.3<br />
4.9<br />
Replace<br />
4.10<br />
4.6.1<br />
4.11<br />
4.10<br />
Tighten<br />
Replace<br />
Replace<br />
5.3.1<br />
Check<br />
Check<br />
Check<br />
Check<br />
Replace<br />
Replace<br />
Check<br />
Check<br />
4.15<br />
Check<br />
Check<br />
Check<br />
Replace<br />
62-11044 5--4
INDICATION/TROUBLE<br />
5.3.1 Expansion Valve<br />
Low suction pressure with high<br />
superheat<br />
Table 5-2 Mechanical Indications - Continued<br />
POSSIBLE CAUSES<br />
Low refrigerant charge<br />
External equalizer line plugged<br />
Ice wax, oil or dirt plugging valve strainer<br />
Broken capillary<br />
Superheat setting too high<br />
REFERENCE<br />
SECTION<br />
4.6.1<br />
Repair<br />
4.12.3<br />
Repair<br />
4.12.2<br />
Low superheat and liquids lugging<br />
in compressor<br />
Fluctuating suction pressure<br />
Superheat setting too low<br />
External equalizer line plugged<br />
Pin and seat of expansion valve eroded or held open by<br />
foreign material<br />
Improper bulb location or installation<br />
Insulation missing from sensing bulb<br />
Low superheat setting<br />
4.12.2<br />
Repair<br />
4.12<br />
4.12<br />
Replace<br />
4.12.2<br />
High superheat Expansion valve setting 4.12.2<br />
5.3.2 Malfunction Hot Gas Solenoid or Condenser Pressure Regulating Valve<br />
Valve does not function properly<br />
Valve shifts but refrigerant<br />
continues to flow<br />
No power to valve<br />
Improper wiring or loose connections<br />
Valve improperly assembled<br />
Coil or coil sleeve improperly assembled<br />
Movement of plunger restricted due to:<br />
a. Corroded or worn parts<br />
b. Foreign material lodged in valve<br />
c. Bent or dented enclosing tube<br />
Foreign material lodged under seat<br />
Defective seat<br />
5.3.3 Standby Compressor Malfunction<br />
Standby compressor fails to start Motor contactor defective<br />
Motor Overload open<br />
Improper power supply<br />
5–minute timer active<br />
Standby compressor fails to start<br />
1∅ Only<br />
Defective start capacitor<br />
Defective start relay<br />
Check<br />
Check<br />
4.10<br />
4.10<br />
Replace<br />
Check<br />
Correct<br />
Check<br />
Check/Replace<br />
Replace<br />
Standby motor starts, then stops Motor Overload open Check<br />
Standby motor starts, then stops<br />
-- 1∅ Only<br />
Defective start capacitor<br />
Defective start relay<br />
Check/Replace<br />
Replace<br />
5--5<br />
62-11044
SECTION 6<br />
SCHEMATIC DIAGRAMS<br />
WARNING<br />
Beware of unannounced starting of the unit. The unit may cycle the fans and operating compressor<br />
unexpectedly as control requirements dictate. To ensure unit will not start, place the EMERGENCY<br />
SWITCH (see Figure 1-1) in the OFF position. To ensure unit is without power, remove power plug<br />
and remove battery negative cable.<br />
Under no circumstances should anyone attempt<br />
to service the microprocessor (see<br />
section 4.14). Should a problem develop<br />
CAUTION<br />
with the microprocessor, contact your nearest<br />
Carrier Transicold dealer for replacement.<br />
6.1 INTRODUCTION<br />
Schematic diagrams for the unit models listed in Table 1-1 are provided herein.<br />
6--1 62-11044
LOCATION SYMBOL DESCRIPTION LOCATION IN UNIT<br />
C--11 AR ALARM RELAY (OPTION) EXTERNAL<br />
B--12 BPT QUENCH THERMOSTAT ROAD COMPRESSOR<br />
J--5 BPV QUENCH VALVE EVAPORATOR<br />
B--6 CC CAB COMM<strong>AND</strong> CAB<br />
B--4 CFM CONDENSER FAN MOTOR CONDENSER<br />
B--11 CLHR CLUTCH ENGINE COMPARTMENT<br />
J--2 DTT DEFROST TERMINATION THERMOSTAT EVAPORATOR<br />
B--9 EB EMERGENCY SWITCH CONDENSER<br />
J7,J8,J9 EFM 1, 2, 3 EVAPORATOR FAN MOTOR EVAPORATOR<br />
B--10 FI IGNITION FUSE ENGINE COMPARTMENT<br />
A13, C13 FR, FR1 ROAD FUSE CONDENSER/BATTERY<br />
C--1 FSBP SUCTION BYPASS FUSE EVAPORATOR<br />
B--3 HP1 HIGH PRESSURE SWITCH CONDENSER<br />
B--4 HP2 CONDENSER PRESSURE SWITCH CONDENSER<br />
D--1 HP4 HIGH AMBIENT PRESSURE SWITCH EVAPORATOR<br />
B--5 HGS1 HOT GAS SOLENOID VALVE CONDENSER<br />
B--5 HGS2 CONDENSER PRESSURE CONTROL VALVE CONDENSER<br />
J--2 LP LOW PRESSURE SWITCH EVAPORATOR<br />
J--3 MP MICROPROCESSOR BOARD CONDENSER<br />
F--13 MP FUSE MICROPROCESSOR BOARD FUSE CONDENSER<br />
J--3 RAS RETURN AIR SENSOR EVAPORATOR<br />
F--1 SBPV SUCTION BYPASS VALVE EVAPORATOR<br />
Figure 6-1 Electrical Schematic Wiring Diagram - Based On Dwg. No. 62-61438 Rev C<br />
62--11044<br />
6--2
ONLY ON <strong>50X</strong><br />
NOTES:<br />
1. UNIT SHOWN IN “OFF” POSITION.<br />
2. WIRE IDENTIFICATION SYSTEM:<br />
COLOR: WHITE -- DC CONTROL CIRCUITS<br />
GREEN -- DC GROUND CIRCUITS<br />
RED -- POSITIVE BATTERY CIRCUITS<br />
BLACK -- NEGATIVE BATTERY CIRCUITS<br />
3. ADDRESS SYSTEM: EXAMPLE: MP43/C8--A<br />
INDICATES A WIRE BETWEEN MICROPROCESSOR<br />
MP (PIN43) <strong>AND</strong> PLUG C8 (PINA).<br />
4. ACCORDING TO EVAPORATOR CONFIGURATION.<br />
INDICATES A SOLDERED SPLICE POINT<br />
PIN CONNECTION<br />
LIGHT LINES INDICATE WIRES IN THE SYSTEM<br />
NORMALLY CLOSED CONTACTS<br />
NORMALLY OPEN CONTACTS<br />
MULTIPLE PLUG CONNECTION NUMBER<br />
JUNCTION BLOCK CONNECTION<br />
SWITCH SYMBOL INDICATES MOMENTARY CONTACTS<br />
INDICATES A WIRE GROUND<br />
INDICATES A CHASSIS GROUND<br />
INDICATES OPTIONS<br />
INDICATES A CONNECTION, WIRE, LUG, ETC.<br />
INSULATING PLUG<br />
COMPONENT CONNECTION NUMBER OR LETTER<br />
SWITCH THERMAL PROTECTOR<br />
CHART 1<br />
+BAT = 12V<br />
FI<br />
1A<br />
FR<br />
50A<br />
FR1<br />
60A<br />
FSBP<br />
3A<br />
MP FUSE<br />
1A<br />
ROAD ONLY<br />
Figure 6-2 Electrical Schematic Wiring Diagram - Based On Dwg. No. 62-61438 Rev C<br />
6--3 62--11044
NOTES:<br />
1. UNIT SHOWN IN “OFF” POSITION.<br />
2. WIRE IDENTIFICATION SYSTEM:<br />
COLOR: WHITE -- DC CONTROL CIRCUITS<br />
GREEN -- DC GROUND CIRCUITS<br />
RED -- POSITIVE BATTERY CIRCUITS<br />
BLACK -- NEGATIVE BATTERY CIRCUITS<br />
3. ADDRESS SYSTEM: EXAMPLE: MP43/C8--A<br />
INDICATES A WIRE BETWEEN MICROPROCESSOR<br />
MP (PIN43) <strong>AND</strong> PLUG C8 (PINA).<br />
4. ACCORDING TO EVAPORATOR CONFIGURATION.<br />
INDICATES A SOLDERED SPLICE POINT<br />
PIN CONNECTION<br />
LIGHT LINES INDICATE WIRES IN THE SYSTEM<br />
NORMALLY CLOSED CONTACTS<br />
NORMALLY OPEN CONTACTS<br />
MULTIPLE PLUG CONNECTION NUMBER<br />
JUNCTION BLOCK CONNECTION<br />
SWITCH SYMBOL INDICATES MOMENTARY CONTACTS<br />
INDICATES A WIRE GROUND<br />
INDICATES A CHASSIS GROUND<br />
INDICATES OPTIONS<br />
INDICATES A CONNECTION, WIRE, LUG, ETC.<br />
INSULATING PLUG<br />
COMPONENT CONNECTION NUMBER OR LETTER<br />
SWITCH THERMAL PROTECTOR<br />
LOCATION SYMBOL DESCRIPTION LOCATION IN UNIT LOCATION SYMBOL DESCRIPTION LOCATION IN UNIT<br />
C--11 AR ALARM RELAY (OPTION) EXTERNAL D--1 HP4 HIGH AMBIENT PRESSURE SWITCH EVAPORATOR<br />
B--12 BPT QUENCH THERMOSTAT ROAD COMPR. B--5 HGS1 HOT GAS SOLENOID VALVE CONDENSER<br />
J--5 BPV QUENCH VALVE EVAPORATOR B--5 HGS2 COND. PRESSURE CONTROL VALVE CONDENSER<br />
M--13 C1 FILTER CAPACITOR CONDENSER B--10 IGNITION SWITCH KEY INFO (IGNITION) ENGINE COMP.<br />
O--3 CB CIRCUIT BREAKER ST<strong>AND</strong>BY BOX O--8 KR KRIWAN RELAY MOTOR PROTECTION ST<strong>AND</strong>BY BOX<br />
B--6 CC CAB COMM<strong>AND</strong> CAB J--3 LP LOW PRESSURE SWITCH EVAPORATOR<br />
B--4 CFM CONDENSER FAN MOTOR CONDENSER J--12/N--7 MC MOTOR CONTACTOR ST<strong>AND</strong>BY PANEL<br />
B--11 CLHR ROAD CLUTCH ENGINE COMP. F--2 MP MICROPROCESSOR BOARD CONDENSER<br />
Q--6 CP PERMANENT CAPACITOR ST<strong>AND</strong>BY PANEL O--7 PTO MOTOR INTERNAL THERMOSTAT COMPRESSOR<br />
R--6 CS1--2 START CAPACITOR ST<strong>AND</strong>BY PANEL Q--4/Q--2 PSR POWER SUPPLY RECEPTACLE EXTERNAL<br />
L--13 R DISCHARGE RESISTOR CONDENSER<br />
J--4 RAS RETURN AIR SENSOR EVAPORATOR<br />
J--2 DTT DEFROST TERMINATION THERMOSTAT EVAPORATOR N--12 RB RECTIFIER BRIDGE CONDENSER<br />
B--9 EB EMERGENCY SWITCH CONDENSER P--12 RBT RECTIFIER BRIDGE THERMISTOR CONDENSER<br />
J7,J8,J9 EFM1,2,3 EVAPORATOR FAN MOTOR EVAPORATOR R--6 RDCS DISCHARGE RESISTOR ON START CAP. START BOX<br />
M--9 F1 PRIMARY TRANSFORMER FUSE ST<strong>AND</strong>BY PANEL O--6 SBM ST<strong>AND</strong>BY MOTOR CONDENSER<br />
B--10 FI IGNITION FUSE ENGINE COMP. F--1 SBPV SUCTION BYPASS VALVE EVAPORATOR<br />
A13,C--13 FR, FR1 ROAD FUSE CONDENSER/BATT. Q--7 STR START RELAY ST<strong>AND</strong>BY PANEL<br />
I--13 FS ST<strong>AND</strong>BY FUSE CONDENSER P--11 TR TRANSFORMER CONDENSER<br />
C--1 FSBP SUCTION BYPASS FUSE EVAPORATOR P--12 TRT TRANSFORMER THERMISTOR CONDENSER<br />
B--3 HP1 HIGH PRESSURE SWITCH CONDENSER<br />
B--4 HP2 COND. PRESSURE CONTROL SWITCH CONDENSER<br />
B--3 HP3 ST<strong>AND</strong>BY HIGH PRESSURE SWITCH CONDENSER<br />
6--4 62--11044
CHART 1<br />
+BAT = 12V<br />
FI<br />
1A<br />
FR<br />
50A<br />
FR1<br />
60A<br />
FS<br />
50A<br />
F1<br />
5AT<br />
FSBP<br />
3A<br />
MP FUSE<br />
1A<br />
Figure 6-3 Electrical Schematic Wiring Diagram - Based On Dwg. No. 62-61456 Rev -<br />
230V/1/60Hz<br />
6--5 62--11044
NOTES:<br />
1. UNIT SHOWN IN “OFF” POSITION.<br />
2. WIRE IDENTIFICATION SYSTEM:<br />
COLOR: WHITE -- DC CONTROL CIRCUITS<br />
GREEN -- DC GROUND CIRCUITS<br />
RED -- POSITIVE BATTERY CIRCUITS<br />
BLACK -- NEGATIVE BATTERY CIRCUITS<br />
3. ADDRESS SYSTEM: EXAMPLE: MP43/C8--A<br />
INDICATES A WIRE BETWEEN MICROPROCESSOR<br />
MP (PIN43) <strong>AND</strong> PLUG C8 (PINA).<br />
4. ACCORDING TO EVAPORATOR CONFIGURATION.<br />
5. MARKING FOR THE WIRES ARE: C12--9/1∅, C12--7/3∅<br />
INDICATES A SOLDERED SPLICE POINT<br />
PIN CONNECTION<br />
LIGHT LINES INDICATE WIRES IN THE SYSTEM<br />
NORMALLY CLOSED CONTACTS<br />
NORMALLY OPEN CONTACTS<br />
MULTIPLE PLUG CONNECTION NUMBER<br />
JUNCTION BLOCK CONNECTION<br />
SWITCH SYMBOL INDICATES MOMENTARY CONTACTS<br />
INDICATES A WIRE GROUND<br />
INDICATES A CHASSIS GROUND<br />
INDICATES OPTIONS<br />
INDICATES A CONNECTION, WIRE, LUG, ETC.<br />
INSULATING PLUG<br />
COMPONENT CONNECTION NUMBER OR LETTER<br />
SWITCH THERMAL PROTECTOR<br />
LOCATION SYMBOL DESCRIPTION LOCATION IN UNIT LOCATION SYMBOL DESCRIPTION LOCATION IN UNIT<br />
C--11 AR ALARM RELAY (OPTION) EXTERNAL F--2 MP MICROPROCESSOR BOARD CONDENSER<br />
B--12 BPT QUENCH THERMOSTAT ROAD COMPR. P--4/P--3 PSR POWER SUPPLY RECEPTACLE EXTERNAL<br />
J--5 BPV QUENCH VALVE EVAPORATOR N--7 PTO MOTOR INTERNAL THERMOSTAT COMPRESSOR<br />
B--6 CC CAB COMM<strong>AND</strong> CAB J--3 RAS RETURN AIR SENSOR EVAPORATOR<br />
B--4 CFM CONDENSER FAN MOTOR CONDENSER O--12 RB RECTIFIER BRIDGE CONDENSER<br />
B--11 CLHR ROAD CLUTCH ENGINE COMP. Q--12 RBT RECTIFIER BRIDGE THERMISTOR RECTIFIER BRIDGE<br />
R--6 SBM ST<strong>AND</strong>BY COMPRESSOR MOTOR CONDENSER<br />
J--2 DTT DEFROST TERMINATION THERMOSTAT EVAPORATOR F--1 SBPV SUCTION BYPASS VALVE EVAPORATOR<br />
Q--9 TR TRANSFORMER CONDENSER<br />
B--9 EB EMERGENCY SWITCH CONDENSER R--11 TRT TRANSFORMER THERMISTOR TRANSFORMER<br />
J7,J8,J9 EFM1,2,3 EVAPORATOR FAN MOTOR EVAPORATOR F--13 MP FUSE MICROPROCESSOR BOARD FUSE CONDENSER<br />
M--9 F1,2,3 PRIMARY TRANSFORMER FUSE ST<strong>AND</strong>BY BOX<br />
N--4 FB FUSE BLOCK ST<strong>AND</strong>BY BOX<br />
B--10 FI IGNITION FUSE ENGINE COMP.<br />
A--13/C--13 FR, FR1 ROAD FUSE CONDENSER/BATT.<br />
I--13 FS ST<strong>AND</strong>BY FUSE CONDENSER<br />
C--1 FSBP SUCTION BYPASS FUSE EVAPORATOR<br />
B--3 HP1 HIGH PRESSURE SWITCH CONDENSER<br />
B--4 HP2 COND. PRESSURE CONTROL SWITCH CONDENSER<br />
B--3 HP3 ST<strong>AND</strong>BY HIGH PRESSURE SWITCH CONDENSER<br />
D--1 HP4 HIGH AMBIENT PRESSURE SWITCH EVAPORATOR<br />
B--5 HGS1 HOT GAS SOLENOID VALVE CONDENSER<br />
B--5 HGS2 CONDENSER PRESSURE CONTROL VALVE CONDENSER<br />
O--8 KR KRIWAN RELAY MOTOR PROTECTION ST<strong>AND</strong>BY BOX<br />
J--2 LP LOW PRESSURE SWITCH CONDENSER<br />
J--12/N--6 MC MOTOR CONTACTOR ST<strong>AND</strong>BY BOX<br />
6--6 62--11044
ONLY ON <strong>50X</strong><br />
CHART 1<br />
+BAT = 12V<br />
FI<br />
1A<br />
FR<br />
50A<br />
FR1<br />
60A<br />
FS<br />
50A<br />
F1<br />
5AT<br />
FSBP<br />
3A<br />
MP FUSE<br />
1A<br />
16A<br />
1.5KW<br />
Figure 6-4 Electrical Schematic Wiring Diagram - Based On Dwg. No. 62-61440 Rev D<br />
230V/3/60Hz<br />
PTO<br />
441VA<br />
3.15AT<br />
5<br />
6--7 62--11044
A<br />
Abnormal Noise, 5-4<br />
Abnormal Pressure, 5-4<br />
Accessing Alarm Messages, 2-8<br />
Alarm Display, 2-8<br />
Alarm Indications, 5-1<br />
C<br />
Cab Command, 2-1<br />
Cab Command Malfunction, 5-4<br />
Charging The <strong>Refrigeration</strong> System, 4-5<br />
Clearing Past Alarm Messages, 2-9<br />
Compressor, 1-8<br />
Compressor, 1-7<br />
Compressor Pressure Regulating Valve, 4-10<br />
Compressor Pressure Regulating Valve, 1-7<br />
Compressor Pressure Regulating Valve (CPR, 1-8<br />
Condenser Coil Cleaning, 4-11<br />
Condenser Fan Motor, 1-9<br />
Condenser Fan Motor Brushes, 4-8<br />
Condenser Pressure Control Solenoid, 4-9<br />
Condenser Pressure Control Valve , 1-7<br />
Condenser Pressure Switch, 4-8<br />
Condenser Pressure Switch, 1-7<br />
Condenser Pressure Switch (HP2), 1-8<br />
Condenser/Subcooler, 1-1<br />
Connect Power, 2-4<br />
Control System, 2-1<br />
D<br />
Defrost, 2-5<br />
Defrost Cycle, 3-2<br />
Defrost Malfunction, 5-3<br />
Defrost Termination Thermostat, 1-8<br />
Defrost Timer, 1-8<br />
Description, 1-1<br />
INDEX<br />
Display, 2-1<br />
E<br />
Electrical Data, 1-9<br />
Evacuation And Dehydration, 4-4<br />
Evaporator, 1-7<br />
Evaporator Coil Cleaning, 4-11<br />
Evaporator Fan Motor, 1-9<br />
Expansion Valve, 5-5<br />
F<br />
Filter Drier, 1-1<br />
Filter--drier, 4-8<br />
Frozen Mode, 3-1<br />
H<br />
High Ambient Switch, 1-8<br />
High Pressure Safety Switch, 1-7<br />
High Pressure Switch , 4-8<br />
High Pressure Switch (HP1), 1-8<br />
Hot Gas Solenoid, 4-9<br />
Hot Gas Valve, 1-9<br />
Hot Gas Valve 1, 1-1<br />
I<br />
Inspection, 2-3<br />
Insufficient Cooling, 5-3<br />
Introduction, 1-1, 5-1, 6-1<br />
K<br />
Keypad, 2-2<br />
L<br />
Low Battery Alarm, 2-8<br />
Low Pressure Switch, 1-7, 1--9<br />
Index--1 62--11044
M<br />
Microprocessor, 4-11<br />
Microprocessor, 2-1<br />
Minimum Off Time, 3-2<br />
N<br />
No Evaporator Air Flow or Restricted Air Flow, 5-4<br />
O<br />
Operation, 2-1<br />
P<br />
Perishable Mode, 3-1<br />
Preventative Maintenance, 4-1<br />
Pumping The Unit Down, 4-3<br />
Q<br />
Quench Valve, 1-7, 1-9<br />
R<br />
Receiver, 1-7<br />
Refrigerant Circuit -- Cooling, 1-11<br />
Refrigerant Circuit -- Heat/Defrost, 1-11<br />
Refrigerant Leak Checking, 4-4<br />
Refrigerant Removal From Compressor, 4-3<br />
<strong>Refrigeration</strong> System, 1-8<br />
Removing Complete Charge, 4-4<br />
Removing The Refrigerant Charge, 4-3<br />
Road Compressor Clutch, 1-9<br />
INDEX<br />
S<br />
Safety Devices, 1-10<br />
Schematic Diagrams, 6-1<br />
Sequence Of Operation, 3-1<br />
Service, 4-1<br />
Set--point, 2-5<br />
Standby Compressor Malfunction, 5-5<br />
Standby High Pressure Switch, 1-7<br />
Standby High Pressure Switch (HP3), 1-8<br />
Standby Motor , 1-7<br />
Start--up, 2-3<br />
Starting, 2-3<br />
Stopping, 2-9<br />
T<br />
Temperature Control, 3-1<br />
Temperature--Pressure Chart , 4-12<br />
Thermal Expansion Valve, 1-7<br />
Thermostatic Expansion Valve, 4-10<br />
Thermostatic Expansion Valve, 1-8<br />
Torque Values, 1-9<br />
Troubleshooting, 5-1<br />
Txv Orifice Strainer, 4-11<br />
U<br />
Unit Operates Long or Continuously in Cooling, 5-3<br />
Unit operating LEDs, 2-2<br />
Unit Will Not Cool, 5-3<br />
Unit Will Not Heat or Heating Insufficient, 5-3<br />
62--11044<br />
Index--2
North America<br />
Carrier Transicold<br />
700 Olympic Drive<br />
Athens, GA 30601 USA<br />
Tel: 1 -706 -357 -7223<br />
Fax: 1 -706 -355 -5435<br />
Central America<br />
and Mexico<br />
Ejercito Nacional No. 418<br />
Piso 9, Torre Yumal<br />
Col. Chapultepec Morales<br />
11570 Mexico, D.F.<br />
Tel: (5255) 9126.0300<br />
Fax: (5255) 9126.0373<br />
Carrier Transicold Division,<br />
Carrier Corporation<br />
Truck/Trailer Products Group<br />
P.O. Box 4805<br />
Syracuse, N.Y. 13221 U.S A<br />
www.carrier.transicold.com<br />
A member of the United Technologies Corporation family. Stock symbol UTX<br />
©2007 Carrier Corporation D PrintedinU.S.A.10/07


