Untitled - MetosExpo - Free
Untitled - MetosExpo - Free
Untitled - MetosExpo - Free

Create successful ePaper yourself
Turn your PDF publications into a flip-book with our unique Google optimized e-Paper software.
"IMPORTERS OF FINE MACHINERY"<br />
If you live EAST of<br />
ssissippi:<br />
Customer Service: (717) 326-3806<br />
ORDERS: 1-800-523-4777<br />
2406 Reach Rd., Williamsport, PA 17701<br />
TABLE SAW<br />
MODEL G1023<br />
ONLY 589500<br />
f.O.B. BElliNGHAM, WA or<br />
WILLIAMSPORT,<br />
PA<br />
20" PLANER<br />
MODEL G1033<br />
ONLY 51<br />
• or BELLINGHAM, WA WILLIAMSPORT, PA<br />
,29500<br />
12" PLANER<br />
ONLY 538500<br />
. BELLINGHAM, WA or<br />
WILLIAMSPORT,<br />
PA<br />
3 H.P.<br />
SHAPER<br />
MODELG1026<br />
ONLY 585000<br />
F.O.B. BElliNGHAM, WA Of<br />
WILLIAMSPORT,<br />
PA<br />
Buy your equipment directly from the<br />
Leader of Woodworking Machinery<br />
Importers. We guarantee that<br />
you'll<br />
receive excellent quality at the lowest<br />
available price.<br />
16" BAND SAW<br />
MODEL G1538<br />
ONLY $52500<br />
F.O.B. BelLINGHAM, WA or<br />
WIlliAMSPORT,<br />
PA<br />
15" PLANER<br />
MODEL G1021<br />
ONLY 573500<br />
(Stand Optional)<br />
F.O.B. BelLINGHAM, WA or<br />
WILliAMSPORT.<br />
PA<br />
1-1/2 H.P. SHAPER<br />
MODEL G1035<br />
ONLY 549500<br />
F.O.B. BELLINGHAM, WA Of<br />
WILLIAMSPORT, PA<br />
Grizzly provides:<br />
Honest, across-the-board dealilngs .:II FE
Working<br />
Fine<br />
_____-----St:ph:mht:r/()cloht:r 1')91<br />
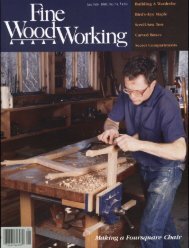
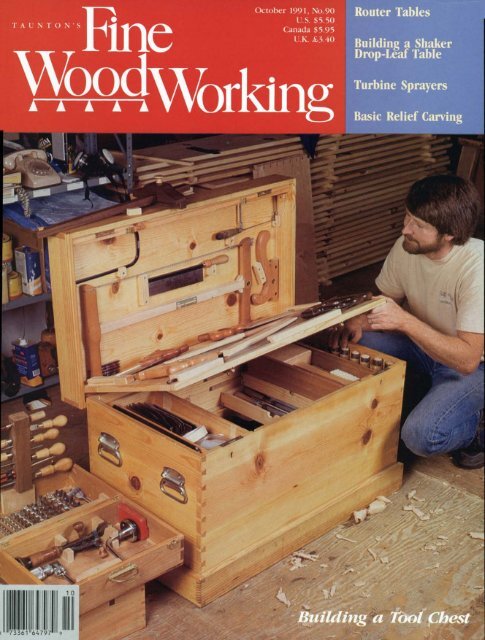
Ed Walker tells how to build a drop-in router table<br />
with a dust-collection chute on p. 56. Cover: Tony<br />
Konovalojf displays his hand-tool storage chest (article<br />
on p. 62). Cover photo: Gary Weisenburger.<br />
Executive Ellitor<br />
M"n"ging Ellitor<br />
Art Director<br />
Senior Ellitor<br />
Jim Boesel<br />
Sandor Nagyszalanczy<br />
Kathleen Rushton<br />
Dick Burrows<br />
Assist"nt Ellitors Charley Robinson,<br />
Gary Weisenburger<br />
Copy Ellitor<br />
Carolyn Kovachik<br />
Assist"nt Art Director<br />
Ellitori"' Assist"nt<br />
Ellitori"' Secret"ry<br />
Aaron Azevedo<br />
Alec Waters<br />
Claire Warner<br />
Contributing Ellitors Tage Frid, R. Bruce Hoadley,<br />
Christian Becksvoort, Michael<br />
'<br />
Dresdner,<br />
Mark Duginske<br />
Consulting Ellitors<br />
Norman Vandal<br />
Methods of Work<br />
Inllexer<br />
Publisher<br />
Harriet Hodges<br />
John Lively<br />
Assist"nt Publisher<br />
Circul"tion M"n"ger<br />
Publisher'S Assist"nt<br />
Associ"te Art Director<br />
George Frank, Richard E. Preiss,<br />
Jim Richey<br />
Prolluction Coorllin"tor<br />
James P. Chiavelli<br />
Brenda Hamilton<br />
Thomas Baker<br />
Wendy Bowes<br />
Sherry Duhigg<br />
Telem"rketinglCustomer Service<br />
Allministr"tive Secret"ry<br />
Lori Moir<br />
Susan M. Clark<br />
Allvertising S"'es M"n"ger Dick West<br />
N"tion"' Accounts M"n"ger Don Schroder<br />
Associ"te<br />
(800) 283-7252<br />
Accounts M"n"ger Barney Barrett<br />
Senior S"'es Coorllin"tor Carole Weckesser<br />
Allvertising Coorlli nmor Kathryn<br />
(203)<br />
Mournian<br />
426-3434<br />
Simonds<br />
Allvertising Secret"ry Betsy Quintiliano<br />
Tel. Fax.<br />
Fine is a reader-written magazine. We welcome<br />
proposals, manusa-ipts, photographs and ideas from our readers,<br />
amateur or professional. We'll acknowledge all submissions<br />
and rerurn those we can't publish. Send your contributions [0<br />
Fine Woodworking, 06470-5506.<br />
PO Box 5506, ewtown, Conn.<br />
Tide to the copyrights in dle contributions appearing in<br />
Fine W'oodworking magazine remains widl tile aumors, photographers<br />
and artists, unless otilelwise indicated. They have<br />
granted publication rights to Fine Woodworking.<br />
Fine Woodworking (ISSN<br />
0361-3453) is published bimonthly,January, March, May,<br />
July, September and November, by The Taunton Press, Inc., Newtown, CT 06470.<br />
Telephone (203) 426-8171. Second·class postage paid at Newtown, CT 06470, and<br />
additional mailing offices. GST # 123210981. Copyright 1991 by The Taunton Press,<br />
Inc. No reproduction without permiSSion of The Taunton Press, Inc. Fine Wood·<br />
\vorking® is a registered trademark of The Taunton Press, Inc. Subscription rates:<br />
United States and possessions, 525 for one year, 545 for two years, 566 for three<br />
years; Canada and other countries, S30 for one year, S55 for cwo years, S80 for three<br />
years (in U.S. dollars, please). Single copy, 54.95. Single copies outside U.s. and pos·<br />
sessions: U.K, £2.95; other countries and possessions, S5.95. Send to Subscription<br />
Dept., The Taunton Press, PO Box 5506, Newtown, CT 06470-5506. For orders only,<br />
call (800) 888·8286. Address all correspondence to the appropriate department<br />
(Subscription, Editorial, or Advertising), The Taunton Press, 63 South Main Street,<br />
PO Box 5506, Newtown, CT 06470-5506. U.S. newsstand distribution: Eastern News<br />
Distributors, Inc., 1130 Cleveland Road, Sandusll'. OH 44870. List management: The<br />
K1eid Co., 530 5th Ave., New York, NY 10036-5101.<br />
DEPARTMENTS<br />
4 Letters<br />
12 Methods<br />
20 Questions<br />
32 Follow-up<br />
Retrieving ball bearings; sexless woodworking; beauty of wood<br />
of Work<br />
Standing shaving horse; drilling jig; shopmade brad pliers<br />
& Answers<br />
ReglUing a chair; dyeing maple; cutting walnut crotch<br />
Finding the radius of an arc; determining shelf spans<br />
Events<br />
106<br />
Books<br />
A look at upcoming programs of interest to woodworkers<br />
114<br />
Notes and Comment<br />
The Band Saw Book,- Projects for Woodworkers,- Seat Weaving<br />
120<br />
Rocket-powered u-ike; Canton woodworking show; finishing tale<br />
ARTICLES<br />
A<br />
44 Building a Loveseat by Gary Rogowski<br />
Interlocking tenons for a strong frame<br />
47 simple router template for complex joints<br />
48 Webbing for a comfortable seat<br />
49<br />
A<br />
Ball Bearings in Shop Tools and Machines<br />
by Robert M. Vaughan<br />
When and how to replace these vital components<br />
52 Beginner's Jewelry Box by Jim Cummins<br />
Tablesaw tricks with casing, curves and coves<br />
56 Building a Router Table by Ed Walker<br />
A drop-in baseplate for easy access<br />
60 Space-saving router tables by Charley Robinson<br />
62 Cabinetmaker's Tool Chest by Tony Konovaloff<br />
A home for hand tools<br />
Postmaster: Send address changes to Fine WOOdw01-king, The Taunton Press, Inc., PO Box 5506,<br />
65 Thicknessing boards with a scrub plane<br />
66 Turbine Spray Systems by Philip Hostetter<br />
A high-volume, low-pressure finishing alternative<br />
68 Conversion air systems: HVLP performance with<br />
a standard compressor by Michael Dresdner<br />
70 The Basics of Classical Relief Carving by Nora Hall<br />
An<br />
A first lesson from a second-generation woodcarver<br />
73 Beveling both sides of a carving tool's edge<br />
74 Elegant Writing Desk by Terry Moore<br />
three-drawer case on fluted legs<br />
A<br />
79 Router Fixture for Making Dowels by Ken Wells<br />
Spinning square blanks into round stock<br />
81 dowel maker you can buy by Gary Weisenburger<br />
82 Quilt Patterns in Parquetry by Charles Detweiler<br />
Scroll-sawing interchangeable pieces<br />
A<br />
86 Spiral-Routing on the Lathe by Norman Zentil<br />
shopmade setup for putting a twist on turnings<br />
90 Shaker Style Drop-Leaf Table by Greg Isaak<br />
Turned legs with drilled-and-chiseled mortises<br />
94 Craft Show at the Smithsonian by Dick Burrows<br />
06470-5506.<br />
Top-notch woodworkers reap profits<br />
Newtown, CT 3
Letters<br />
Electromagnetic radiation from shop tools -As some Fine<br />
Woodworking readers may be aware, there is increasing evidence<br />
that extremely low-frequency electromagnetic radiation<br />
(ELF-EM) causes biological effects at the cellular level. Some epidemiological<br />
studies also implicate ELF-EM in the genesis of certain<br />
types of cancers of the blood and nervous systems, although<br />
evidence for this is less clear. At d1is time, there are no official<br />
standards for safe exposure to these low-frequency EM fields.<br />
As an amateur radio operator, I was curious about my exposure<br />
to d1ese ELF-EM fields while transmitting, and so I obtained<br />
an ELF gauss meter (model SE16 from TRA Instruments; 800-582-<br />
3537) to make some measurements. The results indicated that<br />
there was no significant exposure from the radio equipment.<br />
However, other measurements made around the house and<br />
shop were startling.<br />
The highest readings obtained can1e from<br />
V4-HP<br />
motors in my<br />
woodworking shop. The TRA meter suggests that readings below<br />
3 milligauss are acceptable. In order to be in this "safe" range, I<br />
would have to stand 1.23 meters from my 1-in.-wide belt<br />
sander and 1.3 meters from my radial-arm saw. The motors of<br />
my drill press and shop vacuum had magnetic fields about half<br />
as strong. When I took readings at the tools' operating pOSitions,<br />
the gauss meter went off scale-higher than 24 mG. By way of<br />
contrast, a reading of 16 mG was obtained standing direcdy under<br />
a 138,000v power line.<br />
Woodworkers concerned about the possible heald1 effects of<br />
ELF-EM fields should minimize their exposure to the fields generated<br />
by electric power tools. My measurements indicate that a<br />
wide variation in magnetic fields from different motors is not<br />
direcdy a function of motor power. Perhaps we as woodworkers<br />
should encourage manufacturers to minimize sU-ay magnetic<br />
fields by better motor design.<br />
-Stephen Peterson, Ph.D., Salt Lake City, Utah<br />
Safer sphere-boring-The technique for drilling centered holes<br />
in spheres, illusu-ated in the "Med10ds of Work" section in FWW<br />
#88, p. 18, strikes me as inherendy unsafe. I have seen what a<br />
drill bit can do to a hand, and the result is not pretty. To improve<br />
the method, bore a hole of the proper diameter through<br />
two jig boards. Position one of the boards on the drill-press table<br />
with its hole centered under the bit. Then set a couple of<br />
spacer cleats on this board, and place d1e wooden sphere on the<br />
hole. ext, place the second jig board on top of the sphere, and<br />
you can hold the sphere in place without endangering your hands.<br />
-Mark G. Cads, Juneau, Alaska<br />
TAUNTON PUBUCXfIONS<br />
... by fe1Jo..\' endlUSiflSfS<br />
The Taunton Press: Paul Roman, president; Janice A. Roman, vice<br />
presitlent; Carolyn Kovaleski, administrative secretary; Roger<br />
Barnes, design directo, Susan Edelman, associate design director.<br />
Accounting: Wayne Reynolds, controller, Patrick Lamontagne, mal1ager;<br />
Jeffrey Sherman, financial analyst; Mary Sullivan, accountant;<br />
Elaine Yamin, junior accollntant; Carolyn Stiles, senior cost accounting<br />
clerk; Carol Diehm, accounts payable supervisor; Susan<br />
Burke, accounts payable clerk; Lawrence Rice, credit superViSOr,<br />
Lydia KrikOrian, senior collections clerk; Judith Rivera, Victoria<br />
TheobaJd, collection.s clerks; Diana<br />
D'Onofrio, senior accounting<br />
clerk; Dorothy Blasko, secretary. BooksIVideos: John Kelsey, publisher;<br />
Marcie Seigel, administrative secretary; Christine Timmons,<br />
senior editor, Jeffrey Beneke, associate etli/or; Andrew Schultz, assistanl<br />
editor; Barbara Hudson, secretary; Videos: Craig manoff.<br />
vicleo coordinator; 'ntomas Menard, tlSSistanl producer-, Art/Production:<br />
Robert Glah, manager; Deborah Fillion, senior book designer;<br />
Henry Roth, associate art director, Catherine Cassidy, Jodie<br />
Delohery, assistant art directors; lliana Koehler, productioll assisltmt;<br />
Copy/Production: Ruth Dobsevage, managing editor, Peter Chapman,<br />
Pamela Purrone, copy/production editors; Marketing: Jon Miller,<br />
director; Andrea Ondak,. trade and special sales manager; Barbara<br />
Buckalew, Eileen Hanson, marketing assistants; Philip Allard, promotion<br />
services coordinator; Steven Hunter, art directorj Frd.n<br />
Arminio, secretary. Folkwear: Cheryl Clark. manager; Carol Gee,<br />
administrative assistant. Corporate Marketing: DaJe Brown, corporate<br />
sales tfireclor; Donna Pierpont, public relations manager;<br />
Diane Pauerson, executive secretary. Data Processing: Drew<br />
Salisbury, manager; Brendan Bowe, fulfillment systems manager;<br />
Roger Seliga, sen.ior programmer/analyst; Gabriel Dunn, Robert<br />
Nidsen, programmers; Ellen Wolf, network atlminiSl'rator; Sherill<br />
Kolakowski, computer support tecbnician.<br />
ations: Fu1filJolent & Oper<br />
Tom Luxeder, director; Jane Torrence, secretaryj Circulation:<br />
Patricia williamson, client services coordinator; Roxanne<br />
Frimmet, Megan Sangster, client services representatives; Cusl'Omer<br />
Service (Subscriber): Patricia MaJouff, manager; Nancy Schoch,<br />
senior customer service rep; Donna Baxter, Diane Hurvul, Marylou<br />
Thompson; Mail Processing: Joyce McWilliam, supervisor; Gayle<br />
Retrieving ball bearings -On p. 14 of the March/April issue,<br />
Jack Howard suggests cracking a ball bearing in a vise to reu-ieve<br />
balls for use in locating mating dowel holes. I would like to<br />
point out d1at it is very dangerous to crack a ball bearing in a<br />
vise because the outer case is very hard tool steel and very brittie.<br />
When the outer case cracks it will shatter; shards from d1e<br />
outer case, as well as the balls, will fly all over, and there is a<br />
good possibility that one of these flying missiles will hit you in<br />
the eye or somewhere else on your body. To make d1is med10d<br />
safe, wrap the bearing in a clod1 before cracking it in a vise; this<br />
way, all the pieces, including the balls, will remain in the clod1.<br />
-CD. Forman, Hamre, Zimbabwe<br />
Comments on book review-I have two criticisms of Steve<br />
Loar's review of Michael O'Donnell's book Woodworker Guide<br />
to Woodtuming (FWW #87, p. 118). Loar is disparaging of the<br />
theory contained in the book; he describes it as "formidable and<br />
nearly impassable." Whether Loar is referring to its content or to<br />
its presentation is not clear, but if there are to be continuing<br />
developments in understanding woodturning and its techniques,<br />
we need more, not fewer, theOl-etical writings.<br />
The main and unique feature of O'Donnell's book is its promotion<br />
of the deep-fluted bowl gouge as the preferred tool for<br />
spindle turning in addition to its usual role in bowl turning. On<br />
p. 82, O'Donnell states, "My choice of tool, where pOSSible, is<br />
the deep-fluted gouge, which, as we have seen, will do almost<br />
anything." Loar fails to notice, let alone discuss, this central and<br />
contentious issue. -Mike Darlow, Chippendale, NS W, Australia<br />
In search of the natural beauty of wood-There seems to be<br />
some confusion in the world of woodworking. Many times we<br />
have heard artisans explain that the "Simple, unadorned" shapes<br />
of their work "allow d1e natural beauty of d1e wood to show."<br />
Readers of this magazine are very familiar with this ideal, which<br />
has been the conceptual backbone of most quality wood design for<br />
many years, probably since World War II. This is a sensible attitude,<br />
and it has most likely saved more than a few slabs of exotic<br />
wood from being transmogrified into hideous specimens of<br />
trendy junk. Especially in these days of high prices and deforestation,<br />
it seems almost moral to make something "pure and simple."<br />
The conscious effort of doing one's best to bod1 unveil d1e<br />
beauty of wood and to do it no harm is certainly commendable.<br />
But the people who pursue these goals have come to accept a<br />
very limited view of the beauty of wood. Wood has d1ree dimensions,<br />
each one different and dynamic, and deep carving can free<br />
this tangible loveliness. Why is it then that d1e smood1, unadorned<br />
surface has come to represent d1e "natural beauty?" Is<br />
it because of some residual ancient snobbery that places d1e<br />
painter, a two-dimensional artist, higher in the pecking order<br />
dun the sculptor, a three-dimensional artist? And what of the<br />
beauty of wood basking in d1e soft glow of bronze or standing<br />
proudly in violent contrast to chromium? If you wish to unleash<br />
d1e wild figure of some untamed log, d1ere is no need to square<br />
it up, box it up and put it on a shelf. Scents are extinguished,<br />
muscular fibers are put out to pasture, curves are flattened, and<br />
fabulous allegorical creatures made of knots and twisting grain<br />
Hammond, Barbara Lowe; Customer Service (Trdde): Christine<br />
Cosacchi. superVisor; Gloria Carson, Peggy LeBlanc, Denise Pascal,<br />
data ell try; DiStribution: P'd.ul Seipold, manager; Grace AumuUer,<br />
David Blasko, Michael CapaJbo, James Chappuis, Linnea Ingram,<br />
Mary Ann Costagliola, Fred Monnes, Alice Sa.xton, Astor Taylor, Robert<br />
\Veinstein; Purchasing & Facilities: \ViUiam Schappert, managc."Y', lois<br />
Beck, office-services supervisor, John Zor, mail services; Chuck HolliS,<br />
lIU1intenance foremau; Mark Cole, assistant; Christopher Myers, buy·<br />
er, Donna <strong>Free</strong>man, cheflsuperoisor; Kathleen Costello, Norma-Jean<br />
Taylor, cafeteria assistants; Subscription: Carole Ando, manager;<br />
Connie Barczak, Bonnie Beardsley, Brigitte Blais, Marie Pato, Andrea<br />
Shorrock. Manufucruring: Kathleen Davis, director, Austin E,<br />
Starbird, pre press manager, Robert Marsala, graphiC arts SUperojs01<br />
Susan Kahn, s taff photographer; 1110mas Greco, production mallager/books;<br />
Philip VanKirk, production manager/magazines; Diane<br />
Flanagan, production. 1Jumagerlpromotioll; Mary Beth Cleary,<br />
Deborah Baldwin, Rosemary Pagel, print production aSSOCiates;<br />
Tracie Pavlik, s ec,-etary; Nancy Atkinson, Chansam Thammavongsa,<br />
production assistants; Richard Booth, Deborah Cooper, c% r center<br />
supervisors; Mark Coleman, WiUiam Godfrey, Laurene Jakab, Design<br />
master system operators; Margot Knorr, publictlfioll applicxltiOIlS<br />
mallager; Monied Bulson, tlesktop publishing associate; ancy Knapp,<br />
Personnel: Carol<br />
composition production coordinator, Usa Carlson, systems operator.<br />
Maroni, manager, Unda Ballerini, Chris lincoln,<br />
personnel assistants; Denise DePaola, sc.Y:I-etalY.<br />
4 Fine Woodworking
TS-ALIGNER<br />
Clearly. you do your best work when your tools are<br />
properly adjusted. When your table saw is not<br />
aligned, you risk wandering cuts, burning wood, or<br />
maybe even life threatening accidents.<br />
TS AUG<br />
ER is a precision instrument. It<br />
provides a simple and accurate method for table<br />
by Edward J. Bennett Co.<br />
saw alignment. No morc plastic triangles. 0<br />
more sighting through tiny gaps. The dial indicator<br />
t'trtNla.dllf"ff Offet
Letters (continued)<br />
are beaten into rectangular submission-all in the name of lutural<br />
beauty, Of course, machined surfaces and right angles have<br />
tileir place and meir own strangely natural beauty; just take a<br />
look at a salt crystal. We must continue to explore, but wim caution<br />
and ability, Warning signs abound; me recent deluge of "artiture,"<br />
much of which is questionable art and worse furniture,<br />
can provide some entertaining examples of what happens when<br />
a fellow goes mountain climbing but leaves his pants at home,<br />
-Cameron Bobro, Oakland, Cal.<br />
Sexless woodworking-I'm a female woodworker. If you ever<br />
feature my work, I want to be sure tilat it is in your magazine<br />
because of its superb execution-not because of my sex,<br />
You're doing just fine dealing wim women by hardly dealing<br />
with us at all. But don't get into me quota system. Don't let<br />
a few shrill voices push you into self-consciousness on the issue.<br />
There is no issue, Woodworking has no sex, A friend of mine, a<br />
male woodworker, said, "You know, if it hadn't been fo r those<br />
letters about more female representation, I would hardly have<br />
noticed tilat a woman was on me cover of issue #88," Those<br />
complaining women have robbed ]udim Ames of a little bit of<br />
her triumph, She'll always have to wonder if she was featured<br />
As<br />
because she is a woman,<br />
for<br />
me problems women report wim tool handling, I suggest<br />
mat all women work-hard, Load bales in me hay field, handle<br />
heavy sacks, lift lumber, double-dig garden beds, nail siding,<br />
If all tile exercise you get is guiding a router, no wonder you<br />
have trouble. Most women simply don't work enough to develop<br />
muscle. I am 51 years old, 5-ft. 3-in. tall, weigh 120 Ibs., and have<br />
small bones and tiny hands. I have little trouble wim tools, power<br />
or omerwise. My husband does have me advantage in speed<br />
FREE<br />
Catalog!<br />
Call 1-800-237-5907 TOLL-FREE<br />
Tools Innovative<br />
Woodworking Solve Your Problems!<br />
The Leichtung Workshops Catalog is the<br />
only place you'll find "Leichtung Innovations",<br />
those tools we've deSigned and built on our<br />
own to make your woodworking and home<br />
repair<br />
o<br />
jobs faster and easier. Call our tollfree<br />
phone, mail the coupon, or fax It to<br />
1-216-464-6764!<br />
Please send me your FREE catalog!<br />
Name<br />
Address<br />
City<br />
State Zip<br />
Dept. 2201<br />
I LEICHTUNG 4944 Commerce Pky. #2201<br />
I<br />
ORKSHOP Cleveland, OH 44128<br />
__<br />
READER SERVICE NO. 128<br />
6 Fine Woodworking<br />
I<br />
I<br />
<br />
Buy<br />
Discs-Get<br />
50 VELCRO<br />
50 FREE!<br />
Sanding<br />
Discs available in 80,100,120,<br />
(100 DISCS for only '24.99)<br />
ISO, 220,320<br />
grit SO Discs per<br />
PHONE roll. O,K. 10 mix U and malch,<br />
Check U MasterCard U<br />
Quaker State WOODWORKING SUPPLY<br />
Visa<br />
1-800-776-5467 es;S;d·:;IS;,35. S 4. 75 .<br />
and stamina due to his years of harder work and his heavier<br />
weight, but I work fine at my own pace,<br />
-julia Williams, Somerset, Va.<br />
Sawmill salvage -In response to Earle H. Haffa's letter on salvaging<br />
wood in FWW #88, I agree mat salvaged wood is an excellent<br />
way to get inexpensive lumber, but salvaging woodpulling<br />
nails and slivers-can also be a lot of work I have found<br />
an easier way to salvage lumber. Sawmills will almost always<br />
have "planer outs," On tile large scale of a mill, it is not economically<br />
worm recycling mese boards of varying widms and<br />
micknesses, but for an individual woodworker, these boards can<br />
be a gold mine. I have purchased enough pine planer outs to<br />
completely fill my half-ton pickup for a mere 60,<br />
In addition, sometimes a sawmill will have a batch of one species<br />
going tilrough me mill and an odd log of anomer species<br />
will get in me flow, Rather tiun spend tile time and money to<br />
sort and grade mis lumber, it just gets tossed into a pile, I purchased<br />
enough red oak, maple and poplar, all of which the mill<br />
called firewood, to overload my pickup for 75, Certainly some<br />
of mis wood is checked and split; basically you've got to take<br />
what you can get. However, wim a little creative milling, I've<br />
acquired quite a nice stock of lumber. On my limited budget,<br />
buying wood in tilis way enables me to build much more man I<br />
omerwise could, -Mark A. judd, Geraldton, Ont., Canada<br />
Cove moldings and dial calipers-I'd like to offer a few comments<br />
about a couple of articles in FWW #87, First, and most<br />
importantly, tile position of me angled fence used for cutting<br />
cove moldings on me tablesaw shown in me drawing on p, 51 is<br />
potentially quite dangerous, The fence should be on me near<br />
4434 KUTZTOWN RD, • READING, PA 19560<br />
READER SERVICE NO, 39<br />
... for the Small Shop<br />
24" capacity<br />
Automatic Belt Tracking<br />
Quick Change 25x60 Belt<br />
Heavy Conveyor Feed<br />
Single Phase Standard<br />
Simple, Reliable, Fast<br />
Beautiful Finish<br />
A REAL AMERICAN<br />
3995.00 WIDE BEL T FOR A DRUM MADE<br />
SANDER'S PRICE N.QW<br />
(FOB QUILCENE)<br />
MILLER WOODWORKING MACHINERY, INC.<br />
1110 EAST QUILCENE ROAD<br />
QUILCENE, WA 98376 765-3806<br />
READER SERVICE NO. 17<br />
Now Buy Sanding Products<br />
FACTOR<br />
DIRECT<br />
Call For FREE BROCHURE<br />
1-800-873-7957<br />
industrial grade cloth belts<br />
aluminum oxide resin bond •<br />
size no. finer line med coarse<br />
lx42 lx30 4.51 3.99 3.99 4.51 4.17 4.76 4.36<br />
2x48 7.31 7.31 7.91 5.02<br />
2'12)(16 5.04 5.32 8.61<br />
3x18 3x21 5.37 5.77 5.73 6.19 6.63 6.11<br />
3x24 6.16 8.49 6.16 8.49 6.64 7.16<br />
4x24 4x21 0/. 10 li) 8.96 8.64 8.96 8.64 10.16 9.78 10.80 10.38<br />
4x36 6x48 5 11.41 5.77 11.41 5.77 12.42 6.18 13.34 6.70<br />
4.79 4.79<br />
5.37<br />
5.77<br />
9.59 10.16<br />
ALLIANCE Wholesale Div., ABRASIVES, P.O. Box 3447 INC.<br />
Alliance, OH 44601<br />
$4,00<br />
(Continental U.S, only, Ohio add 6% tax,<br />
shipping charge, Visa, Master<br />
Card, check or money order. No COOs)<br />
READER SERVICE NO. 8S
Serving the Industry for over 10<br />
• AMITY<br />
@HITACHI<br />
Plate Joiner ...............................................<br />
Years<br />
<strong>Free</strong> Catalog<br />
Water-Based Finishes<br />
•<br />
<br />
HVLP Spray Systems ... Call for Prices<br />
·Water Based Finishing Workshops<br />
Random Orbital Sander .............................. $78.00<br />
$215.00<br />
Ml2V Router ............................................ $228.00<br />
rumJiID<br />
Wedge -SMART LEVEL<br />
SV 12SA Sander .......................................... $43.95<br />
TWC24 Workcenter ................................... $98.00<br />
2' Pro with Module ..................................... $99.00<br />
2' Teak with Module ................................. $108.00<br />
5 piece Carving Chisel Set ......................... $25.95<br />
Radi Plane Edging Tool ............................. $18.95<br />
30% Off DML Router Bits<br />
12 piece Sanding Drum Kit .......................... $8.50<br />
<strong>Free</strong> Freight 48 States<br />
Add $3.75 for COD - Prices subject to change<br />
VISA·MasterCard·Discover·AmEx<br />
Call for best prices on:<br />
MiniMax - Safety Speed Cut - Jet<br />
Unique - Senco - Delta<br />
Diversified<br />
Equipment<br />
11<br />
Toll<br />
and Supply<br />
704-545-5198<br />
<strong>Free</strong>: 1-800-827-0049<br />
Fax: 704-545-9906<br />
11223 Blair Rd., Charlotte, NC 28227<br />
<br />
READER SERVICE NO. 78<br />
THE REAL BUILDERS' SUPPLY FOR OVER 200 YEARS.<br />
Beili<br />
Rock Solid<br />
Yankee Tradition.<br />
Rock Bottom<br />
Yankee Prices.<br />
2012<br />
12" Planer<br />
$479<br />
2708W<br />
8114' Table Saw<br />
3612BR<br />
3 HP Plunge Router $169<br />
5OO7NB<br />
7 1/4" Circular Saw $105<br />
6093DW<br />
Cordless Drill Kit $129<br />
Bethel<br />
LS1011<br />
10" Comound Miter $429<br />
1-800-.'}l!-;H Mills<br />
OVER 140 MODELS IN STOCK!<br />
WRITE OR CALL<br />
Lumber 05032 Inc.<br />
OR YOUR FREE CATALOG.<br />
Main Stree Bethel, Vermont<br />
$249<br />
BUILD, REPAIR,<br />
More than 4,000 hard-to-find products to<br />
RESTORE, REFINISH<br />
anything made of wood!<br />
It's the catalog woodworkers rely on for fine woods, veneers,<br />
finishing supplies, tools, hardware, moldings, adhesives and<br />
more ... all top quality, reasonably priced, and covered by our<br />
60-day no-questions-asked guarantee. Just $1.00 brings you<br />
the 116 page color catalog plus all supplements for two full<br />
years. Write for your subscription today!<br />
I n "mul(}(}. CrtJltiorIs Announces Fall 81rglln Rates for t 9911<br />
fu.' Buy sg.95 'ny 0' Nch our Pn, or buy ,'ny Inatruction. 3 'or fuat for 121.951 ,n Incredlbl. I'rlce 0'<br />
'101 Chao •• From the Following:<br />
Entorta",ment Center M 106 Stackable C.D Holders<br />
.102 Stereo Cabinet Ml07 Comer Hu1Cl1<br />
'103 Custom Home Speakers .108 Toy Chest<br />
.104 Gun Cebnol .109 Composl Bin<br />
'105 Coffoen::nd Table MIlO Recycle Or oall1 zer<br />
Plana Ineludl StlP by StlP In'tructlon, & Lin.<br />
.. wall II Ilom.l,le Orowlngl & Re'",nOl Paoe ..<br />
Your Satisfaction Guaranteedl<br />
Sand Check<br />
J{eartwooa<br />
or Money Oroar along<br />
'Bo't820<br />
witI1<br />
Creations<br />
PrO/9C1 Numb8r(s) to:<br />
l<br />
P.O.<br />
- 'Twin LaK;.es, 'WI 53181<br />
READER SERVICE NO.74<br />
FREE<br />
SEARS CATALOG!<br />
New 1991<br />
Power and<br />
Hand Tool<br />
Catalog<br />
• 148 pages of pro-quality portable<br />
electric, bench power, mechanics<br />
and woodworking tools, storage<br />
chests and more.<br />
• Featuring Craftsman, plus Skil,<br />
Black & Decker and more.<br />
1-800-326-1181<br />
Mail coupon below or call toll free<br />
o YES! Send me your FREE 1991 Power<br />
& Hand Tool Catalog (F39 HT 27155).<br />
-------------<br />
Name<br />
Address<br />
Apt.<br />
(<br />
City<br />
State<br />
Zip<br />
Phone<br />
Sears. Roebuck & Co .. P.O. Box<br />
Downers 7013,<br />
Grove, IL 60515-8013.<br />
SATISFACTION GUARANTEED<br />
OR YOUR MONEY BACK.<br />
READER SERVICE NO. 62<br />
Need Parts?<br />
Majllle<br />
De Walt Radial Arm Saws<br />
• P"YellJal;Ye<br />
ltlUlCe Suvice • Oll.site<br />
Repair<br />
Bre<br />
./....sloop C ompute Rec ONliriMUtg<br />
• Obsolete Part Fabricati",,· Radial Ar ... Remac!U";,.,<br />
• Motor Rewilldi,.,· M otor Rotor Repair<br />
• Motor StarkTJ cl C OIIIT ol.r. BkuJe S Nvpe";,.,<br />
Sen,;ee Oft PaiN SloakiJtg aNi TUtti,., Eqllipmelll<br />
• Ambitech • Motor DeWalt Brakes. Radial Ann Delta. Saws DML Blades<br />
• • Murphy Rodgers Dust ColleclOrS<br />
Powennatic· Safety Speed Cut Panel Saws<br />
Wolfe machiDery<br />
g<br />
6107 Merle Hay Road<br />
P.O.<br />
JoimllOll.lA Box 50131 491<br />
800-345-6659<br />
Phone: Fax: 515-27G-0628 515-27G-2766<br />
[]] RAISED<br />
READER SERVICE NO. 61<br />
DOORS PANEL<br />
Also Available:<br />
Ready To Assemble<br />
" Check Out Our Features<br />
Cabinets For The<br />
Kitchen, Bath and<br />
Other Rooms.<br />
Superior Quality<br />
Great Prices<br />
Fast Deli
As side of the work, not the far side. shown, the cutting force<br />
from the blade will tend to push dle work away from dle fence<br />
and into the blade, causing dle molding-up-the-nose effect. If dle<br />
fence is on the near side of the work, dle saw's force will tend to<br />
hold the work against the fence-a much safer situation. However,<br />
even when dle fence is positioned properly, it is still very<br />
important to hold the work firmly down on the saw table when<br />
Letters (continued)<br />
As<br />
sawing cove moldings.<br />
correctly<br />
pointed out in the article, you should take very<br />
light cuts widl each pass. In addition, depending on the shape of<br />
dle cove that you're making, you may want to consider hogging<br />
out some of dle material widl a few passes over a dado set, doing<br />
normal straight ripping, and dlen cleaning up the shape with<br />
angled cove-cutting.<br />
Second, I thought dlat Robert Vaughan's article on dial indicators<br />
and calipers was very well done and useful. But I have a few<br />
things to add by way of clarification.<br />
Under the subheading of "general machinery setup," Mr.<br />
Vaughan describes using an indicator to calibrate how much<br />
movement of a mad-line occurs with one turn of a handwheel.<br />
Readers should beware that in some mad-lines, particularly tablesaws,<br />
the up-and-down motion of the blade is rotary motion, and<br />
the component of pure vertical motion (determining depth of<br />
cut) per handwheel turn will not be dle same at all blade<br />
heights. When dle handwheel is coupled to dle output motion with<br />
a rack and pinion, as in drill-press quills, there is no problem.<br />
Later in dle same section, Vaughan describes checking for an<br />
out-of-round pulley by placing dle indicator against the side of<br />
the pulley. Runout detected dlis way would be caused by dle<br />
pulley not being perpendicular to its shaft (or by a dlickness<br />
variation, which might have no ill effect), but not by being out of<br />
r I Quantities Sp-;cial Pu-;cha-;; -----, Limited . I<br />
:
.. Includes<br />
DRY YOUR<br />
OWN LUMBER •••<br />
I<br />
LD800 WOOD DRYER ... With an EBAC Wood Drying System.<br />
Whether you're a serious home woodworker,<br />
small cabinet shop or a large<br />
wood retailer, EBAC has a wood drying<br />
system that's right for you.<br />
Ebac Wood Dryers:<br />
save you money<br />
are easy to operate<br />
are energy efficient<br />
• give you complete control over<br />
your<br />
EBAC<br />
wood 's<br />
LUMBER<br />
moisture content<br />
DRYERS<br />
II<br />
• give you higher quality wood<br />
Call or write today!<br />
106 John Jefferson Road, Suite 102<br />
Williamsburg, VA<br />
Fax (804) 229-3321 Toll free<br />
23185<br />
In Canada: (416) 985-2123 Fax 1-800-433-9011 (416) 985-3708<br />
READER SERVICE NO. 11<br />
Vacuum veneering the uncommon solution<br />
...<br />
The task of veneering both flat and curved<br />
panels is a common challenge among woodworkers.<br />
The VacuPress meets this challenge by<br />
using a combination of atmospheric p ressure<br />
as a clamp, and vacuum's abili ty to draw glue<br />
into the cell structure to solve those difficult<br />
veneering tasks (as well as the easy ones),<br />
delivering consistent high quality results.<br />
Because the VacuPress can easily be disassembled<br />
for compact storage, it is an efficient<br />
press for woodworking shops of all sizes.<br />
68 Fine WoodWorking,<br />
Contact us today and we'll supply you<br />
with all the information needed to put the<br />
VacuPress<br />
Vacuum<br />
solution<br />
Pressing<br />
to work<br />
Systems,<br />
for you.<br />
Inc.<br />
See October 1990 page<br />
for more information on our system.<br />
1609 RIVER ROAD · BRUNSWICK, MAINE 0401 1<br />
TELEPHONE 207-725-0935 · FAX 207-725-0932<br />
READER SERVICE NO. 3<br />
ELECTRIC BRANDING IRON<br />
Your Satisfaction Guaranteed<br />
Solid Brass-lasts years<br />
Torch heated models start<br />
Special wording available at $26.00<br />
• 2nd line-20 leHersispaces max. • Add $3.00 shipping<br />
OH Res. add 6% sales tax<br />
• 1/4" letters<br />
&dit::::ir.i•. $ 95<br />
B rand Mark<br />
6<br />
1-800-323-2570<br />
TO<br />
462 Carthage Dr , Dept FW10-1<br />
Order by mail from:<br />
ORDER CALL TOLL FREE<br />
Beavercreek, OH 45385<br />
(513) 426-6843 8:00-5:00 EASTERN TIME<br />
ADIRONDACK CHAIR<br />
Full-Size Professional Plan<br />
Make this ctassic American<br />
design. Our special<br />
version may be<br />
folded tor storage<br />
by using ordinary<br />
hardware available<br />
at your local<br />
store. Be ready<br />
lor Summer and<br />
get your plan now!<br />
==<br />
Plan #700 ......... $14.00<br />
(catalog free with order)<br />
FURNITURE DESIGNS, INC., Dept. KA-91<br />
1827 Elmdale Ave., Glenview, IL 60025<br />
(708) 657-7526<br />
READER SERVICE NO. 30 I<br />
Our new catalog is loaded with<br />
quality products to enhance your<br />
wood and clockmaking projects.<br />
7 Reasons<br />
To OwnThe<br />
World's<br />
BEST<br />
Feet-Inch<br />
Calculator<br />
For The Serious Perfect Tool<br />
WoodWorkers<br />
-Now $69.951<br />
1-800-854-8075<br />
Call Toll-<strong>Free</strong> 24-Hrs:<br />
(714) 921-1800 ' FAX: (714) 921 -2799<br />
Ranch, Yorba LindB, CA<br />
QUARTZ & MECHANICAL MOVEMENTS<br />
92687<br />
YES! Please rush meConslruction MBsfer II (s) for the specially<br />
CLOCK<br />
1-800-556-2548<br />
COMPONENTS & ACCESSORIES<br />
discounted price of $69.95 plus $4.95 shpg. (Add $1.50 shpg. for ea. addl.<br />
WEATHER INSTRUMENTS ' HARDWARE<br />
unn). 5 or more are just $64.95 ea.<br />
PLANS · MUSIC MOVEMENTS<br />
IncludeCustom Leather Case(s) @ $10.00 ea.<br />
For your free catalog, call toll-free o Also imprint 3 initials 1_1_1_ 1 @ $1 .75 per initial.<br />
Letters (continued)<br />
indicates to me d1at me glue joint exceeds the strengd1 of me<br />
surrounding wood. I assume mat d1e increased resistance to<br />
racking and increased surface area of me coped joint (over<br />
square shoulders) contribute to me success of mis type of consu-uction.<br />
In addition, information in various Fine Woodworking<br />
articles has persuaded me mat dowels installed cross-grain can<br />
create meir own problems.<br />
Having said all mis, I want to mank ML Beals for his article,<br />
bom for its content and for provoking mought about my own<br />
med10ds.<br />
-Murray Yungblut, Ripley, Ont., Canada<br />
Reproducing faulty design-Nicholas Tyler posed a fine question<br />
in FWW #87: "Why copy faulty design in reproducing antique<br />
furniture?" There are several reasons; I'll leave it to me<br />
reader to determine me validity of each.<br />
The first reason is me one mentioned in Tyler's lerrer as a<br />
quote from an old French cabineU11aker: "ignorance." But mat<br />
seemed a mighty broad condemnation. A second reason for using<br />
consu-uction memods mat will Virtually guarantee some<br />
wood cracking is simply mat d1e customer insists on it. There<br />
are a lot of antique-furniture-lovers out d1ere who, when mey<br />
realize they either can't find or can't afford the original<br />
d1ey want, demand absolute authenticity in d1e reproduction<br />
mey commission. This even includes museums and historical<br />
houses. When I receive mis kind of commission, I moroughly<br />
inform me customer what to expect. I also make a reasonable<br />
effort to suggest changes mat will improve d1e consu-uction, but<br />
not change me appearmce. Often such suggestions are rejected.<br />
When a reproduction will stand alone, me quandary expressed<br />
by Mr. Tyler is more compelling. But d1ere is a situation<br />
where I mink almost anyone would agree mat absolute aumen-<br />
Increase of sanding the belts life expectancy and discs<br />
4009(<br />
by<br />
RECONDmON CLOGGED<br />
BELTS IN SECONDS!<br />
NO-Ufe Amslve B
The World's<br />
Finest Dado Head<br />
Clean Cuts All Your Grooves<br />
"No (including tearout melamines on all five and woods oak/birch tested" plys)<br />
59<br />
• NO SPLINTERING-<br />
p. See<br />
cross-cutting<br />
Fine Woodworking,<br />
oak,<br />
July/August, Issue No. 89,<br />
ply veneers and melamine.<br />
• PERFECT<br />
GROOYESnot<br />
staggered steps<br />
FLAT -BOTTOM<br />
or<br />
round bottoms like a<br />
wobble-dado leaves!<br />
• CUTS IN AU<br />
DIRECTIONS -<br />
rip, cross-cut, miter,<br />
• CUTS<br />
any depth.<br />
ALL GROOYES- \!a"<br />
SIZED<br />
13/16" Y,6"<br />
.005"<br />
thru in<br />
increments. (Set of<br />
plastic adjusting<br />
shims included).<br />
• SUPER-HARD<br />
TRIABLE & RETURNABLE<br />
longer<br />
* See more of our products not for on completely full page cash refund satisfied. if<br />
life, especially good on<br />
ply woods and abrasive<br />
particle-boards.<br />
108 *<br />
CARBIDEgives<br />
up to 300%<br />
Dust Boy, Inc. ®<br />
Dust Collectors.<br />
1-2 hp<br />
Portable - Stationary<br />
• High Efficiency<br />
• Extremely Quiet<br />
• American Made<br />
• 5 Year Warranty<br />
Totally Enclosed Fan Cooled<br />
• Cast Aluminum Blowers<br />
"We Stand Behind<br />
1<br />
OUR Product With Pride"<br />
DUST BOY, INC. RR Milan, 2, BOX IN 47031 WE<br />
269C<br />
WILL NOT BE UNDERSOLD<br />
READER SERVICE NO. 49<br />
1-800-232-3878 (812J 654-2918 Z ..<br />
Sawmill and Dry Kilns<br />
•<br />
27<br />
All Species of Domestic<br />
Lumber<br />
• Direct Importers of<br />
Species of Exotics<br />
• Dimensional, Flitch and<br />
<strong>Free</strong> Form Stock<br />
• Unusual Thicknesses<br />
and Widths<br />
• Cabinet Grade Plywood<br />
7-4<br />
SAWMILL<br />
and Veneers<br />
Call or write for price list<br />
Showroom open Mon. - Sat. PA (21 5) 493-9400<br />
Wi I lartl<br />
"rt,thers<br />
300 Basin Road, Trenton, N.J. 08619 N_J_ (609) 890-1990<br />
CO-MAnc MACHINERY CO ••<br />
READER SERVICE NO. 80<br />
LTD. P.O.BOX, YUAN 128 FENG<br />
TAANM< 42099<br />
PHONE, 0
Methods of Wo rk<br />
drum Lathe-mounted sander<br />
edited drawn by Jim Richey<br />
and<br />
eliminating a lot of tedious measuring and marking. Any tape<br />
residue remaining on the surface can be peeled off easily.<br />
-Frank D. Hal't, Plainfield, Ind.<br />
Cylinder, 2 in. dia.,<br />
wrapped with<br />
abrasive cloth<br />
S<br />
tanding shaving horse<br />
Pipe-clamp head for<br />
adjusting jaw opening<br />
Screen-door<br />
closer opens<br />
clamp when<br />
pedal is released.<br />
I use this drum sander on my lathe to smooth concave surfaces<br />
on the toy cars and trucks I build. The sanding drum is nothing<br />
more than a 2-in. wooden cylinder that's spiral-wrapped with<br />
coarse abrasive cloth. Since most of the sanding I do is at right<br />
angles, I built an L-shaped platen from %-in. plywood; it attaches<br />
to the lathe's ways using the tool rest's hardware.<br />
Quick tip:<br />
-George Clayton, Ft. Worth, Tex.<br />
A penny has a diameter of % in. and is a handy<br />
reference gauge when other measuring devices are lacking.<br />
-Robert Vaughan, Roanoke, Va.<br />
Improved fingerboard<br />
Beveled fingerboard<br />
Spacers lift<br />
fingerboard<br />
high enough<br />
to clamp workpiece.<br />
Foot pedal for<br />
closing jaws<br />
The design of the conventional shaving horse, despite its evolution<br />
over hundreds of years, has some disadvantages: d1e seat<br />
gets pretty uncomfortable after a time, and d1e horse just takes<br />
up too much space. This compact alternative, made mainly from<br />
2x6 and 2x8 lumber, solves both problems. To make the horse,<br />
use hardwood for the clamp block and foot pedal, and yellow<br />
pine construction lumber for the frame and clamp table. Install a<br />
4-ft. lengd1 of iron pipe between the clamp block and the foot<br />
pedal, using a pipe-clan1p fi xture on the top, as shown, to adjust<br />
the clamping width. A screen-door closer attached between the<br />
foot pedal and the frame will provide a strong return spring with<br />
Quick<br />
a gentle action.<br />
tip:<br />
-Paul Weissman, West Redding, Conn.<br />
When cleaning up a curved cut on the edge of<br />
plywood with a rasp, you can avoid tearing out the veneer by<br />
holding the rasp at both ends, 90° across the edge, and drawing<br />
NY<br />
it along d1e edge. Begin wid1 a coarse rasp to remove a lot of<br />
stock, and then continue with finer and finer rasps or files until<br />
you can hand-sand.<br />
-Daria Biagiarelli, Kirkville,<br />
Wider cuts with radial-arm saws<br />
Shim under workpiece lifts<br />
stock to wider section of blade,<br />
increasing saw's cutting capacity.<br />
Fingerboards are great fo r holding boards against a fence or<br />
down on a table, but they usually can't do both jobs very well at<br />
the same time. However, if you cut a bevel on d1e leading edge,<br />
as shown above, the fingerboard can accomplish both tasks.<br />
Raise the fingerboard off d1e table with spacers to make it hit the<br />
stock at the right place. -Richard Chiros, Marlboro, Mass.<br />
Copying furniture carvings<br />
Before you can copy a carving from one piece of furniture onto<br />
another, you need to transfer a pattern of d1e original carving to<br />
the new piece. A quick med10d is to cover the original carved area<br />
with overlapping sU'ips of masking tape. ext, rub the surface of<br />
d1e masking tape with the broad side of the point of a soft lead<br />
pencil. High areas come out dark, low areas come out light.<br />
ow carefully lift off the masking tape as a single sheet, and<br />
transfer it to the piece to be carved. The masking tape becomes<br />
a throwaway template to guide the carving process, thereby<br />
Shim, '% in. thick, increases<br />
cutting capacity 3 in. with<br />
10-in.-dia. blade.<br />
As<br />
It's very frustrating to crosscut a piece of work on a radial-arm<br />
saw and find that the saw's capacity is short by an inch or two.<br />
However, there is an easy way to get an extra few inches of cut.<br />
shown above, place a piece of scrapwood under the edge of<br />
12 Fine Woodworking
__<br />
Conceal, reveal<br />
swivel with a<br />
touch of a finger.<br />
NOT THIS ...<br />
BUT THISI<br />
Since 1955, the Auton Company<br />
has served the design<br />
community with quality motorized<br />
systems that utilize remote<br />
controls and small, powerful<br />
motors. Motorized platforms<br />
glide smoothly and quietly on<br />
YOU BUILD THE FURNITURE-WE'LL PROVIDE THE AUTOMATION<br />
OLD FASHIONED "SCISSOR-LIFT ,,:'K";';N=:VE even<br />
button.<br />
AUTON POP UP COMPUTER LIFTS<br />
four racks and pinions and<br />
swivel at a touch of a<br />
Lower your computer and keyboard into a cabinet<br />
at a touch of a button. Provides vital security while<br />
enhancing the appearance of any office. Helps keep<br />
computers dust free when not in use. Call or write<br />
lOday for free literature.<br />
AUTON COMPANY Box 1129 . Sun Valley, CA 91353-1129 . (818) 367-4340<br />
Beverly HillS/(213) 659-1718 • Honolulu/(808) 734-1260 /FAX (818) 362-9215<br />
Auton does not make furniture. US & Foreign Pat Pend.lMADE IN USA.<br />
BED/FOOT POP-UP TV SWIVEL<br />
+<br />
#26 SHAPER 2 HP<br />
L<br />
iI_:_<br />
BASE PANEL LIFT POP-UP TABLE PROJECTOR POP DOWN<br />
READER SERVICE NO. 8<br />
BLUME SUPPLY, INC.<br />
3316 South Blvd .• Charlotte, NC 28209<br />
704-523-781 1 or 1-800-288-9200<br />
STEP UP TO •••<br />
_JC""'"<br />
$1 199<br />
#1 80 18" PLANER 5 HP<br />
WI KNIFE GRINDER $4395<br />
$1450<br />
#66 10" SAW 2 HP<br />
W/50" VEGA FENCE<br />
#1 00 12" PLANER 2 HP $1825 #60 8" JOINTER<br />
e RB-25 SINGLE PHASE 10 H.P. WIDE BELT SANDER $7499<br />
_<br />
CALL FOR OUR LOW PRICES ON OTHER POWERMATIC MACHINES NOT LISTED, AS<br />
WELL AS PRICES ON THE NEW ARTISANS LINE OF MACHINERY.<br />
11/4"<br />
Design your dovetail pattern right on the jig.<br />
Calibrated settings for fit adjustment.<br />
Cuts any size of joint, in wood up to thick.<br />
• "Hand cut" flexibility, with machine speed, precision and ease.<br />
...<br />
Coffee table made with Leigh MMTA,<br />
using 11;."' finish walnut and maple.<br />
Plus The Leigh<br />
&<br />
Multiple Mortise<br />
Tenon Attachment<br />
Model MMTA<br />
This attachment for your leigh Dove<br />
tail Jig lets you produce precise,<br />
snug fitting multiple mortise & tenon<br />
joints and finger joints-using nothin<br />
more than a plunge router.<br />
For <strong>Free</strong><br />
1-800-663-8932<br />
Brochure<br />
Call<br />
(Toll-<strong>Free</strong>, 24 Hours)<br />
In Canada, call collect :<br />
(604)464-2700, 80m-4:30pm PST.<br />
Or mail in the coupon below to :<br />
leigh Industries ltd.,<br />
LEI:H P.O. Box 357, Port Coquitlam,<br />
B.C., Canada, V3C 4K6<br />
r-----------------------------------------------------<br />
[ j please send me your FREE brochure.<br />
[ j l'm also interested in your video on The Leigh Dovetail Jig.<br />
Name ____________________________________ __<br />
Address ___________________________________ City ____________________<br />
State ___<br />
Zip Code<br />
__FWW
Jletbot/s qf Ubrk (nJIII iUlIed)<br />
the work farthest from the back fence. This moves d1e work up<br />
into the wider part of the blade and gains you extra capacity. For<br />
example, a %-in. shim will add about 3 in. to d1e lengd1 of cut of<br />
a lO-in. sawblade.<br />
-jack jerome, Nokomis, Fla.<br />
Binder clip cord holder<br />
sapwood edge of walnut boards or veneer<br />
Quick tip: The<br />
makes excellent edging fo r lauan (Philippine mahogany) ply<br />
N.Y<br />
wood. The color and texture are almost identical, and bod1 accept<br />
stain d1e same.<br />
-Dario Biagiarelli, Kirkville,<br />
Shopmade brad pliers<br />
Fasten loose-leaf binder<br />
mechanism to wall.<br />
Recently I came across a simple trick to untangle the extension<br />
cords or air hoses mat collect haphazardly underfoot in d1e<br />
shop. Salvage the mechanisms from old three-ring loose-leaf<br />
binders, and fasten mem to walls, machines or benches at an<br />
appropriate height. Then, click them open and insert your ell.1:ensian<br />
cord as you would a sheet of paper. This setup gets the<br />
cord off the floor, but leaves it free to move back and fo rd1 with<br />
d1e tool. And the push of a button frees it entirely, should it be<br />
needed elsewhere. -GI'eg Moore, Oakville, Ont., Canada<br />
Pliers must<br />
grip brad<br />
securely.<br />
Drill into notch from<br />
ont en ____ <br />
I/S<br />
Here's how to alter a pair of needle-nose pliers to drive brads<br />
quickly and easily. Start by filing a slot across the inside faces<br />
of the jaw; locate d1e slot about in. to 1/4 in. from d1e end<br />
of d1e pliers, depending on d1e brads you will be using. The slot<br />
should be deep enough and wide enough to grab me brad head<br />
snugly. Now, close the pliers in a vise, and drill straight down<br />
into d1e closed jaws until d1e bit reaches the slot. Use a drill<br />
bit that is slightly smaller in diameter d1an the brad shaft. It's a<br />
good idea to buff d1e end of the pliers so the rough edges won't<br />
mar the wood.<br />
SHAKER FURNITURE<br />
An exciting collection of Shaker dining<br />
chairs, tables, beds and other furniture<br />
available in Kits or completely finished.<br />
All exemplify the simplicity and versatile<br />
beauty of Shaker design. Pegs, pegboard,<br />
Shaker baskets, oval boxes, dolls and<br />
needlework kits. Large selection of<br />
replacement<br />
SHAKER<br />
chair tape.<br />
FREE<br />
catalog<br />
-and New<br />
WORKSHOPS<br />
12<br />
52<br />
tape<br />
page<br />
samples.<br />
color<br />
Box 1028. FW91, Concord, MA 01742<br />
(617) 646.8985<br />
CARBIDE TIPPED ROUTER BITS<br />
PROFESSIONAL PRODUCTION QUALITY • SATISFACTION GUARANTEED<br />
11<br />
875<br />
1· 11877<br />
11879<br />
11579<br />
an 879 AVE<br />
MULTIPLANE PROFILE BITS<br />
Shank Carb.Hght.<br />
11865 (1/2) 1 3/4" $29.95<br />
11875 (1/2) 1 5/8" $29.95<br />
(1/2) 1 1/2" $31.95<br />
(1/2) 1 3/4" $31.95<br />
(114) 1 3/4" $31.95<br />
BUY A SET OF 4 BITS<br />
- SUPER VALUE · $99.95<br />
CORIAN BITS<br />
Shank<br />
for material<br />
thickness<br />
11920 (1/2) 1/2" $49.00<br />
STRAIGHT BITS<br />
11921 (1/2) 314" $51.00 11214<br />
THUMBNAIL BITS<br />
$29 00<br />
$29 00<br />
ROUND OVER<br />
Shank<br />
Radius<br />
11350 (1/4) 118" $11.00<br />
11230 (114) 1/4" $12.00<br />
11209 (1/4) 3/8" $15.00<br />
11355 (1/4) 1/2" $17.00<br />
11655 (1/2)<br />
11656 (1/2)<br />
1/2"<br />
3/4"<br />
DRAWER LOCK BITS<br />
Shank<br />
Carbo Hght.<br />
$17.00<br />
$21.00<br />
11550 (1/4) 3/4" $29.00<br />
11850 (1/2) 3/4" $29.00<br />
11216<br />
11474<br />
11219<br />
11774<br />
11775<br />
11779<br />
11220<br />
Shank CutDia. Length<br />
(1/4)<br />
(114)<br />
(1/4)<br />
(1/4)<br />
(1/2)<br />
(112)<br />
(1/2)<br />
(1/2)<br />
114"<br />
3/8"<br />
3/4" $ 6.50<br />
I" $ 6.50<br />
1/2" I" $ 7.00<br />
3/4"<br />
I"<br />
$ 9.50<br />
1/2" I" $10.00<br />
I" 1<br />
1/2" 2" $14.00<br />
3/4" 1 1/2" $10.00<br />
1/2" $11.00<br />
LDia.<br />
MULTIFORM MOLDING MAKER BITS<br />
1 3/16" $18.50<br />
Shank Carbo Hght<br />
(excluding sets).<br />
2 1/2" $35.00<br />
11199 (1/2) 2" $40.00<br />
When ordering any 3 or more, deduct $1.00 each<br />
24 FREE 32 PAGE CATALOG<br />
<strong>Free</strong> shipping in Continental U.S. PA residents add 6% for state sales lax.<br />
CROWN MOLDING BIT<br />
MLCS<br />
Shank<br />
To order<br />
Ltd., P.o. Box 4053 FM, PA 19046<br />
by MasterCard or Visa - Toll <strong>Free</strong> 7 Day<br />
11869 (1/2) $38.00<br />
Hour Order Service Call 11·800·S33·9298 I or send check to<br />
Rydal,<br />
READER SERVICE NO. 160<br />
READER SERVICE NO. 114<br />
14 Fine Woodworking
ORDER 1-800-328-0457 - MAIL ORDER HOURS 7:00-5:30 C,ST MONDAY-FRIDAY<br />
DELTA BENCH TOP TOOLS<br />
Model .......... . LlSI Sale<br />
23·700 WeVDry Grinder. .................... 234 159<br />
23-680 6' Bench Grinder 114 HP 86 75<br />
23-880 8' Bench Grinder 112 HP 151 115<br />
11·9SO 8' Drill Press 199 145<br />
28·180 10' Hobby Band Saw ............. 210 144<br />
3HlSO I' Bell sander 2.0 amp .......... 104 78<br />
31-480 4' BeIVDisc Sander. ............... 198 139<br />
31·340 NEW I' Be11l8' Disc Sander 268 184<br />
3Hl80 NEW l' BeIV5' Disc Sander 134 94<br />
NEW TOOLS BY DELTA<br />
40-580 16' 2 speed Scroll Saw .......... 268 184<br />
23·580 5' Bench Grinder 115 HP 62 54<br />
11·990 12' Bench Drill Press ... 276 185<br />
11.tJ90 32' Radial Bench Drill Press 399 279<br />
43·355 314' Shaper 1 112 HP ............. 964 685<br />
43·505 112' Bench RoulerlShaper 399 279<br />
22·540 12' Bench Top Planer ............ 595 389<br />
22·547 sleel blade lor 22·540 Planer....... 19.95<br />
36-220 10' Compound Milre Saw 350 235<br />
28-180 Bench Band Saw ..........•..•..... 232 169<br />
DELTA STATION ARY<br />
34-761 10' Unisaw 1·112 HP ......•..•.. 1715 1295<br />
33-990 10' Radial Arm Saw ....•......•..• 818 585<br />
37·280 6' Molorized Joinler ............... 468 379<br />
50-179 314 HP 2 slage Dust Colleclor483 335<br />
50-181 2 HP Dust Colleclor .........•..... 885 805<br />
22-662 13' Planer with 2 HP motor,<br />
stand, and 32·01 1 EMS 1635 1175<br />
33.tJSO NEW 8·114' Sawbuck 781 549<br />
33.tJ55 above Saw complete wlegs 865 589<br />
34·330 NEW8·114· Table Saw I3A 343 229<br />
34·985 116 HP Siock Feeder .............. 698 485<br />
34-670 10' Motofized Table Saw ....... 511 385<br />
32·100 NEW Station Plale Jointer ..... 645 285<br />
36.tJ4O NEW 8·114' Cmpd Mitre Saw 224 165<br />
34-915 30' Unifenee .......................... 385 239<br />
34-897 SO' Delta Unifenee ................. 525 289<br />
36-755 NEW 10' Tilt Arbor Saw ....... 1264 855<br />
MILWAUKEE TOOLS<br />
6527 NEW Sawzall 8A var. speed<br />
with case ................................ 299 164<br />
0399-1 12V edlss Drill Kil complete .. 299 159<br />
0402-1 above Drill wlkeyless chuck ... 304 169<br />
0395·1 9.6V cordless Drill wlcase ...... 279 154<br />
0224·1 318' Drill 4.5 amp magnum .... 199 113<br />
0234·1 112·DriIl 4.5Amag o.850 rpm 219 118<br />
0244-1 112· Drill 4.5Amag o.800 rpm 219 118<br />
0222-1 318· Drill 3.5 amp o.looo rpm I85 105<br />
0228-1 318' Drill 3.5 amp 0.1000 rpm 179 102<br />
0375-1 318' close quarter Drill ............ 219 129<br />
0379-1 112' close quarter Drill ............ 249 147<br />
6539-1 cdis Screwdriver 190 rpm ...... 125 73<br />
6540-1 6539·1 Driver wlbits & case ... 159 lOS<br />
6546-1 edls Scrwdvr 200 & 400 rpm .. 135 79<br />
3102·1 Plumbers right angle Drill Kit.. 3SO 195<br />
5399 112' D·hdle Hammer Drill Kit .. 319 184<br />
1676·1 HD Hole Hawg with case ....... 449 244<br />
6511 2 speed SawZall with case .... 234 134<br />
67SO-1 Drywall gun 0·4000 5 amp ..... 159 93<br />
6S07 TSC SawZaIl with case .......... 249 135<br />
U :\l2ai::::::::: m<br />
8977 Variable temp. heat gun ......... 114 75<br />
5397-1 3.8' var. spd Hammer Drill Kit 239 139<br />
5371-1 1/2" var. spd Hammer Drill Krt 335 185<br />
3107-1 112' var. spd rt angle Drill Kit.. 380<br />
5660 199<br />
6754-1 DfywaIi Gun 0-4ooo 5.4 amp. 189 1 14<br />
3300-1 112' var. speed rt angle Drill 319 179<br />
1-112 HP Rouler · 10 amp ...... 325 185<br />
Router 2 HP . 12 amp ............ 355 205<br />
6232 4·314' Band Saw with case .... 461 275<br />
6256 var. speed Jig Saw 3.8 amp ... 249 145<br />
6215 16' Chain Saw ....................... 299 174<br />
0235-1 112' Drill wlkyls chuck mag .... 219 125<br />
6145 4·112' Grinder 10,000 rpm ..... 159 95<br />
6142 6145 with case & acces ........ 197 125<br />
6749-1 Drywall Gun 0·2500 5.4 amp. 209 122<br />
5353 Eagle 1-112" Rot.<br />
6365 Hammerw/case895 499<br />
7·114' Circular Saw 13 amp ... 209 118<br />
6367 above Saw· double insulaled 205 120<br />
6366 wnenee & carbide blade 219 125<br />
6368 6365 wnnce,carb. bIde,& ese. 239 134<br />
6377 7-1/4' Worm Drive Saw .......... 319 169<br />
TOOLS ON SALE'" ll!IA ruldAl.<br />
Buy any 7·114' saw(6365,6366,6367,6368,6377) &<br />
receive an Extra Milw. Carbide Tip Saw Blade<br />
an $1 1 .00 value · FREE<br />
PONY AIR PALM NAILER<br />
LPN672 Air Nailer with glove .............. Sale 94.99<br />
FREUD CARBIDE TIPPED SAW BLADES<br />
5/8" Bore • Industrial Grade<br />
Item Description Teeth List Sale<br />
LU72M010 Gen Pur. A. T.B.l O· 40 67 37<br />
LU82M010 Cut-off 10' 80 90 45<br />
LU84MOll Comb 10' SO 76<br />
56 39<br />
LU85M010 Super Cut-offl0' 80 112<br />
LM72M010 Ripping 10' 24 66 36<br />
LU73M010 Cut off 10' 80 82 45<br />
LU87M010 Thin Kert l0' 24 70 38<br />
LU88M010 Thin Kert l0 60 86 44<br />
LU98M010 Ultimate 10' 80 125 69<br />
TK206 10' Framing 24 38 19.95<br />
TK303 7·114' Finishing 40 37 21 .25<br />
TK306 10' Finishing 40 46 24.95<br />
TK906 10' Combo SO 52 27.00<br />
SD306 6' Dado · Carbide ................... 215 109<br />
SD308 8' Dado · Carbide ................... 229 117<br />
FO 1·314' x 5/8' Bisc. 1000 Oty 32 27<br />
FlO 2·118' x 314' Bisc. 1000 Oty<br />
32 27<br />
F20 2·314' x I' Bisc.looo Oty 34 29<br />
FA Assorted Biscuits 1000 Oty 34 29<br />
FB107 7 piece Forstener bit set ........... 86 54<br />
FB100 16 piece Forstner Bit Set 331 165<br />
94·100 5 pc. Router Bit Door System .319 158<br />
JS100 Biscuit Jointer with case ......... 333 159<br />
MAKITA TOOLS<br />
Model ...... .............. List Sale<br />
8070DW 318' vlspd Reverse Dri1l 7.2V 130 78<br />
8071 DWKabove Drill wlremovable ban. 199 115<br />
S090DW 3·3/8' Saw Kit 9.6 vall 256 137<br />
8010DWK 3/8' cordless Drill Kit 7.2V .... 170 97<br />
8010SDW 318' edls Drill Kit 7.2 vOII. ........ 99 59<br />
DA3000DW 318' Angle Drill 7.2 volt ....... 251 134<br />
4390DW 9.6 cordless Reap Saw Kil ... 230 127<br />
8012HDW 2 speed Drill w/clutch-oomp 236 125<br />
8092DW var. spd Drill, Kit complete ... 252 127<br />
8093DW v/spd Drill wlclutch-oomplete 261 129<br />
8095DW above Drill wlkeyless chuck .. 268 135<br />
8093DL 8093DW Drill Kil wlFlash Lt. . 299 169<br />
632007-4 9.6 volt Banery ....................... 48 30<br />
632002-4 7.2 volt Banery ....................... 40 28<br />
S007NBA 7·114' Saw wlelectric brake .. 238 124<br />
SOOSNBA 8·114' Saw wleleetric brake .. 295 158<br />
B0451 0 114 sheet Pad Sander ............. 93 54<br />
9900B 3· x21· BeltSander wlbag ... 278 144<br />
9924DB 3'x 24' Belt Sander wlbag .... 293 153<br />
9045N 112 sheet Fin. Sander wlbag. 241 128<br />
4301BV Orb. spd Jig Saw 3.5A 289 149<br />
JR3000V var.speed Recip Saw wlese 235 129<br />
LS1020 10' Mitre Saw 3.5 amp 580 289<br />
9820-2 Blade Sharpener ................... 387 189<br />
1900BW 3·3/4' Planer wilh case 217 112<br />
1911B 4·318' Planer 7.5 amp ........... 255 139<br />
1100 3·1/4' Planer with case ......... 426 219<br />
9207SPC r SanderlPolisher ............... 288 154<br />
3601 B 1·3/8 HP Router .................... 256 139<br />
9501 BZ 4' Grinder 3.5 amp ................ 130 69<br />
B04530 6' Round Sander ................... 106 64<br />
B045SO 114 sheet Pad Sander wlbag ... 89 57<br />
DA3000R 3IS' Angle DrilL .................... 280 148<br />
HP2010N 314' var. spd Hmr Drill wiese 300 165<br />
270SW 8·114' Table Saw ................... 509 265<br />
2711 10' Table Saw with brake ...... 851 475<br />
2030N 12' PlanerIJointer ................ 34SO 1699<br />
1805B 6·1/8' Planer Kit with case .... 717 365<br />
5OO5BA 5·112' Circular Saw ............... 234 135<br />
4200N 4·318' Circ. Saw 7.5 amp ...... 225 135<br />
2414 14' Chop Saw ....................... 352 205<br />
6404 318' Drill Rev. 0-2100 rpm 2A 104 58<br />
6510LVR 318' Drill Rev. 0-1 050 rpm 149 83<br />
8013BR 112' Drill Rev. 6 amp 258 139<br />
5402A 16' Circular Saw 12 amp 662 335<br />
3612BR 3 HP Plunge Router ............. 377 165<br />
9401 4' x 24' Belt Sander wlbag ... 337 169<br />
4302C var. speed Orbilal Jig Saw _... 302 159<br />
S077B 7-114' Hypoid Saw _ ...... _ ........ 255 138<br />
LSI440 14' Mitre Saw ........ _ ........ _ .. _ .. _ 744 449<br />
LS1030 NEW 10' Mitre Saw .. _ .. _ ........ 420 225<br />
5007NB 7-1I4· Circular Saw I3amp .. 210 112<br />
3612B 3 HP Plunge Router sqlbase 377 165<br />
2012 12" Portable Planer ............ _ .. 895 455<br />
LS1011 10' Slide Compound Saw ..... 842 435<br />
- 2' .......... 377 275<br />
SENCO AIR NAILERS<br />
SFNI Finishing Nailer l'<br />
SFN2 Finish. Nailer 1-112' - 2-112' 571 395<br />
SN325 Nailer 1-718' - 3-114' 665 455<br />
SN4 General purpose 2' - 3-112' 685 475<br />
LS2 Pinner 5/S' -1·.............._...... 351 255<br />
SKS Slapier 5/8· - 1-112· ........_...... 351 255<br />
LS5 Pinner l' - 1-112·_ .................. 399 285<br />
Ulility Coil<br />
BOSTICH AIR NAILERS<br />
N80501 Stick Nailer Super Sale... 389<br />
NSOC-l<br />
Nailer .._.._.._......_.... 845 409<br />
T36-SO Sheallh & Decking Stapler .... 595 334<br />
NI2B-l Coil Roofing Nailer ................ 845 415<br />
N80FN-2 Finishing Nailer ..................... 625 335<br />
T31 Brad Nailer ............................ 270 152<br />
CWC100 1 HP Pancake Compressor . 445 295<br />
SKIL SIULERS<br />
3810 10' Milre Saw ......_.._.._........... 263 225<br />
3810S 3810 wl60 tooth Carbide Blade... 245<br />
77 7-114' Worm Drive Saw .._.._.._ 230 144<br />
77.tJ4 77 saw wlese,car bId,fnc&lube292 189<br />
5510 5-112· Circ. Saw 6.5amp_ ..... 165 109<br />
5656 7-114' Circ. Saw 6.5 amp_ .._.. 165 109<br />
5825 6-112' Worm Drive Saw ......... 246 159<br />
2735-04 12V cordless Drill Kn ...._........ 210 135<br />
1805-02 NEW Biscuil Jointer wiese .... 200 119<br />
PANASONIC CORDLESS<br />
EY6205BC NEW variable speed 12 volt Drill<br />
w/15 minute charger & case . 390 179<br />
EY8005B 12V edls Drill wll hr eharger. 315 149<br />
EY6200B NEW 2 speed 12 vall Drill D-handle<br />
with 15 minute charger_ .._.._.._ 350 178<br />
EY6281 BC NEW variable speed 9.6 volt Drill<br />
wl1 5minute charger wlcase .35O 169<br />
EY571 B var. speed 9.6 volt Drill Ki1 .... 239 128<br />
EY6207BCNEW 12 volt 1/2" Drill wlkeyiess chuck<br />
var. spd wl15 min. charger & case_ ........ 421 219<br />
LEIGH DOVETAIL JIGS<br />
DI258R-12-Llst 329.00-Sale 255.00<br />
DI258R-24-Llst 399.00-Sale 299.00<br />
LEIGH INSTRUCTIONAL VIDEO SALE 29.00<br />
MMTA 24' Mort. & Tenon anachment. .. 299 165<br />
HITACHI TOOLS<br />
P12RA NEW 12' Planer/6' Jointer_ .._.. 1555 819<br />
P12R NEW 12" Portable Planer .._.._.. 1185 619<br />
C7BD 7-114' Circular Saw .. .._..__...._ __ 230 129<br />
M12V NEW 3 HP var. speed Router _447 225<br />
TA12 Plunge Router 3 HP __.._.._..____ __ 354 167<br />
FloooA12' Planerl6' Jointer _........_.._ 2835 1489<br />
Cl0FA 10' Deluxe Mitre Saw ..__....__ __ 53B 275<br />
C12FA NEW 12' Mitre Saw ......_.._.._...... 632 285<br />
C8FB 8-112' Slide Compound Saw ..... 899 445<br />
FREUD LU91MOO8 8-112' clbld 48 tooth 68 40<br />
C15FB 15' Mitre Saw ............................ 745 375<br />
DELTA TOOLS<br />
34-444 Table Saw Complete<br />
wl1-112 H.P. motor & stand<br />
809.00<br />
34-445-34-444 Table Saw<br />
complete w130" Unilence<br />
819.00<br />
37-154 DJ15 6" Jointer<br />
wl3l4 H.P. motor<br />
1069.00<br />
28-283 14" Band Saw<br />
w/enclosed stand<br />
314 H.P. motor<br />
729.00<br />
70.200 NEW 20"<br />
Drill Press<br />
759.00<br />
17-900 16-112" Floor<br />
Drill Press<br />
385.00<br />
Scroll Saw<br />
wlstand and blades<br />
699.00<br />
40-801 18"<br />
DELTA<br />
M34.tJ80<br />
10" MITRE BOX<br />
XTRA SPECIAL<br />
195.00<br />
List 289.00<br />
PIRANHA By B & 0 CARBIDE TOOTH BLADE<br />
Model # Dia. Teeth List Sale<br />
73-716 6-112 IS 13.70 7.35<br />
73-717 7-114 18 13.90 7.99<br />
73-737 7-114 24 17.20 9.29<br />
73-757 7-114 40 31.30 16.79<br />
73-759 8-114 40 44.65 24.99<br />
73-719 8-114 22 19.65 11.95<br />
73-715 5-112 16 13_70 7_99<br />
73-740 10 32 32_98 15.95<br />
73-770 10 80 67.02 29.95<br />
73-71 1 10 SO 65.OS 29.95<br />
PORTA NAILER<br />
401 Porta Nailer complete 265 189<br />
SOl Face Nailer complete ........... 265 189<br />
We stock genuine Porta nails !<br />
BAUER LADDERS<br />
4' Fiberglass 300 Ib rating .... 155 80<br />
5' Fiberglass 300 Ib rating .... 174 70<br />
6' Rberglass 300 Ib rating .... 190 80<br />
SUMMER KIT SPECIALS<br />
8093DWH MaMa edls var. spd Drill Krt wlclutch &<br />
brake. Includes extra banery & holster 313 165<br />
98SOK Porter Cable cordless variable speed<br />
Drill Kn. Includes extra banery ...._........_ 288 169<br />
7334K Porter Cable 5' Random Orbil Sander<br />
wilh case & 1 roll 1 OOX & I SOX discs _.... 253 149<br />
7335K Porter Cable 5' var. spd Random Orbit<br />
Sndr wlcse & 1 roll 1 OOX & 150X discs .. 273 159<br />
7336K Porter Cable 6' var. spd Random Orbit<br />
Sndr wlcse & I roll looX & 150X discs .. 278 165<br />
555K Porter Cable Plate Biscuit Jointer<br />
with case & 1000 assorted biscuns ......... 339 189<br />
JS100K Freud Plate Biscuit Jointer<br />
case & 1000 assorted biscuns_ ........ 351 184<br />
1581VSK Bosch Top Handle Jig Saw<br />
with case & 30 Bosch blades_ ........_.._..... 305 185<br />
1582VSK Bosch CLiC Barrell Grip Jig Saw<br />
with case & 30 Bosch blades_ ................. 305 185<br />
BIESMEYER FENCES<br />
B-SO SO' Cammer. Saw Fence 329 295<br />
T-SaUARE 52 52' Homeshop Fence 249 235<br />
T-SaUARE 40 40' Homeshop Fence ..... 242 209<br />
WEDGE SMART LEVEL<br />
SM-TR2 2 Level wlsensor 120 105<br />
SM-TR4 4 Level wlsensor lSO 125<br />
SM-TR6 6 Level wlsensor 180 155<br />
SM·PR2 2 FT Pro level w/sensor<br />
and lree case Special Sale 99.95<br />
JORGENSEN I-BAR CLAMPS<br />
Model Size ............................. List Sale<br />
7224 24· ........................... 31.46 16.95<br />
7236 36· ........................... 33.77 17.95<br />
7248 48· ........................... 37.12 19.75<br />
MO S' 4-1/2'<br />
JORGENSEN ADJUSTABLE HANDSCREWS<br />
Jaw Open Box<br />
ltemMLenglh Cap List Sale 016<br />
19.00 11.95 62.95<br />
III 10' 6- 21.76 12.99 71.49<br />
12 12' 8-112' 24.95 15.95 81.89<br />
13 14' 10' 31.61 18.95 104.95<br />
lI4 16' 12' 41.11 24.89 146.85<br />
JORGENSEN STYLE 37 2-112"Throat 1I4"x3l4"<br />
ItemM Jaw Length List Sale Box 01 6<br />
3706 6' 9.86 6.49 36.55<br />
3712 12' 10.92 6.99 39.75<br />
3718 18' 12.05 7.75 42.99<br />
3724 24' 13.16 8.39 47.75<br />
3730 30' 14.70 9.55 53.45<br />
3736 36' 16.05 10.39 58.75<br />
PONY CLAMP FIXTURES<br />
Model<br />
List<br />
SO 314' Black Pipe Clamps 13.61<br />
52 1/2" Black Pipe Clamps 11.37<br />
lots<br />
Sale 01 12<br />
7.99 84.99<br />
6.SO 69_SO<br />
BOSCH<br />
1581VS Top Handle Jig Saw ......_.._..... 265 132<br />
1582VSC NEW CLiC Barrell Jig Saw .... 265 132<br />
Bosch Metal Case lor above Jig Saws .... 34 30<br />
Bosch 30 blade assortment lor Jig Saws ..... 25.99<br />
1922VSRK12 volt Orb. Jig Saw camp ... 239 135<br />
1942 Heat Gun 600' -900'............. 111 69<br />
12720 3·x 24· BeltSander wilh bag. 329 169<br />
12730 4' x 24' Belt Sander with bag. 345 178<br />
11-212VSRBulidog 3I4'SDS AIry DrilL. 370 194<br />
11304 Breaker Brute ...._......_........_.. 2000 1205<br />
1194VSRII2' var. speed Hammer DrilL 264 155<br />
1194VSRKabove Hammer Drill wlcase_292 179<br />
1808 5.6 amp Laminate Trimmer .... 149 85<br />
1809K Lam Inslallers Kit with 1809 _309 168<br />
1800 2-114 HP D-handle Router _ 399 259<br />
1801 1 HP Router ...._....................... 184 99<br />
1802 1-112 HP Router ..................... 215 122<br />
1803 112 HP D-handle Router ......... 252 139<br />
1804 1-314 HP 2 Handle Router 236 118<br />
1804K Same as above wiese & acc .. 287 165<br />
1806 1-314 HP D-handle Router ...... 273 148<br />
3258 3-1/4' Planer wlblade guard ... 239 120<br />
3258K 3258 Planer wlsteel case ....... 265 142<br />
32700 3' x 21' Bell Sander with bag. 260 129<br />
1273DVSvar. spd 4' x 24' Belt Sander .. 370 189<br />
1611 3 HP Plunge Router .._.._.._...... 386 198<br />
1611EVS3 HP variable speed Router .._448 232<br />
1651 7-1/4· C"c. Saw drop loot _.._.. 179 109<br />
1632VSRK Reap Saw 8.4Aorb-v/sp .... 225 148<br />
3OSOVSRK 9.6V edls vlsp Drill Kit comp256 132<br />
3051VSRKabove Drill wlkeyless chuck. 268 145<br />
1370DEVS 6' Random Orbit Sander wlcase,<br />
.481 299<br />
............................................... List<br />
ELU BY BLACK & DECKER<br />
Model<br />
Sale<br />
3338 2-114 HP vlspd Plunge Router 427 249<br />
3304 1 HP var. spd Plunge Router .. 292 178<br />
3375 3-lIS- Univ. planer 7.2 amp ..... 313 158<br />
3380 Biscuit jointer with case ........... 542 255<br />
4024 3 x 21 var. speed Bell Sander. 322 188<br />
JET TooLS<br />
JB5014CSNEW 14' Band Saw 1 HP .... 579 405<br />
JT5ol0 10"Tabie Sawwlstd l -1I2 HP.585 459<br />
JJ-8 8' Jointer 2 HP _.._...._........_.._1325 945<br />
De610 1 HP Dust Collector ............... 321 225<br />
DC1182 2 HP Dust Collector ............_.. 577 405<br />
DCI883 3 HP Dust Collector ............... 8SO 625<br />
JJ-4 4' Jointer 112 HP ............_.._.... 398 275<br />
JJ-6CS NEW 6' Jointer 314 HP ........... 579 405<br />
JWP-15H 15' Planer 3 HP .................. 1565 1049<br />
JWP12 12' Portable Planer ................ 628 365<br />
JSG-6 6' x 48' Bell & 12' Disc Sndr. 749 489<br />
JDP10 NEW 10' Bench Drill Press .... 209 179<br />
JDP14M NEW 14' Bench Drill Press .... 339 285<br />
JDP17M NEWI6-1/2'Bench Drill Press399 365<br />
RYOBI SPECIALS<br />
JP-155 6-118· JointerIPlaner ............_ 611 29B<br />
R500 2-114' HP Plunge ROuler _ 331 155<br />
T50254 NEW 10' Milre Saw ......_......... 397 198<br />
T50254Kabove Saw with acc. t &<br />
BBD 73-770 carbide blade ...... 495 245<br />
AP10 10' Surtace Planer 13 amp S20 349<br />
RA200 8-114' Radial Arm Saw ............ 520 245<br />
RE800 3 HP Plunge Router ................ 431 205<br />
BE424 NEW 4' X 24' vlspd Bett Sndr 341 165<br />
BE321 3' x 21' var. spd Bell Sander 272 129<br />
SCI80 NEW 16' Bench Scroll Saw .... 261 139<br />
TFD170VRK 9.6V cordless Drill Kil ...... 292 145<br />
TFD220VRK 12V cordless Drill Ki1. 325 165<br />
JM100KNEW Blscuil Jointer wlcase 431 209<br />
RS115 NEW4-112"v1sp Rdm Orb Sndrl34 75<br />
BT3000 NEW 10' Table Saw .._.._........_699 539<br />
W660 BEST BUY 7-114'Crrc Saw 1 3A179 88<br />
LAMELLO BISCUIT JOINTERS<br />
TOP 10 'Simply the Best" ................... 699 559<br />
STANDARD 10 'Professionals Choice"499 399<br />
DAVID WHITE INSTRUMENTS<br />
LP6-20 Sight Level package - 20x ....... 310 195<br />
LT8-300 Level Trant - 26x ........ 6SO 449<br />
LTB-300Pabove Level wloptical plum _.. 769 529<br />
LT6-9OO Level Tranl - 20x ............_..... 389 245<br />
ALT6-9OOAutomalic Level-Translt-18x .549 389<br />
PORTER CABLE<br />
690 1-II2 HP Router B amp ........... 240 129<br />
691 1-112 HP Router D-handle ...... 260 135<br />
695 1-112 HP RouterlShaper ......... 335 198<br />
696 HD Shaper Table ..................... 185 115<br />
351 3' x 21' Belt Sander wlo bag .. 245 127<br />
352 3' x 21' Belt Sander with bag .255 129<br />
360 3' x 24' Bell Sander with bag .330 174<br />
361 3' x 24' Bell Sander wlo bag .. 310 166<br />
362 4· x 24· BeII Sander with bag .345 184<br />
363 4' x 24' Belt Sander wlo bag .. 179<br />
315-1 7-1I4· Top Hdle Circular Saw .. 210 114<br />
9315-1 315-l comp. wles &carbbld_.. 240 129<br />
617 7-114' Pushhandle Saw .._.._.._.. 210 114<br />
9617 617 compo wiese & carb blde .. 240 129<br />
314 4-112' Trim Saw ........_........_.._.. 240 124<br />
9314 314 Sawwith case .................. 265 148<br />
977SO 112' vlspd Hammer Drill wlcse260 159<br />
9548 X HD Bayonet Saw wlcase ..... 320 195<br />
9629 Recip Saw var. speed 8 amp .. 250 139<br />
9627 Recip Saw 2 speed 8 amp ...... 235 128<br />
666 318' HD vlspd Drill 0-1200 rpm200 119<br />
621 318' HD vlspd Drill 0-l ooo rpm170 95<br />
320 Abrave Plane 3 amp .._.._....... I90 109<br />
9118 Porta Plane Kn 7 amp .._.._.._.... 360 195<br />
7545 0.2500 Drywall Gun 5.2 amp 185 104<br />
S05 1I2 sheet Pad Sander ........_.... 210 112<br />
977SO 112' Hammer Drill wiese 6 amp260 155<br />
7511 318' var. Drill 5.2 amp .._2OO 110<br />
7514 112' var. speed Drill o.7SO rpm210 117<br />
7515 7514 with keyiess chuck ......... 215 122<br />
7649 Barrel Grip Jig Saw 4.8 amp_ .. 2SO 149<br />
5080 Siair ease templel. .................. 200 139<br />
5061 Stair ease templet Hardwood .. 210 145<br />
330 Speed Block Sander 114 sheetl02 55<br />
555 Plate Biscuil Jointer wlcase .... 315 165<br />
345 6' Saw Boss 9 amp ......_.._....... I80 99<br />
9345 345 camp. wlcse & carb blde .. 220 124<br />
100 718 HP Router __.._.._....__.._.._..... 175 95<br />
5116 Omni-Jig_ ........_............_.._...._... 400 259<br />
9647 TIGER CUB Reap. Saw ......... 195 115<br />
9637 Full var. spd Recip Saw Bamp 2SO 134<br />
7519 3-1/4 HP Router 2 Handle .._.... 410 224<br />
7518 3-1/4 HP 5 speed RoUler _.._.... 475 259<br />
7536 2-112 HP 2 Handle Router ....... 355 199<br />
7537 2-112 HP D-Handle RoUler ...... 375 209<br />
7538 3-114 HP Plunge Router .......... 410 224<br />
7399 5.6 amp Drywall Cutout Unil. .. 140 75<br />
7310 5.6 amp Laminate Trimmer ..... 150 85<br />
7312 5.6 amp Offset Base Lam Trim215 119<br />
7319 5.6A Tilt Base Lam Trimmer .... 170 105<br />
97310 Laminate Trimmer Kil comp .... 345 185<br />
7334 5' Random Orbit Sander ......... 210 119<br />
7335 5' var. spd Rndm Orbit Sndr .._230 129<br />
7336<br />
Base<br />
6' var. spd Rndm Orbit Sndr .._235 134<br />
693 1-112 HP Plunge Router Base.295 165<br />
6931 Plunge Router .._.._.._......_120 75<br />
7539 NEW3-1I4HP v/sp Pige Router475 265<br />
NEW CORDLESS<br />
12V Drill wlcase 0-400 rpm ..... 240<br />
98SO with keyless chuck .._.._... 240<br />
12V Drill wlcase 0-1 000 rpm ... 210<br />
9852 with keyless chuck ......... 210<br />
12V 112' Drill wlcase<br />
I<br />
READER SERVICE NO. 63<br />
September/October 1991 15
Methods of Wo rk (continued)<br />
For maximum conu'ol when using the tool, it is important to<br />
keep a firm grip and rotate the nail slightly as you push it in.<br />
With a little practice, you'll be able to drive brads in at any angle,<br />
even sideways.<br />
-Stephen D. Knight, Santa Rosa, Cal.<br />
Quick tip: Although lead can be hazardous to work with, it is<br />
occasionally needed for inlaying or for weighting small turnings.<br />
Those who use lead should be aware that there is a ready supply<br />
of it literally lying on the ground. You can find lead wheel<br />
weights (donated by cars with unbalanced wheels) all along d1e<br />
roads in urban areas.<br />
Threaded<br />
-David Nehenzahl, East Palo Alto, Cal.<br />
in turning insert, blank installed<br />
Inexpensive screw chuck for turners<br />
Disc is counterbored<br />
for bolt.<br />
i<br />
ing to the manufacturer's insU'1.lctions. ow, you can quickly attad1<br />
the blank to d1e d1uck wid1 a bolt sized to fit d1e insert.<br />
This chuck is particularly useful for securing a bowl blank<br />
while you turn a foot on it for remounting d1e blank in a collet<br />
or dU'ee-jaw chuck. The screw chuck<br />
N<br />
leaves d1e top surface of<br />
the work unmarred, except fo r d1e small pilot hole, making it<br />
possible to finish the bowl wid1 only a small opening on the top.<br />
-Dewey Garrett, Livel'more, Cal.<br />
Ceiling joist clamping<br />
to ceiling tacked joists<br />
2x6x10,<br />
Spring 2x4s between<br />
floor and ceiling to<br />
provide clamping<br />
force.<br />
Screw<br />
faceplate<br />
to disc.<br />
secures<br />
blank<br />
to faceplate.<br />
Here's a quick and easy tecl111ique that I use to laminate 2x4s<br />
into larger beams. First, lay a 2x6 on d1e floor, and level it to a<br />
2x6 tacked to your shop ceiling. Make sure d1at the 2x6 on the<br />
Metal threaded inserts can be adapted to make an inexpensive<br />
screw chuck for turners. First, screw a wood block to your faceplate,<br />
and turn a disc large enough to support d1e turning blank.<br />
Drill a centered hole through the disc, and then counterbore the<br />
hole on the back side to make a recess for a bolt head. Nell.1:,<br />
drill a pilot hole in the blank, and push in a metal insert, accordg'<br />
'DVred 7M Ad SAVE!<br />
Buy 12 "EVER-LAST" Belts •••<br />
Get 12 Belts<br />
FREE!<br />
Need ROLLS, WIDE BELTS, DISCS,<br />
SLEEVES, STROKE BELTS, etc.<br />
Write for catalog.<br />
Belts available in 36, 50, 60, 80, 100,<br />
120, 150, lBO, 220, 320 grit sizes.<br />
Please specify grit sizes when ordering,<br />
otherwise an assortment will be supplied.<br />
30 ........ $16.50/00z. 12 FREE<br />
l' 42' ....... $16.95/00z. 12 FREE<br />
2' 4B' ....... $25.25/0oz. 12 FREE<br />
2- x 16' .... $17.95/0oz. 12 FREE<br />
3' lB' ....... $1 B.25/0oz. 12 FREE<br />
o 3' 21 ' ....... $1 9.25/0oz. 12 FREE<br />
0 3' 24' ....... $1 9.75/0oz. 12 FREE<br />
0 4' 21 ' ....... $23.50/0oz. 12 FREE<br />
0 4' 23-'% .... $23.75/0oz. 12 FREE<br />
0 4' 24' ....... $24.00/0oz. 12 FREE<br />
0 4' x 36' ....... $2B.75/0oz. + 12 FREE<br />
o 6' x 4B' ..... $37 .50I'hOoz. + 6 FREE<br />
Other size belts on request.<br />
50 PACK<br />
100 PACK<br />
9" X 11" PAPER SHEETS<br />
A/O or Garnet Cabinet Paper<br />
40-0 ....... 0 $1 7.00 0 $32.00<br />
50-0 ....... 0 $16.00 $29.00<br />
60-0 ....... 0 $15.00 0 $27.00<br />
BO-O ....... O $14.00 0 $25.00<br />
1 00·C ....... 0 $13.00 0 $23.00<br />
1 20-C ...... .D $13.00 0 $23.00<br />
1 50·C ....... 0 $1 3.00 0 $23.00<br />
No Load Finishing Paper (White)<br />
1 20·C ...... .D $1 4.00 0 $24.00<br />
1 50·C ...... .D $1 4.00 0 $24.00<br />
1 BO-A. ...... O $1 1 .00 0 $19.00<br />
220-A ....... 0 $1 1 .00 0 $1 9.00<br />
2BO-A ...... .D $1 1 .00 0 $1 9.00<br />
320-A ...... .D $1 1 .00 0 $1 9.00<br />
400·A ....... 0 $1 1 .00 0 $19.00<br />
o Belt Cleaning Stick ......... $4.95 each<br />
For<br />
I<br />
1-800-428-2222 Fast Delivery Call Toll <strong>Free</strong><br />
(U.S.A.)<br />
SHIPPING CHARGES: $4.75 Continental U.S.<br />
1-800-222-2292 NDUSTRIAL (PA only)<br />
52.75. 535.00 or more add $4.25. PA reSidents<br />
add 6% sales tax. Minimum order 525.00.<br />
0 MONEY ORDER 0 CHECK<br />
o MASTER CARD 0 VISA<br />
L J\ BRASIVES CO.<br />
n. 644 N, 8th S1 • READING, PA 19612<br />
READER SERVICE O. 137<br />
HORIZONT ALIVERTICAL<br />
SANDING MACHINE<br />
VERTICAL<br />
UNIVERSAL<br />
OSCILLATING<br />
EDGE SANDER<br />
MOTOR: '/z HP<br />
$329<br />
SCROLL<br />
N W. ' 99 LBS<br />
G W 108 LBS<br />
CUFT 4.5'<br />
SAW<br />
• STOCK THIS ANTI·KICkBACK FROM KICKING DEVICE BACK.<br />
I PREVENTS<br />
TIlE<br />
THE<br />
TIGIIT·<br />
MODEL MS·22<br />
TIlE<br />
MAX.<br />
MOTOR, 118 HP<br />
N.w .. 65 LBS<br />
G.w., 68 LBS<br />
curr,<br />
$189<br />
J.6·<br />
GRIPPING THICKNE$, ,<br />
$49.99 • WHEEL MAX. DlAMITlR: 2" WHEEl., dla.<br />
4" 12" EXTENSION OF<br />
For 8 complete catalog or more Information write SUNHllL<br />
OR CAll TOll FREE<br />
1000 ANDOYER PARK EAST<br />
1-800-544-1361<br />
SUNHIU-IIACHINERY (206) SEAnLE. 575-4131 WASHINGTON • FAX (206) 575-3617 N'"<br />
us. PATENT NO. 49398<br />
MODEL <br />
NO MS·600<br />
MOTOR II. HP<br />
$499<br />
N.w · 126 LBS<br />
GW 141 LBS<br />
curr. 7.8'<br />
ANTI-KICKBACK<br />
DEVICE ON TABLE SAW<br />
HOLD-DOWN<br />
MODEL, MS·FKl<br />
AND WHEELS , SPRING-LOADED HOLD STOCK<br />
LY AGAINST RIP FENCE.<br />
'CLAMPING HEIGHT AUTOMATrCALLY SELF·<br />
ADJUST ACCORDING TO STOCK UP TO<br />
THICKNESS 4"<br />
'EASY TO BE MOUNTED ON ANY FENCES<br />
AVAILABLE<br />
READER SERVICE NO. 97<br />
16 Fine Woodworking
Clayton Oscillating<br />
Spindle Sanders.<br />
V2"<br />
For large or small<br />
shops. Ideal for con·<br />
tour sanding. Quick<br />
change drums.<br />
to 4". Satisfaction<br />
guaranteed. Covered<br />
by 1 yr. warrantee.<br />
4 models to<br />
choose from. For<br />
p.o.<br />
more<br />
313-548-2380<br />
information<br />
write:<br />
Box 513. MI 48017<br />
Made In U.S.A.<br />
Clayton Machine Corp,<br />
Clawson<br />
SAVE SAVE MONEY! TIME!<br />
READER SERVICE NO. 16<br />
SAVE BACK! YOUR<br />
This time-saving tool is a<br />
must for kitchen cabinet<br />
installation<br />
• Now<br />
one person can do the job<br />
of two<br />
Lifts 300 Ibs.<br />
Avoids back strain and injury<br />
Speeds up installation<br />
time<br />
Call or Write<br />
•<br />
GIIILnT<br />
Rolls easily through for further<br />
doorways<br />
information<br />
Independence, 1605 N. River<br />
Phone (816) 833-0611 MO 64050<br />
READER SERVICE N<br />
Don't miss a single issue!<br />
New! 1991-92<br />
-<br />
The DII<br />
Woodworkers' Store'<br />
Cotologs<br />
EagleSpray<br />
HVLP Turbine Sprayer<br />
ModeIES·1000 $695 00<br />
of purchase)<br />
from includ-<br />
models to<br />
• pAl. U.5O tI!;i>P*>g;n 48 ... , ..<br />
READER SERVICE NO. 89<br />
• Quickly pays for itself by applxing fi nish at more than<br />
twice the efficiency of conventional compression<br />
spray systems. Great for small shops!<br />
Ideal for spraying all water-based finishes. .<br />
.<br />
conventional lacquers. polys and most other finishes<br />
Powerful two-stage turbine delivers 90 cfm at 5 psi<br />
Includes superb AccuSpray gun and 20' of 314' hose<br />
• All-steel housing. Motor rated at 9.7 amps. 110 volts<br />
(800)<br />
Discover ViWUasterClIITi C",d Users<br />
ORDER TOLL FREE<br />
241-6748<br />
CHUCK<br />
1045 No Highland Ave. Dept F90<br />
AUanta, GA 30306 (404) an-4466<br />
• tapers<br />
• flutes<br />
• beads<br />
-----------1<br />
Woodworkers'<br />
Yes! Send me<br />
Store<br />
the next<br />
catalog<br />
four<br />
for<br />
issues<br />
only<br />
of<br />
$2/year.<br />
The<br />
I I<br />
I<br />
<br />
Address<br />
Gty<br />
Th<br />
Stote Z;p DePI.13042 I Wooc:Iworkers<br />
r"Iln.·,.. 21801 Industrial Blvd. L<br />
Credit cord orders<br />
___!tore I (612)428.2199__ -.J<br />
eWULl Rogers.<br />
MN<br />
55374<br />
READER SERVICE NO. 165
Methods of Wo rk (continued)<br />
ceiling runs at a right angle to d1e ceiling joists. ow, one by<br />
one, quickly roll glue on me face of each 2x4 and stack me laminates.<br />
Cover me stack wid1 anod1er 2x6, and men spring precut<br />
2x4s between d1e stack and me ceiling to provide clamping pressure.<br />
The large amount of force is surprising; be carefu l you<br />
don't lift the joists too far. -David Foos, Los Angeles, Cal.<br />
Screw-pocket drilling jig<br />
3. Glue on waste block and<br />
trim guide to increase boring depth.<br />
Making a safer taper jig<br />
1. Drill 2. Lav out<br />
block. pocket and cut blank.<br />
4. Clamp guide<br />
to workpiece<br />
to drill pocket holes.<br />
You can make a shop-built tablesaw taper jig safer and easier to<br />
use by adding a Ys-in.-mick plywood or Masonite shelf to me<br />
bottom, and a hold-down clamp and a handle to d1e top. The<br />
shelf-and-hold-down combination holds d1e workpiece snugly<br />
enough to eliminate the balancing act mat usually accompanies<br />
cutting tapers. The combination also lets you push the jig<br />
mrough as a unit wim your hand far away from me blade. I find<br />
mat me system is especially good for tapering narrow table legs.<br />
-Joe Voltas, Fall River, Mass.<br />
1NboDPEclCf'RS j]aoZ70o®Z70<br />
<br />
25° PANEL VERTICAl PANEL RAISER<br />
LIST $94 50<br />
1 112" REVEAL · 112" SHANK FREE<br />
•<br />
.<br />
$54.95 LIST $84.95<br />
,<br />
Blades,<br />
twO PIECE RAIL & STILE<br />
TK<br />
TK<br />
1/2"SMnkOnlyt<br />
--__ ------;-----'-''''-,;,.;.,;,,;,...I TK<br />
Call about...<br />
j<br />
and the best selection of<br />
Quality Router Bits, saw<br />
.......... ....<br />
and much more!<br />
TK 303 FINISHING 71/4 X 40T CALL<br />
304 FINISHING 8114 X 40T CALL<br />
306 FINISHING 10 X 40T CALL<br />
903 COM8 .7 114 X 30T CALL<br />
TK 904 COM8 ........... 81/4 X 35T CALL<br />
T::faM8 jrd-<br />
r<br />
fREUD LlST:<br />
_B_YR_O_M_L_ IS T_:$_ 1 _47_ .5_0 _SAlI _$_8<br />
9 _ .9 _ 5+ ==-::----:'-:"" __<br />
SHIPPING<br />
BlADES<br />
_ 1 ;<br />
EL: i:<br />
$145.90 SAlI $99.95<br />
OGEE PANEL RAISER REVERSIBLE RAIL & STILE<br />
LU84M010 COMBINATION 10X 50T CALL<br />
LIST $9
__<br />
TAKE ANY BOOK FREE!<br />
JOIN THE NEW BOOK CLUB EXCLUSIVELY FOR WOODWORKERS<br />
Tho Drill Press Book<br />
#80094-93 $16.95<br />
1/2 Price: $8.48<br />
#80090-38 $14.95<br />
1/2 Price: $7.48<br />
CHOOSE ANOTHER BOOK AT 1 /2 PRICE!<br />
#80056-78 $21.95<br />
1/2 Price: $10.98<br />
#80092-38 $14.95<br />
1/2 Price: $7.48<br />
And (If there's you like, no take obligation a third to book buy for W only more $5.95.) books!<br />
6 GREAT REASONS<br />
TO JOIN Now!<br />
-Help yourself to huge savings up to $59.80<br />
15% 50%<br />
by joining now!<br />
-Discover the best new and classic woodworking books<br />
every month in your FREE Club Newsletter.<br />
-Get discounts of up to on every book.<br />
-Take one <strong>Free</strong> book with every four books you buy.<br />
-Get <strong>Free</strong> postage and handling when you include<br />
10 100%!<br />
payment with your order after you join.<br />
-Satisfaction guaranteed If you're ever unhappy<br />
with a book for any reason, just return it within<br />
days for full refund, no questions asked.<br />
#80054-78 $21 .95<br />
1/2 Price: $1 0.98<br />
#80074-38 $14.95<br />
1/2 Price: $7.48<br />
Techniques Table Saw<br />
#80053-93 $16.95<br />
1/2 Price: $8.48<br />
#80061-85 $1 8.95<br />
1/2 Price: $9.48<br />
#80059-38 $14.95<br />
1/2 Price: $7.48<br />
#80091-93 $16.95<br />
1/2 Price: $8.48<br />
#80099-38 $14.95<br />
1/2 Price: $7.48<br />
r""-----..,...."<br />
#80060-61 $17.95<br />
#80055-93 $16.95<br />
1/2 Price: $8.98 1/2 Price: $8.48<br />
#80063-80 $25.90 1/2 Price: $12.95<br />
Count as 1 selection.<br />
#80052-74 $27.90 1/2 Price: $13.95<br />
Count as 1 selection<br />
Here's how the Club works.<br />
Every month you'll get your free issue of<br />
the Club newsletter, Woodworker's Book<br />
Club News. It describes the month's Main<br />
Selection and dozens of other books to<br />
choose from. If you want the Main<br />
Selection, do nothing and it will be sent<br />
automatically. If you want a different<br />
book, or want nothing that month, you'll<br />
always have at least ten days to decide<br />
and return the order form. You have<br />
NO OBLIGATION to buy any more<br />
books-you're just trying out the club for<br />
six months. After that, either you or the<br />
Club can cancel your membership any<br />
time. Each time you buy a book, your<br />
membership will be extended for the<br />
following six months. If you should ever<br />
receive your WWBC News late so you<br />
don't have ten days to decide what you<br />
want, we'll take care of it. If that ever<br />
happens and you receive a book you<br />
don't want, just return it at our expense.<br />
When we say Satisfaction Guaranteed,<br />
we mean it!<br />
#80065-38 $14.95 #80072-93 $1 6.95<br />
#80076-93 $16.95<br />
#80067-51 $19.95<br />
#80070-61 $17.95<br />
1/2 Price: $7.48<br />
1/2 Price: $8.48<br />
112 Price: $8.48<br />
1/2 Price: $9.98<br />
1/2 Price: $8.98<br />
START YOUR CHARTER MEMBERSHIP TODAY-WITH THIS SPECIAL OFFER!<br />
FREE BOOK MEMBERSHIP CERTIFICATE<br />
................. $ FREE<br />
Price ___<br />
o<br />
1/2 $<br />
YES! I'd like to join Woodworker's Book Club! Rush<br />
me my special Charter Membership books:<br />
My FREE Book #<br />
$5.95 $_3'-'..,-97<br />
My Book #<br />
..........<br />
plus postage and handling ................... __<br />
o Optional Book #___<br />
$ ___ 5.5% _<br />
Here's all I pay ..........................................<br />
(Payment must accompany order. Ohioans add<br />
tax.)<br />
o Check enclosed (or) Charge my 0 Visa<br />
o MasterCard<br />
Acct #<br />
Exp date __<br />
_<br />
Credit Cards call TOLL-FREE 1-800-876-0963<br />
9:00 a.m. to 5:00 p.m. Eastern time, Mon.-Fri.<br />
I understand how the Club works and that I have<br />
NO OBLIGATION to buy any more books.<br />
Signature. ___ -,-.,..-,-,---,-_______<br />
required of all applicants<br />
NAME _____________ ADDRESS.<br />
ClTY_<br />
_____________<br />
--:-:--:-:-::- _ :-::- _ STATE ___ Z I P_-,-_<br />
Offer good in U.S. and Canada for new members only.<br />
Remit in U.S. funds. All applications subject to approval.<br />
Please allow 3 weeks for delivery.<br />
WoooWoRKER'S<br />
BOOK CL B lAF2<br />
P.O. Box 12171 • Cincinnati, OH 45212-0171<br />
1991 19<br />
September/October
Cutting a w alnut crotch for best figure<br />
I recently acquired a large walnut log that has a section<br />
where the trunk splits into four or five large branches. I<br />
would like your advice on how to saw this crotch for boards<br />
with optimum figure. I have not been able to find any information,<br />
and I'm not even certain where the figure occurs<br />
within the log. Any assistance you could offer would be greatly<br />
appreciated.<br />
-Jeffrey Bruni, Southampton, Pa.<br />
Bruce Hoadley replies: In walnut crotches, probably the<br />
most desirable figure-the classic feather crotch-occurs on tile<br />
inside of the converging stems in the area between the highest<br />
point of the crotch and the convergence of tile piths of the other<br />
branches involved. The figure will be best if the two side stems<br />
of tile crotch are about equal in size. Lesser areas of figured wood<br />
occur where a subordinate branch forks from a dominant stem.<br />
The figure is best displayed when the crotch is sawn in a<br />
plane common to tile piths of tile main stem and bOtil branches<br />
(see tile drawing below). A board or thin slab cut through the<br />
crotch and containing tile piths of stem and branches should<br />
show strong figure on both faces. Successive side cuts will have<br />
weaker figuring. Just outside of the crotch area, swirl figure, often<br />
quite aeu-active, may also be found.<br />
Pith---<br />
Area of best feather crotch figure<br />
Main trunk<br />
try In your walnut log, witll its multiple-branching stem, to visualize<br />
where the converging piths lie, and make your initial cuts align<br />
with the plane of tile piths. I am sure you will reveal some surfaces<br />
with spectacular figure.<br />
[Bruce Hoadley is professor of wood technology at the University<br />
of Massachusetts at Amherst and a contributing editor to FWW .]<br />
After<br />
Problems with a bleeding oil finish<br />
I recently applied a Danish type of oil finish to a 6-ft. red-oak<br />
kitchen bar top. sanding it down to 220-grit, I applied the<br />
oil in accordance with the directions on the can. However, I<br />
had a hard time getting the surface d1Y without more oil<br />
bleeding out of the pores, and I had to continue wiping down<br />
the top for two days. Once the finish finally dried, I waited a<br />
few days and then waxed it. However, the top doesn't seem to be<br />
very durable or resistant to stains. Can you make some suggestions<br />
on what to do now?-Dennis E. Hurley, Carlisle, Pa.<br />
Michael Dresdner replies: Your problems stem from some<br />
basic misunderstandings concerning Danish oil finishes, most of<br />
which are quite similar. Th e se finishes are actually: exu'emely<br />
thin, long oil varnishes, consisting of linseed oil cut with a large<br />
amount of mineral spirits and buffered with a small amount of<br />
alkyd resin. After tile mineral spirits evaporate, the oil makes a<br />
poor moisture barrier; so the bulk of the protection comes from<br />
the resin, but there is little of that in many mixtures I've used;<br />
The problem you had with oil bleed during application was a<br />
result of overloading the oak's especially large pores with this<br />
mixture of mineral spirits and oil, and this made it virtually impossible<br />
for the finish to dry. And you ended up probably wiping<br />
off the lion's share of finish you had applied, leaving little, if<br />
any, protective coating. Even under the best circumstances, one<br />
coat of Danish oil is a poor barrier for moisture resistance or<br />
heavy wear. And waxing the surface will do little to help; although<br />
wax, when applied over a finish, will repel water, it is a<br />
poor moisture barrier.<br />
Next time, put on at least three or four lighter coats of Danish<br />
oil, allowing the film to completely dry between coats. Or better<br />
still, switch to a more protective varnish or polyurethane finish.<br />
Asking a single coat of Danish oil to stand up to the daily rigors<br />
of a bar top just<br />
chair<br />
isn't realistic.<br />
[Michael Dresdner is a fi nishing consultant in PerkaSie, Pa.]<br />
Regluing a with cyanoacrylate<br />
We have a family heirloom chair that has loosened in all the<br />
joints. Because of its delicacy and sentimental value, I am<br />
very reluctant to attempt to disassemble the chair to reglue it.<br />
Is there any way that the chair can be reglued without taking<br />
it apart?<br />
-Roberta Munsey, North Hollywood, Cal.<br />
Randy Jenkins replies: Recently I was faced with a similar<br />
situation: repairing a friend's set of six dining chairs that had<br />
come unglued. After disassembling tile first chair and regluing it,<br />
I realized that the time and u'ouble involved far exceeded the<br />
money available for tile job. The remaining chairs waited for<br />
some other solution.<br />
Some time later, I was turning a cherry bowl and repaired a<br />
small crack with cyanoacrylate glue. (I use Jet brand, available<br />
nationwide in model, hobby and craft stores.) I was struck by the<br />
capillary action that literally pulled the glue into the crack. This<br />
seemed to offer hope for regluing the dining chairs witllout<br />
time-consuming disassembly. I started on chair number two immediately.<br />
First, I used a scraper and an awl to remove any old<br />
glue from joints tlut were already separated. The chair was then<br />
dry-assembled witll nylon web clamps and bar clamps, and the<br />
screws in the glue blocks on tile underside of tile seat franle<br />
were tightened. Then, using the very fine tip of tile glue borde, I<br />
ran a line of glue along one tightly clamped joint line. The glue<br />
disappeared into the joint immediately-capillary action at work!<br />
I continued to apply glue to all sides of the joint that I could<br />
reach until excess glue began to run out. The joint line was then<br />
sprayed witll a cyanoacrylate "accelerator" (available from hobby<br />
stores) to set the glue more quickly, and one more light application<br />
of glue was made to tlloroughly seal tile joint. All the otller<br />
joints in the chair were treated the same way.<br />
When tile clamps were removed, tile chair was as solid as tile<br />
first one repaired by traditional metllods. As an added test, I<br />
brought the second chair in and let my teenager test it for a<br />
week; there was no indication of glue failure. Since cyanoacrylate<br />
glues make long-lasting and strong bonds with wood, the<br />
test here was primarily of the metllod of application, which<br />
proved successful. The chairs have been in daily use for some<br />
months now with no joint failures. Approximately 1 oz. of glue,<br />
about $2.50 worth, was used per chair. Work time averaged less<br />
than 30 minutes per chair, so even with the much higher glue<br />
cost, tile work was done within budget. Eliminating tile risk of<br />
danlage due to disassembly was also a solid plus.<br />
[Randy Jenkins is a woodworker and retired compressor-systems<br />
specialist in Lafayette, La.]<br />
Trouble with a tablesaw's cut<br />
Several years ago, I bought an imported tablesaw from a<br />
mail-order supplier. After I began using the machine, one<br />
problem kept reappearing. When I was ripping, the material<br />
20 Fine Woodworking
\Q-,:o" .;;; \ r ·-"iit 'r! -'A---!J<br />
ROUTER TABLES · INCRA · »<br />
'-,--- 7!!/i?..7 Cj11"\'.rl.'O",<br />
.. f,
Q & A (continued)<br />
invariably moved away from the fence just beyond the blade.<br />
I have tried to correct this deficiency by switching sawblades<br />
and checking their runout; rebuilding and checking the alignment<br />
of the rip fence; and making sure the saw's throat plate<br />
was absolutely flush with the tablesaw surface. Nothing has<br />
worked, and I've exhausted all the remedies I know. Do you<br />
have any suggestions?<br />
-Ronald D. Frey, Clay, N.Y.<br />
Mark Duginske replies: The problem of the material invariably<br />
moving away from the fence on the outgoing side is not<br />
only disturbing, but can also result in dangerous kickback. There<br />
are a number<br />
As<br />
of things that can cause this problem; it is best to<br />
deal with the simple ideas first and then explore the more complex<br />
possibilities. First of all, the rip fence should be perfectly<br />
straight. simple as tl1is sounds, I have seen many saw fences<br />
come right out of the manufacturer's box and not be straight.<br />
The best way to straighten a crooked fence is to bolt an auxiliary<br />
wood (preferably plywood) fence to it. Shims are used to keep<br />
the new straight fence from assuming the shape of the crooked<br />
one when it's bolted on. You can punch out your own shims<br />
from cardboard or from aluminum-can stock and insert them<br />
between the auxiliary and stock fences. Also, you can use the<br />
shims to square the fence to the saw table.<br />
el\1:, check for blade misalignment, also called "heeling."<br />
(See my article on tablesaw tune-up in FWW #78.) Follow the<br />
directions in the article to align the blade and saw table properly.<br />
Don't mistakenly assume that you can just set the rip fence<br />
parallel to the saw table's miter slot: The slot and sawblade may<br />
not be parallel. Without actually seeing your tablesaw, I think<br />
this is most likely the cause of the problem you're having. Some<br />
people prefer to have the fence angled very slightly so that the<br />
distance between the fence and blade is minutely greater (be-<br />
Y64 Y32 tween in. and in.) at the back of the blade.<br />
Another condition that can cause the problem you describe is<br />
not related to the tablesaw at all. The wood may be releasing<br />
tension and distorting as a result of being cut. This can cause the<br />
wood between the rip fence and the blade to bow away from the<br />
fence. If this is what's occurring, it's best to fit the saw with a kerf<br />
splitter-a special thin, curved bar that's mounted behind the<br />
blade to keep the sawkerf from closing up and pinching tl1e<br />
blade. However, if internal tension in the ,!,ood is the problem,<br />
the opposite situation may also arise: the tWo piece ' may spread<br />
apart after being cut. The spreading can cause the portion of the<br />
workpiece between the fence and blade to bind against the<br />
blade, generating a kickback. For this reason, Europeans prefer<br />
to use a short fence for ripping, which only reaches as far as the<br />
back of the blade, providing clearance when cutting solid wood.<br />
[Mark Duginske is a woodworker, teacher and author who lives<br />
in Wausau, Wisc.]<br />
Making traditional pigeonhole partitions<br />
I am making an 18th-century-style slant-top desk for my<br />
daughter, and I've gotten as far as making the pigeonholes.<br />
The examples I've seen in museums have V-shaped ends on<br />
the partitions that fit into V-shaped grooves in the supporting<br />
pieces. How were these V-grooves cut? Also, why was this particular<br />
joint used?<br />
-john Caywood, Sunnyvale,' Cal.<br />
Lance Patterson replies: I consulted witl1 the other cabinetmaking<br />
and furnituremaking instructors at the Nortl1 Bennett<br />
Street School about your questions, and we think that the v<br />
shaped housings were cut by handplanes in the 18th century. It's<br />
likely that a specific molding plane was used traditionally, but<br />
you can use a regular rebate plane tipped over ,to a 45° angle<br />
TOOLWORKS Lie-Nielsen<br />
Makers of Heirloom Qualiry Tools ,---<br />
I C. ---,<br />
Route 1, 1-800-327 Warren, Plolle$J15. -2520 Maine 04864<br />
World's Largest Manufacturer of Portable Sawmills<br />
<br />
READER SERVICE NO. 65<br />
22 Fine Woodworking<br />
Square Drive Beats<br />
Slippage<br />
Hardened Steel for<br />
Strength<br />
Deep Thread for<br />
• Also Brass & Stainle'sS'-Steel<br />
..... FEE. •• V c.<br />
P.O. Box 3 • Dept FW90<br />
lynchburg · VA · 24505<br />
Toll <strong>Free</strong> 1-800-443-7937<br />
or FAX (804) 847-7136<br />
HARDWOODS<br />
READER SERVICE NO. 52<br />
Own<br />
SawlDill!<br />
Start a Profitable Business!<br />
money cutting for others.<br />
• Completely<br />
Save money cutting your own lumber, make<br />
Six models available<br />
portable, easy to set-up.<br />
Highest quality, made in U.S.A..<br />
Handles logs up to 36"dia. x 33'long<br />
Optional hydraulic log handling<br />
•<br />
1-800-553-0219<br />
30% more yield than circular saws<br />
Visa<br />
32 Page Full Color Catalog - $2.00<br />
66-minute demonstration video-S10.00<br />
MasterCard or accepted<br />
Wood-Mizer Products, Inc .• Dept. Z47<br />
8180 W. 10th St., Indianapolis, IN 46214-2430<br />
READER SERVICE NO. 71
Complete catatlog sent upon order .<br />
• Plastic caliper ($4.00 value) lor any order.<br />
TUNGSTEN CARBIDE TIPPED TOOLS<br />
CALL TOLL FREE<br />
Precision tools for skillful woodworkers<br />
TOOL CO.<br />
1·800·782·6629<br />
cunER TOOL • CUT OIA. CUT O. s.so .(619)535-8940(NATIONWI DE)<br />
(CALIFORNIA)<br />
L. SNK PRICE<br />
ST206<br />
1/'<br />
U<br />
ST208 5/16<br />
1/' 5.50<br />
ST2 10 1/8 1 1/' 5.50<br />
ST2 1J 1/2 1<br />
5.50<br />
ST2 16 5/8 1 1/' 6.25<br />
ST219 1/. 1/' 1/4 8.95<br />
ST406 1/.<br />
1/2 5.50<br />
ST408 5/16 1 1/2 5.50<br />
ST4 10 1/8 1 1/2 5.50<br />
ST.l) 1/2 1 1/2 5.50<br />
up to".11.16<br />
PRODUCTS<br />
STUlL 1/2 1-1/16 1/2 6.95<br />
ST4 1JE 1/2 2· 1/2 n.9S<br />
STU6 5/8 1-1/16 1/2 1.50 Rtil<br />
STU9<br />
1-1/16 1/2 8.95 S60<br />
Cerblde Tipped<br />
ST422 7/8 1-3/16 1/2 10.50<br />
2-piece NEW Stile & Rail<br />
flush<br />
f'TllOP 1/8 1/2<br />
6.00<br />
<br />
F'T2 10 1/8 1<br />
6.50<br />
-- $69 a set<br />
Trim<br />
M'2 13 1/2 1 1/' 6.95<br />
f'T21JL 1/2 1-1/2<br />
10.50<br />
ii ii<br />
f'TUO 1/8 1-)/16 1/2 6.50<br />
FT4 1) 1/2 1-3/16 1/2 6.95<br />
fT4IlL 1/2 1-1/2 1/2 10.50<br />
H<br />
DV210 1/8 1/8<br />
CR01<br />
OV2 1J 1/2 1/2<br />
OG02<br />
OV4 10 1/8 1/8 1/2 4.95<br />
OV4 11 1/2 1/2 1/2<br />
DV4 16 5/8 1/. 1/2 6.50<br />
DV419 1/. 1 1/2 6.95<br />
Dovelail<br />
ii BE03 ii<br />
DV42S 1 7/8 1/2 8.95<br />
<br />
C8206<br />
1/'<br />
1/' 8.00<br />
Pl04<br />
CB210 1/8<br />
1/. 9.00<br />
CB21) 1/2 Sll6 1/. 11.00<br />
OGEE FIU.ET PANEL RAISING<br />
CB216 5/8 1/8<br />
12.50<br />
CB219<br />
1/2 1/. 14.00<br />
C8. l) 1/2 5/16 1/2 11.00<br />
Core BOI OF46I 2-5/1" $24.00<br />
II2SHANK ONlY<br />
CB416 5/8 1/8 1/2 12.50<br />
OFUI 3-1/." $39.00<br />
CB"19<br />
1/2 1/2 14.00<br />
CB422 7/8 5/8 1/2 16.95<br />
CB42S 1<br />
1/2 17. 9<br />
CB432 1-1/4 1/. 1/2<br />
STIlE & RAil<br />
45'<br />
25.95<br />
CB4J8 1-1/2 7/8 1/2 28.95 Revel$able<br />
e<br />
CH210 1 1/8<br />
l2 00 RS248<br />
CH1IJ 1-3/16 1/2<br />
11.00 1/4' shank $37<br />
CH2 16 1-3/8 5/8 1/. l).50 RS448<br />
CH4 16 1-1/8 5/8 1/2 14.00<br />
Cham' e r 112' shank $37<br />
I J <br />
CH419 1-5/8 1/. 1/2 16.00<br />
CH422 1-7/8<br />
1/2 19 .00<br />
CH4 25 2-1/8 1 2 24 .00<br />
WINGS, tCUTTING EDGES<br />
RB2J2 1-1/4 1/2<br />
12.00<br />
RB4l2 1-1/4 1/2 1/2 12.00 FINGER JOINTER<br />
SL20)-2 1-1/4 1/8<br />
10.00<br />
SL205-1 1-1/" 3/16<br />
11.00<br />
Rabbel<br />
{),<br />
FJ463<br />
112' shank 553 -:-<br />
SL206-1 1-1/4 1/'<br />
11.00<br />
2 FUJ1'£S SL210-2 1-1/4 1/8<br />
12.00<br />
LOCK MITRE<br />
TOOL<br />
ML470 $34<br />
. RADIU CUT L. SNK D. PRICE<br />
CR20l 1/16 1/8<br />
10.00<br />
112' shank<br />
CR20) 1/8 1/8 1/' 10.00<br />
CR20S 1/l6 7/16<br />
10.00<br />
CR206 1/. 2/1 1/. 11.00<br />
FOR SI8 TO 1-1/8 STOCK<br />
CR20S 5/16 9/16 1/. 12 .95<br />
CRllO ,,8 5/8<br />
14.00 KEY HOLE<br />
CR2l) 1/2<br />
16.00<br />
KH210<br />
CR406 1/. 1/2 1/2 11.95<br />
1/4' shank<br />
CR410 1/8 5/8 1/2 14.00<br />
Rounding S6.50<br />
CRoll) 1/2 1/. 1/2 16.00<br />
Over<br />
I $21<br />
CR416 5/8<br />
1/2 19.00<br />
CR419 1/. 1/2 20.00<br />
TONGUE & GROOVE<br />
CR425 1/2 1-1/4 1/2 l2.5:J<br />
CR411 1-1/ .. 1-)/4 1/2 42.95<br />
R020 .. Sll2 1/2 1/. 15.00<br />
R0206 1/.<br />
1/' 16.00<br />
Roman $21<br />
1(
Q & A (continued)<br />
and guided by an auxiliary fence (a board with an edge cut at a<br />
45° bevel and clamped to the work), as shown in the drawing<br />
below. You could also make a special stop, to limit the depth of<br />
cut (perhaps another 45° fence), or you could just plane to a<br />
scribed<br />
Front view<br />
line<br />
of<br />
on<br />
horizontal<br />
the work<br />
divider<br />
and then trial-fit each partition.<br />
I think it is safe to conclude that there are two main reasons why<br />
the V-shaped housings were used. First, the miter allows a clean<br />
juncture between the rounded edge on the front of a partition<br />
and the rounded edge (or bead) on the horizontal divider. Secondly,<br />
making the V-shaped housing using either method described<br />
above is a practical and efficient way to create that<br />
mitered connection. Stopped V-shaped grooves or dadoes were<br />
avoided in early furniture, because a plane couldn't easily make<br />
a stopped cut; the ends needed to be chiseled out. But these<br />
days, it is a common practice to cut a stopped dado, say with a<br />
router, and just cut the V-shape for the last % in. or so at the<br />
front. The V-shaped groove is cut with the aid of a scrap block<br />
with a face cut at 45°, to act as a guide for the chisel.<br />
If you want or need a full V-housing for a removable partition<br />
or secret compartment (see Alex Krutsky's spice box article in<br />
FWW #72), the housing can be cut with a V-groove router bit.<br />
Cutting the V-shape on the ends of the partitions is easily done<br />
with a careful setup on the tablesaw or router table. Bury the<br />
cutter or blade into an auxiliary wood fence clamped to your<br />
standard fence, and leave just the right amount of blade or cutter<br />
exposed to saw or shape the desired bevel.<br />
[Lance Patterson is the director of the furnituremaking and<br />
cabinetmaking program at the North Bennet Street School in<br />
Boston, Mass.]<br />
Replacing flat leather drive belts<br />
I recently purchased an 8-in. jointer and a 24-in. planer at an<br />
auction. After getting them home, I discovered that the planer<br />
will need new leather rOller-feed belts. Can you Offer any<br />
sources of supply for replacement parts, leather belts and fittings?<br />
-Alani Willett, Kailua-Kona, Hawaii<br />
Bob Vaughan replies: Whenever I am confronted with flatbelt-driven<br />
machines, I usually convert them to use standard<br />
V-belts because it is a much more efficient power transmission<br />
setup and is no more expensive than replacing the original flat<br />
leather belts. In cases where I'm asked to retain the original belting<br />
system (as in cases where I'm restoring a machine to original<br />
specifications), I obtain new leather belts from McLeod Leather<br />
& Belting Co., PO Box 2310, Greensboro, N.C. 27402; (800) 632-<br />
1316. If the machines's flat-belt pulleys also need replacing, I<br />
go to my local power transmission distributors armed with the<br />
dimensions of Plllleys and the arbor or shaft diameters as my<br />
needs dictate. An alternate choice for leather belts are the seam-<br />
NORTHSTATE<br />
15" PLANERS LENEAVE<br />
QUALITY-SINCE 1957<br />
NORTHSTATE<br />
NORTHSTATE<br />
8" CABINET<br />
SHOP JOINTER<br />
NORTHSTATE<br />
WIDE BELT SANOER<br />
DUST COLLECTORS<br />
Model 310: $779<br />
Powerful 3 hp motor<br />
Cast iron construction<br />
Magnetic switch<br />
1 year warranty<br />
• Dust hood<br />
• Anti-kickback<br />
• Stand included<br />
NORTHSTATE<br />
10", 12", 14" CABINET<br />
SHOP SAWS<br />
• BIESEMEYER, VEGA,<br />
EXCALIBUR<br />
fences available<br />
3, 5, 7-112 hp motors<br />
Magnetic controls<br />
Cast iron top<br />
Uni-Iock fence<br />
VERY HIGH QUALITY<br />
$1, 125 w/std fence<br />
$1.225with 50" rip fence<br />
• HTC MOBILE BASES<br />
Model 315: $849<br />
Same features as the<br />
Model 310 plus:<br />
Table extension<br />
• 2 speeds<br />
NORTHSTATE CABINET<br />
SHOP SHAPER<br />
3 hpll ph, 5 hp/3 ph<br />
2 speed-reversible<br />
2 spindles: 314", 1-1/4"<br />
1/2", 1" available<br />
Router collets avail.<br />
Cast iron table<br />
Spring hold down &<br />
miter gauge<br />
Extra heavy duty<br />
1 year warranty<br />
$1,095<br />
*** FREEBORN***<br />
FREE FREIGHT<br />
• Tilt spindle model avail.<br />
Shaper cutters available<br />
20", 5 hp: $1,350<br />
24",<br />
• $2.795<br />
Heavy cast iron const.<br />
5 hp & Four and Five Head Models<br />
2 hp, single phase<br />
7-1/2 hp<br />
Variable speed<br />
9" x 67" bed<br />
NORTHSTATE<br />
All cast-iron construction<br />
3 knife cutter head<br />
BANDSAWS<br />
14", 1 hp: $295<br />
2-1/4" x 6" capacity<br />
Dual tilt fence<br />
• Designed to make high<br />
PORTER<br />
Magnetic controls<br />
18", 2 hp: $795<br />
• $2.465<br />
20": $1.495<br />
CABLE HITACHI<br />
quality moulding at the<br />
SALE: $795<br />
lowest possible cost<br />
6" iointer. $375<br />
• 24": 12" jointer.<br />
• $1.895<br />
RAISED PANEL<br />
Delta 8" jointer. CALL! DOOR MACHINE<br />
555: Plate Jointer: $163<br />
330: Sander: $53 CI5FB' . M't I re S aw.<br />
360:<br />
'$368<br />
Sander: $174<br />
CSFB:Comp.Mltre:<br />
505:<br />
$439<br />
TR-12:<br />
Sander $108<br />
PI. Router: $169<br />
351: Sander: $124<br />
CCI4: Chop saw: $196<br />
352: Sander: $128<br />
0100: Cordless Dnll:<br />
363:<br />
$114<br />
Sander: $174<br />
CB75F: Re/band-saw:<br />
362:<br />
CALL<br />
Sander: $179<br />
MI2V: 3 114 hp, vs router: $228<br />
361: Sander: $166<br />
7549: VS jigsaw: $134 7749: Radial Arm Saw: $625<br />
9627: Rec. Saw: $127<br />
7770-10: Radial Arm Saw: $865<br />
7519: Router: 7790: Radial Arm Saw: $1147<br />
7538: Router: $224<br />
1765: Belt/Disc Sander: $427<br />
690: Router:<br />
630: $124 All Dewalt Ind. radial arm saws available<br />
Router: $118<br />
<strong>Free</strong>born Shaper Cutters<br />
314: Saw: $124 Mini-Max Machinery<br />
315: Saw: $114 • Adjustable Clamps UNIQUE: Machine all five<br />
9118' Plane Kit· $185 *" PORTER CABLE'"<br />
97310' Lam Tri;' Kit $184 . . components with only one<br />
complete line available<br />
7334: Orbit1 Sande;: $117 operator<br />
5116: Omnijig $262<br />
9505: Commemorative<br />
505:<br />
$129 F20A: Plane: $97<br />
DEWALT<br />
LENEAVEMACHINERY & SUPPLY COMPANY<br />
Best buy in the industry!<br />
Variable speed<br />
Platen head<br />
Dual motors<br />
Heavy cast iron & steel<br />
Plate construction<br />
10, 15, & 20 hp<br />
25" List: $8,650<br />
SALE: $5.895. 15 hp<br />
h!s<br />
37" List: $1 2,900<br />
• SALE: $8.888 . 20 hp •<br />
ov:rṭer."ail.<br />
:<br />
MINI MAX . • LS5 • MACHINERY' •••••••••• EMGLO<br />
J;.J;.J;. eeL TA compressor<br />
305 West Morehead St., Charlotte, NC 28202 (704) 376-7421; Toll free outside NC 800-442-2302 • We<br />
for special<br />
SENCO<br />
SN4 ..................... $475<br />
SN325 $399<br />
SFN2 $386<br />
SFNI $264<br />
SKS $254<br />
LS2 ...................... :. $259 $249<br />
• PW ...................... $345<br />
1-1/2 HP<br />
.......... $298<br />
34-782: Unisaw & All models - Call for promo prices<br />
46-541: Lathe: Call for promo price<br />
43-375: Shaper: Call<br />
40-560: 16" Scroll Saw NEW!: $185<br />
40-601 : Scroll Saw -CALL!<br />
31-730: Belt/Disc Sander: -CALL!<br />
37-350: 8" Jointer w/stand: -CALL!<br />
34-444: 10" Contr. Saw: $595<br />
34-445: 10" wl Unifence - CALL!<br />
BIESEMEYER<br />
28-283: 14" Bandsaw - CALL!<br />
VEGA<br />
EXCALIBUR<br />
28-245: 14" Bandsaw w/access:<br />
17-900: 16-1/2" Drill Press: -CALL!<br />
PARALOK<br />
• UNIFENCE<br />
43-355: Shaper NEW!<br />
fences available<br />
33-990: 10" Radial Arm Saw: $549<br />
36-755: Tilt arbor saw NEW!<br />
32-100: Plate Jointer - NEW! CALL!<br />
22-540: 12" planer NEW! - Call for promo price<br />
Stock feede'rs: 34-985. 34-994, 34-995 -Call for promo price<br />
**Complete Delta line available.**<br />
try not to be undersold,<br />
tell us our competitors' prices.<br />
24 Fine Woodworking
;)(Z:'\ 5"<br />
42<br />
gA')Ar;Aj ®<br />
./{:"}""
to build a sound<br />
stocks, funds.<br />
Some people buy<br />
bonds, mutual<br />
Then there are<br />
those of us who invest<br />
wood.<br />
One thingS for<br />
in tools, machines,<br />
sure,<br />
smartest best. 1b make the<br />
investments<br />
whether you're in "the<br />
market"or in the shop,<br />
it pays to buy the very<br />
at<br />
you can.<br />
That's why Delta,<br />
we build our machines<br />
with a long-term payoff<br />
in mind. We look at<br />
20 talk<br />
how<br />
well they'll be producing<br />
for you<br />
his<br />
years from<br />
now. Just try to an<br />
old-timer<br />
also<br />
into parting<br />
with old Delta<br />
machine.<br />
We're constantly<br />
working to develop<br />
new products and accessories.<br />
And looking<br />
is<br />
for<br />
ways to improve on our<br />
old standbys.<br />
The idea to help<br />
you round out your<br />
future<br />
shop. Solidify<br />
staking<br />
your<br />
investment.<br />
We're our<br />
on it.<br />
• Onr:&..<br />
A Pentair Company<br />
these Far information and on other<br />
neuJ<br />
tolljree products, for the call<br />
of di5triJJutor. yaur nearest Delta Delta<br />
narru3<br />
Machinery<br />
Interrw.tional<br />
PA., Corp., 800-438-2486. t-"IJ.T.
investment portfolio.<br />
NEW<br />
This Stationary<br />
Plate Joiner goes<br />
way beyond<br />
a portable<br />
joiner. A foot<br />
pedal controls<br />
blade movement<br />
so both<br />
hands are free to<br />
control your work.<br />
Handles all types ot<br />
joints in all three<br />
biscuit sizes.<br />
A handful of prevention is worth a shopful of cure. If you agree it's<br />
time to stop eating, breathing and sweeping all that dust, we've got<br />
the right dust collector to meet your needs. A whole range of<br />
two-stage, industrial quality, portable dust collectors, ranging from<br />
3f.I to 3 HP, will let you breathe easier.<br />
FREE EMS AND STAND Handle 13" wide and 5.9"<br />
thick stock with the Delta 13" Planer. Lets you precision plane down to<br />
Ye" thickness. Rugged cast-iron throughout.<br />
Buy now and we'll throw in our heavy-gauge steel stand for free.·<br />
And just for good measure, we'll add on a free Electronic Measuring<br />
System to eliminate the guesswork.·<br />
Standards of the<br />
Industry. We set them<br />
and we won't compromise<br />
them for any<br />
reason. But how about a<br />
rebate or two. Or four.<br />
Choose one or all four of<br />
these "Standards:'Our<br />
Combination 6" Belt!<br />
12" Disc Sander,<br />
8" Precision Jointer,<br />
Heavy Duty Wood<br />
Shaper and any model<br />
Unisaw® 10" Tilting Arbor<br />
Saw. Each comes with<br />
a hundred dollar rebate<br />
check from Delta.·<br />
·Offer good only from participating<br />
distributors in the continental U.S.,<br />
Alaska, Hawaii and Canada, from<br />
September 1,1991 thru March 31,1992.<br />
To qualify, machines must be pur·<br />
chased with motors.<br />
READER SERVICE NO. 124
Q & A (continued)<br />
less rayon belts, typically found on over-arm routers. These<br />
smoother-running, stronger-than-Ieather belts are usually available<br />
from belting and rubber distributors that you can locate in<br />
a metropolitan area by checking the yellow pages.<br />
[Bob Vaughan is a woodworking-machinery rehabilitation specialist<br />
in Roanoke, Va.]<br />
Formaldehyde fumes from building products<br />
I've read that many prOducts made with formaldehyde and<br />
other chemicals continue to give off hazardous fu mes in our<br />
homes long after the obvious odor of these chemicals becomes<br />
unnoticeable. There are many articles and instructions on the<br />
hazards of working with these products and the precautions<br />
on how to handle and work with them in the shop. But is<br />
there a way to control formaldehyde vapor and test for its<br />
presence?<br />
-Daniel P. Parker, Saddle River, NJ<br />
Chris Minick replies: The most<br />
(MDF).<br />
significant source of formaldehyde<br />
contamination in d1e home is likely to be pressed-wood<br />
products such as particleboard, hardwood-plywood paneling,<br />
and medium-density fiberboard Interior-grade pressedwood<br />
products are bonded with a urea-formaldehyde (UF) resin<br />
system. During the manufacturing process, residual free formaldehyde<br />
becomes u-apped in d1e wood product, and it is slowly<br />
released over a period of several months or years.<br />
For some individuals, low levels of formaldehyde can cause watelY<br />
eyes, burning sensations in d1e eyes and throat, nausea and<br />
difficult breathing. Some studies indicate d1at formaldehyde may<br />
also<br />
As<br />
be a central-nervous-system depressant. And formaldehyde has<br />
been shown to cause cancer in laboratOlY animals and is classified<br />
as a suspected human carcinogen by d1e federal govenunent.<br />
bad as all d1at sounds, it's fairly easy to minimize exposure<br />
to formaldehyde vapors in the home. Formaldehyde contamination<br />
can be kept to a minimum by properly ventilating your<br />
home and by using exterior-grade products in the construction<br />
of your home, furniture and cabinetry prOjects. E»1:erior-grade<br />
pressed-wood products are manufactured with an alternate adhesive<br />
bonding system d1at emits far less formaldehyde vapors.<br />
Testing for formaldehyde contamination in the home is inexpensive<br />
and very easy. Two companies, 3M Co. (PO Box 33211,<br />
St. Paul, Minn. 55133-3211) and Air Quality Research, Inc.<br />
(901 Grayson St., Berkeley, Cal. 94710) sell portable monitoring<br />
devices specifically designed to detect low levels of formaldehyde<br />
vapors in d1e home environment. The device is placed in<br />
d1e suspected area, exposed for a specified time, and sent back<br />
to d1e manufacturer for analysis. A detailed analysis report and<br />
information on formaldehyde abatement steps are returned to<br />
you. Your local health department may have a listing of the monitor<br />
distributors in your area. Expect to pay between $60 and<br />
$75 for each monitor, which includes the laboratOlY analysis.<br />
Additional information on formaldehyde contamination can be<br />
obtained from the EPA Toxic Substance Control Act (TSCA) assistance<br />
line (202-554-1404). A very informative booklet, The Inside<br />
St01')I, A Guide to Indoor Air Quality, is also available from d1e<br />
EPA. To get a copy, write to the Indoor Air Division, Office of Air<br />
and Radiation, U.S. Enviromnental Protection Agency, Washington,<br />
D.C. 20460.<br />
[Chris Minick is a product development chemist and amateur<br />
woodworker in Stillwater, Minn.]<br />
Is walnut poisonous?<br />
A very knowledgeable woodworker friend of mine told me<br />
that it is unwise to make objects that will contact fOOd, such<br />
UNDERSTANDING<br />
ORIGINAL HARDWARE<br />
UNDER THE TABLE HARDWARE ...<br />
Seldom seen, usually never<br />
polished, often taken for<br />
granted, - catches for tilt<br />
top's, hinges for drop leaves<br />
and holding clips for<br />
sectional dining tables all<br />
contribute to the function of<br />
the finished piece.<br />
Square, round, lion paw, or<br />
cup casters of all sizes, using<br />
brass, china, wood, cast iron,<br />
leather, or no wheels<br />
finished thousands of legs<br />
since 1700.<br />
Call or write for free minicatalog,<br />
or send $5.00 for<br />
our full 108 page catalog.<br />
We now reproduce more<br />
than 100 items like these.<br />
7<br />
JT-1008 1007 8 5309<br />
0012 12 51895 5639<br />
9034<br />
Pieo Rivera Bermudez Street,<br />
CA 90660<br />
only)<br />
M A IN OFFICE:(2 1 3)949-3747<br />
ATLANTA:(404) 416-6006<br />
(800)786-5626 (order<br />
OWER TOOLS<br />
READER SERVICE NO. 40<br />
4 63 W.<br />
Lincoln Hwy • Exton, PA 193<br />
READER SERVICE NO. 27<br />
tT,..,t Q""qil ct>.p.od,cuoo,<br />
4 1 • (215) 363-7330<br />
28 Fine Woodworking
STEVE WALL LUMBER CO.<br />
Quality Hardwoods and Woodworking Machinery For<br />
The Craftsmen and Educational Institutions<br />
UPS Specials<br />
Ash ...........................414 Select 1.90 ........................................ $59.00<br />
Basswood ................ 4/4 Select 1.30 ........................................ $47.00<br />
Birch ......................... 4/4 Select 1.60 ........................................ $53.00<br />
Butternut ..................414 Log Run 1.40 ........................................ $55.00<br />
Cherry ......................414 Select 2.25 ........................................ $66.00<br />
Cypress .................... 4/4 Select 1.60 ........................................ $49.00<br />
Hickory ..................... 4/4 Select 1.50 ........................................ $47.00<br />
Mahogany (Genuine) 4/4 Select 2.70 ........................................ $73.00<br />
Maple (Hard) 4/4 Select 1.55 ........................................ $52.00<br />
Maple (soft).. .. ... 4/4 Select 1.30 ........................................ $46.00<br />
Pecan .......................414 Select 1.50 ........................................ $47.00<br />
Poplar .......................4/4 Select 1.20 ........................................ $45.00<br />
White & Red Oak ..... 4/4 Select 1.80 ........................................ $57.00<br />
Walnut ...................... 4/4 Select 2.50 ........................................ $71 .00<br />
Cedar (Aromatic Red) .... 4/4 1 C+Btr. 1.35 ........................................ $46.00<br />
White Pine ................ 4/4 F.G. .85 ........................................ $37.00<br />
Yellow Pine .............. 4/4 Clear 1.20 ........................................ $45.00<br />
Above prices are for 100' quantities of<br />
LUMBER SPECIALS<br />
Call for quantity discounts. Other sizes and<br />
grades available.<br />
CHERRY 100 Bd. Ft. Bundle Log Run S2S 13/1 6<br />
kilndried rough lumber sold by the bd. ft.<br />
FOB Mayodan, NC.<br />
WALNUT 100 Bd. Ft. Bundle #1 Common 4/4<br />
'FOB Mayodan - Motor Freight Only<br />
Call For<br />
Best Prices On<br />
BOX 287 • MAYODAN, N.C. 27027<br />
Above prices are 20 bd. ft. bundles of<br />
clear kilndried lumber 3"-10" wide '<br />
3'-7' long. (Random widths & lengths)<br />
Surfaced 2 sides or rough. Delivered<br />
UPS prepaid in the Continental U.S.<br />
STEVE H. WALL LUMBER CO.<br />
$ 90*<br />
$110*<br />
919-427-0637 • 1-800-633-4062 • FAX 919-427-7588<br />
Send $1 .00 For Lumber and Machinery Catalog<br />
READER SERVICE NO. 162<br />
Get the most out of<br />
INCRA JIG and the new<br />
INCRA Fence System on<br />
the ROUTER TABLE,<br />
TABLE SAW and DRILL<br />
PRESS. This one hour<br />
video includes complete<br />
step-by-step instructions,<br />
by the inventor, for<br />
making box joi nts, as<br />
well as half blind, sliding,<br />
and through dovetails,<br />
plus much more.<br />
Here's what's<br />
• • ZEROING YOUR WORK<br />
ii ii:;jiiiiiiiiiiiii included:<br />
--========:;- ;;::;:;;;: ;;;;:-' ·<br />
CENTERING YOUR<br />
WORK<br />
BOX JOINTS<br />
HALF BLIND DOVETAILS<br />
• THROUGH DOVETAILS<br />
TABLE SAW<br />
INCRA STOP<br />
• INCRA DOUBLE-DOUBLE<br />
BOX JOINT<br />
r Th e work shown here<br />
• DRILL PRESS<br />
is just a small<br />
sampling of the new<br />
woodworking<br />
techniques that you<br />
.. ..<br />
------- can master with<br />
For a FREE brochure and your<br />
nearest dealer, write to:<br />
Taylor Design Group. Inc.<br />
P.O. 810262 Dallas, TX 75381<br />
INCRA JIG and The<br />
Complete INCRA JIG<br />
VIDEO.<br />
TEMPLATE GUIDES,<br />
COLLETS & EDGE<br />
GUIDES ARE IN STOCK -<br />
CALL FOR PRICES!<br />
READER SERVICE NO. 15<br />
September/October 199 1 29
Q & A (colltillued)<br />
as salad bowls and cutting boards, out of walnut because it is<br />
poisonous. Is this really true? -Jim Tupper, Seattle, Wash.<br />
Jon Arno replies: Although walnut is probably not the best<br />
wood to use in making such items as salad bowls and cutting<br />
boards, there is little likelihood that any poisoning will result<br />
from the wood itself. Walnut does, however, contain a couple of<br />
substances with pharmacological potency. One of them is a<br />
chemical called juglone, which the tree produces to ward off<br />
attack by decay-causing organisms such as fungi. juglone is believed<br />
to cause dermatitis in some woodworkers who have become<br />
sensitized to it. It is also known to be bOtll an antiseptic<br />
and a laxative. Walnut also contains ellagic acid, which is a fairly<br />
strong tranquilizer and sedative. Because of the presence of<br />
these active compounds, I definitely do not recommend using<br />
walnut containers for storing moist or acidic foods over long<br />
periods of time. As a practical matter, though, food prepared on<br />
a walnut cutting board or served in a walnut salad bowl is not<br />
exposed to the wood long enough to present much of a risk of<br />
absorbing dangerous quantities of toxic substances. A greater<br />
concern with making wooden kitchen utensils rests in selecting<br />
a finish that does not contain toxic ingredients. For example,<br />
some penetrating oils, such as boiled linseed oil, may be formulated<br />
with driers containing heavy metals, which are harmful.<br />
In contrast, most film-type finishes, such as lacquer or polyurethane,<br />
are food safe once tlley have cured. There are many special<br />
food-safe oil finishes available, such as Behlen's Salad-Bowl<br />
Finish (available from Garrett Wade, 161 Ave. of the Americas,<br />
New York, N.Y. 10013).<br />
Assuming that whatever wood you use is going to be thoroughly<br />
sealed with a food-safe finish, perhaps tlle next most important<br />
issue is selecting a species with tlle appropriate physical<br />
characteristics for tlle item'S intended use. In the case of cutting<br />
boards and salad bowls, walnut is certainly not the ideal choice.<br />
Because walnut is a semi-ring-porous wood with an open grain,<br />
food can get trapped in the pores and provide a culture medium<br />
for all sorts of unsavory microorganisms. A finer-textured, diffuse-porous<br />
wood, like sugar maple, would be a more practical<br />
choice. Maple also turns well and yields a smooth surface that is<br />
easier to wipe clean. Also, being about 10% harder than walnut,<br />
maple will withstand more abuse when used for cutting boards.<br />
Uon Arno is a wood technologist and consultant in Schaumburg,<br />
Ill.]<br />
Difficulty dyeing maple<br />
I've been trying to dye a maple table I built, but I can't get the<br />
color as dark as I'd like. What can I do ?<br />
-George Matelinas, Hunlock Creek, Pa.<br />
Michael Dresdner replies: Wood accepts dye to varying degrees,<br />
depending on the wood species, type of dye and its carrier<br />
(water, oil, alcohol). Maple is one wood that is reticent to<br />
accept dye-especially oil-soluble dye. You will get tlle deepest<br />
and darkest color on maple witll a water-soluble aniline dye.<br />
Make sure that tlle wood is clean of any oil or wax and that the<br />
stained areas are resanded. Control the intensity of the color<br />
with the mixture of dye powder to hot water because subsequent<br />
applications of dye won't make the wood darker.<br />
[Michael Dresdner is a contributing<br />
5506,<br />
editor to FWW<br />
06470-5506<br />
.]<br />
Send queries, comments and sources of supply to Q&A, Fine<br />
Woodworking, PO Box Newtown, Conn. We<br />
attempt to answer all questions, but due to the great number of<br />
requests received, the process can take several months.<br />
PUT YOUR ROUTER To WORK<br />
From small job to large, hobbyist to professional,<br />
the rbi Router Mates can handle the job.<br />
Router Table<br />
Router Shop II<br />
By mounting your router<br />
to any of the three, you<br />
handle the project not the<br />
router, giving you greater<br />
control of the speed,<br />
safety, and precision.<br />
1-800-535-8665<br />
1801 Vine Street, P.O. Box 369 ® ..<br />
7oo1nuJur<br />
Call for your FREE Information Kit<br />
Harrisonville, MO 64701<br />
U)<br />
RBlndustries1he<br />
... .....,. -",'<br />
Dept. A61<br />
READER SERVICE NO. 87<br />
30 Fine Woodworking
GO BACK<br />
to BASICS<br />
., ẈllHOUl LEA"lNG<br />
QUAlITl!<br />
BW-12P<br />
$ 369.<br />
BW-15P $ 895.<br />
. BW-20P $1295.<br />
BW-200P* $2495.<br />
-"-t:,.<br />
BW-16PV* $2495.<br />
BW-20PV* $3295.<br />
BW-508* $3995 .<br />
BW-508G* $4595.<br />
BW-612PV* $6295.<br />
BW-612PVG* $6895.<br />
SHAPERS<br />
(7 MODELS)<br />
BW-12JC*<br />
$2595.<br />
BWS-25 $ 6395.<br />
BWS-37 $ 9495.<br />
BWS-25VS $ 6995.<br />
BWS-37VS $10,150.<br />
BWS-13 $<br />
BWS-25-2 $13,900.<br />
BWS-37-2 $16,950.<br />
$4395.<br />
$2595.<br />
$1895.<br />
$1595.<br />
$ 329.95<br />
SHIPPED F.O. B., YORK, PA.<br />
PRICES SUBJECT 10 CHANGE WITHOUT NOTICE.<br />
READER SERVICE NO. 163<br />
September/October 199 1 31
Follow-up<br />
#88 of FWW brought<br />
The radius of an arc revisited-An item in the "Q&A" column<br />
in an avalanche of reader mail. Ernest<br />
Dean, of Felton, Cal., wanted to know of a way to find the radius<br />
of an arc based on d1e arc's rise and d1e length of its chord.<br />
Robert Vaughan answered the question with an equation: Where<br />
A equals d1e arc's rise (height); B equals half d1e arc's chord<br />
(lengd1); and Y equals the unknown radius, then: 2 x A x Y =<br />
B2 + A2. This is basically the same equation that Barrie Graham,<br />
of Arundel, Que., Canada, used to solve the same problem in<br />
a "Methods of Work" tip in d1e March/April 1990 issue. Both<br />
Graham's method and Vaughan's answer elicited d1e same response:<br />
Dozens of letters wid1 methods for solving the problem<br />
without memorizing a mathematical formula. Each of the letters<br />
contained an alternate solution based on one of d1e three med1-<br />
ods illustrated below.<br />
Point on arc Method #1 #1<br />
Finding the radius of an arc<br />
Bisect<br />
chords of<br />
circle to<br />
find center.<br />
The equation for finding the radius of an arc is fine for folks<br />
who like complicated calculations. But formulas and numbers<br />
just tend to stir up my dyslexia, and d1e thought of multiplying<br />
or dividing fractions is simply horrifying.<br />
My simple alternative is based on the fact that the perpendicular<br />
bisector of any chord of a circle passes through the center of<br />
the circle. Three points on a circle define three chords. Bisect<br />
any two chords, as shown in the sketch, and you determine the<br />
center of the circle. All you need is a pair of dividers and<br />
a straightedge.<br />
Method #2 #2<br />
Finding the radius of an arc<br />
Circle 1 Circle 2<br />
arc.<br />
-Rodney Bean, Yellow Springs, Ohio,<br />
and Albert Fiebig, Enosburg Falls, Vt.<br />
Method #3 2<br />
Circle 3<br />
Our geometry class inspected Mr. Grahan1's formula and decided<br />
that it would soon become a cloudy memory and eventually<br />
be forgotten. A better way, we believe, is to learn two simple<br />
underlying prinCiples that would provide a lifetime of solutions.<br />
First, when two chords intersect, the products of the created<br />
pieces are equal. For example in circle 1 on d1e left of the sketch<br />
above, 2 x Y = 6 x 6; 2 x Y = 36; Y = 18.<br />
Since Y + 2 is the diameter of the circle, it follows d1at the<br />
radius of the arc is half the diameter, or 10.<br />
The second prinCiple is the Pythagorean theorem: In any right<br />
triangle, the square of the hypotenuse is equal to d1e sum of the<br />
squares of the legs. For example, by drawing in radius R in circle<br />
2 above and using the theorem, we get the following: R2 =<br />
(R - 2)2 + 62; R2 = R2 - 4R + 4 + 36; 0 = -4R + 40; R = 10.<br />
by Jim Boesel<br />
Mr. Graham's formula was apparendy derived from the Pythagorean<br />
theorem. -Nicole Doan, Debbi Hartman, jill Schreijer,<br />
Ka rissa Kruse and Michael Sansing (teacher),<br />
Rampart High School, Colorado Springs, Colo.<br />
#3<br />
Finding the radius of an arc<br />
I've used an alternative to finding the radius of an arc for many<br />
years to determine the radius of curvature of cathode-ray-tube<br />
faces. By the laws of geometry, A, B and B, C are the sides of<br />
similar triangles. Therefore, the ratio of A to B equals the ratio of<br />
B to C. In the example in circle 3 below, A x B = B x C; 2 x 6<br />
= 6 x C; 2 x C = 36; C = 18. After you know that C = 18, it<br />
is easy to calculate the dian1eter (C + 2, or 20) and the<br />
#88<br />
radius.<br />
-Ray Levy, Soquel, Cal.<br />
Detennining shelf spans -Another "Q&A" in FWW also<br />
prompted several readers to write in. Bob Maxwell, of Washington,<br />
D.C., asked advice on how to determine the acceptable span<br />
for a bookshelf to avoid sagging. David Stensu'om answered wid1<br />
some practical ideas for stiffening shelves when necessary, such<br />
as gluing on hardwood edging and using 1-in.-thick plywood.<br />
Virtually all of the reader mail we received on d1is subject<br />
gave us the same technical information but in various forms. In<br />
his letter, David O. M3.1U1, of Rancho Palos Verdes, Cal., did a<br />
good job of translating enginering jargon into laym3.11's terms.<br />
"There are three factors needed to calculate the mid-span deflection<br />
of a simply supported beam, which is all a shelf really is.<br />
The first factor is the property of the wood to resist bending.<br />
This is known as the modulus of elasticity 3.11d is usually denoted<br />
by the letter 'E.' The value for E for various species of wood is<br />
available in any worthwhile book on wood technology. The<br />
stiffer the wood, the higher the value of E. These values vary<br />
from 1.2 million to 1.9 million pounds per square inch (p.s.i.);<br />
for example, the value fo r white oak is 1.5 million p.s.i.<br />
The second property is the cross section of the shelf. Engineers<br />
commonly refer to this property as the moment of inertia<br />
and they use the letter T to denote it. As most shelves are of a<br />
const3.11t rectangular shape, the section property, or value of I, is<br />
the shelfs width multiplied by the cube of its thickness, divided<br />
by 12. The equation is I = (W x T3) -;.. 12.<br />
The third property is the length of d1e shelf, which is called<br />
the Sp3.11 3.11d is usually denoted by 'L.'<br />
Now, assuming that the wood you have selected is free of major<br />
defects, the cross section is constant, 3.11d the ends of the<br />
shelf are resting on supports 3.11d are not clan1ped down, the<br />
formula for the deflection at midspan for a uniformly loaded<br />
bookshelf is (5 x W x L3) -;.. (384 x E x I), where W equals<br />
the weight of the load.<br />
If the shelf has a concentrated load in d1e center, deflection<br />
will be (W x L3) -;.. (48 x E x I).<br />
If the ends are fi xed, the deflection will be about 20% to 25%<br />
of d1e value derived from d1ese equations."<br />
Richard Stiennon, 3.11 engineering manager in Plymouth, Mich.,<br />
also wrote to us 3.11d summed things up with a few rules of thumb.<br />
"First, the stiffness of a shelf varies inversely with the cube of<br />
the length. So, if a shelf is twice as long, it is one· eighth as stiff.<br />
Second, the stiffness of a shelf varies with the cube of the thickness.<br />
In od1er words, a 1-in.-d1ick shelf is eight times stiffer th3.11 a<br />
Y2-in.-thick shelf. Third, d1e end conditions are e>..tremely important.<br />
A dadoed, mortised or sliding-dovetail joint makes a shelf five<br />
times stiffer th3.11 one that is resting on adjustable tabs."<br />
#89,<br />
Missing photo credit-Our apologies to photographer Jon De<br />
Groot whose photo of Colin Reid's "Batrille Tables" in FWW<br />
D<br />
p. 85, was not credited.<br />
jim Boesel is executive editor of FWW<br />
32 Fine Woodworking
Low Factory To You Pricing<br />
Low Tra nsportation Costs<br />
Prompt, Courteous Service<br />
Toll <strong>Free</strong> Order Department<br />
• Two Factories To Serve You<br />
Beller In Michigan & Georgia<br />
• We Guarantee Quality &<br />
NATIONAL TOLL FREE NUMBERS<br />
Satisfaction<br />
NORTHERN PLANT SOUTHERN PLANT<br />
1·800·528·5544 1·800·999·1192<br />
MICHIGAN<br />
ATLANTA<br />
1·800·627·7238 1-404·881·0892<br />
For FREE IDEA BROCHURE Write:<br />
Glass & Mirror Crafl lndustries, Inc.<br />
2111 HAGGERTY ROAD . P.O. BOX 516<br />
WALLED LAKE, MICHIGAN 48088<br />
<br />
<br />
OOUBLE PENCIL<br />
<br />
CONCAVE BEVEL<br />
<br />
CHAMPFER AT 45"<br />
<br />
FLAT POliSHEO<br />
O.G. EOGE<br />
<br />
c:.-''" SEVEl<br />
<br />
QUARTER BULL NOSE<br />
<br />
PENCIL POLISH EO<br />
<br />
O.G. BEVEl<br />
<br />
TRIPLE BEVEL<br />
OOUBLE BEVEL<br />
ANTIQUE reproduction<br />
READER SERVICE NO. 66<br />
furniture HARDWARE<br />
HORTON Nooks Hill Rd., PO Box 120F CromwelL 203-635-4400<br />
BRASSES<br />
CT 06416<br />
send $3.00 for a catalog<br />
R EADER SERVICE NO. 303<br />
CRAFTSMEN, EQUIP YOUR<br />
SHOP AT GREAT SAVINGS<br />
Catalog of over 500 plans to<br />
build your own tools,<br />
$1.00, refundable<br />
WOOD-MET<br />
A wide variety of plans from complete machines and<br />
attachments<br />
WEST<br />
to handtools<br />
SHOFF SERVICES,<br />
for<br />
CIR.<br />
home,<br />
DEPT. INC<br />
school and commercial<br />
shops. Featured also are accessories for<br />
wood and metal cutting lathes, drills, saws, sanders,<br />
etc., plus things to make of wood and metal.<br />
3314 FWW<br />
PEORIA, ILLINOIS 61604<br />
READER SERVICE NO. 164<br />
CARBIDE ROUTER BITS<br />
Nickel Coated<br />
MAGNATE<br />
SPECIAl.:<br />
STRAIGHT 2-Ruted<br />
1/4" SHANK<br />
No. Dia. Price<br />
201 1/4 $ 6.50<br />
202 5/16 $ 6.50<br />
203 3/8 $ 6.50<br />
205 1/2 $ B.50<br />
208 3/4 $1 1.00<br />
1/2" SHANK, 112" DIa.<br />
1/4" SHANK<br />
No. Cutting Price With Bearing Guide<br />
Length<br />
No. Cutting Price<br />
8205 $ B.OO Dia. Length<br />
8205A 1·1/4 $ B.OO 302 3/8, 1 $ 9.00<br />
8205L 1-1/2 $10.00 303 1/2, 1/2 $ 9.00<br />
8205B 2 $14.00 304 1/2, 1 $ 9.00<br />
BEADING<br />
lW 8HANK<br />
No. R. Price<br />
2801 3/16 $1 2.00<br />
2802 1/4 $13.00<br />
2803 5/1 6 $14.00<br />
2804 3/B $1 5.00<br />
2B05 1/2 $17.00<br />
ROUND OVER<br />
1/4" SHANK,<br />
1/2" Cutting Length<br />
No. Depth<br />
Price<br />
3501 3//8 $14.00<br />
3503 1/2 $14.00<br />
1/2" SHANK,<br />
1/2" Cutting Length<br />
No. Depth<br />
3502 3/B Price<br />
$14.00<br />
3504 1/2 $14.00<br />
DOVETAIL<br />
1/2" SHANK<br />
No. Bead Dia. Price<br />
1703 1/2 $1 7.50<br />
1705 3/4 $21.50<br />
ROMAN OGEE<br />
Price<br />
1/4" SHANK<br />
No. R.<br />
Price<br />
1201 3/1 6 $12.00<br />
1202 1/4 $1 3.00<br />
1203 5/1 6 $14.00<br />
1204 3/B $1 5.00<br />
1205 1/2 $1 7.00<br />
RABBETING<br />
1/4" SHANft<br />
No. Cutting Price<br />
Dia.<br />
402<br />
Length<br />
1/2, 1/2 $ 7.00<br />
HALF-ROUND<br />
1/4" SHANK<br />
No. R. Price<br />
1801 5/32 $1 7.00<br />
1802 1/4 $lB.OO<br />
45° CHAMFER<br />
1/4" SHANK<br />
No. Cutting<br />
Dia. Length<br />
902 1·3/16, 1/2 $16.00<br />
903 1'7/16, 5/8 $1 7.00<br />
COVE<br />
1/4" SHANK<br />
No. R. Price<br />
MAGNATE BUSINESS<br />
1002 3/8 $1 6.00<br />
1003<br />
INTL<br />
1/2 $1 7.00<br />
TOLL FREE 1-800-733-9075<br />
1127 So. Grand Ave., Diamond Bar, CA 91765<br />
i .;.. ! 714 861-1185 FAX 800-733-9076<br />
Ask for a <strong>Free</strong> Cata/o<br />
READER SERVICE NO. 4<br />
Ask about our Special Introductory Discount!<br />
'0 :::<br />
Q. '" o<br />
;:; Cl 'S<br />
c:<br />
:;<br />
o<br />
LL<br />
Glide-Easy Saw<br />
The Ultimate 4x8 Cutting Panel Saw<br />
The Glide-Easy SawN acts<br />
like a 10ft long radial arm<br />
saw. Align a 4x8 sheet to<br />
the cutting line. Then simply<br />
glide the saw.<br />
The Glide-Easy SawN is safe,<br />
fast, precise and economical<br />
on every cut.<br />
Use any 71/4" circular saw<br />
• 4 precise bearings<br />
·2 inch 00 steel saw guides<br />
For a free brochure write to:<br />
Intelligent Product DeSigns<br />
READER SERVICE NO. 67<br />
USED TOOLS<br />
1556 Halford Avenue #363, Santa Clara, CA 95051<br />
ANT IQUE &<br />
Quality, older hand tools for<br />
collectors and woodworkers.<br />
lllustrated lists published 5<br />
times a year.<br />
SUBSCRIPTION > $10.00<br />
CURRENT LIST > $ 2.50<br />
Sl1 W. 11th, Dept. D • Port<br />
specializing in<br />
(206) 452-2292<br />
buy lind sell<br />
Angeles, WA<br />
98362<br />
DOMESTIC & FOREIGN<br />
HARDWOODS<br />
1"<br />
Quality<br />
4"<br />
stock for<br />
Cabinet Work<br />
HARDWOODS<br />
Most all sizes from<br />
up to in thickness<br />
ASH-BASSWOOD<br />
BIRCH-BUTTERNUT<br />
CHERRY -CHESTNUT<br />
EBONY -MAPLE-OAK<br />
POPLAR-ROSEWOOD<br />
SOFTWOODS<br />
TEAK-W ALNUT<br />
Also hardwood plywoods<br />
SUGAR PINE-CYPRESS<br />
MAURICE CONDON CO., INC.<br />
CEDAR-SPRUCE<br />
DOUGLAS FIR etc.<br />
L.<br />
248 Ferris A venue<br />
White<br />
8<br />
Plains, NY 10603<br />
914-946-41 11<br />
Monday through Friday<br />
AM to 4:30 PM<br />
September/October 1991 33
Information this good never<br />
NEW! The Best of Fine Wo odworking<br />
from Direct Fine Woodworking<br />
The black-and-white to full color) . Best<br />
magazi ne<br />
Welcome to The Best of Fine Woodworking. This allnew<br />
series of books picks up where our earlier<br />
Techniques series and Fine Woodworking on ... series<br />
left off (right when Fine Wo odworking changed from<br />
The<br />
of Fine<br />
Woodw01-king begins with articles first published in<br />
late 1984 and continues through today. (There is no<br />
duplication between Best of Fine Woodworking<br />
and the previous series of books.)<br />
Written by skiUed woodworkers<br />
The best woodworking information comes from other<br />
woodworkers. In many cases it has taken years of<br />
experience for the authors to develop the in-depth<br />
knowledge shared ,vith you in The Best of Fine<br />
Woodworleing.<br />
Comprehensive<br />
ten-book series!<br />
1bejoiJlter (;':t"''RI/fUt#1I<br />
Detailed color plwtos and<br />
technical drawings<br />
Every book in the series is filled ,vith detailed,<br />
accurate illustrations-photos and dra\vings that<br />
bring the material to life. 'Whether it's getting the<br />
most out of your router or putting the finishing<br />
touches on a Shaker table, you get artwork that<br />
shows you what you need to know.<br />
Never before in bookform!<br />
Ten full-color volumes present the very best woodworking information<br />
-<br />
..<br />
Finishes and Finishing<br />
Techmques-Details on facing<br />
page.<br />
Modern Woodworking<br />
Techmques -Tu rning your idcas<br />
into finished construction takes<br />
good technique -the kind you'll<br />
lcarn about herc. Experts show<br />
31<br />
how to lay out compound joints,<br />
vacuum veneer, carcase dowel and<br />
build 32mm Eurostyle cabinetry.<br />
articles<br />
Modern Furniture<br />
Projects -Well-designed<br />
contemporary furniturc mcans<br />
simple, clean lines, restrained<br />
dccoration and an cmphasis on<br />
function and durability. Hcre<br />
experts help you build furniture to<br />
meet today's needs. Articles<br />
TAUNTON BOOKS&VlDEOS<br />
. .. . {e/bl' cmJlUsi.1sts<br />
include in-depth information on<br />
constructing a futon couch, a<br />
custom-fitted chair, a pool table, a<br />
two-door credenza, bookcases,<br />
24<br />
computer furniture and plcnty<br />
morc. Includes completc drmvings<br />
and detailed construction<br />
techniques. articles<br />
Power Saws and<br />
Planers -Machine tools are fast<br />
and efficicnt, but only if you know<br />
how to usc them - this book will<br />
help you hone your skills. You'll<br />
learn how to choose a table saw or<br />
radial-aml saw, construct a rip<br />
26<br />
fcncc, build a bandsaw and a<br />
scrollsaw with basic tools, use a<br />
jointer to its full capacity and<br />
more. articles<br />
Traditional Woodworking<br />
Techniques-Here are dozens of<br />
techniques that will allow you to<br />
create the shapes and forms that<br />
characterize traditional furniture.<br />
38<br />
You'll find details on dovetailing,<br />
raised panels, veneering, coped<br />
jOints, cabriole lcgs and shell<br />
carving. articles<br />
Traditional Furniture<br />
Projects-A well-executed piece<br />
of traditional furniture<br />
commands your attention, and<br />
it's challcnging to build. You gct<br />
in-depth information on the<br />
construction of fine period pieces,<br />
such as a Shal,er-style end table, a<br />
pcncil-post bcd, a roll-top desk<br />
and a New England Windsor chair.<br />
Includes complete dra\vings and<br />
detailed construction techniques.<br />
25 articles<br />
Lathes and Turning<br />
Techmques -The lathe can be<br />
the most satisfying machine in<br />
your workshop becausc it allows<br />
you to makc bcautiful things in a<br />
very short time. Experts give you<br />
36<br />
information on production tips,<br />
decoratiye foll, turning, spindleturning,<br />
and sharpening and<br />
honing your tools. articles<br />
Bench Tools-Discover how to<br />
get the most out of your<br />
workbench and hand tools.<br />
Seasoned woodworkers explain<br />
how to choose from a wide variety<br />
of wood and metal plancs,<br />
34<br />
construct wooden clamps, make<br />
classic workbenches, sharpen<br />
planes, chisels, saws, carving<br />
tools, and much morc. articles<br />
To order, use the coupon or the attached card .
goes out of date!<br />
FINE WOODlVOR/aNG BOORS<br />
All the technical<br />
articles and projects<br />
from the past six years<br />
of Fine Woodworking<br />
magazine! Fully<br />
i ndexed.<br />
The Just for trying Best of Fine<br />
Woodworki1Jg, we'll give you<br />
Fine Woodworki1Jg on More<br />
Proven Shop Tips. The volume<br />
solves hundreds of woodworking<br />
Start your collection with<br />
Finishes and Finishing Techniques ...<br />
A good finish can make an ordinary job<br />
look great, but a bad fi nish \l make a<br />
perfect piece of woodworking seem<br />
lifeless. In these 40 articles, experts<br />
address five broad topics: basic finishing<br />
techniques, using major categories of<br />
finishes, special finishes, new finishing<br />
materials and soMng finishing problems.<br />
And Finishi1Jg and Finishi1Jg Techniques is<br />
yours to examine FREE for 14 days. If<br />
you're not satisfied, simply return it.<br />
There's no obligation .<br />
... and you'll receive a FREE B01'lUS BOOK, too!<br />
problems \\th information from<br />
the magazine's Methods of Work<br />
column, issues 49-78. This $9.95<br />
value is yours FREE just for trying<br />
The Best of Fine Woodworking.<br />
Routers and Routing Techniques<br />
-The incredibly versatile router<br />
is a "must have" tool, so it pays<br />
to know as much as you can<br />
about it. There are details on jigs,<br />
fixtures and all-purpose joinery<br />
40<br />
\\th the router, as well as articles<br />
on making a shop-built pin<br />
router, building a display cabinet<br />
and morc. articles<br />
Small Woodworking<br />
Projects-A sle\\' of creative and<br />
beautiful objects. There are toys<br />
for the kids, some elegant carved<br />
kitchen utensils, several turned<br />
40<br />
boxes and a host of other<br />
exceptional projects you can<br />
make for yourself or as gifts.<br />
articles<br />
RISK-FREE OFFER!<br />
Here's how the offer works: When you subscribe to<br />
The Best af Fine Woodworking, you'll receive your first<br />
volume, Finishes and Finishing Thchniques, for<br />
=<br />
Shop Tips<br />
a FREE 14-day examination. You'll also receive<br />
Fine Woodworking on More Proven as a<br />
. U you decide to keep Finishes and<br />
CST).<br />
add 8% sales tax; Canadian residents add 7%<br />
FREE gift just for ordering Finishes and Finishing<br />
Thchn iqlles<br />
Finishing Thclm iqlles , you'll pay just $14.95 in U.s.<br />
funds, plus $3.00 postage and handling (CI' residents<br />
As a subSCriber, you'll then receive future volumes in<br />
the series, shipped one at a time about every sLx<br />
weeks at the sanle $14.95 price plus postage IDld<br />
handling and appropriate taxes. Each book also<br />
comes on the same 14·day exanlination basis. If<br />
you're not delighted with any volume, you can return<br />
it without obligation. 'vVhat's more, there's no<br />
minimum number of books to buy, and you can<br />
cancel at any time.<br />
The Best of Fine Wo odworking<br />
l!1 Yes, please send me my first volume, Finishes and Finishi1Jg Techniques, for a FREE<br />
14-day examination period. If I decide to keep it, I'll pay just $14.95, plus appropriate tax<br />
and $3.00 postage and handling. I will then receive subsequent volumes in The Best of Fine<br />
WOOdW01'ki1Jg series as described above. Whether I keep my first book or not, my bonus<br />
book is mine to keep. #07 A195<br />
Name<br />
Address<br />
100598<br />
City<br />
The Taunton Press,<br />
State Zip<br />
Mail to: 63 South Main St., P.O. Box 5506, Newtown, CT 06470-5506
"The setup is easy, adjustments<br />
-Woodworker's Journal<br />
minimal and the joints perfect.<br />
It's the easiest of all the jigs to<br />
use and great for<br />
-WOOD<br />
production<br />
use ."<br />
$8.95 Magazine<br />
"In a class by itself."<br />
NEW VIDEO: + $2 P/H<br />
No test cuts. Fast setup. Unlimited<br />
widths. Precision joinery. Classic and<br />
variable spacing. Compound angles.<br />
KELLER & co.<br />
1327 T<br />
Keller Dovetail<br />
Street,<br />
System<br />
Dept. F91<br />
Petaluma, CA 94952<br />
(707) 763-9336<br />
Curved dovetails. Box jOil1tS. 20 year<br />
warranty. Made in USA since 1976.<br />
To find out more, contact your Dealer or<br />
Simply the best.<br />
READER SERVICE NO. 38<br />
7" Adjustable Dado Carbide Head npped<br />
OWHAM 8" Carbide ..... urbhie SlackDado d.do at Set<br />
wW<br />
.-. .. opIhIIer he<br />
... mup<br />
.,.<br />
• $89.95<br />
SIr<br />
II8OOCCDSPEC! .. t<br />
'" Jet I600CCD<br />
nw "'-ric cull Ia • t,.... &lwe<br />
cI_.<br />
Tho z 11 _ ouIJI .. ... 4·1/1""<br />
l-1I1"'wI. chippers wit • .taII JOU to aat •<br />
from JJr to IlIl .... Arbor<br />
AdJwt ., width from. )/16" to 13I16"wlthou.t<br />
remo*llI, dadoln, A: dado rabbeu.a, from la Jaw. all For .-.ott. clUD<br />
types fI wood. Dado<br />
wUJ. ntr-9"'-lO" ..... wlth 511"...tJon.<br />
$19.95<br />
16 carbide teeth 117 cd 00 Spec!<br />
Moon's Saw & Tool Inc.<br />
:1531·3' N. ASHLAND AVE. 1<br />
CHICAGO,IL 60614<br />
(312) 54'·7924<br />
SPEC! $74.95 .. t<br />
READER SERVICE NO. 86<br />
(800) 447-7371<br />
Visa, Ma.ltrCharge '"<br />
DIKOnr Card Accepted<br />
NEW!<br />
10" TA BLE SAW W/SLIDING TA BLE<br />
Combines the performance of a stationary tool with<br />
the convenience of a bench top saw. Using advanced<br />
engineering and design. this tool offers more<br />
features. greater precision and more<br />
#BTJOOO<br />
versatility than any other<br />
saw in its price range.<br />
549.<br />
1·800-819JOO • 8ll Anthony St. • Berkeley, CA<br />
FREE FREIGHT VISAIMe<br />
READER SERVICE NO. 53<br />
r-----------I<br />
I<br />
I<br />
I<br />
I<br />
I<br />
I<br />
I<br />
I<br />
I<br />
I<br />
I<br />
ANYTIME<br />
ANYWHERE<br />
ANYWOOD<br />
W&H Molder-Planer & Lathe<br />
Professionals and hobbyists alike know the strengths of our products!<br />
The W&H Molder-Planer converts from planing to molding in only two minutes, and<br />
duplicates moldings from 3/4" deep to 7" wide.<br />
Our 12" Lathe, with its cast iron headstockltailstock and solid steel ways, has four·<br />
speed versatility and 46" between centers!<br />
Superior made-in-USA construction, exceptional warranties, and free 30 day trials are<br />
your assurance of long life and total satisfaction.<br />
Mail this ad or call us toll-free today.<br />
1-800-258-1<br />
YES!<br />
380 In NH 603-654·6828<br />
Williams & Hussey<br />
P.O.<br />
Send your free information today!<br />
Box 1149, Dept. 131AI<br />
Wilton, NH 03086<br />
kit<br />
1 ______ -<br />
READER SERVICE NO. 28<br />
- - --<br />
94710<br />
I<br />
I<br />
I<br />
I<br />
I<br />
I<br />
I<br />
I<br />
I<br />
I<br />
I<br />
.I<br />
, Model 6095DW Cordless Drlver·Drlll Kit<br />
2-Speed, Variable Speed, Rev.,<br />
Equipped With Double Voltage<br />
(9.6V & 7.2V), Keyless Chuck System,<br />
Sale Price $1 37.00<br />
Model 9035N Finishing Sander<br />
Uses '13 Sheet of Standard Sandpaper, Dual Action<br />
Sale Price $41.00<br />
Model 6200DW 3/8" Cordleas Drlver·Drlll Kit<br />
2 Speed, Var. Speed, Rev., Removable 9.6V Battery,<br />
Keyless Chuck, Sale Price $147.00<br />
Model 6093DW Cordleas Drlver·DrllI With Steel Case<br />
2 Speed, Var. Speed, Rev.,<br />
Sale Price $125.00<br />
Model 6093DL Cordleas Drlver·DrllI with Flashlight<br />
Same as Above With Plastic Case<br />
Sale Price $159.00<br />
Model LS101 1 10" Slide Compound Saw<br />
Sale Price $439.00<br />
Model LS1030 10" Miter Saw<br />
Sale Price $209.00<br />
for<br />
Model 2012 12" Portable Planer<br />
Sale Price $449.00<br />
CALL TOLL FREE FOR OUR LOW PRICES ON OTHER<br />
MAKITA TOOLS. 1 -800- 247·7178<br />
5'12% Sales Tax Wisconsin Residents.<br />
HOURS: 8: ClO-4:30 Monday·Friday<br />
VISA · MasterCard . Money Order · Check · C.O.D.<br />
FREE FREIGHT<br />
On All Tools<br />
IN CONTINENTAL U.S.A.<br />
48 STATES<br />
PRICES CHANGE SUSJECT WITHOUT TO NOTICE<br />
NEW BOOKS<br />
READER SERVICE NO. 64<br />
LUMBER COMPANY<br />
P.O. BOX 7668<br />
1801 EAST WASHINGTON AVE.<br />
MADISON, WI 53707<br />
WORLD WOODS IN COLOR<br />
OVER 275 wood.<br />
COMMERCIAL WOOOS IN FULL COWR<br />
PLATES. Use this magnificent book to identify<br />
discover recommended uses. detennine mechanical<br />
specifics, check color, or distinguish between botanical.<br />
commercial. and wood<br />
colloquial names. This is a unique book and<br />
the only full color reference guide on the market.<br />
320pp. Hardbound. Rush $52.95 today or call toll free.<br />
Fine Craf!\II1;ul,>hip ill Wood<br />
FINE CRAFTSMANSHIP IN WOOD<br />
This major new work is illustrated with over 350 pieces of<br />
work in black and white and color photos. It is a tour of the<br />
woodworking scene in Great Britain. Included are<br />
sections on turnery, furniture. marquetry, toymaking.<br />
musical instruments. and more. Nearly 200 of Britains<br />
finest craftsmen and designers are represented. A<br />
LINDEN PUBLISHING INC.<br />
Immediate refund if not fully satisfied.<br />
USA & CANADA TOLL<br />
unique<br />
opportunity to view the state of the art in England. 192pp.<br />
Hardcover. $41.95 .<br />
352 w. Bedford #105• Fresno. CA 93711-6079<br />
FREE 1·800·345·4447<br />
READER SERVICE NO. 129<br />
36 Fine Woodworking
State:<br />
(TRANSPOWER)<br />
WE<br />
ExIra large Table<br />
Only $698<br />
SHAPER I ROUTER MACHINE<br />
HANDLE THE BIG JOBS QUICKLY, EASILY AND ACCURATELY<br />
AT VERY REASONABLE PRICES<br />
DRUM SANDER<br />
AUTO PLANER<br />
For catalogue call<br />
1-800-654-7702<br />
BAND SAW TABLE SAW AUTO FEEDER<br />
SK200J 20'. 3HP<br />
Double drum sander $2250<br />
KS2500 25'. 5HP<br />
Double drum sander $2550<br />
EDGE SANDER<br />
API50 12'. 2 HP .......... $328<br />
AP650 15'. 2 HP .......... $648<br />
AP200A 20'. 3 HP .. ... $1195<br />
AP400 24'. 7';' HP .. $2690<br />
JOINTER<br />
S8500 14' %HP. ... .... $285 MS250 10'. II'z HP ....... $350 RFI50 '10 HP ................. $365<br />
SB600 16'. II'z HP ........ $495 TS200A 10'. 3 HP ......... $745 RFI80 I'z HP ................. $31;>5<br />
S8800 18'. 2 HP ........... $625 TS200HD 10'. 3 HP ...... $985 RF350 1 HP .................. $625<br />
S8800 20' . 3 HP ........ $1340 TS300HD 12'. 3 HP .... $1495<br />
OUST COLLECTOR AIR DRUM SANDER WOOD LATHE<br />
I'. '%'<br />
&'1/ spindles. '10"<br />
& on" router<br />
bit<br />
chucks. 3 HP maIer. 25' x 22' milled lable.<br />
T-slot miler gauge. 800J / 1 1 OOJ reversible<br />
2 speeds. 3' spindle travel. independent<br />
precision fence. 6' insert opening. side &<br />
lop spring hold-downs.<br />
SD800 6' x<br />
90' bell. JT650A 6'. IHP ............ $295 747 1 HP. 2 bags . ....... $168 1 HP motor. 1725 RPM CPl00J 40' copy lalhe$365<br />
HD 1500 40' Heavy duly lathe<br />
$385 4' x 9' air drum. I' shaft. cast iron bed .............. $595<br />
SP860 Tilting spindle shaper ......... $1250 2 HP ............................. $435 JT860 8'. 2 HP .............. $595 200J 2 HP. 2 bags ...... $285 6' x 9' sanding brush.<br />
HP600 3HP shapero 28' table . . . .... $825 SDI 200 6' x 130' belt. JT980 8'. 2 HP .............. $695 300J 3 HP. 2 bags .•....<br />
(TRANSPOWER) TeM Industries, Inc. 91789<br />
DH 150 II'zHP shaper .. ...................... $450 2 HP ............................. $980 JT1200 12'. 3HP ......... $ 1695 400J 3 HP. 4 bags ...... $485 ................................... $285<br />
322 Paseo Sonrisa, Walnut, CA<br />
READER SERVICE NO. 161<br />
BUYING WITH SLIDING A TABLE TABLE SAW WOODWORKING FREE<br />
COSTS BIG BUCKS. TOOL CATALOG!<br />
Our new 140 page.<br />
MULE<br />
BUT BUYING A<br />
SLIDING<br />
'V S'<br />
TABLE FOR<br />
THE SAW<br />
YOU<br />
GOT<br />
NOW<br />
COSTS<br />
JUST<br />
OKA Yl Send me in fo on the tough sliding table<br />
you make that lets me build quality cabinets faster,<br />
more precisely and more safel y.<br />
Name: Address :______________<br />
City: __ __ _<br />
Zip:<br />
cP.S.: I'm also interested in the NEW Mule router<br />
table that's designed to fit on the righlside of my table<br />
saw. I'd like to hear why it saves space and how you<br />
sell if for just $149. D )<br />
Mule Cabinetmaker Machine, Inc,<br />
519 Mill St., PO BOX 73 1<br />
Lockport, NY 14095<br />
Phone us at: 800-563-MULE<br />
In Canada: 416-727-7090<br />
READER SERVICE NO. 70<br />
3650 . WEST HWY . 22, 307 BOX 739136, 9478 WILSON, WYO, 83014<br />
THE SOURCE LOWEST FOR PRICES ENGLISH ON " AND BRUSSO AMERICAN " HARDWARE HARDWARE<br />
'NEW' LOOSE PIN DRAWN BRASS HINGES<br />
BUTT PLATE PLAIN ALL KINDS<br />
HINGES, HANDLES, KNOBS, LOCKS,<br />
HHiNGES, ROSETTE PATTERN STAYS,<br />
BRUSSO HANDLES, KNOBS, CASTORS,<br />
HINGES, CHASED SHAKER BIN PULLS,<br />
<br />
FINIAL HANDLES, KNOBS, FLUSH<br />
.<br />
HINGES, PIERCED WOODEN PULLS,<br />
BALL TIP HANDLES, KNOBS TABLE<br />
HINGES, DROP TURN SLIDES,<br />
ETC. HANDLES. KNOBS, CATCHES,<br />
MUCH MORE IN OUR 48 PAGE CAT, $3,00.<br />
READER SERVICE NO. 304<br />
Finest Creat Prices Quality All Sizes Fast Delivery Qty.'s &<br />
D,F, ENTERPRISES<br />
27 Wills Road . Connellsville, PA 15425<br />
TEL:(412) 626-8870 FAX:(412) 626-8872<br />
Send for our complete product catalog and we'll<br />
include our 'Do-it-yourself' installation and design<br />
kiL Please enclose $1 .00 for shipping and handling.<br />
READER SERVICE NO. 154<br />
fu ll-color catalog is<br />
packed with over<br />
4.000 new and best-selling<br />
quality woodworking tools. books.<br />
cabinetry hardware. and supplies.<br />
1-800-542-9115<br />
Order Yours Today!<br />
Call free OrWIite:<br />
"<br />
Dept. 91WW09T. P26102-1686<br />
SITslrial Park<br />
OBox 1686<br />
Parkersburg. WV<br />
Delmhorst<br />
READER SERVICE<br />
Model<br />
NO. 104<br />
Wood Moisture Detector G-30<br />
• "One-step" operation . Single four function<br />
switch . Temperature stable circuit<br />
.6-30% range moisture content in wood<br />
• Use with any Delmhorst electrode.<br />
OlD<br />
Delmhoral - Ihe name<br />
for reliable experience<br />
and DulJlandlng servlcel<br />
201-334-2557 800-222-0638<br />
Call today loll free<br />
[NJI DELMHORST<br />
I [!J<br />
Instrument<br />
P.O.<br />
Company<br />
Box 68, Dept. 908<br />
Towaco, NJ 07082<br />
READER SERVICE NO. 19<br />
September/October 1991 37
NO MATTER HOW YOU CUT IT ••• YOU JUST CANIT BEAT THE SYSTEM.<br />
THE BT3000 IS MORE THAN JUST A TABLE SAW - IT'S AN ADVANCED CUTTING SYSTEM.<br />
AND THERE'S NOTHING LIKE IT ON THE MARKET. NOTHING.<br />
PRECISELY WHAT<br />
YOU NEED<br />
THE BT3000 OFFERS<br />
UNMATCHED PRE<br />
CISION IN A TABLE<br />
SAW. FOR INSTANCE,<br />
A UNIQUE SLIDING<br />
MITER TABLE PRO<br />
VIDES THE CONTROL<br />
AND STABILITY YOU<br />
NEED TO MAKE PRE<br />
CISE CUTS. AN OVER<br />
SIZED MITER SCALE<br />
PERMITS PIN-POINT<br />
ACCURACY. AND AN<br />
ADJUSTABLE MITER<br />
FENCE ASSURES SMOOTH, EXACT CUTTING; CAN BE<br />
POSITIONED RIGHT NEXT TO THE BLADE. SPECIALLY<br />
DESIGNED LOCKER BRACKET MINIMIZES VIBRATION<br />
AND ENHANCES PRECISION.<br />
THE RIP FENCE HAS<br />
A UNIQUE LOCKING<br />
MECHANISM WHICH<br />
ASSURES PERFECT<br />
ALIGNMENT FOR<br />
PRECISION CUT<br />
TING. THE LOCK<br />
SECURES THE FRONT<br />
END OF THE FENCE<br />
INTO PLACE, AUTO<br />
MATICALLY BRING<br />
ING IT INTO ALIGNMENT, THEN CLAMPS THE BACK<br />
SECURELY ONTO THE REAR RAIL.<br />
POWERFUL<br />
PERFORMANCE<br />
A POWERFUL 13-AMP,<br />
2-HP MOTOR IS EN<br />
HANCED BY THE SMOOTH<br />
CUTTING CAPACITY OF<br />
A 3& TOOTH THIN-KERF<br />
CARBIDE TIPPED BLADE<br />
THAT WAS DESIGNED,<br />
TUNED AND BALANCED<br />
SPECIFICALLY FOR THE<br />
10'<br />
BT3000. THIS PREMIUM<br />
BLADE COMES STANDARD WITH THE BT3000 AND<br />
GLIDES EASILY THROUGH NOMINAL 4X4S.<br />
A MOVABLE BEAST<br />
THE BT3000 WORKS LIKE<br />
A BEAST ALL DAY. DIE<br />
CAST AND EXTRUDED<br />
ALUMINUM CONSTRUC<br />
TION MAKES THIS TOOL<br />
TOUGH. AND IT WEIGHS<br />
ONLY SEVENTY-FIVE<br />
POUNDS, SO IT'S EASY TO<br />
MOVE AROUND THE SHOP<br />
OR JOB SITE, ESPE<br />
CIALLY WHEN EQUIPPED<br />
WITH THE OPTIONAL<br />
STAND AND CASTERS.<br />
SPECIAL DESIGN PERMITS MOVING THE MITER AND<br />
ACCESSORY TABLES TO EITHER SIDE OF THE BLADE,<br />
PROVIDING SUPPORT WHERE NEEDED FOR CUTTING<br />
LARGE BOARDS OR PANELS. IN THIS CASE, THE<br />
MITER TABLE IS PLACED NEXT TO THE ACCESSORY<br />
TABLE, READY FOR RIPPING STOCK UP TO 30" WIDE.<br />
LUMBER NOT INCLUDED<br />
GREATER PRODUCTIVITY AND VERSATILITY<br />
THE BT3000 HAS A COMPLETE LINE OF OPTIONAL ACCES<br />
SORIES WHICH INCLUDE A WORK STAND, DUST COLLEC<br />
TION BAG, MITER CLAMPING KIT, DADO THROAT PLATE,<br />
WIDE TABLE KIT AND A LONG MITER/RIP FENCE KIT.<br />
ADAPTER KIT ACCOMMODATES MOUNTING A JIG SAW AND<br />
A ROUTER, TURNING THE SYSTEM INTO A COMPACT, SELF<br />
CONTAINED WooDSHOP THAT GOES WHERE YOU GO.<br />
SEE THE NEW BT3000 AT A QUALITY TOOL SUPPLIER<br />
NEAR YOU.<br />
RYOSI AMERICA CORPORATION, 1424 PEARMAN DAIRY RD., ANDERSON, SC 29625<br />
READER SERVICE NO. 132 e RYOSI AMERICA CORP. 1991<br />
September/October 199 1 39
''All my tool •<br />
• houlll llB this<br />
,00111"<br />
The Accu-Mite""<br />
miter is a professional<br />
makes gauge perfect that<br />
Shot-pin angles action easily.<br />
assures accuracy dead-on<br />
common angles for<br />
plus a precise -<br />
protractor everything scale for<br />
between! in<br />
We do not recommend operating without the saw blade guard, as is shown here. US Patent Pending<br />
DS<br />
Optional manual accessories:<br />
3/8" pneumatic 3/4" miter clamp-<br />
barwrite<br />
x<br />
for Pl'ecision<br />
COMPANY<br />
Woodwol'king Equipment<br />
brochure. our<br />
Call<br />
free 1-800-382-2637/ Dutch Square Suite SC 803-798-1600<br />
Columbia, Blvd.,<br />
200,<br />
READER SERVICE NO. 96<br />
SC 29210<br />
TOOLS ON SALETM<br />
AMERICA S LOWEST PRICED TOOLS<br />
FREE FREIGHT TO THE<br />
'" ." .. r;JfTT '1'/L"'r\,,-Tt<br />
H'I",;, >",<br />
48<br />
"BLACK<br />
CONTINENTAL<br />
& DECKER<br />
STATES<br />
BLOCKBUSTERS"<br />
ON EVERY ITEM.<br />
••• DRillS •••<br />
Model Description ••....•.•.•....•.••...•.•..•................ Lisl Sale<br />
1 166 0·2500 rpm 4 amp ......... ...... ......... 106 65<br />
2600 3/8', 0·1200 rpm 4.5 amp ... . ........... 142 84<br />
1180 3/8'. 0·1 200 rpm 5amp... ...... 182 104<br />
1321 II2·, spade handle, 450rpm7.0 amp ..... 277 155<br />
1349·09 112', "Timberwoll" righl angle Drill... ...489 279<br />
••• SCREW GUNS •••<br />
2037 0·4000 rpm 5 amp . ................................ 175 97<br />
2038 0·2500 rpm 5 amp.... ... 175 105<br />
2054 0·2500 rpm 5amp wlversa dUich ......... 260 147<br />
2050 0·900 rpm 5 amp wlversa clulch ........... 270 155<br />
2660 0·4000 rpm 4.5 amp.... . . .................... 138 89<br />
••• CORDLESS •••<br />
2663K 9.6V var. spd Drill compo wlcse .... 239 148<br />
266IK 13.2V 'Kodiak' vlspd Drill wlcse .... 445 245<br />
2682K 3/8'. 9.6V vlspd ScruDrili compo wlcse .. 267 169<br />
89<br />
••• GRINDERS •••<br />
Model Description ............................................ Lisl Sale<br />
6247 4' angle Grinder 10,000 rpm 5 amp ........ 125 77<br />
2750 4·112' angle Grinder 10.000 rpm 6 amp .. 138 84<br />
4075 7/9' rt. angle Sander 5000 rpm 15 amp .. 256 139<br />
6 I 38 r/9' SanderlPolisher varia!>e speed ...... 299 195<br />
•••"BULLET" DRILL BIT SETS •••<br />
14890 8 piece lilanium 1I16"·114' w.ndex .......... 35 17.35<br />
14350 II piece sleel lll6"·114" wlindex ............. 32 17.35<br />
14753 13 piece black oxide 1116" ·114" wlindex .. 40 23.95<br />
14353 14 piece sleeI 1l16· · 112' w.ndex ........... 58 33.50<br />
14356 21 piece sleeI 1l16" · 3/8' w.ndex ............ 95 60<br />
14761 21 piece !>acl
MIIRORA - THE HAND MIRROR<br />
COMPLEMENT<br />
PERFECTLY BEVELED MIRROR<br />
RIP:S:AW)l<br />
The Portable Sawmill.<br />
The "affordable portable"<br />
one man band sawmill.<br />
Weighs only 45 Ibs. Cuts<br />
20" diameter logs into<br />
lumber. Minimum 1/8" to<br />
maximum 9" thickness.<br />
Slarting at $1049.00<br />
Better<br />
Write or call for free<br />
(508) 657 -5636<br />
Built<br />
brochure<br />
CORPORATION<br />
845 Woburn Street, Dept. FW, Wilmington, MA<br />
ATTENTION DEALERS!<br />
READER<br />
01887<br />
FOR<br />
EXCITING<br />
APPROVED<br />
OPPORTUNITY<br />
DEALERS ...<br />
Sell some of the fastest-moving woodworking<br />
tools and accessories on the<br />
market today, Quality merchandise with<br />
easy terms and quick turnaround time<br />
from our warehouse to your store.<br />
For more information, please contact:<br />
Woodstock International, Inc.<br />
P.O. Box 2027,<br />
Bellingham, WA 98227-2027<br />
call (206) 734-3482<br />
or FAX (206) 671 -3053<br />
<br />
3Importdr<br />
urOptan<br />
arbbJart<br />
l'hHP, 4.5 GAL.,<br />
7.7 CU.FT. DISP.<br />
$299<br />
4.1 CU.FT.<br />
AT 100 PSI<br />
Splash lubricated<br />
pump wi cast iron cylinder. Solid brass<br />
fittings. Manual reset overload protection.<br />
Enclosed intake liller.<br />
W'<br />
HTC<br />
X 2" FREE COil<br />
MOBILE<br />
WITH HOSE PURCHASE<br />
USE<br />
WITH<br />
BASES<br />
BLOW GUN<br />
FOR WITH JET:<br />
-JET JOINTERS JJ4, JJ6, JJ8<br />
-JET TABLE SAWS JCS10, CTAS10,<br />
JTS10<br />
$8850<br />
-JET BAND SAWS JBSI4CS, JBSI8,<br />
-JET SHAPERS JWSI8, JWS34, WSS3<br />
Call for other<br />
HTC Mobile Bases<br />
PRE·PAID<br />
-JET TABLE SAWS W/BIESEMEYER<br />
JCS10, CTAS10<br />
-JET<br />
JET<br />
12' JOINTER<br />
SANDING<br />
$17850<br />
JJ12<br />
BELTS<br />
- JET 20' PLANER JWP208<br />
Call for other<br />
HTC Mobile Bases<br />
PRE·PAID<br />
We think Jet's Industrial<br />
Sanding Belt line is the<br />
best value in abrasives.<br />
Try them, and ij you don't<br />
agree, we will refund your _<br />
(Min. order 10 belts.) Orders over $50.00<br />
shipped FREE via regular UPS.<br />
3' X 21' $.99 6' X 48' $2,95<br />
3' X 24' 1.09 6' X 89' 5,95<br />
4' X 24' 1.25<br />
YOUR CHOICE<br />
40, 50, 50, 100, 120 GRITS<br />
JET DRILL PRESSES<br />
JDP14J<br />
$259<br />
BENCH MODEL<br />
DRILL PRESS<br />
14' SWING<br />
FREE<br />
'hHP, lPH<br />
tafl!r' ,<br />
895 Motor Parkway<br />
Hauppauge, New York 11788<br />
516/234-2200 800-647-7672<br />
READER SERVICE NO. 60<br />
JDP14M - 14' BENCH DRILL PRESS, 16SP$299<br />
JDP17M -17' BENCH DRILL PRESS, lSSP 375<br />
JDPI4JF -14' Flo DRILL PRESS, 5SP 319<br />
JDP14MF -14' Flo DRILL PRESS, lSSP 359<br />
JDPI7MF -17' Flo DRILL PRESS, lSSP 389<br />
JDP20MF -20'<br />
JET SHAPERS<br />
Flo DRILL PRESS, 12SP 655<br />
JWSI8H -'h' SPINDLE, lHP, lPH $415<br />
JWS34 -'1.'& I' SPINDLES, 2HP, lPH 999<br />
-'h','A'& I' SPINDLES, 3 OR 5 HP 1399<br />
TWSS3 -'A', I', 1'1."SPIND., 30R5HP 2895<br />
SWSS3 -JET JOINTERS<br />
SLIDING TABLE, 3HP<br />
1995<br />
JET SANDERS<br />
JET WIDE BELT SANDERS<br />
DISC<br />
JDS20 -20'<br />
SANDER, 2HP $1195<br />
EHVSSO - 6'X89' SANDER 1.5 HP 589<br />
WDH10 -10' WETIDRY GRINDER, '1.HP 159<br />
JSG96 -S' X 48'/9' DISC SANDER/GRIND. 315<br />
JWB31P - 37"X6O', 2OHP, 3PH<br />
JWBt3P - t3"X6O', 7'hHP, 3PH<br />
JWB25P - 25'X6O', 15HP, 3PH<br />
JWB25PH -25'X75', 15HP, 3PH<br />
JWB31PH -37'X75', 2OHP, 3PH<br />
JWB225 - 25'X6O', 15HP, 3PH<br />
JWB237H - 37"X6O', 3OHP, 3PH<br />
JET BAND SAWS<br />
JET TABLE SAW<br />
JBSI4CS -14' BAND SAW, lHP, lPH<br />
JBS18 - 12' X 17'h' CAP, 2HP, lPH<br />
WBS20- 11W CAP, 20R 3 HP<br />
WBS24 - 24', 3HP OR 5HP<br />
JCS10 -WI BIESEMEYER #40<br />
JCS10 - WjBIESEMEYER #50<br />
JET DUST COLLECTORS<br />
JCS10 - WITH JET FENCE<br />
JCS10A -WI JET FENCE & MTR. CVA.<br />
JTS10PF -10' W/BIESEMEYER JTS12PF -12' W/BIESEMEYER 28<br />
READER SERVICE NO. 204
---<br />
"IMPORTERS OF FINE MACHINERY"<br />
You cannot find a better quality<br />
machine than this for even<br />
twice our price! You will<br />
never see a price this<br />
low again! Features<br />
include: · 3 knife cutter<br />
head • Magnetic<br />
switch • 1-1/2 H.P.<br />
motor . Solid steel<br />
stand with dust<br />
chute • Solid cast<br />
iron construction.<br />
Many more features<br />
too many to<br />
mention! See page<br />
21 in our current catalog.<br />
machine<br />
Same<br />
that<br />
high<br />
we've<br />
quality<br />
for years!<br />
carried<br />
Weighs 460 Ibs.<br />
PRICES ARE F.O.B. WILLIAMSPORT, PA REG.<br />
OR BELLINGHAM, WA<br />
91-1 11 SALE PRICE<br />
BELOW<br />
1988<br />
PRICE!<br />
III JOINTER<br />
MODEL G1011<br />
$69500<br />
$65000<br />
Opportunities Craft IUI"'.I'II'I'.",_<br />
Craft from American<br />
ses<br />
EXHIBITOR<br />
Apply APPLICATIONS<br />
These marketing juried now events to shows exhibit for are American at the all ACC preeminent crafts. Craft Fairs.<br />
1992 ACC Crall Fan AppIIcaIIon DeadlInes<br />
BAlTIMORE February<br />
18-23 October 1. 1991<br />
NEW YORK GIFT FAIR February 22·26 October 1. 1991<br />
ATlANTA April 23-26 October 1. 1991<br />
MINNEAPOLIS May 1·3 October 1.1991<br />
SAN FRANCISCO August 5-9 October<br />
• American Craft· at the International Contemporary Furniture Fair<br />
Craft Enterprises<br />
WEST SPRINGFIELD Ju1e23-28 October 15. 1991<br />
15. 1991<br />
NEW YORK May 17·20 October 15. 1991<br />
TOORDER: ---<br />
To request an application package contact<br />
WEST OF THE MISSISSIPPI EAST OF THE MISSISSIPPI<br />
American<br />
1-800-541-5537 1-800-523-4777 21 South Eltings Comer Rood. Highland.<br />
800/836-3470<br />
NY 12528<br />
or 914/883-6100<br />
READER SERVICE NO. 115<br />
Send for y'our FREE Fine Woodworking book and video catalog.<br />
Find out about the very best<br />
woodworking books and videos available.<br />
Our catalog contains comprehensive<br />
titles on tools, furniture malting, design,<br />
turning, canling and much more.<br />
TO GET YOUR FREE CATALOG,<br />
CALL 1·800·888·8286 OR WRITE:<br />
The Taunton Press<br />
63 South Main Street, P.O. Box 5506<br />
A<br />
Newtown, CT 06470·5506<br />
good miter<br />
is hard to find.<br />
Made in<br />
New England<br />
Now you<br />
know where<br />
to look!<br />
POOTATUCK CORPORATION<br />
P.O. Box 24. Dept. FW913<br />
Windsor. VT 05089 (802) 674·5984<br />
Name ______________________ __<br />
Address _<br />
City/State1Zip<br />
READER SERVICE NO. 50<br />
42 Fine Woodworking<br />
SELF CENTERING NOVA4JAW CHUCK<br />
The NOV A Chuck<br />
combines all Ihe<br />
advamages of 3 and 4<br />
jaw chucks as well as<br />
combination chucks<br />
while solving Ihe<br />
disadvanlages of Ihem<br />
all.<br />
Advantages:<br />
Wide Jaw Movement<br />
Same Jaw used for<br />
Expansion or Contraction<br />
Quick 2-way Lever Action<br />
Holds Square Stock<br />
All Machined Steel<br />
Safe-Easy to Use<br />
• Optional Jaws Available<br />
Sizes Available:<br />
Scars 3/4· 16<br />
General 260 I 1/4·S<br />
PRICE<br />
Delta/Rockweli I"·S<br />
Shopsmith SIS"<br />
$159.95<br />
plain<br />
Powerrmatic 90 I 1/2-8<br />
plus $3.75 shipping<br />
CRAFT SUPPLIES<br />
THE WOODTURNERS CATALOG<br />
Send $2,00 for our 48<br />
U.S.A.<br />
page color calalog<br />
$2.00 refunded wilh order/free<br />
<br />
wilh purchase<br />
[ I . . [.11,1.<br />
1287 E. 1120 S.<br />
PROVO,UT 84606<br />
(80 1 )373-0917 Fax (801 )374-2879<br />
READER SERVICE NO. 202<br />
READER SERVICE NO. 10<br />
Universrty of<br />
Rio Grande, Ohio<br />
2-year Associate Degree in<br />
Fine Technology Wood Working<br />
• Program Emphasis:<br />
Custom<br />
furniture construction<br />
• Hand and power tool techniques<br />
• & Joints fasteners<br />
• Wood turning and carving<br />
• Furniture design<br />
• Finishing<br />
• & Jig fixture design<br />
• Wood bending<br />
• Business management<br />
Knowledgeable instructors, small class size<br />
1-800-282-72011-614-245-5353. and excellent facilities combine to make this<br />
program truly unique. For more information<br />
call Lonnie Bird at or in<br />
Ohio toll·free.<br />
FINE<br />
I<br />
WOOD WORKING<br />
• TECHNOLOGY<br />
UNIVERSITY OF<br />
GRANDE<br />
RIO Grande, OH 45674
Just send $5<br />
with this ad<br />
and we'll mail<br />
you a $10<br />
Trend-lines<br />
catalog<br />
certificate<br />
plus our new<br />
68-page, full-color<br />
woodworkers catalog.<br />
Not only will you immediately double<br />
your investment, but you'll be able to<br />
benefit from our low discount prices for<br />
over 3,000 brand-name, woodworking<br />
products. Included are power tools and<br />
accessories, hand tools, screws, hardware,<br />
wood components, plans, how-to books<br />
and much more.<br />
SO, don't delay, send $5 today to:<br />
Trencl·lines®<br />
Dept. FW91, 375 Beacham Street<br />
Box 6447, Chelsea, MA 02150<br />
I; I) il n jO i; j :l! J<br />
READER SERVICE NO. 130<br />
Random Orbit Disc ;<br />
RIOT! BUY 50... I<br />
get 50 FREE! I<br />
p-c MODEL<br />
I<br />
#7334, 7335, 7336<br />
5" Random $119.99*<br />
Orbit . .<br />
129.99*. 134.99*. . ...<br />
5"V.S. Random Orbit<br />
': 6" V.S Random Orbit<br />
. , . ;<br />
.. '..:.:::.... FREE (100 Discs) I<br />
. Freight FREE! $ 15.99 •<br />
BUY 50 5" PSA DISCS<br />
get 50 ... only 50 Discs per roll. Available in 80, 100, 120, 150,<br />
180, 220, 320 grit. O.K. to Mix and Match Discs. FREE (100 Discs) Discs are shipped FREE with Random Orbit<br />
purchase, or any Disc order over $50.00.<br />
PHONE<br />
$19.99 BUY 50 6" PSA DISCS<br />
get 50 . . . only<br />
I 50 Discs per roll. Available same grit as 5" Discs.<br />
Check 0 MasterCard<br />
1-800-776-5467 0 Visa (ptease include expo Quaker State I<br />
date)<br />
Over $35 · $4.75.<br />
.._----_ PA Residents add 6% Sales Tax.<br />
Kutztown Rd .•<br />
...#'<br />
Reading, PA 19560<br />
. i;':i<br />
I ... they are<br />
,,:;.;:\"!': ' .<br />
out the next day! S&<br />
.. :. '<br />
:' . Sanders Sh;pped<br />
I WOODWORKING SUPPLY I .. 4434<br />
H: Under $35 · $3.75.<br />
SUN HILL MACHINERY<br />
Introducing our NEW CT- 1 332S 13" Wide Belt Sander<br />
with Two Pass 24 " Sanding Width Capacity<br />
This is an ideal choice for<br />
smaller cabinet shops who may<br />
find it difficult to find the space,<br />
or budget for the expense of a<br />
larger wide belt sander.<br />
This machine features<br />
simple, yet durable construction.<br />
It allows a 13"<br />
sanding width capacity,<br />
but work pieces may be<br />
reversed to create a conservative<br />
24" width capacity in just<br />
two passes.<br />
* Powerful 2HP Motor<br />
* Up to 24"(W) Working Capacity<br />
* Infinitely variable feed motor:<br />
0- 1 2FPM<br />
* Weight: 344 lbs.<br />
* Impressive accuracy in light<br />
sizing<br />
* Superior finish sanding<br />
* Quick to change , easy to clean<br />
sanding belt<br />
Optional:<br />
Stand with Casters<br />
The Affordable<br />
Roller Bed Extension<br />
Wide Belt Sander<br />
Sanding Belt<br />
•<br />
$998.00<br />
Quantity<br />
Introductory Price<br />
$69.00<br />
$49.00<br />
$12.90*<br />
Discounts Available<br />
For More Information Please Contact Us:<br />
SUNHILL MACHINERY<br />
500 Andover Park East<br />
Seattle, WA 98 188<br />
Tel : 206/575-4131<br />
FAX: 206/575-36 17<br />
Toll <strong>Free</strong>: 800/544- 1361<br />
READER SERVICE NO. 31<br />
READER SERVICE NO. 118<br />
September/October 1991 43
Fme<br />
Working September/October 1991<br />
Building a Loveseat<br />
Interlocking tenons fo r a strong fra me<br />
by Gary Rogowski<br />
It's hard to say where some of my designs<br />
come from. This loveseat, for example,<br />
grew out of scribbles in my notebooks. I<br />
liked the movement and energy expressed<br />
in those few lines, and I transformed them<br />
into the rails and legs of the piece shown in<br />
the photo on the facing page. From this innocent<br />
starting pOint, I embarked on a more<br />
technical journey to discover all the subtleties<br />
and challenges of making an attractive,<br />
comfortable seat.<br />
Scale drawings of the loveseat initially<br />
helped me design and locate the various<br />
components of the frame. I developed the<br />
basic dimensions from measurements of<br />
chairs and couches that I admired or found<br />
comfortable. If you study figure 1 at right,<br />
you can see that constructing the loveseat<br />
is pretty straightforward. The trickiest<br />
part is mortising the legs so that the tenons<br />
on the front, back and side rails can intersect<br />
within the narrow legs; but it's easy to<br />
cut these joints with the template guides described<br />
on the following pages.<br />
I also extensively shaped and machined<br />
many of the parts, including the side and<br />
backrest slats and the armrests. These details<br />
are a matter of personal taste; you may prefer<br />
a simpler design. The important thing<br />
is not to let yourself be ovelwhelmed by the<br />
size or apparent complexity of projects like<br />
this. I've found that the key to success is<br />
to first break the piece down into units, assemble<br />
those units separately and then later<br />
fit everything together.<br />
pIan<br />
Developing a construction<br />
While designing the loveseat, I tried to simplify<br />
construction as much as possible. Rather<br />
than gluing up the back components between<br />
the assembled sides, I built the backrest<br />
as a separate frame that would slide into<br />
grooves in the rear legs. This construction<br />
method became invisible once a cap piece<br />
was glued to the frame and the rear legs. I<br />
also built the webbing franle separately and<br />
dlen screwed it to the loveseat rails and to<br />
glue blocks attached to d1e frame.<br />
The legs are also simpler than they appear;<br />
d1eir gentle curves largely conceal d1e<br />
flats left where the side rails and armrests<br />
join d1em. The inside face of each front leg is<br />
a straight line tipped back at an 85° angle to<br />
meet d1e side rail and armrest; only the leg's<br />
front edge is curved. The rear legs are a little<br />
trickier because of d1e way they bend away<br />
from d1e frats where the side rails and armrests<br />
intersect, as shown in figure 1. The top<br />
section of each rear leg leans back at 83°; d1e<br />
lower part leans back 85°, just like d1e front<br />
legs. I refined these details, along with the<br />
armrest shape, slat profiles and the overall<br />
look of d1e piece, by making a full-size drawing<br />
and templates for the curved pieces before<br />
I began building.<br />
Mortises wid1 haunched-and-wedged tenons<br />
are used d1roughout. I cut the tenons on<br />
the tablesaw with a crosscut box and inserted<br />
wedges between d1e box's fence and the<br />
workpiece to angle the shoulders where<br />
necessary. A 5° wedge was used for the side<br />
7'<br />
rail and armrest joints for each front leg; a<br />
insert was needed for each armrest-and-rearleg<br />
jOint. In each case, I roughed out the<br />
Fig. 1: Loveseat<br />
:I<br />
Armrest, top view<br />
Side view<br />
_r-<br />
2 29%<br />
\<br />
4 \L ,ea l r sq le ua g reS' 12Y:,2n. x 30 x Armrest, x 4<br />
2 , 25<br />
x<br />
\ b_bt--<br />
<br />
\[77<br />
83°<br />
5<br />
I--t-L1<br />
f--I- I---,V \'I / t--<br />
L I /<br />
Top edges of 1J----4-S -i dēL s - lāt ..L s ,--'--,.....I<br />
front<br />
rails are beveled<br />
including<br />
1--1--<br />
f--I- 1_<br />
to compensate 1--1- I-+-_-+t:.:;e;..:. n:::; o:..:: ns--I-_-l- --l<br />
f--i-<br />
"<br />
for 85° tilt in -<br />
legs.<br />
I 85 V M<br />
J 'i-n\.---4 \ --+--+--+---+-.----11<br />
"', \ Fmot l'9'.<br />
f--!- n ri - c.. .-<br />
and back f--!-<br />
f--y. x<br />
J .;=:--<br />
[7<br />
2Y2 x 12%,<br />
I_-+_+-- II--+_+-<br />
lf-'\<br />
85°<br />
t'------------32%--------------I'--I<br />
Side rails, 1 Yo x 4% X 30Y.<br />
44 Fine Woodworking
tenon cheeks on the bandsaw, and then . I<br />
trimmed them and cut the haunches with a<br />
tablesaw tenoning jig. The edges of the tenon<br />
were rounded over with a router. The tenons<br />
on the long front and back rails were cut<br />
the same way, but the job was tougher because<br />
of the length of the rails. Again, I cut<br />
the shoulders with my tablesaw's sliding carriage,<br />
but I had to set an auxiliary table beside<br />
the saw to support the end of the rail. I<br />
cut each tenon long enough to protrude<br />
through the leg slightly to facilitate cleanup<br />
after assembly. I also cut %2-in.-wide slots in<br />
the tenons for wedges, which I made from<br />
rosewood to conu"ast with the lighter cherry.<br />
To avoid splitting the tenons, I bored a 1'16-in.<br />
dia. hole at the base of the slots to disperse<br />
the pressure when the wedge is inserted.<br />
The wedges were milled about twice the<br />
thickness of the slot and exactly to widtl1.<br />
Routing mortises for<br />
interlocking tenons<br />
My system for cutting mortises is very simple.<br />
All that is required is an ordinary plunge<br />
router fitted with a guide bushing and several<br />
shop-built, L-shaped template guides. I<br />
keep several of tl1ese guides, like the one<br />
shown in the top photo on p. 47, in my shop;<br />
each is sized to accommodate a specific bit<br />
diameter and joint size. After the proper<br />
guide is clamped to the part being mortised,<br />
I can cut haunches, housed mortises or<br />
through mortises with this single template<br />
Front view<br />
x 3 x 63<br />
Cap 2<br />
/<br />
25¥ t==: rr r-r<br />
1\- -<br />
I-<br />
t- I<br />
\<br />
- L.J<br />
\ f<br />
/r \<br />
'---<br />
r--Armrest<br />
: x Front rail, 1 % 4'14 x 55, including tenons<br />
Gently curving lines and pleasing proportions highlight this cherry loveseat. The<br />
slender legs conceal interlocking haunched mortises and tenons joining the sides and rails.<br />
just by changing depth of cut with the router's<br />
adjustable stops. If I need to increase the<br />
setback of a mortise, as I did on one side of<br />
the legs of the loveseat, I insert shims between<br />
the guide and the workpiece. The key<br />
to making these versatile templates is to<br />
keep the guide slot perfectly parallel to the<br />
fence; I'll show you how to do that in the<br />
sidebar on p. 47.<br />
In building the loveseat, I began by roughmilling<br />
enough cherry for the loveseat components<br />
and enough maple for the webbing<br />
frame. Then I cut the mortises in the legs before<br />
shaping them because cutting joints is<br />
easier when working from straight reference<br />
<br />
8 3<br />
1%<br />
../<br />
I<br />
n r<br />
1\ I<br />
surfaces. Because of the way the rear legs are<br />
laid out on the 4-in.-wide stock, I mortised at<br />
90° to their inner faces for the armrest and<br />
side-rail joints. Then I shaped their inner<br />
faces as described below in the section on<br />
special procedures. The front-leg mortises,<br />
however, need to be at an 85° angle to the<br />
inside face of the leg so that the mortise will<br />
be parallel to the floor when the leg is tilted<br />
back. To angle the mortise, I routed an undersized<br />
90° mortise and then chiseled the<br />
mortise ends at 85° to match tl1e crosscut on<br />
the bottom of the legs. As an alternative, you<br />
could bore out the angled mortise with a<br />
drill press fitted witl1 an angled table (see<br />
x 52%<br />
Backrest rails,<br />
7/S X P/\6<br />
f --<br />
/<br />
n =-p<br />
I<br />
\ 7 t-<br />
r \ 1i77J 1 \ '\ 71 11<br />
H t-' 7 -= = / -<br />
I<br />
1\<br />
"k""<br />
including tenons<br />
( "''', %,2%, 10%,<br />
Backrest stiles, 7/S x 19/'6 x 11%, 30<br />
including tenons<br />
t--- I .-..;. -NJl<br />
Fe<br />
0=<br />
-r-t-- -<br />
x Z r---<br />
,<br />
---'<br />
Back rail, 1 % 4% x 55,<br />
I<br />
including tenons<br />
<br />
I'- ",<br />
<br />
II<br />
52 -<br />
II<br />
PhOlO this page: Harold Wood; drawings: Kathleen Rushton September/October 199 1 45
Fig. 2: Interlocking tenon joint<br />
Step 1:<br />
Mortise leg for side rail. First cut mortise<br />
Side rail<br />
'o/Is in. deep; then cut to 10/.s in. deep<br />
at both ends to leave 'h-in. by 1"As-in.<br />
step in middle of mortise.<br />
Fig. 3: Construction details<br />
n<br />
Top<br />
of backrest is trimmed to 7°.<br />
n 0<br />
Dowels, % in., lo c:a:tec<br />
n n<br />
Inside face of front leg<br />
Step 2:<br />
Cut side-rail tenon and notch it with<br />
bandsaw to fit over step in mortise.<br />
Step 3:<br />
Insert side rail in leg and rout<br />
shallow haunch mortise first; then<br />
rout 2-in.-long mortise all the<br />
way through the leg.<br />
Tongue, in. thick, fits in groove in<br />
back leg.<br />
Webbing-frame center stretcher, 3f4 x 1 % x 24%<br />
Notch for wedge<br />
Through mortise<br />
Step 4:<br />
Cut haunch tenon on long front<br />
rail to fit through mortise.<br />
Side-rail tenon<br />
will look like this<br />
after mortising<br />
through the<br />
leg for the<br />
long rail.<br />
for Groove webbing<br />
Maple webbing-frame<br />
---,<br />
stiles, 1 x x 2% ----<br />
28%<br />
Maple webbing-frame ---<br />
rails, 1 x 2 x 52, have<br />
85° angle on outer edges to<br />
match front and back rails.<br />
Glue blocks that<br />
support webbing frame are<br />
installed after frame is inserted<br />
from bottom of loveseat frame.<br />
FWW #69, pp. 42-44), or you could simply<br />
insert a shim under the L-shaped guide.<br />
The real beauty of these guides shows<br />
whenever I cut ramps and steps for haunches<br />
or interlocking joints, such as those between<br />
the legs and rails of the loveseat shown in<br />
figure 2 above. For the loveseat, I had to fit<br />
the long rails into skinny legs that had already<br />
been mortised for the side rails. And<br />
all the rails had to be at the same height and<br />
had to line up flush with the inside corners<br />
of the legs to support the webbing frame.<br />
My solution was to cut double tenons for<br />
the side rails and a single, through-wedged<br />
tenon for d1e long rails. The single tenon intersects<br />
d1e double tenon and locks it inside<br />
d1e slender leg. Since I wanted to cut both<br />
mortises with the same guide, I inserted a<br />
13/ 1 6-in. shim between the guide and d1e wide<br />
face of the leg before routing the mortises<br />
for the side rails.<br />
After clamping d1e guide and spacer to the<br />
wide side of the leg, I plunged down 13j16 in.<br />
to cut the main mortise. Then I set d1e router's<br />
next depd1 stop 1/2 in. deeper d1at1 d1e<br />
original mortise, and I made plunging cuts<br />
on each side of d1e mortise to accept the<br />
double tenon. I notched the center of the<br />
original wide tenon on d1e bandsaw, so that<br />
the tenon would slide into the mortise. After<br />
the pieces were fit toged1er, I clamped a<br />
guide to the adjacent face of the leg, this time<br />
without the spacer, and plunged down<br />
through the tenon at1d leg in two depd1 settings.<br />
On d1e first sening, I cut d1e shallow<br />
recess for d1e haunch; then I cut all the way<br />
d1rough d1e tenon and leg to refine the mortise<br />
to accept d1e tenon from the long rail, as<br />
shown in d1e top photo on d1e facing page.<br />
You could also wait and mortise for the longrail<br />
tenons after each side is glued up. In at1y<br />
case, repeat the process for each leg.<br />
46 Fine Woodworking
ext, the side rails were mortised for the<br />
two curved side slats, as shown in figure 1 on<br />
pp. 44-45. After dry-assembling the side to<br />
check the fit of the roughed-out armrest and<br />
side-rail joints, I measured the height between<br />
each armrest and its side rail to determine the<br />
shoulder-to-shoulder length of the slat. I also<br />
used a straightedge and square to extend<br />
lines up from the %-in.-wide side-rail mortises<br />
to locate the slat mortises in the armrest.<br />
These mortises can't be centered in the armrest<br />
because it is slightly offset (see figure 1).<br />
I trimmed the curves on the slats and rails<br />
with a flush-trimming router bit running<br />
against the full-size templates I previously<br />
made. To give the pieces a nice feel, I also<br />
crowned the concave edge of the slats and<br />
beveled their inner edges with a spokeshave.<br />
The armrests presented me with slightly different<br />
problems because they curve in two<br />
directions. I first bandsawed the top and bottom<br />
curves on each armrest and then refined<br />
them with a template-guided router. To curve<br />
the outside edge of each armrest so that it<br />
flows into the rear leg, I used a thin, flexible<br />
ruler to draw in the curve; then I bandsawed<br />
to the line, pivoting each armrest on its convex<br />
face during tl1e cuts. Finally, I crowned the<br />
top edges of each armrest with a spokeshave.<br />
Special procedures for the loveseat<br />
My design required a couple of special<br />
procedures before the sides and rails could<br />
be assembled.<br />
I To make sure that angled<br />
the faces of tl1e<br />
rear legs accurately, I cut the angles with an<br />
adjustable taper jig on my tablesaw: Two<br />
passes were necessalY: one for the 83° angle<br />
on top and one for the 85° angle on the bottom.<br />
Later, I blended the areas between the<br />
flats and the angles witl1 a spokeshave to create<br />
the impression of one continuous curve.<br />
The bandsawn curve of the back edge on<br />
the rear legs also adds to the continuouscurve<br />
illusion, but the back-edge curve and<br />
the curve on the front legs aren't sawn out<br />
until each side frame is assembled (it's easier<br />
to clamp square components). Before glueup,<br />
I chopped shallow flats into the front legs<br />
to prevent the clamps from slipping; the rear<br />
legs were clan1ped right on. When the frames<br />
were dry, I bandsawed the legs roughly to<br />
shape and cleaned up the curves with a router<br />
template guide and flush-trimming bit.<br />
A plunge router and a simple L<br />
shaped guide clamped to the leg are<br />
used to cut mortises in the legs. Here, the<br />
side rail is inserted into its mortise in<br />
the leg, and the author is routing through<br />
the leg and the side-rail tenon to form the<br />
interlocking rail-to-leg joint. The notched<br />
wood blocks flanking the template are<br />
stops for setting mortise length.<br />
A simple router template for complex joints<br />
Accuracy is an essential part of joinery, but you don't have<br />
to spend a lot of money to obtain it. One of my favorite and<br />
most-reliable mortising methods is based on an ordinary<br />
plunge router fitted with a guide bushing and an L-shaped template<br />
guide. The guide is made by tacking a piece of Vi-in.<br />
plywood to a 1 Vi-in.-thick strip of pine or other softwood<br />
nearly as long as the plywood. A 6-in. by lO-in. piece of<br />
plywood worked fine for the leg mortises in the loveseat discussed<br />
in the main article, beginning on p. 44.<br />
Ys<br />
The major difficulty in making a template guide is cutting<br />
the router slot parallel to the fence. The trick is to tack the<br />
plywood onto the softwood strip, with the plywood edge<br />
set back about in. from the outside face of the softwood.<br />
Then when the guide slot is routed, the softwood strip can<br />
be referenced right off the router-table fence and the slot<br />
will be cut square to the fence, as shown at right.<br />
If you want to make a guide, first find the difference between<br />
the diameter of your guide bushing and the diameter<br />
of the router bit. This difference lets you know how much<br />
%6<br />
larger you must make the slot in the guide to cut the desired<br />
mortise. For example, if you have a %-in.-dia. bit and a<br />
Y2 -in.-dia. bushing and want to cut a %-in.-wide mortise,<br />
the slot must be % in. plus in. on each side, or % in.<br />
To cut the guide slot, carefully draw layout lines on the<br />
plywood to indicate the mortise width plus the offsets. This<br />
way, the mortise wall will be the proper distance from the<br />
inside reference edge of the softwood fence. Also draw in<br />
the ends of the mortise, again with the proper offset.<br />
Now, locate the router-table fence so you can hold the<br />
guide against it and over the bit. Plunge the guide onto the<br />
bit to rout inside the mortise layout line farthest from the<br />
fence. Next, calculate the thickness of a shim needed to move<br />
the guide away from the fence enough to rout inside the<br />
other layout line. Remember to account for the bit's diameter<br />
when shimming the guide to cut the fur wall. Hold the guide<br />
against the fence and the shim and over the spinning bit, and<br />
plunge the piece down. To finish, clear out the waste.<br />
By using angled fences and shims, you can also make<br />
mortising guides for beveled surfaces. Just make sure to label<br />
these guides clearly so you can match them up with the<br />
proper bushing, bit and mortise setback.<br />
-G.R<br />
To widen the mortise guide's slot, Rogowski shims between<br />
the guide and the router-table fence, moving the guide enough<br />
for the spinning bit to cut the inner side of the guide slot.<br />
Photos !.his page: Jim Boesel<br />
September/October 1991 47
Before assembly, I grooved the rear legs to<br />
accept the backrest. This '/2-in.-wide groove<br />
was cut with a table-mounted router with its<br />
fence set to locate the groove parallel to the<br />
83° flat area where the armrest joins the leg.<br />
The groove is centered in the leg; this ensures<br />
that the frame is well supported.<br />
Because of the angle of the legs, the long<br />
rails automatically tip in toward the center of<br />
the loveseat. To establish a flat to match the<br />
webbing frame, I trimmed the upper edges<br />
of dle long rails at a 5° angle. The bottom<br />
edges of dle rails were bandsawn and routed<br />
to match my original pattern. The front rail<br />
fits into a narrow section of dle front legs. To<br />
prevent the face of the rail from extending<br />
beyond the leg, I tapered the rail's ends widl<br />
a spokeshave. I prefer this to thinning dle<br />
entire lengdl of dle rail.<br />
Assembling the loveseat<br />
Gluing up a large frame like dlis takes some<br />
planning and careful attention. Clamping<br />
blocks must be routed out enough so that<br />
they can be taped to the legs and still allow<br />
tile tenons to protrude. Also, blocks had to<br />
be cut to fit under the rails and support dlem<br />
when I glued up dle long rails to dle side<br />
frames. I began the actual assembly by putting<br />
glue in all the mortises, leaving a litde<br />
extra glue at dle mouth of each joint. After<br />
spreading glue on dle tenons, I ran the long<br />
rails into one side frame, which I had set flat<br />
on a newspaper-covered bench. Then I<br />
tipped this frame up and set the rails on tile<br />
support blocks, which held dle rails at the<br />
proper height to enter the other side frame.<br />
After pushing dle side mortises onto the tenons,<br />
I clamped everything tightly. However,<br />
tile job wasn't done because I had to insert<br />
tile wedges before the glue set.<br />
I<br />
So, once the<br />
shoulders were seated, I removed the<br />
clamps, braced the loveseat with my leg and<br />
pounded the wedges home. usually don't<br />
put the clamps back on because they're not<br />
needed if dle joints fit well. But if you have<br />
any doubts, it would be a good idea to reapply<br />
dle clamps to ensure that dlere's adequate<br />
pressure on dle joints.<br />
Building the backrest<br />
and webbing frame<br />
I milled the backrest, cap and<br />
7'<br />
webbing<br />
frame slightly oversized to allow for final fitting<br />
and trimming. The top rail of the backrest<br />
frame was trimmed at a angle to<br />
match dle tops of dle rear legs. The cap was<br />
milled a little thick because I dlought tlle<br />
piece might warp along its lengtll after I cut<br />
its top curve. I planed off the extra material<br />
and flattened the piece before glue-up.<br />
The backrest was assembled by fitting tenons<br />
on tlle six slats into mortises routed into<br />
the frame rails. Since dle piece was designed<br />
to be seen from all sides, tlle backrest slats<br />
had to be shaped and finished like the sideframe<br />
slats. I also found it was a good idea to<br />
cut the tongues along the outer edges of the<br />
backrest stiles and test-fit them into the<br />
grooves in the rear legs before gluing up the<br />
frame. After tile frame was dry, I routed the<br />
ends of the frame rails to form a matching<br />
tongue and ripped dle edge of the backrest's<br />
top rail flush with the tops of the rear legs.<br />
After dle backrest was glued in place, I<br />
used dowel centers to locate mating holes in<br />
the cap, the tops of the legs and tile backrest's<br />
top rail, centering the cap over the<br />
legs. After drilling all the dowel holes, I put a<br />
tllin bead of glue on the top rail of tlle backrest<br />
and clamped the assembly together using<br />
a long strip of 'kin.-tllick plywood as a<br />
clamping pad. After the glue dried, I<br />
crowned tile top edge of the cap witll a<br />
spokeshave and sanded dle cap smooth.<br />
ow tllat the loveseat was essentially finished,<br />
I measured along the inside of the<br />
rails, about an inch below their top edges, to<br />
determine how big to make tlle maple webbing<br />
franle. I cut the long rails a little thick so<br />
I could rip opposing 85° bevels along their<br />
edges; tilis way, they would be parallel with<br />
tile tilted front and back rails. Also, to prevent<br />
tile seat webbing, described in tile sidebar below,<br />
from distorting dle frame, I added a<br />
center su-etcher to the frame. Once all dle<br />
parts were cut to the required dimenSions, I<br />
mortised and tenoned the frame together.<br />
I inserted tlle webbing frame from the<br />
bottom and screwed it to tlle rails. I also added<br />
glue blocks underneath the frame. Since<br />
foam-rubber cushions are available in different<br />
reSiliencies, I made the seat cushion<br />
Gmy<br />
slightly firmer than the back cushion. The<br />
upholstery work was done by a friend. D<br />
Rogowski designs and builds jumiture<br />
in Portland, Oreg<br />
Webbing fo r a comfortable seat<br />
Fig_ 4: Webbing detail<br />
J<br />
Round over inside<br />
edge of rail.<br />
iJ;<br />
clip<br />
0/<br />
Groove for webbing, 3/'6 in. wide<br />
by 0/'6 in. deep by length of rail<br />
/<br />
Metal<br />
p----+----'<br />
J,50<br />
In recent years, I've had the opportunity<br />
to build furniture that has cushions.<br />
And I have been working with<br />
a tough, stretchy webbing that both increases<br />
comfort and regulates the<br />
softness or stiffness of seats and backs.<br />
As an added bonus, it's easy to install.<br />
I generally buy this 2-in.-wide<br />
rubber webbing in 100-ft. rolls, and I<br />
also buy a couple dozen of the special<br />
metal clips needed to install the<br />
webbing. Each clip has a lip that fits<br />
into a slot machined into the seat<br />
frame. Four tiny teeth inside the clip<br />
grab the webbing firmly when the<br />
metal piece is crimped down with<br />
pliers or bench-vise jaws. The webbing<br />
and clips are available from The<br />
Woodworkers' Store (21801 Industrial<br />
Blvd., Rogers, Minn. 55374-9514) for<br />
$1 per foot or 80 cents per foot if you<br />
buy more than 100 ft. The metal clips<br />
are $1.45 for a package of 10. Chances<br />
are, you can also buy small quantities<br />
from a local upholstery shop, but<br />
you'll probably pay a bit more.<br />
To install the webbing for the loveseat<br />
in the main article, I cut the material<br />
to length with a knife. To get medium<br />
tension for the 26-in. front-to-back<br />
span, I cut the webbing 24 in. long<br />
and set 12 strips about 2 in. apart across<br />
the frame; two long strips of webbing<br />
run the length of the frame and are<br />
woven through the crosspieces to<br />
hold everything in place. I fit the clips<br />
in %6-in.-wide by %6-in.-deep angled<br />
grooves ripped the full length of the<br />
rails and stiles of the webbing frame,<br />
as shown at left. I also rounded over<br />
the inside edges of the frame to prevent<br />
damage to the webbing. -C.R<br />
48 Fine Woodworking
Ball Be arings in<br />
Shop Tools and Ma<br />
When and how to replace these<br />
vital components<br />
chines<br />
by Robert M. Vaughan<br />
Removing a ball bearing with a gear puller is the first step in replacing worn-out bearings. Shown above, a bearing separator<br />
inserted between the bearing and the fan on a hand-drill motor's armature provides a means for the puller to grasp the bearing.<br />
A<br />
Ball bearings are among the hardest-working components in<br />
any woodworking machine or portable power tool. rest,<br />
they are constantly under stress from tight V-belts, and under<br />
a load, bearings take an incredible high-speed pounding. In<br />
addition, sawdust packs around ball bearings, threatening to contaminate<br />
their inner workings or soak out the lubrication within.<br />
The fact that these precise, compact, antifriction components last<br />
more than a few working hours is amazing.<br />
Eventually, all ball bearings succumb to tl1e affects of heat, dust<br />
and friction that are part of normal tool use and need to be replaced.<br />
Fortunately, a bearing is designed to be the weak and replaceable<br />
link in tl1e power transmission train in any piece of quality woodworking<br />
equipment. Unfortunately, you might not know when a<br />
bearing is good or bad, whether you can remove and replace it<br />
yourself, or what size and type of bearing you need to replace the<br />
old one witl1. Since ball bearings are used in a million different<br />
applications in woodworking alone, I can't cover all the situations.<br />
But I can give you some good tips on how to spot a bad bearing and<br />
on how to remove and replace a bearing, if you're incli.ned to do so.<br />
Ball-bearing anatomy<br />
While all machines, motors and running mechanisms have bearings<br />
of some kind, not all are ball bearings. Some machines have<br />
bronze-sleeve bearings or poured-lead babbitt bearings, but ball<br />
bearings are more complex tl1an eitl1er of these. A basic ball bearing<br />
is comprised of an inner race, which is a sleeve that fits around<br />
a precisely ground area on the machine's shaft (called the bearing<br />
seat) and has a groove in which the balls roll; an outer race, which<br />
captures the balls in anotl1er groove and fits into the socket or<br />
housing on the machine; a cage, located between the two races that<br />
keeps tl1e balls evenly spaced; any number of hardened-steel balls;<br />
and a shield that keeps tl1e bearing's lubricating grease or oil from<br />
leaking out and prevents dust and debris from contaminating the<br />
bearing. Variations in size, material, design and grade differentiate<br />
one bearing from another. Some bearings<br />
RPM<br />
use double rows of<br />
balls, and some use rollers-straight, tapered or tl1in needles-in<br />
lieu of balls. Any ball bearing is capable of operating under a<br />
higher work load, running at a higher and lasting longer witl10ut<br />
relubrication tl1at1 less-expensive bronze-sleeve bearings. But state<br />
of the art or not, ball bearings still do wear Ollt and need to be<br />
replaced, so you must be able to tell a good bearing from a bad one.<br />
Diagnosing bearing problems<br />
Figuring out whether or not your machine has a bad ball bearing<br />
isn't as simple as you might tl1ink because different problems will<br />
often produce the satne symptoms. A difference in the feel or<br />
sound of a running power tool might indicate that a bearing has<br />
started to go bad, but not always. For exatnple, loose pulleys on<br />
stationary power tools are infatnous for mimicking the sound of<br />
bad bearings, and on portable power tools, bad brushes will do<br />
the satne. Since fixing a pulley or brushes is easier than replacing<br />
bearings, check your machine carefully for loose or vibrating parts<br />
before disassembling it. Audible rumbles and clicks when a machine<br />
starts or coasts to a stop can indicate a lack of lubricant in a<br />
bearing and warn of at1 oncoming failure. When a machine's<br />
sound changes octaves-from a whispering baritone to a soretl1roat<br />
soprano-you should suspect that tl1e bearings are the problem.<br />
Any looseness in a power tool's shaft or arbor indicates a<br />
bearing-related problem, but not necessarily a bad bearing. A worn<br />
beat-ing socket, a conunon problem witl1 portable power tools, usu-<br />
September/October 199 1 49
ally results in a worn shaft. Excessive shaft wear can also occur<br />
when d1e ball bearing itself freezes up, but d1e shaft continues to<br />
rotate inside the inner race-usually requiring extensive repairs.<br />
Some shop situations mat seem unrelated to a machine's bearings<br />
can cause problems. For example, repairing a station31Y machine<br />
wid1 an arc welder can ruin d1e bearings; d1e massive current flow<br />
can cause me electric arc to jump me small gaps between me bearing's<br />
balls and d1e races, causing fine pitting and, eventually, premature<br />
bearing failure. A machine mat's been submersed in water,<br />
such as in a flood, is anomer candidte for early bearing failure.<br />
Grit 311d debris C311 flow and settle into bearings and cause failure,<br />
sometimes after only a few hours of operation. Hence, any machine<br />
d1at has been in a flood should have all bearings replaced. If a machine's<br />
be31·ings continually go bad, examine omer causes, such as<br />
a bent shaft, an out-of-round beat-ing seat or a worn beat-ing housing.<br />
\'\Ihen you locate a bad bearing, your first tendency will probably<br />
be to relubricate it. However, me majority of ball bearings<br />
found in woodworking machines either are perm311ently sealed<br />
311d lubricated or mey are shielded bearings, which can be difficult<br />
to relubricate; in eitl1er case, replacement is reconU11ended. Nonsealed<br />
bearings that lack shields are most often seated in housings<br />
wim grease nipples, and mese bearings should be lubed as part of<br />
me machines standard maintenance. Whatever you do, resist me<br />
temptation to spray a noisy bearing wim a penetrating lubric311t,<br />
like WD-40; it will eventually dlY and leave an undesirable sludge<br />
film inside me bearing.<br />
press,<br />
Pressing a new ball bearing on<br />
a machine's shaft is best done<br />
with a hydraulic or arbor but<br />
it can also be done with a pipe and<br />
a mallet. Above, the shaft (a tablesaw<br />
arbor) is placed on a wood<br />
block on the floor. Then, a pipe fit<br />
over the bearing's inner race is<br />
pounded until the bearing seats.<br />
A drill press can press on small<br />
ball bearings, like the end bearings<br />
on a router's armature<br />
(right). Pipe that fits over the bearings'<br />
inner race is mounted in the<br />
chuck, and pressure is applied by<br />
lowering the drill-press quill.<br />
Extracting bearings<br />
Removing and replacing ball bearings yourself can save time and<br />
money, but you must proceed carefully to avoid problems. Before<br />
old bearings can be extracted, a power tool or motor must be disassembled,<br />
and usually me arbor assembly must be removed from me<br />
machine. First and foremost, unplug the tool or motor before beginning.<br />
Keep in mind mat disassembling a tool usually voids a stillvalid<br />
warranty, and mat unless you're careful and work in a cleat1<br />
environment, taking any machine ap31t can lead to omer problems,<br />
such as losing or contamu1ating crucial p31ts or reassembling me<br />
tool incorrectly. If you don't have me proper tools, take me job to<br />
a reputable machinery-repair shop. Portable power tools Cat1 usually<br />
be sent back to me manufacturer for bearing replacement.<br />
Once a bearing shaft or housing is exposed, you may have to<br />
remove snap rings, which are sometimes used to hold me bearing<br />
in place on tl1e shaft or in me housing. Snap rings are best removed<br />
wim special pliers designed to engage me holes on meir<br />
ends. There are two separate kinds of snap-ring pliers: one for<br />
snap rings mat have to be compressed for removal (used in bearing<br />
housings) and me omer for rings mat must be exp311ded for<br />
removal (used on a shaft). Trying to remove snap rings wimout<br />
mese special pliers is extremely difficult, and you also risk datnaging<br />
me seals or shields of a bearing.<br />
After me snap ring is removed, me bearing will usually slip fairly<br />
easily from its housing, which is typically part of me cast body of<br />
me machine or motor. But if me bearing's inner race fits tightly<br />
against me shaft, a lot of force is required<br />
to remove me bearing from me tool's shaft<br />
or armature. I've used a couple of big<br />
screwdrivers and a vise to remove a few<br />
bearings, but I damaged me parts in almost<br />
every instance. The lesson here is use me<br />
right tools. Hydraulic H-frame or rack-andpinion<br />
arbor presses are me best devices<br />
for eimer removing or pressing on bearings.<br />
However, a bearing (or gear) puller<br />
also works well, is affordable, is available<br />
at better auto-supply stores 311d bearing<br />
suppliers, and can also be rented. A good,<br />
all-around puller has two or mree claws,<br />
which grip me bearing's outer race, and a<br />
center screw tl1at bears against tl1e end of<br />
me shaft and pulls me bearing out as tl1e<br />
screw is tightened wim a wrench. Sometimes<br />
me claws can't reach around tl1e<br />
bearing, such as when a motor's cooling<br />
f311 is in me way. In mat case, you can use a<br />
bearing separator. 1 lis device consists of a<br />
split plate mat is dished out to fit U1tO tight<br />
places and is drawn togemer behind me<br />
bearing wim two bolts. The bearing puller's<br />
jaws are men fit around me edges of<br />
me separator, 311d me puller is used as just<br />
described (shown in me photo on p. 49).<br />
For light bearing-pressing work, like removing<br />
armature bearu1gs on ponable power<br />
tools, you C311 use a drill press as 311<br />
arbor press. First, insert a hardened-steel<br />
dowel or PU1 all me way to me back of me<br />
chuck, 311d tighten me dowel U1 place. 111en,<br />
support tl1e ball bearing on eimer side wim<br />
a couple of scraps of wood, and lower me<br />
drUl-press quill to force me tool's shaft from<br />
50 Fine Woodworking<br />
Photos: SandoI'" Nagyszal:lI1czy
the bearing. However, reserve this method<br />
for small bearings tbat press out easily, and<br />
use it only with a high-quality drill press;<br />
the abuse could strip drill-press gears.<br />
Buying replacement bearings<br />
Ball bearings come in hundreds of types<br />
and sizes. Standard sizes for bearings are<br />
in metrics, except for a couple of inch-size<br />
series and a few metric/inch combination<br />
sizes. These specifications are also u-ue<br />
of router-bit pilot bearings and other portable-power-tool<br />
bearings. Bearings also<br />
come in different grades, from one to seven,<br />
the latter being the most precise, durable<br />
and expensive.<br />
When I'm ready to buy new ball bearings,<br />
I contact the machine's manufacturer<br />
or dealer so that I'm certain of getting the<br />
right replacement bearings. If the manufacturer or dealer doesn't<br />
stock the part (or if I need bearings quickly), I visit my local bearing<br />
supplier. (Check the yellow pages of your local phone book under<br />
"bearing suppliers" or "power transmissions.") I've purchased ball<br />
bearings from mail-order companies, such as ww. Grainger Inc.,<br />
5959 W Howard St., iles, Ill. 60648; call (312) 647-8900 for your<br />
regional distributor. I've also gone to local skateboard shops,<br />
lawn-mower shops and other equipment-repair shops to get a replacement<br />
when in a pinch. Visiting a skateboard shop may seem<br />
farfetched, but skateboard-wheel bearings that sell fo r about $1.50<br />
are the same size and type as the sealed bearings commonly used<br />
in portable power tools. And these bearings can cost 5 or more<br />
from a bearing-supply shop.<br />
Each manufacturer has its own numbering and lettering system<br />
(marked on tile bearing) to denote the bearing's dimensions, type of<br />
seals and grade. Bearings of tile same external dimensions may eem<br />
interchangeable, but may not be. For example, ball bearings found in<br />
many tablesaw qrbors and latile headstocks contain a double row<br />
of balls; single-row bearings of tile same size do exist, but aren't as<br />
durable. So before ordering a replacement, get a strong magnifying<br />
glass and read the numbers, letters and manufacturer's name<br />
on tile side of the bearing. If bearing suppliel,-s don't carry the<br />
same make of bearing, they can cross-reference your bearing's<br />
designation to tileir brand. I always bring tile old bearing along; if<br />
I can't get an exact replacement, I can usually find a substitute tiut<br />
will work. Exact bearing replacement is usually recommended, but<br />
changing an older machine's open or shielded bearings to fully<br />
sealed bearings may be a good idea, such as on a tablesaw where<br />
sawdust has caused premature bearing fa ilure. Witilout getting into a<br />
lengthy discussion of dloosing higher-grade bearings (for information<br />
on this, consult SKF's booklet cited at tile end of the article),<br />
let me just say tilis: Don't try to save money by buying bearings tilat<br />
are a lower grade tilaIl tilose tile machine's maIlufacturer specifies.<br />
You'll face more frequent replacement witil inferior bearings,<br />
aIld they can cause more serious problems, such as scOt-ed shafts.<br />
Installing new bearings<br />
Pressing a ball bearing on a shaft usually isn't as delicate as extracting<br />
a bearing, but it's still best done with a hydraulic or arbor<br />
press. In lieu of a press, a haInmer and pipe will suffice if used<br />
judiciously. Select a pipe that just fits over tile machine's shaft and<br />
that will contact only the inner race of tile bearing. Make sure the<br />
pipe's ends are cut square and that aIly rough edges are filed<br />
smootil, lest tiley damage the bearing or shaft. Now, place one end<br />
You can build up a worn-out bearing socket, such as the one shown here on the<br />
bottom plate Of an orbital sander, with fortified epo:>.JI. To do this, give the new bearing a<br />
light coat of wax, apply epoxy to the worn socket and set the bearing in place.<br />
of the shaft on a hardwood block on a solid floor, slip tile new<br />
bearing on tile shaft, and fit the pipe down over tile bearing's inner<br />
race. Tap carefully on top of the pipe with a hardwood mallet,<br />
a dead-blow hammer, or a regular haIllmer and a block of wood<br />
until you feel tile bearing make solid contact wi til its seat (see the<br />
left photo on the facing page). When you first start tapping, be sure<br />
the bearing is straight on tile shaft, or you could ruin tile shaft, the<br />
bearing or bOtil. For pressing lighter bearings onto portable-power-tool<br />
shafts, you CaIl use a good drill press as discussed earlier<br />
(see the photo at right on the facing page); just substitute a piece<br />
of pipe fo r tile pin in tile drill chuck.<br />
OccaSionally, you'll find tiut a new bearing fits loosely on its<br />
shaft or in its bearing housing, indicating excessive wear in tilose<br />
areas. You can usually repair the worn areas with fortified epoxy<br />
(such as Loctite Weld braIld, available at bearing- aIld machinistsupply<br />
stores), but I mix my own by adding finely shredded fiberglass<br />
from insulation to regular two-part epoll.'y. To build up a<br />
worn bearing housing in a router, fo r example, I first apply a thin<br />
coat of wax over tile new bearing to keep it from gluing pennanently<br />
in place. Next, I spread a layer of tile epoxy on the inside of<br />
tile worn housing (shown above). Then I reassemble the machine<br />
and let the epoxy cure. I've also used this technique to build up<br />
the bearing seat on lightly worn tool shafts; if you do tlle same,<br />
cleaIl the shaft tlloroughly witll a solvent, such as lacquer thinner,<br />
before applying the epoxy. Loctite makes a more expensive compound<br />
called Quick Metal #660 (also sold at bearing- and machinist-supply<br />
stores) that works well for filling gaps up to 0.020 in.<br />
More infonnation<br />
I've just skimmed the surface of ball-bearing problems and remedies<br />
encountered with woodworking machinery. If you face a<br />
problem not discussed here, you might try contacting a bearing<br />
manufacturer's technical-service department, altllough I prefer<br />
talking to a knowledgeable person at my local bearing-supply<br />
store. A booklet by ball-bearing manufacturer SKF called tlle Bearing<br />
installation and Maintenance Guide is free at bearing stores<br />
and tilrough SKF Bearing Indusu'ies Inc., 1100 First Ave., King of<br />
Prussia, Pa. 19406-1352; (215) 391-8000. Altllough primarily for<br />
maintenance engineers who service big machines, like newspaper<br />
printing presses, the booklet offers useful technical information<br />
tilat relates to the bearings used in woodworking machines. D<br />
Bob Vaugban is a woodworking-macbinelY rebabilitation specialist<br />
in Roanoke, Va.<br />
September/October 1991 51
A Beginner's Jewelry Box<br />
Ta blesaw tricks with casing) curves and coves<br />
bYJimcum:rr:1il1S ____ --------:-------------------------------------<br />
A tablesaw is the only tool required to build this jewelry box. The curved sides are glued-up strips that were ripped from standard,<br />
lumberyard-variety door and window casing. The sides were then covered with shopmade veneer that was steam-bent over a tea kettle.<br />
As<br />
was left over from a variety pack assortment of veneers that I got<br />
years ago from Constantine (2050 Eastchester Road, Bronx, N.Y.<br />
10461). a finishing touch, the interior is velvet lined. And dle<br />
Although gray around the muzzle now, I can remember being<br />
a novice woodworker with a lot more enthusiasm than<br />
equipment. My workhorse at first was just a cranky old<br />
Sears tablesaw, and I often felt intimidated by my lack of a full<br />
workshop. Eventually I replaced my oid saw, and dll-ough dle years, I<br />
acquired a 6-in. jOinter, a radial-arm saw, a bandsaw, a drill press, a<br />
planer, a light-duty shaper and a ladle. With tools properly sharpened<br />
and set up, this old dog can finally make just about anything<br />
that takes his fancy; except that darn box on p. 76 of FW\'(i #87.<br />
The box is barely noticeable in dle background of a photo-just<br />
an incidental knickknack on a bedside stand. But dlis box bothered<br />
me because I knew that with all my tooling, I still couldn't<br />
machine its gently curved sides. I'd need either a crown-molding<br />
plane, and an apprentice to help pull it, or a $7,000, 3-phase shaper<br />
and a custom cutter to mold dut profile.<br />
Then I reconsidered. After all, in the early days, I had made<br />
a living widl my trusty tablesaw without resorting to fancy machines<br />
and high-priced tecl1l10logy. How would I have handled<br />
this job way back then ? How could any beginning woodworker<br />
handle it today?<br />
A few minutes spent studying the moldings available at dle local<br />
building-supply yard provided the answer. The shallow curve of a<br />
standard 3-in.-wide ranch-style pine casing was just what I was<br />
looking for. Ali I had to do was buy two 6-ft. lengths of casing, rip a<br />
11/s-in.-wide su'ip from each lengdl and edge-glue the strips together<br />
to form dle curved surface I was after for the box sides (see dle<br />
drawing on p. 54). The rest was easy. Since I didn't want to build a<br />
pine box, I covered the sides widl walnut veneer dun resawed on<br />
dle tablesaw. The bottom of dle box is Y4-in.-thick plywood set into<br />
a rabbet in dle sides. Because plywood is stable, I also used it for<br />
dle hinged lid, but surrounded it widl solid-walnut mitered edging.<br />
The edging is rabbeted to hold both the lkin.-dlick plywood<br />
dut forms the top surface and a l/s-in.-dlick mirror on dle inside of<br />
the lid. I veneered dle plywood top widl an unknown species dlat<br />
best part of building this box is that the only power tool I needed<br />
was my tablesaw.<br />
Making and veneering the sides<br />
The secret weapon that forestalls many problems in dle consu'uction<br />
of dlis box is a roll of 1-in.-wide masking tape. Consider<br />
the first step: After you've ripped the curved edges from dle ranchstyle<br />
casing, you have to edge-glue two strips together to form<br />
the curve of the sides, as shown in the drawing. Because of the<br />
curve, ordinary clamps won't bear properly, and the pieces will<br />
snap apart under pressure. But masking tape wrapped tighdy<br />
around the work every few inches will hold dle pieces in perfect<br />
alignment, and dle tape generates enough pressure for an airtight<br />
glue jOint. Keep your masking tape handy; it will prove essential<br />
again as this job proceeds.<br />
After the sides are dry, you need to veneer dle curved surface.<br />
You could use store-bought veneer, but I cut my own on the tablesaw<br />
by ripping thin slices from a 2V4-in.-wide board that I ran widl<br />
its edge down and its face guided by dle rip fence. When sawing<br />
the veneer, you will get the cleanest surface if the veneer<br />
is not u'apped between dle blade and dle fence. If you cut the<br />
veneer in several pieces (like from a short scrap), you'll have to<br />
reposition dle fence between cuts. The slices should be approximately<br />
V 1 6 in. dlick, but they don't all have to be exactly dle same.<br />
Nell.1:, for convenience in handling, cut dle core and veneer into<br />
pieces a little longer than dle box sides will be. Take note dlat dle<br />
veneer must be slightly narrower than the core or it will buckle<br />
during glue-up.<br />
Shopmade veneer in hand, you will doubt that it will bend to<br />
the core's curve. Don't despair. I used a standard kitchen tea kettle<br />
to steam one side of tlle veneer only, as shown in the photo at dle<br />
52 Fine Woodworking
Masking tape is an<br />
As<br />
essential "tool" for building the jewelry box. Above, the author "clamps" the steam-bent veneer to one of the pine<br />
box sides. Masking tape was also used to clamp the two pieces of curved molding together to form each side.<br />
bottom of this page. the steamed side expands from heat and<br />
moisture, the whole piece will curve smoothly. To hold the curve<br />
as the piece cooled and dried, I placed it inside a paper restraining<br />
sleeve, which can be seen in the foreground of the top photo. To<br />
make the sleeves, just wrap paper around each flat veneer strip<br />
and tape it up. Remove the veneer for steaming, and gently coax<br />
the wood to its curve. The thinner the veneer, the easier it will<br />
bend. The process can happen rapidly, or it might take as long as<br />
15 minutes for a stubborn piece. Don't rush; brute strength will<br />
crack the veneer. When you have the curve, slide the hot wood<br />
into the sleeve, and stuff the concave side witil crumpled newspaper<br />
to hold tile shape (see the top photo).<br />
When tile veneer is dry, apply glue to the core only. Ordinary<br />
white glue works better tilan yellow carpenter's glue for this job,<br />
because white glue doesn't grab as quickly. Lay tile veneer over the<br />
core and quickly secure this assembly witil masking tape at the center<br />
and ends, as shown in tile top photo. Then encircle tile entire<br />
piece with strips of tape. Work quickly because as tile veneer becomes<br />
wet from tile glue, it will begin to flatten out again. If tile<br />
veneer resists, apply a tight first layer of tape one piece at a time,<br />
and tilen wrap the whole length in an overlapping spiral of tape,<br />
pulling each turn tightiy. The masking tape prevents the glue from<br />
drying as fa st as usual, so don't remove the tape for at least 24 hours.<br />
To clean up the top and bottom edges of tile veneered sides, rip<br />
about Ys in. from each edge of all the side pieces. Then, attach a<br />
wooden auxiliary fence to tile rip fence so tilat you'll be able to cut<br />
with tile blade against the auxiliary fence. Now, cut a Y4-in.-wide<br />
rabbet in each side piece, for tile box's<br />
Vs<br />
bottom, by making two<br />
passes with a standard Ys-in.-wide blade. Make tile first pass on all<br />
the sides laid inside-face down on tile saw table with tile auxiliary<br />
fence against tile blade. Move tile fence in. away from tile blade,<br />
and make tile second pass. The blade should be raised just high<br />
enough to meet the veneer when tile box side is laid inside-face<br />
down on the saw table.<br />
At this paint, you can veneer the inside face of tile core for a<br />
better appearance and a more balanced construction, or you can<br />
leave it bare and then later line tile box with fabric as I did.<br />
To cut miters for joining the corners of the box, I tilted the tablesaw<br />
blade to 45°, laid two opposite-side pieces flat-face down<br />
and edge to edge on tile saw table, and pushed tilem past tile<br />
blade with the miter gauge. By cutting two side pieces at one time,<br />
I was assured that their length would be equal.<br />
With the miters cut, I used masking tape to dry-assemble the<br />
box sides so I could measure for tile top and bottom. eA1:, I cut<br />
tile Y4-in.-thick plywood bottom and then fit it into the taped-up<br />
Steaming one side only of shop-cut veneer causes the steamed<br />
side to expand, gently curving the veneer along its length. Cummins<br />
then slipped the veneer into a paper sleeve to hold the curve.<br />
September/October 1991 53
ox. With a tight-fitting bottom in place, you can double-check the<br />
accuracy of the miters; the bottom will also hold the box square<br />
during glue-up. But don't glue the box yet because you will need<br />
to take it apart to install d1e hinges.<br />
Making the lid and coving the edge profile<br />
Rip enough wood for the rabbeted lid frame, according to the dimensions<br />
in the drawing. I mitered the lid's frame as I did the<br />
sides, rabbeted it for d1e mirror and d1e veneer-covered plywood,<br />
and then glued the frame pieces together using masking tape for<br />
alignment and a light-duty band clamp for pressure. If you don't<br />
have a band clamp, you can use a string tourniquet or rubber<br />
bands cut from an old inner tube.<br />
I originally planned to simply round over the edges of the lid<br />
using a router, but my wife, Karen, insisted d1at an agee shape<br />
would look better. Since I didn't own a suitable router bit, I<br />
shaped most of d1e edges by making cove cuts on the tablesaw and<br />
d1en finished up wid1 sandpaper. (For more on coving on the tablesaw,<br />
see FWW #87, p. 51.) Cove cuts are made by passing the<br />
work over the blade at an angle, as shown in the top photo on the<br />
'Is<br />
facing page. The resulting shape is a segment of an ellipse. Coves<br />
have to be cut with a series of very shallow passes, removing a<br />
maximum of about in. at a time. Be sure to run all four edges<br />
past d1e blade before you raise it for d1e next series of passes.<br />
Your final cove doesn't have to match mine, but be sure you have<br />
left enough wood for d1e hinge screws.<br />
For final-shaping d1e lid frame and to remove sawmarks from<br />
the cove, I used 80-grit sandpaper on a Rockwell pad sander. 1 also<br />
used the sander to round over the outer lip on d1e top and bottom<br />
of the lid. To avoid swirl marks, which are the bane of a pad sander's<br />
existence, dust d1e work frequently and slap the paper to remove<br />
clogging dust and any loose abrasive panicles.<br />
Mounting the binges<br />
Because I couldn't find suitable hinges in my woodworking catalogs,<br />
I purchased two solid-brass hasps (Brainerd Manufacturing<br />
Co., 115 N. Washington St., East Rochester, NY. 14445; #804XC) at<br />
a local hardware store and bent them to shape in a vise. I then<br />
drilled and countersunk screw holes. Your hinges don't have to<br />
match mine exactly; anything similar should work fine.<br />
Jewelry box<br />
. __ ... -........................................ -- -- - - - -- - ------J B a c : k i a n dron:to:f:w:a:/:n:LIt<br />
to:p frame are<br />
x Ii'S x 12. Sides are 8 in. long.<br />
Detail: Section view of box<br />
I<br />
Veneer<br />
Velvet liner<br />
removed to<br />
show hinge.<br />
Plywood, %<br />
x 7% x 11 %<br />
Front and back, 0/'6 x 2 x 12%<br />
Sides, 9/,6 x 2 x 9<br />
Walnut veneer<br />
% 8% 117/8<br />
Plywood bottom,<br />
x X<br />
1% ----'1<br />
Detail: Ranch casing<br />
ft= v.<br />
1'/s-in.-wide strips from<br />
I .,..<br />
and glue together to form<br />
sides of box. Trim '/s in. off<br />
both edges of box sides,<br />
and then rabbet fo r bottom.<br />
ranch casing, -..!-------------,<br />
<br />
/" t<br />
,...J,I-------...<br />
, ____ -l<br />
54 Fine Woodworking
To mortise d1e bent hinge leaves, I first disassembled d1e box<br />
and raised d1e tablesaw blade me<br />
11/2<br />
d1ickness of me leaf. Then I laid<br />
d1e back side of me box flat on d1e saw table, and wim me edge<br />
riding against me miter gauge and wid1 a mitered end riding along<br />
d1e saw's fence, I crosscut a slot in. from each end of me piece.<br />
By moving me fence a blade widm farther from me blade after<br />
each pair of cuts until the slot widm matched d1e hasp widm, I was<br />
left wim matched hasp mortises, as shown in me bottom photo.<br />
Because d1e hasps I used have a large hinge barrel, I notched me<br />
back of me box to lower me barrels so mere would be just a slight<br />
gap along me back of me box when d1e lid is closed. I cut these<br />
barrel notches in me same way as me leaf mortises, but wim me<br />
flat side of d1e back, instead of its edge, against the miter gauge.<br />
This is a good time to screw d1e hinges to the back of the box. If<br />
you wait until d1e box is assembled, you'll be working in tight<br />
quarters. I drilled pilot holes and men clipped off me ends of me<br />
screws so mey wouldn't break through to me outside or show up<br />
under d1e finish a few weeks later as a telltale split or bump.<br />
After you have attached me hinges to me body of me box, glue<br />
up d1e sides and bottom using masking tape to hold me pieces in<br />
alignment until you can get a band clamp in place. ow you can<br />
attach me lid using d1e old epoxy trick: First, shim me hinge leaves<br />
slightly open wim a loosely knotted rubber band. Then, apply a<br />
scant drop of five-minute epo}.,)' to me top hinge leaves, and lay<br />
me lid in position. Wait a few minutes before opening me lid and<br />
drilling pilot holes for me screws. You can then pry me lid from<br />
d1e hardware wim a chisel and go on to finishing d1e box.<br />
Finishing touches<br />
I sanded d1e sides wid1 SO-grit paper to remove the sawblade<br />
marks and me fuzzy grain that had been raised by me steam. Then<br />
I went over me entire box with 220-grit sandpaper, first with the<br />
pad sander and men by hand in the direction of me grain. Next, I<br />
applied walnut stain to d1e edges of d1e sides so me pine core<br />
wouldn't be obvious.<br />
Because of d1e small size of d1is project, I decided to finish it<br />
wid1 Crystal Clear Krylon, an aerosol lacquer available at hardware<br />
and art-supply stores. For small jobs, an aerosol saves me me trouble<br />
of setting up and cleaning my regular spray equipment. If you<br />
want to try Krylon, spray on coats mat are wet but very min. The<br />
first coat will show any areas mat may need furmer sanding, which<br />
can be done almost immediately because d1e raw wood will absorb<br />
most of me solvent in d1e lacquer. Anod1er couple of coats<br />
will be needed before d1e entire surface begins to acquire a gloss.<br />
These first few coats offer a chance to practice your spraying skills<br />
because runs, drips, spitting (from residue allowed to accumulate<br />
around d1e nozzle) and puddles can be wiped off wim a clean rag.<br />
Allow this base of lacquer to dry overnight, and d1en apply subsequent<br />
coats at d1e rate of about two per day until you are satisfied.<br />
For an ultimate finish, apply a dozen coats, and let the box sit a<br />
week. Then cut d1e gloss wim 600-grit, wet-or-dry paper (used<br />
wim water), and polish with a paste of rottenstone and water (or<br />
auto-polishing compound). When polishing, check your work frequendy<br />
to avoid cutting through d1e finish.<br />
The box is lined wid1 velvet-covered strips of cardboard, as<br />
shown in me bottom photo. Mat board is ideal, but even cardboard<br />
from a cereal box will do. Cut me cardboard and me velvet<br />
strips to size, and glue me velvet to me cardboard. Be sure to keep<br />
your work area and your hands clean during d1is operation; if any<br />
glue gets onto d1e show surface of me velvet, you'll have to start<br />
over. When d1ese pieces are dry, tack mem into d1e box wim small<br />
drops of glue.<br />
Furd1er refinements such as locks, lid stays and compartments<br />
La PhOtoS; Charley Robinson; drawing: Bob Pointe<br />
The edge of the box lid is coved on the tablesaw. Numerous<br />
shallow passes are made over the blade guided by a rip fence, the<br />
angle of which determines the shape of the cove cut. Cummins<br />
uses a simple jig to support the workpiece and to shield his hands<br />
from the blade.<br />
Velvet-covered cardboard strips line the interior of the box<br />
and conceal the hinge mortises. The hinges are actually brass<br />
hasps from a hardware store. The mortises were made with a series<br />
of shallow cuts on the tablesaw before the box was assembled.<br />
are beyond me scope of this article. At d1is pOint, I'm satisfied to<br />
have proven to myself d1at I can get by wid10ut mat expensive<br />
0<br />
shaper, at least for one more year. Karen fully agrees wid1 this<br />
sentiment, and she also appreciates her new jewelry box, wim lid<br />
of her own design.<br />
NY FW\V, jim Cummins, a past associate editor at owns a picturejmme<br />
06470-5506. 63 5506,<br />
shop in Woodstock, His two woodworking videos, on<br />
small-shop techniques and making boxes, are available from<br />
The Taunton Press, S. Main St. , PO Box Newtown, Conn.<br />
September/October 1991 55
This shop-built router table is<br />
sturdy yet lightweight and<br />
knocks down for portability. It<br />
also has a quick-clamping fence<br />
with an adjustable bit opening,<br />
a dual-router setup and a builtin<br />
dust-collection system.<br />
Building a Router Table<br />
A drop-in baseplate fo r easy access<br />
Ed by Walker<br />
There is no quicker or cheaper way to increase your shop's<br />
versatility than by table-mounting your router. A table-mounted<br />
router is an excellent substitute for a light-duty shaper.<br />
With an almost endless variety of reasonably priced bits to choose<br />
from, a router table lets you shape, mold, bevel, groove, dado, mortise<br />
or trim just about any wood pan you can balance on a tabletop.<br />
A router table can be as simple as a piece of plywood Sitting on<br />
sawhorses, or it can include an elaborate base cabinet full of<br />
drawers. Many woodworkers have installed a router in their workbench<br />
or tablesaw extension. Others have made router tabletops<br />
that can be clamped in a vise and supported on hinged legs and<br />
then stored out of the way when not in use. Some of these options<br />
are discussed in the sidebar on pp. 60-61. The popularity of shopbuilt<br />
router tables has led to the recent proliferation of commercially<br />
available models offered by bod1 small and large manufacturers.<br />
When I was in d1e market for a router table, I examined most of<br />
d1e commercial tables. I concluded that because of their SimpliCity<br />
and because most of them incorporated different ideas developed<br />
by ingenious woodworkers in the first place, I could build a router<br />
table that would suit me better than any I could buy.<br />
I thought my first router table was the ultimate design. It included<br />
a large, heavy base cabinet with lots of storage, and it had builtin<br />
retractable casters so I could move the table around the shop.<br />
However, my second router table, shown in the photo above and<br />
in figure 1 on d1e facing page, has become my favorite. The base of<br />
this router table is designed to be easily disassembled so I can<br />
transport it to job sites or to demonstrations that I conduct. My<br />
portable router table incorporates one of the most significant advancements<br />
in table-mounting routers: The concept of mounting<br />
the router to an oversized baseplate that can be inserted flush into<br />
a rabbeted hole in the tabletop. There's no need to screw the plate<br />
to d1e table because the weight of d1e router holds it down. Tbis<br />
med10d of mounting allows fast removal of the router from the<br />
table for changing bits or for using the router by hand. I decided<br />
to make two cutouts in my tabletop so I could insert two routers<br />
with different bits. OccaSionally, this is a handy feature, but since I<br />
(continued on p. 58)<br />
56 Fine Woodworking
% x 11 x 11<br />
Baseplate,<br />
phenolic (NEMA grade X)<br />
Fig. 1: Router table<br />
Fence, 1'h<br />
x 3% x 20<br />
Baltic-birch plywood top, x 18 x 36, is<br />
edgebanded with oak, and both sides<br />
are covered with plastic laminate.<br />
Table insert is -in.-thick<br />
Baltic-birch<br />
% x<br />
plywood<br />
1 x 38<br />
covered<br />
with plastic laminate.<br />
Oak edge trim on front and<br />
back,<br />
2% 'h 7/s<br />
Tenon, in. thick by<br />
in. wide by in. long<br />
Mortise, '12 in.<br />
wide by 'Is in.<br />
deep by in.<br />
long<br />
Front rail, x 2 x 30,<br />
is Baltic-birch plywood.<br />
1% x 3 x 34,<br />
Leg,<br />
including tenons<br />
1% x 3 x 20<br />
Foot,<br />
Leg leveler is either<br />
%-in.-dia. by 3-in.-long<br />
stem or %-in.-dia. by<br />
3'h-in.-long carriage bolt.<br />
% 3'h<br />
Machine bolts,<br />
in. dia. by<br />
in. long<br />
1 % x 4% x 28'h, Stretcher, including tenons<br />
Fig. 2: Fence and chip-collection system<br />
U-shaped chip chute, 1'h x 4 x 10,<br />
is cut from two layers of Baltic-birch plywood.<br />
Adhesive-backed foam weather stripping forms<br />
seal between the chip chute and the<br />
tabletop and fence.<br />
Optional shim<br />
to offset<br />
1<br />
fence when<br />
using router<br />
table as<br />
a jointer.<br />
Top of chip chute is<br />
clear polycarbonate,<br />
1,4 x4x 10<br />
;'<br />
your<br />
sUfi<br />
Size va.cyum-hose connector<br />
to shop vacuum.<br />
7/sx3x3<br />
Foot pad,<br />
Photos except where noted: Charley Robinson; drawings: Bob La Poime<br />
% x 3 x 3'h<br />
Clear polycarbonate<br />
'h x 1'h x 9'h<br />
guard,<br />
3'h %<br />
Phenolic,<br />
Toilet flange bolt, in.<br />
dia. by in. long<br />
x 2% x 8'h<br />
Baltic-birch plywood,<br />
:Yo<br />
September/October 1991 57
usually only have one router mounted in the table, I made a special<br />
table insert for the other cutout that allows me to hook up a<br />
shop vacuum for chip removal (see the photo on p. 56).<br />
You may choose to build a more elaborate router table than the<br />
one I'm describing in this article, or you may go for the piece of<br />
plywood on sawhorses. But no matter what type of table you decide<br />
to build, I think you'll find the tips and guidelines I present<br />
on the main components of my router table helpful.<br />
The router-table base<br />
The primary function of the base is to place the work surface at a<br />
comfortable height. The tabletop should be at least as high as the<br />
distance from the floor to your wrist, but lower than the distance<br />
from the floor to your elbow; 34 in. to 38 in. is about right for<br />
most people. The type of work you do will help determine the<br />
best height. Generally, small, detailed work will be most comfortable<br />
at elbow height.<br />
As I mentioned earlier, I needed a portable but steady router<br />
table to take to demonstrations. To reduce both costs and weight, I<br />
built the base from construction-grade spruce 2x4s and 2x6s. The<br />
legs are mortised,<br />
1<br />
tenoned and glued to the top rails and feet, but<br />
the stretchers are attached to the legs with %-in. machine bolts that<br />
thread into T-nuts captured in mortises in the stretchers, as shown<br />
in figure on the previous page. The front and back rails are<br />
screwed into the ends of the side rails and to the underside of the<br />
top. After mortising and tenoning the legs and stretchers, I routed<br />
blind mortises in the stretchers for the T-nuts. Then I drilled<br />
7!J 6-in.-dia. holes through the legs and through the ends of the<br />
stretchers to meet the mortises. I dry-assembled the base to make<br />
sure everything fit properly. Then I rounded over all the edges<br />
except the top rail and the top inch of the legs, and sanded the<br />
individual components. I glued up the two leg assemblies (each<br />
conSisting of two legs, a side rail and a foot), making sure they<br />
were flat and square. To complete the leg assemblies, I glued<br />
three pads onto the feet and installed a leg leveler in place of the<br />
fourth foot pad. One leveler is all that's needed to stabilize the<br />
base on uneven floors. If you cannot find a suitable leg leveler at<br />
your local hardware store, you can substitute a carriage bolt<br />
screwed through a T-nut on the bottom of the foot with a threaded<br />
knob locked in place on the threaded end of the carriage bolt.<br />
After bolting the leg assemblies to the stretchers, I fastened the<br />
front and back rails to the ends of the side rails with #10 by<br />
21Iz-in.-long washer-head screws countersunk % in. deep. These<br />
screws reach into the leg tenons, providing much better holding<br />
power than the endgrain of the side rails alone. The top is later<br />
secured by screwing through the front and back rails into the<br />
underside of the top.<br />
The router-table top<br />
A router-table top needs to be strong, stable and smooth. I made<br />
my top from %-in.-thick Baltic-birch plywood. I glued on oak<br />
edgebanding and then covered<br />
(MDF),<br />
both sides of the top with plastic<br />
laminate, as shown in figure 1 on the previous page. The front and<br />
back rails attached to the underside of the top help keep it flat.<br />
Medium-density fiberboard at least 1 in. thick, also makes an<br />
excellent top. Particleboard could be used, but I don't recommend<br />
anything less than 1 Y4 in. thick because I've heard of router baseplates<br />
tearing through the liz-in. thickness left after rabbeting<br />
%-in.-thick particleboard. No matter what material you use, both<br />
sides of the top should be covered with high-pressure plastic laminate,<br />
and all edges should be laminated, banded with hardwood<br />
strips or otherwise sealed for stability. A light-colored, matte laminate<br />
allows temporary layout lines to be marked on the top and<br />
then cleaned off easily. An occasional coat of paste wax will prolong<br />
the top's life and make sliding material over the top easier.<br />
A top that is 16 in. to 24 in. wide by 30 in. to 48 in. long will suit<br />
most needs, although you may want to modify these dimensions to<br />
suit your situation. Keep in mind, however, that with router tables,<br />
bigger isn't necessarily better. If the work is too large for the table,<br />
the router can be removed from the table and hand-guided over<br />
the stationary work. Mounting the router on one end of the top<br />
instead of in the middle provides space for work in progress or for<br />
mounting a second router, which greatly facilitates multiple-setup<br />
operations. In addition, the top should overhang the base by at<br />
least 2 in. to provide space for clamping the fence and other fixtures.<br />
Router baseplates<br />
An integral part of the router-table top is the drop-in baseplate to<br />
which the router is mounted. A variety of baseplate materials can<br />
be used. Clear acrylic is often used for baseplates to increase visibility,<br />
which is beneficial if the router is operated freehand. However,<br />
concentration of stresses around mounting screws in acrylic<br />
can cause chipping and even breakage, allowing the router to fall<br />
out of the table. If acrylic is the only material available, it should<br />
be at least % in. thick, and the baseplate should be as small as<br />
possible. The baseplate must be checked regularly and discarded if<br />
cracks radiate from the screw holes. Polycarbonate, another clear<br />
plastiC, is safe to use, but it will sag over time. In addition, heat<br />
from the router can cause the polycarbonate to expand enough to<br />
jam in the recess. I think 'l'4-in.-thick phenolic resin board is the<br />
best choice for a router baseplate. The phenolic securely holds the<br />
router without danger of breaking or flexing, which can affect the<br />
accuracy of setups. And phenolic's strength allows the use of a<br />
thinner and larger baseplate, which makes inserting and removing<br />
the router easier and maximizes the cutting depth of router bits.<br />
Phenolic comes in a bewildering assorUnent of grades for various<br />
purposes, but paper-base phenolic resin board (NEMA Grade X)<br />
makes an excellent baseplate; it is available in natural (brown) or<br />
black from most plastic-supply stores.<br />
I made an ll-in.-sq. baseplate to accommodate even the largest<br />
router without requiring a lot of twisting and turning to get the<br />
router through the table opening. A square baseplate can also be<br />
rotated 90° to reposition the router controls in relation to the<br />
table-a handy feature at times.<br />
Routing the baseplate recess<br />
The baseplate should fit snugly into its recess in the top so that the<br />
baseplate is flush or about Y64 in. proud of the top. If the baseplate<br />
is low, stock will catch on the edge of the recess and depth of cut<br />
will change as the work passes from the baseplate to the table surface.<br />
A %-in.-wide rabbet around the perimeter of the recess will<br />
adequately support any of the various baseplate materials. I've developed<br />
a method for routing the recess that takes into account the<br />
fact that most router bases are not concentric with the router bit. I<br />
made separate templates of lkin.-thick hardboard for each side of<br />
the router and used them in conjunction with the phenolic baseplate<br />
to set up router guides on the tabletop. This procedure has<br />
yielded extremely accurate baseplate rabbets with non-concentric<br />
circular bases or any other shape router base. I recommend practicing<br />
routing with the templates on some scrap before cutting into<br />
a nice, new router-table top.<br />
To make the templates, I first cut four pieces of hardboard<br />
slightly shorter than the sides of the phenolic baseplate and slightly<br />
wider than the distance from the edge of the router base to the<br />
cutting edge of a 1-in.-dia. straight bit chucked in the router. Next,<br />
I marked one of the template blanks "left" and butted it against a<br />
58 Fine Woodworking
The router jig above is used to trim templates that<br />
are the same width as the distance between the router's<br />
edge and the cutting edge of the bit.<br />
This chip-collection system is a chute that connects<br />
an opening on the back of the fence with a vacuum<br />
port in the tabletop or in a second insert plate (zeft).<br />
straightedge tacked to a piece of scrap plywood, as shown in the<br />
photo above at right. A piece of double-sided tape secured the<br />
template to the plywood. With the left edge of the router base held<br />
firmly against the same straightedge, I routed off the edge of the<br />
template, making it exactly tl1e same widtl1 as the distance from tl1e<br />
router base's edge to the straight bit's edge. I repeated this operation<br />
to make templates for tl1e front, right and back sides.<br />
ext, I positioned the baseplate on the router table where I<br />
wanted the cutout and placed the templates on their respective sides<br />
of the baseplate. This way, I could clamp straightedge guides firmly<br />
against the templates and then remove the templates and the baseplate.<br />
Witl1 the router oriented correctly in relation to tl1e templates<br />
tlut I used to set up tl1e guides, I am ensured of a perfectly<br />
sized recess. After setting the router depth of cut about 164 in. shy<br />
of the baseplate's thickness, I routed a recess with the I-in.-dia. bit<br />
used to make the templates. This recess is the rabbet that will support<br />
the baseplate. I cleared out chips that built up along the guides<br />
and made passes until the bit no longer cut. Then I checked to be<br />
sure no chips were holding the router away from the guides.<br />
To remove tl1e waste in tl1e center of the cutout, I switched to a<br />
14-in.-dia. straight bit, and, without moving tl1e straightedge guides,<br />
I routed all the way through d1e top. Because of d1e difference between<br />
the I-in. -dia. bit d1at cuts the recess and the 14-in. -clia. bit tl1at<br />
cuts through the top, I was left with a %-in.-wide rabbet. Before<br />
removing the straightedge guides, I eased the sharp edges of the<br />
recess with a file, rounded the corners of the baseplate to match<br />
tl1e recess and test-fit the plate. If necessary, additional passes can<br />
be made with the I-in.-dia. bit until the baseplate is just barely<br />
higher than tl1e top. If the recess is too small, tl1e baseplate can be<br />
filed until it fits, or tl1e appropriate guide can be lightIy tapped and<br />
then tI1e recess can be trimmed with one more router pass. Conversely,<br />
if the recess is too deep or too large, tI1e rabbet can be<br />
shimmed. I make shims by sanding the back sides of tI1in strips of<br />
plastic laminate until tI1ey are the proper thickness, and then I glue<br />
tI1em into d1e recess. A snug fit is essential. When the baseplate<br />
was properly fitted to the table, I drilled two I-in.-dia. finger holes<br />
in opposite corners of the baseplate and removed tl1e sharp edges<br />
with a 1s-in.-radius roundover bit. This makes the baseplate easy to<br />
grasp when placing it in or lifting it out of the table.<br />
Fitting the router to the baseplate<br />
I positioned my Elu router diagonally on tl1e baseplate; tl1is diagonal<br />
orientation makes it easier to get the router in and out of tI1e<br />
table and moves tI1e height-adjustment mechanism toward tl1e<br />
front of the table. To mount the router, I first located tI1e center of<br />
d1e baseplate. Then, using the router's subbase as a pattern, I<br />
marked, drilled and countersunk the mounting-screw holes. If<br />
your router does not have a removable subbase, or if you wish to<br />
locate the router precisely in tI1e center of the baseplate, you can<br />
easily make a subbase from a piece of clear plastic large enough to<br />
cover all the router-base screw holes. Place d1e plastic over the<br />
base, mark and drill tI1e screw holes, and tI1en mount tl1e subbase<br />
on tI1e router. Chuck a 'kin.-dia. bit in the router, and plunge<br />
tI1rough the subbase to mark its center. After removing the subbase,<br />
drill a 'kin.-dia. hole in the center of the baseplate blank,<br />
place it on the subbase, and insert a 14 -in.-dia. rod through the<br />
center holes to align tI1e subbase and baseplate. A dab of hot-melt<br />
glue or double-sided tape will hold tI1e subbase in pOSition while<br />
you drill the mounting-screw holes through the baseplate.<br />
To cut the clearance hole in the baseplate, I chucked my largest<br />
bit (it must be sharp) into tI1e router and mounted the router to<br />
tl1e baseplate. In most cases, the screws d1at secure the subbase to<br />
tl1e router will not be long enough to fasten the router to tI1e<br />
tl1icker baseplate. For longer screws, I recommend socket flat-head<br />
cap screws because heads of both Phillips head or slotted screws<br />
are easily stripped, making them difficult to remove. Next, I placed<br />
the baseplate in the table recess with the router above the table<br />
and cranked down the height adjustment to advance d1e cutter<br />
steadily through the baseplate. Variable-speed routers should be<br />
set to tI1eir slowest speed for this operation. If the bit is not designed<br />
for plunge cuts, the center of tI1e baseplate must first be<br />
pierced with a smaller plunging bit.<br />
To support workpieces when using smaller bits, I made a variety<br />
of inserts with center-hole diameters about 1s in. larger than each<br />
bit's diameter. First, I routed a 14 -in.-wide by '/s-in.-deep rabbet<br />
around the clearance hole in the baseplate with a bearing-guided<br />
rabbeting bit. Then, using a circle-cutting jig I designed for my<br />
router, I cut several inserts and routed mating rabbets on the inserts,<br />
again with a bearing-guided rabbeting bit. (A similar circlecutting<br />
jig is available from Woodhaven, 5323 W Kimberly Road,<br />
Davenport, la. 52806.) I also made an insert with no hole to prevent<br />
chips and dust from falling into the router when it is not in<br />
use. To keep the inserts from rotating, I drilled a 'kin.-dia. hole at<br />
the edge of the bit clearance hole in tI1e baseplate, epoxied a short<br />
piece of V4-in.-dia. brass rod into the hole, and cut a matching<br />
notch into tI1e edge of each insert.<br />
Photos this page: Ed Walker<br />
September/October 199 1 59
The fence<br />
In its simplest form, a router-table fence is a straightedge for guiding<br />
the workpiece past the router bit. The utility of the fence can<br />
be increased greatly witil a few minor modifications, such as a recess<br />
for bit clearance, a cutout on tile bottom of the fence for chip<br />
ejection and a Vs-in.-wide chamfer on tile bottom corner of tile<br />
face to prevent chips from building up between the fence and<br />
workpiece. A guard mounted over the cutter will help protect the<br />
operator's hands and eyes. The fence shown in figure 2 on p. 57,<br />
will meet most users' requirements. It has a thinner profile on<br />
each end for clamping to the table, a cutter guard for safety, movable<br />
faces to adjust the opening for different-size bits and an unobstructed<br />
chip-ejection chute. The outfeed fence can also be<br />
shimmed for jointing operations.<br />
To ensure stability, I glued togetiler the main body of tile fence<br />
from plywood, as shown in figure 2. I used phenolic for tile adjustable<br />
faces because of its durability and low-friction surface; howev-<br />
er, plywood would also work well for these parts. The large, flat<br />
heads of toilet flange bolts fit nicely into the rabbeted slots that I<br />
routed in tile adjustable faces. I also routed a Vs-in.-wide chamfer<br />
around the front edges of the phenolic faces to make it easier to<br />
slide workpieces across tile faces and to prevent dust buildup at<br />
tile base of the fence. A clear polycarbonate guard screwed to tile<br />
top of the fence over the cutter provides good visibility and greater<br />
impact resistance than acrylic. When using the router table for<br />
edge-jointing, I insert a shim of stiff paper or plastic laminate to<br />
offset the outfeed fence by the amount I want to remove in one<br />
pass. Slots cut in tile shims allow tilem to slide into place without<br />
the face of the outfeed fence having to be removed completely.<br />
Also, for supporting stock on edge, high vertical faces can be<br />
mounted on the fence in place of the adjustable faces.<br />
As you can see in tile photo at left on p. 59, I like the fence<br />
oriented front to back across tile short dimension of the top. This<br />
orientation allows for shorter fences and fL'\.'!:ures and for easier<br />
Space-saving router tables<br />
by Charley Robinson<br />
Not every shop has room for a large, permanent<br />
router table. And while the portability<br />
of the knockdown table described in<br />
the main article makes it great for on-site<br />
work, the router table also may take up<br />
more floor space than some of us are willing<br />
to allocate. When I was ready to add a<br />
router table to my shop, I decided to use a<br />
surface that was already taking up spacemy<br />
tablesaw's extension table (see the<br />
photo below). I mounted my router on a<br />
clear polycarbonate baseplate for visibility<br />
during freehand operations. Then, I cut a<br />
recess in my tablesaw's extension table<br />
and used the same drop-in technique discussed<br />
in the main article. ot only did<br />
this save shop space, but I ended up with a<br />
large surface to support longer workpieces.<br />
Also, without extra effort, I had an<br />
extremely accurate and easily adjustable<br />
fence. To protect the laminated face of my<br />
rip fence when using it with the router, I<br />
clamp on an auxiliary fence with a hole<br />
bored in the middle for bit clearance.<br />
Because it was difficult to reach the router's<br />
on/off switch, I mounted an electrical<br />
box with two outlets, both controlled by<br />
the same switch, beneath my extension table.<br />
After dropping tlle router into the table,<br />
I lock the router's switch in the "on"<br />
pOSition, plug tlle router into the switched<br />
outlet and then plug my shop vacuum into<br />
Mounting a router in a tablesaw extension offers a large work surface, with<br />
no additional loss Of floor space, and an extremely accurate fence. Attaching an electrical<br />
box with two switched outlets to the front of the extension table provides safe and convenient<br />
control of the router and the shop vacuum.<br />
the other outlet. This way, I control the<br />
router and the vacuum with one switch.<br />
The disadvantage of tlllS outlet setup is the<br />
danger of forgetting to unlock the router<br />
from the "on" pOSition when removing it<br />
from tlle table for freehand use. To make<br />
sure the router doesn't start up unexpectedly<br />
when it's plugged into a live outlet, I<br />
always unlock the switch immediately<br />
upon removing the router from the table.<br />
A folding router table: Another idea<br />
for woodworkers with limited shop space<br />
is to mount the router to a folding table<br />
that can be quickly set up when needed<br />
and then folded compactly for storage. The<br />
sturdy, stowable router table shown in figure<br />
3 on the facing page was sent in by David<br />
Finck, a professional woodworker in<br />
Reader, Wv. His torsion-box top is extremely<br />
strong and stable, and because the<br />
router is mounted to the underside of the<br />
top plywood skin, Finck sacrifices only<br />
% in. of a router bit's maximum depth of<br />
cut. A pair of legs are hinged to one side of<br />
the table and can be locked in the open position<br />
with notched, diagonal braces,<br />
which pivot to allow the table to be folded<br />
for storage. On the side opposite the legs is<br />
a mounting block that clamps into a workbench's<br />
face vise, as shown in figure 3, to<br />
hold the table securely. The wide open<br />
base provides easy access to the on/off<br />
switcll and the router chuck for bit changes.<br />
Although construction is straightforward,<br />
as shown in figure 3, Finck offers<br />
several construction hints. The plywood<br />
block that reinforces tlle center of the table<br />
should be about 2 in. larger than the<br />
router base, and the cutout should allow<br />
%2-in. clearance between the block and<br />
the router base. If your router base is rec-<br />
60 Fine Woodworking
fence adjustments. The shorter fence also makes it easier to work<br />
with slightly bowed stock, and since I have a two-router table, I can<br />
set up separate fences for two operations. Although any C-clamp can<br />
be used to secure the fence to the table, I prefer Vise-Grip locking<br />
C-clamps with swivel pads. The lock/release action of these clamps<br />
makes it quick and easy to reposition the fence or to remove the<br />
fence to gain access to the router. Because the fence will always be<br />
parallel to the bit in any horizontal orientation, I can make accurate<br />
and fine adjustments by simply tapping one end of the fence.<br />
Chip collection<br />
I designed my fence for efficient chip clearance even without a<br />
dust-collection system in operation. But the router makes a lot of<br />
chips, and most of the time I run it with a shop vacuum to collect<br />
the mess before it gets blown all over my shop.<br />
My chip-collection system, shown in figure 2 on p. 57 and the<br />
photo at left on p. 59, consists of two main parts: a U-shaped chip<br />
Fig. 3:<br />
Strap hinge<br />
A stowable<br />
Router<br />
router<br />
table<br />
table<br />
Router table in use<br />
chute that extends from the fence over to the other baseplate cutout<br />
in my router table; and a plywood table insert with a hole cut<br />
through it into which a vacuum-hose connector is glued. The chip<br />
chute was first bandsawn from two pieces of %-in.-thick birch plywood<br />
that had been laminated together, and tl1en the chute was<br />
topped with a sheet of clear polycarbonate. Adhesive-backed foam<br />
weather stripping forms an air seal between the chip chute and the<br />
fence and tabletop. When chip collection is needed, I just place the<br />
chute in position, connect the vacuum hose and turn on the vacuum;<br />
the pressure created by the vacuum holds the chip chute<br />
D<br />
in<br />
place. I routed a rabbet around the vacuum COlU1ector hole in the<br />
plywood table insert, and made a plug to fill the hole when the<br />
vacuum is not<br />
NC),<br />
in use.<br />
N<br />
Ed Wa lker is executive director of the Triangle Area Woodworkers<br />
Club (Raleigh, conducts router seminars, and manufa ctures<br />
and markets router tables in Apex,<br />
C.<br />
Router mounting screws Plastic laminate, 24 in. sq.<br />
Diagonal brace Leg ./ Cross brace<br />
Poplar, :y. x 2 x 20<br />
tangular, orient the router cutout so that<br />
the controls will be facing forward. Finck<br />
also cautions you to position the router<br />
cutout to avoid interference between the<br />
router and your bench-vise handle. The<br />
wider stock around the edges of the torsion-box<br />
core provide a solid area for<br />
attaching the hinges and vise mounting<br />
block and for clamping fences to the table.<br />
Finck also suggests that the legs be<br />
made slightly long and then trimmed to<br />
length after the table is completed; this<br />
way, the table can be made level when it's<br />
clamped in position in a bench vise. When<br />
assembling the table, pOSition the cross<br />
brace, legs and vise mounting block so that<br />
they won't interfere with each other when<br />
the table is folded. For a fence, Finck uses<br />
a 1 %-in.-thick by 2%-in.-wide piece of<br />
jointed-and-squared hardwood with an<br />
opening for chip and bit clearance. D<br />
Charley Robinson is an assistant editor<br />
at FWW.<br />
Cross brace, % x 2 x 24<br />
Position cross brace to<br />
clear router and mounting<br />
block when folded.<br />
Poplar, :y. x 2 x 24<br />
<br />
The hinged legs are in. thick by 2 in. wide<br />
and as long as the distance from<br />
the floor to the top of the bench vise.<br />
September/October 199 1 61
All these tools fit inside the<br />
pine chest on the left. Saws hang<br />
inside the lid; planes sit on the<br />
bottom; a drawknife, spokeshaves<br />
and chisels hang on the chest's<br />
ends; long marking and measuring<br />
tools hang on the front and<br />
back; everything else fits inside<br />
eight drawers or in two removable<br />
boxes. Konovalo!f built the<br />
walnut chest on the right to refine<br />
some of the storage systems.<br />
A Cabinetmaker's<br />
Tool Chest<br />
A home fo r hand tools<br />
by Tony Konovaloff<br />
position upright Lid in \ \<br />
wide frame, Back of by 3% lid in \<br />
39% in. long J \<br />
\<br />
,<br />
2 Butt 10/16 in. in. hinge, long wide<br />
<br />
Ī <br />
beam Panel gauge<br />
\<br />
\<br />
Front and back stops, % x 1'1. x 38% in.<br />
Section view of left side<br />
Handsaws are hung on inside of lid and on inner door.<br />
, " Saw Inside compartment, of chest, 18% 20% x 18% x 38% x 36'12 x 17/8<br />
#1<br />
L1 .n<br />
mortise lock Drawer contents<br />
I<br />
Framin g square hanger #1. Small marking<br />
#2. Large tools marking<br />
'TOP d' awer hinges up for<br />
access to drawer beneath.<br />
<br />
Lid support is<br />
angled SO<br />
Chest back<br />
at<br />
a<br />
top<br />
and<br />
19'1.<br />
hinged<br />
in. high<br />
to<br />
38<br />
back<br />
in.<br />
of<br />
long :dfiont' #4 '12 '12 x 31% #3. tools Spare plane<br />
X<br />
by<br />
ches<br />
A<br />
4-<br />
:- Bifol d rule #4. blades<br />
#5. Miscellaneous Mallet, wax,<br />
4% Kick in. board, <br />
f- #6. screwdrivers Files and rasps<br />
wide<br />
\<br />
#8. #7. Small Hammers planes<br />
wrenches and<br />
>-.<br />
"-'-'<br />
r-<br />
/<br />
/<br />
)/<br />
fl<br />
f--l<br />
<br />
-I ...., -LJ<br />
-"-"-<br />
#2<br />
#3 -<br />
-L.---/<br />
All chest parts are in. thick except where<br />
noted. Drawer sides are in. thick, and<br />
drawer bottoms are % in. thick. Size drawers<br />
to suit your needs.<br />
I <br />
Front of lid frame, 3% in. wide by 39% in. long<br />
h<br />
"<br />
r-'<br />
." i'----Upper guide rails,<br />
I-<br />
Space<br />
"-" '-...%x Low % er x guide 313/4 rails,<br />
62 Fine Woodworking
If you work wood, you need a place to store your tools. So for<br />
many of us, a tote box, a tool cabinet or a chest is one of the<br />
first woodworking projects we undertake. My pine tool chest,<br />
shown on d1e left in the photo on the facing page, was one of my<br />
earliest projects, and it seLved me well for years. Each tool has a<br />
home-on d1e bottom of d1e chest, in one of eight drawers, in removable<br />
boxes or on a rack inside d1e chest or its lid. As I collected<br />
new tools and learned new storage tricks, I altered the chest's<br />
storage layout by moving drawer guides and tool racks. The inside<br />
of the chest is now pockmarked wid1 screw holes, as evidence of<br />
these alterations. So after too many alterations on my pine chest, I<br />
decided to build a new chest of walnut.<br />
Since d1e size of my first tool chest is as practical as it is big, I<br />
made d1e new one, which is shown in d1e drawing on the bottom<br />
of d1ese two pages, the same size. I wanted the chest to be portable,<br />
ald10ugh it takes two people and a forklift to carry it. I was so<br />
familiar with my first chest d1at I could find anyti1ing with my eyes<br />
closed. So, I reasoned, why not just refine that same storage system<br />
in the new chest ?<br />
I went through d1e same steps to plan my new chest as I did<br />
when I built the first one-listing, grouping and measuring all my<br />
tools (as well as some I hoped to buy)-but in d1e end, I only<br />
altered my original design slightly. I decreased the tolerances between<br />
drawers and boxes, I made some drawers shallower, and I<br />
added a couple of drawers. And, for appearance sake, I made the<br />
kick board wider so it would be in balance visually with the sides<br />
of the lid. I'll tell you how the new chest was built and more about<br />
its design, but remember that d1e compartments inside (see the<br />
drawings) are for my tools. So use d1e drawings as a guide-to customize<br />
a chest for your own tool collection.<br />
Planning a place for each tool<br />
A snug home for the tools not only saves space, but also prevents<br />
them from banging around when I move the chest or shuffle<br />
d1rough its contents. I arranged my planes and other large tools on<br />
a "floor plan" of the bottom to arrive at the chest's overall length<br />
and width. The chest's depth was determined by the 16-in.-long<br />
Frame-and-panel inner door, \<br />
Section view of front<br />
Buttons atta ch top panel<br />
PhotOs: Gary Weisenburger; drawings: Kalhleen Rushton<br />
I<br />
tongue of my framing square, which I decided to hang between<br />
d1e drawers and d1e front. And I designed a compartment within<br />
d1e lid for storing my handsaws.<br />
Once I knew the chest's overall size, I turned my attention to the<br />
storage racks, drawers and removable boxes inside. Since I had<br />
already decided to store my planes on d1e bottom, I needed to<br />
devise a way to get d1em out without having to remove everything<br />
else first. The solution was to have a bank of drawers at each end<br />
of d1e chest with an open well between d1el11. I can lift the planes<br />
out through the central well, or I can slide all d1e drawers to one<br />
end of d1e chest and lift the planes out through the open space at<br />
d1e other end. I filled the space in d1e well wid1 two removable<br />
boxes. One box holds my screwdrivers and my drilling tools (bits,<br />
a brace and a geared drill). All my sharpening equipment fits in<br />
the other box. The minimum size of d1e well was determined by<br />
how much space I needed to remove my largest plane, a Stanley<br />
#7 jointer. Once I knew the minimum size of the well, I divided<br />
the remaining space between the two banks of drawers and racks<br />
for hanging tools on d1e back and on d1e sides, as shown.<br />
Like the framing square, long or awkward tools hang on racks<br />
between d1e drawers and d1e chest's sides and ends. I also hang<br />
the tools I use often, like a folding rule and chisels, because d1is<br />
way they're always visible and accessible. My drawknife and spokeshaves<br />
hang on one end; chisels hang on the od1er end; a square,<br />
straightedge, folding rule and panel gauge beam hang on the front<br />
and back sides. I d1en sized the depth of the drawers according to<br />
their contents. I put a mallet and commonly used screwdrivers in<br />
one top drawer, and measuring and marking tools in the other.<br />
Each of the other six drawers contains a different tool group, wid1<br />
the least-used tools in the lower drawers.<br />
The chest holds too many tools to list. I'm amazed that everyd1ing<br />
fits inside when I see all d1e tools spread out on the floor in<br />
front of the chest, as shown on the facing page. In that photo, the<br />
empty walnut chest is almost complete, except for the drawer<br />
guides and tool racks. Ald10ugh I could have glued the guides and<br />
racks into carefully spaced grooves, I chose instead<br />
Slide<br />
to screw d1em<br />
to the chest sides so I can alter d1eir arrangement<br />
(<br />
easily.<br />
clearance) no t c h bolt c h es for t sides inner for door<br />
Fixed tray is screwed to front and back of chest.<br />
179/16 in. wide by 38'116 in. long Lid panel, 207/8 in. wide by 38% in. long<br />
to<br />
37/8 Ends<br />
lid's<br />
in. of wid lid<br />
back frame.<br />
21% in. Ion eby<br />
Hanger for g frame, \ <br />
'"<br />
"\<br />
drawknife :::chI #1 l'<br />
Upper rails gui de 9 -{r-- #2<br />
r.<br />
..l. -. /.....:\ L--l. L-..l. ... l- #5<br />
r--<br />
==C><br />
<br />
""<br />
#3<br />
- i-.I<br />
Arrows indicate<br />
drawer movement.<br />
Drawers # 4 and #8 ==C><br />
Drill box <br />
slide into d<br />
#3<br />
spokeshav Hangers<br />
and #7<br />
fo es<br />
rawers<br />
r<br />
I-- #4 ==c><br />
:-] \I \<br />
Lower rails guid e<br />
17 \ ::J Sharpening<br />
D<br />
:::J -1<br />
box r-<br />
\7<br />
% Bottom, x 19 x 37 5'1. .<br />
---<br />
<br />
J /<br />
J
Making the chest<br />
Sliding dovetails on the<br />
ends of the lid are hand-cut<br />
with a dovetail plane (teft).<br />
The scoring blade on the<br />
plane's side prevents tearout<br />
when cutting across the grain.<br />
Konovaloff hangs the lid<br />
by screwing hinges to the<br />
chest's back. Then he turns<br />
the lid upside down, props<br />
up the chest to align hinges<br />
and mortises, and screws the<br />
hinges to the lid (below).<br />
I made the chest and most of its drawers, boxes and racks from<br />
walnut. My first chest is a testament to the 'durability of pine, but<br />
hardwood can take more abuse and still look good. However, I used<br />
alder for the bottom panel because its lighter color improves visibility<br />
inside dle chest. Before starting dle project, I bought 80 bd. ft.<br />
of 414 lumber: 50 bd. ft. for the chest, kick board and lid, and 30 bd.<br />
ft. for the storage compartments inside. I also used a lot of scrap.<br />
I began by gluing up all the large panels for the sides, ends, top<br />
and bottom, and dlen I thickness-planed them after the glue dried.<br />
I work exclusively with hand tools, and so I scrub-planed dle panels<br />
nearly to thickness (see dle sidebar on the facing page for<br />
more on dlis) and then surfaced them flat widl a jointer plane.<br />
Next, I cut each panel to size (given in the drawings) and plowed a<br />
groove in the sides and ends 12 in. from dleir lower edge, for dle<br />
bottom panel. The sides and ends are joined widl dovetails, and I<br />
cut dle tails first because I find dut it's easier to make dle pins fit<br />
dle tails. As unordlOdox as it may sound, I used a file and finetoodl<br />
rasp, rather than a chisel, to trim dle pins.<br />
I made dle kick board next. Although it strengmens dle bottom<br />
of the chest, dle kick board is really just a protective base molding.<br />
On my first chest, I made the kick board the sanle width as the sides<br />
of the lid, but the kick board looked too narrow. So on the walnut<br />
chest, I made the kick board '/2 in. wider, and it looks more balanced.<br />
To ensure that the dovetailed kick board fit the chest tightly,<br />
I cut the pins on the end pieces first, glued dlem to dle chest,<br />
screwed dlem in place from inside, and dlen held the front and<br />
back pieces up to mark for the tails. After cutting and fitting the<br />
tails, I glued and screwed the front and back pieces in place.<br />
Making the lid<br />
The lid is basically a shallow box that overhangs the outside of the<br />
chest. Long wood cleats, glued inside the front and back of dle lid<br />
frame, act as stops and rest on dle top edges of the chest when dle<br />
lid is closed. An inner frame-and-panel door is hinged to dle back<br />
stop and held closed widl slide bolts that engage the sides of dle lid<br />
frame. The space between the underside of the lid and the inner<br />
door is 1'/8 in. -enough for saws to be hung on both surfaces.<br />
The construction of the lid is somewhat unconventional unless<br />
you dlink of it as a traditional dovetailed drawer turned upside<br />
down. In traditional drawermaking, the back is made narrower<br />
than dle sides so that the bottom can slide over dle back and into<br />
grooves in dle sides. In dle case of my chest's lid, the top-to-sideframe<br />
joints aren't just tongues in grooves, dley're sliding dovetails.<br />
The top panel is butted and glued to the frame in front and<br />
secured to the back with cabineunaker's buttons, like those used to<br />
hold solid tabletops to aprons. This consu-uction anchors the panel at<br />
dle front while allowing it to expand or contract at dle back.<br />
I cut dle sliding dovetails on the ends of the top panel and the<br />
mating grooves in the sides of dle lid frame before joining the<br />
frame pans. The sliding dovetails, which are half as dlick as dle top<br />
panel, are not centered on the panel's ends. I located the tails<br />
close to the panel's inner surface so there would be as much wood<br />
as possible above the mating grooves in me side frames. I cur the<br />
tails widl my Ulmia dovetail plane, as shown in dle top photo. (I<br />
bought my Ulmia plane from Woodcraft Supply, 210 Wood County<br />
Industrial Park, Parkersburg, WV. 02 102-1686.) After planing dle<br />
side frame's grooves, I cut the angled sides by tilting a side rabbet<br />
plane to match dle dovetails' angle. It may seem imprecise to do<br />
dlis by eye, but it's easy widl practice.<br />
When the panel slid freely in the grooves, I cut dle dovetails that<br />
join the lid-frame corners. I laid out the corner dovetails so that<br />
dle sliding-dovetail groove would fall between two pins at the frame's<br />
front and in tile middle of a wide pin at the frame's back. I cut tile<br />
pins on tile side pieces first, and then slid them onto tile top panel's<br />
dovetails to mark the tails on the front and back frame pieces.<br />
When assembling the lid, I was careful not to get glue in the dovetail<br />
grooves, lest dle panel not be able to expand and contract.<br />
Hanging the lid<br />
After planing and scraping the lid smoom and gluing the stops inside,<br />
I hung tile lid on the chest. The brass butt hinges that mount<br />
dle lid to the chest are screwed to tile back of the chest and to the<br />
inside edge of the lid's back frame (see the bottom photo). I used<br />
five 1 'l"6-in.-wide by 2-in.-long hinges, whidl fit perfectiy on dle -in.<br />
wide overlap below tile stop on tile back of the lid frame. The<br />
hinges '/ '<br />
6-in. overhang on the back of the lid frame allows the lid<br />
to open slightly past 90° and rest on two fold-out supports hinged<br />
to the chest's back (see tile drawings on pp. 62-63). The lid tilts<br />
just enough so I can unlatch tile inner door witiloUt it falling open.<br />
I first chiseled hinge mortises in tile lid's back frame and temporarily<br />
mounted tile hinges so I could set the lid in place and mark<br />
the hinge locations on the chest. Then, after chiseling the hinge<br />
mortises in the back of tile chest, I removed the hinges from the<br />
lid and screwed them on the chest, since tile hinge screws in the<br />
chest aren't accessible with me lid in place. To screw the hinges to<br />
the lid, I put it upside down on my bench, laid tile chest on its<br />
back, and propped up the chest with a piece of wood to align the<br />
hinges in dleir mortises on tile lid (shown in dle bottom photo).<br />
The chest was complete except for installing the lock. I chiseled<br />
the front of tile chest for a full-mortise lock and screwed its strike<br />
plate on tile lid's front stop. I didn't use a spring-loaded lock, as is<br />
suggested in early-cabineunaking texts, because 1 was afraid I might<br />
64 Fine Woodworking
leave my keys inside the chest. If I were to close it with a springloaded<br />
lock, the chest would lock automatically. eed I say more ?<br />
Installing the storage compartments<br />
I built the storage<br />
I<br />
compartments from the bottom up. First, I divided<br />
the bottom of the chest for individual planes by dadoing partitions<br />
to a 3-in.-high frame dlat fits around the inside perimeter of<br />
the chest. Next, screwed the tool racks to dle sides and ends of<br />
the chest and dlen installed the drawer guides around dlem. The<br />
L-shaped guides keep the drawers and removable boxes at various<br />
distances from the hanging tools. As shown in dle drawings, the<br />
framing square and 24-in.-long straightedge sit in their own racks<br />
or direcdy on dle drawer guides. After installing the drawers, I<br />
added the two top trays; one is hinged to the drawer beneath it,<br />
and the odler is screwed to dle front and back of the chest.<br />
I finished dle chest's outside widl three coats of a mi.J...'tUre of 4 oz.<br />
of beeswax melted in 1 gal. of boiled linseed oil. I applied a coat<br />
on the inside too, leaving the chest open to dry. Then I fastened<br />
bronze handles on dle ends widl 14-20 stove bolts. 0<br />
Tony KonovaLoff formerly made furniture in Taboe Paradise, CaL. He<br />
is presenl0i a woodworking student at tbe CoLLege of tbe Redwoods.<br />
Thicknessing boards with a scrub plane<br />
If you've ever considered working wood only by hand, you<br />
probably shuddered at the idea of thickness-planing rough<br />
boards. But I flatten and thickness a board quickly with a scrub<br />
plane and smooth the board with a jointer plane.<br />
A scrub plane, which has a flat sole and a convex cutting edge,<br />
leaves a rough, fluted surface, and removes stock quickly. I not only<br />
use mine in the shop, but also to preview lumber I want to buy.<br />
You can even scrub-plane tabletops or panels that are too wide for<br />
your thickness planer. A wood scrub plane sells for about S50;<br />
but you can use a plane you already own and just regrind an extra<br />
blade. (A new blade is about S 12 at hardware stores.)<br />
Turning a jack plane into a scrub plane: The difference<br />
between my jack plane and its scrub plane alter ego is how the<br />
blades are ground: A jack plane's blade is straight and a scrub<br />
plane's blade has a %2-in.-high convex curve (see the top photo).<br />
You don't need more curve than that because it's hard enough<br />
to plane a %6-in.-thick shaving. To make the curved edge, I first<br />
beveled each corner %2 in., and then I ground the curve from<br />
the outside corners of the bevels to the middle of the cutting<br />
edge. I worked slowly with a hand-crank grinding wheel and<br />
quenched the edge often so I didn't anneal dle tempered blade.<br />
While grinding, I maintained a 27° bevel, and I sharpened the<br />
cutting edge by honing a secondary bevel on it.<br />
Since a scrub plane removes thick shavings, I opened me<br />
d1foat by setting me plane's frog as far back as possible. However,<br />
when scrub-planing figured wood, I move dle frog forward a<br />
bit. To set me depm of cut, I align the edge of the cap iron with<br />
the corners of a convex blade, as shown in dle top photo, and<br />
put the blade in the plane. I start by exposing about %2 in. of the<br />
blade and adjust depm to suit the wood's hardness and figure.<br />
A scrub-plane blade can be<br />
made by grinding a convex<br />
edge on a 2-in. -wide jackplane<br />
blade (left). In use, the<br />
cap imn 's edge should align<br />
with the blade's comers.<br />
To thickness-plane a panel,<br />
the author scrub-planes<br />
diagonally to the grain. Then<br />
he scrubs with the grain (below)<br />
and smooths the panel<br />
with a jointer plane.<br />
Using a scrub plane: I use my scrub plane to cut with dle<br />
grain, shown in the bottom photo, diagonally to the grain or,<br />
with care and a sharp blade, direcdy across the grain.<br />
To flatten and thickness-plane a warped or twisted board, I<br />
first scrub equal amounts of wood off the high spots on one side,<br />
and ensure that it is flat by sighting across winding sticks and<br />
planing dle board until the sticks are parallel. I then finish that<br />
surface with a jointer plane. Lasdy, I scribe a line on all four<br />
edges to mark the desired thickness of the board, and then I<br />
scrub dle other side to the line and joint it flat. When removing<br />
lots of wood like thiS, I plane widl the grain and diagonally to it.<br />
When planing a large panel, the blade can get hot, so I'm<br />
careful not to lay me plane where me blade could burn me or<br />
the workpiece. To keep me blade cooler and to avoid dulling<br />
it, I don't drag the plane blade back over the wood before taking<br />
anodler cut. I also scrub-plane dried squeeze-out from gluedup<br />
panels before I mickness-plane and smooth them. I use dle<br />
leading edge of the plane body, not the blade.<br />
-TK<br />
September/October 1991 65
Turbine Spray Systems<br />
A high-volume) low-pressure finishing alternative<br />
by Philip Hostetter<br />
Until recently, one of the most common ways to apply a finish<br />
was to use a spray gun and a conventional air compressor.<br />
But another kind of spray system best known by its<br />
acronym, HVLP, has been receiving a lot of attention lately. HVLP<br />
stands for high volume, low pressure, and refers to spray systems<br />
that apply fi nishing materials in an entirely different way than conventional<br />
high-pressure spray systems. But there's a lot of mystelY<br />
surrounding HVLP systems and their purported advantages, such as<br />
the systems' efficiency and ease of operation. Some manufacturers<br />
have gone so far as to promise that their HVLP system will cut the<br />
amount of finishing materials you use in half.<br />
For many years, I have used compressed air and<br />
As<br />
HVLP systems<br />
for applying a variety of finishes, including shellacs, lacquers (both<br />
nitrocellulose and water base) and catalyzed finishes, to the cabinets<br />
and fu rniture made in my commercial shop. you might<br />
guess, I've found that both systems have advantages and shortcomings.<br />
Anyone considering buying an HVLP system should understand<br />
its pros and cons, as well as how this system works and how<br />
it differs from compressed-air setups. The information in this article<br />
is intended to help you decide if an HVLP system is right for<br />
your finishing needs.<br />
How an HVLP system works<br />
Unlike a compressor and standard spray gun that apply a finish<br />
with a relatively low volume of air at high pressure, an I-NLP system<br />
uses a blower and a special gun to (as the name says) apply a<br />
finish via a high volume of air at a lower pressure. A typical HVLP<br />
system consists of a turbine, a gun and a large-diameter air hose,<br />
all of which look and function somewhat differently than a compressed-air<br />
system.<br />
HVLP (high-volume, low.pressure) systems feed<br />
low-pressure air to a special gun, unlike a regular<br />
compressor that feeds a spray gun with highpressure<br />
air. The result: more-efficient delivery of<br />
fi nish with less overspray and fe wer toxic<br />
fu mes released into the atmosphere.<br />
66 Fine Woodworking<br />
Photos: Sandor NagyszaJancz)'
At the heart of a typical HVLP<br />
CFM<br />
system<br />
CFM<br />
is the turbine, which<br />
pushes out a large volume of air with relatively good efficiency.<br />
For example, a small<br />
CFM<br />
(7 amps to<br />
CFM.<br />
8 amps), one-stage turbine unit<br />
typically produces 3 p.s.i. at 40 to 50 (cubic feet per minute),<br />
while a larger (10 amps to 12.5 amps), three-stage unit may<br />
deliver 6 p.s.i. at 85 to 100 Each stage means the unit<br />
employs another fan, and fans working in a series are capable of<br />
generating higher pressures. An increase in motor size (amperage)<br />
produces a higher volume of air. Because they don't require<br />
heavy, bulky, steel air-storage tanks, turbine units are compact and<br />
lightweight. Small, single-stage and two-stage units are typically<br />
housed in a sheet-metal box about 2 ft. sq. Larger, multiple-stage<br />
turbines intended for the professional finisher are considerably<br />
heavier, weighing 50 lbs. or more, and have wheels for portability.<br />
The turbine discharges air through a quick-change outlet, which<br />
accepts an air hose that connects to the spray gun. Many larger<br />
HVLP turbines have two air outlets, which allow two guns to be<br />
run at the same time. To carry the large volume of air effiCiently,<br />
an HVLP hose is fairly large-about 1 in. in diameter. Since the<br />
turbine has no air-storage tank, the turbine-produced air must escape<br />
when the gun is not spraying. Therefore, an HVLP gun is<br />
called the "bleeder" type: The gun contains a valve that emits a<br />
constant strean1 of air whether or not its trigger is pulled.<br />
Like a regular spray gun, the air passes through an HVLP spray<br />
gun and atomizes the liquid finish, propelling it onto the wood.<br />
Most conventional spray guns are "siphon" type: Air passes through<br />
the gun and creates a partial vacuum that draws fluid up from the<br />
cup. In contrast, an HVLP gun uses pressurized air to force fluid<br />
into the gun via a small tube from the sealed cup to the gun. An<br />
HVLP gun can be fitted with a variety of different fluid tips and air<br />
caps, depending on several variables: d1e desired spray pattern (a<br />
wide fan is used for spraying large surfaces, a narrow jet for detail<br />
work); the output of the turbine; and the viscosity of the finish.<br />
Setting up and using an HVLP system is a breeze. You just plug<br />
d1e turbine in, connect the hose, load the gun's cup with finish<br />
Y2<br />
and<br />
shoot. Some professional HVLP systems, like d1e Lex-Aire LX-75A<br />
and me Croix CX-20 (see sources of supply on p. 69 for addresses),<br />
feature a large, pressurized paint pot or tank that holds 2 gal.<br />
or more with a feed line that runs to the gun to supply finish.<br />
Turbine units have air filters that require occasional cleaning or<br />
replacement, but no other special maintenance is usually required.<br />
HVLP's high transfer efficiency<br />
One of the most touted advantages of HVLP systems is their ability<br />
to deliver finish with a much higher transfer efficiency than compressed-air<br />
systems. Transfer efficiency is specified as d1e percentage<br />
of sprayed material that actually ends up on the workpiece as<br />
opposed to d1e amount d1at's lost as overspray. For example, if you<br />
are spraying door panels wid1 three quarts of lacquer through a<br />
standard compressed-air spray gun with a 35% transfer efficiency,<br />
litde more than one quart ends up on d1e wood. My experience<br />
has been d1at if you spray those same three quarts through a properly<br />
tuned HVLP gun with a transfer efficiency of 50% to 70%,<br />
about two quarts end up on the panels.<br />
An increase in transfer efficiency translates into a savings in finishing<br />
materials, as well as a reduction in harmful solvent emissions<br />
to d1e atmosphere. Clean-air legislation in some areas of the country,<br />
such as Soud1ern California, mandates that commercial finishers<br />
maintain a minimum transfer efficiency of 65% while spraying solvent-base<br />
materials. This percentage, which is difficult to achieve<br />
wid1 an ordimuy compressed-air system, is another reason why finishers<br />
are turning to HVLP spraying. In addition, a reduction in overspray<br />
means spray-booth mters don't need to be changed as often.<br />
Portability is one of HVLP systems' greatest advantages_<br />
Most smail, single-stage turbines, like the EagleSpray Turbo<br />
shown here, are light and have a handle so that the unit, its hose<br />
and the spray gun are easy to carry.<br />
Another advantage of spraying wid1 a high-transfer-efficiency system<br />
is that it reduces spray "bounce back." This is a common finishing<br />
problem when spraying the inside corner of a closed-back<br />
cabinet, for example, where the overspray bounces back into your<br />
face in a choking cloud and setdes on adjacent cabinet surfaces,<br />
leaving them rough and pebbly. HVLP guns have less bounce back<br />
because their low-pressure spray is more like a gende mist than<br />
a forceful shower.<br />
HVLPvs. compressed air<br />
For the past five years, I have used an HVLP system side by side<br />
with a conventional compressed-air system as part of my woodworking<br />
business. This has given me d1e opportunity to see how<br />
d1e two systems compare. First of all, HVLP systems are velY easy<br />
to set up and use, which makes them a good choice for the inexperienced<br />
or occasional finisher. Setting up a standard compressed-air<br />
system requires more experience, time and physical<br />
effort. Plus, the spray gun mix must be set vely carefully to yield<br />
optimum finish delively. In contrast, an HVLP turbine produces a<br />
preset volume of air at a fixed pressure, and people who have<br />
never sprayed a finish before usually find they get acceptable results<br />
the first time around.<br />
One of HVLP's greatest advantages is the system's portability:<br />
Single- and two-stage units are typically between 18 lbs. and 30 lbs.<br />
(see the photo above), and most turbines either have a handle on<br />
top or wheels on the bottom. They're also wired for 110v; so you<br />
can plug them into a standard household electrical oudet. This<br />
makes HVLP a good choice for those who must spray-finish at an<br />
installation site. Further, the air that a turbine produces is warm<br />
and dlY, in conu-ast to the chilled, damp air released by a compressor.<br />
This warm air can actually help water-base finishes dry faster<br />
September/October 1991 67
Conversion air systems:<br />
HVIP peiformance with a<br />
sta,ndartl compressor<br />
by Michael Dresdner<br />
A conversion-air-system (CAS) spray<br />
gun allows a finisher who already owns<br />
a standard air compressor to spray with<br />
an HVLP gun. The Accuspray model 10,<br />
shown here, features a regulator and<br />
gauge mounted below the gun for convenient<br />
air-flow adjustment.<br />
There is little doubt that converting to<br />
a high-volume, low-pressure (HVLP)<br />
spray system can save you money by<br />
reducing the amount of overspray; this<br />
is probably the single biggest reason<br />
for HVLP's quick acceptance by the<br />
manufacturing community. For example,<br />
when General Motors replaced its standard<br />
spray guns, it paid for the entire<br />
cost of the new equipment with the<br />
amount of money saved in paint in just<br />
one day. But like many other shops,<br />
GM saw no reason to tear out its extensive<br />
compressed-air system when making<br />
the change. Instead, it turned to<br />
HVLP's sister technology: conversion<br />
air systems (CAS). CAS provides a way for<br />
even small shops to adopt a highly efficient,<br />
cost-effective spray system while<br />
continuing to use existing compressors<br />
and air lines.<br />
How CAS works: Instead of using<br />
high-volumellow-pressure air from a turbine,<br />
a conversion air system reduces<br />
high-pressure compressed air to low pressure<br />
and high volume mainly in one of<br />
two ways. The first is by using a dedicated<br />
CAS gun (like the Binks Mach 1,<br />
the DeVilbiss V2 or the Croix 711V) that<br />
has a mechanism inside that performs<br />
the conversion Witll a venturi tube or<br />
other device. These guns spray like<br />
HVLP guns, but connect directly to standard,<br />
high-pressure compressed-air<br />
lines. The second system, manufactured<br />
by Accuspray, features a small pressureconversion<br />
unit that mounts directly to<br />
an HVLP gun (shown at left). This system<br />
is versatile because it can be fed from<br />
either a compressor or a turbine. A<br />
third type of conversion air system uses a<br />
wall-mounted unit, which takes in<br />
compressed air and provides an outlet for<br />
an HVLP hose that feeds a standard<br />
HVLP gun. (DeVilbiss and Accuspray manufacture<br />
these systems.) Because these<br />
wall-mounted systems are mostly intended<br />
for large production users, I won't<br />
discuss tllem here.<br />
and flow out better, and it also can reduce blushing problems that<br />
sometimes occur when spraying solvent-base lacquers. I've found<br />
that I can spray lacquer widl an HVLP system even on rainy daysan<br />
activity that would more than likely result in a blushed finish<br />
using compressed air and a regular spray gun.<br />
If material costs and application time are your major criteria<br />
for selecting a spray system-as they should be if you run a production<br />
shop-HVLP systems again have the edge. I use my HVLP<br />
unit to great advantage when I'm spraying lots of large cabinets or<br />
furniture, since dle high u"ansfer efficiency allows me to spray<br />
on more finish in less time. And frankly, I like dle feeling that<br />
I am doing somedling to reduce dle amount of toxic material that's<br />
polluting the environment.<br />
If HVLP has an Achilles' heel, it is its lack of versatility. Merely by<br />
cranking up the pressure of a compressed-air line, you can spray<br />
thick finishes (even contact cement), drive a sandblaster, blow<br />
sawdust from surfaces or run a variety of air-powered tools. An<br />
HVLP turbine, on the other hand, is designed only to spray finishes.<br />
If your shop a!ready has a compressor, yet you'd like to use<br />
a system that has the efficiency of HVLP, you'll want to consider a<br />
conversion-air-system setup (see the sidebar above).<br />
Finishers accustomed to a conventional system will need time to<br />
adjust to HVLP's idiosyncrasies. Since HVLP guns generally deliver<br />
a higher volume of finish, the tendency at fi rst is to inadvertently<br />
flood panels widl finish. Also, conventional-spraying veterans will<br />
feel much less recoil when pulling the trigger on an HVLP gun<br />
(due to the lower operating pressure); this can upset spraying<br />
rhythm and result in an uneven spray pattern on a large surface.<br />
One annoyance of HVLP systems is the constant drone of the tur-<br />
bine, which sounds quite a bit like a shop vacuum. Another in"itation<br />
is the stiff, thick hose that tends to be unwieldy. Fortunately,<br />
maneuverability can be restored by attaching a special 2-ft.-long,<br />
extra-flexible "whip end" at dle gun. And although most HVLP<br />
guns sport adjustment controls that are almost identical to dlose<br />
on conventional guns, others employ mechanisms dlat may be unfamiliar.<br />
For example, dle widdl of the spray pattern (fan) on several<br />
HVLP guns is controlled by turning dle air cap instead of by<br />
adjusting dle more-common thumbscrew at the back of dle gun.<br />
After weighing all of HVLP's pluses and minuses, I'm still not<br />
ready to retire my compressed-air system. When it comes to very<br />
fine spray finishing, such as on tabletops and odler horizontal surfaces,<br />
I still prefer my "old-fashioned" compressor and spray gun.<br />
Perhaps it's just dlat I'm accustomed to my oid gun, but I think it<br />
produces a superior surface film, especially for gloss finishes.<br />
However, odler wood finishers I've talked to say that they've<br />
achieved spraying results comparable o compressed-air guns with<br />
HVLP guns that are of a higher quality dlatl mine.<br />
Choosing an HVLP system<br />
If you've decided that atl HVLP system fits your fi nishing needs,<br />
you'll still be faced with deciding which one to buy. There are<br />
nearly a dozen manufacturers producing HVLP systems (see dle list<br />
in dle sources of supply box on the faCing page), and most offer<br />
several models. To ease dle confUSion, rest assured that turbines of<br />
a given motor size (amperage) and number of stages (one, two or<br />
dlree) will output about dle satne at1lount of air, regardless of dle<br />
brand. The same cannot be said of the guns, however, which vary<br />
as much in quality as they do in price. It seems that dle difference<br />
68 Fine Woodworking
Advantages: The greatest advantage<br />
of conversion air systems is that they are<br />
driven by a regular air compressor; no<br />
special turbine is needed. Also, CAS guns<br />
use a standard, flexible, %-in. or<br />
%-in. compressed-air hose. This is in<br />
contrast to the thick, stiff, l-in.-dia. hose<br />
used with HVLP systems. Also, the<br />
compressor and air line can be used to<br />
drive blow-off guns, vacuum pumps<br />
and air-powered tools-things that a turbine<br />
can't do.<br />
Dedicated CAS guns are the nonbleeder<br />
type, which means air flow can be<br />
stopped totally when the gun's trigger is<br />
released. This makes a CAS gun handle just<br />
like a compressed-air spray gun-a real<br />
plus for the veteran fmisher who is familiar<br />
with conventional equipment.<br />
Another advantage of a dedicated<br />
CAS gun is that it can generate high pressure<br />
at the tip, up to 10 p.s.i., allowing<br />
the gun to spray much more viscous fmishes<br />
than a regular HVLP gun-even<br />
adhesives such as contact cement. By the<br />
time air and finish mix at the tip, CAS<br />
guns spray like HVLP guns, and so it is<br />
reasonable to expect the same high<br />
transfer efficiency from a CAS gun as from<br />
an HVLP system.<br />
Some CAS guns have a control valve<br />
and dial gauge at the base of the gun handle,<br />
offering adjustability for different<br />
spraying conditions, convenience and an<br />
instant readout of gun pressure. At least<br />
two companies, Binks and Accuspray, have<br />
gone a step further by adding a cup-control<br />
valve, which allows the sprayer to create<br />
separate fluid-feed and air-feed<br />
pressures. For instance, this degree of gun<br />
adjustability is great when spraying latex<br />
paints, which require high atomization<br />
pressure and low feed pressure.<br />
Disadvantages: The largest drawback<br />
of using CAS is the compressor itself; larger<br />
compressors tend to be heavy and bulky,<br />
and hence lack portability. Also, many<br />
compressors aren't wired to run on standard<br />
110v household electricity. Another<br />
disadvantage of CAS involves air-quality<br />
requirements. Standard air compressors<br />
produce cool, damp air, which is undesirable<br />
for trouble-free finishing. Fitting<br />
compressed-air lines with ftlters and<br />
moisture traps will take care of the contaminants,<br />
but warming the air involves<br />
a more costly air-line heater. Most CAS<br />
finishers I know have chosen to live with<br />
the cooler air since it's not a Significant liability,<br />
especially when spraying solvent-base<br />
finishes. If you shoot water-base<br />
finishes, you may experience orangepeel<br />
problems in cold weather.<br />
There's another fly in the ointment<br />
to using a CAS gun: Converting air from<br />
high to low pressure is inefficient. As a<br />
consequence, CAS guns generally need to<br />
be fed from a rather large compressor.<br />
CAS guns typically draw at least 10 CFM<br />
(cubic feet per minute), but they can<br />
draw as much as 17 CFM to 20 CFM-a sizable<br />
volume of air-when higher tip<br />
pressures are used to spray tl1ick materials.<br />
Wall-mounted CAS devices that<br />
drive standard HVLP guns are even worse,<br />
since the gun bleeds air even when not<br />
in use. Therefore, it is important to consider<br />
your compressor's CFM output before<br />
buying a conversion air system. I<br />
wouldn't attempt to run a CAS gun<br />
with a compressor smaller than 5 HP.<br />
Buying a CAS gun: Most of the better-known<br />
spray gun manufacturers (see<br />
the sources of supply box below) currently<br />
offer CAS guns in a wide range of<br />
prices. But expect to pay at least $450<br />
for a good-quality CAS gun; more-elaborate<br />
models can top 51,000. Outfitting an entire<br />
conversion air system-gun, lines and<br />
ftlters-will generally cost $200 to<br />
$300 less than a comparable turbine-driven<br />
HVLP system, provided that you already<br />
own an adequate compressor.<br />
When selecting a gun, make certain<br />
that the company you buy it from offers a<br />
complete range of tip and needle sizes<br />
so you can set up the gun to handle the<br />
range of fmishes and the type of spraying<br />
you plan to do. D<br />
Michael Dresdner is a contributing<br />
editor to FWW and a finishing consultant<br />
in Perkasie, Pa.<br />
As<br />
in cost between comparable HVLP systems is largely due to disparities<br />
in guns rather than turbine units.<br />
far as my recommendations are concerned, most small-shop<br />
woodworkers spraying furniture or cabinetry will need a turbine<br />
with no less than two stages, powered by a motor that's rated at no<br />
less than 9 amps. One-stage turbines, which are usually too small<br />
for most fu ll-size finishing jobs, are a great choice for hobbyists<br />
spraying small projects or for furnituremakers and finish carpenters<br />
who want a light, portable unit for touch-up work. Some small<br />
units, like the Accuspray Series 23, come complete with an adjustable<br />
carrying strap, allowing you to tote them around a job site.<br />
Professional wood finishers or production-shop workers who plan<br />
to use an HVLP system for most of their finishing shouldn't settle<br />
for less than rhe power and versatility of a three-stage turbine. The<br />
three-stage unit l awn, an Apollo model 1100, has two switches on<br />
top, which allow me to select between three air-flow levels, depending<br />
on tile job at hand. At the highest setting, I can COiUlect<br />
two guns to my unit, and a helper and I can finish even a big spray<br />
job expediently. Regardless of what size turbine you choose, I suggest<br />
you buy tile best gun you can afford, since the gun is tile most<br />
crucial component of an HVLP system. If you plan to spray waterbase<br />
finishes, catalyzed lacquers or epoxy paints, choose a gun<br />
witil stainless-steel fluid passages to avoid corrosion problems.<br />
Manufacturers of HVLP equipment usually sell tileir systems as a<br />
complete package, including tile turbine, hose and spray gun;<br />
there's nothing else to buy to get started spraying. An HVLP system<br />
should cost less than a conventional compressed-air system. Typically,<br />
single-stage HVLP systems run about $500; two-stage systems<br />
are about $700; and three-stage systems start at about $1,000. Inci-<br />
D<br />
dentally, some manufacturers don't mention in their literature how<br />
many stages a particular turbine has; you'll need to ask.<br />
Pbilip Hostetter is tbe owner of Tbe Woodsbaper Ltd., a cabinet<br />
sbop in New York City tbat specializes in arcbitectural cabinetry<br />
and finisbing.<br />
Sources of supply<br />
The following U.S.-based companies offer HVLP systems.<br />
Accuspray, Inc., 26881 Cannon Road, PO Box 391 525, Cleveland,<br />
OH 441 39; (800) 321-5992, (216) 439- 1 200.<br />
American Spray Industries (Amspray), 221 S. State St., PO Box 86,<br />
Harrison, OH 45030; (800) 443-4500, (812) 637-3215.<br />
Apollo Sprayers International Inc., 1030 Joshua Way, Vista, CA<br />
92083; (619) 727-8300.<br />
Binks Manufacturing Corp., 9201 W Belmont Ave., Franklin Park,<br />
IL 60 131; (708) 671-3000.<br />
Croix Air Products Inc., 520 Airport Road, Fleming Field, South<br />
St. Paul, MN 55075; (612) 455- 1213.<br />
DeVilbiss Ransburg Industrial Liquid Systems, PO Box 913, Toledo,<br />
OH 43692-0913; (800) 338-4448, (419) 470-2169.<br />
Graco Inc., 4050 Olson Memorial Highway, Minneapolis, MN<br />
55422; (612) 623-6000, (800) 367-4023.<br />
Hood Products (EagleSpray-Kace Technologies Inc.), PO Box<br />
513, Milltown, NJ 08850; (800) 966- 5223, (908) 651-1555.<br />
Lex-Aire Spray Systems, 34 Hutchinson Road, Arlington, MA<br />
02174; (800) 537-2473, (617) 646- 1102.<br />
Wagner Spray Tech Corp. (Capspray), 1770 Fernbrook Lane,<br />
Minneapolis, MN 55447; (800) 328-8251, (612) 553-7000.<br />
September/October 1991 69
Master carver and teacher Nora Hall (above) starts her students<br />
off with a kit of only about eight tools, which is all they<br />
need to outline and shape most relief carvings. The flowers in the<br />
photos below, which were drawn and carved by Hal are ideal<br />
first projects for teaching the principles of tool use and the manipulation<br />
of light and shadow to imitate life. Hall's 5-ft. -high carving<br />
in the inset photo shows how simple motifs, such as these flowers,<br />
can be worked together into intricate classical arrangements.<br />
The Basics of Classical Relief Carving<br />
Afirst lesson from a second-generation woodcarver<br />
by Nora Hall<br />
70 Fine Woodworking
Anyone can learn how to carve wood. All it takes is patience,<br />
seven or eight tools and a lot of practice. I work with hundreds<br />
of students from across the country each year, and I<br />
am continually fascinated by how quickly they master the skill. Furnituremakers<br />
are especially eager to learn because they know that<br />
carving gives them an important design tool: a way to manipulate<br />
light and shadow. That's really what decorative carving is all<br />
about-conu-olling light and shadow to create realistic forms.<br />
The method I tead1 to begi1mers is the old-European way of relief<br />
carving that I learned from my father in Holland. I began carving<br />
during World War II, when I was 18. The boys were hiding from<br />
d1e Germans, and since my father needed help in his carving studiO,<br />
I went to work for him. I'm thankful about the way things worked<br />
out; od1e1wise, I might not have had the patience to master the<br />
u"aditional methods of carving motifs like flowers, leaves and scrolls.<br />
Woodcarving can be as simple or as complex as you want, but in<br />
either case, the underlying principles are the same. First and foremost,<br />
your carving should appear lifelike and possess a sense of<br />
movement, whether you're carving a single flower, as described<br />
below, or a full-size human torso. You must observe your subject<br />
carefully, and use your imagination to come up with ways to make<br />
things appear real.<br />
Take an oak leaf, for example. Right off the tree it's a pretty<br />
shape, but it becomes more attractive and complex as it drys, twists<br />
and wrinkles. The same idea applies to carving. You don't want any<br />
perfectly flat or boring surfaces. Something carved exactly round<br />
will look unnatural. You never want any part of your work to appear<br />
heavy and wooden, so you may want to undercut d1e edges of some<br />
parts slightly, to create a dramatic shadow or a feeling of lighU1ess.<br />
Avoiding that heavy feeling might even require you to distort the<br />
scale of an object; carving something larger or smaller than life<br />
may suggest life and movement more than an exact copy. Keep these<br />
basics in mind as you begin to sketch and shape your own carvings.<br />
ber, and the widd1 is listed in either inches or millimeters.<br />
The starter set I specify for my students includes two #3 gouges,<br />
811U11 and 12mm; two #5 gouges, 6mm and lOmm; two #7 gouges,<br />
8mm and 12mm; one #11, 10mm veiner (deep-fluted) gouge; and<br />
a #12, 60° V-parting tool. You'll also need sharpening stones and<br />
slips and some type of leather or abrasive strop for honing the<br />
tools. Sharp cutting edges are essential (see the sidebar on p. 73<br />
for my double-bevel sharpening method). For more on sharpening<br />
carving tools, see FWW #66, pp. 48-51. Finally, you'll need<br />
some type of bench that you can clamp the work to as you carve.<br />
grain<br />
Learning to carve with the<br />
A simple flower, like one of those drawn and carved on the boards<br />
in the photos on the bottom of these two pages, makes a great<br />
practice piece: It requires a variety of cuts and uses all of the tools<br />
in the starter set described above. Also, it's a good project for leaming<br />
how to hold tools properly. For maximum control and a smooth<br />
cut when using a chisel, you must have your wrist and forearm on<br />
the board, as shown in the top photo below. You may have to raise<br />
the level of your benchtop before you can do this comfortably.<br />
It's also important to learn to work ambidextrously. Carvers<br />
must constantly change the direction of cut to avoid tearing d1e<br />
grain. It's not practical to keep moving to the other side of the<br />
bench or to reclamp your work just so you can hold the chisel<br />
with the same hand. Initially, some students sit on the bench and<br />
attempt various acrobatic maneuvers to cut with either their right<br />
or left hand. But after I insist they use both hands, it takes them<br />
only about two hours to learn. It really isn't that hard.<br />
Basswood is good for beginners because it's soft and has a fine<br />
grain. But even with such an easy-to-work wood, you should carve<br />
A basic tool kit for carvers<br />
Your enthusiasm for woodcarving shouldn't be dulled by fears that<br />
you can't start without the hundreds of gouges and chisels pictured<br />
in catalogs. Wid1 my system, you'll need only eight tools to<br />
outline and shape the convex and concave surfaces on any relief<br />
carving. I always stress that d1ese are not beginners' tools; they are<br />
starter tools, and you'll use d1em as long as you carve.<br />
Carving tools are generally classified by d1eir sweep, or the<br />
shape of the cutting edge-flat, gently curved, deeply fluted or V<br />
shaped-and by the width of the edge. As you might expect, narrow,<br />
flat tools are designed to remove less wood with each stroke<br />
d1an wider, deeply fluted tools. The sweep is specified by a num-<br />
# ... '. ---- "<br />
The first step in carving a flower is to outline the shape with a<br />
V-Shaped parting tool. Carving the outline, as opposed to scoring<br />
it with vertical cuts, removes wood and gives you space to work.<br />
Photo: Susan Kahn<br />
Photos except where nOled; Dick Burrows<br />
September/October 1991 71
Hall uses a V-tool to outline the center of the flower. It's im·<br />
portant to just tap the chisel lightly with a hand or mallet at this<br />
stage, to avoid tearout and to maintain control of the cut.<br />
A shallow gouge is used to shape the petals and round over<br />
the center of the flower. For maximum contro4 the carving tool<br />
should be held Iow an the handle and blade, as shown.<br />
with the grain as much as possible. Don't get uptight about this;<br />
cutting in the right direction on the first try isn't a matter of life or<br />
death. Learning to distinguish between smood1 cuts and rough cuts,<br />
and d1en adjusting to d1e changing grain, is the key to success. The<br />
whole process will be a lot clearer once you put tool to wood.<br />
To start, clamp the basswood to your bench so d1e long grain<br />
runs from right to left. Begin carving by making some practice cuts<br />
wid1 the V-tool. This tool is essential for outlining any carving before<br />
you begin shaping details. You may have seen other carvers<br />
outline a carving with stop cuts, which involves driving a tool<br />
straight down into the wood. This operation wedges the wood fibers<br />
apart, rad1er d1at1 sliCing them, and leaves weak areas d1at are<br />
likely to chip out later. Outlining with the V-tool actually removes<br />
wood at1d gives you space to work. Once the shape is outlined,<br />
you can form deep perpendicular walls by making converging<br />
cuts, one su-aight down and d1en one at at1 at1gle to the first cut.<br />
To practice with d1e V-tool, make a series of small, shallow cuts.<br />
For the first 15 minutes, cut diagonally, working from right to left.<br />
Then switch and cut from left to right, nearly perpendicularly<br />
across the first series of lines, creating a pattern that resembles the<br />
checkering on a gunstock. Hold d1e V-tool close to the cutting<br />
edge (see the top photo on d1e previous page). Most people are<br />
reluctant to hold onto the metal below the handle at1d therefore<br />
hold the tool too high. Keep your arm at1d wrist on the work, and<br />
tap the chisel with a mallet. To save wear and tear on your hat1ds<br />
and muscles when roughing out, use a mallet, but don't swing so<br />
hard that you lose control. When working with a mallet, the more<br />
you push your wrist down on the board, the better the cut at1d the<br />
greater your control. Another way to increase control is to take<br />
light cuts. Most beginners mistakenly cut straight down into the<br />
wood; d1ey look as if they are going right through the workbench.<br />
Once you've covered a small area with a cross-hatch pattern,<br />
look carefully at the lines you've cut. You'll notice that the wall on<br />
one side of the V appears smooth, and the wall on the other side<br />
will be rougher. This shows the relationship between direction of<br />
cut at1d wood grain. Think of wood grain as the straw bristles on a<br />
worn broom. If you rub the bristles on the bottom of the broom in<br />
the direction the broom is used for sweeping, the straw lays flat<br />
at1d feels smood1; if you rub in the other direction, the straw resists<br />
at1d the feeling is rougher. Cutting with the grain is smoother<br />
because you're pushing in the direction that causes the fibers to<br />
lay down as they do naturally; on the other side of d1e cut, you're<br />
forcing d1e fibers apart, opening the grain. These sections of open<br />
grain are difficult to fi nish at1d prone' to break off as you carve.<br />
Carving flowers as a first lesson<br />
ow d1at you understand d1e basics about grain direction, you're<br />
ready to really start carving. But first you need a sketch. It doesn't<br />
have to be very elaborate, especially for practice pieces. In my<br />
classes, everyone usually has a coffee cup wim mem in d1e morning,<br />
at1d that becomes d1e pattern for tl1e first flower. Trace the bottom<br />
of d1e cup to form a circle, and tl1en sketch a smaller circle freehat1d<br />
in d1e center of me first one. Next, draw in petals and round<br />
meir ends (see the flower at d1e fat- left on me bottom of p. 70).<br />
Begin work by oudining the flower with me V-tool, as shown in<br />
me top photo on me previous page. Again, keep your forearm and<br />
wrist on me wood, and make light strokes to determine grain direction.<br />
At first, don't worry about making a perfect line. That way<br />
you Cat1 chat1ge your mind about me shape as you study me grain.<br />
You wat1t to cut in the direction mat will leave d1e inside of me<br />
outline smood1 and me outside rough. If me internal area is<br />
rough, it will be prone to break as you shape the various components<br />
of tl1e flower.<br />
Continue making light cuts as you outline d1e center circle and<br />
petals. When you outline the petals, always cut toward the center.<br />
To begin shaping the areas within d1e V-tool outline cuts, use your<br />
#7 gouges. If you need to deepen or clean up any of me outlines,<br />
switch back to the V-tool, as shown in the left photo above, rather<br />
than making stop cuts wim tl1e gouge.<br />
As you carve wid1 your gouges, once again hold d1e handle<br />
down low, so d1at your hand is partially on the blade, for maximum<br />
control, as shown in d1e above photo at right. Experiment<br />
wid1 d1e #7, #5 and #3 gouges, but practice your cuts on scrap<br />
before touching me real carving. This practice time will let you<br />
discover what cuts work best with each gouge. If you have honed<br />
an inside bevel on your tools, as described in me Sidebar, also<br />
experiment with carving with the main bevel up, as well as down.<br />
At d"lis stage, your flower carving still looks rough, but you can<br />
refine it by rounding over at1d smoothing d1e flower's center before<br />
working at1y more on d1e petals. TI1e petals Cat1 be shaped in a variety<br />
of ways. Try hollowing them slightly with a #5 or #7 gouge, as<br />
shown in d1e above photo at right. As you smoom out me shape, use<br />
72 Fine Woodworking
feel of your work. Sharp edges and crisp corners are the hallmark<br />
of high-quality carving.<br />
To fo rm the notch between the ends of the petals, Hall makes<br />
two converging cuts with a gouge and then pops out the chip between<br />
the petals with a third angled cut.<br />
hand pressure rather than a mallet to move the tool, and be careful<br />
not to chip out the edges of the petals. All the petals are shaped in<br />
the same way. Again, rely on your V-tool for refining outlines.<br />
Shape the notches between the ends of the petals with a #3<br />
gouge. You need to make three cuts in from different angles, so<br />
you should make a couple of practice cuts first. Continue practicing<br />
the moves until you master the angle needed to pop out the<br />
chip. The two cuts going into the corner, shown in the photo<br />
above, must be deeper at d1e V of the notch between the petals.<br />
The third cut frees d1e waste because this cut is angled in toward<br />
the other two. This method for coming in from three different angles<br />
is a very important maneuver; you'll use it for years to come.<br />
Finally, smood1 d1e surfaces wid1 your gouges and the outlines<br />
wid1 your V-tool to eliminate any rough or torn areas. If you work<br />
carefully, you shouldn't need to sand much at all, except perhaps<br />
to freshen areas d1at appear soiled from being handled. Don't rely<br />
too much on sandpaper; it will destroy the hand-carved look and<br />
Teaching yourself<br />
Continue to practice by carving the other flower designs in d1e<br />
photos on the bortom of pp. 70-71. When you mink you've learned<br />
all you can from carving flowers, you might try letters, grapes,<br />
leaves or other simple shapes. Then you can put those shapes together<br />
into unique arrangements. Once you begin to master the basics,<br />
you'll discover thousands of subjects and millions of design variations<br />
to explore. Check your library for books with carving illusn"ations,<br />
such as The Manual of Tmditional Wood Carving by Paul<br />
. Hasluck (Dover Publications, 31 E. 2nd St., Mineola, N.Y. 11501;<br />
1977). Most of my students find that once they get started, d1ey can<br />
improve d1eir skills on d1eir own; if they are very observant and<br />
practice a lot, they don't need me or any other teacher for long.<br />
Here are some additional hints to help you along the way. I<br />
carve all my letters freehand, but you can find books on the subject<br />
at local libraries and art-supply stores. Just remember to relate<br />
tool size to d1e size of the shapes in your design. Be conscious of<br />
grain direction, and don't hesitate to make practice cuts until you<br />
get a sense of d1e movements needed to cut a graceful letter.<br />
Leaves are carved just like a flower: oudine the shape, roughcarve<br />
d1e features, refine d1e details. Again, you want your work to<br />
reflect life, so most of your cuts should either originate from the<br />
center or go toward it. Grapes are another good practice project.<br />
When drawing out the partern, you can obtain a more realistic<br />
look by determining how d1e grapes will be hanging; the bortom<br />
of each grape should be somewhat fuller d1an the top.<br />
There's no end to what you can do. As you proceed to more<br />
elaborate reliefs, you might want to experiment by modeling the<br />
piece in clay before working in wood. I definitely recommend clay<br />
modeling when you are ready to try carving a human face. A face is<br />
one of the hardest things to carve. But, like any other carving,<br />
1941.<br />
all it<br />
takes is practice, practice, practice and a lirtle imagination. 0<br />
Nom Hall bas been carving wood profeSSionally since Sbe<br />
carves and leaches carving at bel' studio in Cloverdale, Oreg., Anderson<br />
Ranch in Colomdo and Petel'"S Valley in New jersey.<br />
Beveling both sides of a carving tool's edge<br />
For crisp, smooth cuts, carvers<br />
prefer tools that have<br />
long, shallow bevels between<br />
22° and 30°. Unfortunately,<br />
the cutting edge on<br />
long-beveled gouges is quite<br />
weak and prone to chipping.<br />
To avoid this problem,<br />
European carvers often<br />
fo rm a second bevel on a<br />
gouge's inside curve (see<br />
the photo at left). Beveling<br />
the inside edge of the tool<br />
makes a slightly thicker cutting<br />
edge and extends the<br />
time between regrinding. I've<br />
found that even when a<br />
double-beveled tool begins to<br />
dull, it will cut better than<br />
one with a single bevel because<br />
the wood being removed<br />
seems to slide more<br />
smoothly over the edge.<br />
The inside bevel that I<br />
use is about 7°, measured off<br />
the gouge's inside surface.<br />
After sharpening the primary<br />
bevel and honing it razor<br />
sharp, I then make a series of<br />
strokes on the inside, concave<br />
face of the gouge. To do<br />
this, I use either a round,<br />
hard Arkansas stone or the<br />
round edge of a slip stone.<br />
I also slightly round the<br />
corners of most of my gouges<br />
before sharpening them.<br />
The rounded corners make it<br />
easier to excavate deep<br />
areas when carving in the<br />
conventional manner with<br />
the primary bevel down. In<br />
addition, the combination<br />
of rounded corners and the<br />
inside bevel lets me carve<br />
with the inside bevel down,<br />
for more versatility in<br />
rounding over raised portions<br />
of a carving. Taking the<br />
corners back also means that<br />
I can cut with the tool handle<br />
held higher than I could<br />
with a tool straight from the<br />
factory.<br />
-N.H.<br />
September/October 1991 73
This bubinga writing desk with maple highlights has an intimate center alcove and elegant details, including tapered-and-f!uted<br />
legs that are attached to the case's diagonal corner blocks.<br />
An Elegant Writing Desk<br />
A three-drawer case on fluted legs<br />
by Terry Moore<br />
Of all the different pieces of furniture I build, desks are my<br />
favorite. I think they are special objects, set apart from the<br />
common table by their utilitarian designation. Whed1er an<br />
austere business desk for an executive, an office computer workstation,<br />
or an elaborate cabinet secretaire for the home, each desk is<br />
designed to fit a specific purpose. When I designed this writing<br />
desk, I wanted to create an elegant piece of furniture that would<br />
be used for occasional handwritten correspondence. To d1is end,<br />
d1e desk's form could be of more delicate and aiLy proportions. One<br />
of its two main focal points is d1e curved central drawer, which creates<br />
an inviting intimate alcove; the other focus is d1e tactile form of<br />
d1e fluted legs attached to d1e drawer case's diagonal corner blocks.<br />
Making the drawer case with its corner blocks and aprons, and<br />
later attaching d1e legs, not only simplified the construction process,<br />
but also allowed me to experiment wid1 different leg profiles.<br />
Though I initially tried square-tapered and lad1e-turned designs, I<br />
eventually chose 12-sided, tapered, fluted legs. I'll explain more<br />
about how I made these legs later. The desktop is the same size<br />
and shape as the drawer case, and the top has veneered book-<br />
matched bubinga "panels" that are outlined wid1 curly maple<br />
string inlay. A veneered "frame" borders d1e panels, and the edge<br />
is trimmed with a curly maple binding.<br />
Making the drawer case<br />
Once I decided on the overall size and shape of tl1e top, I began<br />
building the drawer case. I made its visible parts from bubinga and<br />
used cherry for parts tl1at aren't visible. The drawer case has two<br />
short side aprons and one long back apron; a drawer rail above<br />
and below each drawer opening; and a center divider between<br />
each drawer compartment. As I mentioned, the case is assembled<br />
around angled blocks: one at each of the corners and one on each<br />
side of the center drawer. These blocks are mortised to receive the<br />
ends of the aprons and the two center dividers. The ends of the<br />
four side-drawer rails are dovetailed to both d1e front corner<br />
blocks and the front face of the center-drawer blocks. Within each<br />
drawer compartment are two drawer frames. The top frame keeps<br />
tl1e drawer from tipping when opened, and d1e drawer slides on<br />
the bottom frame. The drawer frames are made from cherty, ex-<br />
74 Fine Woodworking<br />
Photo this page: Thomas Ames
Fig. 1: A writing desk<br />
Maple string inlay, V16 in. wide<br />
Flatsawn bubinga veneer<br />
Drawer case is<br />
same size as top.<br />
Top, 1!4. x 24 x 54, is<br />
edgebanded-andveneered<br />
MDF.<br />
Drawer rails<br />
Center drawer, 227/'6 in. wide by 210/'6 in. deep<br />
Bubinga leg is from a<br />
2 x 2 x 27'..7 billet<br />
and then fluted.<br />
All cock bead is Va -in.<br />
tenoned Maple pull,<br />
thick and<br />
to<br />
stands<br />
front<br />
VI6 in.<br />
proud of face.<br />
Side by drawer, in. deep in. wide 22% 11'=!t,6<br />
Bubinga corner block<br />
Maple fluted cap is<br />
!4 in. thick. Size to fit<br />
top of finished<br />
Maple foot,<br />
leg.<br />
from shaped<br />
leg and blank doweled blank, 1% x 2 x to 2<br />
Maple<br />
Detail:<br />
binding<br />
Desktop section view<br />
Bubinga in. thick edgebanding, by 'V16 in. wide<br />
fiberboard, Medium-density in. thick<br />
%<br />
1<br />
Maple in. wide veneer, Maple-veneered ======-- bottom<br />
5/16<br />
Detail: Drawer pull<br />
1%<br />
Carve hollow in pull.<br />
L IwE<br />
--:i>-l<br />
%<br />
Detail: Drawer construction<br />
Center-drawer front is laminated bubinga, % in. thick by 2!4 in. wide.<br />
Poplar sides and back, % in. thick<br />
Solid-maple bottom, Y. in. thick<br />
Photos except where noted: Gary Weisenburger; drawings: Aaron Aze'vedo<br />
September/October 1991 75
cept for the front pieces of the two center frames, which are bubinga<br />
because they are actually the curved center-drawer rails. The<br />
drawer frames' side and back edges have tongues that fit into<br />
grooves on the inside of the aprons and dividers.<br />
The first step was to cut tile corner blocks to the size and shape<br />
shown in figure 2 on the facing page. I began witil a 36-in.-Iong piece<br />
of bubinga, which I milled to 19/16 in. thick by 3 in. wide. I then<br />
tilted tile tablesaw blade to 45° and ripped the corners off the stock<br />
to form the four facets shown in figure 2. After planing the facets<br />
smooth, I crosscut tile stock into six 5-in.-long blocks.<br />
ext, I laid out and cut tile mortises in the blocks to receive the<br />
aprons and dividers. The mortises were located so that the outer<br />
surfaces of tile side and back aprons would be flush with the outer<br />
face of each corner block. The mortises in tile two center-drawer<br />
blocks were aligned so that tile dividers were flush on the side that<br />
faces the center-drawer opening. Since tile tenons were centered<br />
on the 7/s-in.-thick aprons, I centered the mortises 1'16 in. from the<br />
face of the block that tile apron was flush with. I cut all tile mortises<br />
on a slot mortiser (shown in my article in FWW #81), but the<br />
job could be done with a router or a drill press.<br />
Witil tile mortise sizes established, I cut the aprons and dividers<br />
to length (see tile dimensions in figure 2) and formed the tenons on<br />
their ends. The back and side aprons have tenons on bOtil ends, but<br />
the center dividers only have tenons on the front ends; tiley are<br />
doweled to tile back rails. For cutting tenons, I mounted a dado<br />
blade on tile tablesaw and clamped the workpiece vertically to a<br />
tenoning jig. With tile tenons cut, I filed tileir corners round to fit<br />
tile mortises. ext, I measured over 1312 in. from the tenon shoulders<br />
at each end of the back apron and marked the centerlines of the<br />
center dividers' dowel holes. I drilled three, %-in.-dia. by %-in.-deep<br />
holes on each centerline, and I used dowel centers to locate the<br />
holes in tile ends of the dividers. To guide each divider into position,<br />
I clamped a block on the back apron, 1'1 6 in. from the centerline<br />
(half tile divider's thickness). I then held the divider against<br />
the block and kept the top and bottom edges aligned as I pressed<br />
each divider's end against tile dowel centers. I drilled 1-in.-deep<br />
holes in the ends of the dividers and inserted loose-fining dowels<br />
without glue to test for fit and to aid in the dry assembly.<br />
Also in preparation for dry-assembling tile parts, I hot-glued a<br />
triangular softwood clamping caul on the outside diagonal face of<br />
each corner block, as shown in the photo at right below, so I could<br />
apply clamping pressure directly in line with tile tenons. I left<br />
these blocks in place until after the final glue-up, and then I popped<br />
them off witil a chisel and peeled tile hot glue from tile blocks.<br />
Now I was ready to my-assemble the aprons, dividers and corner<br />
blocks to measure the lengtil of the side-drawer rails and tile<br />
lengtil and width of the drawer frames. To ensure accuracy when<br />
measuring, I clanlped the my-assembled parts to a piece of MDF, making<br />
sure tile side aprons and dividers were square with the back<br />
apron, and the drawer openings were parallel. After determining<br />
the dimensions of the drawer rails, I cut tilem to length, allowing<br />
for the single dovetails on their ends. I tilen cut tile dovetails witil<br />
a thin-kerf blade and the tablesaw crosscut box, shown in tile left<br />
photo below. The dovetails were cut witil the blade tilted go<br />
and the<br />
workpieces held vertically and against a stop clamped to tile box's<br />
fence. I set the blade back to 0° to cut tile shoulders, again using a<br />
stop block. I chiseled away tile small ridge in the corners left by the<br />
thin blade. To mark the corner blocks for the dovetails' mating sockets,<br />
I held each tail against tile end of its block and scribed around<br />
tile tail. Then I handsawed to the line and chiseled out the waste.<br />
Making the drawer frames<br />
Since tile drawer frames fit inside the case, tile frames must be<br />
square and to tile exact dimensions of the drawer openings. I added<br />
14 in. to the sides and the back of each frame for tile tongues<br />
that fit into grooves in the aprons and dividers. After cuning tile<br />
side-frame parts to length, I joined them witil open mortises and<br />
tenons. The center frames also have open mortises and tenons on tile<br />
back corners, but the bubinga front rails are joined to the frames'<br />
sides witil blind mortises and tenons.<br />
After removing all the glued-up frames from the clamps, I<br />
scraped off dried squeeze-out and handplaned tile joints flat. Then<br />
I stacked one center frame on top of the other, taped them securely<br />
together and bandsawed tile curve in bOtil front rails at the same<br />
time. I left the frames taped togetiler while I smoothed the curved<br />
edges witil a compass plane (a spokeshave would also work).<br />
To cut dovetails on the ends of the drawer rails, Moore uses<br />
a tablesaw crosscut box and clamps a vertical guide on its fence.<br />
Cutting different angles widens the box's kerf, so he renews the box<br />
by screwing plywood to the base and fence and cutting a fresh kerf<br />
The drawer case is dry-assembled to check that joints fit and<br />
to measure for the drawer frames' size. Softwood cauls, hot-glued<br />
on the beveled corner blocks, keep clamping pressure in line with<br />
the apron tenons. The cauls are chiseled off after final assembly.<br />
76 Fine Woodworking
Side apron,<br />
Fig. 2:<br />
including 7/8 5 21 Y..,<br />
Apron construction<br />
x tenons x<br />
Cherry drawer frames, in. by 2 in., with<br />
'-'4-in. by '-'4-in. tongue on sides and back.<br />
Drawer guide, 21 Dowels, P/16 x P/16 x<br />
by 1Y.. in. in. long dia.<br />
%<br />
--Divider, 7/8 x 5 x 21, including tenon<br />
Corner block<br />
Detail: Top view of corner block<br />
Center-drawer front rails<br />
are 'i'll- in. by 2'-'4-in. bubinga cut to<br />
shape after frame is assembled.<br />
Next, I cut the tongues that are centered along the side and back<br />
edges of each frame. I did this on my shaper, but tongues could be<br />
cut easily with a router or tablesaw. To groove the dividers and<br />
aprons to receive the drawer frames' tongues, I guided my hand-held<br />
router with its fence against the workpiece edge. I located the<br />
grooves so that the inside surface of the side frames would be ' flush<br />
with the inside face of the drawer rails, allowing the drawers to<br />
slide smoothly. To allow for assembly, I cut off the corners of dle<br />
side-drawer frames so dley fit around the inside facet of the corner<br />
blocks (see figure 1 on p. 75). The top center frame is flush widl the<br />
case top, but because the center drawer is narrower than the others,<br />
I adjusted dle router fence to raise the center-drawer-frame groove<br />
1 in. fa rther up from dle case's lower edge (see figure 2). After<br />
grooving all dle aprons and dividers, I glued the appropriate angled<br />
corner block on the front end of each divider, and I extended<br />
dle Y4-in. center-frame grooves % in. into the block. When gluing the<br />
blocks on the dividers, I also glued the corner blocks on bodl ends<br />
of dle back apron and on tile front end of the side aprons.<br />
Gluing up the drawer case<br />
I organized the drawer-case parts into four manageable subassemblies,<br />
each of which I glued up and let dry before going onto<br />
the next assembly stage. First, I glued dle center-drawer frames to<br />
the dividers; second, I glued the dovetailed rails to the dividers'<br />
and side aprons' corner blocks; third, I glued on the four sidedrawer<br />
frames one side at a time; and finally, I added the back<br />
apron witil its corner blocks. When gluing up a case in subassemblies<br />
like dlis, parts must be aligned so they will fit properly at the<br />
next assembly stage. For exanlple, when I glued the drawer frames<br />
to the dividers, I made sure all tile back edges were aligned before<br />
setting aside the subassembly to dry.<br />
When I glued the dowels in dle dividers before the back apron<br />
was glued on, I didn't hammer the dowels to tile bottom of the<br />
holes because pressure from excess glue might have split dle dividers.<br />
Instead, I held a 1 5/16-in.-thick block against the ends of the<br />
divider and hammered the dowels in until their ends were flush<br />
with the block.<br />
To complete me case, I glued dle back-apron-and-corner-block<br />
assembly to the side-apron tenons and the dividers, clamping from<br />
corner block to corner block to press the side aprons' shoulders<br />
up tight. Also, during tilis last stage, I glued a drawer glide on each<br />
side of dle bottom side-drawer frames, as shown in figure 2. With<br />
the drawer case completed, I moved on to building tile desktop.<br />
Making and veneering the desktop<br />
Aldlough the<br />
(MDF).<br />
desktop appears to be a mitered frame widl three<br />
book-matched panels, it is actually bubinga veneer with curly maple<br />
stringing glued on a substrate of l-in.-thick medium-density<br />
fiberboard I thought the frame-and-panel design would emphasize<br />
the writing alcove, but I wanted to avoid the wood move<br />
MDF<br />
ment associated with solid stock.<br />
To lay out the substrate, I turned the case upside down on the<br />
and traced<br />
MDF,<br />
around dle case's perimeter. Then I sawed to a line<br />
% in. inside the tracing to allow for solid-bubinga edgebanding<br />
around dle substrate's perimeter. I made the<br />
MDF.<br />
banding a bit thicker<br />
than the and after gluing on dle banding, I planed and scraped<br />
its edges flush. Next, I used my shopmade vacuum-bag veneer press<br />
to glue maple veneer to the bottom of the Then, I routed a<br />
small rabbet along dle substrate's bottom edge and glued curly<br />
maple veneer to the rabbet's shoulder. This visual transition elevates<br />
the top from the drawer case. After trimming dle curly maple<br />
flush with tile bottom surface, I turned to the top surface.<br />
First, I selected a bubinga plank with spectacular grain and resawed<br />
it on my bandsaw to yield dle IfIO-in.-mick veneer for dle<br />
book-matched panels. I resawed veneer from a piece of verticalgrain<br />
bubinga for the frame veneers. I glued the frame veneers<br />
September/October 1991 77
Moore flutes legs on his<br />
shaper by using a lathe-like<br />
jig with a 12-point index<br />
wheel and a 3Js-in. -radius cutter<br />
(above). A profile template<br />
screwed to the jig's base<br />
fo llows the collar in the<br />
shaper table, and stops on<br />
the ends prevent the cutter<br />
from touching the jig's steel<br />
headstock or tailstock centers.<br />
The block in the jig's middle<br />
keeps the leg from deflecting.<br />
A leg is notched to fit on<br />
the corner blocks using a<br />
jig that guides the leg<br />
against the bandsaw fence<br />
(zeft). The leg is rotated in<br />
the jig so that the notch will<br />
intersect at the ridges between<br />
flutes.<br />
down first, using clamps and softwood cauls, and then I glued<br />
down the maple string, which I ripped from 1 /1O-in.-thick<br />
MDF.<br />
bandsawn<br />
veneer. I held the strings in place with pins until the glue dried.<br />
Since the veneer was so thick, I was able to joint and edge-glue the<br />
book-matched panels before gluing them on the I cut each<br />
panel slightly larger than its opening and handplaned it to a perfect<br />
fit. Then, I spread glue in the panel areas on tlle substrate,<br />
pOSitioned the panels and secured tllem witll tape before putting<br />
tlle top in my vacuum press.<br />
After removing the top when tlle glue had dried, I scraped the<br />
veneers level and then rabbeted around tlle top edge for the curly<br />
maple binding. I glued the binding in the rabbet and held it with a<br />
piece of tape every inch or two while the glue dried, just as I do<br />
when u"imming around the edge of a guitar (building guitars is my<br />
hobby). When the glue was dry, I removed the tape, scraped tlle<br />
binding flush and slightly rounded its corner witll a sanding block.<br />
Then I sanded the desktop and fastened it to the drawer case with<br />
screws through the top drawer frames. Next, I made the legs and<br />
attached tllem to tlle corner blocks.<br />
Fluting legs on a shaper<br />
Although tlle tapered, fluted legs on this desk look somewhat intimidating<br />
to shape, it's a fairly easy operation with the aid of tlle<br />
jig shown in the top photo. My jig supports the leg billet between<br />
centers, and a profile template screwed to the jig's base runs<br />
against the shaper's guide collar as the billet is shaped and fluted<br />
with a three-wing, %-in.-raclius cutter. The jig's fi xed headstock has a<br />
12-point index wheel tllat allows me to rotate the billet in equal increments<br />
and lock it in place as I cut each of the 12 flutes. The<br />
tailstock block has a tenon that slides in a groove in the base so<br />
tllat the tailstock can be adjusted for different-lengtll legs. Once the<br />
tailstock is adjusted, a bolt and wing nut hold it in place securely.<br />
To make the tailstock center, I drilled the end of a Y2 -in.-dia.<br />
steel rod and inserted a finishing nail filed to a pOint. And for tlle<br />
headstock center, I drilled and tapped tlle steel rod to accept a<br />
hanger bolt, which has machine threads on one end and lag<br />
threads on the other. The rods fit tightly in holes in the center of<br />
the headstock and tailstock blocks.<br />
I prepared the leg billets by doweling and gluing a maple foot<br />
block on the bottom end of a bubinga blank. Then, I center-drilled<br />
the top of tile square blank to accommodate the headstock screw and<br />
tapered tlle billet on all four sides using tile bandsaw. Next, I beveled<br />
the billet's corners witll a router and chamfer bit to make it<br />
into a rough, tapered octagon. I screwed the billet to the indexed<br />
headstock screw and tightened the tailstock's center against the billet's<br />
maple foot. Then I cut each flute in two passes.<br />
I used another jig, shown in tlle bottom photo, to hold and align<br />
a fluted leg while I bandsawed tlle notch for attaching the leg to<br />
the drawer-case corner blocks. The leg was screwed to the jig at<br />
both ends, and tlle assembly was rotated so tlut the banclsaw blade<br />
intersected at the high points of flutes on opposite sides of tlle leg.<br />
I crosscut tlle shoulder by placing tile leg, still in tlle jig, against<br />
my radial-arm-saw fence. And, witll tlle blade adjusted to tlle correct<br />
height, I crosscut for the shoulder.<br />
To complete me legs, I glued maple caps on their tops witil epoxy<br />
and extended the flutes onto tlle caps with sandpaper wrapped<br />
around a %-in.-dia. dowel. To attach tlle completed legs to tlle corner<br />
blocks, I tumed the table upside down, and glued and clanlped<br />
each leg in place. When me glue had dried, I screwed into each leg<br />
from inside the drawer case. While the case was upside down, I<br />
glued cock bead (shown in figure 2) to its bottom edges.<br />
Making the drawers and pulls<br />
I put the drawers together with traditional hand-cut joints:<br />
Through dovetails join the back to the sides, and half-blind dovetails<br />
join tile sides to the front. The solid-wood bottom panel slides<br />
under the back into grooves in the sides and front. For more on<br />
u"aditional drawer work, see FW'W #73, p. 48. I made tlle curved<br />
front by laminating seven pieces of lis-in. resawn bubinga over a<br />
form. I resawed tlle veneers from one piece and laminated tllem<br />
in tlle same order, so the glueline would be almost invisible. After<br />
assembling the drawers, I glued blocks on tlle back apron that stop<br />
each drawer when its front is flush witll tlle drawer rails. To complete<br />
tile drawers, I routed a cock-bead rabbet around tile perimeter<br />
of each drawer front. The 5/16-in. rabbet allows the %-in.-wide maple<br />
cock bead to stand proud of the drawer face.<br />
I like tlle feel of carved wooden drawer pulls, and this desk's<br />
curly maple pulls contrast nicely with tlle bubinga. The pulls are<br />
hollowed underneath to provide a grip, and each pull has a tenon,<br />
which is glued into a mortise in the drawer fronts. After shaping<br />
the pulls, I carved the hollow with a gouge and left tile tool marks<br />
D<br />
for a pleasant tactile surprise. Finally, I sprayed the completed<br />
desk with four coats of clear high-gloss lacquer and rubbed tlle<br />
final coat to a satin finish with 0000 steel wool.<br />
TerlJl Moore is a jumituremaker in Newport, NH.<br />
78 Fine Woodworking
A Router F ixture<br />
for Making Dowels<br />
Sp inning square blanks<br />
into round stock<br />
by Ken We lls<br />
When you need dowel stock in unusual or exotic species of wood, where do you turn? The ebony, cocobolo, elm, mahogany,<br />
walnut, oak and sycamore dowels above were all made by running square stock through a simple fixture that mounts on a router.<br />
Have you ever wanted to use exposed dowels for a piece of<br />
furniture, but rejected the idea because you couldn't find<br />
any dowels of the right wood species ? Store-bought dowels<br />
are available here in the United Kingdom in only ramin (a yellowish,<br />
featureless tropical hardwood) and sometimes beech. If dowels are<br />
hidden, it doesn't matter what they look like-they need only be<br />
durable and fit the hole. But for the games and puzzles I manufacture,<br />
I need small-diameter dowels of various species, such as<br />
wenge, ebony and yew, and so I make them. I routed the dowels<br />
shown above by chucking a square blank in an elecu-ic hand drill<br />
and feeding the blank through a fixture screwed atop my router's<br />
baseplate, as shown at right. The dowel is formed as the fi xture<br />
guides the spinning blank past the side of a %-in.-dia. straight bit.<br />
My fixture (see the drawing on the next page) is a 1-in.-thick<br />
block d1rough which I bored several holes: two screw holes, for<br />
mounting the fixture to the base; one center hole, for the router<br />
bit; and two different-size guide holes on either side of the bit.<br />
Since the dowel blank goes in square and comes out round, each<br />
guide hole must start large and decrease to the diameter of the finished<br />
dowel. The diameter of the infeed portion of the guide hole<br />
is equal to the diagonal of the square blank. And the surface of the<br />
outfeed hole must be tangent to the arc of d1e bit's cutting edge;<br />
this principle is similar to d1e relationship of a jointer's outfeed<br />
bed to d1e cutter head. The difference between the radii of the<br />
infeed and outfeed holes is equal to the depth of cut. The chart on<br />
the next page lists the size of the blank and diameter of the infeed<br />
portion of the guide hole for dowels from 1'8 in. dia. to 1'2 in. dia.<br />
in 1"6-in. increments.<br />
Making the fixture<br />
I've made three fixtures; each makes two different-size dowels. My<br />
fixtures are hard phenolic plastic (from afar it looks like wood),<br />
which can be worked wid1 woodworking tools, but you could also<br />
use aluminum or wood. If you use wood, choose a strong and hard<br />
species like lignum vitae, which is oily and self-lubricating. You can<br />
buy phenolic in d1icknesses up to 2 in. from Ridout Plastics (5535<br />
Ruffin Road,<br />
',/4 '/2<br />
San Diego, Cal. 92123; 800-542-6325), but I used epoxy<br />
to laminate four 1'4-in.-d1ick pieces into a 1-in.-thick block. If<br />
you want a fixture for dowels larger than in. dia., make d1e<br />
block about in. to % in. thicker than the diameter of d1e infeed<br />
hole. As shown below, my fixture is bolted through threaded holes<br />
in my router's metal base and baseplate. If your router is fastened<br />
to a table or to an oversized plastic baseplate, it may be more convenient<br />
to make the fixture longer and screw it to holes in the table<br />
or baseplate on either side of the router.<br />
After cutting the glued-up block to width and length, I scribed it<br />
with the centerlines of the five holes (see the drawing). The screw<br />
holes are 1 in. from the ends, d1e bit hole is in the center, and the<br />
To make a dowel, a square blank is chucked in a drill and fed,<br />
spinning, through the fixture's infeed hole. The blank's corners are<br />
trimmed off as it rotates past the straight router bit's cutting edge.<br />
September/October 1991 79
A dowel-making fixture<br />
Mounting-screw hole<br />
0;'''';00 of fe" <br />
Diameter of router-bit hole is in.<br />
larger than bit.<br />
Diameter of outfeed hole<br />
equals diameter of<br />
finished dowel.<br />
Drill infeed hole<br />
1 in. deep, and<br />
then drill outfeed<br />
through block.<br />
3<br />
c,,,,,n,, -t<br />
Top view<br />
The distance between<br />
centers of a guide<br />
hole and the routerbit<br />
hole equals the<br />
/f<br />
radius of the router bit<br />
/ I<br />
plus the radius of the<br />
finished dowel.<br />
1
to the bit; if the dowel is smaller d1an me outfeed hole, the hole<br />
can be moved away from the bit. By taking time to fine-tune the<br />
fixture, I can make perfectly sized dowels at production speed.<br />
To keep a long dowel from whipping, I feed its finished end<br />
mrough a dowel-size hole in a steady rest, which I clamp to me<br />
bench about half d1e dowel's lengm from me outfeed hole. You can<br />
also prevent whipping by pushing half of me blank into d1e ftxture in<br />
me normal fashion, and d1en chucking me drill on d1e fm ished end<br />
of d1e dowel and pulling it me rest of me way d1rough. Whipping<br />
also results from d1e bit being set inside me diameter of me outfeed<br />
hole, which makes me fit loose. If this condition is carefully conu'olled,<br />
you can produce dowels of lesser diameters d1aJ1 d1e ftxture<br />
was made for. To conu'ol whipping in iliis instaJ1ce, I clamp a pressure<br />
pad over me exit hole so me pad bears against me dowel. D<br />
Ken Wells, au/bar a/ Wooden Puzzles and Games (Sterling Publishing<br />
Co), makes puzzles and games in Portsmouth, England.<br />
Perfect alignment of the ouifeed hole with the router bit's cut·<br />
ting edge is essential to ensure an accurately sized dowel. Slightly<br />
oversized mounting holes in the fixture let you move it side to<br />
side while testing alignment with a drill-bit shank.<br />
A dowel maker you can buy<br />
is cut on top of the bit, I only roughly centered<br />
the fixture on my router table. I<br />
mounted the fIXture using machine screws<br />
and lock nuts (provided) and adjusted the<br />
bit height to get a perfectly sized dowel. As<br />
with Wells' fIXture, the finished dowel<br />
must fit snugly in the outfeed hole, which<br />
should burnish the dowel's surface. Anything<br />
less than a snug fit and the dowel will<br />
feed too quickly, which yields a rough finish<br />
or short spots that are skipped over.<br />
Although the square blank should fit<br />
snugly in tl1e infeed guide hole, my blanks<br />
must have been slightly oversized because<br />
friction caused burning in the infeed hole.<br />
To decrease the friction, I handplaned a<br />
chamfer on the corners of tl1e blaJ1k. If you<br />
burn and enlarge the infeed hole in the maple<br />
block, you can buy or make a new one<br />
and screw it to tl1e aluminum tube.<br />
Photos in the product literature suggest<br />
feeding tlle blank tllfOUgh tile fixture by<br />
inserting the blank's end in a square sockby<br />
Gary Weisenburger<br />
If you like the idea of making dowels from<br />
the wood of your chOice, but you would<br />
rather buy a tool to do the job than make<br />
one, there are two on the market to choose<br />
from. One is a fairly expensive, hand-held,<br />
stationary cutter through which you feed<br />
square stock, using a lathe, a drill press or<br />
an electric drill. This hand-held dowel<br />
maker, which has only one size cutter and<br />
costs about $160, is available from Woodcraft<br />
Supply, 210 Wood County Industrial<br />
Park, Parkersburg, wv. 26102- 1686. The<br />
other tool, the Woodhaven Dowel Maker<br />
(shown below), is router mounted like<br />
Ken Wells' fIXture (see the main article)<br />
and is very reasonably priced. It is a rectangular<br />
aluminum tube with a maple infeed<br />
block screwed to one side. The blaJ1k is<br />
guided past the end of a %-in.-dia. corebox<br />
bit instead of past the side of a straight<br />
bit like Wells' tool.<br />
I tried the jig and found the instructions<br />
very easy to follow. Since the dowel blank<br />
et, which is shown chucked in an electric<br />
drill. I didn't have a %-in.-sq. socket to try<br />
this, but it's a great idea.<br />
Y4<br />
Woodhaven (5323 W Kimberly Road,<br />
Davenport, la. 52806; 800- 344-6657),<br />
makes fIXtures for five dowel diameters:<br />
in., % in., % in., % in. and 1 in.; each fixture<br />
is for only one size dowel and costs<br />
about $16. Replacement maple blocks are<br />
about $3. Also, for about $17, Woodhaven<br />
sells a hardware kit, which contains a<br />
clear-plastiC baseplate that attaches to a<br />
router's subbase so that the fixture can be<br />
mounted on the baseplate. The hardware<br />
kit also includes clips tlut allow a routermounted<br />
fixture to be inverted and attached<br />
to plywood or a benchtop. Dowel-making<br />
fixtures are also available from Garrett<br />
Wade, 161 Ave. of the Americas, New<br />
York, .Y. 10013; (800) 221-2942. D<br />
GalJl Weisenbut-ger is an assistant editor<br />
at FWW<br />
Photo: Weisenburger<br />
Gary<br />
Woodhaven's dowel-making jigs work on the same principle as Wells' fixture except that the blank is guided over the end of a %-in. -dia.<br />
core-box bit instead Of past the side of a straight bit. Here, a 7f1 6-in. -sq. mahogany blank is being turned into a %-in. -dia. dowel.<br />
September/October 199 1 81
Quilt Patterns<br />
in Parquetry<br />
Scroll-sawing interchangeable pieces<br />
by Charles Detweiler<br />
My wife, Linda, and I launched a new<br />
career rather unexpectedly in 1982<br />
when a recession in northern Texas<br />
caused a slump in our home-building<br />
business. With time on our hands and a need<br />
for income, Linda innocently suggested that<br />
we combine my interest in woodworking<br />
with her admiration of fabric quilts and<br />
. make something to sell at a local arts-andcrafts<br />
show. After some prodding from our<br />
friends who sold at craft fairs regularly, we<br />
agreed to make some parquetly wall hangings<br />
based on traditional quilt patterns.<br />
From that humble and hesitant beginning,<br />
our business has grown and prospered. Today,<br />
we make "wood quilts," the trademark<br />
we coined for the rype of woodworking we<br />
do, in nearly 200 different designs and sell<br />
them to individuals, gift stores and galleries<br />
nationwide. Although the wall hangings are<br />
our largest sellers, we've also used quilts<br />
as tabletops, and we've grouped quilt blocks<br />
with different geometric and pictorial patterns<br />
into larger afghan-like works and<br />
montages. Recently, we've begun to sell<br />
wood-quilt kits, which have unpainted, precut<br />
pieces that hobbyists can assemble, paint<br />
and frame themselves. But if someone wants<br />
a challenge and prefers to "quilt" from<br />
scratch, this article will show the fundamentals<br />
that we use to cut out and assemble<br />
a custom quilt.<br />
Methods and materials<br />
When most woodworkers hear the word<br />
parquetry, they think of floors decorated<br />
with geometric patterns. Our quilts are similar,<br />
in that small pieces of wood are cut out<br />
and glued to a substrate to form patterns. If<br />
only straight-sided geometric shapes, such as<br />
triangles, squares and parallelograms, are<br />
used, it's fairly easy to cut uniform, interchangeabie<br />
pieces. You just rip strips of<br />
wood and then crosscut them into pieces at<br />
the proper lengths and angles. This method<br />
works fine and produces some beautiful patterns,<br />
but it limits you to straight-sided<br />
pieces. So in order to introduce curved<br />
pieces into our quilt designs, we developed<br />
a method for croll-sawing the pieces.<br />
Just as in conventional fabric quilting,<br />
most of our scroll-sawn wood quilts are<br />
based upon repeated block patterns, like the<br />
full-scale pattern<br />
16<br />
in figure 1 on p. 84. Once<br />
we've sketched a block design, we decide<br />
how many times to repeat it to make up the<br />
quilt (we used blocks for the quilts shown<br />
Dramatic design variations are possible<br />
simply by swapping colors within a<br />
pattern. The quilt shown above and the<br />
one at left have the exact same pattern,<br />
and even the same colors. A subtler variation<br />
is introduced when different kinds<br />
of plywood are used; the quilt at left is<br />
oak and the one above is lauan.<br />
The 31-in.-sq. painted parquetry quilt,<br />
left, was inspired by a traditional quilt<br />
design. The quilt's field and borders are<br />
%-in. -thick plywood glued to a wafer-board<br />
substrate. Grain directions of the pieces<br />
were alternated to add texture and variety.<br />
82 Fine Woodworking<br />
Photos this page: Susan Kahn
here). Then we cut squares-one for each<br />
block in the quilt-from 'k in.-thick plywood.<br />
These squares are stacked in groups<br />
of four, the block pattern is drawn on the top<br />
squares and the stacks are sawn into pieces.<br />
The beauty of this scroll-saw method is<br />
that we can use su-aight-sided, curved and<br />
irregular-shaped pieces, and they all have a<br />
well-matched fit in the finished quilt. Since<br />
multiple layers of plywood blocks are cut at<br />
one time, pieces shaped with arcs or freehand<br />
curves are always uniform. Thus, various<br />
species of plywood can be used and the<br />
pieces interchanged, or the grain direction<br />
of adjacent pieces can be varied to introduce<br />
the look and texture of cloth. This scroll-saw<br />
method allows more design freedom, so I'll<br />
detail the process.<br />
For a scroll-sawn quilt and borders, any<br />
species of Y4-in. plywood can be used. For<br />
example, in the bottom photo on the facing<br />
page, Y4-in. oak ply was used, while in the<br />
top photo on the facing page, Y4-in. lauan<br />
plywood was used. Thinner plywoods will<br />
be easier to cut, but they might be more<br />
u-ouble to glue and fit because they tend to<br />
warp. Solid wood can also be a problem, as<br />
the water from the glue can cause the pieces<br />
to swell and buckle or leave gaps when dry.<br />
We use l4-in.-thick wafer board (available at<br />
most building-supply stores) for tile back<br />
boards, though a thicker backing might be<br />
better if you're making a tabletop. All our<br />
scroll-sawn quilts are framed Witil solid oak<br />
and have %-in.-tilick by 1 Ys-in.-wide subft-ames,<br />
ripped from 1x12 white-pine boards,<br />
to stiffen tile back boards (see figure 2 on<br />
tile following page).<br />
Although experience in making cloth<br />
quilts is helpful in laying out an original<br />
block design, you can find inspiration and<br />
traditional patterns in quilting magazines<br />
and books. By reversing color combinations<br />
of tile pieces within each block or by rotating<br />
the blocks, you can achieve kaleidoscope-like<br />
variations. The quilts on the<br />
facing page illusu-ate the dramatic diversity<br />
possible by alternating colors and materials<br />
in identical blocks. Note tiut simple geometric<br />
shapes, like squares and diamonds, usually<br />
have common opposite- or adjacent-side<br />
lengtils. By lining up equal sides, tile shapes<br />
can be combined to make extraordinary<br />
schemes. Once you've arrived at a design,<br />
you can start to "quilt" your blocks.<br />
Because tile 16 squares will be arranged<br />
in four stacks of four squares each before<br />
they are Cllt into pieces, you need to draw<br />
your pattern on the four top squares only.<br />
There are several options for tilis: You can<br />
copy the pattern onto tile plywood with carbon<br />
paper; you can Cllt a poster-board stencil<br />
with an X-Acto knife and trace it (see<br />
tile top photo below); or if you are planning<br />
to make several quilts with the same pattern,<br />
you can make plywood marking jigs to trace<br />
the lines quickly and accurately; two or<br />
three jigs may be necessary to draw the<br />
whole quilt pattern. To make the jigs, cut<br />
single-pattern shapes out of plywood, and<br />
tilen tack and glue stops on two adjacent<br />
sides. These corner stops will align the jig on<br />
the plywood squares.<br />
After you've transferred the pattern to the<br />
four top quares, you're ready to assemble<br />
tile stacks witil double-faced carpet tape,<br />
which is carried by most hardware stores.<br />
Place small pieces of tape on your design<br />
where you won't cut through tilem, because<br />
the glue on tile tape will gum up tile teeth of<br />
your scroll-saw blade. Since removing tile<br />
tape is rather tediOUS, don't use any more<br />
than necessary. The placement of the tape<br />
will depend on the design, but don't put tape<br />
on parts that will be snipped away early in<br />
the cutting process. However, at least two<br />
pieces of tape will be needed to hold the<br />
stack together until tile last cut is made. To<br />
ensure that the tape is precisely placed each<br />
time, you can make a poster-board or paper<br />
stencil with windows cut out where you<br />
want the tape (see the top photo below).<br />
When taping the squares together, alternate<br />
grain direction (two vertical and two<br />
horizontal), as this makes tile quilt more visually<br />
ineresting (unless you want a more<br />
homogeneous look). Also, align all the edges<br />
of the squares perfectiy in each stack. It's a<br />
good idea to check tilis alignment witil a<br />
combination square after the stack is taped<br />
together but before you cut. If tile stacked<br />
squares are only out of alignment slightly<br />
(plus or minus Y32 in.), you can belt-sand the<br />
edges flush since tile glue-up procedure is<br />
somewhat forgiving of minor errors and<br />
since the frame can accommodate small discrepancies.<br />
When the taped-together stacks<br />
are aligned and square, you're ready to<br />
scroll-saw them into pieces.<br />
I<br />
Cutting and arranging the pattern.<br />
For sawing the plywood stacks into pattern<br />
pieces, use a Hegner Multimax scroll saw<br />
Poster-board patterns are used to trace<br />
the block design on the squares that will<br />
be on top of fo ur stacks. Detweiler also<br />
cuts out stencils, like the one shown in the<br />
background at left, so he can precisely<br />
place double-faced tape between block<br />
layers, but away from lines to be cut.<br />
By scroll-sawing four squares at once,<br />
Detweiler makes uniform pieces throughout<br />
a stack, allowing a piece to be exchanged<br />
with others directly above or below it. He<br />
uses a #5, 16%-t.p.i. Pebeco blade in his<br />
Hegner Multimax scroll saw (below).<br />
Preparing plywood stacks<br />
After you've selected tile type of plywood,<br />
you're ready to Cllt out tile squares tilat will<br />
later be scroll sawn into the pattern pieces. I<br />
rip 5-in.-wide strips on the tablesaw and then<br />
crosscut these into squares using a radialarm<br />
saw and stop blocks.<br />
September/October 1991 83
(available from Advanced MachinelY Imporrs<br />
Ltd., PO Box 312, New Castle, Del.<br />
19720) fitted with a #5 Pebeco blade (also<br />
carried by Advanced Machinery). I prefer a<br />
#5 (0.0150-in -thick by 0.039-in.-wide) blade<br />
with 16'/2 teeth per<br />
As<br />
inch (t.p.i.) because it<br />
cuts smoothly and quickly and because it's<br />
stiff enough to cut sharp corners witllout<br />
much deflection. you cut the stacks into<br />
pieces, set the pieces aside in the same positions<br />
as they were marked to keep things organized<br />
until the cutting is finished.<br />
After cutting all the pieces, pry apart the<br />
taped parrs carefully with a pocket knife or<br />
similar thin-edge tool, and peel off the tape.<br />
If any of the tape's glue is left on the wood,<br />
clean it off with some paint tllinner or alcohol.<br />
After removing tile tape, tile individual<br />
pieces within each stack are rearranged and<br />
laid out into new pattern blocks with tile<br />
parrs and grain alternated or rotated to complement<br />
tlle design (see tile top photo on<br />
the facing page). Remember that all of the<br />
parrs from one square will only interchange<br />
with others in that stack and only in tlle same<br />
place in the pattern. In otller words, even if<br />
each square contains four similar triangles,<br />
each triangle should only be interchanged<br />
witll others that are above or below it in the<br />
stack. This ensures that the pieces will fit<br />
1: Full-scale block pattern Sixteen plywood blocks are required for whole quilt.<br />
perfectly, even if you veered from the line<br />
slightly when cutting.<br />
Borders<br />
For first-time wood quilters, I recommend a<br />
single border, consisting of four equal-widtll<br />
sU-ips around tile quilt's sides. The strips can<br />
be whatever width you choose, but leave<br />
tllem '/2 in. too long and trim tile ends later.<br />
For the quilt described here, we used tllree<br />
borders. A %-in.-wide strip acrs as a thin accent<br />
border to set off the block pattern. A<br />
3-in.-wide border was cut into segments to<br />
form a pattern tlut complemenrs the overall<br />
design. Segmented borders can consist of<br />
triangles or other geomeu'ic shapes determined<br />
by continuing joint lines and colors<br />
from tile quilt's field. A little aritllmetic will<br />
help you figure sizes. Finally, a 1Y4-in.-wide<br />
outer border urrounds the ell.1:erior, like a<br />
mat. I recommend butting the joinrs of this<br />
outer border and the accent border, as opposed<br />
to mitering them, so that size adjustments<br />
can be made more easily.<br />
Determine the lengtll of the accent-border<br />
strips by compressing them around tile field<br />
of pattern blocks lightly (four hands are required<br />
for tllis) and marking where each<br />
strip runs past it adjacent strip. Then I take<br />
the average lengtll of tile four strips and cut<br />
them all tile same length by using a stop<br />
block on the radial-arm saw. I cut the segmented-border<br />
pieces by fitting tllem alongside<br />
tile accent borders just established. I repeat<br />
this for tile outer border, but I leave<br />
tllose ends long and trim tllem at the same<br />
time as the back board after tile glue dries.<br />
Now, cut out your Y4 -in.-thick wafer-board<br />
substrate about 1'2 in. larger tlun tile overall<br />
quilt size. This will allow for any block inconsistencies,<br />
accumulation of spaces between<br />
the pieces or Out of squareness.<br />
Accent border, % in. wide<br />
Fig. 2: Section of quilt's frame and borders<br />
Guilt<br />
All borders and blocks are glued-andpainted<br />
plywood, <br />
field<br />
in. thick.<br />
Outside edge of frame stock<br />
is rounded over before frame<br />
is cut; corners are eased<br />
with a rasp after assembly.<br />
Finish nails, 1!.1 in.<br />
long, are driven into<br />
end of other<br />
frame members<br />
at corners.<br />
Finish nails,<br />
thick White-pine stiffener,<br />
1 in. long, are tacked<br />
from back; three<br />
in. by wide % in.<br />
per piece.<br />
Stained oak frame, '% in.<br />
thick by 1% in. wide, is<br />
face-nailed to stiffener with<br />
1% 1!.1-in.-long finish nails.<br />
Painting the pieces<br />
After all the componenrs are cut, arrange tile<br />
blocks and borders to make up the quilt on a<br />
smootll tabletop, and check tllat all tile pieces<br />
fit well. Then spread out the arrangement,<br />
leaving space between tile pieces so you can<br />
pick them up to color the wood. We brush<br />
on water-base liquid-aClylic paints, such as<br />
Accent brand (HPPG Borden, Accent Producrs<br />
Division, 300 E. Main St., Zurich, Ill.<br />
60047) and Ceranlcoat brand (Delta Technical<br />
Coatings, 2550 Pellissier Place, Whittier, Cal.<br />
90601), which have a cream-like consistency<br />
and are available in 2-oz. jars at most craftsupply<br />
stores. We prefer tllese water-base<br />
painrs for their ease in cleanup and overnight<br />
dlying time, but you could also use<br />
household oil-base stains, enanlel painrs or<br />
tllinned artist'S oils; you should experiment<br />
on scraps first. Working witll one color at a<br />
84 Fine Woodworking<br />
Photos e "cept .. where noted: Jim Boesel; drawings: Aaron Azexedo
time, paint each piece and border, picking<br />
up and returning each to its designated spot<br />
in the layout. Spread the color evenly, brushing<br />
it in the'direction of the grain. If you want<br />
the grain to be more apparent, apply a thinned<br />
wash coat of paint and inU1lediately wipe it off<br />
to the degree of wU1sparency you want. Let<br />
the painted components dry for 12 to 24<br />
hours before gluing them to the back board.<br />
Gluing and clamping<br />
After the parts are dty, push the whole assembly<br />
snugly together again, but off to one<br />
side to make room for the back board. Next,<br />
mark the center of your back board, and<br />
from that pOint, calculate and measure<br />
where the outside edge of the accent border<br />
will be located. Clamp dle accent strips in<br />
place, but don't glue dlem yet. With a carpenter's<br />
square, check d1at these sU-ips form<br />
90° corners. Span across dle corners with<br />
strips of 'I2 -in.-dlick scrapwood, secured widl<br />
spring clamps (see the bottom photo at<br />
right). ow you're ready to transfer the<br />
pieces d1at make up the quilt'S field to the<br />
back board and glue them in place.<br />
Starting in dle clamped accent border's<br />
corner, spread a coat of glue (we use regular<br />
white glue) over just a portion of the back<br />
board, and dlen, working quickly, place the<br />
quilt's pieces; two people are needed to glue<br />
a quilt this size. When the field of pieces is<br />
laid out, clamp the other two accent strips to<br />
dle back board to complete dle far corner.<br />
Be ure you don't push the pieces and borders<br />
togedler too tightly or the assembly<br />
may buckle. Altllough the joints may spread<br />
a bit while dle glue is drying, you can furdler<br />
exaggerate dle space between dle pieces to<br />
emphasize patterns and individual blocks.<br />
But work fairly rapidly so dlat you can make<br />
adjuswlents before the glue sets. (I use a water-filled<br />
spray bottle to wet the tOps of dle<br />
pieces to keep dlem flat and to lengdlen the<br />
glue's setting time.)<br />
After this inner assembly is dty, carefully<br />
fit and glue the accent-border strips and<br />
3-in.-wide segmented-border pieces around<br />
tlle completed field. Finally, glue tlle 1 'I4 -in.<br />
outer-border pieces at the perimeter. To<br />
prevent the border pieces from bowing,<br />
hold dlem down widl scrapwood and spring<br />
clamps tlle same way you anchored dle accent<br />
border when you began gluing the<br />
field. Leave the clamps on for approximately<br />
60 to 90 minutes or until the glue has set, but<br />
hasn't completely dried. Then remove the<br />
clamps and scrapwood, and wipe down the<br />
surface widl a clean, damp rag to remove any<br />
glue squeeze-out. To maintain fiawess in<br />
plywood pieces, cover dle assembly widl a<br />
clean piece or twO of Masonite or plywood,<br />
weighted evenly widl 10 Ibs. to 15 Ibs. per<br />
After<br />
Pieces with different grain directions are interchanged to create texture in the<br />
overall quilt. First, the taped blocks are pried apart carefu lly with a knife. the tape is<br />
removed, individual pieces are laid out into new pattern blocks. Note that all of the<br />
pieces of a stack are kept in their original positions in the pattern.<br />
To keep the borders from bowing, they are secured with spring clamps and fo ur,<br />
1I2-in. -thick strips of scrapwood across the corners. The assembly is then covered with<br />
Masonite and weighted evenly with 10 lbs. to 15 lbs. per square foot while the glue dries.<br />
square foot (we've used piles of books,<br />
stacks of plywood and paint buckets), and allow<br />
the assembly to dty overnight.<br />
Framing and finishing<br />
When the quilt is completely dty, trim the<br />
'14 in. or so off dle oversized back board even<br />
with the outer border's edges. We use a sliding<br />
crosscut box on the tablesaw to do this,<br />
but with a steady hand or a fence, you could<br />
use a bandsaw. For wall hatlgings, we glue<br />
and nail four, %-in.-thick by II/s-in.-wide<br />
white-pine stiffener boards around tlle perimeter<br />
on the underside of the back board<br />
(see figure 2) to help counteract the wafer<br />
board's tendency to bow as a result of the<br />
pat-quetry being glued on only one side.<br />
If the quilt is going to be fratlled, round<br />
one edge of some long pieces of %-in.-thick<br />
by 1 %-in.-wide frame stock using a %-in.<br />
roundover bit in your router (dlis will be<br />
your frame' outside top edge). We use oak<br />
frames, but you could use any hardwood.<br />
Prestain dle frame stock, and crosscut the<br />
four pieces 1 in. longer dlatl required. Butt<br />
the frame pieces around dle quilt, and then<br />
glue and fasten dlem to the stiffener boards<br />
with finish nails (see figure 2). Trim the<br />
excess at each corner, and ease dle sharp,<br />
outside corners with a rasp to match the<br />
rounded-over fratlle edges. Fill the frame's<br />
nail holes, touch up dlese spots and dle corners<br />
with stain, and paint any blemishes in<br />
your quilt before applying the finish. Widl a<br />
cleatl rag, rub on a coat of thinned linseed<br />
oil (we use a 50/50 mLx of oil atld mineral<br />
spirits) to complete the quilt and franle. D<br />
Cbarles Detweiler<br />
2883,<br />
and bis Wife, Linda, make<br />
wood quilts in nortbe1'/ Texas. Tbeir precut<br />
quilt kits are available tbrougb Detweiler<br />
Folk Arts, PO Box Sbennan, Te:x. 75091.<br />
September/October 199 1 85
Routing spiral grooves in a turned column lends a decorative touch that's hard to create any<br />
other way. The author's setup employs a plunge router held in a carriage that is pulled along the<br />
lathe bed as a cable and system of pulleys synchronously rotates the turning blank.<br />
The walnut lamp base, above, was stave-constructed and then turned to a smooth taper. The four<br />
decorative spiral grooves that wrap around the base were routed using Zen til's lathe system.<br />
The mahogany plant stand, left, made by the author, has a column made from a stave-constructed,<br />
hollow turning blank that was sp irally routed using a combination Of regular and custom-made bits.<br />
Spiral-Routing on the Lathe<br />
A shopmade setup fo r putting a twist on turnings<br />
Photo; Norman Zentil<br />
by Norman Zentil<br />
86 Fine Woodworking
Spiral shapes have always appealed to me. So when I turned a<br />
wooden plant stand a couple of years ago, I decided to decorate<br />
it by routing an accelerating spiral pattern into its tapered<br />
column. I built my own spiral-routing system, shown in the<br />
large photo on the facing page and figure 2 on p. 89. The system<br />
employs a router mounted in a sliding carriage, which the operator<br />
pulls along the lathe bed. A system of pulleys and weights,<br />
connected to the carriage by a cable, rotates the turning blank synchronously<br />
with the travel of the router, hence creating grooves,<br />
flutes or reeds on the turning.<br />
Although my setup may look complicated, it's actually not all<br />
that difficult to build, once you understand how it operates. And<br />
although nine years of experience making tools and jigs gave me<br />
the skill to fabricate many of the parts from metal, you can just as<br />
easily substitute plywood and plastic for some of the parts.<br />
Because spiral-routing is done with the lathe off , most of the<br />
system's components don't have to withstand the force of a spinning<br />
lathe. My system is adaptable to just about any lathe with dual<br />
ways-wood- or metal-turning-and is flexible enough to allow<br />
dozens of different spiral patterns to be routed. The setup isn't<br />
limited to just routing cylindrical turnings. By offsetting d1e axis of<br />
the turning, I can rout spirals on d1e surface of a tapered turning,<br />
such as the column on my lamp base shown in the small, top<br />
photo on the facing page. And my system is capable of creating<br />
even more complex forms, like the column on my plant stand<br />
shown in the bottom photo on d1e facing page.<br />
It would take pages of drawings to show you every dimension of<br />
every part of my lathe system, and d1en it probably wouldn't fit<br />
your lad1e. Therefore, I'll concentrate on explaining d1e construction,<br />
features and critical elements of each part so that you can<br />
build your own spiral-routing system. But first, here's a rundown<br />
of all the components and how they function together.<br />
How the system works<br />
The spiral-routing system consists of a number of different parts,<br />
most of which are mounted on the lathe itself. The components<br />
include: the universal drive center and tailstock offsetting device;<br />
the indexer; the router carriage; and the weighted drive cable<br />
and guide assemblies. My shopmade drive center and offsetting<br />
device make it possible to align a tapered turning off of the lathe's<br />
normal cenu'al axis.<br />
The indexer is the real heart of my setup: It provides d1e means<br />
of rotating the turning in a way that's synchronized to d1e linear<br />
movement of d1e router. The body of the indexer is made up of<br />
two parts: an ilU1er diSC, which gets screwed to a 1 V4-in.-dia. shoulder<br />
turned on the end of d1e turning blank, and an outer ring,<br />
around which d1e drive cable is wrapped. A repositionable cursor<br />
is screwed to the disc. Stops are screwed to d1e ring and allow the<br />
position of d1e inner disc and outer ring to be partially shifted for<br />
routing multiple, evenly spaced grooves around a turning.<br />
I adapted my router-carriage design from one I saw in a magazine,<br />
adding cleats and bearings so d1e carriage can slide along the<br />
ways of the lad1e bed. The carriage holds a plunge router above<br />
and parallel to d1e top edge of d1e turning during spiral-routing.<br />
The carriage also provides a means for raising and lowering the<br />
router. An "outrigger arm," which is screwed to d1e base of the<br />
carriage, is grooved for a sliding anchor block that the drive cable<br />
attaches to. This arrangement allows the location of the anchor<br />
point relative to d1e carriage to be changed for creating spirals of<br />
varying character, from a "uniform" spiral-one that twists evenly<br />
all the way around, like the sU'ipes on a barber pole-to an "accelerated"<br />
spiral-one wid1 a twist d1at changes from tightly wound at<br />
the bottom, to no twist at all at the top.<br />
From the outrigger, the drive cable passes through a pair of<br />
guide pulleys, mounted to the lathe bed, that keep the cable nll1ning<br />
smoothly as it changes direction from horizontal to vertical.<br />
The cable then wraps completely around the indexer ring's pulley<br />
once and continues up to a guide assembly screwed to the wall<br />
behind the lathe. Finally, the cable end is tied to a lead weight d1at<br />
keeps the cable taut during spiral-routing.<br />
Here's haw aII the components work together. After d1e surface<br />
of the blank has been turned to a smooth cylinder or taper, the<br />
router carriage is fitted to the bed ways wid1 the cleats and bearings,<br />
and then d1e universal drive center and d1e indexer are<br />
screwed to the ends of the blank. If d1e work is tapered, the offsetting<br />
device is adjusted to make the top edge parallel with the lathe<br />
bed. The anchor block is positioned and clamped to the outrigger,<br />
and the drive cable is threaded in place, as described above. Next,<br />
I set the indexer cursor to the 0° hole, lock the cursor between d1e<br />
stops on d1e pulley, and tighten friction clips on the back of the<br />
indexer. To prepare the carriage, I chuck a bit into the plunge<br />
router and then set the plunge depd1 to take a shallow cut on the<br />
first pass. I slowly plunge the bit into the blank and slide the carriage<br />
toward the tailstock, creating the spiral flute. Each flute is<br />
routed in d1ree passes, with plunge depth increased between<br />
passes. The pOSition of the blank and indexer are shifted for subsequent<br />
spirals: The cursor is removed and repositioned in the proper<br />
hole to yield evenly spaced spirals, as desired (for example,<br />
choose holes 900 apart for four spirals). Subsequent flutes are routed<br />
just like the first.<br />
Jig construction<br />
Most of the components in my setup were made from either Baltic-birch<br />
plywood or aluminum. I chose aluminum for some parts<br />
because it machines easily, but I'm sure that high-quality plywood<br />
or plastic parts would be adequate for most applications. For d1e<br />
sake of brevity, I've simplified some of the parts described below<br />
from the way I originally made them.<br />
The tailstock offsetting device and universal drive center<br />
The tailstock offsetting device (see figure 2 on p. 89) has two basic<br />
parts: the main block and the sliding block. The main block is bored<br />
out to fit d1e lathe's tails tack spindle. A female dovetail is machined<br />
in d1e block, and two holes for locking bolts are drilled and<br />
tapped in one edge. Part of that edge is then slit on the bandsaw, and<br />
another slit is cut at the bottom of the block into the spindlemounting<br />
hole. The sliding block is madlined with a matching male<br />
dovetail. A hole bored into d1e sliding block receives a pressed-in<br />
ball bearing, which in turn gets a lad1e-turned and case-hardened<br />
V4-in.-dia. ball-end center pressed into it. When the sliding block is<br />
slipped into the main block and set to the desired offset, the Allen<br />
head locking bolts close the slits to lock the sliding block in place<br />
and Simultaneously lock the assembly on d1e tailstock spindle.<br />
I made my custom drive center by welding a small universal<br />
joint, purchased from a bearing-supply store, to a small faceplate<br />
on one end and to a #2 Morse tapered shank (to fit my lathe's<br />
headstock) on the other end. IncidentaUy, I use the center to actually<br />
turn tapers on my metal lathe using d1e lad1e's screw-cutting<br />
feed to make d1e cut. If you plan to only use the setup for spiralrouting,<br />
you can sin1ply substitute a regular multispur drive center.<br />
The indexer-The indexer is made up of an inner disc and an<br />
outer ring, each made from two layers of Yz-in. Baltic-birch plywood<br />
glued together and then lathe-turned. My ilU1er disc has a<br />
diameter of 5Yz in. with a Y4-in. by %-in. rabbeted shoulder on the<br />
outer edge. I divided the face of the inner disc to create 2, 3, 4, 5,<br />
PhOlOS except where noted: Sandor Nagyszalanczy<br />
September/October 1991 87
6, 8 and 12 evenly spaced divisions (shown in figure 1 at right).<br />
Next, I drew a circle on the disc, drilled 3/ l<br />
6-in.-dia. holes at each<br />
index line, and routed a %-in.-wide, shallow circular groove<br />
around the disc. The holes and groove are for mounting the cursor,<br />
which I made from Y4-in.-thick aluminum. Two stops, also made<br />
from lkin.-thick aluminum, provide a means of locking the cursor,<br />
and hence the position of the disc to the ring. The stops are slotted<br />
so they can be repositioned for changing groove width during spiral-routing<br />
(described later). I bored a 1Ikin.-dia. hole in the center<br />
of the indexer, and then I drilled two Ys-in.-dia. holes at an<br />
angle for screws that attach the disc to the end of the turning.<br />
The outside edge of the outer ring was turned with a small rim,<br />
which forms a sort of pulley to contain the drive cable. The center<br />
of the outer ring was turned to match the diameter of and fit the<br />
rabbet on the inner disc. The fit should be snug, but not tight. The<br />
outside diameter of my pulley is 8 in.; however, this diameter determines<br />
the number of times the turning rotates as the carriage<br />
travels along its length. Hence, a smaller-diameter pulley will produce<br />
more turns over a given length, yielding a more loosely<br />
coiled spiral; a larger diameter yields fewer turns, producing a<br />
more tightly coiled spiral. You may need to experiment to determine<br />
the best pulley diameter for the spirals you desire (I<br />
wouldn't go under 8 in.). After the pulley was turned, another shallow<br />
groove was routed near the rim, and the two cursor stops<br />
were screwed on. Finally, the friction clips that keep the disc and<br />
pulley together were bent from some cold-rolled steel. Holes in<br />
the clips allow them to be screwed to the tailstock-facing side of<br />
the inner disc. a-rings under the screws and washers (see figure 1<br />
at right) permit the degree of friction that locks the inner disc and<br />
the outer ring together to be adjusted.<br />
The guide assemblies and drive cable-Both upper qnd lower<br />
guide assemblies (shown in figure 2) use aircraft-cable pulleys I<br />
bought at a surplus store. The lower assembly has two pulleys:<br />
One (1 Ys in. dia.) is aligned vertically to accept the cable as it<br />
comes off the indexer, and the other (% in. dia.) is set at an angle<br />
to guide the cable as it travels to and from the carriage ouU·igger.<br />
Both pulleys are attached to an aluminum block clamped between<br />
the lathe's ways with a plate screwed on from underneath. The<br />
larger pulley bolts to the guide block through a slotted hole, with<br />
a washer under the nut, to allow up-and-down adjusU11ent. The<br />
smaller pulley is screwed to the notched end of a short rod, which<br />
mounts through a hole in the guide block and locks with a setscrew.<br />
The rod and setscrew allow this pulley's angle and position<br />
to be adjusted. The upper guide, made from wood scraps, uses a<br />
2-in.-dia. pulley mounted vertically between wood blocks with a<br />
machine screw for an axle. A %-in.-thick plywood backing strip allows<br />
the assembly to be screwed to the wall behind the lathe.<br />
For the drive cable, I used 90-lb.-test, stainless-steel, sevenstrand<br />
fishing line (available at a sporting-goods store that carries<br />
salt-water-fishing tackle). For the weight, I used two 5-lb. lead<br />
weights (available from a tackle shop); that much weight was required<br />
to keep the indexer rotating properly against the pressure<br />
of the cutting router bit as the carriage moved. In lieu of lead, you<br />
could use sand in a cloth sack tied to the end of the cable.<br />
The router carriage-I made the carriage as two separate units:<br />
an outer housing, which rides on the latl1e bed, and an inner cradle,<br />
which holds the plunge router. Rows of %-in.-dia. holes<br />
(spaced % in. apart on the outer housing and % in. apart on the<br />
inner carriage) on both sides of each unit allow router height to<br />
be adjusted in lis-in. increments to accommodate larger- or smaller-diameter<br />
turnings. To strengthen the housing, which is glued<br />
Fig. 1: Indexer<br />
Adjustable stop<br />
Rim is shaped to<br />
keep cable on.<br />
Inner disc, 5% in. di --1::J1I11f1:P<br />
Shoulder on disc<br />
fits rabbet on pulley.<br />
Two<br />
Machine screw<br />
disc recessed<br />
and<br />
with friction into clips,<br />
knurled<br />
screws<br />
nut<br />
secure cursor.<br />
Center hole, Angled screw<br />
1!4 in. dia., attaches turning<br />
fits plug in<br />
to indexer.<br />
end of turning.<br />
Outer pulley, 8 in.<br />
Division of index holes, 0/16 in. dia.,<br />
---,. allows cursor repositioning for<br />
evenly spaced spirals. Holes<br />
on other half are symmetrical.<br />
Centerline<br />
and screwed together from Y2-in. Baltic-birch plywood, 1 allowed<br />
the base and top to overhang the sides and then glued on reinforcing<br />
strips at these junctures. Two wood strips, one on each side of<br />
the lathe bed, act as lateral guides. Two ball bearings (I used regular<br />
skateboard-wheel bearings) bolted to cleats through the guides<br />
on each side ensure that the carriage is held down flat and slides<br />
smoothly (but with some resistance) on the lathe bed. The outrigger<br />
arm, which is screwed to one edge of the carriage, has a %-in.<br />
wide slot dadoed into it. The cable anchor block, an aluminum bar<br />
fitted with an eyebolt for tying on the drive cable, fits into the<br />
outrigger's slot and is secured in place with a small C-clamp.<br />
For a router, 1 use a Hitachi 1R12 plunge model that accepts Y2-in.<br />
shank bits. I've had some success routing spirals with regular,<br />
straight carbide bits. However, a bit with two spiral flutes (cutting<br />
edges) eliminates the tendency for wood chips to back up behind<br />
the cut. Even better is a two-flute milling cutter, which I've found<br />
completely removes the chips during routing.<br />
Spiral-routing variations<br />
With a few alterations to the setup, you can produce a wide variety<br />
of spiral shapes and patterns on your turned work. The indexer<br />
allows you to rout just about as many spirals as you want around<br />
the turning. Also, by changing tl1e location of the cable anchor<br />
block on the outrigger arm, you can adjust the curve of the spirals.<br />
For example, by setting the block very close to the carriage, you'll<br />
produce very uniform spirals down the length of the turning; for<br />
accelerated spirals, move the block farther out on the outrigger.<br />
Once you've found an arrangement you like, uy core-box, veining<br />
or V-bits for different decorative effects. To change the width of cut<br />
using any given bit, set the cursor stops on the indexer pulley farther<br />
apart, and then take two passes-one with the cursor against<br />
one of the stops and anotl1er with the cursor against tl1e other<br />
stop. The friction clips provide enough friction to keep tl1e inner<br />
disc and outer ring from slipping out of position.<br />
Changing the direction in which the cable wraps around the indexer<br />
pulley will allow you to rout spirals that twist in the opposite<br />
direction-a handy option for a pair of columns or matching<br />
88 Fine Woodworking
Fig. 2: Spiral-routing system<br />
cradle, Holes in<br />
%-in. drilled on in.,<br />
centers<br />
%<br />
carriage cradle<br />
Reinforcing strips keep<br />
carriage from racking.<br />
housing, Router carriage 26% in. outer<br />
by 12% 15 in. in. wide long (at high base)<br />
... I.<br />
Upper guide assembly<br />
is screwed to wall<br />
behind lathe.<br />
----'<br />
Lead weights<br />
--=---Ifr"<br />
keep tension on<br />
drive cable.<br />
Holes in housing,<br />
% in., drilled on<br />
34-in.<br />
Baltic-birch<br />
centers<br />
plywood,<br />
allow cradle<br />
in. Stainless-steel<br />
height adjustment in<br />
drive cable wrapped<br />
%-in. increments.<br />
%<br />
once indexer around pulley<br />
Tailstock offsetting device allows<br />
axis of work to be shifted<br />
for turning tapered forms.<br />
Pan-head screw driven<br />
into pulley keeps<br />
cable from slipping.<br />
§LoWergUide assembly,<br />
clamped to lathe bed<br />
Sliding anchor block on<br />
outrigger arm secures<br />
drive cable.<br />
<br />
Ball bearing bolted to cleat<br />
keeps carriage flat on<br />
!<br />
lathe bed. One bearing<br />
per side of carriage. - '<br />
i J;<br />
Ruber O-rJngs per<br />
tensIon adjustment.<br />
Bearing pressed into hole in sliding block<br />
Main block<br />
Sliding block<br />
dovetailed to<br />
fit main block.<br />
Detail: Lower guide assembly<br />
Pulley, 1% in. dia.,<br />
bolts through<br />
slotted holes to<br />
allow adjustment.<br />
Allen cap screws lock sliding block position;<br />
longer bolt locks assembly on spindle.<br />
candlesticks. You could even rout two sets of spirals on the same<br />
turning-one set twisting clockwise and the other counterclockwise-to<br />
create a really intricate pattern. Another simple, yet attractive<br />
effect is to get spiral flutes or reeds to "light out" at one end.<br />
This is done entirely with the tailstock offsetting device. Instead of<br />
leveling the top edge of d1e cone or cylinder-shaped blank, raise<br />
or drop d1e tailstock end so that d1e router bit takes a full-depth<br />
cut at one end and a progressively lighter cut along the blank until<br />
d1e bit stops cutting at the other end. If you wish to rout stopped<br />
spirals or a shorr section of the turning, fit a pair of stop blocks to<br />
the lad1e bed to limit carriage u'avel; I made my stop blocks from<br />
%-in.-thick aluminum and clamped them to the ways.<br />
If you feel really ambitious, you can try making a hollow spiral<br />
column, like the one on my plant stand shown in d1e bottom<br />
photo on p. 86. To make the column, I glued up a hollow turning<br />
blank from tapered staves. I routed accelerated spiral grooves<br />
through d1e wall of the turning, and d1en I employed a custommade<br />
router bit (with a cutting edge on d1e top) that was "plunged<br />
up" and run the length of each groove to clean and shape the<br />
inside of the column. This process creates the effect of four ribbons<br />
of wood swirling up from the base.<br />
D<br />
Norman Zentil is a retired general contractor and woodworker<br />
living in Redondo Beach, Cal.<br />
Drawings: Aaron Azevedo<br />
September/October 199 1 89
I<br />
first became interested in Shaker furniture because of some<br />
pieces my mother owned. I was drawn to the Shakers' simple,<br />
unadorned designs, their restrained, but strong joinery, and<br />
their uncompromising insistence on quality. As I examined my family's<br />
furniture and studied pieces presented in books and museums,<br />
I also became fascinated with the way Shaker designs had<br />
been influenced by Federal furniture built in the United States between<br />
1782 and 1815. The ideas of designers like Duncan Phyfe,<br />
Robert Adam, Thomas Sheraton and George Hepplewhite can be<br />
easily identified in many Shaker originals.<br />
Since I like this diversity of design ideas, it's not surprising that<br />
my table, shown finished on the facing page, is not an exact replica<br />
of any one piece. Rather, it incorporates the features of several<br />
New York and Massachusetts pieces. I based the overall size of the<br />
table and the shape of its legs on a New York original, but I modified<br />
the turned legs to capture the graceful look of Sheraton furniture.<br />
The single drop leaf is from a table at the Hancock Shaker<br />
Museum in Massachusetts.<br />
Like its Shaker ancestors, my table is very functional. Its small<br />
size and two shallow drawers make it ideal as an occasional table,<br />
end table or nightstand. And there is nothing tricky about building<br />
the piece; all the work can be done with a few simple tools. Stock<br />
preparation is relatively easy because the components are so small.<br />
The legs were milled into square blanks, mortised and then turned<br />
to shape. After cutting the aprons to size, I tenoned their ends to fit<br />
the leg mortises. The top is two edge-glued boards, with a routed<br />
rule joint for the drop leaf.<br />
Mortising and turning the legs<br />
I cut the leg mortises wid1 the old drill-and-chisel med10d. This is<br />
one of the simplest methods for cutting mortises if you don't have<br />
a horizontal mortising machine, hollow-chisel mortiser or router.<br />
A drill press and a chisel or two are the only equipment needed. I<br />
started by cutting the stock for d1e legs to the dimensions given in<br />
the drawing on p. 93. To avoid splitting the wood when mortising<br />
near the top of d1e legs or when turning the narrow feet, I cLlt the<br />
square blanks about 1 1 /2 in. oversize on each end.<br />
ell.1:, I laid out the mortises and bored out the space between<br />
the layout lines using a brad-point bit with a diameter just slighdy<br />
smaller than the width of the mortise, as shown in the bottom<br />
photo on the facing page. If you don't have a correct-size bradpoint<br />
bit, you could also use a Forstner or spur bit. A fence<br />
clamped to the drill-press table helped me align the holes. After<br />
boring out as much waste as pOSSible, I squared the mortise walls<br />
with a chisel (see the left photo below). Although the side walls<br />
can usually be pared with hand pressure alone, you may need a<br />
mallet to drive the chisel into the tougher endgrain.<br />
After the mortises were chopped out, the legs were ready to be<br />
turned. If you don't have a lathe, you may prefer to use a squaresectioned<br />
tapered leg, a characteristic of Hepplewhite design. For<br />
stability while turning, I mounted d1e end that will have the least<br />
amount of stock removed, in this case the square top section, on<br />
the lathe's headstock, as shown in the photo at right below. Then I<br />
measured down each leg to locate several checkpoints: the transition<br />
point between the square and turned section; the largest<br />
diameter, which is at the midpoint of the turned section; and d1e<br />
diameter of the bottom, as shown in the drawing on p. 93. Basically,<br />
my med10d was to turn the blank to d1e required diameters at<br />
the major checkpoints with either a parting tool or a 'I2-in. roundnose<br />
scraper. Calipers worked well to gauge the diameters. After<br />
establishing the checkpOints, I used a round nose scraper (see d1e<br />
photo at right below) to blend d1e rest of the leg with the three<br />
diameters I had established. (If you don't have a roundnose scraper,<br />
you can use a sharp gouge.)<br />
After turning the first leg, I realized that taking additional<br />
measurements would help in locating od1er checkpoints. When I<br />
measured my first leg, I found d1at its diameter was 1 '18 in. at<br />
a point 1 '12 in. from the bottom of the transitional collar, and<br />
1 in. in diameter 14% in. below the collar. Establishing these<br />
checkpoints, in addition to the original d1ree, not only ensured<br />
that all four legs were consistent, but it also sped up the turning<br />
process by minimizing guesswork. ext, I smoothed the roughedout<br />
leg wid1 a sharp gouge and a rounclnose scraper, and d1en I<br />
lightly sanded the leg. If you work carefully and check the leg<br />
wid1 calipers as you turn, all four legs should come out pretty<br />
close to the dimensions I've given in d1e drawing on p. 93. I didn't<br />
sand the transitional collar while the piece was on the lathe because<br />
I didn't want to soften this criSp detail. Instead, I sanded it by<br />
hand after d1e leg was removed from the lathe, and then I crosscut<br />
it to final length.<br />
The ridges left by the drill bit are pared away with a sharp<br />
chisel. Hand pressure is usually sufficient to pare the side walls of<br />
the mortise, but a mallet is better for squaring up tougher endgrain.<br />
The legs are turned after the mortises are complete. Isaak<br />
mounts the top of the leg in the headstock and then uses a scraper to<br />
shape the transition between the square top and the rest of the leg.<br />
PhOlO of finished table: Wesley Bender<br />
September/October 199 1 91
Case construction<br />
I cut the apron tenons and drawer-rail tenons shown in the drawing<br />
by making multiple passes on my tablesaw with the workpiece<br />
laid flat on the table and guided by the miter gauge. I made the<br />
cuts with a regular sawblade, although you might prefer to mount<br />
a dado head on your saw to speed the process. Each of the 6-in.<br />
wide apron tenons is Y2 in. thick by % in. long. The drawer-rail<br />
tenons vary in size, as shown in the drawing. The tenons on d1e<br />
top rail are flush with its upper surface, while the tenons on the<br />
bottom rail are centered in the %-in.-d1ick stock. The %-in.-thick<br />
tenons on the center rail are 1 /2 in. wide by % in. long.<br />
I was then ready to assemble the table frame. First, I dry-fit the<br />
two front legs and drawer rails, and pared d1e tenons slightly to<br />
achieve a good fit. I glued up the front assembly first, making sure<br />
that the assembly was square and that the two legs were on the<br />
same plane while drying. The clamps may need to be readjusted.<br />
Care at this stage is well invested; if the case is twisted or out of<br />
square, the drawers will fit poorly. ext, I assembled the two back<br />
legs and the back apron. Because of the wide tenons, d1is assembly<br />
should square itself if the mortises have been cut su"aight.<br />
Now, I notched the left side apron for the pivoting leaf support.<br />
I angled the ends of the notch and the support so they would<br />
swing past each other easily and blend together without an apparent<br />
break when closed. I cut d1e 45° angles with a dovetail saw,<br />
and then I formed the opening by bandsawing away most of the<br />
waste. After trimming to the line with a chisel, I cut and fit the<br />
matching leaf support. With the support screwed in place, as<br />
shown in the drawing, I then planed it until the top surface was<br />
flush with the top of the apron. This ensured that the raised leaf<br />
would be level with the rest of the tabletop. Be aware that the<br />
screw head must be well countersunk to avoid damaging the plane<br />
iron. To complete the table frame, I glued the front assembly to<br />
the back-legs-and-apron assembly, again making sure that the table<br />
was square and true. I assembled the frame upside down on my<br />
bench and then measured from corner to corner after applying the<br />
clamps. The clamps may need to be adjusted to make the diagonals<br />
equal. After the frame was dry, I pinned d1e tenons with<br />
3f16-in.-dia. dowels and sanded them flush. Besides strengd1ening<br />
the frame, the dowels add a nice design detail. To complete the<br />
case, I glued on the cleats, which secure the top.<br />
Drawer construction<br />
After assembling the frame, I measured each opening and assembled<br />
the drawers to fit with about 1/16-in. clearance on the top and<br />
sides. I used half-blind dovetails on the front corners, but made<br />
through dovetails on the back because I think these are essential<br />
components of high-quality work. In keeping with my affection for<br />
the Shakers, I cut the joints by hand. Over the years, I've found<br />
handwork satisfying, and it doesn't take much more time than setting<br />
up a router and jig, once I get into the swing.<br />
Each drawer bottom is a 3/16-in.-d1ick piece of ash, with its grain<br />
running side to side. I glued the bottoms into rabbets in the drawer<br />
fronts and fastened the bottoms to the sides wid1 brass brads. Bottoms<br />
that float in grooved drawer sides were more common in d1e<br />
Federal period, but my research showed that the Shakers often<br />
used nailed-on drawer bottoms for very shallow drawers. Apparendy,<br />
they felt that the floating panels wasted too much space. The<br />
brads flexed enough to allow seasonal wood movement and to<br />
prevent the bottom panels from cracking. I turned the pulls shown<br />
in the drawing by mounting each one like a small spindle between<br />
centers on my lathe. After turning, I trimmed off the waste with a<br />
saw, and then I hand-sanded each pull as it was spinning in the<br />
Jacobs chuck of my drill press.<br />
The next step was to position d1e supporting runners to ensure<br />
smooth-sliding, level drawers. I screwed the fi ller blocks in place,<br />
as shown in the drawing, clamped the runners for each drawer<br />
into position and slid in a drawer. If a drawer slid without binding<br />
and its four corners contacted the drawer rulU1er, I screwed<br />
in the runners and glued in the drawer stops. Otherwise, I adjusted<br />
as needed.<br />
Making the top<br />
I edge-glued two pieces of wood to obtain an 18-in.-wide top. After<br />
d1e top and leaf were squared up and cut to the proper dimen<br />
Sions, I made d1e rule joint. I milled d1e top pieces enough oversize<br />
so d1at an offcut was left d1at I could use for testing router<br />
setups for the rule joint.<br />
The rule joint, when done correctly, adds a very attractive visual<br />
detail. My method is pretty simple; I used only a Y2-in. roundover<br />
bit and a II2-in. cove bit. First, I rounded over the edge of d1e<br />
tabletop that will butt d1e leaf. I made d1is cut deep enough to<br />
leave a Ys-in. shoulder. Similarly, I made a cove cut on the leaf d1at<br />
was deep enough to leave a lis-in. lip d1at will mate with d1e tabletop's<br />
shoulder cut.<br />
Hinge locations are crucial for a good joint, and so d1ese specially<br />
made hinges should be bought before the mating edges are<br />
shaped. The hinges are available from Paxton Hardware Ltd., 7818<br />
Bradshaw Road, Upper Falls, Md. 21156; (301) 592-8505, or Lee<br />
Valley Tools, 1080 Morrison Drive, Ottawa, Ont., Canada K2H 8K7;<br />
(613) 596-0350, and several other supply houses. To ensure that<br />
d1e leaf will move smood1ly, the center of d1e hinge pin must be<br />
mortised in line with d1e shoulder created by the roundover on<br />
the tabletop. To locate d1e center of d1e hinge pin, I marked down<br />
from the shoulder on each edge of the top with a try square and<br />
connected the two points with a straightedge on the underside of<br />
the top. The hinge pin goes directly on this line or slightly toward<br />
the table's edge. If you move the hinge pin's center 1 / 3 2 in. toward<br />
the leaf, d1e leaf will fit tightly to the shoulder when tl1e leaf is up,<br />
but will gradually draw away from the roundover as it is lowered;<br />
this way, parts do not rub, regardless of the season. The hinges can<br />
be mortised in with a chisel or router. I used two hinges, each<br />
Y:z placed about 2 in.<br />
from the end of the joint. (For more information<br />
on making a rule jOint, see FWW #80, pp. 48-52.)<br />
Before assembly, I sanded all parts of the table with 150-grit and<br />
220-grit paper. To make sure everything was smooth and clean before<br />
finishing, I resanded again after assembly. I applied six coats<br />
of tung oil because I d10ught this finish would be most in keeping<br />
with the oil finishes and thin varnishes that the Shakers used. D<br />
Greg Isaak makes period furniture and teaches in LaFox, Ill .<br />
Drawer details<br />
drawer<br />
Solid-ash<br />
Top<br />
drawer bottoms<br />
are glued to the fronts and<br />
nailed to the sides and backs<br />
92 Fine Woodworking<br />
Photos e.XCepl where noted: Dick OurrO\ .. s; drawings: Lee Hov
Table, 29 in. high, including top<br />
Shaker style table<br />
Leaf, % x 10 x 23 Top, % X 170/. x 23<br />
Hinges are located 2 in.<br />
from edge of top.<br />
Rule-joint is routed with<br />
Top-and bottom-drawer<br />
roundover bit and cove bit.<br />
by rails, in. in. wide thick<br />
0/.<br />
1%<br />
Tenon, in. thick<br />
by in. wide by<br />
% in. long, is flush<br />
with top of rail.<br />
Bevel ends to 45<br />
Drop-leaf hinges, 2'l'a in. by 1% in.<br />
Top of leg, in. sq.<br />
1%<br />
<br />
'-Top overhangs at front,<br />
back and sides.<br />
Cleats have slotted<br />
screw holes for<br />
securing top.<br />
Dowels,<br />
% in. dia.,<br />
lock tenons<br />
to legs.<br />
Tenon, % in. wide % in. by thick % in. by<br />
Tenon, long<br />
drawer by % in. rail long, in. thick centered by % in in. %-in.-thick wide<br />
%<br />
Apron by 6 in. tenons, wide by %% in. in. thick long<br />
10/16 in. dia.<br />
All aprons are % in. thick<br />
by 6 in. wide.<br />
Bottom drawer<br />
10/16 in. dia.<br />
September/October 1991 93
94 Fine Woodworking
The scoop-like form below by orm Sartorius of Parkersburg,<br />
Wv., was one of the smallest wood objects highlighted<br />
in the 1991 Washington, D.C., Craft Show, which<br />
featured work by more than 100 woodworkers and other artists<br />
from across the country.<br />
The 9-in.-long scoop is maple burl that was bandsawn and then<br />
hollowed out with carving burrs in a die grinder. The piece was<br />
refined with files, scrapers and sandpaper until the surfaces were<br />
finely shaped and felt "extremely good," said Sartorius.<br />
Sartorius, who's been making spoons for 15 years, said his early<br />
work concentrated on functional spoons, but many people said the<br />
pieces were too nice to use. Over the years, he has moved toward<br />
more sculptural forms, which just happen to resemble spoons.<br />
Stoney Lamar of Saluda, .c., uses a lathe as a carving tool to<br />
create sculptures like the 15-in.-high redwood-lace-burl piece, part<br />
of his "Temple Series 11," shown in the top, right photo below. To<br />
produce the carved effect, Lamar mounted the wood between centers<br />
in different positions so he could turn each section of the<br />
piece from a different axis. He describes the piece as a vessel in an<br />
architectural context. This de-emphasizes the vessel, he said, which<br />
is just a small part of d1e top of the sculpture, but at the same time<br />
elevates the vessel's importance in a larger architectural structure.<br />
Alan Lorn's "Diamond Cabinet" (shown on the opposite page)<br />
and Lee Weitzman's "Ciello Buffet" (shown in the bottom photo)<br />
were also highlighted at d1e show. Proceeds from the craft show<br />
held last spring went to support programs and projects at the<br />
Smithsonian. A spokesperson for the Women's Committee of the<br />
Smithsonian Associates, which sponsored the show, said about<br />
$275,000 in sales were made by woodworkers. For information<br />
about next year's show, write to the Washington Craft Show, Arts &<br />
Industries Building, Room 1465, Smithsonian Institution, Washington,<br />
D.C. 20560. 0<br />
Dick Burrows is senior editor at FWW<br />
Finely finished surfaces are characteristic Of spoon maker Norm Sartorius' work.<br />
The 2-in. -wide form above is based on ancient Roman and Greek vessels.<br />
This redwood-lace-burl sculpture was lathe-turned despite its carved appearance<br />
(right), Turner Stoney Lamar produced the effect by mounting the wood between<br />
centers in different positions so he could turn each section of the piece from a different axis.<br />
Alan Lorn's "Diamond Cabinet, " left,<br />
has quilted maple panels, tiger maple legs,<br />
and African ebony trim, inlays and pulls.<br />
'The design is somewhat Art Deco-Ruhlmann-like.<br />
I've always admired Ruhlmann's<br />
fu rniture, and I enjoy working<br />
with figured woods and inlays, " says Lorn,<br />
who operates a fu rniture-and-architecturai-cabinet<br />
shop in Northampton, Mass.<br />
The 36-in. -wide piece was commissioned<br />
by a client who wanted a liquor cabinet,<br />
and it has large, adjustable shelves fitted<br />
inside the J8-in. -deep carcase.<br />
The broad reflective surfaces on Lee<br />
Weitzman's "Ciello Buffet, " right, were<br />
made by applying gold leaf to bendable<br />
plywood that was specially treated to accept<br />
the gold. "Gold works very well<br />
around curves. The reflection gives the<br />
piece a very opulent look, " says Weitzman,<br />
who runs a Chicago, Ill., furnituredesign-and-manufacturing<br />
studio. The<br />
42-in. -high piece, which derives its name<br />
from the Spanish word fo r beautifu l, is<br />
mahogany with ebony accents and has<br />
a granite top. The center doors and two<br />
curved end panels open to reveal adjustable<br />
shelves.<br />
Photo facing page: Dean Ilowell September/October 1991 95
Signature<br />
__<br />
From Back Cover<br />
to Poster<br />
"I love my new roller stand."<br />
J.KS.·Beaumont TX<br />
LEGACY CHEST<br />
If<br />
TOOL<br />
lhe: worlun;andllp In a 1001<br />
dlot c:hcsc it an,' indlal'on or ma<br />
• .. :md cr..ru.ngn hlp of master carpe.nte flOIICm;l5Q01 11.0. Studl"l'<br />
MT't l:lknl.<br />
lhen the<br />
mUM ha'C ken<br />
v:lk 00" ::Idnrncd rosewood. :.nn:.,nspirlnl. In an cbm!OlKIl "'llh ebony. P'"'rI and<br />
d_ his af:md&thc:r by Scudky'. Ibnl,.'lck acqui Kd the from hl!; bruth.:r try tr:od,,1(t<br />
chlni,. .. and:l coll«tion looI f1 made of tlK<br />
:md .-onem;""' Cl5C ,. 1001.'1. To p;adc the jOO ·plwt into :l<br />
JYI)I")', Scudky kcP' he both wo&s<br />
m::w:le prioI"<br />
wick, }9<br />
lund tools<br />
ouly 1'1';' In.<br />
tool$ as "",U '" ""',<br />
W 1900 'nclmll"ft :ll 1.Vf11pk1c: I of ... oud,,·orklng<br />
.'kk now (1tO' ch(:tt, the<br />
long In. and<br />
Rip-up lHy!l. fokloQ,,1 I::ryc:n<br />
a 19}4 Font<br />
plarK hou<br />
H(bnfur<br />
In<br />
9'/1 In. (krp. Srudlq- dcyjd :I<br />
jlw;aw-puzzlc<br />
P"II: Haro·<br />
and hidckn (omparllllcn(5. Mah"" n:ul",<br />
.<br />
Ius I' VIOlS bcquc;ldK' 10<br />
whkh ""'en In his fAmily ,lnee<br />
IL A good u:.k?" "'ouk! cm<br />
.. · Ihe ebQoy an.:h In<br />
al $700. 1I: ...n.ick. ;I 10 pnlKd ,l(HI",·tJo(hrvo r. plan,<br />
IiO:JUM<br />
M'.II II...., .. "hat.<br />
une 1
WHOLE EARTH ACCESS<br />
TO L L F R E E<br />
PORTER+[ABLE -<br />
bler<br />
FREE FREIGHT<br />
CONTINENTAL U.S.A.<br />
f.CeLTA<br />
<br />
3/8 Magnequench<br />
Cordless Drill Kit 10" Contractors<br />
Unifence<br />
359<br />
Speed-Block<br />
789. Model AP10 •<br />
(table<br />
• Sander<br />
a tional)<br />
__<br />
7:..-=DAYS=-1_-....::<br />
#7334 115 . C3 -<br />
7556<br />
367 3·1/4' plane<br />
345<br />
VISA • MASTERCARD<br />
DISCOVER<br />
.,.._ v;"" R't'Qal I<br />
8=-=OO-:;8=-=29=-:- :-63:...0=-:O:=<br />
"<br />
10" Portable<br />
#9850 135.<br />
Saw w/ 30 " Planer<br />
_ . ,<br />
5 8<br />
Fmishing Model 34-445<br />
FREIGHT INCLUDED<br />
3/8" VSR<br />
Cordless<br />
Driver/Drill<br />
with Keyless<br />
Chuck<br />
#6095°145 .<br />
.<br />
Top-1 0 Deluxe hand joining machine CALL<br />
Standard NEW, hand joining machine CALL<br />
Plates 110, #10, #20, l000/b0x 29.<br />
PORTER CABLE<br />
FREUD cont'd<br />
RYOBf<br />
BOSCH<br />
2-Spd. rt angle drill<br />
179. LU89M010 10' x 72T TCG Non·ferrous metal 65. RA200 8' portable radial arm saw 259. 1582VS VS,Var orb jigsaw w/clic 135.<br />
303 Pro 7" paint remover<br />
155. S0308 8' Dado set<br />
119. L120UK 3·518' Planer kil 99. 3238VS VS,Var .orbil std. duty jigsaw 105.<br />
304 Pro 7" disc sander<br />
125. EB100 Edge bander<br />
RSOG 2114' HP plunge router 149. 1654 7-1/4' Builders circular saw 109.<br />
305 Pro r disc polisher<br />
135. TK204 8·1/4 x 24T Framing Blade<br />
21. RISOK 1 HP plunge router kit 104. lS00 16 gauge shears 229.<br />
320 Abrasive plane<br />
109. TK203 7·1/4' x 24T Framing Blade<br />
la. TR30U Laminate trimmer 85. 1942 Heavy duty heat gun 73.<br />
150. TK303 7-1/4' x 40T Finish Blade<br />
22. B7075K 3' x21' Beitsanderkit 119. 3268 Std.duty heat gun 65.<br />
9118 Porta· plane kit<br />
199. TK304 8-114 x 40T Finish Blade<br />
27. S500A Finishing sander. 116 sheet 36. 3258 3·114' Power Plane 118.<br />
9652 Versa·plane kit<br />
289. TK906 10' x SOT Combination<br />
28. TS251U 10' Miter saw 185. 1600 2·112 HP. D·Handle router 259.<br />
7310 Laminate trimmer<br />
TS360 14' Miter saw 375. 1604 1·3/4 HP Router 119.<br />
7312 Offset base tam. trimmer<br />
124.<br />
MILWAUKEE<br />
RE600 3 Hp Eleclronoc VS Joint Planer 205. 1606 1·314 HP, D·Handle router 140.<br />
7319 Tilt base lam. trimmer<br />
109.<br />
JP155 6 118' VS Joint Planer 300. 9G300 3-1/4 HP Production rouler 339.<br />
rr-<br />
7399 Drywall cutout unit<br />
78.<br />
TF0220VRK 12V. Cordless drili kit 169. 1609K Laminate trimmer installers kit 169.<br />
100 718 HP router<br />
98.<br />
1609 Oft set base laminate trimmer 119.<br />
MAKITA<br />
518 3 HP microprocessor, Sspd 339.<br />
330 Speed block Sander 3/8" '<br />
690 t ·112 HP router<br />
131.<br />
691 1·112 HP router, d·handle<br />
143.<br />
VSRDrjll<br />
555 NEWI plate joining machine 165. #0222-1104. 128.<br />
9164VSR 318' Mighty MKlget VSR drill 105.<br />
6302 112' VSR Drill 119 . 1631K 2-Spd. Panlher recipro saw 129.<br />
6012HOW 2·Spd. cordless driver/drill kil 122. 1611WVS 3HP VS plunge router 235.<br />
6402 318' Drill, heavy duty 100. 1608T NEW! lilt base laminate trimmer 99.<br />
9207SPC 7' Electronic sander/polisher 149. 1632VSK VS,Var. orbil Panther recipro saw 135.<br />
3612BR 112', 3 HP Plunge rouler 175.<br />
S05 1/2 Sheet pad sander<br />
113.<br />
9166VSR 1/2' Mighty Midgel VSR drill 115.<br />
352 3' x 21' dustless belt sander 132. 0239·1 1/2' VSR drill, keyless chuck<br />
270SW 8' Table saw/carbide blade 249. 1194VSR 1/2' VSR Hammer drill 155.<br />
360 3 x 24' dustless belt sander 178. 0224·1 318' Magnum holeshooler<br />
114. 9401 4' 24' Dustless belt sander 165.<br />
11203 1·1/2' Rotary hammer 449.<br />
362 4' x 24' dustless belt sander 185. 0234·1 1/2' Magnum holeshooter<br />
115. 9900B 3' x 21' Dustless belt sander 145.<br />
11212VSR 3/4' VSR bulldog SDS rotary hammer 195.<br />
503 3' x 24'wormdrive belt<br />
0375-1 318' close·quaner drill<br />
125. LS1030 10' Miter saw 229.<br />
11304 Brute breaker hammer 1229.<br />
sander with bag<br />
0379·1 1/2' close·quarter drill<br />
149.<br />
LS10l1 NEW! 10' compound miter saw 459.<br />
11305 Demolilion hammer 689.<br />
314 4·1/2' Trim saw<br />
128. 1676-1 Hole·hawg kil<br />
235. B04510 114 sheet pad sander 54.<br />
12720 3'x24' dustless belt sander 169.<br />
3t5-1 7-1/4' Top handle saw<br />
115. 3002·1 Electricians<br />
548<br />
rt. ang. drill kit<br />
182.<br />
1900BW 3114' Planer w/case 115.<br />
12730 4'x24' dustless belt sander 175.<br />
50900W 3-318' Saw kit, 9.6V 139.<br />
Heavy duty bayonel saw<br />
195. 3102·1 Plumbers rt. ang drill kit<br />
185.<br />
12730VS 4'x24' VS, dustless belt sander 189.<br />
60930W 318' VSR Cordless Driver/drill kil 129.<br />
7549 VS, var orbit, d·handle jigsaw 139.<br />
5397·1 3/8' VS hammer drill kit<br />
137.<br />
SOnB 7·1/4 Hypoid Saw 139.<br />
32700 3'x21 , dustless belt sander 135.<br />
9637 NEW! Full VS Tgersaw K 135. 8975 Heat gun<br />
DA3000DW 318' Angle drill, 7.2V 139.<br />
1347A 4-1/2' mini grinder, 518' arbor 89.<br />
9629 Var. spd Tgersaw w/case 135. 5680 2 hp router<br />
219.<br />
439GOW Cordle:;s recip, saw,9.6V 128.<br />
32830VS VS, Random orbil sander 95.<br />
7523 Pos. clutch screwdriver<br />
155. 5925 3' x 24' dustless bell sander<br />
84000W Cordless hammerdrill kil 149. loooVSR New 3/8 VSR drill 79.<br />
7542 TEKS Driver<br />
125. 5936 3' x 24' dustless bell sander<br />
OA39G0 Cordless angle drill 9.6V 85. 1021VSR New H.D. 318 VSR drill 99.<br />
7545 VSR Drywall driver<br />
105. 6014 112 Sheet pad sander<br />
3705 Oftsel lrimmer 159. 3OSOVSRK New 9.6v VSR cordless drill<br />
621 318' VSR Drill<br />
6215 16' Electric chainsaw<br />
3601B 1-3/8 Hp Router 139.<br />
kit w/case, 2 batteries<br />
129.<br />
7511 318' VSR Drill<br />
114. 6226 2 speed bandsaw w/case<br />
3700B 1/2 HP trimmer 115.<br />
7514 1/2' VSR Drill<br />
119. 6256 Variable speed jigsaw<br />
3620 1 -1/4 HP plunge router kit 109.<br />
666 318' T-Handle drill<br />
120. 6365 7 114' top handle circular saw<br />
9647 Tier Cub all purp, saw kit 119. 63n<br />
<br />
99240B 3' x 24' dustless belt sander 145.<br />
7 114' wormdrive saw<br />
9045B 112 sheet finish sander 129.<br />
7335 N W! VS 5' random orbil sander 129. 6405 8 114' circular saw<br />
B045SO Dustless finishing sander 57. I <br />
':tek1!t:1<br />
7336 NEW! VS 6' random orbit sander 135. 6527 Super Sawzall w/Quick·Lock<br />
9045N 112 sheet dustless finishing sander 129.<br />
7536 NEW! 2112 HP smalic router 205. 6528 Super Sawzall, std. cord<br />
SOG7NBA 7-1/4 circular saw, elec. brake 127.<br />
7537 NEWI 2-112 HP -handle 6539-1 Cordless screwdriver<br />
69. 4200N 4-318' trim saw 127.<br />
, Model 1581VS •<br />
=matic rouler<br />
219.<br />
6543-1 VSR Screw shooter<br />
982G-2 Blade sharpener 199.<br />
7519 EW! 3114 HP router 235. 675G·l VSR Drywall driver<br />
5420A 16' circular saw 329.<br />
7538 NEW! 3114 HP production<br />
.41•<br />
DELTA<br />
34-761 10' 1 112 HP Unisaw<br />
1245.'<br />
6754-1 VSR Magnum drywall driver<br />
2711 10' table saw wlbrake 479.<br />
plunge router<br />
235. 6798-1 Adj. clutch screwshooler<br />
2012 12' portable planer<br />
32·100 Stat ionary plale Joiner<br />
475.<br />
18G5B 6·118' planer kit 359.<br />
34-782 10' Unisaw, w/uOifenee 3HP<br />
9505 Commemorative edilion SOS<br />
HITACHI<br />
Calt for the Iowesl Mees on Makita items not lisled<br />
34-783 10' Unisaw, w/unifence 3HP<br />
polished housing/oak case 135.<br />
F20A 3 114' Plane 99.<br />
43-375 2 Spd. wood sharper<br />
1565.'<br />
6' Saw Boss<br />
104.<br />
TR6 Laminate trimmer 95.<br />
33-G55 Sawbuck wnegs<br />
569.<br />
3380 Jointer/spliner 249.<br />
FREUD<br />
TR8 1/4' plunge router 119.<br />
33-990 10' Radial arm saw<br />
549.'<br />
33G3 HP Plunge router 149.<br />
CR10V VS. Var orbit recipro saw 129.<br />
11·9SO 8' bench drill press<br />
135.<br />
LM72M008 8' x 24T Rip<br />
35.<br />
3304 lhp electronic plunge rouler 149.<br />
M12V NEW! 3HP VS plunge rtr 235.<br />
16.5' Drill press<br />
LM72M010 10' x 24T Rip<br />
39.<br />
4023 3 x 21 belt sander 179.<br />
0100 318' 9.6 v. cordless driver/drill 115.<br />
28-283 14' Wood band saw w/·3I4 HP<br />
LU73M010 10' x 60T ATB<br />
45.<br />
CALL FOR ELU PRODUCTS NOT LISTED<br />
W6V2 0-4000 quiet drywall screwgun 85.<br />
motor encl. sleel std.<br />
655.'<br />
LU81 MOl 0 10' x 40T TCG<br />
42.<br />
BOSTITCH<br />
Cl0FA Deluxe 10' miter saw<br />
LU82M010 10' x 60T TCG<br />
45.<br />
279.<br />
C15FB Deluxe<br />
LU84M008 8' x 40T combination 44. IS'<br />
:J4...'44 10' Contractors saw<br />
619.<br />
miler saw 379.<br />
N60FN2 Finish nailer 339. 2&-245 14' Wood band saw w/std.<br />
Fl000A<br />
&<br />
12' Planer/6' Jointer combo 1589.<br />
N8OC-l Utility coil nailer 112 HP motor 469.'<br />
LU84M011 10' x 40T combination<br />
39.<br />
CB75F Band saw<br />
N80S-1<br />
LU85M008 8' x 64T ATB fine cut-off<br />
49.<br />
1649.<br />
Stick nailer 399. 43-355 New shaper, 1·112 HP 609.'<br />
P12RA Portable Planer/Jointer Combo 879.<br />
LU85M010 10' x BOT A TB fine cul-off<br />
59.<br />
LU85MOI4 14' x tOST ATB fine cut-off 105.<br />
LU85MOI5 IS'<br />
479<br />
N12B-l Coil roofing nailer 399. 22·661 DC-33 3' Planer lG59.'<br />
NSOfN-2 Finish nailer<br />
37·154 6'tong-bed joinler w/el ectricals 999.'<br />
37·350 8' long·bed jointer w/eleclricals 1339.'<br />
x lOST ATB fine cul-off 105.<br />
NEW! 8-1/2" Compound<br />
31·730 6" BeIt, 12' disc w/eleclricals 995.'<br />
LU87M010 10' x 24T thin kert<br />
39.<br />
HBSE75S 3x21 VS Belt Sander 155.<br />
LU88MOI 0 10' x 60T thin kert<br />
49.<br />
. ' Miter Saw<br />
34-985 Production stock feeder 469.'<br />
LU91M008 8·/2' x 48T ATB miter saw blade 39. . #CBFB •<br />
EZ502 Cordless screwdriver<br />
CALL FOR QUOTES ON MACHtNES NOT LISTED<br />
OFSSG 12HP plunge rouler 169.<br />
LU98M010 10' x 80TTCG<br />
69.<br />
SCR2·2 Drywall screwdriver 95.<br />
DAVID WHITE<br />
".<br />
LU91M010 10' x 60T Miler saw blade<br />
52. FREIGHT INCLUDED<br />
822 ANTHONY STREET, BERKELEY CA, 94710<br />
EZI381 112' VSR cordless driver/drill 145. LP6-2O Sight Level Package 229.<br />
48 PAGE CATALOG AVAILABLE • ERRORS SOBJECT TO CORRECTION<br />
89.<br />
58.<br />
349.<br />
98.<br />
229.<br />
135.<br />
59.<br />
219.<br />
225.<br />
117.<br />
169.<br />
265.<br />
130.<br />
118.<br />
169.<br />
129.<br />
175.<br />
169.<br />
145.<br />
89.<br />
119.<br />
109.<br />
READER SERVICE NO. 54<br />
339.<br />
59.<br />
SAN FRANCISCO BAY AREA'S LARGEST TOOL DEALER<br />
ADJUSTABLE CLAMP<br />
EA. BOXl12<br />
15() 'PONY' clamp fixture 7.95 89.00<br />
#52 'PONY' clamp fixture 6.25 69.00<br />
EA. BOXl6<br />
310 6' JORGENSEN hiscrew 8.95 49.95<br />
210 7' JORGENSEN hiscrew 9.95 53.SO<br />
110 8' JORGENSEN hiscrew 11.95 62.95<br />
#1 10' JORGENSEN h/screw 12.95 69.95<br />
#2 12' JORGENSEN h/screw 14.95 79.95<br />
3712 12' Steel bar clamp 6.SO 37.SO<br />
3724 24' Steel bar clamp<br />
45.00<br />
17·900<br />
LAMELLa<br />
7.75<br />
:!:i 5<br />
Jigsaw<br />
135<br />
285.<br />
1659.'<br />
1659.'<br />
339.'<br />
September/October 1991 97
FIXE l'ooDllnIUaXG BOOKS<br />
Choose from these Fine Woodworking favorites:<br />
NEW<br />
Solid-Wood<br />
Cabinet<br />
Construction<br />
by Fran::; [(arg<br />
Now you can combine<br />
traditional construction<br />
methods and modern<br />
design to build lasting<br />
furniture for your living<br />
room, dining room and<br />
bedroom. Karg<br />
furnishes sharp photographs<br />
with superbly detailed line draWings of the<br />
important construction details. Originally<br />
published in German, this book is now<br />
available in English for the first time.<br />
IlARDCOVER, 144 PAGES, 154 PIlOTOS, 160 DRAWL'IGS,<br />
#070 154, $24.95<br />
Dictionary of<br />
Woodworking Tools<br />
by R. A. Salaman<br />
A tool lover's dream come<br />
true! R. A. Salaman gives<br />
you a detailed account<br />
of virtually every<br />
woodworking hand tool<br />
used from the beginning<br />
of the Industrial<br />
Revolution to today.<br />
SOFTCOVER, 546 PAGES, 1,022<br />
DRAWINGS, #070121, $29.95<br />
Queen Anne Furniture<br />
by Norman litndal<br />
The definitive book on<br />
Queen Anne furniture.<br />
Vandal presents a<br />
comprehensive view of<br />
history, design and<br />
construction with<br />
complete measured<br />
drmvings for 18 pieces<br />
of furniture, including<br />
chairS, tables and<br />
chests. IlARDCOVER, COLOR, 256 PAGES, 153 PIlOTOS,<br />
18 PLANS, #070089, $34.95<br />
Design Book Five<br />
Fine<br />
Discover what's new in<br />
woodworking! In<br />
Design Book Five,<br />
readers of<br />
Woodworking display<br />
original and inventive<br />
examples of<br />
contemporary and<br />
traditional furniture,<br />
imaginative<br />
accessories, finely<br />
\<br />
IiSI(i<br />
I ii,,·<br />
\;)( )(1\\,)rh'lt<br />
..:<br />
.\.. . . -.<br />
1"1\1 BOOK ."" ...: :.<br />
! <br />
i"" O-__<br />
detailed canrings and exquisitely crafted<br />
musical instruments. There's also an essay by<br />
Scott Landis on woodworking in the Pacific<br />
Northwest. SOFTCOVER, 192 PAGES, 304 PIlOTOS,<br />
#070086, $19.95<br />
Identifying Wood<br />
by R. Bruce Hoadley<br />
You'll never need<br />
another woodidentification<br />
book.<br />
Hoadley doesn't just<br />
mechanically catalog<br />
the 140 different<br />
species of hardwood,<br />
softwood and tropical<br />
woods commonly<br />
encountered in North America, he teaches you<br />
to become a wood detective yourself. Yo u'll<br />
learn what to look for in any piece of wood<br />
and how to look for it. It's reliable information<br />
you'll use for years. IlARDCOVER, COLOR, 240 PAmll,<br />
393 PIlOTOS, 34 DRAWINGS, 15 TABLES, #070088, $39.95<br />
Understanding Wood<br />
by R. Bruce Hoadley<br />
Hoadley helps you<br />
understand how best<br />
to cut, season,<br />
machine, join, bend,<br />
fasten and finish wood,<br />
and he explores the<br />
crucial interaction of<br />
growth<br />
wood and moisture.<br />
Photos, drawings and<br />
charts explain how a<br />
tree's life and influence the wood's figure,<br />
and much more. IWIDCOVER, 256 PAGES, 294 PHOTOS,<br />
132 DRAWINGS, #0700 11, $29.95<br />
this Use fo rm to order your Fine Woodworking books 100582<br />
Name<br />
City<br />
PUB. #<br />
QTY.<br />
Address<br />
-<br />
State<br />
Zip<br />
TITLE AMOUNTS<br />
CST<br />
sales tax;<br />
If your order is: under $30 add $3 p&b, from<br />
$30.01 to $50 add $4 p&b, over $50<br />
·<br />
8% 7%<br />
add $5 p&h<br />
o My paymen t is enclosed (US. funds, please) o MasterCard o VISA o American Express CT residents add<br />
Canadian residents add<br />
Card #<br />
Exp. date<br />
Signature<br />
TOTAL ORDER S<br />
: Our Guarantee: If you're not satisfied with any book or video you order from us, return it for a complete refund. No questions. No delays.<br />
,<br />
Mail to: The Taunton Press, 63 South Main St., P.O. Box 5506, !\TewtO\Vfl, CT 06470-5506. Or caIl toll-free 1-800-888-8286.<br />
· 1. ___________________________________________________________________________________________________________________________________________________________________________________________________________
TIle CLASS IFIED rate 5.75 per word, minimum ad 15 words. All payments must accompa<br />
all are noncommissionable. TIle WOOD & TOOL EXCHANGE and SmJATIONS<br />
private use individuals only; dle rate is S8.00 per line. Minimum 3 lines,<br />
max. 6 lines, Hmit 2 insenions per year. DISPLAY CLASS IFIED rates on request. Send to:<br />
Fine Woodworking, Advertising Dept., Box 5506, N ewtown, CT 06470-5506. Deadline for<br />
the NouJDec_ issue is August 25. Phone (800) 283-7252 or FAX (203) 426-3434_<br />
CLASSIFIED<br />
ny<br />
WANTED orders; are for by<br />
Business Opportunities<br />
BROOKLYN WOODWORKER CO-OP<br />
seeks new members. Sharing fully-equipped<br />
shop; private space; thriving aonosphere.<br />
61 Greenpoint Ave., Brooklyn, NY 11222. Bill<br />
(718) 349-3614.<br />
RELOCATE CALIFORNIA will match skills<br />
and forwar9 your resume to ftfteen woodworking<br />
companies, then send you the listing.<br />
Send resume and 30 dleckimoney order<br />
to: Industry Opportunities, PO Box<br />
22437, San Diego, CA 92192-0437.<br />
AUSTRALIAN FRANCHISE REQUIRED fo r<br />
items suitable for distribution through a<br />
chain of 150 hardware stores. Jeays Hardware,<br />
Hancock Street, Sandgate, Brisbane,<br />
Queensland, Australia 4017.<br />
CHAIR FACTORY 2340 sq. ft. leased, excellent<br />
location with tourist trade 160,000.<br />
Jackson Hole Furniture: (307) 733-7503.<br />
INVENTIONSINEW PRODUCTS/ideas wanted.<br />
Call TLCI fo r free information, Inventors<br />
Newsletter. 1-800-468-7200, 24 hours per<br />
day. USA and Canada.<br />
STUDIO, FURNITURE BENCH-SPACE<br />
available. Share fu lly-equipped shop ,vith<br />
three others. Spray booth. Creative environment.<br />
Concord, MA (508) 371-0353.<br />
Help Wanted<br />
WOODWORKER EXPERIENCED in quality<br />
fu rniture construaion needed for small custom<br />
shop. Sala,y commensurate with ability.<br />
Resumes only, including photographs of select<br />
pieces to: 741 Rutherford Rd., Greenville,<br />
SC 29609.<br />
SKILLED CABINETMAKER with conservation<br />
knowledge needed by antique firm<br />
with strong museum clientele. Opportunity<br />
to work with fine American objects. Sala,y<br />
negotiable. Resume/portfolio to Sumpter<br />
l'Jicidy III, PO<br />
Box 23001, Ridllnond, VA<br />
23223.<br />
EXPERlENCED CABINETMAKERlFIl'.'lSH<br />
ERiPROJECT LEADERS- for planning, fabricating<br />
and installing high-end furniture<br />
and architectural millwork. Positions from<br />
15,000 to $30,000 for self-motivated individuals<br />
with independence to contribute to<br />
growing business. Excellent benefits. Send<br />
resume: Woodfellows, 8512 Fairway PI.,<br />
Middleton, WI 53562.<br />
Instruction<br />
o E YEAR apprenticeship program in<br />
woodworking. Intensive training encompassing<br />
design, production, and marketing<br />
of fine fu rniture and cabinetry. Tuirion.<br />
Maxwell & Kelly Furniture Co., Philadelphia,<br />
PA. (215) 988-9065.<br />
02339.<br />
GETTING STARTED IN STAINED GLASS.<br />
Instructions, and bonus coupons, 2. \X/hittemore,<br />
Box 2065MS, Hanover, 1A<br />
CHICAGO-AREA APPRE 'TICESHIP_ Prestigous<br />
high-end woodworking studiO. Work<br />
and study for 1 year. Design and build own<br />
projecLS under master crafsrman. 0 tu<br />
Ave., Oak Park, IL 60302.<br />
ition and no salary. Some experience in<br />
power tools req'd. For brodlure write: David<br />
Orth,<br />
The Landing School<br />
1107 Chi cago<br />
LEARN WOODEN BOAT BUILDING & DESIGN,<br />
Two full-time residential programs that offer<br />
intensive training in a creative but disciplined<br />
environment. VA approved. Accredited member,<br />
NATIS_ Financial aid available. Equal opportunilyenrollment.<br />
The Landing School, Box 1490F,<br />
Kennebunkport, ME 04046. (207) 985-7976_<br />
BUILD A CONCERT-QUALITY GUITAR_<br />
Classes for novice and experienced w oodworkers.<br />
The Maine GUitarmakers' School.<br />
Box 791, Rockpol1, ME 04856.<br />
APPRENTICE WITH MASTER CRAFTSMEN_<br />
Unique in-shop experience_ Woodworking<br />
and other crafts. Year round program. Baulines<br />
Craftsman'S Guild-FW, Schoonmaker<br />
Point, Sausalito, CA 94965. (415) 331-8520.<br />
MUSICAL STRING INSTRUMENT REPAIR<br />
In one year you learn to repair and build guitar-<br />
or violin-family instruments. Call Red<br />
\Vmg TecJl1licai College.(8OO) 657-4849. EOE.<br />
LEARN TO TURN WOOD. Precision lathe<br />
work for fun and fine products taught by<br />
JAMES L. COX WOODWORKING SCHOOL.<br />
<strong>Free</strong> brochure. RD 2, Box 126 Be3\er Dam Rd,<br />
Honey Brook, PA 19344. (215) 273-3840.<br />
FURNITURE MAKER experienced in dovetailing<br />
and case construction of 18th centUly<br />
furniture for top-quality custom shop.<br />
Some exper. necessa,y. Ilion Co., 01liStiana,<br />
PA. (717) 529-2677.<br />
WOODWORKING RESIDENCY at Peters<br />
Valley Craft Center available for Spring '92.<br />
Write: PVCe, layton, l'!J 07851. (201) 94&5200.<br />
THE fIYMILLER SCHOOL of<br />
FINE F1NISIfING & HAND JOINERY<br />
One and two-week intensive in-shop<br />
training will give you all the necessary<br />
Imowlcdgc to start your own business.<br />
3rd gcncration craftsn,"n John ll),nillcr.<br />
Send $5/or complcle ;'lfo /Xlckage_<br />
912 Lal
emknives. <strong>Free</strong><br />
FINEST·QUAUTY HAND·FORGED CARV·<br />
I G TOOLS. Small scorps, drawknives,<br />
catalog. onh Bay Forge,<br />
Box F13, Waldron, Wa 98297.<br />
FREE DISCOUNT WOODWORKING Lools<br />
and supplies catalog. Best prices for over<br />
3000 brand name products. Trendlines,<br />
Dept. F\Vl, Box 6447, Chelsea, MA 02150. 1·<br />
(800) 366-6%6.<br />
HAND FORGED CHISELS: superior edge<br />
CUStom made to order. Send SlI catalog CAPE<br />
FORGE, PO i30.x 987, Burlington, vr 05402-ws7.<br />
THE ULTIMATE TOOL BOX SAW. RMI De·<br />
sign introduces three fine pull stroke saws.<br />
Blades are flexible, folding, and replacable.<br />
<strong>Free</strong> brochure. RMI Design, 411 AABC, As·<br />
pen, CO 8161 1. (303) 920,9615.<br />
.-. HAṚ HAND BAR CLAMPS SCREWS<br />
M<br />
--_ .._ P' .• MITRE DOUBLE CLAMPS BAR CLAMPS<br />
MAKERS OF FINE CLAMPS FOR OVER 70 YEARS<br />
PROMPT<br />
HANDFORGED<br />
SHIPMENT · CUSTOMER SATISFACTION<br />
FREE CATALOG · REPLACEMENT PARTS<br />
HARTFORO CLAMP CO , P.O. BOX 280131<br />
EAST HARTFORO CT0612B{)131 ·203·528-1708<br />
TOOLS<br />
For the Serious Woodworker<br />
Call or Write for Catalog<br />
(208) 634-3641<br />
Orders Only (800) 235-4452<br />
BARR SPECIALTY TOOLS<br />
P.O. BOX 4335,<br />
McCALL, 10<br />
Japanese<br />
83638<br />
Saws Pull<br />
We have the largest selection of Japanese<br />
Pull Saws In the United States. Send $1.00<br />
for a 2 year subscription to our 80 page<br />
catalog of fine woodworking tools.<br />
THE JAPAN WOODWORKER<br />
1731 Clement Ave., Suite 100 • Alameda, CA 94501<br />
Phone (415) 521·1810<br />
Power Tools<br />
DELTA AMERlCAN MADE. New and used<br />
specials. New 5HP, 3HP Unisaw, $1400. Send<br />
for complete listing and prices. New IPH,<br />
3HP special motor replaces Delta 83651,<br />
$288. PPD. Plaza Machinery, Box 14, Bethel,<br />
vr 05032. (802) 234'9673<br />
CLOSEOUT- SAVE THOUSANDS: only<br />
$4899. ea.; Ulmia 10 in. table saw widl mor·<br />
tiser; Felder 12 in. iable saw w/scoring; Felder<br />
1 Y.·in. tilting shaper (all widl sliding tables),<br />
Felder 16 in. jointer/planer. 1-8()(}{i48..4264.<br />
ADJUSTABLE CARBIDE ROUTER BITS. Bor·<br />
ing and countersink tools. European made,<br />
unique shape assemblies. $2 catalog.<br />
SHAllPCO, 960·2 AI ness 51. Downsview,<br />
Om., Canada M3J 251.<br />
The Woodworkers' UChoice!<br />
Carter Micro-Precision Band Saw Guides<br />
have ball bearing support wheels and selflubricating<br />
Tefloy blocks. Three sizes.<br />
Mounting brackets, studs and adapter kits<br />
From $45,<br />
ask for free literature.<br />
available.<br />
~<br />
PRODUCTS COMPANY, INC.<br />
Depl 460, 437 Spring SI<br />
Grand Rapids. ,N E<br />
MI 49503<br />
(616) 451-2928 ' FAX (616)451·4330<br />
Publications<br />
FULL-SIZE PROFESSIO Ai P LANS· Catalog<br />
3. Over 200 professionally-designed plans<br />
for building fine furniture. Furniture De·<br />
signs, Inc., CK·91, 1827 Ehndale Ave., Glen·<br />
view, IL 60025<br />
HA RD -TO - FIND<br />
MINIATURE TOOLS<br />
Over 1,000 specialty items for<br />
working small and when preCise<br />
detail counts. Send $1 .00 for 4<br />
issues of our 48 page catalog.<br />
Micro·Mark 340-905 Snyder Ave.<br />
Berkeley Heights, N.J. 07922<br />
THE TOOL CHEST firN<br />
for both the professional and amateur.<br />
1000's •<br />
OF BOOKS COVERING<br />
Woodworking - All Aspects<br />
Home Remodeling & Maintenance<br />
Tools & Their Uses • Contracting<br />
• Projects For Home & Recreation<br />
To order your catalog To. THE TOOL CHEST Dept.T<br />
send $2.00 (refundable 45 Emerson Plaza East<br />
Emerson, NJ 07630<br />
with first order<br />
Safety Equipment<br />
FILTER BAGS FOR DUST COLLECTION<br />
SYSTEMS. Fabric 12/yd. ppd. <strong>Free</strong> system<br />
plans. Baner Emerprises, Box 102B, Prospea<br />
Harbor, lYLE 04669.<br />
BUILD YOUR OWN DUST COLLECTOR.<br />
Detailed plan $14.70 ppd. Approved fabric<br />
for dust colleaion bags, 58 indl wide. $7.99<br />
per yard ppd. We manufacture replacement<br />
bags. SIGERlST MFG. CO., 7141·126 St. Sur·<br />
rey, BC V3W 4A8 Canada. FAX (604) 596·<br />
4982, phone (604) 596·4783.<br />
So<br />
ftware<br />
COMPUTER INDEX locates information<br />
contained in every issue through 1990 of<br />
FINE WOODWORKING, WOOD, WOOD·<br />
\'(fORK, \'(fOODSMITH, TODAY'S WOOD·<br />
WORKER. 1987 -1990 issues; \'(fOOD\'(fORKc<br />
ER'SjOURNAL, WORKBENCH. Yearly updates.<br />
IBM compatible, hard disk, 512k, DOS 2.0 or<br />
newer. $49.95, plus $4.50 S&H. <strong>Free</strong> bro·<br />
chure. WOODFIND, PO Box 2703F, Lynn·<br />
wood, WA 98036.<br />
Wood Parts<br />
NEVER BUY TOY WHEELS AGAIN' Make<br />
your wheels with our WHEELRlGHT. The<br />
Tool Co., 812 Kurzweil, Raymore, MO 64083.<br />
(816) 537-6308<br />
The ultimate wood threading device. Attaches to router<br />
& makes perfect threads in 5 right hand sizes and 3 left.<br />
Write or call: 541 OepI.FW. Swans Rd., HE, Newark,<br />
OH 430S5, 614·345·S045, 1·800·331·4718.<br />
DOWELS - PLUGS - PEGS<br />
Manufacturer Direct<br />
Largest & finest selection Oak, Walnut, Hickory,<br />
Maple, Cherry, Mahogany, Teak, even Treated Dowels.<br />
Quantity discounts.<br />
MIDWEST DOWEL WORKS, INC.<br />
4631 Hutchinson Road<br />
Cincinnati, Ohio 45248<br />
(513) 574·8488<br />
Wood<br />
RAREST CAUFORNIA BURLS direa from<br />
logger. Huge selection beautifully figured<br />
redwood, maple, rnan2anita, and madrone. Also<br />
guitar qualily squares or slabs (707) 442-1319.<br />
UGNUM VITAE aged 20·plus years, 30· to<br />
50-pound billets, 4 in. by 8 in. by 24 in. typi·<br />
cal. 5 per pound. DESIGNWORKS. (301)<br />
987-4551, FAX (301) 987-6392.<br />
Also for turning and furniture. SASE for list<br />
WOOD FOR CARVERS, cut·outs, decoys,<br />
carousel horses, staner kits, tools and books.<br />
W<br />
ood, 3505 32nd St<br />
w., Brandenton, FL<br />
34205.<br />
SAWMILL OVERSTOCK SALE, rosewood, -<br />
chestnut, walnut, maple, and ash lumber<br />
from .50 per bd. ft. Rosewood shons, mill<br />
ends. Redwood burl, maple burl and wal·<br />
nut turning stock. Walnut logs. SASE for<br />
sale list. Pine Creek Wood Co., PO Box 588,<br />
West Linn, OR 97608. (503) 636·6430<br />
VIRGINIA AROMATIC RED CEDAR. Select<br />
grade, S/4/S, 12 sizes available. Red Rose<br />
Cedar, Rte. 5, Box 387, Lexington, VA<br />
24450. FAX : 703·463·7303.<br />
LARGE HIGHLY FIGURED CALIFORNIA<br />
WALNUT SLABS, dry, perfect for desks, tao<br />
bles. Contact: California WalnuL Furniture<br />
DeSigns, 12681 Wolf Rd., Grass Valley, Ca<br />
95949. (916) 268·0203.<br />
ATTENTION VIRGINIA-AREA WOOD·<br />
WORKERS! Kiln·dried walnut at below<br />
wholesale prices. No minimum. Spotsyl·<br />
vania, VA. (703) 972-9045.<br />
UGNUM VITAE aged 20·plus years, 30· to<br />
50·pound billets, 4 in. by 8 in. by 24 in. typi·<br />
cal. $5 per pound. DESIGNWORKS. (301)<br />
987·4551, FAX (301) 987·6392.<br />
NATIVE TEXAS HARDWOODS. Mesquite,<br />
figured fiddleback oaks, pecan, many oLh·<br />
ers. Burls, turning, carving blocks. Texas<br />
Kiln Products. (800) 825·9158.<br />
DOMESTIC HARDWOODS<br />
• •<br />
ASH · CHERRY · OAK ' POPlAR . WALNUT<br />
AROMATIC CEDAR . CYPRESS<br />
SPECIALTY LUMBER PRE·PACKAGED BUNDtES<br />
PRE· SANDED SPECIALTY MOULDINGS<br />
S-4·S LUMBER . flOORING PANEUNG<br />
JOHNSONIUS PRECISION MILLWORK<br />
S;ES 901-352-5656<br />
SEASONED HARDWOODS<br />
P.O. BOX #275, McKENZIE, TN 38201<br />
UT::':UI!E<br />
Highly Figured Western Species<br />
Madrone ' Myrtle · Maple Burl<br />
Lumber . Basketball<br />
· Music Bowl Blanks Burls<br />
.<br />
WHOLESALE SUPPLIER Cutle,y<br />
34707 OVER 10 YRS.<br />
Squaw Valley Road<br />
Gold Beach, OR 97444 503·247·7875<br />
ATTENTION<br />
<br />
hard and soft woods, table slabs,<br />
FLORIDA WOODWORKERS<br />
retfci b} o 1:% e 1tive<br />
e e<br />
'cS o i'$.&lOfr s fi o a '<br />
33411<br />
HENEGAN'S WOOD SHED<br />
7760 Southern Blvd.tFINt West FI Palm Beach,<br />
C,II I4071 793·1557<br />
HARDWOOD CUT TO ORDER<br />
••• 100 Species in Stock ·<br />
• ••<br />
Custom Mouldings ·<br />
MCNisa accepted. Call or write:<br />
COLONIAL HARDWOODS, INC.<br />
7648 Dynatech Ct.<br />
Springfield, VA. 221 53<br />
(703)451·9217 FAX: (703)451 ·0186<br />
FINE<br />
Shiooed UPS<br />
VENEER<br />
or Common Carrier<br />
655-0206<br />
Highest Quality<br />
Retail or<br />
low Prices<br />
Wholesale<br />
Full length Veneers Area Code 716<br />
Large Selection<br />
Exotic Lumbers Call or Write<br />
Custom<br />
for<br />
PI d FREE<br />
r'-" ""<br />
g<br />
<br />
I<br />
11753 Big Fax. Tree No. Rd., (716) E.Aurora, 655-3446 N.Y. 14052<br />
Our wood certainly makes a difference.<br />
CHERRY, WALNUT, AND TIGER MAPLE.<br />
Curly (tiger) walnut in matched sets to 54·in.<br />
wide by 13 ft. long. Norman Hughes, 1627<br />
New London Rd., Landenberg, PA 19350.<br />
(215) 274-8842.<br />
MESQ lTE LUMBER. SASE for prices. In·<br />
c1ude 2 for sample. H. Nordmeyer, PO Box<br />
68, Knippa, TX 78870.<br />
FINALLY!! FRAMERS MOULDING. Lengths,<br />
custom cuts, finished or unfinished. Whole·<br />
sale prices, framing tools, hardware. Com·<br />
plete catalog 1. FrameWealm, Dept. F, RD<br />
#2 Box 261·7, Otego, NY 13820.<br />
SELECT & BETTER 20/BD. FT. BULK<br />
PACKS: cheny 2!1x1. ft.; red elm 1.47!1x1.<br />
ft.; walnut S3.04/bd. ft.; 4 by 4 walnut calVing<br />
stock. Additional species. Visa -MasterCard.<br />
<strong>Free</strong> catalog. Badger Hardwoods; Michael<br />
Hansen, 511 West Geneseo St., Apt #2, lafayette,<br />
CO 80026. (800) 252-2373.<br />
TIGER MAPLE, FIGURED CHERRY & OAK<br />
Heavy stock a specially. E.1Stwoods Co., RD<br />
#1, Hornell, NY 14843<br />
MESQUITE LUMBER. Kiln·dried and bowl<br />
blanks. MESQUITES UNLIMlTED, Rte. 4, Box<br />
322, Wichita Falls, TX<br />
,<br />
76301. (817) 544·2262.<br />
GILMER<br />
503-274-1271 WOOD CO-<br />
Rare & Exotic Woods<br />
in logs. planks & squares<br />
over 50 species in stock<br />
• also cutlery, turning &<br />
musical instrument woods<br />
221 1 NW St. Helens Rd .. Portland. OR 97210<br />
WESTERN PENNSYLVANIA<br />
WOODWORKERS<br />
50 Domestic & Imported Woods · Veneers<br />
Finishes · Mouldings · Hardware · Plans · Books<br />
CalVing Stock · Magazines · Quality Tools<br />
Call or Visit Our Store<br />
UNUSUAL<br />
WOODCRAFTERS<br />
VENEER<br />
SUPPLY<br />
7703 Perry Hwy IRt 191 2921 Buffalo Rd.<br />
Pittsburgh, PA 15237 Erie, PA 16510<br />
(412) 367·4330 (814)899.5466<br />
FORARTISTS ANDCRAFTSMEN<br />
Tired of boring, uniform,<br />
industrial veneers? ARE<br />
YOU READY for unusual,<br />
exciting cuts?<br />
*' - '"<br />
CALL or WRITE for our<br />
... \'<br />
FREE brochure!<br />
B&B 1" *'<br />
RARE WOODS<br />
10946 W. Texas<br />
Lakewood, Ave. <br />
CO 80232 call: 303·986·2585<br />
APPALACHIAN AND DOTIC<br />
HARDWOODS VENtERS PL YWOOD<br />
TURNING<br />
aR,\WOOD<br />
AND CARVING BLOCKS<br />
Call or write for free price list<br />
I<br />
huII·complete line of tools am accessories<br />
'(\\)./)<br />
lB3C!C<br />
EAST GOLOEN LANE, P.O. BOX 323, DEPT. 1 B<br />
NEW OXFORD. PA 17350<br />
PHONE (71 7) 624·4323<br />
FAX (717) 624·4365<br />
& EXOTIC DOMESTIC<br />
OVER 75 SPECIES<br />
LUMBER • PLYWOOD · VENEERS<br />
TURNING SQUARES & BLANKS<br />
Y2" x 3"<br />
COLLECTORS SAMPLE KIT<br />
30 EXOTIC & DOMESTIC WOODS<br />
x 6" SANDED FINISH<br />
$29.00 PLUS $5.00 S&H<br />
Ideal & tor: Furniture Collectors' Makers' Schools Architects· • Craftsmen' Designers cabinet<br />
WOODWORKERS_<br />
-1-800-423-2450<br />
5402 s. 40th st • Phoenox, AZ 85040<br />
(602) 437-4415<br />
100 Fine Woodworking
A1TENTIO WOODWORKERS maple and<br />
redw ood burl. Figured, quilted, bird's-eye,<br />
lace Any size or thickness available. Quality.<br />
Albany, OR (503) 926-1123.<br />
HOMESTEAD HARDWOODS, 2111 Messick<br />
Rd., N. Bloomfield, OH 44450. (216) 889-<br />
3770. Kiln-dried ash, basswood, bunernut,<br />
cherty, chestnut, curly maple, oak, poplar,<br />
sas&:1fras, walnut.<br />
RARE CUBAN MAHOGANY (Swietenia Alabogani)<br />
414 to 12/4, ebony, cocobolo Brazilian<br />
rosewood, bocote, and more. The true<br />
source of high quality at the right price.<br />
SASE, Tropical Exotic Hard",'OOds, PO Box<br />
1806, Carlsbad, Ca 92008.<br />
REDWOOD LACE BURL, OTHER WEST<br />
ERN SPECIES, squares, slabs, whole. Western<br />
lumber, figured lumber, rare woods, sample<br />
kits. SASE list. Eureka Hardwood Supply, 3346<br />
D St, Eureka, CA 95501. (707) 445-3371.<br />
PINK<br />
GABON EBONY, SNAKEWOOD AND<br />
NORY lumber, logs and billets. Quality<br />
guaranteed. \Vholesale prices. Over 60 other<br />
species in Stock. <strong>Free</strong> catalog. (213) 542-<br />
3576. Exotic Hardwoods, 4100-B Spencer<br />
St., Torrance, CA 90503.<br />
- GROFF & HEARNE<br />
LER<br />
WAlNUT--CHERRY AND<br />
OTHER FINE CABINET WOODS.<br />
Boards to 40' wide,<br />
matching flitches, slab cuts, kiln dried.<br />
Groff & Hearne lumber<br />
858 Scotland Road,<br />
Quarryville, PA 17566<br />
717-284-0001<br />
OVER 60 SPECIES OF HARDWOODS. Prepaid<br />
sample box 49. Huge inventory of<br />
turning and carving stock. Many specials.<br />
<strong>Free</strong> list. cur AND DRJED QUAlITY HARD<br />
WOOD. 143 Cedros, Solana Beach, CA<br />
92075 (619) 481-0442.<br />
TRUE QUARTERSAWN LUMBER Oak, cher<br />
Ly, pine, cut from prime logs. Air-dried. Newman,<br />
Box 46, New Braintree, MA 01531.<br />
(508) 867-3318.<br />
HIGHEST QUAUTY 12 by 18 in. and smaller<br />
western veneer, burl and figured w ood.<br />
Black walnut, redwood, madrone, myrtle,<br />
and maple. <strong>Free</strong> samples. Pacific Burl and<br />
Hardwood, 6% SE T Street, Grants Pass, OR<br />
97527. (503) 479-1854.<br />
OREGON BLACK WALNUT - wide boards,<br />
thick material, exceptional color. SASE<br />
Goby Walut Products, Dept A, 5016 Palestine<br />
Rd., Albany, OR 97321. (503) 926-7516.<br />
QUALITY NORTHERN APPALACHIAN<br />
HARDWOOD free deliveLy direct to your<br />
door. Bundled, surfaced, shrink-wrapped.<br />
Satisfaaion quaranteed. Niagara Lumber &<br />
Wood Produas, Inc., 47 Em1 St., East Aurora,<br />
NY 14052 (BOO) 752-5207.<br />
EXOTIC HAWAIIAN HARDWOODS- bundles<br />
of kihl dried Koa, Mango woods. labs,<br />
turning squares. Also custom wood produas,<br />
furniture. Call or write for list. Maui<br />
Trading Company. (808) 878-2705. RR2, Box<br />
263, Kula, HI 96790.<br />
EXOTIC -DOMESTIC LUMBER and bowl<br />
stock Cocobolo $12.50/bc1 ft Bocote $9.501<br />
bel. ft. SASE: GRAY HARDWOODS, Box 1137,<br />
Vista, CA<br />
.. UNICORN_<br />
92085. (619) 940-1856.<br />
UNIVERSAL WOODS ltd<br />
OVER 90 SPECIES IN OUR LARGE<br />
INVENTORY OF QUALITY MATERIAL<br />
EXOTICS - DOMEST ICS - MILLWORK<br />
VENEER-MAIL ORDER-FREE CATALOG<br />
4190 Steeles Ave. West, Woodbridge<br />
Ontario Canada L4l 358<br />
CALL US AT (416) 8S1 2308<br />
Fine<br />
WqqQWorking<br />
Attention Retailers<br />
If you would like to c<br />
arry<br />
Fine Woodworking in your<br />
store, just write or call 1-800-283-7252, and find out<br />
how easy it is to set up an account directly with usno<br />
hassles, no risk, attractive terms.<br />
The Taunton Press, 63 S. Main St, Box 5506, ewtown, cr 06470-5506<br />
QUALITY ORTHERN APPALACHLAN<br />
HARDWOOD free delivery direct to your<br />
door. Bundled, surfaced, shrink-wrapped.<br />
Satisfaaion quaranteed. Niagara Lumber &<br />
Wood Produas, Inc., 47 Elm St., East Aurora,<br />
NY 14052. (800) 752-5207.<br />
BRAZILIAN ROSEWOOD SHORTS, $4.50<br />
per board foot, 25-foot minimum. Average<br />
length 3 ft. to 4ft. H&B Hardwoods. (502)<br />
454-5828, (502) 425-1326.<br />
MESQUITE LUMBER. Kiln-dried and bowl<br />
blanks. MESQUITES UNLlMJTED, Rte. 4, Box<br />
(817) 544-2262.<br />
322, Widlita Falls, 1)( 76301.<br />
CUBAN MAHOGANY(swietel1 iamalXJgol1iJ.<br />
Direa from importer. Kiln dried 414, 5/4, 81<br />
4, 1214 squares and slabs. West Indies Resources.<br />
(813) 337-8784.<br />
TURNING BLOCKS, BURLS, AND<br />
CROTCHES-exotic and domestic hardwoods-write<br />
or call for price list. Woodply<br />
Lumber, 100 Bennington Ave., Dept. F,<br />
<strong>Free</strong>port, NY 11520. (516) 378-2612.<br />
BIGLEAF MAPLE. Large blocks, slight figure.<br />
Small pieces w/great figure. Pallet (4-ft<br />
cube) 1400. (206) 376-2312. Casey Wood,<br />
PO Box %, Olga, WA 98279. Call for details.<br />
QUARTERSAWN WHITE OAK<br />
AND AGURED LUMBER<br />
Curly. Brid's-€),e, Quitted. Crotch<br />
800-373-6097 or<br />
RD #3. 215-775-{)4()()<br />
Box 3268, Mohnlon, PA 1954().9339<br />
Sadtf 'Pod ';:?I<br />
~<br />
TIGER<br />
and BIRD'S-EYE<br />
.. Curly Ash, Curly Oak<br />
Curly Cherry, Curly Birch<br />
LUMBER AND FLOORING<br />
921-A Lancasler Pike, Ouarryville, PA 17566<br />
(717) 284-5030<br />
Limi[ed [0 use by individuals only<br />
WOOD & TOOL EXCHANGE<br />
For Sale<br />
100 YEAR OLD chesmut beams. Hand hewn.<br />
Lumber saws out clear. Forty- 6-in. by 6-in.<br />
by 14-in beams avail. Floyd, VA (703) 745-4419.<br />
RECORD-405 Multi-plane, complete and<br />
in mint condition. 250. Hollow and round<br />
bases, 25 each. (214) 520-1537.<br />
FINE l'(fOODI'(fORKlNG, #1-88<br />
plus Index<br />
1. 250. plus shipping. (201) 666-0962.<br />
36-in. BAt'lDSAW. Cast iron with 11kin.<br />
blade, 5HP. All electrics. Mag. brake, gaakbelt<br />
wlguards by Ainerican Woodwkg. Machine<br />
Co. Special saw guide, $1200. OBO.<br />
170 Moulton Hill Rd.,Monson, MA 01057.<br />
FlN£ l'(fOODI'(fORKING issues 1-82, perfect<br />
rondition $200 plus UPS fi-eight (503) 434-6114.<br />
EWTO<br />
HORIZONTAL BORING MA<br />
CHINE. Double bit w/several spares. Cost<br />
1200. selling for 600. Excell. condo industrial<br />
qlty. Approx. weight 400lbs. Ed Schaper,<br />
745 Straub Rd., Ballwin, MO 63011.<br />
FELDER BF5-26 COMBINATION MA<br />
CHINE. 12-in. saw & I V, -in. shapeI' with<br />
sliding table. 10-in. jointer, 10-in. thicknesser.<br />
Excellent condo (213) 470-2270.<br />
3 PHASE CONVERTER. "ROt31y" new. Convert<br />
220V/sg1. to 220Vf3PH up to 3OHP. RWl big<br />
equip. at home. Gary Mmson. (803) 252-1338<br />
Wanted To Buy<br />
ANTIQUE BANDSAW. 1800's ornate castfoot,<br />
treadle or flat belt w/wooden table, or<br />
wooden spokes. Marst, Egan, Pryibil, Fay or<br />
Crescent. Complete, wino casting cracks.<br />
Top price. Ted Crawford, PO Box 1077, Golden,<br />
CO 80401. (303) 277-9m.<br />
rir··· 2D G:1JES<br />
Get a<br />
CLAMP ONTO THE MOST<br />
COMPLETE WOODWORKING<br />
CATALOG AVAILABLE<br />
eatt<br />
<br />
tor/a!l<br />
1·800·338·6668<br />
Pink Ivory<br />
Dagame<br />
Brazilian Rosewood<br />
Pear<br />
Plum<br />
Burls<br />
Snakewood<br />
Bubinga<br />
Koa<br />
Satinwood<br />
Cocobolo<br />
Padauk<br />
Rosewood<br />
Bloodw ood<br />
Ziricote<br />
Purpleheart<br />
C.Ebony<br />
Pau Rosa<br />
Camphor<br />
.. It's a matter of<br />
pnde for both of us<br />
Quality<br />
Exotic<br />
Wood<br />
» TURNERS «<br />
ThM:k Planks '0< Bowls/Squares<br />
» CABINET MAKERS «<br />
Individu.Uy Selected<br />
'0< Lumber<br />
Furniture/Boxes/Inlays<br />
01"" iD<br />
AU<br />
Spt>c.."<br />
1XJ@a<br />
Welcome··· or Inquiries Call Write<br />
125 Berea Jacqueline Ohio 44017 Drive<br />
READER SERVICE NO. 157<br />
Pernambuco<br />
Mac. Ebony<br />
E.I. Rosew<br />
Bocote<br />
Curly Maple<br />
Quilted Maple<br />
At. Ebony<br />
Zebrano<br />
Lacewood<br />
Lignum Vitae<br />
Osage<br />
Tulipwood<br />
Blackwood<br />
Mahogany<br />
Jelutong<br />
Holly<br />
ood<br />
Wenge<br />
Concalo Alves<br />
Many More ...<br />
pnde 01<br />
" tfs a matter of<br />
for both us<br />
THE BEST PRICES IN THE<br />
BUSINESS!<br />
PREFERRED CLUB<br />
Ask about our exclusive<br />
Save an extra 5%<br />
p<br />
on purchases!<br />
READER SERVICE NO. 110<br />
September/October 199 1 101
NEW!AngleWrighf<br />
SPRAYWAY SAW CLEANER, 836<br />
AND GUM REMOVER PI<br />
shaper and Quickly wipe cutters, cleans off with saw boring a cloth. blades, bits, Works etc. router in Spray minutes. bits, on<br />
DRY SPRAYWAY801 LUBRICANT WOOOWORKER<br />
Reduces Friction . Inhibits Resin Build-up .<br />
Prolongs Tool Life. Contains no silicone or oil.<br />
Paintable,<br />
SPRAYWAY<br />
will not<br />
RO-90<br />
affect wood finishes. Use on all<br />
cutting tools to form a thin, low friction coating.<br />
Prevents Rust . Lubricates . Penetrates .<br />
Displaces Moisture. Rust Protection for saw<br />
blades, cutting tools and other equipment. After<br />
cleaning, spray a thin coating over cleaned area.<br />
Contains no silicone.<br />
Sprayway Contain Environmentally products are aerosal Acceptable packaged. Propellent.<br />
Distributors<br />
SPRAYWAY<br />
write:<br />
INC. (Mfr. )<br />
484 Vista Avenue, Addison, IL 60101·4468<br />
(1·708) 628·3000 FAX (1·708) 543·7797 ____<br />
==--'<br />
READER SERVICE NO.<br />
Amazing New Power Tool<br />
100<br />
Eliminates Hand Sanding<br />
Now you can sand<br />
with a power tool all<br />
those areas where you<br />
previously had to fold<br />
up a piece of paper<br />
&<br />
and<br />
"finger sand." You can<br />
sand right up to, into<br />
and along edges corners<br />
without dulling the '<br />
edge or al tering the profile.<br />
be rotated, bent, formed,<br />
Unlike ordinary sanders,<br />
or cut down to any size<br />
the FEIN "Tri<br />
you want for sanding<br />
angle" Sander oscillates<br />
moldings and channels.<br />
(side to side movement)<br />
Made in Germany by<br />
at a blurring 20,000<br />
the World's oldest power<br />
times a minute. This<br />
tool manufacturer.<br />
unique action keeps the<br />
For more information<br />
sander from running<br />
on our complete line of<br />
away from, or bouncing<br />
off of the edge line.<br />
high performance power<br />
tools, call:<br />
The sanding pad can<br />
1-800-441-9878.<br />
Fein Power Tools Inc.<br />
Pittsburgh, P A<br />
READER SERVICE NO. 48<br />
Set all anes OOto 90° ±1/100$ 75<br />
• Cut angles with no saw<br />
•<br />
adjustment Plus<br />
m<br />
shipping $6.00 for<br />
Aligns tools precisely<br />
handling. and<br />
Rugged, all-metal<br />
•<br />
AngleWright Call Tool Co.<br />
Moneyback<br />
P.O. or write for FREE Brochure:<br />
guarantee<br />
• 90025, 25632, 213/471-7432<br />
Box Los Angeles,<br />
CA<br />
r,<br />
FREE<br />
Mention<br />
hat with<br />
this ad<br />
your<br />
& get<br />
order<br />
a<br />
(6800) ......... CELTA list SALE<br />
22-5-40 12" Poruble Planer<br />
605 -419<br />
34-7B2 Unisaw w/Unif 3HP/I PH' 2206 1679<br />
36-220 10" Compound Mitre Saw 350 2-49<br />
36-755 10" Tilting Arbor Saw' 126-4 B79<br />
43-505 NEW RouterlShaper 40B 276<br />
• Station/try mlJchint'Jry<br />
@HITACHI 166001<br />
CBFB 8 In" Compnd Mitre Saw<br />
READER SERVICE NO. 116<br />
B99 -4-49<br />
C 15FBC 15" Mitre Saw/carb blade 945 459<br />
M 12V<br />
3 1/4 HP Electronic Router -4-47 22B<br />
TR I2 3 HP Router 317 175<br />
W6V2 Screwdriver. 0--4000 RPM 1-45 79<br />
YAMAHA (S70)<br />
r==-"'m:m-.-.-.<br />
w/electric surt*<br />
(5800)<br />
2259 1795<br />
PORT9I+[A8I.E (5700) 5BOO-JM<br />
YG450D 3BOO Watt Generator' 16191295<br />
YG650D 6000 Watt Generator' 21491695<br />
YG650DE 6000 Watt Generator<br />
RA200 Radi.1 Arm Saw 520 245<br />
RE600 3 HP Plunge Router 43 I 209<br />
RSI 15 -4 In" Randm Orb. Sander 131 7B<br />
SC I60 16" Scroll Saw<br />
261 1-43<br />
TR30U Laminate Trimmer 156 BB<br />
-4620 I 0 I Woodcarver Carving Blade 3B.95<br />
362 -4 x 2-4"<br />
lEG (5160)<br />
$269 $1-49<br />
BSPE lOOK Jig Saw Kit<br />
FSPE I 00 Barrel Grip Jig Saw 2-4-4 139<br />
HBSE75S 3 x 21" Belt Sander 279 160<br />
VSR500 5" Random Orbit Sander 220 I 19<br />
o I-4B9 I OFFSET Right Angle Power<br />
Screwdriver Head 26 20<br />
AM39HC-4V 31-4 HP Vert. T.nk<br />
27B<br />
.J E T<br />
AM7BHC-4V I In HP Vert. Tank 29B<br />
AM7BHC-4 I In HP Air Compr. 2BB<br />
169001<br />
17Jil@ir CompreSSorS(54601<br />
n" Floor Drill Press'459 379<br />
DC I IB2 Dust Collector. IIB2CFM'5n -409<br />
JDP I 0 10" Bench Drill Press 209 169<br />
JDP 17MF 16 I<br />
.. Ei-<br />
JJ6CS 6" Long Bed JOinter' 579 399<br />
JWP 12 12" Poruble Planer 628 369<br />
(63001<br />
II BO 3/B" VSR Drill: 0- 1 200 RPM I B2 lOB<br />
1312 In" VSR Drill: 0-900 RPM 206 119<br />
ELU<br />
1703 I 10" Mitre Saw IPim.n. Blade32 I 17B<br />
2037 Drywall Scrugun: 0--4000 175 9B<br />
2670 I n" Impact Wrench 249 13B<br />
269-4 7 11-4" Super Sawcat Orc Saw 24B 15B<br />
50-43-09 Macho III Rot. Ham. Kit 759 -449<br />
163001<br />
272 1 1.5 HP Router wlfree collet $24 I 13B<br />
3JJB 2 1/-4 HP Electr. Plnge Rout. 427 24B<br />
JJ75 3 liB" Universal Planer 313 15B<br />
-402-4 3 x<br />
21" Electron. Belt Sander 322<br />
I BB<br />
Plate Joiners Include 750 Biscuits!<br />
5150-JS I 00 Freud Plate Joiner $299 179<br />
5550-101001 lamello TOP 10 699 579<br />
5300-JJBO Elu JoinerlSpliner 542 273<br />
5122- 160502 Skil Plate JOiner 210 UB<br />
6BOO-32 I 00 Delta Stationary 665 299<br />
lOOK Ryobi Joiner wlfence -43 I 239<br />
JJO 1/-4 Sheet Finish Sander 103 5B 50BO-OB I Virutex Joining Machine 299<br />
Belt Sander wNac 345 I B-4 5700-555 Porter-Cable Plate Joiner299 I B5<br />
690 I In HP Router 240 12-4 5700-5556 Tilt Fence for Porter-Cable -47<br />
7335 VS Random Orbit Sander 230 129 5550- 1 75550 Glue Bottle 21.95<br />
753B 3.5 HP Plunge ht·soo Router -410 229 3600-LAM400T6 Extra Cutter 3B.95<br />
limited<br />
Stationary machine ••<br />
452 (703) 9999<br />
hipped<br />
P lu. fre og<br />
TOLL-FREE - - .<br />
READER SERVICE NO.<br />
Freight <strong>Free</strong> to<br />
p ortable p<br />
Springfield<br />
48 7305 states on<br />
22150<br />
ower tools th ad. VA<br />
Boudlnot Drive }1-fl1E<br />
Quantities<br />
64-4-5-460 . SOURCE.<br />
72<br />
102 Fine Woodworking
FIXE l'ooDllnRI(JXG BOOKS<br />
As you groW as a woodworker ...<br />
so must your shop.<br />
New from Scott Landis: TIre Workslwp Book<br />
full<br />
The<br />
Discover new ways to build, change and<br />
improve your workshop! Scott Landis traveled<br />
the continent looking at hundreds of shops,<br />
and here in Workshop Book he details the<br />
best, from cavernous cabinet shops to<br />
basement alcoves.<br />
You'll learn how other woodworkers solve the<br />
problems you're up against, and you'll be able<br />
to create your own woodworlting sanctuary in<br />
whatever space you can afford.<br />
IS<br />
There are also dozens of fixtures and<br />
The<br />
accessories, and floor plans for a wide<br />
range of woodworlting shops. Whether you're<br />
just starting out in woodworking or are far<br />
along in this lifetime journey, Wo rkshop<br />
Book will be your faithful guide.<br />
HARDCOVER, COLOR, 224 PAGES, 301 PHOTOS,<br />
DRAIV1NGS, #070094, $34.95<br />
76<br />
l\TEW<br />
"He<br />
the<br />
wear our shops - as well as our<br />
homes - like an old jacket or afa·vorite<br />
S"weater, and since most of us spend<br />
majority of our waking hours at work,<br />
they ought to fit well. "<br />
- Scott Landis<br />
The Workshop Book takes<br />
a systematic approach to<br />
common problems such as:<br />
• storage for tools,<br />
lumber and supplies<br />
• heat, light<br />
and electricity<br />
• where to put benches<br />
and machines<br />
• dust collection<br />
• shop security and<br />
personal safety<br />
• malting the most of<br />
whatever workspace<br />
you have<br />
I ,--<br />
Available lIQW -1992 Pine HOOdworking calendar ...<br />
Also by Scott Landis ... The Workbench Book<br />
Explore the strengths and traditions of the<br />
workbench, the heart of the woodworker's<br />
shop. Landis examines benches for ali itinds of<br />
woodworlting - from a traditional Shal{er<br />
bench to a mass-produced Workmate®. In<br />
each case, detailed photos and illustrations<br />
show how the bench works and lead you<br />
through the tough parts of its construction.<br />
HARDCOVER, COLOR, 256<br />
PAGES, 278 PHOTOS, 185<br />
DRAWINGS, 4 BENCH PLAJ'IIS, #070061, $34.95.<br />
"Every conceivable problem and<br />
solution is encountered. "<br />
- Woodworking International<br />
Tal{e a glorious full-color<br />
1992<br />
tour of America's most<br />
The<br />
intriguing workshops.<br />
Each compelling photo in our<br />
calendar comes from<br />
Scott Landis's Workshop<br />
Book.<br />
24 12<br />
Perfect<br />
for anyone who loves<br />
1991<br />
woodworlting. (At in.<br />
by in. when open, this<br />
calendar is bigger than<br />
our version.)<br />
13 PHOTOS, #071007, $14.95<br />
SAVE WHEN YOU BUY THE TWO·BOOK LANDIS SET: $64.95, #07A194<br />
To order, use the attached card or call 1-800-888-8286.<br />
TAUNTON<br />
BOOKS&VIDEOS<br />
... by fellow cnlilusi:ISIS - -
@HITACHI<br />
.,.fi r.<br />
28-180 NEW! '<br />
Bench<br />
NEW wood lathe CALL<br />
NEW router/shaper 275<br />
<br />
NEW radial drill press 279<br />
.,.; .. ,;;<br />
2S-245 14' bandsaw wAamp 579<br />
, ;;'<br />
Bandsaw<br />
$169 '.,.... <br />
wet/dry grinder 1<br />
S' bench drill press<br />
15' hobby scroll saw<br />
16' 2 scroll saw<br />
299 389 689 849<br />
12 volt cordless drill kit<br />
3/S' VSR 4 amp drill<br />
3/S' VSR 5 amp drill<br />
1/2' VSR 5 amp drill<br />
1/2' VSR 5 amp. keyless<br />
drywall 0-2500 VSR drvr<br />
5556 adjuslable tilt fence NEW 49<br />
5116 16' Omni jig NEW 260<br />
7536 hp router NEW 204<br />
7537 2-1/20 hndl router NEW 215<br />
7399 drywall cutout NEW 79<br />
1r;,.Ii 91 __ "Iilg345<br />
7310 laminate trimmer NEW<br />
91 1S porta plane kit w/ct cuner 1<br />
Saw Boss<br />
Kit<br />
$124<br />
"iiiijij-."'.-<br />
104 Fine Woodworking
3IS", VSR cd Is drill kit 134<br />
IS007NIRA:7-1/4" saw wlelect. brk. 1D4<br />
469<br />
S-1/4" table saw wlct bl. 258<br />
LS1011<br />
122700A porta table for 270SW 219<br />
LS1030<br />
10" '<br />
10" mitre saw 229<br />
212'port. planer wld ust cht 459<br />
$439 Saw-;'-.:·:\ ir<br />
.<br />
Compr...1" .., .4...<br />
Mitre<br />
2BR 3 hp plunge router 165<br />
blade sharpener 194<br />
3/4", VSR hammer kit 165<br />
VS recip. saw kit 128<br />
3-1/4" planer wlcase 118<br />
...,...; ':'"<br />
$59 Jack<br />
Pump<br />
2201<br />
2203<br />
2204<br />
25100<br />
IIi!ii." •• jiiij!jjil<br />
6d-16d frame nailer 468<br />
1-1/2 to 2-1/2 fin. nlr. 398<br />
ii!I25 NEW6d to 12d nailer 399<br />
1/4" crown finish stapler 258<br />
1-3/S" to 2" HD stapler 348<br />
SIS" to 1" brad tacker 258<br />
1"10 1-1/2" brad tacker 288<br />
348<br />
338<br />
•• FULL<br />
LINE DISTRIBUTOR ••<br />
FREE<br />
FREIGHT IN 48 CONTIGUOUS USA ••<br />
FACTORY AUTHORIZED SERVICE ••<br />
READER SERVICE NO. 201<br />
ERRORS<br />
AND PRICES SUBJECT TO CHANGE ••<br />
September/October 1991 105
Listings of gallery shows, major craft fa irs, lectures,<br />
workshops and exh ibitions are free, but<br />
restricted to happenings of direct interest to<br />
woodworkers. We list events (including entry<br />
deadlines for fu ture juried shows) that are current<br />
with the time period indicated on the cover<br />
of the magazine, with overlap when space permits.<br />
We go to press three months before the issue<br />
date of the magazine and must be notified<br />
well in advance. For example, the deadline for<br />
events to be held in March or April isJanuaty 1;<br />
for July and August, it's May 1, and so on.<br />
ARIZONA: Exhibition-The Turned Wood Vessel: A<br />
Group Exhibition, Sept. l-Oct. 3 I. Reception: Oct. 17,<br />
7-9 P.M. Joanne Rapp GalIery/fhe Hand and tbe Spirit, 422<br />
N. Marshall Way, Scottsdale, 85251. (602) 949- 1262.<br />
Exhibition-International Lathe-Turned Objects Challenge<br />
N, Sept. 8-Nov. 3. Arizona State University Art Museum.<br />
Contact Wood Turning Center, PO Box 25706,<br />
Philadelphia, PA 19144. (215) 844· 2188.<br />
Show-Phoenix Harvest Festival, ov. 1-3. Phoenix Civic<br />
Plaza. For info, contact Harvest Festival, III Liberty St.,<br />
Petaluma, CA 94952. (800) 321-1213, (707) 778-6300.<br />
Show-9th annual Woodworking Show, Nov. 3. Los Olivos<br />
Adult Center, 38th and Devonshire, Phoenix. Spon·<br />
sored by Arizona Association of Woodworkers. Contact<br />
Herb Miller, 1115 W. Stottler Dr., Chandler, 85224.<br />
CALIFORNIA: Shows-9th annual Long Beach Harvest<br />
Festival, Aug. 31-Sept. 2, Long Beach Convention Center;<br />
Fresno Harvest Festival, Sept. 13-15, Fresno Convention<br />
Center; 8th annual Riverside Harvest Festival, Sept. 20-<br />
22, Riverside Convention Center; 2nd annual Ventura<br />
Harvest Festival, Sept. 27-29, Ventura County Fairgrounds;<br />
Sacramento Harvest Festival, Oct. 4-, Sacramento<br />
Community Center; San Diego Harvest Festival,<br />
Oct. 18-20 & 25-27, Convention and Performing Arts<br />
Center; San Francisco Harvest Festival, Nov. 1-3 & 8- 10,<br />
San Francisco Civic Center in Brooks Hall; Los Angeles<br />
Harvest Festival, Nov. 15-17, Los Angeles Convention<br />
Center. For information on all, contact Harvest Festival,<br />
III Liberty St., Petaluma, 94952. (800) 32 1-1213, (707)<br />
778-6300.<br />
Exhibition-The California Duck, Aug. 31-oct. 27. San<br />
Francisco Craft & Folk Art Museum, Landmark Building A,<br />
Fort Mason, San Francisco, 94 123-1382. (415) 775-0990.<br />
Juried exhibit-Artistry in Wood '91, thru Sept. 15.<br />
Sponsored by the Sonoma County Woodworkers Association.<br />
Also, demonstrations on various woodworking topics,<br />
every Saturday and Sunday afternoon. Sonoma County<br />
Museum, 425 7th St., Santa Rosa, 9540 I. (707) 579- 1500.<br />
Show-Woodworking Machinery & Furnjture Supply<br />
Fair, Sept. 28-Qct. 1. Anaheim Convention Center, Anaheim.<br />
For information, contact Arthur Schwartz, 1516 S.<br />
Pontius Ave., Los Angeles, 90025. (800) 826·8257, (213)<br />
477-852 1.<br />
Workshops-Tool clinic, Oct. 5; Building the Norwegian<br />
Pram, Oct. 12-13, 19-20, 26-27. National Maritime Museum<br />
Association, Buildjng 275, Crissy Field, San Francisco,<br />
94129. (415) 929·0202.<br />
Juried shows-Contemporary Crafts Market, Oct. 12-<br />
13, San Diego Convention Center, III W. Harbor Dr., San<br />
Diego; Nov. 1-3, Santa Monica Civic Auditorium, Main St.<br />
at Pico Blvd., Santa Monica; Mar. 20-22, 1992, Fort Mason<br />
Center, Herbst & Festival Pavilions, Marina Blvd. at Buchanan<br />
St., San Francisco. For info, contact Roy Helms &<br />
Associates, 777 Kapiolani Blvd., Suite 2820, Honolulu, HI<br />
968 13. (808) 422-7362.<br />
Seminar- 10th International Wood Machining Seminar,<br />
Oct. 21-23. Berkeley. Contact Continuing Education in<br />
Engineering, UC Berkeley, 2223 Fulton St., Berkeley,<br />
94720. (415) 642-4151.<br />
J uried show and competition-Palm Springs Wildlife<br />
Art Show and Competition, Dec. 7-8. Doubletree Resort<br />
Hotel, Palm Springs. Carving competitions, demonstra·<br />
tions, juried wildlife show. For info, contact John Farrfield,<br />
show chairman, 9340 Gregory St., La Mesa, 91942. (619)<br />
462·0232.<br />
Workshops-Furnituremaking with hand tools using traditional<br />
joinery, weekends. Call for schedule: Debey Zito,<br />
(415) 648-686 1.<br />
Exhibit-Mixed media including wood turning by Ruth<br />
Hardin and furniture by Yuko Shimuzu. Banaker Gallery,<br />
1373 Locust St., Walnut Creek, 94596. (415) 930-0700.<br />
Workshops-Various workshops including Japanese<br />
woodworking, joinery and sharpening. Contact Hida Tool<br />
Co., 1333 San Pablo, Berkeley, 94702. (415) 524,3700.<br />
Solicitation-New artists wanted for the Los Angeles<br />
Craft & Folk Art Museum Research Library. Used by collectors,<br />
curators, architects, deSigners. 0 fec. For<br />
info, contact the Craft & Folk Art Museum Library, do the<br />
May Co., 6067 Wilshire Blvd., Los Angeles, 90036. (213)<br />
934-7239.<br />
COLORADO: Classes-Woodworking and related<br />
classes, year-round. Red Rocks Community College,<br />
13300 W. 6tb Ave., Lakewood, 8040 1. (303) 988-6160.<br />
Show-Denver Harvest Festival, Oct. 4-. Denver Convention<br />
Center. Contact Harvest Festival, III Liberty St.,<br />
Petaluma, CA 94952. (800) 321-1213, (707) 778-6300.<br />
Residency program-Anderson Ranch Arts Center's<br />
Studio Residency Program, Oct. I-May 15. Offers intcrac·<br />
tive environment for furnituremakers and deSigners. For<br />
info, contact Anderson Ranch, PO Box 5598, Snowmass<br />
Village, 81615. (303) 923-3181.<br />
J uried exhibit-7th annual woodworking exhlbition,<br />
Oct. 19-Dec. 11. Entries accepted: Oct. 11-12. Colorado<br />
Springs Pioneers Museum, Colorado Springs. Contact John<br />
Lewis, Woodworkers Guild of Colorado Springs, 918 N.<br />
Royer St., Colorado Springs, 80903. (719) 632·8548.<br />
Show-Colorado Woodworking Show, Nov. 8-10. National<br />
Western Complex-Expo Hall, Humbolt St. &<br />
E. 47tb<br />
Ave., Denver. For info, contact 1516 S. Pontius Ave., Los<br />
Angeles, CA 90025. (800) 826-8257, (213) 477-852 1.<br />
CONNECTICUT: Classes-Bandsaw Boxes with Bill<br />
Gundling, Sept. 14-15; Spindle Turning with Palmer<br />
Sharpless, Sept. 21-22; Fine Finishes for Furniture with<br />
Frank Klaus, Sept. 28-29; Furnituremaking with John<br />
Dunnjgan, Oct. 5-; Router Techniques with Bill Gundling,<br />
Oct. 19; joinery Techniques with Robert March,<br />
Nov. 9- 10; Wood turning with AI Stirt, Nov. 16-17.<br />
Brookfield Craft Center, PO Box 122, Brookfield, 06804.<br />
(203) 775-4526.<br />
Exhibit-56th annual Society of Connecticut Craftsmen<br />
exhjbit, thru Sept. 29. Presentation of certificate to Dennis<br />
Elliott, SCC's master crafter/educator for 1991, July<br />
21. Stamford Museum and Nature Center, 39 Scofield Rd.,<br />
Stamford. Contact SCC, PO Box 615, Hartford, 06142.<br />
(203) 423·4350.<br />
J uried exhibit-New Views, Sept. 29-oct. 12. Deadline:<br />
Aug. 31. Connecticut artists. Guilford Handcrafts, PO Box<br />
589, 411 Church St., Guilford, 06437. (203) 453-5947.<br />
J uried exhibition-23rd annual Celebration of Ameri·<br />
can Crafts, Nov. II-Dec. 23. Contact TI1e Celebration,<br />
Creative Arts Workshop, 80 Audubon St., New Haven,<br />
06510. (203) 562-4927.<br />
DELAWARE: Fellowships-Winterthur Library fellowsltips<br />
available. Application deadHne: Dec. I. For info,<br />
contact Dr. Katharine Martinez, Winterthur Research Fellowship<br />
Program, The Winterthur Library, Winterthur,<br />
19735. (302) 888-4649.<br />
DISTRICT OF COLUMBIA: Exhibition-Awards in<br />
the Visual Arts 10, thru Sept. 2. Hirshhorn Museum and<br />
Sculpture Garden, Smithsonian Institution. Call (202)<br />
357-2700.<br />
Panel discussion-Fine Handcrafted Wood Objects<br />
Marketing Strategies, Sept. 28. Topics: magazine ads, galleries,<br />
craft shows, direct mail, more. Panel members:<br />
Thomas Moser, Judith Lippman, Craig Nutt, Hugh Belton.<br />
Sponsored by Smithsonian Institution. Call (202) 357-3030.<br />
Course-Furniture Conservation Training Program, be·<br />
ginning Aug. 1992. Application deadline: Nov. 30. For<br />
info, contact Training Secretary, CAllMSC, Smithsonian<br />
Institution, 20560. (301) 238-3700.<br />
Exhibition-Marketplace for 19th-Century Crafts, ov.<br />
1-3. Decatur Carriage House, 1610 H St. .W., 20006.<br />
(202) 842-0920.<br />
Courses-Conservation of Gilt Wood, Nov. 4-7; Structural<br />
Conservation of Furniture, Dec. 3-6. For info, contact<br />
Training Secretary, CAlJMSC, Smithsonian Institution,<br />
20560. (301) 238-3700.<br />
Exhibition-Work by JL Heatwole, ov. 10-16. Senate<br />
rotunda of U.S. Capitol. Sponsored by Virgini.a Senator<br />
John Warner.<br />
FL ORIDA: Juried festival-20th annual Riverside Art<br />
Festival, Sept. 28-29. In Riverside Park. For info, contact<br />
Riverside Art Festival Committee, Riverside Avondale<br />
Preservation, 904 IGng St., Jacksonville, 32205. (904)<br />
389·2449.<br />
Festival- 1 7th annual Florida Heritage Festival, Nov.<br />
6-10. South Florida Fairgrounds. Contact Fantasma Productions,<br />
2000 S. Dixie Highway, West Palm Beach,<br />
33401-7714. (407) 832-6397.<br />
J uried exhibition-The Turner's Dance, Jan. 10-Feb.<br />
29, 1992. St. Petersburg. Entry deadline: Oct. 6. National<br />
juried exhjbition of lathe· turned work. For info, contact<br />
Donna Sinicrope, Florida Craftsmen Gallery, 235 3rd St. S.,<br />
St. Petersburg, 3370 1. (813) 82 1-7391.<br />
J uried festival-29th annual Coconut Grove Arts Festival,<br />
Feb. 15-17. Application deadline: Sept. 16. Contact<br />
Coconut Grove Arts Festival, PO Box 330757, Coconut<br />
Grove, 33233-0757. (305) 447·0401.<br />
GEORGIA: Workshops-Japanese woodworkjng by<br />
Toshihiro Sahara One Saturday each montb, year-round.<br />
Contact Sahara Japanese Architectural Woodworks, 1716<br />
Defoor Place N.W., Atlanta, 30018. (404) 355- 1976.<br />
Show-International Turned Objects Show, thru Nov. 10.<br />
Morgan Cultural Center, Madison. For info, contact International<br />
Sculprure Center, 1050 Potomac St. N.W., Washington,<br />
DC 20007. (202) 965-6066.<br />
Conference-Custom Woodworking Business Conference<br />
and ExpoSition, Nov. 22-24. Georgia World Con·<br />
gress Center, Atlanta. For info, contact John Berry, Trade<br />
Show Div., Vance Publishing Corp., 400 Knightsbridge<br />
Pkwy., Lincolnshire, IL 60069. (708) 634-2600.<br />
Competition-Design Emphasis '92 furniture design<br />
competition, call for entries. Sponsored by and held in<br />
conjunction with the International Woodworking Machinery<br />
& Furniture Supply Fair '92, Aug. 21-24, 1992,<br />
Georgia World Congress Center, Atlanta. For info on the<br />
competition, contact Shirley Byron, IWF, 8931 Shady<br />
Grove Court, Gaithersburg, MD 20877. (301) 948-5730.<br />
ILLINOIS: Juried show-Evanston/Glenbrook Hospitals'<br />
7th annual American Craft Exposition & Sale, Sept.<br />
6-8. Reception, Sept. 5. Henry Crown Sports Pavilion,<br />
Lincoln St., Evanston. For info, contact Shelly Robinson,<br />
Winger & Associates, 320 N. Michigan Ave., Suite 1901,<br />
Chicago, 6060 1. (312) 263·4313.<br />
Seminar-Computers for Woodworking, Sept. 13-15.<br />
Chicago. Contact Architectural Woodwork Institute, 2310<br />
S. Walter Reed Dr., Arlington, VA 22206. (703) 671-9100.<br />
Exhibition-New Art Forms, Sept. 19-22. TI1e Navy<br />
Pier, Chicago. Sponsored by Joanne Rapp Gallery/fhe<br />
Hand and the Spirit. For info, contact the gallery, 422<br />
Marshall Way, Scottsdale, AZ<br />
8525 1. (602) 949· 1262.<br />
Exposition-Chkago International New Art Forms Exposition,<br />
Sept. 20-22. Including Social Signals, Sept. 21, a<br />
syposium focusing on issues pertinent to artists and collectors.<br />
Navy Pier, Chicago. For info, contact Coalition of<br />
Creative Organizations, 600 . McClurg Court, Chicago,<br />
6061 I. (312) 787-6858.<br />
Workshop-End use appHcations of adhesives and sea·<br />
lants, Sept. 23-25. The Forum Hotel, Chicago. Contact<br />
The Adhesive and Sealant Council, 1627 K St. N.W., Suite<br />
1000, Washington, DC 20006. (202) 452- 1 500.<br />
Show-Chicagoland Woodworkjng Show, Oct. 18-20. Inland<br />
Expo CenterlIllinois Exhibition Hall, 400 E. Ogden<br />
Ave., Westmont, 60559. Contact 1516 S. Pontius Ave., Los<br />
Angeles, CA 90025. (800) 826-8257, (213) 477-852 1.<br />
Show-20th annual Midwestern Wood Carvers Show,<br />
Nov. 2-3. Belle-Claire Exposition Hall, 200 S. Belt East,<br />
Belleville. For info, contact Don Lougeay, 1830 E. D St.,<br />
Belleville, 62221. (618) 233·5970.<br />
INDIANA: Festival-50th Chautauqua of the Arts festi·<br />
val, Sept. 28-29. On the streets of Madison. For info, contact<br />
Dixie McDonough: (812) 265- 5080.<br />
Show-Tri State Woodcarvers Show, Oct. 26-27. Washington<br />
Square Mall, 1100 S. Green River Road, Evansville.<br />
For info, contact Bob Koressel, 3901 Rose Ave., Evansville.<br />
(812) 424-2622.<br />
IOWA: Show-Woodcarvings by Leif Melgaard, thru<br />
Sept. 2. Vesterheim, Norwegian-American Museum, 502<br />
W. Water St., Decorah, 52101. (319) 382-9681.<br />
Class-Beginning and Intermediate Figure Carving with<br />
Harley Refsal, Sept. 20-22. Vesterheim, Norwegian-Ameri·<br />
can Museum, 502 W. Water St., Decoral1, 52101. (319)<br />
382-968 1.<br />
KENTUCKY: Workshops-Wood turning and joinery<br />
instruction. Contact Jim Hall, Advenrure in Woods, 415<br />
Center St., Berea, 40403. (606) 986-8083.<br />
MAINE: Workshop-Design as Exploration witl1 Milton<br />
Glase, Aug. 25-3 1. Haystack Mountain School of Crafts,<br />
PO Box 87, Deer Isle, 04627. (207) 348-2306.<br />
Class-Post and Beam Building, Sept. 15-20. Shelter Institute,<br />
38 Centre St., Batb, 04530. (207) 442-7938.<br />
Workshops-Various week-long boatbuilding and wood·<br />
working workshops, thru Oct. 12. Including Marine Carv·<br />
ing, Fundamentals of Boatbuilding, Basic Woodworking,<br />
Oar & Paddle Making, Boatbuilding Tools & Techniques,<br />
Joinerwork. Contact WoodenBoat School, PO Box 78,<br />
Brooklin, 04616. (207) 359·4651.<br />
Classes-Woodworking classes for adults and children in<br />
daytime, evenings and on weekends. Portland School of<br />
Art, 97 Spring St., Portland, 04 101. (207) 775-3052.<br />
MARYLAND: Exhibition-Emerging Masters, thru<br />
Sept. 14. Furnirure by students from the Rhode Island<br />
School of Design and Southeastern Massachusetts Univer<br />
Sity. Meredith Gallery, 805 N. Charles St., Baltimore,<br />
21201. (301) 837-3575.<br />
Juried festival-Sugarloafs 15t11 annual Maryland Crafts<br />
Festival, Oct. 11-13. Timonium. For info, contat Deann<br />
Verdier, Sugarloaf Mountain Works, 20251 Cenrury Blvd.,<br />
Germantown, 20874. (301) 540-0900.<br />
Show-BaltimorelWashington Woodworking Show, Oct.<br />
25-27. Pikesville Armory, 610 Reistertown Rd., Baltimore,<br />
21208. For info, contact 1516 S. Pontius Ave., Los<br />
Angeles, CA 90025. (800) 826-8257, (213) 477-8521.<br />
Conference-Chesapeake Area Wood turner's Conference,<br />
Oct. 25-27. Maryland Hall for the Creative Arts,<br />
Constitution and Greenfield, Annapolis. For info, call<br />
(301) 263-5544.<br />
MASSACHUSETrS: J uried exhibition-Functional<br />
and practical srudio furniture with wltich to live and<br />
work, Sept. 28-Nov. 16. Contact Julie Mansfield, Society<br />
of Arts and Crafts, 175 Newbury St., Boston, 021 16. (617)<br />
266- 1810.<br />
Workshops-Finish Carpentry, Sept. 30-0ct. 4; Cabinetmaking,<br />
Oct. 7-1 1. The Heartwood School, Johnson Rd.,<br />
Washington, 01235. (413) 623-6677.<br />
C1asses-Woodworking classes, throughout most of the<br />
year. Boston Center for Adult Education, 5 Commonwealth<br />
Ave., Boston, 021 16. (617) 267·4430.<br />
Workshop-Rustic Furniture witb Daniel Mack, Oct. 12.<br />
Horizons, 374 Old Montague Rd., Amherst, 01002. (413)<br />
549-484 1.<br />
Class-Timber Framing: A Traditional Approach with Jack<br />
Sobon. For info, contact Jack Sobon, Shaw Rd., Windsor,<br />
01270. (413) 684-3223.<br />
Show-WOOdworking World New England show, Oct.<br />
18-20. Eastern States Exposition Center, 1305 Memorial<br />
Ave., West Springfield, 01089. Contact Woodworking As-<br />
106 Fine Woodworking
ALL FREUD ROUTER 81TI, & SeA PER cunERS ARE 30"'0 OFF OF LlSTI<br />
Shape a Career in Wood<br />
looking for a career that rewards creativity<br />
and traditional skills? Investigate the<br />
School for Professional Crafts! We<br />
offer a two-year certificate program in<br />
Woodworking taught by nationally<br />
recognized professionals. For more<br />
information, call or write for our<br />
Professional Crafts catalog.<br />
Worcester Center 25 Dept Sagamore FW for Crafts<br />
Worcester, 01605 MA Rd.<br />
508/753-8183<br />
R EADER SERVICE NO. 107<br />
@ HITACHI<br />
TRB 112 HP PLUNGE ROUTER S<br />
TR12 3 HP PLUNGE ROUTER<br />
CBFB B 1 2" SLIDE COMPOUND MITER IV<br />
24T BlD<br />
117<br />
168<br />
448<br />
CALL<br />
OUR<br />
FOR<br />
AD·<br />
PRICES<br />
LOWEST<br />
ON<br />
PRICES<br />
ANY TOOLS NOT SEEN IN<br />
ANYWHERE!<br />
WOOD LOVE<br />
ONE-STEP WOOD FINISH<br />
FINALLY ' ALL NATURAL, NON-TOXIC<br />
Easy to Use<br />
Repels Dirt/Water<br />
Penelrates<br />
• Deepens Patina<br />
Fills and Stabilizes All Wood<br />
• Helps Re-Expand Old Wood<br />
1/3 POUND= $8.50 + $1 .50 Shipping<br />
CASH/CHECK/MONEY ORDER<br />
Country<br />
WOOD LOVE'" by<br />
Preserves Wood Naturally Young<br />
Sue Reling Sales<br />
P .0.Box 4132<br />
Simi Valley. CA 93093<br />
VISIT THE SHOW NEAR YOU!<br />
READER SERVICE NO. 6 READER SERVICE NO. 32<br />
• <strong>Free</strong> Workshops . Prizes ·<br />
• Hundreds of Products ·<br />
• Seminars by Mastercraftsmen •<br />
DLRlDIST/SHOPIOEM<br />
Inquiries Inved<br />
See the Widest Variety of<br />
Woodworking Products<br />
COMING<br />
All Under<br />
IN<br />
One Roof!!<br />
HUNDREDS OF ITEMS! NEW PRODUCTS!!<br />
Machinery · Power &<br />
1991-1992<br />
Hand Too ls · Supplies<br />
Atlanta<br />
North Jersey<br />
Baltimore<br />
No. California<br />
Boston<br />
Philadelphia<br />
Char10tte<br />
Portland<br />
Chicago<br />
Richmond<br />
Columbus<br />
Sacramento<br />
Denver<br />
Seattle<br />
Detroit<br />
So. California<br />
Ft. lauderdale<br />
St. louis<br />
Indianapolis<br />
Tampa<br />
Kansas City<br />
Twin Cities<br />
• Milwaukee • Ventura<br />
mailing list for<br />
FREE Brochure & Discount Cou pons<br />
1-800-826-8257 or 21 3-4n-8521<br />
Call NOW to be placed on<br />
Phone Hours 8-5 Pacific Time Weekdays<br />
READER SERVICE NO. 68<br />
How Smooth Does Our<br />
Teflon:Coated Saw Blade Cut?<br />
The WIZARD ELiTET. cuts<br />
so smooth the wood has a<br />
baby-smooth finish.<br />
Coated with non-stick<br />
DuPont Teflon to keep the<br />
blade clean and free of<br />
build-up.<br />
WIZARD ELITE features<br />
specially sharpened carbide<br />
FREE SHARPENING<br />
tips to provide smoother<br />
and easier cuts in hard or<br />
soft wood.<br />
Try WIZARD ELITE and<br />
01<br />
"feel" what we mean.<br />
Teflon is a registered trademark of the DuPont Corp.<br />
Return to laclory within<br />
I·year 01 date purchase.<br />
Coupon enclosed wilh blade.<br />
READER SERVICE NO.<br />
45<br />
If you're not 100 percent<br />
satisfied, we'll refund your<br />
money with no questions<br />
asked. For more information<br />
and a dealer near<br />
you call: 800/828-9000<br />
or 716/778-8588.<br />
UNITED STATES SAW<br />
<br />
The Professional's Choice<br />
Burt, New York 14028<br />
September/October 199 1 107
Events (continued)<br />
sociation of North America, PO Box 706, Plymouth, NH<br />
03264. (800) 521-7623, (603) 536-3768.<br />
Class-Basic Oval Box Construction with Clifford Myers,<br />
ov. 2-3. Hancock Shaker Village, PO Box 898, Pittsfield,<br />
01202. (413) 443-0188.<br />
MICHIGAN: Show-Metro-Detroit Woodworking<br />
Show, Oct. 4-6. Michigan Fairgrounds-Community Arts<br />
Exhibit Hall, 1120 W. State Fair Ave., DetrOit, 48203. For<br />
info, contact 1516 S. Pontius Ave., Los Angeles, CA 90025.<br />
(800) 826-8257, (213) 477-852 1.<br />
MINNESOTA: Class- 1 4th annual KHn Drying sbort<br />
course, Sept. 9-13. University of Minnesota, St. Paul. Contact<br />
Harlan Petersen, Department of Forest Products, Uni·<br />
versity of Minnesota, 2004 Folwell Ave., St. Paul, 55108.<br />
(612) 624-3407.<br />
Show-Twin Cities Woodworking Show, Sept. 27-29.<br />
Minnesota State Fairgrounds, Empire Commons Building,<br />
Snelling & Como Aves., St. Paul, 55108. For info, contact<br />
1516 S. Pontius Ave., Los Angeles, CA<br />
90025. (800) 826-<br />
8257, (213) 477-852 1.<br />
Show-Minneapolis Harvest Festival, Oct. 11-13. Minneapolis<br />
Convention Center. For info, contact Harvest Festival,<br />
111 Libert St., Petaluma, CA 94952. (800) 32 1-1213,<br />
(707) 778-6300.<br />
MISSOlJRI: Fair-Woodcraft fair, Oct. 5. Demonstrations,<br />
exhibits Oct. 6. Paxton Beautiful Woods, 63 11 St.<br />
John, Kansas City, 64123. (816) 483-0659.<br />
Competition-Turned ViSions, May 8-June 27. Deadline:<br />
Sept. 20. Contact Craft Alliance, 6640 Delmar, St.<br />
Louis, 63130. (314) 725-1177.<br />
MONTANA: Workshop-Woodturning with Richard<br />
Raffan, Oct. 7- 13. For info, contact Bud Pearson, Northern<br />
Rockies Woodworking Guild, 316 W. Beall, Bozeman,<br />
597 15. (406) 587-3989.<br />
NEBRASKA: Class-Woodcarviog class with Desiree<br />
Hajny, Oct. 11-13. Midwest Woodworkers Supply, 13209<br />
1 St., Omaha, 681 37. (402) 330-5444.<br />
NEVADA: Show-Las Vegas Harvest Festival, Oct. 11-<br />
13. Cashman Field Exhibition Center. For info, contact<br />
Harvest Festival, III Liberty St., Petaluma, CA 94952.<br />
(800) 321- 1213, (707) 778-6300.<br />
Show-Reno Harvest Festival, Oct. 25-27. Reno Livestock<br />
Events Center. For info, contact Harvest Festival,<br />
III Liberty St., Petaluma, CA 94952. (800) 32 1-1213,<br />
(707) 778-6300.<br />
NE W HAMPSHIRE: Demonstration-lamioating<br />
techniques by Jere Osgood, Sept. 21. Following meeting<br />
of Guild of ew Hampshire Woodworkers. For info, contact<br />
John Skewes, 132 Drinkwater Rd., Kensington. (603)<br />
778-7360.<br />
Oasses-Classes in fme arts and snldio arts. Manchester<br />
Institute of Arts and SCiences, 114 Concord St., Manchester,<br />
03104.<br />
Classes-Various woodworking classes, year-round. including<br />
antique repairs, carving canes & walking stiCks,<br />
small boxes, kitchen utensils, lathe· turning, hand-carving,<br />
more. Contact n,e Hand & I, PO Box 264, Route 25,<br />
Moultonboro, 03254. (603) 476-5121.<br />
NE W JERSEY: Show-Woodworking World Morristown<br />
show, Sept. 27-29. Mennen Sports Arena, 53 E.<br />
Hanover Ave., Morristown, 07962. Contact Woodworking<br />
Association of North America, PO Box 706, Plymouth, NH<br />
03264. (800) 52t-7623, (603) 536-3876.<br />
Juried exhibit-Waterloo Arts<br />
and Crafts Festival, Sept.<br />
28-29. Waterloo Concert Field, Waterloo Rd., Stanhope.<br />
Contact Stella Show Management Co., 105 Shady Lane,<br />
Randolph, 07869. (201) 895-3356.<br />
NE W MEXICO: Classes-Woodworking classes. Northern<br />
New Mexico Community College, EI Rito, 87520.<br />
(505) 58 1-4501.<br />
Juried show-Southwest Arts and Crafts Festival, ov.<br />
7- 10. Manual Lujan Buildiog, New Mexico State Fairgrounds.<br />
For info, contact Southwest Arts and Crafts Festival,<br />
525 San Pedro N.E., Suite 107, Dept. P, Albuquerque,<br />
87108. (505) 262-2448.<br />
NEW YORK: Workshops-Making St. lawrence Skiff<br />
Oars with Bill Smithers, Sept. 14-15; Boat Restoration and<br />
Refinishing Techniques with Philip Gillesse, Sept. 21-22.<br />
Antique Boat Museum, 750 Mary St., Clayton, 13624.<br />
(315) 686-4104.<br />
Classes-Fall woodworking with Maurice Fraser and Bill<br />
Gundling, beginning Sept. 16. <strong>Free</strong> demonstrations, Sept.<br />
11. For info, contact Craft Student League, 610 Lexiogton<br />
Ave. at 53rd, New York City. (212) 735-9732.<br />
Show-14th annual New York Renaissance Festival, thru<br />
Sept. 15. Sterliog Forest, Tuxedo. Weekends only. For<br />
iofo, contact Creative Faires Ltd., PO Box 1688, Westhampton<br />
Beach, 11978. (516) 288-2004.<br />
Exhibition-Swiss Folk Art: Celebrating America's<br />
Roots, Sept. 26-Jan. 1. Contact Museum of American Folk<br />
Art, Two Lincoln Sq., ew York City, 10023-6214. (212)<br />
595-9533.<br />
Exhibit-Group exhibition of art furniture, Sept. 26-0ct.<br />
26. Peter Joseph Gallery, 745 5th Ave., ew York City,<br />
10151. (212) 751-5500.<br />
Workshops-Japanese Hand Tool Workshops with Robert<br />
Meadow, Sept. 28-29, Oct. 12-13, Nov. 16-17. The<br />
Luthierie, 2449 W. Saugerties Rd., Saugerties, 12477.<br />
(914) 246-5207.<br />
Juried show- 17th annual Fall Festival Arts & Crafts<br />
Show, Oct. 12-13. For information, contact Fall Festival<br />
Art Committee, PO Box 808, Ellicottville, 1473 1. (716)<br />
938-6794.<br />
Show-Woodworking World Albany show, Oct. 25-27.<br />
New Scotland Ave. Armory, 130 Scotland Ave., Albany,<br />
12208. Contact Woodworking Association of North<br />
America, PO Box 706, Plymouth, NH 03264. (800) 521-<br />
7623, (603) 536- 3876.<br />
Classes-Various beginniog and advanced woodworking<br />
classes, iocludiog woodturttiog, wood finishiog, router<br />
techniques, marquetry, tool sharpeniog, furniture repair<br />
and more. Constantine, 2050 Eastchester Rd., Bronx,<br />
10461. (212) 792- 1600.<br />
Juried show-Woodworking expo, Nov. 8-9. Ballston<br />
Spa. Entry deadline: Oct. 25. Sponsored by Northeastern<br />
Woodworkers Association and Curtis Lumber Co. Contact<br />
Dave Bielawski, Curtis Lumber, 885 Rte. 67, Ballston Spa,<br />
12020. (518) 885-531 1.<br />
Mee tiJlgs- ew York Woodturners ASSOCiation, first<br />
Tuesday of each month. Woodturning techniques and exhibits<br />
also. n,e Craft Student League, YWCA, 610 lexington<br />
Ave., New York City.<br />
Show-Woodworking World Central New York State<br />
show, Nov. 1-3. New York State Fairgrounds, Horticulture<br />
Building, Syracuse, 13209. Contact Woodworking Association<br />
of North America, PO Box 706, Plymouth, NH<br />
03264. (800) 521-7623, (603) 536-3876.<br />
Exhibit-The Art of the Keyboard: Rediscoveriog Pianos<br />
and Organs, thru Jan. 15. New York State Museum, Albany.<br />
For information, contact University of the State of<br />
New York, State Education Dept., Albany, 12234. (518)<br />
474- 1201 .<br />
NORTH CAROLINA: Workshop-Country Living,<br />
Sept. 2-{). Country Workshops, 90 Mill Creek Rd., Marshall,<br />
28753. (704) 656- 2280.<br />
Clas-Furniture: Quick & Fun with Douglas Prickett,<br />
WOODWORKER II Best on TABLE SAW<br />
With this ONE ALL PURPOSE blade 40 Teeth you can<br />
SMOOTH RIP & CROSSCUT l' - 2' ROCKHARDS and<br />
SOFTWOODS with smooth-as-sanded surface _ PL Y<br />
VENEERS oak/birch crosscut with NO BODOM SPLINTER.<br />
Mostly l/S kerf 15°, ATB and 20° face hook (easyfeed).<br />
DOUBLE HARDER and 40% STRONGER CARBIDE.<br />
Ends blade changing (does rip, combo and crosscut).<br />
Ends scratchy saw cuts (for the rest of your life).<br />
Ends second step finishing (jointing and sanding).<br />
Ends cutting 1/16" oversize to allow for RESURFACE.<br />
Buy and sharpen ONE blade instead of 3, 24T rip, 50T<br />
Combination, BOT Crosscut.<br />
Strongly recommend our .001 flat large stiffenerdampener<br />
against outside of blade for smoothest, quietest,<br />
cuts by this and any other blade.<br />
Use 30T if ripping mostly 2' - 3' hardwoods.<br />
• Side wobble held .001- others .0041.01 0 is common!<br />
RAISE for THICK woods, LOWER for THIN woods and<br />
perfect cut everything! All 5/8' holes, unless otherwise noted.<br />
LEITZ,elc. FOR BETTER CUTS!<br />
WOODWORKER I Best on RADIAL SAW<br />
(tablesaw too) This ALL PURPOSE blade gives scratch free<br />
POLISHED cuts on all materials RIP or CROSSCUT up to 2'.<br />
All 60T and 3/32' THIN kerf 20°- ATB and 5° face hook.<br />
DOUBLE HARDER and 40% STRONGER carbide.<br />
• THIN KERF:<br />
Saves 1/3 wood loss on each cut, radial or table.<br />
Feeds easy when used for moderate rip and crosscut on<br />
table saw.<br />
Reduces "JUMP IN" greatly for better "PULL-CONTROL'.<br />
Practically eliminates bottom splinter on RADIALCROSSCUT.<br />
Totally stops ALL bottom and top splinter on ply veneers<br />
in push-cut mode on RADIAL.<br />
• Our STIFFENER STRONGLY RECOMMENDED AGAINST<br />
outside of blade only for best cuts.<br />
Made and serviced in USA for your benefit.<br />
14" x 60T x 1" 1/8'<br />
12" x 60T x 1 " or 5/B"<br />
10' x 60T x 5/B'<br />
g' x 60T x 51B'<br />
B' x 60T x 51B'<br />
B-1I4" x 40T x 5/B'<br />
RY081 RA200 TS200 SEARS<br />
HITACHI PSMS<br />
For HOLZ-HER VERTICAL PANEL SAW For<br />
List<br />
SALE<br />
$224 $149<br />
19S 129<br />
162 119<br />
156 109<br />
150 99<br />
136 89<br />
MAKITA 5008 NBA<br />
PORTER CABLE 368-1<br />
STREIBIG<br />
DURALINE Hi-AT For TABLE and RADIAL SAW<br />
(very good on chop saw too!) STOP SPLINTERING<br />
those SPLINTERY OAKS, HAflDWOOD VENEERS and<br />
thin 2 SIDE LAMINATES ON PARTICLE BOARD.<br />
FOR FASTER FEED RATES AND<br />
SPLINTER CONTROL<br />
MORE ABSOLUTE<br />
DURALINE Hi-AT<br />
Nole: Fine Woodworking<br />
Editorial Nov./Oec. 1988<br />
No. 73 pg. 65 S. N.<br />
recommendsl1i9.!J.<br />
allernating lop bevel (A TB)<br />
thin kerfs and D blade<br />
stiffeners for smoolhest<br />
cuts on RADIAL SAW,etc.<br />
20%<br />
Jim Forres\, President and<br />
designer microscoping cutting edge.<br />
AII 5/S" hole. Boring up to 1-1/4" $7.50 ex1ra<br />
Larger holes - time basis. Shipping $4.00.<br />
OFF & FREE STIFFENER<br />
with ANY 2nd Blade or Dado<br />
B' x BOT 1/8 & 3/32 $202 14' x BOT $232<br />
List SALE<br />
List SALE<br />
14'x40T x1' $215 $139 9' x 40T 5146 99<br />
14' x 30T x l' 195 129 30T 1 25 89 New<br />
12' x40T x1' lB3 119 "B-1/4"x40T 3132 136 89<br />
g' x BOT 1/8 3/32 207 100T 266<br />
12' x30T x1' 162 109 B"x40T3132 136 89<br />
10' x BOT 1/8 & 3132 207 16' x BOT 262<br />
10'x40T 1I8 &3132 156 109 30T3/32 115 79 DADO KING MULTITOOTH LASERCUT DADO SETcu!s ALL 1/4' - 13/16'<br />
12"xBOT 1' 1/8 212 100T 294<br />
flat bottom grooves WITH or CROSSGRAIN all woods,OAK, BIRCH,<br />
30T 1/8 &3132 135 89 7-1/4" x30T3132 112 49<br />
VENEER PLYS,and MELAMINE. NO SPLINTERING due to unique 4T Neg.<br />
lOOT<br />
SIS' holes, boring to 7' x 30T 3132 1 1 2 49<br />
1-1/4' + $7.50 - SHIPPING $4.00 ••<br />
x l' 253 Above l'<br />
<br />
bore std.<br />
Face fillers and 24T outside saws. NOTHING LIKE IT IN THE USA!!<br />
All CARBIDE is THE HARDEST OF THE C-4 grades<br />
NEW For Sears Tablesaw<br />
..<br />
and 40% STRONGER, NOT WEAKER!!<br />
blade, FREUD, PIRANHA, JAPANESE<br />
WT"<br />
For 50%<br />
•••••• • , 10<br />
f-:---::-:=====-==...,-".,-.,--,----,-,--------j ~<br />
300% longer life!<br />
Use our large liS' DAMPENER<br />
., CHOPMASTER sERIES FOR MITER SAWS<br />
STIFFENERS, against one side<br />
SALE! 15% OFF<br />
for tight, smooth, splinter-free miter-joints.<br />
and larger available<br />
06"<br />
O I<br />
S' - 5/B' Bore LiS1 $299 1 SALE $254 10' - 5/B' Bore Lis1 53621 SALE $308 . . NEW AVAILABLE SIZES.<br />
- $25 Parallel and flat to .001<br />
list<br />
5" - 24 Stops vibration , flutter,<br />
cutting noise and blade ring.<br />
4" - 21 Tryable and RETURNABLE.<br />
Full cash refund.<br />
<strong>Free</strong> dampener or $10.00 off with any 2nd<br />
5/S'<br />
blade.1<br />
.. SALE<br />
SAW Hitachi B-1/2 " DeWall S-1/2 " B-1/2 " x 60T x SIB " $179 $ 99<br />
220mm x<br />
r:y1<br />
30mm Bore 300mm Delta 9 ' x BOT SIB ' 204 109<br />
Ryobi-Makita 10' x SOT x 5/S' 207 119<br />
Hitachi 12<br />
holes bore to 1-V4' $7.50 ' SOT x 1" 229 129<br />
--"""- ,----.. ..=... 1"
SEPTEMBER 28 -<br />
OCTOBER 1,1991<br />
Anaheim Convention Center<br />
Anaheim, California<br />
Saturday through Tuesday -10 am -6 pm<br />
Exhibit Hours:<br />
·SEE TECHNOLOGY in action<br />
-COMPARE and services the latest products<br />
-LEARN industry's vital most information comprehensive at the<br />
conference program<br />
The World<br />
Is Coming to<br />
Ariaheim<br />
NEW IN '9 1! SPECIA L MA CHINERY<br />
ORIENTATION PROGRAMS<br />
foreign<br />
Over<br />
countries. from the and 700 exhibitors U.S. 20<br />
ery<br />
Miles<br />
and showcasing working machin<br />
of<br />
supplies<br />
aisles<br />
ture manufacturing, for cabinet, the woodworking, bedding, upholstery<br />
and related<br />
furni<br />
industries.<br />
Special Woodworking Fair Night<br />
at Disneyland.<br />
Pre-Register and Save<br />
Send $5.00 and the pre-registration form<br />
below by September 10th and your badge<br />
will be mailed to you. ON-SITE REGIS<br />
TRATION (REGISTRATION RECEIVED<br />
AFTER SEPTEMBER 10th) is $1 5.00.<br />
Act now and save $10.00.<br />
Open to the trade only. No one under 16 admitted.<br />
Sponsored by the Association of Woodworking and<br />
Make check payable in U.S. dollars to<br />
Furniture<br />
Woodworking,<br />
Suppliers.<br />
Machinery<br />
Woodworking<br />
& Furniture<br />
Fair.<br />
Supply Fair<br />
:<br />
r-------------------------------------------------------------------------------------------,<br />
Woodworking, Machinery Primary Services Primary Produts (Check ne that best describes<br />
:cJ oscriPtion<br />
k<br />
I & Furniture Supply Fair<br />
(Check One)<br />
your company s products).<br />
G 0 PresidenllOwner<br />
D 0 Manufaclurer, Other 5 0 Cabinels<br />
:<br />
<br />
A 0 ManufaclUrer, Wood 1 0 Furniture, Wood 130 Wood Products such as<br />
1516 S. Pontius Ave. B Manufaclurer, 2 Furniture, Metal &<br />
W<br />
Other Doors, Windows,<br />
I Los Angeles, CA 90025<br />
Sashes, Toys, Boats.<br />
C 0 Manufaclurer, Cabinets 4 Bedding<br />
Pallels, Caskets and<br />
Please send information on<br />
Musical lnslrumenls<br />
o 0 0 Conference Program E 0 Dealer/Distributor<br />
140 Equipment and Tools<br />
6 Manufactured Homes<br />
150 Raw Materials<br />
Hotel F 0 Other: (please specify) 7 0 Millwork<br />
160 Finishing Products<br />
8 0 Architectural Woodwork,<br />
o Air Travel<br />
170 Textiles, Fabrics<br />
including Molding<br />
180 Publication, Consulling,<br />
Note: This form is for pre-registration only. Return complet<br />
9 0 Hardwood Dimension<br />
ed form and $5.00 by Sept. 10th. After Sept. 10, 1991 you<br />
will have to register on-site and pay $15.00.<br />
Please photocopy this for each additional registrant.<br />
Upholslered Products 3 Partilions and Fixtures<br />
and Flooring<br />
100 Plywood - Veneer<br />
110 Industrial Wood Products<br />
120 Upholstered Products<br />
Teaching or Other Service:<br />
(please specify)<br />
190 Other: (please specify)<br />
H Senior ExecutiveN. P.<br />
I<br />
General Manager<br />
J Purchasing<br />
K 0 Plant Manager/Sup!.<br />
L 0 Planllindustrial Engineer<br />
M 0 Foreman/Production Exec.<br />
N Maintenance/Service<br />
o o Designer<br />
P 0 Sales<br />
Q 0 ConsullanllEducator<br />
R 0 Other: (please specify)<br />
L _________ ______ _<br />
READER SERVICE NO. 95<br />
September/October 1991 109
Events (continued)<br />
Sept. 2-6. Penland School, Penland, 28765-0037. (704)<br />
765-2359.<br />
Exhibits-Celebrate Folk Art, Sept. 7; annual members'<br />
exhibit, tbru Dec. l. Both at Folk Art Center, Blue Ridge<br />
Pkwy., Asheville. Sponsored by Southern Highland Handicraft<br />
Guild. For info, contact the guild at PO Box 9545,<br />
Asheville, 28815. (704) 298-7928.<br />
Workshops-Wood Carving with Tom Wolfe, Sept. 7-8;<br />
Marquetry with Claude Edwards, Sept. 21-22. Blue Ridge<br />
Hearthside Craft Center, Highway 105, near entrance to<br />
Seven Devils. For info, contact the craft center, Route 1,<br />
Box 738, Banner Elk, 28604. (704) 963- 5252.<br />
Workshop-Woodtu rning with Rodger Jacobs, Sept. 28.<br />
Hamilton-Jacobs Studios, Route 1, Box 575-A, Newland,<br />
28657. (704) 733-9819.<br />
Workshops-Woodworking and woodcarving workshops,<br />
year-round. Including woodcarving, woodturning,<br />
Windsor chairmaking, bowl turning, more. Contact John<br />
CampbeU Folk School, Route 1, Box 14A, Brasstown,<br />
28902. (800) 562-2440, (704) 837-2775.<br />
Show-Woodworking World Carolina show, Oct. 4-6.<br />
M.e. Benton Convention and Civic Center, 501 W. 5th St.,<br />
Winston-Salem, 27101. Contact Woodworking Association<br />
of North America, PO Box 706, Plymouth, NH<br />
03264. (800) 521-7623, (603) 536-3876.<br />
Juried show-Blue Ridge Hearthside Crafts Show, Oct.<br />
11-13. Blue Ridge Hearthside Craft Center, Highway 105,<br />
near entrance to Seven Devils. For info, contact the craft<br />
center at Route 1, Box 738, Banner Elk, 28604. (704)<br />
963-5252.<br />
Meetings-North Carolina Woodtumers, second Saturday<br />
of every month. Also, woodturning workshops for all<br />
levels. For info, contact Eric Hughes, Route 3, PO Box<br />
300, Conover, 28613. (704) 464-5611.<br />
Fair-Guild Fair '9 1, Oct. 17-20. Asheville Civic Center.<br />
Call the Southern Highland Handicraft Guild at (704)<br />
298-7928.<br />
Seminar-Project Management, Nov. 15-16. Charlotte.<br />
Contact Architectural Woodwork Institute, 2310 S. Walter<br />
Reed Dr., Arlington, VA 22206- 1199. (703) 671-9100.<br />
OHIO: Show-Greater Columbus Woodworking Show,<br />
Sept. 13-15. Ohio Expo CenterlFairgrounds, Lausche<br />
Building, 600 E. 17th Ave., Columbus, 43211. For info,<br />
contact 1516 S. Pontius Ave., Los Angeles, CA 90025.<br />
(800) 826-8257, (213) 477-852 1.<br />
OREGON: Show-Cat theme multimedia show, tbru<br />
Sept. 15. Including wood turning. Made in Jefferson Gallery,<br />
3259 Jefferson Scio Dr., Jefferson, 97352. (503)<br />
327-2543.<br />
Meetings-Guild of Oregon Woodworkers, third Friday<br />
of every month. For location, contact the Guild at PO Box<br />
1866, Portland, 97207. (503) 293-5711.<br />
Show-Oregon Woodworking Show, Nov. 1-3. Memorial<br />
Coliseum Complex-Convention Hall, Williams and<br />
Weidler Sts., Portland, 97227. For info, contact 1516 S.<br />
Pontius Ave., Los Angeles, CA 90025. (800) 826-8257,<br />
(213) 477-852 1.<br />
PENNSYLVANIA: Juried show-Long's Park Arts &<br />
Crafts Festival, Aug. 31-Sept. 2. Lancaster. Contact Long's<br />
Park Arts & Crafts Festival, PO Box 5153, Lancaster, 17601.<br />
Workshops-Authentic Shaker Furniture with John Kassay,<br />
Sept. 14-15; Build a Sack Back Windsor with Michael<br />
Dunbar, Sept. 21-25; Build a Lowboy with Gene Landon,<br />
Sept. 28-0ct. 2; Wood finishing and Antiques with<br />
George Frank, Oct. 5-6; Woodcarving with Elmer Jumper,<br />
Oct. 12-13; Spindle Turning with Palmer Sharpless, Oct.<br />
19-20; Joinery Techniques, Finishing Techniques and<br />
Dovetail Joinery with Frank Klausz, Oct. 26-27; Chip<br />
Carving with Wayne Barton, Nov. 2-3; Traditional Shaker<br />
Oval Boxes with John Wilson, Nov. 8-9; The Tuning, Care<br />
and Use of Old Tools with Mike Dunbar, Nov. 16-17;<br />
Painted Furniture with Eli Rios, Nov. 23-24. For more<br />
info, contact Olde Mill Cabinet Shoppe, 1660 Camp Betty<br />
Washington Rd., York, 17402. (717) 755-8884.<br />
Classes-Windsor chairmaking, all levels, weekly and<br />
weekends. Contact Jim Rendi, Philadelphia Windsor Chair<br />
Shop, PO Box 67, Earlville, 19519. (215) 689-4717.<br />
Exhibition-8th annual Studio Days '9 1, Sept. 20-28.<br />
Chester Springs StudiO, 1668 Art School Rd., PO Box 329,<br />
Chester Springs, 19425. (215) 827-7277.<br />
Show-Philadelphia Woodworking Show, Sept. 20-22.<br />
Philadelphia Armory, 3205 Lancaster Ave., Philadelphia.<br />
For info, contact 1516 S. Pontius Ave., Los Angeles, CA<br />
90025. (800) 826-8257, (213) 477-8521.<br />
Juried exhibitions-The Dining Experience/A Craft<br />
Expression, thru Sept. 22. Also, Re-Awakening: A Celebration<br />
of Spring, May 2-June 7; deadline: Jan. 27. Also,<br />
Stories: The Narrative Art in Contemporary Crafts, Aug.<br />
8-Sept. 20, 1992; deadline: Mar. 2. Luckenbach Mill Gallery,<br />
459 Old York Rd., Bethlehem, 1SOI8. (215) 691- 0603.<br />
Show-Woodworking World Philadelphia Area show,<br />
Oct. 11-13. Valley Forge Convention Center, N. Gulph<br />
and First Aves., King of Prussia, 19406. For info, contact<br />
Woodworking Association of North America, PO Box 706,<br />
Plymouth, NH 03264. (800) 521-7623, (603) 536-3876.<br />
Show and competition-8th annual William Rush<br />
Woodcarving and Wildlife Art Show & Sale, Nov. 2-3.<br />
Penn State, Delaware County campus, Lima. For deadline<br />
and info, contact Bob Young, 736 Oak Way, Havertown,<br />
19083. (215) 446-8945.<br />
Workshops-Woodturning workshops for all ages and<br />
skill levels. Including applications of tool design, principles<br />
of sharpening, finishing, more. Call for dates. David<br />
EUsworth School of Woodtuming, Fox Creek, 1378 Cobbler<br />
Rd., Quarkertown, 18951. (215) 536-5298.<br />
Fair-State Craft Market, Nov. 9-10. Memorial Hall at<br />
York Fairgrounds, York. Work by members of the Pennsylvania<br />
Guild of Craftsmen. For info, contact Pennsylvania<br />
DeSigner-Craftsmen, PO Box 718, Richboro, 18954.<br />
(215) 860-073l.<br />
Show-Woodworking World Central Pennsylvania show,<br />
Nov. 15-17. Pennsylvania Farm Show Complex, West<br />
Bldg., 2301 N. Camerson St., Harrisburg, 171 10. Contact<br />
Woodworking Association of North America, PO Box 796,<br />
Plymouth, NH 03264. (800) 521-7623, (603) 536-3768.<br />
TENNESSEE: Show-Smoky Mountain Sculptures in<br />
Wood show, Oct. 5-6. Chilhowee Park, Kerr Building,<br />
Golden Gloves Arena. Woodcarving competition with 17<br />
categories. Contact Jack or Carole Williams, 2608 Reagan<br />
Rd., Knoxville, 37931.<br />
Juried exhibitions-From AU Directions, Oct. 17-Dec.<br />
14. Everything but the Kitchen Sink: Artists and the Kitchen,<br />
New Forms, New Functions, Feb. 27-May 16, 1992.<br />
Entry deadline: Dec. 12. Artowmont School of Arts and<br />
Crafts, PO Box 567, Gatlinburg, 37738. (615) 436-5860.<br />
Juried shOw-5th annual Master Woodworkers show,<br />
Oct. 25-27; Candy Factory, Knoxville. Furniture and accessories.<br />
For deadline and info, contact Michael Perrin,<br />
Route 2, Box 195-A, Blaine, 37709. (615) 933-8436.<br />
TEXAS: Show- 7th annual East Texas Woodcarving<br />
show, Sept. 13-14. Longview Mall, Longview. Contact<br />
W.A. Chronister, PO Box 244, Gladewater, 75647. (903)<br />
845-4334.<br />
Competition and show-Los Amigos del Mesquite annual<br />
convention, competition and trade show, Sept. 13-15.<br />
Hyatt Hotel, Austin_ For info, contact Herb Nordmeyer,<br />
Los Amigos del Mesquite, PO Box 68, Knippa, 78870.<br />
(512) 934-2616.<br />
Show-Woodcarving show and sale, Oct. 18-19. Ridgmar<br />
Mall, Ft. Worth. Sponsored by Ft. Worth Woodcarvers. For<br />
info and an application, contact Dan Mingea, 1805 Thomas<br />
Place, Ft. Worth, 76107. (817) 731-9565.<br />
rlllfD'<br />
SUNHILL MACHINERY<br />
Portable Dust Collection Systems<br />
,<br />
(<br />
11&"o<br />
I<br />
NW20 PLANER<br />
... our most popular<br />
planer since<br />
1981 ! Equipped<br />
with American<br />
From $2395<br />
motors in choice<br />
of single or<br />
three phase,<br />
these planers feature three knife heads, segmented<br />
infeed roller and chipbreakers, and gear drive to the<br />
feed rollers. These planers will easily plane hardwood<br />
to less than Va" thick. In fact, when we demonstrate<br />
them at shows and in our showroom we<br />
routinely plane stock to less than V16" to show<br />
our potential customers just how good they<br />
are. We invite you to try this with any<br />
other planer, even<br />
twice as much !<br />
UFO-90<br />
$199 $295<br />
UFO-101<br />
Regular Two 4" Inlets<br />
Special<br />
UFO-102B<br />
Single or<br />
Phase,<br />
Three<br />
1883 CFM,<br />
1 HP, Single Phase, 2<br />
610 CfM, 4" Inlet<br />
HP, Single Phase,<br />
$339 $435<br />
3 HP, Available in<br />
1182 CFM,<br />
Regular Three 4" Inlets<br />
$487 $595<br />
Special Regular<br />
Special<br />
All machilJery sold by SUNJ-IILL MACHINER Y is of<br />
500 98188<br />
A"dover Park East<br />
Seattle, WA<br />
Heavy Du ty Industrial Quality and has a One Yea r Wa rranty<br />
SUNHILL MACHINER Y<br />
(206)575-3617 (800)544-1361 (206)575-4131<br />
Telephor,e:<br />
FAX:<br />
Toll <strong>Free</strong>:<br />
READER SERVICE NO. III<br />
READER SERVICE NO. 126<br />
110 Fine Woodworking
CASCADE<br />
TOOLS, INC.<br />
Elegance •<br />
IS easy ...<br />
CALL: 1-800-235-0272 24A'::S<br />
TOTALING<br />
FREE SHIPPING<br />
-1<br />
ON<br />
00 OR<br />
ORDERS<br />
MOREl<br />
PORTABLE DRAFTING BOARD<br />
Design, draw, draft ... anywhere with this<br />
BLAST GATES -ALUMINUM<br />
These are by far the best metal blast gates<br />
91G-l09<br />
truly "amazing" portable drafting board.<br />
DRAFTING TABLE<br />
ONLY $3995<br />
PART No. C3190<br />
ONLy$1995<br />
OPTIONAL DRAFTING HEAD<br />
PART No. C31 91<br />
on the market. Body is solid and made of<br />
cast aluminum. Steel gate pushes out<br />
residual dust so gate closes completely shut<br />
every<br />
ONLY<br />
time.<br />
$1100 <br />
Available in two sizes.<br />
PART No. C31 71 - 3" GATE<br />
<br />
PART No. C31 72 - 4" GATE<br />
ONLy$1325<br />
13" ROLLER BRACKETS<br />
Use this roller bracket to create an extra "helper." Makes material<br />
handling a breeze.<br />
ONLy$1295.<br />
UNIQUE RIGHT ARM CLAMP<br />
We believe we have found a real gem in this<br />
new clamp. Its secret is its pivoting arm which<br />
squares the work for perfect gluing, joining and<br />
fastening.<br />
OR ONLy$1000<br />
PART No. C3029<br />
6 FOR ONLY $5500<br />
BRAD NAILER<br />
16 PC. FORSTNER<br />
<br />
BIT SET<br />
This quality set includes:<br />
1/4", 3/8",1/2", 5/8", 3/4",7/8",<br />
1", 1-1/8", 1 -1/4", 1 -3/8", 1-1/2",<br />
1-5/8", 1-3/4",1-7/8", 2", 2-1/8" bits.<br />
PART No. C3188 ONLy$8995<br />
Make your own roller stands!<br />
PART No. C31 84<br />
This super light finish nailer<br />
gauge brad nails. Great for<br />
carpenters! Work overhead<br />
all day long without fatigue.<br />
For moulding, casing and<br />
wood strips.<br />
ONLY $9995<br />
PART No. C3030<br />
A BETTER FENCE? PRECISELY!<br />
The VEGA SAW FENCE attaches to<br />
_ ........... SPECIAL<br />
NW-254L<br />
TA BLE SAW<br />
(2.6 Ibs.) comes complete<br />
with safety trigger. Magazine<br />
holds 100 3/8" to 1-3/1 6" 18-<br />
Specifically designed<br />
to outperform<br />
and outlast any<br />
ot her contractor's<br />
saw now being<br />
offered by our<br />
competitors, this<br />
excellent unit features<br />
solid cast iron<br />
most<br />
saws in minutes and features:<br />
ALLOY HEAD which glides<br />
on chromed steel l'3ils for rigidity and<br />
smoothness<br />
MICRO-ADJUSTER<br />
• FINGER SAVER AlTAC HMENT with<br />
stock pusher and gauging block (option)<br />
• REAR HOLD<br />
"<br />
DOW N for use with rollers<br />
or feeders<br />
.. VEGA 3, Box 193<br />
. ' Decatur, lllinois 62526<br />
'_..<br />
Route<br />
217-963-2232 1-800-963-VEGA<br />
Thoughtfully designed machines made in the USA<br />
RFADER SERVICE NO. 82<br />
From $595<br />
extensions (not grid type or sheet metal) and an American<br />
made Baldor motor. Table is Tee slotted. Saw comes with an<br />
excellent rip fence with 25" rip capacity. Vega fence<br />
available as extra cost option and extends rip capacity to<br />
50".<br />
27"x40';""<br />
10"<br />
lV2 hp.<br />
260#<br />
RFADER SERVICE NO. 107<br />
R FADER SERVICE NO. 112<br />
September/October 1991 111
Events (colltinued)<br />
Workshop-Timber Frame Horne Design, Nov. 9-10.<br />
Red Suspenders Timber Frames, Rte. 7, Box 8383, Nacogdoches,<br />
75961. (409) 564-9465.<br />
VERMONT: Courses-Ultralight Lapstrake Boat Construction<br />
with Tom Hill, Sept. 2-7; Shaker Boxes with<br />
John Wilson, Sept. 16-17. Vermont State Craft Center,<br />
Frog Hollow, Middlebury, 05753. (802) 388-3177.<br />
Show-Woodworking World Burlington show, Sept. 20-<br />
22. Burlington Memorial Auditorium, 250 Main St., Burlington.<br />
For info, contact Woodworking Association of<br />
North America, PO Box 706, Plymouth, NH 03264. (800)<br />
521-7623, (603) 536-3768.<br />
VIRG INIA: J uried show-Wood Show, thru Sept. 2.<br />
Furniture, sculpture and art made mostly of wood. Middle<br />
Street Gallery, Middle St., PO Box 341, Washington,<br />
22747. (703) 675-3440.<br />
Juried festival-Sugarloafs 11 th annual Virginia Crafts<br />
Festival, Sept. 13-15. Prince William County Fairgrounds.<br />
Contact Deann Verdier, Sugarloaf Mountain Works, 20251<br />
Century Blvd., Germantown, MD 20874. (301) 540-0900.<br />
Exhibit-Shrines and Icons, thru Oct. 4. Objects of wood<br />
and other media. Hand Workshop, 1812 W. Main St.,<br />
Richmond, 23220. (804) 353-0094.<br />
Show-Metro-Richmond Woodworking Show, Oct. 11-13.<br />
State Fair of Virginia, Better Living Center, 600 E. laburnum<br />
Ave., Richmond, 23222. Contact 1516 S. Pontius Ave.,<br />
Los Angeles, CA 90025. (800) 826-8257, (213) 477-852 1.<br />
J uried show- 16th annual Richmond Craft and Design<br />
show, Nov. 15-17. Ricmond Craft Centre for Conventions<br />
and Exhibitions. For info, contact Hand Workshop, 1812<br />
W. Main St., Richmond, 23220. (804) 353-0094.<br />
WASHINGTON: Conference-18th annual Museum<br />
Small Craft Association Conference, Oct. 4-6. Contact<br />
MSCA Conference, Center for Wooden Boats, 1010 Valley<br />
St., Seattle, 98 109. (206) 382-2628.<br />
Meetings-Northwest Woodworkers Guild, last Wednesday<br />
of each month. Contact Kirk Kelsey, 744 N. 78th,<br />
Seattle, 98103. (206) 789-2142.<br />
Workshop-Carvel Dinghy workshop with Eric Dow,<br />
Oct. 19-26. Center for Wooden Boats, 1010 Valley St.,<br />
Seattle, 98109. (206) 382-2628.<br />
J uried show- 11th annual Woodcarving Show, Nov. 9-<br />
10. Western Washington Fairgrounds Expo Hall, 9th and<br />
Meridian, Puyallup. For deadline and info, contact Northwest<br />
Carvers Association, 115 Del Monte Ave., Fircrest,<br />
98466. (206) 564-3278.<br />
Show-Western Washington Woodworking show, ov.<br />
15-17. Seattle Center Exhibition Hall, Mercer St. at 3rd<br />
Ave. N., Seattle, 98109. Contact 1516 S. Pontius Ave., Los<br />
Angeles, CA 90025. (800) 826-8257, (213) 477-852 1.<br />
WEST VIRG INIA: Workshops-Pewter Spinning with<br />
Ralph Gooch, Oct. 4-6; Dovetail Box with David Finck,<br />
Oct. 18-20; Shaker Oval Boxes with John Wilson, Nov.<br />
15-16. Crafts Center, Cedar Lakes, Ripley, 25271. (304)<br />
372-7005.<br />
WISCONSIN: Exhibition-Wood sculptures by three<br />
artists, thru Sept. 1. West Bend Gallery of Fine Arts, 300 S.<br />
6th Ave., West Bend, 53095. (414) 334-9638.<br />
Workshop-Furniture restoration, Sept. 5-6 or 19-20,<br />
Oct. 21-22 or 31- ov. I. Minuteman, 115 N. Monroe St.,<br />
Waterloo, 53594. (800) 733- 1 776.<br />
Exposition-Woodworkers World Expo, Sept. 28-29.<br />
Brown County Expo Centre Complex, Green Bay. Contact<br />
John VanStechleman, Woodworkers World, PO Box<br />
10596, Green Bay, 54307-0596. (800) 236-EXPO, (414)<br />
494-9507.<br />
Show-Woodworking World Milwaukee show, Nov. 8-<br />
10. Waukesha County Exposition Center, Nortl1View Rd.,<br />
Waukesha, 53188. Contact Woodworking Association of<br />
North America, PO Box 706, Plymoutll, NH 03264. (800)<br />
521-7623, (603) 536- 3768.<br />
Semin ars-Training seminars on moulder setup and operations<br />
and profile knife grinding, November. For dates<br />
and info, contact Kelly Markofski, Fox Valley Technical<br />
College, 150 N. Campbell Rd., Oshkosh, 54903-2217.<br />
(414) 233-9191.<br />
CANADA: Classes-Various woodworking classes including<br />
bird carving. wood sculpture, willow chairmaking<br />
and more. For information and schedule, contact the Haliburton<br />
School of Fine Arts,<br />
PO Box 339, Haliburton, Ont.,<br />
KOM ISO. (705) 457- 1680.<br />
Exhibit-Beneath tile Ice: The Art of the Fish Decoy,<br />
Sept. 9-Nov. 4. Kamloops Arts Gallery, B.C. For info, call<br />
Susan Flamm at (212) 977-7170.<br />
Show- 1st Ottawa/Hull Woodworking Show, Sept. 13-<br />
15. Palais des Congres, 200 Dubortage, Hull, Que. For information,<br />
contact Woodworking Association of North<br />
America, PO Box 706, Plymouth, NH 03264. (800) 521-<br />
7623, (603) 536- 3876.<br />
Show-Pickering Wood Show, Oct. 18-20. Metro East<br />
Trade Centre, off Highway 401. For info, contact Ontario<br />
Wood Shows/Cryderman Productions at (519) 351-8344.<br />
Classes-Furnituremaking, carving, lathe turning, router<br />
and more. Tools 'n Space Woodworking, 338 Catherine<br />
St., Victoria, B.C., V9A 3S8. (604) 383-9600.<br />
Meetings-Canadian Woodturners Association meetings,<br />
throughout the year. Second Tuesday of each month.<br />
Contact Bob Stone, PO Box 8812, Ottawa, Ont., KIG 3J I.<br />
(613) 824-2378.<br />
Meetings-Blue Mountain Woodworking Club meetings,<br />
throughout the year. Third Wednesday of each month.<br />
Contact Glenn Carruthers, PO Box 795, Stayner, Ont.,<br />
LOM ISO. (705) 444- 1752.<br />
Meetings-West Island Woodturners Club meetings, second<br />
Tuesday of each month. Also, woodturning courses.<br />
Contact Eric Webb, 61 Devon Rd., Beaconsfield, Que.,<br />
H9W 4K7. (514) 630-3629.<br />
AUSTRALIA: Show-Australian Timber & Working<br />
with Wood show, Oct. 3-6. Royal Exhibition Building,<br />
Melbourne. For info, contact Patrick O'Reilly, Riddell Exhibition<br />
Promotions Pty. Ltd., 10 Mallett St., Camperdown,<br />
N.S.W., 2050. (02) 565 1099.<br />
ENGLAND: Classes-Woodworking classes. Smith's<br />
Gallery, 56 Earlham St., WC2. Contact Laetitia Powell,<br />
Parnham, Beaminster, Dorset, DT8 3NA. (0308) 862204.<br />
Exhibition-lOth Exhibition of Early Musical Instruments,<br />
Nov. 8-10. Royal Horticultural New Hall, Westminster,<br />
London. For info, contact Exhibition Organizer,<br />
The Early Music Shop, 38 Manningham Lane, Bradford<br />
BD1 3EA. 0274 393753.<br />
FRANCE: Demons trations-Les 28 et 29 sept., demonstrations<br />
par les artisans-professeurs de "La Main et<br />
rEsprit" de sculpture sur bois, tournage, ebenisterie, polissage,<br />
placage, vernissage au tampon, finitions, patines,<br />
pe.inture faux marbre et bois, dorure, cannage et rem paillage,<br />
garnissage, reliure. 1060 Burzelles, 123, rue de Fierlant.<br />
02/538 09 70.<br />
GERMANY: Fairs-Furniture and Interiors fair, Sept.<br />
25-oct. I. Trade Fair for Building Systems, Building Materials<br />
and Building Renovation, Oct. 31- ov. 6. Contact<br />
Koch Trade Fairs, 157- 161 E. 86th St., New York, NY<br />
10028. (212) 369-3800.<br />
ITALY: Competition-The Year 2000: 3rd Office Design<br />
Competition. Exhibit of deSigns, Sept. 19-23. Milan.<br />
For info, contact Cosmit, Corso Magenta, 96, 1-20123 Milan.<br />
(02) 48008716.<br />
Welve helped hold it together ... Since 1903<br />
'<br />
J0r8er\ser.<br />
If<br />
"POr\Y:<br />
'Adjusfable',w<br />
Quality in our products ...<br />
dedication in our service. We've held<br />
to these commitments just as you've<br />
held up Our Clamps and Vises as<br />
your standards to each new<br />
generation since 1903. We'll<br />
continue to hold consistently<br />
to our traditions of excellence_<br />
Write for our Catatog SEND $1.00<br />
Adjustable Clamp Company<br />
431 N. Ashland Avenue, Chicago, IL 60622<br />
READER SERVICE NO. 21<br />
112 Fine Woodworking
For that "SPECIAL" project<br />
In stock -No minimum<br />
Orb. Action Nob Hdle Jig Saw $129<br />
"Cllc", Orb. Nob Handle Jig Saw 132<br />
"Cllc", OUltiess Orb. Jig Saw 159<br />
Unv. Shank Multi Orb. Jig Saw 118<br />
7 114" Pivoting Circ. Saw 89<br />
Panther Recp. Saw 134<br />
DUltlel1 Saw<br />
TABLE BILLIARD LEGS<br />
WI TABLE CARVED BASES<br />
(TABLE SLIDES AVAILABLE) FEET<br />
offdaRU,
Books<br />
The Big Book of Whittling and Woodcarving by E.].<br />
Tangerman. Dover Publications Inc., 31 E 2nd St., Mineola,<br />
N.y. 11501; 1989. $12.95, paperback; 192 pp.<br />
This is more good stuff from<br />
E.]. Tangerman. His latest collection<br />
of designs, techniques<br />
and examples of whittling and<br />
woodcarving from a global<br />
perspective is both instructive<br />
and knowledgeable.<br />
Tangerman has kept a "carver's<br />
eye" peeled throughout<br />
his international travels, and<br />
he shares with us the fruits of<br />
such famous woodcarving<br />
centers as Oberammergau in<br />
Germany and remote areas in<br />
Bali, Indonesia.<br />
There is much here for<br />
those wishing to take up carving or for the carver ready to take<br />
on that next challenge. The designs and interpretive text are<br />
clear and concise and leave room for individual creativity. Sections<br />
on tools, tool sharpening and choosing the right wood for<br />
various projects will also prove helpful.<br />
The comprehensive collection of photographs shows how<br />
timeless themes, such as the family and religion, are rendered in<br />
various countries with unique results.<br />
The section on the work of Emil Janel (originally of Orsa,<br />
Sweden) featured on pp. 106-107 is certainly character carving at<br />
its finest. The warmth and humor featured here is wonderful.<br />
I did feel, however, that the slightly "fuzzy" photo of the "ecology<br />
door" (p. 145) was out of place, and I only mention it because<br />
it did not do justice to what was certainly a major undertaking.<br />
All in all, Whittling and Woodcarving is highly recormnended<br />
and will prove helpful to beginning and intermediate carvers. Its<br />
international aspect will also reward those interested in advancing<br />
tlleir knowledge of tile art itself.<br />
-john E Meyers<br />
The Band Saw Book, with 20 Projects by R.]. DeCristoforo.<br />
TAB Books Inc., Blue Ridge Summit, Pa. 17294-0850;<br />
1989. $1695, paperback; 291 pp.<br />
The<br />
Band with Saw 20 Projects Book,<br />
RJ. DeUtsdJIo<br />
At first glance, The Band Saw<br />
Book offers everything you<br />
would expect in a manual<br />
about tile bandsaw. The introduction<br />
stresses the word<br />
"small" a number of times,<br />
and upon closer examination,<br />
that is essentially what this<br />
book is all about. Though it<br />
briefly touches on the existence<br />
of larger models, and<br />
even includes information on<br />
the specialized Japanese resaw<br />
models, it deals mainly<br />
with the "small" bandsaw.<br />
The format is slightly reminiscent<br />
of the old Deltagrams. The book features good-quality<br />
black-and-white photos with many illustrations to clarify the<br />
generally informative text.<br />
The book kicks off witll a chapter explaining the anatomy of<br />
the tool and its various features. This leads into a section on<br />
blade selection, which I found very helpful. It explains tile various<br />
cutting arcs of the different-width blades and compares the<br />
different too til designs available and their respective applica-<br />
tions. Included in this section is a good explanation of the problem<br />
of "blade drift" or "lead," which causes the wood to bind<br />
against the fence or drift away from the fence when you try to<br />
make a straight cut. The author's diagram as to the cause and the<br />
correction of "lead" is very clearly defined and helpful.<br />
Another enlightening chapter is tile one on adjusting and<br />
aligning the saw. It is all elementary stuff, but crucial to the<br />
smooth and efficient operation of any tool. In fact, this seems to<br />
be the drift of the whole book: fundamental, basic information<br />
presented in an orderly fashion.<br />
If you are an experienced woodworker, you may find information<br />
about circle cutting, compound-sawing a cabriole leg and<br />
kerf-bending old hat. In fact, it could be said that this book was<br />
written specifically with the novice in mind, as the Simplistic<br />
projects tend to indicate. But I tllink there is some very useful<br />
information even for the intermediate and advanced woodworker.<br />
For instance, the chapter on sawing patterns was very informative<br />
and the principles found there can be adapted to repetitive production<br />
work like chair parts. I found the chapter on resawing a<br />
little light: It is limited to resawing multiple thin units from one<br />
preshaped thick block. Absent are good examples of resawing<br />
book-matched panels and resawing your own tl1ick veneer. There<br />
does not seem to be any real "meat and potatoes" on the menu!<br />
Being somewhat familiar witll the author from his previous<br />
books, I would have been disappointed if this book didn't include<br />
his talent for making useful jigs and fixtures. Indeed there<br />
are some to be found here also. Altl10ugh the book adequately<br />
covers the material, it stops short of being a<br />
3<br />
comprehensive, definitive<br />
work on tlle bandsaw.<br />
-Terry Moore<br />
Projects for Woodworkers, Volume by the editors of<br />
The Woodworker's Journal. Madrigal Publishing Co., 517<br />
Litchfield Road, PO Box 1629, New Milford, Conn. 06776;<br />
1987. $12. 95, paperback; 121 pp.<br />
Books of woodworking plans,<br />
especially those containing<br />
contributions from a variety<br />
of individuals, are often collections<br />
of boring, uninspired<br />
designs that look as if they<br />
were churned out in a<br />
3<br />
desperate<br />
attempt to meet a publishing<br />
deadline. Projects for<br />
Woodworkers, Volume is a<br />
welcome exception.<br />
Of the 60 plans contained<br />
in the book, about 51 (an unusually<br />
high percentage) are<br />
guides to attractive pieces of<br />
one style or another. The Oriental<br />
section has only two plans of tables, but the tables are<br />
especially attractive for the level of woodworking skill tlleir<br />
construction requires. In addition, tile 10 toy designs range from<br />
attractive to very attractive, and these toys are tile kinds that<br />
kids love to play with: a dump truck, a car witll a boat trailer, a<br />
steamroller, a locomotive with train, and many other wonderful<br />
examples. Most of the contemporary deSigns, mainly tables and<br />
cabinets of various sorts, are sleek and elegant; pieces witll<br />
American influence, like an Early American corner cupboard and<br />
a Shaker chest of drawers, comprise the largest portion of the<br />
book, and about one-half of the pieces display a good sense of<br />
proportion and flow. The level of quality only begins to fail<br />
when the book deals witll such things as wall shelves and hanging<br />
mirrors-items in which elegance is hard to achieve.<br />
Actual construction skills needed for these plans are well within<br />
tile reach of the weekend woodworker. None of the furniture<br />
114 Fine Woodworking
MANNY'S WOODWORKER'S PLACE<br />
TO ORDER CALL TOLL FREE<br />
BOOKS & VIDEOS 1-800-243-0713<br />
INQUIRIES CALL<br />
DISCOUNT PRICES NO SHIPPING CHARGE (U.S.) OVERSEAS ORDERS<br />
VISA, MC, AM.EX.,<br />
ADD<br />
CHECKS ACCEPTED; ADD $3 for C.O.D.<br />
15% SHIPPING WELCOME<br />
CATALOG $2.00 606-255-5444<br />
602 S. Broadway, Lexington, KY 40508<br />
NEW SPIELMAN'S<br />
PATTERN BOOKS<br />
$14<br />
$46<br />
$32<br />
S2I)<br />
POWER TOOLS<br />
Router Basics (Spielman)<br />
Router Book (Geller)<br />
Router Jigs. Techniques (Spielman)<br />
Router Handbook (Spielman)<br />
The Router (Rosendahl)<br />
Scroll Saw Handbook (Spielman)<br />
Shaper Handbook (Cliffe)<br />
Scroll Saw Basics (Spielman)<br />
Table Saw Basics (Cliffe)<br />
Radial Arm Saw Techniques (Cliffe)<br />
Table Saw Techniques (Cliffe)<br />
Getting The Most Out of Radial Arm Saw<br />
Getting The Most Out of Drrll Press (Rockwell)<br />
The Complete Book of Stationary Power Tool<br />
Techniques (de Cristoforo)<br />
The Complete Books of Portable Power Tool<br />
Techniques (de Cristoloro)<br />
Tool Grinding and Sharpening Handbook<br />
S9<br />
SCHOOL P.O.S<br />
,Reiol BRUCE HOADLE <br />
Understanding Wood<br />
5<br />
S26<br />
S25<br />
BOTH FOR $60<br />
SI6<br />
$12<br />
SI4<br />
$12<br />
WOOD IDENTIFICATION<br />
SI 6<br />
World Woods in Color (lincoln)<br />
19<br />
Encyclopedia of Wood (Makepeace)<br />
Knwo Your Woods (Constantine)<br />
SI3<br />
$16<br />
Woods We live With (Schiller)<br />
S26<br />
SI6<br />
(Rockwell)<br />
Classic Fretwork Scroll Saw Patterns SI2<br />
.<br />
SIO<br />
SID Brad Witt · Router Secrets<br />
Victorian Scroll Saw Patterns<br />
SI2 STICKLEY FURNITURE<br />
Wilson · Making Oval Boxes<br />
$30<br />
Scroll Saw Fretwork Patterns<br />
SI2 The Furniture of Gustav StiCkie History.<br />
S17<br />
Todd Designing Your Kitchen<br />
Scroll Saw Fretwork: Tech. & Patterns Techniques. Projects (Bavaro r $35<br />
Todd - Stair Framing<br />
S30<br />
ALL 4 ABOVE $46 The Early Work of Gustav Stickley (Gra<br />
Scroll Saw Puzzle Patterns<br />
SI2<br />
r,<br />
) S20<br />
SI6 Gross Roof Framing Basics<br />
The Mission Furniture of l. & J.G. Stick ey<br />
Gross - Roof Framing Advanced<br />
Scroll Saw Country Patterns<br />
SI2 (Gray)<br />
Spielman's Original Scroll Saw Patterns SI2 Making Authentic Craftsman Furniture<br />
(Davidson) S9<br />
NEW NEW from<br />
Schuttner - Basic Stairbuilding<br />
S28<br />
Bollinger Laying Hardwood Floors S28<br />
Scroll Saw Pattern Book<br />
512 (Stickley)<br />
S9<br />
Bollinger - Sanding. Finishing Floors SI9<br />
Law - Installing Cabinets. Countertops SI9<br />
JOINERY Law · Installing Doors & Windows SI9<br />
Woodjoiner's Handbook (Allen)<br />
$14<br />
RICHARD RAFFAN<br />
Rosendahl - Series of 8 Videos on Router<br />
Book-Woodturning Projects<br />
TAUNTON PRESS Joinery: Methods of Fastening Wood (Self) SI2<br />
SI9 Woodworking Joints (Blandford)<br />
Techniques S24 EA; All 8 for $145<br />
Video-Woodturning Projects<br />
Woodwork Joints (Hayward)<br />
$17 Roger Cliffe - Faceplate Cabinetmaking<br />
80TH $49<br />
<br />
- ..<br />
S9<br />
Modern Practical Joinery (Ellis)<br />
Series of 5 Tapes S30 EA; All 5 for $135<br />
SI8<br />
Book-Turning Wood<br />
Roger Cliffe - Table Saw or Radial Saw<br />
Video-Turning<br />
NEW NEW t-----<br />
S19<br />
Wood<br />
Contract Joinery (Austin) SI5<br />
S38 Techniques S29 EA; both for 156<br />
80TH $49<br />
Book-Turned 80wl Design<br />
S17<br />
Cummins Making Boxes<br />
S28<br />
COMPLETE RAFFAN SET 13Books: 2 Videos) SI2 TOYMAKING Cummins - Small Shop Tips S28<br />
Makin9 Toy Trains in Wood (Lynn) SIO Sundquist - Swedish Carving Techniques $28<br />
NORM<br />
1-----1<br />
ABRAMS Making Classic Cars in Wood (Hicks) SIO Mehler - Build a Shaker Table S28<br />
Classics from New Yankee Workshop<br />
Making Dinosaur Toys in Wood (Wakefield) SI2 Parko - Make a Blanket Chest<br />
The New Yankee Workshop<br />
SI8<br />
BOTH $35<br />
The Workshop Book (Landis) How To Make Animated Toys (Wakefield) $12 Stubbs - Bowl Turning S38<br />
$32 Solid Wood Cabinef Construction (Karg) $23 O a y k a g k;. t W;0 r !:,(6, i $10<br />
;J!<br />
Bush - Carving Techniques and Projects S28<br />
NOTE:<br />
WOOD<br />
"New<br />
TURNING<br />
Yankee Heritage" available Jan.<br />
by<br />
'92<br />
m Graphic Guide to Frame Construction<br />
& t-----<br />
Blizzard's Dazzling Wooden Toys<br />
Rogers MO' dtng and Picture Frames $ 22<br />
(Thallon)<br />
S29 ogers B UI , tng c a b tne t s<br />
S22 BOOKS Fine Homebuilding Great Houses · Craflsman The Ultimate Wood Block Book (Bingham) SI2 Rogers - Building Bookcases<br />
:1;<br />
$22<br />
Style S24<br />
DALE NISH Working at Woodworking (Tolpin) S21 Maas - Router Jigs. Techniques $28<br />
Creative<br />
BAND<br />
Woodturning<br />
A W by<br />
"Best of Fine Woodworking" Series - B Titles FINISHING<br />
Artistic Woodturning SI4 EA: All B lor SIOO Wood Finishing with George Frank SI4 3. Floors $28 EA: All 3 for sao<br />
MasterWoodturners<br />
SI9<br />
...<br />
"Fine woodworkingon" Șeries - 21 Titles S9 A. AI 2l fo Adventures in Wood Finishing (Frank) SIO Roy Underhill - 1. Shop Planes: 2. Chair-<br />
ALL 3 A80VE S46 E r S'75 Video George Frank on Wood finishing $38 makin !lj, 3. LO &<br />
<br />
Timberframe Bldg. EA. $38<br />
Woodfinisher's Handbook (Allen)<br />
B KS The Workbench Book (Landis) $32 Wood Finishing & Refinishing (Gibbia) $15 Klausz _ Mortice & Tennon Joints $28<br />
Design Book Five SI9 Complete Manual 01 Wood Finishing<br />
DUGINSKE<br />
Lowe _ Carve A Ball & Claw Foot $38<br />
Bandsaw<br />
POWERTOOL<br />
Pattern Book SI2<br />
Bandsaw Handbook SI6 Furniture<br />
EA.<br />
Bandsaw Basics<br />
de 1-----1 by -1 &<br />
$28<br />
S9 MAROUETRY<br />
ALL 3 FOR S35 The Marquetry Manual (r,ncOln) SI9<br />
Marquetry and Inlay (Bridgewater) SI5<br />
WOODTURNING<br />
Woodturning lor Cabinetmakers (Dunbar) $14<br />
BOOKS<br />
/-____________ _<br />
_ Practical Wood turner (Pain)<br />
$12<br />
The Craft of Woodturning (Sainsbury) SI2 BOOK VIDEO SETS<br />
CRISTOFORO<br />
CLOCKMAKING The Practice of Woodturning (Darlow)<br />
The Drill Press Book<br />
SI6 Clockmaking: 18 Antique Designs (Nelson) SI8<br />
The Router Book<br />
SI6 How To Build 35 Great Clocks (Daniele)<br />
. PO S24<br />
SET CONTAINS I BOOK & I VIDEO<br />
!fi;.,on)<br />
atic Assembly for Woodturning Cliffe Table Saw Tech.<br />
SI4<br />
The Table Saw Book<br />
SI6 Build Your Own Grandfather Clock (Nelson) SI2 Hand or Simple Turning (Holtzapffel)<br />
The Jigsaw/Scroll Saw Book<br />
$18 Clockmaking for the Woodworker (Kadar) Ornamental or Complex Turnina IHoltzpffel)<br />
ALL f1<br />
$16<br />
Cliffe - Radial Saw Tech.<br />
S16<br />
Savage - Trim Carpentry<br />
4 BOOKS $62 101 Wooden Clock Patterns (Novak) The Woodt"rners Bible (Blandford) SI6 Bollinger - Laying Hardwood Floors<br />
$16 Schuttner Basic Stair Building<br />
$44<br />
$44<br />
Sundquisl - Swedish Carving Tech. S40<br />
X: 1----- ---- -------I "Fine Homebuild rr6St le S<br />
S OO<br />
a'!t!{n!yq, A9d KS TIPS, TECHNIQUES CHIP<br />
S38<br />
________ __<br />
_____--t<br />
I- _ (A _U_9h _ t on _ )<br />
_____ _ S<br />
_____<br />
To Identity and Value (John Alexander) S24 200 Original Shop Aids (Capotosto) $16<br />
S9<br />
ONLY<br />
VIDEOS VHS<br />
$30<br />
$34<br />
S75<br />
S75<br />
Krenov - Wooden Planes. Cabinet Scrapers $38<br />
REFINISHING Byrne - t Tiling Countertops; 2. Walls<br />
CARVING by cabinetmae!!i.!'Fr<br />
SI2 :::<br />
I3<br />
_<br />
-1<br />
$37<br />
Rogers - Building Tables $22<br />
Do o v o eail n l s er<br />
Flexner - 1. Refinishing; 2. Repairing<br />
S44<br />
$44<br />
ING<br />
$45<br />
BARTON Making Kitchen Cabinets (LeVine) S17<br />
i e na n tga1° :fi; o S25<br />
::s r fSh; h ii; h ( f d Mag.) SIO Chip Carving SIO; Chip Carving Pat1erns S10 Building KiFch T e V C O a O bKI'n & ets V'O (C E a O ry ( L EVINE) )<br />
$44<br />
in America lB27-1927 (Roger K. Smith) $55 Video Chip Carving $28; All 3 -S45<br />
H<br />
Th t B)<br />
NEW e Tool Collector's Guide To Value .<br />
$14 WOODWORKING PROJECTS ca ( b;{king (Calhoun)<br />
CARVING<br />
Cabinetmaking from Design to Finish<br />
(Maguire) $21<br />
Tools (Dunbar) $14 101 Projects for Woodworkers $14 Freshwater Fish Carving (Figer)<br />
176 Woodworking Projects (Workbench) SI4 Carving Fish Decoys (Cottle) $25 The Home Cabinetmaker (Burch) $19<br />
BOATBUILDING Making Mechanical Marvels in Wood (Levy) $14 Carving Carousel Animals (Marlow) S19 European Cabinelry (Christ) $18<br />
Making Pet Houses and Carriers (Self) 19 t-<br />
Carousel Horse Carving 1/3 Size (Hughes) S2B<br />
BuildingȚhe New ,nstant Bo ats (P SI9<br />
M B d Cl s " c ft<br />
aYson)<br />
G d<br />
SI4 Sculpting Wood (lindquist) $24<br />
Realistic Decoys (Spielman)<br />
SI6<br />
Canoes and ayaks for the Backyard Builder (Nelson) STAIR, DOOR MAKING<br />
SIB Decoy Pattern Book (Bridenhagen) $14<br />
How To Carve Wild Fowl (Schroeder) Modern Practical Stairbuilding and<br />
S3B Handrailing (Ellis)<br />
00<br />
CA<br />
ra g BO I<br />
RVING /----1 b y<br />
VrDEO I1D B&\"K a2 1 $11 Guitarmaking: Tradition and Technology<br />
$ 58 FURNITURE MAKING Stair Builder's Handbook (Love)<br />
$14<br />
(Cum piano)<br />
Doormaking Patterns & Ideas (Birchard) $1B<br />
BOOKS<br />
Violin Making As It Was and Is (Heron-Allen) $33 Queen Ann Furnilure (Vandal)<br />
r<br />
Making Stringed Instruments (Buchanan) $19 ReprodUCing Antique Furniture (Gotlshall) $38 Windows (Birchard)<br />
$16<br />
TOM WOLFE Making Wood Folk Instruments (Waring) $12 Federal Furnilure (Dunbar)<br />
--- t-<br />
SI1<br />
$13<br />
8 Titles SI2 EA: All 8 for 190 Measured Shop Drawings for American Furniture<br />
1. Traditional Santa Carving<br />
/-----1<br />
- 2. Santa and His (Moser) $16 CARPENTRY',<br />
Friends -3. Carving The Civil War - 4. Carving Out<br />
MALOOF', NAKASHIMA<br />
How to Build Shaker Furniture (Moser) $14<br />
The Wild West - 5. Dog Carving - 6. The Golfers<br />
Antique Country Furniture of North America<br />
CONSTRUCTION<br />
7. Carving Bears and Bunnies - 8. Country Flat<br />
FRIO', UNDERHILL<br />
(Shea) $18 Carpentry (Lewis)<br />
$19<br />
Carving Country Projects for Woodworkers Guide to Residenlial Carpentry (Feirer) $18<br />
$12 EA: All 8 for $90 Sam Maloof. Woodworker (Soft) S38 (Woodworker's Journal) $16 Trim Carpentry Techniques (Savage)<br />
Video - Sam Maloof. Woodworking Profile $28 Construction of American Furniture Treasures The Genius of Japanese Carpentry (Brown) $23<br />
Mlloof Book Ind Video Set S64 (Margon) $9 Harwood Floors (Bollinger)<br />
woov!ic?¥Utz RICK BUTl Soul of A Tree (Nakashima) $35 Fine Furniture for the Amateur Cabinetmaker The Timber Frame House (Benson)<br />
SI6 Tage Frid Teaches Woodworking: Book 1. 2. or 3<br />
Carving Wood<br />
(Marlow) $14 Timber Frame Construclion (Sobon) $12<br />
S17<br />
$20 EA: All 3 for 157<br />
Video - Woodcarving Tools & Tech.<br />
Classic Furniture Projects (Jones) $12 Roof Framing (Gross)<br />
$21<br />
Roy Underhill - 3 Tilleș BUll SET 12 BOOKS I<br />
EA. $12<br />
VIDEO) $62<br />
A 1 3 for $35<br />
Designing Furniture (Stem) $23 Wood-Frame House Construction (Anderson) $13<br />
Building Small Barns. Sheds, Shelters S12<br />
Dictionary of American Hand Tools (Sellens) $49 Shop savv M<br />
(Moungovan)<br />
1: Video-Kitchen Cabinets (Levine) S28<br />
1----004<br />
Dictionary 01 Woodworking Tools (Salaman) $2B Weekend Projects for Woodworkers<br />
Restoring. Tuning & Using Classic Woodworking Projects for Woodworkers Vol. I to IV ea. $12<br />
: '<br />
) "24<br />
Doll's House Do-It Yourself (Dodge)<br />
ore ur In <br />
asslc ma ra ( ar ner • Patterns and Projects for the Scroll Saw<br />
(Snaith) $IB 1"'----------------1<br />
$14<br />
MISC<br />
Cabinetmaking. The Professional Approach<br />
$14<br />
$2B Shelves, Closets & Cabinets (Jones) $16<br />
Ft T: o bu :;. ing (<br />
th<br />
HII) S4B MUSICAL INSTRUMENTS 1---------------1 i b:r i lg n h g ul0<br />
at)<br />
$32<br />
Make Your Own Electric Guitar (Hiscock) $16 Make a Windsor Chair (Dunbar)<br />
$32 Make Your Own Handcrafted Doors &<br />
$22<br />
$22<br />
$14<br />
$17<br />
$17<br />
$19<br />
READER SERVICE NO. 205<br />
September/October 199 1 115
Books (continued)<br />
is overengineered; in fact, FWW readers may find themselves<br />
substituting a dado or rabbet for nails here and there. Nonetheless,<br />
the instructions are both adequate and clear, and the aud10rS<br />
provide alternate methods of consu'uction for those who<br />
do not own stationary power tools.<br />
As project books go, this is a good one. If you're an amateur<br />
woodworker wanting to branch out into new areas of design or<br />
craft, I recommend that you take a look at it. -Richard Griffin<br />
Seat Weaving In Rush, Cane and Cord by Ricky Holdstock.<br />
Guild of Master Craftsman Publications Ltd., 166 High<br />
St., Lewes, East Sussex BN7 1XU, England; 1989. $25, paperback;<br />
142 pp.<br />
This is no overnight rush job,<br />
but rather a well-thought-out,<br />
descriptive work written by a<br />
master craftsman who obviously<br />
enjoys his work.<br />
The profusion of clear<br />
black-and-white photos, line<br />
drawings and descriptive text<br />
take you all the way from<br />
start to finish on the seating<br />
materials and designs described.<br />
Final finishes and future<br />
care are also covered.<br />
Weaving techniques and<br />
med10ds of joining the various<br />
materials employed are discussed in full, and usually several<br />
different ways of doing each are examined, indicating the<br />
merits as well as the disadvantages. Holdstock acknowledges the<br />
individuality of a craftsperson's work without touting one way as<br />
being better than the od1er, and he thoroughly examines different<br />
techniques so that you can try several avenues to find a way<br />
that suits you best. This leaves you with a better understanding<br />
of the work in progress and eliminates some of the frustrations<br />
of a beginner. Configuration of seat shape is also taken into consideration<br />
in each of the various weaves, and the proper filling<br />
for these seats is explained.<br />
Rush, cane and cord are listed on d1e cover as being the materials<br />
used. Holdstock not only delves into those, but also into<br />
using fiber rush, sea grass, Danish cord, poly cord and several<br />
varieties of cane. He acknowledges man-made fibers and their<br />
uses as alternatives for materials not readily available or hard to<br />
work with. The use of complementary materials for the same<br />
work is also covered, and Holdstock gives advantages and reasons<br />
for using each. The only materials familiar to me and not<br />
covered were ash, fiber and reed splints, which are more common<br />
in the United States than in England. There is no description<br />
of the uses or patterns for these materials, even though d1ey<br />
could apply to much of the work described.<br />
Tools basic to the craft are discussed. Suitable alternative handmade<br />
and commonly owned tools and their uses are explained,<br />
sometimes eliminating d1e need for you to buy a special tool.<br />
Three woodworking projects-a stool, a ladderback chair and<br />
a caned armchair-are included, all of which require woven<br />
areas of one form or anod1er. The woodworking measurements<br />
are given in metrics, wid1 inches in parentheses. Indigenous<br />
woods are used and the reasons for using each are discussed.<br />
How to bend the ladderback pieces is covered: The aud10r gives<br />
an illustration of a readily made steam box, a bending jig and a<br />
#405 #435# 105 9-'12" $16 blade length:<br />
10-'12" 0" $17 $16<br />
(replacement<br />
blade length:<br />
fast cut<br />
(replacement blade $14)<br />
blade length:<br />
1/91.<br />
fast cut<br />
(replacement fine cut<br />
HIDA TOOL, INC. I GYOKUCHO JAPAN<br />
... plus $3 (S&'H). Sale ends I<br />
."<br />
blade $13)<br />
$16) blade<br />
Send for a free brochure of all lines of RAZOR SAWS
MONEY! MAKE<br />
Kiln Dry for others.<br />
As the nation's largest manufacturer<br />
of dehumidification Dry Kilns,<br />
we can supply you with the same<br />
type equipment used by many of the<br />
major firms.<br />
Call or write<br />
today for free<br />
facts that will<br />
help you make<br />
P. o.<br />
-NYLE<br />
and save money.<br />
Corporation<br />
Box<br />
Nyle 207-989-4335<br />
1107, Bangor, Maine 04401<br />
READER SERVICE NO. 51<br />
Rated #1<br />
BAND SAW BLADES<br />
CARBON<br />
<br />
MADE TO YOUR SPECIFICATIONS<br />
BI-METAL &<br />
<br />
Industrial Quality - American Made<br />
Also:<br />
Hard-to-find Thin Kerf Blades<br />
for popular, 3-wheel bandsaws<br />
:<br />
1-800-SAW-BLAD<br />
<strong>Free</strong> shipping on 5-blade<br />
orders<br />
Industrial Blade & Product Co.<br />
2100 S. Wright, Santa Ana, CA 92705<br />
Ph. (714) 557-4131<br />
READER SERVICE NO. 106<br />
o SEND. ME A<br />
Excahbur P.O. Box 82 Machine FREE Corp.<br />
AMERICAN MADE, HEAVY DUTY!<br />
DRUM SANDER<br />
Sand boards, frames,<br />
doors, veneer, knots, wild<br />
grain perfectly nat and<br />
smooth every time!<br />
Reduce sanding time from<br />
hours to minutes!<br />
Delivers sanding precision<br />
equal to large W id e belt<br />
sanders at an affordable<br />
price!<br />
This is the best drum<br />
sander in the world. It has<br />
quality features not found<br />
on oHler brands. Let us<br />
prove it to you.<br />
__<br />
BROCHURE f£caa6ur<br />
,\'" e311-800-368-7677<br />
MACHI E CORPORATION<br />
READER SERVICE NO. 127<br />
ENERAYTools<br />
Built to last a lifetime<br />
Table Saw standard fence 350·1 $1245<br />
•<br />
50" 10"<br />
* with Beisemeyer fence 350-T50 $1385<br />
* with Paralock or Excalibur 350P50/E5 $1465<br />
15" Bandsaw enclosed stand 490-1 $845<br />
• Variable Speed Lathe 160-2<br />
$1100<br />
Variable Speed Lathe lhp 260-1 $2175<br />
* 8" Jointer enclosed stand 480-1 $1450<br />
* 15" Drill Press 6 Speed 34-01 $530<br />
* 3/4 110 Spindle Shaper 2800-B $1395<br />
To Order or get Information:<br />
imball AVe<br />
* 1 114" Spindle Shaper SS032 Call<br />
* 14" Radial Arm Saw VI54 Call<br />
• Dowel Machine 3/8"-11/4" DM-032 $695<br />
rl:"<br />
802-863-9036<br />
o E = 53 T.A= c::: 0<br />
A DOVER) RESOUR ES COMPANY<br />
589-2008 2800, FW, MI 48007<br />
P.O. Box Dept. Troy,<br />
(31 3)<br />
READER SERVICE NO. 101<br />
;:
.<br />
Books (continued)<br />
drilling jig with configurations and measurements. And in the<br />
back of the book you'll fi nd a metric conversion table, a list of<br />
material suppliers and a selection of seat patterns.<br />
I found much of interest in this book and had no trouble understanding<br />
the few areas I was unfamiliar with. Occasional difficulties<br />
with phrasing or colloquialisms were quickly remedied<br />
by rereading the text and/or referring to the appropriate photo<br />
or line drawing. If you are currently weaving seats or are considering<br />
doing so, this is a "must-have" book for your library. Well<br />
written and informative, Seat Weaving in Rush, Cane and Cord<br />
will surely become one of the most reached for books on your<br />
shelf, supplying information on materials and patterns for those<br />
special projects.<br />
- Tom Phillips<br />
Making Country Rustic Wood Projects by Patrick Spielman.<br />
Sterling Publishing Co., 387 Park Ave. S., New York, N.Y..<br />
10016-8810; 1985. $12.95, paperback; 160 pp.<br />
In the title of this work, making and rustic are definitely the<br />
operative words. A good writer, Spielman does an excellent job<br />
of conveying some very helpful hints on shopping at local sawmills<br />
for inexpensive softwoods, air-drying them, selecting<br />
boards for tlle charm and character of their "defects," and assembling<br />
them, unplaned, into useful objects. The projects used<br />
to illustrate tllese techniques include both indoor/outdoor furniture,<br />
such as benches, tables and chairs; a handsome gun cabinet;<br />
and numerous decorative items, such as plaque-type clocks,<br />
picture frames, knickknack shelves, weather vanes, turnings,<br />
carvings and mailboxes.<br />
Black-and-white photos are found on virtually every page and<br />
measured drawings are employed here and there, but step-by-<br />
step, descriptive text on shaping and assembly methods is not<br />
provided with each project. The joinery employed is so simple,<br />
however, that this doesn't detract from the projects, and the author<br />
conveys his design concepts concisely, allowing him to<br />
share more t')pics than might otllerwise have been possible. Under<br />
the heading "Architectural Projects" are some rustic-style options<br />
for doors, shutters, a flower planter, a plank walkway and various<br />
wall-paneling u-eatments using cedar shakes and endgrain<br />
blocks. Spielman demonstrates a good eye for the value of texture<br />
in achieving a rich, solid look with minimum effort and at the<br />
lowest possible cost. Also, he shares his considerable experience<br />
in getting the most out of common woodworking tools and selecting<br />
appropriate glues and fInishes for both indoor and outdoor<br />
applications. No doubt about it, this book offers a lot of helpful<br />
tips and practical guidance from an accomplished professional,<br />
but the book is also somewhat tainted with commercialism.<br />
Spielman, who runs a furniture operation in northern Wisconsin,<br />
uses this book to sell mail-order plans, while making it<br />
abundantly clear that the commercial use of his designs by others<br />
is prohibited. I suspect that after a fair number of his more entrepreneurial<br />
readers cough up $12.95 for this rather lean paperback,<br />
they may be soured by his protective attitude. Spielman's<br />
designs are attractive, but they are based on Early American style<br />
Teny<br />
elements that have been in use for literally centuries and are<br />
tllerefore not all that unique.<br />
-Jon Arno<br />
john E.<br />
N.Y N.H.<br />
Meyers is a woodcarver in Stirling, ant., Canada.<br />
Moore is a professional fumiturernaker in Newport, Richard<br />
Griff in is an amateur woodworker in Oak Park, Ill. Tom<br />
Phillips is a rusticjumiture maker in Tupper Lake, jon Arno<br />
is a wood technologist and consultant in Schaumburg, Ill.<br />
r-Io Texas bl •• sJfIIlSIIOW 1001 DI'lces!<br />
Cl5FB<br />
_<br />
03'15-' 3I8".drill, vit ... tion·frM saw -... (<br />
55'_ 19008W PlIW1eI' kit Ornnijig dovetail templets<br />
0300-' 3I8"CotdlessdtiU.I2V. 1 78.00<br />
3·"'"<br />
with case 5118 1 12" hand 2" (pinS)$3S.00<br />
2012 12" 5119 1 12" hand 'Z' spacing '-<br />
112 hr. th .. VS. 2- speecI<br />
(tails) 35.00<br />
5455 riff' HD Polisher, 11 amp. 129.00<br />
5660 1.5 HP RouIt!f with 114' 189.00<br />
5600 coI01<br />
2HP RouIerwi1h lf2" lightweight. Planer,<br />
218.00<br />
5925 3")(24" coI01 Belt snct w .ld-t.g 2"9.00<br />
.. "-x24" Bett sndr<br />
12 amp 5122 AdjustabietlYough 11500<br />
5123 1I2"boX1C*1til.. 59 00<br />
motor<br />
e-_", &-1 ,,<br />
wkt-blg 249.00 27 8-1 ''''<br />
eo,.<br />
TabMlsawf 269.00<br />
HD fini shing "9.00 3612SR 3 HP . 165.00 7/8 HP Router<br />
sander.'''' sheet<br />
6145 HD 4·112"<br />
I52S6 Sndr,lgtinder<br />
HO VS Jig Saw. top-hndI<br />
1tu-1'-<br />
N<br />
7" 00<br />
Plunge router. ' 7-1I4' Top handle circutar 11 •.<br />
,!;<br />
00 Plunge<br />
148.00<br />
617<br />
P<br />
;::; 11"" "<br />
.<br />
ush<br />
Slitt8fbaseS<br />
6300 6-1"'" Cir. saw, Ilv. 173.00<br />
" ".00 <br />
Bosch 69 a!.; 7s00<br />
hr.th 1 .. w .t:harger<br />
SOnB<br />
15365 7·114" HO Or. saw.<br />
63n wrm dr. dr. faa<br />
t=sawwith 137.00<br />
119.00<br />
saw, 151. 189.00<br />
cartlide<br />
23-580 5"<br />
mo, Sa 0rW ShIr, lIS Gnnder<br />
".00<br />
VSR. 7.2V.<br />
6753-1 HD3.5a OrWscrw Shlr. WIth 1001 case blade 97310 I..amlna le trimmer kit 184 00 31..()8(1 SandefWllh I" x 30"<br />
VS84.00<br />
Speed-BIoc:!8 5400 . standardti/t. otIset and sanding bolt. 5"<br />
ctrillkit. 2· speed .9.6V.<br />
sander<br />
31-460<br />
w k:ase with<br />
A<br />
32·100 Plate joiner<br />
SAW BLADES<br />
... ".",.- - ""x3D' O<br />
Slikit'"<br />
lU7jM0Q8 8"x48TATBCrosscUC $42.00<br />
_. • <br />
100, 120. 150, 220 or 320 grit) sanders I<br />
LU .. .,...",.. 39 . 00 ' ... ".",.- 113599 12.95<br />
.<br />
..<br />
".00<br />
601001/olK 318" Cordless driver<br />
driI. 95.00<br />
high RPM. -, saw •<br />
6093DW 3I8" CordIessdriver 155.00 330<br />
5120 11<br />
.." h·blind S900<br />
5121 Tapered sliding 00<br />
fi:';, !' .,,'"<br />
15" $36900<br />
_ _ ... 27<br />
110T<br />
<br />
blade<br />
..<br />
Carbide<br />
$99.00<br />
. ... i2!<br />
7ue (I) 12·plece OIessional gtade<br />
/4.Ott<br />
1I-1'j};;<br />
:c;;=.;etape<br />
'<br />
Chrome vanadI m steel profess·<br />
e r;B<br />
u<br />
TA 12 3·HP FJtunge action 169 00<br />
rCOler 112".318"& 1 14"<br />
M 12V 3-11 . HP PIooge 228.00<br />
dIsc<br />
router. vanable speed<br />
""BeIt,6"discsancler<br />
" Saw;:<br />
rame and<br />
.. ""<br />
;;tll<br />
135.00<br />
284.00 C12f'A 299 00<br />
"'.00<br />
MIler<br />
"'.<br />
27HP &<br />
, Inm . ._<br />
.
DOWEL MATE<br />
Same Day Service<br />
TOLL FREE<br />
fI,!,!:'?!?:, CALL 1-800-262·5482<br />
• FREE FREIGHT ON ANY S50 ORDER •<br />
9035N<br />
1/3 SHEET<br />
SANDER<br />
STRAIGHT<br />
LINE OR<br />
ORBITAL<br />
ROUTER ARC ATTACHMENT<br />
ROUTER MATE<br />
Rouler Nol Included<br />
• DOWEL<br />
Router<br />
Not Included<br />
" Family of Fine Wood Working Machines<br />
(ALL MADE IN TltE USA)<br />
MATE for tough ioints that are perfectly<br />
aligned, The Dowel Mate is the answer. A single step<br />
on the foot pedal first clamps the wood & then shoots<br />
in two dowel holes. Air clamp & air feed.<br />
RING MASTER Test your imagination . . . Cut rings<br />
out of a board with the renowned Ring Master & produce<br />
any hollow cylindrical shape in wood. Create<br />
beautiful wood works of art from start to finish.<br />
PANEL TEMPLATE Produce something special! .<br />
Route decorative panel desigr.s in seconds. 32 different<br />
PORTA-NAILS, INC .• PO BOX 1257 • WILMINGTON,<br />
• ROUTER<br />
corner designs, a side design & arc attachment are<br />
available to create unique parts.<br />
MATE converts portable routers to precision<br />
Routing machines.<br />
• Route Faster . More Accurately . More<br />
Profitably . . . with the All New Router Mate<br />
• ROUTER ARC ATTACHMENT cut precision arcs and<br />
circles from 9" to 50" in diameter with your router.<br />
Easily adjustable and precisely repeatable. Adaptable<br />
to any portable router.<br />
See your woodworking machinery dealer or call toll free for an informative brochure.<br />
NC 28402, USA · 919-762-6334 · 1-800-634-9281<br />
READER SERVICE NO. 46<br />
1911B 4 31S" Planer<br />
. S13S.88<br />
..<br />
3612BR 3 HP Plungr Rouler<br />
1923B 3114"Planer . . 137.88<br />
Round Base S178.88<br />
1100 3 114" Planer KII wlCase 218.88<br />
3620 1 114 HP Plunge Rouler 108.88<br />
1805 6 118" Planer Kil wlCase 366.88<br />
3606 1 HP Rouler 104.88<br />
2012 12" Surtace Planer 463.88<br />
$44488<br />
LS1011<br />
2708<br />
10" SLIDE<br />
81/4"<br />
COMPOUND<br />
$26388<br />
TABLE SAW<br />
MITER SAW<br />
WICARBIDE<br />
BLADE<br />
IN STOCK!<br />
1·800·262·5482<br />
LS1030 10" Miler Saw .S224.88<br />
<br />
..-. ... <br />
CALL<br />
THAT'S 1·800·2MAKITA FOR LOW PRICES<br />
...-"' ONMAKITA LINE<br />
S485.88<br />
LS1020 10" Miler Saw, H.D. Base289.88 2711 10" Table Saw<br />
• fa<br />
449 WHITEWATER ST., WHITEWATER, WI 531 90 <br />
READER SERVICE NO. 203<br />
DO HOW WORK WOULD LIKE YOU<br />
WITHOUT THIS<br />
<br />
oJ1[j]J(§J[]@]®<br />
u.s. PATENT U,793.604<br />
Woodworking and the INCRA System Precision<br />
The INeRA SYSTEM includes:<br />
• INCRA JIG<br />
• Aluminum INCRA FENCE SYSTEM<br />
with the patented INCRA STOP<br />
• INCRA Right Angle Fixture<br />
J]1lr07 ".'.'.'.'.'.' ••<br />
The Official iNCRA JIG Handbook &<br />
Templates<br />
• INCRA GAUGE<br />
• NEW! The Complete INCRA JIG<br />
VIDEO<br />
INCRA Precision Woodworking System<br />
From the precisely cut strips in the<br />
laminated top, to the perfectly<br />
mortised wooden hinges, to the<br />
spectacular INCRA Douulv-uuulul<br />
Box Joints, this beautiful jewelry<br />
box would have been virtually<br />
impossible to make without the<br />
unprecedented accuracy of<br />
INCRA JIG and the INCRA<br />
Fence System.<br />
For a FREE brochure and your<br />
nearest dealer, write to:<br />
Taylor Design Group, Inc.<br />
P.O. 810262 Dallas, TX 75381<br />
From the simplicity of half blind<br />
and through dovetails, to<br />
intricate joinery like the new<br />
INCRA Double-Double Through<br />
Dovetail, INCRA JIG makes it all<br />
possible.<br />
This wide selection of<br />
beautiful joinery can be<br />
easily accomplished with<br />
INCRA JIG and the official<br />
INCRA JIG Handbook &<br />
Templates.<br />
The Complete INCRA JIG VIDEO<br />
This 1 hour video has step-bYstep<br />
instructions, by the<br />
inventor, for making box jOints<br />
as well as half blind, sliding, and<br />
through dovetails, plus much<br />
more. Includes full video<br />
•• lIb!II<br />
instructions and FREE templates<br />
and plans for making the INCRA<br />
Double-Double Box Joint.
Notes and Comment<br />
I<br />
Mark Buchalter, a student at Genoa, a design and fu rnituremaking school in upstate New<br />
York, built his piece, "Nysam (New York studio apartment multipurpose) Table, " above,<br />
from African mahogany, with inset marble squares and silver candle holders.<br />
"Vessel Series-Tempest Sea" (right) by Robert Winland of Cincinnati, Ohio, is a 22-in. <br />
high vessel that is dovetailed together from African mabogany and topped by a red oak<br />
and curly bird's-eye maple structure. The medallion on the front is turned from spalted<br />
wood and wenge.<br />
Cincinnati fu rnituremaker Michael Toombs' mauve-tinted vanity table and sto04 "From<br />
the Vineyard, " has a 55-in. -wide bird's-eye maple carcase, steel legs and sheet-metal trays<br />
in the top. Bins in the front pivot out from behind doors (below).<br />
Canton's "Across the Board" woodworking show<br />
If you want to see an extensive collection of<br />
top-quality woodworking, you have to go to<br />
a gallery or museum in a large meu'opolitan<br />
area, right ? Well, not if you live in Canton,<br />
Ohio. The Canton Art Institute recendy sponsored<br />
Across d1e Board: Creative Expressions<br />
in Wood, an ambitious and extensive display<br />
of a surprising variety of wooden objects, including<br />
furniture, cabinetry, sculptures and<br />
turnings from local to international makers.<br />
The exhibit, which ran from April 6 toJuly<br />
7, was really four shows in one: Ohio Artists:<br />
ew Directions in Wood, a display of work<br />
by 14 regional artisans; Three Generations of<br />
Studio Art Furniture, a representative collection<br />
of work by five internationally recognized<br />
designers and makers, including John Makepeace<br />
(England), Helmut Lueckenhausen<br />
(Ausu'alia) and David Delmony (Germany);<br />
me International Turned Objects Show, a<br />
touring exhibit of 93 pieces created by me<br />
world's finest woodturners; and a display of<br />
work by d1e faculty, students, graduates and<br />
artists in residence at Genoa, a design and<br />
furnituremaking school in Genoa, N.Y. Visitors<br />
to Canton were able to wander d1rough<br />
me institute's roomy gallery spaces, each<br />
acconunodating a different show, and see a<br />
remarkably diverse range of woodworking,<br />
including me mree pieces shown here.<br />
In ac;ldition to d1e impressive amount of<br />
woodwork, M]. Albacete, Canton's executive<br />
director, and Clifford Buisch, president of<br />
120 Fine Woodworking<br />
Photos this page: Sandor NagyszaJanczy
200.000<br />
WHY<br />
OVINA<br />
SAW FENCE.<br />
1011<br />
200,000 Over in<br />
Doran fact. in Calgary.<br />
Robert in Brisbane. Jose in Puerto<br />
Rico. Alvise in Milan. The list<br />
of Biesemeyer T-Square saw<br />
fence owners spans the globe,<br />
and continues to grow.<br />
Why so many? Because<br />
Biesemeyer sets the industry standard.<br />
The T-Square saw fence<br />
system cuts precision parts for all<br />
your home shop projects. Safely.<br />
Affordably.<br />
Biesemeyer's new slkling<br />
==makeo' J<br />
breeze.<br />
/""""4<br />
. -<br />
_<br />
And now Biesemeyer introduces the new sliding<br />
- ""--- .. table. Perfect for cross-cutting. By using the<br />
"<br />
T-Square sliding table on your table<br />
saw, you get the benefits of a radial<br />
arm saw-for a fraction of the cost.<br />
Cap off your saw fence and<br />
sliding table with the added safety<br />
of Biesemeyer's new BladeGuard<br />
system. Safety was never this convenient<br />
before. BladeGuard easily<br />
1-800-782-1831.<br />
lifts out of the way for cuts<br />
835-9300.<br />
using jigs<br />
and for sliding table use.<br />
For more information, call<br />
In Arizona,<br />
And for useful hints on the many uses of our products, just ask for<br />
Bill Biesemeyer, fellow woodworker.<br />
1·800·782·1831<br />
Try them for two weeks. If you're not completely satisfied, you'll<br />
receive a full refund plus shipping costs.<br />
BIESEMEYER®<br />
It still costs less to own the best.<br />
Exclusively<br />
Pedonnax<br />
Precision Drum SandelS<br />
best<br />
Revolutionary Component Concept!<br />
Ifs Versatile .... lfs Expandable ....<br />
and of all .... lfs Affordablel<br />
You select the components to fit your<br />
budget and your needs. The Performax<br />
SIT Sander attaches to a radial saw or<br />
to a Pro Stand.<br />
Patented Drum Design<br />
dissipates heat for hours of steady<br />
use, offers greater strength and<br />
durability, dimension stock to within<br />
.01 of<br />
NEW<br />
Abrasive READER SERVICE NO. 9<br />
Take-Up Mechanism<br />
keeps<br />
abrasive<br />
tight,<br />
accepts<br />
any<br />
grit<br />
of abrasive.<br />
Feed<br />
No-Give<br />
Power<br />
offers infinitely<br />
variable feed rate of 0-10'<br />
or 0-20' Iminute. Feed<br />
multiple pieces as<br />
short as 2 1/4" and<br />
the thinnest veneer. READER SERVICE NO. 37<br />
NEW Dual Drum Super Max<br />
The only dual<br />
CII!!\!!!i!?!!!!!l::!<br />
drum<br />
sander<br />
that<br />
lets<br />
you easily<br />
change<br />
grits<br />
for<br />
any<br />
abrasive<br />
For Maximum<br />
combination.<br />
READER SERVICE NO. 88<br />
and Maximum Performance<br />
It WILL Buy Value<br />
exceed<br />
a Performax.<br />
1-800-334-4910<br />
your expectations.<br />
For a <strong>Free</strong> Brochure and the Dealer Nearest You Call<br />
or (612) 895-9922<br />
or write: PERFORMAX PRODUCTS, F3<br />
1221 1 Woodlake Drive, Burnsville, MN 55337<br />
R EADER SERVICE NO. 29<br />
September/October 199 1 121
Notes and Comment (continued)<br />
Genoa and guest curator of the exhibit, assembled<br />
an extensive assorUnent of other<br />
displays and activities. TIlese induded several<br />
exhibits featuring historic model ships, antique<br />
tools and scale models of wooden<br />
buildings; a]udge's Choice Exhibition where<br />
local woodworkers brought in pieces for display,<br />
with prizes awarded to the best; and a<br />
variety of woodworking displays and events,<br />
induding a furnituremaking demonstration<br />
by Mike Bellinski and a lecture/workshop on<br />
basic wood tedulology by yours truly.<br />
If you live in the Ohio region and missed<br />
the Canton show, take note: The success of<br />
this show has encouraged the institute to undertake<br />
other such projects in the future. For<br />
information, call the Canton Art Institute at<br />
(216) 453-7666. -Sandor Nagyszalanczy<br />
Losing your nerve<br />
It's not supposed to happen. Serious woodworkers<br />
don't take chances and they don't<br />
get hurt. Right? Wrong!<br />
It was a lazy Saturday afternoon in the<br />
park, and I was enjoying that annual ritual<br />
known across the nation as the "company<br />
picnic." Lunch was over. The kids were terrorizing<br />
the park, and a number of grownups<br />
were sitting around relaxing.<br />
I am an amateur woodcarver, and I'm<br />
pretty serious about what I do. I had been<br />
working on a myrtle belt buckle as a gift for<br />
the husband of one of my employees. The<br />
piece was about finished, but I was cleaning<br />
up a few rough places with a small skew<br />
chisel. I was anxious to show off the completed<br />
work, and so I rushed it a little.<br />
Snap! The edge of the buckle gave way<br />
and the chisel went straight to the bone at<br />
the base of my right-hand index finger. Call<br />
it instinct or reflex, but the chisel was on the<br />
ground and the thumb of my left hand was<br />
on the wound before I realized what had<br />
happened. Within a minute, I was lying on a<br />
bench feeling a little dizzy; I lay tllere until<br />
someone realized I needed help.<br />
We headed straight for tile nearest hospital.<br />
The 45-minute ride and tile lack of feeling<br />
in my finger brought me no comfort. The<br />
bowl of ice I had my hand in looked like<br />
strawberry jello. I knew that I had done<br />
something terrible to my hand.<br />
Once tile bleeding was controlled, the<br />
doctor began probing my finger with a pin.<br />
"Well, you did it," he said. I was informed<br />
that I had clipped tile radial nerve leading to<br />
my right index finger. Stitches were next and<br />
then came the most troubling news: There<br />
was no way to repair tile damage. The finger<br />
would remain numb.<br />
Fortunately, when I returned to tile hospital<br />
a few days later to have tile wound inspected<br />
and the stitches removed, tile young<br />
doctor who removed tile stitches had a different<br />
diagnosis. She referred me to tile<br />
hospital's hand clinic, and tile doctors tllere<br />
said tlley could repair the damage.<br />
The required surgery was quite an experience.<br />
A tight-fitting rubber cuff was applied<br />
to my wrist to stop tile flow of blood long<br />
enough to repair the nerve and stitch tllings<br />
back together. The incision site was numbed<br />
by several injections at tile base of my index<br />
finger, and tllen a drape was placed between<br />
my line of vision and my extended right hand.<br />
The repair was done under a special microscope,<br />
which allowed the two surgeons<br />
to see the incision at the same time. One<br />
held tile severed nerve ends togetller, while<br />
the otller stitched. Three tiny stitches and<br />
less than an hour later the job was done.<br />
I kept my hand in a sling to position it a<br />
bove my heart for a few days, and tllen it was<br />
back to normal.<br />
It has been almost five years since tile surgery,<br />
and although I still do not have full<br />
feeling in my finger, most of it is back It has<br />
taken time. For the first two years, I could<br />
not pick up small parts between my thumb<br />
and index finger. The flat pick that I used to<br />
play the guitar kept falling on the floor, and I<br />
didn't even feel it slip out of my grasp. The<br />
worst is over, and I see (feel) some improvement<br />
even now.<br />
I hope tllis story will help a number of fellow<br />
woodworkers. The obvious lesson here<br />
is tile issue of safety. Familiarity seems to<br />
breed contempt even when working witll<br />
dangerous power tools, let alone a chisel. It<br />
takes a great deal of discipline to continue<br />
working in a safe matUler for long periods of<br />
time. Increased skill seems to bring along<br />
tile notion tllat increased risk is a tolerable<br />
option. Most accidents can be prevented, but<br />
only if we are convinced of tile datlger and<br />
take action.<br />
And what about tile "true" accident? Odds<br />
are, matlY of us are going to have one. My<br />
reaction was certainly not predictable. Even<br />
though I didn't have a life-threatening injury,<br />
I experienced mild shock atld most certainly<br />
needed assistance. How many times<br />
have you headed for tile shop witll no one<br />
else around, absolutely certain tllat tllere<br />
would be no accident and that if by chance<br />
tllere was, you could handle it? Are you<br />
ready for that accident? Do you have atly<br />
first-aid resources available? These should<br />
include equipment (adequate first-aid kit),<br />
people (it's hard to dial a phone with no fingers)<br />
and a platl (what to do and where to go<br />
for emergency treaunent).<br />
Lastly, follow-up health care requires no<br />
less attention tllatl accident prevention atld<br />
first-aid resources. Suppose you do your<br />
best to prevent injury, but still have atl accident.<br />
Even if you do have first-aid help available,<br />
will you know what the next best step<br />
is? Certainly you can't go wrong hotfooting it<br />
to tile nearest emergency-treaunent facility.<br />
But what happens after tllat ? I got two different<br />
diagnoses, atld it was just a fluke that<br />
I ratl into tile second doctor who knew my<br />
nerve damage could be fixed. Nearly all<br />
woodworkers face tile risk of serious injury,<br />
yet we are generally ignOratlt concerning<br />
possible u·eatments. We of all people<br />
should be up to date on what tile medical<br />
community can offer. Start doing your<br />
homework now by interviewing your own<br />
doctor, and tllen brat1Ch out to the nearest<br />
medical facility. You never know when you<br />
may lose your nerve.<br />
-Robert Feltman, San jose, Cal.<br />
The rocket-powered tricycle<br />
"Netley's Rocket-Powered Tricycle," as I<br />
have entitled tile sculpture shown in tile<br />
photo below, was inspired by a tricycle given<br />
to me by a neighbor atld by a passage<br />
from a book<br />
TIle u-icycle was probably 50 or 60 years<br />
old, and I held onto it for several years before<br />
I decided to attempt a reproduction of it<br />
in wood. Over a period of about six months,<br />
I gradually assembled the frame, hatldlebars,<br />
seat and wheels.<br />
At about the satne time that I decided to<br />
make tile U-icycle, I Cat11e across a StOlY in a<br />
book by tile old-time radio comediatlS "Bob<br />
and Ray." The StOlY is about a guy named<br />
Netley atld his polished hardwood tricycle,<br />
which differs from a normal trike in its method<br />
of propulsion, as discussed in tile following<br />
excerpt from the StOlY. So I decided to<br />
combine tile atltique tricycle with the "Bob<br />
atld Ray" story. The results are shown in<br />
tile photo below.<br />
Ray: "._. And I see you've brought several<br />
products with you today to atlalyze for our<br />
listeners. I'm particularly interested in that<br />
tiling there wi til the tllree wheels on it."<br />
Netley: "That's a child's tricycle I'm recommending<br />
for its safety features. It's made in<br />
Denmark of polished hardwood. And you<br />
can see how the corners of each piece have<br />
PhOlO: John Taye<br />
This life-size sculpture of a rocket-powered<br />
tricycle was based on an antique version<br />
and an old comedy routine.<br />
122 Fine Woodworking
Another "buy 1 tool get our 228 page tool free" offer.<br />
Just a few of the unique woodworking tools of<br />
the 3,500 others available from our most versatile<br />
tool, the 1992 Garrett Wade Catalog.<br />
The 228 page caralog<br />
by<br />
is<br />
Mark<br />
<strong>Free</strong> with<br />
Duginske<br />
any order<br />
from rhis ad. Or if you would just like the<br />
catalog, send us $4.00 with your name and<br />
address.<br />
A I 2 Band Saw Books<br />
Learn whar makes your bandsaw rick. Tune-up<br />
and maintenance; blade selection, tracking and<br />
rensioning; plus cutting methods for various<br />
woods and orher materials. Hundreds of rips<br />
and shortcuts. Unlock your saw's potential.<br />
02109.03 Band Saw Basics $ 9.95<br />
16104.02 Band Saw Handbook $16.95<br />
B I The Saw Setting Gauge That Can Be<br />
Read From Any Position<br />
Most gauges have at least one or two main<br />
weaknesses. They eirher resr partially on the<br />
insert plate which is usually not the same<br />
hei g<br />
lis"<br />
ht as the main table, or ate so th.in that it is<br />
difficult to ensure that teeth are bemg g auged<br />
ar rhe to p of the arc. This gauge is made from<br />
machined W' rhick Aluminum and is 9" long.<br />
With Y-t" graduations on one end and on the<br />
other, it will indicate any height from lis" to<br />
2". Most useful for rable saws but also handy<br />
for routers. The markings are vertical on one<br />
face and horizontal on the other, so you can<br />
read them easily and accurately.<br />
7lK26.02 Saw Setting Gauge $17.95<br />
D l Our 202GF Gap Filling Glue Fills Gaps<br />
It has a very high solids content so thar small<br />
gaps in our joinery are acrually filled - wirh<br />
strengrh. And rhe "squeeze-our" beads righr up<br />
and chips off when dry. No soaking in to ruin<br />
finishes. Dries to a light tan. Water clean-up.<br />
62J0 1.01 1 pc. 202GF $ 7.25<br />
62J01.03 1 qc. 202GF $13.10<br />
C I Yt6" Super Narrow Blades<br />
You may have never seen a blade like this. A<br />
24tpi raker sryle, it produces smoorh cuts<br />
while making incredibly right turns. We recommend<br />
using our Cool Blocks with these delicate<br />
blades, because the y can be ser closer to the<br />
blade wi rhout danger of overheating.<br />
Cabinetmaker's Special Bandsaw Blades<br />
A Garrett Wade exclusive. They look like "skip<br />
rooth" blades. Bur each tooth is actually<br />
formed as a hook, with every 5th tooth an unset<br />
raker. The resulr is a very smoorh cutting blade<br />
rhar feeds easily. W' blade is for general work,<br />
and W' for resawing and heavy straight sawing.<br />
93 W' Blades (Delra 14" and copies)<br />
33Kl1.01 Y16" Scroll<br />
33Kl 1.02 W' (4 tpi) Cabinet<br />
33Kl1.03 Yl" (3 rpi) Cabinet<br />
$17.75<br />
$12.95<br />
$13.95<br />
80" Blades (Sears 12'<br />
33K12.01 Y16" Scroll<br />
33K12.02 W' Cabinet<br />
33K12.03 W' Cabinet<br />
72" Blades (Shopsmith)<br />
33K13.01 Y16" Scroll<br />
33K13.02 W' Cabiner<br />
33K13.03 W' Cabinet<br />
$16.25<br />
$11.95<br />
$12.95<br />
14.95<br />
$11.25<br />
$11.95<br />
E I The "Blind Nailer" Used To Be A Staple<br />
In Every Finish Carpenter's Tool Box<br />
This unique rool allows you to set nails or brads<br />
invisibly. Slip rhe special chisel, wirh irs finger<br />
nail shaped cutting edge, into the positioning<br />
jig and tighten the clamping screw. Place rhe<br />
Rat sole on the wood and strike the end of the<br />
chisel with a firm tap with the palm of your<br />
hand. The Blind Nailer will lift a perfect small<br />
chip from the surface. Hammer your nail or<br />
brad in and then glue the chip back in place.<br />
44K0 1.04 · Blind Nailer $19.95<br />
F I S p ecial Bandsaw "Cool Blocks" Prolong<br />
Blade Life & Increase Accuracy<br />
Made of a special graphite impregnated Phenolic<br />
laminate, rhis ser of 4 replaces your upper<br />
and lower side blade guides. Cool Blocks run<br />
cooler and are more slippery than conventional<br />
sreel guides. Since they can be ser acrually<br />
touching the blade, they give you better control<br />
of the cut.<br />
Model<br />
33K09.01"'" Delta 14" $11.95<br />
33K09.02"B" Sears 12" $11.95<br />
33K09.04"D" Shopsmirh $12.95<br />
33K09.05"E" Old Sears (Y-t" Rd.) $11.95<br />
33K09.06"F" Jet 14" (fits Delta copies) $11.95<br />
33K09.20"K" New Tilt-Head Sears $16.95<br />
r;a·: •.' ......................................................... STOCK# QTY. DESCRIPTION PRICE TOTAL .<br />
161 Avenue of the Americas<br />
GW 1 1992 Catalog (free with order from this ad) $4 00<br />
New York, NY <br />
10013 Dept. 132<br />
Call Toll <strong>Free</strong> 800·22 1 ·2942<br />
(NY 2]2·807·1757 No Collect Calls Please)<br />
Please send me these Garrett Wade tools and include a FREE<br />
1992 Catalog with my order. (PriCe> good until September 14, 1992)<br />
Name:<br />
Address:<br />
____________________________________ __<br />
Ci<br />
o<br />
ty:<br />
Check or Money Order 0 Discover<br />
State: ___ __ Zip: _____<br />
Expiracion Dace: ________________________________ __<br />
:eri::: d I I I I I I I I I I I I I I I II<br />
New York Residents add applicable Sales Tax<br />
Shipping & Handling: $3.25 for order rotal up ro $10<br />
$4.55 for $1O.01 ro$20<br />
$5.45 for $20.01 ro $50<br />
$6.90 for over $50.<br />
Sub Total<br />
Sales Tax<br />
Shipping<br />
Grand Total<br />
September/October 1991 123
Notes and Comment (continued)<br />
been rounded off. That prOtects small children<br />
against a lOt of the minor scratches they<br />
get from sharp points on metal tricycles-or<br />
even plastic ones."<br />
Ray: "Well, that's truly an important safety<br />
feature. And I hope I didn't sound foolish by<br />
failing to recognize the dling as a u-icycle.<br />
But it doesn't have any pedals on it."<br />
Netley: " o. That's another feature. It<br />
doesn't have pedals."<br />
Ray: "Well, I guess that's for safety, too. But<br />
how does the child move it along without<br />
pedals ?"<br />
etley: "It's really a whole new concept<br />
in tricycles. This little box under the seat is<br />
a Simplified rocket engine that propels the<br />
trike."<br />
Ray: "You mean you put rocket fuel in dlis<br />
dling ?!"<br />
Netley: " 0, no. othing dlat sophisticated.<br />
It works more like a simple Fourth of<br />
July skyrocket. A small charge of gunpowder<br />
goes in here. And the child just lights the<br />
fuse when he's ready to ride."<br />
Piano bar<br />
As a longtime cabinetmaker, I have been<br />
asked to make some ouu-ageous pieces. The<br />
phOto below of a piatl0 altered to accommodate<br />
liquor bottles atld glasses is the latest<br />
of these projects.<br />
The client who ordered dlis piece had the<br />
piatl0 in storage for 15 years since her modler's<br />
deadl. She had promised never to dis-<br />
Ray: "Well, don't you think it's kind of<br />
dangerous for a child three or four years<br />
old to be playing around widl matches and<br />
gunpowder?"<br />
Netley: "Oh, I don't know. I hadn't thought<br />
much about that aspect. I suppose a parent<br />
could supervise at first-and make dle child<br />
aware of any possible danger."<br />
Ray: "Well,<br />
MPH<br />
I suppose. But even so ..."<br />
Netley: "The instruction booklet says dut<br />
tile tricycle never attains a speed of more<br />
tilatl 15 if the correct gunpowder charge<br />
is put in dlere. And, as I said before, dle corners<br />
are rounded off in case the child should<br />
take a spill."<br />
Ray: "Well, I guess it's okay dlen . ..."<br />
-John Taye, Boise, fda.<br />
EDITOR'S NOTE: The previous excerpt was reprinted<br />
with permission of The Putnam Publishing<br />
Group from tbe New.' Improved.' Bob and Ray<br />
Book by Bob Elliot and Ray Goulding. Reprinted<br />
by McGraw-Hill Publishers, 1985, by arrangement<br />
with G.P. Putnam's Sons.<br />
pose of dle baby grand. But since the storage<br />
costs had become so high, and having atl additional<br />
piatl0 was nOt in her interest, she<br />
was faced with eitiler violating a promise to<br />
her modler or adapting the piano's use. By<br />
altering dle normal perspective atld recycling<br />
some of the piatl0'S parts, I built this<br />
liquor cabinet. Promise intact, the client now<br />
enjoys using the piano.<br />
-John C. Packard, Sea Cliff, NY.<br />
Gene Hennessey<br />
Photo:<br />
A wood finisher's winged helpers<br />
In the early '40s, I knew atl antiques dealer<br />
I'll call Monsieur Leroy who had a store on<br />
the south side in midtown New York City. In<br />
dle windows of his store, he displayed mostly<br />
restored, but flashy French atltiques. His<br />
interpretation of restoration was to dress up<br />
poor imitations with atrocious glossy finishes<br />
and freshly gold-replated hardware<br />
(what the French call ormolu). And although<br />
each piece had a sky-high price tag, Monsieur<br />
Leroy's sales talk, delivered in a heavy<br />
French accent, rarely failed to convince prospective<br />
buyers-mostly the nouveau richethat<br />
tiley were making atl excellent investment<br />
by purchasing the item.<br />
One day, at an auction sale, Leroy purchased<br />
a "sunburst" round clock, about 6 in.<br />
in diameter, surrounded by a gold-leafed<br />
wood fratlle carved to look like stylized sun<br />
rays. Leroy's purchase was a genuine atltique,<br />
about 200 years old, and he soon realized<br />
that it had great sales appeal. So,<br />
shrewdly, he located atld purchased a dozen<br />
atltique clock and barometer meChatlisms<br />
dlat would suit a similar frame. Then, he<br />
contacted his cabineunaker and had him<br />
make a dozen wood fratTIes, all copies of<br />
his genuine antique sunburst.<br />
I gOt involved in Leroy's little scheme<br />
when dle ersatz frames were complete. He<br />
invited me to his store, and pOinting to dle<br />
brand-new sunbursts, he asked if I could finish<br />
dlem to match the original. Even though<br />
I had no real experience with gilding and<br />
didn't have the faintest idea how it was done,<br />
I assured Leroy dlat I was the best man for<br />
the job. But before Leroy agreed, he warned<br />
me that one of the most common ways atltique<br />
experts detect frauds is by dle lack of<br />
"fly specks" in a supposedly aged finish.<br />
These spots are usually crudely imitated by<br />
unqualified fakers. Jokingly, I assured Leroy<br />
dlat I would hire well-fed flies and provide<br />
tilem widl fur-lined toilet seats to help me<br />
create an authentic finish.<br />
Luckily, I was able to locate a very good<br />
gilder, atl elderly fellow by dle natne of<br />
Szabo. His name atld accent over the telephone<br />
assured me that, like myself, he was a<br />
Hungarian. Szabo's shop was only two<br />
blocks away from mine, atld he hardly had<br />
time to hatlg up his receiver before I walked<br />
tilrough his door. I found there a man nearing<br />
his '80s-a man of power atld competence,<br />
balanced by friendly generosity. After<br />
we shook hands, he gold-leafed the first new<br />
sunburst franle while I watched. Then we<br />
gold-leafed dle second togedler, atld finally,<br />
I gold-leafed the dlird while he watched and<br />
asserted his uncompromising demands for<br />
perfection. In the next few days, I goldleafed<br />
the remaining nine sunbursts, but I<br />
never had a chatlCe to pay back Szabo for his<br />
teachings (except maybe through my tears at<br />
124 Fine Woodworking
You<br />
Build<br />
Can<br />
Power<br />
Be Proud<br />
Tools<br />
- And SAVE!!!<br />
Of ..<br />
cnofts_ Remember lp" ... me.nt when "_"ty<br />
With GIL-BIIT stili does. tools sonoethlng? It<br />
Construct your own:<br />
12·in BAND SAW<br />
18-in BAND SAW<br />
lO-in. TllI/ARBOR SAW<br />
LATHEIDRILL PRESS COMB.<br />
9-in TILI TABLE SAW<br />
·6-in BELI SANDER<br />
SPINDLE SHAPER<br />
• CIRCULAR SAW TABLE<br />
GIL-BILT kits include step-by-step plans, full<br />
scale patterns and all necessary metal parts<br />
and components except wood and motor.<br />
Made in America with pride by Gilliam<br />
Manufacturing, Inc. since 1946.<br />
Send $7.50 per plan or $25 for plans for all<br />
eight tools listed above or send $2 for<br />
descriptive brochure only. Satisfaction<br />
Guaranteed.<br />
GILUOM MANUFACTURING, INC.,<br />
Dept. FW-91<br />
P.O. Box 1018<br />
St. Charles, MO 63302<br />
Phone (314)724-1B12<br />
§pea: Throal capacily 18<br />
Featured here: 18·io. Band Saw<br />
in.<br />
Thickness capacity 12 in.<br />
Ta ble size 26 in. x 28 in.<br />
Ta ble lilt O· 1045·<br />
Blade furnished 124 in. x 1/4 x 6T<br />
Table heighl 39 III in.<br />
Overall dimensions 33 '12 in. wide<br />
29 in. deep<br />
71 III in. high<br />
Speed (wi 1.725 rpm molorl<br />
425 rpm 2000 bfpm<br />
Order No. 451-K only$23950 (less<br />
cost of plan. if prev;ously<br />
purchased) plus shipping<br />
Speed reduction kit available for<br />
cutting steel.<br />
==t Econ-Abrasives<br />
BB..1S<br />
GRITS ASSORTED UNLESS OTHERWISE SPEOF1EO<br />
lx30 $.73ea 3x24 $.84ea<br />
lx42 .738a 3x27 .878a<br />
lx44 .73ea 4x21 3/4 .968a<br />
21/2X16 .nea 4x24 .998a<br />
3x18 .18ea 4>
Notes and Comment (contillued)<br />
his burial a few months later).<br />
To complete the finish on the sunbursts, I<br />
followed my standard procedure for reproducing<br />
an antique fini h. First, I made the<br />
finish look the way it did when it was new,<br />
and then I recreated the conditions that aged<br />
it. This involved some inventiveness when it<br />
came to reproducing tile fine fly specks on<br />
tilose gilded frames. I started by laying tile<br />
frames in my backyard and surrounding<br />
tilem witil uncovered dishes of leftover food,<br />
to attract flies. I then coated tile frames witil<br />
honey water and waited for my little winged<br />
helpers to descend and "perform tileir duties."<br />
While the flies' finishing methods may<br />
have been uncouth, the specks they left behind<br />
were autilentic enough to put most an<br />
I<br />
tique fakers to shame!<br />
When at last delivered the replica sunbursts,<br />
Leroy could not tell the original from<br />
the duplicates. After examining each closely<br />
with his magnifier, he finally yelled, "These<br />
fly specks look real !" "But tiley are real," I<br />
replied. "Didn't I tell you I would hire flies<br />
for tile job?" I don't tilink he ever suspected<br />
tiut I was telling him tile u·uth.<br />
-George Fmnk, Wal7n Mineral Springs, Fla.<br />
Product reviews<br />
43215. 180 E.<br />
Elmer's Fill 'N Finish Wood Filler,<br />
Borden, Inc., Broad St., Columbus,<br />
Obio<br />
It must be fairly daunting to compete in an<br />
arena full of products that, for tile most part,<br />
all do pretty much what they are intended to<br />
do. About tile best one can hope for is tiut<br />
one product will do the job a little better<br />
than its competitors. To tilat end, Elmer's Fill<br />
'N Finish by Borden, shown below, would<br />
have to be declared a success.<br />
Wood fi ller, or wood dough (so as not to<br />
be confused witil pore filler), is a tilick, pasty<br />
material designed to fill nicks, holes and defects<br />
in raw wood. It is generally applied<br />
witil a putty knife and allowed to dry, whereupon<br />
it is sanded flush with the surrounding<br />
Photo: Charley Robinson<br />
Elmer's Fill 'N Finish applies easily and<br />
shrinks very little. Large holes can be filled<br />
with successive layers, and then the last<br />
layer can be sanded flush with the surface.<br />
wood surface. The goal is to find a wood filler<br />
that dries quickly (we are all a bit impatient,<br />
are we not ?), sands easily, takes a stain<br />
well and generally acts as much like wood as<br />
is possible. Frankly, most brands of wood<br />
dough on the market have these characteristics<br />
to some degree, although some are a bit<br />
too grainy, some don't take stain well and<br />
some don't sand easily. Elmer's Fill 'N Finish<br />
has all of its ducks in a row. It sands easily,<br />
dries quickly, doesn't smell too bad, is nonflammable,<br />
and has a good consistency both<br />
in its initial handling and in tile dried texture.<br />
It shrinks vely little as it dries, and it<br />
takes a stain better tilaIl most otilers tiut I<br />
have come across.<br />
Mind you, these are only minor differences,<br />
but Fill 'N Finish does marginally outperform<br />
most of its fellows on the hardware<br />
store shelf. In such a tightly competitive<br />
field, tilat may well be enough.<br />
-Micbael Dresdner, Perkasie, Pa.<br />
Plano Glue Press, SL - lnnovation,<br />
Umea, Sweden.<br />
The Plano Glue Press, shown in tile photo<br />
above, is a vertical, wall-hung clamping system<br />
that applies pressure across bOtil faces,<br />
as well as tile edges, of a panel. To use the<br />
system, the bottoms of the claITIps are set to<br />
the appropriate width for tile material. I<br />
found that numbering the square holes on<br />
each bar, starting from tile top, makes setting<br />
up the clanlps easier. The glued pieces are<br />
dropped into the claIllPS from tile top, the<br />
clamp heads are secured aIld tilen the hand<br />
wheels are tightened. Because as much as<br />
1,750 p.s.i. of pressure is applied to all four<br />
PaIlel surfaces at once, the panels I glued up<br />
came out flatter than aIly I had done before,<br />
even tilough I had previously used dowels,<br />
splines or biscuits to align the boards before<br />
claIllping with bar or pipe clamps.<br />
There are two basic components to the<br />
system: a wall-mounted back rail and a<br />
clamp that is held vertically by the back rail.<br />
The back rail (model PCRI000) is only 39 in.<br />
long, so longer paIlels may require two or<br />
more back rails, as shown in the photo<br />
above. TIle back rails are screwed to a 3Y4-in.<br />
thick by 4-in.-wide board tiut is mounted on<br />
the shop wall. This mounting board, located<br />
39Y2 in. above the floor, provides knuckle<br />
clearaI1Ce between the clamps and the wall,<br />
aIld makes a convenient storage space. The<br />
claIllPS, Witil 13fs-in.-wide extruded aluminum<br />
baI's, are available in two different capacities:<br />
Model PClOOO handles paIlels up to<br />
43 in. wide ($159/clanlp), and model PC1250<br />
($179/clamp) accepts panels as wide as 48 in.<br />
The length of panel that can be edge glued is<br />
limited only by the number of claITIps and<br />
tile wall space.<br />
1/16<br />
The maximum thickness that can be<br />
clamped for both models is 4% in., and the<br />
minimum thickness is about in. Key-<br />
Gluing up flat panels is greatly simplified<br />
with the Plano Glue Press because the<br />
easily loaded, wall-mounted clamps apply<br />
pressure to the face Of the panels as well<br />
as to the edges.<br />
board-insu'ument makers won't be tile only<br />
woodworkers who will appreciate this capability.<br />
While the Plano Glue Press is an excellent<br />
edge clamp, it's also a pretty good<br />
veneering clamp when used with flat, stiff<br />
sheet stock for platens.<br />
In addition to providing a better glue up,<br />
tile Plano Glue Press is easy to load, and tile<br />
vertical orientation frees up bench space. I<br />
save time because I Call glue up more quickly,<br />
aIld I don't have to move large glue-ups from<br />
my bench while tile glue dries. If you don't<br />
have wall space for the claIllPS, you CaIl atradl<br />
tile back rail to tile back of your workbendl.<br />
Although more thaIl 150 per claIl1p may<br />
seem high, tile Plano Glue Press is actually<br />
only slightly more expensive than a comparable<br />
number of good-quality bar clamps.<br />
Factoring in the time saved in clamping up<br />
and then flattening panels, the higher costs<br />
are easily justified. Also, the distributor, AdvaI1Ced<br />
Machinery Imports Ltd. (PO Box 312,<br />
New Castle, Del. 19720; 800·648-4264) offers<br />
four different package deals, at substaIltial<br />
savings, tilat should satisfy evelyone from<br />
tile occasional woodworker to tile professional.<br />
-Hugb Foster, Manitowoc, Wisc.<br />
Notes and Comment<br />
Do you know something we don't about<br />
the woodworking scene in your area ?<br />
Please take a moment to fill us in. Notes<br />
and Comment pays for stories, tidbits,<br />
commentary and reports on exhibits<br />
and events. Send manuscripts and color<br />
slides (or, black·and-white photos -preferably<br />
with negatives) to Notes and<br />
Comment, Fine Woodworking, PO Box<br />
5506, Newtown, Conn. 06470-5506<br />
126 Fine Woodworking
__ __<br />
A NEW WAY TO<br />
CARRY ON A FINISHING<br />
TUDITION.<br />
The Wagner<br />
r! __ "_.<br />
r',. method<br />
is unlike<br />
classic,<br />
professional finish on the wood<br />
any finishing<br />
ever seen before. But it can put a<br />
working projects you're doing now,<br />
right in your own workshop.<br />
FineCoat's secret is<br />
Wagner's<br />
(HVLP) gy.<br />
High-Volume,<br />
Low-Pressure very little bounceback or over-spray.<br />
to<br />
technolo- You dont need a spray booth, just an<br />
It allows you open mind and a few minutes read<br />
to spray, with about<br />
any<br />
FineCoat's<br />
fInish<br />
advantages.<br />
on the shelf<br />
you've<br />
givesyou a<br />
prQ/essional<br />
sprayJinish.<br />
Coverage is<br />
smooth and<br />
even over the<br />
most intricate<br />
pieces.<br />
The FineCoat unit is<br />
portable, storable,<br />
and plugs into<br />
a'1Y120V<br />
outlet.<br />
from mind,<br />
type of fInish you had in<br />
the<br />
The FineCoat can give you the<br />
start of the project<br />
It handles urethanes, oils,<br />
varnishes, shellacs,<br />
lacquers, s tains, even<br />
enamel paints. Every<br />
FineCoat unit also<br />
comes with helpful<br />
hints for thinning and<br />
Your hand has never had<br />
spraying different materials.<br />
this much control.<br />
With FineCoat you can get close,<br />
without dripping, or cover large areas.<br />
1/4'<br />
The spray width adjusts from<br />
to a foot wide. You can<br />
also adjust<br />
READER SERVICE O. 136<br />
to a vertical, horizontal, or circular<br />
pattern, without changing nozzles.<br />
While your coats are drying, the<br />
spray gun stands<br />
V4" 1b 12" Wide<br />
securelv in its own<br />
unit ADd when the<br />
last coat is on,<br />
check your watch.<br />
You'll most likely<br />
be done finishing<br />
and cleaning-up, in less time than<br />
you used to spend on the finishing<br />
process alone.<br />
1-800-328-8251.<br />
To find out more about FineCoat,<br />
call We'll send<br />
you more information or refer you<br />
to a FineCoat dealer.<br />
r---------------------------------------------------------,<br />
Send for free literature or<br />
,<br />
,<br />
video. a helpful demonstration<br />
Check the first box below and we'll send<br />
}Qu more literature on HVLP spraying and the<br />
FineCoat sprayer. Or, check the second box<br />
and send $3 to cover postage and handling.<br />
We'll send }Qu the literature along with a<br />
videotape demonstrating the usage and<br />
applications of FineCoat.<br />
D<br />
(Enclaie<br />
Send me more information, free.<br />
for $3. a<br />
D Send me infOOnatbn and the FineCoat video<br />
check p ayable to Wagner<br />
Spray Tech, or we'll charge it to your<br />
MasterCard #<br />
! !<br />
, or<br />
""<br />
l<br />
}QurVisa #,<br />
N. _________ ___<br />
:<br />
ADDRESS, :<br />
__________<br />
'0: : cnY ________ _<br />
: Sf ATE ZIP<br />
.:<br />
:<br />
Mail<br />
.. to, Wagner FineCoa 1 no Fernbrook Ln<br />
§: MN55447<br />
lj:<br />
!<br />
i ,<br />
.)<br />
Plymouth.<br />
FW09<br />
i 1NAlinERe<br />
Ii<br />
Low ; i<br />
A.CoaIN<br />
Overspray Finishing System ,<br />
Q L ________________________________________________________ J
odel Osos,<br />
maker Bruce of Los<br />
CaL, built this F4U4 Corsair fighter<br />
M<br />
Crawford.<br />
drawings,<br />
plane by gluing up more than 1,000<br />
small pieces of wood. Working carefully from<br />
his own Crawford stack-laminated<br />
dauk, lacewood,<br />
and then caned<br />
Only types<br />
wrious species of wood, including<br />
Peruvian walnut, satine, pa<br />
and two<br />
wing<br />
of ebony, each chosen for<br />
its color. a few details, such as the star<br />
and stripes emblems, are inlaid veneer. The airplane,<br />
which bas a span of 17 in., also<br />
bas 2,500 "rivets,» which Crawford cut from<br />
brass rod, set in holes and sanded flush.<br />
The intricate detailing, the etched-glass propeller<br />
and the brass mounting rods that look<br />
like wpor trails all combine to suggest the<br />
roar<br />
Counting flying of a nine-cylinder Corsair overhead.<br />
airplanes, cars and motorcycles,<br />
Crawford has made more than 200 wood models.<br />
HIGH-FLYING MODEL<br />
Photos: Gary Weisenburger