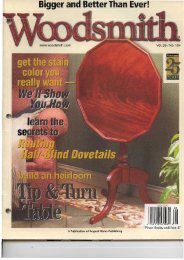
You also want an ePaper? Increase the reach of your titles
YUMPU automatically turns print PDFs into web optimized ePapers that Google loves.
' I #ow to Rescue Your Router Bits! '2<br />
J www. woodsmith .corn<br />
Vol. 28 1 No. I 67<br />
jointer technique;<br />
- -3u<br />
t6 know<br />
,able<br />
~echlf~~~e<br />
for supel itrung<br />
.?I<br />
\<br />
7<br />
% W +A<br />
Cabinet, -
9<br />
Table<br />
from our imders<br />
Tips & Techniques ..I...m.......<br />
project!@w&sf<br />
.4 - ..--<br />
weekend project<br />
all about<br />
Curved~Fretnt Buukcm, a ,.,<br />
Router Bit Revbal .............. .8 w wtly cwiw si&s af thii bmbw give k13<br />
Don't toss thme old, sorry-looking router Mts,<br />
itasophirtlcatgdLodG~utpu'llbepWanily 3<br />
We'll show you how to make them cut lik new.<br />
mpr'id at haw easy it goes qether, Y/ ;.<br />
,A . ,.<br />
tools of the trade<br />
designer series project<br />
SketchU b~Google**~~*~*~~~~.10 TallflfchenT&b ............<br />
If you # ought a computer design program was<br />
22<br />
out of reach, check wt this offering.<br />
techniques from our shop<br />
Quick & Accurate Mortises. ..... .I<br />
the msnpamrrd 5tyEirh dew d&ia pt~jm k<br />
w h am ~ vw a&hth. kit &h4t ~Wiobk: &E<br />
g~&oo;hvaking that peer into<br />
2 heirloom project<br />
Dbplay ~bjwt<br />
, , , , , . . ,<br />
Power and hand tool5 work side-brideto give<br />
you perfect mortises - fast, MthaMgKthatk taQitliilandpafl<br />
jigs and fixtures<br />
EZ Smart Guide.. ,............<br />
This innovative guide sysbm turns your circular<br />
saw into a precisian tool for cutting she& stock.<br />
r<br />
contmgamy, puJ Ild thb psnjett will W 'in<br />
about anywh~re in your hme.<br />
J.4 6
Now> you ran have the best, timesaving secrets, solutions,<br />
and techniques sent directly to ytlur computer. Just go to<br />
~.Woedsmihmm and click on "FREE lip by hail" to<br />
sign up. You'll receive a new tip by email each week.<br />
I<br />
These two symbols let you know there's maw ifdomati&<br />
online at www.Wmdsmith.<br />
videosr technique nmjecQ ,
I<br />
I<br />
hlLR0aarn-w<br />
FoztbtramdonwhIuse ~ ~ L o t f a t l ~ r n e %&lspetQsit~@Btod%<br />
t o ~<br />
~ ~ g ~ u g ~ d f s h n & cw e s ~ f ~ - e k . a s h d m ~ b & w ~ , ~ t ,<br />
er~myroutat~-$ettingthe T Q ~ ~ ~ l & Imdeawadlehrfhebewntu<br />
t $ w<br />
kce to align wetly dght has a& h the miW dot: at om wd sB@.i&m~@ I d a 'af),% WOdmjsbema~fmme-<br />
~~bffie.tolb~~~I~ethebeam<br />
phecratdkismadetaiititujgiy'<br />
W f s , ~ I W ~ a l i ~ nf ht<br />
e m d k m f i l i t inthemibdW.Inthe~pat<br />
~<br />
pdepepu~h.<br />
t&ekncdf&~&hb dthe~i=ide,l&kdh-W<br />
Thegaugeisjustahardwood p~Ididethegaq&to~~ iasertmdathumhs~~.<br />
beamthatfikint~mad~~le enddlfthetabfetomaleesure&e Analumbum "dl& fib in a<br />
cmdk.Thecta$IesUdeein& kq&the~disiaw~~ rroltclhIslthetapprt~fthecra-<br />
&.Urhentheth~~i$<br />
Ic<br />
A<br />
mp*m&'&wb<br />
"-3<br />
c l l & ~ h ~ t & y m<br />
F<br />
-.- - ---<br />
SUBMlr8t@llR.. FIB6<br />
WhWwd Mmw.<br />
&W Rmb<br />
ib&&mH~@fS, ofrio
more tips trom our readers I ;.<br />
mrn&time&; that .exha stor$-@ is'<br />
s q pu right in the'hce,<br />
FO; mveral years, I've had a<br />
large ~toard' pand abh&e$<br />
to my shop wall. tt hag BT,&<br />
me weu aver the pars, £mJdhg<br />
&@&<br />
-&ta M.wIsr;w,m<br />
,- ,
pmjw hi@-<br />
) p h p t q 8 U U f e ~ ~ ~ w<br />
holm. But tapping tkF$ p1#@.-m<br />
~ h ~ l e s w i t h a h m m ~ ~<br />
&ip&mtapofthephJ@.<br />
'Ib.wive @& p~blpm, I d-zr<br />
~ ~ ~ p u ~ ~ ~ & w -<br />
ingkltaakapiaeoflJidia.rlawd I<br />
md &iW.sa "&pW b ~rte md<br />
tbm&htbdWn&~d&p&<br />
as pu can s i h ~ d&d 'a.'<br />
Now1 set the plug in<br />
ietbd ho4eI p b the plug setk<br />
t~lp~p~~&e.ko'le. NDmm<br />
&t*@<br />
on theplug@.<br />
J---J<br />
t FFMd<br />
Cdg<br />
The Winner!<br />
C$mgtatulations Thomas<br />
Edwards bf Pullyallup,<br />
Wsahiffgtom. His hardwars<br />
a &edeqste~ wa~3e1-d as.<br />
,'+,qfw. HF Wign uncl,wers<br />
.7$bLwrw while wine<br />
-.va<br />
, :. Pi& lpr&qqwq-ganized-<br />
W,Bn$ pw'hvii.rotl wid<br />
1wIK a F%@r~mbla !awiable<br />
.i&e@d rdutwJ 4Wck aut the'<br />
,- infarmatian & the<br />
h
"'A i
**t*'m-<br />
'. W ~ w ~ y ~ ~ r n W ~<br />
-.<br />
r ~ J W &,Qf d-ine ao<br />
b @ w ~ k ~ ~ q y W &<br />
&&Wtrlwrn*mwbk<br />
Yw&f II**M&W<br />
3&&it.~Wtw&&~#n ~~~<br />
$ WMg$L&Btl1l~a@<br />
7 ~ ~ ~ ~ ~ y ~ t~ hi t e ~ * ~ & m ~ WM ~ e ~ a . ws a a ~<br />
' r n @ ~ b ~ o~ r % ~ p ~ y ~ w -&b&hemw*d&<br />
b £ t<br />
*p& d*htj. wd8"-ilreaex~.*%~ helashargtotbew<br />
-TQ @& up *%bpu*a fiutpb & %mvwqwwwgm?a<br />
The tau& carbide cutting edges on rout- Pmket stones are lexi expensive. You<br />
er bits mean ordinary Hes and stones can hold them in your hand or clamp<br />
won't do the job. Instead, I turn to dk- them to the bench for shmpenktgbits.<br />
rnond stones. They come! in fhree styles. I€ you'^ honing small bits, you'll need<br />
TIIE small diamond bench stone is p i to use a needle file. They m e in difkrtt<br />
for larger bits. Its atended h@ allows shapes to meet your needs. Sources far all<br />
wu to make longer passes.<br />
th~s~smlrefudonpage4~.<br />
,mne
is sdp2t the rig@ drill Kt. ybuY $tiwed. Yq11 e m seWg<br />
kdit~4b~if~rmupzf~ &eI~satheblt~~m<br />
k1'ahaw.t fRi' nanWef+tl mm the dtbdyrnbyaxat-th,<br />
@mth&width'dthemW, This lbq slide the pWe $6 +he biW<br />
wap ymll hveephty of fwm to At tha h€t end d fhe.layout mafic,<br />
square up the sdm without ktbq<br />
Now you can c1mpa stopbhk to<br />
the Pmk get tQa wide.<br />
tile h, %'box eplaim<br />
I prefer b we FarsAhr $i@ be- Itow to wpIete the ddkgopuse<br />
* lmve & l4xJ s4r* m&n by wing a s p a bW.<br />
bMwh In the wtk. But brad SQURRE II WIKL & pQu{ve<br />
g.& bi& will wak tod, Yau just Whed ddlwghut & holm, t.h~<br />
med to tkw twhiqw Wt's next Wp is fo &or bp,d qm'<br />
15#t for 4he type of bit you de. tke mo& For %&I) I begin by<br />
ThE iuu&dms Qn the opib<br />
phc,hg the wmkph in e vise<br />
pw*k'-t-.<br />
or searing it @ the hch wi&<br />
Ifypuu%aFmhabfi,~ dam#$. I like toweik&~@tly~~er<br />
M dm d m the2q4 d tRe drill tl-@rnortiw& 1~ emgrbndp<br />
~~mrk~bttinandsllt w~gbttopud~dwxt&ii~~.<br />
~ ~ ~ meavb&kr @ v B<br />
~mlRbBtKhwthb~Bi~ V@W&&BW&<br />
~ F ' m ~ d y b ~ d f lI~ssp*a%fi~d&&bdem<br />
-<br />
hgmt&zwaefhdiihdpk .. .<br />
up!h~rn,T$ew'~apvi&e<br />
wide Cw$a* %"I. The wad:-<br />
~ ~ ~ t ~ & ~ ~ ~ ,<br />
w<br />
move the &amKS vvm a wm<br />
u r m<br />
a n<br />
the top mtn% rW&&<br />
HI&&,€& mm m a<br />
t~tiwf up i@ wt t& M~bm<br />
SrnMMW*<br />
Side and ends<br />
" &fmii-e<br />
stmuid be<br />
smooth and<br />
square<br />
A ,><br />
*'<br />
is fa UE the ~h&d MI
tor your clrcu~ar s,. ..
I<br />
I<br />
M ~ H E The . EZ Smart has<br />
some other nice features as well.<br />
For one thing, the guide rails are<br />
available in six Merent lengths.<br />
~ uvou t can connect .. two or three ..<br />
,'<br />
sections to make a longer guide<br />
rail. The rail sections are lhked Vs::<br />
together by short, aluminum con- ,<br />
rtectors (see first photo at right). So ,,<br />
you can make up a guide raiI that<br />
is just as long as you need.<br />
U P S . A lot of strai&tdge<br />
guides use hand damps to hold<br />
them in place. The problem with You can make a longer guide rail by simpty<br />
this is that the clsmps can get in the connecting two shorter lengths of rail.<br />
way of your saw when mahg a<br />
cut. But the clamps on the EZ Smt<br />
slide in a slot on the underside of<br />
the w e , so they're always out of<br />
the way (second photo).<br />
AHIKHlP FEWURE. Ta combat chip<br />
ping, the EZ Swrarl b w comes with<br />
two styles of replaceable, zero-dearance<br />
inserts - one for use with the<br />
guide rail artd one for bhand<br />
cuts. And both edges of the guide<br />
rail are fitted with a replaceable,<br />
antidp edge strip. Thtw reduce<br />
e chipping by supporting he workpiece<br />
right up to the blade.<br />
ACCESSOIES. AU these features are<br />
great, but what makes the EZ Smart<br />
really stand out are the accessories<br />
availabIe for it (see box below).<br />
After taking a look at these, you<br />
quickly realize that this isn't just<br />
a saw guide - it's a precision cutting<br />
system for the circular saw.<br />
BOTlOM UM Overall, I didn't find<br />
much about the EZ Smart to &ticize.<br />
The fit and finish of some of<br />
the parts Ieft a little to be desired,<br />
but ~s didn't affect tlw functionality<br />
of the tool. The EZ Smart will<br />
Adding Versatilitv: EZ Smart Accessories<br />
:lamps fit into a slot underneath the<br />
rail, where they won't get in the way.<br />
work with most right-blade circular<br />
saws, but be prepared to drill<br />
some holes in the base of your saw<br />
to attach the base. You may also<br />
have to enlarge the opening in the<br />
EZ Smart base to accommodate the<br />
blade guard of your saw.<br />
Depending on which "package"<br />
you order, the EZ Smart starts at<br />
$135 (see page 49 for sources). Although<br />
this may seem hgh for a<br />
sbaightedge guide, if you do a lot<br />
of work with sheet goods, I ttunk<br />
it's money well spent I<br />
The basit EZ Smmf Gu& ~arks pat h accessories allow you to use dle, take a look at the videos on the EZ<br />
for cutling plywood and lumber to size. the E Z Srotttrt for a lot more tkan just S d website: www.~mexom.)<br />
But what really mkes the EZ Smrt simple cuts in plywood. You can use it Like the EZ S m t itself, most of the<br />
system so ap-g are &e acrmmries for cutling parts to length, squasing up arxdes are u£fd In different sizes<br />
that are available, wake a look at the panels, or muting joinery (For mare on and packages depending upan your<br />
phofns below to a few.) all the tasks that the EZ Smvt cart hm- spdc needs (see page 49 for murces).
curved-front<br />
ofstorage in just a little space.<br />
As much as I ejq a challenge, I<br />
have to admit that every now arid<br />
then it's nice to huild a simple,<br />
straightforward pro]*&. And with<br />
it's clean Iines and basic design,<br />
that's exactly what this b m k is.<br />
The ronstmdion is a h straightforward.<br />
It uses quick-connect<br />
fastmersp m there's no complicated<br />
joinery to deal with. And it's made<br />
almost entirely out of plywmd, so<br />
you don't have to spend a lot of<br />
time gluing up solid-wood pm&.<br />
But in spite of it4 simplicity, this<br />
project will still thrrrw you a m e<br />
-two mesIinEdCt. If you U e a<br />
look at the photo, you1 see that the<br />
sides of the bookcase have a graceful<br />
curve along the front edge.<br />
While these curves add visual<br />
appeal to the bookcase, hey create<br />
a chanenge when it comes to edging<br />
the plywbod. Here again, fhe<br />
solution is simple - flexible, itonon<br />
edge b&g (photo below).<br />
s<br />
banding is fast and<br />
easy to apply, even<br />
to the curved edges<br />
of the bookcasle<br />
sides. See page 21<br />
for more details.
IF- -<br />
I<br />
FIRSZ Place nail:<br />
location pohh r<br />
dboa rd temg<br />
I,
#endon to the p v e that runs<br />
slZong the bad edge of each side. first job 4 to drill the hob for<br />
These grooves will hold the back the c~mector hard-. Each<br />
panel. Eecause the 4k" plywood connector is made up of two<br />
used for the back panel is clowr parts: a cam and a pin. The pin<br />
to %6" thick, I cut the groove by is installed into he side of the<br />
making two pasw on my table bookcase, W& dm cam fits into<br />
saw to get a snug fit.<br />
aFMG M EllnrL At Ibis poht* all<br />
aholeintPLeshelf.<br />
Theresiitrickis~ttLe holes<br />
that's left to complete the sides is in fhe shelves ahped with th@<br />
to cut the curved &ape. You can holes in fhe sides of the bkcase.<br />
seehowtofinishuptheairvein To help me with this, I d ajig<br />
the +wo drawings Mow.<br />
THkSHEWCS. Now, it's time: to fmus<br />
lihtheoneahowninthebaxat<br />
right. Shq Notebook on page 30<br />
on &*elves. As I saidbefore, the shows huw to make the jig.<br />
topl bottom, and middle ahelves<br />
are fixed. In fact, they're holding<br />
tOE KKR NO TOP IWIL To provide<br />
extra suppoft and give the<br />
thebookcase trJgeh with quick- boobase a more fhbhed look,<br />
connect hardware. The other two you cm add a toe kick to the<br />
shelves are adjustable and will<br />
TES~ on shelf pins. (Sources are<br />
lisfed on page 49.)<br />
bottom shelf and a back pad to<br />
the top. Both are rabbeted to fit<br />
into wves (see details 'a' and 'c'<br />
A f t e ~ ~ ~ ~ s &n h the e ppposite l ~ & page). ~ ~ The panel<br />
(remmbm that the fixed she£veg<br />
a~ three Writ widths), you can<br />
set the adjustable shlves aside far<br />
now WW you mtinue wmlung of the battom &If.<br />
qn the thee fbed shelves.<br />
TOP M L NOTCH& You'Il notice in<br />
~ I W I stmkd ~ by , detail 'a' (top of oppposik page)<br />
Wng the upper and lower fixed that the t ~p panel has notb in<br />
shelves over to my table saw.<br />
These shelves need grooves to<br />
hold the Yfl plywood for the back<br />
panel, as shown in details W ahd<br />
'c' at he top of the opposite page.<br />
Qnce the grooves are cut tab<br />
these tw~ shelves and the middle<br />
shelf over to the W press;#&e<br />
is "trapped" In t?ae paves in the<br />
sides, while fie toe kick is glued<br />
in the pwe onthebottom side<br />
its uppa corners. The mtdw fit<br />
mund blocks that will be addd<br />
to the grooves during assembly to<br />
prokt the dge ban*.<br />
With all fhis dme, the next step<br />
wilI be to add the edging and put<br />
the bookcme together*<br />
Dr9UIng the a m Holes* Orill the holes for the cams<br />
fm the b&m side of the sheh. Take are so you<br />
don? drill through theshe/= (&tail 'a><br />
Route and Flip Rotate th3 shelf and flip the ji'g81<br />
drill the cam hob in the back of the s heh. A sup<br />
pofi bJOdc kwp the shelf /MI,<br />
Ddi- the Comer Hdes, Ling the j$ up &A<br />
the am t~ &U the hob for the btmmrs<br />
into the idg~ sf t&&hk,<br />
spacer bl<br />
behveen<br />
edge of shelf<br />
Middle H&~WiwMWe& Add a ipcef to &dl fie<br />
hob id &i mtWe Shelf to account for the back<br />
pnel tht i@&@@a$aim.
Material<br />
4 Cw$&<br />
B UppwPi<br />
C MlMb F h
oekc&e And since WI mad@ h e & € ( ~ .place ~<br />
edge Banding are an iron, a TrSrnmitlg<br />
fatly with fh@ pmfeKt. mtlrem&ngt#<br />
The edge band- is just a law y mmf scmchhg* Thkn sbpljr<br />
narrow ship of %$'-hick venm. iron th banding ontdtb edge af<br />
(It's said b a fm dikrmt widths .the plywood (phuto 2):<br />
and.~sofw~,~%ur~sr~n I~thatI~the~tfesu~ts<br />
page $9.) me side of the banding by &aning a shm- ofbidis<br />
mv- wjth a heat-activated ing at a time. FWm W 30 se~snds<br />
@~.~y~tkhZivEt~d@k~@~flyi~ b&ud~e~~~t$&t&e#~<br />
lvbci-
tall Kitchen Tab!?<br />
WMhH yw*m =ding I& ~ y ~ ~ M e til bh e m<br />
mmhg mwpapx over b d - m&~W* kQut &the way<br />
imt -ur 21 mhag dWC (* p ~ ~ ~ ~ w ~ ~ p ~ g ~ ~ *<br />
tw &t&m set fit r@t:h n .m*
sL-7 TF-: Aligning and Drihg Mortises
HwTa Rout Stmeed Mortises<br />
Rpurer Tgbk S u p 5@ &:'fp-nce I?&' fwfrr the hic .pkcnge Rout, && *e rnw!&e EmW Ga mi% @&WeY'e adthe w&+<br />
firznm r ~$mdIbfied with the ciMip&m of t& p i e &l& the ma* &ow aaijd p;hr@;&-Wp&&, hut unfit M<br />
bir* ma&sM ahd mp mads an ?b:%e. op- mW hi We i3~<br />
,ha&:oh tfkY&e.
I<br />
4<br />
making the TOP<br />
W1th the base complete, it's time to<br />
start building the bp. I glued up<br />
the top from narrow maple stock<br />
to give it a butcher-block look that<br />
fits In with just abwt any kitchen<br />
decor. It's a little more work than<br />
some of the alternatives, but this<br />
arrangement means the top will be<br />
mose stable. It will stay flatter and<br />
mt expand and contract as much<br />
with seasonal changes.<br />
aJlTM THE STRIPS. I stated by<br />
jointing and planing a few pieces<br />
of maple stock. 1 took extra care<br />
to make sure every- was perfdy<br />
flat and parallel dm@ this<br />
step, because the planed surfaces<br />
will actually end up being the glue<br />
joints I've ripped the W s<br />
into mwer strips. (The box k-<br />
low explains how to pmpare and<br />
lay out the strips for a flat top).<br />
Next, set up your table saw with<br />
a god rip blade and dwble-check<br />
the fence to make sure it's parallel<br />
to the blade. Then you can rip the<br />
maple into strips. For the best glue<br />
joinis? I like to ca~fully joint each<br />
strip, Then you can move on to arrmging<br />
them for glue-up.<br />
Urn OUT TOP. Ifs a goad idea<br />
to ixlspect each piece for straight-<br />
ness. When you cut long, narrow<br />
p i e you can get some bowing.<br />
So now is the time to detwmh<br />
which strips are bowed and in<br />
which direction so you cnn take<br />
that into account during assembly.<br />
The box Mow explains how to do<br />
this to get good results.<br />
HUM IT UP. Now, you can glue<br />
up the top. I first glued the strips<br />
into s m a h &~fls (about 8"<br />
Cuttin! and Assembling the Top<br />
. .<br />
wide) so I could run them through<br />
a planet. Take a look at the box on<br />
the next page fax details m making<br />
a fIat and smooth tabletop.<br />
BBW DEWILL Now, you can trim<br />
the top to size and rout the rounclover<br />
on the comers and top edge.<br />
Then sand everything smooth.<br />
After painting the base and applying<br />
a finish to the top, you can<br />
attach the top with Zfasteners, as<br />
shown In the drawing above. Then<br />
you can hun to makmg the stools.<br />
mi<br />
81 '<br />
I<br />
1<br />
I<br />
j<br />
Ripping the Stock. Ch& to make sure your fence is parailel to the Lay Out the Pieces To compensate for bowing,<br />
blade to avoid saw mark and burning, Then rip the strips and flip them lay out the strips as frown above. This waj you'll<br />
an their side. This edge grain wili become the top of the tabb A quick get a bemr glue h d and you won't have m wony<br />
pend mark to identify them will save time hte~ about cracks appearing in the future. I<br />
4<br />
26 <strong>Woodsmith</strong><br />
No. <strong>167</strong><br />
-
How-To:<br />
Flatten The<br />
Tabletop<br />
~~g a glued-up tabktop begins<br />
during & asmbly stag.<br />
Chping up the individual strips<br />
on a perfectly flat surface and tapping<br />
them in place with a mallet<br />
is pmbably the best way to get<br />
dl in he. You can a h use<br />
cauls mnnbg perpendicular to fie<br />
strips to keep them from ddhg<br />
underclampiq pmsure<br />
f UT AMD TRUE. When the dries,<br />
it's tempting ta try and ff atten h<br />
pane1 by running it thmugh a<br />
planer. A p h will pmduce n flat<br />
surface, but if the-opposite si& is<br />
uneven, the surfaces won't he parallel.<br />
You1 get an unwen panel<br />
-<br />
that won't sit fiat un th~ base. The<br />
solution is to flakken ane Bide first.<br />
If you've dm everyfhingyoucantQkeep~flat<br />
during the glueup, it% nut hard to<br />
knock down the remaining ridg~.<br />
You'll want to begin by mrnoving<br />
the glue squeezeout. An old chisel<br />
wo& great for this.<br />
#EaFORFUTNE%Istartby~<br />
a straightedge to check the surface<br />
and make a se~es of penal ma&<br />
an the high spots. Then you can<br />
turn to the belt sander and a W<br />
grit belt (see box at n@). It<br />
shmt work of the the.<br />
The goal<br />
duringthis phase is to move only<br />
the Mgh spob. 8. angle th~ sander<br />
or yw can even sand acrows the<br />
gain. Skap hquently and recheck<br />
the surface with a straightedge.<br />
When alI the high sp& are<br />
smoothed out, you can switch tn<br />
a 120+€ belt and s a d with the<br />
@, moving fmm slde to side<br />
mid you have a nice, flat surface.<br />
W SMOOTH, Then you can run<br />
the panels through the phr, hking<br />
light cuts. Stay a little shy of<br />
the finat c h i b s - yauzl sand<br />
the top to final thickness after you<br />
glue up the pads. Give the top a<br />
final sandmg far a smooth finish
P'-ty asad ~~* 'ke<br />
lower spin* Mek their rmrnded<br />
dp@veyaurf&a~Ie<br />
rwing qotwhiled~.<br />
llEm. me &.table, &e -1<br />
top a& gluerd up hm m w<br />
~ p s . I ~ t h C F ~ ~<br />
t0asmnble;utdfkttkn~asI<br />
did for tke table Q. A d hy'm<br />
atkhd to ttPe base with z-fastenem,<br />
jm lik~ the table.<br />
d y diWl in the<br />
'sblkp b ~slight.IwLuld~ I<br />
ZidtH-dhQd~b<br />
ybuvH be sinp;tm k, 1 E iit<br />
h d p ~ ~ a l i t t b m o ~ e ~<br />
WbEftheedgeia-<br />
A~~0~1woEpa#da~,<br />
d&u~m*fQP$&pu%e<br />
d&I&I'~~~W~wOn<br />
Mve my'd.,%m@ a gmd<br />
$putfor mh&dpliltle t&lemd<br />
s ~ h ~ ~ . u l<br />
No. <strong>167</strong>
,A,,<br />
.<br />
Materials, Supplies .& Cutting Diagram<br />
,,,<br />
,<<br />
TABLE<br />
A l,%s-I4<br />
I3 . Upp,er Etrd .Aprons Q) j4 x 2'~~ - 2Q<br />
C,>91jp.w Side Aprpns (23 % x 2 V! - 32<br />
D',' LQWW E-nd Aprohs (2) 3Lq x ?! - 20<br />
,<br />
-<br />
D-' 8<br />
H Center Stretches 41)<br />
-, .<br />
(8) Tabletop.2-fwteners<br />
(8)#8x2%" Fh Wmdscrws<br />
, ~(8)#8x3~"PhW\lood~~~<br />
. I<br />
Island Worksurface<br />
Thi6 tall tabb abo makm w handy standalone<br />
workeurface for the kitchen. And by addlng a<br />
~oupla mom s$retckew ~C~OSG the bottom,<br />
you can crm~<br />
a tihslf for swvlng large itema.<br />
There am onb two thing6 you need to do be-<br />
fore wssambling the base. Fbt, you'll add Wo<br />
&ra mort;ls@e in the end mile (see drawing<br />
below). But $ha nim thing IG you can use the<br />
same routlng technique that I used for the<br />
table [see the box al; the bott~pn of page 25).<br />
The other thing you'll new4 t~ do i6 make<br />
ma mom ce~ter straher~. The tkk hem I6<br />
'co make sum the spaclng between them is the<br />
Bama when you msrnbla the base,<br />
i<br />
1<br />
20 -
t<br />
- -<br />
t;>:,'
. , > . , I<br />
> 7 .-<br />
6kns Stop ', > . C<br />
When yau @ &y tu hidl the<br />
@w*ina,edbp~a~ mona*.~tW~QEl M%&ewy*<br />
an 32, p'11nml mal Wbppd&&ge9~~%hvea%* RrPa piem of tndrfing bani<br />
~ o f ~ & - r n d ' ~tmter&onbo&e$p<br />
~ ~ ~ d<br />
the oi%e~&ed the wmkp&e, Just<br />
~ ~ h p ~ ~ € ~ W Ai K e4 Y i l % ~ ~ ~ turnZhern~kpi~owr,re&the<br />
s ~ g<br />
caten~~Ietofindmqld~<br />
md mau& to do he j&. Fa 1 trim 219e mlbg *ips fwm the thebhka&kfmL<br />
mademylowrrqwrtm-mundflas5 w~F~.3~.Ta&ahisfgiQt~ W ~ y o w ~ d ~ ~ ~ , ysur p wow l l &$<br />
&p mokfing. It onlp tab a few raise the bls*fe chvethew&kp-, need to miter Ule quarter-round rtop moldibq:.:-. ,?;<br />
~~~pit.o&itjW.theW ~ ~ ~ t ~ f e n w t g ~ ~~len@t,~paucmseam t h e ~ d l<br />
. ,.v.;r;.,L2 ,L,, ;.,yef<br />
. -> ,la:<br />
yau~-TRephato~tri@t~ piamofmold@hhdpd dw&win~tiortby~or<br />
., . .: - i<br />
> );:>:&<br />
how it Emkf at h eompMon of ths wmkpbad cut bike* glkng~~psin~e.<br />
.
Heirloom Project :-<br />
g lass-panel<br />
Display<br />
a<br />
Cabinet<br />
You won't believe how quickly<br />
this project can be built. The<br />
key is simple, traditional joinery.<br />
@<br />
Shuwingortisjwtwhatthiscabinetisall<br />
about. And t k are ~ enough htemtlng<br />
detaibbtmdeitjwqtothetopofthe<br />
-- I *<br />
list of p&& h t I wmtedb build. , , . ' 'I<br />
Mowmu&pmpk~~fheabpb "' .<br />
displayed in tkre "ghed-in"upper sectirn<br />
Or hmv the cabinet offers both "hidden"<br />
and~~.Andfhefzlrtthatithasa<br />
emalz~~~roucantuekitinjust<br />
abwt&t~,@vkgitalotof~tB;<br />
But woadww will W notice rrf the<br />
details an8 strafghH~rw?rxd cmstmctim<br />
that makes thisdiner a~stad+ut<br />
FRAldE AND PANE. Just kause a project<br />
isc~in*doesn"tmewnym~<br />
.*pm-kthe-krn&v<br />
Qfmqgp~.&meamdpd - ..<br />
~ ~ . ~ ~ f o<br />
~ t h e j a n q ~ b & ~ ~<br />
~DSIE~~RLU. %aM-rw&f+o<br />
mti&*t&thebe~thavetodowith<br />
~~~thatkeepthe~Wfrorn<br />
hdag bov. sming at the bowmF<br />
thecabinetr&scm&pfhatr&eitoff~ .--<br />
~Tkis~a~aPhInWlower<br />
e<br />
keep a &m l&Wg bomm heavy.<br />
Tha?&dMisa*@*tu<br />
e a ~ ~ m m m oFdy, f ~ afthe ~ ~ .<br />
top, I Ugsd a pmmdecwe mokhg~to~add<br />
one last eyecaw
M a & t?&vk~<br />
rnoitvn makm it wy<br />
m add &ad to s@nr,en<br />
FRONT<br />
SEmIOW<br />
vlEW<br />
For hadware<br />
mKes, turn to<br />
PVm<br />
are made with<br />
A<br />
she I in lower<br />
part of care is<br />
made from<br />
mQd<br />
I<br />
Mdse and<br />
tenon face<br />
frame adds<br />
Saiditv to<br />
- Y t
uild the<br />
SIDES &<br />
I mentioned Wore that the case<br />
is made up of three hame and<br />
panel amanbeS and an open face<br />
hamc What's surpcbbg abut<br />
this is just how quicliiy khese<br />
&$embb go iqvthr.<br />
SIMPLE Jmw: me reasan Eox<br />
this is the johry that's used on<br />
the back and sih. Here, I chm<br />
a stub t m ami pve. Besides<br />
quick assembly, this joint<br />
has another hg advantage:<br />
yw can cut it enMy an fm<br />
table saw. And afk adding<br />
W1 plpwd panels, the's<br />
phfy of glue surface to ae<br />
ate a strong, rigid asmrhly<br />
Befm getting started on<br />
the frames, there's one ather<br />
thing I'd Uke to mention.<br />
And this has to do with<br />
working effieimtly. 'She<br />
joinery for both the side<br />
versatile guide to and back assemblies is identical.<br />
rout the dadoes So you can save some -time by<br />
in the sides. Turn cutting it & at one he.<br />
to page 30 for When you're ripping the parts<br />
details, to width, be sure to note the different<br />
sizes af both the sacs<br />
and rails (drawing at right). The<br />
low rds will get a" arc cut on<br />
the bottom edge later. But for<br />
now, I leftit square to mh cutting<br />
the joky simpler.<br />
WTHElldtC Orwe the pinery<br />
is mnpkte, ~rou can go ahead<br />
aRdcutthearcontPlelo+verrails<br />
[dd 'c'). A trip to the band saw<br />
I1<br />
I<br />
makes quick work of row cut-<br />
! tingthew. Thenthe edgeanbe<br />
cleaned up with a dntmdm.<br />
t<br />
No. <strong>167</strong><br />
1
2 .,<br />
-<br />
. .<br />
. - .<br />
.<br />
- . ?.Y2= ,:- 2-,' ' -. --<br />
-<br />
-<br />
.--I- - k.;1;<br />
9; -15 m. - .-:<br />
:..?; . -<br />
m<br />
bdbm rail to &ch h c m s<br />
Qtt the db<br />
and hack.<br />
nm, rn 0- %and, khe<br />
ba&bs J W a& bn be<br />
taped just H k m the<br />
sides-& back. NOW, glue up<br />
facefmmhkmg-tohep<br />
i t ~ a s ~ ~ m ~ '<br />
MM removing the damp,<br />
h last thing to do on the face<br />
frame is tb rut a rabbet m the<br />
'track hce of each stile. W mbbet.<br />
will capture the side hmes<br />
and make assembly easier,<br />
cnst Assam GlUiTlg the fBCe<br />
hame in p w is *try amght-<br />
£omad. h d like the d*<br />
assembly, ifs a pd idea td ror~<br />
cmtr&emadqgat&htjdnt<br />
line.- the sfde &m-md<br />
tXpRra+b~~tirt~fam~.<br />
All that's left JO cb on the caw.<br />
is to rout astopped&amhm<br />
the front corn&. And you can<br />
kam how the best mdts<br />
in the boxat right.<br />
.<br />
~ m E ~ ' I O P<br />
w&h**oftfrea~<br />
complete,ywmm gets&<br />
m~tcwp,'mekq~5n~w-<br />
~ a t # ~ . ~ ~ j W a p l ~ u d<br />
pd W1521W-widElHli~ edg-<br />
*. Bide9:'lfie &g&g i's<br />
mikmd Wih a 'rig m-< 88<br />
hy9ucrulmindetailY;a'<br />
~tqp~is.~sitarpLy<br />
~ ~ b u l . i e ~ a f t l w ~ . h<br />
~ ~ w i n g ' r ~ ~ c a n ~ ~ ~ ~<br />
@timed. Ifi cam&& side WA<br />
sideand 11wh with the back,<br />
mlrourrmk'fhe~~ista<br />
add a ~ ~ o ~ ~ MDW l dthe<br />
m g<br />
t c p . ~ T ~ a p ~ ~ v e<br />
matding &at's lxlked to wrap<br />
;rfmmdthebt: ai~ d&
make the<br />
Wi& the t w mplete, &re<br />
areodllyawqde~thhgsto<br />
&amdd,WWorku\riilk<br />
~dup.mrtextstepiett0<br />
build the two doors. And since the<br />
mtru&m&ea& one is a Bide<br />
twkmt, I'll tah ym drrw& the<br />
pmmeat aae.<br />
Infhednwing atright, yotl>m<br />
web'tiheupdmwillhse<br />
a glass pard Wif will match the<br />
panels you% inst& in the sides.<br />
IOIMRX 'Since a @ panel<br />
dm't add &m@h to a dmr, the<br />
~ ~ nwds to rbe strong n<br />
and rigidtomakeupforit Thfs<br />
mttkesita~~&farmortise<br />
and jainerp. In detail 'a,'<br />
you11 find the dimension% you'll<br />
need to complete the jojnery.<br />
WE?, hthdmrfrmhas<br />
~ @ ~ ~ * p u ~ ~<br />
r o u t n r a b b e t ~ ~ ~<br />
to hold the glass panel, as illustrated<br />
ia detail %.'<br />
lie @B pmek are held in<br />
place with some simple stop I<br />
made at the table saw and mu*<br />
table. You can see the stepby-step<br />
proas on page 31.<br />
ollentl# ows, At the same h e<br />
youq* ord* the glass for<br />
the dm and sides, you can also
I....<br />
-..<br />
mt a join- in my 9%. But me like a contradiction that such big bfifa. Number one is that<br />
" t I o w n m 1 a b h tool can be so usz- you can put a smooth, strd ",<br />
xtqwhg stock% &me&. h memIt'sesmWyapairaf~ rn~thefaceafabuardebigp't<br />
b e it takes to think abaut narrowt b n Wb sephrzted and flat, or fate jQinting. Each<br />
out a hand $am nr a belt by a horizontal cutterhead. The it$ awn techruqae.<br />
you can joint a hard for infeed Wle is mi& or lowered to<br />
-1<br />
by the Mw And an adjmt- Edge<br />
ablefmcec~utbeusedto~~ mms<br />
L<br />
wifhevmasimpfetmllha jainthgastrnight,<br />
~ ~ a l abdforetpl<br />
i ~ ~ -<br />
how4 But k leaning TZre p- B<br />
faward. Y u run<br />
a s d amount Of material. The
. . :,.<br />
4<br />
:'/ ,<br />
*t spot while a h I&#&@'&<br />
wwkpiwmqa* h-<br />
at*^ d*<br />
**w@m-ed<br />
~*Ykww"~'brtmw~k<br />
h m ~ ~ ~ m<br />
&eJmW&<br />
be dimbing up and away a<br />
&-h&&~8-.&<br />
wer hMwt mure<br />
:clthqou--w Qmpq*P -<br />
-<br />
-/--=====<br />
: s ~ ~ b a ~ d ~ d h
When you wmt to make me face<br />
ofa~td~amsits~and<br />
~ d m g i t s ~ , t h e ~<br />
ef iB your bmt Optim. And &Ice<br />
Wtbg theficeqareb atn dge<br />
way isn't a concan, this cm be<br />
a bit cask than edge jointing.<br />
mE Just like jointing an<br />
+,face jointing starbby iakmg<br />
alaakatthelmm&Ybpwantko<br />
d!zmhine the grain dimdon and<br />
wh* the hard tras arty -us<br />
cupping acmw its width or tww<br />
or Wt along its leng!h Agam,<br />
pull have an easier h e getting a I<br />
strqiht, at workpiece by joinkg ?:33=<br />
-... .. :<br />
withthehollowsidedows~ ....*.-. .'<br />
A wm Bm When face iointing,<br />
k with mul-<br />
Elimina?e ~JI<br />
push down o
. I<br />
sqare edp# the caw might be the cut (called snipe) or tke hives<br />
Outfeed Height.<br />
that €he knives not in8t;luBd atap mfAQ halhay throw a W can US a<br />
cody. All ihe hives 5ftould be pass, the outfeed babk is too low or sttaigh9eB'g.e fo<br />
at he same Mght and perf&ly too hgh. lk &odd be setBwhwifh check the height<br />
pivahl to the tables (m rniddle the topmost arc d the kniw flow pf the auW<br />
drawing at right). A knife that's a $rp sight bwiqg). Too high and<br />
Wehighonsrnesideofthekible ~ugetsrdpe,~~awandywget &&@c rhe hi&<br />
will joint a bevdd edge. If this is<br />
the case, just reset h knives.<br />
a 'klbx~b" rut. A straightedge is id<br />
you need to hd<br />
the @ hdW<br />
Shop Tip: Sho~Made Pushblock<br />
me & the ChaIllagH to he<br />
j&&&&ia$pIr;flg firm, steady<br />
&md.pmmwe while at the<br />
m.w.h.* w<br />
k&m*Mmf%<br />
C<br />
&add Flake Very<br />
I<br />
I
-<br />
'- ;<br />
ScabbIeSbr~<br />
; me $22 thing &at<br />
the cwhhefs shown at right is<br />
pu c".w ~~~c~~<br />
but size them ta hold pt ab6*<br />
anydun#. Far inEm~e$ Z 'm&.a<br />
kw to hold screws d hardware,<br />
axrd w,larpr ones t9 hold #he<br />
wlBld-ies, ~&u-&, wdkg 5-<br />
* , m d ~ t ~ ~ k P m<br />
W- wfi~kllg W h I@&.<br />
AU p heed f9 build thise<br />
bdy cmiain&a'i$ Somz wordI<br />
hqdhkd, and glue. %q'j;e<br />
- wemble;8 wie eimgle dado<br />
jw. For the' @la sk#, .pu<br />
my wmt t@ Mild the. s&bk<br />
. iw?@ UQ .hold@rn.@rnirrrn
k & easy steps for<br />
Antiquing<br />
The hardwarn br a project<br />
is just as important as the,<br />
#<br />
~n md finish. Here are e<br />
fewhardwa~"fini&e3~t~<br />
give your pi~jed the right look.
. ,<br />
>-.<br />
Blades h r<br />
the T ab<br />
Saw<br />
A Mend told me I<br />
should be using<br />
thin-kerf blades on my<br />
table saw. They don't<br />
7 A %jwkerf bl& lo& much different to<br />
amI and a full- ma. C the any slgnifk<br />
kerf blade. mnf mwmiagse?<br />
u r -<br />
rn 'Rwwbzw ~ m &c;<br />
W$ WU& &#$ && Ji@#a ~ dlY d - We<br />
e dVwrn& JR $a?$ IBnvmliMm~ @I@&J 'FWQJ&&<br />
*dhMdaWU&<br />
*by<br />
Yj&e
There's no question that using<br />
your computer to design p~ojects<br />
.can be & real timesa,ver,<br />
However, mest dwign p-mgmms<br />
run a lM1e-bit on the expensive<br />
side, Gaugle's SkeEhUp softwsm,<br />
faatu red an page 10, is<br />
free. You wn dawnload it ahd<br />
try it for yburself by checking out<br />
~.s~hug.sam.<br />
ROUTER 11181I5108aTIOH<br />
If you'm as hard on router bits<br />
as I am, you'll appreciatethe tip<br />
far dining and honing them on<br />
page 8. kls easy lo keep-them in<br />
good shape with just a Ikjs TLC<br />
and the right d s . The diamond<br />
bench stone, needle files, and<br />
pocket stones I used rare made by<br />
EZE-LAPDiamond Products. You<br />
can find eontact infarmatiori for<br />
Ei'E-LAP retailen, in the margin.<br />
These items are also mailable at<br />
ths <strong>Woodsmith</strong> Stow.<br />
EZ SMMT 6WDE<br />
Whethef itfa cutting plywbbd fo'r<br />
Rome canstructian or a furnituw<br />
project, the EZSrnart Guide<br />
shown an pzr~e 14 is a handy<br />
way ta g@t more out of your circtslsr<br />
saw. The basic system and<br />
optional a ~wari~s are a l I available<br />
from Eumkm~n&, See<br />
thk margin far deteils.<br />
HARDBOUND<br />
VOLUMES<br />
This set includes five hardbound volumes<br />
Being able to add a custom patina<br />
tb d-thd8.b hadwarn awns up<br />
a lot of mibilh fm y~ur pmj- pan&<br />
mls. The ammonia, murk a&,<br />
and lacquer thinnei you might<br />
need am' a~ailab~s at pwr local<br />
home center ar hardware Hare.<br />
The dahning solution I used was<br />
feomths bbmithStwI4E5mJ.<br />
I atso found rlerkgning sqILltians<br />
art ~anwawtt~~~~rnm14<br />
& 02001547). Informatian far btk<br />
$QU~C&S~S shm at fight<br />
BOOKCASE<br />
For the bookcase featured on<br />
page 16, I used Minifix connsGtQrs<br />
(22161), and some Y$<br />
shdf support pins (227651 from<br />
Ro&t.<br />
I atso dmided that this<br />
was a gaud projmt to use Ironon<br />
edging (916851 to cover f h ~<br />
plywood. The chefry veneer<br />
edging is also available Prom the<br />
Wwa'smith Sore.<br />
TALL TABLE AND STOOCS<br />
The tall mbte and tita~ls profect<br />
ferurd on page 22 doesn't<br />
require e lot & supplie~ other<br />
than t h wood, ~ but I did use<br />
some tabletop fasteners, &en<br />
cerllqdZ+lips, tu am& the top to<br />
rhrp.tram. I turned ta Lee Vale$<br />
~13U1,01) for these hahdy and<br />
easy-m-use f astenar~,<br />
1 mads a trip tp my local glas<br />
supplkr for thesh~lvss and &or<br />
in the display cabinet<br />
on page. 32. You nsn mer the<br />
chr'me, UalCtippid butt Piiriges<br />
(01HP8.20) snd the chromeplated<br />
utilify catches (01 L85,02),<br />
fram Lea Vafle y. 1 faund the, '4'<br />
nickel-plated shelf supports<br />
(338601, and the rubber su$hions~<br />
(33928) that keep the shelves<br />
from rerttling at Rackler.<br />
HARPWARE STORME<br />
Moat of rha hardware starage<br />
ideas on page $4 can be built<br />
from scrap hardwood, MDF, or<br />
h~rdbaard. One of the projects,<br />
however, uses handy, glasstspperd,<br />
aluminum watch me!&&<br />
cases (27K50.751 from Lm kMey<br />
I ohmetbe 2%"-dia. cases for this<br />
project, but they eym in a wide<br />
variety of other sires, as WQII.<br />
f heir contact information is in<br />
fbe margfi at right.<br />
zm-w vbld<br />
M8hrEE&%<br />
PMsm<br />
amdcd<br />
Each volume inch<br />
or Call 1-800-444-7527 To
-<br />
de w* ,a, iikT -,<br />
uw- &p&dy ha door.<br />
I ONLINE mm - i , Wen it 6 -dm to it.,& pwW<br />
video workshop 1 jet isn't &J mu&.moy<br />
a bupjoint goqd news &,<br />
fiw?~ a j %yw h t amhw&qlaQk&a*m&<br />
, ,<br />
< - ,.%* - -<br />
c ,>- >:,.>:<br />
!<br />
'<br />
$hq@tifif-a W-lap jaf.<br />
11WH4r trL You s& hbw
_<br />
MITERED-END
. - - -<br />
L-- :<br />
- -<br />
- ' ----- - - -<br />
tr-, - -,<br />
2 . - - -<br />
w-<br />
-<br />
looking inside<br />
' -<br />
-<br />
L.. I.<br />
Final Details - - -<br />
7, - -1<br />
-<br />
-<br />
Drsplay Wne,<br />
This beautiful cablnet&&<br />
mightdraw<br />
#mi attantion than<br />
what's on display<br />
Mtk It combins<br />
A Tutt Kitchen Tabfe. Whether it's with stools you<br />
chase<br />
adaatic-n and<br />
(tibwel or ones that yw build, this table<br />
great placeto enjoy your momlng coffee, Complete<br />
I plans for the table and stools start on pger 22.<br />
instrudms<br />
-<br />
: ! *<br />
-<br />
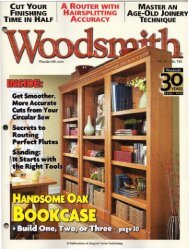
Cumed-Fmnt Bookc~se. From the louk of it, you might think )<br />
that this elegant bookcam would be a bit of a challenge to<br />
build. But that's certainly not the caM, Plywood construction,<br />
quick-connect hardware, and iron-on edge banding make it a<br />
breeze. Turn to page 16 and you'll s& what 1 mean.<br />
.- - -<br />
- - -<br />
- -<br />
- - - - - --<br />
-<br />
- - - - --<br />
- - --<br />
- - - -<br />
- - ----. -<br />
- - - -<br />
- - .-- -<br />
-<br />
- - . -


