132140 Product Manual - Northern Tool + Equipment
132140 Product Manual - Northern Tool + Equipment
132140 Product Manual - Northern Tool + Equipment
Create successful ePaper yourself
Turn your PDF publications into a flip-book with our unique Google optimized e-Paper software.
THANK YOU FOR CHOOSING A NORTHERN TOOL + EQUIPMENT CO., INC. PRODUCT!<br />
For future reference, please complete the owner's record below:<br />
Model: _______________ Purchase Date: _______________<br />
Save the receipt, warranty, and instruction manual. It is important that you read the entire<br />
manual to become familiar with this product before you begin using it.<br />
This machine is designed for certain applications only. <strong>Northern</strong> <strong>Tool</strong> + <strong>Equipment</strong> cannot<br />
be responsible for issues arising from modification. We strongly recommend this machine is<br />
not modified and/or used for any application other than that for which it was designed. If you<br />
have any questions relative to a particular application, DO NOT use the machine until you<br />
have first contacted <strong>Northern</strong> <strong>Tool</strong> + <strong>Equipment</strong> to determine if it can or should be performed<br />
on the product.<br />
For technical questions please call 1-800-222-5381.<br />
INTENDED USE<br />
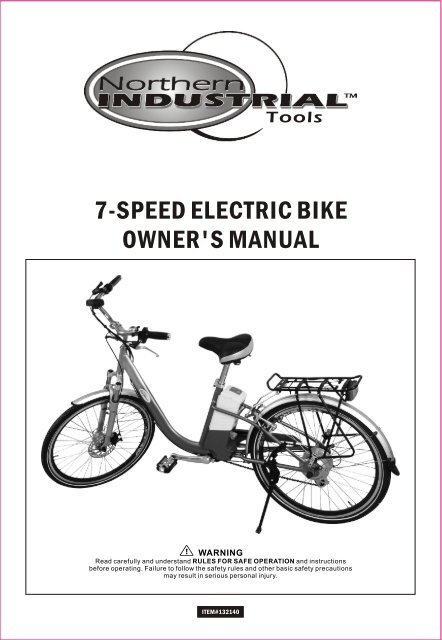
This electric bicycle is installed with an electric drive system. Although this product<br />
operates much like a standard bicycle, there are differences. Please carefully read the<br />
User's <strong>Manual</strong> before use.<br />
CAUTION: Do not lend this electric bicycle to those who cannot ride a bicycle.<br />
HELMETS SAVE LIVES! Always wear a properly fitted helmet when riding your electric<br />
bicycle. Do not ride at night. Avoid riding in wet or hazardous conditions.<br />
TECHNICAL SPECIFICATIONS<br />
Electric Driving System<br />
Frame Size<br />
Frame<br />
Wheel Size<br />
Fork<br />
Gear Shifter<br />
Rear Derailleur<br />
Chain<br />
Rims<br />
Brake<br />
Spoke<br />
Tire<br />
Battery<br />
Max Speed<br />
Charging Time<br />
Battery Life Span<br />
Motor<br />
Riding Distance at one charge<br />
Recommended Load Capacity<br />
Max Climbing Angle<br />
1 OF 13<br />
1:1.5 ASSIST POWER<br />
26"<br />
Alloy<br />
26"<br />
Suspension<br />
7 SPEED<br />
M310 7T SHIMANO<br />
HP20<br />
26"<br />
Front: Disc brake, Rear: V-brake<br />
UCP<br />
26" 1.75<br />
Lithium-Ion (24V/8Ah)<br />
15 1/2 MPH (25km/h)<br />
5-6 hours<br />
500 times<br />
24V 180W<br />
15 1/2 miles (25Km)<br />
165 lbs. (75 kg)<br />
7
CORRECT FRAME SIZE<br />
When selecting a new bicycle, frame size is very important.<br />
Most full-sized bicycles come in a range of frame sizes. These<br />
sizes usually refer to the distance between the center of the<br />
bottom bracket and the top of the frame seat tube.<br />
The above chart and diagram will help you find the correct<br />
frame size. Rider leg length should be measured from the inseam.<br />
WARNING: For riding safety and comfort, there should be no less than 1" to 2" of<br />
clearance between the intended rider and the top tube of the bicycle frame.<br />
The ideal clearance will vary based on rider preference. These basic rules are in place to<br />
make straddling the frame when off the saddle easier and safer.<br />
When measuring the fit of the bicycle, make sure you have both feet flat on the ground. It is<br />
okay for women to use a men's bike to determine proper fit.<br />
ASSEMBLY INSTRUCTIONS<br />
Your new bicycle was assembled and tuned in the factory<br />
and then partially disassembled for shipping. You may have<br />
purchased the bicycle already fully assembled and ready to<br />
ride or in the shipping carton in the partially disassembled<br />
form. The following instructions will enable you to prepare<br />
your bicycle for years of riding enjoyment.<br />
WARNING: We recommend that you consult a bicycle<br />
technician if you have doubts or concerns about your ability<br />
to properly assembly, repair, or maintain your bicycle.<br />
GETTING STARTED<br />
Open the carton from the top and remove the bicycle. Remove the straps and protective<br />
wrapping. Inspect the bicycle and all accessories and parts for damaged or missing parts. It<br />
is recommended that the threads be lubricated prior to installation. Do not discard packing<br />
materials until assembly is complete to insure that no required parts are accidentally<br />
discarded. Assemble your bicycle following the steps that pertain to your model.<br />
Handlebars<br />
Remove the bubble bag from the handlebar. Place the handlebar stem into the top of the<br />
handle tube, ensuring that all cables are free of tangles. Tighten the stem bolt observing the<br />
minimum insertion mark and checking that the forks and the handlebars are facing<br />
forward.<br />
<strong>Tool</strong>s Required: Inner Hex Wrench (not included)<br />
Serial Number<br />
<strong>Tool</strong>s Required:<br />
- Philips head screw driver<br />
- 4mm 5mm 6mm & 8mm Allen keys<br />
- Adjustable wrench or a 9mm, 10mm,<br />
14mm & 15mm open and box end<br />
wrenches<br />
- A pair of pliers with cable cutting ability
WARNING: Over tightening the stem bolt or headset assembly may cause damage to<br />
the bicycle and/or injury to the rider.<br />
If the stem is not inserted to at least the " Minimum Insertion" mark, it is possible to overtighten<br />
the stem bolt and damage the fork steering tube. This could result in unsafe<br />
conditions and an injury risk to the rider. Check steering tightness prior to riding by<br />
straddling the front wheel and turning the handlebar. If you can turn it without the front<br />
wheel turning, the stem is too loose. Re-align the handlebar with the front wheel and retighten<br />
the stem bolt.<br />
Seat<br />
Insert the seat assembly into the frame of the bicycle and adjust the seat to the desired<br />
height. The seat post must be inserted to at least the " Minimum Insertion" line marked on<br />
the seat post. Move the quick release lever to the closed position. You should feel<br />
considerable resistance while moving the lever. If not, re-open and re-tighten the lever, then<br />
move it to the closed position so it is in line with the frame. Position the top of the seat<br />
parallel with the ground. Push the front of the seat up and down to firmly mesh the serrations<br />
together. The serrations must mesh completely together to insure a stable riding position.<br />
Check for tightness by twisting the seat from side to side, and from front to back. If the seat<br />
moves at the seat clamp or quick release, reposition and re-tighten the appropriate<br />
clamping mechanism.<br />
Pedals<br />
Start each pedal spindle by hand to avoid stripping the threads, then tighten with a 15mm<br />
narrow open-ended wrench. It is very important that you check the crank set for correct<br />
adjustment and tightness before riding your bicycle. The new crank may become loose with<br />
initial use. Once the pedals have been attached, check that the crank arm rotates smoothly<br />
and that there is no lateral movement.<br />
WARNING: Attachment of an incorrect pedal into a crank arm will cause irreparable<br />
damage.<br />
Final Check<br />
All other parts like front wheel, front disc brakes, headlights etc. were assembled by the<br />
factory; no other assembly needed.<br />
Tire Pressure: Check the tire pressure and inflate to the range recommended on the tire<br />
sidewalls.<br />
WARNING: Before riding, ensure all nuts, bolts and fittings on the bicycle have been<br />
correctly tightened.<br />
GENERAL SAFETY RULES<br />
· Bicyclists are expected to obey the same laws as all other road vehicles. These include<br />
giving way to pedestrians and stopping at red lights and stop signs. For further information,<br />
contact the Department of Transportation in your State.<br />
· Ride in a predictable manner. Always ride with traffic.<br />
· Always use hand signals to indicate turning and stopping.<br />
· Ride defensively. To other road users, you may be hard to see.<br />
· Concentrate on what's ahead. Avoid pot holes, loose gravel, wet road markings, oil, curbs,<br />
speed bumps, drainage grates and other obstacles if at all possible.<br />
· Cross train tracks at a 90-degree angle or walk your bicycle across.<br />
· Expect the unexpected, such as opening car doors or cars backing out of concealed<br />
driveways.<br />
· Be extra careful at intersections and when attempting to pass other vehicles.<br />
· Familiarize yourself with all of the bicycle's features. Practice gear shifts, braking, and the<br />
use of toe clips and straps, if fitted.<br />
· Wear proper riding attire and avoid open toe shoes. When wearing loose pants, use leg<br />
clips or elastic bands to prevent them from being caught in the chain.<br />
3 OF 13
· Do not carry packages or passengers that will interfere with your visibility or diminish<br />
control of the bicycle.<br />
· Do not use items that may restrict your hearing.<br />
· When braking, always apply the rear brake first, then the front. The front brake is more<br />
powerful and if it is not correctly applied, you may lose control. Never lock up the brakes.<br />
· Maintain a safe stopping distance from all other riders, vehicles, and objects. Safe braking<br />
Distances are subject to the prevailing weather conditions.<br />
Wet Weather Riding<br />
CAUTION: Riding in wet weather is not recommended. Follow these precautions:<br />
· Brake earlier and provide yourself with a longer stopping distance.<br />
· Decrease your riding speed, avoid sudden braking and take corners with additional<br />
caution.<br />
· Wear reflective clothing and use safety lights for greater visibility when riding.<br />
· Take extra care around potholes and slippery surfaces, such as line markings and train<br />
tracks.<br />
Riding At Night<br />
CAUTION: Ride at night only when necessary. Follow these precautions:<br />
· Ensure the bicycle is equipped with a full set of clean, correctly positioned reflectors.<br />
· Use properly functioning lights, with a white headlight and a red taillight.<br />
· If the lights are battery powered, make sure the batteries are well charged.<br />
· Certain taillights have a flashing mechanism, which enhances visibility.<br />
· Always wear reflective or light colored clothing.<br />
· Slow down and use familiar roads with street lighting, whenever possible.<br />
Hill Technique<br />
· Gear down before a climb and continue gearing down as required to maintain pedaling<br />
speed.<br />
· If you reach the lowest gear and are struggling, stand up on your pedals. This will give you<br />
more power from each pedal revolution.<br />
· When descending, use the high gears to avoid rapid pedaling.<br />
· Do not exceed a comfortable speed; maintain control and take additional care.<br />
Cornering Technique<br />
· Brake slightly before cornering and prepare to lean your body into the corner.<br />
· Keep the inside pedal at the 12 o'clock position and slightly point the inside knee in the<br />
direction you are turning. Keep the other leg straight; don't pedal through fast or tight<br />
corners.<br />
MAINTENANCE INSTRUCTIONS<br />
Every time you ride your bicycle, its condition changes. The more you ride, the more<br />
frequently maintenance will be required. We recommend you spend a little time on regular<br />
maintenance tasks. The following schedules are a useful guide. You should be able to<br />
accomplish most tasks. For additional assistance we recommend you see a bicycle<br />
technician.<br />
Brakes<br />
The correct adjustment and operation of your bicycle's brakes is extremely important for<br />
safe operation. Brakes should be checked for effective operation before every ride.<br />
Frequent checking for adjustments is necessary as the control cable will stretch and the<br />
brake pads will become worn with use.<br />
WARNING: Never ride a bicycle unless the brakes are functioning properly.<br />
4 OF 13
Inspection<br />
Brake levers should be checked for tightness at least every three months. They should be<br />
set in a comfortable position within easy reach of the rider's hands. Brake levers should be<br />
firmly affixed to the handlebar. The brake pads should be checked for correct positioning<br />
and tightness before every ride, and the various bolts and nuts at least every three months.<br />
Squeeze each brake lever to make sure they operate freely and that the brake pads press<br />
hard enough on the rims to stop the bike. There should be about 1mm2mm clearance<br />
between each pad and the rim when the brakes are not applied. The brake pads must be<br />
properly centered for maximum contact with the rim. Replace the brake pads if they are over<br />
worn (when the grooves or pattern can't be seen). The brake cable wires should be checked<br />
for kinks, rust, broken strands, or frayed ends. The outer casing should also be checked for<br />
kinks, stretched coils, and other damage. If the cables are damaged, they should be<br />
replaced.<br />
Cables and Cable Housing<br />
Cables and housing are one of the most over-looked parts on the bicycle. The first indication<br />
that your cables and housing need to be replaced is an increased amount of pressure<br />
needed to operate the brakes or shifters. Before every ride, check that there are no kinks or<br />
frays in the cables and housing. Also check that the housing is seated properly into each<br />
cable stop on the bicycle. It is recommended that the cables and housing be replaced at<br />
least every riding season to prolong the life of your bike.<br />
WARNING: Do not ride a bicycle that is not operating properly.<br />
Hub Bearing<br />
When checked, the hub bearings of either wheel will require adjustment if there is any play.<br />
1.Check to make sure locknuts are tight.<br />
2.To adjust, remove wheel from bicycle and loosen the locknut on one side of the hub while<br />
holding the bearing cone with a flat open-end wrench.<br />
3.Rotate the adjusting cone as needed to eliminate play.<br />
4.Re-tighten the locknut while holding the adjusting cone in position.<br />
5.Re-check that the wheel can turn freely without excessive play.<br />
Wheel Inspection<br />
It is important that wheels are kept in top condition. Properly maintaining your bicycle's<br />
wheels will help braking performance and stability when riding. Be aware of the following<br />
potential problems:<br />
Dirty or greasy rims<br />
CAUTION: Dirty or greasy rims can render your brakes ineffective. When cleaning, use<br />
a clean rag and wash with soapy water, rinse and air dry. Don't ride while the wheels are still<br />
wet. When lubricating your bicycle, do not get oil on the rim.<br />
Straight wheels<br />
Lift each wheel off the ground and spin them to see if they are straight and true. If wheels are<br />
not straight, they will need to be adjusted. This is difficult and is best left to a bicycle<br />
technician.<br />
Broken or loose spokes<br />
Check that all spokes are tight and that none are missing or damaged.<br />
CAUTION: Damaged spokes can cause serious injury.<br />
Loose hub bearings<br />
Lift each wheel off the ground and try to move the wheel from side to side.<br />
CAUTION: If there is movement between the axle and the hub, adjustment is<br />
required.<br />
5 OF 13
Axle nuts<br />
Check that they are tight before each ride.<br />
Quick release<br />
Check that they are set to a closed position and are properly tensioned before each ride.<br />
CAUTION: Maintain the closed position and the correct adjustment. Failure to do so<br />
may result in serious injury.<br />
Lubrication<br />
Frequency<br />
Weekly<br />
Monthly<br />
Every Six Months<br />
Yearly<br />
Component<br />
chain<br />
derailleur wheels<br />
derailleur<br />
brake calipers<br />
brake levers<br />
shift levers<br />
freewheels<br />
brake cables<br />
bottom bracket<br />
pedals<br />
derailleur cables<br />
wheel bearings<br />
headset<br />
seat pillar<br />
Reflectors<br />
Your bicycle is supplied with one front, one rear, two wheel, and two pedal reflectors. These<br />
are an important safety and legal requirement. They should remain securely fitted and in<br />
good, clean condition at all times. Periodically, inspect all reflectors, brackets, and<br />
mounting hardware for signs of wear or damage. Replace immediately if damaged.<br />
Tires<br />
Tires must be maintained properly to ensure stability. Check the following areas:<br />
Inflation: Use a tire gauge to check that the tires are inflated to the pressure indicated on the<br />
tire sidewalls.<br />
CAUTION: If inflating tires with a service station pump, take care. Over-inflation can<br />
cause a tire blow out.<br />
Bead Seating: When inflating or refitting tire, make sure that the bead is properly seated in<br />
the rim.<br />
Tread: Check that the tread shows no signs of excessive wear or flat spots, and that there<br />
are no cuts or other damage.<br />
Valves: Make sure valve caps are fitted and that valves are free from dirt. Allowing dirt in the<br />
valve can lead to a flat tire, and serious injury.<br />
Recommended Tire Pressures<br />
The recommended pressure on the sidewall of the tire should match the following chart. Use<br />
this as a general guide.<br />
6 OF 13<br />
Lubricant<br />
chain lube or light oil<br />
chain lube or light oil<br />
oil<br />
oil<br />
oil<br />
lithium-based grease<br />
oil<br />
lithium-based grease<br />
lithium-based grease<br />
lithium-based grease<br />
lithium based grease<br />
lithium based grease<br />
lithium based grease<br />
lithium based grease<br />
How to Lubricate<br />
brush on or squirt<br />
brush on or squirt<br />
oil can<br />
3 drops from oil can<br />
2 drops from oil can<br />
disassemble<br />
2 squirts from oil can<br />
disassemble<br />
disassemble<br />
disassemble<br />
disassemble<br />
disassemble<br />
disassemble<br />
disassemble<br />
Note: The frequency of maintenance should increase with use in wet or dusty conditions. Do not over lubricate-remove<br />
excess lubricant to prevent dirt build-up. Never use a degreaser to lubricate your chain.
BMX: 35-50 PSI<br />
MTB: 46-65 PSI<br />
Road Touring: 70-90 PSI (Recommended)<br />
Road Racing: 110-125 PSI<br />
Hybrid/Cross: 60-100 PSI<br />
How To Fix a Flat Tire<br />
If you need to repair a tire, follow these steps:<br />
1.Remove the wheel from the bicycle.<br />
2.Deflate the tire completely through the valve. Loosen the tire bead by pushing it inward.<br />
3.Press one side of the tire bead up over the edge of the rim.<br />
Note: Use tire levers. Using a screwdriver may damage the rim.<br />
4.Remove the tube, leaving the tire on the rim.<br />
5.Patch the leaks using a tube repair kit, or replace the tube.<br />
Note: Make sure that the size of the replacement tube matches the size stated on the tire<br />
sidewall and that the valve is the correct type for your bicycle.<br />
6.Match the position of the leak in the tube with the tire to locate the possible cause and<br />
mark the location on the tire.<br />
7.Remove the tire completely and inspect it for nails, glass, etc. The inside of the rim should<br />
also be inspected to make sure there are no protruding spokes, rust or other potential<br />
causes. Replace the rim tape, which covers the spoke ends, if damaged.<br />
8.Remount one side of the tire onto the rim.<br />
9.Using a hand pump, inflate the tube just enough to give it some shape.<br />
10.Place the valve stem through the hole in the rim and work the tube into the tire. Note: Do<br />
not let the tube twist.<br />
11.Using your hands only, remount the other side of the tire by pushing the edge toward the<br />
center of the rim. Start on either side of the valve and work around the rim.<br />
12.Before the tire is completely mounted, push the valve up into the rim so that the tire sits<br />
squarely in position.<br />
13.Fit the rest of the tire, rolling the last, most difficult, part on with your thumbs. Note: Avoid<br />
using tire levers as these can puncture the tube or damage the tire.<br />
14.Check that the tube is not caught between the rim and the tire bead at ay point.<br />
15.Using a hand pump, inflate the tube until the tire begins to take shape. Check that the tire<br />
bead is evenly seated all the way around the rim. When properly seated, fully inflate the tire<br />
to the pressure marked on the sidewall. Use a tire gauge to check.<br />
16.Place the wheel into the frame checking that all gears, brakes and quick release levers<br />
are properly adjusted.<br />
Handlebar Stem<br />
The handlebar stem fits into the steering column. It is held firm<br />
by the action of a binder bolt and expander wedge which, when<br />
tightened, binds with the inside of the fork steerer tube.<br />
When removing the stem, loosen the stem bolt two or three<br />
turns, and then tap it to loosen the wedge inside.<br />
To lubricate, first wipe off any grease and grime. Next, apply a<br />
thin film of grease to the part, including the wedge that will be<br />
inserted into the frame. The height of the handlebar can be<br />
adjusted for comfort. The stem is marked with the words max.<br />
height/minimum insertion.<br />
WARNING: Never ride a bicycle if the stem has been raised so that the max.<br />
height/minimum insertion line can be seen.<br />
WARNING: Over tightening the stem bolt or headset assembly may cause damage to<br />
the bicycle and/or injury to the rider.<br />
When re-fitting the stem, make sure the handlebar is correctly aligned and tightened using<br />
the appropriate hex wrench.<br />
7 OF 13
Test the security of the handlebar within the stem, and the stem within the fork steerer tube,<br />
by clamping the front wheel between your knees and trying to move the handlebar up and<br />
down, and from side to side. The handlebar should not move when applying pressure.<br />
Handlebars<br />
The exact positioning of the handlebar is a matter of personal comfort. Make sure the<br />
handlebar and the fork are facing forward. If you need to replace the fork, please consult a<br />
qualified bicycle technician.<br />
WARNING: Never ride unless the handlebar clamping mechanism has been securely<br />
tightened.<br />
Headset Inspection<br />
The headset bearing adjustment should be checked every month. This is important because<br />
the headset locks the fork into the frame, and if loose, can cause damage or result in an<br />
accident. Stand over the frame top tube with both feet on the ground. Apply the front brake<br />
firmly and rock the bicycle back and forth. If you detect any looseness in the headset, it will<br />
need adjustment.<br />
Check that the headset is not overly tight by slowly rotating the fork to the right and left. If<br />
the fork tends to stick or bind at any point, the bearings are too tight.<br />
Note: If your bike is equipped with a threadless headset, please see a qualified bicycle<br />
technician for repairs and adjustments.<br />
Headset Adjustment<br />
Loosen the top locknut (or remove it completely) along with the reflector bracket, if fitted.<br />
Turn the adjusting cup clockwise until finger tight. Replace the lock washer and reflector<br />
bracket, and then re-tighten the lock nut using a suitable wrench.<br />
Note: Do not over tighten or bearing damage will occur.<br />
WARNING: Always make sure that the headset is properly<br />
adjusted and that the headset locknut is tight before riding.<br />
WARNING: Over tightening the stem bolt or headset<br />
assembly may cause damage to the bicycle and /or injury to the<br />
rider.<br />
Saddle and Seat Post<br />
Inspection:<br />
The seat fixing bolt and the seat post binder bolt should be<br />
checked for tightness and adjustment every month. On<br />
removing the seat post from the frame, you will notice a mark<br />
with words max. height/minimum insertion.<br />
WARNING: To avoid damage, the minimum insertion mark<br />
must be inside the frame.<br />
Lubrication:<br />
Remove the seat post from the frame and wipe off any grease,<br />
rust or dirt. Apply a thin film of new grease to the part that will be inserted into the frame. Reinsert,<br />
adjust, and tighten the seat post.<br />
Adjustment:<br />
The seat can be adjusted in height, angle, and distance from the handlebars to suit the<br />
individual rider. Saddle angle is a matter of personal preference but the most comfortable<br />
position will usually be found when the top of the seat is almost parallel to the ground, or<br />
slightly raised at the front.<br />
The saddle can also be adjusted by sliding it forward or back along the mounting rails.<br />
When fitting, position the seat post into the clamp under the seat and place it in the frame<br />
without tightening. Adjust it to the desired angle and position, and tighten the clamping<br />
8 OF 13
mechanism.<br />
Test it by grasping the seat and trying to turn it sideways. If it moves, tighten the binder bolt.<br />
Note: Remember that the minimum insertion mark must remain inside the frame assembly.<br />
CHARGING THE BATTERY<br />
The battery of the electric bicycle can be charged with the bicycle<br />
or independently.<br />
Please use the special charger provided.<br />
Charging the battery on the bicycle<br />
1.Stop the electric bicycle at suitable place and turn the main<br />
switch to OFF position.<br />
2.Turn the handle of battery box to expose the charging inlet.<br />
3.Insert the plug into the charging inlet.<br />
4.When finished, unplug it and close the handle.<br />
Charging the battery after removing<br />
1.Place the bicycle on an even surface.<br />
2.Turn the main switch to the OFF position and take out the key.<br />
3.Insert the key into the battery lock and turn 180° counter<br />
clockwise.<br />
4.Lift the bar under the saddle so that the saddle is vertical. Pull<br />
the handle of battery box to remove the battery<br />
Installing the battery<br />
1.Hold the handle of battery box and re-insert the battery.<br />
2.Turn the key 180° clockwise, then remove the key.<br />
3.Pull back the handle of battery box.<br />
4.Return the saddle to its normal position.<br />
5.Connect the plug.<br />
Charging Method<br />
1.Plug of charger into the charging socket of the battery.<br />
2.Plug of charger into an outlet (110V).<br />
WARNING: The battery should be kept upright when charging.<br />
Indication of Charger State<br />
Charger State<br />
Power on<br />
Charging State<br />
Full State<br />
Indicator<br />
Please see the label on the charger for additional instruction.<br />
Power indicator light is red<br />
Power and Charging indicator light is red<br />
Power indicator light is red and charging indicator light is green<br />
9 OF 13
Charging Environment<br />
A dry, level surface<br />
Should be out of direct sunlight<br />
Make sure there is proper ventilation<br />
Keep away from children and pets<br />
Temperature range should be 0-40 C during charging<br />
Cautions for charging the battery<br />
Please refer to the charger instructions for detailed information.<br />
Battery should be charged once every 2 months when not used.<br />
Remove the battery when not used frequently.<br />
Charge the battery before using.<br />
WARNING:<br />
Battery should only be charged using the charger provided.<br />
Keep the battery and charger away from children and pets.<br />
Do not touch the charger plug and power supply with wet hands.<br />
Do not turn the pedal when charging (on the bicycle).<br />
Do not use the charger for other electric bicycles and electrical products.<br />
Charger will become warm when charging. Do not cover.<br />
Store the charger in a dry, secure environment.<br />
Follow all operating instructions.<br />
Keep the charger free of dirt, dust, and moisture.<br />
Dispose of the battery in a proper manner.<br />
OPERATING THE ELECTRIC BICYCLE<br />
This electric bicycle is motor-driven.<br />
This product complies with the state standards.<br />
The product performs at its best on flat, even surfaces. Hills and uneven surfaces will<br />
increase the burden on the motor and battery. Please use the pedals for better performance.<br />
This will increase the driving distance and prolong the life of the bicycle and the battery.<br />
Power Supply<br />
Insert the key into the main power switch. Turn it clockwise to activate it.<br />
The controller should indicate that the power is on. The handle indicator should be lit. The<br />
electric bike is now ready.<br />
CAUTION: Please turn the main power switch to the OFF position when finished riding.<br />
Riding with the Motor<br />
When riding the bicycle, you can adjust the speed from 315 1/2 MPH (525 km/h).<br />
To stop the motor, simply let off the throttle and apply the front or rear brake.<br />
Avoid power failure by making sure the battery is charged.<br />
Riding without the Motor<br />
This electric bicycle can also be ridden using the pedals.<br />
Since an electric bicycle is heavier than a normal bicycle, extra force is required to pedal it.<br />
Battery voltage indication<br />
This electric bicycle is installed with power volume indicator<br />
The power volume indicator will light on when the battery is fully charged.<br />
The indicator will gradually diminish with use. Battery should be charged when there is only<br />
one indicator light on.<br />
Instruction<br />
Please take in to consideration how far you plan on going when assessing whether the<br />
battery needs charging.<br />
10 OF 13
Estimated distance with a fully-charged, new battery<br />
On a flat road: 1224 mile (2545 km) range.<br />
Note: There are a number of factors that can affect riding distance: How many times you<br />
stop and start, the amount of weight on the bicycle, the slope and condition of the road, wind<br />
conditions, temperature, and tire pressure.<br />
Temperature has a direct effect on the battery. Lower temperatures decrease battery<br />
performance.<br />
Load Goods<br />
Recommended max. load of this electric bicycle (weight of the passengers and goods) is<br />
165 lbs. (75kg). NOTE: Increased weight will affect travel speed and mile range.<br />
The loading capacity and goods size of the bracket and luggage tank are shown below:<br />
Too many goods will impact traveling distance and battery and motor performance.<br />
Max Load<br />
Size of Goods<br />
Bracket<br />
Luggage Tank<br />
Width<br />
Length<br />
Height<br />
WARNING: Do not exceed maximum load weight and size. Overloading and improperly<br />
affixed loads can result in unsafe riding conditions and serious injury.<br />
Instructions for parking and storing the electric bicycle<br />
Stop the electric bicycle on even and solid surface.<br />
Hold the rack and kick the support.<br />
CAUTION: Lock the support rods after parking the bicycle. Turn the main power switch<br />
to OFF position or refer to the power lock indication mark.<br />
Turn the main power switch to the OFF position<br />
If the main power switch is not turned off, it can cause driving system failure due to<br />
inadequate power supply, and may result in a loss of battery performance.<br />
Take out the key<br />
Take the key out to avoid theft after the bicycle is stopped.<br />
6 lbs. (3kg)<br />
22 lbs. (10kg)<br />
Check before operating<br />
Make sure to thoroughly inspect the electric bicycle before driving.<br />
11 OF 13<br />
3.9" (10cm) left and right of the luggage tank<br />
3.9" (10cm) behind the luggage tank<br />
15.7" (40cm) up the luggage tank
Confirm before driving<br />
1.Make sure the handlebar is stable.<br />
2.Ring of bell.<br />
3.Inspect the brakes and brake levers.<br />
Hold the front and rear brake, confirm that there is 1/2"<br />
of distance between the brake and brake handle<br />
Check the wear of brake rubber<br />
Please replace the brake rubber if the slot is less than 1/32"<br />
(1mm).<br />
Slot of brake rubber exceeds 1/32" (1mm).<br />
4.Height of saddle and handlebar<br />
The saddle is the proper height when your feet tips touch the ground when sitting on the bike.<br />
Your elbows should be slightly bent when holding the handlebar.<br />
5.Power volume of battery<br />
Turn the main switch to ON position, confirm remaining power through the power indicator.<br />
6.Installation of battery<br />
Confirm the battery is tightly installed in the bicycle.<br />
7.Check the wheel shaft<br />
Confirm that the front and rear wheels are tight (recommended torque is shown below)<br />
Rotation Torque of Front Shaft Nut: 265-354 in-lbs. (300-400kgfcm) (30-40Nm)<br />
Rotation Torque of Rear Shaft Nut: 398-637 in-lbs. (450-720kgfcm) (45-72Nm)<br />
8.Air pressure and damage to tires<br />
Confirm the air pressure of tires. Low air pressure may cause<br />
broken wheels or swaying. Inspect the tires for damage,<br />
including foreign objects such as nails and glass.<br />
Length contacting with floor<br />
3 1/24" (9-10cm)<br />
Weight of passenger<br />
132 lbs. (60kg)<br />
Test condition<br />
9.Confirm that the pedals are stable.<br />
If there is play in the pedals, tighten the bolts immediately.<br />
10.Make sure the saddle is tight and free from movement.<br />
11.Check the chain tension.<br />
Please adjust the chain if it exceeds 46" (1015mm).<br />
12.Confirm the chain is lubricated (30# machine oil) and works smoothly.<br />
12 OF 13<br />
Air pressure<br />
44 PSI (300kpa)
TROUBLESHOOTING<br />
Electric Driving System<br />
Low speed<br />
Charger<br />
WARRANTY<br />
Phenomenon<br />
Electric driving system is unstable<br />
Power indicator is off<br />
Electric driving system makes<br />
noise<br />
Electric driving system generates<br />
smoke or odor<br />
Battery power indicator lights on,<br />
but the motor doesn't work<br />
Drive distance is short<br />
Charge failure<br />
Charger generates noise, odor<br />
and smoke<br />
Charger becomes warm<br />
One-Year Limited Warranty<br />
Check<br />
Battery is not charged<br />
Tire pressure is low<br />
Tire is damaged<br />
Overloading<br />
Does plug tightly connect with<br />
the battery<br />
Is the battery fully charged?<br />
Is it used in a low temperature<br />
environment?<br />
Battery service life has expired<br />
Is the power socket tightly<br />
connected with charging plug?<br />
Is the charger indicator light on?<br />
It may generate heat when<br />
o<br />
charging (4060 C)<br />
13 OF 13<br />
Charge the battery<br />
Inflate the tire<br />
Repair the tire<br />
Solution<br />
Limit the goods at max load<br />
Tightly connect the plug<br />
If this doesn't solve the problem, it is possible<br />
that the battery terminal or wire is loose.<br />
Please contact the seller<br />
Check for foreign objects in the electric driving<br />
system or a lack of lubricant<br />
Please contact the seller<br />
Electric driving system is faulty<br />
Please contact the seller<br />
Wire is loose or electric drive system is faulty<br />
Please contact the seller<br />
Charge the battery<br />
Operate in warmer environment<br />
Please replace the battery.<br />
The Battery service life is expired when the dis<br />
charging time is less than 70 minutes at 5A<br />
current in the 20 environment after charging.<br />
Connect it again. If it still won't charge, that<br />
means the charger has failed or the fuse is<br />
damaged<br />
Please contact the seller<br />
Confirm the charging method and charge<br />
again If it still doesn't charge, you have charger<br />
failure<br />
Please contact the seller<br />
Immediately unplug the power socket and stop<br />
using.<br />
Please contact the seller<br />
Immediately unplug the power socket and stop<br />
using.<br />
Please contact the seller
WARNING<br />
Some dust created by power sanding, sawing, grinding, drilling, and other construction<br />
activities contains chemicals known to the State of California to cause cancer, birth defects<br />
or other reproductive harm. Some examples of these chemicals are:<br />
· Lead from lead-based paints<br />
· Crystalline silica from bricks and cement and other masonry products, and arsenic and<br />
chromium from chemically-treated lumber.<br />
Your risk from these exposures varies, depending on how often you do this type of work. To<br />
reduce your exposure to these chemicals: work in a well ventilated area, and work with<br />
approved safety equipment, such as those dust masks that are specially designed to filter<br />
out microscopic particles.<br />
<strong>Tool</strong>s<br />
<strong>Northern</strong> <strong>Tool</strong> + <strong>Equipment</strong> Co.,<br />
2800 Southcross Drive West<br />
P.O. Box 1499 Burnsville, MN 5337-0499<br />
Made in China


