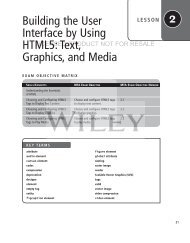
Building the User Interface by Using HTML5: Organization ... - server
Building the User Interface by Using HTML5: Organization ... - server
Building the User Interface by Using HTML5: Organization ... - server

Create successful ePaper yourself
Turn your PDF publications into a flip-book with our unique Google optimized e-Paper software.
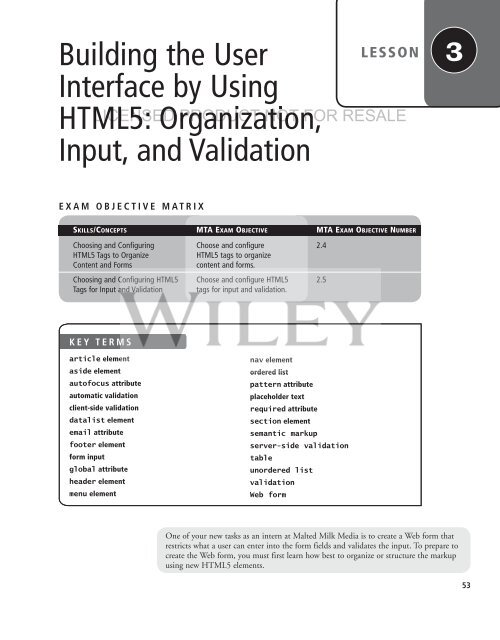
<strong>Building</strong> <strong>the</strong> <strong>User</strong><br />
<strong>Interface</strong> <strong>by</strong> <strong>Using</strong><br />
<strong>HTML5</strong>: <strong>Organization</strong>,<br />
Input, and Validation<br />
LESSON<br />
LICENSED PRODUCT NOT FOR RESALE<br />
3<br />
EXAM OBJECTIVE MATRIX<br />
SKILLS/CONCEPTS MTA EXAM OBJECTIVE MTA EXAM OBJECTIVE NUMBER<br />
Choosing and Configuring Choose and configure 2.4<br />
<strong>HTML5</strong> Tags to Organize<br />
<strong>HTML5</strong> tags to organize<br />
Content and Forms<br />
content and forms.<br />
Choosing and Configuring <strong>HTML5</strong> Choose and configure <strong>HTML5</strong> 2.5<br />
Tags for Input and Validation tags for input and validation.<br />
KEY TERMS<br />
article element<br />
aside element<br />
autofocus attribute<br />
automatic validation<br />
client-side validation<br />
datalist element<br />
email attribute<br />
footer element<br />
form input<br />
global attribute<br />
header element<br />
menu element<br />
nav element<br />
ordered list<br />
pattern attribute<br />
placeholder text<br />
required attribute<br />
section element<br />
semantic markup<br />
<strong>server</strong>-side validation<br />
table<br />
unordered list<br />
validation<br />
Web form<br />
One of your new tasks as an intern at Malted Milk Media is to create a Web form that<br />
restricts what a user can enter into <strong>the</strong> form fields and validates <strong>the</strong> input. To prepare to<br />
create <strong>the</strong> Web form, you must first learn how best to organize or structure <strong>the</strong> markup<br />
using new <strong>HTML5</strong> elements.<br />
53
54 | Lesson 3<br />
■ Choosing and Configuring <strong>HTML5</strong> Tags to Organize Content and Forms<br />
THE BOTTOM LINE<br />
<strong>HTML5</strong> introduces several new elements for organizing content and forms. They represent<br />
<strong>the</strong> new semantic markup that’s an important part of <strong>HTML5</strong>.<br />
LICENSED PRODUCT NOT FOR RESALE<br />
<strong>HTML5</strong> markup introduces many new markup tags for organizing <strong>the</strong> structure of HTML<br />
documents, which makes documents easier to create and modify. The new tags have more<br />
intuitive names than similar constructs in previous HTML specifications; <strong>the</strong> tags are named<br />
more appropriately for <strong>the</strong> part of <strong>the</strong> page <strong>the</strong>y apply to, such as , ,<br />
and .<br />
<strong>HTML5</strong> has also streamlined table creation, moving many of <strong>the</strong> table attributes that affect<br />
width, cell padding, and vertical and horizontal alignment to <strong>the</strong> CSS file.<br />
Understanding Semantic HTML<br />
Semantic markup uses tag names that are intuitive, making it easier to build and modify<br />
HTML documents, and for Web browsers and o<strong>the</strong>r programs to interpret.<br />
CERTIFICATION READY<br />
What is semantic<br />
markup?<br />
2.4<br />
One of <strong>the</strong> very handy new features of <strong>HTML5</strong> is <strong>the</strong> use of semantic markup, which gives<br />
better meaning, or definition, to several tags so <strong>the</strong>y make more sense to humans, programs,<br />
and Web browsers. As mentioned in Lesson 2, not all HTML tags have been replaced or<br />
updated for <strong>HTML5</strong>, but some new tags introduced in <strong>HTML5</strong> make <strong>the</strong> work of creating<br />
Web pages a lot easier.<br />
In HTML 4.01 and prior specifications, a developer creating <strong>the</strong> structure of an HTML<br />
document uses <strong>the</strong> tag frequently throughout. The tag often includes a class or<br />
ID attribute, which may also include CSS styles such as background-color, height, and<br />
width. A simple example of a tag is:<br />
This is a header <br />
TAKE NOTE<br />
*<br />
class and id are global attributes, which means <strong>the</strong>y can be used with any HTML<br />
element. You can see <strong>the</strong> complete list of global HTML attributes at http://dev.w3.org/<br />
html5/markup/global-attributes.html.<br />
The div element alone doesn’t have much meaning without <strong>the</strong> id or class attribute. Even<br />
<strong>the</strong> ID can be assigned a value of your choice, such as "header", "header_inner", "slogan",<br />
"content", "style", and many more. An example from an HTML 4.01 document<br />
is shown as follows:<br />
<br />
<br />
<br />
Happy dogs are good dogs<br />
<br />
<br />
<strong>HTML5</strong> uses simpler tags to replace many of <strong>the</strong> div tags, some of which are shown in<br />
Figure 3-1.
<strong>Building</strong> <strong>the</strong> <strong>User</strong> <strong>Interface</strong> <strong>by</strong> <strong>Using</strong> <strong>HTML5</strong>: <strong>Organization</strong>, Input, and Validation | 55<br />
Figure 3-1<br />
A comparison of document<br />
parts marked up in HTML 4.01<br />
and <strong>HTML5</strong><br />
HTML 4.01<br />
<br />
<br />
HTML 5<br />
<br />
<br />
<br />
<br />
LICENSED PRODUCT NOT FOR RESALE<br />
<br />
<br />
<br />
Notice how <strong>HTML5</strong>’s semantic markup gives more specific meaning to parts of an HTML<br />
document, making <strong>the</strong> structure easier to understand.<br />
<strong>Using</strong> Tags to Add Structure to an HTML Document<br />
CERTIFICATION READY<br />
Which <strong>HTML5</strong> tags are<br />
used to structure and<br />
organize a document?<br />
2.4<br />
New <strong>HTML5</strong> elements for structuring and organizing content in an HTML document<br />
include header, footer, section, nav, article, and aside.<br />
Now that you understand semantic markup, let’s look at several of <strong>the</strong> new <strong>HTML5</strong><br />
elements for organizing documents. Table 3-1 lists new <strong>HTML5</strong> structure-related tags and<br />
describes <strong>the</strong>m.<br />
Table 3-1<br />
New <strong>HTML5</strong> markup tags for<br />
organizing content and creating<br />
structure<br />
TAG<br />
<br />
<br />
<br />
<br />
<br />
<br />
<br />
<br />
<br />
<br />
<br />
DESCRIPTION<br />
Defines an area for contact information for a page or section<br />
Defines an article, such as a magazine or newspaper article, blog post, or<br />
similar content<br />
Defines content that’s separate from but related to <strong>the</strong> page content; similar<br />
to a sidebar in book chapters and magazine articles<br />
Contains additional details pertinent to text around it; creates an interactive<br />
widget a user can display or hide<br />
Defines a footer for a document or section; may include <strong>the</strong> document<br />
author, contact information, copyright information, and links to terms<br />
of use<br />
Defines a header for a document or section; may contain introductory content<br />
or navigation links<br />
Groups headings and subheadings (using <strong>the</strong> to tags) for<br />
multi-level headings<br />
Defines a block of navigation links<br />
Defines a section in a document, such as chapters, parts of a <strong>the</strong>sis, or<br />
parts of a Web page whose content is distinct from each o<strong>the</strong>r<br />
Defines a visible heading for a details element; user can click to display or<br />
hide information<br />
Defines a possible line break; when a word is very long, or you’re concerned<br />
<strong>the</strong> browser will break a line at <strong>the</strong> wrong place, you can use <strong>the</strong><br />
element to break <strong>the</strong> word or line appropriately
56 | Lesson 3<br />
TAKE NOTE<br />
*<br />
As you learned in Lesson 1, <strong>the</strong> <strong>HTML5</strong> standard won’t be finalized for several years,<br />
which means changes to <strong>the</strong> specification are still occurring. The major Web browsers, like<br />
Microsoft Internet Explorer and Mozilla Firefox, support many <strong>HTML5</strong> elements but not<br />
all of <strong>the</strong>m. The “When Can I Use” Web site at http://caniuse.com/ is an excellent source<br />
for determining which browsers support specific <strong>HTML5</strong> features. The Web site is updated<br />
regularly, so you should make it a part of your essential <strong>HTML5</strong> resources. In addition,<br />
you can test any browser’s support for <strong>HTML5</strong> <strong>by</strong> browsing to <strong>the</strong> <strong>HTML5</strong> Test Web site<br />
at http://html5test.com.<br />
LICENSED PRODUCT NOT FOR RESALE<br />
Let’s look more closely at <strong>the</strong> <strong>HTML5</strong> tags shown in Figure 3-1, which are <strong>the</strong> most commonly<br />
used structure-related <strong>HTML5</strong> tags.<br />
THE HEADER AND FOOTER ELEMENTS<br />
The header element defines a header for a document, section, or article. In HTML 4.01,<br />
you use <strong>the</strong> header div as mentioned in <strong>the</strong> previous section (). The<br />
footer element defines a footer for a document or section, and typically contains information<br />
about <strong>the</strong> document or section, such as <strong>the</strong> author name, copyright data, links to related<br />
documents, and so on. The footer element doesn’t automatically appear at <strong>the</strong> bottom<br />
(or foot) of <strong>the</strong> document—you need to use CSS to instruct <strong>the</strong> browser where to display<br />
<strong>the</strong> footer. Footers that appear at <strong>the</strong> bottom of every Web page or document are known as<br />
“sticky footers.”<br />
An example of an article with a header tag and a footer tag is as follows:<br />
<br />
<br />
Learning <strong>HTML5</strong><br />
The New Elements<br />
<br />
New <strong>HTML5</strong> tags make Web page and application<br />
development easier than ever.<br />
<br />
Published:
<strong>Building</strong> <strong>the</strong> <strong>User</strong> <strong>Interface</strong> <strong>by</strong> <strong>Using</strong> <strong>HTML5</strong>: <strong>Organization</strong>, Input, and Validation | 57<br />
CERTIFICATION READY<br />
When should I use <strong>the</strong><br />
tag versus<br />
ano<strong>the</strong>r type of element?<br />
2.4<br />
THE SECTION ELEMENT<br />
The section element defines a section in a document, such as a chapter, parts of a <strong>the</strong>sis,<br />
or parts of a Web page whose content is distinct from each o<strong>the</strong>r. The WC3 specifies uses<br />
for <strong>the</strong> section element to differentiate it from o<strong>the</strong>r structure-related elements, mainly that<br />
it contain at least one heading and that it define something that would appear in <strong>the</strong> document’s<br />
outline. For example, you should use <strong>the</strong> section element to divide different parts<br />
of a one-page Web site or to create a portfolio of images. The following is an example of a<br />
simple section:<br />
LICENSED PRODUCT NOT FOR RESALE<br />
<br />
Eight Count<br />
Hip-hop dance instructors often teach moves<br />
that have eight counts per set.<br />
<br />
Table 3-2 lists situations in which you should avoid using <strong>the</strong> section element, and provides<br />
<strong>the</strong> better technique.<br />
Table 3-2<br />
Situations in which you<br />
should not use <strong>the</strong> section<br />
element<br />
TAKE NOTE<br />
*<br />
The new <strong>HTML5</strong> structure-related<br />
tags don’t<br />
replace <strong>the</strong> tag<br />
entirely, but <strong>HTML5</strong><br />
tags greatly reduce <strong>the</strong><br />
number of tags<br />
needed in an HTML<br />
document.<br />
SITUATION<br />
Separate content that is independent from <strong>the</strong> rest of <strong>the</strong> content<br />
on <strong>the</strong> Web page or document<br />
Plan to syndicate a block of content<br />
Create a sidebar<br />
Wrap and position multiple sections that are not related to<br />
each o<strong>the</strong>r<br />
Add a drop shadow to or border around an item<br />
USE<br />
article<br />
article<br />
aside<br />
Knowing when to use <strong>the</strong> tag versus a different element can be tricky at times.<br />
When you’re working on an HTML document and are unsure which element to use, browse<br />
<strong>the</strong> W3C <strong>HTML5</strong> specification or research <strong>the</strong> Web to see how o<strong>the</strong>r developers have handled<br />
a similar situation.<br />
When defining a section header, which may contain h1 through h6 headings, you can use <strong>the</strong><br />
hgroup element to group headings. The hgroup element affects organization but not presentation.<br />
Consider using hgroup when you have a heading and a subheading one right after <strong>the</strong><br />
o<strong>the</strong>r, as follows.<br />
<br />
<br />
Hip-Hop Dance Routines<br />
The Eight-Count Method<br />
<br />
<br />
Hip-hop dance instructors often teach<br />
moves that have eight counts per set.<br />
<br />
<br />
div<br />
div<br />
This markup would appear in a Web page as shown in Figure 3-3.
58 | Lesson 3<br />
Figure 3-3<br />
<strong>Using</strong> hgroup to group headings<br />
in an HTML document<br />
LICENSED PRODUCT NOT FOR RESALE<br />
TAKE NOTE<br />
*<br />
Remember, you have<br />
several choices of tools<br />
to use for creating<br />
HTML documents. For<br />
<strong>the</strong> PC, consider <strong>the</strong><br />
Notepad or Notepad++<br />
text editors, <strong>the</strong> HTML-<br />
Kit or KompoZer<br />
HTML editors, or<br />
development tools like<br />
Microsoft Visual Studio,<br />
Visual Studio for Web,<br />
or Microsoft Expression<br />
Web.<br />
CREATE AN HTML DOCUMENT WITH A HEADER, SECTIONS, AND A FOOTER<br />
GET READY. To create an HTML document using <strong>the</strong> <strong>HTML5</strong> header, section, and footer<br />
elements, perform <strong>the</strong> following steps:<br />
1. <strong>Using</strong> an HTML editor or app development tool and a Web browser, create a simple<br />
HTML document that incorporates <strong>the</strong> , , and tags.<br />
Include two sections, and be sure to include at least one h1 element within <strong>the</strong> sections.<br />
You can include images if you want. The markup might look like <strong>the</strong> following:<br />
<br />
<br />
<br />
<br />
My Page<br />
<br />
<br />
<br />
Selecting a Concert Style<br />
<br />
<br />
Symphonies<br />
A symphony is a type of musical composition generally<br />
performed <strong>by</strong> a full orchestra.<br />
<br />
<br />
Raves<br />
A rave is a ga<strong>the</strong>ring of people who listen and dance to<br />
music, especially electronic music, usually performed <strong>by</strong> a<br />
live band or live DJs.<br />
<br />
<br />
Author: Nathaniel Becker<br />
<br />
<br />
<strong>Building</strong> <strong>the</strong> <strong>User</strong> <strong>Interface</strong> <strong>by</strong> <strong>Using</strong> <strong>HTML5</strong>: <strong>Organization</strong>, Input, and Validation | 59<br />
Figure 3-4<br />
An HTML document with a<br />
header, footer, and section<br />
This markup would display in a Web page as shown in Figure 3-4.<br />
Header<br />
LICENSED PRODUCT NOT FOR RESALE<br />
Sections<br />
Footer<br />
Figure 3-5<br />
Simple links using <strong>the</strong> nav<br />
element<br />
2. Save <strong>the</strong> file as L3-MyPage.html.<br />
3. Validate <strong>the</strong> document using <strong>the</strong> W3C Markup Validation Service at http://validator.<br />
w3.org. If you need help doing so, refer to Lesson 2.<br />
4. Leave <strong>the</strong> editing tool and Web browser open if you continue to <strong>the</strong> next exercise<br />
during this session.<br />
THE NAV ELEMENT<br />
The nav element defines a block of navigation links. The nav element is useful for creating<br />
a set of navigation links as your document’s primary navigation, a table of contents, breadcrumbs<br />
in a footer, or Previous-Home-Next links.<br />
The W3C mentions that you don’t have to use tags for all navigation links, just major<br />
blocks of links. Because tags are interpreted <strong>by</strong> screen reader software for <strong>the</strong> visually<br />
challenged, <strong>the</strong> software can determine if it should make <strong>the</strong> navigation links available to <strong>the</strong><br />
user immediately or not, depending on <strong>the</strong>ir importance.<br />
The following example shows <strong>the</strong> tag in use:<br />
<br />
Hip-Hop<br />
Modern<br />
Swing<br />
Tap<br />
<br />
The links would display in a Web page as shown in Figure 3-5.
60 | Lesson 3<br />
An example of markup for Previous-Home-Next links follows, with vertical bars after each<br />
navigation item to separate it from <strong>the</strong> o<strong>the</strong>rs visually:<br />
<br />
Previous |<br />
Home |<br />
Next<br />
<br />
<br />
LICENSED PRODUCT NOT FOR RESALE<br />
The links would appear in a Web page as shown in Figure 3-6.<br />
Navigation is often displayed in a vertical list, which you’ll learn how to do later in this<br />
lesson.<br />
Figure 3-6<br />
Previous-Home-Next navigation<br />
with vertical bars separating<br />
each link<br />
ADD THE NAV ELEMENT TO AN HTML DOCUMENT<br />
GET READY. To add <strong>the</strong> nav element to an HTML document, perform <strong>the</strong> following<br />
steps:<br />
1. In your HTML editor or app development tool, open <strong>the</strong> L3-MyPage.html file<br />
(if it’s not already open) and save it as L3-MyPage-nav.html to create a<br />
new file.<br />
2. Include <strong>the</strong> following nav tags and content within <strong>the</strong> tag:<br />
<br />
Selecting a Concert Style<br />
<br />
Symphonies |<br />
Raves<br />
<br />
<br />
This navigation block will link to <strong>the</strong> Symphonies and Raves sections in <strong>the</strong> HTML<br />
document.<br />
3. To make <strong>the</strong> links work, modify <strong>the</strong> Symphones and Raves heads as follows:<br />
Symphonies<br />
Raves
<strong>Building</strong> <strong>the</strong> <strong>User</strong> <strong>Interface</strong> <strong>by</strong> <strong>Using</strong> <strong>HTML5</strong>: <strong>Organization</strong>, Input, and Validation | 61<br />
4. Resave <strong>the</strong> file as L3-MyPage-nav.html and <strong>the</strong>n open it in a Web browser. The<br />
navigation links would appear in a Web page as shown in Figure 3-7.<br />
Figure 3-7<br />
Page with newly added<br />
navigation links<br />
LICENSED PRODUCT NOT FOR RESALE<br />
Navigation<br />
links<br />
5. Leave <strong>the</strong> editing tool and Web browser open if you continue to <strong>the</strong> next exercise<br />
during this session.<br />
THE ARTICLE ELEMENT<br />
The article element defines a part of an HTML document that consists of a “selfcontained<br />
composition” that is independent from <strong>the</strong> rest of <strong>the</strong> content in <strong>the</strong> document.<br />
Content set off <strong>by</strong> tags can be distributed in syndication, so think of it as content<br />
that makes sense on its own. (Web syndication is <strong>the</strong> process of making content from<br />
one Web site available to many Web sites.).<br />
TAKE NOTE<br />
*<br />
The W3C encourages use of <strong>the</strong> article element ra<strong>the</strong>r than <strong>the</strong> section element for any<br />
content that could be syndicated<br />
Examples of content suitable for tagging with include a magazine article, a blog<br />
entry, or content for an RSS feed. You can also use <strong>the</strong> article element for About and<br />
Contact content, which are independent from <strong>the</strong> rest of <strong>the</strong> page on which <strong>the</strong>y reside but<br />
aren’t necessarily going to be syndicated.<br />
THE ASIDE ELEMENT<br />
The aside element is used to set off content that’s related to <strong>the</strong> current topic but<br />
would interrupt <strong>the</strong> flow of <strong>the</strong> document if left inline. Essentially, <strong>the</strong> aside element<br />
is used for information that lends itself to sidebars and notes. This content might give<br />
a more detailed look at a topic, offer related reading links, or display definitions for<br />
keywords in <strong>the</strong> paragraph. The aside element doesn’t change <strong>the</strong> position of content<br />
or how <strong>the</strong> content displays; it simply lets <strong>the</strong> browser and search engines know that it’s<br />
related content.
62 | Lesson 3<br />
<br />
<br />
Learning <strong>HTML5</strong><br />
The New Elements<br />
<br />
New <strong>HTML5</strong> tags make Web page and application<br />
development easier than ever. One of <strong>the</strong> very<br />
handy new features of <strong>HTML5</strong> is <strong>the</strong> use of<br />
semantic markup.<br />
<br />
semantic markup<br />
gives better meaning, or definition,<br />
to tags so <strong>the</strong>y make more sense to humans,<br />
programs, and Web browsers<br />
<br />
Not all HTML tags have been replaced or updated<br />
for <strong>HTML5</strong>, but some new tags introduced in <strong>HTML5</strong><br />
make <strong>the</strong> work of creating Web pages a lot<br />
easier.<br />
<br />
Published: September 3, 2012<br />
<br />
<br />
LICENSED PRODUCT NOT FOR RESALE<br />
The markup would appear in a Web page as shown in Figure 3-8.<br />
Figure 3-8<br />
An example of an aside<br />
element<br />
Aside<br />
As you can see in Figure 3-8, <strong>the</strong> aside content doesn’t really stand out from <strong>the</strong> rest of <strong>the</strong><br />
content. You could add <strong>the</strong> horizontal rule tag before and after <strong>the</strong> aside content,<br />
which would appear in a Web browser as shown in Figure 3-9.
<strong>Building</strong> <strong>the</strong> <strong>User</strong> <strong>Interface</strong> <strong>by</strong> <strong>Using</strong> <strong>HTML5</strong>: <strong>Organization</strong>, Input, and Validation | 63<br />
Figure 3-9<br />
<strong>Using</strong> <strong>the</strong> tag to add<br />
horizontal rules to set off aside<br />
content<br />
LICENSED PRODUCT NOT FOR RESALE<br />
You could also use CSS to adjust <strong>the</strong> margins of <strong>the</strong> aside content so it’s indented on <strong>the</strong> left<br />
and right. In later lessons, you’ll learn CSS layout techniques to display similar content in a<br />
box along <strong>the</strong> left or right side of <strong>the</strong> corresponding body text.<br />
ADD THE ASIDE ELEMENT TO AN HTML DOCUMENT<br />
GET READY. To add <strong>the</strong> aside element to an HTML document, perform <strong>the</strong> following steps:<br />
1. In your HTML editor or app development tool, open <strong>the</strong> L3-MyPage-nav.html file (if<br />
it’s not already open) and save it as L3-MyPage-art-aside.html to create a new file.<br />
2. Include an aside element just before <strong>the</strong> footer, as follows:<br />
<br />
<br />
Note: The U.S. Drug Enforcement Administration is also<br />
interested in raves. Go to http://www.justice.gov/dea/<br />
ongoing/raves.html to learn more.<br />
<br />
3. Resave <strong>the</strong> file as L3-MyPage-art-aside.html and view it in a Web browser. The page<br />
should look similar to Figure 3-10.<br />
4. Validate <strong>the</strong> document using <strong>the</strong> W3C Markup Validation Service at http://validator.<br />
w3.org.<br />
5. Close <strong>the</strong> file, and <strong>the</strong>n leave <strong>the</strong> editing tool and Web browser open if you continue<br />
to <strong>the</strong> next exercise during this session.<br />
✚ MORE INFORMATION<br />
To find out about new features of <strong>HTML5</strong>, browse <strong>the</strong> “Learn <strong>HTML5</strong> in 5 Minutes!” Web page at http://msdn.<br />
microsoft.com/en-us/hh549253 and <strong>the</strong> W3C “HTML elements” Web page at http://dev.w3.org/html5/markup/<br />
elements.html#elements.
64 | Lesson 3<br />
Figure 3-10<br />
An HTML document that<br />
includes article and aside<br />
elements<br />
LICENSED PRODUCT NOT FOR RESALE<br />
Aside<br />
<strong>Using</strong> Tags to Create Tables and Lists<br />
Tables and lists give structure to specific information in HTML documents. A table contains<br />
rows and columns, and displays data in a grid. In HTML, you can create ordered<br />
and unordered lists. Each item in an ordered list is marked <strong>by</strong> a number or letter. An<br />
unordered list is a bulleted list.<br />
This section focuses on how to create tables and lists using HTML elements. <strong>HTML5</strong> introduces<br />
some new elements for both tables and lists, but most of <strong>the</strong> tags and concepts are <strong>the</strong><br />
same as previous specifications. If you’ve ever created an HTML table or list, you should be<br />
able to breeze through this section.<br />
CERTIFICATION READY<br />
How do you create a<br />
table?<br />
2.4<br />
CREATING TABLES<br />
An HTML table contains rows and columns, and is used to organize and display information<br />
in a grid format. Some developers use tables for layout purposes, such as to position or align<br />
content with images, but that’s not <strong>the</strong> best use for tables.<br />
Regarding markup, every HTML table begins with <strong>the</strong> tag. Rows are marked <strong>by</strong> <strong>the</strong><br />
tag, column headers use <strong>the</strong> tag, and cells are defined <strong>by</strong> <strong>the</strong> tag.<br />
The markup for a very basic two-column, five-row table is as follows. Comments have been<br />
added to indicate columns and rows, which are informational only and don’t appear when <strong>the</strong><br />
document is viewed in a browser, is shown in Figure 3-11:<br />
<br />
<br />
Quarter <br />
Total Sales <br />
<br />
<br />
Q1<br />
$4,349<br />
<strong>Building</strong> <strong>the</strong> <strong>User</strong> <strong>Interface</strong> <strong>by</strong> <strong>Using</strong> <strong>HTML5</strong>: <strong>Organization</strong>, Input, and Validation | 65<br />
<br />
Q2<br />
$2,984<br />
<br />
<br />
Q3<br />
$3,570<br />
<br />
<br />
Q4<br />
$7,215<br />
<br />
<br />
LICENSED PRODUCT NOT FOR RESALE<br />
Figure 3-11<br />
A simple table<br />
TAKE NOTE<br />
*<br />
You must include <strong>the</strong><br />
<strong>the</strong>ad and tfoot elements<br />
before <strong>the</strong> tbody<br />
element so <strong>the</strong> browser<br />
can render <strong>the</strong> table<br />
header and footer before<br />
receiving all of <strong>the</strong> rows<br />
of data.<br />
<strong>Building</strong> on a simple table, you can use <strong>the</strong> tag to add a caption above or below<br />
<strong>the</strong> table. To apply inline styles using HTML ra<strong>the</strong>r than CSS, use <strong>the</strong> tag to apply<br />
styles to an entire column. (You’ll learn about inline formatting shortly.) The <br />
tag groups columns within a table so you can apply formatting to <strong>the</strong> group ra<strong>the</strong>r than just a<br />
column.<br />
When creating a long table that requires scrolling within a browser, use <strong>the</strong> ,<br />
, and tags. The content within <strong>the</strong> table header and footer will remain on<br />
<strong>the</strong> page while <strong>the</strong> content marked <strong>by</strong> will scroll between <strong>the</strong>m.<br />
The tag creates column headings (bolded <strong>by</strong> default), and <strong>the</strong> tag is<br />
used to display <strong>the</strong> last row, such as a totals row. The tag defines all of <strong>the</strong> content<br />
between <strong>the</strong> header and footer.<br />
The following is an example of <strong>the</strong> markup for a table with three columns and five rows, <strong>the</strong><br />
first row being <strong>the</strong> column headings and <strong>the</strong> last row <strong>the</strong> table foot. The markup also includes<br />
a caption above <strong>the</strong> table. The markup is shown rendered <strong>by</strong> a browser in Figure 3-12:<br />
<br />
Sales for Employee ID 2387<br />
<br />
66 | Lesson 3<br />
Figure 3-12<br />
A more advanced version of a<br />
simple table<br />
LICENSED PRODUCT NOT FOR RESALE<br />
<br />
<br />
<br />
<br />
Quarter<br />
Total Sales<br />
Goal Met?<br />
<br />
<br />
<br />
<br />
Total<br />
$18,118<br />
<br />
<br />
<br />
<br />
Q1<br />
$4,349<br />
Yes<br />
<br />
<br />
Q2<br />
$2,984<br />
No<br />
<br />
<br />
Q3<br />
$3,570<br />
Yes
<strong>Building</strong> <strong>the</strong> <strong>User</strong> <strong>Interface</strong> <strong>by</strong> <strong>Using</strong> <strong>HTML5</strong>: <strong>Organization</strong>, Input, and Validation | 67<br />
<br />
<br />
Q4<br />
$7,215<br />
Yes<br />
<br />
<br />
LICENSED PRODUCT NOT FOR RESALE<br />
Notice in <strong>the</strong> preceding example <strong>the</strong> use of background color for grouped columns. This is<br />
an example of inline formatting. The style attribute uses one or more CSS properties and<br />
values, separated <strong>by</strong> semicolons. For HTML color, you can use ei<strong>the</strong>r <strong>the</strong> color name or <strong>the</strong><br />
hexadecimal code. The hexadecimal code #EEE8AA produces <strong>the</strong> pale goldenrod color. The<br />
hexadecimal code #00FA9A produces <strong>the</strong> spring green color. An HTML standard color chart<br />
is available at http://www.w3schools.com/html/html_colornames.asp.<br />
You could also center <strong>the</strong> content in a cell, column, or column group using style="textalign:center".<br />
To string multiple properties and values in <strong>the</strong> same style attribute, use<br />
syntax similar to style="color:blue;text-align:center". CSS and its many properties<br />
are covered in Lessons 4 through 6 of this book.<br />
Table 3-3 summarizes <strong>the</strong> common elements used to build tables in <strong>HTML5</strong>.<br />
Table 3-3<br />
Common elements used to<br />
build tables<br />
ELEMENT<br />
col<br />
colgroup<br />
caption<br />
table<br />
tbody<br />
td<br />
tfoot<br />
th<br />
<strong>the</strong>ad<br />
tr<br />
DESCRIPTION<br />
Defines a table column<br />
Defines a group of columns in a table<br />
Marks text as a table caption<br />
Defines a table<br />
Defines a group of rows in a table for formatting and scrolling<br />
purposes<br />
Defines a table cell<br />
Defines a group of footer rows in a table for formatting and<br />
scrolling purposes<br />
Defines a table header cell<br />
Defines a group of heading rows in a table for formatting and<br />
scrolling purposes<br />
Defines a table row<br />
TAKE NOTE<br />
*<br />
If you’ve created tables using HTML 4 or earlier, you might be familiar with <strong>the</strong> cellpadding,<br />
cellspacing, frame, rules, summary, and/or width elements. They are<br />
deprecated and not supported in <strong>HTML5</strong>.
68 | Lesson 3<br />
CREATE A TABLE<br />
GET READY. To create a table, perform <strong>the</strong> following steps:<br />
1. <strong>Using</strong> an HTML editor or app development tool and a Web browser, create a file<br />
named L3-PracTable.html with <strong>the</strong> following markup:<br />
<br />
LICENSED PRODUCT NOT FOR RESALE<br />
<br />
<br />
<br />
High-grossing Movies<br />
<br />
<br />
<br />
<br />
Movie<br />
Gross Proceeds<br />
<br />
<br />
Avatar<br />
$2.7 billion<br />
<br />
<br />
Titanic<br />
$2.1 billion<br />
<br />
<br />
The Dark Knight<br />
$1.0 billion<br />
<br />
<br />
<br />
<br />
2. Italicize <strong>the</strong> title of each movie <strong>by</strong> using <strong>the</strong> tags.<br />
3. Modify <strong>the</strong> table to add a caption above <strong>the</strong> table that reads “High-grossing Movies”<br />
and a footer that includes <strong>the</strong> word “Total” and “$5.8 billion”.<br />
4. Change <strong>the</strong> background of <strong>the</strong> entire table, from column headings through<br />
<strong>the</strong> footer, to khaki, using hexadecimal code #F0E68C. To do so, add <strong>the</strong><br />
following colgroup markup between and ,<br />
as follows:<br />
<br />
<br />
<br />
<br />
5. Save <strong>the</strong> file and view it in a Web browser. The finished table should look similar to<br />
Figure 3-13. Revise your markup if necessary and resave <strong>the</strong> file.<br />
6. Close <strong>the</strong> file, and <strong>the</strong>n leave <strong>the</strong> editing tool and Web browser open if you continue<br />
to <strong>the</strong> next exercise during this session.
<strong>Building</strong> <strong>the</strong> <strong>User</strong> <strong>Interface</strong> <strong>by</strong> <strong>Using</strong> <strong>HTML5</strong>: <strong>Organization</strong>, Input, and Validation | 69<br />
Figure 3-13<br />
The final high-grossing<br />
movies table<br />
LICENSED PRODUCT NOT FOR RESALE<br />
CERTIFICATION READY<br />
How do you create<br />
an ordered list and an<br />
unordered list?<br />
2.4<br />
CREATING LISTS<br />
Creating lists in <strong>HTML5</strong> is simple, especially if you’ve created <strong>the</strong>m in previous HTML specifications.<br />
The rules are nearly identical, although <strong>HTML5</strong> modified how one list item should<br />
be used and introduces some new attributes.<br />
There are two primary types of HTML lists:<br />
• Ordered list: Orders <strong>the</strong> list entries using numbers, <strong>by</strong> default. It uses <strong>the</strong> tag. You<br />
can use <strong>the</strong> following attributes with an ordered list:<br />
a. reversed: Uses <strong>the</strong> value “reversed,” which reverses <strong>the</strong> order of <strong>the</strong> list, in descending<br />
order; this attribute is not supported in most browsers as of this writing<br />
b. start number: Specifies <strong>the</strong> start value of <strong>the</strong> ordered list<br />
c. type: Specifies <strong>the</strong> kind of marker to use at <strong>the</strong> beginning of each list item; <strong>the</strong> value<br />
“1” is <strong>the</strong> default and displays decimal numbers, <strong>the</strong> value “A” uses capital letters, <strong>the</strong><br />
value “a” uses lowercase letters, <strong>the</strong> value “I” uses uppercase Roman numerals, and<br />
<strong>the</strong> value “i” uses lowercase Roman numerals<br />
• Unordered list: Displays list entries in a bulleted list. It uses a tag.<br />
Items in a list are marked <strong>by</strong> , which indicates an ordinary list item. Let’s look at<br />
some examples.<br />
Here is an ordered list, shown in a browser in Figure 3-14:<br />
Favorite cupcakes:<br />
<br />
Chocolate chip cheesecake<br />
Strawberry delight<br />
Italian creme<br />
<br />
Here is an unordered list, and shown in a Web browser in Figure 3-15:<br />
Cupcake flavors:<br />
<br />
Strawberry delight<br />
Chocolate chip cheesecake<br />
Italian creme<br />
70 | Lesson 3<br />
Figure 3-14<br />
An example of an ordered list<br />
LICENSED PRODUCT NOT FOR RESALE<br />
Figure 3-15<br />
An example of an<br />
unordered list<br />
You can change <strong>the</strong> round bullet symbols in an unordered list <strong>by</strong> simply adding an attribute<br />
to change <strong>the</strong> nature of <strong>the</strong> bullets. For square symbols, add type="square" to <strong>the</strong> <br />
tag, and for empty circles add type="circle". You can also add <strong>the</strong> attributes to individual<br />
list items (marked <strong>by</strong> ) to affect individual points. For example, to display all bullet symbols<br />
as filled-in squares:<br />
Cupcake flavors:<br />
<br />
Strawberry delight<br />
Chocolate chip cheesecake<br />
Italian creme<br />
<br />
The markup would appear as shown in Figure 3-16.
<strong>Building</strong> <strong>the</strong> <strong>User</strong> <strong>Interface</strong> <strong>by</strong> <strong>Using</strong> <strong>HTML5</strong>: <strong>Organization</strong>, Input, and Validation | 71<br />
Figure 3-16<br />
The bulleted items have<br />
filled-in squares as symbols<br />
LICENSED PRODUCT NOT FOR RESALE<br />
Ano<strong>the</strong>r type of list is <strong>the</strong> definition list. It displays items with <strong>the</strong>ir definitions below <strong>the</strong> list<br />
item and indented. The tag defines <strong>the</strong> list, <strong>the</strong> tag marks each term in <strong>the</strong> item,<br />
and <strong>the</strong> tag defines each description. Here’s an example of <strong>the</strong> markup, and Figure 3-17<br />
shows <strong>the</strong> rendered list.<br />
<br />
Strawberry delight<br />
Strawberry meringue buttercream with<br />
tiny wild strawberries<br />
Chocolate chip cheesecake<br />
Mini chocolate chips blended with creamy<br />
cheesecake and a chocolate brownie bottom,<br />
topped with cream cheese frosting<br />
Italian creme<br />
Italian cream cake topped with cream<br />
cheese frosting and toasted coconut<br />
<br />
Figure 3-17<br />
An example of a definition list
72 | Lesson 3<br />
TAKE NOTE<br />
*<br />
The menu element was<br />
deprecated in HTML<br />
4.01 but has been redefined<br />
in <strong>HTML5</strong>.<br />
<strong>HTML5</strong> also uses <strong>the</strong> menu element, which presents a list (or menu) of commands, usually<br />
with buttons. The W3C prefers that you use <strong>the</strong> menu element only for context menus, lists<br />
of form controls and commands, toolbars, and similar items. The <strong>HTML5</strong> menu element is<br />
not widely supported <strong>by</strong> browsers as of this writing.<br />
LICENSED PRODUCT NOT FOR RESALE<br />
CREATE AN ORDERED LIST<br />
GET READY. To create an ordered list, perform <strong>the</strong> following steps:<br />
1. <strong>Using</strong> an HTML editor or app development tool and a Web browser, enter <strong>the</strong> following:<br />
<br />
<br />
<br />
<br />
Desktops<br />
Laptops<br />
Tablets<br />
Smartphones<br />
<br />
<br />
<br />
2. Save <strong>the</strong> file as L3-OrderedList.html and view it in a Web browser.<br />
3. To change <strong>the</strong> initial markers to capital letters, insert type="A" in <strong>the</strong> tag,<br />
like this: <br />
4. Save <strong>the</strong> file and view it in a Web browser. Do <strong>the</strong> list items now start with A, B, C, and D?<br />
5. To start list numbering at 5, insert start="5" in <strong>the</strong> tag. Replace <strong>the</strong> current<br />
tag with this: <br />
6. Save <strong>the</strong> file and view it in a Web browser. Do <strong>the</strong> list items now start with 5 and end<br />
with 8?<br />
7. Close <strong>the</strong> file, and <strong>the</strong>n leave <strong>the</strong> editing tool and Web browser open if you continue<br />
to <strong>the</strong> next exercise during this session.<br />
■ Choosing and Configuring <strong>HTML5</strong> Tags for Input and Validation<br />
THE BOTTOM LINE<br />
Developers use Web forms as <strong>the</strong> interface for collecting information from Web site and<br />
client application users. HTML input elements serve to build a form’s interface and ensure<br />
that information is collected from users consistently. Validation ensures that <strong>the</strong> entered<br />
information is in <strong>the</strong> correct format and usable before sending <strong>the</strong> data to <strong>the</strong> <strong>server</strong>.<br />
In HTML, input and validation apply to forms. A Web form is a Web page that provides<br />
input fields for a user to enter data, which is sent to a <strong>server</strong> for processing. From <strong>the</strong>re, <strong>the</strong><br />
information is stored in a database or forwarded to a recipient.<br />
Web forms are used as <strong>the</strong> interface for many different tasks:<br />
• To log in to a Web site, <strong>server</strong>, or network<br />
• To collect contact information, such as name, email address, phone number, and mailing<br />
address<br />
• To sign up for emails or newsletters from an organization
<strong>Building</strong> <strong>the</strong> <strong>User</strong> <strong>Interface</strong> <strong>by</strong> <strong>Using</strong> <strong>HTML5</strong>: <strong>Organization</strong>, Input, and Validation | 73<br />
• To capture user comments after an article on a Web site<br />
• To select preferences on a Web page<br />
• To enter reservation information<br />
Many client applications use some kind of Web form to interact with <strong>the</strong> user.<br />
You use HTML input elements to build a form’s interface and ensure that information is collected<br />
from users consistently. Validation ensures that <strong>the</strong> entered information is in <strong>the</strong> correct format<br />
and usable before sending <strong>the</strong> data to <strong>the</strong> <strong>server</strong>. For example, if you enter “637 Park Street” into<br />
a Web address field, which is expecting something like “http://www.example.com”, validation will<br />
fail and prompt <strong>the</strong> user to correct <strong>the</strong> input. Validation also reduces <strong>the</strong> amount of spam and<br />
malicious content that can make its way to <strong>the</strong> <strong>server</strong> or <strong>the</strong> recipient of <strong>the</strong> form’s data.<br />
LICENSED PRODUCT NOT FOR RESALE<br />
Understanding Input and Forms<br />
TAKE NOTE<br />
*<br />
Check <strong>the</strong> functionality<br />
of any form you create<br />
in many different browsers<br />
during development.<br />
This ensures <strong>the</strong> elements<br />
and attributes you<br />
select work as expected<br />
or <strong>the</strong> fall-back<br />
method collects acceptable<br />
input.<br />
Table 3-4<br />
Form element attributes used<br />
in <strong>HTML5</strong><br />
Most Web forms, or at least many fields in most forms, require specifically formatted<br />
input. The new <strong>HTML5</strong> form and input attributes are intuitive, easy to use, and replace<br />
a lot of scripting that was required in HTML 4.01 and previous versions.<br />
Form input is <strong>the</strong> information a user enters into fields in a Web or client application form.<br />
(To keep things simple, we use <strong>the</strong> term “Web form” most of <strong>the</strong> time, but it applies to client<br />
application as well.) <strong>HTML5</strong> introduces several new form and input element attributes, such<br />
as url for entering a single Web address, email for a single email address or a list of email<br />
addresses, and search to prompt users to enter text <strong>the</strong>y want to search for. The new attributes<br />
make form development much easier than in <strong>the</strong> past. What used to take a lot of scripting<br />
can be accomplished <strong>by</strong> <strong>HTML5</strong> tags.<br />
On <strong>the</strong> flip side, many of <strong>the</strong> new attributes are not yet supported <strong>by</strong> all of <strong>the</strong> major browsers.<br />
However, if you use a new element or attribute that isn’t yet supported, <strong>the</strong> browser “falls<br />
back” to an alternate display, a different form of input, or what have you.<br />
<strong>HTML5</strong> introduces two new attributes for <strong>the</strong> form element—autocomplete and novalidate.<br />
All attributes for <strong>the</strong> form element are listed in Table 3-4, with <strong>the</strong> new attributes indicated<br />
with a double asterisk.<br />
ATTRIBUTE VALUE DESCRIPTION<br />
accept-charset character_set Specifies a set of character encodings <strong>the</strong><br />
<strong>server</strong> accepts<br />
action URL Specifies <strong>the</strong> Web address to which form<br />
data is sent<br />
autocomplete** on Specifies whe<strong>the</strong>r autocomplete is on or off<br />
off<br />
in a form or input field; can be “on” for<br />
specific input fields and “off” for <strong>the</strong> form,<br />
or vice versa<br />
enctype application/x-www- Specifies <strong>the</strong> encoding type for form data<br />
form-urlencoded when submitting <strong>the</strong> data to a <strong>server</strong>;<br />
multipart/<br />
used only for method="post"<br />
form-data<br />
text/plain<br />
(continued)
74 | Lesson 3<br />
Table 3-4<br />
continued<br />
CERTIFICATION READY<br />
Which <strong>HTML5</strong>-specific<br />
attributes do you use for<br />
restricting form input?<br />
2.5<br />
ATTRIBUTE VALUE DESCRIPTION<br />
method get Specifies <strong>the</strong> HTTP (transmission) method<br />
post<br />
used when sending form data; use “get”<br />
for retrieving data and use “post” for<br />
storing or updating data or sending email<br />
LICENSED PRODUCT NOT FOR RESALE<br />
name text Specifies <strong>the</strong> name of a form, which is used<br />
to reference form data after a form is<br />
submitted<br />
novalidate** novalidate A Boolean attribute that specifies that <strong>the</strong><br />
form data (user input) should not be validated<br />
when submitted; <strong>HTML5</strong> also allows<br />
Boolean attributes to be set <strong>by</strong> mentioning<br />
<strong>the</strong> attribute without an equals sign or<br />
assigned value<br />
target _blank Specifies where to display <strong>the</strong> response<br />
_self<br />
received after submitting <strong>the</strong> form<br />
_parent<br />
_blank loads <strong>the</strong> response in a new,<br />
_top<br />
unnamed browser window<br />
_self loads <strong>the</strong> response in <strong>the</strong> current<br />
window; this is <strong>the</strong> default, so it’s use<br />
isn’t required<br />
_parent loads <strong>the</strong> response in <strong>the</strong> parent<br />
window (<strong>the</strong> browser window that opens<br />
<strong>the</strong> form window)<br />
_top loads <strong>the</strong> response in <strong>the</strong> full<br />
browser window<br />
**New in <strong>HTML5</strong>.<br />
<strong>HTML5</strong> introduces numerous input element attributes. The attributes for <strong>the</strong> input element<br />
are listed in Table 3-5; new attributes in <strong>HTML5</strong> are indicated <strong>by</strong> a double asterisk.<br />
Table 3-5<br />
Input element attributes used<br />
in <strong>HTML5</strong><br />
ATTRIBUTE VALUE DESCRIPTION<br />
accept audio/* Specifies file types <strong>the</strong> <strong>server</strong> accepts; used<br />
video/*<br />
only for type="file"<br />
image/*<br />
MIME_type<br />
alt text Specifies alternate text for images; used only<br />
for type="image"; commonly used when<br />
creating a custom Submit button from your<br />
own image file<br />
autocomplete** on Specifies whe<strong>the</strong>r autocomplete is on or off<br />
off<br />
in a form or input field; can be “on” for<br />
specific input fields and “off” for <strong>the</strong> form,<br />
or vice versa<br />
(continued)
<strong>Building</strong> <strong>the</strong> <strong>User</strong> <strong>Interface</strong> <strong>by</strong> <strong>Using</strong> <strong>HTML5</strong>: <strong>Organization</strong>, Input, and Validation | 75<br />
Table 3-5<br />
continued<br />
ATTRIBUTE VALUE DESCRIPTION<br />
autofocus** autofocus A Boolean attribute, specifies that a control<br />
is to be focused, or selected, as soon as <strong>the</strong><br />
page loads<br />
LICENSED PRODUCT NOT FOR RESALE<br />
checked checked Specifies that an input element be preselected<br />
upon page load; used only for<br />
type="checkbox" or type="radio"<br />
disabled disabled Disables an input element<br />
form** form_id Specifies <strong>the</strong> form (or multiple forms)<br />
an input element belongs to<br />
formaction** URL Specifies <strong>the</strong> Web address of <strong>the</strong> file that will<br />
process <strong>the</strong> input control when <strong>the</strong> form is<br />
submitted<br />
formenctype** application/x- Specifies <strong>the</strong> encoding type for form<br />
www-form-<br />
data when submitting <strong>the</strong> data to<br />
urlencoded a <strong>server</strong>; used only for method=”post”<br />
multipart/<br />
form-data<br />
text/plain<br />
formmethod** get Specifies <strong>the</strong> HTTP (transmission) method<br />
post<br />
used for sending form data to a Web<br />
address<br />
formnovalidate** formnovalidate A Boolean attribute that prevents validation<br />
when submitting input<br />
formtarget** _blank Specifies a keyword that indicates<br />
_self<br />
where to display <strong>the</strong> response<br />
_parent<br />
received after submitting <strong>the</strong> form<br />
_top<br />
framename<br />
height pixels Specifies <strong>the</strong> height of an input element;<br />
used only with input type="image"<br />
list** datalist_id Refers to a datalist element that contains<br />
predefined content to autocomplete input,<br />
such as selecting an item from a dropdown<br />
list<br />
max** number Specifies <strong>the</strong> maximum value for an input<br />
date<br />
element<br />
min** number Specifies <strong>the</strong> minimum value for an input<br />
date<br />
element<br />
multiple** multiple A Boolean attribute that specifies <strong>the</strong> user<br />
may enter multiple values<br />
pattern** regexp Provides a format (a regular expression) for<br />
<strong>the</strong> input field; <strong>the</strong> input element’s value is<br />
checked against <strong>the</strong> expression<br />
(continued)
76 | Lesson 3<br />
Table 3-5<br />
(continued)<br />
ATTRIBUTE VALUE DESCRIPTION<br />
placeholder** text Displays a key word or short phrase that<br />
describes <strong>the</strong> expected value of an input<br />
field, such as “Email” for an email input<br />
field; placeholder disappears when user<br />
enters data<br />
LICENSED PRODUCT NOT FOR RESALE<br />
readonly readonly Restricts an input field to read-only<br />
required** required A Boolean attribute that requires an input<br />
field to be filled out before submitting <strong>the</strong><br />
form<br />
size number Specifies <strong>the</strong> width of an input element, in<br />
number of characters<br />
src URL Specifies <strong>the</strong> Web address of <strong>the</strong> image<br />
used as a submit button; used only for<br />
type="image"<br />
step** number Specifies <strong>the</strong> accepted number of intervals<br />
for an input element; can be used with <strong>the</strong><br />
min and max attributes to create a range<br />
of values<br />
For example, you are creating a slider bar for<br />
input. If you set step="3", each time <strong>the</strong><br />
user move <strong>the</strong> slider, <strong>the</strong> input value increases<br />
or decreases <strong>by</strong> 3<br />
type<br />
button, checkbox, Specifies <strong>the</strong> type of input element to display<br />
color, date,<br />
datetime,<br />
datetime-local,<br />
email, file,<br />
hidden, image,<br />
month, number,<br />
password, radio,<br />
range, reset,<br />
search, submit,<br />
tel, text, time,<br />
url, week<br />
value text Specifies <strong>the</strong> value of an input element<br />
width pixels Specifies <strong>the</strong> width of an input element;<br />
used only with input type=”image”<br />
**New in <strong>HTML5</strong>.
<strong>Building</strong> <strong>the</strong> <strong>User</strong> <strong>Interface</strong> <strong>by</strong> <strong>Using</strong> <strong>HTML5</strong>: <strong>Organization</strong>, Input, and Validation | 77<br />
EXPLORING FORM CREATION, INPUT ATTRIBUTES, AND VALUES<br />
To create a form, use <strong>the</strong> start and end tags. All of <strong>the</strong> form’s content and fields go<br />
between <strong>the</strong> two tags. Most forms also include <strong>the</strong> id attribute in <strong>the</strong> start tag, as follows:<br />
<br />
<br />
<br />
LICENSED PRODUCT NOT FOR RESALE<br />
The fieldset element is used with many forms to group related elements. The <br />
tag draws a box around individual elements and/or around <strong>the</strong> entire form, as shown in<br />
Figure 3-18.<br />
Figure 3-18<br />
The fieldset element<br />
groups related elements in a<br />
form and adds a border<br />
If <strong>the</strong> form is included in an HTML document with o<strong>the</strong>r items, you can use <strong>the</strong> tag<br />
at <strong>the</strong> beginning and end of <strong>the</strong> form to separate it from o<strong>the</strong>r content. <strong>Using</strong> <strong>the</strong> tag<br />
also lets you include inline formatting, if <strong>the</strong> form uses tags to align fields vertically short and<br />
simple and you don’t want to create a CSS style sheet. The tag uses <strong>the</strong> id attribute<br />
and appears before <strong>the</strong> first tag. The label element displays <strong>the</strong> label for each field.<br />
An example of <strong>the</strong> markup for a very simple form is:<br />
<br />
<br />
<br />
Name<br />
<br />
<br />
<br />
Email<br />
<br />
<br />
<br />
<br />
The form is shown in Figure 3-19.
78 | Lesson 3<br />
Figure 3-19<br />
A very simple form<br />
LICENSED PRODUCT NOT FOR RESALE<br />
Now let’s look at some of <strong>the</strong> new <strong>HTML5</strong> attributes and values. Although this section<br />
doesn’t address everything listed in Tables 3-4 and 3-5, it does describe and show examples of<br />
some of <strong>the</strong> most commonly used attributes and values.<br />
The required attribute requires information in a field when <strong>the</strong> form is submitted. The<br />
email attribute (shown in <strong>the</strong> preceding example) requires <strong>the</strong> user to enter an email<br />
address. The browser will alert <strong>the</strong> user with an error message to fix <strong>the</strong>se issues.<br />
An example of an input element with <strong>the</strong> required and email attributes is:<br />
<br />
To make a form more user-friendly, add placeholder text. Placeholder text is text displayed<br />
inside an input field when <strong>the</strong> field is empty. It helps users understand <strong>the</strong> type of information<br />
<strong>the</strong>y should enter or select. When you click on or tab to <strong>the</strong> input field and start typing,<br />
<strong>the</strong> newly entered text replaces <strong>the</strong> placeholder text. An example of <strong>the</strong> placeholder<br />
attribute is:<br />
<br />
The pattern attribute provides a format (a regular expression) for an input field, which is<br />
used to validate whatever is entered into <strong>the</strong> field. For example, let’s say you have a required<br />
input field for employee ID. Every employee ID begins with two capital letters followed<br />
<strong>by</strong> four digits. You would use a text input field with <strong>the</strong> required and pattern attributes to<br />
ensure that <strong>the</strong> field (1) is populated when <strong>the</strong> user clicks <strong>the</strong> submit button and (2) contains<br />
a value that matches <strong>the</strong> correct format for an employee ID. If <strong>the</strong> user hovers over <strong>the</strong><br />
field, <strong>the</strong> message in <strong>the</strong> title attribute displays, which you add separately. An example of<br />
<strong>the</strong> pattern attribute is:<br />
<br />
You can use <strong>the</strong> pattern attribute with <strong>the</strong>se types: text, search, url,<br />
telephone, email, and password.
<strong>Building</strong> <strong>the</strong> <strong>User</strong> <strong>Interface</strong> <strong>by</strong> <strong>Using</strong> <strong>HTML5</strong>: <strong>Organization</strong>, Input, and Validation | 79<br />
The datalist element enables you to present <strong>the</strong> user with a drop-down list of options<br />
to select from. Only <strong>the</strong> options in <strong>the</strong> list may be selected. Alternately, you could insert<br />
type="text" into <strong>the</strong> input element to create a text box in which <strong>the</strong> user enters text. The<br />
following example lets <strong>the</strong> user select from one of three countries:<br />
<br />
<br />
<br />
<br />
<br />
<br />
LICENSED PRODUCT NOT FOR RESALE<br />
The search value for <strong>the</strong> type attribute enables you to create a search feature for a Web<br />
page. An example of <strong>the</strong> markup is:<br />
<br />
<br />
<br />
<br />
Finally, <strong>the</strong> autofocus attribute moves <strong>the</strong> focus to a particular input field when a Web<br />
page loads. An example of autofocus is when you open a search engine Web page and <strong>the</strong><br />
insertion point automatically appears in <strong>the</strong> input box so you can type search terms without<br />
first clicking in <strong>the</strong> box. An example of <strong>the</strong> markup to place <strong>the</strong> focus on a field named<br />
fname when a page loads is:<br />
<br />
autofocus has historically been handled <strong>by</strong> JavaScript, and if a user turns off JavaScript in a Web<br />
browser, <strong>the</strong> autofocus feature doesn’t work. To work around this issue, <strong>the</strong> <strong>HTML5</strong> autofocus<br />
attribute is supported <strong>by</strong> all major browsers and behaves consistently across all Web sites.<br />
CREATE A SIMPLE WEB FORM<br />
GET READY. To create a simple Web form, perform <strong>the</strong> following steps:<br />
1. <strong>Using</strong> an HTML editor or app development tool and a Web browser, create a simple<br />
Web form with <strong>the</strong> following markup:<br />
<br />
<br />
<br />
<br />
Contact Us<br />
<br />
<br />
<br />
<br />
<br />
Name<br />
80 | Lesson 3<br />
Email<br />
<br />
Phone<br />
<br />
Questions or<br />
Comments<br />
<br />
LICENSED PRODUCT NOT FOR RESALE<br />
<br />
<br />
<br />
<br />
<br />
<br />
2. Save <strong>the</strong> file as L3-WebForm-orig.html. The rendered version is shown in<br />
Figure 3-20.<br />
Figure 3-20<br />
The beginning of a Web form<br />
3. The Web form looks unstructured. Ideally, you would use CSS to apply alignment, but<br />
because you haven’t learned CSS yet, you can apply a workaround to make <strong>the</strong> fields<br />
align vertically. One method is to add start and end tags around each<br />
label/input pair. This would align <strong>the</strong> fields vertically and add boxes around <strong>the</strong>m.<br />
<strong>Using</strong> opening and closing tags instead of tags would accomplish<br />
<strong>the</strong> same thing but without adding boxes. For this exercise, use <strong>the</strong> tags.<br />
Figure 3-21 shows <strong>the</strong> same Web form with tags around <strong>the</strong> label/input pairs,<br />
including <strong>the</strong> comments field.
<strong>Building</strong> <strong>the</strong> <strong>User</strong> <strong>Interface</strong> <strong>by</strong> <strong>Using</strong> <strong>HTML5</strong>: <strong>Organization</strong>, Input, and Validation | 81<br />
Figure 3-21<br />
A Web form using tags to<br />
align fields vertically<br />
LICENSED PRODUCT NOT FOR RESALE<br />
4. Add placeholder text to all fields. The result should look similar to Figure 3-22, if<br />
viewed in <strong>the</strong> Mozilla Firefox Web browser.<br />
Figure 3-22<br />
A Web form with placeholders<br />
added to each field<br />
5. Save <strong>the</strong> file as L3-WebForm-placeholders.html.<br />
6. Leave <strong>the</strong> file and editing tool open if you continue to <strong>the</strong> next exercise during this<br />
session.<br />
✚ MORE INFORMATION<br />
To learn more about <strong>HTML5</strong> input element attributes, visit <strong>the</strong> W3C.org Web site at http://bit.ly/I1PW3P.<br />
Understanding Validation<br />
<strong>HTML5</strong> provides new attributes that validate Web form fields as users are entering<br />
data or when <strong>the</strong>y click <strong>the</strong> submit button. The attributes include required, email, and<br />
pattern, among o<strong>the</strong>rs.
82 | Lesson 3<br />
Validation is <strong>the</strong> process of verifying that information entered or captured in a form is in <strong>the</strong><br />
correct format and usable before sending <strong>the</strong> data to <strong>the</strong> <strong>server</strong>. Some things that are verified<br />
during validation are:<br />
• Required fields are empty<br />
• Email addresses are valid<br />
• Dates are valid<br />
• Text does not appear in a numeric field or vice versa<br />
LICENSED PRODUCT NOT FOR RESALE<br />
CERTIFICATION READY<br />
How does <strong>HTML5</strong><br />
validate data entered into<br />
a form <strong>by</strong> a user?<br />
2.5<br />
<strong>Using</strong> HTML 4.01 and previous specifications, you often needed to use a lot of JavaScript<br />
or scripting in ano<strong>the</strong>r language to create custom validity rules and response messages, or to<br />
determine if an element is invalid.<br />
In <strong>HTML5</strong>, several of <strong>the</strong> input element types you learned about in <strong>the</strong> last section offer<br />
automatic validation of input, which means <strong>the</strong> browser checks <strong>the</strong> data <strong>the</strong> user inputs.<br />
This is referred to as client-side validation, because <strong>the</strong> input data is validated before submission<br />
to <strong>the</strong> <strong>server</strong>. (In cases in which <strong>the</strong> <strong>server</strong> validates data received from an input form,<br />
it’s referred to as <strong>server</strong>-side validation.) If <strong>the</strong> user enters <strong>the</strong> wrong type of data into a field,<br />
such as an email address in a field with <strong>the</strong> url attribute, <strong>the</strong> browser instructs <strong>the</strong> user to<br />
enter a valid URL. Let’s look at examples of <strong>the</strong> default error messages that are generated during<br />
automatic validation.<br />
The required attribute avoids <strong>the</strong> problem of empty fields that need to be populated. When<br />
a user skips a required field and clicks <strong>the</strong> submit button, an error message appears as shown<br />
in Figure 3-23. This example uses <strong>the</strong> Mozilla Firefox Web browser.<br />
Figure 3-23<br />
Error message in <strong>the</strong> Firefox<br />
browser for a required field<br />
<strong>HTML5</strong> also offers validation of Web addresses entered into fields with <strong>the</strong><br />
construct, and numbers entered into fields with <strong>the</strong> construct. If you use <strong>the</strong> min and max attributes with type="number",<br />
you will receive an error message from <strong>the</strong> browser if you enter a number that’s too small or<br />
too large.<br />
Finally, <strong>the</strong> pattern attribute prevents <strong>the</strong> user from entering data that doesn’t follow<br />
<strong>the</strong> pattern expression. In this example, <strong>the</strong> pattern attribute validates a five-digit zip<br />
code:<br />
<br />
Incorrectly entering data in <strong>the</strong> Zip Code field in <strong>the</strong> Firefox browser results in <strong>the</strong> error message<br />
shown in Figure 3-24.
<strong>Building</strong> <strong>the</strong> <strong>User</strong> <strong>Interface</strong> <strong>by</strong> <strong>Using</strong> <strong>HTML5</strong>: <strong>Organization</strong>, Input, and Validation | 83<br />
Figure 3-24<br />
Error message in <strong>the</strong> Firefox<br />
browser when entering an<br />
incorrect pattern<br />
LICENSED PRODUCT NOT FOR RESALE<br />
As mentioned previously, no markup is required to activate <strong>HTML5</strong> form validation—it’s on<br />
<strong>by</strong> default. To turn it off, use <strong>the</strong> novalidate attribute for specific input fields.<br />
TAKE NOTE<br />
*<br />
You must also validate<br />
Web forms just<br />
as you do an ordinary<br />
HTML document<br />
using <strong>the</strong> W3C Markup<br />
Validation service at<br />
http://validator.w3.org.<br />
ADD VALIDATION FIELDS TO A WEB FORM<br />
GET READY. To add validation fields to a Web form, perform <strong>the</strong> following steps:<br />
1. <strong>Using</strong> an HTML editor or app development tool, open L3-WebForm-placeholders.html.<br />
2. Save <strong>the</strong> file as L3-WebForm-valid.html.<br />
3. Add <strong>the</strong> required attribute to <strong>the</strong> email field, as follows:<br />
<br />
Email<br />
< input type="email" name="email" required<br />
placeholder="Email address"><br />
<br />
4. Add <strong>the</strong> pattern attribute to <strong>the</strong> phone field. The expression should restrict entry to<br />
area code and phone number, in <strong>the</strong> format XXX-XXX-XXXX, as follows:<br />
<br />
Phone<br />
< input type="text" name="phone" pattern="[0-9]{3}-<br />
[0-9]{3}-[0-9]{4}" placeholder="Phone number"><br />
<br />
5. Save <strong>the</strong> file, and <strong>the</strong>n view it in a Web browser. Type text in each input field except<br />
<strong>the</strong> email field and click <strong>the</strong> Submit button. Did you receive an error message<br />
prompting you to enter an email address?<br />
6. Type text in each field again including <strong>the</strong> email field, but this time type a phone<br />
number without <strong>the</strong> area code and <strong>the</strong>n click Submit. Did you receive an error regarding<br />
<strong>the</strong> phone number field?<br />
7. Close <strong>the</strong> file, <strong>the</strong> editing tool or app development tool, and <strong>the</strong> Web browser.<br />
SKILL SUMMARY<br />
IN THIS LESSON YOU LEARNED:<br />
• <strong>HTML5</strong> introduces several new elements for organizing content and forms. They represent<br />
<strong>the</strong> new semantic markup that’s an important part of <strong>HTML5</strong>.<br />
• Semantic markup uses tag names that are intuitive, making it easier to build and modify<br />
HTML documents, and for Web browsers and o<strong>the</strong>r programs to interpret.<br />
• New <strong>HTML5</strong> elements for structuring and organizing content in an HTML document<br />
include header, footer, section, nav, article, and aside. These elements reduce<br />
<strong>the</strong> number of div tags required in a document.<br />
• Tables and lists give structure to specific information in HTML documents. A table contains<br />
rows and columns, and displays data in a grid. In HTML, you can create ordered and<br />
(Continued)
84 | Lesson 3<br />
unordered lists. Each item in an ordered list is marked <strong>by</strong> a number or letter. An unordered<br />
list is a bulleted list.<br />
• Developers use Web forms as <strong>the</strong> interface for collecting information from Web site and<br />
client application users. HTML input elements serve to build a form’s interface and ensure<br />
that information is collected from users consistently.<br />
• Most Web forms, or at least many fields in most forms, require specifically formatted<br />
input. The new <strong>HTML5</strong> form and input attributes are intuitive, easy to use, and replace a<br />
lot of scripting that was required in HTML 4.01 and previous versions.<br />
• Validation ensures that information entered in an input field of a Web form is in <strong>the</strong> correct<br />
format and usable before sending <strong>the</strong> data to <strong>the</strong> <strong>server</strong>.<br />
• <strong>HTML5</strong> provides new attributes that validate Web form fields as users are entering data<br />
or when <strong>the</strong>y click <strong>the</strong> submit button. The attributes include required, email, and pattern,<br />
among o<strong>the</strong>rs.<br />
LICENSED PRODUCT NOT FOR RESALE<br />
■ Knowledge Assessment<br />
Fill in <strong>the</strong> Blank<br />
Complete <strong>the</strong> following sentences <strong>by</strong> writing <strong>the</strong> correct word or words in <strong>the</strong> blanks provided.<br />
1. An HTML contains rows and columns, and is used to display information<br />
in a grid format.<br />
2. Class and ID are attributes, which means <strong>the</strong>y can be used with any<br />
HTML element.<br />
3. An list orders <strong>the</strong> list entries using numbers, <strong>by</strong> default.<br />
4. An list displays list entries in a bulleted list.<br />
5. The <strong>HTML5</strong> element presents a list (or menu) of commands, usually<br />
with buttons.<br />
6. Form is <strong>the</strong> information a user enters into fields in a Web or client<br />
application.<br />
7. The attribute requires information in a field when <strong>the</strong> form is submitted.<br />
8. text is displayed inside an input field when <strong>the</strong> field is empty. It helps<br />
users understand <strong>the</strong> type of information <strong>the</strong>y should enter or select.<br />
9. is <strong>the</strong> process of verifying that information entered or captured in a<br />
form is in <strong>the</strong> correct format and usable before sending <strong>the</strong> data to <strong>the</strong> <strong>server</strong>.<br />
10. The attribute moves <strong>the</strong> focus to a particular input field when a Web<br />
page loads.<br />
Multiple Choice<br />
Circle <strong>the</strong> letter that corresponds to <strong>the</strong> best answer.<br />
1. Which <strong>HTML5</strong> element defines subdivisions in a document, such as chapters, parts of a<br />
<strong>the</strong>sis, or parts of a Web page whose content is distinct from each o<strong>the</strong>r?<br />
a. aside<br />
b. section<br />
c. header<br />
d. article
<strong>Building</strong> <strong>the</strong> <strong>User</strong> <strong>Interface</strong> <strong>by</strong> <strong>Using</strong> <strong>HTML5</strong>: <strong>Organization</strong>, Input, and Validation | 85<br />
2. Which <strong>HTML5</strong> element defines a part of an HTML document that consists of a “selfcontained<br />
composition” that’s independent from <strong>the</strong> rest of <strong>the</strong> content in <strong>the</strong> document<br />
and may be syndicated?<br />
a. aside<br />
b. section<br />
c. header<br />
d. article<br />
LICENSED PRODUCT NOT FOR RESALE<br />
3. Which <strong>HTML5</strong> element is used to set off content that’s related to <strong>the</strong> current topic but<br />
would interrupt <strong>the</strong> flow of <strong>the</strong> document if left inline?<br />
a. aside<br />
b. section<br />
c. header<br />
d. article<br />
4. Which <strong>HTML5</strong> attribute provides a format (a regular expression) for an input field,<br />
which is used to validate whatever is entered into <strong>the</strong> field?<br />
a. pattern<br />
b. autofocus<br />
c. required<br />
d. placeholder<br />
5. Which of <strong>the</strong> following does validation not check and return an error for, <strong>by</strong> default,<br />
if invalid?<br />
a. Required fields are empty<br />
b. Valid email addresses<br />
c. Email address to <strong>the</strong> wrong recipient<br />
d. Text in a numeric field or vice versa<br />
6. Which of <strong>the</strong> following is a practical use for a Web form?<br />
a. To collect contact information from a user<br />
b. To capture user comments after an article on a Web site<br />
c. Both a and b<br />
d. Nei<strong>the</strong>r a nor b<br />
7. Which of <strong>the</strong> following are new form attributes in <strong>HTML5</strong>? (Choose all that apply.)<br />
a. autocomplete<br />
b. target<br />
c. method<br />
d. novalidate<br />
8. What pattern attribute expression would you use to enter a product code that consists of<br />
three digits, separated <strong>by</strong> a hyphen, and <strong>the</strong>n a single lowercase letter?<br />
a. [a-z]{1}-[0-9]{3}<br />
b. [0-9]{3}-[a-z]{1}<br />
c. [A-Z]{3}-[0-9]{1}<br />
d. [0-9]{1}-[a-z]{3}<br />
9. Which of <strong>the</strong> following displays a key word or short phrase that describes <strong>the</strong> expected<br />
value of an input field, and <strong>the</strong>n disappears when a user enters data?<br />
a. label<br />
b. placeholder<br />
c. title<br />
d. email
86 | Lesson 3<br />
10. What is <strong>the</strong> format for <strong>the</strong> <strong>HTML5</strong> tag that validates an email address?<br />
a. <br />
b. <br />
c. Email<br />
d. <br />
LICENSED True / False PRODUCT NOT FOR RESALE<br />
Circle T if <strong>the</strong> statement is true or F if <strong>the</strong> statement is false.<br />
T F 1. In a table, <strong>the</strong> tfoot element must appear before <strong>the</strong> tbody element.<br />
T F 2. You can use numbers or letters for each item in an ordered list.<br />
T F 3. You can specify <strong>the</strong> height of an input element using <strong>the</strong> size attribute.<br />
T F 4. The label element displays <strong>the</strong> caption, or title, for a table.<br />
T F 5. The nav element defines a block of navigation links.<br />
■ Competency Assessment<br />
Scenario 3-1: Markup for a Newsletter Article<br />
Sally Rowe, <strong>the</strong> document controller at Malted Milk Media, wants to publish a series of<br />
articles on <strong>the</strong> company intranet regarding document security and versioning. She needs to<br />
create a skeleton of <strong>the</strong> <strong>HTML5</strong> markup for an article that will appear in <strong>the</strong> monthly online<br />
newsletter created <strong>by</strong> one of <strong>the</strong> Web developers. Each article will have a title and subtitle,<br />
several paragraphs of text, and her name and <strong>the</strong> article date in <strong>the</strong> footer. What should her<br />
article markup look like?<br />
Scenario 3-2: Displaying Long Tables in HTML<br />
Vince generates accounting reports for <strong>the</strong> VP of Finance at Momentum Strategies, a PR firm<br />
geared toward political campaigns. Vince regularly prints tables that are two- or three-pages<br />
long and delivers hard copies to senior management staff. He wants to publish <strong>the</strong>m to a<br />
secure area of <strong>the</strong> company intranet, but <strong>the</strong> rows of data separate from <strong>the</strong> column headings<br />
and totals line at <strong>the</strong> end. He wants to know how to present <strong>the</strong> tables properly in <strong>HTML5</strong>.<br />
What do you tell him?<br />
■ Proficiency Assessment<br />
Scenario 3-3: Creating a Glossary of Terms<br />
Waylon is a student working on a term paper. His instructor requires each student to format<br />
<strong>the</strong> paper for display on <strong>the</strong> Web. Waylon wants to include a glossary of terms at <strong>the</strong> end of<br />
<strong>the</strong> paper but can’t produce <strong>the</strong> right “look” using an unordered list. Which markup would be<br />
better suited for Waylon’s glossary?<br />
Scenario 3-4: <strong>Using</strong> Proper Input Types in a Web Form<br />
Margie is creating and testing a Web form that includes an email field, a Web address field,<br />
and a zip code field, among o<strong>the</strong>rs. When she has a few co-workers test <strong>the</strong> form, she finds<br />
<strong>the</strong>y often enter <strong>the</strong> email address in <strong>the</strong> Web address field <strong>by</strong> mistake, and sometimes enter<br />
too many or too few numbers in <strong>the</strong> zip code field. She doesn’t want to use a pattern expression<br />
because she says it’s too complicated. What o<strong>the</strong>r input types can Margie use?