
You also want an ePaper? Increase the reach of your titles
YUMPU automatically turns print PDFs into web optimized ePapers that Google loves.
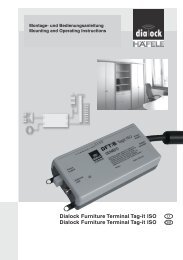
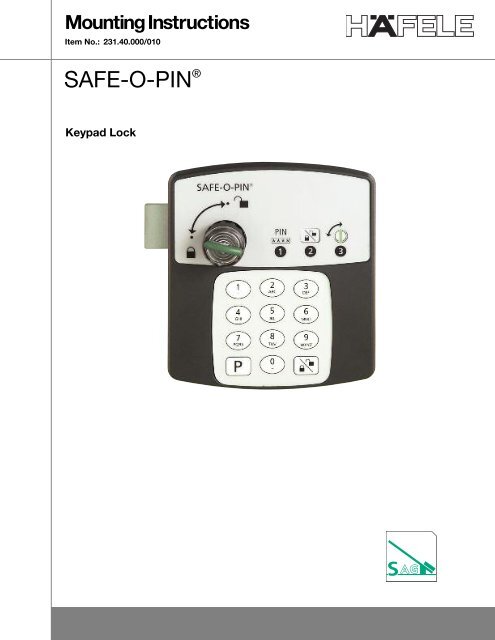
Mounting Instructions<br />
Item No.: 231.40.000/010<br />
<strong>SAFE</strong>-O-PIN ®<br />
Keypad Lock
Note regarding this manual<br />
This manual replaces all earlier editions.<br />
The information in this manual may be changed without notice.<br />
The information in this manual was produced with greatest care. However, Schulte-Schlagbaum AG,<br />
assumes no responsibility for the accuracy and completeness of the information in this manual. In particular,<br />
Schulte-Schlagbaum AG assumes no liability for consequential loss or damage as a result of incompetence<br />
or inaccurate information.<br />
Copying of this document and the use or communication of the contents are prohibited without express<br />
authority. Offenders are liable to the payment of damages. All rights are reserved in the event of the grant<br />
of a patent or the registration of a utility model or design.<br />
Safety and warning notices – read before commissioning<br />
The device may only be used for the purpose intended by the manufacturer.<br />
The operating instructions have to be kept in an easily accessible place.<br />
Unacceptable changes as well as the use of spare parts and special features which are not sold or recommended<br />
by the manufacturer, may cause fire, electric shocks and injuries. Therefore, such measures lead<br />
to no liability of the manufacturer and a lapse of all warranty claims.<br />
Repair work may only be carried out by the manufacturer.<br />
The appliance is subject to the manufacturer’s guarantee regulations in the version valid at the time of purchase.<br />
We cannot be held liable for improper or faulty manual or automatic adjustment or parameters<br />
resp. improper use of the appliance.<br />
The user has to make sure that the appliance is installed and operated according to the technical rules of<br />
the country of installations as well as other regional regulations.<br />
2
Contents<br />
Note 2<br />
Safety and warning notices 2<br />
Assembly and Function Check 4<br />
Draft 4<br />
Important information 5<br />
Delivery Status<br />
Lock and un<strong>lock</strong> with TestCode 5<br />
Set-up<br />
Programming MasterCode2 (Un<strong>lock</strong> and Lock) 6<br />
Lock and un<strong>lock</strong> with MasterCode2 6<br />
Lock and un<strong>lock</strong> with UserCode2- “fixed <strong>lock</strong>er” 7<br />
Change from “fixed <strong>lock</strong>er” to “free <strong>lock</strong>er” choice<br />
Change to UserCode1- “free <strong>lock</strong>er choice” 8<br />
Lock and Un<strong>lock</strong> with UserCode1 – “free <strong>lock</strong>er choice” 8<br />
Change from UserCode1 to UserCode2 – “fixed <strong>lock</strong>er” 9<br />
MasterCode1 (only un<strong>lock</strong>ing) 9<br />
Programming MasterCode1 (only un<strong>lock</strong>ing) 10<br />
Un<strong>lock</strong> with MasterCode1 (only un<strong>lock</strong>ing) 10<br />
Activation with MasterCode2 11<br />
Deactivate MasterCode1 (only un<strong>lock</strong>ing) 11<br />
Deactivate MasterCode2 12<br />
MasterReset 12<br />
Further Information<br />
Battery 13<br />
Battery life span 13<br />
Battery control/Battery alarm 13<br />
Battery change 13<br />
LED-Signals 14<br />
Activation-Codes 14<br />
Codes 15<br />
Maintenance 15<br />
Technical Data 15<br />
3
Assembly and<br />
Function Check<br />
• Fix the <strong>SAFE</strong>-O-PIN <strong>lock</strong>er <strong>lock</strong> to the<br />
inner side of the door with 4 screws.<br />
• Switch on the face plate with display<br />
and connector (outside).<br />
Caution: Connector must not be<br />
damaged or bent at installation!<br />
• Then link the housing and the face<br />
plate (inside) with 4 special screws<br />
(supplied ex works). Do not extend<br />
the maximum torque!<br />
• Check the function of the <strong>SAFE</strong>-O-PIN<br />
with the TestCode (see page 5).<br />
Draft<br />
4
Important Information<br />
• Enter PIN-Code: minimum 4, maximum 10 digits.<br />
• Press button to confirm PIN-Code.<br />
• Enter PIN-Code is time limited.<br />
• If PIN-Code has not been entered fluently (breaks of more than 3 seconds between each number)<br />
process will be interrupted. LED lamp flashes red 3 times. Then the PIN-Code can be entered anew.<br />
• If you enter 3 times a wrong UserCode or MasterCode, the <strong>lock</strong> is b<strong>lock</strong>ed for 1 minute.<br />
• The LED flashes every 3 seconds.<br />
• Please see the list of all LED-signals (on page 14).<br />
Delivery Status<br />
All <strong>SAFE</strong>-O-PIN <strong>lock</strong>s are delivered in the same status. The TestCode is activated for <strong>lock</strong>ing and<br />
un<strong>lock</strong>ing. Please see the set-up information on page 6.<br />
Lock and Un<strong>lock</strong> with the TestCode<br />
The TestCode for easy function control (<strong>lock</strong>/un<strong>lock</strong>) after installation.<br />
Lock and Un<strong>lock</strong> with TestCode<br />
>Press button 0<br />
>Then press button<br />
LED flashes green.<br />
>Turn knob to <strong>lock</strong><br />
(when opening <strong>lock</strong><br />
un<strong>lock</strong>ing automatically)<br />
LED flashes green<br />
Information:<br />
TestCode stays valid until first “real” programming of UserCode has been made.<br />
5
Set-up<br />
With the MasterCode2 every <strong>lock</strong>er can be <strong>lock</strong>ed or un<strong>lock</strong>ed anytime. MasterCode2 is necessary for<br />
change from “fixed <strong>lock</strong>er” to “free <strong>lock</strong>er choice”.<br />
For set-up each <strong>SAFE</strong>-O-PIN <strong>lock</strong> has to be programmed with MasterCode 2.<br />
Each <strong>lock</strong> is supplied with a MasterCode 2. This code is the same for all installations. Therefore it is a<br />
must to program at site an individual MasterCode2.<br />
Caution: Only management personnel must know the programmed MasterCode2!<br />
Programming MasterCode2 (Un<strong>lock</strong> and Lock)<br />
By the operator<br />
> Press button P and together and for 2 seconds<br />
for 2 seconds<br />
LED flashes orange (every further<br />
entering will be accepted by LED green)<br />
> Enter factory MasterCode2 (Buttons 7 6 7 6 2)<br />
and press button<br />
> Enter new MasterCode2 (Example: 1 2 3 6)<br />
and press button<br />
> Repeat new MasterCode2<br />
and press button<br />
LED flashes green<br />
*Make note of New Code<br />
Recommendation: Check whether the coded MasterCode2 works! (see below)<br />
Lock and Un<strong>lock</strong> with MasterCode2<br />
By the operator<br />
With the MasterCode2 each <strong>lock</strong>er can be un<strong>lock</strong>ed and <strong>lock</strong>ed, i.e. if a user has forgotten his code.<br />
> Press button for 2 seconds press for 2 seconds<br />
LED flashes green 1 time<br />
> Enter MasterCode2 (Example: 1 2 3 6 )<br />
and press button<br />
LED flashes green<br />
> Turn knob to <strong>lock</strong> (When opening<br />
<strong>lock</strong> un<strong>lock</strong>ing automatically)<br />
LED flashes green<br />
6
Lock and Un<strong>lock</strong> with UserCode2-“fixed <strong>lock</strong>er”<br />
By the user<br />
The <strong>SAFE</strong>-O-PIN <strong>lock</strong>s are supplied with UserCode2 “fixed <strong>lock</strong>er” (each user can use one certain <strong>lock</strong>er)<br />
to <strong>lock</strong> and un<strong>lock</strong> the <strong>lock</strong>er, the user has to enter his individual code (UserCode2) once. Then he can<br />
<strong>lock</strong> and un<strong>lock</strong> “his” <strong>lock</strong>er with this code. If necessary he can enter a new code.<br />
Programming of UserCode2<br />
> Press button P (every further entering<br />
will be accepted by LED green)<br />
> Enter UserCode2 (Example: 2 3 6 9 )<br />
and press button<br />
LED flashes green<br />
Lock and Un<strong>lock</strong> with UserCode2<br />
> Enter UserCode2 (Example: 2 3 6 9)<br />
and press button<br />
LED flashes green<br />
> Turn knob to <strong>lock</strong> (When opening<br />
<strong>lock</strong> un<strong>lock</strong>ing automatically)<br />
LED flashes green<br />
7
Change from “fixed <strong>lock</strong>er” to “free <strong>lock</strong>er choice”<br />
Change to UserCode1 – “free <strong>lock</strong>er choice”<br />
By the operator<br />
With “free <strong>lock</strong>er choice” the user can enter any code to <strong>lock</strong> the <strong>lock</strong>er.<br />
To change to “free <strong>lock</strong>er choice” the UserCode1 must be programmed by the operator.<br />
Programming UserCode1<br />
> Press button P and together and for 2 seconds<br />
for 2 seconds<br />
LED flashes orange for 1 second<br />
(every further entering will be<br />
accepted by LED green).<br />
> Enter MasterCode2 (Example: 1 2 3 6)<br />
and press button<br />
> Enter activation code for “free <strong>lock</strong>er choice”<br />
(buttons 8 2 1) and press button<br />
LED flashes green<br />
Lock and Un<strong>lock</strong> with UserCode1 – “free <strong>lock</strong>er choice”<br />
By the user<br />
No previous programming necessary.<br />
Lock and Un<strong>lock</strong> with UserCode1<br />
> Enter UserCode1 (Example: 9 6 3 2)<br />
and press button<br />
LED flashes green<br />
> Turn knob to <strong>lock</strong> (When opening<br />
<strong>lock</strong> un<strong>lock</strong>ing automatically).<br />
LED flashes green for 1 second<br />
8
Change from UserCode1 to UserCode2 – “fixed <strong>lock</strong>er”<br />
By the operator<br />
When changing from UserCode1 to UserCode2 the previous UserCode2 is not activated and must be programmed.<br />
Change from UserCode1 to UserCode2<br />
> Press button P and together and for 2 seconds<br />
for 2 seconds<br />
LED flashes orange (every further entering<br />
will be accepted by LED green)<br />
> Enter MasterCode2 (Example: 1 2 3 6)<br />
and press button<br />
> Enter activation code for “fixed <strong>lock</strong>er”<br />
(buttons 8 2 2) and press button<br />
LED flashes green<br />
Activation MasterCode1 (only un<strong>lock</strong>ing)<br />
Only un<strong>lock</strong>ing of <strong>lock</strong>s is possible. The <strong>lock</strong> cannot be used unless MasterCode2 deb<strong>lock</strong>s the <strong>lock</strong> for<br />
new UserCodes.<br />
• MasterCode1 has to be programmed.<br />
• MasterCode1 only possible after MasterCode2 has been set (see page 6).<br />
Activate MasterCode1<br />
> Press button P and together and for 2 seconds<br />
LED flashes orange (every further entering<br />
will be accepted by LED green)<br />
> Enter MasterCode2 (Example: 1 2 3 6)<br />
and press button<br />
> Enter activation code (buttons 6 2 1)<br />
and press button<br />
LED flashes green<br />
Information:<br />
The MasterCode1 is only activated (a pre-programmed code 7 6 7 6 1 is already set which shall be<br />
changed). MasterCode1 must be programmed.<br />
9
Programming MasterCode1 (only un<strong>lock</strong>ing)<br />
Programming MasterCode1<br />
> Press button P and together and for 2 seconds<br />
for 2 seconds<br />
LED flashes orange (every further entering<br />
will be accepted by LED green)<br />
> Enter factory-MasterCode1<br />
(buttons 7 6 7 6 1) and press button<br />
> Enter new MasterCode1<br />
(Example: 1 2 3 7) and press button<br />
> Repeat new MasterCode1<br />
and press button<br />
LED flashes green<br />
Information:<br />
Now a <strong>lock</strong>er can be un<strong>lock</strong>ed with MasterCode1. Identical codes for MasterCode1 and MasterCode2 is<br />
not allowed.<br />
Un<strong>lock</strong> with MasterCode1<br />
Now a <strong>lock</strong>ed <strong>lock</strong>er can be un<strong>lock</strong>ed with MasterCode1. After un<strong>lock</strong>ing by MasterCode1 the <strong>lock</strong>er<br />
cannot be <strong>lock</strong>ed again. MasterCode2 must be authorized.<br />
Un<strong>lock</strong> with MasterCode1<br />
> Press button for 2 seconds press for 2 seconds<br />
LED flashes green 1 time<br />
> Enter MasterCode1 (Example: button 1 2 3 7)<br />
and press button<br />
The <strong>lock</strong> un<strong>lock</strong>s automatically,<br />
LED flashes green.<br />
Information:<br />
If a UserCode is entered, LED flashes orange.<br />
Use MasterCode2 first. (see page 11)<br />
10
Activation with MasterCode2<br />
After un<strong>lock</strong>ing with MasterCode1 the <strong>lock</strong> must be activated with MasterCode2. The <strong>lock</strong>er can be<br />
<strong>lock</strong>ed with a UserCode again.<br />
Activation with MasterCode2<br />
> Press button for 2 seconds press for 2 seconds<br />
LED flashes green<br />
> Enter MasterCode2 (Example: buttons 1 2 3 6)<br />
and press button<br />
LED flashes green for 2 seconds<br />
Information:<br />
The <strong>SAFE</strong>-O-PIN <strong>lock</strong> is now activated for further use.<br />
Deactivation of MasterCode1 (only un<strong>lock</strong>ing)<br />
Attention: Activating of MasterCode1 is possible after MasterReset only!<br />
Deactivation MasterCode1<br />
> Press button P and together and for 2 seconds<br />
for 2 seconds<br />
LED flashes orange (every further entering<br />
will be accepted by LED green)<br />
> Enter MasterCode1 (Example: buttons 1 2 3 7)<br />
and press button<br />
> Enter button (0) and press button<br />
> Repeat enter (0) and press button<br />
LED flashes green<br />
11
Deactivation MasterCode2<br />
Attention: In case the MasterCode2 is deactivated no change of operation instructions are possible.<br />
Activating of MasteCode2 is possible after a MasterReset only!<br />
Deactivation MasterCode2<br />
> Press button P and together and for 2 seconds<br />
for 2 seconds<br />
LED flashes orange (every further<br />
entering will be accepted by LED green)<br />
> Enter MasterCode2 (Example: buttons 1 2 3 6)<br />
and press button<br />
> Enter button (0) and press button<br />
> Repeat enter (0) and press button<br />
LED flashes green<br />
MasterReset<br />
To reset the <strong>SAFE</strong>-O-PIN <strong>lock</strong> into the delivery status (factory default).<br />
• TestCode active<br />
• MasterCode2 reset to 7 6 7 6 2<br />
• MasterCode1 is deactive (factory-code 7 6 7 6 1)<br />
• UserCode2 active.<br />
MasterReset<br />
1. Open battery cover<br />
2. Unplug battery<br />
3. Press buttons 1 3 0 together and and for 3 seconds<br />
4. Plug battery in, while still holding buttons<br />
Hold 1 3 0 for 3 seconds and and<br />
Until LED flashes orange 3 times<br />
5. Release buttons 1 3 0<br />
LED flashes green<br />
6. Close battery cover<br />
7. Test the function of the <strong>lock</strong><br />
(Lock and un<strong>lock</strong> with TestCode).<br />
Information:<br />
The <strong>SAFE</strong>-O-PIN <strong>lock</strong> is reset into delivery status and must be set up again.<br />
MasterCode2 must be programmed (see “Set-up”, page 6)<br />
12
Further Information<br />
Battery<br />
The <strong>SAFE</strong>-O-PIN <strong>lock</strong> must only be used with the battery pack (231.49.900).<br />
Other battery packs might lead to malfunction or damage of the <strong>lock</strong>.<br />
Battery life span<br />
Battery life span: minimum 3 years with 40 operations per day.<br />
This can vary due to climate conditions, especially low temperature.<br />
The date of battery change depends on:<br />
• Number of operations<br />
• Date of battery installation<br />
• Environmental temperature<br />
Also for only a few operations the battery change might be necessary after 5 years.<br />
Battery control / Battery alarm<br />
The automatic <strong>SAFE</strong>-O-PIN battery control insures that a <strong>SAFE</strong>-O-PIN <strong>lock</strong> with low battery power cannot<br />
be <strong>lock</strong>ed.<br />
Low battery power: LED light flashes red and green (alternating)<br />
Battery alarm: The <strong>SAFE</strong>-O-PIN <strong>lock</strong> b<strong>lock</strong>s against <strong>lock</strong>ing. Immediate change of battery necessary.<br />
Battery Change<br />
No code is deleted.<br />
• Open battery cover with special screw driver (231.49.920).<br />
• Unplug empty battery pack.<br />
• Plug in new battery pack.<br />
The <strong>SAFE</strong>-O-PIN <strong>lock</strong> is ready for use immediately.<br />
Dispose of the empty battery pack according to environmental regulations.<br />
13<br />
Battery cover plate
LED-Signals<br />
The integrated bi-color LED shows visual status to the user.<br />
The following LED colors are as well:<br />
Status<br />
Failures<br />
green red<br />
green and red flash together = orange<br />
for 1 second Function (<strong>lock</strong>/un<strong>lock</strong>) O.K.<br />
Programming O.K.<br />
for 2 seconds Un<strong>lock</strong>ing O.K.<br />
for 1 second MasterCode is activated.<br />
MasterReset O.K.<br />
Every 3 seconds Wrong code used 3 times – 1 minute b<strong>lock</strong>ed<br />
(1 minute b<strong>lock</strong>ed)<br />
and alternately Battery alarm, <strong>lock</strong>ing and un<strong>lock</strong>ing not assured<br />
Handling mistake<br />
Wrong code<br />
for 3 seconds Internal <strong>lock</strong> failure<br />
Activation Codes<br />
TestCode 0<br />
ActivationCode for UserCode1 8 2 1<br />
Free <strong>lock</strong>er choice<br />
Activation Code for UserCode2 8 2 2<br />
Fixed <strong>lock</strong>er<br />
ActivationCode for MasterCode1 6 2 1<br />
DeactivationCode for MasterCode1/2 0<br />
FactoryCode for MasterCode 1 7 6 7 6 1<br />
FactoryCode for MasterCode2 7 6 7 6 2<br />
ActivationCode for MasterReset 1 3 0<br />
14
Codes<br />
Codes for the operator<br />
MasterCode1<br />
Only un<strong>lock</strong>ing, no <strong>lock</strong>ing possible. Locker is b<strong>lock</strong>ed, <strong>lock</strong> but be activated with MasterCode2.<br />
MasterCode2<br />
Locking/Un<strong>lock</strong>ing possible at any time. For change from “fixed <strong>lock</strong>er” to “free <strong>lock</strong>er choice”.<br />
MasterReset<br />
For reset of the <strong>SAFE</strong>-O-PIN <strong>lock</strong> into delivery status.<br />
Codes for the user<br />
UserCode1<br />
Code for “free <strong>lock</strong>er choice”. Locker can be <strong>lock</strong>ed with any code.<br />
UserCode2<br />
Code for “fixed <strong>lock</strong>er”. Only the pre-programmed code can be used for <strong>lock</strong>ing.<br />
Maintenance<br />
<strong>SAFE</strong>-O-PIN is maintenance-free. It must not be oiled!<br />
To clean only use non-adhesive, residue-free cleanser.<br />
No aggressive cleansers, no acid or base cleansers.<br />
Technical data<br />
Size (L x H x W): 4 5/16 x 4 15/16 x 3 7/16 in (see drawing 3.8600)<br />
Weight: aprrox. 0.882 lbs (incl. battery)<br />
Protection: IP 43<br />
Temperature Range: 32°F to 140°F (function)<br />
-13°F to 140°F (storing)<br />
Humidity: 10% to 90% (without condensation)<br />
Battery life span: 3 years, with approx. 40 operations per day<br />
Code: Minimum 4, maximum 10 digits<br />
Door thickness: Minimum 3/8 in, maximum 13/16 in<br />
Signals: 1 x LED red and 1 x LED green<br />
3901 Cheyenne Drive<br />
P.O. Box 4000<br />
Archdale, NC 27263<br />
1-800-423-3531<br />
www.hafele.com<br />
15