NOAH ACTUATOR - catalogus-beheer.nl
NOAH ACTUATOR - catalogus-beheer.nl NOAH ACTUATOR - catalogus-beheer.nl
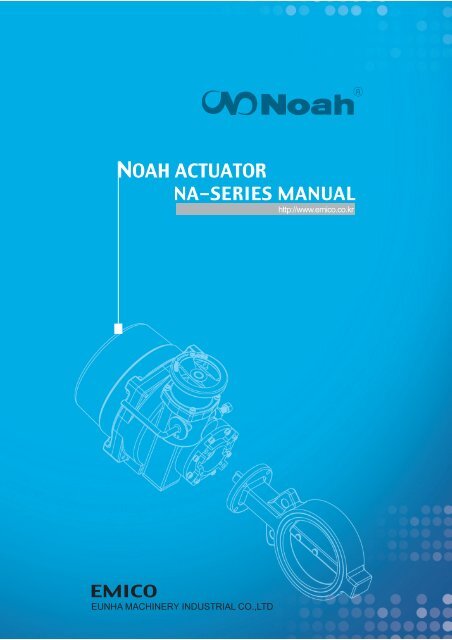
NOAH ACTUATOR NA-SERIES MANUAL http://www.emico.co.kr EMICO EUNHA MACHINERY INDUSTRIAL CO.,LTD
- Page 2 and 3: N A Table of Contents 1. Caution 2
- Page 4 and 5: NA SERIES MANUAL Actuator MUST be p
- Page 6 and 7: NA SERIES MANUAL 3. Actuator Specif
- Page 8 and 9: NA SERIES MANUAL 4. Standard Specif
- Page 10 and 11: 9 Emico Noah NA SERIES MANUAL 6. Pe
- Page 12 and 13: NA SERIES MANUAL 7. Exterior Parts
- Page 14 and 15: NA SERIES MANUAL 8. Interior Parts
- Page 16 and 17: NA SERIES MANUAL 10. Actuator Mount
- Page 18 and 19: NA SERIES MANUAL
- Page 20 and 21: NA SERIES MANUAL 12-1-3 Apply a thi
- Page 22 and 23: NA SERIES MANUAL EMICO mounts an
- Page 24 and 25: NA SERIES MANUAL Actuator Selectio
- Page 26 and 27: NA SERIES MANUAL 14. Manual Operati
- Page 28 and 29: NA SERIES MANUAL Dry Contact(Volt
- Page 30 and 31: NA SERIES MANUAL 18. Visual Indicat
- Page 32 and 33: NA SERIES MANUAL 20. Electrical Wir
- Page 34 and 35: NA SERIES MANUAL 21. Maintenance 21
<strong>NOAH</strong> <strong>ACTUATOR</strong><br />
NA-SERIES MANUAL<br />
http://www.emico.co.kr<br />
EMICO<br />
EUNHA MACHINERY INDUSTRIAL CO.,LTD
N A<br />
Table of Contents<br />
1. Caution 2<br />
2. Storage 4<br />
3. Actuator Specification 5<br />
4. Standard Specification 7<br />
5. Optional Specification 8<br />
6. Performance 9<br />
7. Exterior Parts Identification 11<br />
8. Interior Parts Identification 13<br />
9. Actuator Nameplate Information 14<br />
10. Actuator Mounting Flange 15<br />
11. Actuator Drive Bushing 16<br />
12. Actuator and Valve Assembly 18<br />
13. Actuator Installation 24<br />
14. Manual Operation 25<br />
15. Limit Switch Setting 26<br />
16. Over Torque Switch Setting 27<br />
17. Mechanical Stop Setting 28<br />
18. Visual Indicator Setting 29<br />
19. Wire Connection 30<br />
20. Electric Wiring 31<br />
21. Maintenance 33<br />
22. Warranty Information 33<br />
23. Troubleshooting 34
EUNHA MACHINERY INDUSTRIAL CO.,LTD.<br />
1. Caution<br />
ELECTRICAL SHOCK HAZARD<br />
To avoid serious personal injury, property damage or death, turn<br />
off ALL power to the <strong>ACTUATOR</strong> BEFORE removing the cover.<br />
BEFORE installation or use, verify the nameplate information to<br />
insure the correct model number, torque, voltage and enclosure<br />
type.<br />
Be sure to completely review the <strong>ACTUATOR</strong> manual prior to<br />
operation.<br />
Final limit switch adjustment MUST be done after mounting the<br />
<strong>ACTUATOR</strong> to the valve. Incorrect adjustment may cause<br />
<strong>ACTUATOR</strong> failure.<br />
Over torque switches are factory set. Tampering with the over<br />
torque switch settings may damage the <strong>ACTUATOR</strong> and VOID<br />
the Warranty.<br />
http://www.emico.co.kr<br />
2
NA SERIES MANUAL<br />
Actuator MUST be properly grounded. Use the grounding lugs<br />
provided on the inside or outside of the <strong>ACTUATOR</strong> body.<br />
To minimize the possible damage caused by condensation, be<br />
sure to energize the heater.<br />
Care should be taken when wiring 3-phase <strong>ACTUATOR</strong>S.<br />
Confirm proper rotation and limit switch shutoff function during<br />
the initial operation. If the <strong>ACTUATOR</strong> rotates in the reverse<br />
direction, then the phasing needs to be corrected by switching<br />
two of the 3-phase wires on the terminal block.<br />
Explosion-proof products must be used under the temperature<br />
and environment appropriate for the product spec.<br />
Flameproof Enclosure Level and Environment of <strong>ACTUATOR</strong><br />
<br />
Explosion proof <strong>ACTUATOR</strong>S and wiring must be properly<br />
sealed prior to operation. Improper installation may cause a<br />
hazardous condition and failure of the explosion proof enclosure.<br />
The manufacture is not responsible for any losses or<br />
damages caused by incorrect installation.<br />
1. Certified cable entries rated for at least 90 must be used<br />
when installed.<br />
2. If conduit is used for cable entry, a seal fitting with setting<br />
compound must be installed as close as possible, within<br />
450mm, to the <strong>ACTUATOR</strong>.<br />
3 Emico Noah
EUNHA MACHINERY INDUSTRIAL CO.,LTD.<br />
2. Storage<br />
The <strong>ACTUATOR</strong> must be stored in a clean, dry, temperature controlled area. The unit shall be<br />
stored with the cover installed and with the conduit openings sealed. Storage must be off the floor.<br />
Care must be taken to guard the <strong>ACTUATOR</strong> from condensation in extreme temperature variations.<br />
Heaters should be energized as soon as <strong>ACTUATOR</strong>S are installed.<br />
<br />
<br />
<br />
<br />
Improper storage of the <strong>ACTUATOR</strong> will VOID WARRANTY.<br />
http://www.emico.co.kr<br />
4
NA SERIES MANUAL<br />
3. Actuator Specification<br />
3-1 The NA-SERIES <strong>ACTUATOR</strong> has been designed for the automation of 90-degree rotating<br />
equipment. The <strong>ACTUATOR</strong> is available in 13 different sizes with torque outputs<br />
from 6kgm to 250kgm. The <strong>ACTUATOR</strong> is suitable for ball valves and butterfly valves<br />
as well as dampers.<br />
3-2 Environment and Temperature<br />
<br />
<br />
<br />
<br />
The <strong>ACTUATOR</strong> enclosure is made from an<br />
anodized aluminum alloy which is also dry powder<br />
epoxy painted to help protect it from oxidation.<br />
Flameproof Enclosure<br />
Explosion Proof<br />
Ex IIB T4<br />
Ex IIB T4<br />
-20 ~ 55<br />
CSA (Canada /USA) GOST (Russia)<br />
Certification Body ATEX (Europe) KTL (South Korea)<br />
NEPSI (China) KOSHA (South Korea)<br />
5 Emico Noah
EUNHA MACHINERY INDUSTRIAL CO.,LTD.<br />
<br />
<br />
Hand/Auto declutch type with motor priority, the hand lever engages the manual override<br />
and will automatically reset when the motor is energized.<br />
<br />
<br />
The self-locking worm gear system prevents any valve back drive from occurring.<br />
<br />
<br />
The 20watt internal heater helps to minimize condensation due to temperature and<br />
humidity changes.<br />
<br />
<br />
The mechanical, cam actuated, limit switches are included to accurately calibrate the<br />
valve position.<br />
<br />
<br />
The torque switches are cam actuated and factory set to provide over torque protection<br />
for the valve as well as the <strong>ACTUATOR</strong>. Torque switches are not included in the<br />
NA006 and NA009.<br />
<br />
<br />
The <strong>ACTUATOR</strong> motor is protected with an embedded 150-degree C thermal protector<br />
designed to protect the motor from overheating.<br />
<br />
<br />
The visual indicator is directly connected to the <strong>ACTUATOR</strong> output shaft and is<br />
designed for visual indication from a distance.<br />
<br />
<br />
Mechanical limit stops are designed to protect against the over-travel of quarter turn<br />
applications while using the manual over ride or in the event of a limit switch failure.<br />
<br />
<br />
Mounting is standardized to the ISO-5211 specification and the removable drive bushing<br />
can be machined to match valve stem.<br />
http://www.emico.co.kr<br />
6
NA SERIES MANUAL<br />
4. Standard Specification<br />
<br />
Enclosure<br />
Ambient Temperature<br />
Ambient Humidity<br />
Power Supply<br />
Torque Switches<br />
Limit Switches<br />
Stall Protection<br />
Travel Angel<br />
Indicator<br />
Manual Override<br />
Self Locking<br />
Mechanical Stops<br />
Space Heater<br />
Conduit Entries<br />
Lubrication<br />
Material<br />
Surface Treafment<br />
External Coating<br />
Dielectric Strength<br />
Insulation<br />
Anti Vibration<br />
<br />
<br />
<br />
<br />
<br />
<br />
<br />
<br />
<br />
<br />
<br />
<br />
<br />
<br />
<br />
<br />
<br />
<br />
<br />
<br />
<br />
<br />
<br />
<br />
<br />
<br />
<br />
<br />
7 Emico Noah
EUNHA MACHINERY INDUSTRIAL CO.,LTD.<br />
5. Optional Specification<br />
EXP<br />
IP68<br />
ALS<br />
ATS<br />
EXT<br />
PIU<br />
CPT<br />
<br />
<br />
<br />
<br />
<br />
<br />
<br />
<br />
<br />
<br />
<br />
PCU<br />
<br />
<br />
LCU 1<br />
<br />
<br />
LCU 2<br />
IMS<br />
NAC<br />
RBP<br />
<br />
<br />
<br />
<br />
<br />
<br />
http://www.emico.co.kr<br />
8
9 Emico Noah<br />
NA SERIES MANUAL<br />
6. Performance
EUNHA MACHINERY INDUSTRIAL CO.,LTD.<br />
<br />
<br />
<br />
<br />
<br />
<br />
<br />
<br />
<br />
<br />
<br />
<br />
<br />
<br />
<br />
<br />
<br />
<br />
<br />
<br />
<br />
<br />
<br />
<br />
<br />
<br />
<br />
<br />
<br />
<br />
<br />
<br />
<br />
<br />
<br />
<br />
<br />
<br />
<br />
<br />
<br />
<br />
<br />
<br />
<br />
<br />
<br />
<br />
<br />
<br />
<br />
<br />
<br />
<br />
<br />
<br />
<br />
<br />
<br />
<br />
<br />
<br />
<br />
<br />
<br />
<br />
<br />
<br />
<br />
<br />
<br />
<br />
<br />
<br />
<br />
<br />
<br />
<br />
<br />
<br />
<br />
<br />
<br />
<br />
<br />
<br />
<br />
<br />
<br />
<br />
<br />
<br />
<br />
<br />
<br />
<br />
<br />
<br />
<br />
<br />
<br />
<br />
<br />
<br />
<br />
<br />
<br />
<br />
<br />
<br />
<br />
<br />
<br />
<br />
<br />
<br />
<br />
<br />
<br />
<br />
<br />
<br />
<br />
<br />
<br />
<br />
<br />
<br />
<br />
<br />
<br />
<br />
<br />
<br />
<br />
<br />
<br />
<br />
<br />
<br />
<br />
<br />
<br />
<br />
<br />
<br />
<br />
<br />
<br />
<br />
<br />
<br />
<br />
<br />
<br />
<br />
<br />
<br />
<br />
<br />
<br />
<br />
<br />
<br />
<br />
<br />
<br />
<br />
<br />
<br />
<br />
<br />
<br />
<br />
<br />
<br />
<br />
<br />
<br />
<br />
<br />
<br />
<br />
<br />
<br />
<br />
<br />
<br />
<br />
<br />
<br />
<br />
<br />
<br />
<br />
<br />
<br />
<br />
<br />
<br />
<br />
<br />
<br />
<br />
<br />
<br />
<br />
<br />
<br />
<br />
<br />
<br />
<br />
<br />
<br />
<br />
<br />
<br />
<br />
<br />
<br />
<br />
<br />
<br />
<br />
<br />
<br />
<br />
<br />
<br />
<br />
<br />
<br />
<br />
<br />
<br />
<br />
<br />
<br />
<br />
<br />
<br />
<br />
<br />
<br />
<br />
<br />
<br />
<br />
<br />
<br />
<br />
<br />
<br />
<br />
<br />
<br />
<br />
<br />
<br />
<br />
<br />
<br />
<br />
<br />
<br />
<br />
<br />
<br />
<br />
<br />
<br />
<br />
<br />
<br />
<br />
<br />
<br />
<br />
<br />
<br />
<br />
<br />
<br />
<br />
<br />
<br />
<br />
<br />
<br />
<br />
<br />
<br />
<br />
<br />
<br />
<br />
<br />
<br />
<br />
<br />
10<br />
http://www.emico.co.kr
NA SERIES MANUAL<br />
7. Exterior Parts Identification<br />
<br />
<br />
<br />
<br />
<br />
<br />
<br />
<br />
<br />
<br />
<br />
<br />
<br />
<br />
<br />
<br />
<br />
<br />
<br />
<br />
<br />
<br />
<br />
<br />
<br />
11 Emico Noah
EUNHA MACHINERY INDUSTRIAL CO.,LTD.<br />
7. Exterior Parts Identification<br />
<br />
<br />
<br />
<br />
<br />
<br />
<br />
<br />
<br />
<br />
<br />
<br />
<br />
<br />
<br />
<br />
<br />
<br />
<br />
<br />
<br />
<br />
<br />
<br />
<br />
<br />
<br />
<br />
<br />
<br />
http://www.emico.co.kr<br />
12
NA SERIES MANUAL<br />
8. Interior Parts Identification<br />
<br />
<br />
<br />
<br />
<br />
<br />
<br />
<br />
<br />
<br />
<br />
<br />
<br />
<br />
<br />
<br />
<br />
<br />
<br />
<br />
<br />
<br />
<br />
<br />
<br />
<br />
<br />
13 Emico Noah
EUNHA MACHINERY INDUSTRIAL CO.,LTD.<br />
9. Actuator Nameplate Information<br />
BEFORE installation or use, verify the nameplate information to insure that you have the correct<br />
model number, torque, voltage and enclosure type.<br />
<br />
<br />
<br />
<br />
<br />
<br />
Manufacturer and Contact Info<br />
<br />
<br />
<br />
<br />
<br />
<br />
Model Number<br />
<br />
Motor Wattage<br />
<br />
A unique serial number is issued for each <strong>ACTUATOR</strong>.<br />
<br />
Main power supply voltage for motor<br />
<br />
Electrical diagram for <strong>ACTUATOR</strong> as built. The circuit diagram can be located inside<br />
top cover. Contact your supplier if you cannot locate the diagram or it is different than<br />
the one listed on the nameplate.<br />
<br />
<br />
<br />
Options installed will be listed here. For complete listing of options and descriptions<br />
please refer to Section 5 Optional Specification.<br />
<br />
If the application requires an explosion proof <strong>ACTUATOR</strong>, you<br />
MUST confirm that the nameplate lists the explosion proof symbol<br />
or the certification body number. If no symbol or certification is<br />
located on the nameplate, immediately contact the supplier as<br />
the <strong>ACTUATOR</strong> is not manufactured for explosion proof service.<br />
<br />
<br />
http://www.emico.co.kr<br />
14
NA SERIES MANUAL<br />
10. Actuator Mounting Flange<br />
The NA-Series mounting flange is manufactured to ISO5211 standards. If the <strong>ACTUATOR</strong> does<br />
not mount directly to the valve, then a mounting kit will need to be manufactured.<br />
<br />
<br />
<br />
<br />
<br />
<br />
<br />
<br />
<br />
<br />
<br />
<br />
<br />
<br />
<br />
<br />
<br />
<br />
<br />
<br />
<br />
<br />
<br />
<br />
<br />
<br />
<br />
<br />
<br />
<br />
<br />
15 Emico Noah
EUNHA MACHINERY INDUSTRIAL CO.,LTD.<br />
11. Actuator Drive Bushing<br />
A removable blank drive bushing is supplied with each <strong>ACTUATOR</strong> that can be machined to<br />
adapt to the valve stem.<br />
<br />
<br />
Remove the 4 bolts by using an L-wrench and the<br />
separate Drive Bushing from <strong>ACTUATOR</strong>.<br />
<br />
<br />
<br />
<br />
<br />
<br />
<br />
<br />
The drive bushing should be Machined to match the valve stem dimensions<br />
when the valve is in the full open or full closed position. The <strong>ACTUATOR</strong><br />
bushings can be provided machined and ready to mount to the valve if the<br />
valve drawings are provided to the manufacture.<br />
<br />
<br />
http://www.emico.co.kr<br />
16
NA SERIES MANUAL<br />
<br />
<br />
<br />
<br />
<br />
<br />
<br />
<br />
<br />
<br />
<br />
<br />
<br />
<br />
<br />
<br />
<br />
<br />
<br />
17 Emico Noah
EUNHA MACHINERY INDUSTRIAL CO.,LTD.<br />
12. Actuator and Valve Assembly<br />
EMICO mounts and cycles the valve assembly, and then calibrates the limit switch settings.<br />
<br />
<br />
12-1-1<br />
Confirm that the valve mounting dimensions match the <strong>ACTUATOR</strong> base and<br />
machined bushing dimentions.<br />
<br />
<br />
<br />
<br />
<br />
<br />
12-1-2<br />
Pull lever to engage the hand wheel, then rotate the <strong>ACTUATOR</strong> to the full clockwise /<br />
closed position turn the valve shaft to the full close position.<br />
<br />
<br />
<br />
<br />
<br />
<br />
http://www.emico.co.kr<br />
18
NA SERIES MANUAL<br />
12-1-3<br />
Apply a thin coat of grease to the drive bushing and<br />
install in the <strong>ACTUATOR</strong>. Apply a thin coat of grease<br />
to the valve stem and then mount the <strong>ACTUATOR</strong> to<br />
the valve as shown.<br />
<br />
<br />
<br />
<br />
<br />
<br />
12-1-4<br />
Fasten the <strong>ACTUATOR</strong> and valve together using<br />
Stud bolts and nuts or hex bolts. Firmly tighten the<br />
assembly and confirm that there is no gap<br />
between the <strong>ACTUATOR</strong> and valve.<br />
19 Emico Noah
EUNHA MACHINERY INDUSTRIAL CO.,LTD.<br />
12-1-5<br />
Engage the hand wheel and rotate counterclockwise(open).<br />
Confirm that the valve opens<br />
while turning the hand wheel.<br />
12-1-6<br />
Remove the Top Cover and set the ACTU-<br />
ATOR LIMIT SWITCHES.<br />
(Refer to Section 15 Limit Switch Setting)<br />
12-1-7<br />
Adjust the length of the Mechanical Limit<br />
Stops.<br />
(Refer to Section 17 Mechanical Limit stop<br />
bolt setting)<br />
<br />
<br />
<br />
<br />
<br />
<br />
<br />
http://www.emico.co.kr<br />
20
NA SERIES MANUAL<br />
<br />
<br />
EMICO mounts and cycles the valve assembly, and then calibrates the limit switch<br />
settings.<br />
<br />
<br />
<br />
<br />
<br />
To mount the <strong>ACTUATOR</strong> and Ball Valve, a separate<br />
mounting kit is required. The mounting kit will need to be<br />
manufactured based on the <strong>ACTUATOR</strong> and valve<br />
mounting dimentions.<br />
<br />
<br />
<br />
<br />
ex) Bracket process<br />
<br />
<br />
12-2-2<br />
In general, when a mounting kit is designed on<br />
the Ball Valve, a GLAND is installed to prevent<br />
valve stem leakage of fluid and an adjustable<br />
bolt is installed to tighten the valve packing and<br />
stop any leakage.<br />
21 Emico Noah
EUNHA MACHINERY INDUSTRIAL CO.,LTD.<br />
<br />
<br />
<br />
<br />
<br />
<br />
<br />
12-2-4<br />
Apply a thin coat of Grease to the Drive Bushing<br />
and install in the <strong>ACTUATOR</strong>. Apply a thin coat<br />
of Grease to the Valve stem / coupling and then<br />
mount the <strong>ACTUATOR</strong> to the Valve and mounting<br />
kit as shown.<br />
12-2-5<br />
Fasten the <strong>ACTUATOR</strong>, valve and mounting kit<br />
together using stud bolts and nuts or hex bolts.<br />
Firmly tighten the assembly together and confirm<br />
that there are no gaps between the components.<br />
<br />
<br />
<br />
<br />
12-2-6<br />
Confirm that the ball valve rotates open<br />
while you manually engage the manual<br />
override and rotate the hand wheel counter<br />
clockwise<br />
(Refer to Section 15 Limit Switch Setting)<br />
<br />
<br />
<br />
12-2-7<br />
Adjust the length of the mechanical Limit<br />
stop.<br />
(Refer to Section 17 mechanical Limit stop<br />
Setting)<br />
http://www.emico.co.kr<br />
22
NA SERIES MANUAL<br />
<br />
Actuator Selection by Valve Size<br />
This is a general guide that is set by the company and is not an absolute standard.<br />
Application spec may vary according to the valve manufacturer, environment and<br />
fluid characteristics."<br />
Consult with our sales department about detailed and special spec.<br />
<br />
TYPE<br />
BUTTERFLY 2-WAY BALL 2-WAY BALL<br />
VALVE VALVE VALVE<br />
NA006 80A 40A<br />
NA009 100A 50A 40A<br />
NA015 125A 65A 50A<br />
NA019 150A 80A 65A<br />
NA028 200A 100A 80A<br />
NA038 250A 100A<br />
NA050<br />
125A<br />
NA060 300A 150A 125A<br />
NA080 350A 150A<br />
NA100<br />
200A<br />
NA150 400/450A<br />
NA200 500A 250A 200A<br />
NA250 600A 300A 250A<br />
<br />
Damper Torque Formula for Actuator Selection<br />
Round Damper<br />
T = d3 X P<br />
X 10<br />
-9<br />
X 1.8 = kgm<br />
12 X n<br />
Square Damper<br />
BEARING MOUNTING (NO MOUNTING = 2.5)<br />
T = a2 X bX P X 10<br />
-9<br />
X 1.8 = kgm<br />
8 X n<br />
a : Height, b: Width, d : Damper Diameter (mm), n : Number of Wings,<br />
P : Pressure (mmAq)<br />
23 Emico Noah
EUNHA MACHINERY INDUSTRIAL CO.,LTD.<br />
13. Actuator Installation<br />
When installing an <strong>ACTUATOR</strong>, proper clearence around the <strong>ACTUATOR</strong> is required to ensure<br />
that the cover can be removed to allow for mainteriance.<br />
<br />
<br />
<br />
<br />
<br />
<br />
<br />
<br />
<br />
<br />
<br />
<br />
GROUND<br />
http://www.emico.co.kr<br />
24
NA SERIES MANUAL<br />
14. Manual Operation<br />
14-1<br />
Pull the lever located on the side of the <strong>ACTUATOR</strong> toward the hand wheel. The lever should<br />
“lock” in position. Turn the hand wheel and the <strong>ACTUATOR</strong> output will rotate.<br />
14-2<br />
If the lever does not “lock” in the upright position, then turn the hand wheel halfway and pull<br />
lever to the upright position.<br />
<br />
<br />
14-3<br />
After manual operation , leave the lever as is. When power is re-applied to the <strong>ACTUATOR</strong>,<br />
the lever will disengage and declutch the manual override. The <strong>ACTUATOR</strong> motor will then<br />
rotate the valve to the powered position.<br />
14-4<br />
If the Lever does not “lock” in the manual position while trying to manually operate the ACTU-<br />
ATOR, then the <strong>ACTUATOR</strong> gearing may be jammed and needs to be checked.<br />
25 Emico Noah
EUNHA MACHINERY INDUSTRIAL CO.,LTD.<br />
15. Limit Switch Setting<br />
<br />
Close/Open Limit Switch Cam Setting<br />
15-1-1<br />
Confirm that the power is off.<br />
Pull lever located on the side of the ACTUAOR to<br />
engage the manual override handwheel.<br />
Rotate the handwheel clockwise to fully close the<br />
<strong>ACTUATOR</strong> / valve.<br />
15-1-2<br />
Loosen the Closed Limit Switch cam set screw as<br />
shown. Rotate cam in the closed / clockwise<br />
direction and engage the switch lever to actuate<br />
the switch<br />
If Auxillary limit switches are included in the<br />
<strong>ACTUATOR</strong>, then set the corresponding auxillary<br />
switch at this time.<br />
<br />
<br />
<br />
<br />
<br />
<br />
<br />
<br />
<br />
<br />
<br />
<br />
<br />
15-1-3<br />
Firmly re-tighted the cam set screw.<br />
15-1-4<br />
To set the open limit switch, follow the same proceedure as above except that the rotation<br />
will be counter-clockwise using the open limit switch cam.<br />
http://www.emico.co.kr<br />
26
NA SERIES MANUAL<br />
<br />
Dry Contact(Volt Free) Close/Open Auxiliary Limit Switch Setting<br />
<br />
Using the manual override or power, rotate <strong>ACTUATOR</strong> to the full clockwise position.<br />
Loosen the set screw in the ACLS cam and then rotate the cam in the clockwise rotation<br />
to engage the auxillary switch.<br />
<br />
<br />
<br />
<br />
<br />
<br />
<br />
<br />
<br />
15-2-3<br />
Firmly re-tighten the cam set screw.<br />
15-2-4<br />
To set the open auxillary limit switch, follow the same proceedure as above except that<br />
the rotation will be counter-clockwise using the open auxillary limit switch cam.<br />
16. Over Torque Switch Setting<br />
The over torque switches are factory set. Tampering with the over torque<br />
switch settings may damage the <strong>ACTUATOR</strong> and VOID the warranty. For<br />
more intormation contact Emico.<br />
27 Emico Noah
EUNHA MACHINERY INDUSTRIAL CO.,LTD.<br />
17. Mechanical limit stop setting<br />
In the event of a limit switch malfunction, the mechanical limit stops will prevent the <strong>ACTUATOR</strong><br />
from over traveling and causing damage to the valve. The mechanical limit stops should be<br />
reset whenever any adjustment is made to the open and closed limit switches, this will protect<br />
the valve in the event of an electrical malfunction.<br />
17-1<br />
Turn the power off to the <strong>ACTUATOR</strong>. Engage the manual override and fully close the valve<br />
clockwise.<br />
17-2<br />
As shown below, turn the mechanical limit stop into the body until contact is made between the<br />
limit stop and worm wheel. After contact is made, then turn the limit stop back out two turns and<br />
lock it in place with the nut by tightening the nut against the body.<br />
<br />
<br />
<br />
<br />
<br />
17-3<br />
To set the open limit stop, follow the above instructions except rotate the <strong>ACTUATOR</strong> in<br />
the counter clockwise rotation.<br />
If the mechanical stops are improperly set, motor and gear damage may<br />
occur.<br />
After setting the limit stops, check for proper function by operating the<br />
<strong>ACTUATOR</strong> both manually and electricly. Confirm that the end of travel<br />
limit switches shut off power to the motor in both the open and closed<br />
positions, and that the motor is not stalled or in an over-torque condition.<br />
http://www.emico.co.kr<br />
28
NA SERIES MANUAL<br />
18. Visual Indicator Setting<br />
The valve position is easily confirmed from a distance by looking at the indicator dome located<br />
on the top of the <strong>ACTUATOR</strong> cover.<br />
Non explosion proof<br />
explosion proof<br />
<br />
If the position shown on the indicator is incorrect, simply loosen the set screw and rotate the<br />
indicator to the correct position and retighten the set screw.<br />
<br />
<br />
<br />
<br />
<br />
<br />
<br />
<br />
<br />
<br />
non-explosion proof<br />
explosion proof<br />
29 Emico Noah
EUNHA MACHINERY INDUSTRIAL CO.,LTD.<br />
19. Wire Connection<br />
The two conduit entries on the NA-Series <strong>ACTUATOR</strong> are basiclly PF3/4 . The <strong>ACTUATOR</strong> is<br />
sold worldwide and so there may be some differences as to thread pitch standards. Check with<br />
your supplier as to the standard that is supplied in your area.<br />
<br />
<br />
<br />
<br />
<br />
<br />
<br />
<br />
<br />
19-1<br />
Standard conduit and conduit fittings may be used. It is recommended that a seal fitting be fitted<br />
to the actuator conduit entry and sealed with a resin compound after all wiring has been<br />
installed. This will help prevent humidity and water from entering the actuator enclosure.<br />
<br />
<br />
<br />
<br />
<br />
<br />
<br />
<br />
<br />
19-3<br />
Any unused conduit entry must remain plugged with the pipe plug supplied in the <strong>ACTUATOR</strong>.<br />
Do not remove as the unit is already sealed.<br />
19-4<br />
Certified cable entries rated for at least 90<br />
Example of a General Cable Gland<br />
19-2<br />
Cable Glands used in explosion proof applications must be certified<br />
for the proper explosion proof application class and properly<br />
sealed. Failure to use the correct components may result in the<br />
failure of the <strong>ACTUATOR</strong> enclosure. EMICO is not responsible<br />
the improper installation of these <strong>ACTUATOR</strong>S.<br />
must be used when installed.<br />
19-5<br />
If conduit is used for cable entry, a seal fitting with setting compound must be provided close to<br />
the entry.<br />
http://www.emico.co.kr<br />
30
NA SERIES MANUAL<br />
20. Electrical Wiring<br />
20-1<br />
Separate the cover of the <strong>ACTUATOR</strong> by loosening the four cover bolts.<br />
20-2<br />
Confirm that the wiring diagram located in the <strong>ACTUATOR</strong> and Wiring No. on the name plate<br />
match with each other.<br />
20-3<br />
Confirm that the main power and power supply described on the name plate of <strong>ACTUATOR</strong><br />
match with each other.<br />
<br />
NA - Series uses a WAGO brand terminal strip to<br />
allow easy wiring and to protect against vibration.<br />
<br />
<br />
<br />
<br />
<br />
<br />
<br />
<br />
<br />
<br />
<br />
Insert a small flathead screwdriver as shown to open the terminal point, then insert the wire<br />
20-5<br />
Be sure to properly ground the <strong>ACTUATOR</strong> wiring to the grounding terminals provided on the<br />
inside and outside of the actuator body.<br />
<br />
<br />
20-6<br />
Be sure to wire and energize the heater that is provided.<br />
20-7<br />
Each <strong>ACTUATOR</strong> must be powered by their own individual relays to prevent voltage feedback<br />
and <strong>ACTUATOR</strong> damage.<br />
31 Emico Noah
EUNHA MACHINERY INDUSTRIAL CO.,LTD.<br />
20-8<br />
With a 3-phase (380V, 440V) powered <strong>ACTUATOR</strong>, care must be taken to confirm the proper<br />
motor rotation when the power and signal are applied. If the <strong>ACTUATOR</strong> rotates in the reverse<br />
direction than what is expected, the limit switches will not function correctly and a mis-wire has<br />
occured. Corrective action needs to be taken.<br />
20-8-1<br />
With power disconnected, manually operate the <strong>ACTUATOR</strong> to a mid position.<br />
20-8-2<br />
Apply power / signal to rotate the <strong>ACTUATOR</strong> open or closed and confirm the rotation is<br />
correct.<br />
20-8-3<br />
If the rotaion is incorrect, then shut off the <strong>ACTUATOR</strong> and re-wire two of the three wires<br />
as shown.<br />
<br />
In the case of a<br />
reverse phase<br />
<br />
<br />
20-9<br />
After the wiring is completed in the <strong>ACTUATOR</strong>, use wire ties to clean up the <strong>ACTUATOR</strong> and<br />
group wires together, and be certain that the wires are secured away from any moving parts,<br />
remove any loose debris.<br />
20-10<br />
When all the work is completed, replace the top cover and secure it using the four cover screws.<br />
20-11<br />
Apply the power and do a final check to confirm proper operation.<br />
Main Power must o<strong>nl</strong>y be applied when the top cover is re-installed on the<br />
<strong>ACTUATOR</strong> body. If the main power is on while wiring the <strong>ACTUATOR</strong> stop<br />
work immediately and turn the power off. O<strong>nl</strong>y then is it safe to proceed.<br />
http://www.emico.co.kr<br />
32
NA SERIES MANUAL<br />
21. Maintenance<br />
21-1 Lubrication<br />
Under normal conditions, no additional grease<br />
needs to be added to the <strong>ACTUATOR</strong>. However<br />
if the ambient temperature is greater than 40c of<br />
the humidity is less than 15%, periodic re-greasing<br />
is recommended. The Recomended grease<br />
used in the NA-Series <strong>ACTUATOR</strong> is SHELL<br />
ALVIDA EP2.<br />
<br />
<br />
21-2 Regular Checkup<br />
It is recommended that the <strong>ACTUATOR</strong> be cycled every two weeks after purchase. To minimize<br />
the effects of condensation in the <strong>ACTUATOR</strong> it is recommended that the conduit entries are<br />
sealed at the <strong>ACTUATOR</strong> and that the heater is energized.<br />
22. Warranty Information<br />
The warranty will be void under the following conditions.<br />
22-1 Failure or damage caused by misuse or abuse.<br />
22-2 Failure or damage caused by unauthorized modifications or repairs done to the<br />
<strong>ACTUATOR</strong>.<br />
22-3 Failure caused by the unauthorized modification / change of the wiring.<br />
22-4 Failure caused by a reverse phase mis-wire when using three phase power.<br />
22-5 Failure caused by water leakage due to the improper sealing of the <strong>ACTUATOR</strong><br />
conduit entries or by failure to install the cover properly.<br />
22-6 Failure caused by improperly set limit switches.<br />
22-7 Failure caused by fire, flood damage or other “acts of god”<br />
22-8 Failure occuring 1 year after the shipment date.<br />
33 Emico Noah
EUNHA MACHINERY INDUSTRIAL CO.,LTD.<br />
23. Troubleshooting<br />
If the <strong>ACTUATOR</strong> fails to function correctly, first check for any mechanical / alignment problems,<br />
then check for any electrical problems. See chart below for more information.<br />
Problem Cause Solution<br />
Manual override will not move<br />
Level will not hold position when<br />
pulled toward the hand wheel<br />
The hand wheel is engaged and<br />
rotated, but the output drive bushing<br />
will not move.<br />
In manual operation,<br />
the <strong>ACTUATOR</strong> will not cycle full<br />
open or full close<br />
Normal<br />
Operation<br />
by Remote<br />
location<br />
<strong>ACTUATOR</strong> will not<br />
cycle to full open or<br />
full close<br />
<strong>ACTUATOR</strong><br />
sudde<strong>nl</strong>y stops<br />
during operation<br />
<strong>ACTUATOR</strong> will not<br />
function from remote<br />
location<br />
When 3-phase operation rotates<br />
<strong>ACTUATOR</strong> in the oppsit direction<br />
than the signal that is applied<br />
When <strong>ACTUATOR</strong> continues to<br />
rotate even after the cam strikes<br />
the limit switch<br />
The worm wheel and mechanical<br />
limit stop is jammed<br />
The worm wheel and mechanical<br />
limit stop is jammed<br />
Worm Wheel and Gear<br />
Separation and Failure<br />
Mechanical limit stop is not set<br />
correctly<br />
Limit Switch malfunction and / or<br />
Mechanical limit stop set<br />
incorrectly<br />
The over Torque Switch has<br />
tripped<br />
Main Power Failure<br />
Wire Disconnect or a Short circuit<br />
Motor or condenser is Damage<br />
Motor has over heated<br />
Wiring failure<br />
Gears are JAMMED<br />
Phase reversal<br />
Limit Switch Failure,<br />
disconnect or short curcuit<br />
Phase reversal<br />
Loosen the mechanical limit stop<br />
and the valve mounting blots.<br />
Correct the mechanical stop<br />
position and then secure the<br />
mounting bolts and limit stop.<br />
Disassemble the <strong>ACTUATOR</strong><br />
and replace damaged gear.<br />
Reset the mechanical limit stop<br />
Reset the limit switch cam and<br />
reset the mechanical limit stop<br />
Valves torque has increased.<br />
Valve needs to be checked /<br />
repaired or replaced, or the over<br />
torque switch has failed and needs<br />
to be reset<br />
Main Power Check<br />
Replace defective wire<br />
Replace Motor or condenser<br />
Do not over cycle the motor<br />
Check the circuit diagram and wiring status<br />
Release JAMMED Gears<br />
Switch two of the 3-phase wires<br />
Replace defective switch and<br />
reconnect loose wire<br />
Switch two of the 3-phase wires<br />
In addition to the above described mechanical / electric failures, other causes may be the reason<br />
for a failure based on the site conditions. For more information please contact Emico for consulation.<br />
For faster service, please have all of the nameplate information avalible calling the factory.<br />
http://www.emico.co.kr<br />
34


