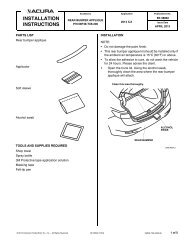
INSTALLATION INSTRUCTIONS - Acura Parts Super Store
INSTALLATION INSTRUCTIONS - Acura Parts Super Store
INSTALLATION INSTRUCTIONS - Acura Parts Super Store

You also want an ePaper? Increase the reach of your titles
YUMPU automatically turns print PDFs into web optimized ePapers that Google loves.
<strong>INSTALLATION</strong><br />
<strong>INSTRUCTIONS</strong><br />
Accessory<br />
INTERIOR PANELS<br />
P/N 08Z03-TX4-210A<br />
Application<br />
2014 RDX<br />
Publications No.<br />
BII 48861<br />
Issue Date<br />
MARCH 2013<br />
PARTS LIST<br />
Right rear door panel<br />
Dashboard right panel<br />
Left rear door panel<br />
Dashboard left panel<br />
3 Alcohol swabs<br />
Passenger’s dashboard panel<br />
TOOLS AND SUPPLIES REQUIRED<br />
Masking tape<br />
Illustration of the Interior Panels in the Vehicle<br />
Console right panel<br />
DASHBOARD<br />
LEFT PANEL<br />
LEFT<br />
FRONT<br />
DOOR<br />
PANEL<br />
DASHBOARD<br />
RIGHT PANEL<br />
CONSOLE<br />
LEFT PANEL<br />
PASSENGER’S<br />
DASHBOARD<br />
PANEL<br />
Console left panel<br />
Right front door panel<br />
LEFT REAR<br />
DOOR PANEL<br />
RIGHT REAR<br />
DOOR PANEL<br />
RIGHT<br />
FRONT<br />
DOOR<br />
PANEL<br />
CONSOLE<br />
RIGHT PANEL<br />
QA01008AD<br />
Left front door panel<br />
© 2013 American Honda Motor Co., Inc. – All Rights Reserved. BII 48861 (1303) 08Z03-TX4-2000-90 1 of 8
<strong>INSTALLATION</strong><br />
Client Information: The information in this installation<br />
instruction is intended for use only by skilled<br />
technicians who have the proper tools, equipment, and<br />
training to correctly and safely add equipment to your<br />
vehicle. These procedures should not be attempted by<br />
“do-it-yourselfers.”<br />
NOTE:<br />
• Do not damage the vehicle during installation.<br />
• This kit should be installed only if the ambient air<br />
temperature is 15°C (60°F) or above.<br />
• Align each part carefully. Attempting to detach the<br />
double-faced tape may damage the part or ruin the<br />
double-faced tape.<br />
1. Using an alcohol swab, thoroughly clean the areas<br />
where the left front door panel, dashboard left panel,<br />
dashboard right panel, console left panel, and<br />
console right panel will attach.<br />
LEFT FRONT<br />
DOOR<br />
Clean with an<br />
alcohol swab.<br />
2. Attach masking tape to the ends of the adhesive<br />
backings, and attach them to the front surface of the<br />
left front door panel. Remove the remaining<br />
adhesive backings.<br />
MASKING<br />
TAPE<br />
2 ADHESIVE<br />
BACKINGS<br />
(Remove.)<br />
Attach.<br />
7 ADHESIVE<br />
BACKINGS<br />
(Peel back.)<br />
LEFT FRONT<br />
DOOR PANEL<br />
QA00702AD<br />
3. Align the left front door panel and attach it as shown.<br />
LEFT FRONT<br />
DOOR<br />
Align.<br />
ALCOHOL<br />
SWAB<br />
CENTER<br />
CONSOLE<br />
QA00701AD<br />
LEFT FRONT<br />
DOOR PANEL<br />
QA00703AD<br />
2 of 8 BII 48861 (1303) © 2013 American Honda Motor Co., Inc. – All Rights Reserved.
4. While applying light pressure against the left front<br />
door panel, carefully remove the adhesive backings.<br />
7. Align the dashboard left panel and attach it as<br />
shown.<br />
LEFT FRONT<br />
DOOR<br />
7 ADHESIVE<br />
BACKINGS<br />
(Remove.)<br />
Align.<br />
LEFT FRONT<br />
DOOR PANEL<br />
QA00704AD<br />
DASHBOARD<br />
DASHBOARD<br />
LEFT PANEL<br />
QA00706AD<br />
5. Using your hand, firmly press the left front door panel<br />
against the left front door.<br />
6. Attach masking tape to the ends of the adhesive<br />
backings, and attach them to the front surface of the<br />
dashboard left panel. Remove the remaining<br />
adhesive backings.<br />
8. While applying light pressure against the dashboard<br />
left panel, carefully remove the adhesive backings.<br />
2 ADHESIVE<br />
BACKINGS<br />
(Remove.)<br />
3 ADHESIVE<br />
BACKINGS<br />
(Remove.)<br />
MASKING<br />
TAPE<br />
Attach.<br />
DASHBOARD<br />
LEFT PANEL<br />
2 ADHESIVE<br />
BACKINGS<br />
(Peel back.)<br />
QA00705AD<br />
DASHBOARD<br />
DASHBOARD<br />
LEFT PANEL<br />
QA00707AD<br />
9. Using your hand, firmly press the dashboard left<br />
panel against the dashboard.<br />
© 2013 American Honda Motor Co., Inc. – All Rights Reserved. BII 48861 (1303) 3 of 8
10. Attach masking tape to the ends of the adhesive<br />
backings, and attach them to the front surface of the<br />
dashboard right panel. Remove the remaining<br />
adhesive backings.<br />
12. While applying light pressure against the dashboard<br />
right panel, carefully remove the adhesive backings.<br />
2 ADHESIVE<br />
BACKINGS<br />
(Remove.)<br />
DASHBOARD<br />
RIGHT PANEL<br />
MASKING<br />
TAPE<br />
Attach.<br />
3 ADHESIVE<br />
BACKINGS<br />
(Remove.)<br />
2 ADHESIVE<br />
BACKINGS<br />
(Peel back.)<br />
DASHBOARD<br />
RIGHT PANEL<br />
QA00708AD<br />
11. Align the dashboard right panel and attach it as<br />
shown.<br />
Align.<br />
DASHBOARD<br />
QA00710AD<br />
13. Using your hand, firmly press the dashboard right<br />
panel against the dashboard.<br />
14. Attach masking tape to the ends of the adhesive<br />
backings, and attach them to the front surface of the<br />
console left panel. Remove the remaining adhesive<br />
backings.<br />
4 ADHESIVE<br />
BACKINGS<br />
(Remove.)<br />
MASKING<br />
TAPE<br />
Attach.<br />
DASHBOARD<br />
RIGHT PANEL<br />
DASHBOARD<br />
QA00709AD<br />
CONSOLE<br />
LEFT PANEL<br />
4 ADHESIVE<br />
BACKINGS<br />
(Peel back.)<br />
QA00711AD<br />
4 of 8 BII 48861 (1303) © 2013 American Honda Motor Co., Inc. – All Rights Reserved.
15. Align the console left panel and attach it as shown.<br />
Align with the front end<br />
of the center console.<br />
Align.<br />
19. Using an alcohol swab, thoroughly clean the areas<br />
where the right front door panel and passenger’s<br />
dashboard panel will attach.<br />
DASHBOARD<br />
Clean with an<br />
alcohol swab.<br />
RIGHT<br />
FRONT<br />
DOOR<br />
CONSOLE<br />
LEFT PANEL<br />
CENTER<br />
CONSOLE<br />
QA00712AD<br />
16. While applying light pressure against the console left<br />
panel, carefully remove the adhesive backings.<br />
4 ADHESIVE<br />
BACKINGS<br />
(Remove.)<br />
ALCOHOL<br />
SWAB<br />
QA00714AD<br />
20. Attach masking tape to the ends of the adhesive<br />
backings, and attach them to the front surface of the<br />
right front door panel. Remove the remaining<br />
adhesive backings.<br />
Attach.<br />
MASKING<br />
TAPE<br />
7 ADHESIVE<br />
BACKINGS<br />
(Peel back.)<br />
CONSOLE<br />
LEFT PANEL<br />
CENTER<br />
CONSOLE<br />
QA00713AD<br />
RIGHT FRONT<br />
DOOR PANEL<br />
17. Using your hand, firmly press the console left panel<br />
against the center console.<br />
18. Repeat steps 14 through 17 on the other side to<br />
install the console right panel to the center console.<br />
5 ADHESIVE<br />
BACKINGS<br />
(Remove.)<br />
QA00715BD<br />
© 2013 American Honda Motor Co., Inc. – All Rights Reserved. BII 48861 (1303) 5 of 8
21. Align the right front door panel and attach it as<br />
shown.<br />
Align.<br />
RIGHT<br />
FRONT<br />
DOOR<br />
24. Attach masking tape to the ends of the adhesive<br />
backings, and attach them to the front surface of the<br />
passenger’s dashboard panel. Remove the<br />
remaining adhesive backings.<br />
2 ADHESIVE<br />
BACKINGS<br />
(Remove.)<br />
MASKING<br />
TAPE<br />
Attach.<br />
RIGHT FRONT<br />
DOOR PANEL<br />
QA00716BD<br />
22. While applying light pressure against the right front<br />
door panel, carefully remove the adhesive backings<br />
as shown.<br />
RIGHT FRONT<br />
DOOR PANEL<br />
PASSENGER’S<br />
DASHBOARD<br />
PANEL<br />
25. Align the passenger’s dashboard panel and attach it<br />
as shown.<br />
TOP VIEW<br />
5 ADHESIVE<br />
BACKINGS<br />
(Peel back.)<br />
QA01001AD<br />
PASSENGER’S <br />
DASHBOARD PANEL<br />
Align.<br />
Equal spacing.<br />
7 ADHESIVE<br />
BACKINGS<br />
(Remove.)<br />
RIGHT FRONT<br />
DOOR<br />
QA00717BD<br />
23. Using your hand, firmly press the right front door<br />
panel against the right front door.<br />
DASHBOARD<br />
PASSENGER’S<br />
DASHBOARD<br />
PANEL<br />
QA01002AD<br />
6 of 8 BII 48861 (1303) © 2013 American Honda Motor Co., Inc. – All Rights Reserved.
26. While applying light pressure against the<br />
passenger’s dashboard panel, carefully remove the<br />
adhesive backings.<br />
28. Using an alcohol swab, thoroughly clean the areas<br />
where the right rear door panel and the left rear door<br />
panel will attach.<br />
PASSENGER’S<br />
DASHBOARD<br />
PANEL<br />
RIGHT REAR DOOR:<br />
Clean with an<br />
alcohol swab.<br />
5 ADHESIVE<br />
BACKINGS<br />
(Remove.)<br />
DASHBOARD<br />
QA01003AD<br />
ALCOHOL<br />
SWAB<br />
27. Using your hand, firmly press the passenger’s<br />
dashboard panel against the dashboard.<br />
RIGHT REAR<br />
DOOR<br />
QA01004BD<br />
LEFT REAR DOOR:<br />
Clean with an<br />
alcohol swab.<br />
ALCOHOL<br />
SWAB<br />
LEFT REAR<br />
DOOR<br />
QA01009BD<br />
© 2013 American Honda Motor Co., Inc. – All Rights Reserved. BII 48861 (1303) 7 of 8
29. Attach masking tape to the ends of the adhesive<br />
backings, and attach them to the front surface of the<br />
right rear door panel. Remove the remaining<br />
adhesive backings.<br />
31. While applying light pressure against the right rear<br />
door panel, carefully remove the adhesive backings.<br />
RIGHT REAR<br />
DOOR PANEL<br />
Attach.<br />
RIGHT REAR<br />
DOOR PANEL<br />
MASKING<br />
TAPE<br />
5 ADHESIVE<br />
BACKINGS<br />
(Peel back.)<br />
5 ADHESIVE<br />
BACKINGS<br />
(Remove.)<br />
30. Align the right rear door panel and attach it as<br />
shown.<br />
QA01005BD<br />
5 ADHESIVE<br />
BACKINGS<br />
(Remove.)<br />
RIGHT REAR<br />
DOOR<br />
QA01007BD<br />
32. Using your hand, firmly press the right rear door<br />
panel against the right rear door.<br />
33. Repeat steps 29 through 32 on the other side to<br />
install the left rear door panel to the left rear door.<br />
Align.<br />
RIGHT REAR<br />
DOOR PANEL<br />
RIGHT REAR<br />
DOOR<br />
QA01006BD<br />
8 of 8 BII 48861 (1303) © 2013 American Honda Motor Co., Inc. – All Rights Reserved.