Download User Guide (PDF) - NCI Finance
Download User Guide (PDF) - NCI Finance
Download User Guide (PDF) - NCI Finance

You also want an ePaper? Increase the reach of your titles
YUMPU automatically turns print PDFs into web optimized ePapers that Google loves.
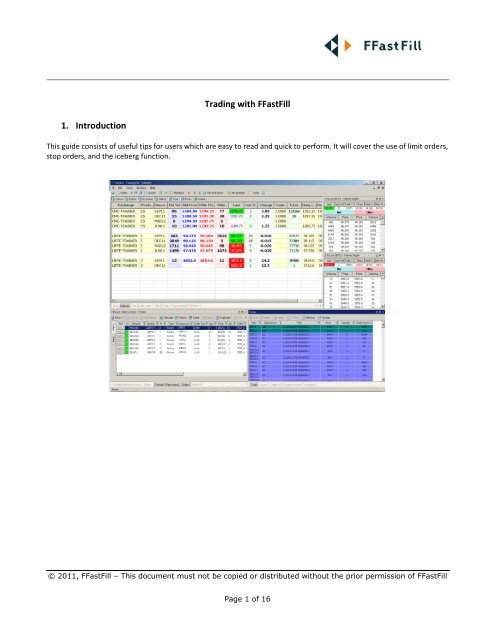
Trading with FFastFill<br />
1. Introduction<br />
This guide consists of useful tips for users which are easy to read and quick to perform. It will cover the use of limit orders,<br />
stop orders, and the iceberg function.<br />
© 2011, FFastFill – This document must not be copied or distributed without the prior permission of FFastFill<br />
Page 1 of 16
2. Customising the workspace<br />
There are many different ways of customising the workspace to suit the user’s needs (for a more detailed explanation of<br />
all the features, please refer to the latest <strong>User</strong> <strong>Guide</strong> by going to [Help], [Contents]). In the example below, we have<br />
removed some of the columns which can be done by left clicking on the column heading, bringing up the column chooser,<br />
and hiding the unwanted columns,<br />
© 2011, FFastFill – This document must not be copied or distributed without the prior permission of FFastFill<br />
Page 2 of 16
Next, go to [Tools], [Options], [Window] and tick the below boxes ‘Allow window redocking’ and ‘Allow windows to be<br />
docked into each other’. Enabling this will allow users to tidy their view of the application and access sections of the<br />
application more easily.<br />
3. Colour coding filled orders<br />
To colour code filled orders, go to [Tools], [Options] then tick ‘Colour code filled orders’.<br />
© 2011, FFastFill – This document must not be copied or distributed without the prior permission of FFastFill<br />
Page 3 of 16
The filled orders in the Orders View will then change from the single colour scheme shown to a colour coded Orders View,<br />
showing filled buy trades in blue and sell trades in pink – see below:<br />
© 2011, FFastFill – This document must not be copied or distributed without the prior permission of FFastFill<br />
Page 4 of 16
To Exit<br />
4. Save the workspace<br />
From the main window select [File], [Exit]. If the ‘Ask to allow application shutdown’ options is set (in the [Options] –<br />
[General dialog settings]), you will be asked to confirm the shutdown. Click ‘OK’.<br />
Save workspace on shutdown<br />
If the ‘Ask to save workspace on shutdown’ option is set (in the [Options] – [General dialog settings]), the ‘Save<br />
Workspace’ prompt is displayed.<br />
Enter a name for your workspace (or choose from an existing entry from the list to overwrite). Click ‘OK’ to Save<br />
Preference settings or ‘Cancel’ to discard. You can enable this workspace to be shared with other Traders in your Trader<br />
group if you wish. If you make and changes to the screen settings, it is important to remember to save the workspace.<br />
© 2011, FFastFill – This document must not be copied or distributed without the prior permission of FFastFill<br />
Page 5 of 16
Placing orders<br />
Please remember that the LME’s Select system operates a strict order priority so that you may lose the initial ranking of<br />
your order if you amend if prior to the order being filled. This is particularly the case if you increase the order volume or<br />
decide to delete it and subsequently reinstate at a later point. If you wish to increase the size of your existing order, it is<br />
usually better to enter a new order for the additional amount rather than increasing the size of the existing order.<br />
1. Submitting an order<br />
An order ticket will generate if the trader right clicks at a price and changes the price, volume, Buy or Sell as desired.<br />
Note: If you right click on a Buy order, it is a Buy by default and if you right click on a Sell order, it is a Sell by default.<br />
2. Limit<br />
The trader determines the volume and price at which the order will be submitted to the market. The order will be<br />
executed at that price or better:<br />
© 2011, FFastFill – This document must not be copied or distributed without the prior permission of FFastFill<br />
Page 6 of 16
3. Stop Limit (Stop Loss)<br />
Stop Limit (Stop Loss) orders are triggered when the pre set level is traded on LME Select. For example, if the order ticket<br />
is set to ‘Volume 10’ and ‘Price 7450’, as soon as 7450 trades, the stop is triggered and the order will be worked at the<br />
price of 7450. If the market goes below this limit, no trades are executed. When triggered, this attempts to trade the<br />
desired number of lots, but within the price limit that has been set. The order stays in the system as a limit order for the<br />
rest of the day.<br />
It is possible to set a limit on a stop order. In this example, the limit is set $10 below the stop level of 7450. When 7450 is<br />
triggered, this attempts to trade the desired number of lots, down to the price limit of 7440. Again, any unfilled orders will<br />
remain in the system as price limit orders.<br />
© 2011, FFastFill – This document must not be copied or distributed without the prior permission of FFastFill<br />
Page 7 of 16
4. OCO orders<br />
An OCO (One Cancels Other) order consists of two linked orders – if one is filled, the other is cancelled.<br />
To bring up an OCO ticket, open a normal order ticket, then click the icon next to [Price]. This opens an OCO order ticket.<br />
To create the first order, fill in the relevant details as you would normally, and click ‘Add’.<br />
Fill in the details for the second leg. The order below shows the first leg as a limit order, to BUY 10 at a price of 39500.<br />
The second leg is a stop order, to BUY 10 on a stop at 39400. If you need to remove a leg, highlight it and click ‘Delete<br />
Leg’.<br />
© 2011, FFastFill – This document must not be copied or distributed without the prior permission of FFastFill<br />
Page 8 of 16
Once you have completed the second order, click ‘Submit OCO’. The order will show in the orderbook as two separate<br />
orders. Once an order is filled, the second order will be pulled from the market. The same functionality on Stop Limit<br />
orders is described in the previous pages.<br />
5. Random Icebergs<br />
In addition to being able to iceberg an order into the market, you are now able to randomise both the volume and the<br />
time at which orders are submitted. Select [Iceberg] from the order types. This opens up the ‘Advanced Iceberg Options’.<br />
The trader can choose [Random Clip] and change the [Min] and [Max] lottage as required.<br />
© 2011, FFastFill – This document must not be copied or distributed without the prior permission of FFastFill<br />
Page 9 of 16
Note: Iceberg orders do not guarantee a fill even if the market trades through your limit as new orders are only submitted<br />
once the first tranche is filled. During this short delay in submitting the second order, other trades can take place.<br />
6. Good Till Date (GTD) & Good Till Cancel (GTC)<br />
Good Till Date requires that the order is held in the system until the conclusion of the trading date specified.<br />
To implement this feature, the user must select the drop down menu at the bottom of the order ticket, using the double<br />
arrow >> which switches to
© 2011, FFastFill – This document must not be copied or distributed without the prior permission of FFastFill<br />
Page 11 of 16
Hints<br />
1. Filled / Part Filled Order Alerts<br />
If you would like an alert when you are filled or part filled on an order:<br />
Select [Tools] and [Options]<br />
Select [Orders] tab, and ensure the circled window is enabled:<br />
© 2011, FFastFill – This document must not be copied or distributed without the prior permission of FFastFill<br />
Page 12 of 16
Now whenever an order is filled or part-filled, you will see a message window like the one shown below:<br />
2. Duplicating Orders<br />
If you are re-entering a pulled order, or wish to duplicate a previous order’s details – highlight the chosen order in your<br />
orderbook, and select [Duplicate] from the tabs menu.<br />
An order ticket will appear, duplicating the previous order’s details. You can amend the order details if you wish, before<br />
executing the order. This will create a new order in the market, with a separate Order ID.<br />
© 2011, FFastFill – This document must not be copied or distributed without the prior permission of FFastFill<br />
Page 13 of 16
3. Tracking the Orders<br />
The orders window can be opened by clicking the [Orders] button. The trader can select from the list of available filters to<br />
view selected orders immediately.<br />
The [Orders] window shows the full details of all the orders placed during one trading day. Filled and pulled orders are<br />
removed from this view by acknowledging them. To acknowledge an order, click anywhere on the order. Filled orders that<br />
are acknowledged are moved to the ‘Filled orders’ view.<br />
4. Adjust, Hold and Pull Orders<br />
When terminating the application, all working orders will automatically be pulled. Working orders can be pulled by a<br />
trader at any time, by clicking the ‘Pull’ button for the orders.<br />
© 2011, FFastFill – This document must not be copied or distributed without the prior permission of FFastFill<br />
Page 14 of 16
COLUMN<br />
Pull<br />
History<br />
Order ID<br />
Exchange<br />
Type<br />
Description<br />
Order Type<br />
Qty<br />
Price<br />
Qty Done<br />
Client<br />
Status<br />
Buy / Sell<br />
Open / Close<br />
Order No.<br />
Order ID<br />
Trader<br />
Adjust<br />
Hold<br />
Submit<br />
DESCRIPTION<br />
Pull the selected order<br />
View the history of the order<br />
Order identification<br />
Name of exchange where the order was submitted<br />
Type of order - if placed on Future or Option<br />
Description of order (maturity dates)<br />
Type of order (for details on Order type, go to Order Types)<br />
Submitted quantity<br />
Submitted price<br />
The quantity done before now<br />
Name of the client on whose behalf the order was submitted<br />
Order ststus<br />
Buy or Sell order<br />
Opening or closing order<br />
Order number at the exchange<br />
Application order ID<br />
Name of the trader who submitted the order<br />
Click to adjust the particular order<br />
Click to hold the order (Only available when the order has an Active status)<br />
Click to submit the order with 'Held' status<br />
To adjust an order, click on ‘ADJ’, this will bring up the ticket, where you can change the volume or price, then click<br />
‘Update’.<br />
© 2011, FFastFill – This document must not be copied or distributed without the prior permission of FFastFill<br />
Page 15 of 16
© 2011, FFastFill – This document must not be copied or distributed without the prior permission of FFastFill<br />
Page 16 of 16