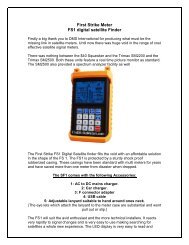
First Strike FS1 Manual - First Strike Meters
First Strike FS1 Manual - First Strike Meters
First Strike FS1 Manual - First Strike Meters
You also want an ePaper? Increase the reach of your titles
YUMPU automatically turns print PDFs into web optimized ePapers that Google loves.
Model: <strong>FS1</strong><br />
Fir s t S trike Met er s<br />
<strong>FS1</strong> Digital Satellite Finder<br />
Operator’s <strong>Manual</strong><br />
http://www.<strong>First</strong><strong>Strike</strong><strong>Meters</strong>.com<br />
sales@<strong>First</strong><strong>Strike</strong><strong>Meters</strong>.com
<strong>FS1</strong> www.<strong>First</strong><strong>Strike</strong><strong>Meters</strong>.com<br />
Make certain that the battery is fully<br />
charged before the first using of the<br />
meter.<br />
Warning: The meter is powered with<br />
high-performance Li-ion battery.<br />
Use only the charger provided by<br />
the manufacturer. Using any other<br />
battery charger may overheat or<br />
distort the meter, or cause fire,<br />
injury or harm to the environment<br />
and will void the warranty.<br />
CAUTION<br />
RISK OF ELECTRIC SHOCK<br />
DO NOT OPEN<br />
!<br />
To ensure safe operation and maximum benefit from the features of<br />
this device, please read this manual carefully prior to initial use.<br />
The technical specifications and operating methods included in this<br />
manual are subject to changes without notice. In case of any inquires<br />
after a period of usage, please consult the manufacturer.<br />
WARNNING<br />
Inspect the instrument, box and packing material prior to use to verify that<br />
damage has not occurred in transit to your location. Verify that all listed<br />
accessories are included with your unit, and that the unit is functioning properly.<br />
In the event of improper operation, or that items are missing or damaged, please<br />
contact your distributor immediately.<br />
1<br />
This extended warranty program will<br />
not cover physical and non-physical<br />
damages, which include accident,<br />
use of supplies or parts not meeting<br />
the product's specifications, misuse<br />
other software application, damage<br />
due to shipment, neglect, fire, water,<br />
lightning, or other acts of nature,<br />
unauthorized product modification,<br />
removal, installation and set-up<br />
service charges by any third party,<br />
and failure to follow instructions<br />
supplied with the product.
<strong>FS1</strong> www.<strong>First</strong><strong>Strike</strong><strong>Meters</strong>.com<br />
!<br />
Battery Notice:<br />
Do not expose to, dispose of the battery in fire.<br />
Avoid shorting the battery.<br />
Avoid excessive physical shock or vibration.<br />
Do not disassemble or deform the battery.<br />
Do not leave battery in charger over 12 hours.<br />
Store the battery in a cool, dry and well-ventilated area.<br />
Keep battery packs away from children.<br />
Promptly and properly dispose of used battery packs according to local<br />
regulations for the disposal of batteries.<br />
Damaged or leaking battery packs should be handled with extreme care.<br />
Charge unused battery packs at least once every six months.<br />
!<br />
Charger Notice:<br />
Charge the battery packs only with the specified charger.<br />
Never use a modified or damaged charger.<br />
We recommend that Li-Ion batteries should be charged in an unoccupied<br />
area.<br />
Do not charge battery packs near combustible or conductive materials.<br />
Charge the battery packs in a well-ventilated room that does not exceed<br />
room temperatures of 40ºC/104ºF.<br />
AC Adaptor<br />
Car charger<br />
RF connector<br />
USB cable<br />
User manual<br />
Li-ion battery<br />
Accessories<br />
1PC<br />
1PC<br />
2PCS<br />
1PC<br />
1PC<br />
1PC<br />
2
<strong>FS1</strong> www.<strong>First</strong><strong>Strike</strong><strong>Meters</strong>.com<br />
I N D E X<br />
Accessories.........................................................................<br />
2<br />
INDEX......................................................................................................3<br />
Overview: ................................................................................................. 4<br />
Screen instructions: .................................................................................. 4<br />
Panel introduction: ................................................................................... 7<br />
Start using your meter. ............................................................................. 9<br />
4-1. Power on/off: ............................................................................. 9<br />
4-2. Enter the coordinates of your location. ...................................... 9<br />
4-3. <strong>Manual</strong>ly Searching Satellite .................................................. 10<br />
4.4 Using default channel plan. ...................................................... 13<br />
4.5 Using user channel plan. .......................................................... 13<br />
4.6 Copy a channel from default channel plan to the user channel<br />
plan. ................................................................................................ 14<br />
4.7 Modify channels in both default & user channel plan. ............... 14<br />
4.8 Delete channel in the user channel plan. .................................. 14<br />
4.9 Restore factory settings. ........................................................... 15<br />
4.10 Upgrades: ............................................................................... 15<br />
4.11 Charging by satellite receiver: ................................................. 15<br />
Technical parameters ............................................................................ 16<br />
3
<strong>FS1</strong> www.<strong>First</strong><strong>Strike</strong><strong>Meters</strong>.com<br />
Overview:<br />
<strong>FS1</strong> Satellite Finder is an ideal instrument for satellite installation. It<br />
reacts fast, works reliably, the easy-to-use features can really make<br />
satellite searching a easy job.<br />
The meter calculates the elevation and polarization automatically and<br />
show in the display, according to your location and satellite’s longitude.<br />
The meter comes with the global data of satellite channel plan, you can<br />
also download channel plan data via PC or edit the user-defined channel<br />
plan which can save up to 100 satellite parameters.<br />
Screen instructions:<br />
Screen instructions: Fig.1<br />
Fig.1<br />
4
<strong>FS1</strong> www.<strong>First</strong><strong>Strike</strong><strong>Meters</strong>.com<br />
(1) Positioning guide zone:<br />
A:Indicates the azimuth direction.<br />
E:Indicates the degree of elevation<br />
P: Indicates the LNB polarization angle<br />
(2) Satellite settings zone:<br />
L: Satellite longitude<br />
F: Transponder frequency<br />
SR: Symbol rate<br />
LO: Local oscillator frequency<br />
LNB: 13V(vertical) or 18V (horizontal) polarization switch<br />
22KHz Control: “ON” indicates on, blank indicates off.<br />
(3) Channel number zone:<br />
User channel plan can save 100 user-defined satellite parameters, you<br />
can also save frequently-used parameters here.<br />
Using and key select the channel. The meter has preset the<br />
data of most satellite channel plans in the world, and reserves 300 empty<br />
channel plans.<br />
Inputting the longitude and latitude of your location, the meter will<br />
automatically select and display a channel that you can receive.<br />
(4) Latitude and longitude settings & functions zone:<br />
LONG: Longitude<br />
LAT: Latitude<br />
: It blinks when pressing to indicate saved successfully.<br />
:Indicates the mode of local channel plan.<br />
:Hold for 3 seconds until the symbol shows, indicating the<br />
speaker is off; Press and hold for 3 seconds again to turn on the<br />
speaker.<br />
5
<strong>FS1</strong> www.<strong>First</strong><strong>Strike</strong><strong>Meters</strong>.com<br />
:Linked with PC<br />
:Shows current battery status, blinks when the battery is low.<br />
(5) Measurement zone: After setting satellite parameters, you should<br />
move cursor to channel number zone and press any numeric key from 0<br />
to 9 to activate the measurement.<br />
S, Q column<br />
S, Q column displays the signal strength and signal quality in<br />
percentage.<br />
S, S/N and B<br />
S:Actual value of signal strength<br />
S/N: Carrier noise ratio<br />
B: Bit error rate<br />
Indicates the signal has been locked.<br />
6
<strong>FS1</strong> www.<strong>First</strong><strong>Strike</strong><strong>Meters</strong>.com<br />
Panel introduction:<br />
Fig. 2<br />
(1) Input port: The port to connect with LNB<br />
(2) Output port: When the battery is low, connect this port with input<br />
port of satellite receiver, then turn on the receiver to supply power<br />
for meter and get signal input.<br />
(3) LCD: LCD display with backlight.<br />
7
<strong>FS1</strong> www.<strong>First</strong><strong>Strike</strong><strong>Meters</strong>.com<br />
(4) Option Key & shift key between default and user-defined channel<br />
plans:<br />
Single-press, the cursor will move downwards circularly.<br />
Hold for 3 seconds, screen will shift between default and user-defined<br />
channel plans.<br />
(5) Number digit key & backlight key:<br />
Single-press: cursor moves left<br />
Hold for 3 seconds to turn on or turn off backlight.<br />
(6) Number digit key & mute key:<br />
Single-press: cursor moves right<br />
Hold for 3 seconds to turn on (off) the speaker.<br />
(7) Save & delete key:<br />
Press to save modified items.<br />
Hold for 3 seconds to delete the selected item.<br />
(8) Load and unit key<br />
Single-press: load parameters in local channel plan to user-defined<br />
channel plan.<br />
Hold for 3 seconds to shift among the measurement units dBuV, dBmV,<br />
dBm.<br />
(9) Numeric Keys: Enter numbers from 0 to 9. When cursor is in channel<br />
number zone, press any nummeric key to start or stop the signal<br />
measurment.<br />
Hold “0” key for 3 seconds to enter local longitude & latitude modifying<br />
mode.<br />
(10) POWER: power on & power off key.<br />
(11) Data port to connect with PC<br />
8
<strong>FS1</strong> www.<strong>First</strong><strong>Strike</strong><strong>Meters</strong>.com<br />
(12) Charging port<br />
(13) Speaker<br />
Start using your meter.<br />
4-1. Power on/off:<br />
Hold the power key until the meter “beeps” and enters the main menu.<br />
Press the power key again to power off.<br />
4-2. Enter the coordinates of your location.<br />
Enter the latitude and longitude of your location.<br />
<strong>First</strong>, using key move cursor to channel number zone. Make sure<br />
the measurement zone is blank, otherwise press any numeric key to quit<br />
the measurement mode. Then hold “0” key for 3 seconds, the cursor will<br />
move to the longitude and latitude setting zone. As shown in Fig. 3<br />
Fig. 3<br />
9
<strong>FS1</strong> www.<strong>First</strong><strong>Strike</strong><strong>Meters</strong>.com<br />
For example: Enter longitude 117E,latitude 39N.<br />
Using key move cursor to “LONG”,using or key select<br />
the number digit, and enter the number “117” when the cursor blinks.<br />
Continuing to press or key until “E” or “W” blinks, press any<br />
key from 0 to 9 to shift between “E” and “W”.<br />
Using key move cursor to “LAT”, enter “39”. Continuing to press<br />
or key until “N” or “S” blinks, press any key from 0 to 9 to shift<br />
between “N” and “S”.<br />
Hold “0” for 3 seconds to save and exit<br />
4-3. <strong>Manual</strong>ly Searching Satellite<br />
4-3-1. Enter parameters:<br />
In user channel plan, move cursor to channel number zone, press<br />
or to select an empty channel plan, pressing key to move<br />
cursor to L, F, SR, LO, LNB, 22KHz and enter the correct parameters<br />
one by one.<br />
For example:<br />
Moving cursor to “L” and enter 146E:<br />
Enter number when the digit blinks, using or key move the<br />
cursor. When the cursor is at “hundred” it won’t blink, directly enter “1”.<br />
Continuing to use or key move the cursor to “E” or “W”,when<br />
“E” or “W” blinks, press any numeric key from 0 to 9 to shift between “E”<br />
10
<strong>FS1</strong> www.<strong>First</strong><strong>Strike</strong><strong>Meters</strong>.com<br />
or “W”.<br />
When the cursor is at “LNB” or “22KHz”, use any numeric key to shift<br />
between the options.<br />
After entering all parameters, press key to save. The cursor moves<br />
to channel number area automatically and all parameters are saved into<br />
current channel successfully.<br />
Note: As “L” is entered, the meter will calculate elevation and polarization<br />
and display on the positioning guide zone, according to local longitude &<br />
latitude you have entered, provided the satellite program is available<br />
locally.<br />
4-3-2. Signal measurement:<br />
Make sure the cursor is in the channel number zone, press any numeric<br />
key to launch signal test mode. When the input port is connected with<br />
LNB, the meter will detect LNB noise and display the signal level,<br />
indicating the LNB is OK and connected well with the meter. As Fig.4<br />
Fig. 4<br />
4-3-3. Signal searching:<br />
Turn the antenna in the direction the meter indicates, the tone will<br />
become louder and sharper. When the antenna is close to the satellite,<br />
11
<strong>FS1</strong> www.<strong>First</strong><strong>Strike</strong><strong>Meters</strong>.com<br />
the meter shows a increasing value of S/N and BER. As Fig. 5<br />
Fig. 5<br />
Continue to turn the antenna slowly in the direction that makes the S/N<br />
increase. When the value is sufficient, the meter sounds a steady tone<br />
and show icon on the display. As Fig. 6<br />
Fig. 6<br />
Continue to tune the antenna until the meter shows the maximum S/N<br />
value, now the antenna is in the best position. As Fig. 7<br />
12
<strong>FS1</strong> www.<strong>First</strong><strong>Strike</strong><strong>Meters</strong>.com<br />
Fig. 7<br />
Note: In measurement mode, you can press or key to change<br />
the parameter of “F” item by 1MHz step. Press key to save.<br />
icon will blink when the battery is low, please charge the battery or<br />
connect to the STB as power supply, otherwise although the meter can<br />
still work it may not be able to supply power for the LNB.<br />
4.4 Using default channel plan.<br />
Hold key until shows at the lower right corner of screen, press<br />
or to change the channel number. Press any numeric key to<br />
start testing.<br />
4.5 Using user channel plan.<br />
In default channel plan, hold key until disappears. The meter<br />
13
<strong>FS1</strong> www.<strong>First</strong><strong>Strike</strong><strong>Meters</strong>.com<br />
enters user channel plan mode. Press or to change channel<br />
number and press any numeric key to start testing.<br />
4.6 Copy a channel from default channel plan to the user channel<br />
plan.<br />
In default channel plan mode, using and keys select the<br />
favorite channel and press key. The meter displays in the<br />
lower right and the channel is copied to the user channel plan<br />
successfully.<br />
4.7 Modify channels in both default & user channel plan.<br />
In the default or user channel plan mode, using key move the<br />
cursor to the item and modify it. Press key to save. The meter<br />
displays in the lower right and the channel modification is saved<br />
successfully.<br />
In the default channel plan mode, the “L” item can’t be modified.<br />
Above function can’t be done in the test mode, press any numeric to<br />
switch out of test mode.<br />
4.8 Delete channel in the user channel plan.<br />
In the user channel plan mode, using and keys select the<br />
14
<strong>FS1</strong> www.<strong>First</strong><strong>Strike</strong><strong>Meters</strong>.com<br />
channel to be deleted and hold for 3 seconds to delete the channel.<br />
4.9 Restore factory settings.<br />
Type in 9876 immediately after power on, about 5 seconds later, the<br />
meter will restart and recover to factory settings. All saved and modified<br />
contents will loss. Please use this function carefully.<br />
4.10 Upgrades:<br />
Install the software provided in the product disk or downloaded from<br />
www.<strong>First</strong><strong>Strike</strong><strong>Meters</strong>.com, connect with PC with the communication<br />
cable.<br />
4.11 Charging by satellite receiver:<br />
The input port of a satellite receiver can supply power for the meter.<br />
Connect the input port of satellite receiver with the output port of the<br />
meter.<br />
AS Fig. 8<br />
15
<strong>FS1</strong> www.<strong>First</strong><strong>Strike</strong><strong>Meters</strong>.com<br />
Fig. 8<br />
Above configuration is used only when the battery is low.<br />
Technical parameters<br />
Input frequency range: 950~2150MHz<br />
Signal level range: 30dBuV-105dBuV<br />
Measurement unit: dBmV; dBµV; dBm<br />
Measurement accuracy: ±1.5dB<br />
Input resistance: 75Ω<br />
Symbol rate: 2Msps-45Msps<br />
Connector: F type<br />
Measurement item: signal strength; bit error rate; S/N<br />
QPSK switch: Auto<br />
22K control: supported<br />
16
<strong>FS1</strong> www.<strong>First</strong><strong>Strike</strong><strong>Meters</strong>.com<br />
Audio output: speaker<br />
Display: Code segment wide-temperature LCD<br />
Memory content: 300 reserved locations for global satellite channels,<br />
100 user-defined channels<br />
LNB Power Supply: 13V, 18V, ≤400mA<br />
Interface mode: USB<br />
Adapter power supply:AC100V-240V<br />
DC input: 13.5V/2A<br />
Output port voltage: DC12-23V<br />
Battery working time: about 2.5 hours continuously after full charged,<br />
varying from LNB with different power consumption.<br />
Charging time: 4 to 6 hours<br />
Working Temperature:0 ℃ ~40℃<br />
Storage Temperature:-10 ℃ ~50℃<br />
Dimensions: 142*82*35(mm)<br />
Weight: 0.42Kg<br />
Gross weight:0.9 Kg<br />
17


