GSE350-355 IS Indicator User Manual - Avery Weigh-Tronix
GSE350-355 IS Indicator User Manual - Avery Weigh-Tronix
GSE350-355 IS Indicator User Manual - Avery Weigh-Tronix

Create successful ePaper yourself
Turn your PDF publications into a flip-book with our unique Google optimized e-Paper software.
3. The PctLo value will be displayed. Key the in target percentage value with the<br />
numeric keys and press [ENTER].<br />
4. The PctHi value will be displayed. Key the in target percentage value with the<br />
numeric keys and press [ ENTER].<br />
5. Press [SELECT] to select the desired weigh mode parameter.<br />
4.6.2 Start Checkweighing<br />
The checkweigh applications do not have a start function. Simply put the item to be<br />
weighed onto the scale platter. An annunciator will illuminate to indicate whether the<br />
item is within tolerance.<br />
Annunciators<br />
In order for the annunciators to activate, the displayed value must be at least five<br />
graduations above zero.<br />
Status<br />
Annunciator<br />
Status<br />
Annunciator<br />
Color (LED)<br />
OVER SP 1 Illuminated Red<br />
GOOD SP 2 Illuminated Green<br />
UNDER SP 3 Illuminated Yellow<br />
4.7 Fill<br />
The fill program is used for single-speed or dual-speed filling operations. The dualspeed<br />
fill operation allows for both a fast and a slow fill mode. During a fast-fill,<br />
setpoints 1 (SP1) and 2 (SP2) are activated. During a slow-fill or single-speed fill, only<br />
setpoint 1 (SP1) is activated. This feature must be enabled before attempting to use.<br />
Over filling can be prevented with the use of pre-act values (PA1 and PA2). Pre-act 1<br />
(PA1) is used for switching the fast fill to a slow fill. Pre-act 2 (PA2) is used as a final<br />
cutoff value.<br />
4.7.1 Enter a Target Value<br />
Pressing [TARE] or [SAMPLE/ENTER] alone allows access to the subsets. PA1 and<br />
PA2 are the subsets for Targ 1.<br />
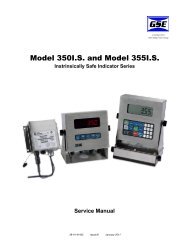
Model 350 I.S.<br />
1. Press [SELECT] until tArG1 is displayed.<br />
2. Press [PRINT] until the first digit of the new target is displayed. Press [UNITS]<br />
to accept the number displayed. Continue this step until the desired number is<br />
entered. Refer to the example below.<br />
26<br />
Model 350 I.S. and <strong>355</strong> I.S. <strong>User</strong> Instructions