GSE350-355 IS Indicator User Manual - Avery Weigh-Tronix
GSE350-355 IS Indicator User Manual - Avery Weigh-Tronix
GSE350-355 IS Indicator User Manual - Avery Weigh-Tronix

You also want an ePaper? Increase the reach of your titles
YUMPU automatically turns print PDFs into web optimized ePapers that Google loves.
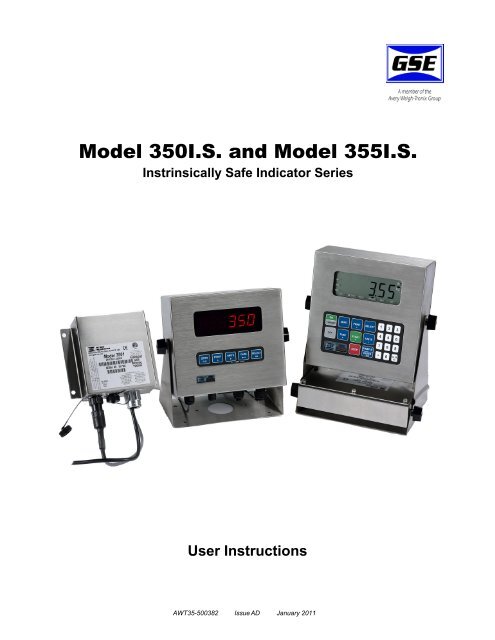
Model 350I.S. and Model <strong>355</strong>I.S.<br />
Instrinsically Safe <strong>Indicator</strong> Series<br />
<strong>User</strong> Instructions<br />
AWT35-500382 Issue AD January 2011
© <strong>Avery</strong> <strong>Weigh</strong>-<strong>Tronix</strong>, LLC 2011. All rights reserved.<br />
No part of this publication may be reproduced, stored in an electronic retrieval system, or transmitted in any form<br />
or by any means, electronic, mechanical, photocopying, recording or otherwise without the prior written consent of<br />
the copyright owner, or as permitted by law or under license. Full acknowledgment of the source must be given.<br />
<strong>Avery</strong> <strong>Weigh</strong>-<strong>Tronix</strong> is a registered trade mark of the <strong>Avery</strong> <strong>Weigh</strong>-<strong>Tronix</strong>, LLC. This publication was correct at the<br />
time of going to print however, <strong>Avery</strong> <strong>Weigh</strong>-<strong>Tronix</strong>, LLC reserves the right to alter without notice the specification,<br />
design, price or conditions of supply of any product or service at any time.<br />
All third party brands and product names used within this document are trademarks or registered trademarks of<br />
their respective holders.<br />
All <strong>Weigh</strong>-<strong>Tronix</strong> / GSE products bearing the Factory Mutual seal are designed and manufactured according to the<br />
guidelines set forth by Factory Mutual Research. It is the responsibility of owners to gain approval from their<br />
insurance company for the suitability of the <strong>Weigh</strong>-<strong>Tronix</strong> equipment and installation for their particular<br />
environment.<br />
<strong>Weigh</strong>-<strong>Tronix</strong> assumes no responsibility or liability either expressed or implied for the suitability of the <strong>Weigh</strong>-<strong>Tronix</strong><br />
equipment for the owners' specific application or environment.<br />
Model 350 I.S. and Model <strong>355</strong> I.S. book
Table of Contents<br />
Chapter 1 General information and warnings ......................................................................................... 3<br />
About this <strong>Manual</strong> ..............................................................................................................3<br />
Text Conventions ........................................................................................................ 3<br />
Special Messages ....................................................................................................... 3<br />
Installation .......................................................................................................................... 4<br />
Electrical Installation .......................................................................................................... 4<br />
Pluggable Equipment .................................................................................................. 4<br />
Permanently Wired Equipment - Isolator Requirements ............................................. 4<br />
Safe Handling of Equipment with Batteries ................................................................. 5<br />
Wet Conditions ............................................................................................................ 5<br />
Routine Maintenance ......................................................................................................... 5<br />
Cleaning the <strong>Indicator</strong> ........................................................................................................ 6<br />
Training .............................................................................................................................. 6<br />
Sharp Objects .................................................................................................................... 6<br />
FCC and EMC Declarations of Compliance ....................................................................... 7<br />
Chapter 2 Installation ................................................................................................................................ 9<br />
Hazardous Area Approval (ATEX) ................................................................................... 10<br />
Desktop Mounting ............................................................................................................ 10<br />
Outline Drawings .............................................................................................................. 10<br />
Model 350 I.S. ........................................................................................................... 11<br />
Model <strong>355</strong> I.S. ........................................................................................................... 12<br />
AC and DC Powered ........................................................................................................ 13<br />
DC Operated ............................................................................................................. 13<br />
AC Operated ............................................................................................................. 14<br />
AC To DC Power Supply Extension Cable ................................................................ 14<br />
Chapter 3 Display and Keypad ............................................................................................................... 15<br />
Display ............................................................................................................................. 15<br />
LED Display ............................................................................................................... 15<br />
LCD Display .............................................................................................................. 15<br />
Keypads ........................................................................................................................... 16<br />
Model 350 I.S. Keypad .............................................................................................. 16<br />
Model <strong>355</strong> I.S. Keypad .............................................................................................. 17<br />
<strong>Weigh</strong> Mode Functions .............................................................................................. 19<br />
Chapter 4 Operation ................................................................................................................................ 21<br />
Entering a Tare Value (Model 350 I.S.) ........................................................................... 21<br />
Entering a Tare Value (Model <strong>355</strong> I.S.) ........................................................................... 21<br />
Enter an ID Number ......................................................................................................... 21<br />
Set Time & Date ............................................................................................................... 22<br />
Model 350 I.S. ........................................................................................................... 22<br />
Model <strong>355</strong> I.S. ........................................................................................................... 22<br />
Parts Counting .................................................................................................................23<br />
Model 350 I.S. ........................................................................................................... 23<br />
Model <strong>355</strong> I.S. ........................................................................................................... 24<br />
View the average piece weight .................................................................................. 24<br />
Percentage Checkweigh .................................................................................................. 25<br />
Enter a Target Value ................................................................................................. 25<br />
Start Checkweighing ................................................................................................. 26<br />
Fill .................................................................................................................................... 26<br />
Enter a Target Value ................................................................................................. 26<br />
Start Fill .....................................................................................................................27<br />
Fill Example ............................................................................................................... 28<br />
Batch ................................................................................................................................ 28<br />
Model 350 I.S. and <strong>355</strong> I.S. <strong>User</strong> Instructions 1
Enter a Target ........................................................................................................... 28<br />
Start Batch ................................................................................................................. 29<br />
Batch Example .......................................................................................................... 30<br />
Discharge ......................................................................................................................... 30<br />
Enter a Target ........................................................................................................... 31<br />
Pre-acts ..................................................................................................................... 32<br />
Start Discharge .......................................................................................................... 32<br />
Discharge Example ................................................................................................... 33<br />
Fill and Discharge ............................................................................................................33<br />
Enter a Target ........................................................................................................... 33<br />
Pre-acts ..................................................................................................................... 34<br />
Activation Method ...................................................................................................... 34<br />
Pause ........................................................................................................................ 35<br />
Fill and Discharge Example ....................................................................................... 35<br />
Absolute Checkweigh ...................................................................................................... 36<br />
Enter a Target Value ................................................................................................. 36<br />
Start Checkweighing ................................................................................................. 37<br />
Absolute Checkweighing Example ............................................................................ 37<br />
Target Deviation Checkweigh .......................................................................................... 37<br />
Enter a Target Value ................................................................................................. 37<br />
Start Checkweighing ................................................................................................. 38<br />
Target Deviation Checkweighing Example ................................................................ 39<br />
Batch 2 ............................................................................................................................. 39<br />
Enter a Target ........................................................................................................... 39<br />
Activation Method ...................................................................................................... 40<br />
Batch2 Example ........................................................................................................ 40<br />
Chapter 5 Troubleshooting ..................................................................................................................... 41<br />
Operational Errors ............................................................................................................ 41<br />
Miscellaneous Errors ....................................................................................................... 41<br />
Hardware Errors ............................................................................................................... 42<br />
Communication Errors ..................................................................................................... 42<br />
Chapter 6 Specifications ......................................................................................................................... 43<br />
2<br />
Model 350 I.S. and <strong>355</strong> I.S. <strong>User</strong> Instructions
1 General information and warnings<br />
1.1 About this <strong>Manual</strong><br />
This manual is divided into chapters by the chapter number and the large text at the top<br />
of a page. Subsections are labeled as shown by the 1 and 1.1 headings shown above.<br />
The names of the chapter and the next subsection level appear at the top of alternating<br />
pages of the manual to remind you of where you are in the manual. The manual name<br />
and page numbers appear at the bottom of the pages.<br />
1.1.1 Text Conventions<br />
Key names are shown in brackets e.g. [PRINT] and reflect the case of the key being<br />
described. This applies to the keys on the indicator keypad.<br />
Displayed messages appear in italic type and reflect the case of the displayed<br />
message.<br />
1.1.2 Special Messages<br />
Examples of special messages you will see in this manual are defined below. The<br />
signal words have specific meanings to alert you to additional information or the relative<br />
level of hazard.<br />
DANGER!<br />
TH<strong>IS</strong> <strong>IS</strong> A DANGER SYMBOL.<br />
DANGER MEANS THAT FAILURE TO FOLLOW SPECIFIC PRACTICES<br />
OR PROCEDURES WILL CAUSE INJURY OR DEATH.<br />
ELECTRICAL WARNING!<br />
TH<strong>IS</strong> <strong>IS</strong> AN ELECTRICAL WARNING SYMBOL.<br />
ELECTRICAL WARNINGS MEAN THAT FAILURE TO FOLLOW<br />
SPECIFIC PRACTICES OR PROCEDURES MAY RESULT IN<br />
ELECTROCUTION, ARC BURNS, EXPLOSIONS OR OTHER HAZARDS<br />
THAT MAY CAUSE INJURY OR DEATH.<br />
WARNING!<br />
This is a Warning symbol.<br />
Warnings mean that failure to follow specific practices and procedures may<br />
have major consequences such as injury or death.<br />
CAUTION!<br />
This is a Caution symbol.<br />
Cautions give information about procedures that, if not observed, could result<br />
in damage to equipment or corruption to and loss of data.<br />
Model 350 I.S. and Model <strong>355</strong> I.S. <strong>User</strong> Instructions 3
NOTE: This is a Note symbol. Notes give additional and important information, hints<br />
and tips that help you to use your product.<br />
1.2 Installation<br />
DANGER: R<strong>IS</strong>K OF ELECTRICAL SHOCK. NO USER SERVICEABLE<br />
PARTS. REFER TO QUALIFIED SERVICE PERSONNEL FOR SERVICE.<br />
1.3 Electrical Installation<br />
CAUTION: The AC to DC Power Supply power cable must be connected to an<br />
earth-grounded electrical outlet. The electrical supply must have a circuit<br />
breaker with an appropriate rating to protect from over-current conditions.<br />
For your protection, all electrical (110V or 230V) equipment used out of doors or<br />
in wet or damp conditions should be supplied from a correctly fused power<br />
source and protected by an approved ground fault protection device (RCD,<br />
GFCI etc.)<br />
IF IN DOUBT SEEK ADVICE FROM A QUALIFIED ELECTRICIAN.<br />
1.3.1 Pluggable Equipment<br />
Pluggable equipment must be installed near an easily accessible socket outlet.<br />
1.3.2 Permanently Wired Equipment - Isolator Requirements<br />
Permanently connected equipment must have a readily accessible disconnect device<br />
incorporated in the fixed wiring such as an isolator or circuit breaker with at least 3mm<br />
contact separation.<br />
The isolator MUST NOT be installed into the flexible power cable supplied with the unit.<br />
The mains supply to the weighing equipment MUST be protected by a 4000A breaking<br />
capacity fuse of a suitable current rating (a suitable fuse is a 3A Bussmann type<br />
TDC180). These fuses are usually of the sand filled type.<br />
4<br />
Model 350 I.S. and Model <strong>355</strong> I.S. <strong>User</strong> Instructions
1.3.3 Safe Handling of Equipment with Batteries<br />
CAUTION: Danger of explosion if battery is incorrectly replaced. Replace only<br />
with the same or equivalent type recommended by the manufacturer. Dispose<br />
of used batteries according to the manufacturer’s instructions.<br />
ATTENTION: Il y a danger d'explosion s'il y a remplacement incorrect de la<br />
batterie, remplacer uniquement avec une batterie du même type ou d'un type<br />
équivalent recommandé par le constructeur. Mettre au rebut les batteries<br />
usagées conformément aux instructions du fabricant.<br />
1.3.4 Wet Conditions<br />
Under wet conditions, the plug must be connected to the final branch circuit via an<br />
appropriate socket / receptacle designed for washdown use.<br />
Installations within the USA should use a cover that meets NEMA 3R specifications<br />
as required by the National Electrical Code under section 410-57. This allows the unit<br />
to be plugged in with a rain tight cover fitted over the plug.<br />
Installations within Europe must use a socket which provides a minimum of IP56<br />
protection to the plug / cable assembly. Care must be taken to make sure that the<br />
degree of protection provided by the socket is suitable for the environment.<br />
1.4 Routine Maintenance<br />
IMPORTANT: This equipment must be routinely checked for proper operation<br />
and calibration.<br />
Application and usage will determine the frequency of calibration required for<br />
safe operation.<br />
Always turn off the machine and isolate from the power supply before starting any<br />
routine maintenance to avoid the possibility of electric shock.<br />
Make sure that it is placed securely on a flat and level surface.<br />
Model 350 I.S. and Model <strong>355</strong> I.S. <strong>User</strong> Instructions 5
1.5 Cleaning the <strong>Indicator</strong><br />
Table 1.1 Cleaning DOs and DON’Ts<br />
DO<br />
DO NOT<br />
Wipe down the outside of standard products Attempt to clean the inside of the indicator<br />
with a clean cloth, moistened with water and<br />
Use harsh abrasives, solvents, scouring cleaners or<br />
a small amount of mild detergent<br />
alkaline cleaning solutions<br />
Spray the cloth when using a proprietary Spray any liquid directly on to the display window<br />
cleaning fluid<br />
1.6 Training<br />
Do not attempt to operate or complete any procedure on a indicator unless you have<br />
received the appropriate training or read the instruction books.<br />
To avoid the risk of RSI (Repetitive Strain Injury), place the indicator on a surface which<br />
is ergonomically satisfactory to the user. Take frequent breaks during prolonged usage.<br />
1.7 Sharp Objects<br />
Do not use sharp objects such as screwdrivers or long fingernails to operate the keys.<br />
6<br />
Model 350 I.S. and Model <strong>355</strong> I.S. <strong>User</strong> Instructions
1.8 FCC and EMC Declarations of Compliance<br />
United States<br />
Table 1.2<br />
This equipment has been tested and found to comply with the limits for a Class A digital device, pursuant to Part 15 of the FCC Rules.<br />
These limits are designed to provide reasonable protection against harmful interference when the equipment is operated in a<br />
commercial environment. This equipment generates, uses, and can radiate radio frequency energy and, if not installed and used in<br />
accordance with the instruction manual, may cause harmful interference to radio communications. Operation of this equipment in a<br />
residential area is likely to cause harmful interference in which case the user will be required to correct the interference at his own<br />
expense.<br />
Canada<br />
Table 1.3<br />
This digital apparatus does not exceed the Class A limits for radio noise emissions from digital apparatus set out in the Radio<br />
Interference Regulations of the Canadian Department of Communications.<br />
Le présent appareil numérique n’émet pas de bruits radioélectriques dépassant les limites applicables aux appareils numériques de<br />
la Classe A prescrites dans le Règlement sur le brouillage radioélectrique edicté par le ministère des Communications du Canada.<br />
European Countries<br />
Table 1.4<br />
WARNING: This is a Class A product. In a domestic environment, this product may cause radio interference in which the user may be<br />
required to take adequate measures.<br />
Model 350 I.S. and Model <strong>355</strong> I.S. <strong>User</strong> Instructions 7
8<br />
Model 350 I.S. and Model <strong>355</strong> I.S. <strong>User</strong> Instructions
2 Installation<br />
The Model 350/<strong>355</strong> I.S. stainless steel enclosure meets NEMA 4X type specifications.<br />
The encapsulant used is Dow Corning "Sylgard 170" Silicone Elastomer.<br />
Do not allow the power supply or battery pack to be immersed in hazardous<br />
liquid, or to be subjected to any condensation of the hazardous atmosphere.<br />
If the power supply or battery pack is likely to be splashed with hazardous<br />
liquid, protect it with a splash guard.<br />
Never mount the power supply or battery pack in a position where it is<br />
permanently subjected to hazardous atmosphere, such as in a pit, or any<br />
closed, unventilated space. Always mount the unit in a position which<br />
minimizes its' exposure to the hazardous gas, vapor, or dust.<br />
The heating effect of the sun must be taken into account when installing<br />
hazardous area equipment, especially in hot climates. If exposed to direct<br />
sunlight, it is possible that the temperature class (T4 = 135 ºC, T3 = 200 ºC ) may<br />
be exceeded.<br />
Contact <strong>Avery</strong> <strong>Weigh</strong>-<strong>Tronix</strong> for further information with regard to hazard<br />
analysis, and compatibility of equipment with hazardous materials.<br />
WARNING: Risk of electrical shock!<br />
WARNING! Only authorised personnel who have had appropriate product<br />
training and hazardous area training relavent to the locattion in which the<br />
equipment is to be sited must install and maintain this equipment. The<br />
installation must be done in accordance with the procedures detailed in the<br />
Service <strong>Manual</strong>. Refer to your supplier for more details.<br />
Model 350 I.S. and Model <strong>355</strong> I.S. <strong>User</strong> Instructions 9
2.1 Hazardous Area Approval (ATEX)<br />
Gas<br />
Approval<br />
Temperature<br />
Range<br />
T class Zone<br />
<strong>Indicator</strong> II 1 G Ex ia IIC T4 -10 °C to + 50 °C T4 1 & 2<br />
AC mains PSU II 2 G Ex mb[ia] IIC T4 -10 °C to + 50 °C<br />
<strong>Indicator</strong> II 1 G Ex ia IIC T4 -10 °C to + 50 °C T3 0, 1 & 2<br />
Battery pack II 1 G Ex ia IIC T3 -10 °C to + 40 °C<br />
Dust<br />
Approval<br />
Temperature<br />
Range<br />
Enclosure Zone<br />
<strong>Indicator</strong> II 1 D Ex iaD 20 T117 °C -10 °C to + 50 °C IP6X 21 & 22<br />
AC mains PSU II 2 D Ex mbD 21 T64 °C -10 °C to + 50 °C<br />
<strong>Indicator</strong> II 1 D Ex iaD 20 T117 °C -10 °C to + 50 °C IP6X 20, 21 & 22<br />
Battery pack II 1 D Ex iaD 20 T193 °C -10 °C to + 40 °C<br />
2.2 Desktop Mounting<br />
The Model 350/<strong>355</strong> I.S. includes a swivel bracket for quick adjustment for viewing the<br />
display.<br />
2.3 Outline Drawings<br />
The outline drawings provide measurements needed for indicator installation.<br />
10<br />
Model 350 I.S. and Model <strong>355</strong> I.S. <strong>User</strong> Instructions
2.3.1 Model 350 I.S.<br />
Figure 2.1 Model 350 I.S. with Standard Swivel Bracket<br />
Figure 2.2 Model 350 I.S. with Battery Swivel Bracket<br />
Model 350 I.S. and Model <strong>355</strong> I.S. <strong>User</strong> Instructions 11
2.3.2 Model <strong>355</strong> I.S.<br />
Figure 2.3 Model <strong>355</strong> I.S. with Standard Swivel Bracket<br />
Figure 2.4 Model 335 I.S. with Battery Swivel Bracket<br />
12<br />
Model 350 I.S. and Model <strong>355</strong> I.S. <strong>User</strong> Instructions
2.4 AC and DC Powered<br />
2.4.1 DC Operated<br />
Part number 24H350-3502A<br />
The battery is enclosed in a stainless steel case and cannot be removed from the case.<br />
The battery module is mounted on the indicator swivel bracket. The battery will operate<br />
approximately 200 continuous hours with LCD display (backlight off, 1 load cell and no<br />
options installed) or 100 hours with the LED display (one load cell and no options<br />
installed). Please do not throw away old battery packs. Recycle or return to place<br />
of purchase for recycling.<br />
Mount the battery module in the swivel bracket:<br />
1. Hold the battery module in both hands. Make sure the connectors on the<br />
battery module are facing the back of the indicator.<br />
2. Line up the two protrusions on each side of the battery module with the slide<br />
rails on the swivel bracket.<br />
3. Push the module into the slide rails until the knobs drop into the slots in the<br />
swivel bracket.<br />
4. Tighten the knobs to hold the battery module in the swivel bracket.<br />
Battery Charging<br />
THE BATTERY MUST BE CHARGED IN THE SAFE AREA<br />
Connect the battery to the <strong>Avery</strong> <strong>Weigh</strong>-<strong>Tronix</strong> battery charger. Connect the battery<br />
charger to AC power. Charging will take approximately 3.5 hours.<br />
Low Battery Indication<br />
The low battery annunciator will be lit when the voltage reaches a low threshold and<br />
the low battery message (Lo Bat) is shown on the display for 1.5 seconds every 15<br />
seconds.<br />
Flat (Discharged) Battery Shutdown<br />
The indicator will shutdown after five minutes of flat (discharged) battery condition.<br />
Model 350 I.S. and Model <strong>355</strong> I.S. <strong>User</strong> Instructions 13
2.4.2 AC Operated<br />
Part number 24H350-3501A<br />
The AC- DC power supply is in a stainless steel enclosure which is remotely mounted.<br />
Refer to Figure 2.5 for mounting dimensions.<br />
When one power supply is used to power two indicators then the combination cannot<br />
be used in a Zone 1 or a IIC gas group hazard.<br />
The AC to DC supply has a conduit fitting on the bottom where the power cable is<br />
attached to the unit. This fitting is 1" in diameter and has a 1/2" thread. Ensure that the<br />
conduit is correctly connected using suitable ATEX approved conduit fittings and seals.<br />
The AC power supply cable must be mechanically protected in conduit when the AC<br />
Power Supply is installed in the hazardous area.<br />
Figure 2.5 AC to DC Power Supply Outline Drawing<br />
2.4.3 AC To DC Power Supply Extension Cable<br />
The extension cable comes in either 25' or 50' length. This cable is used for mounting<br />
the AC to DC converter away from the indicator. Fifty feet is the maximum allowed from<br />
power supply to indicator.<br />
14<br />
Model 350 I.S. and Model <strong>355</strong> I.S. <strong>User</strong> Instructions
3 Display and Keypad<br />
3.1 Display<br />
The Model 350 and <strong>355</strong> intrinsically safe indicators are available with a six digit, 7-<br />
segment red LED display, six digit, 7-segment black LCD display or 7-segment backlit<br />
LCD display. The Model 350 and <strong>355</strong> I.S. will display alphanumeric data, but due to the<br />
nature of 7-segment LED / LCD and the limitation of six digits, some information is<br />
abbreviated.<br />
All segments and annunciators are illuminated for a brief display test upon power up.<br />
The current gross weight is then displayed in default units.<br />
3.1.1 LED Display<br />
The LED display is a six digit, 7-segment bright red LED screen with 12 annunciators<br />
to show weight and status information.<br />
The SP1, SP2, and SP3 annunciators are red, green, and yellow.<br />
There is also an annunciator for a third unit of measure under kg. Place the third unit<br />
label above the third annunciator (the third unit is available on both the LED and LCD<br />
displays).<br />
Figure 3.1 Model 350/<strong>355</strong> I.S. LED Display<br />
3.1.2 LCD Display<br />
The LCD display is a six digit, 7-segment black LCD screen with 12 annunciators and<br />
a bargraph to show the operational status.<br />
Figure 3.2 Model 350 I.S. LCD Display<br />
Model 350 I.S. and Model <strong>355</strong> I.S. Service <strong>Manual</strong> 15
3.2 Keypads<br />
3.2.1 Model 350 I.S. Keypad<br />
The Model 350 I.S. offers a sealed 5-button elastomer keypad which is used for<br />
operator input. Each key is assigned two distinct functions. Various key combinations<br />
are also used. Each key has secondary functions; allowing an operator to enter target<br />
values, perform piece samples, access setup parameters, etc.<br />
ZERO<br />
CLR<br />
PRINT<br />
UNITS<br />
TARE<br />
SELECT<br />
ON<br />
OFF<br />
Figure 3.3 Model 350 I.S. Keypad<br />
Key Press <strong>Weigh</strong> Mode Count Mode<br />
Performs a gross zero function<br />
and/or clears an entry in progress.<br />
Hold this key on power-up to turn<br />
on the display if in sleep mode.<br />
Performs a print function and/or<br />
'scrolls' through digits during<br />
setpoint entry.<br />
Performs a quantity zero function<br />
and/or clears an entry in<br />
progress.<br />
Performs a print function and/or<br />
'scrolls' through digits during<br />
setpoint entry.'<br />
Toggles between 'lb' and 'kg' and/<br />
or advances cursor to next entry<br />
position.<br />
Toggles through standard sample<br />
sizes and/or begins a new<br />
sample entry.<br />
Performs an auto-tare function (if<br />
enabled) and/or accepts an entry<br />
in progress.<br />
Toggles between display modes<br />
and/or restores power to the<br />
indicator (if auto-shutoff enabled).<br />
Performs an auto-tare function<br />
and requests a piece sample<br />
and/or accepts an entry in<br />
progress.<br />
Toggles between display modes<br />
and/or restores power to the<br />
indicator (if auto-shutoff enabled).<br />
Absolute clear - clears an entry in<br />
progress and/or clears the value<br />
of a parameter.<br />
No function.<br />
16<br />
Model 350 I.S. and Model <strong>355</strong> I.S. Service <strong>Manual</strong>
Key Press <strong>Weigh</strong> Mode Count Mode<br />
Backspace - erases the right-most<br />
digit during data entry.<br />
Backspace - erases the rightmost<br />
digit during sample entry.<br />
Extended gross.<br />
Extended gross.<br />
Reverse character scroll during<br />
data entry.<br />
Reverse character scroll during<br />
sample entry.<br />
Turn off indicator by holding key<br />
for approximately 1 second.<br />
Turn off indicator by holding key<br />
for approximately 1 second.<br />
3.2.2 Model <strong>355</strong> I.S. Keypad<br />
The Model <strong>355</strong> I.S. keypad performs different functions in the <strong>Weigh</strong> Mode and the<br />
Count Mode. The numeric keys make entering values such as tare or average piece<br />
weight easier.<br />
ON<br />
TARGET<br />
ZERO<br />
PRINT<br />
SELECT<br />
1 2 3<br />
OFF<br />
TARE<br />
START<br />
UNITS<br />
4 5<br />
7 8<br />
6<br />
9<br />
STOP<br />
SAMPLE<br />
ENTER<br />
YES<br />
CLR<br />
0<br />
NO<br />
Figure 3.4 Model <strong>355</strong> I.S. Keypad<br />
Model 350 I.S. and Model <strong>355</strong> I.S. Service <strong>Manual</strong> 17
Key Press <strong>Weigh</strong> Mode Count Mode<br />
Performs a gross zero function and/or<br />
clears an entry in progress.<br />
Performs a quantity zero function and/or<br />
clears an entry in progress.<br />
Performs a print function and/or 'scrolls'<br />
through digits during setpoint entry.<br />
Performs a print function and/or 'scrolls'<br />
through digits during setpoint entry.<br />
Toggles between 'lb' and 'kg' and/or<br />
advances cursor to next entry position.<br />
Toggles through standard sample sizes<br />
and/or begins a new sample entry.<br />
Performs an auto-tare function (if<br />
enabled) and/or accepts an entry in<br />
progress. If a tare weight is known, key<br />
in the value and press [TARE].<br />
Toggles between display modes and/or<br />
restores power to the indicator (if autoshutoff<br />
enabled).<br />
Performs a sample. If a number is<br />
keyed in before hand, it will be used as<br />
the sample size. Accepts an entry.<br />
Performs an auto-tare function and<br />
requests a piece sample and/or accepts<br />
an entry in progress.<br />
Toggles between display modes and/or<br />
restores power to the indicator (if autoshutoff<br />
enabled).<br />
Performs a sample. If a number is keyed<br />
in before hand, it will be used as the<br />
sample size.<br />
CLR<br />
NO<br />
Clears an entry in progress. Hold this<br />
key on power-up to turn on the display if<br />
in sleep mode.<br />
Performs a quantity zero function and/or<br />
clears an entry in progress.<br />
If setpoints are enabled, causes a<br />
process to start or resume.<br />
If setpoints are enabled, causes a<br />
process to start or resume.<br />
If setpoints are enabled, causes a<br />
pause. Press [STOP] again to abort the<br />
process.<br />
If setpoints are enabled, causes a pause.<br />
Press [STOP] again to abort the process.<br />
Wake up the indicator if in sleep mode.<br />
Turn on the indicator if power is off.<br />
Access the target entry mode.<br />
Turn off indicator by holding key for<br />
approximately 1 second.<br />
Wake up the indicator if in sleep mode.<br />
Turn on the indicator if power is off.<br />
Access the target entry mode.<br />
Turn off indicator by holding key for<br />
approximately 1 second.<br />
18<br />
Model 350 I.S. and Model <strong>355</strong> I.S. Service <strong>Manual</strong>
3.2.3 <strong>Weigh</strong> Mode Functions<br />
The Model 350 I.S. and Model <strong>355</strong> I.S. keypads have five primary <strong>Weigh</strong> Mode<br />
functions:<br />
Performs a gross zero and selects the gross mode.<br />
Initiates data transmission out the selected communication<br />
port.<br />
Toggles the units of measure between lb, kg, g, lb oz, oz.<br />
Tares any displayed weight and selects the net mode.<br />
Toggles the display between GROSS, NET, QUANTITY and<br />
setpoint TARGETS (if enabled).<br />
Model 350 I.S. and Model <strong>355</strong> I.S. Service <strong>Manual</strong> 19
20<br />
Model 350 I.S. and Model <strong>355</strong> I.S. Service <strong>Manual</strong>
4 Operation<br />
The Model 350 I.S. and <strong>355</strong> I.S. provide many options for check-weighing, parts<br />
counting and filling etc. The functions described in this section are not available until<br />
enabled within the setup parameters. Contact your GSE distributor to configure the<br />
indicator for a specific operation.<br />
4.1 Entering a Tare Value (Model 350 I.S.)<br />
If a tare value is known, it is possible to enter that value into the tare register. Follow<br />
the steps below.<br />
1. From the gross mode use the [SELECT] key to scroll in the first number.<br />
2. Use the [PRINT] key to scroll in the first number.<br />
3. Press the [UNITS] key to move to the next digit.<br />
4. Repeat steps 2 and 3 until the desired number is showing on the display.<br />
5. Press the [TARE] key to accept the entered tare value.<br />
4.2 Entering a Tare Value (Model <strong>355</strong> I.S.)<br />
If a tare value is known, it is possible to enter that value into the tare register. Follow<br />
the step below.<br />
1. Key in the known tare value with the numeric keys and press [TARE]. The<br />
display will access the net mode.<br />
4.3 Enter an ID Number<br />
If the ID parameter has been enabled previously, a number may be entered to print on<br />
a ticket. Follow the instructions below to enter an ID number.<br />
1. Press the [PRINT] key from the weigh mode. The display will show the current<br />
ID number if one has been entered previously.<br />
2. Key in the desire ID number (numeric and/or alphanumeric) and press [TARE]<br />
(Model 350 I.S.) or [ENTER] (Model <strong>355</strong> I.S.). This will print a ticket.<br />
-or-<br />
2a. If the ID number shown is acceptable simply press [TARE] (Model 350 I.S.) or<br />
[ENTER] (Model <strong>355</strong> I.S.). This will print a ticket which includes the entered ID<br />
number.<br />
Model 350 I.S. and <strong>355</strong> I.S. <strong>User</strong> Instructions 21
4.4 Set Time & Date<br />
The time and date feature is stored as non-volatile (time/date setting will not be lost<br />
when the unit power is reset).<br />
The time and date can be accessed from the weigh mode with the [SELECT] key if the<br />
time/date parameter has been enabled. Time and date can be accessed via the<br />
communication port by sending 11%s.<br />
4.4.1 Model 350 I.S.<br />
To enter the time from the Enter~tine~00.00.00 prompt<br />
EXAMPLE: 16.32.41 (4:32:41 P.M.)<br />
1. Press [PRINT] to toggle through the numbers to enter the hour. Hours must be<br />
entered as military time.<br />
2. Press [UNITS] once to move the cursor. Press [PRINT] to select the next digit.<br />
3. Press [UNITS] twice to move the decimal point over to separate the hour from<br />
the minutes. It is not necessary to enter a 0 before a single digit hour.<br />
To enter the date from the Enter~date~01.01.70 prompt<br />
EXAMPLE: 01.09.11 (January 9, 2011)<br />
1. Press [PRINT] to toggle through the numbers to enter the month.<br />
2. Press [UNITS] twice to move the decimal point over to separate the month<br />
from the day. It is not necessary to enter a 0 before a single digit month. If it is<br />
a double-digit entry, press [UNITS] once to move the cursor and then [PRINT]<br />
to scroll through the digits.<br />
3. Press [PRINT] to toggle through the numbers to enter the day.<br />
4. Press [UNITS] twice to move the decimal point over to separate the day from<br />
the year. It is not necessary to enter a 0 before a single digit month. If it is a<br />
double-digit entry, press [UNITS] once to move the cursor and then [PRINT] to<br />
scroll through the digits.<br />
5. Press [PRINT] to toggle through the numbers to enter the year.<br />
6. Press [UNITS] once to move the cursor and then press [PRINT] to scroll<br />
through the digits.<br />
7. Press [TARE] twice to accept the entry.<br />
4.4.2 Model <strong>355</strong> I.S.<br />
To enter the time from the Enter~tine~00.00.00 prompt<br />
EXAMPLE: 16.32.41 (4:32:41 P.M.)<br />
1. Key in the date in the following format: 16.32.41<br />
2. Press [ENTER] to except the time and move to the weigh mode.<br />
22<br />
Model 350 I.S. and <strong>355</strong> I.S. <strong>User</strong> Instructions
To enter the date from the Enter~date~01.01.70 prompt<br />
EXAMPLE: 01.09.11 (January 9, 2011)<br />
1. Key in the date in the following format: 1.9.11. It is not necessary to enter a 0<br />
before a single digit month.<br />
2. Press [ENTER] to except the date and move to the time entry. Press [ENTER]<br />
again to bypass the time entry.<br />
4.5 Parts Counting<br />
The counting parameter must be enabled before using. Follow the instructions below<br />
for sampling and counting parts. A new sample must be performed for each unique part<br />
being counted. The indicator will not store the average piece weight.<br />
4.5.1 Model 350 I.S.<br />
Sample selectable fixed counts from the weigh mode<br />
1. From the weigh mode, press [SELECT] until the QTY annunciator is lit. The<br />
display may show do APS if an average piece weight is not found. This<br />
message is to let you know this is a new sample. Go to step 2.<br />
2. Press [TARE] to perform a sample. Add 10 will be displayed. If 10 is the<br />
desired sample size, go to step 4. Otherwise go to step 3.<br />
2a. If a fixed sample size other than 10 is desired, press [SELECT] to toggle<br />
through sample size choices 5, 10, 20, 50 and 100. When the desired sample<br />
size is displayed, go to step 4.<br />
3. Add the pieces to be sampled and press [TARE]. After motion is stabilized, the<br />
sampled quantity will be displayed.<br />
4. Continue adding parts to be counted. The display will show the number of<br />
parts added.<br />
4a. If a different part needs to be counted, go to step 2.<br />
To sample using variable counts<br />
1. From the weigh mode, press [SELECT] until the QTY annunciator is lit. The<br />
display may show do APS if an average piece weight is not found. This<br />
message is to let you know this is a new sample. Go to step 2.<br />
2. Press [TARE] to perform a sample. Add 10 will be displayed.<br />
3. Add pieces and key in the number of pieces being sampled by entering the<br />
known sample size. First press the [PRINT] key until the first digit is displayed.<br />
Use the [UNITS] key to move to the next digit. Continue using the [PRINT] and<br />
[UNITS] keys until the desired sample size is displayed and press [TARE].<br />
4. Add the pieces to be sampled and press [TARE]. After motion is stabilized, the<br />
sampled quantity will be displayed.<br />
5. Continue adding parts to be counted. The display will show the number of<br />
parts added.<br />
Model 350 I.S. and <strong>355</strong> I.S. <strong>User</strong> Instructions 23
5a. If a different part needs to be counted, go to step 2.<br />
View the average piece weight<br />
1. From the QTY mode, press [SELECT] once. The display will show APS and<br />
then flash the last sampled average piece weight. This value cannot be altered.<br />
2. Press the [SELECT] key to exit the average piece weigh mode. Continue to<br />
press [SELECT] until the desire weigh mode parameter is displayed.<br />
4.5.2 Model <strong>355</strong> I.S.<br />
To sample using selectable fixed counts from the weigh mode<br />
1. From the weigh mode press [ENTER]. Add 10 will be displayed.<br />
1a. If 10 is the desired sample size, go to step 2. Otherwise go to step 1b.<br />
1b. If a fixed sample size other than 10 is desired, press [SELECT] or [UNITS] to<br />
toggle through sample size choices 5, 10, 20, 50 and 100. When the desired<br />
sample size is displayed, go to step 3.<br />
2. Add the pieces to be sampled and press [ENTER]. After motion is stabilized,<br />
the sampled quantity will be displayed.<br />
3. Continue adding parts to be counted. The display will show the number of<br />
parts added.<br />
3a. If a different part needs to be counted, go to step 2.<br />
To sample using variable counts<br />
1. From the weigh mode press [ENTER]. Add 10 will be displayed. If 10 is the<br />
desired sample size, go to step 3. Otherwise go to step 2.<br />
2. Add pieces and key in the number of pieces being sampled with the numeric<br />
keys. Press [ENTER] to accept the entry.<br />
3. Add the pieces to be sampled and press [ENTER]. After motion is stabilized,<br />
the sampled quantity will be displayed.<br />
4. Continue adding parts to be counted. The display will show the number of<br />
parts added.<br />
4a. If a different part needs to be counted, go to step 2.<br />
4.5.3 View the average piece weight<br />
1. From the QTY mode, press [SELECT] once. The display will show APS and<br />
then flash the last sampled average piece weight. This value cannot be altered.<br />
2. Press the [SELECT] key to exit the average piece weigh mode. Continue to<br />
press [SELECT] until the desire weigh mode parameter is displayed.<br />
24<br />
Model 350 I.S. and <strong>355</strong> I.S. <strong>User</strong> Instructions
4.6 Percentage Checkweigh<br />
This feature is commonly used in checkweigh applications and must be enabled before<br />
attempting to use.<br />
After a target weight is entered, upper and lower tolerances are entered as a<br />
percentage of the target. Over and under tolerance values are automatically calculated<br />
according to the percentages entered. The desired target may be based on gross<br />
weight, net weight or quantity (if counting is enabled).<br />
4.6.1 Enter a Target Value<br />
Model 350 I.S.<br />
1. Press [SELECT] until tArG1 is displayed. If the target value shown is correct,<br />
press [TARE] to go to the PctLo value. To change the target value, go to step 2.<br />
2. Press [PRINT] until the first digit of the new target is displayed. Press [UNITS]<br />
to accept the number displayed. Continue this step until the desired number is<br />
entered. Refer to the example below as a reference.<br />
Example: Target of 20<br />
2a. Press [PRINT] four times<br />
m D<strong>IS</strong>PLAY READS > 2<br />
2b. Press [UNITS] to accept the 2 that is displayed<br />
m D<strong>IS</strong>PLAY READS > 2 .<br />
2c. Press [PRINT] once<br />
m D<strong>IS</strong>PLAY READS > 20<br />
2d. Press [TARE] to accept the target weight as 20<br />
m D<strong>IS</strong>PLAY READS > 20<br />
3. Press [TARE] to accept the entered value. Once the tare key is pressed, PctLo<br />
will be displayed. This is where the low percentage will be entered. Enter<br />
target percentage value in the same manner as the target weight was entered<br />
above. If the displayed value is correct, press [TARE].<br />
4. Next the PctHi value will be displayed. This is target percentage value for the<br />
high percentage. Enter this value in the same manner as the target weight was<br />
entered above.<br />
4a. If the displayed value is correct press [SELECT]. The display will return to the<br />
weigh mode.<br />
4b. Press [SELECT] to view the desired weigh mode parameter.<br />
Model <strong>355</strong> I.S.<br />
1. Press [SELECT] until tArG1 is displayed.<br />
2. Key in the target weight with the numeric keys and press [ENTER].<br />
Model 350 I.S. and <strong>355</strong> I.S. <strong>User</strong> Instructions 25
3. The PctLo value will be displayed. Key the in target percentage value with the<br />
numeric keys and press [ENTER].<br />
4. The PctHi value will be displayed. Key the in target percentage value with the<br />
numeric keys and press [ ENTER].<br />
5. Press [SELECT] to select the desired weigh mode parameter.<br />
4.6.2 Start Checkweighing<br />
The checkweigh applications do not have a start function. Simply put the item to be<br />
weighed onto the scale platter. An annunciator will illuminate to indicate whether the<br />
item is within tolerance.<br />
Annunciators<br />
In order for the annunciators to activate, the displayed value must be at least five<br />
graduations above zero.<br />
Status<br />
Annunciator<br />
Status<br />
Annunciator<br />
Color (LED)<br />
OVER SP 1 Illuminated Red<br />
GOOD SP 2 Illuminated Green<br />
UNDER SP 3 Illuminated Yellow<br />
4.7 Fill<br />
The fill program is used for single-speed or dual-speed filling operations. The dualspeed<br />
fill operation allows for both a fast and a slow fill mode. During a fast-fill,<br />
setpoints 1 (SP1) and 2 (SP2) are activated. During a slow-fill or single-speed fill, only<br />
setpoint 1 (SP1) is activated. This feature must be enabled before attempting to use.<br />
Over filling can be prevented with the use of pre-act values (PA1 and PA2). Pre-act 1<br />
(PA1) is used for switching the fast fill to a slow fill. Pre-act 2 (PA2) is used as a final<br />
cutoff value.<br />
4.7.1 Enter a Target Value<br />
Pressing [TARE] or [SAMPLE/ENTER] alone allows access to the subsets. PA1 and<br />
PA2 are the subsets for Targ 1.<br />
Model 350 I.S.<br />
1. Press [SELECT] until tArG1 is displayed.<br />
2. Press [PRINT] until the first digit of the new target is displayed. Press [UNITS]<br />
to accept the number displayed. Continue this step until the desired number is<br />
entered. Refer to the example below.<br />
26<br />
Model 350 I.S. and <strong>355</strong> I.S. <strong>User</strong> Instructions
Example: Target of 20<br />
2a. Press [PRINT] four times<br />
m D<strong>IS</strong>PLAY READS > 2<br />
2b. Press [UNITS] to accept the 2 that is displayed<br />
m D<strong>IS</strong>PLAY READS > 2 .<br />
2c. Press [PRINT] once<br />
m D<strong>IS</strong>PLAY READS > 20<br />
2d. Press [TARE] to accept the target weight as 20<br />
m D<strong>IS</strong>PLAY READS > 20<br />
3. Press [TARE]. Once the tare key is pressed, it is possible that PA1 will be<br />
displayed if the pre-act parameter is enabled.<br />
3a. If a value is desired, enter it in the same manner as the target weight was<br />
entered above. When the displayed value is correct, press [TARE].<br />
3b. If no value is to be entered or PA1 is not displayed, press [TARE] to go to the<br />
next screen.<br />
3c. If PA2 is displayed, enter the value in the same manner as the target weight<br />
was entered above and press [TARE] to accept or press [TARE] to return to<br />
the weigh mode. Press [SELECT] to view the desired weigh mode parameter.<br />
Model <strong>355</strong> I.S.<br />
1. Press [SELECT] until tArG1 is displayed.<br />
2. Key in the desired target value with the numeric keys and press [ENTER].<br />
3. The PA1 value will be displayed. Key the in value with the numeric keys and<br />
press [ENTER].<br />
4. The PA2 value will be displayed. Key the in value with the numeric keys and<br />
press [ENTER].<br />
5. Press [SELECT] to select the desired weigh mode parameter.<br />
4.7.2 Start Fill<br />
Activation Method<br />
The fill begins with the selected activation method. The method is determined by the<br />
parameters in the setup mode.<br />
The deactivation of the setpoints is automatic. The desired target may be based on net<br />
or quantity (if counting is enabled).<br />
Activation types<br />
l<br />
l<br />
Tare key - Press the [TARE] key to start the process. A tare weight will be set<br />
and the weight will switch to net zero.<br />
Remote key - Press the remote key switch.<br />
Model 350 I.S. and <strong>355</strong> I.S. <strong>User</strong> Instructions 27
l<br />
Auto-start - The process is automatically activated. It waits for a no-motion<br />
condition and then adds the target to the current displayed weight to achieve<br />
a relative cutoff value.<br />
Annunciators<br />
Fill Status<br />
Fast Fill<br />
Dribble Fill (or Single-Speed Fill)<br />
Fill Done or Pause<br />
Annunciator Status<br />
SP 1 & SP 2 Illuminated<br />
SP 1 Illuminated<br />
SP 1 & SP 2 Off<br />
4.7.3 Fill Example<br />
With a system set up to fill 55-gallon drums with motor oil, the following settings might<br />
be used to achieve an accurate final fill weight of 400 lbs.:<br />
Parameter<br />
Setting<br />
Actual Cutoff Value<br />
Comments<br />
Targ 1 = 400 Desired final weight.<br />
Pre-act 1 = 28 400 - 28 = 372.0 Switch to dribble feed at 372.<br />
Pre-act 2 = .5 400 - 0.5 = 399.5 Final fill valve closes at 399.5.<br />
4.8 Batch<br />
The standard batch program is used for batching up to three separate items.<br />
Ingredients 1 through 3 use setpoints and pre-acts 1 through 3 respectively. Ingredients<br />
are batched one at a time. Free falling product can be accounted for with the use of<br />
pre-act values (PA1 - PA3). This feature must be enabled before attempting to use.<br />
4.8.1 Enter a Target<br />
Pressing [TARE] or [ENTER] alone allows access to the subsets. PA 1 and PA 2 are<br />
the subsets for Targ 1.<br />
Model 350 I.S.<br />
1. Press [SELECT] until tArG1 is displayed.<br />
2. Press [PRINT] until the first digit of the new target is displayed. Press [UNITS]<br />
to accept the number displayed. Continue this step until the desired number is<br />
entered.<br />
Example: Target of 20<br />
2a. Press [PRINT] four times<br />
m D<strong>IS</strong>PLAY READS > 2<br />
2b. Press [UNITS] to accept the 2 that is displayed<br />
28<br />
Model 350 I.S. and <strong>355</strong> I.S. <strong>User</strong> Instructions
m D<strong>IS</strong>PLAY READS > 2 .<br />
2c. Press [PRINT] once<br />
m D<strong>IS</strong>PLAY READS > 20<br />
2d. Press [TARE] to accept the target weight as 20<br />
m D<strong>IS</strong>PLAY READS > 20<br />
3. Press [TARE]. Once the tare key is pressed, it is possible that PA1 will be<br />
displayed if the pre-act parameter is enabled.<br />
3a. If a value is desired, enter it in the same manner as the target weight was<br />
entered above. When the displayed value is correct, press [TARE].<br />
3b. If no value is to be entered or PA1 is not displayed, press [TARE] to go to the<br />
next screen.<br />
4. Repeat steps 2 and 3 until all targets and pre-acts are entered. Press [TARE]<br />
to return to the weigh mode.<br />
Model <strong>355</strong> I.S.<br />
1. Press [SELECT] until tArG1 is displayed.<br />
2. Key in the desired target value with the numeric keys and press [ENTER].<br />
3. The PA1 value will be displayed. Key the in value with the numeric keys and<br />
press [ENTER].<br />
4. Repeat steps 2 and 3 for tArG2, PA2, tArG3 and PA3.<br />
5. Press [SELECT] to select the desired weigh mode parameter.<br />
4.8.2 Start Batch<br />
Activation Method<br />
The batch begins with the selected activation method. The method is determined by<br />
the parameters in the setup mode. The deactivation of the setpoints is automatic. The<br />
desired target may be based on net or quantity (if counting is enabled).<br />
Activation types<br />
l<br />
l<br />
l<br />
Tare key - Press the [TARE] key to start the process. A tare weight will be set<br />
and the weight will switch to net zero.<br />
Remote key - Press the remote key switch.<br />
Auto-start - The process is automatically activated. It waits for a no-motion<br />
condition and then adds the target to the current displayed weight to achieve<br />
a relative cutoff value.<br />
Model 350 I.S. and <strong>355</strong> I.S. <strong>User</strong> Instructions 29
Annunciators<br />
Batch Status<br />
Annunciator<br />
Status<br />
Setpoint Status (Requires Setpoint Option Board)<br />
Fill 1 SP 1 Illuminated Relay 1 Contacts Closed,Relay 2 and 3 Contacts Open<br />
Fill 2 SP 2 Illuminated Relay 2 Contacts Closed,Relay 1 and 3 Contacts Open<br />
Fill 3 SP 3 Illuminated Relay 3 Contacts Closed,Relay 1 and 2 Contacts Open<br />
4.8.3 Batch Example<br />
With a system set up a system to make a 50,000 lb batch with water (30,000 lbs.), corn<br />
syrup (15,000 lbs.) and caramel color (5,000 lbs.), ingredient 1 should start with [TARE]<br />
and subsequent ingredients should auto-start.<br />
Parameter<br />
Setting<br />
Actual Cutoff Value<br />
Comments<br />
Target 1 = 30,000<br />
Desired water weight.<br />
Pre-Act 1 = 100 30,000 - 100 = 29,900 Water valve closes at 29,900 lbs. Free-fall<br />
will bring weight to 30,000.<br />
Start 1 = Tare<br />
Start water with [TARE].<br />
Target 2 = 15,000<br />
Desired corn syrup weight.<br />
Pre-Act 2 = 236 15,000 - 236 = 14,764 Corn syrup valve closes at 14,764 lbs. Freefall<br />
will bring weight to 15,000.<br />
Start 2 = Auto<br />
Calculated cutoff value for corn<br />
syrup is added to current displayed<br />
weight<br />
Start corn syrup when water is done and<br />
motion has stopped.<br />
Target 3 = 5,000<br />
Desired caramel coloring weight.<br />
Pre-Act 3 = 142 5,000 - 142 = 4,858 Carmel coloring valve closes at 4,858. Freefall<br />
will bring weight to 5,000.<br />
Start 3 = Auto Calculated cutoff value for caramel<br />
coloring is added to current<br />
displayed weight<br />
Start caramel coloring when corn syrup is<br />
done and motion has ceased.<br />
4.9 Discharge<br />
The discharge program is designed for single-speed or dual-speed dispensing of<br />
product from a larger weigh vessel. Discharge is a loss-in-weight application similar in<br />
operation to the fill program. When a discharge is initiated, the scale automatically tares<br />
and comes to a net zero weight. The appropriate setpoints are activated and material<br />
is discharged until the decreasing net weight reaches the desired target value. Free<br />
falling product can be accounted for with the use of pre-act values (PA1 - PA3). This<br />
feature must be enabled before attempting to use.<br />
30<br />
Model 350 I.S. and <strong>355</strong> I.S. <strong>User</strong> Instructions
4.9.1 Enter a Target<br />
Pressing [TARE] or [ENTER] alone allows access to the subsets. PA 1 and PA 2 are<br />
the subsets for Targ 1.<br />
Model 350 I.S.<br />
1. Press [SELECT] until tArG1 is displayed.<br />
2. Press [PRINT] until the first digit of the new target is displayed. Press [UNITS]<br />
to accept the number displayed. Continue this step until the desired number is<br />
entered.<br />
Example: Target of 20<br />
2a. Press [PRINT] four times<br />
m D<strong>IS</strong>PLAY READS > 2<br />
2b. Press [UNITS] to accept the 2 that is displayed<br />
m D<strong>IS</strong>PLAY READS > 2 .<br />
2c. Press [PRINT] once<br />
m D<strong>IS</strong>PLAY READS > 20<br />
2d. Press [TARE] to accept the target weight as 20<br />
m D<strong>IS</strong>PLAY READS > 20<br />
3. Press [TARE]. Once the tare key is pressed, it is possible that PA1 will be<br />
displayed if the pre-act parameter is enabled.<br />
3a. If a value is desired, enter it in the same manner as the target weight was<br />
entered above. When the displayed value is correct, press [TARE].<br />
3b. If no value is to be entered or PA1 is not displayed, press [TARE] to go to the<br />
next screen.<br />
4. Repeat steps 2 and 3 until all targets and pre-acts are entered. Press [TARE]<br />
to return to the weigh mode.<br />
Model <strong>355</strong> I.S.<br />
1. Press [SELECT] until tArG1 is displayed.<br />
2. Key in the desired target value with the numeric keys and press [ENTER].<br />
3. The PA1 value will be displayed. Key the in value with the numeric keys and<br />
press [ENTER].<br />
4. Repeat steps 2 and 3 until all targets and pre-acts are entered.<br />
5. Press [SELECT] to select the desired weigh mode parameter.<br />
Model 350 I.S. and <strong>355</strong> I.S. <strong>User</strong> Instructions 31
4.9.2 Pre-acts<br />
Pre-act 1 is used for dual-speed dispensing. Pre-act 1 specifies when the system<br />
should switch from fast-discharge to slow-discharge. When using a single-speed<br />
device, pre-act 1 should be set to 0 from the Setup Mode. Pre-act 2 specifies the point<br />
where the final cutoff should occur, regardless of a single-speed or dual-speed<br />
operation.<br />
4.9.3 Start Discharge<br />
Activation Method<br />
The dispensing activation is limited to [TARE] or a remote key input. The deactivation<br />
of the setpoints is automatic. The desired target may be based on net or quantity (if<br />
counting is enabled).<br />
The discharge begins with the selected activation method. The method is determined<br />
by the parameters in the setup mode.<br />
The deactivation of the setpoints is automatic. The desired target may be based on net<br />
or quantity (if counting is enabled).<br />
Activation types<br />
l<br />
l<br />
Tare key - Press the [TARE] key to start the process. A tare weight will be set<br />
and the weight will switch to net zero.<br />
Remote key - Press the remote key switch.<br />
Annunciators<br />
Discharge Status<br />
Annunciator Status<br />
Setpoint Status (Requires<br />
Setpoint Option Board)<br />
Fast Discharge SP 1 & SP 2 Illuminated Relay 1 and 2 Contacts Closed<br />
Slow (or Single-Speed) Discharge SP 1 Illuminated Relay 1 Contacts Closed<br />
Fill Done or Pause SP 1 & 2 Off Relay 1 and 2 Contacts Open<br />
32<br />
Model 350 I.S. and <strong>355</strong> I.S. <strong>User</strong> Instructions
4.9.4 Discharge Example<br />
With a system set up to dispense ball bearings from a 50,000 lb weigh-bin and the fastfeed<br />
requiring an early cutoff to slow-feed, the following settings might be used to<br />
achieve accurate dispensing of 1000 bearings:<br />
Parameter<br />
Setting<br />
Actual Cutoff Value<br />
Comments<br />
Targ 1 = 1000 0 - 1000 = (-1000) Desired quantity (decreasing value from a net zero:<br />
enter as a positive value).<br />
Based = Qty<br />
Targets are compared to quantity (P170 Enabled).<br />
PA 1 = 200 1000 - 200 = 800<br />
0 - 800 = (-800)<br />
Start = [TARE]<br />
PA 2 = 15 1000 - 15 = 985<br />
0 - 985 = (-985)<br />
Switch to slow feed at -800 bearings (decreasing<br />
value from a net zero: enter as a positive value).<br />
Start discharge with [TARE].<br />
Final gate begins closing at 985 bearings. Delayed<br />
closure brings final quantity to 1000 (decreasing<br />
value from a net zero: enter as a positive value).<br />
4.10 Fill and Discharge<br />
The fill and discharge program combines a fill operation with a discharge operation.<br />
This automates a single-speed vessel filling operation with a single-speed multiple<br />
dispensing function. Setpoint 1 is used for filling the vessel and Setpoint 2 is used for<br />
product discharge. Free falling product can be accounted for with the use of pre-act<br />
values (PA1 and PA2). This feature must be enabled before attempting to use.<br />
4.10.1 Enter a Target<br />
1. Press [SELECT] until tArG1 is displayed.<br />
2. Press [PRINT] until the first digit of the new target is displayed. Press [UNITS]<br />
to accept the number displayed. Continue this step until the desired number is<br />
entered.<br />
Example: Target of 20<br />
2a. Press [PRINT] four times<br />
m D<strong>IS</strong>PLAY READS > 2<br />
2b. Press [UNITS] to accept the 2 that is displayed<br />
m D<strong>IS</strong>PLAY READS > 2 .<br />
2c. Press [PRINT] once<br />
m D<strong>IS</strong>PLAY READS > 20<br />
2d. Press [TARE] to accept the target weight as 20<br />
m D<strong>IS</strong>PLAY READS > 20<br />
3. Press [TARE]. Once the tare key is pressed, it is possible that PA1 will be<br />
displayed if the pre-act parameter is enabled.<br />
Model 350 I.S. and <strong>355</strong> I.S. <strong>User</strong> Instructions 33
3a. If a value is desired, enter it in the same manner as the target weight was<br />
entered above. When the displayed value is correct, press [TARE].<br />
3b. If no value is to be entered or PA1 is not displayed, press [TARE] to go to the<br />
next screen.<br />
4. Repeat steps 2 and 3 until all targets and pre-acts are entered. Press [TARE]<br />
to return to the weigh mode.<br />
Model <strong>355</strong> I.S.<br />
1. Press [SELECT] until tArG1 is displayed.<br />
2. Key in the desired target value with the numeric keys and press [ENTER].<br />
3. The PA1 value will be displayed. Key the in value with the numeric keys and<br />
press [ENTER].<br />
4. Repeat steps 2 and 3 until all targets and pre-acts are entered.<br />
5. Press [SELECT] to select the desired weigh mode parameter.<br />
4.10.2 Pre-acts<br />
Pre-act 1 is used for vessel filling. Pre-act 1 specifies the point where the final cutoff for<br />
the fill should occur. Pre-act 2 specifies the point where the final cutoff for the material<br />
discharge should occur.<br />
Pre-act 1 controls setpoint 1. Pre-act 2 controls setpoint 2.<br />
4.10.3 Activation Method<br />
The fill and discharge functions begin with their selected activation methods. The<br />
deactivation of the setpoints is automatic. The desired target may be based on net or<br />
quantity (if counting is enabled).<br />
Activation types<br />
l<br />
l<br />
l<br />
Tare key - Press the [TARE] key to start the process. A tare weight will be set<br />
and the weight will switch to net zero.<br />
Remote key - Press the remote key switch.<br />
Auto-start - The process is automatically activated. It waits for a no-motion<br />
condition and then adds the target to the current displayed weight to achieve<br />
a relative cutoff value.<br />
34<br />
Model 350 I.S. and <strong>355</strong> I.S. <strong>User</strong> Instructions
Annunciators<br />
Status<br />
Annunciator Status<br />
Setpoint Status (Requires<br />
Setpoint Option Board)<br />
Vessel Fill SP 1 Illuminated Relay 1 Contacts Closed<br />
Vessel Discharge SP 2 Illuminated Relay 2 Contacts Closed<br />
Fill Done or Pause SP 1 & SP 2 Off Relay 1 and Relay 2 Contacts Open<br />
4.10.4 Pause<br />
The Model 350/<strong>355</strong> I.S. can pause setpoint operations. This is useful as a safety<br />
device, for mid-cycle operator breaks, mechanical adjustments, etc. This feature must<br />
be enabled before attempting to use.<br />
When invoked, Pause deactivates all setpoints. The display will show: Tare= ~ Abort.<br />
Pressing [TARE] will abort the current cycle; any other keypress will resume the cycle.<br />
The Pause feature has four settings:<br />
Pause Setting Action Result<br />
Keypad 350/<strong>355</strong> Key Press Current cycle paused - all setpoints<br />
deactivated.<br />
Remote Key Remote Key Contact Closure Current cycle paused - all setpoints<br />
deactivated.<br />
Both 350/<strong>355</strong> Key Press or Remote<br />
Key Contact Closure<br />
Current cycle paused - all setpoints<br />
deactivated.<br />
4.10.5 Fill and Discharge Example<br />
Parameter<br />
Setting<br />
Targ 1 = 2000<br />
Based = Net<br />
Actual Cutoff<br />
Value<br />
Comments<br />
Desired vessel fill target.<br />
Targets are compared to net weight.<br />
PA 1 = 5 2000 - 5 = 1995 Fill valve closes at 1995 lbs.<br />
Start 1 = R-but<br />
Start fill with remote key closure.<br />
Targ 2 = 45 0 - 45 = (-45) Desired discharge target (decreasing weight from a net<br />
zero: enter as a positive value).<br />
PA 2 = 5 45 - 5 = 40<br />
0 - 40 = (-40)<br />
Discharge valve closes at (-40) lbs. (decreasing weight<br />
from a net zero: enter as a positive value).<br />
Model 350 I.S. and <strong>355</strong> I.S. <strong>User</strong> Instructions 35
4.11 Absolute Checkweigh<br />
This program is commonly used for check-weigh applications where the accepted<br />
tolerance will be an absolute value between and upper and lower limit.<br />
After a target weight is entered, upper and lower tolerances are entered as absolute<br />
values. The desired target may be based on gross weight, net weight, or quantity (if<br />
counting is enabled). Only the annunciators will light to indicator the setpoint status. Be<br />
sure to enter both the upper and limits. Failure to enter one of these values will cause<br />
a setpoint error. This feature must be enabled before attempting to use.<br />
4.11.1 Enter a Target Value<br />
Model 350 I.S.<br />
1. Press [SELECT] until tArGL is displayed. The low target value will need to be<br />
entered. Go to steip 2.<br />
2. Press [PRINT] until the first digit of the new target is displayed. Press [UNITS]<br />
to accept the number displayed. Continue this step until the desired number is<br />
entered.<br />
Example: Target of 20<br />
2a. Press [PRINT] four times<br />
m D<strong>IS</strong>PLAY READS > 2<br />
2b. Press [UNITS] to accept the 2 that is displayed<br />
m D<strong>IS</strong>PLAY READS > 2 .<br />
2c. Press [PRINT] once<br />
m D<strong>IS</strong>PLAY READS > 20<br />
2d. Press [TARE] to accept the target weight as 20<br />
m D<strong>IS</strong>PLAY READS > 20<br />
3. Press [TARE]. Once the tare key is pressed, tArGH will be displayed. This is<br />
where the high target value will be entered. Enter this value in the same<br />
manner as the target weight was entered above. If the displayed value is<br />
correct, press [TARE]. The display will return to the gross mode.<br />
Model <strong>355</strong> I.S.<br />
1. Press [SELECT] until tArGL is displayed.<br />
2. Key in the low target weight with the numeric keys and press [ENTER].<br />
3. The tArGH value will be displayed. Key the in value with the numeric keys and<br />
press [ENTER].<br />
4. Press [SELECT] to select the desired weigh mode parameter.<br />
36<br />
Model 350 I.S. and <strong>355</strong> I.S. <strong>User</strong> Instructions
4.11.2 Start Checkweighing<br />
The checkweigh applications do not have a start function. Simply put the item to be<br />
weighed onto the scale platter. An annunciator will illuminate to indicate whether the<br />
item is within tolerance.<br />
Annunciators<br />
In order for the annunciators to activate, the displayed value must be at least five<br />
graduations above zero.<br />
Status<br />
Annunciator<br />
Status<br />
Annunciator<br />
Color (LED)<br />
OVER SP 1 Illuminated Red<br />
GOOD SP 2 Illuminated Green<br />
UNDER SP 3 Illuminated Yellow<br />
4.11.3 Absolute Checkweighing Example<br />
With a system set up to check-weigh 50 lb. cement bags, the following settings might<br />
be used check-weigh bag from 49.5 to 51.5 lbs.:<br />
Parameter Setting Acceptable Values Comments<br />
Target = 50.00<br />
Desired bag weight.<br />
Low Value = 49.50 0 - 49.50 lbs. Low acceptable range = 0 to 49.50 lbs.<br />
Target Window 49.50 - 51.50 lbs Good light within this range<br />
High Value = 51.50 51.50 lbs. and above High acceptable range = 51.50 lbs. and above<br />
4.12 Target Deviation Checkweigh<br />
The target deviation method uses a target value in which the upper and lower<br />
tolerances are deviated from the target. The upper and lower tolerances are fixed<br />
values. The accept window is varied by adding the high tolerance to the target and<br />
subtracting the low tolerance from the target. This feature is commonly used in checkweigh<br />
applications. The desired target may be based on gross weight, net weight or<br />
quantity (if counting is enabled). The annunciators will light on the indicator display or<br />
physical setpoints can be added. This feature must be enabled before attempting to<br />
use.<br />
4.12.1 Enter a Target Value<br />
Model 350 I.S.<br />
1. Press [SELECT] until tArG1 is displayed. The target value will need to be<br />
entered. Go to step 2.<br />
2. Press [PRINT] until the first digit of the new target is displayed. Press [UNITS]<br />
to accept the number displayed. Continue this step until the desired number is<br />
entered.<br />
Model 350 I.S. and <strong>355</strong> I.S. <strong>User</strong> Instructions 37
Example: Target of 20<br />
2a. Press [PRINT] four times<br />
m D<strong>IS</strong>PLAY READS > 2<br />
2b. Press [UNITS] to accept the 2 that is displayed<br />
m D<strong>IS</strong>PLAY READS > 2 .<br />
2c. Press [PRINT] once<br />
m D<strong>IS</strong>PLAY READS > 20<br />
2d. Press [TARE] to accept the target weight as 20<br />
3. Press [TARE]. Once the tare key is pressed, Lo will be displayed. This is<br />
where the lower tolerance value will be entered. Enter this value in the same<br />
manner as the target weight was entered above. If the displayed value is<br />
correct, press [TARE].<br />
4. Press [TARE]. Once the tare key is pressed, Hi will be displayed. This is where<br />
the upper tolerance value will be entered. Enter this value in the same manner<br />
as the target weight was entered above. If the displayed value is correct, press<br />
[TARE]. The display will return to the gross mode.<br />
Model <strong>355</strong> I.S.<br />
1. Press [SELECT] until tArG1 is displayed.<br />
2. Key in the target weight with the numeric keys and press [ENTER].<br />
3. The Lo value will be displayed. Key the in value with the numeric keys and<br />
press [ENTER].<br />
4. The Hi value will be displayed. Key the in value with the numeric keys and<br />
press [ENTER].<br />
5. Press [SELECT] to select the desired weigh mode parameter.<br />
4.12.2 Start Checkweighing<br />
The checkweigh applications do not have a start function. Simply put the item to be<br />
weighed onto the scale platter. An annunciator will illuminate to indicate whether the<br />
item is within tolerance.<br />
Annunciators<br />
In order for the annunciators to activate, the displayed value must be at least five<br />
graduations above zero.<br />
Status<br />
Annunciator<br />
Status<br />
Annunciator<br />
Color (LED)<br />
OVER SP 1 Illuminated Red<br />
GOOD SP 2 Illuminated Green<br />
UNDER SP 3 Illuminated Yellow<br />
38<br />
Model 350 I.S. and <strong>355</strong> I.S. <strong>User</strong> Instructions
4.12.3 Target Deviation Checkweighing Example<br />
With a system set up to check-weigh ice cream containers, the following settings might<br />
be used to guarantee container weights from 1.98 to 2.04 lbs.:<br />
Parameter<br />
Setting<br />
Acceptable Values<br />
Comments<br />
Target = 10.00<br />
Desired container weight.<br />
Lo Value = 0.5 10.00 - 0.5 = 9.50 Low acceptable range = 9.50 to 10.00<br />
Hi Value = 0.25 10.00 + 0.25 = 10.25 High acceptable range = 10.00 to 10.25<br />
4.13 Batch 2<br />
The batch 2 program is used for batching up to three separate items without using preact<br />
values. Ingredients 1 through 3 use setpoints 1 through 3 respectively. Ingredients<br />
are batched one at a time. The target values can only be set from the weigh mode by<br />
pressing the [SELECT] key.<br />
After a batch is run all target values will be set back to 0. The target values will be set<br />
to 0 after accessing the setup mode or if power is cycled. If a new batch is started when<br />
all target values are set to 0 an error message "No Targ" will be displayed. This feature<br />
must be enabled before attempting to use.<br />
4.13.1 Enter a Target<br />
Model 350 I.S.<br />
1. Press [SELECT] until tArG1 is displayed.<br />
2. Press [PRINT] until the first digit of the new target is displayed. Press [UNITS]<br />
to accept the number displayed. Continue this step until the desired number is<br />
entered.<br />
Example: Target of 20<br />
2a. Press [PRINT] four times<br />
m D<strong>IS</strong>PLAY READS > 2<br />
2b. Press [UNITS] to accept the 2 that is displayed<br />
m D<strong>IS</strong>PLAY READS > 2 .<br />
2c. Press [PRINT] once<br />
m D<strong>IS</strong>PLAY READS > 20<br />
2d. Press [TARE] to accept the target weight as 20<br />
m D<strong>IS</strong>PLAY READS > 20<br />
3. If more than one target is enabled, press [SELECT] to advance to the next<br />
target (e.g. tArG2). Repeat steps 2 and 3 until all values are entered.<br />
Model 350 I.S. and <strong>355</strong> I.S. <strong>User</strong> Instructions 39
Model <strong>355</strong> I.S.<br />
1. Press [SELECT] until tArG1 is displayed.<br />
2. Key in the target weight with the numeric keys and press [ENTER].<br />
3. If more than one target is enabled, press [SELECT] to advance to the next<br />
target (e.g. tArG2). Repeat steps 2 and 3 until all values are entered.<br />
4.13.2 Activation Method<br />
The filling of each ingredient begins when one of three selectable start functions occur.<br />
Each ingredient may have its own start function. The deactivation of the setpoint is<br />
automatic. The desired targets may be based on net weight or quantity (if counting is<br />
enabled).<br />
Annunciators<br />
Status<br />
Annunciator<br />
Status<br />
Annunciator Color (LED)<br />
Fill 1 SP 1 Illuminated Relay 1 Contacts Closed,<br />
Relay 2 and 3 Contacts Open<br />
Fill 2 SP 2 Illuminated Relay 2 Contacts Closed,<br />
Relay 1 and 3 Contacts Open<br />
Fill 3 SP 3 Illuminated Relay 3 Contacts Closed,<br />
Relay 1 and 2 Contacts Open<br />
4.13.3 Batch2 Example<br />
With a system set up a system to make a 50,000 lb batch with water (30,000 lbs.), corn<br />
syrup (15,000 lbs.) and caramel color (5,000 lbs.), ingredient 1 should start with [TARE]<br />
and subsequent ingredients should auto-start.<br />
Parameter Setting Actual Cutoff Value Comments<br />
Target 1 = 30,000 Desired water weight. Target 1 = 30,000<br />
Based = Net Targets are compared to net weight. Based = Net<br />
Start 1 = Tare Start water with [TARE] Start 1 = Tare<br />
Target 2 = 15,000 Desired corn syrup weight. Target 2 = 15,000<br />
Start 2 = Auto Start corn syrup when water is done and Start 2 = Auto<br />
motion has stopped.<br />
Target 3 = 5,000 Desired caramel coloring weight. Target 3 = 5,000<br />
Start 3 = Auto Start caramel coloring when corn syrup<br />
is done and motion has ceased.<br />
Start 3 = Auto<br />
40<br />
Model 350 I.S. and <strong>355</strong> I.S. <strong>User</strong> Instructions
5 Troubleshooting<br />
The Model 350/<strong>355</strong> I.S. utilizes the following types of error messages: Operational<br />
Errors, Hardware Errors, Calibration Errors, Communication Errors, and Miscellaneous<br />
Errors.<br />
5.1 Operational Errors<br />
Error Code<br />
Code02<br />
Code03<br />
Funct ~ Disbl<br />
Code 04<br />
Code 05<br />
Code 08<br />
Tare ~ Error<br />
Tare ~ GT FS<br />
Delay<br />
Delay ~ Abort<br />
Print ~ Abort<br />
Add ~ Load!<br />
Out of ~ Range<br />
Need APS<br />
Edit Disbl<br />
Description<br />
Under Load. Input signal is less than negative full scale. Check load cell wiring.<br />
Over load input signal is greater than positive full scale. Use same checks as "under load" above.<br />
Attempted to perform a function disabled in the Setup Mode.<br />
The digits on the display have exceeded the six digit display capacity.<br />
Zero attempted beyond the value set.<br />
Input signal greatly exceeds the valid range. Check the load cell connection.<br />
Negative tare attempted when disabled.<br />
Tare value greater than full scale capacity.<br />
Indicates that a motion delay is in effect (zero, tare, etc.).<br />
Acknowledges that a motion delayed function was aborted.<br />
Acknowledges that a motion delayed print request was aborted.<br />
If displayed after performing a count sample, this message indicates that a larger sample size is required.<br />
Attempted to enter a value beyond the allowable range.<br />
A setpoint start is initiated and the setpoint is based on quantity and no piece weight has been established<br />
(start will not occur).<br />
Unable to edit the time and date.<br />
5.2 Miscellaneous Errors<br />
Error Code<br />
T.X.YYYY<br />
Description<br />
If catastrophic errors occur in the software, a trap error may occur and freeze the display with address<br />
information (X = bank number and YYYY = the address of the trap error. Press any key five seconds after<br />
viewing message to reboot the unit).<br />
Model 350 I.S. and <strong>355</strong> I.S. <strong>User</strong> Instructions 41
5.3 Hardware Errors<br />
Error Code<br />
Code00<br />
A-D ~ Bad!<br />
or<br />
Code17<br />
Deflt ~ A-D<br />
Re- ~ Boot!<br />
Code21~E2rd<br />
Code21~E2sd<br />
Deflt ~ Setup<br />
Ch.XXXX<br />
E2 ~ Full!<br />
NoSpc ~ Free!<br />
An EPROM problem detected during power up.<br />
Description<br />
Problem with A/D chip detected. Disconnect any options installed and re-power the unit. Options are<br />
connected to the same serial lines as the A/D so they may prevent it from working properly.<br />
Bad A/D calibration values.<br />
EEPROM data could not be read. Attempting power-up reset.<br />
Error while reading data from EEPROM.<br />
Error while saving data to EEPROM.<br />
An error occurred when reading setup data from the EEPROM during power-up. All parameters are set to<br />
factory default.<br />
A checksum error occurred during power-up. All annunciators are lit. The EPROM integrity test failed or is<br />
improperly seated.<br />
The EEPROM setup exceeds the memory capacity.<br />
The current setup exceeds the setup RAM capacity.<br />
5.4 Communication Errors<br />
Error Code<br />
Par-Er<br />
Buf-Er<br />
Bit-Er<br />
Trans~Hold1<br />
Trans~Hold2<br />
Error~BaudX<br />
Description<br />
The selected parity does not match that of the connected device.<br />
The receive buffers capacity was exceeded. This indicates a handshaking problem.<br />
The stop bit of a received character did not occur when expected.<br />
Data transmission is inhibited due to a deasserted handshake on communication port 1. Press [ZERO] or<br />
[CLR] to abort transmission.<br />
Data transmission is inhibited due to a deasserted handshake on communication port 2. Press [ZERO] or<br />
[CLR] to abort transmission.<br />
The X being either comm port 1 or comm. port 2. The baud rate selected is too high for the microprocessor<br />
rate.<br />
42<br />
Model 350 I.S. and <strong>355</strong> I.S. <strong>User</strong> Instructions
6 Specifications<br />
Performance<br />
Full Scale (F.S.) Selectable 0 to 999,999<br />
Resolution<br />
20-bit A/D converter, 100,000d displayed, 1,000,000d internal<br />
A/D Conversion<br />
60 Hz<br />
Zero Track Aperture<br />
0 - 100% of Full Scale<br />
Operating Temperature<br />
-10°C to +40°C<br />
Units of Measure<br />
lb, kg, oz, g, lb-oz<br />
Electrical<br />
Power Requirement<br />
Excitation Voltage<br />
Excitation Current<br />
F.S. Signal Input<br />
Signal Connection<br />
Rechargeable battery or AC power supply<br />
5 VDC or optional 8V DC<br />
57 mA max. (5V EXC) or 91mA max. (8V EXC) / (4) 350Ω bridge<br />
0.1 mV/V min - 10 mV/V max<br />
4 lead or 6 lead with sense<br />
Process Control<br />
Remote Input<br />
Programmable, two momentary contact closure (100ms minimum) TARE, PRINT, ZERO<br />
Communication<br />
Comm 1<br />
Comm 2<br />
Data Output<br />
Protocol<br />
Baud Rate<br />
RS232 bi-directional serial port<br />
TTL port for optional Fiber Optic Module<br />
16 selectable fixed-format transmissions or 2 custom formats (programmable via RS232)<br />
Selectable<br />
150 - 115200 bps<br />
Display<br />
LED<br />
LCD / LCD Backlit<br />
6-digit weight display, 0.8" (22mm) height<br />
12 LED annunciators for operational status<br />
6-digit weight display, 1.0" (25.4mm) height<br />
12 LCD annunciators for operational status. Built in LCD status bargraph.<br />
Keypad<br />
350I.S.<br />
<strong>355</strong>I.S.<br />
Five key, durable elastomeric rubber<br />
22 key, full numeric, durable elastomeric rubber<br />
Enclosure<br />
Material<br />
Mounting<br />
Stainless Steel, NEMA 4X / IP66 Design<br />
Swivel bracket<br />
Model 350 I.S. and <strong>355</strong> I.S. <strong>User</strong> Instructions 43
Safe Area Options<br />
Fiber Optic Transceiver<br />
Communicates with hazardous area indicator via fiber-optic cable.<br />
Battery Charger<br />
Charges battery in approximately 3.5 hours.<br />
Analog Output Module 0-10 VDC/5mA, 0-20mA/10V, 4-20mA/10V, electrically isolated, 16 bit resolution with up to 10<br />
updates per second response time, mounts internal to enclosure<br />
Relay Output Module<br />
Three (3) solid-state 24-280 VAC, 1A with up to 10 updates per second response time, mounts<br />
internal to enclosure or three (3) 3- 60 VDC, 2A<br />
Two Option Mount Kit<br />
Mounts up to two option boards inside the stainless enclosure<br />
Battery Power Supply Kits Two versions: one mounts inside the stainless steel enclosure, the other mounts inside the die<br />
cast enclosure<br />
RS-485 Network Module<br />
Enables the communication port to be a RS-485 network port. Multi drop capable.<br />
20 mA Current Loop Enables the communication port to be a digital 20 mA current loop port.<br />
Hazardous Area Options<br />
AC / DC Power Module<br />
Battery Module<br />
Dura Shield<br />
Splash Guard<br />
Stainless steel enclosure. Universal AC input 90-250VAC, 50/60 Hz.<br />
Stainless steel enclosure, mounts to indicator swivel bracket. 200 hours continuous use with<br />
LCD display + 1 loadcell, and 100 hours continuous use with LED display + 1 loadcell.<br />
Durable adhesive plastic that adheres to the front surface of the stainless steel enclosure model<br />
Clear plastic cover which covers the entire indicator.<br />
Refer to page 10 for hazardous approval information.<br />
44<br />
Model 350 I.S. and <strong>355</strong> I.S. <strong>User</strong> Instructions
<strong>Avery</strong> <strong>Weigh</strong>-<strong>Tronix</strong> USA<br />
1000 Armstrong Dr.<br />
Fairmont MN 56031 USA<br />
Tel:507-238-4461<br />
Fax:507-238-4195<br />
Email: usinfo@awtxglobal.com<br />
www.wtxweb.com<br />
<strong>Avery</strong> <strong>Weigh</strong>-<strong>Tronix</strong> UK<br />
Foundry Lane,<br />
Smethwick, West Midlands,<br />
England B66 2LP<br />
Tel:+44 (0) 8453 66 77 88<br />
Fax: +44 (0)121 224 8183<br />
Email: info@awtxglobal.com<br />
www.averyweigh-tronix.com