Marvair SP-SC Air.pdf - Marlow-Hunter, LLC
Marvair SP-SC Air.pdf - Marlow-Hunter, LLC
Marvair SP-SC Air.pdf - Marlow-Hunter, LLC

You also want an ePaper? Increase the reach of your titles
YUMPU automatically turns print PDFs into web optimized ePapers that Google loves.
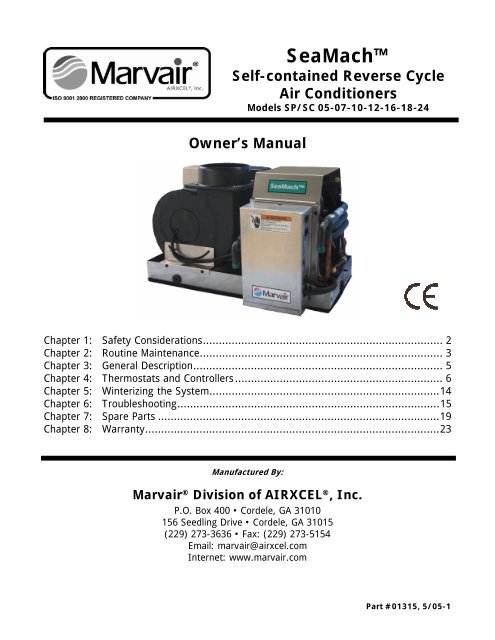
SeaMach<br />
Self-contained Reverse Cycle<br />
<strong>Air</strong> Conditioners<br />
Models <strong>SP</strong>/<strong>SC</strong> 05-07-10-12-16-18-24<br />
Owner’s Manual<br />
Chapter 1: Safety Considerations........................................................................... 2<br />
Chapter 2: Routine Maintenance............................................................................ 3<br />
Chapter 3: General Description.............................................................................. 5<br />
Chapter 4: Thermostats and Controllers ................................................................. 6<br />
Chapter 5: Winterizing the System........................................................................14<br />
Chapter 6: Troubleshooting..................................................................................15<br />
Chapter 7: Spare Parts ........................................................................................19<br />
Chapter 8: Warranty............................................................................................23<br />
Manufactured By:<br />
<strong>Marvair</strong> ® Division of AIRXCEL ® , Inc.<br />
P.O. Box 400 • Cordele, GA 31010<br />
156 Seedling Drive • Cordele, GA 31015<br />
(229) 273-3636 • Fax: (229) 273-5154<br />
Email: marvair@airxcel.com<br />
Internet: www.marvair.com<br />
Part #01315, 5/05-1
SeaMach Reverse Cycle <strong>Air</strong> Conditioners<br />
Chapter 1 – Safety Considerations<br />
Congratulations on your purchase of a SeaMach marine air conditioner by <strong>Marvair</strong> ® . Your air<br />
conditioner has been designed to provide years of safe, dependable operation. These instructions contain<br />
a general description on the operation of the unit, how set up or program the thermostat/ controller, a list<br />
of routine maintenance items, basic trouble shooting information, and the warranty.<br />
The first thing we recommend for you to do is to write down the model number and the serial number of<br />
the SeaMach unit. Both numbers can be found on the data label on the unit. Refer to them whenever you<br />
call upon your SeaMach dealer regarding this unit.<br />
Model No. _________________________________ Serial Number___________________<br />
Safety Considerations<br />
Self-contained units or evaporators of split systems should never be installed in engine rooms or<br />
other areas where fuel, battery or bilge vapors may be introduced to the living quarters on board.<br />
These components do not meet federal requirements for ignition protection. Do not install in spaces<br />
containing gasoline engines, tanks, LPG/CPG cylinders, valves, fuel line fittings, or regulators. Failure<br />
to comply may result in injury or death. (Condensing units do comply with U<strong>SC</strong>G/ABYC Ignition<br />
Protection standards and may be installed in engine compartments.)<br />
Do not terminate condensate drain line within four feet of any outlet of engine or generator exhaust<br />
systems, nor in a compartment housing an engine or generator.<br />
Installation and servicing of this system can be hazardous due to system pressure and electrical<br />
components. When working on this equipment, always observe precautions described in the literature,<br />
tags and labels attached to the unit(s). Follow all safety codes.<br />
<strong>Marvair</strong> recommends that you use only factory certified, EPA licensed refrigerant technicians and<br />
qualified marine electricians. ABYC certification in both HVAC and Marine electrical trades is<br />
desirable. In receiving these certifications, a technician and his employer has made a statement of<br />
commitment to professional, technically proficient and reliable service.<br />
CAUTION: Under both heating and cooling modes of operation, certain components will run at fairly<br />
high temperatures. Exercise care in working around operating equipment. Do not touch operating<br />
machinery without the aid of qualified personnel, as referred to above.<br />
SeaMach Owner’s Manual 5/05 Page 2 of 24
SeaMach Reverse Cycle <strong>Air</strong> Conditioners<br />
Chapter 2 - Routine Maintenance<br />
Return <strong>Air</strong> Grilles<br />
Return air filters should be cleaned regularly. The filter shipped with your SeaMach unit is located in<br />
front of the air coil can be cleaned with a vacuum cleaner or rinsed with fresh water.<br />
Condensate Pan and Lines<br />
The condensate and lines can develop an algae type growth. Periodic inspection and treatment with a<br />
mild solution of bleach and water poured into the condensate pan will keep the condensate pan and lines<br />
clear.<br />
Sea Water Strainer<br />
The seawater strainer is available in several configurations – bronze or plastic. Yours has been sized in<br />
accordance to system specifications for volume of water required. It is used to prevent debris such as<br />
eelgrass, sea week, leaves, etc., from passing through the system water lines and condensing coil. These<br />
items could lodge themselves in the water supply causing several possible shutdown faults, and left<br />
unchecked, equipment damage. Should the strainer become clogged or partially obstructed, adverse<br />
performance will be experienced. The first indication will be a high pressure. (For mechanical controls<br />
see Troubleshooting.) The unit will shut down. Turn unit off; check strainer and pump, restart. (See<br />
Pump and Troubleshooting.)<br />
To eliminate these potential problems, it is recommended that you check to make sure you have water<br />
flow each time you turn the system on and clean your strainer weekly. More often as conditions dictate.<br />
Localized situations: In some regions, it is common to experience a tremendous presence of jellyfish or<br />
sea nettles concentrated in back bay marinas for short periods of time. These can clog strainers and<br />
water pumps every hour to hour and a half in some cases. In such severe conditions, seek the advice of<br />
your local factory service representative. They will be most familiar with solutions to localized<br />
situations. <strong>Marvair</strong> works closely with our servicing dealers when custom solutions are required. During<br />
the warranty period, factory approval must be obtained for any modification to be done to alleviate the<br />
problem without voiding warranty coverage.<br />
Sea Water Pump<br />
Your seawater pump has been sized in accordance with specifications for system water flow and<br />
volume. While it will shut down to protect from damage, it is not advisable to run the seawater pump<br />
dry. Possible damage may still be incurred. Damage incurred due to a pump running dry is not covered<br />
under warranty. The pump is not self-priming. It must be initially primed upon commissioning. Properly<br />
installed, once primed, barring haul outs or interrupted water flow due to an external cause, it should not<br />
need to be primed again.<br />
Occasionally, sea grass, jellyfish and other items may pass through your strainer and get lodged in the<br />
pump impeller. Should cleaning your strainer fail to eliminate a water flow problem, you should next<br />
check the pump. First loosen the discharge line and gently remove it from the pump assembly. (Make<br />
sure the seacock is open.) Water should rise above the pump to a level equal to the waterline of your<br />
boat. If not, there is a blockage.<br />
Loosen and remove the four screws in the front of the wet end assembly. Gently rock the face on the<br />
assembly back and forth until you break the seal between it and the rubber O-ring gasket. Water should<br />
now be flowing freely. If not, the blockage is between the strainer and the pump. If water is flowing,<br />
close the seacock. Remove pump face. The impeller is now exposed. Any debris should be easily seen<br />
SeaMach Owner’s Manual 5/05 Page 3 of 24
SeaMach Reverse Cycle <strong>Air</strong> Conditioners<br />
and removed. Re-assemble. Be careful not to deform O-ring. Replace the four screws. Before sealing the<br />
face against the O-ring, open the seacock. Water should be leaking visibly from the pump face. Tighten<br />
screws. Water will stop leaking when proper seal is achieved. Do not over tighten. In this manner, you<br />
have primed the pump. Restart system. (If problem persists, see Troubleshooting.)<br />
Grilles and Proper <strong>Air</strong> Flow<br />
The most important thing to remember with all grilles, both supply and return air, is that they must never<br />
be restricted by objects such as bed linens, duffel bags, tackle bags, etc.<br />
Return <strong>Air</strong> Grille(s) and Filter(s)<br />
Return air grilles are available in both aluminum and wood in standard configurations. They do not have<br />
adjustable louvers and are available with and without filters. Return air filters should be cleaned<br />
regularly. The filter shipped with your SeaMach unit is located in front of the air coil can be cleaned<br />
with a vacuum cleaner or rinsed with fresh water.<br />
If your unit’s return air grille has a filter, be sure that your boat builder or installation technician has<br />
removed the standard filter that comes with every unit in front of the evaporator (air) coil. Two filters<br />
can unduly restrict air flow and in some cases, cause problems with performance. Use EITHER a return<br />
air filter grille or the supplied filter, never both.<br />
Depending upon the floor plan, your boat’s space constraints may dictate that a unit be installed in an<br />
area that makes it difficult to access and clean the filter. If this is the case, and you do not have a return<br />
air filter grille, you should consider removing the disposable unit filter and upgrading to a return air<br />
filter grille.<br />
NOTE: Blocking the return air grille of neglecting filter cleaning will result in a restriction of air flow.<br />
In the heating mode, this will cause a HIGH PRESSURE FAULT shutdown. In the cooling mode, after a<br />
period of time, you will experience icing of the evaporator coil and a resultant LOW PRESSURE<br />
FAULT shutdown.<br />
Supply <strong>Air</strong> Grille(s)<br />
Most installations will have more than one supply air grille. Standard main supply air grilles are<br />
generally made of aluminum or wood frames with two or four-way adjustable louvers. These may be<br />
adjusted to direct air flow from the grille to ensure a uniform cabin temperature. Main supply air grilles<br />
should never be closed at any time while running in either the heating or cooling modes. Secondary<br />
supply air grilles more frequently will be a 4” round plastic design, but they can also be of the aluminum<br />
or wood frame standard configuration and are usually located out of the main salon, galley, dinette area.<br />
These may, depending upon the style you or your boat manufacturer has chosen, be closable. During the<br />
day, these may be closed should you like more air directed to the main living area. Consult with your<br />
local SeaMach service representative if you are unsure which are the main supply grilles on your boat.<br />
Closing off the main supply air grille or secondary air grilles, in some applications, may restrict air flow<br />
and cause ice up of the evaporator in the cooling mode or high pressure fault shut down in the heating<br />
mode.<br />
Should either of these conditions occur, open all closed supply air grilles and restart system. This should<br />
eliminate the problem. If the problem recurs again, consult your local SeaMach service representative.<br />
SeaMach Owner’s Manual 5/05 Page 4 of 24
SeaMach Reverse Cycle <strong>Air</strong> Conditioners<br />
Chapter 3 - General Description<br />
The SeaMach line of reverse cycle air conditioners built by <strong>Marvair</strong>® are self-contained, water-cooled<br />
units designed for use with either fresh or seawater. The <strong>SP</strong> models are built in various sizes with<br />
capacities from 5,000 to 24,000 BTUH. Both 115 volt and 230volt models are available. The S*M<br />
models are designed to be used with a 24 volt wall mounted thermostat. The S*B models have an<br />
electronic control board which allows the use of a multifunction Mach<strong>Air</strong> OLED thermostat/controller.<br />
<strong>SP</strong> models use R-22 refrigerant, <strong>SC</strong> models use R-407c refrigerant.<br />
Operating Ranges<br />
The SeaMach reverse cycle air conditioner is designed to operate in the heating mode with a<br />
minimum inlet water temperature of 60°F (15°C) and in the cooling mode with a maximum inlet water<br />
temperature of 100°F (38°C).<br />
Heating<br />
Cooling<br />
Max. Water Temperature 85°F (29°C) 100°F (38°C)<br />
Min. Water Temperature 50°F (10°C) 60°F (15°C)<br />
Max. Entering <strong>Air</strong> Temperature 78°F (25°C) 95-115°F* (35°C – 46°C*)<br />
Min. Entering <strong>Air</strong> Temperature 55-65 °F* (12°C – 18°C*) 68°F (19°C)<br />
* Depends upon inlet water temperature and relative humidity.<br />
General Operation<br />
The SeaMach reverse cycle air conditioner has both a heating and cooling mode of operation.<br />
It uses R-22 or R407c refrigerant in a conventional vapor compression cycle to transfer heat from the air<br />
in the boat to the water. In the cooling mode, a blower blows the cabin air through the indoor or<br />
evaporator coil where it is cooled and dehumidified. Liquid refrigerant passing through the evaporator is<br />
boiled into a gas by heat removed from the air. The warmed refrigerant gas enters the compressor where<br />
its temperature and pressure are increased. The hot refrigerant gas travels to the water coil or condenser<br />
where it is cooled by the water and condenses to a liquid. Liquid refrigerant is metered back into the<br />
evaporator coil to repeat the process.<br />
In the heating mode, the process is reversed. A special reversing valve reverses the flow of the<br />
refrigerant throughout the system exchanging the roles of the condenser and evaporator. The refrigerant<br />
flows through the water or evaporator coil, picks up heat from the water, and becomes a vapor. The<br />
vapor then enters the compressor where it is compressed to a higher temperature. It is then pumped to<br />
the indoor coil where the air moving across the coil picks up the heat and the warm air is blown into the<br />
room. The compressed refrigerant vapor condenses to a liquid as it gives up heat. Finally, liquid<br />
refrigerant flows into the capillary tubes into the indoor coil where the cycle is repeated.<br />
The SeaMach reverse cycle air conditioner is controlled by a thermostat or controller mounted on the<br />
wall.<br />
SeaMach Owner’s Manual 5/05 Page 5 of 24
SeaMach Reverse Cycle <strong>Air</strong> Conditioners<br />
Chapter 4 - Thermostats and Controllers<br />
Your SeaMach unit is controlled by a wall mounted thermostat (models <strong>SP</strong>M or <strong>SC</strong>M) or a Mach<strong>Air</strong><br />
OLED multifunction thermostat/ controller (models <strong>SP</strong>B or <strong>SC</strong>B). Please determine which unit you have<br />
installed and proceed with the appropriate instructions for setting up the thermostat. Before setting up<br />
either thermostat:<br />
1. Turn the seacock valve to the open position<br />
2. If the water pump has a dedicated breaker, turn it on. Verify that water is being discharged<br />
overboard.<br />
3. Turn on the circuit breaker to the SeaMach unit.<br />
Instructions for the Mach<strong>Air</strong> OLED Thermostat/Controller for use with<br />
SeaMach Models <strong>SP</strong>B or <strong>SC</strong>B<br />
General Description<br />
The Mach<strong>Air</strong> OLED is a digital thermostat/controller that provides temperature and humidity control,<br />
allows for fan speed adjustment and shows fault conditions in a compact, yet easily readable display.<br />
The Mach<strong>Air</strong> OLED thermostat/controller is designed to operate with SeaMach self contained<br />
models <strong>SP</strong>B and <strong>SC</strong>B and split systems models, CUB and CCB. The SeaMach OLED (Organic Light<br />
Emitting Diode) is the latest in display technology with features not available in other, less advanced<br />
systems. OLED (Organic Light Emitting Diode) displays are brighter, thinner, lighter and use less power<br />
than older LCDs. In addition, OLED’s offer wider viewing angles and higher contrast than LCDs.<br />
The thermostat/controller is easily programmed to allow the user to customize the operation of the<br />
SeaMach unit. Intuitive icons enable the viewer to see at a glance the operating status of the unit and the<br />
cabin temperature. If the display has not been touched for 4-1/2 minutes, the display dims. After another<br />
4-1/2 minutes, the display enters QUIET mode. During this time, a small light will rotate around the<br />
display’s perimeter, showing that the system is functioning. To protect the board from voltages<br />
fluctuations, there are fuses on the board in the SeaMach unit. Prior to calling for service, please check<br />
these fuses and replace if required.<br />
Set Up (Programming)<br />
The following instructions provide a step by step procedure for setting up (programming) the<br />
Mach<strong>Air</strong> OLED thermostat/controller. Before starting, it is advisable to completely read the Set Up<br />
instructions. Also, make sure that SeaMach unit has been installed properly and power is connected to<br />
the SeaMach unit. There is a factory installed 2 to 3 minute time delay from when the display is<br />
activated until the compressor turns on. This delay prevents destructive short cycling of the compressor.<br />
While the time delay is in effect, a bar in the lower left hand corner of the display rotates. This rotating<br />
bar indicates that the delay is in process. When the compressor time delay has elapsed, the compressor<br />
will turn on, COMP will be displayed, and the bar will disappear. Changing either the Temperature set<br />
point or the Mode selection<br />
will start the delay timer.<br />
To turn the display on,<br />
gently push on the 4<br />
position touch pad for 2<br />
seconds. The display will<br />
illuminate and Set Point<br />
will be displayed.<br />
SeaMach Owner’s Manual 5/05 Page 6 of 24
SeaMach Reverse Cycle <strong>Air</strong> Conditioners<br />
To enter the Set Up mode, gently push & release on the center of the 4 position touch pad. During SET<br />
UP, if the touch pad is not pressed for 4 seconds, the thermostat /controller will exit the SET UP mode.<br />
To return to SET UP, press the center of the touch pad. Press & release the right side of the touch pad<br />
repeatedly to return to your previous point in the SET UP mode.<br />
Temperature Set Point Set Up<br />
To adjust the temperature set point, gently push on the top of<br />
the touch pad to raise the set point temperature or on the<br />
bottom to lower the set point temperature. Note: the<br />
temperature scale – ºF or ºC – can be selected in step 5.<br />
After selecting the desired set point, press on the right side<br />
once of the touch pad to move to Operating Mode Set Up.<br />
Operating Mode Set Up<br />
The SeaMach unit has five modes of operation – Auto, Cool Only, Heat Only, Fan Only and the<br />
Dehumidification Mode. Press either the top or the bottom of the touch pad to select the desired mode.<br />
Note: the Auto mode is recommended for normal operation.<br />
Auto – The SeaMach unit will automatically heat or cool, depending upon the set point temperature.<br />
Cool – The SeaMach unit will only operate in the cooling mode.<br />
Heat - The SeaMach unit will only operate in the heating mode.<br />
Fan Only – The fan in the SeaMach unit will run to provide air circulation in the cabin, but no heating<br />
or cooling will be provided.<br />
Dehumidification Mode – This mode is recommended when the boat is going to be unoccupied for<br />
more than 48 hours during warm or hot seasons. In the Dehumidification mode, the SeaMach unit will<br />
operate in the cooling mode for 15 minutes every 6 hours to remove moisture from the cabin. The unit<br />
will only operate if the cabin temperature is 67°F (19°C) or above.<br />
To proceed to Fan Mode Set Up, press the right side of the touch pad.<br />
SeaMach Owner’s Manual 5/05 Page 7 of 24
Fan Mode Set Up<br />
SeaMach Reverse Cycle <strong>Air</strong> Conditioners<br />
In the Fan Mode, there are three selections – Manual, Auto and Continuous. Select Manual, Auto or<br />
Continuous by pressing the top or the bottom of the touch pad.<br />
In the Manual mode, a constant fan speed is selected; the desired fan speed is selected in Fan Speed<br />
Selection Set Up (next screen).<br />
If Auto is selected, the fan will automatically change speeds, depending on the difference between the<br />
temperature in the cabin and the set point temperature. The fan will start on maximum speed. As the<br />
cabin temperature approaches the set point temperature, the fan will slow down to the minimum set<br />
speed. The minimum speed is selected in Fan Speed Selection (next screen). Auto is the recommended<br />
Fan Mode selection.<br />
In Continuous mode, the compressor will cycle on and off depending on the temperature in the cabin,<br />
but the fan will run continuously.<br />
To move to Fan Speed Set Up, press on the right side of the touch pad.<br />
Fan Speed Set Up<br />
In the previous Fan Mode, either Manual or Auto was selected.<br />
If Manual was selected, set the desired fan speed by pressing the top or bottom of the touch pad. In this<br />
mode the fan remains at a constant speed and does not vary. The number indicates the fan speed on a<br />
scale from 1-28.<br />
If Auto, was selected in the Fan Mode, now select the Low Fan Speed. The lower the setting, the longer<br />
it takes to reach the set point temperature. The number indicates the fan speed on a scale of 1-28.<br />
To move to Temperature Scale Set Up, press on the right side of the touch pad.<br />
SeaMach Owner’s Manual 5/05 Page 8 of 24
SeaMach Reverse Cycle <strong>Air</strong> Conditioners<br />
Temperature Scale Set Up<br />
The temperature can be displayed in either Fahrenheit or Centigrade by pressing the top or bottom of the<br />
touch pad.<br />
To move to <strong>Air</strong> Sensor Set Up, press the right side of the touch pad.<br />
<strong>Air</strong> Sensor Set up<br />
The SeaMach OLED display has an internal temperature sensor. In some installations this sensor may<br />
be affected by an external heat source. An optional remote sensor can be installed to provide a more<br />
accurate sensing of the cabin temperature. If you do not have a remote air sensor, select “INT” by<br />
pressing the top or bottom of the touch pad. If there is a remote sensor, select “OPT”.<br />
Note: If OPT is selected without connecting the remote sensor, an alarm notice will be displayed.<br />
This completes the set up of your Mach<strong>Air</strong> OLED controller. To have the controller accept your<br />
selections, do not press the 4 position touch pad for 10 seconds and the controller will automatically exit<br />
the program mode.<br />
Operating Screens<br />
Cooling Screen<br />
Heating Screen<br />
SeaMach Owner’s Manual 5/05 Page 9 of 24
SeaMach Reverse Cycle <strong>Air</strong> Conditioners<br />
Dehumidification Screen<br />
Defrost Screen<br />
Defrost - Under certain conditions in the cooling mode, ice may form on the indoor coil. A dirty filter or<br />
restricted air flow can cause ice to form on the coil. To prevent excessive ice formation, the fan will<br />
continue to run, but the compressor will automatically turn off until the temperature of the coil rises to<br />
the factory set temperature. When this temperature is reached, the SeaMach unit will automatically<br />
resume normal operation.<br />
Alarms<br />
In addition to controlling the temperature, the Mach<strong>Air</strong> OLED controller also monitors the operation<br />
of the SeaMach unit and will display fault conditions. If a problem is detected, a message will be<br />
displayed on the screen. Once an alarm has been detected, it is necessary to turn power off to the<br />
SeaMach unit at the breaker and then restore power to the unit to clear the alarm.<br />
Low Voltage - The display will show Low Voltage if low voltage is detected for 10 seconds. For 115<br />
volt units, the low voltage threshold is 93 volts; for 230 volts the threshold is 185 volts. These limits are<br />
factory set and cannot be changed.<br />
Sensor INT - The display will show SENSOR INT when the built–in sensor in the Mach<strong>Air</strong> OLED<br />
display is defective. If this display persists, contact <strong>Marvair</strong> or your local SeaMach service center.<br />
Sensor OPT - The display will show SENSOR OPT (optional) when the remote sensor is defective or if<br />
the remote sensor was selected in the <strong>Air</strong> Sensor set up, but a remote sensor is not connected. If this<br />
display persists, contact <strong>Marvair</strong> or your local SeaMach service center.<br />
SeaMach Owner’s Manual 5/05 Page 10 of 24
SeaMach Reverse Cycle <strong>Air</strong> Conditioners<br />
LP (Low Refrigerant Pressure) or HP (High Refrigerant Pressure) - When either LP or HP is<br />
displayed, the SeaMach unit will turn off and try to restart after 3 minutes. If there is a second LP or HP<br />
fault, the SeaMach unit will shut down and LP or HP will be displayed. High pressure is most often due<br />
to inadequate water flow. Check the overboard water discharge and the pump fuse.<br />
Low pressure is frequently due to inadequate or restricted air flow, e.g., a dirty filter or closed supply air<br />
grilles. Contact <strong>Marvair</strong> or your local SeaMach service center.<br />
Sensor Coil - The display will show COIL SENSOR when the defrost sensor is defective or not properly<br />
installed. If this display persists, contact <strong>Marvair</strong> ® or your local SeaMach service center.<br />
SeaMach Owner’s Manual 5/05 Page 11 of 24
SeaMach Reverse Cycle <strong>Air</strong> Conditioners<br />
SeaMach Owner’s Manual 5/05 Page 12 of 24
SeaMach Reverse Cycle <strong>Air</strong> Conditioners<br />
Instructions for the Manual Thermostat for use with SeaMach models <strong>SP</strong>M or<br />
<strong>SC</strong>M.<br />
Cooling Cycle<br />
1. Set the compressor time delay to 3 minutes<br />
2. Adjust the cooling temperature set point on the thermostat higher than the cabin temperature.<br />
3. Slowly lower the thermostat’s cooling set point until the set point is below the cabin temperature.<br />
The blower, compressor and pump should be operating.<br />
4. Close all doors and hatches.<br />
5. Allow the unit to operate 10 minutes.<br />
6. After 10 minutes, there should be a 15°F (8°C) to 20°F (11°C) difference in the supply and return air<br />
temperatures.<br />
Heating Cycle<br />
Note: Do not turn unit “OFF” and then immediately back “ON”. Wait three minutes to<br />
allow refrigerant pressures to equalize.<br />
1. Adjust the heating temperature set point on the display module or the thermostat higher than the<br />
cabin’s temperature.<br />
2. Slowly raise the thermostat’s heating set point until the set point is above the cabin temperature. The<br />
blower, compressor and pump should be operating.<br />
3. Close all doors and hatches.<br />
4. Allow the unit to operate 5 minutes.<br />
5. After 5 minutes there should be a 15°F (8°C) to 25°F (11°C) difference in the supply and return air<br />
temperature.<br />
SeaMach Owner’s Manual 5/05 Page 13 of 24
SeaMach Reverse Cycle <strong>Air</strong> Conditioners<br />
Chapter 5 - Winterizing the System<br />
There are two scenarios for winterizing the system – the boat remains in the water or the boat is<br />
out of the water, in dry dock storage. Please follow the procedures described below for your situation.<br />
Boat remains in the water<br />
In water storage requires the use of a potable anti-freeze solution throughout the system’s water supply<br />
and discharge lines. Be sure to follow all state, local and federal ordinances before discharging an antifreeze<br />
solution overboard.<br />
1. Close ball valve.<br />
2. Disconnect water line at ball valve.<br />
3. Insert line into a bucket of potable anti-freeze.<br />
4. Run air conditioner until a solid stream of anti-freeze is being discharged overboard.<br />
5. Reconnect water line at ball valve.<br />
Boat is out of water in dry dock<br />
With the boat out of the water:<br />
1. Open the seacock to permit all the water to drain out of system via the thru-hull fitting.<br />
2. Remove and empty the seawater strainer basin.<br />
3. Loosen the screws on the pump head to allow the water to drain from the pump and from the water<br />
line between the pump and strainer.<br />
4. Close the seacock.<br />
When the boat is put back into the water in the spring:<br />
1. Gradually open the seacock to allow water to fill the system to the level of the pump.<br />
2. Tighten the pump face to achieve a seal.<br />
3. When pump is primed, open the seacock valve completely.<br />
SeaMach Owner’s Manual 5/05 Page 14 of 24
SeaMach Reverse Cycle <strong>Air</strong> Conditioners<br />
Chapter 6 – Troubleshooting<br />
Troubleshooting Guide<br />
PROBLEM/SYMPTOM LIKELY CAUSE(S) CORRECTION<br />
The unit does not<br />
operate.<br />
1. Power supply problem.<br />
Blower runs but<br />
compressor does not<br />
start.<br />
Compressor runs, but<br />
blower will not run.<br />
2. Tripped breaker/disconnect.<br />
3. Thermostat<br />
1. Power supply problem.<br />
2. Thermostat<br />
3. Safety switches are<br />
tripping out unit.<br />
4. Loose or defective<br />
wires.<br />
5. Compressor<br />
6. Refrigerant leakage or<br />
loss.<br />
7. Control board<br />
8. Compressor Run<br />
Capacitor<br />
1. Blower motor capacitor<br />
2. Blower motor.<br />
3. Power supply problem.<br />
4. Control board<br />
1. Check voltage at power supply. Check wiring to<br />
unit and external breakers or fuses.<br />
2. Check circuit protection devices for continuity.<br />
3. Setpoint may be too high if in cooling mode or too<br />
low if in heating mode; check unit and reset.<br />
Thermostat may be out of calibration or otherwise<br />
defective. Also check for loose connection(s).<br />
1. Check voltage at power supply. Voltage at unit<br />
must be + 10% of rated nameplate voltage.<br />
2. Check the thermostat and unit for loose wires.<br />
Secure any loose connection. Check location of<br />
sensor and make sure that it does not touch the<br />
indoor coil. The sensor and/or thermostat should<br />
be replaced if defective.<br />
3. Check for water flow. Check refrigerant charge.<br />
Check switches for loose wire connection, broken<br />
or burned contacts.<br />
4. Tug on wires to see if they will separate from their<br />
connections. Replace terminals if they are loose<br />
or weak.<br />
5. Check for electrical shorts, ground and open<br />
circuits. Replace compressor if defective. If<br />
electrical checks are ok, install a start capacitor<br />
and direct wire to see if the compressor will start.<br />
If this fails, remove and replace the compressor.<br />
6. Locate leak(s), reclaim, repair, evacuate and<br />
recharge unit with refrigerant.<br />
7. Verify that power is being provided from the<br />
control board. Replace control board if it is<br />
defective.<br />
8. Verify capacitance, check for electrical shorts and<br />
ground. If defective, replace.<br />
1. Verify capacitance, check for electrical shorts and<br />
ground. If defective, replace.<br />
2. Check for electrical shorts, ground and open<br />
circuits. Replace blower motor if it is defective.<br />
3. Check voltage at power supply. Voltage at unit<br />
must be + 10% of rated nameplate voltage.<br />
4. Verify that power is being provided from the<br />
control board. Replace control board if it is<br />
defective.<br />
SeaMach Owner’s Manual 5/05 Page 15 of 24
SeaMach Reverse Cycle <strong>Air</strong> Conditioners<br />
PROBLEM/SYMPTOM LIKELY CAUSE(S) CORRECTION<br />
Unit provides<br />
1. Restriction in water<br />
insufficient cooling. system.<br />
Unit provides<br />
insufficient heating.<br />
2. Water pump.<br />
3. <strong>Air</strong> filter.<br />
4. Indoor coil.<br />
5. Ice on indoor coil.<br />
6. Unit is undersized<br />
7.Low refrigerant<br />
1. Restriction in water<br />
system.<br />
2. Water pump.<br />
3. <strong>Air</strong> filter.<br />
4. Indoor coil.<br />
5. Unit is undersized.<br />
6. Water temperature.<br />
7. Reversing valve.<br />
8. Low refrigerant<br />
1. Strainer or thru-hull fitting are clogged. Clean and<br />
check for water flow. Make sure seacock (ball<br />
valve) is open.<br />
2. Check for electrical shorts, ground and open<br />
circuits. Replace water pump if it is defective.<br />
Replace water pump if it is undersized.<br />
3. Clean or replace the air filter if it is dirty.<br />
4. The indoor coil may require cleaning if the unit<br />
was operated without a filter.<br />
5. Thermostat setting is too low. Shut down unit until<br />
ice has melted and restart at a higher temperature<br />
setting.<br />
6. Check if the unit is undersized for the load.<br />
Replace with larger unit or add additional unit(s) if<br />
necessary.<br />
7. Add refrigerant<br />
1. Strainer or thru-hull fitting are clogged. Clean and<br />
check for water flow. Make sure seacock (ball<br />
valve) is open.<br />
2. Check for electrical shorts, ground and open<br />
circuits. Replace water pump if it is defective or<br />
undersized.<br />
3. Clean or replace the air filter if it is dirty.<br />
4. The indoor coil may require cleaning if the unit<br />
was operated without a filter.<br />
5. Check if the unit is undersized for the load.<br />
Replace with larger unit or add additional unit(s) if<br />
necessary.<br />
6. Check water inlet temperature using a<br />
thermometer. The inlet water temperature should<br />
never be below 50°F.<br />
7. Check for power to the solenoid coil, verify that<br />
the coil is functional. If the unit still does not<br />
switch to heating, replace the reversing valve,<br />
evacuate and recharge the unit.<br />
8. Add refrigerant<br />
SeaMach Owner’s Manual 5/05 Page 16 of 24
SeaMach Reverse Cycle <strong>Air</strong> Conditioners<br />
PROBLEM/SYMPTOM LIKELY CAUSE(S) CORRECTION<br />
Noise operation. 1. Copper tubing is<br />
vibrating.<br />
Water is leaking from<br />
unit.<br />
2. Indoor blower assembly.<br />
3. Loose cabinet or<br />
components.<br />
4. Improper unit<br />
installation.<br />
1. Condensate pan.<br />
2. Condensate drain line<br />
or pump.<br />
1. Adjust by bending slightly to a more stable<br />
position. Separate any tubing that is making<br />
contact with other tubing or components.<br />
2. If blower wheel is hitting housing, adjust the wheel<br />
position in the housing. Replace blower motor or<br />
assembly if the bearing(s) are defective.<br />
3. Check and tighten loose screws.<br />
4. Make sure unit is level and secure to deck.<br />
1. Check for leaks and repair as required.<br />
2. Check for leaks and repair as required.<br />
Electrical shock at unit.<br />
3. Loose fittings or<br />
connections.<br />
1. Electrical component is<br />
shorted to ground.<br />
3. Tighten fittings and connections. Check the<br />
condensate drain line for leaks.<br />
1. Check control board, blower motor, compressor<br />
and pumps with an ohmmeter or high potential<br />
tester. Determine what is grounded and replace<br />
or rewire.<br />
2. Line trip is too sensitive<br />
SeaMach Owner’s Manual 5/05 Page 17 of 24
SeaMach Reverse Cycle <strong>Air</strong> Conditioners<br />
Alarm Screens – Mach<strong>Air</strong> OLED only<br />
PROBLEM/SYMPTOM LIKELY CAUSE(S) CORRECTION<br />
Low Voltage 1. Insufficient power to unit. 1. Check power supply to the unit.<br />
Int. <strong>Air</strong> Sensor<br />
1. The internal air sensor in the<br />
display is defective.<br />
1. Replace display. Contact <strong>Marvair</strong> or your<br />
local SeaMach representative.<br />
Sensor OPT<br />
LPS (low refrigerant<br />
pressure) in cooling<br />
mode or HPS (high<br />
refrigerant pressure) in<br />
heating mode<br />
LPS (low refrigerant<br />
pressure) in heating<br />
mode or HPS (high<br />
refrigerant pressure) in<br />
cooling mode<br />
Coil Sensor<br />
1. The optional remote sensor is<br />
not connected.<br />
2. Internal sensor was selected<br />
in the programming mode, but<br />
a remote sensor is not<br />
installed.<br />
3. Remote sensor is not properly<br />
connected.<br />
4. Remote sensor is defective.<br />
1. Blocked or severely restricted<br />
air flow.<br />
2. Improper refrigerant charge<br />
1. Inadequate water flow<br />
2. Defective pump<br />
1. Frost sensor not properly<br />
installed.<br />
2. Defective frost sensor<br />
1. Install the remote sensor.<br />
2. Change OPT to INT in the air sensor SET<br />
UP.<br />
3. Connect remote sensor properly.<br />
4. Replace sensor. Contact <strong>Marvair</strong> or your<br />
local SeaMach representative.<br />
1. Clean filter, open any closed grilles and<br />
checked for kinks in duct work.<br />
2. Contact <strong>Marvair</strong> or your local SeaMach<br />
representative.<br />
1. Check strainer. Clean if necessary. Check<br />
for kinked water lines. Make sure the pump<br />
is primed.<br />
2. Replace pump<br />
1. Properly attach the frost sensor.<br />
2. Replace the frost sensor.<br />
SeaMach Owner’s Manual 5/05 Page 18 of 24
SeaMach Reverse Cycle <strong>Air</strong> Conditioners<br />
Chapter 7 – Spare Parts List<br />
MACHAIR 1<br />
MACHAIR<br />
OLED<br />
THERMOSTAT PARTS LIST<br />
DE<strong>SC</strong>RIPTION<br />
<strong>SP</strong>BxxRCB <strong>SP</strong>BxxRCA <strong>SP</strong>BxxRCF <strong>SP</strong>MxxRCB <strong>SP</strong>MxxRCA <strong>SP</strong>MxxRCF<br />
<strong>SC</strong>BxxRCB <strong>SC</strong>BxxRCA <strong>SC</strong>BxxRCF <strong>SC</strong>MxxRCB <strong>SC</strong>MxxRCA <strong>SC</strong>MxxRCF<br />
Control Board 80525 80525 80525 80525 80525 80525<br />
Display, Black 80527 80527 80527 80527 80527 80527<br />
Display, White 80528 80528 80528 80528 80528 80528<br />
Display, Beige with Cover 80529 80529 80529 80529 80529 80529<br />
Display, Manual --- --- --- 80519 80519 80519<br />
Display Cable, 15 Ft. 80526 80526 80526 80526 80526 80526<br />
<strong>Air</strong> Sensor 70347 70347 70347 70347 70347 70347<br />
Control Board 80505 80506 80506 80505 80506 80506<br />
Display 80518 80518 80518 80518 80518 80518<br />
Frost Sensor 70331 70331 70331 70331 70331 70331<br />
Remote Mount Temperature<br />
Sensor and 20 Ft. Cable<br />
80510 80510 80510 80510 80510 80510<br />
REPLACEMENT PARTS LIST - <strong>SP</strong>BxxRCB<br />
ITEM<br />
DE<strong>SC</strong>RIPTION<br />
<strong>SP</strong>B05RCBL<br />
<strong>SP</strong>B07RCBR <strong>SP</strong>B10RCBR <strong>SP</strong>B12RCBR <strong>SP</strong>B16RCBL <strong>SP</strong>B18RCBR<br />
<strong>SP</strong>B07RCBL <strong>SP</strong>B10RCBL <strong>SP</strong>B12RCBL <strong>SP</strong>B16RCBL <strong>SP</strong>B18RCBL<br />
1 Compressor 10257 10239 10012 10067 10229 10256<br />
2 Capacitor, Compressor 50296 50296 50265 50265 50265 50315<br />
3<br />
Motor Protector, Compressor<br />
Texas Instruments P/N<br />
MRA5731-114 MRA4761-114 MRA4760-114 MRA4759-117 Internal<br />
4<br />
5<br />
6<br />
Indoor Coil, R.H. Unit<br />
Motor/Blower Assembly, Standard<br />
Capacitor, Blower Motor, Standard<br />
n/a<br />
30061<br />
50308<br />
60087<br />
30053<br />
50308<br />
60088<br />
30049<br />
50301<br />
60089<br />
30049<br />
50301<br />
60090<br />
30052<br />
50298<br />
60090<br />
30056<br />
50298<br />
Indoor Coil, L.H. Unit<br />
Motor/Blower Assembly, High Static<br />
Capacitor, Blower Motor, High Static<br />
60127<br />
n/a<br />
n/a<br />
60119<br />
30047<br />
50303<br />
60121<br />
n/a<br />
n/a<br />
60122<br />
n/a<br />
n/a<br />
60123<br />
n/a<br />
n/a<br />
60123<br />
n/a<br />
n/a<br />
7 Distributor, with Screen None 20276 20276 20275 20275 20294<br />
8 Tube, Capillary (Qty) 81224 81032 (Two) 81224 (Two) 81032 (Three) 81224 (Three) 80950 (Three)<br />
9 Heat Exchanger 60126 60091 60092 60092 60092 60092<br />
10 Valve, Reversing 20279A 20279A 20280A 20280A 20280A 20280A<br />
11 Coil, Reversing Valve 20278A 20278A 20278A 20278A 20278A 20278A<br />
12 Switch, High Pressure 70080 70080 70080 70080 70080 70080<br />
13 Switch, Low Pressure 70047 70047 70047 70047 70047 70047<br />
14 Plenum, Adapter Ring None 01316 01317 01317 01317 01317<br />
15 Hose Adapter, Blower (Optional) None 90134 (5") 90135 (6") 90135 (6") 90136 (7") 90136 (7")<br />
16 Filter, Return <strong>Air</strong> 81291 81289 81289 81288 81288<br />
SeaMach Owner’s Manual 5/05 Page 19 of 24
SeaMach Reverse Cycle <strong>Air</strong> Conditioners<br />
REPLACEMENT PARTS LIST - <strong>SP</strong>BxxRCA<br />
ITEM<br />
DE<strong>SC</strong>RIPTION<br />
<strong>SP</strong>B07RCAR <strong>SP</strong>B10RCAR <strong>SP</strong>B12RCAR <strong>SP</strong>B16RCAL <strong>SP</strong>B18RCAR <strong>SP</strong>B24RCAR<br />
<strong>SP</strong>B07RCAL <strong>SP</strong>B10RCAL <strong>SP</strong>B12RCAL <strong>SP</strong>B16RCAL <strong>SP</strong>B18RCAL <strong>SP</strong>B24RCAL<br />
1 Compressor 51450 10081 10082 10228 10007 10223<br />
2 Capacitor, Compressor 50306 50306 50265 50265 50265 50280<br />
3<br />
Motor Protector, Compressor<br />
Texas Instruments P/N<br />
MRA5472-114 MRA4765-114 MRA4763-114 Internal<br />
4<br />
5<br />
6<br />
Indoor Coil, R.H. Unit<br />
Motor/Blower Assembly, Standard<br />
Capacitor, Blower Motor, Standard<br />
60087<br />
30054<br />
50307<br />
60088<br />
30048<br />
50299<br />
60089<br />
30048<br />
50299<br />
60090<br />
30051<br />
50297<br />
60090<br />
30057<br />
50297<br />
60118<br />
30059<br />
Indoor Coil, L.H. Unit<br />
Motor/Blower Assembly, High Static<br />
Capacitor, Blower Motor, High Static<br />
60119<br />
30046<br />
50302<br />
60121<br />
n/a<br />
n/a<br />
60122<br />
n/a<br />
n/a<br />
60123<br />
n/a<br />
n/a<br />
60123<br />
n/a<br />
n/a<br />
60124<br />
n/a<br />
n/a<br />
7 Distributor, with Screen (Qty) 20276 20276 20275 20275 20294 20275 (Two)<br />
8 Tube, Capillary (Qty) 81032 (Two) 81224 (Two) 81032 (Three) 81224 (Three) 80950 (Three) 81032 (Six)<br />
9 Heat Exchanger 60091 60092 60092 60092 60092 60117<br />
10 Valve, Reversing 20279A 20280A 20280A 20280A 20280A 20220A<br />
11 Coil, Reversing Valve 50232A 50232A 50232A 50232A 50232A 50232A<br />
12 Switch, High Pressure 70080 70080 70080 70080 70080 70080<br />
13 Switch, Low Pressure 70047 70047 70047 70047 70047 70047<br />
14 Plenum, Adapter Ring 01316 01317 01317 01317 01317 01317<br />
15 Hose Adapter, Blower (Optional) 90134 (5") 90135 (6") 90135 (6") 90136 (7") 90136 (7") 90136 (7")<br />
16 Filter, Return <strong>Air</strong> 81291 81289 81289 81288 81288 81288<br />
ITEM<br />
DE<strong>SC</strong>RIPTION<br />
<strong>SC</strong>B07RCBR <strong>SC</strong>B10RCBR <strong>SC</strong>B12RCBR <strong>SC</strong>B16RCBL<br />
<strong>SC</strong>B07RCBL <strong>SC</strong>B10RCBL <strong>SC</strong>B12RCBL <strong>SC</strong>B16RCBL<br />
1 Compressor 10247 10250 10248 10249<br />
2 Capacitor, Compressor 50296 50296 50265 50265<br />
3<br />
Motor Protector, Compressor<br />
MRA5731-114 MRA5723-114 MRA5784-113 MRA4759-117<br />
4<br />
5<br />
6<br />
REPLACEMENT PARTS LIST - <strong>SC</strong>BxxRCB<br />
Texas Instruments P/N<br />
Indoor Coil, R.H. Unit 60087 60088 60089 60090<br />
Indoor Coil, L.H. Unit 60119 60121 60122 60123<br />
Motor/Blower Assembly, Standard 30053 30049 30049 30052<br />
Motor/Blower Assembly, High Static 30047 n/a n/a n/a<br />
Capacitor, Blower Motor, Standard 50308 50301 50301 50298<br />
Capacitor, Blower Motor, High Static 50303 n/a n/a n/a<br />
7 Distributor, with Screen 20276 20276 20275 20275<br />
8 Tube, Capillary (Qty) 81032 (Two) 81224 (Two) 81032 (Three) 81224 (Three)<br />
9 Heat Exchanger 60091 60092 60092 60092<br />
10 Valve, Reversing 20279A 20280A 20280A 20280A<br />
11 Coil, Reversing Valve 20278A 20278A 20278A 20278A<br />
12 Switch, High Pressure 70080 70080 70080 70080<br />
13 Switch, Low Pressure 70047 70047 70047 70047<br />
14 Plenum, Adapter Ring 01316 01317 01317 01317<br />
15 Hose Adapter, Blower (Optional) 90134 (5") 90135 (6") 90135 (6") 90136 (7")<br />
16 Filter, Return <strong>Air</strong> 81291 81289 81289 81288<br />
SeaMach Owner’s Manual 5/05 Page 20 of 24
SeaMach Reverse Cycle <strong>Air</strong> Conditioners<br />
REPLACEMENT PARTS LIST - <strong>SC</strong>BxxRCF<br />
ITEM<br />
DE<strong>SC</strong>RIPTION<br />
<strong>SC</strong>B07RCFR <strong>SC</strong>B10RCFR <strong>SC</strong>B12RCFR <strong>SC</strong>B16RCFL<br />
<strong>SC</strong>B07RCFL <strong>SC</strong>B10RCFL <strong>SC</strong>B12RCFL <strong>SC</strong>B16RCFL<br />
1 Compressor 10245 10246 10243 10244<br />
2 Capacitor, Compressor 50265 50265 50265 50265<br />
3<br />
Motor Protector, Compressor<br />
M<strong>SP</strong>28APW-114 MRA1723-114 MST16AHZ-112 MST16AHW-112<br />
4<br />
5<br />
6<br />
Texas Instruments P/N<br />
Indoor Coil, R.H. Unit 60087 60088 60089 60090<br />
Indoor Coil, L.H. Unit 60119 60121 60122 60123<br />
Motor/Blower Assembly, Standard 30054 30048 30048 30051<br />
Motor/Blower Assembly, High Static 30046 n/a n/a n/a<br />
Capacitor, Blower Motor, Standard 50307 50299 50299 50297<br />
Capacitor, Blower Motor, High Static 50302 n/a n/a n/a<br />
7 Distributor, with Screen (Qty) 20276 20276 20275 20275<br />
8 Tube, Capillary (Qty) 81032 (Two) 81224 (Two) 81032 (Three) 81224 (Three)<br />
9 Heat Exchanger 60091 60092 60092 60092<br />
10 Valve, Reversing 20279A 20280A 20280A 20280A<br />
11 Coil, Reversing Valve 50232A 50232A 50232A 50232A<br />
12 Switch, High Pressure 70080 70080 70080 70080<br />
13 Switch, Low Pressure 70047 70047 70047 70047<br />
14 Plenum, Adapter Ring 01316 01317 01317 01317<br />
15 Hose Adapter, Blower (Optional) 90134 (5") 90135 (6") 90135 (6") 90136 (7")<br />
16 Filter, Return <strong>Air</strong> 81291 81289 81289 81288<br />
REPLACEMENT PARTS LIST - <strong>SP</strong>MxxRCB<br />
ITEM<br />
DE<strong>SC</strong>RIPTION<br />
<strong>SP</strong>M05RCBL<br />
<strong>SP</strong>M07RCBR <strong>SP</strong>M10RCBR <strong>SP</strong>M12RCBR <strong>SP</strong>M16RCBL <strong>SP</strong>M18RCBR<br />
<strong>SP</strong>M07RCBL <strong>SP</strong>M10RCBL <strong>SP</strong>M12RCBL <strong>SP</strong>M16RCBL <strong>SP</strong>M18RCBL<br />
1 Compressor 10257 10239 10012 10067 10229 10256<br />
2 Capacitor, Compressor 50296 50296 50265 50265 50265 50315<br />
3<br />
Motor Protector, Compressor<br />
Texas Instruments P/N<br />
MRA5731-114 MRA4761-114 MRA4760-114 MRA4759-117 Internal<br />
4<br />
5<br />
6<br />
Indoor Coil, R.H. Unit<br />
Motor/Blower Assembly, Standard<br />
Capacitor, Blower Motor, Standard<br />
n/a<br />
30061<br />
50308<br />
60087<br />
30053<br />
50308<br />
60088<br />
30049<br />
50301<br />
60089<br />
30049<br />
50301<br />
60090<br />
30052<br />
50298<br />
60090<br />
30056<br />
50298<br />
Indoor Coil, L.H. Unit<br />
Motor/Blower Assembly, High Static<br />
Capacitor, Blower Motor, High Static<br />
60127<br />
n/a<br />
n/a<br />
60119<br />
30047<br />
50303<br />
60121<br />
n/a<br />
n/a<br />
60122<br />
n/a<br />
n/a<br />
60123<br />
n/a<br />
n/a<br />
60123<br />
n/a<br />
n/a<br />
7 Distributor, with Screen None 20276 20276 20275 20275 20294<br />
8 Tube, Capillary (Qty) 81224 81032 (Two) 81224 (Two) 81032 (Three) 81224 (Three) 80950 (Three)<br />
9 Heat Exchanger 60126 60091 60092 60092 60092 60092<br />
10 Valve, Reversing 20279A 20279A 20280A 20280A 20280A 20280A<br />
11 Coil, Reversing Valve 20278A 20278A 20278A 20278A 20278A 20278A<br />
12 Switch, High Pressure 70080 70080 70080 70080 70080 70080<br />
13 Switch, Low Pressure 70047 70047 70047 70047 70047 70047<br />
14 Plenum, Adapter Ring None 01316 01317 01317 01317 01317<br />
15 Hose Adapter, Blower (Optional) None 90134 (5") 90135 (6") 90135 (6") 90136 (7") 90136 (7")<br />
16 Transformer, 40 VA 50203 50203 50203 50203 50203 50203<br />
17 Contactor, Compressor and Pump 50104 50104 50104 50104 50104 50104<br />
18 Relay, Indoor Blower 50023 50023 50023 50023 50023 50023<br />
19 Terminal Block (Qty) 80812 (Two) 80812 (Two) 80812 (Two) 80812 (Two) 80812 (Two) 80812 (Two)<br />
20 Ground Lug 80271 80271 80271 80271 80271 80271<br />
21 Thermostat, Heat Pump, ICM 50121 50121 50121 50121 50121 50121<br />
22 Filter, Return <strong>Air</strong> 81291 81289 81289 81288 81288<br />
SeaMach Owner’s Manual 5/05 Page 21 of 24
SeaMach Reverse Cycle <strong>Air</strong> Conditioners<br />
REPLACEMENT PARTS LIST - <strong>SP</strong>MxxRCA<br />
ITEM<br />
DE<strong>SC</strong>RIPTION<br />
<strong>SP</strong>M07RCAR <strong>SP</strong>M10RCAR <strong>SP</strong>M12RCAR <strong>SP</strong>M16RCAL <strong>SP</strong>M18RCAR <strong>SP</strong>M24RCAR<br />
<strong>SP</strong>M07RCAL <strong>SP</strong>M10RCAL <strong>SP</strong>M12RCAL <strong>SP</strong>M16RCAL <strong>SP</strong>M18RCAL <strong>SP</strong>M24RCAL<br />
1 Compressor 51450 10081 10082 10228 10007 10223<br />
2 Capacitor, Compressor 50306 50306 50265 50265 50265 50280<br />
3<br />
Motor Protector, Compressor<br />
Texas Instruments P/N<br />
MRA5472-114 MRA4765-114 MRA4763-114 Internal<br />
4<br />
5<br />
6<br />
Indoor Coil, R.H. Unit<br />
Motor/Blower Assembly, Standard<br />
Capacitor, Blower Motor, Standard<br />
60087<br />
30054<br />
50307<br />
60088<br />
30048<br />
50299<br />
60089<br />
30048<br />
50299<br />
60090<br />
30051<br />
50297<br />
60090<br />
30057<br />
50297<br />
60118<br />
30059<br />
Indoor Coil, L.H. Unit<br />
Motor/Blower Assembly, High Static<br />
Capacitor, Blower Motor, High Static<br />
60119<br />
30046<br />
50302<br />
60121<br />
n/a<br />
n/a<br />
60122<br />
n/a<br />
n/a<br />
60123<br />
n/a<br />
n/a<br />
60123<br />
n/a<br />
n/a<br />
60124<br />
n/a<br />
n/a<br />
7 Distributor, with Screen 20276 20276 20275 20275 20294 20275 (Two)<br />
8 Tube, Capillary (Qty) 81032 (Two) 81224 (Two) 81032 (Three) 81224 (Three) 80950 (Three) 81032 (Six)<br />
9 Heat Exchanger 60091 60092 60092 60092 60092 60117<br />
10 Valve, Reversing 20279A 20280A 20280A 20280A 20280A 20220A<br />
11 Coil, Reversing Valve 50232A 50232A 50232A 50232A 50232A 50232A<br />
12 Switch, High Pressure 70080 70080 70080 70080 70080 70080<br />
13 Switch, Low Pressure 70047 70047 70047 70047 70047 70047<br />
14 Plenum, Adapter Ring 01316 01317 01317 01317 01317 01317<br />
15 Hose Adapter, Blower (Optional) 90134 (5") 90135 (6") 90135 (6") 90136 (7") 90136 (7") 90136 (7")<br />
16 Transformer, 40 VA 50203 50203 50203 50203 50203 50203<br />
17 Relay, Compressor and Pump 50023 50023 50023 50023 50023 50023<br />
18 Relay, Indoor Blower 50023 50023 50023 50023 50023 50023<br />
19 Terminal Block (Qty) 80812 (Two) 80812 (Two) 80812 (Two) 80812 (Two) 80812 (Two) 80812 (Two)<br />
20 Ground Lug 80271 80271 80271 80271 80271 80271<br />
21 Thermostat, Heat Pump, ICM 50121 50121 50121 50121 50121 50121<br />
22 Filter, Return <strong>Air</strong> 81291 81289 81289 81288 81288 81288<br />
REPLACEMENT PARTS LIST - <strong>SC</strong>MxxRCF<br />
ITEM<br />
DE<strong>SC</strong>RIPTION<br />
<strong>SC</strong>M07RCFR <strong>SC</strong>M10RCFR <strong>SC</strong>M12RCFR <strong>SC</strong>M16RCFL<br />
<strong>SC</strong>M07RCFL <strong>SC</strong>M10RCFL <strong>SC</strong>M12RCFL <strong>SC</strong>M16RCFL<br />
1 Compressor 10245 10246 10243 10244<br />
2 Capacitor, Compressor 50265 50265 50265 50265<br />
3<br />
Motor Protector, Compressor<br />
Texas Instruments P/N<br />
M<strong>SP</strong>28APW-114 MRA1723-114 MST16AHZ-112 MST16AHW-112<br />
4<br />
5<br />
6<br />
Indoor Coil, R.H. Unit<br />
Motor/Blower Assembly, Standard<br />
Capacitor, Blower Motor, Standard<br />
60087<br />
30054<br />
50307<br />
60088<br />
30048<br />
50299<br />
60089<br />
30048<br />
50299<br />
60090<br />
30051<br />
50297<br />
Indoor Coil, L.H. Unit<br />
Motor/Blower Assembly, High Static<br />
Capacitor, Blower Motor, High Static<br />
60119<br />
30046<br />
50302<br />
60121<br />
n/a<br />
n/a<br />
60122<br />
n/a<br />
n/a<br />
60123<br />
n/a<br />
n/a<br />
7 Distributor, with Screen 20276 20276 20275 20275<br />
8 Tube, Capillary (Qty) 81032 (Two) 81224 (Two) 81032 (Three) 81224 (Three)<br />
9 Heat Exchanger 60091 60092 60092 60092<br />
10 Valve, Reversing 20279A 20280A 20280A 20280A<br />
11 Coil, Reversing Valve 50232A 50232A 50232A 50232A<br />
12 Switch, High Pressure 70080 70080 70080 70080<br />
13 Switch, Low Pressure 70047 70047 70047 70047<br />
14 Plenum, Adapter Ring 01316 01317 01317 01317<br />
15 Hose Adapter, Blower (Optional) 90134 (5") 90135 (6") 90135 (6") 90136 (7")<br />
16 Transformer, 40 VA 50203 50203 50203 50203<br />
17 Relay, Compressor and Pump 50023 50023 50023 50023<br />
18 Relay, Indoor Blower 50023 50023 50023 50023<br />
19 Terminal Block (Qty) 80812 (Two) 80812 (Two) 80812 (Two) 80812 (Two)<br />
20 Ground Lug 80271 80271 80271 80271<br />
21 Thermostat, Heat Pump, ICM 50121 50121 50121 50121<br />
22 Filter, Return <strong>Air</strong> 81291 81289 81289 81288<br />
SeaMach Owner’s Manual 5/05 Page 22 of 24
Parts<br />
SeaMach Reverse Cycle <strong>Air</strong> Conditioners<br />
Chapter 8 – Warranty<br />
<strong>Marvair</strong> ® SeaMach Self-Contained and Split Systems Warranty<br />
If any part of your <strong>Marvair</strong> SeaMach unit fails because of a manufacturing defect within twentyseven<br />
months from the date of original shipment by <strong>Marvair</strong> or within twenty-four months from the date<br />
of original start-up, whichever is the later date, <strong>Marvair</strong> will furnish without charge, EXW Cordele,<br />
Georgia, the required replacement part.<br />
In addition, if the air coil fails because of a manufacturing defect within sixty-three months from the<br />
date of original shipment by <strong>Marvair</strong> or within sixty months from the date of original start-up,<br />
whichever is the later date, <strong>Marvair</strong> will furnish without charge, EXW Cordele, Georgia, the required<br />
replacement coil.<br />
In addition, if any stainless steel component fails because of a manufacturing defect within one<br />
hundred twenty three months from the date of original shipment by <strong>Marvair</strong> or within one hundred<br />
twenty months from the date of original start-up, whichever is the later date, <strong>Marvair</strong> will furnish<br />
without charge, EXW Cordele, Georgia, the required replacement part.<br />
In addition, if the display or PC board in the SeaMach unit, models <strong>SP</strong>B or <strong>SC</strong>B, fails because of a<br />
manufacturing defect within thirty-nine months from the date of original shipment by <strong>Marvair</strong> or within<br />
thirty-six months from the date of original start-up, whichever is the later date, <strong>Marvair</strong> will furnish<br />
without charge, EXW Cordele, Georgia, the required replacement part.<br />
In addition, if the thermostat used with the SeaMach unit, models <strong>SP</strong>M or <strong>SC</strong>M, fails because of a<br />
manufacturing defect within fifteen months from the date of original shipment by <strong>Marvair</strong> or within<br />
twelve months from the date of original start-up, whichever is the later date, <strong>Marvair</strong> will furnish<br />
without charge, EXW Cordele, Georgia, the required replacement part.<br />
Any incidental supplies, e.g. filters, driers, fuses, are not included. The owner must provide proof of<br />
the date of the original start-up. The owner’s registration card filed with <strong>Marvair</strong>, the date of the<br />
purchase of the vessel, an invoice, or similar document are examples of proof of the date of the original<br />
start-up.<br />
Labor<br />
If any part of your <strong>Marvair</strong> SeaMach air conditioner fails because of a manufacturing defect within<br />
fifteen months from the date of original shipment by <strong>Marvair</strong> or within twelve months from the date of<br />
original start-up, whichever is the earlier date, <strong>Marvair</strong> will pay for the related service labor to replace<br />
the failed part according to the <strong>Marvair</strong> labor rate schedule currently in effect. The owner must provide<br />
proof of the date of the original start-up. The owner’s registration card filed with <strong>Marvair</strong>, the date of the<br />
purchase of the vessel, an invoice, or similar document are examples of proof of the date of the original<br />
start-up.<br />
When service is required, it must be performed during normal working hours (8:00 a.m. to 5:00<br />
p.m.) Monday through Friday and must be performed by <strong>Marvair</strong> personnel or their designated Service<br />
Representative.<br />
SeaMach Owner’s Manual 5/05 Page 23 of 24
SeaMach Reverse Cycle <strong>Air</strong> Conditioners<br />
The responsibility of the Owner of the Equipment includes the following:<br />
1. To operate the equipment according to the manufacturer's instructions.<br />
2. To provide easy accessibility for service.<br />
3. To check and reset circuit breaker(s) and disconnect before calling for service. (Circuit<br />
breaker(s) may be in the main service panel.)<br />
4. To keep the unit clean and free of dirt.<br />
5. To clean and/or replace the filter as required. (The filter may be located in the return air filter<br />
grille or in front of the evaporator coil.)<br />
6. To keep the evaporator coil clean and the condenser coil free of sediment or scale.<br />
7. To pay the charges incurred when any of the above have not been done.<br />
8. To pay for repair or replacement of any material or part other than those within the <strong>Marvair</strong><br />
unit or thermostat itself.<br />
9. To check any fuses on the circuit board and replace as required.<br />
The owner of the product may ship the allegedly defective or malfunctioning product or part to<br />
<strong>Marvair</strong>, at such owner’s expense, and <strong>Marvair</strong> will diagnose the defect and, if the defect is covered<br />
under this warranty, <strong>Marvair</strong> will honor its warranty and furnish the required replacement part. All costs<br />
for shipment and risk of loss during shipment of the product or part to <strong>Marvair</strong> and back to the owner<br />
shall be the responsibility and liability of the owner. Upon request by an owner, <strong>Marvair</strong> may arrange<br />
for remote diagnosis and repair of the allegedly defective or malfunctioning product or part.<br />
An owner requesting performance under this Warranty shall provide reasonable access to the<br />
allegedly defective or malfunctioning product to <strong>Marvair</strong> and its authorized agents and employees.<br />
This warranty does not cover damage caused by improper installation including any refrigerant leaks<br />
in the tubing and fittings between the evaporator and condenser sections on split systems; misuse of<br />
equipment; negligent servicing; damage due to use of the product for purposes other than those for<br />
which it was designed; damage caused by natural disasters, power surges, lightning and submersion;<br />
damage caused by unauthorized modifications; and damage caused by improper wiring or power supply<br />
to the air conditioner including operating the unit with an undersized generator.<br />
THIS WARRANTY AND SERVICE POLICY CONSTITUTE THE EXCLUSIVE REMEDY<br />
OF ANY PURCHASER OF A MARVAIR REVERSE CYCLE AIR CONDITIONER AND IS IN<br />
LIEU OF ALL OTHER WARRANTIES, EXPRESSED OR IMPLIED, INCLUDING,<br />
WITHOUT LIMITATION, ANY IMPLIED WARRANTY OF MERCHANTABILITY OR<br />
FITNESS FOR USE, TO THE FULLEST EXTENT PERMITTED BY LAW. IN NO EVENT<br />
SHALL ANY IMPLIED WARRANTY OF MERCHANTABILITY OR FITNESS FOR USE<br />
EXCEED THE TERMS OF THE APPLICABLE WARRANTY STATED ABOVE AND<br />
MARVAIR SHALL HAVE NO OTHER OBLIGATION OR LIABILITY. IN NO EVENT<br />
SHALL MARVAIR BE LIABLE FOR INCIDENTAL OR CONSEQUENTIAL DAMAGES OR<br />
MONETARY DAMAGES.<br />
THIS WARRANTY GIVES YOU <strong>SP</strong>ECIFIC LEGAL RIGHTS, AND YOU MAY ALSO HAVE<br />
OTHER RIGHTS WHICH VARY FROM STATE-TO-STATE. Some states do not allow limitations or<br />
exclusions, so the above limitations and exclusions may not apply to you.<br />
4/05 Rev. 2<br />
SeaMach Owner’s Manual 5/05 Page 24 of 24