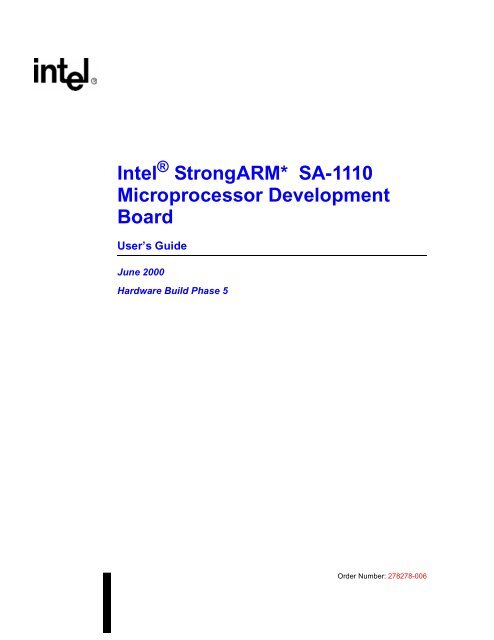
Intel StrongARM* SA-1110 Microprocessor Development Board
Intel StrongARM* SA-1110 Microprocessor Development Board
Intel StrongARM* SA-1110 Microprocessor Development Board

Create successful ePaper yourself
Turn your PDF publications into a flip-book with our unique Google optimized e-Paper software.
<strong>Intel</strong> ® <strong>StrongARM*</strong> <strong>SA</strong>-<strong>1110</strong><br />
<strong>Microprocessor</strong> <strong>Development</strong><br />
<strong>Board</strong><br />
User’s Guide<br />
June 2000<br />
Hardware Build Phase 5<br />
Order Number: 278278-006
Information in this document is provided in connection with <strong>Intel</strong> ® products. No license, express or implied, by estoppel or otherwise, to any intellectual<br />
property rights is granted by this document. Except as provided in <strong>Intel</strong>'s Terms and Conditions of Sale for such products, <strong>Intel</strong> assumes no liability<br />
whatsoever, and <strong>Intel</strong> disclaims any express or implied warranty, relating to sale and/or use of <strong>Intel</strong> products including liability or warranties relating to<br />
fitness for a particular purpose, merchantability, or infringement of any patent, copyright or other intellectual property right. <strong>Intel</strong> products are not<br />
intended for use in medical, life saving, or life sustaining applications.<br />
<strong>Intel</strong> may make changes to specifications and product descriptions at any time, without notice.<br />
Designers must not rely on the absence or characteristics of any features or instructions marked “reserved” or “undefined.” <strong>Intel</strong> reserves these for<br />
future definition and shall have no responsibility whatsoever for conflicts or incompatibilities arising from future changes to them.<br />
The <strong>SA</strong>-<strong>1110</strong> <strong>Development</strong> <strong>Board</strong> may contain design defects or errors known as errata which may cause the product to deviate from published<br />
specifications. Current characterized errata are available on request.<br />
Contact your local <strong>Intel</strong> sales office or your distributor to obtain the latest specifications and before placing your product order.<br />
Copies of documents which have an ordering number and are referenced in this document, or other <strong>Intel</strong> literature may be obtained by calling 1-800-<br />
548-4725 or by visiting <strong>Intel</strong>'s website at http://www.intel.com.<br />
Copyright © <strong>Intel</strong> Corporation, 2000<br />
*Third-party brands and names are the property of their respective owners.<br />
<strong>Intel</strong> ® <strong>StrongARM*</strong> <strong>SA</strong>-<strong>1110</strong> <strong>Microprocessor</strong> <strong>Development</strong> <strong>Board</strong> User’s Guide
Contents<br />
1 Introduction.....................................................................................................................1–1<br />
1.1 Related Documentation.....................................................................................1–4<br />
1.2 <strong>SA</strong>-<strong>1110</strong> <strong>Development</strong> Platform Overview........................................................1–4<br />
2 Getting Started ...............................................................................................................2–1<br />
2.1 Physical Description ..........................................................................................2–1<br />
2.1.1 Unpacking the <strong>Intel</strong>® <strong>StrongARM*</strong> <strong>SA</strong>-<strong>1110</strong> <strong>Development</strong> <strong>Board</strong> ...2–5<br />
2.1.2 <strong>Development</strong> JTAG ..........................................................................2–5<br />
2.1.3 <strong>Intel</strong>® <strong>StrongARM*</strong> <strong>SA</strong>-<strong>1110</strong> <strong>Development</strong> <strong>Board</strong> Software ............2–5<br />
2.1.4 Assembling the <strong>SA</strong>-<strong>1110</strong> <strong>Development</strong> Platform .............................2–5<br />
2.2 Providing Power for Only the <strong>SA</strong>-<strong>1110</strong> <strong>Development</strong> <strong>Board</strong>.............................2–6<br />
2.3 Providing Power for the <strong>SA</strong>-<strong>1110</strong> <strong>Development</strong> <strong>Board</strong> and the <strong>SA</strong>-1111<br />
<strong>Development</strong> Module ........................................................................................2–8<br />
2.4 Using the ARM* ADS with the <strong>SA</strong>-<strong>1110</strong> <strong>Development</strong> Platform .......................2–9<br />
2.4.1 Angel* Firmware.............................................................................2–10<br />
2.4.2 Connecting the <strong>SA</strong>-<strong>1110</strong> <strong>Development</strong> Platform to the Host .........2–10<br />
2.4.3 Bringing Up the Angel* Debug Monitor ..........................................2–10<br />
2.4.4 Running an Application ..................................................................2–11<br />
3 Theory of Operation .......................................................................................................3–1<br />
3.1 System Partitioning ...........................................................................................3–1<br />
4 Hardware Considerations...............................................................................................4–1<br />
4.1 Xbus Expansion Headers..................................................................................4–1<br />
4.2 Storage..............................................................................................................4–1<br />
4.2.1 <strong>Intel</strong>® <strong>StrongARM*</strong> <strong>SA</strong>-<strong>1110</strong> <strong>Development</strong> <strong>Board</strong> Memory Map .....4–1<br />
4.2.2 Flash Memory...................................................................................4–2<br />
4.2.3 Main SDRAM Interface.....................................................................4–3<br />
4.2.4 Expansion Flash Memory.................................................................4–3<br />
4.2.5 Expansion SDRAM Interface............................................................4–3<br />
4.2.6 Compact Flash .................................................................................4–3<br />
4.3 <strong>Intel</strong>® <strong>StrongARM*</strong> <strong>SA</strong>-<strong>1110</strong> GPIO Usage........................................................4–4<br />
4.3.1 GPIO 0 and GPIO 1 .........................................................................4–6<br />
4.3.2 <strong>Intel</strong>® <strong>StrongARM*</strong> <strong>SA</strong>-<strong>1110</strong> GPIO Pin Descriptions .......................4–7<br />
4.4 Register Descriptions ........................................................................................4–8<br />
4.4.1 <strong>Intel</strong>® <strong>StrongARM*</strong> <strong>SA</strong>-<strong>1110</strong> System Configuration<br />
Register SCR ...................................................................................4–8<br />
4.4.2 <strong>SA</strong>-<strong>1110</strong> <strong>Development</strong> <strong>Board</strong> Control Register<br />
BCR 0x1200,0000 ..........................................................................4–10<br />
4.4.3 <strong>SA</strong>-<strong>1110</strong> <strong>Development</strong> <strong>Board</strong> Status Register 0x1200,0000 .........4–14<br />
4.5 System Reset..................................................................................................4–15<br />
4.6 System Displays..............................................................................................4–16<br />
4.6.1 LED Displays..................................................................................4–16<br />
4.6.2 LCD Displays..................................................................................4–16<br />
4.6.2.1 Sharp 3.9” Reflective Color...............................................4–16<br />
4.6.2.2 Memory Pixel Representations Versus Physical<br />
Pixel Interface ...................................................................4–17<br />
<strong>Intel</strong> ® <strong>StrongARM*</strong> <strong>SA</strong>-<strong>1110</strong> <strong>Microprocessor</strong> <strong>Development</strong> <strong>Board</strong> User’s Guide<br />
iii
4.6.2.3 Mapping 18 Bit LCDs to 16 Bits of Pixel Data .................. 4–17<br />
4.6.2.4 LCD Backlight Frontlight Support ..................................... 4–17<br />
4.7 Debugging....................................................................................................... 4–17<br />
4.7.1 Keypad ........................................................................................... 4–18<br />
4.7.2 Debug Switches ............................................................................. 4–18<br />
4.7.3 Function Switches .......................................................................... 4–18<br />
4.7.4 Logic Analyzer Support ..................................................................4–19<br />
4.8 SMBus.............................................................................................................4–19<br />
4.9 Serial Ports...................................................................................................... 4–19<br />
4.10 Power System .................................................................................................4–20<br />
4.10.1 Power System Design Benefits...................................................... 4–20<br />
4.10.2 Power System Design.................................................................... 4–20<br />
4.10.2.1 1.5V Core Power .............................................................. 4–21<br />
4.11 Power for the <strong>Intel</strong>® <strong>StrongARM*</strong> <strong>SA</strong>-<strong>1110</strong> <strong>Development</strong> <strong>Board</strong>.................... 4–22<br />
4.11.1 3.3 V Main System Power Design Considerations......................... 4–22<br />
4.11.2 MAX1705 Boost Converter and MIC5219 LDO Linear Regulator.. 4–23<br />
4.11.2.1 Sleep Mode ...................................................................... 4–24<br />
4.11.2.2 Virtual Backup Battery ...................................................... 4–25<br />
4.11.2.3 Linear Boost Bootstrap System ........................................4–25<br />
4.11.2.4 Radio Power ..................................................................... 4–26<br />
4.11.2.5 LCD Power .......................................................................4–27<br />
4.11.2.6 System Power Limits ........................................................ 4–27<br />
4.12 Audio Systems ................................................................................................ 4–28<br />
4.12.1 Stereo Codec ................................................................................. 4–29<br />
4.12.2 L3 Bus ............................................................................................ 4–29<br />
4.12.3 Stereo Codec Interface ..................................................................4–30<br />
4.12.4 Microphone and Speaker ............................................................... 4–31<br />
4.12.5 <strong>SA</strong>-<strong>1110</strong> <strong>Development</strong> <strong>Board</strong> Stereo Codec Sampling Rates .......4–31<br />
4.12.6 Phone Codec and Soft Modem ...................................................... 4–31<br />
4.12.7 Audio System Routing and Mixing Diagram................................... 4–32<br />
4.12.7.1 UDA1341 Loopback Mode ............................................... 4–32<br />
4.12.7.2 UDA1341 Digital Routing with Mixing in the <strong>SA</strong>-<strong>1110</strong> ...... 4–32<br />
4.13 Radio Interface................................................................................................ 4–33<br />
4.13.1 CDMA Radio Module...................................................................... 4–34<br />
4.13.2 GSM Radio Module........................................................................ 4–34<br />
4.13.3 Bluetooth Radio Module................................................................. 4–34<br />
4.14 Quiet Alert Motor ............................................................................................. 4–34<br />
4.15 IrDA Infra-red Communications.......................................................................4–34<br />
4.16 USB Client Port ............................................................................................... 4–35<br />
4.17 Video Output Design ....................................................................................... 4–35<br />
4.17.1 <strong>SA</strong>-<strong>1110</strong> Core Clock Frequency..................................................... 4–36<br />
4.17.2 Interlaced Video ............................................................................. 4–36<br />
4.17.3 Video Output Interlaced Timing Generation................................... 4–36<br />
4.17.4 Interlaced Display Buffer ................................................................4–36<br />
5 Analog I/O .....................................................................................................................5–1<br />
5.1 UCB1300 Analog IO..........................................................................................5–1<br />
5.1.1 Battery Voltage.................................................................................5–1<br />
5.1.2 Battery Temperature ........................................................................5–2<br />
5.1.3 Analog Spare....................................................................................5–2<br />
5.2 Analog Outputs .................................................................................................5–3<br />
iv<br />
<strong>Intel</strong> ® <strong>StrongARM*</strong> <strong>SA</strong>-<strong>1110</strong> <strong>Microprocessor</strong> <strong>Development</strong> <strong>Board</strong> User’s Guide
5.3 Touch Screen ....................................................................................................5–3<br />
6 System Power Management .........................................................................................6–1<br />
6.1 Battery Power....................................................................................................6–1<br />
6.2 Battery Management.........................................................................................6–1<br />
6.2.1 Low-Cost Battery Management........................................................6–1<br />
6.2.2 Smart Battery Management .............................................................6–3<br />
6.2.3 Battery Physical Interface.................................................................6–3<br />
6.2.4 Battery Capacity ...............................................................................6–3<br />
6.2.5 Battery Safety...................................................................................6–3<br />
6.2.6 Fuel Gauging....................................................................................6–4<br />
6.2.7 Special Handling and Storage Requirements for Batteries ..............6–5<br />
A In-Circuit Programming ......................................................................................................7<br />
A.1 In-Circuit Programming of Flash Devices..............................................................7<br />
A.2 In-Circuit Programming of CPLD Devices .............................................................7<br />
Figures<br />
1-1 Preliminary <strong>Intel</strong>® <strong>StrongARM*</strong> <strong>SA</strong>-<strong>1110</strong> Developer Platform ..........................1–2<br />
1-2 Preliminary Cross-Sectional view of <strong>SA</strong>-<strong>1110</strong> <strong>Development</strong> Platform ..............1–3<br />
2-1 <strong>Intel</strong>® <strong>StrongARM*</strong> <strong>SA</strong>-<strong>1110</strong> <strong>Development</strong> <strong>Board</strong>, Side 1................................2–3<br />
2-2 <strong>Intel</strong>® <strong>StrongARM*</strong> <strong>SA</strong>-<strong>1110</strong> <strong>Development</strong> <strong>Board</strong>, Side 2................................2–4<br />
2-3 Li-Ion Battery Location ......................................................................................2–6<br />
2-4 Master Power Clip Location ..............................................................................2–7<br />
2-5 AC Power Input Jack Location ..........................................................................2–7<br />
2-6 Li-Ion Battery Location ......................................................................................2–8<br />
2-7 AC Power Input Jack Location ..........................................................................2–9<br />
3-1 <strong>Intel</strong>® <strong>StrongARM*</strong> <strong>SA</strong>-<strong>1110</strong> <strong>Development</strong> Platform Block Diagram ................3–2<br />
3-2 <strong>Intel</strong>® <strong>StrongARM*</strong> <strong>SA</strong>-<strong>1110</strong> <strong>Development</strong> <strong>Board</strong> Inputs and Outputs.............3–3<br />
3-3 Data Flow in the <strong>SA</strong>-<strong>1110</strong> <strong>Microprocessor</strong>........................................................3–4<br />
4-1 Li-ion Discharge Curves ..................................................................................4–21<br />
4-2 Linear Boost Bootstrap Power System............................................................4–26<br />
4-3 Stereo Codec Glue Logic ................................................................................4–30<br />
4-4 UDA1341 Interface Timing ..............................................................................4–30<br />
4-5 Audio Mixing Diagram .....................................................................................4–33<br />
4-6 Waking Circuit .................................................................................................4–35<br />
4-7 Interlaced Frame Buffer...................................................................................4–37<br />
Tables<br />
4-1 System Memory Map .......................................................................................4–2<br />
4-2 GPIO Usage for <strong>Intel</strong>® <strong>StrongARM*</strong> Platforms .................................................4–5<br />
4-3 UCB 1300 CODEC............................................................................................4–6<br />
4-4 GPIO Pin Descriptions ......................................................................................4–7<br />
4-5 System Configuration Bit Descriptions ............................................................4–10<br />
<strong>Intel</strong> ® <strong>StrongARM*</strong> <strong>SA</strong>-<strong>1110</strong> <strong>Microprocessor</strong> <strong>Development</strong> <strong>Board</strong> User’s Guide<br />
v
4-6 <strong>Board</strong> Control Register.................................................................................... 4–11<br />
4-7 <strong>Board</strong> Status Register .....................................................................................4–15<br />
4-8 LED Descriptions ............................................................................................ 4–16<br />
5-1 ADC Input Pin Descriptions...............................................................................5–1<br />
5-2 Battery Voltage Level Indications......................................................................5–2<br />
5-3 Battery Temperature Indications .......................................................................5–2<br />
vi<br />
<strong>Intel</strong> ® <strong>StrongARM*</strong> <strong>SA</strong>-<strong>1110</strong> <strong>Microprocessor</strong> <strong>Development</strong> <strong>Board</strong> User’s Guide
Introduction<br />
Introduction 1<br />
The <strong>Intel</strong> ® <strong>StrongARM*</strong> <strong>SA</strong>-<strong>1110</strong> <strong>Microprocessor</strong> (<strong>SA</strong>-<strong>1110</strong>) is a highly integrated<br />
communications microcontroller that incorporates a 32-bit <strong>StrongARM*</strong> RISC processor core,<br />
system support logic, multiple communication channels, an LCD controller, a memory and<br />
PCMCIA controller, and general-purpose I/O ports. For more information about the <strong>SA</strong>-<strong>1110</strong><br />
device, see the <strong>Intel</strong> ® StrongARM * <strong>SA</strong>-<strong>1110</strong> <strong>Microprocessor</strong> Developer’s Manual, order number<br />
278240.<br />
The <strong>Intel</strong> ® <strong>StrongARM*</strong> <strong>SA</strong>-1111 <strong>Microprocessor</strong> Companion Chip (<strong>SA</strong>-1111) is a companion<br />
chip to the <strong>SA</strong>-<strong>1110</strong>, providing a variety of functions suitable for use in a high-performance<br />
handheld computer system. The <strong>SA</strong>-1111 brings a new level of integration to small systems,<br />
providing a variety of I/O functions that enable complete systems to be built with very little “glue”<br />
logic. In addition to a complete USB Host Controller, the <strong>SA</strong>-1111 includes extensive support for<br />
PCMCIA and Compact Flash (CF), two PS/2 ports, two industry-standard serial ports, and other<br />
I/O capabilities. It can acquire the system memory bus and do DMA transfers to system memory<br />
(EDO or SDRAM) with its high-performance memory controller. For more information about the<br />
<strong>SA</strong>-1111 device, see the <strong>Intel</strong> ® <strong>StrongARM*</strong> <strong>SA</strong>-1111 Companion Chip Developer’s Manual, order<br />
number 278242.<br />
The <strong>Intel</strong> ® <strong>StrongARM*</strong> <strong>SA</strong>-<strong>1110</strong> <strong>Development</strong> Platform (<strong>SA</strong>-<strong>1110</strong> <strong>Development</strong> Platform) order<br />
number <strong>SA</strong>111XDEVKIT is based upon these devices and is composed of a two board set 1 :<br />
• <strong>Intel</strong> ® <strong>StrongARM*</strong> <strong>SA</strong>-<strong>1110</strong> <strong>Development</strong> <strong>Board</strong> (<strong>SA</strong>-<strong>1110</strong> <strong>Development</strong> <strong>Board</strong>) order<br />
number <strong>SA</strong><strong>1110</strong>DEVBD.<br />
• <strong>Intel</strong> ® <strong>StrongARM*</strong> <strong>SA</strong>-1111 Companion Chip <strong>Development</strong> Module (<strong>SA</strong>-1111 <strong>Development</strong><br />
Module) order number <strong>SA</strong>1111DEVMOD.<br />
Note:<br />
This document and module are for the Phase 5 hardware build of this product. For the latest<br />
information and updates, see the hardware release notes that are provided in hardcopy format, the<br />
software readme.txt files that are provided in the software kits, and related specification updates on<br />
<strong>Intel</strong>’s website for developers.<br />
Figure 1-1 shows the preliminary front view of the <strong>SA</strong>-<strong>1110</strong> <strong>Development</strong> Platform and Figure 1-2<br />
shows a preliminary cross-sectional view.<br />
1. Though not included with the kit, the <strong>SA</strong>-<strong>1110</strong> <strong>Development</strong> Platform also supports a graphics module.<br />
<strong>Intel</strong> ® <strong>StrongARM*</strong> <strong>SA</strong>-<strong>1110</strong> <strong>Microprocessor</strong> <strong>Development</strong> <strong>Board</strong> User’s Guide 1-1
Introduction<br />
Figure 1-1. Preliminary <strong>Intel</strong> ® <strong>StrongARM*</strong> <strong>SA</strong>-<strong>1110</strong> Developer Platform<br />
<strong>Intel</strong> ® StrongARM *<br />
<strong>SA</strong>-<strong>1110</strong> hand held<br />
reference design.<br />
Add shield gnd<br />
points every 0.5"<br />
around entire board<br />
SW<br />
LEDs LCD CPLD Reg16<br />
Sharp 3.9" color reflective TFT LCD<br />
Reg16<br />
LCD GOO<br />
IrDA<br />
0.75"<br />
<strong>Intel</strong> StrongARM<br />
<strong>SA</strong>-<strong>1110</strong> <strong>Board</strong><br />
[top view]<br />
Light Green:<br />
3V side one components<br />
Dark Green:<br />
3V side two components<br />
Blue: 1.65V Vcore<br />
Red: 5V<br />
Yellow: LCD components<br />
Magenta:<br />
System power components<br />
0.157" non-plated tooling<br />
and board stacking holes<br />
spaced 0.2" from edges<br />
unless marked otherwise.<br />
5V<br />
L<br />
L<br />
20S<br />
Hi<br />
3V<br />
L<br />
12V<br />
CD side 2<br />
L<br />
tp<br />
A3-A0<br />
sdclks31 Data0<br />
gpio<br />
CFII<br />
<strong>SA</strong>-<strong>1110</strong><br />
uBGA<br />
lcd<br />
SDRAM<br />
D7-D0<br />
54 tsop 256Mb<br />
A4-A12<br />
D8-D15<br />
cas 25Addr0<br />
cia<br />
Socket<br />
BUF Axcv Dxcv<br />
5"<br />
AA<br />
Batt.<br />
AA<br />
Batt.<br />
Li-ion<br />
UR<br />
14500<br />
AA Batteries<br />
shown for<br />
scale only.<br />
Final design<br />
will be Li-ion<br />
types<br />
LCD GOO and DAA GOO<br />
are areas of discrete R<br />
and C components<br />
Shear line to remove logic<br />
analyzer headers. No<br />
components on this line.<br />
RJ45<br />
10BT<br />
3/4"<br />
SMC91C96<br />
Ethernet<br />
mic<br />
10-pin Pots +<br />
RS232<br />
US<br />
AR<br />
Pwr<br />
2Kb<br />
HD<br />
set<br />
Stereo<br />
3.5<br />
1Kb<br />
3 1/2"<br />
USB<br />
2 Slot PCMCIA<br />
stand off carriage allows<br />
components under slot 1<br />
0.35"<br />
0.75"<br />
<strong>Intel</strong> <strong>StrongARM*</strong><br />
<strong>SA</strong>-1111 <strong>Board</strong><br />
[top view]<br />
LA 10 x 2<br />
LA 10 x 2<br />
Port 2 9-pin<br />
Dsub<br />
LA 10 x 2<br />
LA 10 x 2<br />
LA 10 x 2<br />
LA 10 x 2<br />
232<br />
SW PAK<br />
LA 10 x 2<br />
LA 10 x 2<br />
max<br />
232<br />
Console 9-pin<br />
Dsub<br />
3/4"<br />
Keypad<br />
ISP 5x2<br />
Test CPLD<br />
2064<br />
pz3128<br />
CPLD<br />
100TQFP<br />
SJ<br />
out<br />
max<br />
16<br />
00<br />
AC<br />
97<br />
1341<br />
SJ<br />
in<br />
Dxcv Axcv BUF<br />
socket<br />
mic<br />
PCMCIA Card<br />
2.1 x 3.35<br />
A1 A22<br />
<strong>SA</strong>-1111<br />
uBGA<br />
A3 - A0 D7 - D0<br />
SDRAM<br />
54tsop256Mb<br />
A4 - A12 D8 - D15<br />
Flash<br />
56<br />
TSOP<br />
3.5"<br />
5"<br />
PS2<br />
D0 D15<br />
TPS<br />
2105<br />
usb<br />
USB<br />
1"<br />
AMP 536280-6 140 pin facing up<br />
5"<br />
Provide 3.3V<br />
power shunt for<br />
StrongARM <strong>SA</strong>-1111<br />
measurements.<br />
* Other brands and<br />
names are the property<br />
of their respective<br />
owners.<br />
A7310-01<br />
1-2 <strong>Intel</strong> ® <strong>StrongARM*</strong> <strong>SA</strong>-<strong>1110</strong> <strong>Microprocessor</strong> <strong>Development</strong> <strong>Board</strong> User’s Guide
Introduction<br />
Figure 1-2 shows a preliminary sideview of the <strong>SA</strong>-<strong>1110</strong> development board:<br />
Figure 1-2. Preliminary Cross-Sectional view of <strong>SA</strong>-<strong>1110</strong> <strong>Development</strong> Platform<br />
32 Surface<br />
mount leds<br />
Full development system<br />
with <strong>Intel</strong> ® <strong>StrongARM*</strong><br />
<strong>SA</strong>-1111, GFX, LCD,<br />
touch screen and<br />
frontlight.<br />
Speaker<br />
Touch Screen<br />
Front Light<br />
Sharp Reflective 3" LCD<br />
mic<br />
SDRAM<br />
mic<br />
GFX<br />
<strong>SA</strong>-<strong>1110</strong><br />
<strong>SA</strong>-1111<br />
XCVR<br />
XCVR<br />
0.775"<br />
2.25"<br />
5"<br />
Plexiglass<br />
5 cm<br />
J2<br />
J3<br />
1.5"<br />
3.4 cm<br />
Note: Not to scale<br />
Li-lon Battery<br />
Plexiglass<br />
* Other brands and names are the property of their respective owners.<br />
A7371-01<br />
The modular design of the <strong>SA</strong>-<strong>1110</strong> <strong>Development</strong> Platform makes it a flexible, extendable and<br />
reusable design that supports 1 the following requirements:<br />
• Targeted for hand-held applications<br />
• Multiple OS development platform<br />
• Third-party vendor graphics accelerator development platform<br />
• <strong>Development</strong> platform for <strong>SA</strong>-1111 Companion Chip<br />
• <strong>SA</strong>-<strong>1110</strong> <strong>Development</strong> <strong>Board</strong> may be used as a palm PC reference design and development<br />
platform<br />
• <strong>SA</strong>-<strong>1110</strong> <strong>Development</strong> <strong>Board</strong> may be used as host board for PCI bridge ASIC/FPGA and a<br />
Windows CE reference platform<br />
• Battery powered design example<br />
• Power management and battery management including SMBus and SBS development<br />
platform<br />
• RF communications development board with interfaces for CDMA and GSM and Bluetooth 2<br />
RF modules<br />
1. The <strong>SA</strong>-<strong>1110</strong> <strong>Development</strong> Platform has not been certified as being compliant with FCC, CE, UC, or PTT telephone standards or regulations.<br />
2. For the Phase 5 release of this product, formal Bluetooth interface specifications were not available. For more information, see section<br />
Section 4.13.3.<br />
<strong>Intel</strong> ® <strong>StrongARM*</strong> <strong>SA</strong>-<strong>1110</strong> <strong>Microprocessor</strong> <strong>Development</strong> <strong>Board</strong> User’s Guide 1-3
Introduction<br />
1.1 Related Documentation<br />
Other documentation that may be helpful while reading this document are described in the<br />
following table:<br />
Title<br />
Location<br />
<strong>Intel</strong> ® <strong>StrongARM*</strong> <strong>SA</strong>-<strong>1110</strong> <strong>Microprocessor</strong> Advanced<br />
Developer’s Manual, order number: 278240<br />
<strong>Intel</strong> ® <strong>StrongARM*</strong> <strong>SA</strong>-<strong>1110</strong> <strong>Microprocessor</strong> Specification<br />
Update, order number: 278259<br />
<strong>Intel</strong> ® <strong>StrongARM*</strong> <strong>SA</strong>-<strong>1110</strong> <strong>Development</strong> <strong>Board</strong> Parts List,<br />
order number: 278280<br />
<strong>Intel</strong> ® <strong>StrongARM*</strong> <strong>SA</strong>-<strong>1110</strong> <strong>Development</strong> <strong>Board</strong> Schematics,<br />
order number: 278279<br />
<strong>Intel</strong> ® <strong>StrongARM*</strong> <strong>SA</strong>-1111 <strong>Microprocessor</strong> Companion Chip<br />
Developer’s Manual, order number: 278242<br />
<strong>Intel</strong>’s website for developers is at: http://developer.intel.com<br />
<strong>Intel</strong> ® <strong>StrongARM*</strong> <strong>SA</strong>-1111 <strong>Microprocessor</strong> Companion Chip<br />
Specification Update, order number: 278260<br />
<strong>Intel</strong> ® <strong>StrongARM*</strong> <strong>SA</strong>-1111 Companion Chip <strong>Development</strong><br />
<strong>Board</strong> Schematics, order number: 289282<br />
<strong>Intel</strong> ® <strong>StrongARM*</strong> <strong>SA</strong>-1111 Companion Chip <strong>Development</strong><br />
<strong>Board</strong> Parts List, order number: 278283<br />
<strong>Intel</strong> ® <strong>StrongARM*</strong> <strong>SA</strong>-1111 Companion Chip <strong>Development</strong><br />
<strong>Board</strong> User’s Guide, order number: 278281<br />
<strong>Intel</strong> ® <strong>StrongARM*</strong> <strong>SA</strong>-<strong>1110</strong> <strong>Development</strong> <strong>Board</strong> - Windows*<br />
CE Software Kit User Guide, order number: 278322<br />
The ARM Debug Monitor: Angel<br />
ARM Architecture Reference Manual<br />
ARM’s website is at:<br />
http://www.arm.com<br />
1.2 <strong>SA</strong>-<strong>1110</strong> <strong>Development</strong> Platform Overview<br />
The <strong>SA</strong>-<strong>1110</strong> <strong>Development</strong> <strong>Board</strong>, the <strong>SA</strong>-1111 <strong>Development</strong> Module, and the graphics<br />
accelerator boards are a flexible software and hardware development environment and example<br />
design. When the <strong>SA</strong>-<strong>1110</strong> <strong>Development</strong> <strong>Board</strong> is used as a development system, the <strong>SA</strong>-1111<br />
<strong>Development</strong> Module is also required to provide Ethernet, serial port, LEDs and logic analyzer<br />
support.<br />
The <strong>SA</strong>-<strong>1110</strong> <strong>Development</strong> <strong>Board</strong> has the following resources and features:<br />
• Up to 32MB fast page mode <strong>Intel</strong> ® StrataFlash memory<br />
• Up to 64MB 100 MHz SDRAM<br />
• Un-buffered main memory interface allows highest possible SDRAM memory bandwidth<br />
• Small form factor 3.5” x 5” x 0.5” (same size as the Sony Nino*)<br />
1-4 <strong>Intel</strong> ® <strong>StrongARM*</strong> <strong>SA</strong>-<strong>1110</strong> <strong>Microprocessor</strong> <strong>Development</strong> <strong>Board</strong> User’s Guide
Introduction<br />
• Phillips Semiconductor UCB1300* codec supports microphone, speaker, POTS line soft<br />
modem DAA connections and touch screen<br />
• Phillips Semiconductor UDA1341* stereo codec supports high quality 16 bit stereo audio<br />
record and playback<br />
• Infra-red interface for IrDA data links up to 4Mb<br />
• Battery powered, using high efficiency DC-DC converters and a single Lithium ion (Li-ion)<br />
cell<br />
• Smart battery technology development platform and reference design when used with smart<br />
battery packs<br />
• Integrated 3.9” reflective color TFT LCD and touch screen<br />
• Optional 8” color passive LCD for use with GFX companion chip<br />
• Two expansion headers for the <strong>SA</strong>-1111 <strong>Development</strong> Module, the graphics accelerator board,<br />
or other boards<br />
• Built in mini speaker and two microphones<br />
• Built in quiet alert vibration motor<br />
• One type II Compact Flash socket (available only when the <strong>SA</strong>-1111 <strong>Development</strong> Module<br />
and graphics accelerator boards are not present)<br />
• USB slave port for PC synchronization and battery trickle charge<br />
• RF module interface connector for CDMA, GSM and Bluetooth modules up to 4 Watts<br />
• Base station connector for JTAG programming, RS232, power input, and telephone<br />
The <strong>SA</strong>-1111 <strong>Development</strong> Module has the following features 1 :<br />
• Expansion Flash bank. Up to 32MB socketed fast page mode StrataFlash memory<br />
• Expansion SDRAM bank (up to 64MB 50MHz SDRAM)<br />
• Supports UDA1341 stereo codec for high quality 16 bit stereo audio record and playback<br />
• Supports AC97 stereo codec for high quality 16 bit stereo audio record and playback<br />
• Form factor is six inches by five inches by 1.38 inches<br />
• Built in microphone<br />
• One type II PCMCIA socket<br />
• One type II Compact Flash socket<br />
• USB host port<br />
• USB host plug and power control device<br />
• Two PS2 ports<br />
• Logic analyzer pods<br />
• 32 LEDs to display program debug data<br />
• 10BASE-T Ethernet controller<br />
• Debug serial ports (RS-232)<br />
1. For more information about the <strong>SA</strong>-1111 <strong>Development</strong> Module, see the <strong>Intel</strong> ® <strong>StrongARM*</strong> <strong>SA</strong>-1111 Companion Chip <strong>Development</strong> Module<br />
User’s Guide.<br />
<strong>Intel</strong> ® <strong>StrongARM*</strong> <strong>SA</strong>-<strong>1110</strong> <strong>Microprocessor</strong> <strong>Development</strong> <strong>Board</strong> User’s Guide 1-5
Introduction<br />
The graphics accelerator board has the following features 1 :<br />
• Third-party high performance graphics accelerator<br />
• Two head display support; Analog XGA and LCD XGA<br />
• Direct connection for Sharp LM8V31 dual scan STN VGA color panel with backlight and<br />
touch screen<br />
1. For more information about the graphics accelerator board, see the third-party documentation.<br />
1-6 <strong>Intel</strong> ® <strong>StrongARM*</strong> <strong>SA</strong>-<strong>1110</strong> <strong>Microprocessor</strong> <strong>Development</strong> <strong>Board</strong> User’s Guide
Getting Started 2<br />
This <strong>SA</strong>-<strong>1110</strong> <strong>Development</strong> <strong>Board</strong> is supplied as a mother board and functions as both a standalone<br />
handheld PC device as well as a development platform when used with the <strong>SA</strong>-1111<br />
<strong>Development</strong> Module.<br />
This chapter provides a physical description of the <strong>SA</strong>-<strong>1110</strong> <strong>Development</strong> <strong>Board</strong> and describes<br />
how to:<br />
• Unpack the card and give it a visual inspection<br />
• Verify the <strong>SA</strong>-<strong>1110</strong> <strong>Development</strong> <strong>Board</strong> kit contents<br />
• Install the provided hardware<br />
2.1 Physical Description<br />
Figure 2-1 and Figure 2-2 shows the physical layout of the <strong>SA</strong>-<strong>1110</strong> <strong>Development</strong> <strong>Board</strong>. The<br />
<strong>SA</strong>-<strong>1110</strong> <strong>Development</strong> <strong>Board</strong> uses a 6-layer, micro-via, double-sided surface mount technology.<br />
The following components and systems are on side one of the <strong>SA</strong>-<strong>1110</strong> <strong>Development</strong> <strong>Board</strong>:<br />
• LCD cable connector—50-pin connector for the Sharp 3.9” LCD display<br />
• Touch screen header—Four-pin connector for the touch screen connector<br />
• <strong>Intel</strong> StrataFlash Memory—One of two 128 Mbit <strong>Intel</strong> StrataFlash memory components for<br />
storage of the operating system and applications<br />
• Spare ADC input—An analog to digital converter that could be used as a photo-sensor input to<br />
sense ambient light for background light control<br />
• Battery temperature sensor—Senses temperature of the Li-ion battery<br />
• Base station—14-pin connector for Joint Test Action Group (JTAG) programming, RS232,<br />
power input jack, and telephone<br />
• Headset jack 2.5 mm—2.5 mm standard telephony headset connector (earphone and<br />
microphone)<br />
• Stereo jack 3.5 mm—standard stereo headphone 3.5 mm connector<br />
• USB Type B connector—Universal Serial Bus, four-pin end point connection (slave) for host<br />
communications<br />
• Microphone connector—accepts Electret type microphone<br />
• Radio connector—30 pin connector that accepts CDMA, GSM, or Bluetooth 1 radio modules<br />
• SDRAM—One of two 128 Mbit SDRAM storage devices<br />
• <strong>Intel</strong> ® <strong>StrongARM*</strong> <strong>SA</strong>-<strong>1110</strong> <strong>Microprocessor</strong>—Small size, low power, high performance, 32-<br />
bit StrongARM processor.<br />
1. For the phase 5 release of this product, formal Bluetooth interface specifications were not available. For more information, see<br />
Section 4.13.3.<br />
<strong>Intel</strong> ® <strong>StrongARM*</strong> <strong>SA</strong>-<strong>1110</strong> <strong>Microprocessor</strong> <strong>Development</strong> <strong>Board</strong> User’s Guide 2-1
Getting Started<br />
• 140-pin expansion header—Main connector for <strong>SA</strong>-1111 <strong>Development</strong> Module (daughter) or<br />
third-party daughter cards<br />
• Video out header—Five-pin connector that provides composite video<br />
The following components and systems are on side two of the <strong>SA</strong>-<strong>1110</strong> <strong>Development</strong> <strong>Board</strong>:<br />
• Base station connector—14-pin connection for JTAG programming, RS232, power input jack,<br />
and telephone<br />
• GPIO 0 switch—Manual override for GPIO 0<br />
• GPIO 1 switch—Manual override for GPIO 1<br />
• User software definable switches—Eight push-button switches for user software definable<br />
signals<br />
• Battery headers—Ten-pin connector for battery temperature and status detection<br />
• Compact Flash II header—50-pin connector used for Ethernet and memory expansion<br />
• Backlight header—Five-pin connector for backlighting the LCD display<br />
• Left channel input—Half of stereo input<br />
• Right channel input—Half of stereo input<br />
• <strong>Intel</strong> StrataFlash Memory—One of two 128 Mbit <strong>Intel</strong> StrataFlash memory components for<br />
the operating system and applications<br />
• SDRAM—One of two 128 Mbit SDRAM<br />
• 140-pin expansion header—Main connector for <strong>SA</strong>-1111 <strong>Development</strong> Module (daughter) or<br />
third-party daughter cards<br />
2-2 <strong>Intel</strong> ® <strong>StrongARM*</strong> <strong>SA</strong>-<strong>1110</strong> <strong>Microprocessor</strong> <strong>Development</strong> <strong>Board</strong> User’s Guide
Getting Started<br />
Figure 2-1. <strong>Intel</strong> ® <strong>StrongARM*</strong> <strong>SA</strong>-<strong>1110</strong> <strong>Development</strong> <strong>Board</strong>, Side 1<br />
Master Battery<br />
Clip<br />
Reset<br />
Switch<br />
(Momentary)<br />
S9<br />
J22<br />
Video Out<br />
Header<br />
LCD<br />
Cable<br />
Connector<br />
J9<br />
E1<br />
J18<br />
J2<br />
140-pin<br />
Expansion<br />
Header for<br />
<strong>Intel</strong> ® <strong>StrongARM*</strong><br />
<br />
<br />
<strong>SA</strong>-1111<br />
<strong>Microprocessor</strong><br />
<strong>Development</strong><br />
Module or<br />
other<br />
Daughter<br />
Card<br />
<strong>Intel</strong> <br />
<strong>StrongARM*</strong><br />
<strong>SA</strong>-<strong>1110</strong><br />
<strong>Microprocessor</strong><br />
Touch<br />
Screen<br />
Header<br />
SDRAM<br />
<br />
Large<br />
Dimple<br />
for Pin 1<br />
Indicator<br />
<strong>Intel</strong> <br />
Strata-<br />
Flash<br />
Memory<br />
Spare ADC<br />
Input<br />
J19 J21<br />
J8<br />
E11 E2<br />
Radio<br />
Connector<br />
Internal<br />
Speaker<br />
Jacks<br />
Battery<br />
Temperature<br />
Sensor<br />
J14<br />
J11<br />
J17<br />
J10<br />
J16<br />
Microphone<br />
Pads<br />
J5<br />
J1<br />
J7<br />
Microphone<br />
Jack<br />
Base Station<br />
Power Input Jack<br />
Headset Jack<br />
(2.5 mm)<br />
Stereo Jack<br />
(3.5 mm)<br />
* Other brands and names are the property of their respective owners.<br />
USB Type B<br />
Connection<br />
A7223-01<br />
<strong>Intel</strong> ® <strong>StrongARM*</strong> <strong>SA</strong>-<strong>1110</strong> <strong>Microprocessor</strong> <strong>Development</strong> <strong>Board</strong> User’s Guide 2-3
Getting Started<br />
Figure 2-2. <strong>Intel</strong> ® <strong>StrongARM*</strong> <strong>SA</strong>-<strong>1110</strong> <strong>Development</strong> <strong>Board</strong>, Side 2<br />
Large Dimple for Pin 1 Indicator<br />
Battery Header<br />
<strong>Intel</strong> ® StrataFlash<br />
Memory<br />
140-pin<br />
Expansion<br />
Header for<br />
<strong>Intel</strong><br />
<strong>StrongARM*</strong> <br />
<strong>SA</strong>-1111<br />
<strong>Development</strong><br />
Module or<br />
Daughter<br />
Card<br />
Compact<br />
Flash II<br />
Header<br />
<strong>Intel</strong><br />
StrataFlash<br />
Memory<br />
Large<br />
Dimple<br />
for Pin 1<br />
Indicator<br />
J2<br />
J4<br />
J6<br />
E35<br />
E12<br />
J6<br />
S8<br />
S7<br />
S6<br />
S5<br />
S4<br />
S3<br />
S2<br />
User-<br />
Software<br />
Definable<br />
Switch<br />
User-<br />
Software<br />
Definable<br />
Switch<br />
User-<br />
Software<br />
Definable<br />
Switch<br />
User-<br />
Software<br />
Definable<br />
Switch<br />
User-<br />
Software<br />
Definable<br />
Switch<br />
User-<br />
Software<br />
Definable<br />
Switch<br />
GPIO1<br />
GPIO0<br />
Backlight<br />
Header<br />
J13<br />
S1<br />
J15<br />
J20<br />
Left<br />
Channel<br />
Input<br />
J10<br />
Right Channel Input<br />
Power Input Jack<br />
* Other brands and names are the property of their respective owners.<br />
Base Station<br />
Connector<br />
A7222-02<br />
2-4 <strong>Intel</strong> ® <strong>StrongARM*</strong> <strong>SA</strong>-<strong>1110</strong> <strong>Microprocessor</strong> <strong>Development</strong> <strong>Board</strong> User’s Guide
Getting Started<br />
2.1.1 Unpacking the <strong>Intel</strong> ® <strong>StrongARM*</strong> <strong>SA</strong>-<strong>1110</strong> <strong>Development</strong><br />
<strong>Board</strong><br />
Warning:<br />
This board contains electronic components that are susceptible to permanent damage from<br />
electrostatic discharge (static electricity). To prevent electrostatic discharge, it is supplied in an<br />
antistatic bag. When handling the board, risk of damage can be alleviated by following a few<br />
simple precautions:<br />
• Remove the board from the bag only when you are working on an antistatic, earthed surface<br />
and wearing an earthed antistatic wrist strap.<br />
• Keep the antistatic bag that the card was supplied in; if you remove the board from a system,<br />
store it back in the bag.<br />
• Do not touch the gold contacts.<br />
2.1.2 <strong>Development</strong> JTAG<br />
The <strong>SA</strong>-<strong>1110</strong> <strong>Development</strong> <strong>Board</strong> uses the JTAG interface to program the PZ3128 and PZ3064<br />
Complex Programmable Logic Devices (CPLDs). This code can be downloaded from <strong>Intel</strong>’s<br />
website for developers.<br />
The same JTAG loop also includes the <strong>SA</strong>-<strong>1110</strong> component. With the appropriate software<br />
installed, the <strong>SA</strong>-<strong>1110</strong> JTAG port hardware can be used to program the flash memories at a slow<br />
rate. However, the <strong>SA</strong>-<strong>1110</strong> JTAG port does not support JTAG In-Circuit Emulation (ICE).<br />
2.1.3 <strong>Intel</strong> ® <strong>StrongARM*</strong> <strong>SA</strong>-<strong>1110</strong> <strong>Development</strong> <strong>Board</strong> Software<br />
The following source and executable files are available from the StrongARM section in the<br />
developer's area on the <strong>Intel</strong> website:<br />
• Angel debug monitor – Software component for StrongARM based on ARM software that<br />
loads an application from a remote host computer or application flash.<br />
• Set of microHal libraries – Lowest level software that provides initialization for the<br />
StrongARM evaluation boards. This layer, provided as source-code for a library, resides<br />
between the actual hardware and any Real Time Operating System (RTOS) or user application.<br />
• Diagnostics – A set of test programs that analyze the functions of <strong>SA</strong>-<strong>1110</strong> <strong>Development</strong><br />
<strong>Board</strong>s and <strong>SA</strong>-1111 <strong>Development</strong> Modules.<br />
• Sample I/O drivers – Available for developers using Windows* CE.<br />
2.1.4 Assembling the <strong>SA</strong>-<strong>1110</strong> <strong>Development</strong> Platform<br />
The 140-pin connectors are very fragile on the <strong>SA</strong>-<strong>1110</strong> <strong>Development</strong> <strong>Board</strong> and the <strong>SA</strong>-1111<br />
<strong>Development</strong> Module. Care must be taken when assembling or disassembling these modules. For<br />
information about assembling procedures, see the <strong>Intel</strong> ® <strong>StrongARM*</strong> <strong>SA</strong>-1111 <strong>Microprocessor</strong><br />
<strong>Development</strong> Module User’s Guide.<br />
<strong>Intel</strong> ® <strong>StrongARM*</strong> <strong>SA</strong>-<strong>1110</strong> <strong>Microprocessor</strong> <strong>Development</strong> <strong>Board</strong> User’s Guide 2-5
Getting Started<br />
Caution:<br />
If the 140-pin connector is damaged due to improper assembly, the reader must contact their <strong>Intel</strong><br />
Sales representative for module replacement.<br />
2.2 Providing Power for Only the <strong>SA</strong>-<strong>1110</strong> <strong>Development</strong><br />
<strong>Board</strong><br />
Use the following procedure to provide power only for the <strong>SA</strong>-<strong>1110</strong> <strong>Development</strong> <strong>Board</strong>. To<br />
provide power for the <strong>SA</strong>-<strong>1110</strong> <strong>Development</strong> <strong>Board</strong> and the <strong>SA</strong>-1111 <strong>Development</strong> Module, see<br />
Section 2.3.<br />
Caution:<br />
The following procedure assumes that the jumper (shunt) for J22, the Master Power Clip for the<br />
Li-ion battery, has been removed and that all power associated with the <strong>SA</strong>-<strong>1110</strong> <strong>Development</strong><br />
<strong>Board</strong> is off. For more information about Li-ion battery considerations, see Chapter 6.<br />
Note: A very high value capacitor of 0.33 Farads (super cap) is connected in parallel with the power input<br />
from J10. This capacitor provides enough power to support the system for several minutes in sleep<br />
mode when power from J10 is removed.<br />
1. Verify that the Li-Ion battery is installed on the <strong>SA</strong>-<strong>1110</strong> <strong>Development</strong> <strong>Board</strong> and that the<br />
battery harness is connected to J4 (see Figure 2-3 for the location of the Li-Ion battery).<br />
Figure 2-3. Li-Ion Battery Location<br />
Plexiglass<br />
5 cm<br />
J2<br />
J3<br />
1.5"<br />
3.4 cm<br />
Note: Not to scale<br />
Li-lon Battery<br />
Plexiglass<br />
A7884-01<br />
2-6 <strong>Intel</strong> ® <strong>StrongARM*</strong> <strong>SA</strong>-<strong>1110</strong> <strong>Microprocessor</strong> <strong>Development</strong> <strong>Board</strong> User’s Guide
Getting Started<br />
2. Verify that the jumper (shunt) for J22 is inserted on the Master Power Clip (J22 should appear<br />
covered).<br />
Figure 2-4. Master Power Clip Location<br />
Master Battery<br />
Clip<br />
Reset<br />
Switch<br />
(Momentary)<br />
S9<br />
J22<br />
Video Out<br />
Header<br />
LCD<br />
Cable<br />
Connector<br />
J9<br />
E1<br />
J18<br />
J2<br />
140-pin<br />
Expansion<br />
Header for<br />
<strong>Intel</strong> ® <br />
<strong>StrongARM*</strong><br />
<strong>SA</strong>-1111<br />
<strong>Development</strong><br />
Module or<br />
other<br />
Daughter<br />
Card<br />
* Other brands and names are the property of their respective owners.<br />
A7761-01<br />
3. Select the appropriate AC adapter to DC converter device (wall brick) depending upon<br />
whether you are in a 110-volt or 220-volt environment.<br />
4. Insert the power jack that is connected to the wall brick into J10 (see Figure 2-5 for the<br />
location of J10).<br />
Figure 2-5. AC Power Input Jack Location<br />
J14<br />
J11<br />
J10<br />
J17<br />
J5<br />
J16<br />
J1<br />
J7<br />
Base Station<br />
Power Input Jack<br />
Headset Jack<br />
2.5 mm<br />
Stereo Jack<br />
3.5 mm<br />
USB Type B<br />
Connection<br />
A7615-01<br />
Note: The power jack may have to be rotated to its flat side to accommodate any other connectors in J10.<br />
5. Plug in the wall-brick into an AC outlet.<br />
6. See the <strong>Intel</strong>® <strong>StrongARM*</strong> <strong>SA</strong>-<strong>1110</strong>/<strong>SA</strong>-1111 <strong>Development</strong> Kit Quick Start User’s Guide file<br />
for success and failure indications of start-up diagnostic results and how to proceed.<br />
<strong>Intel</strong> ® <strong>StrongARM*</strong> <strong>SA</strong>-<strong>1110</strong> <strong>Microprocessor</strong> <strong>Development</strong> <strong>Board</strong> User’s Guide 2-7
Getting Started<br />
To disconnect power, remove the power jack from J10 and remove the Master Power Clip from J22<br />
and wait for the super cap to discharge (typically less than 5 minutes).<br />
Note:<br />
If sleep mode was entered as a result of VDD_FAULT or BATT_FAULT signals, GPIO 0 and<br />
GPIO 1 are the only wake up events that can bring the <strong>SA</strong>-<strong>1110</strong> out of sleep mode.<br />
2.3 Providing Power for the <strong>SA</strong>-<strong>1110</strong> <strong>Development</strong><br />
<strong>Board</strong> and the <strong>SA</strong>-1111 <strong>Development</strong> Module<br />
Use the following procedure to provide power for the <strong>SA</strong>-<strong>1110</strong> <strong>Development</strong> <strong>Board</strong> and the<br />
<strong>SA</strong>-1111 <strong>Development</strong> Module. To provide power for only the <strong>SA</strong>-<strong>1110</strong> <strong>Development</strong> <strong>Board</strong>, see<br />
Section 2.2.<br />
Caution:<br />
The following procedure assumes that all power associated with the <strong>SA</strong>-<strong>1110</strong> <strong>Development</strong> <strong>Board</strong><br />
is off. For more information about Li-ion battery considerations, see Chapter 6.<br />
Note:<br />
A very high value capacitor of 0.33 Farads (super cap) is connected in parallel with the power input<br />
from J10. This capacitor provides enough power to support the system for several minutes in sleep<br />
mode when power from J10 is removed.<br />
1. Disconnect the battery harness from J4 and remove the Li-Ion battery from the <strong>SA</strong>-<strong>1110</strong><br />
<strong>Development</strong> <strong>Board</strong> (see Figure 2-6 for the location of the Li-Ion battery).<br />
Figure 2-6. Li-Ion Battery Location<br />
Plexiglass<br />
5 cm<br />
J2<br />
J3<br />
1.5"<br />
3.4 cm<br />
Note: Not to scale<br />
Li-lon Battery<br />
Plexiglass<br />
A7884-01<br />
2. Assemble the <strong>SA</strong>-<strong>1110</strong> <strong>Development</strong> <strong>Board</strong> with the <strong>SA</strong>-1111 <strong>Development</strong> Module, as<br />
described in the <strong>Intel</strong>® <strong>StrongARM*</strong> <strong>SA</strong>-1111 Companion Chip <strong>Development</strong> <strong>Board</strong> User’s<br />
Guide.<br />
3. Select the appropriate AC adapter to DC converter device (wall brick) depending upon<br />
whether you are in a 110-volt or 220-volt environment.<br />
2-8 <strong>Intel</strong> ® <strong>StrongARM*</strong> <strong>SA</strong>-<strong>1110</strong> <strong>Microprocessor</strong> <strong>Development</strong> <strong>Board</strong> User’s Guide
Getting Started<br />
4. Insert the power jack that is connected to the wall brick into J10 (see Figure 2-7 for the<br />
location of J10).<br />
Figure 2-7. AC Power Input Jack Location<br />
J14<br />
J11<br />
J10<br />
J5<br />
J1<br />
J17<br />
J7<br />
J16<br />
Base Station<br />
Power Input Jack<br />
Headset Jack<br />
2.5 mm<br />
Stereo Jack<br />
3.5 mm<br />
USB Type B<br />
Connection<br />
A7615-01<br />
Note: The power jack may have to be rotated to its flat side to accommodate any other connectors in J10.<br />
5. Plug in the wall-brick into an AC outlet.<br />
6. See the <strong>Intel</strong>® <strong>StrongARM*</strong> <strong>SA</strong>-<strong>1110</strong> <strong>Development</strong> <strong>Board</strong> Quickstart file for success and<br />
failure indications of start-up diagnostic results and how to proceed.<br />
To disconnect power, remove the power jack from J10 and wait for the super cap to discharge<br />
(typically less than 5 minutes).<br />
Note:<br />
If sleep mode was entered as a result of VDD_FAULT or BATT_FAULT signals, GPIO 0 and<br />
GPIO 1 are the only wake up events that can bring the <strong>SA</strong>-<strong>1110</strong> out of sleep mode.<br />
2.4 Using the ARM* ADS with the <strong>SA</strong>-<strong>1110</strong> <strong>Development</strong><br />
Platform<br />
The ARM Developer Suite (ADS) is provided in the <strong>SA</strong>-<strong>1110</strong> <strong>Development</strong> Platform kit. The<br />
ARM ADS is a cross-development tool set for ARM processors and is provided with an integrated<br />
development environment. The ARM ADS includes a debugger that allows the debugging of<br />
applications running on the target <strong>SA</strong>-<strong>1110</strong> <strong>Development</strong> Platform.<br />
When running the ARM debugger, one part runs on the host (this part includes the user interface)<br />
and the other part runs on the target (the <strong>SA</strong>-<strong>1110</strong> <strong>Development</strong> Platform). The host and target<br />
interact across a communications channel. By default, the <strong>SA</strong>-<strong>1110</strong> <strong>Development</strong> Platform uses its<br />
RS232 port to communicate with the host. The software that runs on the target is called the remote<br />
debug stub or debug monitor. The debug monitor used with the <strong>SA</strong>-<strong>1110</strong> <strong>Development</strong> Platform is<br />
a program called Angel.<br />
<strong>Intel</strong> ® <strong>StrongARM*</strong> <strong>SA</strong>-<strong>1110</strong> <strong>Microprocessor</strong> <strong>Development</strong> <strong>Board</strong> User’s Guide 2-9
Getting Started<br />
2.4.1 Angel* Firmware<br />
To use the ARM ADS with the <strong>SA</strong>-<strong>1110</strong> <strong>Development</strong> Platform, Angel must be resident. See the<br />
Angel readme file for information on installing Angel.<br />
2.4.2 Connecting the <strong>SA</strong>-<strong>1110</strong> <strong>Development</strong> Platform to the Host<br />
After installing the ARM ADS on the host system, connect the <strong>SA</strong>-<strong>1110</strong> <strong>Development</strong> <strong>Board</strong> to the<br />
host using the base station cable that is supplied in the <strong>SA</strong>-<strong>1110</strong> <strong>Development</strong> Platform kit. This<br />
split cable contains the Dsub9 serial port, Dsub25 JTAG, and RJ11 phone jack connectors. Connect<br />
the Dsub9 connector to the RS-232 serial port on the host. The black Base Station connector of the<br />
split cable containing the POTS and RS-232 signals must be connected to the Base Station header<br />
on side 1 (J10) of the <strong>SA</strong>-<strong>1110</strong> <strong>Development</strong> <strong>Board</strong>.<br />
The same serial connections and cable as described in the preceding paragraph can be used and is<br />
the recommended method for providing serial communications between the host and <strong>SA</strong>-<strong>1110</strong><br />
<strong>Development</strong> Platform when the companion <strong>SA</strong>-1111 <strong>Development</strong> Module is attached. For this to<br />
work, ensure that switchpak 2 (SW2), switch 3 (SW2-3) on the <strong>SA</strong>-1111 <strong>Development</strong> Module is<br />
in the ON position. For the location of SW2, refer to the <strong>SA</strong>-1111 <strong>Development</strong> Module User’s<br />
Guide. Alternatively, serial communications between the host and target can be provided by the<br />
double-female Dsub9 terminated RS232 cable that comes in the <strong>SA</strong>-1111 <strong>Development</strong> Module kit<br />
and the serial ports (UART1 and UART3) on the <strong>SA</strong>-1111 <strong>Development</strong> Module. Refer to the<br />
<strong>Intel</strong> ® StrongARM * <strong>SA</strong>-1111 <strong>Development</strong> Module User’s Guide and the Angel software kit’s<br />
readme.txt for more information on using those serial ports.<br />
The 9-pin RS232 cable connected to the Base Station serial port (J10) on the <strong>SA</strong>-<strong>1110</strong><br />
<strong>Development</strong> <strong>Board</strong> cannot be connected at the same time as the UART1 serial port (J16) on the<br />
<strong>SA</strong>-1111 <strong>Development</strong> Module. Connecting them at the same time will corrupt the data on the<br />
UART1.<br />
2.4.3 Bringing Up the Angel* Debug Monitor<br />
To configure the debug environment, power up the <strong>SA</strong>-<strong>1110</strong> <strong>Development</strong> Platform and invoke the<br />
ARM AXD Debugger on the host system. Select the Options menu and choose the Configure<br />
Target option. In the Choose Target dialog, select the ADP target and press the “Configure” button.<br />
The Remote_A Connection dialog appears. Press the Select button and choose the ARM serial<br />
driver. Press the “Configure” button. The Setup Serial Connection dialog will appear. Select the<br />
appropriate serial port (COM1..4) that is being used on the host for communicating to the <strong>SA</strong>-<strong>1110</strong><br />
<strong>Development</strong> <strong>Board</strong>. Select 115200 from the Baud Rate drop-down list. Only reduce the<br />
connection speed if you experience communications problems. Press “OK”.<br />
The following settings also should be made in the Remote_A Connection dialog:<br />
Heartbeat – Should be disabled (not checked)<br />
Endian – “Little” should be selected<br />
Channel Viewers – Should be disabled (not checked)<br />
Press “OK” in the Remote_A Connection dialog box to save the new settings. Press “OK” in the<br />
Choose Target box to accept the ADP target and activate remote debugging. A banner is printed in<br />
the RDI Log window of the AXD Debugger announcing the presence of the Angel Debug Monitor<br />
on the <strong>SA</strong>-<strong>1110</strong> <strong>Development</strong> Platform.<br />
2-10 <strong>Intel</strong> ® <strong>StrongARM*</strong> <strong>SA</strong>-<strong>1110</strong> <strong>Microprocessor</strong> <strong>Development</strong> <strong>Board</strong> User’s Guide
Getting Started<br />
2.4.4 Running an Application<br />
The ARM ADS comes with some example applications that can be built and run. Follow the<br />
instructions above under Section 2.4.2 and connect the <strong>SA</strong>-<strong>1110</strong> <strong>Development</strong> Platform to the host.<br />
On the host, invoke CodeWarrior for ARM Developer Suite. From the Files menu, select Open and<br />
navigate to the directory where the ARM SDK is installed. By default this directory is Program<br />
Files\ARM\ARM Developer Suite. Open the random number test project file, randtest.mcp, that<br />
can be found in Program Files\ARM\ARM Developer Suite\Examples\explasm. A window for the<br />
randtest project will appear. From the Project menu, select the “Make” option. The output window<br />
will display the progress and status of the build; there should be no errors.<br />
Before running the randtest application, ensure that the <strong>SA</strong>-<strong>1110</strong> <strong>Development</strong> Platform is<br />
connected to the host and apply power to it. It is assumed that the connections and remote<br />
configuration options have already been properly set as described in the previous Section 2.4.2 and<br />
Section 2.4.3. From the main CodeWarrior window select the Project menu and choose the “Run”<br />
option. The ARM AXD Debugger will be invoked. The Angel Debug Monitor will be started and<br />
the randtest application will be run. The console window will display the results of ten calls to the<br />
randomnumber() routine.<br />
For more information on using the ADS, refer to the reference manual and user’s guide in the<br />
Program Files\ARM\ARM Developer Suite\pdf directory or to the ARM web site at<br />
http://www.arm.com. A software kit containing Angel sources, images, and build directions for the<br />
<strong>SA</strong>-<strong>1110</strong> <strong>Development</strong> Platform are provided on <strong>Intel</strong>’s website at http://www.developer.intel.com<br />
under the StrongARM processors products software library.<br />
<strong>Intel</strong> ® <strong>StrongARM*</strong> <strong>SA</strong>-<strong>1110</strong> <strong>Microprocessor</strong> <strong>Development</strong> <strong>Board</strong> User’s Guide 2-11
Theory of Operation 3<br />
The <strong>SA</strong>-<strong>1110</strong> <strong>Development</strong> Platform is designed for the hardware and software development of<br />
hand-held, palm-top and tethered applications. The <strong>SA</strong>-<strong>1110</strong> <strong>Development</strong> Platform provides all<br />
the system components necessary for a Windows* CE or other OS hand-held PC system or a subnotebook<br />
system development platform including three independent video heads, high-quality<br />
stereo sound and radio interface support.<br />
3.1 System Partitioning<br />
The <strong>SA</strong>-<strong>1110</strong> <strong>Development</strong> Platform’s system partitioning is designed so that the <strong>SA</strong>-<strong>1110</strong><br />
<strong>Development</strong> <strong>Board</strong> functions as a standalone palm-size PC reference design. The <strong>SA</strong>-<strong>1110</strong><br />
<strong>Development</strong> <strong>Board</strong>’s mechanical design supports simple system packaging using sheet Lexan*,<br />
screws and spacers to integrate the LCD, optional frontlight, touch screen and batteries.<br />
The block diagram shown in Figure 3-1 illustrates the modularity and flexibility of the design. Two<br />
140-pin fully buffered daughter board expansion headers (J2) are supported; one on each side of<br />
the <strong>SA</strong>-<strong>1110</strong> <strong>Development</strong> <strong>Board</strong>. Either side of J2 can be used to support the <strong>SA</strong>-1111<br />
<strong>Development</strong> Module or the graphics accelerator module.<br />
The functionality of the dual interconnects is identical. The rationale for two interconnects is as<br />
follows: When the cards are connected in an extended fashion (“Z” shaped), full electronic probing<br />
is possible. When connected in a compact format (“U” shaped), tight packaging is facilitated.<br />
<strong>Intel</strong> ® <strong>StrongARM*</strong> <strong>SA</strong>-<strong>1110</strong> <strong>Microprocessor</strong> <strong>Development</strong> <strong>Board</strong> User’s Guide 3-1
Theory of Operation<br />
Figure 3-1. <strong>Intel</strong> ® <strong>StrongARM*</strong> <strong>SA</strong>-<strong>1110</strong> <strong>Development</strong> Platform Block Diagram<br />
LCD Header<br />
LCD CPLD data<br />
formater for Sharp 3.9"<br />
LCD analog support<br />
for Sharp 3.9"<br />
<strong>Intel</strong>® <strong>StrongARM*</strong> <strong>SA</strong>-<strong>1110</strong><br />
CPU <strong>Board</strong><br />
UCB1300<br />
POTS<br />
Codec<br />
Buffer<br />
RS232<br />
IrDA<br />
USB stv<br />
UDA1341<br />
I2S 16 Bit<br />
Stereo Codec<br />
Power<br />
Manager<br />
Battery<br />
Battery<br />
PAL<br />
<strong>Intel</strong><br />
StrongARM<br />
<strong>SA</strong>-<strong>1110</strong><br />
16Mx16<br />
SDRAM<br />
16Mx16<br />
SDRAM<br />
Address<br />
Decode Bus<br />
Contrl. CPLD<br />
8Mx16<br />
<strong>Intel</strong><br />
Page Mode<br />
Strata Flash<br />
8Mx16<br />
<strong>Intel</strong><br />
Page Mode<br />
Strata Flash<br />
Xceiver<br />
Xceiver<br />
Expansion Header<br />
Graphics Header<br />
CF Type II Slot<br />
Max 3243<br />
Header<br />
RS232<br />
<strong>Intel</strong>® <strong>StrongARM*</strong> <strong>SA</strong>-1111<br />
<strong>Board</strong><br />
9 Pin<br />
RS232<br />
Address 25:0 Buffer<br />
Test<br />
Pods<br />
Address 9:0 Address 5:2<br />
Expansion Header<br />
8Mx16 <strong>Intel</strong><br />
16Mx16<br />
<strong>Intel</strong><br />
Page Mode Test<br />
D15:0 D15:0 D15:0 Xceiver<br />
D15:0<br />
SDRAM<br />
Pods<br />
StrongARM<br />
Strata Flash<br />
<strong>SA</strong>-1111<br />
Socket<br />
16Mx16<br />
SDRAM<br />
D31:0 D31:0<br />
D31:0<br />
Xceiver<br />
8Mx16 <strong>Intel</strong><br />
Page Mode<br />
Strata Flash<br />
Socket<br />
Test<br />
Pods<br />
SMC<br />
91C96<br />
Enet<br />
10B<br />
T<br />
D7:0<br />
CPLD Debug<br />
Registers<br />
Lights<br />
Switches<br />
4x5 Key Pad<br />
Header<br />
32 SMT<br />
LEDs<br />
PCMCIA<br />
Slot 1<br />
Slot 2<br />
UDA1341<br />
I2S 16-Bit<br />
Stereo Codec<br />
AC97<br />
Codec<br />
SSP<br />
PWM-a<br />
PWM-b<br />
PS/2a<br />
U<strong>SA</strong>R SPI<br />
Key Coder<br />
3.5mm Jacks<br />
PS/2b<br />
<br />
* Other brands and names are the property of their respective owners.<br />
USB<br />
Host<br />
Matrix Keyboard Headers<br />
8 Switch<br />
Pack<br />
A6881-01<br />
3-2 <strong>Intel</strong> ® <strong>StrongARM*</strong> <strong>SA</strong>-<strong>1110</strong> <strong>Microprocessor</strong> <strong>Development</strong> <strong>Board</strong> User’s Guide
Theory of Operation<br />
As shown in Figure 3-2, the system partitioning allows the <strong>SA</strong>-<strong>1110</strong> <strong>Development</strong> <strong>Board</strong> to be used<br />
by itself as a minimal palm-size PC system. All device interfacing is implemented with in-system<br />
programmable CPLDs and most system interface points are available on connectors suitable for<br />
daughter boards or cables.<br />
Figure 3-2. <strong>Intel</strong> ® <strong>StrongARM*</strong> <strong>SA</strong>-<strong>1110</strong> <strong>Development</strong> <strong>Board</strong> Inputs and Outputs<br />
touch<br />
Pwr<br />
mic<br />
Base Header<br />
spk<br />
JTAG<br />
DAA<br />
Headset Jack<br />
mic<br />
USB<br />
Stereo<br />
Headphones Jack<br />
UCB1300<br />
POTS<br />
codec<br />
Touch<br />
Screen<br />
RS232<br />
USBend<br />
IrDA<br />
Stereo<br />
codec<br />
CPLD<br />
<strong>Intel</strong> ® <strong>StrongARM*</strong> <br />
<strong>SA</strong>-<strong>1110</strong><br />
SDRAM<br />
SDRAM<br />
LCD<br />
TVenc<br />
Chrg<br />
<strong>Intel</strong> ®<br />
StrataFlash<br />
Memory<br />
<strong>Intel</strong> <br />
StrataFlash<br />
Memory<br />
batt<br />
Xcvr Xcvr Xcvr<br />
CF II Slot<br />
<strong>Intel</strong> StrongARM * <strong>SA</strong>-1111 140-pin Header<br />
Graphics 140-pin Header<br />
* Other brands and names are the property of their respective owners.<br />
A7264-01<br />
<strong>Intel</strong> ® <strong>StrongARM*</strong> <strong>SA</strong>-<strong>1110</strong> <strong>Microprocessor</strong> <strong>Development</strong> <strong>Board</strong> User’s Guide 3-3
Theory of Operation<br />
Although not intended as a ready to manufacture product design, the <strong>SA</strong>-<strong>1110</strong> <strong>Development</strong> <strong>Board</strong><br />
provides the basis for low-cost derivative designs. Figure 3-3 shows how data flows within the<br />
<strong>SA</strong>-<strong>1110</strong> <strong>Development</strong> Module.<br />
Figure 3-3. Data Flow in the <strong>SA</strong>-<strong>1110</strong> <strong>Microprocessor</strong><br />
OSC<br />
OSC<br />
RTC<br />
PLL<br />
<strong>Intel</strong> ®<br />
StrongARM *<br />
<strong>SA</strong>-1 Core<br />
PC<br />
ADDR<br />
ICache<br />
16 KB<br />
ICache<br />
8 KB<br />
IMMU<br />
32 TLBs<br />
DMMU<br />
32 TLBs<br />
JTAG<br />
& Test<br />
Timers<br />
Power<br />
Manager<br />
Reset<br />
Controller<br />
Interrupt<br />
Controller<br />
Instructions<br />
Data<br />
Write<br />
Buffer<br />
Minicache<br />
Read<br />
Buffer<br />
Memory<br />
&<br />
PCMCIA<br />
Controller<br />
Address<br />
Data [32]<br />
Control<br />
GPIOs<br />
Bridge<br />
DMA<br />
LCD Controller<br />
USB Client SDLC IrDA UART USB Client<br />
* Other brands and names are the property of their respective owners.<br />
A7263-01<br />
The <strong>SA</strong>-<strong>1110</strong> <strong>Development</strong> <strong>Board</strong> supports the following applications:<br />
• Palm-size PC with docking USB PC sync<br />
• MP3 HiFi stereo record and playback<br />
• Hand writing recognition<br />
• Speech recognition<br />
• Web browser<br />
• VoIP with voice dialing and speakerphone<br />
• Wireless voice dialing VoIP/POTS handset or speakerphone using CF RF modem<br />
• POTS voice dialing speakerphone<br />
• Video capture with CMOS camera and video capture daughter board<br />
• Broadcast TV receiver using video capture daughter board with Microtune ® TV tuner chip<br />
• IBM 340 Mb compact flash microdrive applications<br />
3-4 <strong>Intel</strong> ® <strong>StrongARM*</strong> <strong>SA</strong>-<strong>1110</strong> <strong>Microprocessor</strong> <strong>Development</strong> <strong>Board</strong> User’s Guide
Hardware Considerations<br />
Hardware Considerations 4<br />
This chapter provides an in-depth description on the following topics:<br />
• Xbus expansion headers<br />
• Storage<br />
• GPIOs<br />
• Registers<br />
• Displays<br />
• Buses and Ports<br />
• Power<br />
• Audio<br />
• Video<br />
4.1 Xbus Expansion Headers<br />
The general-purpose expansion bus headers provided on the <strong>SA</strong>-<strong>1110</strong> <strong>Development</strong> <strong>Board</strong> are<br />
referred to as the Xbus headers (not to be confused with I<strong>SA</strong> Xbus). All <strong>SA</strong>-<strong>1110</strong> address, data and<br />
memory interface signals are buffered before driving the Xbus headers.<br />
The Xbus headers allow interfacing to the <strong>SA</strong>-1111 microprocessor companion chip and the <strong>SA</strong>-<br />
1111 <strong>Development</strong> Module as well as a third-party graphics chip daughter board.<br />
These general-purpose expansion headers allow the use of the <strong>SA</strong>-<strong>1110</strong> <strong>Development</strong> <strong>Board</strong> as a<br />
general-purpose hardware and software development platform for battery-powered and tethered<br />
applications. For more information about Xbus headers, see the <strong>Intel</strong> ® StrongARM * <strong>SA</strong>-1111<br />
<strong>Development</strong> Module User’s Guide.<br />
4.2 Storage<br />
This section describes the memory map, the SDRAM interface, the expansion flash memory, the<br />
interface for the expansion SDRAM, and compact flash issues.<br />
4.2.1 <strong>Intel</strong> ® StrongARM * <strong>SA</strong>-<strong>1110</strong> <strong>Development</strong> <strong>Board</strong> Memory<br />
Map<br />
Table 5-1 shows the address ranges for the standard <strong>SA</strong>-<strong>1110</strong> <strong>Development</strong> <strong>Board</strong> Xbus devices as<br />
well as flash memory, SDRAM, and system control and system debug registers. The address range<br />
field indicates the entire decoded range while the size:width field indicates the actual resource size<br />
and width within the decoded range. All decoded resources are address wrapped within their<br />
address range.<br />
<strong>Intel</strong> ® <strong>StrongARM*</strong> <strong>SA</strong>-<strong>1110</strong> <strong>Microprocessor</strong> <strong>Development</strong> <strong>Board</strong> User’s Guide 4-1
Hardware Considerations<br />
Table 4-1. System Memory Map<br />
Address Range<br />
Resource<br />
Size<br />
Use<br />
<strong>SA</strong>-<strong>1110</strong> <strong>Development</strong> <strong>Board</strong><br />
Size: Width<br />
E800,0000-FFFF,FFFF Reserved 384 Mbyte Reserved —<br />
E000,0000-E7FF,FFFF Zeros Bank 128 Mbyte Cache flush Read zeros, no bus cycle<br />
D800,0000-DFFF,FFFF SDRAM bank 3 128 Mbyte Empty —<br />
D000,0000-D7FF,FFFF<br />
SDRAM bank 2 128 Mbyte<br />
Expansion SDRAM bank<br />
on <strong>SA</strong>-1111 board Clk/4<br />
16 Mbyte/32 Mbyte/64 Mbyte:<br />
32 bits wide<br />
C800,0000-CFFF,FFFF SDRAM bank 1 128 Mbyte Empty —<br />
C000,0000-C7FF,FFFF<br />
SDRAM bank 0 128 Mbyte<br />
Main SDRAM bank on <strong>SA</strong>-<br />
<strong>1110</strong> board Clk/2<br />
16 Mbyte/32 Mbyte/64 Mbyte:<br />
32 bits wide<br />
B000,0000-BFFF,FFFF<br />
A000,0000-AFFF,FFFF<br />
9000,0000-9FFF,FFFF<br />
8000,0000-8FFF,FFFF<br />
LCD and DMA Control<br />
256 Mbyte<br />
Memory Control<br />
256 Mbyte<br />
<strong>SA</strong>-<strong>1110</strong> System Control<br />
Module Register a<br />
256 Mbyte<br />
Peripheral Control<br />
256 Mbyte<br />
Internal —<br />
Internal —<br />
Internal —<br />
Internal —<br />
5000,0000-7FFF,FFFF Reserved 768 Mbyte Reserved —<br />
4800,0000-4FFF,FFFF CS5 128 Mbyte GFX (uses rdy) TBD bytes: 32 bits wide<br />
4000,0000-47FF,FFFF CS4 128 Mbyte <strong>SA</strong>-1111 (uses Rdy) 8KB<br />
3000,0000-3FFF,FFFF<br />
PCMCIA/CF Slot B 512<br />
Mbyte<br />
Compact Flash<br />
2x2KBytes: 16 bits wide<br />
2000,0000-2FFF,FFFF<br />
PCMCIA/CF Slot A 512<br />
Mbyte<br />
PCMCIA (<strong>SA</strong>-1111)<br />
3x64 MBytes: 16 bits wide<br />
1800,0000-1FFF,FFFF CS3 128 Mbyte Ethernet device (uses rdy) 1Kbytes: 8 bits wide<br />
1000,0000-17FF,FFFF<br />
CS2 128 Mbyte<br />
<strong>SA</strong>-<strong>1110</strong> <strong>Development</strong><br />
<strong>Board</strong> system registers<br />
Various widths<br />
0800,0000-0FFF,FFFF<br />
CS1 128 Mbyte<br />
Expansion flash on<br />
<strong>SA</strong>-1111 board<br />
16/32 MBytes: 32 bits wide<br />
0000,0000-07FF,FFFF<br />
CS0 128 Mbyte<br />
Boot/Application flash<br />
ROM on <strong>SA</strong>-<strong>1110</strong> board<br />
16/32 MBytes: 32 bits wide<br />
a. This register is located in the <strong>SA</strong>-<strong>1110</strong> device.<br />
4.2.2 Flash Memory<br />
The <strong>SA</strong>-<strong>1110</strong> <strong>Development</strong> <strong>Board</strong> flash bank is populated with 128 Mbit fast page mode 3 V<br />
StrataFlash memory. These devices allows 32 Mbyte flash banks.<br />
4-2 <strong>Intel</strong> ® <strong>StrongARM*</strong> <strong>SA</strong>-<strong>1110</strong> <strong>Microprocessor</strong> <strong>Development</strong> <strong>Board</strong> User’s Guide
Hardware Considerations<br />
4.2.3 Main SDRAM Interface<br />
The <strong>SA</strong>-<strong>1110</strong> <strong>Development</strong> <strong>Board</strong> provides support for 64 Mbit, 128 Mbit or 256 Mbit SDRAMs.<br />
The 54 pin TSOP footprint supports a wide variety of SDRAM vendors and densities. The system<br />
partitioning is designed to minimize the loading and etch length on the <strong>SA</strong>-<strong>1110</strong> pin bus. This<br />
permits the system to run up to 103 MHz SDRAM using <strong>SA</strong>-<strong>1110</strong> CoreClk/2 and 125 MHz<br />
SDRAM components. Using two 256 Mb 16 Mx16 SDRAMs provides a main memory load of<br />
64 MBytes. The <strong>SA</strong>-<strong>1110</strong> <strong>Development</strong> <strong>Board</strong> is configured with 128 Mb SDRAMs for a<br />
32 MByte memory load.<br />
4.2.4 Expansion Flash Memory<br />
The <strong>SA</strong>-1111 <strong>Development</strong> Module flash bank is populated with 128 Mbit socketed fast page mode<br />
3V StrataFlash memory devices. These devices allow 32 Mbyte flash banks.<br />
Switch component SW2, switch 8 on the <strong>SA</strong>-1111 Evaluation Module allows selection of either the<br />
main flash bank on the <strong>SA</strong>-<strong>1110</strong> <strong>Development</strong> <strong>Board</strong> or the expansion flash bank on the <strong>SA</strong>-1111<br />
<strong>Development</strong> Module as the boot bank. For more information on the effects of SW2, see the <strong>Intel</strong> ®<br />
StrongARM * <strong>SA</strong>-1111 Companion Chip <strong>Development</strong> <strong>Board</strong> User’s Guide.<br />
4.2.5 Expansion SDRAM Interface<br />
The <strong>SA</strong>-1111 <strong>Development</strong> Module provides support for 64 Mbit, 128 Mbit or 256 Mbit SDRAMs.<br />
The 54 pin TSOP footprint supports a wide variety of SDRAM types and sizes. The <strong>SA</strong>-1111<br />
<strong>Development</strong> Module’s SDRAMs are buffered from the <strong>SA</strong>-<strong>1110</strong> CPU and must run on a <strong>SA</strong>-<strong>1110</strong><br />
CoreClk/4 permitting a maximum SDRAM clock speed of 51.5 MHz for this SDRAM bank. Using<br />
two 256 Mb 16Mx16 SDRAMs provides a expansion memory load of 64 Mbytes. The <strong>SA</strong>-1111<br />
<strong>Development</strong> Module is initially configured with 128 Mb SDRAMs for a 32 Mbyte memory load.<br />
4.2.6 Compact Flash<br />
The <strong>SA</strong>-<strong>1110</strong> <strong>Development</strong> <strong>Board</strong> supports a single type II CF socket. The <strong>SA</strong>-<strong>1110</strong> <strong>Development</strong><br />
<strong>Board</strong> CF slot uses the same interface signals required by the <strong>SA</strong>-1111 <strong>Development</strong> Module and<br />
graphics accelerator boards, therefore the CF socket on the <strong>SA</strong>-<strong>1110</strong> <strong>Development</strong> <strong>Board</strong> only<br />
functions when there are no daughter boards present.<br />
Caution:<br />
Do not plug a CF card plugged into the <strong>SA</strong>-<strong>1110</strong> <strong>Development</strong> <strong>Board</strong> CF socket when the<br />
<strong>SA</strong>-1111 <strong>Development</strong> or graphics boards are present or it will crash the system and may damage<br />
the <strong>SA</strong>-1111 component, the graphics accelerator device or <strong>SA</strong>-<strong>1110</strong> <strong>Development</strong> <strong>Board</strong>’s<br />
transceiver component. The buffer and transceiver chips on the <strong>SA</strong>-<strong>1110</strong> <strong>Development</strong> <strong>Board</strong> that<br />
normally drive the CF socket are reconfigured to become the system buffers and transceivers that<br />
are used to isolate the <strong>SA</strong>-1111 <strong>Development</strong> Module and graphics boards from the <strong>SA</strong>-<strong>1110</strong><br />
<strong>Development</strong> <strong>Board</strong> when the daughter boards are attached.<br />
E11, which is shown on sheet 4 of 12 on the <strong>Intel</strong> ® StrongARM * <strong>SA</strong>-<strong>1110</strong> <strong>Development</strong> <strong>Board</strong><br />
Schematics, is a CPLD that controls the transceivers and some of the CF support signals. In<br />
addition, GPIO bits 5:4 control the flash size, as shown in Table 4-5. The <strong>SA</strong>-<strong>1110</strong> GPIO pins<br />
GPIO 21, GPIO 22, GPIO 24 and GPIO 25 serve dual functions in the <strong>SA</strong>-<strong>1110</strong> <strong>Development</strong><br />
<strong>Board</strong> CF design. When the <strong>SA</strong>-1111 <strong>Development</strong> Module is attached, GPIO 22 GPIO 21 are<br />
configured to be the GPIO alternate function bus DMA control signals nMBREQ and nMBGNT<br />
while GPIO 24 and GPIO 25 are the graphics and <strong>SA</strong>-1111 interrupt inputs. When the <strong>SA</strong>-1111<br />
<strong>Intel</strong> ® <strong>StrongARM*</strong> <strong>SA</strong>-<strong>1110</strong> <strong>Microprocessor</strong> <strong>Development</strong> <strong>Board</strong> User’s Guide 4-3
Hardware Considerations<br />
<strong>Development</strong> Module is not attached and the <strong>SA</strong>-<strong>1110</strong> <strong>Development</strong> <strong>Board</strong> CF slot is active then<br />
GPIO 21 and GPIO 22 are used as CF RDY interrupt signals and CF card detect interrupt while<br />
GPIO 24 ad GPIO 24 are used as CF BVD2 and CF BVD1 inputs.<br />
Note:<br />
The <strong>SA</strong>-<strong>1110</strong> <strong>Development</strong> <strong>Board</strong> CF slot is addressed in the same address space as the <strong>SA</strong>-1111<br />
<strong>Development</strong> Module’s CF and PCMCIA slots, however the CF slot control signals and interrupt<br />
signals are not the same. Refer to the <strong>Intel</strong> ® StrongARM * <strong>SA</strong>-1111 Companion Chip Developer’s<br />
Manual for the details. Two versions of the CF drivers are required for the <strong>SA</strong>-<strong>1110</strong> <strong>Development</strong><br />
Platform, one for the <strong>SA</strong>-1111 <strong>Development</strong> Module and one for the <strong>SA</strong>-<strong>1110</strong> <strong>Development</strong> <strong>Board</strong>.<br />
Several key functions available in CF devices are:<br />
• Ethernet interface<br />
• High speed modem<br />
• Wireless one way and two way paging<br />
• IBM micro-drives up to 340 Mbyte<br />
• Bluetooth 1 RF modules<br />
4.3 <strong>Intel</strong> ® StrongARM * <strong>SA</strong>-<strong>1110</strong> GPIO Usage<br />
The <strong>SA</strong>-<strong>1110</strong> <strong>Development</strong> <strong>Board</strong> system maps the <strong>SA</strong>-<strong>1110</strong> GPIO pins as shown in Table 5-4.<br />
The table shows the GPIO mapping of <strong>SA</strong>-<strong>1110</strong> <strong>Development</strong> <strong>Board</strong> and previous <strong>Intel</strong> ®<br />
StrongARM * development platforms for comparison and as an aid to OS and Angel porting.<br />
1. For the Phase 5 release of this product, formal Bluetooth interface specifications were not available. For more information, see section<br />
Section 4.13.3.<br />
4-4 <strong>Intel</strong> ® <strong>StrongARM*</strong> <strong>SA</strong>-<strong>1110</strong> <strong>Microprocessor</strong> <strong>Development</strong> <strong>Board</strong> User’s Guide
Hardware Considerations<br />
Note:<br />
GPIO 0 and GPIO 1 are the only wake up events that can cause the <strong>SA</strong>-<strong>1110</strong> to come out of sleep<br />
mode if sleep mode was entered as a result of VDD_FAULT or BATT_FAULT signals.<br />
Table 4-2. GPIO Usage for <strong>Intel</strong> ® StrongARM * Platforms<br />
GPIO<br />
<strong>SA</strong>-1100 <strong>Development</strong><br />
Platform a<br />
a. Order number DE–1S110–OA<br />
b. Order number DE–1S110–OC<br />
<strong>SA</strong>-1100 Multimedia and <strong>SA</strong>-1101<br />
<strong>Development</strong> <strong>Board</strong>s b<br />
<strong>SA</strong>-<strong>1110</strong> <strong>Development</strong> Platform<br />
27 32 KHz Out 3.68 MHz Out 3.68M_32K<br />
26 RCLK_Out GPIO or RCLK_Out VBATT_LOW_IRQ/RCLK<br />
25 KBC_ATN# Keypad IRQ/Xbus_spare <strong>SA</strong>111_IRQ_CF_BVD1<br />
24 KBC_WUKO SideKick IRQ GFX_IRQ_CF_BVD2<br />
23 KBC_WKUP# UCB_IRQ UCB1300_IRQ<br />
22 IRQ_C# nMBREQ nMBREQ_CF_CardDetect<br />
21 IRDA_SD nMBGNT nMBGNT_CF_IRQ<br />
20 LED_RED# I2C SDA UART3_CLK/SPARE<br />
19 SDLC_GPI I2C SCL STEREO_64FS_CLK<br />
18 SDLC_HSKI FIFO_IRQ L3_I2C_SCL<br />
17 SDLC_AAF Xbus_spare L3_MODE (LED)<br />
16 SDLC_HSKO Xbus_spare PS_MODE_SYNC<br />
15 UART_RXD UART_RXD L3_I2C_SDA<br />
14 UART_TXD UART_TXD RADIO_IRQ<br />
13 SSP_SFRM Header SSP_SFRM/spare SSP_UDA1341_SFRM<br />
12 SSP_SCLK Header SSP_SCLK/spare SSP_UDA1341_SCLK<br />
11 SSP_RXD Header SSP_RXD/spare SSP_UDA1341_RxD<br />
10 SSP_TXD Header SSP_TXD/spare SSP_UDA1341_TxD<br />
9 LCD_D15/LED_GRN1# LCD_D15 LCD_D15_CNFG7<br />
8 LCD_D14/LED_GRN2# LCD_D14 LCD_D14_CNFG6<br />
7 LCD_D13/P1_F1# LCD_D13 LCD_D13_CNFG5<br />
6 LCD_D12/P1_IREQ# LCD_D12 LCD_D12_CNFG4<br />
5 LCD_D11/P1_STSCHG# LCD_D11 LCD_D11_CNFG3<br />
4 LCD_D10/P0_F1# LCD_D10 LCD_D10_CNFG2<br />
3 LCD_D9/P0_IREQ# LCD_D9 LCD_D9_CNFG1<br />
2 LCD_D8/P0_STSCHG# LCD_D8 LCD_D8_CNFG0<br />
1 SW1 SW1/SW 7:0_IRQ/alt FIFO IRQ ON_OFF_SW2_or_FIQ<br />
0 SW0 SW0/DSP_IRQ/SW 7:0_IRQ ON_OFF_SW1<br />
<strong>Intel</strong> ® <strong>StrongARM*</strong> <strong>SA</strong>-<strong>1110</strong> <strong>Microprocessor</strong> <strong>Development</strong> <strong>Board</strong> User’s Guide 4-5
Hardware Considerations<br />
GPIO<br />
Table 4-3. UCB 1300 CODEC<br />
<strong>SA</strong>-1100 <strong>Development</strong><br />
Platform a<br />
<strong>SA</strong>-1100 Multimedia and <strong>SA</strong>-1101<br />
<strong>Development</strong> <strong>Board</strong>s b<br />
9 ADC_SYNC ACD_SYNC ADC_SYNC<br />
8 DAA_OH DAA_OH DAA_OH (LED)<br />
7 DAA_RI# DAA_RI# DAA_RI-<br />
6 RED_LED# 7 segment dot LED CLID (caller ID)<br />
5 GRN_LED# NOT USED FuncSW6<br />
4 SEVEN_SEG_BLANK NOT USED FuncSW5<br />
3 SEVEN_SEG_LED[3] NOT USED FuncSW4<br />
2 SEVEN_SEG_LED[2] NOT USED FuncSW3<br />
1 SEVEN_SEG_LED[1] NOT USED FuncSW2<br />
0 SEVEN_SEG_LED[0] NOT USED FuncSW1<br />
a. Order number DE–1S110–OA<br />
b. Order number DE–1S110–OC<br />
<strong>SA</strong>-<strong>1110</strong> <strong>Development</strong> Platform<br />
4.3.1 GPIO 0 and GPIO 1<br />
When the <strong>SA</strong>-1111 <strong>Development</strong> Module and Angel debug monitor are attached, GPIO 0 and<br />
GPIO 1 have special use at system boot time. The Angel boot software reads the <strong>SA</strong>-<strong>1110</strong> GPIO 0<br />
and GPIO 1 to determine which of four boot images to jump to. After system reset, GPIO 0 and<br />
GPIO 1 are driven through the <strong>SA</strong>-1111 <strong>Development</strong> Module’s test CPLD from switch pack SW2,<br />
switches 1 and 2. After boot time, the GP01_OFF bit in the NCR may be set to three-state the<br />
CPLD GPIO 0 and GPIO 1 drivers and allow these GPIOs to be used as their normal functions.<br />
When the <strong>SA</strong>-<strong>1110</strong> <strong>Development</strong> <strong>Board</strong> is used without the <strong>SA</strong>-1111 <strong>Development</strong> Module, the<br />
GPIO 0 and GPIO 1 signals are used for the soft power on/off switches and a spare fast interrupt<br />
(FIQ) signal.<br />
If the Angel boot software is run on the <strong>SA</strong>-<strong>1110</strong> <strong>Development</strong> <strong>Board</strong> without the <strong>SA</strong>-1111<br />
<strong>Development</strong> Module attached, then S1 and S2 on the <strong>SA</strong>-<strong>1110</strong> <strong>Development</strong> <strong>Board</strong>, which drive<br />
GPIO 0 and GPIO 1, can be used to select the Angel boot vector.<br />
4-6 <strong>Intel</strong> ® <strong>StrongARM*</strong> <strong>SA</strong>-<strong>1110</strong> <strong>Microprocessor</strong> <strong>Development</strong> <strong>Board</strong> User’s Guide
Hardware Considerations<br />
4.3.2 <strong>Intel</strong> ® StrongARM * <strong>SA</strong>-<strong>1110</strong> GPIO Pin Descriptions<br />
Details of the <strong>SA</strong>-<strong>1110</strong> GPIO pins are shown in Table 5-4. Pin Name indicates the actual name of<br />
the pin on the <strong>SA</strong>-<strong>1110</strong> device, while Signal Name indicates the signal name and function on the<br />
<strong>SA</strong>-<strong>1110</strong> <strong>Development</strong> Module.<br />
Table 4-4. GPIO Pin Descriptions (Sheet 1 of 2)<br />
Pin Name Signal Name Description<br />
GP[0]<br />
GP[1]<br />
GP[9:2]<br />
GP[13:10]<br />
GP[14]<br />
GP[15]<br />
GP[16]<br />
GP[17]<br />
GP[18]<br />
GP[19]<br />
GP[20]<br />
GP[21]<br />
On_Off_Sw1<br />
On_Off_Sw2<br />
and Spare<br />
FIQ<br />
LCD_D(15:8)<br />
CNFG(7:0)<br />
SSP_<br />
UDA1341<br />
Radio_IRQ<br />
L3_SMB_<br />
SDA<br />
PSMODE_<br />
SYNC<br />
L3_MODE<br />
LED<br />
L3_I2C_SCL<br />
SSP_UDA<br />
1341<br />
Extrn_Clk<br />
UART3 CLK/<br />
SPARE<br />
MBGNT<br />
CF_IRQ<br />
Main system software control on/off switch<br />
Application dependent switch. Used to toggle main system power between run and sleep<br />
modes.<br />
Secondary system software control on/off switch<br />
Application dependent switch. Used to toggle backlight power on and off. May function as<br />
one touch record button that wakes up system to record audio.<br />
Secondary function as a spare FIQ interrupt if required by GFX board.<br />
LCD data for upper 8 bits of 16 bit color<br />
After system boot, these pins should be configured to drive the upper LCD data bits.<br />
System configuration information<br />
At system boot time, GPIO 9:2 may be read to determine system configuration. Refer to<br />
CNFG table.<br />
SSP UDA1341 stereo codec port<br />
Radio Interrupt request<br />
0 – No interrupt<br />
1 – Interrupt<br />
Only available when radio board is attached.<br />
Shared L3 and SMB control ports<br />
SMB data<br />
L3 data is part of the L3 control bus to the UDA1341 stereo codec.<br />
The System Management Bus (SMBus) is used to control smart battery chips<br />
Power supply mode and sync control<br />
0 – Low power operation for sleep mode<br />
1 – High power, low noise operation for run mode<br />
Sync – Program SDLC clock out to synchronize power switches. Used to reduce RFI and<br />
video or audio noise<br />
L3 mode signal with LED<br />
L3 MODE is part of the L3 control bus to the UDA1341 stereo codec.<br />
This GPIO has a LED that may be used by the boot code to indicate boot status by<br />
flashing codes. After boot time this GPIO must function as the UDA1341 MODE signal.<br />
Shared L3 and I2C control ports<br />
I2C clock<br />
L3 clock is part of the L3 control bus to the UDA1341 stereo codec.<br />
SCL is used as System Management Bus (SMBus) to control smart battery components<br />
SSP UDA1341 stereo codec external clock input<br />
UART3 Clock input<br />
User to provide high speed clock to UART3. UART3 is used as the radio communications<br />
port. Bluetooth radio may require use of the external UART3 clock. Also a possible spare<br />
GPIO if Bluetooth is not present.<br />
MBGNT <strong>SA</strong>-<strong>1110</strong> DMA bus grant signal when <strong>SA</strong>-1111 development is attached<br />
CF_IRQ compact flash interrupt when no daughter boards are attached<br />
<strong>Intel</strong> ® <strong>StrongARM*</strong> <strong>SA</strong>-<strong>1110</strong> <strong>Microprocessor</strong> <strong>Development</strong> <strong>Board</strong> User’s Guide 4-7
Hardware Considerations<br />
Table 4-4. GPIO Pin Descriptions (Sheet 2 of 2)<br />
Pin Name Signal Name Description<br />
GP[22]<br />
GP[23]<br />
GP[24]<br />
GP[25]<br />
GP[26]<br />
MBREQ<br />
CF_<br />
CardDetect<br />
UCB1300_<br />
IRQ<br />
GXF_IRQ<br />
CF_BVD2<br />
MBREQ <strong>SA</strong>-<strong>1110</strong> DMA bus request signal when the <strong>SA</strong>-1111 <strong>Development</strong> Module is<br />
attached<br />
CF compact flash card detect interrupt when no daughter boards are attached<br />
CF_CD1 and CF_CD2 are logically AND’ed on the <strong>SA</strong>-<strong>1110</strong> <strong>Development</strong> <strong>Board</strong><br />
0 – CF card present<br />
1 – CF card absent<br />
UCB1300 Codec, UCB_GPIO and touch screen interrupts<br />
Graphics daughter board interrupt<br />
CF_BVD2 signal when no daughter boards are attached<br />
<strong>SA</strong>-1111_IRQ <strong>SA</strong>-1111 <strong>Development</strong> Module interrupt<br />
CF_BVD1 CF_BVD1 signal when no daughter boards are attached<br />
VBATT_LOW<br />
_IRQ<br />
RClk<br />
VBATT_LOW_IRQ Low battery interrupt<br />
RClk, CPU coreclk/2 to clock logic analyzer pods when <strong>SA</strong>-1111 <strong>Development</strong> Module is<br />
attached.<br />
GP[27] 3.68M_32K 3.68 MHz <strong>SA</strong>-1111 and GFX PLL reference clock and GFX 32 KHz power up clock<br />
GP[31:28] Reserved –<br />
4.4 Register Descriptions<br />
This section describes the following registers:<br />
• System configuration register—to control SDRAM size, flash size, and type of module such as<br />
<strong>SA</strong>-1111 development module.<br />
• <strong>Board</strong> configuration register—to control the compact flash, codec, IRDA, stereo, audio, LCD,<br />
RS232, LEDs, communication ports, charger, radio, and speaker.<br />
• <strong>Board</strong> status register—to control communications and radio ports.<br />
4.4.1 <strong>Intel</strong> ® StrongARM * <strong>SA</strong>-<strong>1110</strong> System Configuration Register<br />
SCR<br />
The <strong>SA</strong>-<strong>1110</strong> <strong>Development</strong> <strong>Board</strong> supports several different SDRAM and flash memory types and<br />
sizes as well as different LCD types and multiple daughter cards. To allow the system boot code to<br />
correctly configure the <strong>SA</strong>-<strong>1110</strong> memory interface and timing registers, the <strong>SA</strong>-<strong>1110</strong> <strong>Development</strong><br />
<strong>Board</strong> uses GPIO 9:2 pins to input system configuration information at boot time.<br />
Note:<br />
In this document, the System Configuration Register (SCR) is referred to as a register, though no<br />
register actually exists and therefore there is no corresponding address. The register bits are<br />
composed of GPIO pins with some of them connected to pull-down resistors.<br />
In the <strong>SA</strong>-<strong>1110</strong> <strong>Development</strong> Platform, the GPIO 9:2 pins serve two functions: first as SCR bits<br />
that can be read at boot time, and later as the upper 8 bits of the LCD data port.<br />
After system reset and boot, all <strong>SA</strong>-<strong>1110</strong> GPIO pins are reset to be inputs. During the boot<br />
sequence the boot code performs the following sequence to determine the system configuration:<br />
1. Configure GPIO 9:2 as outputs<br />
4-8 <strong>Intel</strong> ® <strong>StrongARM*</strong> <strong>SA</strong>-<strong>1110</strong> <strong>Microprocessor</strong> <strong>Development</strong> <strong>Board</strong> User’s Guide
Hardware Considerations<br />
2. Write 0xFF to GPIO 9:2<br />
3. Configure GPIO 9:2 as inputs<br />
4. Read GPIO 9:2 and save as system configuration byte.<br />
High value resistors (100 K Ohms) are attached between GPIO 9:2 and ground on those bits that<br />
must read as zeros in the configuration status register. High value resistors are required to minimize<br />
wasted power in the resistors while the LCD is operating. These 100K ohm pull-down resistors<br />
allow the GPIO pin to return to a valid zero level when the GPIO pins are configured as inputs.<br />
To read the SCR bits, the boot code must first configure the GPIO 9:2 pins as outputs and then set<br />
them to 0xFF very early in the boot process. This precharges the GPIO 9:2 pins to 3 volts. The boot<br />
code must then configure the GPIO 9:2 pins as inputs and read the pins. The boot code must then<br />
store the configuration information in a global area so that drivers and system services can<br />
subsequently utilize the information.<br />
The pins that have the 100K ohm pull-down resistors settle to a valid zero level in less then 2<br />
microseconds. The pins that do not have pull-down resistors maintain valid high levels for more<br />
then 10 microseconds. Due to these time constraints, the SCR boot code needs to sample the GPIO<br />
9:2 pins only during valid times.<br />
A section of boot code that allows the SCR bits to be read at a valid time is shown in Example 4-1:<br />
Example 4-1. Boot Code to Read SCR Bits<br />
10<br />
ldr r0, =GPDR_PHYSICAL ; equate with physical address of GPIO<br />
; pin direction register<br />
ldr r1, =0x0807A7FC ; <strong>SA</strong><strong>1110</strong>DB Pin direction, for now get rid of<br />
; MBGRNT, STEREO, RXD<br />
str r1, [r0]<br />
ldr r0, =GPSR_PHYSICAL ; to find out <strong>SA</strong>-<strong>1110</strong> HH board config must<br />
; write FF<br />
; to GPIO 2:9<br />
ldr r1, =GPIO_2_T0_9 ; writing 0 has no effect so can blast the 1s in<br />
str r1, [r0]<br />
ldr r0, =GPDR_PHYSICAL ; now configure pins 2 through 9 as input<br />
ldr r1, =0x0807A400<br />
str r1, [r0]<br />
ldr r0, =GPLR_PHYSICAL ; equate with physical address of GPIO pin level<br />
; register<br />
mov r2,#0x64 ; 100 decimal<br />
ldr r1, [r0] ; now read pins to determine the configuration<br />
subs r2,r2,#1 ; loop 100x through to make sure the pin bleed<br />
; down takes<br />
bne %b10<br />
and r1, r1, #GPIO_2_T0_9; mask off non-configuration pins<br />
ldr r0, =CONFIG_PHYSICAL; equate with address of area to store<br />
; SCR configuration info for later use<br />
str r1, [r0] ; store configuration in global area<br />
ldr r0, =GPDR_PHYSICAL<br />
ldr r1, =0x0807A7FC ; restore correct pin direction<br />
str r1, [r0]<br />
<strong>Intel</strong> ® <strong>StrongARM*</strong> <strong>SA</strong>-<strong>1110</strong> <strong>Microprocessor</strong> <strong>Development</strong> <strong>Board</strong> User’s Guide 4-9
Hardware Considerations<br />
Table 4-5 provides bit descriptions of the SCR:<br />
Table 4-5. System Configuration Bit Descriptions<br />
System Configuration<br />
<strong>SA</strong>-<strong>1110</strong> <strong>Development</strong> <strong>Board</strong><br />
Bit<br />
3<br />
1<br />
3<br />
0<br />
2<br />
9<br />
2<br />
8<br />
2<br />
7<br />
2<br />
6<br />
2<br />
5<br />
2<br />
4<br />
2<br />
3<br />
2<br />
2<br />
2<br />
1<br />
2<br />
0<br />
1<br />
9<br />
1<br />
8<br />
1<br />
7<br />
1<br />
6<br />
1<br />
5<br />
1<br />
4<br />
1<br />
3<br />
1<br />
2<br />
1<br />
1<br />
1<br />
0<br />
9 8 7 6 5 4 3 2 1 0<br />
Reserved<br />
<strong>SA</strong>-1111<br />
GFX<br />
Reserved<br />
Flash_Size<br />
SDRAM_<br />
Sizes<br />
Reserved<br />
Reset a ? ? ? ? ? ? ? ? ? ? ? ? ? ? ? ? ? ? ? ? ? ? ? ? ? ? ? ? ? ? ? ?<br />
Bits Name Type Description<br />
1:0 Reserved — —<br />
3:2<br />
SDRAM_<br />
Size<br />
Read only b<br />
SDRAM size<br />
11 – 128 Mbit devices. 32 Mbyte total bank size<br />
10 – 64 Mbit devices. 16 Mbyte total bank size<br />
01 – 256 Mbit devices. 64 Mbyte total bank size<br />
00 – Reserved<br />
5:4 Flash_Size Read only b Flash size<br />
11 – 128 Mbit devices. StrataFalsh 32 Mbyte total bank size<br />
10 – 32 Mbit devices. StrataFalsh 8 Mbyte total bank size<br />
01 – 16 Mbit devices. FlashFile 4 Mbyte total bank size<br />
00 – 64 Mbit devices. StrataFalsh 16 Mbyte total bank size<br />
7:6 Reserved — —<br />
8 GFX Read only b 0 – Present<br />
Graphics Accelerator board<br />
1 – Not Present<br />
9 <strong>SA</strong>-1111 Read only b <strong>SA</strong>-1111 <strong>Development</strong> Module<br />
0 – Present<br />
1 – Not Present<br />
31:10 Reserved — —<br />
a. A question mark (?) indicates that this value is unknown at reset.<br />
b. The values written in this bit are readable, but cannot be modified by software.<br />
4.4.2 <strong>SA</strong>-<strong>1110</strong> <strong>Development</strong> <strong>Board</strong> Control Register BCR<br />
0x1200,0000<br />
The <strong>SA</strong>-<strong>1110</strong> <strong>Development</strong> <strong>Board</strong> requires additional GPIO output functions which are<br />
implemented in the <strong>SA</strong>-<strong>1110</strong> <strong>Development</strong> <strong>Board</strong> Control Register (BCR) to control the compact<br />
flash, codec, IRDA, stereo, audio, LCD, RS232, LEDs, communication ports, charger, radio, and<br />
speaker.<br />
The BCR is write only–system software must maintain a shadow copy of the BCR to perform<br />
read-modify-write functions.<br />
4-10 <strong>Intel</strong> ® <strong>StrongARM*</strong> <strong>SA</strong>-<strong>1110</strong> <strong>Microprocessor</strong> <strong>Development</strong> <strong>Board</strong> User’s Guide
Hardware Considerations<br />
Note:<br />
The BCR is not reset at power up time and is maintained during sleep mode. System software must<br />
initialize this register very early in the cold power up code.<br />
Table 4-6. <strong>Board</strong> Control Register (Sheet 1 of 4)<br />
0x1200,0000 <strong>Board</strong> Control Register <strong>SA</strong>-<strong>1110</strong> Evaluation Module<br />
Bit<br />
3<br />
1<br />
3<br />
0<br />
2<br />
9<br />
2<br />
8<br />
2<br />
7<br />
2<br />
6<br />
2<br />
5<br />
2<br />
4<br />
2<br />
3<br />
2<br />
2<br />
2<br />
1<br />
2<br />
0<br />
1<br />
9<br />
1<br />
8<br />
1<br />
7<br />
1<br />
6<br />
1<br />
5<br />
1<br />
4<br />
1<br />
3<br />
1<br />
2<br />
1<br />
1<br />
1<br />
0<br />
9 8 7 6 5 4 3 2 1 0<br />
Reserved<br />
Spk_Off<br />
Rad_On<br />
Qmute<br />
IRDECODE<br />
I2CENAB<br />
Rad_WU<br />
COM_RTS<br />
COM_DTR<br />
Vib_On<br />
D8_LED<br />
D9_LED<br />
RS232En<br />
LCD On<br />
LCD12or16<br />
Light<br />
Audio_On<br />
CF_Bus_On<br />
Stereo_LB<br />
IRDA_MD[1:0]<br />
IRDA_FSEL<br />
SOFT_RST<br />
CF_RST GFX_RST<br />
CF_PWR NEP_RST<br />
Reset a ? ? ? ? ? ? ? ? 1 0 ? ? ? ? ? ? 0 1 1 0 0 ? 0 0 1 ? ? ? ? ? 0 0<br />
Bits Name Type Description<br />
0 CF_PWR Write Only b 0 – CF power off<br />
1 – CF 3.3V power on<br />
Compact Flash Power<br />
Must be programmed to 0 when system goes to sleep.<br />
1<br />
CF_RST<br />
GFX_RST<br />
Write Only b<br />
Codec Reset<br />
0 – Holds UCB1300, ADI7171, and UDA1341 in reset<br />
1 – Allows UCB1300, ADI7171 and UDA1341 to run<br />
Must be programmed to 0 when system goes to sleep.<br />
3 IRDA_FSEL Write Only b 0 – SIR<br />
1 – MIR/FIR<br />
IRDA Frequency select<br />
Controls IRDA chip data rate. Refer to IRDA chip vendor spec for details<br />
5:4<br />
IRDA_<br />
MD[1:0]<br />
Write Only b<br />
IRDA Mode 1:0 Range/Power select<br />
00 – Max range and power<br />
01 – Shutdown. Power off<br />
10 – 2/3 range and power<br />
11 – 1/3 range and power<br />
Must be programmed to 01 when system goes to sleep<br />
6 Stereo_LB Write Only b Stereo Loopback<br />
0 – Stereo loopback off<br />
1 – Stereo loopback on<br />
Stereo loopback is used by the system applications to route audio signals<br />
in the <strong>SA</strong>-<strong>1110</strong> <strong>Development</strong> <strong>Board</strong>. Loopback is also used by diagnostic<br />
software.<br />
7 CF_Bus_On Write Only b Compact Flash bus on<br />
0 – CF BUS ON<br />
1 – CF BUS off (float)<br />
Must be programmed to 0 when Xbus daughter boards are present<br />
Must be programmed to 1 when system goes to sleep<br />
<strong>Intel</strong> ® <strong>StrongARM*</strong> <strong>SA</strong>-<strong>1110</strong> <strong>Microprocessor</strong> <strong>Development</strong> <strong>Board</strong> User’s Guide 4-11
Hardware Considerations<br />
Table 4-6. <strong>Board</strong> Control Register (Sheet 2 of 4)<br />
0x1200,0000 <strong>Board</strong> Control Register <strong>SA</strong>-<strong>1110</strong> Evaluation Module<br />
Bit<br />
3<br />
1<br />
3<br />
0<br />
2<br />
9<br />
2<br />
8<br />
2<br />
7<br />
2<br />
6<br />
2<br />
5<br />
2<br />
4<br />
2<br />
3<br />
2<br />
2<br />
2<br />
1<br />
2<br />
0<br />
1<br />
9<br />
1<br />
8<br />
1<br />
7<br />
1<br />
6<br />
1<br />
5<br />
1<br />
4<br />
1<br />
3<br />
1<br />
2<br />
1<br />
1<br />
1<br />
0<br />
9 8 7 6 5 4 3 2 1 0<br />
Reserved<br />
Spk_Off<br />
Rad_On<br />
Qmute<br />
IRDECODE<br />
I2CENAB<br />
Rad_WU<br />
COM_RTS<br />
COM_DTR<br />
Vib_On<br />
D8_LED<br />
D9_LED<br />
RS232En<br />
LCD On<br />
LCD12or16<br />
Light<br />
Audio_On<br />
CF_Bus_On<br />
Stereo_LB<br />
IRDA_MD[1:0]<br />
IRDA_FSEL<br />
SOFT_RST<br />
CF_RST GFX_RST<br />
CF_PWR NEP_RST<br />
Reset a ? ? ? ? ? ? ? ? 1 0 ? ? ? ? ? ? 0 1 1 0 0 ? 0 0 1 ? ? ? ? ? 0 0<br />
Bits Name Type Description<br />
8 Audio_On Write Only b Audio power on<br />
0 – UDA1341, MIC and DAA power off<br />
1 – UDA1341, MIC and DAA power on<br />
Must be programmed to 0 when system goes to sleep.<br />
Note that the UCB1300 has its own internal power down modes and is not<br />
controlled by this signal.<br />
9 Light Write Only b 0 – Backlight off<br />
1 – Backlight on<br />
Backlight<br />
Must be programmed to 0 when system goes to sleep<br />
10 LCD12or16 Write Only b LCD 12bpp or 16bpp output select<br />
Configures the PZ3128 CPLD to map the <strong>SA</strong>-<strong>1110</strong> LCD data pins as 12 bit<br />
RGB444 or 16 bit RGB565.<br />
0 – 12RGB<br />
1 – 16RGB<br />
11 LCD On Write Only b 0 – LCD and control logic power off<br />
1 – LCD and control logic power on<br />
LCD power on<br />
Must be programmed to 0 when system goes to sleep<br />
12 RS232En Write Only b RS 232 transceiver enable<br />
Controls power on RS232 level converters.<br />
0 – RS232 force power off<br />
1 – RS232 enable auto power on<br />
Must be programmed to 0 when system goes to sleep<br />
13 D9_LED Write Only b Red LED<br />
0 – LED on<br />
1 – LED off<br />
Application dependant. General application usage. May be used by<br />
developers as general-purpose indicator or as a scope trigger.<br />
Must be programmed to 1 when system goes to sleep.<br />
14 D8_LED Write Only b Green LED<br />
0 – LED on<br />
1 – LED off<br />
Application dependant. General application usage. May be used by<br />
developers as a general-purpose indicator or as a scope trigger.<br />
Must be programmed to 1 when system goes to sleep.<br />
4-12 <strong>Intel</strong> ® <strong>StrongARM*</strong> <strong>SA</strong>-<strong>1110</strong> <strong>Microprocessor</strong> <strong>Development</strong> <strong>Board</strong> User’s Guide
Hardware Considerations<br />
Table 4-6. <strong>Board</strong> Control Register (Sheet 3 of 4)<br />
0x1200,0000 <strong>Board</strong> Control Register <strong>SA</strong>-<strong>1110</strong> Evaluation Module<br />
Bit<br />
3<br />
1<br />
3<br />
0<br />
2<br />
9<br />
2<br />
8<br />
2<br />
7<br />
2<br />
6<br />
2<br />
5<br />
2<br />
4<br />
2<br />
3<br />
2<br />
2<br />
2<br />
1<br />
2<br />
0<br />
1<br />
9<br />
1<br />
8<br />
1<br />
7<br />
1<br />
6<br />
1<br />
5<br />
1<br />
4<br />
1<br />
3<br />
1<br />
2<br />
1<br />
1<br />
1<br />
0<br />
9 8 7 6 5 4 3 2 1 0<br />
Reserved<br />
Spk_Off<br />
Rad_On<br />
Qmute<br />
IRDECODE<br />
I2CENAB<br />
Rad_WU<br />
COM_RTS<br />
COM_DTR<br />
Vib_On<br />
D8_LED<br />
D9_LED<br />
RS232En<br />
LCD On<br />
LCD12or16<br />
Light<br />
Audio_On<br />
CF_Bus_On<br />
Stereo_LB<br />
IRDA_MD[1:0]<br />
IRDA_FSEL<br />
SOFT_RST<br />
CF_RST GFX_RST<br />
CF_PWR NEP_RST<br />
Reset a ? ? ? ? ? ? ? ? 1 0 ? ? ? ? ? ? 0 1 1 0 0 ? 0 0 1 ? ? ? ? ? 0 0<br />
Bits Name Type Description<br />
15 Vib_On Write Only b Vibration motor (quiet alert)<br />
0 – Motor off<br />
1 – Motor on<br />
Must be programmed to 0 when system goes to sleep.<br />
This device uses significant power and should be used sparingly to<br />
conserve battery usage.<br />
16 COM_DTR Write Only b Must be programmed to 0 when system goes to sleep<br />
COMport Data Terminal Ready<br />
17 COM_RTS Write Only b Must be programmed to 0 when system goes to sleep<br />
COMport Request To Send<br />
18 Rad_WU Write Only b Radio wake up interrupt<br />
0 – No interrupt<br />
1 – Interrupts CPU in radio module<br />
Must be programmed to 0 when system goes to sleep<br />
19 I2CENAB Write Only b 0 – Off<br />
1 – On<br />
I2C Switch Enable<br />
Must be set to zero to allow compact flash cards to function<br />
20 IRDECODE Write Only b IR Decode Enable<br />
0 – Off<br />
1 – On<br />
Must be set to zero to allow IRDA to function<br />
21 Qmute Write Only b 0 – Audio on<br />
Quick Mute<br />
1 – Audio mute<br />
<strong>Intel</strong> ® <strong>StrongARM*</strong> <strong>SA</strong>-<strong>1110</strong> <strong>Microprocessor</strong> <strong>Development</strong> <strong>Board</strong> User’s Guide 4-13
Hardware Considerations<br />
Table 4-6. <strong>Board</strong> Control Register (Sheet 4 of 4)<br />
0x1200,0000 <strong>Board</strong> Control Register <strong>SA</strong>-<strong>1110</strong> Evaluation Module<br />
Bit<br />
3<br />
1<br />
3<br />
0<br />
2<br />
9<br />
2<br />
8<br />
2<br />
7<br />
2<br />
6<br />
2<br />
5<br />
2<br />
4<br />
2<br />
3<br />
2<br />
2<br />
2<br />
1<br />
2<br />
0<br />
1<br />
9<br />
1<br />
8<br />
1<br />
7<br />
1<br />
6<br />
1<br />
5<br />
1<br />
4<br />
1<br />
3<br />
1<br />
2<br />
1<br />
1<br />
1<br />
0<br />
9 8 7 6 5 4 3 2 1 0<br />
Reserved<br />
Spk_Off<br />
Rad_On<br />
Qmute<br />
IRDECODE<br />
I2CENAB<br />
Rad_WU<br />
COM_RTS<br />
COM_DTR<br />
Vib_On<br />
D8_LED<br />
D9_LED<br />
RS232En<br />
LCD On<br />
LCD12or16<br />
Light<br />
Audio_On<br />
CF_Bus_On<br />
Stereo_LB<br />
IRDA_MD[1:0]<br />
IRDA_FSEL<br />
SOFT_RST<br />
CF_RST GFX_RST<br />
CF_PWR NEP_RST<br />
Reset a ? ? ? ? ? ? ? ? 1 0 ? ? ? ? ? ? 0 1 1 0 0 ? 0 0 1 ? ? ? ? ? 0 0<br />
Bits Name Type Description<br />
22 Rad_On Write Only b Radio Power On<br />
0 – Radio power off<br />
1 – Radio power on<br />
Must be programmed to 0 when system goes to sleep.<br />
This device uses significant power and should be used sparingly to<br />
conserve battery usage. During transmission the radio may consume 10<br />
times more power then the rest of the system.<br />
23 Spk_Off Write Only b Speaker Off<br />
0 – Speaker amplifier power on<br />
1 – Speaker amplifier power off<br />
Must be programmed to 1 when system goes to sleep<br />
This device may use significant power and should be used sparingly to<br />
conserve battery usage.<br />
31:24 Reserved — —<br />
a. A question mark (?) indicates that this value is unknown at reset.<br />
b. The values written to these bits are not readable. A record of them must be maintained by software.<br />
4.4.3 <strong>SA</strong>-<strong>1110</strong> <strong>Development</strong> <strong>Board</strong> Status Register 0x1200,0000<br />
The <strong>SA</strong>-<strong>1110</strong> <strong>Development</strong> <strong>Board</strong> requires additional GPIO input functions which are<br />
implemented in the <strong>SA</strong>-<strong>1110</strong> <strong>Development</strong> <strong>Board</strong> Status Register (BSR) for communications and<br />
radio functions. The BSR is read only.<br />
4-14 <strong>Intel</strong> ® <strong>StrongARM*</strong> <strong>SA</strong>-<strong>1110</strong> <strong>Microprocessor</strong> <strong>Development</strong> <strong>Board</strong> User’s Guide
Hardware Considerations<br />
Note:<br />
The BSR is updated after each read to the BSR—to capture the present value of the BSR, two<br />
consecutive read operations are required.<br />
Table 4-7. <strong>Board</strong> Status Register<br />
Physical Address 32-Bit Register <strong>SA</strong>-<strong>1110</strong> Evaluation <strong>Board</strong><br />
Bit<br />
3<br />
1<br />
3<br />
0<br />
2<br />
9<br />
2<br />
8<br />
2<br />
7<br />
2<br />
6<br />
2<br />
5<br />
2<br />
4<br />
2<br />
3<br />
2<br />
2<br />
2<br />
1<br />
2<br />
0<br />
1<br />
9<br />
1<br />
8<br />
1<br />
7<br />
1<br />
6<br />
1<br />
5<br />
1<br />
4<br />
1<br />
3<br />
1<br />
2<br />
1<br />
1<br />
1<br />
0<br />
9 8 7 6 5 4 3 2 1 0<br />
Reset a<br />
Rad_RI<br />
Rad_DCD<br />
Rad_DSR<br />
Rad_CTS<br />
COM_DSR<br />
COM_CTS<br />
COM_DCD<br />
RS232_Valid<br />
Reserved<br />
? ? ? ? ? ? ? ? ? ? ? ? ? ? ? ? ? ? ? ? ? ? ? ? ? ? ? ? ? ? ? ?<br />
Bits Name Type Description<br />
23:0 Reserved Read only b —<br />
24<br />
RS232_<br />
Valid<br />
Read only b MAX3244 RS232 transceiver detects a valid RS232 level<br />
25 COM_DCD Read onlb b COM port Carrier Detect c<br />
26 COM_CTS Read only b COM port Clear To Send<br />
27 COM_DSR Read only b COM port Data Set Ready<br />
28 Rad_CTS Read only b Radio port Clear To Send<br />
29 Rad_DSR Read only b Radio port Data Set Ready<br />
30 Rad_DCD Read only b Radio port Carrier Detect<br />
31 Rad_RI Read only b Radio port Ring Indicator<br />
a. A question mark (?) indicates that this value is unknown at reset.<br />
b. The values written in this bit are readable, but cannot be modified by software.<br />
c. Not implemented in Phase 5, always reads 0.<br />
4.5 System Reset<br />
A MAX811 device is used to sense the 3.3 V rail and generate a reset signal called RESET_IN. A<br />
manual reset switch also allows warm reset and system booting. The MAX811 component releases<br />
the system reset signal when the 3.3 V rail is above 3.08 V.<br />
Three subsystems in the <strong>SA</strong>-<strong>1110</strong> <strong>Development</strong> Platform have a programmable soft reset control.<br />
The <strong>SA</strong>-<strong>1110</strong> <strong>Development</strong> <strong>Board</strong> provides the following reset controls:<br />
• <strong>SA</strong>-<strong>1110</strong> Compact Flash Reset (when Graphics and <strong>SA</strong>-1111 <strong>Development</strong> Modules are not<br />
present)<br />
• GFX_Reset<br />
• UCB1300 and UDA1341 Codec_Reset (<strong>SA</strong>-<strong>1110</strong> <strong>Development</strong> <strong>Board</strong> only)<br />
The application must clear the reset on any subsystem that is to be used or initialized. The reset<br />
controls are not affected by RESET_IN.<br />
<strong>Intel</strong> ® <strong>StrongARM*</strong> <strong>SA</strong>-<strong>1110</strong> <strong>Microprocessor</strong> <strong>Development</strong> <strong>Board</strong> User’s Guide 4-15
Hardware Considerations<br />
4.6 System Displays<br />
This section describes the LED and LCD display topics on the <strong>SA</strong>-<strong>1110</strong> <strong>Development</strong> <strong>Board</strong>.<br />
4.6.1 LED Displays<br />
There are six LEDs on the <strong>SA</strong>-<strong>1110</strong> <strong>Development</strong> <strong>Board</strong>. These are primarily intended to provide<br />
general status and power status and some low-level system debug and development support. Many<br />
more system debug LEDs are on the <strong>SA</strong>-1111 <strong>Development</strong> Module.<br />
Table 4-8. LED Descriptions<br />
LED Name Description<br />
D13<br />
D9<br />
D8<br />
D11<br />
D10<br />
D4<br />
GPIO 17_LED<br />
D9_LED<br />
D8_LED<br />
AGC_LED<br />
OH_LED<br />
CORE_PWR_LED<br />
GPIO 17 LED<br />
Used to signal boot diagnostic status. General purpose boot progress indicator.<br />
Uses flashing codes to indicate boot progress. After boot time GPIO 17 is used as<br />
the L3 MODE signal.<br />
D9 LED<br />
General purpose red LED controlled by BCR.<br />
D8 LED<br />
General purpose green LED controlled by BCR.<br />
Automatic Gain Control LED<br />
Used to indicate analog clipping in the microphone input circuit in the UDA1341<br />
stereo codec. Intended as a development aid in AGC level control software and<br />
speech recognition development.<br />
Off Hook LED<br />
Indicates POTS modem off hook signal. Connected to UCB1300 GPIO_8. Also used<br />
by system diagnostics to indicate successful UCB1300 communication.<br />
Core Power LED<br />
Indicates <strong>SA</strong>-<strong>1110</strong> Vcore voltage is active. Used as an aid in power management<br />
code development. Vcore is controlled by the <strong>SA</strong>_PWR_EN signal from the <strong>SA</strong>-<strong>1110</strong><br />
device.<br />
4.6.2 LCD Displays<br />
4.6.2.1 Sharp 3.9” Reflective Color<br />
The <strong>SA</strong>-<strong>1110</strong> <strong>Development</strong> <strong>Board</strong> provides direct support for a Sharp 3.9” 320x240 reflective TFT<br />
color LCD (Sharp panel number LQ039Q2DS01). These panels utilize a new technology that does<br />
not require backlighting and thus use much less battery power than the more common transmissive<br />
LCD types. An optional frontlight may be switched on or off as required by the ambient lighting<br />
conditions.<br />
Note:<br />
The design does not include a backlight power supply.<br />
The 3.9” reflective panel requires rather elaborate analog and digital support circuitry on the<br />
<strong>SA</strong>-<strong>1110</strong> <strong>Development</strong> <strong>Board</strong>. Sharp does sell a custom ASIC part number LZ9GG31 that<br />
implements the required digital circuitry, however the <strong>SA</strong>-<strong>1110</strong> <strong>Development</strong> <strong>Board</strong> uses a PZ3126<br />
CPLD to implement the LZ9GG31 functions.<br />
4-16 <strong>Intel</strong> ® <strong>StrongARM*</strong> <strong>SA</strong>-<strong>1110</strong> <strong>Microprocessor</strong> <strong>Development</strong> <strong>Board</strong> User’s Guide
Hardware Considerations<br />
A limitation with the <strong>SA</strong>-<strong>1110</strong> is that it can not switch between eight bits per pixel (bpp) palettized<br />
color RGB444 and 16 bpp hi-color RGB565 with out re-mapping the LCD data pins at the board<br />
level. Normally this is not a problem because the bpp required by a particular application is known<br />
before a design is complete. To provide a more flexible development design, the <strong>SA</strong>-<strong>1110</strong><br />
<strong>Development</strong> <strong>Board</strong> replaces the LZ9GG31 ASIC with a PZ3128 CPLD that implements the Sharp<br />
LCD digital functions and in addition allows selecting between 8 bpp palettized color with<br />
RGB444 12bpp, and hi-color RGB565 16bpp color systems. These two modes require different pin<br />
mappings between the <strong>SA</strong>-<strong>1110</strong> and the LCD that the CPLD can be programmed to accommodate.<br />
In addition, no two LCDs are the same and the CPLD allows developers to adapt designs to support<br />
other displays types or NTSC/PAL TV encoders. This LCD CPLD facilitates the adaptation of<br />
many different LCD types to the <strong>SA</strong>-<strong>1110</strong> <strong>Development</strong> <strong>Board</strong>.<br />
The <strong>SA</strong>-<strong>1110</strong> <strong>Development</strong> <strong>Board</strong> provides all required support circuitry for the 3.9” LCD and a<br />
matching Hirose 50-pin connector for direct interfacing to this panel.<br />
To use an LCD other than the Sharp 3.9”, a custom adapter flex print cable (FPC) must be<br />
designed.<br />
4.6.2.2 Memory Pixel Representations Versus Physical Pixel Interface<br />
A frequent source of confusion with <strong>SA</strong>-1100 and <strong>SA</strong>-<strong>1110</strong> LCD applications is the number of bits<br />
per pixel. It is important to distinguish between the bits per pixel representation in <strong>SA</strong>-<strong>1110</strong> system<br />
memory and the bits per pixel of the physical interface between the <strong>SA</strong>-<strong>1110</strong> and the LCD panel.<br />
An operating system may use eight bit pixels in system memory while the <strong>SA</strong>-<strong>1110</strong> LCD controller<br />
color look up table (also known as a color palette) maps the eight bit memory pixels to twelve bit<br />
physical pixels (RGB444) that appear on the LCD pixel data pins.<br />
4.6.2.3 Mapping 18 Bit LCDs to 16 Bits of Pixel Data<br />
Most TFT color LCDs have 18 bit interfaces which expect six bits of red, six bits of green and six<br />
bits of blue, written as RGB 666. The <strong>SA</strong>-<strong>1110</strong> <strong>Development</strong> <strong>Board</strong> provides 16 bits per pixel<br />
maximum. To map the 16 bit <strong>SA</strong>-<strong>1110</strong> LCD interface to an 18-bit color TFT LCD the LSBs of the<br />
red and blue colors must be connected to ground. This results in five bits of blue, six bits of green<br />
and five bits of red (RGB 565). The perceived color difference between RGB 666 and RGB 565 is<br />
minimal.<br />
4.6.2.4 LCD Backlight Frontlight Support<br />
The <strong>SA</strong>-<strong>1110</strong> <strong>Development</strong> <strong>Board</strong> provides a connector suitable for powering a backlight inverter<br />
circuit. The raw battery voltage is available on the backlight connector to power a backlight<br />
inverter. A program controlled GPIO pin allows switching the backlight/frontlight on and off. A<br />
PWM DAC signal from the <strong>SA</strong>-1111 <strong>Development</strong> Module is also available on the connector to<br />
control brightness if required by the display system.<br />
Note:<br />
The design does not include a backlight power supply.<br />
4.7 Debugging<br />
This section describes the <strong>SA</strong>-<strong>1110</strong> <strong>Development</strong> <strong>Board</strong>’s keypad, debug and functional switches.<br />
<strong>Intel</strong> ® <strong>StrongARM*</strong> <strong>SA</strong>-<strong>1110</strong> <strong>Microprocessor</strong> <strong>Development</strong> <strong>Board</strong> User’s Guide 4-17
Hardware Considerations<br />
4.7.1 Keypad<br />
A 5 x 4 matrix keypad suitable for use with telephone applications 1 is supported in the <strong>SA</strong>-1111<br />
<strong>Development</strong> Module. The primary use of the keypad is as a simple input device for system<br />
debugging and diagnostic interaction. Applications may also use this resource.<br />
4.7.2 Debug Switches<br />
A switch pack containing eight switches is provided on the <strong>SA</strong>-1111 <strong>Development</strong> Module. The<br />
switches may be read in the SWPK register. With the exception of Switch 8, which controls the<br />
boot ROM bank select, the switch definitions are “soft” and may be defined by the debug<br />
environment.<br />
4.7.3 Function Switches<br />
The <strong>SA</strong>-<strong>1110</strong> <strong>Development</strong> <strong>Board</strong> has eight switches. These switches are mounted on the side of<br />
the board and may be activated while booting the device.<br />
• GPIO 0 switch–Manual override for GPIO 0<br />
• GPIO 1 switch–Manual override for GPIO 1<br />
• User software definable switches–Six switches for user software definable signals. Possible<br />
applications are as follows.<br />
—Power on/off<br />
— Backlight on/off (soft switch)<br />
—Scroll/Fast forward/Volume up/down<br />
—Scroll/left/right/Fast reverse<br />
—Record memo (audio microphone)<br />
— Playback/stop<br />
—Main Menu<br />
With the exceptions of the GPIO 0 and GPIO 1 switches (S1 and S2 respectively), which also<br />
functions as the system power on/off/wake-up switch, and the reset switch (S9), the definition of all<br />
other switches (S3 through S8) as well as de-bouncing is done entirely in software.<br />
Due to the limited number of switches, it is recommended that the switches share multiple<br />
functions. An example would be a single switch for power on/off and backlight on/off with the<br />
functions distinguished by the push duration or tap sequence.<br />
The audio record/playback/fast forward/fast reverse/stop/volume functions should always be<br />
assigned to switches and should not require using the touch screen. Audio record, playback and<br />
shuttle function applications should permit single-handed operation.<br />
1. The <strong>SA</strong>-<strong>1110</strong> <strong>Development</strong> Platform has not been certified as compliant with FCC, CE, UC, or PTT telephone standards or regulations.<br />
4-18 <strong>Intel</strong> ® <strong>StrongARM*</strong> <strong>SA</strong>-<strong>1110</strong> <strong>Microprocessor</strong> <strong>Development</strong> <strong>Board</strong> User’s Guide
Hardware Considerations<br />
4.7.4 Logic Analyzer Support<br />
Logic analyzer support is needed on a very small percentage of all development boards. To reduce<br />
the <strong>SA</strong>-<strong>1110</strong> <strong>Development</strong> <strong>Board</strong> complexity, no logic analyzer test heads are provided on the<br />
<strong>SA</strong>-<strong>1110</strong> <strong>Development</strong> <strong>Board</strong>. However, the <strong>SA</strong>-1111 <strong>Development</strong> Module provides logic<br />
analyzer access to all of the <strong>SA</strong>-<strong>1110</strong> memory interface signals. For more information, see the<br />
<strong>Intel</strong> ® StrongARM * <strong>SA</strong>-1111 <strong>Development</strong> Module User’s Guide.<br />
4.8 SMBus<br />
The SMBus interface is a two-wire serial protocol requiring open-collector drivers that allow the<br />
“wire or” of data on the SMBus. The SMBus SDA (data) and SCL (clock) have pull-up resistors to<br />
VDD such that an un-driven SMBus pin will be high (one). The GPIO pins on the <strong>SA</strong>-<strong>1110</strong><br />
<strong>Development</strong> Module are three-state drivers that have programmable control of direction and data<br />
as well as interrupt generation from either or both edges of a signal. To use the GPIO pins with the<br />
SMBus requires the use of the GPIO direction control bits for two of the GPIO pins as SMBus data<br />
bits.<br />
The GPIO GPCR data register bits for both bits assigned to the SMBus are always cleared to zero.<br />
To drive a low (zero) onto the SMBus SDA or SCL lines the direction bit is set to 1, which drives<br />
the zero data on to the SMBus pin. To drive a one, the GPDR bit for the SMBus pin is set to zero,<br />
which reconfigures the pin as an input and turns off the three-state driver allowing the pull-up on<br />
the SMBus to pull the SMBus line high to a one. The value of the SMBus pins may be read at any<br />
time through the GPLR. For more information about the GPCR, GPDR, and GPLR registers, see<br />
the <strong>Intel</strong> ® StrongARM * <strong>SA</strong>-<strong>1110</strong> <strong>Microprocessor</strong> Advanced Developer’s Manual.<br />
The SMBus protocol can be implemented in <strong>SA</strong>-<strong>1110</strong> software with the assistance of interrupt<br />
driven, system timed, programmed I/O. The system timer establishes the SMBus clock rate as well<br />
as avoiding polled PIO of the SMBus GPIO pins. This strategy allows direct connection of two<br />
GPIO pins to the two-wire SMBus with no external glue logic and a minimum of MIPS.<br />
The SMBus is provided on the battery connector to support smart battery packs.<br />
4.9 Serial Ports<br />
The <strong>SA</strong>-<strong>1110</strong> <strong>Development</strong> <strong>Board</strong> provides a RS232 interface connected to the <strong>SA</strong>-<strong>1110</strong> serial<br />
port 1. A custom 14-pin header made by FCI is used to allow an external connection to the RS232<br />
port and the POTS signals. This header is similar to the serial adapter headers and the cables used<br />
in cell phones. This communications port may be used for the debug serial port or as an application<br />
communications port. This port provides RTS, CTS, DTR and DSR modem signals to support a<br />
serial IO port PC synchronous application.<br />
A Maxim MAX3244* RS232 transceiver is used to manage the level conversion and line interface.<br />
This device has a power saving automatic shutdown that powers down the chip if no valid RS232<br />
levels are detected. The component may also be forced off by RS232En, which is bit 12 in the<br />
<strong>Board</strong> Control Register. When off, the CMOS receiver signals are three-stated allowing this serial<br />
port to be shared with the <strong>SA</strong>-1111 <strong>Development</strong> Module.<br />
The <strong>SA</strong>-1111 <strong>Development</strong> Module provides a standard 5x2 0.1” header for the <strong>SA</strong>-<strong>1110</strong> serial<br />
port 1. This port is used for system debugging and firmware development. When the <strong>SA</strong>-1111<br />
<strong>Development</strong> Module is attached, the <strong>SA</strong>-<strong>1110</strong> <strong>Development</strong> <strong>Board</strong> shuts down its MAX3244<br />
<strong>Intel</strong> ® <strong>StrongARM*</strong> <strong>SA</strong>-<strong>1110</strong> <strong>Microprocessor</strong> <strong>Development</strong> <strong>Board</strong> User’s Guide 4-19
Hardware Considerations<br />
RS232 transceiver to avoid conflict with the <strong>SA</strong>-1111 <strong>Development</strong> Module RS232 transceiver.<br />
The <strong>SA</strong>-<strong>1110</strong> <strong>Development</strong> Module’s RS232 transceiver may be forced off by RS232En. A second<br />
port on the <strong>SA</strong>-1111 <strong>Development</strong> Module that is connected to the <strong>SA</strong>-<strong>1110</strong> serial port 3, is<br />
provided via a nine-pin RS232 port connector on the board. This port may be used for debug<br />
messages from the development environment.<br />
Note:<br />
The nine-pin RS232 cable connected to the Base Station serial port (J10) on the <strong>SA</strong>-<strong>1110</strong><br />
<strong>Development</strong> <strong>Board</strong> cannot be connected at the same time as the UART1 connector on the<br />
<strong>SA</strong>-1111 <strong>Development</strong> Module. Failure to do so will corrupt the data on the UART1.<br />
4.10 Power System<br />
The <strong>SA</strong>-<strong>1110</strong> development system has a unique, highly efficient and cost effective battery power<br />
system.<br />
4.10.1 Power System Design Benefits<br />
The <strong>SA</strong>-<strong>1110</strong> <strong>Development</strong> Platform provides the following benefits:<br />
• Requires only a single cell Li-ion 3.6 V battery<br />
• Greater then 90% efficiency on 3.3 V, 1.5 Vcore, and radio power rails in operating mode<br />
• Greater then 90% efficiency on 3.3V rail in sleep mode<br />
• Supports high power, high efficiency radio power rail for radio modules requiring either two<br />
cell Li-ion batteries providing 7.2 V power or a single cell Li-ion battery providing 3.6 V<br />
power<br />
• Control of pulse width modulation (PWM) or pulse frequency modulation (PFM) and power<br />
switching synchronization modes of main switching regulators<br />
• Very clean power rails for audio and LCD systems<br />
• Allows charging from AC power adapter or USB power input using a Maxim MAX846*<br />
Li-ion charge controller<br />
• Provides battery temperature monitoring<br />
• Provides battery voltage and charger voltage monitoring<br />
• Provides automatic battery lockout to prevent over-discharge and possible battery damage<br />
• Provides low battery interrupt to <strong>SA</strong>-<strong>1110</strong> processor<br />
• Provides power switches for Compact Flash socket, audio subsystem and LCD display<br />
subsystems<br />
4.10.2 Power System Design<br />
There are two main power rails in any <strong>SA</strong>-<strong>1110</strong> design; are the 3.3 V main power and the<br />
1.5 V core power. The 3.3 V rail must be on all the time to support sleep mode and preserve<br />
SDRAM contents and system timer. In addition, a medium power 5 V rail is needed for the LCD as<br />
well as a 7.6 V (two Li-ion cell equivalent) high power rail for the CDMA radio module.<br />
4-20 <strong>Intel</strong> ® <strong>StrongARM*</strong> <strong>SA</strong>-<strong>1110</strong> <strong>Microprocessor</strong> <strong>Development</strong> <strong>Board</strong> User’s Guide
Hardware Considerations<br />
As shown in Figure 4-1, the battery charge and discharge rates are quoted in relative terms related<br />
to the rated capacity of the battery. As an example, a 1000 mA hour battery may be discharged at a<br />
2 C rate where C is the rated battery current or 1000 mA in this example. A 0.2 C rate would be<br />
200 mA for a 1000mAh battery. A Li-ion battery with a 100% charge starts at a terminal voltage of<br />
4. 1 V and quickly discharges to about 3.6 V where it remains for most of the discharge cycle.<br />
Toward the end of the discharge cycle the Li-ion terminal voltage falls rapidly from 3.6 V to 2.7 V<br />
where the discharge must be stopped or battery damage (loss of capacity) may result. Two Li-ion<br />
cells result in a 8.2 V to 5.4 V terminal voltage discharge curve, while a single cell Li-ion batteries<br />
produce 4.1 V to 2.7 V through out its discharge cycle with a 3.6 V nominal voltage. The discharge<br />
curves of Li-ion batteries are very flat when compared to lead acid or alkaline types. Li-ion<br />
batteries do not exhibit the memory effects associated with NiCd batteries or the high self<br />
discharge rates associated with NiMH batteries. In addition, Li-ion batteries have the highest<br />
energy density (watt hours per CC) of any available, affordable battery technology.<br />
Figure 4-1. Li-ion Discharge Curves<br />
PWR IN<br />
Voltage / V<br />
3.6V<br />
batt<br />
Chrg<br />
Batt Lockout<br />
<strong>SA</strong> PWR EN<br />
Discharge Rate Characteristics<br />
4.5<br />
1C discharge (4.1V cccv)<br />
20˚C<br />
4.0<br />
0.2C<br />
3.5<br />
2C<br />
3.0<br />
1C<br />
2.5<br />
2.0<br />
0 500<br />
1000 1500<br />
Capacity / mAh<br />
Super<br />
cap<br />
SMPS<br />
track<br />
off 3.2V<br />
LDO<br />
off<br />
on<br />
3.3V<br />
LDO<br />
1.55V<br />
SMPS<br />
5.5v Radio power @900ma<br />
or 3.5V during sleep<br />
LCD en<br />
5V<br />
LDO<br />
LCD<br />
5V<br />
Main<br />
3.3V<br />
Vcore<br />
1.55V<br />
A7267-01<br />
Figure 5-1 shows the effect of higher discharge rates on a Li-ion cell. This voltage sag effect under<br />
heavy loads is due to the internal resistance of the Li-ion cell which is less then 0.2 ohms typically.<br />
Discharge loads that are less then 20% (0.2C) of the battery capacity result in the most power<br />
efficient use of this battery type.<br />
4.10.2.1 1.5V Core Power<br />
The single Li-ion cell 1.5 V core power regulator solution is very simple and efficient. A<br />
MAX1692 buck regulator is fed from the 4.1 V – 2.7 V single cell Li-ion battery. This regulator,<br />
which is described in detail in Section 4.11.1, can achieve greater than 90% efficiency and is turned<br />
off during sleep mode by the <strong>SA</strong>-<strong>1110</strong> <strong>SA</strong>_PWR_EN signal. The MAX1692 buck regulator is a<br />
<strong>Intel</strong> ® <strong>StrongARM*</strong> <strong>SA</strong>-<strong>1110</strong> <strong>Microprocessor</strong> <strong>Development</strong> <strong>Board</strong> User’s Guide 4-21
Hardware Considerations<br />
high frequency type regulator. Powering the 1.5 V switching regulator from two Li-ion cells (8.2 V<br />
to 5.4 V) results in less than 85% power conversion efficiency. Using a single Li-ion design instead<br />
of two results in a greater than 90% conversion efficiency for the 1.5 V rail.<br />
4.11 Power for the <strong>Intel</strong>® <strong>StrongARM*</strong> <strong>SA</strong>-<strong>1110</strong><br />
<strong>Development</strong> <strong>Board</strong><br />
The following two sections provide a background on the design considerations for the 3.3 V supply<br />
on the <strong>SA</strong>-<strong>1110</strong> <strong>Development</strong> <strong>Board</strong> and the actual implementation used.<br />
4.11.1 3.3 V Main System Power Design Considerations<br />
Note:<br />
This section provides a background on design considerations for the power supply on the <strong>SA</strong>-<strong>1110</strong><br />
<strong>Development</strong> <strong>Board</strong>, while Section 5.21.2 describes the actual implementation.<br />
The terminal voltage for a single cell Li-ion battery varies between 4.1 V to 2.7 V throughout its<br />
discharge cycle. This presents a problem for the 3.3 V power supply design, because the battery<br />
terminal voltage starts out higher than the 3.3 V rail and ends up lower than the 3.3 V rail.<br />
Switching regulators are generally considered the highest efficiency solution to most battery power<br />
conversion designs. Switching regulator power conversion technology provides buck regulators<br />
that reduce a high voltage to a lower voltage. Boost regulators can convert a low voltage to a higher<br />
voltage. Combination buck/boost regulators can handle the 4.1V to 2.7V input variation of a single<br />
Li-ion cell to produce the 3.3 V on the main power rail.<br />
An alternative solution for 3.3 V generation could use a boost regulator to produce 5 V from the<br />
2.7 V to 4.1 V battery (the LCD requires 5 V anyway) plus a secondary or post regulator to buck<br />
the 5 V down to 3.3 V. This results in reduced conversion efficiency for the 3.3 V rail because the<br />
efficiency of the two regulators are multiplied, 90% of 90% equals 81%.<br />
However, switching regulators are typically less efficient at low-power levels than at high-power<br />
levels. A switching regulator that is 90% efficient at full load may be less than 80% efficient under<br />
very light loads, even when taking advantage of the pulse width modulation (PWM) or pulse<br />
frequency modulation (PFM) selections that the regulators provide to optimize conversion<br />
efficiency for heavy and light loads. This is important because the sleep mode, which is a very low<br />
power mode, must be very efficient to allow the longest possible sleep times. Unfortunately, the 5<br />
V to 3.3 V boost buck combination results in less than 65% (80% of 80%) combined efficiency in<br />
sleep mode.<br />
Buck and boost switching regulators as well as linear regulators are most efficient when the input<br />
voltage is close to the output voltage. This is why the 1.5 V buck regulator is 91% efficient when<br />
powered by a single cell 3.6 V Li-ion battery and only 85% efficient when powered from two cells<br />
at 7.2 V. A key point here is that linear regulators, which are generally considered to be very<br />
inefficient, can be more efficient than switching regulators if the input voltage is only slightly<br />
higher than the output voltage. Low drop out (LDO) linear regulators improve this situation by<br />
allowing the input voltage to be as little as 150 mv higher than the regulated output voltage at the<br />
full rated load.<br />
4-22 <strong>Intel</strong> ® <strong>StrongARM*</strong> <strong>SA</strong>-<strong>1110</strong> <strong>Microprocessor</strong> <strong>Development</strong> <strong>Board</strong> User’s Guide
Hardware Considerations<br />
Given that Li-ion batteries discharge at less then a 0.2C rate (20% of the total mah rating) have a<br />
terminal voltage at or above 3.6 V over 80% of their discharge cycle; the use of a simple LDO<br />
linear regulator connected directly to the battery provides the 3.3 V rail a very power efficient, lowcost<br />
solution. An LDO linear regulator also does not require the bulky coils, capacitors and diodes<br />
that switching regulators do, resulting in even lower cost and less circuit board “real estate”.<br />
At the beginning of a charge with a terminal voltage of 4.1V, the LDO linear regulator for the 3.3 V<br />
rail is over 80% efficient. When the battery is at its nominal voltage of 3.6 V, the LDO regulator is<br />
over 91% efficient and approaches 96% efficiency as the battery discharges towards the 3.45 V<br />
LDO cutout point. The efficiency goes up in sleep mode where the small load results in an even<br />
lower drop out voltage of 20 mV, which allows the battery to discharge to 3.32 V before drop out<br />
starts. With a 3.32 V battery voltage, the 3.3 V LDO linear regulator is over 99% efficient.<br />
In addition, using a LDO linear regulator provides the 3.3V rail results with a very clear power<br />
supply that requires fewer and smaller filter capacitors, saving cost and board space. An added<br />
benefit is less noise in the audio, telephony and display systems.<br />
Unfortunately, two major disadvantages to this scheme are:<br />
• The last 20% of the battery capacity is not usable because the bottom 20% of the charge<br />
terminal voltage goes below the 3.45 V cutout level necessary to maintain the 3.3 V output<br />
from the LDO linear regulator.<br />
• Battery voltage sag due to discharge rates in the 1C to 2C range, which may be typical when<br />
the radio is transmitting, would cause the 3.3 V LDO linear regulator to drop out.<br />
A three part solution to this dilemma also results in solving the two cell Li-ion radio power<br />
requirements as well as allowing the elimination of the backup battery, improved power conversion<br />
efficiency, reducing system cost, and reduced audio and video noise. This unique power system<br />
design is referred to as a linear boost bootstrap with virtual backup battery. The three key elements<br />
of this design are as follows:<br />
• Use of an adjustable boost regulator with a built in adjustable LDO linear post regulator and<br />
LDO track mode feature.<br />
• Use of a separate 3.3 V LDO linear regulator connected directly to the single cell Li-ion<br />
battery in parallel with the boost converter LDO linear post regulator.<br />
• Reservation of the bottom 20% of battery charge when the battery terminal voltage is below<br />
3.45V, to be used as a virtual backup battery. Reserving the last fraction of charge of a system<br />
battery to preserve the memory contents is probably not new, however it is an optional cost<br />
reducing feature that is a natural consequence of the linear boost bootstrap design.<br />
4.11.2 MAX1705 Boost Converter and MIC5219 LDO Linear<br />
Regulator<br />
Note:<br />
This section provides a description of how the actual power supply was implemented on the <strong>SA</strong>-<br />
<strong>1110</strong> <strong>Development</strong> <strong>Board</strong>, while Section 4.11.1 describes design considerations.<br />
The MAX1705 has three key features that support the linear boost bootstrap <strong>SA</strong>-<strong>1110</strong><br />
<strong>Development</strong> <strong>Board</strong> power system design. First, the MAX1705 has a built-in adjustable LDO<br />
linear regulator that is fed from the main boost regulator output. Second, the MAX1705 has a<br />
special track mode that can be set to allow the main boost regulator to be regulated to 0.3 V above<br />
the LDO output instead of the normal 5 V output. This causes the main boost output to track 0.3 V<br />
above the LDO output to keep the LDO from dropping out. This permits efficient boost and post<br />
linear regulation of the 3.3 V supply when the 5 V output is not needed, such as sleep mode. Third,<br />
<strong>Intel</strong> ® <strong>StrongARM*</strong> <strong>SA</strong>-<strong>1110</strong> <strong>Microprocessor</strong> <strong>Development</strong> <strong>Board</strong> User’s Guide 4-23
Hardware Considerations<br />
the MAX1705 supports a low battery sensing circuit that is used to sense the 2.7V bottom of charge<br />
level and shutdown all battery loads in the <strong>SA</strong>-<strong>1110</strong> <strong>Development</strong> <strong>Board</strong> system to protect the<br />
Li-ion battery from over-discharge damage.<br />
The <strong>SA</strong>-<strong>1110</strong> <strong>Development</strong> <strong>Board</strong> design sets the MAX1705 main boost output to 5.5 V, which is<br />
the maximum the boost output can be set to on the MAX1705. The LDO output is set to 3.2 V.<br />
Given that the MAX1705 LDO power input is from the main boost output rail on the MAX1705,<br />
the resulting conversion efficiency from the battery to the 3.2 V output is<br />
0.9 X 3.2/5.5 X 100 = 52%, which is very poor. However, the MAX1705 3.2 V LDO output is<br />
wired in parallel with a MIC5219 3.3V LDO which is powered directly from the battery. The<br />
MIC5219 has a very low drop out voltage, has an enable input, and is available in very small<br />
packaging.<br />
With the two LDO outputs wired in parallel, the load is powered from the LDO that has the highest<br />
output voltage. As long as the battery is above 3.45 V, the MIC5219 3.3 V LDO powers the 3.3 V<br />
circuits on the <strong>SA</strong>-<strong>1110</strong> <strong>Development</strong> <strong>Board</strong>. If the battery sags below 3.45 V, then the 3.3 V<br />
circuits smoothly transition to drawing powered from the 3.2 V LDO in the MAX1705 which is<br />
powered from the main 5.5 V output of the MAX1705 boost regulator. This bootstrap feature<br />
allows the 3.2 V LDO to pick up or bootstrap the 3.3 V circuits when the battery sags below 3.45 V<br />
necessary to power the 3.3 V LDO. Setting the MAX1705 LDO to 3.2 V allows a smooth<br />
automatic load transfer from the MIC5219 3.3V LDO when the battery voltage sags under heavy<br />
load from the radio transmitter or when the battery is near the end of charge and the battery voltage<br />
is sinking below 3.45 V. This method allows the <strong>SA</strong><strong>1110</strong> <strong>Development</strong> <strong>Board</strong> to use the very<br />
efficient and clean direct battery powered 3.3 V LDO through 80% of the discharge cycle while<br />
providing reserve boosted linear regulation for the 3.3 V circuits when the battery drops below<br />
3.45 V. All the 3.3 V devices in the <strong>SA</strong>-<strong>1110</strong> <strong>Development</strong> <strong>Board</strong> are specified to function<br />
normally down to 3.0 V, so the 3.3 V to 3.2 V switch over still has 200 mV of voltage margin.<br />
The 3.2 V LDO reserve boost regulation power supply is no more then 52% efficient when the<br />
boost output is at 5.5 V. However, this supply is only used when the radio is transmitting at full<br />
power, which may cause the battery to sag below 3.45 V. In this case, the power drain from the<br />
radio is almost 10 times the entire 3.2 V load anyway, making the poor 3.2 V conversion efficiency<br />
while transmitting inconsequential.<br />
The third feature of the MAX1705 used in the <strong>SA</strong>-<strong>1110</strong> <strong>Development</strong> <strong>Board</strong> power system is the<br />
battery threshold sensing circuit. This circuit is set to detect the Li-ion battery going below the<br />
2.7 V end of charge threshold. The low battery output signal, BATT_LOCKOUT, forces the<br />
MAX1705 to shut down and also shuts down the MIC5219 3.3V linear regulator, which shuts<br />
down the <strong>SA</strong>-<strong>1110</strong> and all other 3.3 V loads including SDRAM. When the <strong>SA</strong>-<strong>1110</strong> is shut down,<br />
the <strong>SA</strong>_PWR_EN signal goes low which also shuts down the MAX1692 1.5 V core regulator. The<br />
end result is all battery loads are off, all memory contents are lost, but the expensive Li-ion battery<br />
is saved from over discharge damage that can drastically reduce its storage capacity.<br />
4.11.2.1 Sleep Mode<br />
The efficiency of the 3.3 V power system is very critical in sleep mode. The <strong>SA</strong>-<strong>1110</strong> <strong>Development</strong><br />
<strong>Board</strong> with its two SDRAM memories requires about 1 mA sleep current on the 3.3 V rail. With a<br />
100% efficient 3.3 V power conversion, a 1000 mah battery fully charged results in about 1000<br />
hours of sleep time, or about 6 weeks. A power system that boosts the Li-ion battery voltage to 5 V<br />
and then bucks it to 3.3 V (less than 65% efficient) would last less then 4 weeks.<br />
The efficiency of the 3.3 V rail in sleep mode with the linear boost bootstrap design is over 91% for<br />
most of the battery discharge cycle and approaches 100% towards the 3.32 V drop out point. This<br />
efficiency is better than any switching regulator can achieve in low-power mode. Below the 3.32 V<br />
drop out point, with the MAX1705 in track mode and its 3.2 V LDO regulator picking up the load,<br />
4-24 <strong>Intel</strong> ® <strong>StrongARM*</strong> <strong>SA</strong>-<strong>1110</strong> <strong>Microprocessor</strong> <strong>Development</strong> <strong>Board</strong> User’s Guide
Hardware Considerations<br />
the combined efficiency of the boost regulator in low-power PFM and track mode and the 3.2 V<br />
LDO is 0.8 X 3.2/3.5 X 100 = 73%. However this 73% only applies to the last 10% of the discharge<br />
cycle where the battery voltage is below 3.32 V and before it falls to the 2.7 V battery lockout cutoff<br />
point.<br />
4.11.2.2 Virtual Backup Battery<br />
The linear boost bootstrap design relies on an LDO regulator in parallel with a boost converter and<br />
a post LDO regulator to automatically load switch as the battery voltage falls from a high of 4.1 V<br />
down to the 3.45 V main LDO drop out voltage. Below the 3.45 V main LDO drop out, the 3.3 V<br />
circuits are powered by the 3.2 V LDO, which is powered from the boost regulator at the 5.5 V.<br />
The linear boost bootstrap design is over 90% efficient for over 90% of the discharge cycle. The<br />
design supplies full-system power all the way down to a 0.9 V battery voltage (well below the<br />
2.7 V battery lockout point). However the full power 3.3 V efficiency is much less<br />
(0.9 X 3.2/5.5 X 100= 52%) when the battery is below the 3.45 V point.<br />
By reserving the bottom 10% of the charge as a virtual backup battery, the system can avoid the<br />
reduced full-load conversion efficiency for the last 10% of the charge cycle and uses it instead to<br />
eliminate the back up battery that is normally required. With the linear boost bootstrap circuits in<br />
sleep mode, the last 10% of the charge is used at a 73% conversion efficiency. For example, if the<br />
last 10% of the charge is at 100 mah and the 3.3 V sleep load is 1 ma, then the virtual battery lasts<br />
73% of 100 mah or 73 hours, or about three days. If longer sleep times are required, the voltage<br />
threshold where the virtual backup battery provides power can be raised.<br />
The virtual battery design provides a direct read of the battery voltage through the UCB1300<br />
Analog to Digital converters. The OS should notify the user to recharge or swap batteries as the<br />
battery voltage approaches the 3.45 V virtual backup battery point. A low battery interrupt is also<br />
provided as an alternative to scheduled battery voltage readings through the UCB1300. This low<br />
battery interrupt is set at 3.5 V and is only active when the LCD is powered on. The low battery<br />
interrupt results in the user receiving a two minute warning before an OS invoked sleep shutdown.<br />
A hardware forced sleep mode is also provided with a MAX812 voltage sensing chip that drives<br />
the <strong>SA</strong>-<strong>1110</strong> VDD_FAULT signal when the battery drops below 3.08 V. The MAX812 may be<br />
eliminated if the OS managed battery monitor and sleep mode entry is reliable and the OS never<br />
hangs.<br />
A very high value capacitor of 0.33 Farads (known as a supercap) connected in parallel with the<br />
battery supports the system in sleep mode for several minutes if battery changes are required. A<br />
low value resistor (1 ohm) in series with the supercap is essential to reduce inrush current when a<br />
charged battery is attached to a discharged supercap.<br />
The virtual backup battery circuit used in the <strong>SA</strong>-1111 <strong>Development</strong> Module is, of course, an<br />
optional system design feature. Other designs may need real backup batteries as required by the<br />
application.<br />
4.11.2.3 Linear Boost Bootstrap System<br />
Figure 5-2 shows the complete linear boost bootstrap system with virtual backup battery. Not<br />
shown are the low-battery interrupt-sensing circuit and the end-of-charge forced-sleep-mode<br />
circuit.<br />
<strong>Intel</strong> ® <strong>StrongARM*</strong> <strong>SA</strong>-<strong>1110</strong> <strong>Microprocessor</strong> <strong>Development</strong> <strong>Board</strong> User’s Guide 4-25
Hardware Considerations<br />
Figure 4-2. Linear Boost Bootstrap Power System<br />
0.33 F<br />
SuperCap<br />
Li-ion<br />
4.1 V to<br />
2.7 V<br />
MAX<br />
1705<br />
5.5 V Radio Power<br />
or<br />
3.5 V During Sleep<br />
<strong>SA</strong>_PWR_EN<br />
BATT LOCKOUT<br />
track<br />
off<br />
LDO<br />
3.2 V<br />
LDO<br />
5.0 V<br />
5.0 V<br />
LCD<br />
Power<br />
LDO<br />
3.3 V<br />
3.3 V Main<br />
MAX<br />
1602<br />
1.5 V Core<br />
A7297-01<br />
4.11.2.4 Radio Power<br />
The <strong>SA</strong>-<strong>1110</strong> <strong>Development</strong> <strong>Board</strong> supports CDMA or GSM radio module daughter boards. The<br />
CDMA board electro-mechanical interface is supported on the <strong>SA</strong>-<strong>1110</strong> <strong>Development</strong> <strong>Board</strong> radio<br />
connector. The GSM radio module is supported with the addition of a small adaptor board that<br />
provides a smart card slot and connector type conversion.<br />
Note: The GSM adapter is not available in Phase 5.<br />
The CDMA power requirements are matched to a two cell Li-ion battery that must be capable of<br />
supplying up to 850 mA (worst case) during maximum power transmission.<br />
The GSM power requirements are matched to a single cell Li-ion battery with a maximum current<br />
of up to 2.5 A at a 12.5% duty cycle. The 0.33 F supercap used in the virtual backup battery design<br />
also assists the main battery in meeting this very high current pulse demand.<br />
The GSM power requirements are easily met by providing a connection to the single Li-ion main<br />
battery.<br />
The CDMA requirements are for a nominal 7.2 V two cell Li-ion supply. The discharge curves for<br />
a two cell Li-ion battery run from 8.2 V fully charged, down to 5.4 V at the end of charge. A simple<br />
solution was to use the high power MAX1705 boost output, which is designed to be adjustable<br />
from 2.5 V to 5.5 V. Setting the MAX1705 boost output to 5.5 V allows powering the CDMA<br />
module which requires a minimum of 5.4 V input. The current requirements of the CDMA module<br />
are a maximum of 850 ma, which matches the maximum performance of the MAX1705.<br />
4-26 <strong>Intel</strong> ® <strong>StrongARM*</strong> <strong>SA</strong>-<strong>1110</strong> <strong>Microprocessor</strong> <strong>Development</strong> <strong>Board</strong> User’s Guide
Hardware Considerations<br />
4.11.2.5 LCD Power<br />
The Sharp 3.9” LCD requires +5.0 V, +3.3 V +15 V, -14 V, and -11.7 V, all at low or very low<br />
power levels. A MAX633 boost switching regulator is used to provide +15 V and to provide a<br />
charge pump driver to allow the generation of a –14 V, and from that a 3.3 V Zener diode drops it to<br />
–11.7 V. All LCD interfaces require proper sequencing of their power pins. To achieve the<br />
sequencing, the <strong>SA</strong>-<strong>1110</strong> <strong>Development</strong> <strong>Board</strong> powers all LCD circuits from a MIC5219 5.0 V<br />
LDO linear regulator powered from the 5.5 V CDMA radio power rail. The battery power<br />
conversion efficiency for this linear regulated 5 V rail powered from the boost 5.5 V output is<br />
0.9 X 5/5.5 X 100 = 81%. The MIC5219 5.0V LDO LCD regulator regulates the 5.5 V down to<br />
5.0 V, supports an output enable signal, and provides a very clean power rail to the LCD. The very<br />
clean power rail to the LCD requires fewer bulk capacitors to smooth out, and results in a noise free<br />
display. The LCD 5.0 V MIC5219 powers the MAX633 boost regulator as well as two more<br />
MIC5219 regulators that are cascaded to provide correctly sequenced 4.0 V and 3.3 V for the LCD<br />
and its control logic.<br />
Most handheld devices turn on the LCD when the system is turned on. However, the <strong>SA</strong>-<strong>1110</strong><br />
<strong>Development</strong> Platform also supports high quality stereo audio that permits the unit to play MP3<br />
entertainment audio like a personal stereo player. In this mode, the LCD is not needed for long<br />
periods of time and battery charge can be substantially extended by allowing the LCD to be turned<br />
off during audio only mode. Bit 11 in the <strong>Board</strong> Control Register, LCD On, controls the LCD<br />
power enable.<br />
4.11.2.6 System Power Limits<br />
The following list defines the <strong>SA</strong>-<strong>1110</strong> <strong>Development</strong> <strong>Board</strong>’s maximum available power:<br />
• +3.3 V 300 mA main power–Always on to preserve DRAM contents in sleep mode<br />
• +1.5 V to +2 V (depends on <strong>SA</strong>-<strong>1110</strong> order number) 500 mA <strong>SA</strong>-<strong>1110</strong> core power–Demand<br />
switched 1<br />
• +4.1 V to 2.7 V 1000 mA–Main Li-ion battery power to GSM radio<br />
• +5.5 V 850 mA. CDMA radio module power–Demand switched 1<br />
• +5.0 V 180 mA LCD power – Demand switched 1<br />
• +15 V 25 mA LCD power – Demand switched 1<br />
• -15 V 10 mA LCD power – Demand switched 1<br />
• -11.7 V 1 mA LCD power – Demand switched 1<br />
These numbers represent the maximum load limits on each rail. It is unlikely that all rails would be<br />
fully loaded at the same time, and typical loading is much less than the maximums. The <strong>SA</strong>-<strong>1110</strong><br />
<strong>Development</strong> <strong>Board</strong>’s power system can sustain these maximum loads, however, the battery life<br />
would be shortened substantially. Ideally the battery discharge current would never exceed 2C or<br />
two times the rated battery capacity current (1000 mah to 1500 mah). The 2C limit would be<br />
approached when using the radio module. Typical loads when not using the radio should be in the<br />
0.1C to 0.2C range which is optimal for Li-ion batteries.<br />
1. Controlled by the <strong>SA</strong>-<strong>1110</strong> PWR_EN signal.<br />
<strong>Intel</strong> ® <strong>StrongARM*</strong> <strong>SA</strong>-<strong>1110</strong> <strong>Microprocessor</strong> <strong>Development</strong> <strong>Board</strong> User’s Guide 4-27
Hardware Considerations<br />
4.12 Audio Systems<br />
The <strong>SA</strong>-<strong>1110</strong> <strong>Development</strong> <strong>Board</strong> audio subsystem has two primary components: the UCB1300<br />
POTS and handset codec and the UDA1341 stereo codec. The UCB1300 is interfaced to the <strong>SA</strong>-<br />
<strong>1110</strong> Multimedia Communications Port (MCP) and supports POTS softmodem and medium<br />
quality mono audio. The UDA1341 is interfaced to the <strong>SA</strong>-<strong>1110</strong> Serial Peripheral Interface (SPI)<br />
with the addition of a small amount of glue logic. The UDA1341 supports high quality stereo<br />
capture and playback.<br />
The <strong>SA</strong>-<strong>1110</strong> <strong>Development</strong> <strong>Board</strong>’s audio subsystem includes the following resources:<br />
• UCB1300 audio codec for phone headset and microphone<br />
• UCB1300 phone codec for softmodem POTS connection<br />
• UDA1341 stereo codec<br />
• UDA1341 digital mixing of Line1 and Line2 inputs<br />
• UDA1341 microphone inputs with automatic gain control<br />
• UDA1341 Treble, Bass and Volume controls<br />
• Digital loopback of UDA1341 providing board level source mixing and diagnostics<br />
• Two built-in electret microphones<br />
• 250 mW stereo audio amplifier to drive speaker(s) or headphones<br />
• One built-in mini speaker<br />
• 3.5 mm stereo headphone jack<br />
• 2.5 mm headset and microphone jack<br />
• Radio analog audio input<br />
• Radio analog audio output<br />
The <strong>SA</strong>-<strong>1110</strong> board audio system allows the software to control the following functions:<br />
• Selection of analog audio sources, including two microphones<br />
• UCB1300 audio output (analog)<br />
• Radio audio output (analog)<br />
• Selection of digital audio sources<br />
• UCB1300 system digital audio<br />
• UDA1341 system digital audio<br />
• UDA1341 controlled mixing of audio sources (using stereo loopback mode)<br />
• UCB1300 speaker with microphone 1<br />
• UCB1300 speaker with radio speaker<br />
• Radio speaker with microphone 2<br />
• Software digital mixing of audio sources<br />
• Any OS managed digital audio streams with any analog audio source (UCB speaker, radio<br />
speaker, microphone 1, microphone 2)<br />
4-28 <strong>Intel</strong> ® <strong>StrongARM*</strong> <strong>SA</strong>-<strong>1110</strong> <strong>Microprocessor</strong> <strong>Development</strong> <strong>Board</strong> User’s Guide
Hardware Considerations<br />
• Software control of audio destinations<br />
• Any OS managed digital audio streams or analog audio source to mini-speaker or UBC<br />
microphone input or radio microphone input or headset or headphones<br />
• Automatic gain control for microphone1 inputs<br />
• Treble, bass and volume control<br />
4.12.1 Stereo Codec<br />
A Philips UDA1341 I2S 16 bit delta sigma stereo codec is provided on the <strong>SA</strong>-<strong>1110</strong> <strong>Development</strong><br />
<strong>Board</strong> through the glue logic to the <strong>SA</strong>-<strong>1110</strong> SSP port. The UDA1341 on the <strong>SA</strong>-<strong>1110</strong><br />
<strong>Development</strong> <strong>Board</strong> provides high quality stereo sound input and output for entertainment sound<br />
and speech recognition application support without requiring the <strong>SA</strong>-1111 companion chip. The<br />
<strong>SA</strong>-<strong>1110</strong> <strong>Development</strong> <strong>Board</strong> provides a UDA1341 digital loopback that allows the UDA1341 to<br />
be used as a systems audio routing and mixing resource without having to set up the <strong>SA</strong>-<strong>1110</strong> SPI<br />
port to access the UDA1341.<br />
A 0.250 mW per channel audio amplifier drives the internal speaker or the 3.5 mm standard stereo<br />
jack for high quality stereo output to a headset.<br />
Volume, treble and bass settings are by program control of the UDA1341. Volume control up/down<br />
switches may be allocated from the general purpose system switches as required by the application.<br />
The UDA1341 is interfaced to the <strong>SA</strong>-<strong>1110</strong> SSP port using a small amount of CPLD glue logic as<br />
shown in Figure 5-3.<br />
The UDA1341 also requires a three wire control interface known as L3. This control interface is<br />
similar to I 2 C* in that it may be implemented using programmed I/O and GPIO pins. The L3 bus<br />
and SMbus bus share the same GPIO pin.<br />
4.12.2 L3 Bus<br />
The UDA1341 L3 bus utilizes a simple serial protocol similar to the I 2 C—see the UDA1341<br />
specifications for details. The L3 includes a clock pin, a data pin, and a mode pin. These three slow<br />
speed signals are connected to the <strong>SA</strong>-<strong>1110</strong> GPIO pins and are driven with software to implement<br />
the L3 protocol.<br />
<strong>Intel</strong> ® <strong>StrongARM*</strong> <strong>SA</strong>-<strong>1110</strong> <strong>Microprocessor</strong> <strong>Development</strong> <strong>Board</strong> User’s Guide 4-29
Hardware Considerations<br />
4.12.3 Stereo Codec Interface<br />
The UDA1341 interfaces to the <strong>SA</strong>-<strong>1110</strong> SSP port. The SSP must be configured in a TI<br />
synchronous serial format with 16 bit data slots. A small amount of glue logic is required to<br />
interface the UDA1341 to the SSP port. Figure 5-3 shows a simplified version of the glue. The<br />
logic is implemented in the <strong>SA</strong>-<strong>1110</strong> <strong>Development</strong> <strong>Board</strong> control CPLD.<br />
Figure 4-3. Stereo Codec Glue Logic<br />
11.98 MHz from<br />
MCP Clock<br />
CODEC RESET L<br />
Divide <br />
by 4<br />
GPIO19 SSP<br />
CLK IN<br />
CODEC<br />
256 FS SYSCLK<br />
GPIO13 SSP<br />
SFRM<br />
D<br />
C<br />
Q<br />
Q<br />
CODEC<br />
Word<br />
Select<br />
GPIO12 SCLK<br />
CODEC BCLK<br />
A7266-01<br />
Figure 5-4 shows how the glue logic modifies the SSP TI synchronous serial format to match the<br />
I2S format used by the UDA1341. The UDA1341 must be configured using the L3 interface to<br />
communicate in an MSB-Justified format with 16 bit data slots.<br />
Figure 4-4. UDA1341 Interface Timing<br />
SCLK<br />
SFRM<br />
Tx and<br />
Rx Data<br />
MSB MSB-1 MSB-2<br />
WS<br />
BCLK<br />
A6949-01<br />
4-30 <strong>Intel</strong> ® <strong>StrongARM*</strong> <strong>SA</strong>-<strong>1110</strong> <strong>Microprocessor</strong> <strong>Development</strong> <strong>Board</strong> User’s Guide
Hardware Considerations<br />
4.12.4 Microphone and Speaker<br />
The <strong>SA</strong>-<strong>1110</strong> <strong>Development</strong> <strong>Board</strong> includes two built in electret type microphones as well as a mini<br />
speaker.<br />
Two microphones are required to provide optimal sound capture. One microphone is used during<br />
dictation when the <strong>SA</strong>-<strong>1110</strong> <strong>Development</strong> <strong>Board</strong> is held like a tape recorder in front of the mouth.<br />
The other microphone is used during voice cell-phone calls when the <strong>SA</strong>-<strong>1110</strong> <strong>Development</strong> <strong>Board</strong><br />
is held like a phone. The audio mixing functions in the <strong>SA</strong>-<strong>1110</strong> <strong>Development</strong> <strong>Board</strong> allow the<br />
selection of which microphone to use for voice or using both microphones for high quality stereo<br />
recording.<br />
A 2.5 mm jack is provided for a headset/microphone and a 3.5 mm stereo jack is provided for<br />
stereo headphones. An internal three pin header is provided to allow connections to stereo line in<br />
signals.<br />
4.12.5 <strong>SA</strong>-<strong>1110</strong> <strong>Development</strong> <strong>Board</strong> Stereo Codec Sampling Rates<br />
The <strong>SA</strong>-<strong>1110</strong> <strong>Development</strong> Module UDA1341 does not include a sample rate clock generator.<br />
Therefore, when web browsing, the following sample rates are expected:<br />
• 8 KHz<br />
• 11.025 KHz<br />
• 16 KHz<br />
• 22.05 KHz<br />
• 44.1 KHz<br />
To save the cost and power of a dedicated oscillator and clock generator for these frequencies, the<br />
<strong>SA</strong>-<strong>1110</strong> <strong>Development</strong> <strong>Board</strong> derives the 11.29 MHz 128 times clock from the CPU memory clock<br />
using a clock “shimming” scheme implemented in the UDA1341 glue logic CPLD. This clock<br />
shimming scheme produces a 11.29 MHz 128 times oversampling clock that is between 1.1% and<br />
0.1% accurate depending on the CPU core clock chosen. A software sample rate converter (SRC)<br />
function is required to up sample the 8, 11, 16, 22 KHz rates to 44 KHz.<br />
4.12.6 Phone Codec and Soft Modem<br />
The UCB1300 Codec from Philips and a DAA telephone line interface from Krypton support<br />
softmodem and speaker phone. The UCB1300 has two codecs: one for the phone line and one for<br />
microphone and speaker or handset.<br />
The UCB1300 handset codec requires different sampling rates than the stereo codec and may be<br />
required to run concurrently with the UDA1341. The <strong>SA</strong>-<strong>1110</strong> <strong>Development</strong> <strong>Board</strong> audio mixing<br />
system includes analog to digital to analog functions that allows the UBC1300 digital audio to be<br />
converted to analog, passed to the UDA1341, and then converted back to digital at the 46.8 KHz<br />
sample rate thus avoiding a software sample rate conversion.<br />
The UCB1300 handset codec analog audio input is from UDA1341 analog audio right channel<br />
output. The UDA1341 may be programmed to select between the main microphone or the back<br />
microphone. The UCB1300 handset codec analog audio speaker output is connected to the<br />
<strong>Intel</strong> ® <strong>StrongARM*</strong> <strong>SA</strong>-<strong>1110</strong> <strong>Microprocessor</strong> <strong>Development</strong> <strong>Board</strong> User’s Guide 4-31
Hardware Considerations<br />
UDA1341 Line1 input right channel analog input mixer as well as to the 2.5 mm headset jack. This<br />
allows the UCB1300 to directly drive the phone headset as well as an additional input to the audio<br />
mixing functions in the UDA1341 and <strong>SA</strong>-<strong>1110</strong>.<br />
4.12.7 Audio System Routing and Mixing Diagram<br />
Figure 5-5 provides a guide to managing the audio routing and mixing. The UDA1341 allows<br />
mixing of the Line 1 and Line 2 inputs. The mix is specified by two scaling factors (shown as M in<br />
Figure 5-5) that are applied to the Line 1 and Line 2 stereo inputs before they are added together.<br />
When used for system routing and mixing, the left and right stereo channels are used to manage<br />
mono sources such as radio and telephony sound. All UDA1341 control is through the L3 interface<br />
that is driven by <strong>SA</strong>-<strong>1110</strong> GPIO bits.<br />
The system is designed to work in two modes:<br />
• UDA1341 loopback<br />
• UDA1341 digital routing with mixing in the <strong>SA</strong>-<strong>1110</strong> device<br />
4.12.7.1 UDA1341 Loopback Mode<br />
First is the basic mode that uses the UDA1341 in loopback mode as a system audio router and<br />
mixer. Audio_On, which is bit 8 in the BCR, enables the UDA1341 digital loopback that is<br />
implemented in the CPLD glue logic. This loopback mode allows the mixing and selecting of the<br />
following sources and destinations:<br />
• The main microphone is selected or mixed with the UCB1300 speaker to feed the radio<br />
microphone and UCB1300 microphone.<br />
• The UCB speaker is selected or mixed with the radio speaker out to feed the mini speaker or<br />
headphone/headset.<br />
4.12.7.2 UDA1341 Digital Routing with Mixing in the <strong>SA</strong>-<strong>1110</strong><br />
In this mode, the mixing circuits in the UDA1341 are still available, however, the <strong>SA</strong>-<strong>1110</strong> SPI<br />
port is active and all digital data is routed through the <strong>SA</strong>-<strong>1110</strong> device and back out to the<br />
UDA1341. This allows the OS to mix any combination of sources and route the result to the system<br />
speaker or headphones or radio microphone.<br />
4-32 <strong>Intel</strong> ® <strong>StrongARM*</strong> <strong>SA</strong>-<strong>1110</strong> <strong>Microprocessor</strong> <strong>Development</strong> <strong>Board</strong> User’s Guide
Hardware Considerations<br />
A second UDA1341 and a standard AC97 codec are also implemented on the <strong>SA</strong>-1111<br />
<strong>Development</strong> Module.<br />
Figure 4-5. Audio Mixing Diagram<br />
0/6<br />
POTS IN ADC DAC<br />
dB<br />
POTS OUT<br />
VOUT R<br />
UGB MIC<br />
0/6<br />
dB<br />
ADC<br />
UCB1300<br />
POTS codec<br />
DAC<br />
UCB SPKR<br />
OUT<br />
MCP<br />
<strong>Intel</strong> ® StrongARM * <strong>SA</strong>-<strong>1110</strong><br />
SPI<br />
Digital Loopback<br />
VOUT L<br />
Mini<br />
Spkr<br />
Radio<br />
Spkr<br />
Back<br />
mic<br />
VinL1<br />
VinL2<br />
0/6<br />
dB<br />
0/6<br />
dB<br />
ADC<br />
ADC<br />
M<br />
M<br />
+<br />
AUD<br />
DAC<br />
AMP<br />
spk<br />
UCB<br />
Spkr<br />
Mini<br />
Spkr<br />
VinR1<br />
headset jack<br />
VinR2<br />
Back mic<br />
0/6<br />
dB<br />
0/6<br />
dB<br />
ADC<br />
ADC<br />
M<br />
M<br />
+<br />
AUD<br />
DAC<br />
AMP<br />
To Radio Mic<br />
UCB Mic<br />
VOUT R<br />
* Other brands and names are the property of their respective owners.<br />
A7265-01<br />
4.13 Radio Interface<br />
The <strong>SA</strong><strong>1110</strong> <strong>Development</strong> <strong>Board</strong> includes interface support for the two world wide digital radio<br />
network standards, CDMA and GSM. In addition, interfaces to Bluetooth systems are possible with<br />
this general purpose radio interface.<br />
<strong>Intel</strong> ® <strong>StrongARM*</strong> <strong>SA</strong>-<strong>1110</strong> <strong>Microprocessor</strong> <strong>Development</strong> <strong>Board</strong> User’s Guide 4-33
Hardware Considerations<br />
4.13.1 CDMA Radio Module<br />
The <strong>SA</strong>-<strong>1110</strong> <strong>Development</strong> <strong>Board</strong> provides primary support for a CDMA radio module. A 30-pin<br />
header provides a serial port interface, analog audio input and output, radio control signals and<br />
interrupts with a high-power 5.5 V rail. The <strong>SA</strong>-<strong>1110</strong> serial port 3 is used to communicate with the<br />
radio modules. CDMA AT modem commands are issued over this interface and data packets are<br />
transmitted and received.<br />
4.13.2 GSM Radio Module<br />
Secondary support is provided for a GSM radio module, and requires an adapter header or board.<br />
This adapter board must also provide a socket for a smart card component required by GSM.<br />
Most radio control signals are shared with the CDMA interface. An <strong>SA</strong>-<strong>1110</strong> <strong>Development</strong> <strong>Board</strong><br />
jumper option allows changing the power feed from the 3.6 V raw battery required by the GSM<br />
module.<br />
Note: The GSM adapter module is not available for Phase 5.<br />
4.13.3 Bluetooth Radio Module<br />
At the time of this writing, formal Bluetooth interface specifications were not available. However,<br />
specification details for the 30-pin radio header on the <strong>SA</strong>-<strong>1110</strong> <strong>Development</strong> <strong>Board</strong> should<br />
provide all the signal and power data necessary to interface a serial Bluetooth board. The<br />
<strong>SA</strong>-<strong>1110</strong> <strong>Development</strong> <strong>Board</strong> jumpers allow switching of the radio header serial port from serial<br />
port 3 to serial port 1, which is capable of up to 1.5 Mb data rates.<br />
4.14 Quiet Alert Motor<br />
The <strong>SA</strong>-<strong>1110</strong> <strong>Development</strong> <strong>Board</strong> includes a quiet alert motor activation circuit that, when<br />
enabled, produces a vibration instead of sound. Most phones and pagers and many PDAs include<br />
this type of alert. Vib_On, which is bit 15 in the BCR, controls an MIC2514 switch that drives the<br />
micro motor with its eccentric wobble weight.<br />
System boot code must initialize the BCR very early in the power up code to prevent this motor<br />
from running after a cold start. The use of the motor should be limited to short bursts to conserve<br />
battery charge.<br />
4.15 IrDA Infra-red Communications<br />
The <strong>SA</strong>-<strong>1110</strong> <strong>Development</strong> <strong>Board</strong> includes a IrDA port and transceiver that is capable of up to<br />
4 Mb/s communications. The Hewlett-Packard IrDA transceiver is controlled from IRDA_FSEL<br />
(bit 3) and IRDA_MD[1:0] (bits 5:4) in the BCR for frequency, range, and power selections.<br />
4-34 <strong>Intel</strong> ® <strong>StrongARM*</strong> <strong>SA</strong>-<strong>1110</strong> <strong>Microprocessor</strong> <strong>Development</strong> <strong>Board</strong> User’s Guide
Hardware Considerations<br />
4.16 USB Client Port<br />
The <strong>SA</strong>-<strong>1110</strong> <strong>Development</strong> <strong>Board</strong> includes a standard USB client jack that allows the <strong>SA</strong>-<strong>1110</strong><br />
<strong>Development</strong> <strong>Board</strong> to communicate up to 12 Mbs as a USB client. This port may be used for high<br />
speed system synchronization between the <strong>SA</strong>-<strong>1110</strong> <strong>Development</strong> Platform and a host PC.<br />
To allow the USB to wake up a sleeping <strong>SA</strong>-<strong>1110</strong> <strong>Development</strong> <strong>Board</strong> when it is plugged into a<br />
USB host port, the following circuit is required:<br />
Figure 4-6. Waking Circuit<br />
USB 5 V<br />
5 V to 3.3 V<br />
Converter<br />
GPIOn<br />
A8051-01<br />
The USB port implementation on the <strong>SA</strong>-<strong>1110</strong> <strong>Development</strong> board attempted to supply up to<br />
500 mA of current at 5 V for use by the <strong>SA</strong>-<strong>1110</strong> <strong>Development</strong> <strong>Board</strong>. However, this<br />
implementation does not conform to USB specifications for bus powered devices.<br />
The <strong>SA</strong>-<strong>1110</strong> device cannot support a bus powered device model because when the host initiates a<br />
suspend, the device is required to consume less than 500 µA (for more information, see section<br />
7.2.3 of the USB specification, version 1.1). The device cannot limit its current consumption to<br />
500 µA unless it enters sleep mode. Unfortunately, if the device enters sleep mode, all of the UDC<br />
registers are reset, and then it will not respond to its host-assigned address.<br />
To prevent the <strong>SA</strong>-<strong>1110</strong> <strong>Development</strong> <strong>Board</strong> from drawing power from the USB host, remove D6.<br />
4.17 Video Output Design<br />
The TV video output design in the <strong>SA</strong>-<strong>1110</strong> <strong>Development</strong> board uses an ADV7171* NTSC/PAL<br />
encoder. The ADV7171 offers the following features:<br />
• 16-bit pixel stream needed by <strong>SA</strong>-<strong>1110</strong> TV video applications.<br />
• Four DACs to allow simultaneous output of CVBS and RGB signals. This is very useful in TV<br />
core designs where the ADV7171 will drive the CRT RGB circuitry directly.<br />
• Programmable color subcarrier PLL allows nonstandard video timing while maintaining color<br />
lock in the TV. This allows the <strong>SA</strong>-<strong>1110</strong> to use the standard 3.6864 MHz crystal. The 4.2.2<br />
YUV pixel interface to the ADV7171 from the <strong>SA</strong>-<strong>1110</strong> uses 16 LCD data lines 8 of which are<br />
GPIOs.<br />
The clock for the ADV7171 must be twice that of the 12.27 MHz LCD clock supplied by the<br />
<strong>SA</strong>-<strong>1110</strong> when it is programmed with TV video timings. This clock doubler is implemented in the<br />
LCD CPLD.<br />
<strong>Intel</strong> ® <strong>StrongARM*</strong> <strong>SA</strong>-<strong>1110</strong> <strong>Microprocessor</strong> <strong>Development</strong> <strong>Board</strong> User’s Guide 4-35
Hardware Considerations<br />
4.17.1 <strong>SA</strong>-<strong>1110</strong> Core Clock Frequency<br />
The following is a discussion of how the <strong>SA</strong>-<strong>1110</strong> core timing is adapted to TV timing. The<br />
purpose of this discussion is to provide an understanding of how the <strong>SA</strong>-<strong>1110</strong> can be adapted to TV<br />
timing.<br />
The goal is to find a 3.xxxx MHz crystal frequency that is as close as possible to the 3.6864 MHz<br />
nominal frequency and that has an integer multiple close to the 206 MHz maximum <strong>SA</strong>-<strong>1110</strong> core<br />
clock. At the same time this 2XX MHz core clock must have an integer divisor that produces<br />
exactly 12.272725 MHz.<br />
First find a multiple of 12.272725 MHz that comes closest to the highest core frequencies specified<br />
in the clock chapter of the <strong>SA</strong>-<strong>1110</strong> <strong>Microprocessor</strong> Technical Reference Manual. Then substitute<br />
the exact 12.272725 MHz multiple and re-deriving the 3.XXXX MHz crystal required to generate<br />
a 2XX MHZ clock that is an exact multiple of 12.272725 MHz. This approach results in a new<br />
3.681818 MHz crystal frequency that is within less than 0.15% of the optimal 3.6864 MHz.<br />
3.681818 MHz times 4 times 15 yields the desired 220.90 MHz core clock while 220.90 MHz<br />
divided by 18 yields the 12.272725 MHz required for the TV video encoder. The <strong>SA</strong>-<strong>1110</strong><br />
reference design will use the standard 3.6864 MHz crystal. To compensate for the color subcarrier<br />
video timing errors that this produces in the encoder color burst generator, color subcarrier PLL<br />
control registers in the ADV7171 are programmed to compensate for this error. The 147MHz<br />
<strong>SA</strong>-<strong>1110</strong> clock selection also results in a 0.15% accurate TV clock.<br />
The <strong>SA</strong>-<strong>1110</strong> reference design diagnostic manager contains example code that adjusts the <strong>SA</strong>-<strong>1110</strong><br />
LCD timing parameters to allow the ADV7171 to operate in color with the full range of core clock<br />
selections.<br />
4.17.2 Interlaced Video<br />
An NTSC frame of 525 lines displayed at 30 Hz interlaced consists of two fields of 262.5 lines<br />
displayed at 60 Hz. Normally this is achieved in a video controller by having the vertical timing<br />
generator count half-lines (instead of full lines) and programming it to 525 half-lines. This<br />
produces a vsync every 262.5 lines and provides the ½ line offset between fields required for<br />
interlaced timing. Since there is no provision for the interlaced timing in the <strong>SA</strong>-<strong>1110</strong> LCD<br />
controller, the interlaced timing must be done somewhat differently.<br />
4.17.3 Video Output Interlaced Timing Generation<br />
The <strong>SA</strong>-<strong>1110</strong> LCD controller is programmed for 525 lines of video displayed at a 30 Hz rate. The<br />
ADV7171 tracks this video timing and will regenerate the missing vertical sync pulse at the correct<br />
½ line point resulting in a 262.5 line 60Hz interlaced timing output.<br />
4.17.4 Interlaced Display Buffer<br />
The video image in the <strong>SA</strong>-<strong>1110</strong> DRAM must be written in interlaced order and with regard to<br />
where the two fields are normally blanked. Although this complicates the rendering code, it is<br />
possible to design rendering routines that are just as efficient as normal line sequential rendering.<br />
The interlaced frame buffer image in <strong>SA</strong>-<strong>1110</strong> DRAM contains YUV components in 4.2.2 format.<br />
Each 32-bit word in the DRAM frame buffer contains four 8-bit video components appearing as<br />
UYVY.<br />
4-36 <strong>Intel</strong> ® <strong>StrongARM*</strong> <strong>SA</strong>-<strong>1110</strong> <strong>Microprocessor</strong> <strong>Development</strong> <strong>Board</strong> User’s Guide
Hardware Considerations<br />
Figure 4-7. Interlaced Frame Buffer<br />
31 24 33 16 15 8 7 0<br />
PixelA+1 U[7:0] PixelA+1 Y[7:0] PixelA V[7:0] PixelA Y[7:0]<br />
A8004-01<br />
Note:<br />
The representation of the color information in <strong>SA</strong>-<strong>1110</strong> memory is an arbitrary selection between<br />
UYVY and YUYV. In the board design, the ADV7171 inputs Y on bits 7:0 and UV on bits 15:8.<br />
Video out data in a YUV format has an advantage over video processed by an RGB display device.<br />
When video is processed to an RGB display device, such as a SVGA LCD display, an extra<br />
rendering step to convert from YUV to RGB is necessary. Maintaining the video image in its native<br />
YUV color space avoids this computationally intensive step and results in higher frame rates for<br />
H324 video conferencing and allows real time 30 FPS CCIR601 video pass through.<br />
<strong>Intel</strong> ® <strong>StrongARM*</strong> <strong>SA</strong>-<strong>1110</strong> <strong>Microprocessor</strong> <strong>Development</strong> <strong>Board</strong> User’s Guide 4-37
Analog I/O 5<br />
The <strong>SA</strong>-<strong>1110</strong> <strong>Development</strong> <strong>Board</strong> has several analog I/O systems in addition to the audio systems.<br />
The non-audio analog IO functions include the following:<br />
• Battery temperature<br />
• Battery voltage<br />
• Charger voltage<br />
• Spare analog input<br />
• Touch screen<br />
5.1 UCB1300 Analog IO<br />
The UCB1300 supports four general-purpose analog inputs to the same ten-bit analog to digital<br />
converter that support the touch screen. The inputs are high level inputs with 8 V DC required for a<br />
full-scale reading. With the ten-bit ADC this means that the analog resolution is approximately<br />
8 mV. Low level signals such as TEMP (main battery temperature) may have limited resolution. In<br />
the <strong>SA</strong>-<strong>1110</strong> <strong>Development</strong> <strong>Board</strong>, the four analog input channels are assigned as follows:<br />
Table 5-1. ADC Input Pin Descriptions<br />
ADC<br />
Input<br />
Name<br />
Description/use<br />
0 V_PWR_IN<br />
1 VBATT<br />
2 TEMP<br />
Charger input voltage—This voltage must be monitored to determine the presence of<br />
a battery charger voltage.<br />
Main battery terminal voltage—May be used by battery management software to<br />
monitor battery voltage.<br />
Main battery temperature—Temperature sensor input used to monitor battery<br />
temperature.<br />
3 SPARE Analog Spare Input—User definable inputs.<br />
5.1.1 Battery Voltage<br />
The <strong>SA</strong>-<strong>1110</strong> <strong>Development</strong> <strong>Board</strong> battery voltage is monitored by one of the UCB1300 analog<br />
inputs. The UCB1300 ADC device is accurate to about 10%.<br />
<strong>Intel</strong> ® <strong>StrongARM*</strong> <strong>SA</strong>-<strong>1110</strong> <strong>Microprocessor</strong> <strong>Development</strong> <strong>Board</strong> User’s Guide 5-1
Analog I/O<br />
The single cell Li-Ion battery has critical voltage thresholds as follows:<br />
Table 5-2. Battery Voltage Level Indications<br />
2 cell<br />
Li-Ion<br />
Voltage<br />
UCB1300<br />
ADC decimal<br />
value<br />
(estimated)<br />
Indication<br />
2.7V 270<br />
3.0V 300<br />
4.1V 410<br />
>4.2V >420<br />
Bottom Of Charge (BOC)—Must not fall below this voltage or battery<br />
service life may diminish.<br />
Sleep Threshold Voltage (STV)—10% charge remaining. Force into sleep<br />
mode or data may be lost.<br />
Top Of Charge (TOC)—Must not exceed this voltage (stop charging<br />
immediately).<br />
Danger—Sound alarms, flash LEDs (personal safety and fire hazard, stop<br />
charging immediately).<br />
The UCB1300 is not sufficiently accurate to monitor Li-ion battery voltages. A one time per<br />
system calibration step must be performed and the conversion factor saved in the system flash<br />
memory for use by the OS and applications. The system software must provide 0.05 V of hysteresis<br />
and rolling averages to eliminate noise and power fluctuations.<br />
5.1.2 Battery Temperature<br />
The <strong>SA</strong>-<strong>1110</strong> <strong>Development</strong> <strong>Board</strong> battery temperature is monitored with an Analog Devices<br />
TMP37 low-power, low-cost, thermometer device. This device is accurate to 2% and converts<br />
temperature from °C to an analog voltage with a 20mV/C° conversion factor. The device output is<br />
offset from absolute zero and will output the following voltages:<br />
Table 5-3. Battery Temperature Indications<br />
Temp<br />
C°<br />
TMP37<br />
Output<br />
UCB1300<br />
ADC decimal<br />
value (estimated)<br />
Indication<br />
25° 0.50 V 62 Room temperature.<br />
40° 0.80 V 100 Battery High Temp—stop charging immediately.<br />
>50° >1.00 V >125<br />
Danger<br />
Sound alarms, flash LEDs.<br />
Personal safety and fire hazard.<br />
Stop charging.<br />
5.1.3 Analog Spare<br />
Spare analog input for user definable inputs.<br />
5-2 <strong>Intel</strong> ® <strong>StrongARM*</strong> <strong>SA</strong>-<strong>1110</strong> <strong>Microprocessor</strong> <strong>Development</strong> <strong>Board</strong> User’s Guide
Analog I/O<br />
5.2 Analog Outputs<br />
The <strong>SA</strong>-1111 <strong>Development</strong> Platform’s <strong>SA</strong>-1111 companion chip provides two Pulse Width<br />
Modulated (PWM) general purpose outputs. These signals are available as test points on the <strong>SA</strong>-<br />
1111 <strong>Development</strong> Module and are wired to the 140 pin connectors. The PWM signals are intended<br />
for use in controlling the brightness and contrast of a display system and are not used in the <strong>SA</strong>-<br />
<strong>1110</strong> <strong>Development</strong> <strong>Board</strong> but may be used by the GFX graphics boards. A resistor and capacitor<br />
are required to integrate the PWM digital signal to an analog signal. The PWM outputs are<br />
intended as low frequency analog control signals and are limited to less then 1 KHz bandwidth.<br />
The UCB1300 provides an analog audio output for direct drive of a small low power speaker. This<br />
signal is input to the UDA1341 stereo codec which is part of the <strong>SA</strong>-<strong>1110</strong> <strong>Development</strong> <strong>Board</strong><br />
audio mixing function. The UCB1300 also provides a DAC as part of the touch screen interface.<br />
5.3 Touch Screen<br />
The <strong>SA</strong>-<strong>1110</strong> <strong>Development</strong> <strong>Board</strong> supports a standard resistive pressure sensitive touch screen.<br />
The UCB1300 directly interfaces to the touch screen mounted over the Sharp 3.9” display. The<br />
touch screen is analog in nature and uses the ten-bit ADC resource in the UCB1300. Refer to the<br />
UCB1300 specification for more information about touch screens.<br />
<strong>Intel</strong> ® <strong>StrongARM*</strong> <strong>SA</strong>-<strong>1110</strong> <strong>Microprocessor</strong> <strong>Development</strong> <strong>Board</strong> User’s Guide 5-3
System Power Management 6<br />
The <strong>SA</strong>-<strong>1110</strong> <strong>Development</strong> <strong>Board</strong> is a battery-powered design. It will also run from an AC adapter<br />
that charges the built in batteries or it can draw power from the USB slave port connection.<br />
System power management is a complicated resource management problem that requires<br />
knowledge of all the system resources, as well as an understanding of battery technology and safety<br />
issues.<br />
The following section is intended as a short primer on the <strong>SA</strong>-<strong>1110</strong> <strong>Development</strong> <strong>Board</strong> power<br />
system resources and Li-ion battery management basics.<br />
6.1 Battery Power<br />
The main battery is a Lithium Ion (Li-ion) cell of 1000 mAH or greater capacity for a total energy<br />
capacity of 3.6 Watt hours. A Li-ion cell has a fully charged terminal voltage of 4.1 V, a nominal<br />
voltage of 3.6 V and a bottom of charge voltage of 2.5 V.<br />
6.2 Battery Management<br />
The <strong>SA</strong>-<strong>1110</strong> <strong>Development</strong> <strong>Board</strong> supports two types of battery and power management: a simple<br />
low-cost scheme and a more expensive smart-battery scheme.<br />
6.2.1 Low-Cost Battery Management<br />
Note:<br />
This section provides background information on low-cost battery management issues. The<br />
<strong>SA</strong>-<strong>1110</strong> <strong>Development</strong> <strong>Board</strong> supports the hardware implementation of most battery management<br />
functions, however, the software implementation is operating system specific and has not been<br />
fully implemented yet.<br />
The battery terminal voltage may be measured in real time by using the UCB1300 auxiliary analog<br />
to digital converter input AD1. The operating system reads, records and produces histograms<br />
relative to the battery terminal voltage and battery temperature on a fixed schedule of no less than<br />
once per minute.<br />
A battery voltage threshold detect with a hysteresis interrupt circuit is used to interrupt the<br />
<strong>SA</strong>-<strong>1110</strong> via GPIO 26. When the battery hits the hard wired low voltage threshold of 3.5 V, an<br />
interrupt to the <strong>SA</strong>-<strong>1110</strong> is generated. Depending upon the operating system, the system software<br />
should measure the battery terminal voltage using the UBC1300 AD1 and warn the user of the low<br />
battery condition. The hardware for the low-battery interrupt is only active while the LCD is<br />
powered up. The low-battery interrupt scheme requires less software development then the<br />
periodic measurement scheme and is usually a simpler and less sophisticated solution, depending<br />
upon the operating system used. However it does require some system and hardware resources and<br />
it does not provide gas gauging functions.<br />
<strong>Intel</strong> ® <strong>StrongARM*</strong> <strong>SA</strong>-<strong>1110</strong> <strong>Microprocessor</strong> <strong>Development</strong> <strong>Board</strong> User’s Guide 6-1
System Power Management<br />
A second battery threshold circuit, a MAX812 chip set to 3.08 V is used to force the <strong>SA</strong>-<strong>1110</strong><br />
system into sleep mode. This signal drives the VDD_FAULT input on the <strong>SA</strong>-<strong>1110</strong>. When this<br />
interrupt occurs there is no time for user warnings or a user-friendly shutdown. The system is<br />
forced into sleep mode.<br />
The state of charge on Li-ion cells may be measured with reasonable accuracy simply by<br />
measuring the battery terminal voltage and temperature while imposing a consistent load. When<br />
measuring the terminal voltage the software must ensure that the same resources are powered up to<br />
provide a consistent load that provides a more accurate state of charge indicator. For example the<br />
terminal voltage should not be measured with the radio on at one point and the radio off at the next<br />
point. Software gas gauging may use a table lookup of the battery terminal voltage and battery<br />
temperature to indicate charge condition in 10% increments. The table should be calibrated for one<br />
Li-ion cell. A one time per system software calibration step may be required to obtain accurate<br />
results with the UCB1300 analog to digital converters. Battery should also be measured and<br />
included in the charge state calculation. Battery has a significant effect on usable charge. Cold<br />
batteries have substantially reduced capacity and the remaining charge varies with ambient<br />
temperature.<br />
The charge state measurement is a rolling average over several minutes that eliminates noise and<br />
short term voltage dips due to varying loads. When the battery terminal voltage approaches the<br />
10% charge remaining point the user should be warned by a software implementation of the<br />
approaching bottom of charge condition.<br />
The batteries must not be allowed to run down below the 10% point. The bottom 10% of the battery<br />
charge is needed to maintain the SDRAM memory contents during sleep. The 10% reserve battery<br />
scheme eliminates the need for a backup battery. A super cap is used to preserve the SDRAM<br />
contents for over 2 minutes when the main batteries are changed.<br />
A built in semi-smart Li-ion battery charger chip a MAX846 controls by the <strong>SA</strong>-<strong>1110</strong> software.<br />
The battery terminal voltage and temperature should be monitored during charging to determine<br />
end of charge and overcharge conditions. The presence of live input power to the charger may be<br />
sensed via the UCB1300 AD0. The charger circuit is controlled via the <strong>SA</strong>-<strong>1110</strong> <strong>Development</strong><br />
<strong>Board</strong> Control Register (BCR).<br />
The MAX846 is calibrated for single cell Li-ion charging and, if left to itself, will correctly manage<br />
the charge cycle. However, the MAX846 does not monitor battery temperature.<br />
Battery temperature is monitored during battery charge cycles with the temperature-sensor<br />
component (Analog Devices, TMP37), which is connected to the UCB1300 analog input AD2. For<br />
more information on the battery temperature, see Section 6.2.1.<br />
Warning:<br />
Battery over temperature is a serious and dangerous condition with Li-ion cells. Personal injury or<br />
fire may result if the charge cycle is not terminated and if the batteries are not allowed to cool.<br />
A software implementation should monitor and indicate the following conditions:<br />
• Battery at high temperature, which is over 40 °C, should indicate the immediate termination of<br />
the charge cycle.<br />
• Battery over temperature, which is over 50 °C, should indicate the immediate termination of<br />
the charge cycle and the sounding of an audio alarm and flashing LED indicators.<br />
6-2 <strong>Intel</strong> ® <strong>StrongARM*</strong> <strong>SA</strong>-<strong>1110</strong> <strong>Microprocessor</strong> <strong>Development</strong> <strong>Board</strong> User’s Guide
System Power Management<br />
6.2.2 Smart Battery Management<br />
The <strong>SA</strong>-<strong>1110</strong> <strong>Development</strong> <strong>Board</strong>’s battery pack connector includes connections for SMBus smart<br />
battery system. Smart battery chips and smart battery packs are attached to the <strong>SA</strong>-<strong>1110</strong><br />
<strong>Development</strong> <strong>Board</strong>’s battery pack connector.<br />
Smart battery system software has also been developed using this interface. For more information<br />
on smart battery systems, refer to <strong>Intel</strong>’s web site for developers.<br />
6.2.3 Battery Physical Interface<br />
The <strong>SA</strong>-<strong>1110</strong> <strong>Development</strong> <strong>Board</strong>’s battery interface will be via the J4 pin header that provides the<br />
following connections:<br />
• Battery pack plus<br />
• Battery pack minus<br />
• Ground<br />
• SMBus SDA or thermistor signal<br />
• SMBus SCL or thermistor return<br />
• Key pin<br />
• SMBus Interrupt<br />
The pack power header pins must be capable of up to 2 A of continuous current.<br />
If the smart battery chips are not used, a thermistor must be attached to the Li-ion battery pack. The<br />
thermistor shares the pins assigned to the SMBus signals. Zero ohm jumpers on the <strong>SA</strong>-<strong>1110</strong><br />
<strong>Development</strong> <strong>Board</strong> can configure the system for thermistor or SMBus usage.<br />
6.2.4 Battery Capacity<br />
Capacity is typically quoted at specific temperatures and discharge rates. High discharge rates and<br />
low temperatures will result in drastically reduced battery capacity.<br />
Charging and discharging rates are usually quoted as a factor times the rated capacity. As an<br />
example, a fast battery charging rate may be quoted as 0.5C. If the capacity of a battery is<br />
1000mAH then 0.5C would specify a 500 mA fast charge rate.<br />
6.2.5 Battery Safety<br />
Most high performance batteries exhibit very low internal resistance. Low internal resistance<br />
permits very high discharge currents especially under short circuit conditions. Short circuit<br />
conditions must be avoided as they could result in personal injury or fire.<br />
Li-ion batteries present an added hazard due to the potentially explosive nature of lithium.<br />
Overcharged and overheated Li-ion batteries can split and release lithium which reacts explosively<br />
when exposed to water or moisture in the air.<br />
<strong>Intel</strong> ® <strong>StrongARM*</strong> <strong>SA</strong>-<strong>1110</strong> <strong>Microprocessor</strong> <strong>Development</strong> <strong>Board</strong> User’s Guide 6-3
System Power Management<br />
An added complication with sophisticated battery management systems and Li-ion batteries is the<br />
possibility of battery fires or explosions caused by flawed hardware or software design or computer<br />
viruses.<br />
6.2.6 Fuel Gauging<br />
Fuel gauging or gas gauging refers to the hardware and software techniques that attempt to<br />
maintain an accurate accounting of the remaining battery capacity. In the past these attempts have<br />
proved very inaccurate. <strong>Intel</strong> is a prime sponsor of the Smart Battery Systems (SBS) initiative that<br />
includes micro-controllers that can sense and store battery information. A goal of better than 20%<br />
accuracy is desired to provide useful information to the users.<br />
Several key parameters affect accurate fuel gauging.<br />
• Battery chemistry<br />
• Battery capacity<br />
• Battery age and history<br />
• Battery temperature<br />
• Battery terminal voltage<br />
• Discharge current<br />
• Charge current<br />
The SBS specifies a System Management Bus (SMBus) for communicating with the battery<br />
management controllers. The SMBus is a subset of the I 2 C* bus protocol that can be supported<br />
using <strong>SA</strong>-<strong>1110</strong> GPIO pins.<br />
Benchmarq Products supplied some of the first SBS v1.0 compatible battery management<br />
components. Benchmarq Products supplies both devices as well as small boards intended for<br />
integration inside battery packs. The <strong>SA</strong>-<strong>1110</strong> <strong>Development</strong> <strong>Board</strong> may optionally use a 0.25” by<br />
3.5” battery management board attached directly to the batteries. To accurately register battery<br />
temperature the battery management ICs are in close proximity to the batteries. Battery<br />
temperature is a critical parameter for accurate fuel gauging and battery safety. The use of a<br />
separate battery management board allows the development and evaluation of alternate vendor<br />
battery management boards. The interface to the batteries and battery management boards is<br />
through a simple header that provides power ground and SMBus connections.<br />
SBS battery management ICs provide non-volatile storage of many critical battery statistics such as<br />
the following parameters:<br />
• Battery pack serial number<br />
• Battery temperature<br />
• Remaining charge<br />
• Instantaneous current<br />
• Total life time charge<br />
• Total lifetime discharge<br />
• Time<br />
6-4 <strong>Intel</strong> ® <strong>StrongARM*</strong> <strong>SA</strong>-<strong>1110</strong> <strong>Microprocessor</strong> <strong>Development</strong> <strong>Board</strong> User’s Guide
System Power Management<br />
• Max charge current<br />
• Max temp<br />
6.2.7 Special Handling and Storage Requirements for Batteries<br />
The following URL contains battery safety information:<br />
Note:<br />
The link that follows is provided for your convenience. This link is not part of <strong>Intel</strong>'s Web site. <strong>Intel</strong><br />
does not control the content on other company's Web sites or endorse other companies supplying<br />
products or services.<br />
http://www.batteryeng.com/safety.htm<br />
Lithium battery storage areas should be clearly marked and provided with "Lith-X" or a Class D<br />
fire extinguisher. Batteries could burst if subjected to excessive heating. In the event of fire, only<br />
"Lith-X" or a Class D fire extinguisher should be used, as water will cause exposed lithium to<br />
ignite. Signs should clearly state water is not to be used in case of fire.<br />
<strong>Intel</strong> ® <strong>StrongARM*</strong> <strong>SA</strong>-<strong>1110</strong> <strong>Microprocessor</strong> <strong>Development</strong> <strong>Board</strong> User’s Guide 6-5
In-Circuit Programming A<br />
This appendix lists the vendors that support in-circuit programming of Flash devices and CPLDs.<br />
Since many new vendors provide in-circuit programming solutions each year, <strong>Intel</strong> recommends<br />
that designers contact them for their latest products.<br />
A.1 In-Circuit Programming of Flash Devices<br />
The vendors that support in-circuit programming of Flash devices are:<br />
JTAG Technologies BV<br />
P.O. Box 1542<br />
5602 BM Eindhoven<br />
The Netherlands<br />
Tel: +31 40 295 08 70<br />
Fax: +31 40 246 84 71<br />
E-mail: info@jtag.nl<br />
Corelis Inc.<br />
12607 Hiddencreek Way<br />
Cerritos, CA 90703-2146<br />
Tel: 562-926-6727<br />
Fax: 562-404-6196<br />
E-mail: sales@corelis.com<br />
A.2 In-Circuit Programming of CPLD Devices<br />
The vendors that support in-circuit programming of CPLD devices are:<br />
Xilinx, Inc.<br />
2100 Logic Drive<br />
San Jose, CA 95124-3400<br />
Tel: (408) 559-7778<br />
TWX: 510-600-8750<br />
Fax: 408-559-7114<br />
<strong>Intel</strong> ® <strong>StrongARM*</strong> <strong>SA</strong>-<strong>1110</strong> <strong>Microprocessor</strong> <strong>Development</strong> <strong>Board</strong> User’s Guide A-7