How to Adjust the Fast Track LCD Contrast.pdf
How to Adjust the Fast Track LCD Contrast.pdf
How to Adjust the Fast Track LCD Contrast.pdf

Create successful ePaper yourself
Turn your PDF publications into a flip-book with our unique Google optimized e-Paper software.
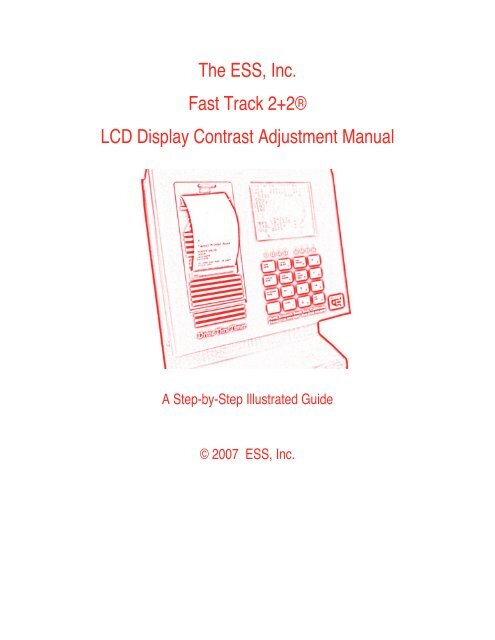
The ESS, Inc.<br />
<strong>Fast</strong> <strong>Track</strong> 2+2®<br />
<strong>LCD</strong> Display <strong>Contrast</strong> <strong>Adjust</strong>ment Manual<br />
A Step-by-Step Illustrated Guide<br />
© 2007 ESS, Inc.
<strong>Fast</strong> <strong>Track</strong> 2+2® <strong>LCD</strong> <strong>Contrast</strong> <strong>Adjust</strong>ment Procedure<br />
ESS, Inc. -- 615-340-9033<br />
This document will demonstrate how <strong>to</strong> adjust <strong>the</strong> contrast on <strong>the</strong> <strong>LCD</strong> Display of your 2000 Series <strong>Fast</strong> <strong>Track</strong> timer.<br />
In this procedure you will leave <strong>the</strong> Power applied <strong>to</strong> <strong>the</strong> timer. Touch only <strong>the</strong> places that we instruct you <strong>to</strong> <strong>to</strong>uch.<br />
Tools Needed:<br />
Small jewelers straight screwdriver<br />
Note: In this procedure you will be opening<br />
<strong>the</strong> <strong>Fast</strong> <strong>Track</strong> timer.<br />
Be very careful <strong>to</strong> support <strong>the</strong> front<br />
cover as it is lowered. Do not let it drop<br />
down all <strong>the</strong> way or <strong>the</strong> grey ribbon cable<br />
that connects <strong>the</strong> Main Board <strong>to</strong> <strong>the</strong> E<strong>the</strong>rnet<br />
Board could become disconnected.<br />
[Not all models will have <strong>the</strong> grey ribbon cable.]<br />
<strong>Fast</strong> <strong>Track</strong> - <strong>LCD</strong> <strong>Contrast</strong> <strong>Adjust</strong>ment Page 1
<strong>Fast</strong> <strong>Track</strong> 2+2® <strong>LCD</strong> <strong>Contrast</strong> <strong>Adjust</strong>ment Procedure<br />
ESS, Inc. -- 615-340-9033<br />
Opening <strong>the</strong> Timer<br />
If your timer has 2 or more thumbscrews on<br />
each side, as seen in this pho<strong>to</strong>, remove<br />
<strong>the</strong>m all EXCEPT for <strong>the</strong> bot<strong>to</strong>m one on each<br />
side, closest <strong>to</strong> you (far<strong>the</strong>st from <strong>the</strong> wall).<br />
The thumbscrews are loosened by turning<br />
<strong>the</strong>m Counter-Clockwise (<strong>to</strong> <strong>the</strong> LEFT).<br />
Gently pull on <strong>the</strong> <strong>to</strong>p of <strong>the</strong> front cover, it<br />
should open similar <strong>to</strong> <strong>the</strong> door of an oven.<br />
If your timer has only 2 thumbscrews on<br />
each side as shown in this pho<strong>to</strong>, remove<br />
or loosen <strong>the</strong> <strong>to</strong>p one. Leave <strong>the</strong> bot<strong>to</strong>m<br />
one, closest <strong>to</strong> you, attached but loosened<br />
slightly.<br />
The thumbscrews are loosened by turning<br />
<strong>the</strong>m Counter-Clockwise (<strong>to</strong> <strong>the</strong> LEFT).<br />
Gently pull on <strong>the</strong> <strong>to</strong>p of <strong>the</strong> front cover, it<br />
should open similar <strong>to</strong> <strong>the</strong> door of an oven.<br />
<strong>Fast</strong> <strong>Track</strong> - <strong>LCD</strong> <strong>Contrast</strong> <strong>Adjust</strong>ment Page 2
<strong>Fast</strong> <strong>Track</strong> 2+2® <strong>LCD</strong> <strong>Contrast</strong> <strong>Adjust</strong>ment Procedure<br />
ESS, Inc. -- 615-340-9033<br />
Locating R13<br />
The potentiometer (R13) that<br />
adjusts <strong>the</strong> contrast of <strong>the</strong> <strong>LCD</strong> is<br />
located on <strong>the</strong> far Right side of<br />
<strong>the</strong> Main Board.<br />
A closer view of R13. There are two potentiometers<br />
on this section of <strong>the</strong> board,<br />
R13 will be <strong>the</strong> one closest <strong>to</strong> <strong>the</strong> wall,<br />
far<strong>the</strong>st from you.<br />
<strong>Fast</strong> <strong>Track</strong> - <strong>LCD</strong> <strong>Contrast</strong> <strong>Adjust</strong>ment Page 3
<strong>Fast</strong> <strong>Track</strong> 2+2® <strong>LCD</strong> <strong>Contrast</strong> <strong>Adjust</strong>ment Procedure<br />
ESS, Inc. -- 615-340-9033<br />
<strong>Adjust</strong>ing <strong>the</strong> <strong>LCD</strong><br />
Making very small adjustments,<br />
turn <strong>the</strong> white plastic<br />
insert of R13....Clockwise <strong>to</strong><br />
make <strong>the</strong> display darker,<br />
Counter-Clockwise <strong>to</strong> make<br />
<strong>the</strong> display lighter.<br />
Note: Be careful <strong>to</strong> turn <strong>the</strong><br />
insert slowly and not <strong>to</strong>o far, it<br />
should only travel about 300<br />
degrees. When you feel resistance,<br />
S<strong>to</strong>p.<br />
If you can, close <strong>the</strong> cover<br />
slightly so that you can watch<br />
<strong>the</strong> display as you make <strong>the</strong><br />
adjustment.<br />
<strong>Fast</strong> <strong>Track</strong> - <strong>LCD</strong> <strong>Contrast</strong> <strong>Adjust</strong>ment Page 4
<strong>Fast</strong> <strong>Track</strong> 2+2® <strong>LCD</strong> <strong>Contrast</strong> <strong>Adjust</strong>ment Procedure<br />
ESS, Inc. -- 615-340-9033<br />
The Goal<br />
The image in <strong>the</strong> middle is what you’re aiming for. Make very small adjustments until you get it just right.<br />
When you’ve made <strong>the</strong> display look like <strong>the</strong> image in <strong>the</strong> middle (above) close <strong>the</strong> timer.<br />
End of Procedure.<br />
Final Notes<br />
Call Us with any questions.<br />
ESS, Inc.<br />
615-340-9033<br />
www.essnashville.com<br />
help@drivethruhelp.com<br />
© 2007 ESS, Inc. All Rights Reserved.<br />
<strong>Fast</strong> <strong>Track</strong> - <strong>LCD</strong> <strong>Contrast</strong> <strong>Adjust</strong>ment Page 5