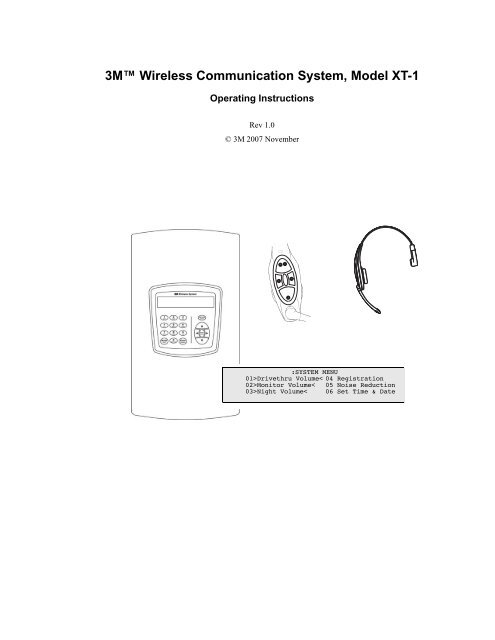
3M™ Wireless Communication System, Model XT-1
3M™ Wireless Communication System, Model XT-1
3M™ Wireless Communication System, Model XT-1

Create successful ePaper yourself
Turn your PDF publications into a flip-book with our unique Google optimized e-Paper software.
3M <strong>Wireless</strong> <strong>Communication</strong> <strong>System</strong>, <strong>Model</strong> <strong>XT</strong>-1<br />
Operating Instructions<br />
Rev 1.0<br />
© 3M 2007 November<br />
:SYSTEM MENU<br />
01>Drivethru Volume< 04 Registration<br />
02>Monitor Volume< 05 Noise Reduction<br />
03>Night Volume< 06 Set Time & Date
Table of Contents<br />
Table of Contents<br />
OVERVIEW ..................................................................................................................................... 7<br />
Safety Information ..................................................................................................................... 7<br />
Safety Rules ............................................................................................................................ 7<br />
Intended Use ........................................................................................................................... 7<br />
Signal Words ........................................................................................................................... 7<br />
Product Safety Labels ............................................................................................................. 7<br />
<strong>System</strong> Warnings .................................................................................................................... 8<br />
Other Conventions .................................................................................................................... 8<br />
Important Notes and Notes...................................................................................................... 8<br />
FCC Information......................................................................................................................... 8<br />
CONFIGURATION .......................................................................................................................... 9<br />
Enter Configuration Mode......................................................................................................... 9<br />
Navigating the Base Station Display ....................................................................................... 9<br />
Interpreting Display Information .............................................................................................. 9<br />
Buttons................................................................................................................................... 10<br />
Connecting to the Ethernet Port ............................................................................................ 11<br />
Network Setup ....................................................................................................................... 11<br />
Logging into the Base Station with a Computer .................................................................... 11<br />
Change Basic Volume Settings.............................................................................................. 12<br />
Inbound Microphone Volume ................................................................................................ 12<br />
Outbound Talk Volume.......................................................................................................... 12<br />
Vehicle Alert Volume ............................................................................................................. 12<br />
Outbound Greeter Message Volume..................................................................................... 13<br />
Change the Monitor Volume................................................................................................... 13<br />
Inbound Listen ....................................................................................................................... 13<br />
Outbound Talk ....................................................................................................................... 13<br />
Vehicle Present ..................................................................................................................... 14<br />
Vehicle Approach .................................................................................................................. 14<br />
Page Messages..................................................................................................................... 14<br />
Greeter Messages ................................................................................................................. 14<br />
Change the Night Volume....................................................................................................... 15<br />
Registering Headsets.............................................................................................................. 15<br />
Add Headsets ........................................................................................................................ 15<br />
Remove Headsets .................................................................................................................16<br />
List All Headsets.................................................................................................................... 16<br />
Resetting Inactive Days.........................................................................................................16<br />
Checking Headset Software Revision ................................................................................... 16<br />
Change Noise Reduction Level.............................................................................................. 16<br />
Inbound Microphone Noise Reduction Level......................................................................... 16<br />
Acoustic Echo Canceller........................................................................................................ 17<br />
Set <strong>System</strong> Date and Time...................................................................................................... 17<br />
Change Global Settings ..........................................................................................................17<br />
Text and Audio Prompts Language....................................................................................... 17<br />
Drive Thru Audio Duplex Mode ............................................................................................. 18<br />
Page Channel Heard by Order Taker.................................................................................... 18<br />
Number of Base Stations at this Site..................................................................................... 18<br />
Store is Now Closed Prompt ................................................................................................. 19<br />
Pull Ahead Prompt................................................................................................................. 19<br />
Customer Order Point Prompt Language.............................................................................. 19<br />
Order Point TALK with No Vehicle ........................................................................................ 19<br />
Order Takers in Cross Lane Mode ........................................................................................ 19<br />
3M <strong>Wireless</strong> <strong>Communication</strong> <strong>System</strong>, <strong>Model</strong> <strong>XT</strong>-1: Operating Instructions<br />
Rev 1.0 © 3M 2007 November<br />
Page 3 of 48
Table of Contents<br />
Detector Type ........................................................................................................................ 20<br />
Order Taking Modes Setup..................................................................................................... 20<br />
Change Site Scheduling..........................................................................................................20<br />
Regular Site Schedule...........................................................................................................21<br />
Holiday/Exception Schedule.................................................................................................. 21<br />
Change Site Information .........................................................................................................21<br />
Change Self Monitoring ..........................................................................................................21<br />
Change Passcodes.................................................................................................................. 22<br />
User Passcodes .................................................................................................................... 22<br />
Installer Setup .......................................................................................................................... 22<br />
Load Installation Settings ......................................................................................................22<br />
Save Installation Settings ......................................................................................................23<br />
Factory Setup (Restore Factory Defaults)............................................................................. 23<br />
Create and Load Templates.................................................................................................... 23<br />
Reboot <strong>System</strong>......................................................................................................................... 23<br />
Check the Revision Levels ..................................................................................................... 23<br />
Activate the Backup Intercom ................................................................................................ 24<br />
OPERATION ................................................................................................................................. 25<br />
Headsets................................................................................................................................... 25<br />
Overview................................................................................................................................ 25<br />
Component Identification and Description........................................................................................25<br />
Fitting the Headset ................................................................................................................ 26<br />
Replace the Battery ............................................................................................................... 26<br />
Out of Range ......................................................................................................................... 27<br />
Cleaning................................................................................................................................. 27<br />
Base Station Setup .................................................................................................................. 28<br />
Navigating in the Base Station in Run Mode.................................................................................... 28<br />
Change Order Taking Mode.................................................................................................. 28<br />
Explanation of Order Taking Modes................................................................................................. 29<br />
Listen: Auto, Manual, and Always On .......................................................................................... 29<br />
Talk: Manual Latching, Push to Talk, Automatic .......................................................................... 29<br />
Automatic Standby: On and Off ...................................................................................................30<br />
Vehicle Detector: Presence or Ignored ........................................................................................ 30<br />
Order Point: Used or Not Used .................................................................................................... 30<br />
Which Order Taking Mode to Select ................................................................................................ 30<br />
Change Lane Mode ............................................................................................................... 30<br />
Split Lane ......................................................................................................................................... 31<br />
Cross Lane....................................................................................................................................... 31<br />
Change Volume Mode........................................................................................................... 31<br />
MAINTENANCE ............................................................................................................................ 33<br />
Headset..................................................................................................................................... 33<br />
Replacing the Ear and Headband Pads ................................................................................ 33<br />
Battery Charger........................................................................................................................ 33<br />
Location ................................................................................................................................. 33<br />
Cleaning the Contacts ...........................................................................................................33<br />
Batteries.................................................................................................................................... 34<br />
Care, Handling and Storage.................................................................................................. 34<br />
Low Battery Message ............................................................................................................ 34<br />
Charging Batteries................................................................................................................. 34<br />
Disposing of Batteries............................................................................................................ 34<br />
Making Sure Batteries are Ready for Use............................................................................. 35<br />
Important Information about <strong>XT</strong>-1 Rechargeable Batteries................................................... 35<br />
3M <strong>Wireless</strong> <strong>Communication</strong> <strong>System</strong>, <strong>Model</strong> <strong>XT</strong>-1: Operating Instructions<br />
Page 4 of 48<br />
Rev 1.0 © 3M 2007 November
Table of Contents<br />
TROUBLESHOOTING .................................................................................................................. 37<br />
General Troubleshooting........................................................................................................ 37<br />
Battery and Battery Charger Troubleshooting ..................................................................... 38<br />
APPENDIX: BASE STATION SPECIFICATIONS........................................................................ 39<br />
Physical .................................................................................................................................... 39<br />
Electrical................................................................................................................................... 39<br />
Functional................................................................................................................................. 39<br />
APPENDIX: GREETER MODULE................................................................................................ 41<br />
Greeter Setup ........................................................................................................................... 41<br />
Enter the Greeter Configuration Menu .................................................................................. 41<br />
Play Greeter Message........................................................................................................... 41<br />
Select Specific Greeter Messages ........................................................................................ 41<br />
Change Playback Mode ........................................................................................................ 41<br />
Change Playback Delay Time ............................................................................................... 42<br />
Set Greeter Playback through Headsets............................................................................... 42<br />
Set Playback through Monitor ............................................................................................... 42<br />
Turn on Tone to Headsets During Greeter Playback ............................................................ 43<br />
Turn on Restaurant Closed Playback Message.................................................................... 43<br />
Turn on External Detector Playback Message...................................................................... 43<br />
INDEX............................................................................................................................................ 45<br />
3M <strong>Wireless</strong> <strong>Communication</strong> <strong>System</strong>, <strong>Model</strong> <strong>XT</strong>-1: Operating Instructions<br />
Rev 1.0 © 3M 2007 November<br />
Page 5 of 48
Table of Contents<br />
3M <strong>Wireless</strong> <strong>Communication</strong> <strong>System</strong>, <strong>Model</strong> <strong>XT</strong>-1: Operating Instructions<br />
Page 6 of 48<br />
Rev 1.0 © 3M 2007 November
Overview<br />
Overview<br />
Safety Information<br />
Safety Rules<br />
Read, understand, and follow all safety information contained in these<br />
instructions prior to installation & operation of the 3M Headset Intercom<br />
<strong>System</strong>, <strong>Model</strong> <strong>XT</strong>-1. Failure to follow all instructions listed could result in<br />
electrical shock, fire and/or other personal injury. Retain these instructions for<br />
future reference.<br />
Intended Use<br />
The 3M Headset Intercom <strong>System</strong> <strong>Model</strong> <strong>XT</strong>-1 is intended for use to provide 2-<br />
way radio-frequency audio communication in quick service drive-through<br />
restaurants and convenience stores.<br />
The system must be installed as specified in the <strong>Model</strong> <strong>XT</strong>-1 Installation<br />
Instructions and operated as specified in <strong>Model</strong> <strong>XT</strong>-1 Operating Instructions in<br />
quick service drive-through restaurants and convenience stores. It has not been<br />
evaluated for other uses or locations.<br />
Signal Words<br />
Explanation of Signal Word Consequences<br />
WARNING:<br />
CAUTION:<br />
CAUTION:<br />
Indicates a potentially hazardous situation, which, if<br />
not avoided, could result in death or serious injury<br />
and/or property damage.<br />
Indicates a potentially hazardous situation, which, if<br />
not avoided, may result in minor or moderate injury<br />
and/or property damage.<br />
Indicates a potentially hazardous situation, which, if<br />
not avoided, may result in property damage.<br />
Product Safety Labels<br />
Explanation of Product Safety Labels<br />
Attention: Read accompanying documentation<br />
Warning: Risk of Electric Shock<br />
3M <strong>Wireless</strong> <strong>Communication</strong> <strong>System</strong>, <strong>Model</strong> <strong>XT</strong>-1: Operating Instructions<br />
Rev 1.0 © 3M 2007 November<br />
Page 7 of 48
Overview<br />
<strong>System</strong> Warnings<br />
WARNING<br />
To reduce the risks associated with hazardous voltage:<br />
• Disconnect power to the receptacle before installing or removing the<br />
Base Station Power Supply. When removing receptacle cover screw,<br />
cover may fall across plug pins or receptacle may become displaced.<br />
Use only with duplex receptacle having center screw. Secure unit in<br />
place by receptacle cover screw.<br />
• If power supply is supplied with a grounding pin, connect directly to a<br />
grounding receptacle – 3 prong.<br />
To reduce the risks associated fire & property damage:<br />
• Do not open, crush, expose to heat above 200 °F or incinerate the<br />
battery.<br />
• Always replace batteries, battery chargers and power supplies with<br />
3M approved units acceptable for use in this system to avoid system<br />
function & safety concerns.<br />
CAUTION<br />
To reduce the risks associated with environmental contamination due to<br />
battery pack & to lead in the solder:<br />
• Dispose of batteries, power supplies, battery charger and base<br />
station in accordance with federal, state & local requirements. If<br />
preferred, return these components to 3M Service Center for<br />
disposal.<br />
Other Conventions<br />
FCC Information<br />
Important Notes and Notes<br />
Important Note:<br />
It is strongly recommended that you pay attention to information inside of an<br />
“Important Note:” box.<br />
Note:<br />
You may find information inside of a “Note:” box helpful.<br />
Note:<br />
This equipment has been tested and found to comply with the limits for a<br />
Class A digital device, pursuant to part 15 of the FCC Rules. These limits are<br />
designed to provide reasonable protection against harmful interference when<br />
the equipment is operated in a commercial environment. This equipment<br />
generates, uses, and can radiate radio frequency energy and, if not installed<br />
and used in accordance with the instruction manual, may cause harmful<br />
interference to radio communications. Operation of this equipment in a<br />
residential area is likely to cause harmful interference in which case the user<br />
will be required to correct the interference at his own expense.<br />
3M <strong>Wireless</strong> <strong>Communication</strong> <strong>System</strong>, <strong>Model</strong> <strong>XT</strong>-1: Operating Instructions<br />
Page 8 of 48<br />
Rev 1.0 © 3M 2007 November
Configuration<br />
Configuration<br />
Enter Configuration Mode<br />
Configuration mode is a passcode-protected area that contains most of the<br />
configuration options for the base station system. Using the access provided for<br />
users it is possible to set up all of the functionality of the system.<br />
To enter the configuration mode:<br />
1. From the Run mode menu, press and hold Mode.<br />
2. While continuing to hold Mode, enter your user passcode.<br />
3. Release Mode. The display will show the user name and ID number<br />
(e.g., User1 ID = 1)<br />
Notes:<br />
The default user password is 1234.<br />
There are two levels of passcode: installers and users. Using a user’s<br />
passcode permits you into the entire system menu.<br />
Navigating the Base Station Display<br />
Once you are in the configuration mode, you can use the buttons on the base<br />
station display to update all configuration parameters.<br />
Interpreting Display Information<br />
Depending upon what you are doing, or what you can do, text on the display<br />
screen is handled according to the following conventions:<br />
Static or Informational<br />
<br />
>Editable, Selected<<br />
Editable, in Edit Mode <br />
[Variable, not Editable]<br />
Static, informational, or noneditable<br />
text has no markings on<br />
it.<br />
Editable items that are not<br />
currently-selected appear inside<br />
of outwardly-pointing pointers.<br />
Editable items that are currentlyselected<br />
appear inside if<br />
inwardly-pointing pointers.<br />
Editable items that are currently<br />
being edited have arrows<br />
pointing inwardly.<br />
Variable items that cannot be<br />
edited appear inside of square<br />
brackets. In some cases the item<br />
is editable, but only from a<br />
different location in the menu.<br />
{ information } An on-screen explanation of a<br />
key point or reminder appears<br />
within curved brackets.<br />
3M <strong>Wireless</strong> <strong>Communication</strong> <strong>System</strong>, <strong>Model</strong> <strong>XT</strong>-1: Operating Instructions<br />
Rev 1.0 © 3M 2007 November<br />
Page 9 of 48
Configuration<br />
Buttons<br />
Following is a brief description of the buttons on the display and their functions.<br />
Directional arrow<br />
() buttons<br />
Number/letter (0 – 9)<br />
buttons<br />
Mode (Exit) button<br />
Enter (Select) buttons<br />
(both buttons perform the<br />
exact same functions)<br />
You can use these buttons to scroll around<br />
when navigating the menus. When you are<br />
editing information, the up and right arrows<br />
scroll “up” (increment) and the down and left<br />
arrows scroll “down” (decrement) list of<br />
values.<br />
You can use these buttons to specify exact<br />
numbers or letters in fields that permit them.<br />
Each time you press button, the result<br />
changes to the next available number or<br />
letter. For instance, pressing the 7 button<br />
three times creates a letter “t” (7-s-t). See<br />
Service button below for creating upper-case<br />
letters.<br />
In run mode, you must press and hold Mode<br />
while entering your passcode to enter user or<br />
installation service.<br />
In user and installation service modes, use<br />
the Mode button to exit from a current field<br />
that you are editing without saving any<br />
changes or to go upward (backward) in the<br />
configuration menus.<br />
Use the Enter button to execute the current<br />
selection:<br />
Pressing Enter on a menu opens the menu<br />
and shows you its submenu items.<br />
Pressing Enter on an editable field switches<br />
you to edit mode so you can change the value<br />
in the field using the arrows and<br />
number/letter buttons where applicable.<br />
Pressing Enter while in edit mode saves the<br />
changes you have made and exits edit mode.<br />
3M <strong>Wireless</strong> <strong>Communication</strong> <strong>System</strong>, <strong>Model</strong> <strong>XT</strong>-1: Operating Instructions<br />
Page 10 of 48<br />
Rev 1.0 © 3M 2007 November
Configuration<br />
Service (Shift) button<br />
Use the Service button to access upper-case<br />
letters or to initiate a service call to 3M or as<br />
a confirmation in some items.<br />
Pressing and holding the Service button while<br />
editing a field that permits alphabet letter<br />
entry (e.g., store address) shifts the letter to<br />
upper case.<br />
In run mode, press and hold the Service<br />
button, then enter your passcode to initiate an<br />
internet request for help from 3M. A 3M<br />
representative will call your store telephone<br />
number shortly after you initiate the request.<br />
Your base station must be connected to the<br />
internet for this function to work. If you<br />
press the Service button and do not enter a<br />
passcode, the base station will go to a<br />
Service screen used for installation and<br />
troubleshooting.<br />
The directional arrows can be used for scrolling from one menu item to another<br />
or to scroll through available choices when editing fields.<br />
Connecting to the Ethernet Port<br />
All of the procedures in this chapter assume that you are using the display to<br />
configure your base station(s). However it is also possible to configure the base<br />
station using a desktop or laptop computer. To do so, use the display to set the<br />
DSP configuration (see below), then connect the computer and the base station<br />
using a patch cable (to a router) or a crossover cable (directly to a computer).<br />
Network Setup<br />
To configure the network:<br />
• Enter the configuration mode (see above).<br />
• Select 16 Network Setup.<br />
• Change the values for, web server enabled, email enabled, IP<br />
address, subnet mask, default gateway, and Your E-Mail<br />
Address Suffix. Your network administrator should be able to<br />
supply the values if you do not know them.<br />
Logging into the Base Station with a Computer<br />
Once the base station is connected to (and correctly configured with) your Local<br />
Area Network, you can log into it from any other computer on the network and<br />
operate the station as you would from the local interface. You must know the IP<br />
Address of the base station and you must have password for one of the user<br />
accounts in the base station<br />
To find out the base station’s IP address:<br />
1. Enter the configuration mode (see above).<br />
2. Select 16 Network Setup.<br />
3. Look at the series of numbers and decimals after IP Address.<br />
(e.g., 133.75.123.27).<br />
3M <strong>Wireless</strong> <strong>Communication</strong> <strong>System</strong>, <strong>Model</strong> <strong>XT</strong>-1: Operating Instructions<br />
Rev 1.0 © 3M 2007 November<br />
Page 11 of 48
Configuration<br />
To find out your user password:<br />
1. Enter the configuration mode (see page 9).<br />
2. Select 13 Change Passcodes > Change User Passcodes.<br />
3. Look at the passcode following your user number (e.g., “User 5.”)<br />
To log into the base station:<br />
Change Basic Volume Settings<br />
• Using a web browser, type in the IP address of the base station in the<br />
browser’s Address bar, then press Enter.<br />
• Type in your user name and password. Do NOT type the space<br />
between User and the user number (e.g., type “User5” instead of<br />
“User 5”).<br />
Notes:<br />
The default user name is “User1”; the password is 1234.<br />
Note:<br />
All volume settings should be adjusted during normal or peak business hours.<br />
Adjusting them during slow times will likely produce volume settings that are<br />
too low.<br />
Note:<br />
Inbound and outbound are always defined from the perspective of the headset.<br />
Inbound Microphone Volume<br />
Changing the inbound microphone volume affects the sound volume coming<br />
from the customer order point microphone.<br />
To turn up or down the inbound microphone:<br />
1. Enter the configuration mode, see page 9.<br />
2. Select a new value for 01 Drivethru Volume > Inbound Mic<br />
Volume. The range is 0 (silent) to 20 (maximum).<br />
Outbound Talk Volume<br />
Changing the outbound talk volume affects the volume of the speaker at the<br />
customer order point.<br />
Note:<br />
To avoid feedback, set the outbound talk volume as low as possible.<br />
To change the outbound talk volume:<br />
1. Enter the configuration mode, see page 9.<br />
2. Select a new value for 01 Drivethru Volume > Outbound Talk<br />
Volume. The range is 0 (silent) to 20 (maximum).<br />
Vehicle Alert Volume<br />
Changing the vehicle alert volume affects the volume of the vehicle alert signal<br />
on the headsets.<br />
3M <strong>Wireless</strong> <strong>Communication</strong> <strong>System</strong>, <strong>Model</strong> <strong>XT</strong>-1: Operating Instructions<br />
Page 12 of 48<br />
Rev 1.0 © 3M 2007 November
Configuration<br />
To change the vehicle alert volume:<br />
1. Enter the configuration mode, see page 9.<br />
2. Select a new value for 01 Drivethru Volume > Vehicle Alert<br />
Volume. The range is 0 (silent) to 20 (maximum).<br />
Outbound Greeter Message Volume<br />
Changing the outbound greeter message volume affects the sound volume of the<br />
custom greeting messages and the system internal greetings (“Store Closed” and<br />
“Please Pull Ahead”).<br />
To turn up or down the greeter message volume:<br />
1. Enter the configuration mode, see page 9.<br />
2. Select a new value for 01 Drivethru Volume > Greeter Message<br />
Volume. The range is 0 (silent) to 20 (maximum).<br />
Change the Monitor Volume<br />
The monitor is an additional speaker that can be used to monitor drive thru<br />
communication without a headset, typically in the kitchen. If the monitor has a<br />
volume control built into it, you can use it to control the overall volume level of<br />
the speaker. To be more specific about which elements you want to control,<br />
follow the instructions in the following sections.<br />
Inbound Listen<br />
Changing the inbound listen volume affects how loudly the monitor plays the<br />
inbound (customer order point) communication. You can also disable the<br />
monitor playing inbound sounds.<br />
To change the inbound listen monitoring settings:<br />
1. Enter the configuration mode, see page 9.<br />
2. Select 02 Monitor Volume.<br />
3. To enable or disable the monitor playing the inbound sounds, change<br />
the value for Inbound Listen: Enable to ON or OFF.<br />
4. To change the volume level, select a new value for Inbound Listen:<br />
Volume. The range is 0 (silent) to 20 (maximum).<br />
Outbound Talk<br />
Changing the outbound talk volume affects how loudly the monitor plays the<br />
outbound (order taker) communication. You can also disable the monitor<br />
playing outbound talk.<br />
Note:<br />
To avoid feedback and echo, set the outbound talk volume as low as possible.<br />
To change the outbound talk monitoring settings:<br />
1. Enter the configuration mode, see page 9.<br />
2. Select 02 Monitor Volume.<br />
3. To enable or disable the monitor playing the outbound talk, change the<br />
value for Outbound Talk: Enable to ON or OFF.<br />
4. To change the volume level, select a new value for Outbound Talk:<br />
Volume. The range is 0 (silent) to 20 (maximum).<br />
3M <strong>Wireless</strong> <strong>Communication</strong> <strong>System</strong>, <strong>Model</strong> <strong>XT</strong>-1: Operating Instructions<br />
Rev 1.0 © 3M 2007 November<br />
Page 13 of 48
Configuration<br />
Vehicle Present<br />
Changing the vehicle present volume affects how loudly the monitor plays the<br />
vehicle present tone. You can also disable the monitor playing the vehicle<br />
present tone.<br />
To change the vehicle present monitoring settings:<br />
1. Enter the configuration mode, see page 9.<br />
2. Select 02 Monitor Volume.<br />
3. To enable or disable the monitor playing the vehicle present tone,<br />
change the value for Vehicle Present: Enable to ON or OFF.<br />
4. To change the volume level, select a new value for Vehicle<br />
Present: Volume. The range is 0 (silent) to 20 (maximum).<br />
Vehicle Approach<br />
Some sites are equipped with a vehicle approach detector, which alerts you<br />
when a vehicle enters the parking lot or drive through approach lane. If your<br />
site is equipped with the detector, you can change the volume at which the tone<br />
is played on the monitor. Also, if you do not wish to hear the tone, you can<br />
disable it.<br />
To change the vehicle approach monitoring settings:<br />
1. Enter the configuration mode, see page 9.<br />
2. Select 02 Monitor Volume.<br />
3. To enable or disable the monitor from playing the vehicle approach<br />
tone, change the value for Vehicle Approach: Enable to ON or<br />
OFF.<br />
4. To change the volume level, select a new value for Vehicle<br />
Approach: Volume. The range is 0 (silent) to 20 (maximum).<br />
Page Messages<br />
Paging is headset-to-headset communications. Changing the page message<br />
volume affects how loudly the monitor plays internal paging messages. You can<br />
also disable the monitor playing internal paging messages.<br />
Note:<br />
To avoid feedback and echo, set the volume as low as possible.<br />
To change the page message volume monitoring settings:<br />
1. Enter the user service mode, see page 9.<br />
2. Select 02 Monitor Volume.<br />
3. To enable or disable the monitor playing internal paging messages,<br />
change the value for PAGE Messages: Enable to ON or OFF.<br />
4. To change the volume level, select a new value for PAGE Messages:<br />
Volume. The range is 0 (silent) to 20 (maximum).<br />
Greeter Messages<br />
Changing the greeter message volume affects how loudly the monitor plays the<br />
greeter messages. You can also disable the monitor playing the greeter<br />
messages.<br />
To change the greeter message volume monitoring settings:<br />
1. Enter the configuration mode, see page 9.<br />
3M <strong>Wireless</strong> <strong>Communication</strong> <strong>System</strong>, <strong>Model</strong> <strong>XT</strong>-1: Operating Instructions<br />
Page 14 of 48<br />
Rev 1.0 © 3M 2007 November
Configuration<br />
2. Select 02 Monitor Volume.<br />
3. To enable or disable the monitor playing greeter messages, change the<br />
value for Greeter Messages: Enable to ON or OFF.<br />
4. To change the volume level, select a new value for Greeter<br />
Messages: Volume. The range is 0 (silent) to 20 (maximum).<br />
Change the Night Volume<br />
You can assign a standard reduction in the volume level of the customer order<br />
point speaker for night hours when lower volume is typically required. With the<br />
night volume set, the system automatically adjusts the volume during night<br />
hours, then back to normal during the day.<br />
To change the night volume setting:<br />
1. Enter the configuration mode, see page 9.<br />
2. Select a new value for 03 Night Volume > Reduce DriveThru<br />
Volume At Night By. The range is 0 to the current day volume<br />
level.<br />
Notes:<br />
Night Volume is never higher than Day Volume.<br />
Night volume reduction is a subtracted value, not the resulting level;<br />
therefore, if it is the same as the day volume level, the speaker will turn off at<br />
night.<br />
You cannot change the day outbound talk volume on this screen, only the<br />
reduction amount identified above.<br />
Registering Headsets<br />
Each headset must be registered to a base station before it can be used. Once<br />
registered, it should not need to be registered again unless it is intentionally<br />
removed.<br />
Add Headsets<br />
Each headset has a unique identification number. The number is imprinted on<br />
the headset and broadcast to the base station whenever it is turned on.<br />
Notes:<br />
One headset should not be registered to more than one base station at any<br />
given site, whether or not the bases are interconnected. Remove the headset<br />
from the existing base station before adding it to a different one.<br />
To register a headset:<br />
1. Enter the base station configuration mode, see page 9.<br />
2. Select 04 Registration > 1 Add New Headsets.<br />
3. Power on the headset when prompted.<br />
4. Wait up to two minutes for {Headset xxxxxxx Has Been<br />
Registered!} to appear at the bottom of the display.<br />
5. Repeat step 3 for additional headsets.<br />
6. Press Mode when finished.<br />
3M <strong>Wireless</strong> <strong>Communication</strong> <strong>System</strong>, <strong>Model</strong> <strong>XT</strong>-1: Operating Instructions<br />
Rev 1.0 © 3M 2007 November<br />
Page 15 of 48
Configuration<br />
Remove Headsets<br />
Perform the following steps to un-register a lost, destroyed, or otherwise<br />
removed headset from the system, including a headset that is sent back to 3M<br />
for repair. The headset would have to be registered again at a later date.<br />
1. Enter the base station configuration mode, see page 9.<br />
2. Select 04 Registration > 2 Remove Headsets.<br />
3. Scroll to the number of the headset you want to un-register.<br />
4. Press Enter.<br />
Note:<br />
If you do not know or have access to the number of the headset to be unregistered,<br />
identify the headsets that you want to remain in service and unregister<br />
any that remain on the list.<br />
List All Headsets<br />
To see a list of the registered headsets:<br />
1. Enter the base station configuration mode, see page 9.<br />
2. Select 04 Registration > 3 List All Headsets.<br />
Resetting Inactive Days<br />
For any headset, you can manually reset its number of inactive days to zero (see<br />
“Change Self Monitoring” on page 21 for information about the inactive days<br />
timer.<br />
To reset the inactive days:<br />
1. Enter the base station configuration mode, see page 9.<br />
2. Navigate to 08 Headset Setup > Currently Editing Headset.<br />
3. Press or if necessary to scroll to the headset ID number for the<br />
headset you want to reset.<br />
4. Select .<br />
Checking Headset Software Revision<br />
To check the software revision number for a headset:<br />
1. Enter the base station configuration mode, see page 9.<br />
2. Navigate to 08 Headset Setup > Currently Editing Headset.<br />
3. Press or if necessary to scroll through the headsets. The software<br />
version appears next to the headset ID number.<br />
Change Noise Reduction Level<br />
There are several ways to improve the sound quality at the headset using the<br />
following settings.<br />
Inbound Microphone Noise Reduction Level<br />
The inbound microphone noise reduction level setting reduces background noise<br />
to make it easier to hear speech at the customer order point.<br />
Perform the following steps to increase or decrease the noise reduction level.<br />
1. Enter the base station configuration mode, see page 9.<br />
3M <strong>Wireless</strong> <strong>Communication</strong> <strong>System</strong>, <strong>Model</strong> <strong>XT</strong>-1: Operating Instructions<br />
Page 16 of 48<br />
Rev 1.0 © 3M 2007 November
Configuration<br />
2. Make a new selection for 05 Noise Reduction > Inbound Mic<br />
Noise Reduction Level. Options are Off, Min, Low, Med, Hi, and<br />
Max. You may need to experiment for a setting that works best for<br />
your ambient noise environment.<br />
Acoustic Echo Canceller<br />
Perform the following procedure if there is a delayed repetition (echo) of the<br />
outbound sound:<br />
1. Enter the base station configuration mode, see page 9.<br />
2. Make a new selection for 05 Noise Reduction > Acoustic Echo<br />
Chancellor. Options are Min, Low, Med, and Max. You may need to<br />
experiment for a setting that works best for your ambient noise<br />
environment and staff.<br />
Set <strong>System</strong> Date and Time<br />
Perform the following procedure to set the system time and date.<br />
1. Enter the base station configuration mode, see page 9.<br />
2. Change the date and time values for 06 Set Time & Date in the<br />
Time and Date fields as required. Use the arrows to scroll from one<br />
field to the next and type new values over the existing data in the<br />
formats shown in parentheses:<br />
• HH = Hours (01 to 24, e.g., 6:00 pm is 18)<br />
• MM = Minutes (01 to 60)<br />
• SS = Seconds (01 to 60)<br />
• MMM = Month (Jan, Feb, Mar, Apr, May, Jun, Jul, Aug, Sep, Oct,<br />
Nov, or Dec)<br />
• DD = day (01 to 31)<br />
• Year = Last two digits of the year (00 to 99, 20 is fixed and<br />
cannot be changed)<br />
Change Global Settings<br />
Global settings are an assortment of options that you must choose based upon<br />
the basic configuration of your system.<br />
Text and Audio Prompts Language<br />
You can choose between English, Spanish, and French language for all text and<br />
audio prompts, which is essentially all of the factory prerecorded information<br />
coming from the base station and all of the printed text on the display.<br />
Note:<br />
Changing the text and audio prompt language will also change the language of<br />
the headset messages.<br />
Perform the following procedure to change the text and audio prompts:<br />
1. Enter the base station configuration mode, see page 9.<br />
2. Change the value for 07 Global Settings > Text & Audio<br />
Prompts Language to English, Español., or Francais.<br />
3M <strong>Wireless</strong> <strong>Communication</strong> <strong>System</strong>, <strong>Model</strong> <strong>XT</strong>-1: Operating Instructions<br />
Rev 1.0 © 3M 2007 November<br />
Page 17 of 48
Configuration<br />
Drive Thru Audio Duplex Mode<br />
The system can function using half duplex or full duplex modes. Choosing<br />
between the two modes is based upon the desired operation.<br />
Note:<br />
In half duplex installations, all latching order taking modes and hands free<br />
mode are disabled.<br />
Perform the following procedure to change the drive through audio mode:<br />
1. Enter the base station configuration mode, see page 9.<br />
2. Change the value for 07 Global Settings > DriveThru Audio<br />
Duplex Mode to Full or Half.<br />
• In half-duplex systems, when the order taker is speaking, it is<br />
impossible to hear any speech coming from the customer order<br />
point.<br />
• In full-duplex systems, the order taker can speak and hear speech<br />
coming from the customer order point at the same time.<br />
Page Channel Heard by Order Taker<br />
You can enable or disable the order taker from being able to hear any paging<br />
while speaking to a customer over the customer order point. This may prevent<br />
interference with the order taking process.<br />
Perform the following procedure to enable or disable the order taker hearing<br />
pages while talking:<br />
1. Enter the base station configuration mode, see page 9.<br />
2. Select 07 Global Settings.<br />
3. To enable or disable the monitor playing the outbound talk, change the<br />
value for PAGE Channel Heard by Order Taker: to NO or YES.<br />
Number of Base Stations at this Site<br />
When there are two base stations used together (tandem, dual, or side-by-side<br />
drive thrus) they must be configured to work together.<br />
Perform the following procedure to enable the two stations to work together:<br />
1. On the base first station:<br />
• Enter the base station configuration mode, see page 9.<br />
• Change the value for 07 Global Settings > Number of<br />
BaseStations at This Site to 2.<br />
• Press Enter to implement the change.<br />
• On the first base station, stations, change the value for 07<br />
Global Settings > Lane Number of This Base<br />
Station to 1.<br />
2. On the second base station:<br />
• Enter the base station configuration mode, see page 9.<br />
• Change the value for 07 Global Settings > Number of<br />
BaseStations at This Site to 2.<br />
• Press Enter to implement the change.<br />
• On the second base station, stations, change the value for 07<br />
Global Settings > Lane Number of This Base<br />
Station to 2.<br />
3M <strong>Wireless</strong> <strong>Communication</strong> <strong>System</strong>, <strong>Model</strong> <strong>XT</strong>-1: Operating Instructions<br />
Page 18 of 48<br />
Rev 1.0 © 3M 2007 November
Configuration<br />
Store is Now Closed Prompt<br />
Perform the following procedure to enable or disable the automatic store closed<br />
prompt to let customers know in your absence that the store is closed:<br />
1. Enter the base station configuration mode, see page 9.<br />
2. Change the value for 07 Global Settings > ”Store is Now<br />
Closed” Prompt? to Yes or No.<br />
Pull Ahead Prompt<br />
Perform the following procedure to enable or disable the automatic pull ahead<br />
prompt to let customers know to pull ahead when they are at an out-of-service<br />
customer order point in a tandem drive thru:<br />
1. Enter the base station user service mode, see page 9.<br />
2. Change the value for 07 Global Settings > ”Pull Ahead”<br />
Prompt (Tandem Only)? to Yes or No.<br />
Customer Order Point Prompt Language<br />
Perform the following procedure to select the language(s) of the store closed and<br />
pull ahead prompts. The prompts can be spoken in English, Spanish, French, or<br />
repeated in multiple languages:<br />
1. Enter the base station configuration mode, see page 9.<br />
2. Change the value for 07 Global Settings > Order Point<br />
Prompts in English? to Yes or No.<br />
3. Press Enter to implement the change or press Mode to abandon the<br />
change and leave the option at its previous setting.<br />
4. Change the value for 07 Global Settings > Order Point<br />
Prompts in Spanish? to Yes or No.<br />
5. Press Enter to implement the change or press Mode to abandon the<br />
change and leave the option at its previous setting.<br />
6. Change the value for 07 Global Settings > Order Point<br />
Prompts in French? to Yes or No.<br />
Order Point TALK with No Vehicle<br />
Perform the following procedure to permit or prevent the order taker to talk to<br />
the order point when no vehicle is detected.<br />
1. Enter the base station user service mode, see page 9.<br />
2. Change the value for 07 Global Settings > Order Point TALK<br />
With No Vehicle? to Yes or No.<br />
Order Takers in Cross Lane Mode<br />
In systems with two customer order points, in Split Lane mode, you can specify<br />
whether you would like to be able to permit communication between the two<br />
split systems.<br />
Perform the following procedure to enable or disable talk (T1/T2) buttons to be<br />
able to speak on the lane to which it is not assigned.<br />
1. Enter the base station configuration mode, see page 9.<br />
2. Change the value for 07 Global Settings > Order Takers in<br />
CROSS Lane Mode? to YES or NO.<br />
Perform the following procedure to enable or disable paging to be heard by<br />
operators on both lanes.<br />
1. Enter the base station configuration mode, see page 9.<br />
3M <strong>Wireless</strong> <strong>Communication</strong> <strong>System</strong>, <strong>Model</strong> <strong>XT</strong>-1: Operating Instructions<br />
Rev 1.0 © 3M 2007 November<br />
Page 19 of 48
Configuration<br />
2. Change the value for 07 Global Settings > PAGE Messages Can<br />
Cross Lanes? to YES or NO.<br />
Detector Type<br />
Because there are two basic types of vehicle detector, pulse and presence, you<br />
must specify which type you have in the base station.<br />
1. Enter the base station configuration mode, see page 9.<br />
2. Change the value for 07 Global Settings > Vehicle<br />
Detector#1 to Presence or Pulse.<br />
Note:<br />
Vechicle detector#1 is always the order point.<br />
3. For presence type detectors, specify a value for Vehicle Detector<br />
#X Minimum (Seconds). Setting a higher number will increase the<br />
customer’s wait time, but decrease false detections that could be caused<br />
by cars driving over the detector without stopping.<br />
Notes:<br />
When the pulse setting is used, each call must be ended by pressing the page<br />
button on the headset.<br />
If you are using a vehicle detector board, the presence or pulse setting should<br />
match the dip switch setting on the board.<br />
If the vehicle detector is set to delay (via its own dip switches) and you set a<br />
delay in the base station, the delays are additive: you could end up with a<br />
longer than expected total delay.<br />
Order Taking Modes Setup<br />
Perform the following procedure to enable or disable some of the seven different<br />
order taking modes from appearing on the Run Menu:<br />
1. Enter the base station configuration mode, see page 9.<br />
2. Navigate to 09 O.T. Modes Setup.<br />
3. Change the value for each of the following options to Yes or No:<br />
• Manual Listen/Push To Talk<br />
• Manual Listen/Manual Latching Talk<br />
• Auto Listen/Push To Talk<br />
• Auto Listen/Manual Latching Talk<br />
• Hands Free<br />
• Outside<br />
• Always On (Bypass Vehicle Detector)<br />
(Press or to scroll up and down the list)<br />
Note:<br />
Order taking modes are described in the Operation section, see page 29.<br />
Change Site Scheduling<br />
The site schedule is the calendar of store open and closing times.<br />
3M <strong>Wireless</strong> <strong>Communication</strong> <strong>System</strong>, <strong>Model</strong> <strong>XT</strong>-1: Operating Instructions<br />
Page 20 of 48<br />
Rev 1.0 © 3M 2007 November
Configuration<br />
Note:<br />
All timekeeping is done using a 24 hour clock (e.g., 6:00 p.m. appears as<br />
18:00).<br />
Regular Site Schedule<br />
The regular site schedule is the opening and closing times for each day of the<br />
week and the times assigned as “Day” and “Night,” which determine when the<br />
day and night volume settings change.<br />
Perform the following procedure to set the regular site schedule:<br />
1. Enter the base station configuration mode, see page 9.<br />
2. Navigate to 10 Site Scheduling > Regular Site Schedule.<br />
3. Change the value for each day of the week and each of the four defined<br />
fields (Open, Day, Night, and Close).<br />
(Press , , , and to scroll up and down the list).<br />
Holiday/Exception Schedule<br />
The holiday/exception schedule can be used to identify up to 12 days in the year<br />
on which the store schedule is different than it would have been otherwise. The<br />
holiday/exception schedule should be updated at least once a year to ensure it<br />
conforms to the current year’s calendar.<br />
Perform the following procedure to set the holiday/exception schedule:<br />
1. Enter the base station configuration mode, see page 9.<br />
2. Navigate to 10 Site Scheduling.> Holiday/Exception<br />
Schedule.<br />
3. For each day that needs a non-typical schedule, enter the three-letter<br />
month and two digit date under Date, then change the open and close<br />
times on the line to the right of the date.<br />
(Press , , , and to scroll through the fields.)<br />
Change Site Information<br />
Site information is useful for warranty registration and to support service calls.<br />
This information is most useful when the system has an internet connection.<br />
Tech Services can use it to identify and contact the store when it receives a<br />
service request. All information is entered free-format using the numeric<br />
keypad. To type upper case letters, use the Shift key.<br />
Perform the following procedure to change the site information:<br />
1. Enter the base station configuration mode, see page 9.<br />
2. Navigate to 11 Site Information.<br />
3. For each field that needs to be modified, enter the appropriate data.<br />
(Press , , , and to scroll through the fields.)<br />
Change Self Monitoring<br />
Self-monitoring is a function available for all systems where the base station is<br />
continuously connected to a store Ethernet connection. The base station keeps<br />
track of all of the headsets in the system, looking for periods of extended nonuse<br />
that may indicate a headset problem that needs attention.<br />
Perform the following procedure to enable and configure self monitoring:<br />
1. Enter the configuration mode, see page 9.<br />
2. Select 12 Self Monitoring.<br />
3M <strong>Wireless</strong> <strong>Communication</strong> <strong>System</strong>, <strong>Model</strong> <strong>XT</strong>-1: Operating Instructions<br />
Rev 1.0 © 3M 2007 November<br />
Page 21 of 48
Configuration<br />
3. To enable or disable self monitoring, change the value for Self<br />
Monitoring Enabled? to Yes or No.<br />
4. If self monitoring is enabled:<br />
• Select a value for Number of Inactive Days Allowed.<br />
The range is 7 to 255. The number represents how many days<br />
of inactivity must pass for any given headset before the system<br />
interprets the absence as a problem and forwards the<br />
information to 3M.<br />
• Select a value for Resend Error Reports. Your choices<br />
are Never, Every Day, Every Week, or Every Month.<br />
This is the frequency that the base station will attempt to<br />
resend the error message until the error condition is corrected.<br />
Change Passcodes<br />
User and installer passcodes can be individualized for better security control<br />
against unauthorized changes. The system has a default user and a default<br />
installer passcode pre-installed. Check your documentation for those passcodes.<br />
User Passcodes<br />
If you enter a user passcode, you have full access to the Change User Passcodes<br />
menu. You can change or delete any passcode.<br />
Perform the following procedure to set up and/or change user passcodes:<br />
1. Enter the configuration mode, see page 9.<br />
2. Select 13 Change Passcodes > Change User Passcodes.<br />
3. Identify the user number you want to change, then press , , , and<br />
as necessary to scroll to the desired passcode.<br />
4. Enter a new four-digit passcode in place of the old passcode.<br />
5. Press Enter to implement the change or press Mode to abandon the<br />
change and leave the passcode at its previous setting.<br />
Installer Setup<br />
Installer setup is a special group of setup options typically only used by the<br />
installer or in case of complete system restoration or backup.<br />
Load Installation Settings<br />
Installation settings are a complete set of configuration data that the installer can<br />
save after the initial installation configuration is completed. It is essentially a<br />
backup save point in case configuration settings are inadvertently changed in<br />
ways that are not easy to identify or correct.<br />
To load the installation settings:<br />
Important Note:<br />
By performing this procedure you will be erasing the current configuration<br />
and reloading the configuration that was last saved, likely when the system<br />
was first installed.<br />
1. Enter the configuration mode, see page 9.<br />
2. Select 14 Installer Setup.<br />
3. Change the value for Load Installation Settings to Yes.<br />
3M <strong>Wireless</strong> <strong>Communication</strong> <strong>System</strong>, <strong>Model</strong> <strong>XT</strong>-1: Operating Instructions<br />
Page 22 of 48<br />
Rev 1.0 © 3M 2007 November
Configuration<br />
Save Installation Settings<br />
Note:<br />
This function is only available to installers.<br />
Perform the following procedure to save the current configuration into<br />
permanent memory over the existing installation settings.<br />
Important Note:<br />
By performing this procedure you will be erasing the existing saved<br />
installation settings, making it impossible to revert to the settings that were<br />
saved after installation.<br />
1. Enter the configuration mode, see page 9.<br />
2. Select 14 Installer Setup.<br />
3. Change the value for Save Installation Settings to Yes.<br />
Factory Setup (Restore Factory Defaults)<br />
Perform the following procedure to restore all of the configuration settings to the<br />
factory default settings. This procedure should be performed only if the current<br />
configuration and the saved installation settings are unusable.<br />
Important Note:<br />
By performing this procedure you will reset the system to the initial<br />
configuration, making it impossible to revert to the settings that were saved<br />
after installation.<br />
1. Enter the configuration mode, see page 9.<br />
2. Select 15 Factory Setup.<br />
3. Change the value of Restore All Factory Settings to Yes.<br />
Create and Load Templates<br />
You can save an entire base station configuration as a file on a PC and use the<br />
file as a template for other base stations. You must be using a PC to use<br />
templates.<br />
Reboot <strong>System</strong><br />
Perform the following procedure to cleanly power down, then power up without<br />
unplugging the system:<br />
1. Enter the configuration mode, see page 9.<br />
2. Select 16 Reboot <strong>System</strong>.<br />
3. Change the value of Power Cycle Complete <strong>System</strong> to Yes.<br />
4. Press Service.<br />
Check the Revision Levels<br />
Perform the following procedure to view the revision levels and serial numbers<br />
of your base station:<br />
1. Enter the configuration mode, see page 9.<br />
2. Select 17 Revision Levels.<br />
3M <strong>Wireless</strong> <strong>Communication</strong> <strong>System</strong>, <strong>Model</strong> <strong>XT</strong>-1: Operating Instructions<br />
Rev 1.0 © 3M 2007 November<br />
Page 23 of 48
Configuration<br />
Activate the Backup Intercom<br />
Many systems include a wired backup intercom system that can be used if the<br />
main wireless system cannot be used. If your system has a backup intercom<br />
system, perform the following steps to activate it:<br />
• Remove the base station cover.<br />
• Press and latch the two switches named “BACKUP INTERCOM.”<br />
3M <strong>Wireless</strong> <strong>Communication</strong> <strong>System</strong>, <strong>Model</strong> <strong>XT</strong>-1: Operating Instructions<br />
Page 24 of 48<br />
Rev 1.0 © 3M 2007 November
Operation<br />
Operation<br />
Headsets<br />
Overview<br />
This chapter provides instructions for using headsets with an <strong>XT</strong>-1 Intercom<br />
<strong>System</strong> after the system has been installed, configured, and powered on.<br />
Component Identification and Description<br />
Volume Down<br />
T2<br />
Indicator LED<br />
Volume up<br />
On/Off<br />
Adjustment<br />
Slide<br />
Battery<br />
Release<br />
Page<br />
T1<br />
• Adjustment Slide: Push or pull to adjust for a comfortable fit.<br />
• Indicator LED: Indicates operating status of the headset.<br />
• Off (no light) indicates power is off. It will turn off<br />
automatically if it fails to register within two minutes or if the<br />
battery dies.<br />
• Momentary amber flash indicates power was just turned on.<br />
• Steadily flashing green indicates it is trying to register with the<br />
base station.<br />
• Momentary red flash indicates it has successfully registered with<br />
a base station (“Lane 1” or “Lane 2” will also be heard in the<br />
earpiece).<br />
• Solid green indicates it is registered and is in standby mode.<br />
• Solid red indicates it is the active order taker and will transmit<br />
any sound it picks up to the order point.<br />
• Steadily flashing red indicates it is the active order taker but the<br />
microphone is muted.<br />
• T1 and T2 (Talk:buttons): Connect you to the order point.<br />
• When there are two order points, T1 connects to order point 1<br />
and T2 connects to order point 2.<br />
• When there is only one order point, T1 and T2 both connect to<br />
the order point.<br />
• If you are in Manual Latching or Hands Free modes, the talk<br />
button establishes you as the order taker; and while you are the<br />
order taker, the talk button is an order point mute button (each<br />
tap turns mute on or off to the order point).<br />
3M <strong>Wireless</strong> <strong>Communication</strong> <strong>System</strong>, <strong>Model</strong> <strong>XT</strong>-1: Operating Instructions<br />
Rev 1.0 © 3M 2007 November<br />
Page 25 of 48
Operation<br />
• On/Off: Turns the headset on and off. Hold for 3 seconds to turn off.<br />
• Volume: The up button increases volume, the down button decreases<br />
volume.<br />
• Page: Allows you to talk to all headsets on the same lane (or both lanes<br />
depending upon the configuration), but never to the order point. If the<br />
order taker taps the page button, he or she is no longer the order taker.<br />
The next person to press a talk button becomes the order taker. There<br />
is an option in Global settings to allow the order taker to hear or not to<br />
hear page messages.<br />
• Battery Release: Slide up to remove the battery.<br />
Fitting the Headset<br />
Make the following adjustments to the headset to make it comfortable, less<br />
likely to fall off, and easy for you to hear and speak clearly:<br />
1. Rotate the ear cup and ear pad so that the indicator on the ear cup is<br />
aligned to the back of your head.<br />
2. Adjust the size of the headband until the ear pad rests against one ear<br />
and the battery side pad rests just above the other ear.<br />
3. Rotate the microphone boom up or down so its tip is in line with the<br />
corner of your mouth. Do not bend the boom.<br />
Replace the Battery<br />
It is important to have fully charged batteries in the headset. When a battery is<br />
low, the system plays a “change battery now” message in the headset every 15<br />
seconds.<br />
Note:<br />
When installing a battery, make sure it is fully charged. It is important to<br />
remember that an unused <strong>XT</strong>-1 battery loses five percent of its charge per<br />
week. If a battery has not been used for several weeks, make sure to charge it<br />
prior to use.<br />
1. Slide and hold the battery release.<br />
2. Remove the discharged battery from the battery housing.<br />
3. Insert a fully charged battery in the housing with the notch facing the<br />
battery release. Make sure the battery is fully inserted (battery release<br />
clicks).<br />
3M <strong>Wireless</strong> <strong>Communication</strong> <strong>System</strong>, <strong>Model</strong> <strong>XT</strong>-1: Operating Instructions<br />
Page 26 of 48<br />
Rev 1.0 © 3M 2007 November
Operation<br />
Out of Range<br />
In addition to “Change Battery Now” you may also hear a message for “Out of<br />
Range.” If you hear this in your headset, you need to move closer to the Base<br />
Station. You will know you are in range when you hear the message “Lane 1”<br />
or “Lane 2.”<br />
Cleaning<br />
For good health and hygiene, you should clean the headsets regularly. Here are<br />
some guidelines:<br />
• Check the headsets every day. If they are dirty, clean them. Even if<br />
they don’t look dirty, every headset should be cleaned on a regular<br />
schedule.<br />
• Before cleaning, remove the soft foam ear pad and microphone<br />
windscreen. If used.<br />
• Use a soft cloth and mild cleaning solution to wipe the surfaces clean.<br />
We recommend using a 3M 504/7065 Cleaning Wipe or a 3M<br />
High Performance Cloth lightly dampened with 3M Food Service<br />
Degreaser, 7L, (70-0708-3996-7).<br />
• Remove stubborn particles from switches and clear plugged speaker<br />
holes with a soft toothbrush.<br />
• Gently clear plugged holes in the microphone tip with a wooden<br />
toothpick.<br />
• Do NOT soak the headset or immerse it in water; you might damage<br />
the electronics.<br />
• Do NOT bend the battery contact or microphone boom.<br />
3M <strong>Wireless</strong> <strong>Communication</strong> <strong>System</strong>, <strong>Model</strong> <strong>XT</strong>-1: Operating Instructions<br />
Rev 1.0 © 3M 2007 November<br />
Page 27 of 48
Operation<br />
Base Station Setup<br />
Most of the base station configuration is performed during installation by the<br />
installer or by a manager. The setup options listed in this section are only those<br />
that can be performed without entering the passcode-protected areas of the base<br />
station.<br />
The following procedures are all performed at the base station using the base<br />
station keypad. The base station must be turned on (plugged in) and in Run<br />
Mode without a security passcode entered.<br />
The following diagram shows how the display on the base station looks in Run<br />
Mode.<br />
13:25 WED,NOV/16/2005 | MODE< ML/PTT ><br />
NOISE REDUCTION [LOW] | LANE 2 <br />
GREETER PLAYING MSG 1 | VOLUME < DAY ><br />
Navigating in the Base Station in Run Mode<br />
To navigate the base station in Run mode you only need to use Enter, Mode, and<br />
the directional arrow buttons: up , down , left , and right . The<br />
remaining buttons function only in manager or installer configuration modes.<br />
Change Order Taking Mode<br />
There are seven order taking modes, which offer different combinations of<br />
speaking, listening, automatic standby, vehicle detector, and order point modes.<br />
Perform the following procedure to switch to a different order taker mode:<br />
1. Press until the Mode selection is highlighted.<br />
2. Press Enter.<br />
3M <strong>Wireless</strong> <strong>Communication</strong> <strong>System</strong>, <strong>Model</strong> <strong>XT</strong>-1: Operating Instructions<br />
Page 28 of 48<br />
Rev 1.0 © 3M 2007 November
Operation<br />
3. Press , , , or to select a new order taker mode. Your choices<br />
are ML/PTT, ML/MLT, AL/PTT, AL/MLT, Hands Free, Outside, and<br />
Always On. See “Explanation of Order Taking Modes,” and “Which<br />
Order Taking Mode to Select” below.<br />
Note:<br />
Your system may be configured with fewer order taking mode options than<br />
the number described in this section. You must enter User configuration<br />
(passcode required) to enable or disable individual order taking modes.<br />
Explanation of Order Taking Modes<br />
The following table shows how each order taking mode affects components and<br />
settings in the system. The paragraphs that follow the table explain the meaning<br />
of information in the table.<br />
Order<br />
Taking<br />
Mode<br />
Listen Talk Vehicle<br />
Detector<br />
Automatic<br />
Standby<br />
Order<br />
Point<br />
ML/PTT Manual Push to Talk Presence On Used<br />
ML/MLT Manual Manual<br />
Latching<br />
Presence On Used<br />
AL/PTT Automatic Push to Talk Presence On Used<br />
AL/MLT Automatic Manual<br />
Latching<br />
Presence On Used<br />
Hands Free Automatic Automatic Presence On Used<br />
Outside Manual Manual<br />
Latching<br />
Always On Always on Manual<br />
Latching<br />
Ignored Off Not<br />
Used<br />
Ignored Off Used<br />
Listen: Auto, Manual, and Always On<br />
In Manual Listen (ML), the operator must press the talk lane button to turn on<br />
the order point microphone (to hear the customer order). The order point<br />
microphone will remain on until the vehicle leaves.<br />
In Automatic Listen (AL), the order point microphone turns on and stays on<br />
whenever a vehicle is detected. The order point microphone will remain on until<br />
the vehicle leaves.<br />
In Always On, the order point speaker is always on so the customer can always<br />
be heard regardless of whether a vehicle is detected at the order point. Always<br />
On is a special failure mode that is useful if the vehicle detector cannot be used.<br />
Talk: Manual Latching, Push to Talk, Automatic<br />
In Manual Latching Talk (MLT), the operator must press and release the talk<br />
lane button to “latch” or lock the headset microphone in the on position. The<br />
operator can continue to speak hands free until the talk button is pressed and<br />
released again. When Automatic Standby is on (see below), the microphone will<br />
also be turned off when the vehicle is no longer detected.<br />
In Push to Talk (PTT), the operator must press and hold the talk button while<br />
speaking into the headset microphone. Releasing the button turns off the<br />
microphone.<br />
3M <strong>Wireless</strong> <strong>Communication</strong> <strong>System</strong>, <strong>Model</strong> <strong>XT</strong>-1: Operating Instructions<br />
Rev 1.0 © 3M 2007 November<br />
Page 29 of 48
Operation<br />
In Hands Free, the headset microphone is on whenever the order point vehicle<br />
detector detects a vehicle. Because Automatic Standby (see below) is also on<br />
when Hands Free is On, the microphone is turned off when the vehicle is no<br />
longer detected.<br />
Automatic Standby: On and Off<br />
When Automatic Standby is on, the order taker’s microphone and the order<br />
point microphone turn off when the vehicle is no longer detected.<br />
Vehicle Detector: Presence or Ignored<br />
When the vehicle detector is on (in presence mode), a car entering the order<br />
point is sensed and the ordering system reacts according to the order taking<br />
mode. When the vehicle detector is off (ignored), Automatic Listen, Automatic<br />
Talk, and Automatic Standby are unavailable. Only Outside or Always On order<br />
taking modes are recommended when the vehicle detector cannot be used.<br />
Order Point: Used or Not Used<br />
When the order point is used, customers can order using any of the typical order<br />
taking modes, with the exception of the Outside mode (see below for<br />
explanation).<br />
Which Order Taking Mode to Select<br />
Each order taking mode is designed for a specific purpose so you do not need to<br />
manually select the modes for the individual components and potentially end up<br />
with a non-working configuration.<br />
ML/PTT, ML/MLT, AL/PTT, AL/MLT, and Hands free should be selected for<br />
typical ordering configurations where all of the drive thru employees are inside<br />
of the building and all of the equipment is working properly. The choices<br />
between them tend to vary according to the number of people available, how<br />
many duties they must perform simultaneously, and possibly employee<br />
preferences.<br />
If you plan to have the order taker standing outside with a headset, Outside<br />
mode is the best choice. The order point speaker, microphone, and vehicle<br />
detector are disabled. This allows hands free communication to staff inside the<br />
store for order entry and/or special requests.<br />
If the vehicle detector is not functioning properly, Always On mode is the best<br />
choice. The microphone at the order point is on continuously, regardless of the<br />
status of the vehicle detector. Typically, when a vehicle detector fails, it reports<br />
the presence of a vehicle continuously, which functions as (bookmark).<br />
Change Lane Mode<br />
Perform the following procedure to select the lane mode that is appropriate for<br />
your current situation. Descriptions for the two modes follow the procedure.<br />
4. Press until the Lane X selection is highlighted (where X is the lane<br />
number, 1 or 2).<br />
5. Press Enter.<br />
6. Press or to select between the two possible lane modes: CROSS<br />
and SPLIT.<br />
7. Press Enter to implement the change or press Mode to abandon the<br />
change and leave the previous lane mode in effect.<br />
3M <strong>Wireless</strong> <strong>Communication</strong> <strong>System</strong>, <strong>Model</strong> <strong>XT</strong>-1: Operating Instructions<br />
Page 30 of 48<br />
Rev 1.0 © 3M 2007 November
Operation<br />
Split Lane<br />
Split Lane mode is the preferred mode for heavy volume because it essentially<br />
separates the communications between the two base stations.<br />
• Operators will only hear a signal from the order point last used: single<br />
repeating beep from order point 1 or a double repeating beep from<br />
order point 2.<br />
• The headset buttons T1 and T2 communicate only with order point 1<br />
and order point 2, respectively.<br />
• For paging, pressing the page button on a lane 1 headset is only heard<br />
by other lane 1 headsets. Likewise pressing the page button on a lane 2<br />
headset is only heard by other lane 2 headset.<br />
Notes:<br />
A headset becomes a “lane 1” or “lane 2” headset by momentarily pressing<br />
and releasing the T1 or T2 button.<br />
You can configure the base stations to permit paging to be heard by both<br />
lanes. Refer to configuration section of the manager’s guide.<br />
Cross Lane<br />
Cross Lane mode is the preferred mode for lighter volume or whenever one<br />
order taker needs to answer both order points: essentially, the two order points<br />
cross over.<br />
• Operators will hear signals from both order points: single repeating<br />
beep from order point 1 or a double repeating beep beep from order<br />
point 2.<br />
• The headset buttons T1 and T2 communicate only with order point 1<br />
and order point 2, respectively.<br />
• For paging, pressing the page button is heard by all headsets.<br />
Change Volume Mode<br />
If you have night volume reduction in use on your system, the volume change<br />
happens automatically at the set “Day” and “Night” times. However, you can<br />
change the volume mode manually without changing the day or night time<br />
setting.<br />
Perform the following procedure to change between night and day or day and<br />
night volume:<br />
1. Press until the Volume selection is highlighted.<br />
2. Press Enter.<br />
3. Use the arrows to select between DAY and NIGHT.<br />
4. Press Enter to implement the change or press Mode to abandon the<br />
change and leave the previous setting in effect.<br />
3M <strong>Wireless</strong> <strong>Communication</strong> <strong>System</strong>, <strong>Model</strong> <strong>XT</strong>-1: Operating Instructions<br />
Rev 1.0 © 3M 2007 November<br />
Page 31 of 48
Operation<br />
3M <strong>Wireless</strong> <strong>Communication</strong> <strong>System</strong>, <strong>Model</strong> <strong>XT</strong>-1: Operating Instructions<br />
Page 32 of 48<br />
Rev 1.0 © 3M 2007 November
Maintenance<br />
Maintenance<br />
Headset<br />
Replacing the Ear and Headband Pads<br />
To replace the ear pad, remove the worn/damaged ear pad from the ear cup and<br />
replace it with a new pad.<br />
Headband Pad<br />
Ear Pad<br />
Battery Charger<br />
To replace the headband pad, remove the worn/damaged pad by peeling it from<br />
the back of the battery housing. Remove protective backing from new pad and<br />
press it into place on the back of the battery housing.<br />
Location<br />
The battery charger should be placed on a flat surface such as a desktop or table<br />
in a clean, dry environment.<br />
Cleaning the Contacts<br />
If the indicators fail to light during charger operation, clean the contacts using a<br />
water–moistened cotton swab.<br />
3M <strong>Wireless</strong> <strong>Communication</strong> <strong>System</strong>, <strong>Model</strong> <strong>XT</strong>-1: Operating Instructions<br />
Rev 1.0 © 3M 2007 November<br />
Page 33 of 48
Maintenance<br />
Batteries<br />
Care, Handling and Storage<br />
• Avoid dropping batteries.<br />
• Do not carry batteries in your pockets or leave them in hot, damp or<br />
dirty places.<br />
• Clean the battery contacts periodically using a water–moistened swab.<br />
• Be careful not to short the battery contacts together.<br />
• Do not set the batteries contact–side down on a bare metal countertop.<br />
Low Battery Message<br />
When the battery voltage is too low, the headset sounds a “change battery now”<br />
message at fifteen-second intervals to alert the operator to install a fully charged<br />
battery. The “change battery now” message continues for two minutes after<br />
which the headset turns off automatically to prevent damage to the batteries.<br />
Charging Batteries<br />
To charge a battery, insert the battery in one of the charging slots.<br />
• The indicator lights RED to indicate the battery is charging.<br />
• The indicator lights GREEN to indicate the battery is charged.<br />
Note:<br />
Discharged batteries require 3 ½ hours to charge.<br />
Note:<br />
When the GREEN indicator lights, the battery is approximately 80%<br />
charged. An additional 1/2 hour of charging is required to achieve maximum<br />
charge.<br />
Charging<br />
Status<br />
Indicator<br />
Disposing of Batteries<br />
To help protect the environment and conform to regulations, <strong>XT</strong>-1 rechargeable<br />
batteries must be returned to 3M at the end of their useful life. Contact your 3M<br />
representative for additional instructions.<br />
3M <strong>Wireless</strong> <strong>Communication</strong> <strong>System</strong>, <strong>Model</strong> <strong>XT</strong>-1: Operating Instructions<br />
Page 34 of 48<br />
Rev 1.0 © 3M 2007 November
Maintenance<br />
Making Sure Batteries are Ready for Use<br />
Follow these tips to make sure batteries are always ready for use:<br />
• Have an extra battery for each headset. This helps ensure that a fully<br />
charged battery is always available.<br />
• Recharge a low battery as soon as it is removed from the headset.<br />
When a battery is low, repeat messages are heard in the headset for 2<br />
minutes, and then the headset shuts off.<br />
• Keep the battery and charger contacts clean. Use a cotton swab and<br />
approved cleaner in accordance with manufacturer’s instructions to<br />
clean the contact surfaces.<br />
• Remember that a battery recharge takes approximately 3 ½ hours.<br />
• Avoid removing and reinserting batteries while they are charging<br />
(charging status indicator is RED).<br />
• Remember that batteries discharge fastest during Talk and Page<br />
operation. Avoid unnecessary communications.<br />
• Always use the On/Off switch to power off the headset before<br />
removing the battery.<br />
Important Information about <strong>XT</strong>-1 Rechargeable Batteries<br />
Keep the following information in mind as you operate the system and as you<br />
establish operating procedures:<br />
• Each <strong>XT</strong>-1 battery contains an internal protective device to prevent<br />
unsafe discharge rates. But, as with any battery, avoid shorting across<br />
the battery contacts with metal items. Never carry a battery in a pocket<br />
or place it in a drawer where it can accidentally be shorted by keys,<br />
coins etc.<br />
• Have adequate charging capacity for the number of headsets in your<br />
system. One 3-slot battery charger will handle up to three headsets.<br />
Use of more than three headsets requires a 6-slot battery charger.<br />
• Batteries perform best at moderate temperatures. Extremes of heat and<br />
cold reduce their performance.<br />
• An unused <strong>XT</strong>-1 battery loses five percent of its charge per week.<br />
Batteries that have not been used for several weeks should be recharged<br />
before use.<br />
The four-character date code stamped on each 3M battery (wwyy) refers to the<br />
week and the year the battery was manufactured. Batteries are generally usable<br />
for two years beyond that date. Batteries used more often will need replacement<br />
sooner.<br />
WARNING<br />
Do not open, crush, expose to heat above 200 °F or incinerate the battery.<br />
3M <strong>Wireless</strong> <strong>Communication</strong> <strong>System</strong>, <strong>Model</strong> <strong>XT</strong>-1: Operating Instructions<br />
Rev 1.0 © 3M 2007 November<br />
Page 35 of 48
Maintenance<br />
3M <strong>Wireless</strong> <strong>Communication</strong> <strong>System</strong>, <strong>Model</strong> <strong>XT</strong>-1: Operating Instructions<br />
Page 36 of 48<br />
Rev 1.0 © 3M 2007 November
Troubleshooting<br />
General Troubleshooting<br />
Troubleshooting<br />
Problem Possible Cause Solution<br />
No communications. All headsets have<br />
green LED is flashing.<br />
The base station has no power.<br />
Headsets are not registered to Base<br />
Station.<br />
Make sure the power transformer is<br />
plugged into the wall outlet and into the<br />
base station power receptacle. If the LCD<br />
display does not come on, check for power<br />
at the wall outlet.<br />
Register headsets<br />
A single headset has green LED flashing<br />
No vehicle alert tone in all headsets.<br />
All headsets will not go into Standby<br />
(silence) when the vehicle leaves the menu<br />
sign.<br />
The Base Station is defective.<br />
Headset is not registered to base station.<br />
Defective headset.<br />
No power to the external vehicle detector.<br />
Vehicle detector is “locked up.”<br />
The base station alert tone volume is set<br />
too low.<br />
<strong>System</strong> is in Always On order taking mode.<br />
This is normal when a pulse (air switch)<br />
type of vehicle detector is used.<br />
There is a large metal object near the loop<br />
in the driveway (if a loop is used).<br />
The Loop detector is “locked up.”<br />
Defective vehicle detector.<br />
<strong>System</strong> is in Always On order taking mode.<br />
Call for authorized service.<br />
Register the headset.<br />
If the other headsets register OK, the single<br />
headset needs repair.<br />
Plug the vehicle detector into power outlet<br />
or replace the detector fuse.<br />
Remove power to vehicle detector for a few<br />
seconds to reset the detector.<br />
Adjust alert tone volume.<br />
Change the talking mode.<br />
Press the Page switch to silence the menu<br />
microphone.<br />
Remove the object.<br />
Unplug the loop detector from the AC outlet<br />
and plug it back in to reset the detector.<br />
Call for authorized service.<br />
Change the talking mode.<br />
Audio on all headsets cuts out or is<br />
interrupted.<br />
Inbound audio cuts out (but outbound audio<br />
is okay)<br />
No Talk or listen from the menu sign when<br />
using the backup wired intercom. The <strong>XT</strong>-1<br />
system works OK.<br />
The Backup Intercom is on (the switch is<br />
engaged).<br />
Loose or frayed wiring.<br />
Poor location of Base Station antennae<br />
(behind large metal objects, too far from<br />
work area, etc.).<br />
The AEC level is too high.<br />
The headset is too close to loud ambient<br />
noise.<br />
The backup switch on the base station is<br />
not in the correct position.<br />
No power to the backup intercom.<br />
The volume controls are set too low on the<br />
backup intercom.<br />
Disengage the Backup Intercom switch on<br />
the base station.<br />
Call for authorized service.<br />
Relocate the Base Station, or antennae.<br />
Reduce the AEC level.<br />
Move the headset away from sources of<br />
loud ambient noise.<br />
Turn the backup switch ON.<br />
Turn the backup intercom on or plug in its<br />
power transformer.<br />
Turn the volume controls up.<br />
3M <strong>Wireless</strong> <strong>Communication</strong> <strong>System</strong>, <strong>Model</strong> <strong>XT</strong>-1: Operating Instructions<br />
Rev 1.0 © 3M 2007 November<br />
Page 37 of 48
Troubleshooting<br />
Problem Possible Cause Solution<br />
No Talk or Page to other headsets from a<br />
single headset, or Talk or Page buttons<br />
require excessive pressure to operate.<br />
Low Talk volume on a single headset.<br />
Louder Talk volume or feedback from a<br />
single headset.<br />
The “hands free” function does not work.<br />
No vehicle alert tone in headset.<br />
Defective backup intercom or wiring.<br />
Worn or defective Talk or Page switch.<br />
Defective headset.<br />
The holes in front of the microphone are<br />
plugged with dirt or grease.<br />
Operator is not positioning the microphone<br />
correctly.<br />
Defective headset.<br />
Volume setting on headset is too low.<br />
Volume setting on headset is too high.<br />
The holes in back of the microphone are<br />
plugged with dirt or grease.<br />
The system is operating in half duplex<br />
mode.<br />
Hands free order taking mode not selected.<br />
Backup switch not completely pressed (i.e.,<br />
one of the other two buttons is pressed).<br />
Call for authorized service.<br />
Call for authorized service.<br />
Call for authorized service.<br />
Adjust/reposition the headset<br />
microphone(s).<br />
Call for authorized service.<br />
Power off and power on headset to reset<br />
volume level.<br />
Power off and power on headset to reset<br />
volume level.<br />
Call for authorized service.<br />
Hands Free is disabled in half duplex mode.<br />
Select hands free order taking mode in the<br />
base station.<br />
Press the other button into the correct<br />
location.<br />
Battery and Battery Charger Troubleshooting<br />
Problem Possible Cause Solution<br />
No lights come on when a battery is<br />
inserted into charger.<br />
Short battery life.<br />
The green light on the charger never comes<br />
on.<br />
Dirty contacts on battery or charger.<br />
No power to charger.<br />
Defective battery.<br />
Defective charger.<br />
Worn out batteries.<br />
Wrong type of power transformer used for<br />
charger.<br />
Defective battery.<br />
Clean contacts on battery and charger.<br />
Make sure power transformer is plugged<br />
into charger and a “live” outlet.<br />
Try a known good battery.<br />
Call for authorized service.<br />
Replace battery.<br />
Make sure power transformer is marked<br />
“Secondary Voltage 14 VAC.”<br />
Replace the battery.<br />
3M <strong>Wireless</strong> <strong>Communication</strong> <strong>System</strong>, <strong>Model</strong> <strong>XT</strong>-1: Operating Instructions<br />
Page 38 of 48<br />
Rev 1.0 © 3M 2007 November
Appendix: Base Station Specifications<br />
Appendix: Base Station Specifications<br />
Physical<br />
Parameter<br />
Dimensions (l x w x d)<br />
Specification or Requirement<br />
20 in. x 11½ in. x 2 in.<br />
(51 cm x 29 cm x 5 cm)<br />
Electrical<br />
Parameter<br />
Input Power<br />
Radio Frequency<br />
Speaker outputs<br />
Specification or Requirement<br />
120 VAC, 50/60 Hz, 15A<br />
Standard 3-prong outlet required<br />
(station includes AC adapter)<br />
2.4 GHz ISM<br />
5W<br />
Functional<br />
Parameter<br />
Maximum number of order points<br />
per base station<br />
Maximum number of headsets<br />
per base station<br />
Maximum number of vehicle<br />
detectors per base station<br />
Maximum number of greeter<br />
modules per base station<br />
Maximum number of timer vehicle<br />
detector modules per base station<br />
Specification or Requirement<br />
1<br />
more than 15<br />
3<br />
1<br />
3<br />
3M <strong>Wireless</strong> <strong>Communication</strong> <strong>System</strong>, <strong>Model</strong> <strong>XT</strong>-1: Operating Instructions<br />
Rev 1.0 © 3M 2007 November<br />
Page 39 of 48
Appendix: Base Station Specifications<br />
3M <strong>Wireless</strong> <strong>Communication</strong> <strong>System</strong>, <strong>Model</strong> <strong>XT</strong>-1: Operating Instructions<br />
Page 40 of 48<br />
Rev 1.0 © 3M 2007 November
Appendix: Greeter Module<br />
Appendix: Greeter Module<br />
Greeter Setup<br />
The greeter module is an accessory that stores prerecorded messages and plays<br />
them back when vehicles arrive.<br />
You can record a series of messages then select or combine them to convey<br />
standard messages and reduce time and errors.<br />
Enter the Greeter Configuration Menu<br />
All of the greeter settings are located in a top-level “Greeter Setup”<br />
configuration menu.<br />
Perform the following procedure to enter the greeter configuration menu:<br />
1. Enter the base station configuration mode, see page 9.<br />
2. Press and release Mode until the Greeter Setup menu appears.<br />
Play Greeter Message<br />
Perform the following procedure to listen to the current greeter messages:<br />
1. Enter the greeter configuration menu, see above.<br />
2. Select 1 Play Greeter Messages. The currently-selected message<br />
plays on the headsets.<br />
3. Press Service to stop playing when finished.<br />
Select Specific Greeter Messages<br />
You can store up to four different greeter messages, then select one or more of<br />
them to be played at any given time. Perform the following procedure to enable<br />
specific greeter messages:<br />
1. Enter the greeter configuration menu, see above.<br />
2. Select 1 Play Greeter Messages.<br />
3. Change the value of the desired message (1-4) to ON or OFF.<br />
4. Return to step 3 if you want to change additional messages.<br />
Change Playback Mode<br />
Perform the following procedure to change the greeter playback mode.<br />
1. Enter the greeter configuration menu, see above.<br />
2. Select 1 Play Greeter Messages > Playback.<br />
3. Change the value of the playback setting. Your choices are:<br />
• ALTERNATING—A different message plays for each vehicle that<br />
pulls up to the customer order point. Multiple messages must be<br />
selected.<br />
• PLAY ONCE—All messages selected play once for every vehicle<br />
that pulls up to the customer order point.<br />
• REPEATEDLY—All messages selected play continuously until<br />
the order taker starts to speak.<br />
3M <strong>Wireless</strong> <strong>Communication</strong> <strong>System</strong>, <strong>Model</strong> <strong>XT</strong>-1: Operating Instructions<br />
Rev 1.0 © 3M 2007 November<br />
Page 41 of 48
Appendix: Greeter Module<br />
Perform the following procedure to record (store) a new greeter message:<br />
Notes:<br />
If you store a new greeter message in an occupied slot, the old greeter<br />
message will be permanently erased.<br />
Each recorded message can be no more than 15 seconds long.<br />
1. Put on a working headset with the power on.<br />
2. At the base station, enter the greeter configuration menu, see page 41.<br />
3. Select 2 Record Greeter Messages > Record Message >X<<br />
where “x” represents the greeting number you want to record.<br />
4. Scroll to Record.<br />
5. Press and hold the Page button on the headset.<br />
6. Press and hold Service on the base station and speak the message you<br />
want to record.<br />
7. When finished, release Service, then release the page button.<br />
8. To hear the new greeting played back, scroll to Playback and press<br />
Service.<br />
Note:<br />
Instead of recording a live greeting from a headset, you can use a message that<br />
was prerecorded and saved on a media recording/playback device, such as a<br />
CD or MP3 player or on the hard drive on a computer. Connect the device to<br />
the AUX AUDIO IN jack on the bottom of the base station, and use the<br />
device’s controls to start and stop the playback by using the base station’s<br />
Service button.<br />
Change Playback Delay Time<br />
Playback delay time is the number of seconds between when the vehicle detector<br />
detects a vehicle and when the greeter begins to playback the message.<br />
Perform the following procedure to change the playback delay time:<br />
1. Enter the greeter configuration menu, see page 41.<br />
2. Navigate to 3 Greeter Setup >Playback After Delay Of<br />
>XX< Seconds where “xx” represents the current number of seconds.<br />
3. Change the number of seconds to a new value. The range is 0 to 15<br />
seconds.<br />
Set Greeter Playback through Headsets<br />
You have the choice of allowing the greeting to be played through the headset in<br />
addition to being played to the customer at the order point.<br />
Perform the following procedure to enable or disable playback through headsets:<br />
1. Enter the greeter configuration menu, see page 41.<br />
2. Change the value for 3 Greeter Setup > Playback To The<br />
Headsets? to YES or NO. Selecting YES means the greeting will play<br />
on the headsets as well as the order point. Selecting NO means it will<br />
only be heard at the order point (and the monitor if selected below).<br />
Set Playback through Monitor<br />
You have the choice of allowing the greeting to be played through the<br />
monitoring speaker in addition to being played to the customer at the ordering<br />
point.<br />
3M <strong>Wireless</strong> <strong>Communication</strong> <strong>System</strong>, <strong>Model</strong> <strong>XT</strong>-1: Operating Instructions<br />
Page 42 of 48<br />
Rev 1.0 © 3M 2007 November
Appendix: Greeter Module<br />
Perform the following procedure to enable or disable playback through the<br />
monitor:<br />
1. Enter the greeter configuration menu, see page 41.<br />
2. Change the value for 3 Greeter Setup > Playback To The<br />
Monitor? to YES or NO. Selecting YES means the greeting will play<br />
on the monitor as well as the order point. Selecting NO means it will<br />
only be heard at the order point (and the headsets if selected above).<br />
Turn on Tone to Headsets During Greeter Playback<br />
If the greeting is not playing over the headsets, a continuous tone can be played<br />
while the customer is hearing the greeting. This permits the order taker to know<br />
when the greeting is playing and when it has stopped.<br />
To enable or disable the tone during greeter playback:<br />
1. Enter the greeter configuration menu, see page 41.<br />
2. Change the value for3 Greeter Setup > Tone To Headsets<br />
During Playback? to YES or NO. Selecting YES means the tone will<br />
play on the headsets. Selecting NO means it will not play on the<br />
headsets.<br />
Turn on Restaurant Closed Playback Message<br />
You can assign a standard message to be played to customers during hours when<br />
the restaurant is closed. The clock and store hours must be set correctly, and the<br />
actual message must be recorded, then it can be set to activate automatically<br />
whenever the restaurant is closed.<br />
To turn on the restaurant closed playback message:<br />
Notes:<br />
Make sure that the clock setting and store hours are correct before enabling<br />
the restaurant closed message playback.<br />
1. Enter the greeter configuration menu, see page 41.<br />
2. Change the value for 3 Greeter Setup > Restaurant Closed<br />
Playback Message to 1, 2, 3, 4, or OFF. Selecting 1, 2, 3, or 4<br />
means the corresponding message will play when the store is closed.<br />
Selecting OFF means a message will never be played.<br />
Note:<br />
When you have a restaurant closed playback message, “CLS” will appear in<br />
the numbered slot (1, 2, 3, or 4) for the number you select.<br />
Turn on External Detector Playback Message<br />
If an external detector is used and connected to the E<strong>XT</strong>_MSG trigger pin on the<br />
base station circuit board, you can assign a message to be played back whenever<br />
the external detector is activated.<br />
To turn on the external detector playback message:<br />
1. Enter the greeter configuration menu, see page 41.<br />
2. Change the value for 3 Greeter Setup > External Playback<br />
Message to 1, 2, 3, 4, or OFF. Selecting 1, 2, 3, or 4 means the<br />
corresponding message will play when the external detector is<br />
activated. Selecting OFF means a message will never be played.<br />
3M <strong>Wireless</strong> <strong>Communication</strong> <strong>System</strong>, <strong>Model</strong> <strong>XT</strong>-1: Operating Instructions<br />
Rev 1.0 © 3M 2007 November<br />
Page 43 of 48
Appendix: Greeter Module<br />
3M <strong>Wireless</strong> <strong>Communication</strong> <strong>System</strong>, <strong>Model</strong> <strong>XT</strong>-1: Operating Instructions<br />
Page 44 of 48<br />
Rev 1.0 © 3M 2007 November
Index<br />
Index<br />
Acoustic echo .................................................. 17<br />
Acoustic echo cancelling................................. 17<br />
Adding headsets .............................................. 15<br />
Adjustment Slide ............................................. 25<br />
AL (automatic latching) .................................. 29<br />
Alert tone, none ............................................... 37<br />
Alternating, greeter.......................................... 41<br />
Always On (mode) .......................................... 29<br />
Audio mode ..................................................... 18<br />
Automatic standby modes ............................... 29<br />
backup intercom .............................................. 24<br />
Base station setup ............................................ 28<br />
Battery ............................................................. 26<br />
general information ..................................... 35<br />
low............................................................... 34<br />
short life....................................................... 38<br />
Battery Release................................................ 26<br />
Boot ................................................................. 23<br />
Caution definition.............................................. 7<br />
Change Battery Now<br />
Heard on headset ......................................... 27<br />
Charge battery ................................................. 34<br />
Charger<br />
no lights or not working .............................. 38<br />
Charger, battery ............................................... 33<br />
CLS.................................................................. 43<br />
Configuration................................................... 11<br />
Contacts, battery.............................................. 33<br />
Create templates .............................................. 23<br />
Cross lane mode .............................................. 31<br />
Crossing, lane .................................................. 19<br />
cut out (headset) .............................................. 37<br />
Date ................................................................. 17<br />
Dead battery .................................................... 38<br />
Delay time, greeting ........................................ 42<br />
Dimensions...................................................... 39<br />
Display<br />
buttons ......................................................... 10<br />
navigating ...................................................... 9<br />
Disposal, battery...............................................34<br />
Ear cup .............................................................26<br />
Ear pad .............................................................33<br />
Echo .................................................................17<br />
Enter (Select) button ........................................10<br />
Ethernet port.....................................................11<br />
Factory settings ................................................23<br />
FCC information ................................................8<br />
Feedback ..........................................................38<br />
Fitting (headset) ...............................................26<br />
Full duplex<br />
definition ......................................................18<br />
Global settings..................................................17<br />
Green light, charger....................................34, 38<br />
Greeter<br />
setup .............................................................41<br />
tone...............................................................43<br />
Greeter messages..............................................14<br />
Half duplex<br />
definition ......................................................18<br />
Hands free<br />
not working ..................................................38<br />
Headband pad...................................................33<br />
Headset<br />
auditory messages ........................................27<br />
cleaning ........................................................27<br />
cuts out .........................................................37<br />
goes into standby..........................................37<br />
registering.....................................................15<br />
Headsets ...........................................................25<br />
Holiday scheduling ..........................................21<br />
Inbound listen...................................................13<br />
Inbound microphone<br />
noise reduction level ....................................16<br />
volume..........................................................12<br />
Indicator LED ..................................................25<br />
Input Power......................................................39<br />
Installation settings.....................................22, 23<br />
Intended use .......................................................7<br />
Lane 1 or Lane 2<br />
heard on headset...........................................27<br />
Lane crossing ...................................................19<br />
Lane mode........................................................30<br />
Language<br />
prompts.........................................................17<br />
3M <strong>Wireless</strong> <strong>Communication</strong> <strong>System</strong>, <strong>Model</strong> <strong>XT</strong>-1: Operating Instructions<br />
Rev 1.0 © 3M 2007 November<br />
Page 45 of 48
Listen modes.................................................... 29<br />
Listing headsets ............................................... 16<br />
Load templates ................................................ 23<br />
Low battery...................................................... 34<br />
Maintenance .................................................... 33<br />
ML (manual latching)...................................... 29<br />
Mode<br />
audio ............................................................ 18<br />
cross lane ..................................................... 31<br />
lane .............................................................. 30<br />
order taking............................................ 20, 28<br />
run................................................................ 28<br />
service............................................................ 9<br />
split lane ...................................................... 31<br />
talking.......................................................... 29<br />
volume ......................................................... 31<br />
Mode (Exit) button .......................................... 10<br />
Monitor volume............................................... 13<br />
Night volume................................................... 15<br />
No alert tone .................................................... 37<br />
No communication .......................................... 37<br />
Noise reduction................................................ 16<br />
Noise reduction level....................................... 16<br />
On/Off (headsets) ............................................ 26<br />
Once each, greeter ........................................... 41<br />
Operation ......................................................... 25<br />
Order point modes ........................................... 29<br />
Order taking mode..................................... 20, 28<br />
Out of Range ................................................... 27<br />
Outbound greeter message volume.................. 13<br />
Outbound talk .................................................. 13<br />
volume ......................................................... 12<br />
Outside (mode) ................................................ 29<br />
Page (headset).................................................. 26<br />
Page channel.................................................... 18<br />
Page messages ................................................. 14<br />
Paging<br />
definition ..................................................... 14<br />
Paging problem................................................ 38<br />
Passcodes......................................................... 22<br />
Play greeter message ....................................... 41<br />
Playback mode, changing................................ 41<br />
Product Overview.............................................. 7<br />
Prompt<br />
language....................................................... 19<br />
pull ahead .................................................... 19<br />
store closed .................................................. 19<br />
PTT (Push to talk) ................. See Talking modes<br />
Pull ahead prompt ........................................... 19<br />
Reboot ............................................................. 23<br />
Registering headsets........................................ 15<br />
Regular site schedule....................................... 21<br />
Removing headsets.......................................... 16<br />
Repeatedly, greeter.......................................... 41<br />
Restaurant closed message.............................. 43<br />
Revision levels ................................................ 23<br />
Rotate ear cup.................................................. 26<br />
Run mode ........................................................ 28<br />
Safety rules........................................................ 7<br />
Schedule .......................................................... 21<br />
Select greeter messsage................................... 41<br />
Self monitoring.......................................... 16, 21<br />
Service (Shift) button ...................................... 11<br />
Site information............................................... 21<br />
Site scheduling ................................................ 20<br />
Specifications .................................................. 39<br />
Split lane mode................................................ 31<br />
Storage, battery ............................................... 34<br />
Store closed prompt......................................... 19<br />
<strong>System</strong> date and time ...................................... 17<br />
T1 and T2 ........................................................ 25<br />
Talk<br />
modes .......................................................... 29<br />
Talk Buttons.................................................... 25<br />
Talking modes................................................. 29<br />
Templates ........................................................ 23<br />
Time ................................................................ 17<br />
Transducer Mode ............................................ 20<br />
Troubleshooting .............................................. 37<br />
Two base systems............................................ 18<br />
User passcode.................................................. 22<br />
Vehicle<br />
alert volume................................................. 12<br />
approach ...................................................... 14<br />
detector modes ............................................ 29<br />
present ......................................................... 14<br />
Volume............................................................ 12<br />
headset......................................................... 26<br />
inbound microphone.................................... 12<br />
mode............................................................ 31<br />
monitor ........................................................ 13<br />
night ............................................................ 15<br />
outbound greeter message ........................... 13<br />
outbound talk............................................... 12<br />
vehicle alert ................................................. 12<br />
Warning definition ............................................ 7<br />
3M <strong>Wireless</strong> <strong>Communication</strong> <strong>System</strong>, <strong>Model</strong> <strong>XT</strong>-1: Operating Instructions<br />
Page 46 of 48<br />
Rev 1.0 © 3M 2007 November
Index<br />
3M <strong>Wireless</strong> <strong>Communication</strong> <strong>System</strong>, <strong>Model</strong> <strong>XT</strong>-1: Operating Instructions<br />
Rev 1.0 © 3M 2007 November<br />
Page 47 of 48
Building and Commercial Services Division<br />
Food Services Business<br />
3M Center<br />
St. Paul, MN 55144-1000<br />
Printed in U.S.A.<br />
© 3M 2007 November<br />
78-6911-4939-3 Rev 1.0