HME system 20 drive-thru timer system operations manual.pdf
HME system 20 drive-thru timer system operations manual.pdf
HME system 20 drive-thru timer system operations manual.pdf

You also want an ePaper? Increase the reach of your titles
YUMPU automatically turns print PDFs into web optimized ePapers that Google loves.
II. ACCESSING THE SYSTEM <strong>20</strong>A<br />
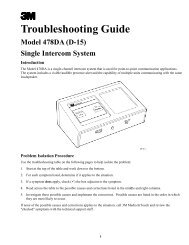
After a <strong>system</strong> has been installed and the power supply has been plugged in, the<br />
<strong>system</strong> will be in operation. There is no ON/OFF switch on the control unit.<br />
To control access to various functions, the System <strong>20</strong>A provides different levels of<br />
security, using codes which must be entered through the keypad. The lowest level<br />
of access is available when the user passcode is entered. The user passcode level<br />
allows reports to be generated, but does not allow <strong>system</strong> settings to be changed.<br />
The next level of access is available when the lockout code is entered. The lockout<br />
code level allows <strong>system</strong> settings to be changed, and reports to be generated. If<br />
the <strong>system</strong> is set up with a lockout code and a blank user passcode, anyone can<br />
generate reports but only a person who knows the lockout code can change the<br />
<strong>system</strong> settings. A new <strong>system</strong> does not have a lockout code or user pass code.<br />
Refer to page 13 for instructions on setting or changing either or both of these<br />
codes. Each code can have up to seven digits.<br />
When the System <strong>20</strong>A is first installed and plugged in, or when it has been reset by<br />
removal of the battery, the first two messages shown on page 11 will appear on the<br />
data display. When the first message appears, enter a date (mm/dd/yy) at least one<br />
month prior to the current date, and press the ENTER key. Using this earlier date is<br />
necessary for the <strong>system</strong> to correctly set up the data base to properly handle any<br />
report request. The correct current date should be entered later using the <strong>system</strong><br />
setup function shown on page 14. Some companies insist that all their stores use<br />
the same date for this entry, so be certain of such customer requirements before<br />
entering a date.<br />
If requested, enter the current time and press the ENTER key. If the date and time<br />
information was entered by the <strong>system</strong> installer, the two displays requesting it will not<br />
appear. Instead, the date and time will appear on the display as shown in the third<br />
message on page 11. If this is the case, proceed with Step 1.<br />
10