Mastering Your Embroidery Module/Machine BERNINA®
Mastering Your Embroidery Module/Machine BERNINA®
Mastering Your Embroidery Module/Machine BERNINA®

Create successful ePaper yourself
Turn your PDF publications into a flip-book with our unique Google optimized e-Paper software.
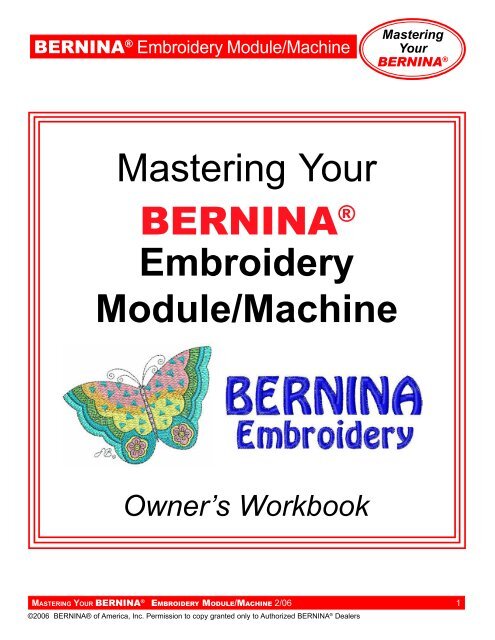
BERNINA ® <strong>Embroidery</strong> <strong>Module</strong>/<strong>Machine</strong><br />
<strong>Mastering</strong><br />
<strong>Your</strong><br />
BERNINA ®<br />
<strong>Mastering</strong> <strong>Your</strong><br />
BERNINA ®<br />
<strong>Embroidery</strong><br />
<strong>Module</strong>/<strong>Machine</strong><br />
Owner’s Workbook<br />
MASTERING YOUR BERNINA ® EMBROIDERY MODULE/MACHINE 2/06 1<br />
©2006 BERNINA® of America, Inc. Permission to copy granted only to Authorized BERNINA ® Dealers
BERNINA ® <strong>Embroidery</strong> <strong>Module</strong>/<strong>Machine</strong><br />
<strong>Mastering</strong><br />
<strong>Your</strong><br />
BERNINA ®<br />
Table of Contents<br />
Section A: <strong>Embroidery</strong> Beginnings .............................................................................. 3<br />
Introduction .............................................................................................................. 4<br />
General Information: <strong>Your</strong> <strong>Embroidery</strong> <strong>Machine</strong>/<strong>Module</strong> .......................................... 5<br />
4 Levels of BERNINA ® v4.0 <strong>Embroidery</strong> Software.................................................. 9<br />
Getting Started ........................................................................................................10<br />
Needles ..................................................................................................................14<br />
Thread ....................................................................................................................16<br />
<strong>Embroidery</strong> Thread.................................................................................................17<br />
Stabilizers & Interfacings ........................................................................................18<br />
Sewing & Craft Sprays ...........................................................................................19<br />
Samples<br />
Stitching A Motif .................................................................................................20<br />
Monochrome <strong>Embroidery</strong> .................................................................................22<br />
Customizing Thread Color ................................................................................24<br />
Duplicating & Rescaling Motifs .........................................................................26<br />
Proportional Resizing of Motifs .........................................................................28<br />
Rotating Designs ..............................................................................................30<br />
Proportional Resizing & Rotation ......................................................................32<br />
Stretching Designs............................................................................................34<br />
Right-to-Left Mirror Image .................................................................................36<br />
Up-to-Down Mirror Image ..................................................................................38<br />
Using <strong>Embroidery</strong> Cards ..................................................................................40<br />
Using an <strong>Embroidery</strong> CD or USB stick ..............................................................42<br />
Saving & Deleting <strong>Embroidery</strong> Motifs .....................................................................44<br />
<strong>Embroidery</strong> Beginnings Shopping List....................................................................46<br />
Section B: Beyond the Basics .....................................................................................47<br />
General Information: Working with Alphabets & Text ..............................................48<br />
Selecting, Adding, & Deleting Letters......................................................................49<br />
Saving Text Designs ...............................................................................................50<br />
Samples<br />
Alphabet Sampler .............................................................................................52<br />
Manipulating Alphabets ......................................................................................54<br />
Stitch Density ....................................................................................................56<br />
Combining Motifs ..............................................................................................58<br />
Combining Lettering & Motifs ............................................................................60<br />
Rehooping .........................................................................................................62<br />
Free-Arm <strong>Embroidery</strong> .......................................................................................64<br />
Baseline Sampler .............................................................................................66<br />
Changing Lettering Height .................................................................................68<br />
Changing Lettering Spacing ..............................................................................70<br />
Mega Hoop ........................................................................................................72<br />
myartista Portal ...............................................................................................74<br />
Beyond the Basics Shopping List ...........................................................................76<br />
MASTERING YOUR BERNINA ® EMBROIDERY MODULE/MACHINE 2/06 2<br />
©2006 BERNINA® of America, Inc. Permission to copy granted only to Authorized BERNINA ® Dealers
BERNINA ® <strong>Embroidery</strong> <strong>Module</strong>/<strong>Machine</strong><br />
<strong>Mastering</strong><br />
<strong>Your</strong><br />
BERNINA ®<br />
<strong>Mastering</strong> <strong>Your</strong><br />
BERNINA ®<br />
<strong>Embroidery</strong><br />
<strong>Module</strong>/<strong>Machine</strong><br />
Owner’s Workbook<br />
Section A<br />
<strong>Embroidery</strong> Beginnings<br />
MASTERING YOUR BERNINA ® EMBROIDERY MODULE/MACHINE 2/06 3<br />
©2006 BERNINA® of America, Inc. Permission to copy granted only to Authorized BERNINA ® Dealers
BERNINA ® <strong>Embroidery</strong> <strong>Module</strong>/<strong>Machine</strong><br />
<strong>Mastering</strong><br />
<strong>Your</strong><br />
BERNINA ®<br />
Introduction<br />
Congratulations on your purchase of a BERNINA ® embroidery machine and/or module!<br />
This workbook is designed to be used in conjunction with the Owners Classes you will take at your<br />
BERNINA ® dealership, and contains a series of exercises intended to familiarize you with the features<br />
of your new BERNINA ® . In addition, you will learn about needles, threads, stabilizers, interfacing,<br />
embroidery hoops and accessories, all of which will increase your knowledge of sewing and assist<br />
you in achieving success in all of your sewing endeavors.<br />
Once you have completed the exercises designated for your BERNINA ® machine, attach the sewn<br />
samples to the indicated pages and insert the pages into plastic page protectors and store them in<br />
a 3-ring binder. They can then be used as a reference tool in the future as you use your machine and<br />
explore the creative possibilities it affords you.<br />
BERNINA ® of America, Inc. strives to provide its customers not just with quality sewing machines, but<br />
with informative publications and classes. Along with providing Owners Classes, your local BERNINA ®<br />
dealer stocks BERNINA ® books and magazines, such as ABC’s of <strong>Embroidery</strong> and Through the<br />
Needle. Plus, BERNINA ® of America, Inc. has a website – www.berninausa.com – offering free projects<br />
and embroidery designs, inspirational stories, and interviews with creative stitchers.<br />
Learn to use your BERNINA ® machine to its full extent and enjoy being creative with fabric and thread!<br />
This class is formatted for owners of the following<br />
BERNINA ® embroidery systems:<br />
• deco 330<br />
• aurora 430E<br />
• aurora 440QEE<br />
• artista 630E<br />
• artista 640E<br />
• artista 730E<br />
• artista 200E with 730 upgrade installed<br />
My BERNINA ® embroidery<br />
machine/module model is:<br />
______________________<br />
I purchased it on: ________<br />
at ____________________<br />
______________________<br />
______________________<br />
MASTERING YOUR BERNINA ® EMBROIDERY MODULE/MACHINE 2/06 4<br />
©2006 BERNINA® of America, Inc. Permission to copy granted only to Authorized BERNINA ® Dealers
BERNINA ® <strong>Embroidery</strong> <strong>Module</strong>/<strong>Machine</strong><br />
General Information:<br />
<strong>Your</strong> <strong>Embroidery</strong> <strong>Machine</strong>/<strong>Module</strong><br />
<strong>Module</strong>/<strong>Machine</strong> Details<br />
See Owners Manual for details.<br />
• Card Slot<br />
• USB Port<br />
• Hoop Clamp<br />
• Selection Menu<br />
• Layout/Edit Screen(s)<br />
• <strong>Embroidery</strong>/Stitch Screen<br />
deco 330<br />
artista 630E & 640E<br />
<strong>Mastering</strong><br />
<strong>Your</strong><br />
BERNINA ®<br />
artista 730E<br />
Selection<br />
Menus<br />
Layout /<br />
Edit 1 & 2<br />
Screens<br />
<strong>Embroidery</strong><br />
Screens<br />
MASTERING YOUR BERNINA ® EMBROIDERY MODULE/MACHINE 2/06 5<br />
©2006 BERNINA® of America, Inc. Permission to copy granted only to Authorized BERNINA ® Dealers
BERNINA ® <strong>Embroidery</strong> <strong>Module</strong>/<strong>Machine</strong><br />
<strong>Mastering</strong><br />
<strong>Your</strong><br />
BERNINA ®<br />
<strong>Embroidery</strong> Hoops<br />
• deco 330 Hoops<br />
Small Free-Arm Hoop - optional accessory<br />
Medium Hoop - standard accessory<br />
Large Hoop - standard accessory<br />
Round Hoop - optional accessory<br />
Notes<br />
• aurora & artista Hoops<br />
Small<br />
- standard for artista 730E<br />
- optional for artista 630E & 640E<br />
- optional for aurora 430E & 440QEE<br />
Spacer for freearm embroidery<br />
- standard with artista 730E<br />
- optional for artista 630E & 640E<br />
- optional for aurora 430E & 440QEE<br />
Medium<br />
- standard for artista 640E & 730E<br />
- optional for artista 630E<br />
- optional for aurora 430E & 440QEE<br />
Large Oval<br />
- standard for artista 630E, 640E, and 730E<br />
- standard for aurora 430E & 440QEE<br />
Note: optional Hoop’N’Buddyz Hat Hoop Insert<br />
available for stitching caps (fits Large Oval only)<br />
Mega<br />
- optional; available for artista 630E, 640E, and 730E<br />
- not available for aurora 430E & 440QEE<br />
• Hoop-It-All Hoops (optional)<br />
Note: Not all hoops are available for all systems.<br />
- Quilters Square Double Wide<br />
- Super Double Wide<br />
- deco 330 Double Wide<br />
- Big/Cap<br />
Additional Accessories<br />
• Hoop Templates (included with hoops)<br />
• Spool Caps<br />
• Thread Net - helps control slippery embroidery threads<br />
• Supplemental/Silky Thread Guide (artista & aurora only)<br />
MASTERING YOUR BERNINA ® EMBROIDERY MODULE/MACHINE 2/06 6<br />
©2006 BERNINA® of America, Inc. Permission to copy granted only to Authorized BERNINA ® Dealers
BERNINA ® <strong>Embroidery</strong> <strong>Module</strong>/<strong>Machine</strong><br />
<strong>Mastering</strong><br />
<strong>Your</strong><br />
BERNINA ®<br />
• Multi-Spool Thread Stand (adapter bases available for all<br />
BERNINA® embroidery systems)<br />
• Multi-Spool Thread Stand Extender<br />
- holds three additional spools<br />
- Thread Stand accommodates two Extenders<br />
• Straight Stitch Plate (optional, artista & aurora only)<br />
• <strong>Embroidery</strong> (gold latch) Bobbin Case<br />
(artista 640E & 730E only)<br />
• Dust Cover (deco only)<br />
• Zippered Travel Bag for <strong>Module</strong><br />
• Suitcase System (optional for all machines and modules)<br />
Notes<br />
Studio BERNINA® <strong>Embroidery</strong> Collections<br />
• .exp formatted cards for deco 330/500/600/650 & artista<br />
systems (aurora systems: access cards via Magic Box Plus)<br />
• non-encrypted, multi-format CDs including true .art files for use<br />
with the artista 730E through the CD drive, or for use with all<br />
other BERNINA® <strong>Embroidery</strong> Systems through BERNINA®<br />
<strong>Embroidery</strong> Software (Editor Lite through Designer Plus)<br />
• .art formatted CDs for artista 730E & BERNINA® <strong>Embroidery</strong><br />
Software<br />
• multi-formatted (including .art) USB sticks for artista<br />
embroidery systems & BERNINA® <strong>Embroidery</strong> Software<br />
• <strong>Embroidery</strong> Take-Out design CDs available through dealers<br />
• www.embroideryonline.com – downloadable design files<br />
Needles<br />
• Types/Sizes/Parts - see information on pages 14-15<br />
• Match needle size and type to thread size & fabric type<br />
• For more information: Feetures Volume 3, Unit P, pages 1-11<br />
<strong>Embroidery</strong> & Bobbin Thread<br />
Good quality vs. poor quality: the better the thread, the better<br />
the results and the easier the process<br />
Fiber content: different types (polyester, nylon, rayon, cotton,<br />
metallic, acrylic, etc.) produce different results<br />
Thread weight: the thicker the thread, the denser the stitching –<br />
embroidery designs are generally digitized for use with 40<br />
weight embroidery threads such as Isacord or Polysheen<br />
MASTERING YOUR BERNINA ® EMBROIDERY MODULE/MACHINE 2/06 7<br />
©2006 BERNINA® of America, Inc. Permission to copy granted only to Authorized BERNINA ® Dealers
BERNINA ® <strong>Embroidery</strong> <strong>Module</strong>/<strong>Machine</strong><br />
<strong>Mastering</strong><br />
<strong>Your</strong><br />
BERNINA ®<br />
Software and Peripherals<br />
• BERNINA ® <strong>Embroidery</strong> Software<br />
Editor Lite (available for aurora & artista systems only)<br />
Editor<br />
Auto-Designer<br />
Designer Plus<br />
Notes<br />
• USB Cable (standard with aurora & artista systems)<br />
to connect embroidery system to computer<br />
• BERNINA ® CD Drive (optional accessory for artista 730E only)<br />
• BERNINA ® Modem for dial-up service providers (optional<br />
accessory for artista 200E/730E only)<br />
• BERNINA ® Ethernet LAN card for broadband (highspeed)<br />
service providers (optional accessory for artista 200E/730E<br />
only)<br />
• Magic Box Plus & Mini Magic Box Plus<br />
Used to transfer designs to artista Magic card for deco 330<br />
Used to convert non-.art design cards<br />
Used by the aurora embroidery system to access Studio<br />
BERNINA ® embroidery card files<br />
Used to transfer .art files (in .exp format) to artista Magic<br />
Card for artista 730E<br />
Used to read non-.art design collection files into the<br />
BERNINA ® <strong>Embroidery</strong> Software<br />
• Swap Box<br />
Used to convert deco 500/600/650 cards to deco 330<br />
Used to transfer designs from deco 500/600/650 cards<br />
to artista Swap Card for use in deco 330 and artista<br />
embroidery systems<br />
• USB PC Card Reader from OESD<br />
Used to transfer designs from PC to artista 730E & deco 330<br />
Personal Design Card<br />
MASTERING YOUR BERNINA ® EMBROIDERY MODULE/MACHINE 2/06 8<br />
©2006 BERNINA® of America, Inc. Permission to copy granted only to Authorized BERNINA ® Dealers
BERNINA ® <strong>Embroidery</strong> <strong>Module</strong>/<strong>Machine</strong><br />
<strong>Mastering</strong><br />
<strong>Your</strong><br />
BERNINA ®<br />
4 Levels of BERNINA ® v4.0 <strong>Embroidery</strong> Software<br />
There are 4 levels of BERNINA ® version 4.0 <strong>Embroidery</strong> Software: Editor Lite (available only with aurora & artista 630E/<br />
640E/730E embroidery systems),<br />
Editor, Auto-Designer, & Designer Plus. For a complete comparison chart, visit www.berninausa.com.<br />
Editor Lite v4.0<br />
Basic customizing software for quickly & easily combining designs & text.<br />
Functions as the “editing screen” for the aurora embroidery system, and as an alternate “editing” screen for the artista<br />
630E/640E/730E<br />
• For the user that wishes to combine and re-color designs<br />
• For the user that wishes to add text and manipulate lettering<br />
• For users wishing to work with design CDs, USB sticks, and/or designs downloaded from www.embroideryonline.com<br />
• Can use Magic Box Plus and artista Magic Card, and/or USB PC Card Reader and artista 200E/730E Personal Design<br />
Card, and/or BERNINA ® USB Stick<br />
• Integral part of the aurora embroidery system<br />
• Also included with artista 630E/640E/730E embroidery systems<br />
Editor v4.0<br />
Powerful but easy-to-use software for making changes to existing designs.<br />
• For the user that wishes to customize and edit designs and lettering<br />
• For users wishing to work with designs from cards, disks, CDs, USB sticks, and/or designs downloaded from Internet<br />
• Includes the Cross Stitch Program<br />
• Includes the BERNINA ® Quilter Program<br />
• Can use the Reader/Writer Box and Personal Design Cards<br />
• Can use the Magic Box Plus and artista Magic Card, and/or the USB PC Card Reader and the artista 200E/730E<br />
Personal Design Card, and/or BERNINA ® USB stick<br />
Auto-Designer v4.0<br />
Create professional-looking embroidery designs in seconds.<br />
• For the user that wishes to customize and edit designs and lettering<br />
• For users wishing to work with designs from cards, disks, CDs, USB sticks, and/or designs downloaded from Internet<br />
• For the user that wishes to create (digitize) designs automatically<br />
• Includes the Cross Stitch Program<br />
• Includes the BERNINA ® Quilter Program<br />
• Includes the PhotoSnap Program<br />
• Can use the Reader/Writer Box and Personal Design Cards<br />
• Can use Magic Box Plus and artista Magic Card, and/or USB PC Card Reader and artista 200E/730E Personal<br />
Design Card, and/or BERNINA ® USB stick<br />
Designer Plus v4.0<br />
Explore the complete world of embroidery software including hand-look<br />
Craft Stitches, Auto-Applique, Auto-Digitizing & Manual Digitizing tools<br />
• For the user that wishes to create (digitize) original embroidery designs<br />
• For the user that wishes to customize and edit designs and lettering<br />
• For users wishing to work with designs from cards, disks, CDs, USB sticks, and/or designs downloaded from Internet<br />
• For the user that wishes to create (digitize) designs automatically<br />
• For the user that wants complete control and digitizing flexibility<br />
• Includes the Cross Stitch, PhotoSnap, and BERNINA ® Quilter Programs<br />
• Can use the Reader/Writer Box and Personal Design Cards<br />
• Can use Magic Box Plus and artista Magic Card, and/or USB PC Card Reader and artista 200E/730E Personal<br />
Design Card, and/or BERNINA ® USB stick<br />
MASTERING YOUR BERNINA ® EMBROIDERY MODULE/MACHINE 2/06 9<br />
©2006 BERNINA® of America, Inc. Permission to copy granted only to Authorized BERNINA ® Dealers
BERNINA ® <strong>Embroidery</strong> <strong>Module</strong>/<strong>Machine</strong><br />
<strong>Mastering</strong><br />
<strong>Your</strong><br />
BERNINA ®<br />
Getting Started<br />
artista & aurora <strong>Embroidery</strong> <strong>Module</strong> Set Up<br />
• Turn machine OFF<br />
(Note: artista 630E/640E/730E ONLY may start with<br />
machine ON)<br />
• <strong>Module</strong> Connection Cable<br />
- Stored on the bottom back edge of the module<br />
- Make sure the FLAT side of the cable plug is to the FRONT<br />
• Attaching the <strong>Module</strong><br />
- Place the machine on a flat surface (such as a table or<br />
countertop)<br />
- Place the module on the machine behind the free arm<br />
- Slide module on from left until lugs engage in base plate<br />
• Removing <strong>Module</strong><br />
- Turn machine OFF<br />
(Note: artista 630E/640E/730E ONLY may leave<br />
machine ON)<br />
- Remove cable plug from sewing/embroidery computer<br />
- Lift module slightly (do NOT lift using the embroidery arm!)<br />
and slide the module to the left<br />
Notes<br />
Prepare for <strong>Embroidery</strong><br />
• Presser Foot<br />
- Attach <strong>Embroidery</strong> Foot #15 or #26 to the machine (artista<br />
& aurora only)<br />
• Needles<br />
- Use the proper needle for the thread and fabric being used<br />
- Insert a new needle at the beginning of each project<br />
- Needle should be in the highest position when attaching<br />
the hoop to prevent snagging fabric and/or bending needle<br />
• Straight Stitch Plate (optional accessory for artista & aurora)<br />
- Reduces flagging of fabric, resulting in improved stitching<br />
• Bobbin<br />
- Use the <strong>Embroidery</strong> (gold latch) Bobbin Case (artista 640E<br />
& 730E), threading the “pigtail” for increased bobbin<br />
thread tension<br />
- Thread the “finger” of the bobbincase (artista 630E &<br />
aurora 430E & 440E) for increased bobbin thread tension<br />
MASTERING YOUR BERNINA ® EMBROIDERY MODULE/MACHINE 2/06 10<br />
©2006 BERNINA® of America, Inc. Permission to copy granted only to Authorized BERNINA ® Dealers
BERNINA ® <strong>Embroidery</strong> <strong>Module</strong>/<strong>Machine</strong><br />
<strong>Mastering</strong><br />
<strong>Your</strong><br />
BERNINA ®<br />
Threading<br />
• Thread machine with the presser foot up (this releases tension)<br />
• Thread using either the horizontal or vertical spool pin with<br />
the foam pad attached<br />
- Horizontal spool pin is for use with cross-wound threads<br />
- match disc size to end of spool<br />
- smallest disc fits into the end of large cones/spools<br />
such as Isacord embroidery thread<br />
- Vertical spool pin is for use with stacked threads<br />
- also for some decorative threads (metallic threads)<br />
- use supplemental thread guide as needed to control<br />
problematic threads<br />
• Use a thread net to prevent thread from forming loops which<br />
might interfere with consistent feeding of thread<br />
• Multiple Spool Holder (optional; available for deco, artista &<br />
aurora)<br />
- attaches to the back of the machine<br />
- holds up to 13 thread spools<br />
Notes<br />
Hooping Fabric<br />
• Find the center of the fabric<br />
• Separate the embroidery hoop sections<br />
- Loosen the screw. It should be loose enough that fabric<br />
and stabilizer both will EASILY fit into the hoop<br />
Note: For more information, see appropriate pages in manual<br />
(aurora 430E & 440QEE: pages 67-68; artista 630E/640E<br />
pages 115-116; artista 730E: pages 221-222)<br />
• <strong>Embroidery</strong> Templates<br />
- Use to ensure that the motif is centered in the hoop<br />
- Each hoop has a corresponding template<br />
- When inserted correctly, “BERNINA” reads left to right,<br />
right side up<br />
- Template surface is marked in 1cm squares<br />
- Each template has cut-outs to facilitate transfer of markings<br />
to fabric<br />
- There are finger holes to facilitate easy removal of the<br />
small and medium hoop templates<br />
- Included with the Large Oval and Mega hoop templates,<br />
special attachment clips facilitate easy removal<br />
MASTERING YOUR BERNINA ® EMBROIDERY MODULE/MACHINE 2/06 11<br />
©2006 BERNINA® of America, Inc. Permission to copy granted only to Authorized BERNINA ® Dealers
BERNINA ® <strong>Embroidery</strong> <strong>Module</strong>/<strong>Machine</strong><br />
<strong>Mastering</strong><br />
<strong>Your</strong><br />
BERNINA ®<br />
• Secure fabric/stabilizer in the hoop<br />
- Lay the outer hoop on a HARD, FLAT surface<br />
- (deco 330 only: Place so the clamp lies off the edge of the<br />
surface and the hoop lies flat.)<br />
- Secure stabilizer to the back of the fabric by lightly spraying<br />
stabilizer with HRFive temporary adhesive spray<br />
- Place fabric and stabilizer on a firm surface<br />
- Position template inside the inner hoop<br />
- Position inner hoop on fabric, aligning any markings<br />
- Grasping both inner hoop and fabric/stabilizer, insert them<br />
into the outer hoop, making sure that the arrows align at<br />
the edges of both the inner and outer hoops<br />
- DO NOT DISTORT THE FABRIC when tightening the screw<br />
on the hoop<br />
- Hooped fabric should be taut, but not stretched or distorted<br />
- Remove template before stitching<br />
Notes<br />
Attaching and Removing Hoop<br />
• When attaching hoops, be sure to seat the frame securely.<br />
• Release the clamp completely before removing the frame from<br />
the machine<br />
MASTERING YOUR BERNINA ® EMBROIDERY MODULE/MACHINE 2/06 12<br />
©2006 BERNINA® of America, Inc. Permission to copy granted only to Authorized BERNINA ® Dealers
BERNINA ® <strong>Embroidery</strong> <strong>Module</strong>/<strong>Machine</strong><br />
<strong>Mastering</strong><br />
<strong>Your</strong><br />
BERNINA ®<br />
Adjusting the Hoop Reference Position (aurora & artista only)<br />
• This process calibrates the needle to the center of the hoop<br />
• Only necessary to calibrate one hoop, as the adjustment<br />
applies to all hoop sizes<br />
Notes<br />
Adjusting <strong>Embroidery</strong> Hoop (EC on PC)<br />
This process is only necessary if the hoop center does not<br />
correspond with the indicated hoop center of the EC on PC<br />
display.<br />
• place template in hoop<br />
Note: aurora 430E/440QEE Large Oval template grid is orange<br />
• select attached hoop<br />
• use arrow keys to place center of template exactly under<br />
the needle point<br />
• press the Shift key (keep depressed)<br />
• using the mouse, click on the icon that appears on the screen<br />
next to the Position Hoop icon<br />
• the adjustment will be saved<br />
Adjusting <strong>Embroidery</strong> Hoop (on-screen)<br />
(artista 630E/640E/730E)<br />
• touch external Setup button.<br />
• select the <strong>Embroidery</strong> Settings option.<br />
• insert embroidery template into large hoop and attach hoop<br />
to module.<br />
Note: artista 630E/640E Large Oval template grid is orange;<br />
artista 730E Large Oval template grid is purple.<br />
• touch “Check”; hoop position will be read and hoop will stop<br />
with needle over center marking of hoop template.<br />
• if needle is not positioned directly over the center, use the<br />
positioning arrows to make adjustments.<br />
• touch OK; hoop setting is now saved and you may touch Esc<br />
to leave this menu as well as the Setup menu.<br />
MASTERING YOUR BERNINA ® EMBROIDERY MODULE/MACHINE 2/06 13<br />
©2006 BERNINA® of America, Inc. Permission to copy granted only to Authorized BERNINA ® Dealers
BERNINA ® <strong>Embroidery</strong> <strong>Module</strong>/<strong>Machine</strong><br />
<strong>Mastering</strong><br />
<strong>Your</strong><br />
BERNINA ®<br />
Sewing <strong>Machine</strong> Needles<br />
Along with thread, needles are very important to stitch formation. Many<br />
“mechanical” problems and damage to fabrics can be traced to a bent,<br />
damaged, or incorrect size or type needle. Approximately 60% of all<br />
needles are discarded at some stage of production. When selecting<br />
the correct needle for any sewing project, consider the following:<br />
Needle system – 130/705H<br />
Needle point – to assure proper stitch formation and avoid fabric damage<br />
Needle size – smaller for lightweight fabrics; larger for heavier fabrics<br />
If the needle is:<br />
Too small – the thread can’t stay in the groove to form a loop to be picked<br />
up by the hook point<br />
Bent – thread loop forms too far away from hook point; hook can’t enter<br />
the loop to form stitch<br />
Blunt – needle won’t pierce fabric so no thread loop forms to make a stitch<br />
• Needles should be changed after every 1-2 hours of embroidery stitching,<br />
before stitching the outline of any design, and after every 4-6 hours of regular<br />
sewing. The needle is the most inexpensive part in your embroidery system but is<br />
one of the most crucial for getting good results and keeping your machine<br />
running well. Don’t let false economy keep you from doing what is best for your<br />
embroidery projects and your machine.<br />
• Selected thread should fit in the groove on the front of the needle. If it isn’t<br />
protected by the groove, a needle with a larger groove should be used.<br />
• Always make sure needles are fully inserted, as high as possible, with the<br />
flat side to the back.<br />
Needle Size<br />
Conversion Chart<br />
European vs. Domestic<br />
60 = 8<br />
70 = 10<br />
75 = 11<br />
80 = 12<br />
90 = 14<br />
100 = 16<br />
110 = 18<br />
120 = 19<br />
Regardless of the system,<br />
the greater the number,<br />
the larger the diameter of<br />
the needle.<br />
Which Needle?<br />
Not all needles are appropriate for<br />
use in embroidery machines. As with<br />
all sewing projects, needle choice is<br />
detemined by the fabric, thread, and<br />
application. For most embroidery, an<br />
Organ needle or <strong>Embroidery</strong> needle<br />
is the best choice.<br />
Occasionally, other needles may be<br />
recommended for specially digitized<br />
techniques, such as a Wing needle<br />
heirloom embroidery.<br />
Needle “Secret” Code<br />
• DRI = Triple<br />
• E = <strong>Embroidery</strong><br />
• J = Jeans<br />
• L, LL, R = Leather<br />
• M = Microtex<br />
• MET = Metallica<br />
• N = Topstitching/Cordonnet<br />
• Q = Quilting<br />
• S = Stretch<br />
• SUK = Fine Ball Point<br />
• SES = Medium Ball Point<br />
• WING = Wing<br />
• ZWI = Double<br />
• ZWIHO = Double Wing<br />
MASTERING YOUR BERNINA ® EMBROIDERY MODULE/MACHINE 2/06 14<br />
©2006 BERNINA® of America, Inc. Permission to copy granted only to Authorized BERNINA ® Dealers
BERNINA ® <strong>Embroidery</strong> <strong>Module</strong>/<strong>Machine</strong><br />
<strong>Mastering</strong><br />
<strong>Your</strong><br />
BERNINA ®<br />
Ball Point<br />
60-100<br />
Has a rounded point. 70 for lingerie,<br />
nylon, jersey; 80 for<br />
T-shirt; 90 for sweatshirt fleece.<br />
Microtex<br />
/ Sharp<br />
A sharp point with a thin shaft.<br />
Specially designed for microfiber<br />
fabrics.<br />
Stretch<br />
Stretch<br />
Double<br />
Universal<br />
Double<br />
Universal<br />
Triple<br />
(Drilling)<br />
Jeans<br />
70-90<br />
2.5/75<br />
3.0/75<br />
60-120<br />
1.6/70-<br />
8.0/100<br />
2.5/90<br />
3.0/90<br />
70-110<br />
A stretch needle has a more rounded<br />
point than a Ball Point, and a blue<br />
anti-cling coating which helps to<br />
prevent skipped stitches in knits and<br />
elastic. Sometimes used on<br />
Ultrasuede ® , vinyl, and plastic.<br />
Two ballpoint needles on one shank;<br />
each needle has a large scarf. Used<br />
for hemming and for stitching on knit<br />
fabric.<br />
A compromise between a sharp and<br />
a ballpoint needle; can be used on<br />
both wovens and knits.<br />
60 – very fine batiste<br />
70 – broadcloth<br />
80 – trigger and gabardine<br />
90 – denim and twill<br />
100/110/120 – canvas<br />
Two needles attached to one shank.<br />
Used for pintucks, hems, and<br />
decorative work.<br />
Three needles attached to one<br />
shank. Used to create mock smocking<br />
and other decorative effects.<br />
Has a sharp point and a shaft that is<br />
less prone to flex. The sharpness of<br />
the needles makes it better for use on<br />
denim and woven fabrics where a<br />
clean stitch is desired.<br />
Quilting<br />
Topstitch<br />
<strong>Embroidery</strong><br />
<strong>Embroidery</strong><br />
Double<br />
Metafil<br />
Wing<br />
The thin, tapered point of this needle<br />
causes less damage to fabric when<br />
seaming and cross seaming.<br />
A sharp point with a large eye and<br />
deep groove. For use with heavier<br />
fabrics – the large groove cradles<br />
heavier threads.<br />
Sharp needle with a large eye and<br />
groove; also has a coating and a<br />
larger scarf. For use with embroidery<br />
thread – prevents shredding of rayon<br />
or metallic threads. Two threads<br />
may be used through the eye.<br />
Two <strong>Embroidery</strong> needles attached<br />
to one shaft; for double needle<br />
work with embroidery threads.<br />
Similar to <strong>Embroidery</strong> needle, with<br />
large eye and deep groove, but<br />
made of a special heat-resistant alloy<br />
and with a friction-reducing coating.<br />
Especially suitable for manufactured<br />
fibers such as polyester, acrylic, nylon.<br />
Sharp pointed needle with a noncutting<br />
wedge of metal on each side.<br />
Makes a hole in the fabric without<br />
cutting the threads of the fabric. Used<br />
for decorative and heirloom work,<br />
such as hemstitching. Works best on<br />
natural fibers or on the bias.<br />
Jeans<br />
Double<br />
Leather<br />
4.0/80<br />
80-100<br />
Two Jeans needles attached to one<br />
shank. For topstitching on denim with<br />
heavy thread; can also be used for<br />
decorative stitching with metallic<br />
thread.<br />
Point is a sharp cutting wedge.<br />
Used for leather only. Not for vinyl<br />
or simulated leathers.<br />
Double<br />
Wing<br />
Metallica<br />
Metallica<br />
Double<br />
One regular needle and one wing<br />
needle attached to a single shaft.<br />
Makes one large and one regular hole.<br />
Designed for use with metallic threads;<br />
has a large eye and deep groove.<br />
Two Metallica points on one shaft.<br />
MASTERING YOUR BERNINA ® EMBROIDERY MODULE/MACHINE 2/06 15<br />
©2006 BERNINA® of America, Inc. Permission to copy granted only to Authorized BERNINA ® Dealers
BERNINA ® <strong>Embroidery</strong> <strong>Module</strong>/<strong>Machine</strong><br />
<strong>Mastering</strong><br />
<strong>Your</strong><br />
BERNINA ®<br />
Thread<br />
Poor quality or the wrong type of thread can cause poor stitches on any<br />
machine. Thread passes through the eye of the needle approximately 37<br />
times in a “seesaw” action before it forms a single stitch. Poor quality<br />
thread results in crooked and looped stitches, uneven fills, misaligned<br />
outlines, frayed thread, and/or needle breakage. To achieve quality<br />
stitches, an embroidery machine needs five things: correct thread,<br />
correct stabilizer, correct hooping, correct needle, and properly adjusted<br />
thread tensions.<br />
Notes<br />
Several factors such as the fiber, twist, ply, finish, and size of thread<br />
must be considered for use with today’s fabrics for fine stitches.<br />
Staple – refers to the length of fibers used to twist together to form a<br />
single ply. Domestic thread fiber lengths are usually 1½” to 2½” long<br />
while European threads use 5½” to 6½” lengths.<br />
Ply – number of strands twisted together to make a single thread.<br />
Roll – the tendency of thread to roll to the right or left during<br />
stitching, causing the stitch to appear slightly crooked. Poor quality<br />
threads are more likely to roll.<br />
Twist – the crimping of fibers which causes them to interlock firmly into<br />
a single ply. Thread should not untwist during stitching. This will cause<br />
skipped stitches, thread breakage, crooked stitches, and weak spots in<br />
seams.<br />
Right twist – most American threads<br />
are twisted to the right, causing<br />
some rolling. This gives average<br />
stitch quality.<br />
Left twist – Most commercial and<br />
imported threads are twisted to the<br />
left, giving better than average stitch<br />
quality. Left twist resists rolling and<br />
makes a larger loop for the hook<br />
point to enter, reducing skipped<br />
stitches.<br />
MASTERING YOUR BERNINA ® EMBROIDERY MODULE/MACHINE 2/06 16<br />
©2006 BERNINA® of America, Inc. Permission to copy granted only to Authorized BERNINA ® Dealers
BERNINA ® <strong>Embroidery</strong> <strong>Module</strong>/<strong>Machine</strong><br />
<strong>Mastering</strong><br />
<strong>Your</strong><br />
BERNINA ®<br />
<strong>Embroidery</strong> Thread<br />
The popularity of embroidery and wearable art embellishments has<br />
necessitated the creation and marketing of many new thread types,<br />
such as shiny polyesters, rayons and metallics. High quality threads<br />
made in West Germany generally have a left twist; Mettler and Isacord<br />
threads are also left twist. To test the twist of a thread: while holding the<br />
spool in the left hand, roll the strand of thread towards you with one<br />
thumb. Left twist will tighten, right twist will loosen.<br />
Notes<br />
Fiber – refers to the type of material used to produce the thread.<br />
Some commonly used embroidery and embellishment threads:<br />
• Polyester 2 ply embroidery thread – Isacord and Polysheen<br />
embroidery thread – excellent for embroidery, very abrasion<br />
resistant. Recently made available in variegated colorways.<br />
• Acrylic embroidery thread – excellent for embroidery. Abrasion<br />
resistant. Available in variegated colors.<br />
• Cotton 2 ply embroidery thread – such as Mettler 60/2 – excellent<br />
for French <strong>Machine</strong> Sewing, delicate machine embroidery, piecing<br />
and darning. Has a matte finish with a slight sheen.<br />
• Cotton 2 ply embroidery thread – such as Mettler 30/2 – loose<br />
twist for a soft, shiny look in machine embroidery, applique, and<br />
buttonholes. Thicker than most embroidery threads, 30 weight<br />
cotton may require that the stitch density be decreased slightly.<br />
Available in variegated colors.<br />
• Rayon – available in 30 and 40 weight – a lustrous embroidery<br />
thread. Weaker than cotton, it is used for decorative work only.<br />
Available in variegated colors.<br />
Thread Storage<br />
Thread does wear out and deteriorate with age; it should be stored<br />
with care to keep it usable as long as possible. Extreme moisture may<br />
cause thread to swell while very dry conditions can leave it dry and<br />
brittle as it ages. Store thread in a covered place (thread box with a lid,<br />
cabinet with doors, or drawers that close) if possible to keep it dustfree.<br />
Be wary of old spools of thread recovered from Grandma’s sewing box.<br />
The fibers may be so weak and brittle that even if it sews without<br />
breaking, it may be so unstable that the garment or project will not hold<br />
together and the life of the project may be considerably shortened.<br />
MASTERING YOUR BERNINA ® EMBROIDERY MODULE/MACHINE 2/06 17<br />
©2006 BERNINA® of America, Inc. Permission to copy granted only to Authorized BERNINA ® Dealers
BERNINA ® <strong>Embroidery</strong> <strong>Module</strong>/<strong>Machine</strong><br />
<strong>Mastering</strong><br />
<strong>Your</strong><br />
BERNINA ®<br />
Stabilizers & Interfacings<br />
Tear-Away Stabilizer: The most commonly used type of stabilizer,<br />
designed to provide temporary support of stitching. Placed on the wrong<br />
side of the project and carefully pulled away once stitching is complete.<br />
Available in three weights – heavy, medium, and light. Multiple lightweight<br />
layers may be preferable to one heavy layer, as they are easier to<br />
remove. The Hydro-Stick version, available in lightweight and heavyweight<br />
tear-away, has water-activated adhesive on one side for a secure<br />
bond and a high degree of stabilization for very dense and/or intricate<br />
designs. Also available: Smooth Touch Tear-Away, Ultra Clean & Tear.<br />
Notes<br />
Cut-Away Stabilizer: The most widely used stabilizer in the commercial<br />
market. Does not break down under dense stitching, due to the high fiber<br />
– rather than paper – content. Excess stabilizer is trimmed away after<br />
stitching (leave approximately ¼” of stabilizer around the edges).<br />
A Hydro-Stick version of heavyweight cut-away is also available.<br />
Web/Poly-Mesh Type Stabilizer: A specially formulated cut-away<br />
stabilizer developed for use behind lightweight or light-colored fabrics.<br />
Available in fusible or non-fusible versions.<br />
Water-Soluble Stabilizer: Used for backing and topping, in single or<br />
multiple layers. Available in several weights: Aqua Film Universal Weight,<br />
Aqua Film Extra Weight, Badgemaster (very heavy), and Aqua Mesh<br />
Wash Away. Excellent for decorative stitching and cutwork as there are<br />
no remnants of stabilizer left after removal (it dissolves). As a topping,<br />
it keeps stitches from being lost in heavily napped fabrics such as velvet<br />
and corduroy.<br />
Iron-On Tear-Away Stabilizer: A non-woven product similar to paper.<br />
Perfect for knits, this tear-away stabilizer is temporarily bonded to the<br />
fabric, inhibiting the tendency of the material to stretch.<br />
Heat Removable Stabilizer: Woven from strands of fiber that are<br />
burned away at a low temperature, heat removable stabilizers are<br />
perfect for heirloom stitchery.<br />
Liquid/Spray Stabilizers: Wonderful for sheer fabrics from which all<br />
stabilizer must be removed after stitching, these products are painted or<br />
sprayed onto the fabric. Several light applications are preferable to one<br />
heavy layer.<br />
MASTERING YOUR BERNINA ® EMBROIDERY MODULE/MACHINE 2/06 18<br />
©2006 BERNINA® of America, Inc. Permission to copy granted only to Authorized BERNINA ® Dealers
BERNINA ® <strong>Embroidery</strong> <strong>Module</strong>/<strong>Machine</strong><br />
<strong>Mastering</strong><br />
<strong>Your</strong><br />
BERNINA ®<br />
Knit Fusible Interfacing: A very lightweight, flexible interfacing sometimes<br />
used in addition to or instead of a stabilizer, it gives permanent<br />
support (as an underlining) to a fabric. Perfect for plackets, garment<br />
edges, under buttonholes, and anywhere extra body and stability are<br />
needed. Can also be used to stabilize decorative stitch work.<br />
Notes<br />
Woven Fusible Interfacing: This interfacing is sometimes used in<br />
addition to or instead of a stabilizer, it gives permanent support (as an<br />
underlining) to a fabric. Generally cut on the bias to provide better drape.<br />
Gives a firmer hand or finish than knit or non-woven interfacings. Used for<br />
lapels, facings, and anywhere a great deal of extra body and stability are<br />
needed.<br />
Sewing & Craft Sprays<br />
HRFive Temporary Adhesive Spray: It’s water-soluble, so it washes<br />
out completely. Great for basting or holding two layers of fabric and/or<br />
batting together. Can be used as a repositionable spray, allowing items<br />
to stay sticky but be repositioned on other surfaces. This water-soluble<br />
adhesive washes out completely. Works well for securing “hard-to-hoop”<br />
items such as collars and cuffs to hooped stabilizer for embroidering.<br />
Also works on paper, and can be used as a no-show adhesive on vellum.<br />
606 Fusible Spray: 606 is used to make any fabric or stabilizer fusible.<br />
Apply to the wrong side of the fabric to be fused, using several light coats,<br />
rather than one heavy coating. The more coats used, the stronger the<br />
bond will be. Fuse as directed on label.<br />
Fabric Shield: Used to protect fabrics from dust, dirt, grease, and oil,<br />
this spray is water repellent and can be laundered and dry-cleaned.<br />
HRZero Adhesive Remover Spray: For removing adhesives, such as<br />
quilt sprays and other spray adhesives, in addition to label and tapes from<br />
various surfaces. Use on work surface areas, hoops, needles, frames,<br />
quilting frames, stencils, table tops, etc. For use on plastic, metal, wood,<br />
glass, stone, and ceramic surfaces. Not intended for fabric surfaces.<br />
MASTERING YOUR BERNINA ® EMBROIDERY MODULE/MACHINE 2/06 19<br />
©2006 BERNINA® of America, Inc. Permission to copy granted only to Authorized BERNINA ® Dealers
BERNINA ® <strong>Embroidery</strong> <strong>Module</strong>/<strong>Machine</strong><br />
Stitching A Motif<br />
<strong>Mastering</strong><br />
<strong>Your</strong><br />
BERNINA ®<br />
deco 330<br />
Select indicated motif.<br />
Stitch. Note: At the end of each<br />
color, the machine automatically<br />
stops and a message<br />
appears reminding you to cut<br />
the thread and rethread for the<br />
next color.<br />
When the motif is complete, a<br />
message appears indicating<br />
that the stitching is finished.<br />
Press the carriage return key<br />
after finishing the last section to<br />
return the carriage to the stored<br />
position.<br />
aurora 430E & 440QEE<br />
Select and open indicated motif. Click<br />
on Write to <strong>Machine</strong> icon. Select<br />
aurora 430/440 (stitch out only); EC<br />
on PC opens. Note: Make sure feed<br />
dog is lowered, presser foot is up,<br />
and foot control is removed.<br />
Attach hoop. Click on the module arm<br />
graphic to calibrate the module.<br />
Click on start button on EC on PC<br />
screen. Hoop moves, then an animation<br />
prompts you to lower the presser<br />
foot and press the Start/Stop button on<br />
the machine.<br />
<strong>Machine</strong> will sew a few stitches and<br />
stop. An animation appears, prompting<br />
you to trim thread tail. When first color<br />
is complete, animation will prompt you<br />
to change the thread to the next color.<br />
When embroidery is complete, <br />
appears in lower left corner of EC on<br />
PC screen. Trim and mount sample.<br />
Notes<br />
artista 630E & 640E<br />
Select the sewing machine icon<br />
and motifs (butterfly) folder to<br />
access the stored embroidery<br />
designs.<br />
Select indicated design; stitch.<br />
630E: At the end of each color,<br />
the machine automatically stops<br />
and a message appears reminding<br />
you to cut the thread and<br />
rethread for the next color.<br />
640E: At the end of color one, the<br />
thread is automatically cut and a<br />
message appears reminding you<br />
to thread the next color.<br />
artista 730E<br />
Select the sewing machine icon<br />
and motifs (butterfly) folder to<br />
access the stored embroidery<br />
designs.<br />
Select indicated design. Touch<br />
OK to go to <strong>Embroidery</strong> Ready<br />
screen.<br />
Stitch. Note: At the end of each<br />
color, thread is automatically<br />
cut and a message appears<br />
reminding you to thread the<br />
next color.<br />
When the motif is complete, a<br />
message will appear indicating<br />
that the stitching is finished.<br />
When motif is complete, an OK<br />
appears on screen to indicate<br />
that stitching is finished.<br />
MASTERING YOUR BERNINA ® EMBROIDERY MODULE/MACHINE 2/06 20<br />
©2006 BERNINA ® of America, Inc. Permission to copy granted only to Authorized BERNINA ® Dealers<br />
<strong>Embroidery</strong> Motif<br />
deco 330<br />
#36 - floral swag<br />
aurora 430E & 440QEE<br />
My Designs > Floral3.art<br />
artista 630E & 640E<br />
#17 - floral heart<br />
artista 730E<br />
#5 - floral wreath<br />
Fabric & Stabilizer<br />
8” x 10” rectangle
BERNINA ® <strong>Embroidery</strong> <strong>Module</strong>/<strong>Machine</strong><br />
Stitching A Motif Sample<br />
<strong>Mastering</strong><br />
<strong>Your</strong><br />
BERNINA ®<br />
deco 330<br />
aurora 430E & 440QEE<br />
artista 630E & 640E<br />
artista 730E<br />
MASTERING YOUR BERNINA ® EMBROIDERY MODULE/MACHINE 2/06 21<br />
©2006 BERNINA ® of America, Inc. Permission to copy granted only to Authorized BERNINA ® Dealers
BERNINA ® <strong>Embroidery</strong> <strong>Module</strong>/<strong>Machine</strong><br />
Monochrome <strong>Embroidery</strong><br />
<strong>Mastering</strong><br />
<strong>Your</strong><br />
BERNINA ®<br />
deco 330<br />
Note: To achieve the same<br />
effect on the deco 330, use the<br />
same thread color for all color<br />
changes.<br />
aurora 430E & 440QEE<br />
Select Mono/Multicolor icon<br />
(paintbrush). When engaged,<br />
the entire design will stitch<br />
without stopping<br />
for color changes.<br />
Click EC on PC start button;<br />
lower presser foot and press<br />
the Start/Stop button on the<br />
machine. The complete motif<br />
will be embroidered without<br />
stopping.<br />
When stitching is complete, a<br />
appears in the lower left<br />
corner of the EC on PC screen.<br />
Trim and mount sample.<br />
Notes<br />
artista 630E & 640E<br />
Touch OK to go to <strong>Embroidery</strong><br />
Ready screen.<br />
Select the Single/Multi color<br />
motif symbol (paintbrush icon).<br />
With this function engaged, the<br />
entire motif will be completed<br />
in one color with no stops or<br />
thread cuts.<br />
Stitch.<br />
artista 730E<br />
Touch OK to go to <strong>Embroidery</strong><br />
Ready screen.<br />
Select the Single/Multi color<br />
motif symbol (paintbrush icon).<br />
With this function engaged, the<br />
entire motif will be completed<br />
in one color with no stops or<br />
thread cuts.<br />
Stitch.<br />
<strong>Embroidery</strong> Motif<br />
deco 330<br />
#36 - floral swag<br />
aurora 430E & 440QEE<br />
My Designs > Floral3.art<br />
artista 630E & 640E<br />
630E: #14 - floral heart<br />
640E: #17 - floral heart<br />
artista 730E<br />
#5 - floral wreath<br />
Fabric & Stabilizer<br />
8” x 10” rectangle<br />
MASTERING YOUR BERNINA ® EMBROIDERY MODULE/MACHINE 2/06 22<br />
©2006 BERNINA ® of America, Inc. Permission to copy granted only to Authorized BERNINA ® Dealers
BERNINA ® <strong>Embroidery</strong> <strong>Module</strong>/<strong>Machine</strong><br />
Monochrome <strong>Embroidery</strong> Sample<br />
<strong>Mastering</strong><br />
<strong>Your</strong><br />
BERNINA ®<br />
deco 330<br />
aurora 430E & 440QEE<br />
artista 630E & 640E<br />
artista 730E<br />
MASTERING YOUR BERNINA ® EMBROIDERY MODULE/MACHINE 2/06 23<br />
©2006 BERNINA ® of America, Inc. Permission to copy granted only to Authorized BERNINA ® Dealers
BERNINA ® <strong>Embroidery</strong> <strong>Module</strong>/<strong>Machine</strong><br />
Customizing Thread Color<br />
<strong>Mastering</strong><br />
<strong>Your</strong><br />
BERNINA ®<br />
deco 330<br />
n/a<br />
aurora 430E & 440QEE<br />
Select Settings >Thread Colors ><br />
Isacord 40wt-shades.<br />
Click on Color 1 in top panel of<br />
dialog box; scroll through colors<br />
in lower panel of dialog box.<br />
Select color 5934; click Assign.<br />
Select Color 2 from top panel.<br />
Type 2250 in the Search field.<br />
Click Assign. Click OK.<br />
Select File>Save As. Type<br />
thread color exercise in the<br />
File Name field. Click Save.<br />
Note: Using Save As preserves<br />
your original design file.<br />
Send to aurora to embroider the<br />
newly colored design.<br />
Trim and mount sample.<br />
Notes<br />
artista 630E, 640E, 730E<br />
Hoop fabric and stabilizer in Medium hoop.<br />
Select floral motif again. It opens in the Edit 1 screen. Touch the Color<br />
Number icon in lower left corner of screen; Color Motif display appears.<br />
Touch the Color Information bar. A dialog box opens with Change thread<br />
color/brand information. In this box, the current thread color and/or<br />
brand of thread can be changed.<br />
Select a brand of thread, selecting from Isacord, Madeira, Mettler Silky<br />
Sheen, Sulky, and Mettler Poly Sheen. Assign a new shade of green to<br />
the design and touch OK.<br />
Edit 1 screen reappears. Use right hand scroll arrow to move to second<br />
color; touch Color Information Bar. Repeat process changing the color of<br />
the flowers.<br />
Repeat a third time and change the color of the flower centers.<br />
Embroider your newly colored design. If you wanted, this customized motif<br />
could be saved with your new color settings for later use. (Saving Motifs will<br />
be covered on page 44, Saving & Deleting <strong>Embroidery</strong> Motifs.)<br />
Trim and mount the sample.<br />
<strong>Embroidery</strong> Motif<br />
deco 330<br />
n/a<br />
aurora 430E & 440QEE<br />
My Designs > Floral3.art<br />
artista 630E & 640E<br />
630E: #14 - floral heart<br />
640E: #17 - floral heart<br />
artista 730E<br />
#5 - floral wreath<br />
Fabric & Stabilizer<br />
8” x 10” rectangle<br />
MASTERING YOUR BERNINA ® EMBROIDERY MODULE/MACHINE 2/06 24<br />
©2006 BERNINA ® of America, Inc. Permission to copy granted only to Authorized BERNINA ® Dealers
BERNINA ® <strong>Embroidery</strong> <strong>Module</strong>/<strong>Machine</strong><br />
Customizing Thread Color Sample<br />
<strong>Mastering</strong><br />
<strong>Your</strong><br />
BERNINA ®<br />
deco 330<br />
aurora 430E & 440QEE<br />
n/a<br />
artista 630E & 640E<br />
artista 730E<br />
MASTERING YOUR BERNINA ® EMBROIDERY MODULE/MACHINE 2/06 25<br />
©2006 BERNINA ® of America, Inc. Permission to copy granted only to Authorized BERNINA ® Dealers
BERNINA ® <strong>Embroidery</strong> <strong>Module</strong>/<strong>Machine</strong><br />
Duplicating & Rescaling Motifs<br />
(aurora 430E/440QEE & artista 630E/640E/730E only)<br />
<strong>Mastering</strong><br />
<strong>Your</strong><br />
BERNINA ®<br />
aurora 430E & 440QEE<br />
Connect aurora to PC following instructions in owner’s manual.<br />
Select File>Open from main menu. From My Designs folder, select Floral5.art.<br />
Open. Choose Select Object tool; click on design to select it.<br />
Select Edit>Duplicate from main menu. There are now 2 embroidery motifs on<br />
screen. While duplicate is selected, click &drag it to left. Note: When designs<br />
are duplicates or pasted, the new design is placed in the location from which it<br />
was copied.<br />
Right click to open Object Properties dialog box. Type 180 in width and height<br />
fields. Click OK.<br />
Select File>Save As. Type duplication exercise in File Name field. Click Save.<br />
Note: Using the Save As function preserves your original design file.<br />
Send design to aurora for embroidery. Trim and mount sample.<br />
Notes<br />
Note: With Editor Lite you can use<br />
menu commands or toolbar icons to<br />
access features and functions.<br />
artista 630E & 640E:<br />
Hoop fabric and stabilizer in Large<br />
Oval Hoop.<br />
Select indicated motif; it opens in<br />
Edit 1. Select Add Motif icon;<br />
reselect the same design. There are<br />
now two copies of motif on screen;<br />
the first one is gray and the second<br />
one - on top - is in color. The color<br />
motif is the active one.<br />
Touch the To Next Page - Edit 2<br />
symbol. Touch the Move Motif symbol<br />
and move the active motif toward top<br />
of hoop. Note: It may be necesssary<br />
to select the Large Oval hoop.<br />
Using the Retrieve function, activate<br />
the other motif and move it toward the<br />
lower end of the hoop.<br />
Touch Rescale Motif Proportionally<br />
icon; increase lower motif size to<br />
160%. Touch OK.<br />
Embroider motif. When stitching is<br />
complete, trim and mount sample.<br />
Note the design stitch count for later<br />
reference.<br />
artista 730E:<br />
Hoop fabric & stabilizer in Large Oval<br />
Hoop.<br />
Select indicated motif; it opens in<br />
Edit 1 screen. Select Duplicate Motif<br />
symbol. There are now 2 copies of<br />
motif on screen. The 1st one is gray<br />
and the top one is in color. The color<br />
motif is the active one.<br />
Touch the To Next Page - Edit 2<br />
symbol. Touch Move Motif symbol;<br />
move active motif toward top of hoop.<br />
Using Retrieve function, activate other<br />
motif; move toward lower end of hoop.<br />
Touch Rescale Motif Proportionally ;<br />
increase lower motif size to 180%; OK.<br />
Dialog box asks if you wish to<br />
recalculate stitch count or simply<br />
resize motif without recalculating<br />
stitch density. Select “recalculate”<br />
option. Note: “resize” simply takes<br />
existing design and spreads stitches<br />
to fit new size parameters of design.<br />
Embroider motif. When complete,<br />
trim and mount sample. Note stitch<br />
count of design for later reference.<br />
<strong>Embroidery</strong> Motif<br />
deco 330<br />
n/a<br />
artista 430E & 440QEE<br />
My Designs > Floral5.art<br />
artista 630E & 640E<br />
630E: #13 - floral<br />
640E: #19 - floral<br />
artista 730E<br />
#4 - daisy<br />
Fabric & Stabilizer<br />
8” x 10” rectangle<br />
MASTERING YOUR BERNINA ® EMBROIDERY MODULE/MACHINE 2/06 26<br />
©2006 BERNINA ® of America, Inc. Permission to copy granted only to Authorized BERNINA ® Dealers
BERNINA ® <strong>Embroidery</strong> <strong>Module</strong>/<strong>Machine</strong><br />
Duplicating & Rescaling Motifs Sample<br />
<strong>Mastering</strong><br />
<strong>Your</strong><br />
BERNINA ®<br />
deco 330<br />
aurora 430E & 440QEE<br />
n/a<br />
artista 630E & 640E<br />
artista 730E<br />
MASTERING YOUR BERNINA ® EMBROIDERY MODULE/MACHINE 2/06 27<br />
©2006 BERNINA ® of America, Inc. Permission to copy granted only to Authorized BERNINA ® Dealers
BERNINA ® <strong>Embroidery</strong> <strong>Module</strong>/<strong>Machine</strong><br />
Proportional Resizing of Motifs<br />
(artista 730E only)<br />
artista 730E only<br />
<strong>Mastering</strong><br />
<strong>Your</strong><br />
BERNINA ®<br />
Notes<br />
Hoop fabric & stabilizer in Large Oval Hoop. Open a New file.<br />
Select the motif used in the previous exercise. Select the Duplicate Motif<br />
symbol.<br />
Touch the To Next Page - Edit 2 symbol. Touch the Move Motif symbol;<br />
move active motif toward top of hoop. Using the Retrieve function,<br />
activate the other motif; move it toward the lower end of the hoop.<br />
Touch the Rescale Motif Proportionally ; increase the lower motif size to<br />
180%. Touch OK. The dialog box opens asking if you wish to recalculate<br />
the stitch count or simply resize the motif. This time, select the “resize”<br />
option.<br />
Embroider the resized motif. When the motif is complete, trim and<br />
mount the sample. Note the stitch count of the design for later reference.<br />
Notice the dramatic difference between the “resized” sample and the<br />
“recalculated” sample from the previous exercise. <strong>Your</strong> artista 730E<br />
added stitches to the “recalculated” motif to make the daisy motif look as<br />
nice as the original.<br />
<strong>Embroidery</strong> Motif<br />
deco 330<br />
n/a<br />
aurora 430E & 440QEE<br />
n/a<br />
artista 630E & 640E<br />
n/a<br />
artista 730E<br />
#4 - daisy<br />
Fabric & Stabilizer<br />
8” x 10” rectangle<br />
MASTERING YOUR BERNINA ® EMBROIDERY MODULE/MACHINE 2/06 28<br />
©2006 BERNINA ® of America, Inc. Permission to copy granted only to Authorized BERNINA ® Dealers
BERNINA ® <strong>Embroidery</strong> <strong>Module</strong>/<strong>Machine</strong><br />
<strong>Mastering</strong><br />
<strong>Your</strong><br />
BERNINA ®<br />
Proportional Resizing of Motifs Sample<br />
deco 330<br />
n/a<br />
aurora 430E & 440QEE<br />
n/a<br />
artista 630E & 640E<br />
artista 730E<br />
n/a<br />
MASTERING YOUR BERNINA ® EMBROIDERY MODULE/MACHINE 2/06 29<br />
©2006 BERNINA ® of America, Inc. Permission to copy granted only to Authorized BERNINA ® Dealers
BERNINA ® <strong>Embroidery</strong> <strong>Module</strong>/<strong>Machine</strong><br />
Rotating Designs<br />
<strong>Mastering</strong><br />
<strong>Your</strong><br />
BERNINA ®<br />
deco 330<br />
The deco 330 rotates designs<br />
in clockwise increments of 45º<br />
(1x = 45º, 2x = 90º, 3x = 135º....)<br />
Select indicated motif. Select<br />
Editing tab. Use positioning arrows<br />
or touch screen to move the motif<br />
up and to the right.<br />
Select Pattern selection tab.<br />
Select motif again. Touch Rotate<br />
45º. Move design to right.<br />
Select Pattern selection tab.<br />
Select motif again. Touch Rotate<br />
45º two times. Move design to left<br />
and down.<br />
Embroider. Press carriage return<br />
key after finishing last section to<br />
return carriage to stored position.<br />
Trim sample, then mount it on the<br />
following page.<br />
artista 630E & 640E<br />
The artista 630E & 640E rotate<br />
designs in clockwise & counterclockwise<br />
increments of 1º.<br />
Select motif; it opens in Edit 1.<br />
Select Large Oval hoop. Select<br />
Edit 2; move design to upper right<br />
corner of hoop.<br />
Go to Edit 1 > Add Motif. Select<br />
same motif again. Go to Edit 2;<br />
select Rotation icon; rotate<br />
design 22º. Move motif up and<br />
slightly to the left.<br />
Continue adding motifs, rotating<br />
to 45º, 70º, and 90º. Using the<br />
Retrieve function, arrange as<br />
shown. Touch OK.<br />
Embroider and trim sample, then<br />
mount it on the following page.<br />
aurora 430E & 440QEE<br />
Editor Lite software provides quick &<br />
easy rotation by 45º increments, free<br />
rotation by clicking & dragging, and<br />
by specifying degree of rotation in the<br />
Object Projecties box.<br />
Select motif; copy; paste. Right click<br />
to open new design’s Object Properties<br />
> General. Type 22 in Rotation<br />
field; click OK. Move design up and<br />
to the right.<br />
Click Paste; while selected, rotate<br />
design 45º by left clicking Rotate<br />
CCW/CW icon. Move up & to right.<br />
Click Paste; right click to open<br />
Object Properties > General. Type 77<br />
in Rotation field; OK. Move up and to<br />
the right.<br />
Paste again; left click 2x on Rotate<br />
CCW/CW icon. Move up & to right.<br />
Save As rotation exercise. Send to<br />
machine. Stitch, trim, mount.<br />
artista 730E<br />
The artista 730E rotates designs<br />
in clockwise and counterclockwise<br />
increments of 1º.<br />
Select motif. Select Edit 2. Using<br />
Stitch Length and Width knobs,<br />
move design to upper right<br />
corner.<br />
Go to Edit 1. With motif selected,<br />
touch Duplicate. Select Edit 2.<br />
Rotate 22º, then move up &<br />
slightly to right.<br />
Continue to duplicate and rotate<br />
motifs to 45º, 77º, and 90º. Using<br />
Retrieve function, arrange as<br />
shown. Touch OK.<br />
Embroider and trim sample, then<br />
mount it on the following page.<br />
Notes<br />
Note: Editor Lite software provides<br />
quick and easy rotation – 45°<br />
increments by clicking on Rotate<br />
CCW/CW icon, free rotation by<br />
clicking and dragging, and by a<br />
specific degreesof rotation in the<br />
Object Properties box.<br />
<strong>Embroidery</strong> Motif<br />
deco 330<br />
#35 - floral border<br />
aurora 430E & 440QEE<br />
My Designs ><br />
BlackBorder2.art<br />
artista 630E & 640E<br />
630E: #21 - floral<br />
640E: #27 - floral<br />
artista 730E<br />
#14 - little wild rose<br />
Fabric & Stabilizer<br />
8” x 10” rectangle<br />
MASTERING YOUR BERNINA ® EMBROIDERY MODULE/MACHINE 2/06 30<br />
©2006 BERNINA ® of America, Inc. Permission to copy granted only to Authorized BERNINA ® Dealers
BERNINA ® <strong>Embroidery</strong> <strong>Module</strong>/<strong>Machine</strong><br />
Rotating Designs Sample<br />
<strong>Mastering</strong><br />
<strong>Your</strong><br />
BERNINA ®<br />
deco 330<br />
aurora 430E & 440QEE<br />
artista 630E & 640E<br />
artista 730E<br />
MASTERING YOUR BERNINA ® EMBROIDERY MODULE/MACHINE 2/06 31<br />
©2006 BERNINA ® of America, Inc. Permission to copy granted only to Authorized BERNINA ® Dealers
BERNINA ® <strong>Embroidery</strong> <strong>Module</strong>/<strong>Machine</strong><br />
Proportional Resizing/Rescaling & Rotation<br />
<strong>Mastering</strong><br />
<strong>Your</strong><br />
BERNINA ®<br />
deco 330<br />
deco 330 designs can be resized in<br />
increments of 10%, from 90-120%.<br />
Select indicated motif. Select<br />
Editing tab. Select Resize key.<br />
Touch the minus (-) key one time.<br />
Touch OK. Touch Rotate 45º one<br />
time. Use the positioning arrows or<br />
the touch screen to move design<br />
up and to the right.<br />
Select Pattern selection tab.<br />
Select the motif again. Move to<br />
lower left. Touch Resize key. Touch<br />
the plus (+) key two times. Touch<br />
OK; touch OK.<br />
Embroider. Press the carriage<br />
return key after finishing the last<br />
section to return the carriage to<br />
the stored position.<br />
Trim and mount the sample.<br />
aurora 430E & 440QEE<br />
Select motif. Select Edit > Duplicate.<br />
There are now 2 embroidery<br />
motifs on screen. While selected,<br />
click & drag duplicate to the right.<br />
Note: When designs are pasted,<br />
duplicates are placed in location<br />
from which they were copied.<br />
Click and drag a black corner<br />
sizing handle toward center of<br />
motif. This proportionally scales<br />
down the motif.<br />
Left click on selected motif; the<br />
corner handles open (turn clear).<br />
Click and drag one corner rotation<br />
handle to rotate design freely.<br />
Position motifs in a pleasing<br />
arrangement.<br />
Save As proportional rescaling<br />
and rotation exercise.<br />
Stitch, trim, and mount sample.<br />
Notes<br />
artista 630E & 640E<br />
Select motif; it opens in Edit 1.<br />
Select Large Oval hoop. Select<br />
Add Motif and reselect design.<br />
There are now 2 copies on<br />
screen; the one in color is active.<br />
Go to Edit 2. Touch Rescale Motif<br />
Proportionally icon; decrease size<br />
of active motif to 70%. Touch Move<br />
Motif; move toward top of hoop.<br />
Touch Retrieve until only larger<br />
motif is active. Touch Move Motif;<br />
rotate counterclockwise until<br />
symbol reads -32º. Note: Items<br />
can be rotated 1º at a time or in<br />
90º increments.<br />
Retrieve only smaller motif; rotate<br />
clockwise to 16º. Using Move Motif;<br />
move designs to a pleasing central<br />
arrangement. Touch OK.<br />
Embroider. Trim & mount sample.<br />
artista 730E<br />
Select indicated motif; it opens in<br />
Edit 1. Select Large Oval Hoop.<br />
Select Duplicate Motif symbol; there<br />
are now 2 copies of motif on screen<br />
(color motif is active).<br />
Go to Edit 2. Touch Rescale Motif<br />
Proportionally; decrease active motif<br />
size to 70%. Touch Move Motif; move<br />
motif toward top of hoop.<br />
Touch Retrieve until only large motif<br />
is active. Touch Move Motif; move<br />
large motif toward bottom of hoop.<br />
Select Rotate. Rotation can be done<br />
1° at a time or in 90° increments.<br />
Rotate large motif CCW to -32°.<br />
Retrieve smaller motif; rotate CW to<br />
+16°. Using Move Motif option, create<br />
a pleasing arrangment; touch OK.<br />
Choose the Recalculation option.<br />
When processing is complete,<br />
embroider. Trim and mount the<br />
sample.<br />
MASTERING YOUR BERNINA ® EMBROIDERY MODULE/MACHINE 2/06 32<br />
©2006 BERNINA ® of America, Inc. Permission to copy granted only to Authorized BERNINA ® Dealers<br />
<strong>Embroidery</strong> Motif<br />
deco 330<br />
#15 - butterfly<br />
aurora 430E & 440QEE<br />
My Designs > flower.art<br />
artista 630E & 640E<br />
#1 - butterfly<br />
artista 730E<br />
#2 - butterfly<br />
Fabric & Stabilizer<br />
8” x 10” rectangle
BERNINA ® <strong>Embroidery</strong> <strong>Module</strong>/<strong>Machine</strong><br />
<strong>Mastering</strong><br />
<strong>Your</strong><br />
BERNINA ®<br />
Proportional Resizing/Rescaling & Rotation Sample<br />
deco 330<br />
aurora 430E & 440QEE<br />
artista 630E & 640E<br />
artista 730E<br />
MASTERING YOUR BERNINA ® EMBROIDERY MODULE/MACHINE 2/06 33<br />
©2006 BERNINA ® of America, Inc. Permission to copy granted only to Authorized BERNINA ® Dealers
BERNINA ® <strong>Embroidery</strong> <strong>Module</strong>/<strong>Machine</strong><br />
Stretching Designs<br />
(aurora & artista 730E only)<br />
The height and width of objects can be changed independently,<br />
allowing items to be made tall and thin and/or short and wide.<br />
<strong>Mastering</strong><br />
<strong>Your</strong><br />
BERNINA ®<br />
Notes<br />
aurora 430E & 440QEE<br />
Open a New design file.<br />
Left click on the Lettering icon. Click in the middle of the hoop to<br />
begin text. Type B; press Enter on the keyboard. Click on one of the<br />
corner sizing handles to rescale the letter.<br />
Select letter. Select Edit > Duplicate; move duplicate down and to<br />
the right. Click & drag top center sizing handle to alter letter height.<br />
Click on Paste icon; move new duplicate down and to the right. Click<br />
and drag left center sizing handle to alter letter width.<br />
Reposition letters as needed to form a pleasing arrangement.<br />
Save As stretching exercise; click Save.<br />
Embroider, trim, mount sample.<br />
artista 730E<br />
Select indicated motif.<br />
Touch the Duplicate icon to copy the design. Touch Edit 2; select<br />
the Adjust Height/Width icon. Increase the height of the active motif<br />
to 140%. Move the motif to the upper right corner.<br />
Duplicate the design again. Touch Edit 2; return the height of the<br />
active motif to 100%, then increase the width to 140%. Move the<br />
motif to the lower left corner. Touch OK to process design.<br />
Embroider and trim sample, then mount it on the following page.<br />
<strong>Embroidery</strong> Motif<br />
deco 330<br />
n/a<br />
aurora 430E & 440QEE<br />
Lettering - “B”<br />
artista 630E & 640E<br />
n/a<br />
artista 730E<br />
#2 - butterfly<br />
Fabric & Stabilizer<br />
8” x 10” rectangle<br />
MASTERING YOUR BERNINA ® EMBROIDERY MODULE/MACHINE 2/06 34<br />
©2006 BERNINA ® of America, Inc. Permission to copy granted only to Authorized BERNINA ® Dealers
BERNINA ® <strong>Embroidery</strong> <strong>Module</strong>/<strong>Machine</strong><br />
<strong>Mastering</strong><br />
<strong>Your</strong><br />
BERNINA ®<br />
Stretching Designs Sample<br />
deco 330<br />
aurora 430E & 440QEE<br />
n/a<br />
artista 630E & 640E<br />
artista 730E<br />
n/a<br />
MASTERING YOUR BERNINA ® EMBROIDERY MODULE/MACHINE 2/06 35<br />
©2006 BERNINA ® of America, Inc. Permission to copy granted only to Authorized BERNINA ® Dealers
BERNINA ® <strong>Embroidery</strong> <strong>Module</strong>/<strong>Machine</strong><br />
<strong>Mastering</strong><br />
<strong>Your</strong><br />
BERNINA ®<br />
Right-to-Left Mirror Image<br />
deco 330<br />
Right/Left Mirror Image<br />
Select the indicated motif. Select<br />
the Editing tab. Use the positioning<br />
arrows to move the motif to<br />
the left.<br />
Select Pattern selection tab.<br />
Select motif again. Touch the<br />
Right/Leftt Mirror Image icon.<br />
Use the positioning arrows to<br />
move motif to the right.<br />
Embroider. Press the carriage<br />
return key after finishing the last<br />
section to return the carriage to<br />
the stored position.<br />
Trim; mount the sample on the<br />
following page.<br />
aurora 430E & 440QEE<br />
Right/Left Mirror Image<br />
Select the indicated motif.<br />
Left click on the Scale By 20%<br />
icon to scale the motif down 20%.<br />
Select Edit>Duplicate; there are<br />
now two motifs on screen. Click<br />
on Mirror Image Right/Leftt to<br />
mirror image motif.<br />
While duplicate is selected, use<br />
the left arrow keyboard key to<br />
move design to left. Note: Use up<br />
or down arrows to move design<br />
along its vertical axis, and/or right<br />
and left arrows to move design<br />
along its horizontal axis.<br />
Save As right-left mirror image<br />
exercise.<br />
Embroider, trim, mount sample.<br />
Notes<br />
artista 630E & 640E<br />
Right/Left Mirror Image<br />
Select indicated motif. In Edit 1,<br />
select the Medium hoop. Select<br />
the Add Motif symbol and reselect<br />
the indicated motif. There are<br />
now two motifs on the screen.<br />
Go to Edit 2. Touch the Right/Left<br />
Mirror Image symbol. The active<br />
motif is flipped. Move it to the left<br />
side of the hoop.<br />
Retrieve the other motif and<br />
move it to the right side of the<br />
hoop. Touch OK.<br />
Use the Retrieve icon to activate<br />
both motifs. Select the rescale<br />
function & decrease size to 75%.<br />
Stitch, trim and mount sample.<br />
artista 730E<br />
Right/Left Mirror Image<br />
Select indicated motif. In Edit 1,<br />
select the Medium hoop. Select<br />
Duplicate Motif symbol. There are<br />
now two motifs on the screen.<br />
Go to Edit 2. Touch the Right/Left<br />
Mirror Image symbol. The active<br />
motif is flipped. Move it to the left<br />
side of the hoop.<br />
Retrieve the other motif and<br />
move it to the right side of the<br />
hoop. Touch OK.<br />
Use the Retrieve icon to activate<br />
both motifs. Select the rescale<br />
function & decrease size to 75%.<br />
Stitch, trim and mount sample.<br />
<strong>Embroidery</strong> Motif<br />
deco 330<br />
#14 - seahorse<br />
aurora 430E & 440QEE<br />
My Designs > Floral1.art<br />
artista 630E & 640E<br />
#19 - flowers<br />
#25 - flowers<br />
artista 730E<br />
#8 - grape leaf<br />
Fabric & Stabilizer<br />
8” x 10” rectangle<br />
MASTERING YOUR BERNINA ® EMBROIDERY MODULE/MACHINE 2/06 36<br />
©2006 BERNINA ® of America, Inc. Permission to copy granted only to Authorized BERNINA ® Dealers
BERNINA ® <strong>Embroidery</strong> <strong>Module</strong>/<strong>Machine</strong><br />
<strong>Mastering</strong><br />
<strong>Your</strong><br />
BERNINA ®<br />
Right-to-Left Mirror Image Sample<br />
deco 330<br />
aurora 430E & 440QEE<br />
artista 630E & 640E<br />
artista 730E<br />
MASTERING YOUR BERNINA ® EMBROIDERY MODULE/MACHINE 2/06 37<br />
©2006 BERNINA ® of America, Inc. Permission to copy granted only to Authorized BERNINA ® Dealers
BERNINA ® <strong>Embroidery</strong> <strong>Module</strong>/<strong>Machine</strong><br />
Up-to-Down Mirror Image<br />
(deco 330, aurora & artista 730E only)<br />
deco 330<br />
Up/Down Mirror Image<br />
Select indicated motif. Select<br />
Editing tab. Use the positioning<br />
arrows to move the motif down.<br />
Select Pattern selection tab.<br />
Select motif again. Touch the<br />
Up/Down Mirror Image icon. Use<br />
the positioning arrows to move the<br />
motif up.<br />
Embroider. Press the carriage<br />
return after finishing the last<br />
section to return the carriage to<br />
the stored position.<br />
aurora 430E & 440QEE<br />
Up/Down Mirror Image<br />
Select indicated motif.<br />
Left click on the Scale By 20%<br />
icon to scale the motif down 20%.<br />
Select Edit>Duplicate from the<br />
main menu. There are now two<br />
embroidery motifs on the screen.<br />
While duplicate is selected, click<br />
& drag it toward bottom of hoop.<br />
Click on the Mirror Image<br />
Up/Down icon to mirror image the<br />
motif.<br />
<strong>Mastering</strong><br />
<strong>Your</strong><br />
BERNINA ®<br />
Notes<br />
Trim; mount on following page.<br />
Save As up-downl mirror image<br />
exercise.<br />
Stitch, trim, and mount sample.<br />
artista 630E & 640E<br />
Up/Down Mirror Image<br />
n/a<br />
artista 730E<br />
Up/Down Mirror Image<br />
Select the indicated motif.<br />
In Edit 1, select the Medium hoop.<br />
Select Duplicate Motif symbol.<br />
There are now two copies of the<br />
motif on the screen.<br />
Go to Edit 2. Touch the Up/Down<br />
Mirror Image symbol. The active<br />
motif is flipped. Move it to the<br />
lower end of the hoop.<br />
Retrieve the other motif and<br />
move it to the upper end of the<br />
hoop. Touch OK.<br />
Stitch, trim and mount sample.<br />
<strong>Embroidery</strong> Motif<br />
deco 330<br />
#19 - fancy border<br />
aurora 430E & 440QEE<br />
My Designs > Floral8.art<br />
artista 630E & 640E<br />
n/a<br />
artista 730E<br />
#14 - little wild rose<br />
Fabric & Stabilizer<br />
8” x 10” rectangle<br />
MASTERING YOUR BERNINA ® EMBROIDERY MODULE/MACHINE 2/06 38<br />
©2006 BERNINA ® of America, Inc. Permission to copy granted only to Authorized BERNINA ® Dealers
BERNINA ® <strong>Embroidery</strong> <strong>Module</strong>/<strong>Machine</strong><br />
Up-to-Down Mirror Image Sample<br />
<strong>Mastering</strong><br />
<strong>Your</strong><br />
BERNINA ®<br />
deco 330<br />
aurora 430E & 440QEE<br />
artista 630E & 640E<br />
artista 730E<br />
n/a<br />
MASTERING YOUR BERNINA ® EMBROIDERY MODULE/MACHINE 2/06 39<br />
©2006 BERNINA ® of America, Inc. Permission to copy granted only to Authorized BERNINA ® Dealers
BERNINA ® <strong>Embroidery</strong> <strong>Module</strong>/<strong>Machine</strong><br />
Using <strong>Embroidery</strong> Cards<br />
<strong>Mastering</strong><br />
<strong>Your</strong><br />
BERNINA ®<br />
deco 330<br />
Insert desired embroidery card<br />
into slot on right side of embroidery<br />
machine. Select Design<br />
Card tab. Scroll through desings<br />
and select desired motif.<br />
Embroider and trim sample.<br />
Press the carriage return key<br />
after finishing the last section to<br />
return the carriage to the stored<br />
position.<br />
Trim and mount sample.<br />
aurora 430E & 440QEE<br />
<strong>Embroidery</strong> collections on cards<br />
may be accessed using the Mini<br />
Magic Box Plus or Magic Box Plus<br />
and sent directly to the machine<br />
using EC on PC.<br />
Stitch, trim, and mount sample.<br />
Notes<br />
artista 630E & 640E<br />
<strong>Embroidery</strong> collections on cards<br />
may be accessed using the Mini<br />
Magic Box Plus or Magic Box<br />
Plus and sent directly to the<br />
machine for stitching, or written<br />
to a BERNINA ® Personal Design<br />
Stick for use in the machine.<br />
Stitch, trim, and mount sample.<br />
artista 730E<br />
Insert desired embroidery card<br />
into slot on right side of sewing<br />
machine.<br />
Touch embroidery card icon<br />
(teddy bear) motif. Select desired<br />
motif.<br />
Stitch, trim, and mount sample.<br />
<strong>Embroidery</strong> Motif<br />
deco 330<br />
any card design<br />
(sample: Studio BERNINA ®<br />
Fun with Bears by Mary Ann<br />
June Collection)<br />
aurora 430E & 440QEE<br />
any card design<br />
(sample: Studio BERNINA ®<br />
Dena’s Closet Crafter’s<br />
Collection)<br />
artista 630E & 640E<br />
any card design<br />
(sample: Studio BERNINA ®<br />
Floral Inspirations by Debbie<br />
Mumm Collection)<br />
artista 730E<br />
any card design<br />
(sample: Studio BERNINA ®<br />
Fuzzytails by Lisa McCue<br />
Collection)<br />
MASTERING YOUR BERNINA ® EMBROIDERY MODULE/MACHINE 2/06 40<br />
©2006 BERNINA ® of America, Inc. Permission to copy granted only to Authorized BERNINA ® Dealers
BERNINA ® <strong>Embroidery</strong> <strong>Module</strong>/<strong>Machine</strong><br />
Using <strong>Embroidery</strong> Cards Sample<br />
<strong>Mastering</strong><br />
<strong>Your</strong><br />
BERNINA ®<br />
deco 330<br />
aurora 430E & 440QEE<br />
artista 630E & 640E<br />
artista 730E<br />
MASTERING YOUR BERNINA ® EMBROIDERY MODULE/MACHINE 2/06 41<br />
©2006 BERNINA ® of America, Inc. Permission to copy granted only to Authorized BERNINA ® Dealers
BERNINA ® <strong>Embroidery</strong> <strong>Module</strong>/<strong>Machine</strong><br />
Using an <strong>Embroidery</strong> CD or<br />
BERNINA ® or OESD USB Stick<br />
<strong>Mastering</strong><br />
<strong>Your</strong><br />
BERNINA ®<br />
deco 330<br />
n/a<br />
artista 630E & 640E<br />
<strong>Embroidery</strong> collections on CDs<br />
and BERNINA ® or OESD USB<br />
Sticks may be accessed through<br />
the Editor Lite <strong>Embroidery</strong> Software;<br />
simply select the CD or<br />
USB Stick drive drive instead of<br />
the My Designs folder.<br />
Select Iris. Select Add Design<br />
and insert Iris text. Position within<br />
hoop as desired.<br />
Stitch, trim, and mount sample.<br />
aurora 430E & 440QEE<br />
<strong>Embroidery</strong> collections on CDs<br />
and BERNINA ® or OESD USB<br />
Sticks may be accessed through<br />
the Editor Lite <strong>Embroidery</strong> Software;<br />
simply select the CD or<br />
USB Stick drive instead of the My<br />
Designs folder.<br />
Select Girl Bear. Select Insert<br />
Design; select Boy Bear. Position<br />
within hoop as desired.<br />
Stitch, trim, and mount sample.<br />
artista 730E<br />
CDs: Optional CD Drive required<br />
Connect BERNINA ® CD Reader to<br />
artista.<br />
USB Sticks: Use USB port in right side<br />
of artista 730.<br />
Insert CD or BERNINA ® or OESD USB<br />
Stick; select Seasonal Designs icon.<br />
Select #42-Violets. Touch Add Motif<br />
button. Select #41-Bleeding Heart.<br />
Select Edit 2. Select Move Motif symbol;<br />
move Bleeding Heart to left of Violets.<br />
Select Edit 1; select Duplicate icon.<br />
Select Edit 2: touch Right/Left Mirror<br />
Image to reverse duplicated Bleeding<br />
Heart. Move it to the right.<br />
Touch Retrieve icon until all three<br />
flowers are selected. Rotate grouping<br />
90º by touching Rotation symbol two<br />
times. Touch OK.<br />
Embroider, trim, and mount sample.<br />
Note: Designs may also be<br />
accessed using any level of<br />
BERNINA ® <strong>Embroidery</strong> Software,<br />
including Editor Lite.<br />
Notes<br />
artista 730 CD Reader<br />
Microsoft ® CE.NET gives the<br />
artista 730 the ability to have<br />
both a USB client port and a<br />
USB host port.<br />
Client Port<br />
Enables your artista 730E to<br />
receive instructions from your<br />
PC and BERNINA® embroidery<br />
software.<br />
Host Port<br />
Allows the artista 730E to give<br />
direction to a peripheral such<br />
as the BERNINA ® CD-R drive<br />
and retrieve .ART files from<br />
BERNINA ® design CDs and<br />
OESD multi-format design<br />
collection CDs.<br />
<strong>Embroidery</strong> Motif<br />
deco 330<br />
n/a<br />
aurora 430E & 440QEE<br />
any CD or USB Design Stick<br />
design (sample: Sue Dreamer<br />
Collection, Girl Bear & Boy<br />
Bear)<br />
artista 630E & 640E<br />
any CD or USB Design Stick<br />
design (sample: Tuscan<br />
Memories by Louise Max<br />
Collection, Iris & Iris text)<br />
artista 730E<br />
any CD or USB Design Stick<br />
design (sample: artista 730E<br />
design CD or USB Stick,<br />
Violets & Bleeding Heart)<br />
MASTERING YOUR BERNINA ® EMBROIDERY MODULE/MACHINE 2/06 42<br />
©2006 BERNINA ® of America, Inc. Permission to copy granted only to Authorized BERNINA ® Dealers
BERNINA ® <strong>Embroidery</strong> <strong>Module</strong>/<strong>Machine</strong><br />
CD or USB Stick Sample<br />
<strong>Mastering</strong><br />
<strong>Your</strong><br />
BERNINA ®<br />
deco 330<br />
aurora 430E & 440QEE<br />
n/a<br />
artista 630E & 640E<br />
artista 730E<br />
MASTERING YOUR BERNINA ® EMBROIDERY MODULE/MACHINE 2/06 43<br />
©2006 BERNINA ® of America, Inc. Permission to copy granted only to Authorized BERNINA ® Dealers
BERNINA ® <strong>Embroidery</strong> <strong>Module</strong>/<strong>Machine</strong><br />
<strong>Mastering</strong><br />
<strong>Your</strong><br />
BERNINA ®<br />
Saving & Deleting <strong>Embroidery</strong> Motifs<br />
After customizing an embroidery motif or creating a combination that you<br />
want to be able to quickly access and use again, follow these steps.<br />
(For these exercises, use the combination from the previous exercise.)<br />
deco 330<br />
Saving a Motif to <strong>Machine</strong><br />
Select Editing tab. Touch Save<br />
File Key. Touch File Name key to<br />
assign file name. Key in file<br />
name. Touch OK; touch OK.<br />
Saving to a<br />
Personal Design Card<br />
Select Editing; touch Save File.<br />
Touch Built in/Card key to toggle<br />
to Personal Design Card. Touch<br />
File Name key to assign file<br />
name. Key in file name. Touch<br />
OK; touch OK.<br />
Deleting a Motif<br />
Select Editing tab. Touch Delete<br />
key symbol (trash can).<br />
Retrieving a Saved Motif<br />
Select Pattern selection tob.<br />
Select Open File key. Touch Built<br />
in/Card key to toggle between<br />
Built in motifs and motifs on the<br />
PDC. Use arrow keys to select<br />
desired motif. Touch OK.<br />
aurora 430E & 440QEE<br />
Saving a Motif<br />
Select File > Save As. Save in<br />
desired location (My Designs<br />
folder or other location).<br />
Note: Motifs are accessed<br />
through the Editor Lite software<br />
on your PC.<br />
Notes<br />
Formatting the<br />
Personal Design Card<br />
(deco 330 only)<br />
Formatting the Personal<br />
Design Card (PDC) enables<br />
designs to be saved and<br />
transferred from the PC to the<br />
deco 330. Note: The deco<br />
330 will only read expanded<br />
(.exp) format designs.<br />
Insert the PDC into the slot<br />
on the side of the deco 330.<br />
Select the Mode key. Select<br />
Set Up and page forward until<br />
“Format Card” appears.<br />
Touch “Format Card”. Note:<br />
All designs previously saved<br />
to PDC will be erased.<br />
If using BERNINA ® embroidery<br />
software, the card will<br />
automatically be formatted<br />
when a design is written to<br />
the PDC, and the design will<br />
automatically be converted to<br />
.exp format. Note: All designs<br />
previously saved to PDC will<br />
remain on the card.<br />
MASTERING YOUR BERNINA ® EMBROIDERY MODULE/MACHINE 2/06 44<br />
©2006 BERNINA® of America, Inc. Permission to copy granted only to Authorized BERNINA ® Dealers
BERNINA ® <strong>Embroidery</strong> <strong>Module</strong>/<strong>Machine</strong><br />
<strong>Mastering</strong><br />
<strong>Your</strong><br />
BERNINA ®<br />
Saving & Deleting <strong>Embroidery</strong> Motifs<br />
After customizing an embroidery motif or creating a combination that you<br />
want to be able to quickly access and use again, follow these steps.<br />
(For these exercises, use the combination from the previous exercise.)<br />
artista 630E & 640E<br />
Saving a Motif<br />
Go to Edit 1. Select the Save icon<br />
(floppy disc). A screen appears that<br />
enables you to save your motif to<br />
the sewing/embroidery computer or<br />
Personal Design Stick.<br />
artista 730E<br />
Saving a Motif<br />
Go to Edit 1. Select the Save icon<br />
(floppy disc). A screen appears<br />
that enables you to save your motif<br />
to the sewing/embroidery computer<br />
or Personal Design Card or Stick.<br />
Notes<br />
Select the <strong>Embroidery</strong> computer<br />
symbol. <strong>Your</strong> motif combination<br />
is shown as NEW on the screen.<br />
Touch the picture of your motif.<br />
The saved combination is<br />
displayed in the Edit 1 screen.<br />
Deleting a Saved Motif<br />
Select the My Designs folder.<br />
Select the trash can. Select the<br />
motif you wish to delete. Select<br />
OK. After confirming your decision<br />
to delete the design, the design is<br />
deleted.<br />
Note: It is not possible to delete<br />
designs from the motif or alphabet<br />
folders, only from the My Designs<br />
folder.<br />
Deleting All Saved Designs<br />
It is possible to delete the entire<br />
contencts of a Personal Design<br />
Stick or the My Designs folder.<br />
Touch Set Up; the Selection menu<br />
appears. Touch the Reset icon.<br />
Select Delete User Data. In embroidery<br />
mode, two options are available:<br />
My Designs or Personal<br />
Design Stick (the stick must be<br />
plugged into the embroidery computer).<br />
Select desired option.<br />
Confirm the display message by<br />
touching OK. Touch Esc until the<br />
last activated embroidery screen<br />
appears.<br />
Select the <strong>Embroidery</strong> computer<br />
symbol. <strong>Your</strong> motif combination<br />
is shown as Untitled on the<br />
screen. Touch the picture of<br />
your motif. A “keyboard” screen<br />
appears; input a name for your<br />
creation. Note: Upper and lower<br />
case letters are available as well<br />
as a variety of numbers and<br />
symbols. After naming your motif,<br />
touch OK. The saved combination<br />
is displayed in the Edit 1 screen.<br />
Deleting a Motif<br />
In the Edit 1 screen, select New<br />
Motif icon. Select the My Designs<br />
folder. Select the Help symbol.<br />
Touch the embroidery motif you<br />
wish to delete. An information<br />
screen appears, listing Design<br />
Information.<br />
Touch the Delete symbol (trash<br />
can). A Delete Design screen<br />
appears offering the option to<br />
delete ONLY the selected design<br />
or to delete the entire contents of<br />
the selected folder.<br />
Select the Delete Design ONLY<br />
option. One more dialog box<br />
appears, asking is you are sure<br />
that you want to delete the<br />
selected motif. Confirm by selecting<br />
Yes. The motif is now deleted.<br />
MASTERING YOUR BERNINA ® EMBROIDERY MODULE/MACHINE 2/06 45<br />
©2006 BERNINA® of America, Inc. Permission to copy granted only to Authorized BERNINA ® Dealers
BERNINA ® <strong>Embroidery</strong> <strong>Module</strong>/<strong>Machine</strong><br />
<strong>Mastering</strong><br />
<strong>Your</strong><br />
BERNINA ®<br />
<strong>Embroidery</strong> Beginnings Shopping List<br />
Magic Box Plus with artista Magic Card<br />
Mini Magic Box Plus with artista Magic Card<br />
USB PC Card Reader (OESD)<br />
BERNINA ® CD Drive (200/730 only)<br />
<strong>Embroidery</strong> Collections<br />
(Studio BERNINA ® Cards & CDs,<br />
BERNINA ® & OESD USB Design Sticks)<br />
______________<br />
______________<br />
______________<br />
Stabilizers<br />
Cut-Away<br />
Heavyweight Cut-Away<br />
Xtra Heavyweight Cut-Away<br />
Hydro-Stick Cut-Away<br />
Cut-Away Poly-Mesh<br />
Fusible Poly-Mesh<br />
Stabil-Stick Cut-Away<br />
Tear-Away<br />
Lightweight Tear-Away<br />
Smooth Touch Tear-Away<br />
Medium Weight Tear-Away<br />
Hydro-Stick Tear-Away<br />
Ultra Clean & Tear<br />
Stabil-Stick Tear-Away<br />
Water-Soluble<br />
Aqua Film Topping & Backing<br />
Badge Master Wash-Away<br />
Aqua Mesh Wash-Away<br />
Aqua Mesh Plus (adhesive-backed)<br />
Other<br />
Spray Starch<br />
Brush/Paint-On products<br />
Fusible Interfacing products<br />
HRFive Temporary Spray Adhesive<br />
ABCs of <strong>Embroidery</strong><br />
Sew Much Fun<br />
A Touch of Artistry I<br />
Seasons of Artistry<br />
Through the Needle magazine<br />
Isacord <strong>Embroidery</strong> Threads<br />
color ________<br />
color ________<br />
color ________<br />
Yenmet Metallic <strong>Embroidery</strong> Threads<br />
color ________<br />
color ________<br />
Other <strong>Embroidery</strong> Threads<br />
color ________<br />
color ________<br />
Bobbin Thread<br />
<strong>Embroidery</strong> Needles – mixed #75/90<br />
Organ <strong>Embroidery</strong> Needles<br />
#70/10 Sharps (#70/10, 80/12, 90/14)<br />
Ballpoint (#70/10, 80/12, 90/14)<br />
Supplemental Thread guide<br />
Multiple Spool Holder<br />
BERNINA ® Thread Box<br />
Clear Acrylic <strong>Embroidery</strong> Table (18” x 24”)<br />
Large Clear Acrylic <strong>Embroidery</strong> Table (24” x 24”)<br />
Suitcase System<br />
<strong>Embroidery</strong> Hoops<br />
deco 330<br />
Free Arm Hoop<br />
Round Hoop<br />
aurora/artista<br />
Small <strong>Embroidery</strong> Hoop<br />
Freearm <strong>Embroidery</strong> Spacer<br />
Medium <strong>Embroidery</strong> Hoop<br />
Large Oval Hoop<br />
Hoop ‘N’ Buddyz Hat Hoop Insert (fits Large Oval only)<br />
Mega Hoop (artista 630E/640E/730E only)<br />
Hoop-It-All Hoops<br />
Quilters Square Double Wide<br />
Super Double Wide<br />
deco 330 Double Wide<br />
Big/Cap Hoop<br />
MASTERING YOUR BERNINA ® EMBROIDERY MODULE/MACHINE 2/06 46<br />
©2006 BERNINA® of America, Inc. Permission to copy granted only to Authorized BERNINA ® Dealers
BERNINA ® <strong>Embroidery</strong> <strong>Module</strong>/<strong>Machine</strong><br />
<strong>Mastering</strong><br />
<strong>Your</strong><br />
BERNINA ®<br />
<strong>Mastering</strong> <strong>Your</strong><br />
BERNINA ®<br />
<strong>Embroidery</strong><br />
<strong>Module</strong>/<strong>Machine</strong><br />
Owner’s Workbook<br />
Section B<br />
Beyond the Basics<br />
MASTERING YOUR BERNINA ® EMBROIDERY MODULE/MACHINE 2/06 47<br />
©2006 BERNINA® of America, Inc. Permission to copy granted only to Authorized BERNINA ® Dealers
BERNINA ® <strong>Embroidery</strong> <strong>Module</strong>/<strong>Machine</strong><br />
General Information:<br />
Working with Alphabets & Text<br />
Working with Alphabets<br />
deco 330<br />
3 sizes: Large - 30mm; Medium - 20mm; Small - 10mm<br />
2-letter and 3-letter monograms<br />
<strong>Mastering</strong><br />
<strong>Your</strong><br />
BERNINA ®<br />
Notes<br />
aurora 430E/440QEE - see chart<br />
alphabets can be resized using Editor Lite<br />
artista 630E/640E/730E - see chart<br />
alphabets can be resized using on-screen editing functions<br />
Alphabet deco 330 aurora artista 630E artista 640E artista 730E<br />
Alice -- -- -- -- yes<br />
Anniversary -- yes yes yes --<br />
Bamboo -- -- -- -- --<br />
Blackboard -- -- -- -- yes<br />
Chateau -- -- -- yes --<br />
Cheltenham yes -- -- -- --<br />
Child’s Play -- -- -- -- yes<br />
Cursive -- -- -- -- yes<br />
Drifter -- -- -- -- yes<br />
Emerald -- -- -- yes --<br />
Gothic yes -- -- -- --<br />
Guinevere -- yes yes yes --<br />
King Charles -- yes yes yes yes<br />
Lisa -- -- -- -- yes<br />
London -- yes yes yes yes<br />
Script yes -- -- -- --<br />
Swiss Block -- yes yes yes yes<br />
Varsity Block -- -- -- -- yes<br />
MASTERING YOUR BERNINA ® EMBROIDERY MODULE/MACHINE 2/06 48<br />
©2006 BERNINA ® of America, Inc. Permission to copy granted only to Authorized BERNINA ® Dealers
BERNINA ® <strong>Embroidery</strong> <strong>Module</strong>/<strong>Machine</strong><br />
<strong>Mastering</strong><br />
<strong>Your</strong><br />
BERNINA ®<br />
Selecting, Adding, & Deleting Letters<br />
deco 330<br />
Selecting Characters<br />
Select Alphabet tab. Touch the<br />
Font key. Select font style. Touch<br />
the desired letters on the “keyboard”<br />
screen. Use the A/a icon<br />
to toggle between upper and<br />
lower case letters.<br />
Deleting & Adding Characters<br />
- to delete, move cursor under<br />
the letter/character; select the<br />
Delete icon (trash can)<br />
- to add, move cursor to the right<br />
of the desired position; select the<br />
character and touch OK<br />
artista 630E & 640E<br />
Selecting Characters<br />
Select the Alphabet folder from<br />
embroidery menu. Select a font.<br />
Touch desired letter on “keyboard”<br />
screen; it appears at top<br />
of screen. Select ABC icon for<br />
upper case letters; abc for lower<br />
case letters, ÄÀÁ for special<br />
uppercase letters, äàá for special<br />
lowercase letters, 123 for numbers;<br />
@# for other characters.<br />
Deleting Characters<br />
Select the
BERNINA ® <strong>Embroidery</strong> <strong>Module</strong>/<strong>Machine</strong><br />
<strong>Mastering</strong><br />
<strong>Your</strong><br />
BERNINA ®<br />
Saving Text Designs<br />
deco 330<br />
Select Alphabet key. Touch<br />
the Font key. Select font style.<br />
Touch the desired letters on<br />
the “keyboard” screen. Use<br />
the A/a icon to toggle between<br />
upper and lower case letters.<br />
Touch OK.<br />
Select the Editing tab. Touch<br />
the Save File key. Touch File<br />
Name key to assign file name.<br />
Key in file name. Touch OK;<br />
touch OK.<br />
aurora 430E & 440QEE<br />
Select File > Save As. Select<br />
location, type in file name,<br />
press OK.<br />
Notes<br />
artista 630E & 640E<br />
Saving to <strong>Machine</strong> Memory<br />
Touch Save in the Edit 1<br />
screen. The lettering to be<br />
saved is displayed as NEW<br />
on left side of the screen.<br />
Select NEW motif; lettering<br />
is saved and machine returns<br />
to Edit screen.<br />
Saving to a BERNINA ®<br />
Personal Design Stick<br />
Insert BERNINA ® Personal<br />
Design Stick. Touch Save in<br />
the Edit 1 screen. Select the<br />
USB device icon from the<br />
Selection menu. The lettering<br />
is displayed as NEW on left<br />
side of the screen. Select the<br />
NEW motif; it is now saved<br />
on the BERNINA ® Personal<br />
Design Stick.<br />
artista 730E<br />
Saving to <strong>Machine</strong> Memory<br />
Go to Edit 1. Touch Save; motif<br />
appears as “Untitled”.<br />
Lettering will be saved in My<br />
Designs.<br />
Select lettering; a keyboard<br />
appears. Enter name of untitled<br />
design; touch OK.<br />
Saving to a Personal Design Card<br />
or BERNINA ® Personal Design<br />
Stick Insert Personal Design Card<br />
or BERNINA ® Personal Design<br />
Stick into slot or USB port in right<br />
side of machine.<br />
Go to Edit 1. Touch Save; motif<br />
appears as “Untitled”.<br />
Select design card icon or USB<br />
device icon.<br />
Select untitled motif; enter name;<br />
touch OK.<br />
MASTERING YOUR BERNINA ® EMBROIDERY MODULE/MACHINE 2/06 50<br />
©2006 BERNINA ® of America, Inc. Permission to copy granted only to Authorized BERNINA ® Dealers
BERNINA ® <strong>Embroidery</strong> <strong>Module</strong>/<strong>Machine</strong><br />
<strong>Mastering</strong><br />
<strong>Your</strong><br />
BERNINA ®<br />
Nothing is missing; this is an empty page.<br />
MASTERING YOUR BERNINA ® EMBROIDERY MODULE/MACHINE 2/06 51<br />
©2006 BERNINA ® of America, Inc. Permission to copy granted only to Authorized BERNINA ® Dealers
BERNINA ® <strong>Embroidery</strong> <strong>Module</strong>/<strong>Machine</strong><br />
<strong>Mastering</strong><br />
<strong>Your</strong><br />
BERNINA ®<br />
Alphabet Sampler<br />
deco 330<br />
Select Alphabet tab. Select the<br />
first alphabet and program its<br />
name. Select the Editing tab.<br />
Move the word to the top of the<br />
hoop and center. Add the names<br />
of the remaining alphabet styles.<br />
Note: Cheltenham may need to<br />
be entered in small font size.<br />
Add the two-letter monogram<br />
without a crest, and the threeletter<br />
monogram with a crest.<br />
<strong>Embroidery</strong>. Press the carriage<br />
return key after finishing the last<br />
section to return the carriage to<br />
the stored position.<br />
Trim and mount the sample.<br />
aurora 430E & 440QEE<br />
Open a New file. Left click on the<br />
Lettering Values icon. Left click<br />
on screen; a vertical cursor<br />
appears. Type Anniversary; the<br />
outline of the letters appears on<br />
screen. Press Enter; lettering is<br />
filled and selected.<br />
While still selected, Copy and<br />
Paste a duplicate. Use the down<br />
arrows to move the duplicate<br />
word below the original. Right<br />
click to open the Lettering Object<br />
Properties box; change text in<br />
box to Guinevere, select<br />
Guinevere alphabet, click OK,<br />
and click away from the lettering<br />
to deselect it.<br />
Press A on the keyboard to open<br />
the Lettering Object Properties<br />
box. Select King Charles alphabet;<br />
type King Charles, click<br />
OK. Click on screen below other<br />
words to set text. Click away<br />
from the lettering to deselect it.<br />
Repeat for London and Swiss<br />
Block alphabets. Change first<br />
text block to Anniversary font.<br />
Arrange as shown. Note: Some<br />
alphabets may need to be<br />
reduced to fit within the hoop.<br />
Save As alphabet sampler.<br />
Stitch, trim, and mount.<br />
artista 630E/640E/730E<br />
Select the first alphabet and program its name. Touch OK.<br />
Select Large hoop. Go to Edit 2. Move the word to the top of the hoop.<br />
Go to Edit 1. Use the Add Motif function to add remaining alphabet styles.<br />
Note: Some alphabets may need to be reduced to fit within the hoop.<br />
Touch OK to process design combination. Stitch, trim & mount sample.<br />
Notes<br />
Monograms<br />
(deco 330 only)<br />
Monograms Without Crest:<br />
Select Alphabet tab. Touch<br />
the Font key. Select 2-letter<br />
or 3-letter Monogram. Select<br />
desired characters. Touch OK.<br />
Monograms With Crest:<br />
Select Alphabet tab. Touch<br />
the Font key. Select 2-letter<br />
or 3-letter Monogram. Select<br />
Crest style. Select desired<br />
characters. Touch OK.<br />
<strong>Embroidery</strong> Fonts<br />
deco 330<br />
all alphabets<br />
aurora 430E & 440QEE<br />
all alphabets<br />
artista 630E & 640E<br />
all alphabets<br />
artista 730E<br />
all alphabets<br />
Fabric & Stabilizer<br />
8” x 10” rectangle<br />
MASTERING YOUR BERNINA ® EMBROIDERY MODULE/MACHINE 2/06 52<br />
©2006 BERNINA ® of America, Inc. Permission to copy granted only to Authorized BERNINA ® Dealers
BERNINA ® <strong>Embroidery</strong> <strong>Module</strong>/<strong>Machine</strong><br />
<strong>Mastering</strong><br />
<strong>Your</strong><br />
BERNINA ®<br />
Alphabet Sampler<br />
deco 330<br />
aurora 430E & 440QEE<br />
artista 630E & 640E<br />
artista 730E<br />
( )<br />
MASTERING YOUR BERNINA ® EMBROIDERY MODULE/MACHINE 2/06 53<br />
©2006 BERNINA ® of America, Inc. Permission to copy granted only to Authorized BERNINA ® Dealers
BERNINA ® <strong>Embroidery</strong> <strong>Module</strong>/<strong>Machine</strong><br />
Manipulating Alphabets<br />
<strong>Mastering</strong><br />
<strong>Your</strong><br />
BERNINA ®<br />
deco 330<br />
Select indicated alphabet. Select<br />
medium size font. Select vertical<br />
lettering. Program the word<br />
BERNINA. Move the word to the<br />
right. Select the Alphabet tab.<br />
Program <strong>Embroidery</strong>. Touch OK.<br />
Embroider sample. Press the<br />
carriage return key after finishing<br />
the last section to return the<br />
carriage to the stored position.<br />
Trim and mount sample.<br />
artista 630E & 640E<br />
Select indicated alphabet;<br />
program the word BERNINA,<br />
touch OK.<br />
Select the Large Oval hoop.<br />
Go to Edit 2; rotate lettering 90º.<br />
Touch Show Grid icon two times<br />
to activate grid. Move lettering<br />
so the lower edge of the letters<br />
rest on the center grid line.<br />
Go to Edit 1; select Add Motif<br />
icon. Program <strong>Embroidery</strong>;<br />
touch OK. Use same process<br />
as above to rotate the word 90º.<br />
Move <strong>Embroidery</strong> directly under<br />
BERNINA.<br />
Touch OK when editing is<br />
complete. Stitch, trim, and<br />
mount sample.<br />
aurora 430E & 440QEE<br />
Left click on the Lettering/Values<br />
button on the design toolbar.<br />
Place cursor on design screen;<br />
left click. A vertical cursor appears.<br />
Select indicated alphabet; type<br />
BERNINA using the keyboard.<br />
Press Enter; lettering is filled and<br />
remains selected.<br />
Use the Rotate CW/CCW tool to<br />
rotate the lettering 90º. Click<br />
outside the lettering to deselect it.<br />
Repeat above instructions to add<br />
the word <strong>Embroidery</strong> to your<br />
design. Position it directly under<br />
the word BERNINA.<br />
Save As manipulating alphabet.<br />
Stitch, trim, and mount.<br />
artista 730E<br />
Select indicated alphabet;<br />
program BERNINA, touch OK.<br />
Select Large Oval hoop. Select<br />
Edit 2. Touch Show Grid icon 2x<br />
to activate grid. Move lettering so<br />
lower edge of text box rests on<br />
center grid line.<br />
Rotate lettering 90º.<br />
Select Add Motif icon; program<br />
<strong>Embroidery</strong>; touch OK. Use the<br />
same process as above to rotate<br />
word 90º. Move <strong>Embroidery</strong><br />
directly under BERNINA.<br />
Touch OK when editing is done.<br />
Stitch, trim & mount sample.<br />
Notes<br />
<strong>Embroidery</strong> Font<br />
deco 330<br />
Cheltenham<br />
aurora 430E & 440QEE<br />
London<br />
artista 630E/440E<br />
Guinevere<br />
artista 730E<br />
Bamboo<br />
Fabric & Stabilizer<br />
8” x 10” rectangle<br />
MASTERING YOUR BERNINA ® EMBROIDERY MODULE/MACHINE 2/06 54<br />
©2006 BERNINA ® of America, Inc. Permission to copy granted only to Authorized BERNINA ® Dealers
BERNINA ® <strong>Embroidery</strong> <strong>Module</strong>/<strong>Machine</strong><br />
Manipulating Alphabets Sample<br />
<strong>Mastering</strong><br />
<strong>Your</strong><br />
BERNINA ®<br />
deco 330<br />
aurora 430E & 440QEE<br />
artista 630E & 640E<br />
artista 730E<br />
MASTERING YOUR BERNINA ® EMBROIDERY MODULE/MACHINE 2/06 55<br />
©2006 BERNINA ® of America, Inc. Permission to copy granted only to Authorized BERNINA ® Dealers
BERNINA ® <strong>Embroidery</strong> <strong>Module</strong>/<strong>Machine</strong><br />
Stitch Density<br />
(artista 640E/730E only)<br />
artista 640E<br />
Select London alphabet; type B; touch OK. Select Edit 2 and increase<br />
the size of the letter to 200%.<br />
<strong>Mastering</strong><br />
<strong>Your</strong><br />
BERNINA ®<br />
Notes<br />
Select Edit 1. Select the Add Motif icon. Select London alphabet; type B;<br />
touch OK. Select Edit 2 and increase size to 200%.<br />
Move second B to right of first B. Go to Edit 1; select Stitch<br />
Density icon; increase stitch density to 160%. Touch OK.<br />
Select Add Motif icon. Select London ; type B; OK. Select Edit 2;<br />
increase size to 200%.<br />
Move third B to left of first B. Go to Edit 1; select Stitch Density icon;<br />
decrease stitch density to 40%.<br />
Adjust placement of letters if needed. Note: Touch Grid icon two times<br />
to see grid and center mark.<br />
Touch OK. Select Recalculate.<br />
Embroider, trim, and mount sample, noting stitch density of each letter.<br />
Note: Notice that the satin stitches moved closer together or further<br />
apart, while the straight stitches under the design remained unchanged.<br />
Stitch density changes affect both satin stitching and step stitching.<br />
artista 730E<br />
Select Drifter font; type B. Select Edit 2 and increase the size of the<br />
letter to 200%.<br />
Go to Edit 1; duplicate design 2 times so that there are 3 Bs on screen.<br />
Select Edit 2; move motifs so that they are aligned left to right. Note:<br />
Touch Grid icon two times to see grid and center mark.<br />
Retrieve B on right. Select Motif Properties; alter satin<br />
density to 160%.<br />
Retrieve B on left. Select Motif Properties; alter satin density to 40%.<br />
Touch OK. Select Recalculate.<br />
Embroider, trim, and mount sample, noting stitch density of each letter.<br />
Note: Notice that the satin stitches moved closer together or further<br />
apart, while the straight stitches under the design remained unchanged.<br />
<strong>Embroidery</strong> Font<br />
deco 330<br />
n/a<br />
aurora 430E & 440QEE<br />
n/a<br />
artista 630E & 640E<br />
640E only: London<br />
artista 730E<br />
Drifter<br />
Fabric & Stabilizer<br />
8” x 10” rectangle<br />
MASTERING YOUR BERNINA ® EMBROIDERY MODULE/MACHINE 2/06 56<br />
©2006 BERNINA ® of America, Inc. Permission to copy granted only to Authorized BERNINA ® Dealers
BERNINA ® <strong>Embroidery</strong> <strong>Module</strong>/<strong>Machine</strong><br />
<strong>Mastering</strong><br />
<strong>Your</strong><br />
BERNINA ®<br />
Stitch Density Sample<br />
deco 330<br />
n/a<br />
aurora 430E & 440QEE<br />
n/a<br />
artista artista 630E 640E & 640E<br />
artista 730E<br />
MASTERING YOUR BERNINA ® EMBROIDERY MODULE/MACHINE 2/06 57<br />
©2006 BERNINA ® of America, Inc. Permission to copy granted only to Authorized BERNINA ® Dealers
BERNINA ® <strong>Embroidery</strong> <strong>Module</strong>/<strong>Machine</strong><br />
Combining Motifs (On-Screen Editing)<br />
<strong>Mastering</strong><br />
<strong>Your</strong><br />
BERNINA ®<br />
deco 330<br />
Select indicated motif. Select<br />
the Editing tab. Touch Rotate 45°<br />
one time.<br />
Select Pattern selection tab.<br />
Select indicated motif. Move<br />
motif up. Select Pattern selection<br />
tab. Select same motif. Touch<br />
Mirror Image Up/Down. Move<br />
motif down. Touch OK.<br />
Embroider. Return carriage to<br />
stored position. Trim and mount<br />
sample.<br />
artista 630E & 640E<br />
Select indicated motif; select Large<br />
Oval Hoop.<br />
Go to Edit 2. Touch Rescale Motif<br />
symbol; decrease size of motif to 80%.<br />
Touch Rotate Motif symbol 2 times<br />
to automatically rotate motif 90°.<br />
Go to Edit 1; touch Add Motif icon to<br />
return to motif menu. Select 2nd motif.<br />
Touch Add Motif again; select 2nd<br />
motif again; there are now 3 motifs<br />
on screen with the last one on top.<br />
Go to Edit 2. Select Move Motif and<br />
move motif up in the hoop. Rotate 90°.<br />
Use Retrieve icon to select other motif.<br />
Engage Mirror Image, rotate 90°, and<br />
use Move Motif icon to move selected<br />
motif to lower part of the hoop. When<br />
pleased with arrangement, select OK.<br />
Embroider, trim, and mount sample.<br />
aurora 430E & 440QEE<br />
Select File > Open > My Designs ><br />
Editor Lite folder > Floral6.art. Open.<br />
Select File > Insert Design; My<br />
Designs > Editor Lite > Floral3.art.<br />
Open.<br />
While inserted design is selected, left<br />
click twice on Rotate CCW/CW icon.<br />
Move to lower right of 1st design.<br />
Copy and paste a 2nd floral swag.<br />
Mirror Image Up/Down; move to left.<br />
Edit>Select All. Left click twice on<br />
Rotate CCW/CW icon.<br />
Select Settings>Thread Colors.<br />
Select Thread Type > Isacord Shades<br />
Assign thread colors:<br />
• Color 1: 5531 • Color 2: 3910<br />
• Color 3: 0015 • Color 4: 5531<br />
• Color 5: 3920<br />
Click OK.<br />
Save As combining motifs.<br />
Stitch, trim, mount sample.<br />
artista 730E<br />
Select indicated motif; select Large<br />
Oval Hoop.<br />
Go to Edit 2. Touch Rotate Motif symbol<br />
twice to automatically rotate motif 90°.<br />
Go to Edit 1. Touch Add Motif icon<br />
to return to motif menu. Select second<br />
motif. Touch the Duplicate Motif symbol.<br />
There are now 3 motifs on screen with<br />
the last one on top.<br />
Return to Edit 2; top motif is active.<br />
Mirror Image motif both Right/Left and<br />
Up/Down. Use the Move and Retrieve<br />
functions to arrange motifs as desired.<br />
When pleased with arrangement, touch<br />
OK. Choose Recalculation option. When<br />
processing is complete, embroider<br />
design. Trim and mount sample.<br />
Notes<br />
<strong>Embroidery</strong> Motif<br />
deco 330<br />
#50 - needle & thread<br />
#30 - sewing border<br />
aurora 430E & 440QEE<br />
Floral6.art (Editor Lite)<br />
Floral3.art (Editor Lite)<br />
artista 630E & 640E<br />
630E: #20 - flower 1; #19 - flower<br />
640E: #26 - flower 1; #25 - flower<br />
artista 730E<br />
#14 - little wild rose<br />
#16 - little pansies<br />
Fabric & Stabilizer<br />
8” x 10” rectangle<br />
MASTERING YOUR BERNINA ® EMBROIDERY MODULE/MACHINE 2/06 58<br />
©2006 BERNINA ® of America, Inc. Permission to copy granted only to Authorized BERNINA ® Dealers
BERNINA ® <strong>Embroidery</strong> <strong>Module</strong>/<strong>Machine</strong><br />
Combining Motifs Sample<br />
<strong>Mastering</strong><br />
<strong>Your</strong><br />
BERNINA ®<br />
deco 330<br />
aurora 430E & 440QEE<br />
artista 630E & 640E<br />
artista 730E<br />
MASTERING YOUR BERNINA ® EMBROIDERY MODULE/MACHINE 2/06 59<br />
©2006 BERNINA ® of America, Inc. Permission to copy granted only to Authorized BERNINA ® Dealers
BERNINA ® <strong>Embroidery</strong> <strong>Module</strong>/<strong>Machine</strong><br />
Combining Lettering & Motifs<br />
(On-Screen Editing)<br />
deco 330<br />
Select indicated motif. Move<br />
down. Select Pattern selection<br />
tab. Select same motif. Touch<br />
Top/Bottom Mirror Image. Move<br />
motif up. Select Alphabet tab.<br />
Select Gothic, medium size font.<br />
Using upper and lower case<br />
letters, program Bernina; touch<br />
OK. Move up slightly. Touch<br />
Alphabet tab. Program deco 330;<br />
touch OK. Move down slightly;<br />
touch OK.<br />
Embroider. Return carriage to<br />
stored position. Trim and mount<br />
sample.<br />
aurora 430E & 440QEE<br />
Left click Hoop icon to turn off hoop<br />
display. Open Quilt8.art. Select motif;<br />
right click twice on Rotate CCW/CW<br />
icon. Left click Scale by 20% icon.<br />
Copy and paste design; select Mirror<br />
Image Top/Bottom. Move motif to left.<br />
Press A on keyboard to open Lettering<br />
Object Properties box. Select<br />
Anniversary, centered, 15mm height.<br />
Type Custom Creation; press Enter;<br />
type By, press enter, type your name,<br />
click OK. Click to set lettering<br />
between 2 designs. Adjust positioning<br />
to create a pleasing arrangment.<br />
Left click on Hoop icon to turn on<br />
hoop display.Select Edit > Select All.<br />
Left click twice on Rotate CCW/CW<br />
icon. While selected, rescale combination<br />
to fit inside hoop using corner<br />
sizing handles.<br />
Save As > motifs and lettering<br />
Stitch, trim and mount sample.<br />
<strong>Mastering</strong><br />
<strong>Your</strong><br />
BERNINA ®<br />
Notes<br />
artista 630E & 640E<br />
Select indicated motif; it opens in<br />
Edit 1 screen. Go to Edit 2. Reduce<br />
design to 70%; rotate 270º. Move to<br />
lower edge of hoop.<br />
Go to Edit 1; select Add Motif icon.<br />
Select motif again. Reduce design to<br />
70%; rotate 90º. Move to upper edge<br />
of hoop. Touch Show Grid icon two<br />
times to activate placement grid.<br />
Go to Edit 1; touch Add Motif icon;<br />
select King Charles alphabet; input<br />
Bernina; touch OK. Go to Edit 2 and<br />
move motif to center of hoop.<br />
Select Add Motif; select King Charles<br />
again; input artista 630E or 640E;<br />
touch OK. Go to Edit 2; reduce the<br />
selected lettering to 65%; move<br />
below the word Bernina.<br />
Use Move Motif function to fine-tune<br />
design arrangement.<br />
Embroider, trim, and mount sample.<br />
artista 730E<br />
Select indicated motif; it opens in<br />
Edit 1. Select Large Oval Hoop. Go to<br />
Edit 2. Reduce design to 80%; rotate<br />
-65º. Move to upper edge of hoop.<br />
Select Duplicate icon to copy design.<br />
Rotate 2nd motif 155º functions. Move<br />
to lower edge of hoop.<br />
Touch Show Grid icon 2 times to<br />
activate grid. Touch Add Motif icon;<br />
select Alice alphabet; input Bernina;<br />
OK. Select Edit 2; move text so lower<br />
edge is on horizontal grid line.<br />
Select Edit 1, touch Add Motif icon.<br />
Select Alice again; input artista 730E;<br />
OK. Select Edit 2; move text so upper<br />
edge rests on horizontal grid line. Use<br />
Move Motif function to fine-tune design.<br />
Touch OK to process multiple<br />
elements into a single design.<br />
Embroider, trim, and mount sample.<br />
<strong>Embroidery</strong> Motif<br />
deco 330<br />
#19 - fancy border<br />
Gothic alphabet<br />
aurora 430E & 440QEE<br />
Quilt8.art (Editor Lite)<br />
Anniversary alphabet<br />
artista 630E & 640E<br />
630E: #8 Lace Panel 2<br />
640E: #9 Lace Panel 2<br />
King Charles alphabet (Font 1)<br />
artista 730E<br />
#8 - grape leaf<br />
Alice alphabet<br />
Fabric & Stabilizer<br />
8” x 10” rectangle<br />
MASTERING YOUR BERNINA ® EMBROIDERY MODULE/MACHINE 2/06 60<br />
©2006 BERNINA ® of America, Inc. Permission to copy granted only to Authorized BERNINA ® Dealers
BERNINA ® <strong>Embroidery</strong> <strong>Module</strong>/<strong>Machine</strong><br />
Combining Lettering & Motifs Sample<br />
<strong>Mastering</strong><br />
<strong>Your</strong><br />
BERNINA ®<br />
deco 330<br />
aurora 430E & 440QEE<br />
artista 630E & 640E<br />
artista 730E<br />
MASTERING YOUR BERNINA ® EMBROIDERY MODULE/MACHINE 2/06 61<br />
©2006 BERNINA ® of America, Inc. Permission to copy granted only to Authorized BERNINA ® Dealers
BERNINA ® <strong>Embroidery</strong> <strong>Module</strong>/<strong>Machine</strong><br />
Rehooping<br />
<strong>Mastering</strong><br />
<strong>Your</strong><br />
BERNINA ®<br />
deco 330<br />
Draw a baseline. Hoop fabric at<br />
one end; use template to keep line<br />
vertical.<br />
Select Gothic alphabet. Select<br />
vertical lettering. Program<br />
BERNINA; touch OK. Position<br />
needle starting point over<br />
baseline. Embroider.<br />
Rehoop fabric with BERNINA<br />
at top, keeping baseline straight.<br />
Select Alphabet tab. Program<br />
deco 330. Position needle<br />
starting point over baseline at<br />
an appropriate distance from<br />
BERNINA. Embroider.<br />
Return carriage to stored position.<br />
Trim and mount sample.<br />
aurora 430E & 440QEE<br />
Open a New file. Touch A on the<br />
keyboard. Type BERNINA 430E or<br />
BERNINA 440E; select Swiss<br />
Block , change height to 31.75mm,<br />
click OK. Click on screen to place<br />
lettering. Right click 2 times on the<br />
Rotate CW/CCW icon.<br />
Note that lettering does not fit<br />
within hoop. Select lettering; click<br />
to open Lettering Values box. In<br />
text box, delete A 430E or A 440E,<br />
leaving the letters BERNIN; OK.<br />
Remaining letters fit within hoop.<br />
Draw a line to represent design<br />
baseline. Hoop fabric, using hoop<br />
template to keep line straight and<br />
centered. Embroider BERNIN.<br />
Return to Editor Lite screen.<br />
Select lettering; right click to open<br />
Lettering Values box. In text box,<br />
delete BERNIN and type A 430E<br />
or A 440E; OK. Text fits in hoop.<br />
Rehoop fabric, aligning baseline<br />
and positioning needle an appropriate<br />
distance from BERNIN.<br />
Embroider, trim, & mount sample.<br />
artista 630E, 640E, & 730E<br />
Draw a line to represent the design baseline. Hoop fabric in Medium hoop;<br />
use template to keep line straight and centered.<br />
Select London alphabet; enter BERNINA. Go to Edit 2; rotate 90º. Touch OK.<br />
630E/640E: Select Edit 2; move lower edge of text to marked baseline.<br />
730E: Select Move Hoop; position needle over marked baseline.<br />
All: Using the template to keep the line straight, vertical and centered,<br />
embroider BERNINA.<br />
Rehoop fabric. Select London again; enter 630E, 640E, or 730E. Go to<br />
Edit 2; rotate 90º. Touch OK.<br />
630E/640E: Select Edit 2; move lower edge of text to marked baseline.<br />
730E: Select Move Hoop; position needle over marked baseline.<br />
All: Position text an appropriate distance from BERNINA. Embroider, trim,<br />
and mount sample.<br />
Notes<br />
<strong>Embroidery</strong> Alphabet<br />
deco 330<br />
Gothic alphabet<br />
aurora 430E & 440QEE<br />
Swiss Block alphabet<br />
artista 630E & 640E<br />
London alphabet<br />
artista 730E<br />
London alphabet<br />
Fabric & Stabilizer<br />
8” x 10” rectangle<br />
MASTERING YOUR BERNINA ® EMBROIDERY MODULE/MACHINE 2/06 62<br />
©2006 BERNINA ® of America, Inc. Permission to copy granted only to Authorized BERNINA ® Dealers
○ ○ ○ ○ ○ ○ ○<br />
○ ○ ○ ○ ○ ○ ○<br />
○ ○ ○ ○ ○ ○ ○<br />
BERNINA ® <strong>Embroidery</strong> <strong>Module</strong>/<strong>Machine</strong><br />
Rehooping Sample<br />
<strong>Mastering</strong><br />
<strong>Your</strong><br />
BERNINA ®<br />
deco 330<br />
aurora 430E & 440QEE<br />
artista 630E & 640E<br />
artista 730E<br />
MASTERING YOUR BERNINA ® EMBROIDERY MODULE/MACHINE 2/06 63<br />
©2006 BERNINA ® of America, Inc. Permission to copy granted only to Authorized BERNINA ® Dealers
BERNINA ® <strong>Embroidery</strong> <strong>Module</strong>/<strong>Machine</strong><br />
Free-Arm <strong>Embroidery</strong><br />
<strong>Mastering</strong><br />
<strong>Your</strong><br />
BERNINA ®<br />
deco 330<br />
Select indicated motif. Select<br />
Editing tab. Select Hoop selection<br />
icon. Select A(F): 126 x 110mm.<br />
Touch OK.<br />
Embroider sample.<br />
Return carriage to stored<br />
position.<br />
Trim and mount sample.<br />
artista 630E & 640E<br />
Attach adapter and module to<br />
free-arm. Do NOT attach Small<br />
Hoop to module at this time.<br />
Select indicated motif. Go to<br />
Edit 2; rotate 30 degrees. Reduce<br />
size as needed (stitching field =<br />
72mm x 50mm).<br />
Touch OK; the module will<br />
register the free arm adapter,<br />
move the embroidery arm, and<br />
check for a hoop. Attach the<br />
Small hoop and touch OK to<br />
process the embroidery design.<br />
Stitch, trim, and mount sample.<br />
aurora 430E & 440QEE<br />
Attach adapter and module to<br />
free-arm. Do NOT attach Small<br />
Hoop to module at this time.<br />
Select indicated motif in Editor<br />
Lite.<br />
Select the artista 50 x 72<br />
Freearm hoop.<br />
Select the Scale by 20% Down/<br />
Up icon, by RIGHT mouse clicking<br />
on it one time.<br />
Save As freearm sample.<br />
Stitch, trim, and mount.<br />
artista 730E<br />
Attach adapter and module to<br />
free-arm. Do NOT attach Small<br />
Hoop to module at this time.<br />
Select indicated motif. Reduce<br />
size as needed in Edit 2 (stitching<br />
field = 72mm x 50mm).<br />
Touch OK; the module will<br />
register the free arm adapter,<br />
move the embroidery arm, and<br />
check for a hoop. Attach the<br />
Small hoop and touch OK to<br />
process the embroidery design.<br />
Stitch, trim, and mount sample.<br />
Notes<br />
Attaching Spacer<br />
Important Note: Use only<br />
the Small Hoop for free-arm<br />
embroidery.<br />
• Remove slide-on table.<br />
• Place spacer on sewing<br />
machine arm. Push toward<br />
sewing machine to engage<br />
the lugs.<br />
• Attach embroidery module.<br />
Removing Spacer<br />
• Remove module.<br />
• Grasp right rear corner<br />
of spacer; remove from<br />
sewing machine.<br />
<strong>Embroidery</strong> Motif<br />
deco 330<br />
#37 - flower frill<br />
aurora 430E & 440QEE<br />
Floral single.art (Editor Lite)<br />
artista 630E & 640E<br />
630E: #55 - snowflake<br />
640E: #71 - snowflake<br />
artista 730E<br />
#14 - little Wild Rose<br />
Fabric & Stabilizer<br />
8” x 10” rectangle<br />
MASTERING YOUR BERNINA ® EMBROIDERY MODULE/MACHINE 2/06 64<br />
©2006 BERNINA ® of America, Inc. Permission to copy granted only to Authorized BERNINA ® Dealers
BERNINA ® <strong>Embroidery</strong> <strong>Module</strong>/<strong>Machine</strong><br />
Free-Arm <strong>Embroidery</strong> Sample<br />
<strong>Mastering</strong><br />
<strong>Your</strong><br />
BERNINA ®<br />
deco 330<br />
aurora 430E & 440QEE<br />
artista 630E & 640E<br />
artista 730E<br />
MASTERING YOUR BERNINA ® EMBROIDERY MODULE/MACHINE 2/06 65<br />
©2006 BERNINA ® of America, Inc. Permission to copy granted only to Authorized BERNINA ® Dealers
BERNINA ® <strong>Embroidery</strong> <strong>Module</strong>/<strong>Machine</strong><br />
Baseline Sampler<br />
<strong>Mastering</strong><br />
<strong>Your</strong><br />
BERNINA ®<br />
deco 330<br />
Select Alphabet tab. Select medium<br />
font size. Program BERNINA; touch<br />
OK. Move word up.<br />
Select Alphabet tab; vertical lettering.<br />
Program BERNINA; OK. Move<br />
right.<br />
Select Alphabet tab. Select Script<br />
font. Select Horizontal lettering.<br />
Program Bernina ; touch OK.<br />
Rotate 45º. Move into position.<br />
Embroider. Return carriage to<br />
stored position. Trim and mount<br />
sample.<br />
artista 630E & 640E<br />
To create arched lettering, select,<br />
rotate, and place each letter<br />
individually. For greatest accuracy,<br />
use the hoop grid background to<br />
arrance letters.<br />
Use indicated alphabet to input<br />
Bernina; select OK. Place in<br />
upper part of hoop.<br />
Go to Add Motif; select indicated<br />
alphabet. Select B; place to left;<br />
rotate to fit an imaginary circle<br />
template. Go to Add Motif; select e;<br />
place to right of B. Rotate to fit<br />
imaginary circle template.<br />
Continue in this manner, adding<br />
letters to complete Bernina. Select<br />
Retrieve; fine tune letter placement.<br />
Repeat this process to form<br />
additional baselines.<br />
aurora 430E & 440QEE<br />
Select New; left click Lettering Values.<br />
Place cursor on screen; left click;<br />
vertical cursor appears.<br />
Type aurora; outline appears. Press<br />
Enter; text is filled & selected.<br />
Right click on lettering; Object Properties<br />
box opens with aurora in text box.<br />
Change lettering to Swiss Block;<br />
height = 20mm; OK. While selected,<br />
click arrow in Color Selection box;<br />
select C6; deselect to view changes.<br />
Press A on keyboard; type aurora.<br />
Select Anniversary, H = 24mm;<br />
Clockwise baseline. Follow Status Line<br />
prompts (center, radius, circle or oval);<br />
Enter. Right click for Object Properties;<br />
change Baseline radius to 50º; OK.<br />
Select and change color to C10.<br />
Select A key; type aurora. Select<br />
Vertical baseline; King Charles; H =<br />
14mm; OK. Follow prompts; left click<br />
at top of column. While selected,<br />
change color to C4.<br />
Save As > lettering baselines.<br />
artista 730E<br />
To create arched lettering, use Letter<br />
Manipulation dialog box.<br />
Use Alice alphabet to input Bernina; OK.<br />
Select Medium Hoop; select Duplicate.<br />
Go to Edit 2. Select Letter Manipulation<br />
symbol; Vertical Baseline; OK. Select<br />
Move Motif ; use Stitch Length (-300)<br />
& Width (+100) knobs to move vertical<br />
Bernina to left.<br />
Retrieve 2nd Bernina. Using default<br />
baseline (Horizontal), move lettering to<br />
Length knob = +100 & Width = +350.<br />
Go to Edit 1; Duplicate. Go to Edit 2;<br />
Select Letter Manipulation; Curved<br />
Baseline ABOVE smallest green circle;<br />
OK. Move Bernina to Stitch Length knob<br />
= +150 and Stitch Width knob = +100.<br />
Go to Edit 1; Duplicate. Go to Edit 2;<br />
select Letter Manipulation. Choose<br />
Curved Baseline BELOW smallest circle.<br />
Position word at Stitch Length knob =<br />
+150 & Width knob = -400. Touch OK.<br />
Notes<br />
<strong>Embroidery</strong> Alphabet<br />
deco 330<br />
Gothic & Script<br />
aurora 430E & 440QEE<br />
Swiss Block, Anniversary, &<br />
King Charles<br />
artista 630E & 640E<br />
Swiss Block<br />
artista 730E<br />
Alice<br />
Fabric & Stabilizer<br />
8” x 10” rectangle<br />
MASTERING YOUR BERNINA ® EMBROIDERY MODULE/MACHINE 2/06 66<br />
©2006 BERNINA ® of America, Inc. Permission to copy granted only to Authorized BERNINA ® Dealers
BERNINA ® <strong>Embroidery</strong> <strong>Module</strong>/<strong>Machine</strong><br />
Baseline Sampler<br />
<strong>Mastering</strong><br />
<strong>Your</strong><br />
BERNINA ®<br />
deco 330<br />
aurora 430E & 440QEE<br />
artista 630E & 640E<br />
artista 730E<br />
MASTERING YOUR BERNINA ® EMBROIDERY MODULE/MACHINE 2/06 67<br />
©2006 BERNINA ® of America, Inc. Permission to copy granted only to Authorized BERNINA ® Dealers
BERNINA ® <strong>Embroidery</strong> <strong>Module</strong>/<strong>Machine</strong><br />
<strong>Mastering</strong><br />
<strong>Your</strong><br />
BERNINA ®<br />
Changing Lettering Height<br />
deco 330<br />
Select Alphabet tab. Select small<br />
font size. Program BERNINA;<br />
touch OK. Move word up.<br />
Select Alphabet tab. Select medium<br />
font size. Program<br />
BERNINA: touch OK. Move up.<br />
Select Alphabet tab. Select large<br />
font size. Program BERNINA;<br />
touch OK. Position as needed.<br />
Embroider. Return carriage to<br />
stored position. Trim and mount<br />
sample.<br />
aurora 430E & 440QEE<br />
Open a New file. Press A (on keyboard)<br />
to open Lettering Object<br />
Properties. Select King Charles,<br />
height 14mm. Type aurora; press<br />
Enter; OK. Click to see lettering.<br />
Copy & paste to create 5 auroras.<br />
Select second aurora; right click<br />
to open Lettering Object Properties.<br />
Change height to 20mm; OK.<br />
Note: Third & fifth auroras will be<br />
used in next exercise, Changing<br />
Letter Spacing.<br />
Select fourth aurora; click & drag<br />
top center sizing hangle to adjust<br />
height of lettering.<br />
Reposition as desired. Save As<br />
lettering height & spacing. Do<br />
not stitch until after next exercise.<br />
Notes<br />
artista 630E/640E<br />
While lettering can’t be resized<br />
directly on the 630E/640E, the size<br />
of the lettering object can be<br />
changed using the Proportional<br />
Resizing tools.<br />
Open alphabets; select Swiss Block.<br />
Enter BERNINA; OK. Select Large<br />
Oval Hoop.<br />
Using the Add Motifs tool, add four<br />
additional BERNINAs to create a<br />
total of five copies. Use the Move<br />
Motif and Retrieve functions to<br />
arrange the words as shown in the<br />
illustration.<br />
Select Edit 2; use the Retrieve<br />
and Proportional Resizing tools<br />
to change each BERNINA to a<br />
different size as shown.<br />
artista 730E<br />
Open alphabets; select Drifter. Enter<br />
BERNINA; OK. Select Medium Hoop.<br />
Duplicate BERNINA to create a total<br />
of five copies. Use the Move Motif and<br />
Retrieve functions to arrange the words<br />
as shown in the illustration.<br />
Select BERNINA at top of hoop. Touch<br />
Letter Manipulation symbol and change<br />
Letter Height to 6mm. Touch OK. Use<br />
positioning functions to move the word<br />
to Stitch Length knob = +500, Stitch<br />
Width knob = 0.<br />
Repeat this process for each BERNINA<br />
as indicated below: Note: Stitch Width<br />
knob position = 0 for all words.<br />
1: Height = 6mm SL knob = +500<br />
2: Height = 10mm SL knob = +350<br />
3: Height = 14mm SL knob = +150<br />
4: Height = 18mm SL knob = -100<br />
5: Height = 20mm SL knob = -400<br />
When combination is complete, touch<br />
OK. Stitch, trim and mount sample.<br />
<strong>Embroidery</strong> Motif<br />
deco 330<br />
Gothic<br />
artista 430E & 440QEE<br />
King Charles<br />
artista 630E & 640E<br />
Swiss Block<br />
artista 730E<br />
Drifter<br />
Fabric & Stabilizer<br />
8” x 10” rectangle<br />
MASTERING YOUR BERNINA ® EMBROIDERY MODULE/MACHINE 2/06 68<br />
©2006 BERNINA ® of America, Inc. Permission to copy granted only to Authorized BERNINA ® Dealers
BERNINA ® <strong>Embroidery</strong> <strong>Module</strong>/<strong>Machine</strong><br />
<strong>Mastering</strong><br />
<strong>Your</strong><br />
BERNINA ®<br />
Changing Lettering Height Sample<br />
deco 330<br />
aurora 430E & 440QEE<br />
artista 630E & 640E<br />
artista 730E<br />
MASTERING YOUR BERNINA ® EMBROIDERY MODULE/MACHINE 2/06 69<br />
©2006 BERNINA ® of America, Inc. Permission to copy granted only to Authorized BERNINA ® Dealers
BERNINA ® <strong>Embroidery</strong> <strong>Module</strong>/<strong>Machine</strong><br />
Changing Letter Spacing<br />
(aurora 430E/440QEE & artista 730E only)<br />
aurora 430E & 440E<br />
The last exercise – Changing Lettering Height – should still be on the<br />
screen.<br />
<strong>Mastering</strong><br />
<strong>Your</strong><br />
BERNINA ®<br />
Notes<br />
Select the third aurora; open Lettering Object Properties. Change letter<br />
spacing to 3.5; click OK.<br />
Select the fifth aurora; select<br />
the Reshape icon. Adjust letter<br />
spacing manually by clicking<br />
on the diamond-shaped control<br />
points and sliding the letters along the baseline.<br />
Reposition as desired. Save As lettering height & spacing. Stitch,<br />
trim, and mount sample.<br />
artista 730E<br />
Open alphabet folder; select King Charles alphabet. artista; touch OK.<br />
Select Medium Hoop.<br />
Duplicate artista to create a total of three copies. Use the Move Motif<br />
and Retrieve functions to arrange the words as shown in the illustration.<br />
Note: Stitch Width knob position = 0 for all words.<br />
1st artista Height = 14mm Stitch Length knob = +300<br />
2nd artista Height = 14mm Stitch Length knob = 0<br />
3rd artista Height = 14mm Stitch Length knob = -300<br />
The top artista has no spacing changes.<br />
Retrieve middle artista. Touch the Letter Manipulation symbol and<br />
change the Letter Spacing to 3mm. Touch OK.<br />
Retrieve last artista. Change spacing to 5mm. Touch OK.<br />
Embroider combination in the Medium Hoop. Trim and mount sample.<br />
<strong>Embroidery</strong> Motif<br />
deco 330<br />
n/a<br />
aurora 430E & 440QEE<br />
King Charles<br />
artista 630E & 640E<br />
n/a<br />
artista 730E<br />
King Charles<br />
Fabric & Stabilizer<br />
8” x 10” rectangle<br />
MASTERING YOUR BERNINA ® EMBROIDERY MODULE/MACHINE 2/06 70<br />
©2006 BERNINA ® of America, Inc. Permission to copy granted only to Authorized BERNINA ® Dealers
BERNINA ® <strong>Embroidery</strong> <strong>Module</strong>/<strong>Machine</strong><br />
<strong>Mastering</strong><br />
<strong>Your</strong><br />
BERNINA ®<br />
Changing Letter Spacing Sample<br />
deco 330<br />
aurora 430E & 440QEE<br />
n/a<br />
artista 630E & 640E<br />
artista 730E<br />
n/a<br />
MASTERING YOUR BERNINA ® EMBROIDERY MODULE/MACHINE 2/06 71<br />
©2006 BERNINA ® of America, Inc. Permission to copy granted only to Authorized BERNINA ® Dealers
BERNINA ® <strong>Embroidery</strong> <strong>Module</strong>/<strong>Machine</strong><br />
Mega Hoop<br />
(artista 630E/640E & 730E only)<br />
artista 630E & 640E<br />
Hoop fabric and stabilizer in the Mega Hoop. Put clamps into the designated<br />
notches and attach hoop to the artista 630E/640E.<br />
<strong>Mastering</strong><br />
<strong>Your</strong><br />
BERNINA ®<br />
Notes<br />
Select the London alphabet. Enter Discover <strong>Your</strong> Creative Wings;<br />
touch OK.<br />
Select Edit 2. Touch the Rotation Arrows to automatically rotate the<br />
design 90º.<br />
Enlarge text to the length of the Mega Hoop. Touch OK.<br />
The artista will instruct you to reposition the Mega Hoop. Press the<br />
front clip only and gently push or pull the hoop until the attachment<br />
mechanism clicks in the place in the desired position. The artista will<br />
instruct you to check that the notch is firmly in position. Press OK to<br />
confirm.<br />
Stitch. The artista will prompt you to reposition the hoop when needed.<br />
Follow the screen directions to complete stitching the design.<br />
Trim and mount the sample.<br />
artista 730E only<br />
Hoop fabric and stabilizer in the Mega Hoop. Put clamps in designated<br />
notches and attach hoop to the artista 730E.<br />
Select the Blackboard alphabet. Enter Nothing Sews Like A BERNINA.<br />
Nothing! Touch OK.<br />
Select Edit 2. Touch the Rotation Arrows twice to automatically rotate<br />
the design 90º. Enlarge text to the length of the Mega Hoop. Touch OK.<br />
The artista will instruct you to reposition the Mega Hoop. Press the<br />
front clip only and gently push or pull the hoop until the attachment<br />
mechanism clicks into place in the desired position. The artista will<br />
instruct you to check that the notch is firmly in position. Press OK<br />
to confirm.<br />
Stitch. The artista will prompt you to reposition the hoop when needed.<br />
Follow the screen directions to complete stitching the design.<br />
Trim and mount the sample on the following page.<br />
<strong>Embroidery</strong> Alphabet<br />
deco 330<br />
n/a<br />
aurora 430E & 440QEE<br />
n/a<br />
artista 630E & 640E<br />
London<br />
artista 730E<br />
Blackboard<br />
Fabric & Stabilizer<br />
8” x 10” rectangle<br />
MASTERING YOUR BERNINA ® EMBROIDERY MODULE/MACHINE 2/06 72<br />
©2006 BERNINA ® of America, Inc. Permission to copy granted only to Authorized BERNINA ® Dealers
BERNINA ® <strong>Embroidery</strong> <strong>Module</strong>/<strong>Machine</strong><br />
<strong>Mastering</strong><br />
<strong>Your</strong><br />
BERNINA ®<br />
Mega Hoop Sample<br />
deco 330<br />
n/a<br />
aurora 430E & 440QEE<br />
n/a<br />
artista 630E & 640E<br />
artista 730E<br />
MASTERING YOUR BERNINA ® EMBROIDERY MODULE/MACHINE 2/06 73<br />
©2006 BERNINA ® of America, Inc. Permission to copy granted only to Authorized BERNINA ® Dealers
BERNINA ® <strong>Embroidery</strong> <strong>Module</strong>/<strong>Machine</strong><br />
myartista Portal<br />
(artista 730E only)<br />
artista 730E<br />
With the artista turned off, connect the artista 730 Dial-Up Modem<br />
(optional accessory) to a dial-up phone line and to the artista 730E.<br />
<strong>Mastering</strong><br />
<strong>Your</strong><br />
BERNINA ®<br />
Notes<br />
Access a Dial-Up Internet Service Provider:<br />
- select Setup and touch Portal provider settings<br />
- touch the red circle to select an empty provider slot<br />
- touch the bar next to the check mark<br />
- touch the provider bar and key in the provider's name; touch OK<br />
- touch gray Number bar; touch yellow Number bar to erase line<br />
- enter the phone number used to access the provider; touch OK<br />
- touch gray User Name bar; touch yellow User Name bar to remove line<br />
- enter your user name; touch OK<br />
- touch gray Password bar; touch yellow Password bar to remove *****<br />
- enter your password; touch OK<br />
Note: Passwords are case sensitive. Use upper and lower case<br />
lettering where needed.<br />
- touch ESC to exit Setup<br />
Select the Portal icon. This message appears: A modem connection<br />
is required. Do you want to connect to: _________ Touch Yes.<br />
A Connecting... message appears at lower edge of the touch screen.<br />
When The modem is connected successfully to: _________<br />
appears, touch OK.<br />
Select Large Oval from the available choices.<br />
This message appears: A modem connection is active. Do you want to<br />
disconnect? Touch No.<br />
Select the Save icon. Select the Untitled design; enter a name for the<br />
design, which you will stitch out later.<br />
The artista 730 will again ask if you want to disconnect. Touch No.<br />
Return to the Portal icon to retrieve additional designs. When finished,<br />
disconnect at prompt. Unplug cable from artista 730.<br />
Retrieve one of the Portal designs from your My Designs folder.<br />
Embroider and trim sample, then mount on the following page.<br />
Note: To access broadband (high speed) Internet, download and follow<br />
the BERNINA ® Ethernet LAN Card Instructions from www.berninausa.com > my<br />
artista > artista Technical.<br />
myartista Portal<br />
A special Internet gateway<br />
available only to artista 730<br />
owners, accessible via the<br />
optional artista 730 Dial-Up<br />
Modem and BERNINA®<br />
Ethernet LAN Card.<br />
From any sewing screen<br />
touch Portal to access:<br />
News Flashes: Advance<br />
notice of upcoming products<br />
and events of interest to<br />
artista 730 owners.<br />
Stitch Memos: Informative<br />
articles to help artista 730<br />
owners maximize the use of<br />
unique artista 730 features.<br />
Foot Notes: Details on the<br />
use of various presser feet<br />
and accessories for you<br />
artista 730E sewing and<br />
embroidery projects.<br />
<strong>Embroidery</strong> Designs:<br />
Select the portal from<br />
an <strong>Embroidery</strong> Menu to<br />
download .ART designs.<br />
Designs on the myartista<br />
Portal are selected from<br />
www.embroideryonline.com<br />
and are updated monthly.<br />
MASTERING YOUR BERNINA ® EMBROIDERY MODULE/MACHINE 2/06 74<br />
©2006 BERNINA ® of America, Inc. Permission to copy granted only to Authorized BERNINA ® Dealers
BERNINA ® <strong>Embroidery</strong> <strong>Module</strong>/<strong>Machine</strong><br />
<strong>Mastering</strong><br />
<strong>Your</strong><br />
BERNINA ®<br />
myartista Portal Sample<br />
deco 330<br />
n/a<br />
aurora 430E & 440QEE<br />
n/a<br />
artista 630E & 640E<br />
artista 730E<br />
n/a<br />
Use any embroidery design<br />
from the myartista Portal<br />
MASTERING YOUR BERNINA ® EMBROIDERY MODULE/MACHINE 2/06 75<br />
©2006 BERNINA ® of America, Inc. Permission to copy granted only to Authorized BERNINA ® Dealers
BERNINA ® <strong>Embroidery</strong> <strong>Module</strong>/<strong>Machine</strong><br />
Beyond the Basics Shopping List<br />
<strong>Mastering</strong><br />
<strong>Your</strong><br />
BERNINA ®<br />
<strong>Embroidery</strong> Collections<br />
______________<br />
______________<br />
OESD Cut-Away Stabilizers<br />
Heavyweight Cut-Away<br />
Xtra Heavyweight Cut-Away<br />
Hydro-Stick Cut-Away<br />
Cut-Away Poly-Mesh<br />
Fusible Poly-Mesh<br />
Stabil-Stick Cut-Away<br />
OESD Tear-Away Stabilizers<br />
Lightweight Tear-Away<br />
Smooth Touch Tear-Away<br />
Medium Weight Tear-Away<br />
Hydro-Stick Tear-Away<br />
Ultra Clean & Tear<br />
Stabil-Stick Tear-Away<br />
OESD Water-Soluble Stabilizers<br />
Aqua Film Topping & Backing<br />
Badge Master Wash-Away<br />
Aqua Mesh Wash-Away<br />
Aqua Mesh Plus (adhesive-backed)<br />
Spray Starch<br />
Brush/Paint-On stabilizer products<br />
Fusible Interfacing products<br />
HRFiveTemporary Spray Adhesive<br />
<strong>Embroidery</strong> Needles - mixed #75/90<br />
Organ <strong>Embroidery</strong> Needles<br />
#70/10 Sharps<br />
#80/12 Sharps<br />
#90/14 Sharps<br />
#70/10 Ballpoint<br />
#80/12 Ballpoint<br />
#90/14 Ballpoint<br />
ABCs of <strong>Embroidery</strong><br />
Sew Much Fun<br />
A Touch of Artistry I<br />
Seasons of Artistry<br />
Through the Needle magazine<br />
Isacord <strong>Embroidery</strong> Threads<br />
colors ________<br />
Yenmet Metallic <strong>Embroidery</strong> Threads<br />
colors ________<br />
Other <strong>Embroidery</strong> Threads<br />
color ________<br />
Supplemental Thread guide<br />
Multiple Spool Holder<br />
Bobbin Thread<br />
BERNINA ® and OESD Thread Boxes<br />
Plexiglass Table<br />
Large Plexiglass Table<br />
Suitcase System<br />
Reader/Writer Box<br />
USB Card Reader from OESD<br />
Personal Design Card or USB Stick<br />
Magic Box Plus & artista Magic Card<br />
Mini Magic Box Plus & artista Magic Card<br />
BERNINA ® Dial-Up Modem<br />
BERNINA ® Ethernet LAN Card<br />
BERNINA ® <strong>Embroidery</strong> Software<br />
Editor<br />
Auto-Designer<br />
Designer Plus<br />
OESD eXplorations Software<br />
deco 330 <strong>Embroidery</strong> Hoops<br />
Free-Arm Hoop<br />
Round Hoop<br />
aurora/artista <strong>Embroidery</strong> Hoops<br />
Small <strong>Embroidery</strong> Hoop<br />
Freearm Adapter (spacer)<br />
Medium <strong>Embroidery</strong> Hoop<br />
Large Oval <strong>Embroidery</strong> Hoop<br />
Hoop ‘N’ Buddys Hat Hoop Insert<br />
(fits Large Oval Hoop only)<br />
Mega Hoop (artista 630E/640E/730E only)<br />
Hoop-It-All Hoops<br />
Quilters Square Double Wide<br />
Super Double Wide<br />
deco 300 Double Wide<br />
Big/Cap Hoop<br />
MASTERING YOUR BERNINA ® EMBROIDERY MODULE/MACHINE 2/06 76<br />
©2006 BERNINA ® of America, Inc. Permission to copy granted only to Authorized BERNINA ® Dealers