Introducing Latex - Bruce E. Shapiro
Introducing Latex - Bruce E. Shapiro
Introducing Latex - Bruce E. Shapiro

You also want an ePaper? Increase the reach of your titles
YUMPU automatically turns print PDFs into web optimized ePapers that Google loves.
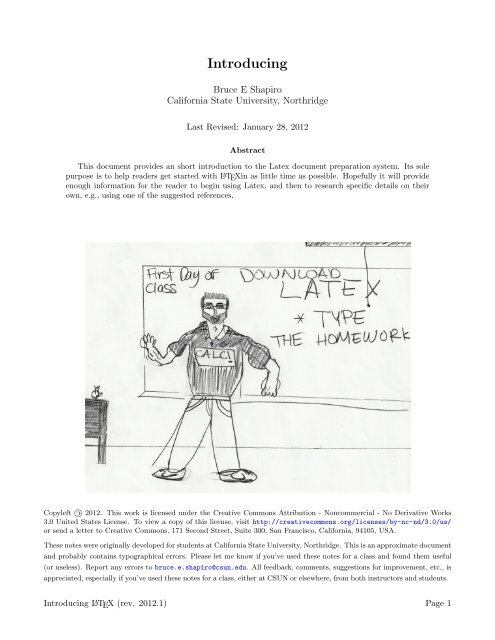
<strong>Introducing</strong><br />
<strong>Bruce</strong> E <strong>Shapiro</strong><br />
California State University, Northridge<br />
Last Revised: January 28, 2012<br />
Abstract<br />
This document provides an short introduction to the <strong>Latex</strong> document preparation system. Its sole<br />
purpose is to help readers get started with L A TEXin as little time as possible. Hopefully it will provide<br />
enough information for the reader to begin using <strong>Latex</strong>, and then to research specific details on their<br />
own, e.g., using one of the suggested references.<br />
Copyleft 2012. This work is licensed under the Creative Commons Attribution - Noncommercial - No Derivative Works<br />
3.0 United States License. To view a copy of this license, visit http://creativecommons.org/licenses/by-nc-nd/3.0/us/<br />
or send a letter to Creative Commons, 171 Second Street, Suite 300, San Francisco, California, 94105, USA.<br />
These notes were originally developed for students at California State University, Northridge. This is an approximate document<br />
and probably contains typographical errors. Please let me know if you’ve used these notes for a class and found them useful<br />
(or useless). Report any errors to bruce.e.shapiro@csun.edu. All feedback, comments, suggestions for improvement, etc., is<br />
appreciated, especially if you’ve used these notes for a class, either at CSUN or elsewhere, from both instructors and students.<br />
<strong>Introducing</strong> L A TEX (rev. 2012.1) Page 1
Contents<br />
I Before You Use L A TEX the First<br />
Time 3<br />
1 What is L A TEX? 3<br />
2 Where Can I Get L A TEX? 3<br />
2.1 Use it On Campus . . . . . . . . . . . 3<br />
2.2 Download and Install at Home . . . . 3<br />
3 How Do I Use L A TEX? 4<br />
II Typesetting With L A TEX 5<br />
4 Document Structure 5<br />
4.1 The Basics . . . . . . . . . . . . . . . 5<br />
4.2 Entering Text and Symbols . . . . . . 6<br />
5 Document Layout 7<br />
5.1 Margins and Text Alignment . . . . . 7<br />
5.2 Paragraph Indentation and Spacing . . 8<br />
5.3 Double-spacing . . . . . . . . . . . . . 8<br />
5.4 Multiple Columns . . . . . . . . . . . 8<br />
5.5 Forcing Page Breaks . . . . . . . . . . 9<br />
5.6 Vertical and Horizontal Space . . . . . 9<br />
5.7 Footnotes . . . . . . . . . . . . . . . . 9<br />
5.8 Inserting Code . . . . . . . . . . . . . 9<br />
5.9 Boxes Around Text . . . . . . . . . . . 10<br />
5.10 Counters and labels . . . . . . . . . . 10<br />
5.11 Headers and Footers . . . . . . . . . . 10<br />
5.12 Including External Files . . . . . . . . 11<br />
5.13 Lists . . . . . . . . . . . . . . . . . . . 11<br />
6 Tabs, Tables, and Figures 12<br />
6.1 Tabbing . . . . . . . . . . . . . . . . . 12<br />
6.2 Tabular Arrays . . . . . . . . . . . . . 12<br />
6.3 Floating Tables . . . . . . . . . . . . . 13<br />
6.4 Inserting Pictures . . . . . . . . . . . . 13<br />
7 Math Mode 15<br />
7.1 Inline Equations . . . . . . . . . . . . 15<br />
7.2 Display Equations . . . . . . . . . . . 15<br />
7.3 Numbered Equations . . . . . . . . . . 15<br />
7.4 Boxed equations . . . . . . . . . . . . 16<br />
7.5 Aligned and Multi-line Equations . . . 16<br />
7.5.1 The align Environment . . . . 16<br />
7.5.2 The split Environment . . . . 16<br />
7.5.3 The cases Environment . . . . 16<br />
7.6 Superscripts and Subscripts . . . . . . 17<br />
7.7 Roots and Fractions . . . . . . . . . . 17<br />
7.8 Integrals . . . . . . . . . . . . . . . . . 17<br />
7.9 Sums and Products . . . . . . . . . . . 18<br />
7.10 Limits . . . . . . . . . . . . . . . . . . 18<br />
7.11 Lines Above and Below Expressions . 18<br />
7.12 Text Above and Below Expressions . . 18<br />
7.13 Arrows Above & Below Expressions . 18<br />
7.14 Chemical Reactions . . . . . . . . . . . 19<br />
7.15 Large Parenthesis . . . . . . . . . . . . 19<br />
7.16 Matrices and Arrays . . . . . . . . . . 19<br />
A Symbol Tables 20<br />
A.1 Math Fonts . . . . . . . . . . . . . . . 20<br />
A.2 Math Accents . . . . . . . . . . . . . . 20<br />
A.3 Greek Letters . . . . . . . . . . . . . . 20<br />
A.4 Variable Size Symbols . . . . . . . . . 20<br />
A.5 Named Math Functions . . . . . . . . 20<br />
A.6 Brackets . . . . . . . . . . . . . . . . . 20<br />
A.7 Relational Symbols . . . . . . . . . . . 20<br />
A.8 AMS Relational Symbols . . . . . . . 21<br />
A.9 Binary Operations . . . . . . . . . . . 21<br />
A.10 AMS Binary Operations . . . . . . . . 21<br />
A.11 Standard Arrows . . . . . . . . . . . . 21<br />
A.12 AMS Arrows . . . . . . . . . . . . . . 21<br />
A.13 Miscellaneous Math Symbol . . . . . . 21<br />
A.14 Special Math Typesetting . . . . . . . 22<br />
A.15 Text Accents . . . . . . . . . . . . . . 22<br />
A.16 Special Symbols in Text Mode . . . . 22<br />
A.17 Text Font Styles . . . . . . . . . . . . 22<br />
A.18 Font Sizes . . . . . . . . . . . . . . . . 22<br />
B References 22<br />
<strong>Introducing</strong> L A TEX (rev. 2012.1) Page 2
Part I<br />
Before You Use L A TEX the First Time<br />
1 What is L A TEX?<br />
is a document preparation system for mathematics.<br />
The main things that distinguish it from a<br />
word processor (like Microsoft Word) are:<br />
• All documents are stored as text files. This<br />
means you can always look at them with almost<br />
any program that reads text.<br />
• The document you print normally a .pdf, .ps,<br />
or .dvi file, is separate from the document you<br />
edit, which is called a .tex file. Conversion<br />
takes place in a process called typesetting.<br />
2. A L A TEX editor, such as Texmaker, TeXworks,<br />
TeXshop, or WinEdt. (Technically you could<br />
use any text editor but then you would have to<br />
do your typesetting from the command line.)<br />
3. A pdf file viewer such as Acrobat Reader, Okular,<br />
Evince.<br />
2 Where Can I Get L A TEX?<br />
2.1 Use it On Campus<br />
<strong>Latex</strong> is installed on all computers in the College of<br />
Science of Science and Mathematics Computer Labs.<br />
Locations and hours are give at http://www.csun.<br />
edu/csm/computing.htm.<br />
2.2 Download and Install at Home<br />
Instructions for a Linux Install<br />
• Formatting instructions are visibly embedded<br />
in the text by means of special commands<br />
that begin a backslash character (\), e.g.,<br />
I \underline{like} onions!<br />
. will be typeset as<br />
I like onions!<br />
• L A TEX contains a lot of special commands for<br />
making equations look precisely the same<br />
way they do in textbooks.<br />
To use L A TEXyou must have three things installed on<br />
your computer:<br />
1. A L A TEXsystem - this is a large collection of<br />
binary and script files that you will never use<br />
directly, but will access through (2).<br />
Install texlive (or texlive-all) and texmaker<br />
from your package manager.<br />
If they are not available, binary and source files<br />
can be downloaded from http://www.tug.org/<br />
texlive/acquire-netinstall.html and http://<br />
www.xm1math.net/texmaker/download.html.<br />
You will be able to use L A TEXvia Texmaker from the<br />
command line ($Texmaker) or you can access the individual<br />
commands such as $pdftex,$latex,... on<br />
the command line. In the later case you may prefer<br />
to use emacs instead of Texmaker.<br />
Instructions for a Mac Install<br />
You should install the following two packages:<br />
1. Download The MacTex 2011 Distribution<br />
from http://www.tug.org/mactex/2011/.<br />
The total download is around 2 GB. After<br />
the download is finished, locate the download<br />
file and run the installer.<br />
<strong>Introducing</strong> L A TEX (rev. 2012.1) Page 3
2. Download the latest version of Texmaker<br />
from http://www.xm1math.net/texmaker/<br />
download.html. After the download is<br />
finished unpack the zip file and drag the<br />
Texmaker application to your Applications<br />
folder.<br />
We will use L A TEX directly from Texmaker, which<br />
you can access from your Applications folder.<br />
Instructions for Windows 7<br />
You should install the following two packages:<br />
1. MiKTeX from http://miktex.org/. The<br />
Basic MiKTeX 2.9 Installer (164 MB) will<br />
be enough for most purposes. After you download<br />
the file, run the installer. (This version<br />
installs essential files only; if you need something<br />
special, it will install it later.) If you<br />
decide to download the complete system you<br />
have download the MiKTeX 2.9 Installer (7<br />
MB), and then run the installer twice: once<br />
to download the software (about 2 GB), then<br />
a second time to install the software.<br />
2. Texmaker from http://www.xm1math.net/<br />
texmaker/download.html. After you download<br />
the file, you have to run the installer once;<br />
then look for Texmaker in your Start menu.<br />
2. Using a L A TEX-cognizant text editor such as<br />
Texmaker. You do everything in step 1 but<br />
instead of using the Command Line you use<br />
menus to invoke the various options. For example,<br />
using Texmaker, you would:<br />
(a) Create a new document using the<br />
File / New and then File / Save option<br />
on the menu bar. Make sure the file name<br />
ends in .tex.<br />
(b) Initialize the document with a basic template<br />
using the Wizard / Quick-Start<br />
options on the menu bar.<br />
(c) Edit the document using formatting commands<br />
as described in the rest of this document.<br />
(d) Compile the document from to PDF using<br />
the PDFLaTeX button on the menu<br />
bar.<br />
(e) Check for any errors in the error window.<br />
(f) View the PDF file using the View PDF<br />
button on the menubar.<br />
Schematic of different L A TEX file conversion commands available<br />
at the command prompt.<br />
Figure from Wikimedia<br />
Commons under the Creative Commons Attribution-Share<br />
Alike 3.0 Unported license at http://commons.wikimedia.<br />
org/wiki/File:LaTeX_diagram.svg.<br />
3 How Do I Use L A TEX?<br />
There are two ways to use L A TEX:<br />
1. From the command line: (a) edit your documents<br />
in a text editor such as emacs or<br />
Notepad; (b) convert your .tex files to .pdf<br />
(or other formats) using a command such as<br />
pdflatex in the terminal (Linux or Macs)<br />
or command prompt (Windows); and (c) view<br />
or print your .pdf file using Acrobat Reader,<br />
Preview, or Okular.<br />
<strong>Introducing</strong> L A TEX (rev. 2012.1) Page 4
Part II<br />
Typesetting With L A TEX<br />
4 Document Structure<br />
4.1 The Basics<br />
documents are divided into two parts, called the<br />
preamble and the body. We can think of them<br />
figuratively like this:<br />
PREAMBLE<br />
BODY<br />
The preamble tells information about the entire document,<br />
like the page size and which parts of you are<br />
going to use. The body contains the actual text of<br />
your document, along with local (rather than global)<br />
formatting commands. For example, the block:<br />
\documentclass[12pt,letterpaper]<br />
{article}<br />
\usepackage[latin1]{inputenc}<br />
\usepackage{amsmath}<br />
\usepackage{amsfonts}<br />
\begin{document}<br />
\begin{center}Quadratics\end{center}<br />
The solution of $$ax^2+bx+c=0$$ is<br />
$$x=\dfrac{-b\pm\sqrt{b^2-4ac}}<br />
{2a}$$<br />
And that’s \textit{just}<br />
the way it is.<br />
\end{document}<br />
will look something like this, when it is typeset:<br />
The solution of<br />
is<br />
Quadratics<br />
ax 2 + bx + c = 0<br />
x = −b ± √ b 2 − 4ac<br />
2a<br />
And that’s just the way it is.<br />
The preamble starts with \documentclass and<br />
ends with \begin{document}<br />
The body starts with the \begin{document} and<br />
ends with an \end{document}<br />
Here is our schematic again:<br />
\documentclass<br />
... % preamble<br />
\begin{document}<br />
... % body<br />
\end{document}<br />
The format of the \documentclass command is<br />
\documentclass[options]{class}<br />
where options can be omitted.<br />
Standard classes are: book, report, article,<br />
letter and beamer (the last is for presentations).<br />
Typical options are font and page size and orientation,<br />
such as 10pt, 11pt, and 12pt, letterpaper,<br />
legalpaper,A4paper,landscape (default is portrait),<br />
onecolum (default), and twocolumn.<br />
Additional sets of commands are enabled by adding<br />
specific packages,<br />
\usepackage{package name}<br />
<strong>Introducing</strong> L A TEX (rev. 2012.1) Page 5
4.2 Entering Text and Symbols<br />
In you pretty much just type the text content the<br />
way you want it just as you would in any word processor,<br />
with the following things to remember:<br />
• Some characters have special meanings: #,<br />
$,&,~, ,^,%,{,},\<br />
• Begin a new paragraphs by skipping a line.<br />
Paragraph indentation and spacing is discussed<br />
in section ??.<br />
• Formatting is controlled by markup with simple<br />
commands like<br />
\command<br />
or command environments<br />
\begin{env }...\end{env }<br />
environments (things that look like<br />
\begin{name} ... \end{name).<br />
Commands mean do something now, like<br />
enter a check mark (\checkmark) or insert a<br />
page break (\newpage).<br />
Environments mean enter a new mode<br />
(\begin{env }) and don’t leave it until I<br />
tell you to (\end{env }), like<br />
\begin{center}<br />
All of this will be<br />
centered.<br />
\end{center}<br />
• Equations and certain mathematical symbols<br />
can only be included by using “math mode.”<br />
This is discussed in section 7.<br />
There are over 4000 special symbols that can be<br />
used in L A TEX 2ε; a comprehensive list (over 140<br />
pages) has been compiled by Scott Patkin and is<br />
available from CTAN at http://www.ctan.org/<br />
tex-archive/info/symbols/comprehensive/.<br />
Here are some examples:<br />
©=\copyright †=\dag ‡= \ddag<br />
̌=\checkmark §=\S =\P<br />
£=\pounds ✠=\maltese R=\circledR<br />
There are lots of ways to lots of non-English text<br />
characters , such as à or ü, and entire alphabets.<br />
The L A TEX “special” characters, what they are used for, and how you can still manage to add them to your document.<br />
Character Special Command Normal Meaning<br />
# \# Argument of a user-defined command.<br />
$ \$ Beginning and end of an equation.<br />
& \& Tab stop in an array or table.<br />
˜ \˜ Special accent, eg. ~{o} gives õ<br />
\ Subscript (in math mode), $a 3$ gives a 3<br />
ˆ \ˆ Special accent, eg. ^{e} gives ẽ<br />
% \% Everything after a % is ignored as a comment,<br />
through the end of the line<br />
{ \{ Used in pair with } to surround arguments<br />
of functions and environments.<br />
} \} Used in pair with { to surround arguments<br />
of functions and environments.<br />
\ \textbackslash Used to invoke a command or begin or end<br />
an environment.<br />
<strong>Introducing</strong> L A TEX (rev. 2012.1) Page 6
5 Document Layout<br />
Books, reports and articles are arranged hierarchically<br />
into numbered chapters, sections, subsections,<br />
sub-subsections, paragraphs, and sub-paragraphs.<br />
Books and reports may also be divided into parts,<br />
which are larger than chapters. The syntax for starting<br />
a new chapter, section, etc, is, e.g.,<br />
\section[short-title ]{real-title }<br />
where real-title is the required title of the section,<br />
and the optional short-title is a shorter<br />
title that is used for the table of contents and<br />
page headers and footers. Similar commands are<br />
used for \part, \subsection, \subsubsection,<br />
\paragraph, and \sub-paragraph.<br />
If you want to omit the number, put an asterisk at<br />
the end of the command, as in \subsubsection*.<br />
This will create the new section, subsection, etc.,<br />
but omit the number and leave it out of the table of<br />
contents.<br />
The command<br />
\tableofcontents<br />
will automatically generate a table of contents from<br />
all the numbered sections, subsections, etc.<br />
Here is an example of sectioning commands. The typeset document is illustrated on the following page.<br />
\documentclass<br />
...<br />
\title{My Favorite Vaudevillians}<br />
\date{}<br />
\begin{document}<br />
\begin{center}{\LARGE \textbf{My Favorite Vaudevillians}}\end{center}<br />
\section{The Three Stooges}<br />
\subsection{History } The original group was composed of Moe Howard, Samuel<br />
("Shemp") Howard and Lary Fine. When Shemp quite, their brother Jerome Howard<br />
("Curly"), joined the group ...<br />
\subsection{Films}<br />
Films included \textit{Turn Back the Clock}, ...<br />
\section{The Marx Brothers}<br />
\subsection{History}The Marx Brothers also started as a Vaudeville group of five<br />
bothers, Chico (Leonard), Harpo (Arthur), Grocho (Julius), Gummo (Milton), and Zeppo<br />
(Herbert) Marx. Gummu left the act after World War I, so he never appeared in any<br />
films. ...<br />
\subsection{Films} Their film career included \textit{Cocoanuts}(1929), \textit{Animal<br />
Crackers} (1930), \textit{Monkey Business}(1931), ...<br />
...<br />
\end{document}<br />
5.1 Margins and Text Alignment<br />
The easiest way to control Margins is with the<br />
geometry package. Putting<br />
\usepackage[left=1.0in, right=1.0in,<br />
top=1.0in,bottom=1.0in]{geometry}<br />
in the preamble will give the entire document oneinch<br />
margins all around the page.<br />
By default, text is both right and left justified.<br />
To force all your text to be right-justified,<br />
\begin{flushright} text \end{flushright}<br />
To be left-justified:<br />
\begin{flushleft} text \end{flushleft}<br />
To be centered:<br />
\begin{center} text \end{center}<br />
<strong>Introducing</strong> L A TEX (rev. 2012.1) Page 7
My Favorite Vaudevillians<br />
1 The Three Stooges<br />
1.1 History<br />
The original group was composed of Moe Howard, Samuel (”Shemp”) Howard and Lary Fine.<br />
When Shemp quite, their brother Jerome Howard (”Curly”), joined the group ...<br />
1.2 Films<br />
Films included Turn Back the Clock, ...<br />
2 The Marx Brothers<br />
2.1 History<br />
The Marx Brothers also started as a Vaudeville group of five bothers, Chico (Leonard), Harpo<br />
(Arthur), Grocho (Julius), Gummo (Milton), and Zeppo (Herbert) Marx. Gummu left the<br />
act after World War I, so he never appeared in any films. ...<br />
2.2 Films<br />
Their film career included Cocoanuts(1929), Animal Crackers (1930), Monkey Business(1931),<br />
...<br />
5.2 Paragraph Indentation and Spacing<br />
By default, new paragraphs are indented half an<br />
inch (except for the first paragraph of a new section,<br />
which is not indented), and there is no space<br />
between paragraphs.<br />
\setlength{\parindent}{0pt}<br />
\setlength{\parskip}{1ex}<br />
in your preamble, then put<br />
\doublespace<br />
where you want to begin double-spacing, and<br />
\singlespace<br />
where you want to return to single-spacing.<br />
5.4 Multiple Columns<br />
\setlength{\parindent}{0pt} sets the paragraph<br />
indentation to zero.<br />
\setlength{\parskip}{1ex} sets the space between<br />
paragraphs to the height of the letter x.<br />
Units can be in any of in, cm, mm, pt, ex, em.<br />
One ex is the height of the letter x; one em is the<br />
width of the letter m. Points (pt) are equal to 1/72<br />
of an inch, so 72pt and 1in would be identical.<br />
5.3 Double-spacing<br />
To get double spacing, put the line<br />
\usepackage{setspace}<br />
You can switch back and forth between one and two<br />
columns by using the commands<br />
\twocolumn<br />
\onecolumn<br />
but they always skip to the start of the next page<br />
before changing the columns.<br />
To change the number of columns anywhere on a<br />
page, put<br />
\usepackage{multicol}<br />
1<br />
in the preamble, and use the environment<br />
\begin{multicols}{2}<br />
<strong>Introducing</strong> L A TEX (rev. 2012.1) Page 8
...<br />
\end{multicols}<br />
You can replace the 2 with a 3 or 4 for 3 or 4 column<br />
text.<br />
5.5 Forcing Page Breaks<br />
There are two types of forced page breaks you can<br />
use:<br />
\newpage fills up the rest of the current page with<br />
blank space and jumps to the top of the next page.<br />
\pagebreak will try to spread out existing text to<br />
evenly fill out current page (by making paragraph<br />
breaks bigger) and then skip to the next page. If<br />
you put the command in the middle of a paragraph<br />
it will start the new page at the end of the paragraph.<br />
5.6 Vertical and Horizontal Space<br />
\hspace{1in} adds an extra inch of horizontal white<br />
space.<br />
\vspace{24pt} adds an extra 24 points of vertical<br />
white space.<br />
Any of the standard units can be used for either<br />
command.<br />
\hfill adds space to fill up the current line, as in<br />
will produce<br />
I \hfill Am \hfill Legend<br />
I Am Legend.<br />
\vfill adds vertical space to fill up the page.<br />
\hrulefull fills up the current line with a horizontal<br />
line like this:<br />
\dotfill fills up the current line with dots that look<br />
like this: . . . . . . . . . . . . . . . . . . . . . . . . . . . . . . . . . . . . . . . . .<br />
5.7 Footnotes<br />
Footnotes are inserted with the command<br />
\footnote{Text of footnote.} at the exact position<br />
where the footnote marker should be. Footnotes<br />
are normally numbered sequentially; to<br />
change this you can use the argument num, as in<br />
\footnote[num]{text of footnote}. Footnotes are<br />
then placed at the bottom of the page 1 . Each footnote<br />
is indented.<br />
To remove the indentation throughout your document<br />
put the following in your preamble:<br />
\usepackage[hang,flushmargin]footmisc.<br />
5.8 Inserting Code<br />
The verbatim environment lets you add a block of<br />
text exactly the way you type it, with no typesetting<br />
or command interpretation, as in this example:<br />
Here is a Python program for least squares:<br />
\begin{verbatim}<br />
def fit(xd,yd):<br />
SX=sum(xd)<br />
SY=sum(yd)<br />
SX2=sum([x*x for x in xd])<br />
SXY = sum ([x*y for (x,y) in zip(xd,yd)])<br />
n=len(xd)<br />
M = np.array([[n, SX],\<br />
[SX, SX2]])<br />
B = np.array([SY, SXY])<br />
return(np.linalg.solve(M, B))<br />
\end{verbatim}<br />
Here is a Python program for least squares:<br />
def fit(xd,yd):<br />
SX=sum(xd)<br />
SY=sum(yd)<br />
SX2=sum([x*x for x in xd])<br />
SXY = sum ([x*y for (x,y) in zip(xd,yd)])<br />
n=len(xd)<br />
M = np.array([[n, SX],\<br />
[SX, SX2]])<br />
B = np.array([SY, SXY])<br />
return(np.linalg.solve(M, B))<br />
If you just want to include a short segment of code<br />
like C123_=A_+B_ you can use the inline version of<br />
the verbatim environment,<br />
\verb! code !<br />
1 like this!<br />
<strong>Introducing</strong> L A TEX (rev. 2012.1) Page 9
where the exclamation point (!) should be replaced<br />
by any character that is not include in code . For<br />
example, the following are equivalent:<br />
\verb.C123_=A_+B_.<br />
\verb^C123_=A_+B_^<br />
and each will insert the string C123_=A_+B_ into your<br />
document.<br />
5.9 Boxes Around Text<br />
The \fbox is convenient for putting boxes around<br />
text; if you typeset \fbox{like this} it will look<br />
like this .<br />
Getting boxes around verbatim text is more complicated,<br />
but you can use the following template (this<br />
is what was used in this document) to make it work.<br />
First, include the line<br />
\usepackage{fancyvrb}<br />
in the preable. The following template will create<br />
a three-inch wide box with your code left-justified<br />
inside the box. If you want the box to be wider,<br />
change the width from 3in to something else. If you<br />
don’t want the box to be in the center of your page,<br />
leave out the center environment.<br />
\begin{center}<br />
\begin{minipage}{3in}<br />
\begin{Verbatim}[frame=single]<br />
%<br />
% put you code here<br />
%<br />
\end {Verbatim}<br />
\end{minipage}<br />
\end{center}<br />
For more details refer to the <strong>Latex</strong> reference on<br />
minipage and fancyvrb.<br />
5.10 Counters and labels<br />
thepage gives the current page number.<br />
thechapter gives the current chapter number.<br />
thesection gives the current section number.<br />
To refer to a particular section, chapter, etc., you can<br />
label it. Immediately after the \section command<br />
include a label command, for example,<br />
\label{section-Quadratics}<br />
Then to refer to that section, use<br />
as in,<br />
\ref{section-Quadratics}.<br />
In section \ref{section-Quadratics}<br />
we will learn how to solve the<br />
quadratic equation (see page<br />
\pageref{page-quad}).<br />
To refer to a particular page, use the \pageref command<br />
to refer to any label on that page, as in the<br />
above example.<br />
5.11 Headers and Footers<br />
By default the page number is printed in the bottom<br />
center of the page, with no other headers and<br />
footers.a<br />
pagestyle{empty} in the preamble will turn off all<br />
headers and footers, including page numbers.<br />
To define your own headers and footers put<br />
\usepackage{fancyhdr}<br />
in the preamble, then define your own style.<br />
single sided documents, still in the preamble:<br />
For<br />
\fancypagesytel{mystyle}{<br />
\lhead{Text for the top left of the page}<br />
\chead{Text for the top center of the page}<br />
\rhead{Text for the top right of the page}<br />
\lfoot{Text for the bottom left of the page}<br />
\cfoot{Text for the bottom center of the page}<br />
\rfoot{Text for the bottom right of the page}<br />
}<br />
\renewcommand{\footrulewidth}{0.4pt}<br />
\renewcommand{\headrulewidth}{0.4pt}<br />
The footrulewidth and the headrulewidth give<br />
the thickness of lines between the text and the<br />
header and footer. By default the headrule is set<br />
<strong>Introducing</strong> L A TEX (rev. 2012.1) Page 10
to 0.4 pt and the foorule is set to zero.<br />
them off set them to 0pt.<br />
To turn<br />
To actually use the style, at the beginning of your<br />
body include the command<br />
\pagestyle{mystyle}<br />
If you have two-sided text, then you have to specify<br />
the header and the footer differently for the even and<br />
odd numbered pages. The shorthand for this is<br />
\fancyfoot[LE,RO]{text}<br />
\fancyhead[LO,RE]{text}<br />
and so forth, where L, C, and R mean left, center,<br />
and right, and E and O mean even and odd.<br />
You can insert page numbers with \thepage; chapter<br />
numbers with \thechapter; section numbers with<br />
\thesection, etc.<br />
If you do not specify anything for the right header,<br />
the current section or chapter title will be placed<br />
there. If you want to suppress this use<br />
\fancyhead[R]{}<br />
or to specify your own header there<br />
\fancyhead[R]{My Document Header}<br />
If you don’t want a line between the text and<br />
footer and header, sent the footrulewidth and<br />
headrulewidth to zero pt.<br />
5.12 Including External Files<br />
You can put any part of your document, including<br />
the preamble, into one or more external files:<br />
\input{filename.tex }<br />
For example, you could put all of your files into separate<br />
documents in the same folder:<br />
\input{headers.tex}<br />
\begin{document}<br />
\input{mydocument1.tex}<br />
\input{mydocument2.tex}<br />
...<br />
\end{document}<br />
If they are in different folders you should specify<br />
the relative path (if you specify the absolute path<br />
it won’t work if you move the file to a different machine<br />
or are sharing it with a collaborator):<br />
\input{../myfile.tex}<br />
\input{../../dir1/dir2/myfile.tex}<br />
\input{./dir1/myfile.tex}<br />
where we “..” means one “go up to the enclosing<br />
folder” and “.” means inside the current<br />
folder, so that ./dir1/myfile.tex means look for<br />
myfile.tex in the subdirectory dir1 which is a subdirectory<br />
of the same folder where my main document<br />
is sitting; and ../myfile.tex means look in<br />
the current folder’s parent directory.<br />
5.13 Lists<br />
The \enumerate environment produces numbered<br />
lists.<br />
Each item in the list begins with the \item command,<br />
which may span multiple paragraphs. Each<br />
item is indented.<br />
Things I like:<br />
\begin{enumerate}<br />
\item I like onions<br />
\item I like bagels<br />
\item I like toast<br />
\end{enumerate}<br />
=⇒<br />
Things I like:<br />
1. I like onions<br />
2. I like bagels<br />
3. I like toast<br />
The \itemize environment is used for itemized lists.<br />
I am a frog because:<br />
\begin{itemize}<br />
\item I am green<br />
\item I can swim<br />
\item I eat flies<br />
\end{itemize}<br />
=⇒<br />
I am a frog because:<br />
• I am green<br />
• I can swim<br />
• I eat flies<br />
Lists may be nested to any depth. Enumerated lists<br />
will be numbered like an outline with labels 1., (a),<br />
i., A. To change the label on a list, use<br />
\renewcommand{label } {type {counter }optional-text }<br />
label is the name of list level you are redefining.<br />
Values are labelenumi, labelenumii,<br />
labelenumiii, labelenumiv.<br />
<strong>Introducing</strong> L A TEX (rev. 2012.1) Page 11
counter is the counter value to use. Normally enumi<br />
is associated with label labelenumi, etc.<br />
The starting value of the enumerate list counter can<br />
be reset to any value. After the \enumerate but<br />
before the first \item, use<br />
\setcounter{enumi}{6}<br />
will start the list at item 7.<br />
type is taken from the following table:<br />
Thus<br />
type Values<br />
\arabic 1, 2, 3, 4, ...<br />
\Roman I, II, III, IV, ...<br />
\roman i, ii, iii, iv, ...<br />
\alph a, b, c, d, ...<br />
\ALPH A, B, C, D, ...<br />
\renewcommand{\labelnumii}{\Alph{enumii}.}<br />
changes the second level numbering to an upper-case<br />
alphabet character followed by a period.<br />
Example of nested lists:<br />
\begin{enumerate}<br />
\item Frogs<br />
\begin{enumerate}<br />
\item Green<br />
\item Eat flies<br />
\item Swim<br />
\end{enumerate}<br />
\item Apples<br />
\begin{enumerate}<br />
\item Red<br />
\item Fruit<br />
\item Juicy<br />
\end{enumerate}<br />
\end{enumerate}<br />
=⇒<br />
1. Frogs<br />
(a) Green<br />
(b) Eat flies<br />
(c) Swim<br />
2. Apples<br />
(a) Red<br />
(b) Fruit<br />
(c) Juicy<br />
6 Tabs, Tables, and Figures<br />
6.1 Tabbing<br />
The \tabbing environment sets tab stops and can<br />
be used to generate simple tables.<br />
The first line of the \tabbing environment defines<br />
the tab stops.<br />
Each tab stop is defined by \= and the line is terminated<br />
by the double slash \\<br />
After the first line tab jumps are indicated by \> .<br />
Each subsequent line of the \tabbing environment<br />
must also be terminated by \\ .<br />
For example:<br />
\begin{tabbing}<br />
Math \hspace{2cm} \= is \hspace{1cm} \= kool \\<br />
Physics \>is \>boring \\<br />
Video Games \> rock \> my socks off<br />
\end{tabbing}<br />
Math is kool<br />
Physics is boring<br />
Video Games rock my socks off<br />
6.2 Tabular Arrays<br />
The \tabular environment generates aligned columnar<br />
arrays in text mode. The \array environment<br />
works the same way, but in math mode.<br />
\begin{tabular}{columns } ... \end{tabular}<br />
columns =xxx...x where each x=r, l, or c, to indicate<br />
whether or not the corresponding column<br />
should be right justified, left justified, or centered.<br />
The vertical line character (—) may be used to<br />
indicate that lines should be placed between the<br />
columns, thus<br />
\begin{tabular}{|l|l|ccc|} ... \end{tabular}<br />
denotes a 5-column table where the first two columns<br />
are left justified, the right 3 columns are centered,<br />
and there are lines between the 1st and 2nd columns,<br />
the 2nd and 3rd columns, and on the left and right<br />
hand edge of the table.<br />
\hline can be used to place horizontal lines between<br />
rows in the table.<br />
Jumping to the next column is specified within a row<br />
by & (Ampersand character).<br />
<strong>Introducing</strong> L A TEX (rev. 2012.1) Page 12
A table may be centered on a page or column by<br />
using the \center environment.<br />
For example<br />
\begin{tabular}{|c|c|}<br />
\hline Name & Grade \\<br />
\hline Tom & A\\<br />
\hline Dick & C\\<br />
\hline Harry & B+\\<br />
\hline<br />
\end{tabular}<br />
6.3 Floating Tables<br />
=⇒<br />
Name Grade<br />
Tom A<br />
Dick C<br />
Harry B+<br />
Sequentially numbered, captioned tables are produced<br />
by wrapping tabular environments with the<br />
table environment.<br />
\begin{table}[where ]<br />
\caption{caption-text }<br />
\begin{tabular}{· · · }<br />
· · ·<br />
tablar contents<br />
· · ·<br />
\end{tabular}<br />
\end{table}<br />
This places the caption at the top of the table; it can<br />
also be placed at the bottom of the table, immediately<br />
following the \end{tabular}.<br />
To refer to the table number elsewhere in the document<br />
insert a \label command immediately after<br />
the \caption.<br />
Tables are numbered sequentially through the document<br />
(or chapter).<br />
where may contain any of the following: h = here<br />
(put the table here); t = top (at the top of the current<br />
page, or the next page if it won’t fit); p = page<br />
(on a separate page); b = bottom (on the bottom of<br />
the current page).<br />
6.4 Inserting Pictures<br />
Put the following in your preamble:<br />
\include{graphicx}<br />
Then at the exact spot where you want to include<br />
your picture, put<br />
\includegraphics[size ]{filename }<br />
size options are width=3in, scale=.5, or<br />
height=43mm.<br />
filename should be specified relative to directory<br />
that your .tex file is sitting in. While in theory you<br />
could use an absolute file name, if you were to zip<br />
the folder and mail the package to a collaborate then<br />
it wouldn’t work.<br />
The type of graphics format varies from system to<br />
system. Generally .png, .tif, and .jpg work everywhere.<br />
If you are using PDFLaTeX you can also<br />
use .pdf files as pictures. If you are using pure<br />
latex (which converts files to .dvi format, and not<br />
to .pdf) it will also accept encapsulated postscript<br />
files, .eps.<br />
The following example will insert the file<br />
pictures/fred.png in your document and make<br />
it one-inch wide:<br />
\includegraphics[width=1in]{pictures/fred.png}<br />
You can add a caption and a figure number to a<br />
picture the same way as with a table by using the<br />
figure environment.<br />
\begin{figure}[h]<br />
\caption{...}<br />
\label{figure:my-figure}<br />
\begin{center}<br />
\includegraphics[width=2.54cm]{fred.png}<br />
\end{center}<br />
\end{figure}<br />
The location can be h (here); p (page); t (top); or b<br />
(bottom) and mean the same thing as with a table<br />
environment.<br />
The wrapfigure environment will allow you to wrap<br />
text around a figure. To do so, put<br />
in the preamble, then<br />
\usepackage{wrapfig}<br />
<strong>Introducing</strong> L A TEX (rev. 2012.1) Page 13
\begin{wrapfigure}{r}{1.1in}<br />
\begin{center}<br />
\includegraphics[width=1in]<br />
{happy.png}<br />
\end{center}<br />
\caption{A happy computer!}<br />
\end{wrapfigure}<br />
Alignment can normally be either l for left,<br />
or r for right. Lowercase l or r forces the<br />
figure to start precisely where specified (and<br />
may cause it to run over page breaks), while<br />
capital L or R allows the figure to float.<br />
If you defined your document as<br />
twosided, the alignment can also<br />
be i for inside or o for outside,<br />
as well as I or O. The width is, of<br />
course, the width of the figure. In<br />
most cases wrapfigure adds too<br />
much vertical spacing, which you<br />
can reduce by adding appropriate<br />
\vspace{x } commands with negatives<br />
arguments in the desired<br />
locations.<br />
the vertical space.<br />
Figure 1: A<br />
happy computer!<br />
A negative vertical space means reduce<br />
You can include multiple graphics in the same figure<br />
by using the \subfigure command:<br />
\begin{wrapfigure}{l}{4.2in}<br />
\subfigure[Cray 2.]{\includegraphics[height=1in]{Cray.jpg}}<br />
\subfigure[Apple 1.]{\includegraphics[height=1in]{Apple.jpg}}<br />
\subfigure[IBM PC.]{\includegraphics[height=1in]{IBMPC.jpg}}<br />
\caption{Three computers.}<br />
\end{wrapfigure}<br />
Lorem ipsum dolor sit amet, consectetur adipiscing elit. Quisque porttitor fringilla nisi nec tempus.<br />
Fusce ac est arcu, sodales scelerisque sapien. Nulla facilisi. Phasellus eu elit massa. Etiam quis hendrerit<br />
elit. Nunc commodo dignissim pretium. Aenean neque enim, pretium a placerat vel, venenatis<br />
id nulla. In eget diam turpis. Donec tempus placerat nunc ut fringilla. Integer aliquam, urna non<br />
pellentesque interdum, mauris neque consectetur nisi, ut aliquam odio augue eu sapien. Donec mattis<br />
iaculis nunc id vestibulum.<br />
Quisque ultrices<br />
ultricies libero sed luctus.<br />
Curabitur commodo,<br />
dolor vitae bibendum<br />
lacinia, neque ante<br />
ultricies neque, et gravida<br />
dolor arcu eu eros. Nunc<br />
(a) Cray 2. (b) Apple 1. (c) IBM PC.<br />
eget justo et ipsum sollicitudin<br />
imperdiet. Nullam<br />
et diam erat. Sed mattis<br />
Figure 2: Three computers.<br />
ligula in magna dictum porta. Quisque a adipiscing tellus. Sed hendrerit, urna quis facilisis condimentum,<br />
leo nunc sollicitudin nisi, a ornare urna purus quis eros. Ut id erat at nunc rutrum varius. Vivamus ac<br />
turpis at enim pulvinar ultrices nec et libero. Phasellus ut nibh nibh. Fusce tincidunt purus ac sem lobortis<br />
porttitor. Morbi in risus eros, eu egestas neque.<br />
<strong>Introducing</strong> L A TEX (rev. 2012.1) Page 14
7 Math Mode<br />
L A TEXhas two modes: text mode and math mode.<br />
All equations are written in math mode. All text is<br />
written in text mode.<br />
7.1 Inline Equations<br />
An equation that is included in the flow of text, without<br />
breaking to a new line, is called an inline equation.<br />
Inline equations must begin and end with a<br />
dollar sign, $ .<br />
An examples of inline equations is y = ∫ b<br />
a e−αx2 dx.<br />
For example, one can typeset<br />
with<br />
Functions of the form f(t) = 1(1 + e −t ) are known<br />
as sigmoid functions.<br />
Sigmoidal functions have the<br />
interesting property that they satisfy the logistic differential<br />
equation y ′ = y(1 − y)<br />
Functions of the form $f(t)=1(1+e^{-t})$<br />
are known as \textit{sigmoid} functions.<br />
Sigmoidal functions have the interesting<br />
property that they satisfy the<br />
\textit{logistic differential equation}<br />
$y’=y(1-y)$<br />
Even to insert special characters like ∑ or ∫ you<br />
need to use math mode, e.g., as $\sum$ or $\int$ .<br />
7.2 Display Equations<br />
In display mode an equation is placed on a line by<br />
itself surrounded by white space. By default, it is<br />
centered in the middle of the line, although equations<br />
can be optionally right or left justified.<br />
There are two ways to insert display equations; there<br />
is no advantage to either of these over the other. You<br />
can either surround your display equation by doubledollar-signs,<br />
e.g., $$ at both the beginning and the<br />
end of the equation, or you can begin the equation<br />
with \[ and end it with \] . Thus to typeset<br />
x = −b ± √ b 2 − 4ac<br />
2a<br />
you can use either<br />
or<br />
\[x=\frac{-b\pm\sqrt{b^2-4ac}}{2a}\]<br />
$$x=\frac{-b\pm\sqrt{b^2-4ac}}{2a}$$<br />
7.3 Numbered Equations<br />
Equations can be automatically numbered with the<br />
equation environment:<br />
\begin{equation}<br />
\label{eq-quad}<br />
x=\frac{-b\pm\sqrt{b^2-4ac}}{2a}<br />
\end{equation}<br />
which will be typeset as:<br />
x = −b ± √ b 2 − 4ac<br />
2a<br />
(1)<br />
To suppress the equation number use<br />
\begin{equation*}· · · \end{equation*} , which<br />
is equivalent to $$· · · $$ .<br />
The argument to \label can be any string; it is standard<br />
practice to preface it with something like eq or<br />
equation so that it will be easy to identify as an<br />
equation in the source code.<br />
To refer to equation 1 use either \ref{label } or<br />
\eqref{label }. The eqref command automatically<br />
includes parenthesis, so that \eqref{eq-quad}<br />
looks like (1), while \ref{eq-quad} looks like 1.<br />
The global properties of equations are controlled by<br />
arguments to the \documentclass command in the<br />
preamble:<br />
leqno will put all equation numbers on the left-hand<br />
margin (by default they are on the right).<br />
fleqn will make all equations flush-left (by default<br />
they are centered)<br />
<strong>Introducing</strong> L A TEX (rev. 2012.1) Page 15
7.4 Boxed equations<br />
To put a box around an inline equation like<br />
y = ∫ f(x)dx use<br />
\fbox{$y=\int f(x)dx$}<br />
To put a box around a display equation, as in<br />
∫<br />
u =<br />
f(x)dx<br />
use \boxed{$y=\int f(x)dx$}.<br />
\boxed works with both numbered and unnumbered<br />
equations.<br />
7.5 Aligned and Multi-line Equations<br />
7.5.1 The align Environment<br />
There are several ways to align equations vertically.<br />
The simplest is with the align environment. For<br />
example,<br />
x = 1 (2)<br />
y = 2 + x (3)<br />
z = 3 + 2x + y (4)<br />
where all the equal signs are aligned vertically, can<br />
be typeset using align as can be written using<br />
\begin{align}<br />
x&=1\\<br />
y&=2+x\\<br />
z&=3+2x+y<br />
\end{align}<br />
The ampersand & is used as an alignment character<br />
(like a tab stop) inside and align.<br />
The double-backslash \\ is used to indicate the<br />
start of a new line inside the align.<br />
To suppress all of the equation numbers use \align*<br />
instead of align.<br />
\nonumber will suppress the specific equation number<br />
of the line on which it is placed (and the equation<br />
counter will not be incremented).<br />
7.5.2 The split Environment<br />
Long equations that require more than one line can<br />
be typeset with split. The ampersand & and<br />
double-backslash \\ are used for alignment and line<br />
splitting within the split environment:<br />
\begin{equation}<br />
\begin{split}<br />
\sum_{n=0}^\infty ar^n & =<br />
a + ar + ar^2 + ar^3 + \cdots \\<br />
& = \dfrac{a}{1-r}<br />
\end{split}<br />
\end{equation}<br />
Note that only one equation number is assigned to<br />
a split equation<br />
∞∑<br />
ar n = a + ar + ar 2 + ar 3 + · · ·<br />
n=0<br />
= a<br />
1 − r<br />
(5)<br />
The split environment can only be used within<br />
the equation or equation* environments, not the<br />
shorthand $$· · · $$ or \[ · · · \] forms<br />
7.5.3 The cases Environment<br />
The cases environment is used when the right-hand<br />
side of an equation has multiple cases:<br />
{<br />
−x, x < 0<br />
|x| =<br />
(6)<br />
x, x ≥ 0<br />
As with split and align the ampersand & and<br />
double-backslash \\ are used for alignment and new<br />
line. Use \text to include text in the equation:<br />
\begin{equation}<br />
\int x^n \: dx =<br />
\begin{cases}<br />
\dfrac{x^{n+1}}{n+1} + C,<br />
&\text{ if } n\neq -1\\<br />
\lng{x} + C, &\text{ if } n = -1<br />
\end{cases}<br />
\end{equation}<br />
<strong>Introducing</strong> L A TEX (rev. 2012.1) Page 16
which is typeset as<br />
⎧<br />
∫ ⎨ x n+1<br />
x n dx = n + 1 + C,<br />
⎩<br />
ln x + C,<br />
if n ≠ −1<br />
if n = −1<br />
(7)<br />
\frac{a+\frac{p}{q}}{c+d}<br />
on the left side of the equation and<br />
\frac{a+\dfrac{p}{q}}{c+d}<br />
7.6 Superscripts and Subscripts<br />
Use the carat ^ for superscripts, shift- 6 on USkeyboards,<br />
as in $x^2$ for x 2 .<br />
Use the underscore<br />
Y 3 .<br />
for subscripts, e.g., $Y 3$ for<br />
If the subscript or superscript is longer than a single<br />
character it must be enclosed in curly brackets, e.g.,<br />
$x^a+b$ gives x a + b while $x^{a+b}$ gives x a+b .<br />
Subscripts or superscripts on subscripts are denoted<br />
by appropriate nesting of curly brackets.<br />
$$x_{i+j,k_i} = \frac{p^i q^j}{r_{k_i}}$$<br />
x i+j,ki = pi q j<br />
r ki<br />
on the right.<br />
Roots and fractions can be combined, as in<br />
or<br />
$$\sqrt{1+\frac{1}{x}}=<br />
\sqrt{1+\tfrac{1}{x}}$$<br />
√1 + 1 x = √<br />
1 + 1 x<br />
$$\frac{a}{\sqrt{b+\frac{c}{d}}} =<br />
\frac{a}{\sqrt{b+\dfrac{c}{d}}},$$<br />
a<br />
√ b +<br />
c<br />
d<br />
a<br />
= √<br />
b + c ,<br />
d<br />
7.7 Roots and Fractions<br />
\sqrt{x} gives √ x.<br />
\sqrt[n]{x} gives n√ x.<br />
\frac{numerator }{denominator } gives text-size<br />
fractions, as in a+b<br />
c+d .<br />
\dfrac{numerator }{denominator } enlarges the<br />
numerator and denominator so that each is textsized,<br />
as in a + b<br />
c + d .<br />
\tfrac{numerator }{denominator } gives textsized<br />
equations in a display equation,<br />
tfrac = a+b<br />
c+d = a + b<br />
c + d = frac<br />
They can also be nested in display equations,<br />
which was typeset with<br />
a + p q<br />
c + d = a + p q<br />
c + d<br />
7.8 Integrals<br />
\int<br />
\iint<br />
\iiint<br />
\oint<br />
\iiiint<br />
\limits<br />
These are used for single, double, and triple integrals.<br />
Limits are specified as subscripts or superscripts. To<br />
get the limit to be beneath the integral sign (e.g., for<br />
a volume or surface multiple integral) use \limits<br />
(which means to interpret the subscript the way it<br />
is interpreted for \lim).<br />
∮<br />
Γ<br />
∫ b<br />
g(λ) dλ =<br />
f(x) dx = F (b) − F (a)<br />
a<br />
∫ 1 ∫ x ∫ 1−x 2 −y 2<br />
0<br />
−x<br />
∫∫∫<br />
V<br />
0<br />
dV = 4 3 πr3<br />
f(x, y, z)dzdydz<br />
<strong>Introducing</strong> L A TEX (rev. 2012.1) Page 17
which can be typeset with the following:<br />
$$\int_a^b f(x) dx = F(b)-F(a)$$<br />
$$\oint_{\Gamma} g(\lambda)<br />
d\lambda = \int_0^1 \int_{-x}^{x}<br />
\int_0^{1-x^2-y^2} f(x,y,z) dz dy dz$$<br />
$$\iiint\limits_V dV =<br />
\frac{4}{3}\pi r^3$$<br />
7.9 Sums and Products<br />
\sum gives a summation.<br />
\prod gives a product.<br />
Begin and end values are specified as subscripts (begin<br />
values) and superscripts (end values).<br />
For display mode, start and end values are automatically<br />
placed below and above the sybmol, so that<br />
$$\sum {k=1}^{\infty}p k$$ becomes<br />
∞∑<br />
k=1<br />
while in text mode, they are placed in normal subscript<br />
mode, and $\sum {k=1}^{\infty}p k$ becomes<br />
∑ ∞<br />
k=1 p k (there was only a single dollar sign<br />
around the second form; otherwise they were identical).<br />
The format for sums and products is the same,<br />
so that $$\prod {k=1}^{10}\dfrac{k+1}{k+2}$$<br />
becomes<br />
10∏ k + 1<br />
k + 2<br />
7.10 Limits<br />
k=1<br />
\lim is used for a limit.<br />
The target of a limit is specified as a subscript using<br />
the underscore. In text mode<br />
$$\lim_{x\to\infty}<br />
\frac{3x^2+4x}{7x^2+2}=\frac{3}{7}$$<br />
3x<br />
looks like lim 2 +4x<br />
x→∞ 7x 2 +2<br />
it becomes<br />
p k<br />
= 3 7<br />
, while in display mode<br />
3x 2 + 4x<br />
lim<br />
x→∞ 7x 2 + 2 = 3 7<br />
7.11 Lines Above and Below Expressions<br />
\overline{expression } draws a line over an expression.<br />
\underline{expression } draws a line under an expression<br />
We define by AB the line segment connecting<br />
points A and B.<br />
We denote the complex conjugate of z = a+bi<br />
by<br />
z = a + bi = a − bi<br />
We define by $\overline{AB}$ the line segment<br />
connecting points $A$ and $B$.<br />
We denote the complex conjugate of $z=a+bi$ by<br />
$$\overline{z}=\overline{a+bi}=a-bi$$<br />
7.12 Text Above and Below Expressions<br />
\overbrace{expression } puts a horizontal brace<br />
above an expression. Superscripted \text expressions<br />
will be written above the brace.<br />
\underbrace{expression } puts a horizontal brace<br />
below an expression. Subscripted \text expressions<br />
will be written below the brace.<br />
For example,<br />
f(x) = f(a) +<br />
\underbrace{(x-a)f’(a)}_{\text{Linear Term}} +<br />
\overbrace{\frac{1}{2}(x-a)^2<br />
f’’(a)}^{\text{Quadratic Term}} + \cdots<br />
will be typeset as<br />
f(x) = f(a) + (x − a)f ′ (a) +<br />
} {{ }<br />
Linear Term<br />
Quadratic Term<br />
{ }} {<br />
1<br />
2 (x − a)2 f ′′ (a) + · · ·<br />
7.13 Arrows Above & Below Expressions<br />
The following provide variable length arrows above<br />
or below expression :<br />
\overleftarrow{expression }<br />
\overrightarrow{expression }<br />
<strong>Introducing</strong> L A TEX (rev. 2012.1) Page 18
\overleftrightarrow{expression }<br />
\underleftarrow{expression }<br />
\underrightarrow{expression }<br />
\underleftrightarrow{expression }<br />
For example<br />
gives<br />
$$\overleftrightarrow{APBXC} =<br />
\overleftarrow{APB} +<br />
\overrightarrow{BXC}$$<br />
←−−−−−→<br />
AP BXC = ←−−− AP B + −−−→ BXC<br />
Use \left. ... \right] to only get one bracket.<br />
For example,<br />
∫ b<br />
∣ ∣∣∣<br />
b<br />
2xdx = x 2<br />
a<br />
matches the \right{|} with a \left{.} in<br />
$$\left.\int_a^b 2x dx = x^2\right|_a^b$$<br />
Use \{ to get the curly-bracket.<br />
7.16 Matrices and Arrays<br />
a<br />
7.14 Chemical Reactions<br />
Rate constants in simple chemical reactions can be<br />
attached to arrows with overset and underset:<br />
X + Y k 1<br />
⇋<br />
k2<br />
Z, A + B k 3<br />
→ C<br />
$$X+Y \underset{k_2}{\overset {k_1}<br />
{\rightleftharpoons}} Z,<br />
A+B \overset{k_3}{\rightarrow} C$$<br />
Longer expressions can use xleftarrow and<br />
xrigharrow<br />
A + B<br />
combine to form<br />
−−−−−−−−−−→ C<br />
$$A+B \xrightarrow{<br />
\text{combine to form}}C$$<br />
7.15 Large Parenthesis<br />
Variable size parenthesis (or brackets) as in<br />
[√ ( ) ]<br />
p a + b<br />
q + + d<br />
c<br />
use pairs of \left and \right commands.<br />
$$\left[ \sqrt{\frac{p}{q}} +<br />
\left( \frac{a+b}{c} \right)<br />
+ d \right]$$<br />
The matrix family gives a number of shorthand matrix<br />
environments:<br />
$$\begin{pmatrix} a & b \\ c & d \end{pmatrix},<br />
\begin{Bmatrix} a & b \\ c & d \end{Bmatrix},<br />
\begin{bmatrix} a & b \\ c & d \end{bmatrix},<br />
\begin{vmatrix} a & b \\ c & d \end{vmatrix},<br />
\begin{Vmatrix} a & b \\ c & d \end{Vmatrix},<br />
\begin{matrix} a & b \\ c & d \end{matrix}$$<br />
produces<br />
( ) { } [ ]<br />
a b a b a b<br />
, , ,<br />
c d c d c d ∣ a<br />
c<br />
b<br />
∥ ∥∥∥ d∣ , a<br />
c<br />
b<br />
d∥ , a<br />
c<br />
In each of these environments, elements are centered<br />
in their appropriate columns, the ampersand & is<br />
used to skip to the next element and the double backslash<br />
is used to indicate the end of a line.<br />
For more precise control, the array environment<br />
may be used. Its structure is identical to the<br />
tabular environment, except that tabular may<br />
only be used in text mode and array may only be<br />
used in math mode. Fore example, the partitioned<br />
matrix<br />
⎛<br />
a b<br />
⎞<br />
c<br />
⎝ p q r ⎠<br />
x y z<br />
can be typeset with array,<br />
$$\left(<br />
Every \left must have a \right.<br />
\begin{array}{cc|c}<br />
a & b & c \\<br />
The argument of the \right corresponding to a particular<br />
\left can be different. This allows one to<br />
\hline<br />
p & q & r \\<br />
open a pair with a different type of bracket than it<br />
x & y & z<br />
is closed with, e.g., \end{array}<br />
(a ]<br />
\right) $$<br />
+ b<br />
+ d<br />
c<br />
<strong>Introducing</strong> L A TEX (rev. 2012.1) Page 19<br />
b<br />
d
A<br />
Symbol Tables<br />
A.1 Math Fonts<br />
\mathbb<br />
\mathcal<br />
\mathfrak<br />
\mathbf<br />
A, B, C, D, E, F, G, H, I, J, K, L, M, N, O, P, Q, R, S, T, U, V, W, X, Y, Z<br />
A, B, C, D, E, F, G, H, I, J , K, L, M, N , O, P, Q, R, S, T , U, V, W, X , Y, Z<br />
A, B, C, D, E, F, G, H, I, J, K, L, M, N, O, P, Q, R, S, T, U, V, W, X, Y, Z<br />
A, B, C, D, E, F, G, H, I, J, K, L, M, N, O, P, Q, R, S, T, U, V, W, X, Y, Z<br />
A.2 Math Accents<br />
∑ ∑ ⋂ ⋂ ⊙ ⊙ |= \models ⊥ \perp ‖ \|<br />
\sum \bigcap \bigodot<br />
∏ ∏ ⋃ ⋃ ⊗ ⊗<br />
≍ \asymp ⊲⊳ \bowtie | \mid<br />
\prod \bigcup \bigotimes ≻ \succ ≽ \succeq ⌢ \frown<br />
∐ ∐ ⊔ ⊔ ⊕ ⊕ ≺ \prec ≼ \preceq ⌣ \smile<br />
\coprod \bigsqcup \bigoplus<br />
∫ ∫<br />
∮ ∮<br />
⊎ ⊎<br />
\int<br />
\oint<br />
\biguplus<br />
∨ ∨ ∧ ∧<br />
\bigvee \bigwedge<br />
A.5 Named Math Functions<br />
â \hat{a} á \acute{a} ā \bar{a}<br />
\arccos \cos \csc \exp \ker \limsup<br />
ȧ \dot{a} ă \breve{a} ǎ \check{a}<br />
\arcsin \cosh \deg \gcd \lg \ln<br />
à \grave{a} ⃗a \vec{a} ä \ddot{a}<br />
\arctan \cot \det \hom \lim \log<br />
ã \tilde{a}<br />
\arg \coth \dim \inf \liminf \max<br />
\min \Pr \sec \sin<br />
\sinh \sup \tan \tanh<br />
A.6 Brackets<br />
α \alpha κ \kappa σ \sigma<br />
The \left and \right commands may be applied to each of these<br />
β \beta λ \lambda ς \varsigma<br />
symbols.<br />
γ \gamma µ \mu τ \tau<br />
( ( / / ↑ \uparrow | |<br />
δ \delta ν \nu υ \upsilon<br />
) ) \ \backslash ↓ \downarrow ‖ \|<br />
ɛ \epsilon ξ \xi φ \phi<br />
[ [ ⌊ \lfloor ↕ \updownarrow 〈 \langle<br />
ε \varepsilon o o ϕ \varphi<br />
] ] ⌋ \rfloor ⇑ \Uparrow 〉 \rangle<br />
ζ \zeta π \pi χ \chi<br />
{ \{ ⌈ \lceil ⇓ \Downarrow<br />
η \eta ϖ \varpi ψ \psi<br />
} \} ⌉ \rceil ⇕ \Updownarrow<br />
θ \theta ϖ \varpi ω \omega<br />
ϑ \vartheta ρ \rho<br />
γ \gamma ϱ \varrho<br />
A.7 Relational Symbols<br />
Γ \Gamma Ξ \Xi Φ \Phi<br />
≤ \le ≥ \ge ≠ \neq<br />
∆ \Delta Π \Pi Ψ \Psi<br />
.<br />
≤ \leq ≥ \geq<br />
= \doteq<br />
Θ \Theta Σ \Sigma Ω \Omega<br />
≪ \ll ≫ \gg ≈ \approx<br />
Λ \Lambda Υ \Upsilon<br />
⊂ \subset ⊃ \supset ∼ = \cong<br />
⊆ \subseteq ⊇ \supseteq ≡ \equiv<br />
⊏ \sqsubset ⊐ \sqsupset ∝ \propto<br />
⊑ \sqsubseteq ⊒ \sqsupseteq ∼ \sim<br />
∈ \in ∋ \ni ≃ \simeq<br />
⊢ \vdash ⊣ \dashv ‖ \parallel<br />
A.3 Greek Letters<br />
A.4 Variable Size Symbols<br />
<strong>Introducing</strong> L A TEX (rev. 2012.1) Page 20
A.8 AMS Relational Symbols<br />
A.11 Standard Arrows<br />
Requires \usepackage{amssymb}<br />
≦ \leqq ⊃ \supset ⊜ \circeq<br />
\leqslant \supseteqq \triangleq<br />
\eqslantless \precapprox ∼ \thicksim<br />
\lesssim \vDash ≈ \thickapprox<br />
\lessapprox \Vvdash ⊳ \vartriangleleft<br />
≅ \approxeq ⌣ \smallsmile \trianglelefteq<br />
⋖ \lessdot ⌢ \smallfrown ⊐ \sqsupset<br />
≪ \lll ≏ \bumpeq \succcurlyeq<br />
≶ \lessgtr ≎ \Bumpeq \curlyeqsucc<br />
\doteqdot ≧ \geqq \succsim<br />
≬ \between \geqslant \succapprox<br />
⋔ \pitchfork \eqslantgtr ⊲ \vartriangleright<br />
∽ \backsim \gtrsim \trianglerighteq<br />
⋍ \backsimeq \gtrapprox \preccurlyeq<br />
\subseteqq ⋗ \gtrdot \curlyeqprec<br />
⋐ \Subset ≫ \ggg \shortparallel<br />
⊏ \sqsubset ≷ \gtrless \risingdotseq<br />
⊩ \Vdash \gtreqless \fallingdotseq<br />
\shortmid \gtreqqless ∝ \varpropto<br />
\precsim ≖ \eqcirc ◭ \blacktriangleleft<br />
∴ \therefore ∵ \because \backepsilon<br />
← \leftarrow ←− \longleftarrow<br />
⇐ \Leftarrow ⇐= \Longleftarrow<br />
→ \rightarrow −→ \longrightarrow<br />
⇒ \Rightarrow =⇒ \Longrightarrow<br />
↔ \leftrightarrow ←→ \longleftrightarrow<br />
⇔ \Leftrightarrow ⇐⇒ \Longleftrightarrow<br />
↦→ \mapsto ↦−→ \longmapsto<br />
←↪ \hookleftarrow ↩→ \hookrightarrow<br />
↼ \leftharpoonup ⇀ \rightharpoonup<br />
↽ \leftharpoondown ⇁ \rightharpoondown<br />
⇋ \rightleftharpoons \leadsto<br />
↑ \uparrow ↓ \downarrow<br />
⇑ \Uparrow ⇓ \Downarrow<br />
↑ \uparrow ⇑ \Uparrow<br />
↓ \downarrow ⇓ \Downarrow<br />
↕ \updownarrow ⇕ \Updownarrow<br />
↗ \nearrow ↘ \searrow<br />
↕ \updownarrow ⇕ \Updownarrow<br />
A.12 AMS Arrows<br />
A.9 Binary Operations<br />
± \pm ∩ \cap ◦ \circ<br />
∓ \mp ∪ \cup • \bullet<br />
× \times ⊎ \uplus ⋄ \diamond<br />
÷ \div ⊓ \sqcap ⊳ \lhd<br />
· \cdot ⊔ \sqcup ⊲ \rhd<br />
⋆ \star ∨ \vee \unlhd<br />
∗ \ast ∧ \wedge \unrhd<br />
† \dagger ⊕ \oplus ⊘ \oslash<br />
‡ \ddagger ⊖ \ominus ⊙ \odot<br />
∐ \amalg ⊗ \otimes ○ \bigcirc<br />
□ \Box ♦ \Diamond △ \bigtriangleup<br />
≀ \wr ⊳ \triangleleft ▽ \bigtriangledown<br />
\ \setminus ⊲ \triangleright<br />
\dashrightarrow \dashleftarrow<br />
⇔ \leftleftarrows ⇆ \leftrightarrows<br />
⇚ \Lleftarrow \looparrowleft<br />
⇌ \leftrightharpoons \curvearrowleft<br />
\downdownarrows \curvearrowright<br />
⇈ \upuparrows ↿ \upharpoonleft<br />
⇃ \downharpoonleft ↾ \upharpoonright<br />
\leftrightsquigarrow ⇒ \rightrightarrows<br />
⇄ \rightleftarrows ↠ \twoheadrightarrow<br />
↣ \rightarrowtail \looparrowright<br />
⇋ \rightleftharpoons \Lsh<br />
\circlearrowright \Rsh<br />
\circlearrowleft ⊸ \multimap<br />
⇂ \downharpoonright \rightsquigarrow<br />
A.13 Miscellaneous Math Symbol<br />
A.10 AMS Binary Operations<br />
Requires \usepackage{amssymb}<br />
∔ \dotplus \curlywedge ⊟ \boxminus<br />
⋓ \Cap ⋒ \Cup ⊡ \boxdot<br />
⊼ \barwedge ⊚ \circledcirc \divideontimes<br />
⊺ \intercal ⋊ \rtimes \doublebarwedge<br />
⊠ \boxtimes ⋉ \ltimes \smallsetminus<br />
⊞ \boxplus ⊖ \circleddash \curlyvee<br />
\veebar ⊛ \circledast ⋌ \rightthreetimes<br />
⊟ \boxminus \centerdot ⋋ \leftthreetimes<br />
. .. \ddots · · · \cdots<br />
. .. \vdots<br />
. . . \ldots ℵ \aleph ′ \prime<br />
∀ \forall ∞ \infty \hbar<br />
∅ \emptyset ∃ \exists □ \Box<br />
ı \imath ∇ \nabla ¬ \neg<br />
√<br />
♦ \Diamond j \jmath<br />
\surd<br />
♭ \flat △ \triangle l \ell<br />
⊤ \top ♮ \natural ♣ \clubsuit<br />
℘ \wp ⊥ \bot ♯ \sharp<br />
♦ \diamondsuit R \Re ‖ \|<br />
\ \backslash ♥ \heartsuit I \Im<br />
∠ \angle ∂ \partial ♠ \spadesuit<br />
<strong>Introducing</strong> L A TEX (rev. 2012.1) Page 21
A.14 Special Math Typesetting<br />
ãbc \widetilde{abc} âbc \widehat{abc}<br />
←−<br />
−→<br />
abc \overleftarrow{abc} abc \overrightarrow{abc}<br />
abc<br />
{}}{<br />
\overline{abc} abc \underline{abc}<br />
abc \overbrace{abc}<br />
}{{}<br />
abc \underbrace{abc}<br />
√<br />
abc \sqrt{abc}<br />
n √ abc \sqrt[n]{abc}<br />
© \copyright \textcopyleft<br />
® \textregistered ₩ \textwon<br />
฿ \textbaht \textborn<br />
° \textdegree \textleaf<br />
₤ \textlira \textmarried<br />
♪ \textmusicalnote № \textnumero<br />
f ′ f’<br />
abc<br />
xyz<br />
\frac{abc}{xyz}<br />
A.17 Text Font Styles<br />
A.15 Text Accents<br />
\rm Roman \it italic \sc Small Caps<br />
\bf boldface \sl slanted \sf Sans Serif<br />
\tt typewriter<br />
These may only be used in text mode, and are not valid in math mode.<br />
ó \’{o} ò \‘{o} ô \^{o} ö \"{o} õ \~{o}<br />
ō \={o} ȯ \.{o} ŏ \u{o} ǒ \v{o} ő \H{o}<br />
oo \t{oo} ¸o \c{o} ọ \d{o} ō \b{o} ˚o \r{o}<br />
A.16 Special Symbols in Text Mode<br />
œ \oe Œ \OE æ ae Æ \AE å \aa<br />
Å \AA ø \o Ø \O ̷l \l ̷L \L<br />
ß ss SS \SS ¡ !‘ ¿ ?‘ † \dag<br />
§ \S ‡ \ddag \P & \& € \texteuro<br />
¥ \yen $ \$ % \% \_ £ \pounds<br />
A.18 Font Sizes<br />
\tiny<br />
\scriptsize<br />
\footnotesize<br />
\small<br />
\normalsize<br />
\large<br />
\Large<br />
\LARGE<br />
\huge<br />
\Huge<br />
the quick brown fox<br />
the quick brown fox<br />
the quick brown fox<br />
the quick brown fox<br />
the quick brown fox<br />
the quick brown fox<br />
the quick brown fox<br />
the quick brown fox<br />
the quick brown fox<br />
the quick brown fox<br />
B<br />
References<br />
Online References: There are many good online references for The Not So Short Introduction to LaTeX http://tobi.oetiker.<br />
LATEX. Because of the fluidity of the internet, the URL’s may ch/lshort/<br />
change.<br />
Print References<br />
The LaTeX Reference Manual: http://home.gna.org/<br />
latexrefman/<br />
These are just a couple that I like; there are lots of good ones.<br />
Grätzer G, More Math into LATEX, 4th Edition, Springer (2007).<br />
<strong>Latex</strong> Reference Pages: http://herbert.the-little-red-haired-girl.<br />
org/html/latex2e/<br />
Kopka H and Daly P. A Guide to LaTeX2e. Addison Wesley (2003).<br />
The LaTeX Tutorial: http://www.tug.org/tutorials/tugindia/<br />
The LaTeX Wikibook: http://en.wikibooks.org/wiki/LaTeX<br />
Mittelback F et. al. The LaTeX Companion. Addison Wesley<br />
(2004).<br />
<strong>Introducing</strong> L A TEX (rev. 2012.1) Page 22