LT3-00032-2-A - DDKS Industries, hydraulic components distributor
LT3-00032-2-A - DDKS Industries, hydraulic components distributor
LT3-00032-2-A - DDKS Industries, hydraulic components distributor

You also want an ePaper? Increase the reach of your titles
YUMPU automatically turns print PDFs into web optimized ePapers that Google loves.
ASSEMBLY PROCEDURE<br />
SEAL ASSEMBLY<br />
SEAL ASSEMBLY<br />
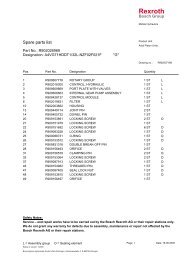
See figure 7.<br />
NOTE: 24 series only - to replace shaft seal only:<br />
Remove unit for disassembly.<br />
Some units require removing an adapter housing and external pump.<br />
Follow steps removing the internal auxiliary pump and seal plate see figure 10.<br />
Remove retaining ring (8), figure 4.<br />
Remove shaft seal. Follow seal assembly in reverse order.<br />
Assemble new shaft seal per instructions below.<br />
After seal is replaced re-install retaining ring (8), figure 4 and reassemble auxiliary<br />
pump and unit per assembly instructions.<br />
CAUTION: Failure to follow these instructions may result in pump failure.<br />
Procedure for installation of Mechanical Shaft Seals<br />
Use only clean <strong>hydraulic</strong> fluid from the test stand or system to lubricate the seal. The<br />
fluid must be compatible with the type of seals being installed. Ensure that your hands<br />
are clean at all times when installing seals.<br />
Install the shaft into the unit per procedure.<br />
Assure that the seal faces of the stator and carbon ring remain clean throughout the<br />
installation. These parts have highly polished finishes which must be maintained to<br />
seal properly.<br />
Lubricate the seal ring on the outside of the seal stator (ceramic) and install into seal<br />
retainer. Inspect the back of the retainer to assure that the seal ring and stator are<br />
installed completely and squarely into the retainer and the stator is not tipped. Care<br />
must be taken to assure that the stator is not damaged. Avoid any impact on this<br />
piece.<br />
Install o-rings into grooves on the seal retainer as required.<br />
Lubricate the shaft in the seal area, the ID of the Rubber boot, the face of the stator<br />
and the face of the carbon ring. Without touching the face of the carbon seat, slip<br />
the assembled spring and rubber boot onto the shaft until the spring retainer bottoms<br />
out. Align the seal retainer and mounting flange bolt holes and push this assembly<br />
down with the seal stator face against the carbon face until the seal retainer is in the<br />
mounting flange pilot, taking care to keep the parts as even as possible. Secure (Do<br />
not use impact tool) with 4 screws and torque to required specification.<br />
Allow the unit to sit for a minimum of one hour before running to allow time for the<br />
seal friction ring to adhere to the shaft.<br />
FIGURE 7<br />
22