Apple Configurator Fundamentals
In this issue we go over Apple Configurator basics. In the issue you'll also learn how to create a free Apple ID, which can be used to download free apps from Apple's App Store. This Apple ID is important in the management of devices with Apple Configurator. I've provided support and training on Apple Configurator in the district for several years and in the issue I provide some critical information that can help you effortlessly manage your devices. The focus is on the classroom teacher but these instructions can be used campus wide. The Campus Technologists in our district use these instructions regularly to manage devices in carts or devices issued to students.
In this issue we go over Apple Configurator basics. In the issue you'll also learn how to create a free Apple ID, which can be used to download free apps from Apple's App Store. This Apple ID is important in the management of devices with Apple Configurator.
I've provided support and training on Apple Configurator in the district for several years and in the issue I provide some critical information that can help you effortlessly manage your devices. The focus is on the classroom teacher but these instructions can be used campus wide. The Campus Technologists in our district use these instructions regularly to manage devices in carts or devices issued to students.

Create successful ePaper yourself
Turn your PDF publications into a flip-book with our unique Google optimized e-Paper software.
Digital Maestro<br />
Magazine<br />
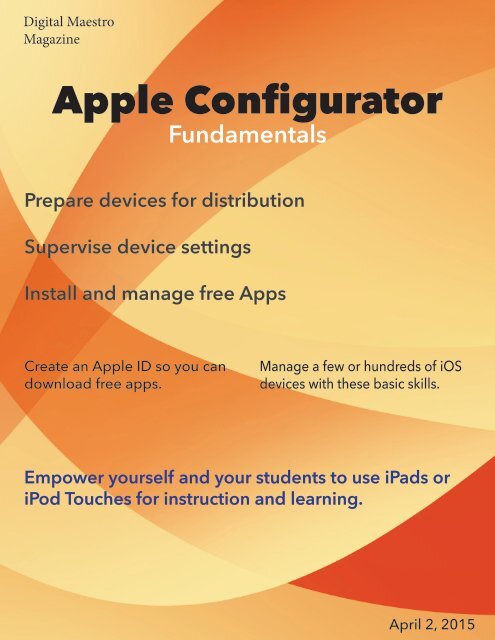
<strong>Apple</strong> <strong>Configurator</strong><br />
<strong>Fundamentals</strong><br />
Prepare devices for distribution<br />
Supervise device settings<br />
Install and manage free Apps<br />
Create an <strong>Apple</strong> ID so you can<br />
download free apps.<br />
Manage a few or hundreds of iOS<br />
devices with these basic skills.<br />
Empower yourself and your students to use iPads or<br />
iPod Touches for instruction and learning.<br />
April 2, 2015
<strong>Apple</strong> <strong>Configurator</strong> Basics<br />
Introduction<br />
What is <strong>Apple</strong> <strong>Configurator</strong> and why should I as<br />
a teacher use this tool in my classroom? Isn’t that<br />
someone elses job? You might be lucky enough<br />
to have someone at your campus support and<br />
maintain the technology, but that isn’t often the<br />
case. If you have someone, this person is usually<br />
busy and difficult to find. My focus in these lessons<br />
is the classroom teacher. I believe as teachers<br />
we should empower ourselves to manage our<br />
classroom instruction, and that involves instructional<br />
technology tools.<br />
I’ve been a teacher for over twenty years and over<br />
those twenty years I’ve learned that we wear many<br />
hats and one of those hats in today’s classroom is<br />
tech support. That’s why I write this magazine. We<br />
don’t have time to wait weeks, days or even hours<br />
for someone to get some technology done for<br />
us. This is why you should know how to use <strong>Apple</strong><br />
<strong>Configurator</strong> if you have iOS devices in your<br />
classroom.<br />
You probably have a handful of iPads or iPod<br />
Touch devices in your classroom for students to<br />
use. If you’re like most teachers you’ve probably<br />
spent hours downloading and installing apps for<br />
your students. You’ve probably also spent time<br />
re-installing Apps after a student has removed<br />
them from the device. You’ve probably had to reset<br />
some settings that were changed by students<br />
and struggled with getting into an iPad after a<br />
student has set a password. There are probably a<br />
dozen more things you’ve had to do to make sure<br />
those devices are working and ready for your students.<br />
You might have given up and decided not<br />
to use them. They’re probably locked in a closet<br />
somewhere never to see the light of day until they<br />
are sent to that technology cemetery of outdated<br />
devices. I see that happen all too often in school<br />
districts.<br />
I don’t want you to struggle with those iOS devices<br />
and I want your students to use them. I<br />
want you to look forward to asking students to<br />
get those iPads out and get to doing some great<br />
things. Plan to spend a couple of hours learning<br />
how to do this. I know how precious your time is<br />
and that’s why you should spend at least a couple<br />
of ours learning how to use <strong>Apple</strong> <strong>Configurator</strong>.<br />
Once you learn how <strong>Apple</strong> <strong>Configurator</strong> can help,<br />
you will spend less time managing and more time<br />
using them.<br />
When a device isn’t managed, students can get<br />
into things they shouldn’t. This often means they<br />
remove apps or change device settings. The most<br />
important step in preventing students from doing<br />
stuff they shouldn’t is to have effective classroom<br />
management. This is true if you are going to use<br />
technology like iPads or traditional technologies<br />
like paper and pencil. I want to focus less on what<br />
they shouldn’t be doing and more on what can be<br />
done with them and how <strong>Apple</strong> <strong>Configurator</strong> can<br />
help you get things done.<br />
You won’t be able to get much done if you download<br />
and start <strong>Apple</strong> <strong>Configurator</strong>. You need to<br />
have some things in place first and you need to<br />
have some information ready. <strong>Apple</strong> <strong>Configurator</strong><br />
is a software tool that is designed to help setup<br />
and manage iOS devices like iPads, iPod Touches<br />
and iPhones. It can be used to quickly setup one<br />
to several hundred iOS devices. <strong>Apple</strong> <strong>Configurator</strong><br />
is easy to use but you need to understand<br />
some things before it can help you work effectively.<br />
We will be learning the basics to get you started<br />
with <strong>Apple</strong> <strong>Configurator</strong>. I won’t cover all the<br />
options available because that would entail an<br />
lengthy book. Instead I will chunk the instructions<br />
for you so that in time you will learn all you need<br />
to know to effectively manage these devices.<br />
Digital Maestro
<strong>Apple</strong> <strong>Configurator</strong> Basics<br />
What will you need?<br />
Your OS<br />
<strong>Apple</strong> <strong>Configurator</strong> is a free utility from <strong>Apple</strong><br />
and it can be downloaded through the <strong>Apple</strong><br />
Store. To access the <strong>Apple</strong> Store, you will need a<br />
computer with OS X, Version 10.6 or later. Version<br />
10.6 is Snow Leopard. Snow Leopard is no longer<br />
available to download from <strong>Apple</strong> or to Purchase.<br />
You might be able to find someone selling a copy<br />
on Ebay or Amazon. The price is usually about<br />
$20 plus shipping and handling.<br />
Your RAM<br />
If your computer does not have at least version<br />
10.6 of OS X, it might be too slow to help you<br />
manage the iOS devices. If this is all you have,<br />
then you might look into upgrading the RAM on<br />
the computer. Most computers that old came with<br />
1GB of RAM. You should look into purchasing<br />
2GB or 4GB of RAM. I recommend 4GB of RAM.<br />
This additional memory will help compensate for<br />
the slow processor on the computer.<br />
The Latest OS X<br />
Updating to Snow Leopard and updating the<br />
RAM is only half the process. You need to update<br />
Snow Leopard to the latest OS X, which is Yosemite.<br />
If your computer was purchased in 2007<br />
or later you will be in luck because the minimum<br />
requirements for Yosemite is an Intel MacBook or<br />
iMac built in late 2007. If your computer doesn’t<br />
even match this minimum hardware requirement,<br />
don’t bother with Snow Leopard or the RAM.<br />
If you can update to Yosemite then your in luck<br />
once again because the latest OS X versions are<br />
free. Go to the <strong>Apple</strong> Store and search for Yosemite.<br />
Click the get button and follow the instructions<br />
for updating your OS X version.<br />
After Yosemite<br />
If you are reading this after Yosemite is no longer<br />
available and the latest OS X version is out, there<br />
might be issues. I don’t know yet if the newer OS<br />
X will support your older computer. It might not. I<br />
will post helpful information if that does happen<br />
when it happens.<br />
In the mean time I highly recommend purchasing<br />
an updated computer to help handle future<br />
updates from <strong>Apple</strong>.<br />
Software Licenses<br />
<strong>Apple</strong> <strong>Configurator</strong> will help you install apps onto<br />
iOS devices. <strong>Apple</strong> <strong>Configurator</strong> is programmed<br />
to abide by <strong>Apple</strong>’s software license agreement.<br />
This means that unless the app is free, you will<br />
need to purchase a license for any paid apps.<br />
This includes the installation of even one paid<br />
app. You will need the Redeem code those that<br />
apps. Redeem codes are available when apps are<br />
purchased through the <strong>Apple</strong> Volume Purchase<br />
Program. If you are not part of the <strong>Apple</strong> Volume<br />
Purchase Program then your district can apply to<br />
be part of the program.<br />
Don’t worry too much about not being able to install<br />
purchased apps through <strong>Apple</strong> <strong>Configurator</strong>.<br />
There are plenty of great free apps to install. In<br />
the future I will be expanding the list of free education<br />
apps on my site to help you.<br />
Digital Maestro
<strong>Apple</strong> <strong>Configurator</strong> Basics<br />
Get An <strong>Apple</strong> ID<br />
Having an <strong>Apple</strong> ID is essential for using <strong>Apple</strong><br />
<strong>Configurator</strong> to setup your iOS devices. An <strong>Apple</strong><br />
ID is used to authenticate a computer to manage<br />
your iOS devices and it is used to install Apps<br />
from the <strong>Apple</strong> App Store.<br />
Where do you get an <strong>Apple</strong> ID? I’m glad you<br />
asked. In this lesson we will learn how to get our<br />
own free <strong>Apple</strong> ID. You might already have an<br />
<strong>Apple</strong> ID for your campus or district. How do you<br />
know if we have one? Ask the technology person<br />
at your campus or in your district.<br />
Sometimes campuses or districts will setup <strong>Apple</strong><br />
IDs that can be used to purchase and distribute<br />
Apps to iOS devices. This is often done in concert<br />
with <strong>Apple</strong>’s Volume Purchase Program. Find out<br />
if there is an <strong>Apple</strong> ID that can be used by you at<br />
your campus. If there is, use that.<br />
An <strong>Apple</strong> ID is usually an email address. Make<br />
sure to get the password for the <strong>Apple</strong> ID too. If<br />
the district has given you an <strong>Apple</strong> ID as part of a<br />
Volume Purchase Agreement, you won’t be able<br />
to purchase anything with that ID. The ID in this<br />
case will be used to install apps and manage the<br />
device only. There is a volumen purchase ID that<br />
is used to purchase and in some cases distriubute<br />
those apps onto devices.<br />
Free’s good, there’s lots of great stuff you can use<br />
on the iPad for free. On the other hand if your<br />
district is in the Volume Purchase Program, then<br />
the district can use that program to purchase lots<br />
of Apps and media at 50% discounts. You get the<br />
discount when you purchase 20 or more of one<br />
item.<br />
If you don’t have an <strong>Apple</strong> ID provided by your<br />
campus or the district, we will walk through the<br />
process of getting your own <strong>Apple</strong> ID. Keep in<br />
mind that this <strong>Apple</strong> ID is to be used in your classroom<br />
and associated with the iOS devices you<br />
plan to manage. <strong>Apple</strong> IDs are free, so you can<br />
get one for your class and one for yourself.<br />
<strong>Apple</strong> IDs are usually associated with a credit<br />
card or other payment method. The idea is that<br />
you will be using this ID to purchase media from<br />
<strong>Apple</strong>. In this lesson I will show you how to create<br />
an <strong>Apple</strong> ID with the option to opt out of a payment<br />
method. To get the no payment method<br />
option we need to select a free application from<br />
the iTunes Store.<br />
Start iTunes<br />
Most people have a personal iTunes account and<br />
you might be using yours on this computer. If<br />
you are, you will need to sign out of that account.<br />
Click on Store in the menu and select sign out.<br />
Digital Maestro
<strong>Apple</strong> <strong>Configurator</strong> Basics<br />
I recommend you use a designated computer in<br />
the classroom to manage the devices. Try not to<br />
use your personal computer. If you will be using<br />
your personal computer and use it to purchase<br />
items with your personal iTunes account, I recommend<br />
you create a separate iTunes library. I cover<br />
the process for creating a separate iTunes library<br />
at the end of the lesson. A separate iTunes library<br />
will provide a clear way of separating apps purchased<br />
with your account from apps purchased<br />
through your classroom, campus or district.<br />
If for some reason your personal app purchases<br />
get mixed in, <strong>Apple</strong> <strong>Configurator</strong> will not install<br />
them and you will get an error message. The error<br />
message doesn’t tell you exactly what went wrong<br />
and it can be very frustrating. I know because<br />
campus technolgists and teachers have called<br />
me ready to give up because they have made this<br />
very simple mistake. Head my advice, separate<br />
your apps.<br />
You will be prompted to enter your <strong>Apple</strong> ID and<br />
password.<br />
Below the <strong>Apple</strong> ID login fields, you will see a<br />
button to create an <strong>Apple</strong> ID. Click on this button<br />
to begin.<br />
Let’s search for a free application to purchase. I’ll<br />
search for Evernote because I know this App is<br />
free. Search for this free app or a free app of your<br />
own. Click on the Get button.<br />
A welcome page will open. Click the continue<br />
button.<br />
A page with <strong>Apple</strong>’s Terms and conditions will<br />
open. Click on the box to indicate you have read<br />
the information and click the agree button.<br />
Digital Maestro
<strong>Apple</strong> <strong>Configurator</strong> Basics<br />
Get An <strong>Apple</strong> ID<br />
The next step is where you create your <strong>Apple</strong> ID<br />
name. Don’t use your personal email. Use your<br />
personal email for your personal <strong>Apple</strong> ID. I recommend<br />
you create an email address just for this<br />
account. There are lots of services out there that<br />
provide free email accounts. These include Google,<br />
Yahoo and Microsoft. Stop here and go create<br />
an email account using one of these services.<br />
Enter the email address you created for the <strong>Apple</strong><br />
ID and create a password. I recommend using a<br />
different password from the one you used for the<br />
email. Knowing the password for both the email<br />
and <strong>Apple</strong> ID is a serious security problem. A<br />
student could easily change both passwords and<br />
you would have no way of accessing either.<br />
Keep the password complex but easy for you to<br />
remember. For example, the password could be<br />
aardvark but instead of spelling it the regular way,<br />
try it this way, @@RdV@rK. I used the @ symbol in<br />
place of the letter ‘A’ and alternated upper and<br />
lower case letters. <strong>Apple</strong> requires that you include<br />
a number in the password and that the password<br />
be at least eight characters. To accommodate this<br />
requirement my password will be @@RdV@rK#1.<br />
This password is more than eight characters long,<br />
includes both upper and lower case letters and at<br />
least one number.<br />
The security questions are important. If you forget<br />
the password or <strong>Apple</strong> ID, <strong>Apple</strong> will not be<br />
able to help you until you answer these questions.<br />
Click on the pull down menu and select a<br />
question. Provide an answer for each of the three<br />
questions.<br />
These security questions are great, but if you are<br />
in any way involved with social media, most of<br />
these answers can be easily answers by anyone<br />
that knows you, and your students pay close attention<br />
weather you know it or not.<br />
Digital Maestro
<strong>Apple</strong> <strong>Configurator</strong> Basics<br />
Here’s a trick to up the level of these security<br />
questions. Provide the answer from one of the<br />
other questions. For example, for the question<br />
that asks for your favorite children’s book, which<br />
you’ve probably read to your students a few<br />
times, provide the answer to your first car. If the<br />
Velveteen Rabbit is your favorite children’s book,<br />
type Mustang for your favorite children’s book.<br />
For the question about the model of your first car,<br />
enter Velveteen Rabbit.<br />
For the third question you could spell out the<br />
name backwards. For example if you grew up on<br />
Mocking Bird Lane, Type Lane Bird Mocking.<br />
Yes, these tricks are all fine but that just makes it<br />
harder to remember! When you forget a password,<br />
you’re already stressed about forgetting the<br />
password or <strong>Apple</strong> ID. In addition to these tricks, I<br />
recommend you use a password manager. There<br />
are several free apps that help keep passwords.<br />
These apps include Keeper password manager,<br />
Password Manager, and last pass just to mention<br />
three. Your probably tempted to write this information<br />
down on a sticky and place it under one<br />
of your desk drawers. That could work, just don’t<br />
forget it’s there.<br />
Please don’t use stickies I know dozens of teacher<br />
password because they are taped to their laptop<br />
or to their screen.<br />
A rescue email is where <strong>Apple</strong> will send a link to<br />
reset your password or with a reminder of your<br />
<strong>Apple</strong> ID. This email can be your personal email. I<br />
recommend you use your personal email because<br />
if anyone ever tries to reset the password the<br />
email will go to you and you’ll know somethings<br />
rotten, and it ain’t that cafeteria food.<br />
Provide your date of birth. This serves two purposes.<br />
It identifies you as being older than 13,<br />
<strong>Apple</strong> won’t provide IDs for children thirteen or<br />
younger, and it is one of the security questions.<br />
Don’t lie on this one. Several teachers have, and<br />
then can’t remember what date they gave. Provide<br />
you real birth date. I’m 51 and I’ve managed<br />
to stick around this long so I’m proud to let people<br />
know I’m still here and made it through the<br />
eighties and punk rock music.<br />
You can choose to receive email from <strong>Apple</strong> or<br />
not. Remove the check marks if you don’t want to<br />
get email from <strong>Apple</strong> about announcements or<br />
offers.<br />
Click the continue button.<br />
A payment method page will open. We selected<br />
a free App to purchase and by doing so we are<br />
provided the option to not provide a payment<br />
method. This option is automatically selected for<br />
us. You can use gift cards with an account that<br />
does not include a payment method. Leave the<br />
option set at none or choose a payment method<br />
if you are creating this as a personal account.<br />
DON’T use your personal credit card for payment<br />
options with an account that is going to be used<br />
at your school. That’s just crazy!<br />
If you have a gift card to use with this account, this<br />
is the time to enter the redeem code in the box<br />
provided below the payment methods.<br />
Provide your campus mailing address. Use your<br />
personal address for your personal <strong>Apple</strong> ID account.<br />
Click the Create <strong>Apple</strong> ID button.<br />
Digital Maestro
<strong>Apple</strong> <strong>Configurator</strong> Basics<br />
Get An <strong>Apple</strong> ID<br />
A page will let you know that the email address<br />
used to create the <strong>Apple</strong> ID needs to be verified.<br />
You will be prompted to login with your <strong>Apple</strong> ID<br />
to complete the verification process.<br />
Go over to the email and click on the verify link.<br />
When the account is verified you will see this verification<br />
page.<br />
Now we’re going to use this <strong>Apple</strong> ID in our next<br />
step.<br />
Digital Maestro
<strong>Apple</strong> <strong>Configurator</strong> Basics<br />
Authorize iTunes<br />
We are going to use your <strong>Apple</strong> ID to authorize<br />
the computer to manage the iOS devices through<br />
<strong>Apple</strong> <strong>Configurator</strong>. This is an important step. The<br />
first time I tried to use <strong>Apple</strong> <strong>Configurator</strong> it took<br />
me a couple of days to figure out what was going<br />
wrong. Not matter what I did, I could not install<br />
Apps through <strong>Apple</strong> <strong>Configurator</strong> onto the iPads.<br />
Authorizing the computer permits <strong>Apple</strong> <strong>Configurator</strong><br />
to install Apps onto managed devices.<br />
Enter your <strong>Apple</strong> ID and password and click the<br />
Authorize button.<br />
A message will display to let you know the computer<br />
is now authorized to manage the media<br />
purchased from iTunes.<br />
That’s all there is to this step. You can quit iTunes.<br />
Open iTunes and click on the Store option in the<br />
menu.<br />
If you are using your personal computer it might<br />
already be tied to your personal <strong>Apple</strong> ID account.<br />
If it is, you will need to log out of the account.<br />
You won’t loose anything. It’s like logging<br />
out of your online back account.<br />
Digital Maestro
<strong>Apple</strong> <strong>Configurator</strong> Basics<br />
Get <strong>Apple</strong> <strong>Configurator</strong><br />
<strong>Apple</strong> <strong>Configurator</strong> is a free application from<br />
<strong>Apple</strong>. To run <strong>Apple</strong> <strong>Configurator</strong>, you will need<br />
the latest version of OS X. The current version is<br />
Yosemite. If you don’t have the current version,<br />
the App store will not permit you to download<br />
and install <strong>Apple</strong> <strong>Configurator</strong>. Luckily <strong>Apple</strong>’s<br />
operating systems are free as long as you have<br />
a computer with OS 10.6 or later installed. That’s<br />
the Snow Leopard OS X.<br />
To begin the installation, click the Get button.<br />
You will be prompted to enter your iTunes account<br />
information. Type in your information and<br />
click the sign in button.<br />
The App Store will download and install <strong>Apple</strong><br />
<strong>Configurator</strong> onto the computer.<br />
Go to the App Store.<br />
Click once in the search box and type <strong>Apple</strong> <strong>Configurator</strong>.<br />
Press enter to search the App Store.<br />
Digital Maestro
<strong>Apple</strong> <strong>Configurator</strong> Basics<br />
When the installation is done, you will see the<br />
installation button change to read Open. Click on<br />
the open button to start <strong>Apple</strong> <strong>Configurator</strong>.<br />
When <strong>Apple</strong> configurator starts for the first time<br />
you will see this welcome screen.<br />
In the future when opening <strong>Apple</strong> <strong>Configurator</strong>,<br />
you can find it in your Applications folder.<br />
Digital Maestro
<strong>Apple</strong> <strong>Configurator</strong> Basics<br />
Reset Your iPads<br />
The first step is to prepare your devices. This may<br />
involve two steps on your part. If you’ve been using<br />
the iOS devices and they currently have Apps<br />
and accounts setup, you will need to wipe these<br />
devices before you can use <strong>Apple</strong> <strong>Configurator</strong> to<br />
prepare them.<br />
You will need to wipe them because we are going<br />
to use <strong>Apple</strong> <strong>Configurator</strong> to manage the devices<br />
and they cannot have other account or Apps installed<br />
that may conflict with the way <strong>Apple</strong> <strong>Configurator</strong><br />
will manage the devices.<br />
I’ve worked with teachers that have spent hours or<br />
days setting up their iPads with the settings and<br />
Apps for their students and frown when I tell them<br />
it all has to be erased. I let them know that it will<br />
be alright because this will make their job much<br />
easier in the future. In the future they won’t have<br />
to spend hours or days setting up Apps or resetting<br />
iPads that have been changed by students.<br />
If you have brand new iOS devices out of the box<br />
you won’t need to wipe them. Leave them as they<br />
are, don’t bother going through the setup process<br />
on each device. That’s <strong>Apple</strong> <strong>Configurator</strong>’s<br />
job.<br />
If you have new devices in the box, I encourage<br />
you to read this part, because it might come in<br />
hand in the future.<br />
Grab a device and tap on the settings icon.<br />
In the General settings area scroll down to the<br />
bottom.<br />
Digital Maestro
<strong>Apple</strong> <strong>Configurator</strong> Basics<br />
At the bottom of the General settings you will see<br />
a button named “Reset”. Tap on the “Reset” button<br />
If the devices is protected with a passcode, you<br />
will be prompted to enter the passcode.<br />
On the reset page you will see several reset options.<br />
Tap on the “Erase All Content and Settings”<br />
button.<br />
You will see a message letting you know that this<br />
will delete all media and data from the device. It<br />
will also reset all settings. Tap the Erase button.<br />
Digital Maestro
<strong>Apple</strong> <strong>Configurator</strong> Basics<br />
Reset Your iPads<br />
You get one more warning to make sure you want<br />
to erase the device. Tap the erase button.<br />
You’ll be prompted to provide the password for<br />
the iTunes account that is currently associated<br />
with the device. This might be different from the<br />
iTunes account we created earlier. Type in the<br />
password for the account and tap erase.<br />
The device will now restart and reset itself to the<br />
original factory settings. The process could take<br />
a few minutes. You’ll need to do this to all your<br />
devices.<br />
Digital Maestro
<strong>Apple</strong> <strong>Configurator</strong> Basics<br />
Preparing Devices<br />
The first step in the process is to prepare you device<br />
for supervision. This means that <strong>Apple</strong> <strong>Configurator</strong><br />
will modify the iOS on the device so that<br />
it has increased security and can be managed by<br />
<strong>Apple</strong> <strong>Configurator</strong>.<br />
On the welcome page we see there are three sections.<br />
The prepare section prepares the device for<br />
supervision. Once the device is supervised it can<br />
be assigned to students, if that is your intention.<br />
You don’t have to assign a device to a student but<br />
the option is there if you need to do so. In most<br />
situations you will prepare the device for supervision<br />
and determine the components of the device<br />
you want to supervise. This option is best when<br />
you plan to use a group of devices and don’t want<br />
to keep track of which student will use a specific<br />
device. Assigning a device to students takes us to<br />
another level of supervision and I won’t be covering<br />
that process in this issue.<br />
Click on the prepare button and connect one iPad<br />
to your computer. Start with one iPad because it<br />
will make the learning process easier. What you<br />
learn to do with one iPad you can use on a dozen<br />
to a hundred devices if needed.<br />
From now on you will see this screen when preparing<br />
or supervising devices. The welcome<br />
screen only appears the first time you start <strong>Apple</strong><br />
<strong>Configurator</strong>.<br />
Next to the prepare icon you’ll see a number 1.<br />
This number represents the number of devices<br />
you will be preparing. If we had ten devices connected<br />
through a USB hub, then this number<br />
would appear as 10 next to the icon.<br />
This number is very useful. I’ve used it often when<br />
helping teachers prepare several devices. These<br />
devices are usually in a cart that holds about<br />
thirty. The number sometimes doesn’t match what<br />
we have connected.<br />
This number will not match because of a couple<br />
of reasons. The cable to the device is loose<br />
or not connected. The device battery might be<br />
completely drained and doesn’t have a charge. In<br />
which case it can’t send a signal to your computer<br />
to let it know it’s available.<br />
If the number doesn’t match what you think<br />
should be connected, check he connections<br />
first. If the connections are good, then one of<br />
the devices might not have enough of a charge<br />
to be recognized by the computer. If the device<br />
doesn’t have enough charge, you might need to<br />
wait about five to fifteen minutes for the device to<br />
have a sufficient charge.<br />
If the device isn’t connected to a charging cart<br />
or powered USB hub, then you will need to plug<br />
it into a charger. Make sure all devices are fully<br />
charged if they are not connected to a charging<br />
cart or powered USB hub. If a device runs out of<br />
power during a preparation or supervision, it will<br />
not complete the process and you’ll need to do<br />
that one by itself later. I recommend that all your<br />
devices are charged at 100% or connected to a<br />
power source.<br />
Digital Maestro
<strong>Apple</strong> <strong>Configurator</strong> Basics<br />
Preparing Devices<br />
The first option you see in the Prepare section<br />
is the option to name each device and add a<br />
sequential number to each. This is very useful if<br />
you want to provide a name and number to each<br />
device.<br />
I’ve worked with several teachers that want the<br />
devices to be numbered according to the number<br />
on the physical device. For example if they have<br />
devices numbered from 1 to 30, they want <strong>Apple</strong><br />
<strong>Configurator</strong> to give them the same number.<br />
<strong>Apple</strong> <strong>Configurator</strong> is software and is not smart<br />
like we are. It can’t see the number on the device<br />
and give it the same number internally. Teachers<br />
get frustrated because the numbers don’t match.<br />
If you plan to give each a name and number with<br />
<strong>Apple</strong> <strong>Configurator</strong>, keep in mind that the internal<br />
name and numbering won’t match the external<br />
name and numbering. If you want to give them<br />
the number that matches outside, you will need<br />
to do that one at a time.<br />
Digital Maestro<br />
The supervision switch is automatically set to off.<br />
This is because you don’t have to supervise a<br />
device. <strong>Apple</strong> <strong>Configurator</strong> can be used to prepare<br />
devices for distribution only. This could be<br />
distribution to teachers. The purpose in this case<br />
would be to make sure each has the most current<br />
iOS installed and to setup some basic configurations<br />
on each device. The most basic configuration<br />
would be to setup access to the campus or<br />
district wireless network.<br />
Typically we would turn the supervision switch to<br />
ON and then click the prepare button. If you are<br />
preparing devices that have been used before<br />
and you had to reset them, we won’t supervise<br />
them right away. If you have several devices connected<br />
to a USB hub or cart we won’t supervise<br />
them right away either.<br />
Why not supervise them right away? I’ve done this<br />
training several times and without fail we forget<br />
one device or more. There is often some issue<br />
with one of the devices. During the supervise process,<br />
<strong>Apple</strong> <strong>Configurator</strong> downloads and installs<br />
the latest version of the iOS. It will do this even<br />
if the latest version is already installed. With one<br />
device we will know if there is an issue right away.<br />
With a dozen or more devices, we won’t know if<br />
there is an issue for a while. This could typically be<br />
a few minutes into the the supervise process or at<br />
the end of the process. If a device encounters an<br />
error during the supervise process we can’t stop<br />
the process to take care of that one device. We<br />
would have to pull that one device, or others if it’s<br />
more than one and supervise it separately once<br />
the others are complete. This will add some more<br />
time to our process. One device could take us a<br />
half hour or more. Several devices could take a<br />
few more hours.<br />
This is why I want to recommend that you hold off<br />
on the supervision process for a few seconds because<br />
it could pay off in lost time later. We are going<br />
to click the prepare button without supervising<br />
the device or updating the system. The point<br />
here is to get <strong>Apple</strong> <strong>Configurator</strong> to communicate<br />
with each device and give us instant feedback on<br />
any issues we might encounter during the supervision<br />
process. The process will take us less than a<br />
minute and save us hours later.
<strong>Apple</strong> <strong>Configurator</strong> Basics<br />
Supervising Devices<br />
In this lesson our goal is to prepare devices so<br />
they can be supervised for distribution to students.<br />
If you plan to simply prepare devices for<br />
teacher distribution without supervision I’m planning<br />
on covering that in a separate issue.<br />
Leave the supervision option off and click on the<br />
update iOS pull down menu and select never update<br />
device. Leave the other options as you see<br />
them in this example. Click the prepare button at<br />
the bottom.<br />
<strong>Apple</strong> <strong>Configurator</strong> will begin to prepare the<br />
device. This will only take a few seconds with one<br />
device. With several devices it could take a minute<br />
or less. I’ve done this with about 35 devices at<br />
once and had results in less than a minute.<br />
Turn the Supervision switch on.<br />
Click on the Organization Info.<br />
If everything wen’t well then you will see a screen<br />
like this with a checkmark next to each device.<br />
This means that <strong>Apple</strong> <strong>Configurator</strong> did not encounter<br />
any issues with the device.<br />
<strong>Apple</strong> <strong>Configurator</strong> will prompt you to enter this<br />
information when supervising devices so let’s do<br />
it now. This information is embedded onto the device<br />
and can be very useful when trying to recover<br />
a lost or stolen device. Police can use this information<br />
to verify the device belongs to your campus<br />
or district.<br />
Digital Maestro
<strong>Apple</strong> <strong>Configurator</strong> Basics<br />
Supervising Devices<br />
I recommend providing your campus name,<br />
phone number and address. Don’t provide the<br />
specific name of an individual because we all<br />
know that personnel at the campus can change<br />
over time. Don’t provide the email for yourself or<br />
anyone at the campus because you or that person<br />
might not be there in the future.<br />
Click Done.<br />
Click on the Setup section.<br />
We reset the devices and in doing so the devices<br />
return to their factory settings. This means they<br />
are like they came out of a fresh box. You will<br />
need to go through the typical setup process.<br />
That’s several steps. In the Setup section we can<br />
instruct the devices to skip some of the questions<br />
and save us some time. This is also useful if you<br />
plan to distribute the devices to teachers during a<br />
professional development. It can save you some<br />
time in walking them through the process.<br />
Place a check mark next to each of the steps you<br />
want to skip during the setup process on each<br />
device.<br />
I’ve placed a check mark next to all the options. I<br />
plan to control all of these later with a profile.<br />
Click back on the Setting section.<br />
I mentioned a Profile. A Profile is a set of instructions<br />
and settings that can be set on each device.<br />
In this example we will create a simple Profile for<br />
the devices. I won’t go into detail on all the possible<br />
settings in this issue. I plan to cover this in<br />
a separate lesson. Most of the settings are self<br />
explanatory but others require some background<br />
information.<br />
Digital Maestro
<strong>Apple</strong> <strong>Configurator</strong> Basics<br />
Click on the plus button at the bottom of the Profiles<br />
box. Select Create New Profile from the menu<br />
options.<br />
At the bottom we see a security option. The automatic<br />
setting is set to always. This is a good<br />
setting but I like to change it. Why? Good question.<br />
The always option is good but it displays a<br />
remove option button on the device. This means<br />
that anyone with the correct password can remove<br />
the Profile. We don’t want to provide the<br />
option for anyone to remove the Profile. The<br />
ultimate aim is to provide secure devices that<br />
can be used by all students and where students<br />
cannot have the opportunity to bypass any of our<br />
settings.<br />
The first section we see is the General section. In<br />
this section we need to provide a name for our<br />
profile. I recommend naming the profile for your<br />
campus or district, but you can give it any name<br />
you want. In future issues I will discuss the use of<br />
multiple profile options.<br />
This is the only required field. For this example<br />
well leave the other fields empty. Scroll down in<br />
the General section area to the bottom.<br />
Click on the pull down menu and select never.<br />
The never option provides the same security but<br />
does not present a remove button on the device.<br />
Digital Maestro
<strong>Apple</strong> <strong>Configurator</strong> Basics<br />
Supervising Devices<br />
Click on the Wi-Fi section and click on the Configure<br />
button.<br />
Select the security type from the security type pull<br />
down menu. You will need to get this from your<br />
campus or district network person.<br />
In the first box provide the name of your wireless<br />
network.<br />
Type in the password for the secure wireless network<br />
type. That’s all we’ll do with this Profile for<br />
now. Click the Save button.<br />
Digital Maestro
<strong>Apple</strong> <strong>Configurator</strong> Basics<br />
computer. In the future it will simply install the<br />
latest update. Updating each device could take<br />
between ten to fifteen minutes. The more devices<br />
you have connected the longer it will take.<br />
The Profile will appear in the Profiles box. It isn’t<br />
automatically selected for installation onto our<br />
devices. This is because we can create multiple<br />
profiles to deal with multiple devices or groups of<br />
devices. Place a check mark on the profile.<br />
When the process is complete, the device will no<br />
longer appear in the Prepare section. It will be<br />
placed in the Supervision section. Next to the icon<br />
in the Supervision section, you will see a number<br />
representing the devices that are supervised.<br />
Click on the Supervise section.<br />
We are now ready to supervise our device. Click<br />
the Prepare button at the bottom. You will be<br />
prompted to apply the settings to the device.<br />
Click the Apply button.<br />
We skipped the Apps section for now. I’ll cover<br />
that later.<br />
<strong>Apple</strong> <strong>Configurator</strong> will download the latest<br />
version of the iOS for your devices and install it<br />
onto each device. <strong>Apple</strong> configurator will only<br />
download the latest iOS once and save it on your<br />
You’ll see the supervised devices listed on the left.<br />
Each device that is currently connected will have<br />
a green dot next to its name. On the right side<br />
you’ll see similar options to the ones we saw in<br />
the Prepare section.<br />
Digital Maestro
<strong>Apple</strong> <strong>Configurator</strong> Basics<br />
Managing Apps<br />
One of the advantages of using <strong>Apple</strong> <strong>Configurator</strong><br />
is that we can install Apps onto the device<br />
quickly. This is much faster and less tedious than<br />
installing each app on each device. In this lesson<br />
we’ll learn how to install Apps onto devices. There<br />
are two class of Apps we can install onto devices.<br />
Free Apps can be easily installed and this is what<br />
we will focus on in this lesson. Paid apps are a<br />
little more difficult to work with because they<br />
require that you have a Volume Purchase Program<br />
Account. I’ll go over the differences in the lesson.<br />
Before we can use <strong>Apple</strong> <strong>Configurator</strong> to install<br />
Apps onto devices, we need to download them<br />
with iTunes first.<br />
Switch over to <strong>Apple</strong> <strong>Configurator</strong> and click on<br />
the Supervision icon.<br />
Click on the Apps section.<br />
Open iTunes<br />
Find some free apps and download them with<br />
iTunes. Free apps have the Get button.<br />
Enter the password to your classroom or campus<br />
<strong>Apple</strong> ID when prompted. You will only be<br />
prompted to provide the password once per<br />
session. This means that the next time you start<br />
iTunes and wish to download free Apps, you will<br />
be prompted for the password again. Download<br />
as many free apps as you like and would like to<br />
install onto the devices.<br />
This is where we manage the Apps we plan to<br />
install onto devices.<br />
The first thing we need to do is import the Apps<br />
from iTunes. Click on the plus icon at the bottom<br />
of the section.<br />
Digital Maestro
<strong>Apple</strong> <strong>Configurator</strong> Basics<br />
<strong>Apple</strong> <strong>Configurator</strong> will find the current active<br />
iTunes library and take you to the mobile Apps<br />
section. This is a list of all the Apps you downloaded<br />
through the iTunes App store. You will<br />
need to select the apps to import into <strong>Apple</strong> <strong>Configurator</strong>.<br />
If you are using this library for the device<br />
Apps only, then you can select all of them.<br />
You will be prompted to provide the <strong>Apple</strong> ID<br />
and password for these Apps. This has to be the<br />
same ID used when downloading the Apps. This<br />
is where you could encouter an error if you are<br />
mixing your personal apps with classroom apps.<br />
Your personal apps are under one account and<br />
classroom apps are under another account. You<br />
can only use one account to install apps through<br />
<strong>Apple</strong> <strong>Configurator</strong>.<br />
I’ll select all my Apps and click the Select button.<br />
You can select all of them by clicking on one app<br />
then using the short cut key Command A.<br />
In this example I’ve downloaded and imported<br />
some paid Apps to demonstrate the difference<br />
between them when it comes to installing them<br />
onto devices. You shouldn’t see this message if all<br />
you did was download free Apps.<br />
Digital Maestro
<strong>Apple</strong> <strong>Configurator</strong> Basics<br />
Managing Apps<br />
The Apps are listed in alphabetical order automatically.<br />
There is a check box to the left of each<br />
App. This is so you can select the Apps you want<br />
to install onto devices. Why not just install all of<br />
them? Great question! Your devices might not<br />
have enough space to install all the Apps available<br />
under your account. You might also have<br />
devices that are designated for different grade<br />
levels. In this case you can install Apps that are<br />
specific to those grade levels. You might have one<br />
App that is to be used by a special needs student<br />
and in that case you can make sure it is installed<br />
onto one device only. This is important when<br />
dealing with apps purchased through the Volumen<br />
Purchase Program. If only one app is purchased<br />
it can only be installed onto one device.<br />
I can select the Apps I want to install by placing a<br />
check mark next to each App.<br />
To install all the Apps, I can click on the select all<br />
button at the bottom of the section. This button<br />
selects or unselects all the Apps.<br />
In my example I want you to notice that not all the<br />
Apps are selected. The check mark for these Apps<br />
is whited out. That’s because these Apps were<br />
purchased. Purchased Apps cannot be distributed<br />
with <strong>Apple</strong> <strong>Configurator</strong> without the proper<br />
redemption codes.<br />
Notice that there is an exclamation mark and a<br />
number box to the right of the paid apps.<br />
Digital Maestro
<strong>Apple</strong> <strong>Configurator</strong> Basics<br />
If I click on the number box, I will get an option to<br />
import redemption codes. These codes are provided<br />
through the Volume Purchase Program. The<br />
codes are downloaded in a spreadsheet file. This<br />
file is imported by clicking the Import Redemption<br />
Codes button. Without a redemption code,<br />
these apps will not be installed onto any device.<br />
To install the fee Apps onto the devices, click the<br />
Apply button.<br />
One of the drawbacks with managing Apps<br />
through <strong>Apple</strong> <strong>Configurator</strong> is that you need to<br />
keep importing apps from iTunes. Another drawback<br />
is that <strong>Apple</strong> <strong>Configurator</strong> does not automatically<br />
retrieve the latest version of the Apps.<br />
Before you drop your head in disappointment,<br />
keep in mind that this could be a good thing.<br />
Children and adults don’t always like change.<br />
Apps can change drastically and children might<br />
have difficulty with the change. As a teacher you<br />
don’t want to pause your lesson because an app<br />
was recently updated and students aren’t familiar<br />
with the changes. This recently happened with a<br />
tool called Penultimate. The new version is great<br />
but it was very different in many ways from the<br />
previous version.<br />
If you like having the latest version of any app<br />
then there is an option for you. I will demonstrate<br />
how to keep your apps updated at the end of the<br />
lesson.<br />
The process for installing apps onto the devices<br />
will depend on the number of apps you will install<br />
and the size of the apps. When the process is<br />
complete we can take a look at what we’ve done.<br />
Digital Maestro
<strong>Apple</strong> <strong>Configurator</strong> Basics<br />
Managing Apps<br />
When the process is complete, click the stop<br />
button at the bottom. Disconnect the device from<br />
the computer. It doesn’t have to be ejected. Go<br />
through the setup process. During this process<br />
you will select the language and country as usual.<br />
When you get to some other steps in the process<br />
the will either not appear or already include the<br />
information. In our case the WiFi network should<br />
already be set and all you need to do is click the<br />
next button. In my example I placed a check mark<br />
on all the options to bypass, so I won’t be asked<br />
about the license agreement, <strong>Apple</strong> ID setup and<br />
some other usual setup settings.<br />
Once the setup is complete check the installed<br />
apps on the iPad. You have just prepared and<br />
supervised your first device. I recommend you<br />
go through the process with one or two more<br />
devices before you jump into prepareing dozens<br />
or more. The practice will be worth the price of<br />
frustration if you forget a step in the process.<br />
Digital Maestro
<strong>Apple</strong> <strong>Configurator</strong> Basics<br />
App Updates<br />
Devices can be set to automatically download<br />
and install App updates. This setting is usually<br />
turned on automatically. To verify follow the steps<br />
below. Use these same steps to turn off automatic<br />
updates.<br />
On the device tap on the Settings icon.<br />
The option to automatically update the apps is<br />
turned on. This means that apps will automatically<br />
be updated on the device as they become available.<br />
This doesn’t mean that the update will be<br />
installed as soon as it is available. The iOS device<br />
will wait until there is not activity for a while, usually<br />
overnight, and then download the updates. If<br />
you plan to rely on updates through this function,<br />
I recommed you plug in the devices to power<br />
source every evening and make sure they have<br />
access to a WiFi network.<br />
In the settings look for the iTunes & App Store<br />
section. Tap on this section.<br />
Digital Maestro