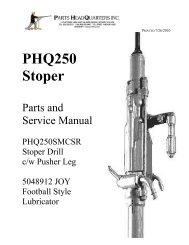
PHQ250JHMAVL Jackleg MK 1 Parts and Repair Manual PDF
PHQ250JHMAVL Jackleg MK 1 Parts and Repair Manual PDF
PHQ250JHMAVL Jackleg MK 1 Parts and Repair Manual PDF

Create successful ePaper yourself
Turn your PDF publications into a flip-book with our unique Google optimized e-Paper software.
Page 31<br />
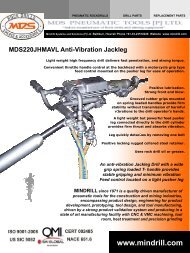
101. Fit the clevis body (A693A) onto the shaft of the clevis body spindle<br />
with the spindle locating pin (D2546) lined up properly. Thread on the<br />
clevis body spindle nut (D1982) <strong>and</strong> tighten.<br />
102. Insert the clevis body spindle assembly into<br />
the cylinder lug bush. Fit the spindle thrust<br />
washer (D1392) two lock washer keys (D1426)<br />
spindle spring (C1571) spindle lock washer<br />
(C1519) <strong>and</strong> spindle nut (C1527).<br />
103. Take care when slipping the lock washer<br />
over the spindle that the keys are in the proper<br />
place. Tighten the spindle nut to give the desired<br />
degree of friction between the clevis assembly<br />
<strong>and</strong> the cylinder lug bush.<br />
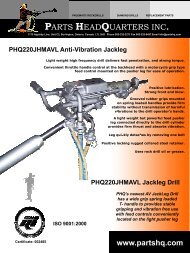
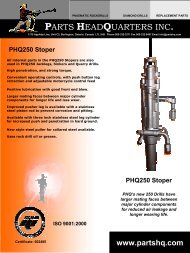
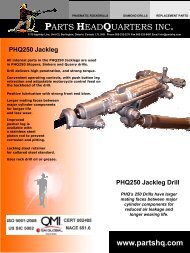
Your <strong>PHQ250JHMAVL</strong> Anti-vibration drill is now complete <strong>and</strong> ready for testing.<br />
Running in<br />
104 Place the assembled drill on the PHQ test bench <strong>and</strong> run for approximately 15 minutes at low<br />
throttle to “run-in” the assemble parts <strong>and</strong> insure the parts in the drill are fully lubricated before<br />
testing the torque of the drill. The PHQ test bench supplied with compressed air at a minimum<br />
volume of 5.0 cu m/m (175 cfm) <strong>and</strong> minimum pressure of 620 kPa (6 Bar) (90 psi) is required<br />
to adequately test <strong>Jackleg</strong> <strong>and</strong> Stoper Pneumatic Rock Drills.<br />
Remove the pusher leg from the jackleg drill <strong>and</strong> connect the drill to the adapter on the saddle.<br />
Move the drill saddle forward with the pneumatic pusher cylinder built into the test bench.<br />
Insert the spring loaded collared rod shank into the chuck bushing of the rock drill <strong>and</strong> close the<br />
steel retainer locking the drill into position so that it does not jump back if leg pressure releases.<br />
Version 200711