installation - Combisafe
installation - Combisafe
installation - Combisafe

You also want an ePaper? Increase the reach of your titles
YUMPU automatically turns print PDFs into web optimized ePapers that Google loves.
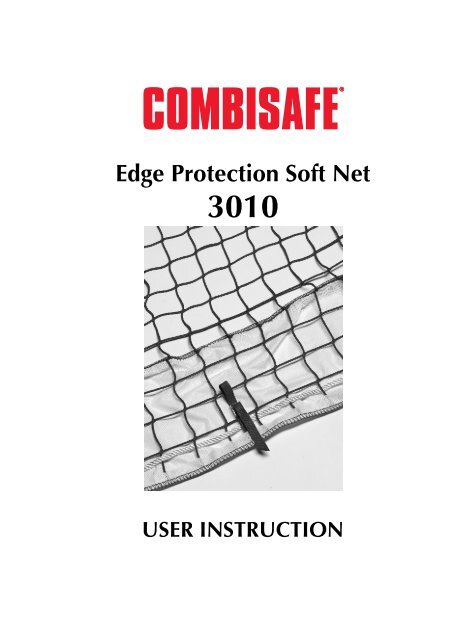
COMBISAFE®<br />
Edge Protection Soft Net<br />
3010<br />
USER INSTRUCTION
Edge Protection Soft Net<br />
Contents<br />
Contents<br />
GENERAL INFORMATION ............................................................. 4<br />
SAFETY INSTRUCTIONS…………………….................................... 5<br />
Always check products and equipment before use……………... 5<br />
Do not combine products.......................................................... 5<br />
Always use personal fall arrest equipment.................................. 5<br />
Inspection after a fall ................................................................. 6<br />
Wind, ice and snow……………………………………………….. 6<br />
Remember................................................................................. 6<br />
TECHNICAL DATA .............................................. ………..……….. 7<br />
General dimensions and weight…………….............................. 7<br />
DESIGN AND FUNCTION ............................................................. 8<br />
Product features........................................................................ 8<br />
Design wind load .................................................................... 9<br />
Compliance to EN 13374.......................................................... 9<br />
INSTALLATION .................................................... ………………… 10<br />
Installation of safety net on edge protection.............................. 10<br />
Connecting nets........................................................................ 17<br />
MAINTENANCE ................................................... ………………… 22<br />
Safety checks.................................................. ………………… 22<br />
Annual Inspection ......................................... ………………… 22<br />
Scrapping ...................................................... ………………… 23<br />
Storage .......................................................... ………………… 23<br />
Repairs .......................................................... ………………… 23<br />
© <strong>Combisafe</strong> international AB - UI 3010-EN-1038<br />
Subject to changes.<br />
3
General information<br />
Edge Protection Soft net<br />
NOTE!<br />
Always read the instruction manual before use.<br />
<strong>Combisafe</strong> accepts no liability for items that have<br />
been altered.<br />
GENERAL INFORMATION<br />
The Safety Net 3010 is a 1,5x10m net that can be attached to<br />
any edge protection, free standing or for example scaffold. It<br />
can be attached to any type of rails, wooden or tubes. For EN<br />
13374 classed B and C this might need to be checked, contact<br />
<strong>Combisafe</strong> if any uncertainty.<br />
The Safety Net 3010 complies to EN13374 Class A, B, C and<br />
EN1263-1 System U.<br />
4
Edge Protection Soft Net<br />
Safety instructions<br />
SAFETY INSTRUCTIONS<br />
Always check products and equipment before use<br />
Check all components of the Safety Net before assembly.<br />
Never use damaged materials as this can affect safety.<br />
Do not combine products<br />
It is not recommended to install, combine or interconnect<br />
COMBISAFE Safety Nets using products other than those<br />
supplied by COMBISAFE. <strong>Combisafe</strong> product liability only<br />
applies to combinations with correctly fitted, COMBISAFE<br />
products.<br />
Always use personal fall arrest equipment<br />
Personal fall arrest equipment must always be worn during<br />
assembly and dismantling when a risk of falling exists. This<br />
also applies to work carried out from a MEWP (mobile<br />
elevating working platform).<br />
Figure 1. Personal fall arrest equipment<br />
5
Safety instructions<br />
Edge Protection Soft Net<br />
Inspection after a fall<br />
If a guard rail is subject to an accident or exposed to a heavy<br />
load, the Safety Net must be checked by a competent person.<br />
Contact <strong>Combisafe</strong> in the event of uncertainty.<br />
Wind, ice and snow<br />
If the density of the guard rail is increased, for example, by<br />
using scaffold sheeting or plywood, the wind load at the given<br />
wind strength will increase.<br />
Never cover the guard rail without checking that the permitted<br />
wind load has not been exceeded.<br />
The Safety Net is not designed for exposure to static or<br />
dynamic loads resulting from ice and snow.<br />
Always keep the Safety Net free from ice and snow.<br />
Remember<br />
• Plan the fall guard at an early stage, this will benefit<br />
everyone.<br />
• Only use inspected safety products.<br />
• Cordon off below and around the assembly area in<br />
connection with the <strong>installation</strong> so that unauthorized<br />
personnel are not injured if, for example, you should drop<br />
tools or material.<br />
• Keep the <strong>installation</strong> area in order.<br />
• A safe workplace is an agreeable workplace.<br />
• Many fall accidents occur from a low height.<br />
6
Edge Protection Soft Net<br />
Technical data<br />
TECHNICAL DATA<br />
General dimensions and weight<br />
3010 Safety Net<br />
Figure 2. Safety Net 1,5x10m<br />
Product number<br />
Weight<br />
3010 8,7 kg<br />
The mesh size is 100x100 mm.<br />
100335 Combistrap<br />
Figure 3. Combistrap<br />
Product number<br />
Weight<br />
100335 0,06 kg<br />
7
Design and function<br />
Edge Protection Soft Net<br />
DESIGN AND FUNCTION<br />
Product features<br />
Figure 4. Border cord and integrated straps<br />
A border cord is running all around the edges and<br />
every 0,7 m there is a fixed strap, sewed to the net.<br />
The Safety Net 3010 also contains:<br />
• A marking label showing what type of net and<br />
code it is.<br />
• 3 test cords for testing aging.<br />
• If tested, the net also have test information<br />
labels showing status and when it needs to be<br />
tested again.<br />
8<br />
Figure 5. Marking/age testing labels and test cords
Edge Protection Soft Net<br />
Design and function<br />
Design wind load<br />
The design wind load on the net according to EN<br />
13374 is 932 N/m (if the complete height of the net is<br />
used).<br />
Compliance to EN 13374<br />
Sloped surfaces and dynamic loads<br />
The actual net itself complies to all classes and is tested<br />
like this for EN13374 and EN1263-1, but the system<br />
with fixings complies only to class A if the net is used<br />
as it is.<br />
If the net is used on sloped areas over 10 degrees<br />
additional fixing needs to be done according to<br />
following :<br />
Class B<br />
From 10 to 25 degrees<br />
The bottom of the net shall be fixed extra with one<br />
Combistrap (100335) between every strap that sits on<br />
the net.<br />
Class C<br />
From 25 to 60 degrees<br />
The total perimeter of the net shall be fixed extra with<br />
one Combistrap (100335) between every strap that sits<br />
on the net.<br />
9
Installation<br />
Edge Protection Soft Net<br />
INSTALLATION<br />
Installation of Safety Net on edge protection<br />
NOTE!<br />
Additional straps needs to be used for class B and C<br />
and 100335 Combistrap is then used, see “Compliance<br />
to EN 13374”.<br />
Start with placing the net in front of the edge protection<br />
with the toe board towards the edge protection facing<br />
downward.<br />
Figure 6. Place the net in front of the edge protection<br />
Fix the bottom of the net with the straps by putting the<br />
strap under the toe board and the other side around the<br />
border cord and the toe board. Tighten the strap.<br />
10
Edge Protection Soft Net<br />
Installation<br />
Figure 7. Fitting bottom of the net to the toe board<br />
11
Installation<br />
Edge Protection Soft Net<br />
Repeat this for all straps at the bottom and fix them<br />
around the border cord and the toe board.<br />
Figure 8. Continuing fixating bottom of the net<br />
Take the top of the net up to the top rail and place the<br />
strap over the rail. The other end of the strap shall go<br />
around the border cord, and the net shall be lifted up<br />
so it is tensioned between the top rail and the toe<br />
board. Pass the strap through a suitable mesh so the net<br />
is tensioned. All “extra net” is collected and fixed<br />
inside the strap<br />
12
Edge Protection Soft Net<br />
Installation<br />
Figure 9. Fixing the upper net corner to the top rail<br />
13
Installation<br />
Edge Protection Soft Net<br />
The middle strap in the end of the net is preferably<br />
fixed around the border cord and the post. This might<br />
not be wanted if the top rail and the toe board has an<br />
overhang, and the strap can then be left, or fixed to any<br />
other structure, building etc.<br />
Figure 10. Fixing the side of the net to a post<br />
Continue fixing the top straps around the border cord<br />
and the top rail, and collect as many meshes as needed<br />
to tension the net. Make sure not to tension the net to<br />
much so the toe board lifts from the ground.<br />
14
Edge Protection Soft Net<br />
Installation<br />
Figure 11. Continuing fixating top of the net<br />
When passing by a post the border cord and net can be<br />
placed in the guard rail holder, remember to tension.<br />
15
Installation<br />
Edge Protection Soft Net<br />
Figure 11. Net placed in the guard rail holder<br />
Check that the net is properly fastened, tensioned and<br />
that there are no gaps bigger than 100 mm, or<br />
maximum 25 mm under the toe board.<br />
Figure 12. Net fully assembled<br />
16
Edge Protection Soft Net<br />
Installation<br />
Connecting nets<br />
When two nets meet on a post, both nets are simply<br />
connected to the posts.<br />
When a net ends between two posts the nets needs to<br />
be connected.<br />
Figure 13. Net ending between two posts<br />
Place the strap under the toe board, but when going<br />
around the border cord and the toe board, make sure to<br />
17
Installation<br />
Edge Protection Soft Net<br />
also pass the strap through the other net, and by doing<br />
this overlapping the nets so no gaps appear.<br />
Figure 14. Interconnecting nets around the toe board<br />
18
Edge Protection Soft Net<br />
Installation<br />
Repeat the same procedure with the top straps by going<br />
around the border cord, through the other net and<br />
around the top rail. Remember to tension the net.<br />
Figure 15. Interconnecting nets around top guardrail<br />
Connect both nets to each other a couple of meshes in<br />
so the nets overlap each other.<br />
19
Installation<br />
Edge Protection Soft Net<br />
Figure 16. Interconnecting rest of vertical net sides<br />
Inspect the connections so they are properly fixed and<br />
there are no gaps bigger than 100 mm or 25 mm in the<br />
toe board.<br />
20
Edge Protection Soft Net<br />
Installation<br />
Figure 17. Two interconnected nets<br />
21
Maintenance<br />
Edge Protection Soft Net<br />
MAINTENANCE<br />
Safety checks<br />
Before every use :<br />
o Always check the Safety Nets for any signs of<br />
damage or visible deformation.<br />
o Do not use Safety Nets that do not pass checks<br />
according to the following check list :<br />
Check list<br />
o Aging/Wear.<br />
o No damage to mesh cords.<br />
o No damage to border ropes.<br />
o Visible <strong>Combisafe</strong> labeling and ID<br />
number.<br />
o Existing test cords<br />
o Evidence of approval to the ENstandard.<br />
Tested and approved Safety Nets must have an<br />
additional label confirming the status of the net.<br />
If no test meshes remains, the net can be used one year<br />
after the date written on the last test tag given that no<br />
other damage exists.<br />
If in doubt, consult <strong>Combisafe</strong>.<br />
Annual inspection<br />
The Safety Net test cord must be tested annually. The<br />
test cord can be sent to <strong>Combisafe</strong> or another<br />
accredited testing institute.<br />
22
Edge Protection Soft Net<br />
Maintenance<br />
Scrapping<br />
When the Safety Nets have failed their safety<br />
inspection, they can be recycled as polypropylene and<br />
their border cords as nylon.<br />
Storage<br />
Store the Safety Nets in a dry and well ventilated place,<br />
protected from the weather and from chemical<br />
substances.<br />
Repairs<br />
Contact <strong>Combisafe</strong> for further information.<br />
23
<strong>Combisafe</strong> International AB<br />
www.combisafe.com