Outboard FourStroke I
Outboard FourStroke I
Outboard FourStroke I

You also want an ePaper? Increase the reach of your titles
YUMPU automatically turns print PDFs into web optimized ePapers that Google loves.
<strong>Outboard</strong> <strong>FourStroke</strong> I<br />
Technician’s Guide<br />
1
Table of Contents<br />
Section 1 – General Information<br />
Section 2 – Powerheads<br />
Section 3 – Electrical Systems<br />
Section 4 – Fuel Systems<br />
Section 5 – Timing and Synchronizing<br />
Section 6 – Service Bulletins<br />
Section 7 – Tool Suppliers<br />
3<br />
2
Section 1 - General Information<br />
1-1 90-898311<br />
3
Table of Contents<br />
Table of Contents .............................................................................................2<br />
Exhaust Emissions Standards..........................................................................4<br />
What Are Emissions?....................................................................................4<br />
Hydrocarbons - HC .......................................................................................4<br />
Carbon Monoxide - CO .................................................................................4<br />
Oxides of Nitrogen - NOx..............................................................................5<br />
Controlling Emissions....................................................................................5<br />
Stoichiometric (14.7:1) Air/Fuel Ratio ...........................................................5<br />
<strong>Outboard</strong> Hydrocarbon Emissions Reductions.................................................6<br />
8 1/3% _ PER YEAR OVER 9 MODEL YEARS............................................6<br />
Emissions Information ......................................................................................7<br />
Emissions Information ......................................................................................8<br />
Manufacturer’s Responsibility .......................................................................8<br />
Dealer Responsibility ....................................................................................8<br />
Owner Responsibility ....................................................................................8<br />
EPA Emission Regulations ...........................................................................9<br />
Engine Emission Certification Label............................................................10<br />
Inspection And Maintenance Schedule ..........................................................11<br />
Inspection And Maintenance Schedule ..........................................................12<br />
Before Each Use.........................................................................................12<br />
After Each Use............................................................................................12<br />
Every 100 Hours Of Use Or Once Yearly, Whichever Occurs First ............13<br />
Every 300 Hours of Use or Three Years .....................................................13<br />
Before Periods of Storage...........................................................................13<br />
Timing Belt Inspection 15 HP Only.................................................................14<br />
Changing Engine Oil.......................................................................................15<br />
Oil Draining Procedure (15 HP shown) .......................................................15<br />
Changing Oil Filter ......................................................................................15<br />
Oil Filling .....................................................................................................15<br />
Storage Preparation........................................................................................16<br />
Fuel System ................................................................................................16<br />
Protecting External <strong>Outboard</strong> Components ................................................16<br />
Protecting Internal Engine Components .....................................................16<br />
Gear Case...................................................................................................17<br />
Positioning <strong>Outboard</strong> for Storage (15 HP shown) .......................................17<br />
Conditions Affecting Performance ..................................................................17<br />
Weather.......................................................................................................17<br />
Propeller Selection..........................................................................................19<br />
Special Aluminum Propellers Required for 40/50/60 Bigfoot 4-Stroke Models<br />
........................................................................................................................20<br />
Models Affected ..........................................................................................20<br />
Mercury/Mariner 40 and 50 Bigfoot 4–Stroke 2.31:1 ..................................22<br />
Mercury/Mariner 60 Bigfoot 4–Stroke 2.31:1 ..............................................22<br />
.Props for Pontoons ....................................................................................22<br />
Props for Pontoons .....................................................................................23<br />
Remote Control Cables...............................................................................24<br />
Measuring Throttle and Shift Cables...........................................................24<br />
SHIFT EFFORT TOOL................................................................................26<br />
Tool Installation...........................................................................................26<br />
2005/2006 Model Year Changes14 Pin Adapter and Control Harnesses...29<br />
Battery Specification ...................................................................................31<br />
Battery Rating System ................................................................................32<br />
Cold Cranking Amps (CCA) ........................................................................32<br />
90-898311 1-2<br />
4
Marine Cranking Amps (MCA).....................................................................32<br />
Reserve Capacity ........................................................................................32<br />
Amperage/Hour Rating................................................................................32<br />
Charging Guide ...........................................................................................33<br />
Effects of Temperature on a Standing Battery ............................................33<br />
Battery Cable Wire Gauge Size...................................................................35<br />
Warning System Operation .........................................................................36<br />
Warning System Activated ..........................................................................36<br />
Engine Overheat .........................................................................................36<br />
1-3 90-898311<br />
5
Notes<br />
_______________________<br />
_______________________<br />
_______________________<br />
_______________________<br />
_______________________<br />
_______________________<br />
_______________________<br />
_______________________<br />
_______________________<br />
_______________________<br />
_______________________<br />
_______________________<br />
_______________________<br />
_______________________<br />
_______________________<br />
_______________________<br />
_______________________<br />
_______________________<br />
_______________________<br />
_______________________<br />
_______________________<br />
_______________________<br />
_______________________<br />
_______________________<br />
_______________________<br />
_______________________<br />
_______________________<br />
_______________________<br />
Exhaust Emissions Standards<br />
Through the Environmental Protection Agency (EPA), the federal government<br />
has established exhaust emissions standards for all new marine engines sold<br />
in the U.S.<br />
What Are Emissions?<br />
Emissions are what comes out of the exhaust system in the exhaust gas when<br />
the engine is running. They are formed as a result of the process of<br />
combustion or incomplete combustion.<br />
To understand exhaust gas emissions, remember that both air and fuel are<br />
made of several elements. Air contains oxygen and nitrogen among other<br />
elements; gasoline contains mainly hydrogen and carbon. These four<br />
elements combine chemically during combustion.<br />
If combustion were complete, the mixture of air and gasoline would result in<br />
these emissions: water, carbon dioxide and nitrogen, which are not harmful to<br />
the environment.<br />
But combustion is not usually complete. Also, potentially harmful gases can be<br />
formed during and after combustion.<br />
All marine engines must reduce the emission of certain pollutants, or<br />
potentially harmful gases in the exhaust to conform with levels legislated by<br />
the EPA. Emissions standards become more stringent each year. Standards<br />
are set primarily with regard to three emissions:<br />
1) Hydrocarbons (HC)<br />
2) Carbon Monoxide (CO)<br />
3) Oxides of Nitrogen (NOx).<br />
Hydrocarbons - HC<br />
Gasoline is a hydrocarbon fuel. The two elements of hydrogen and carbon are<br />
burned during combustion in combination with oxygen. But they are not totally<br />
consumed. Some pass through the combustion chamber and exit the exhaust<br />
system as unburned gases known as hydrocarbons.<br />
Carbon Monoxide - CO<br />
Carbon is one of the elements that make up the fuel burned in the engine<br />
along with oxygen during the combustion process. If the carbon in the<br />
gasoline could combine with enough oxygen (one carbon atom with two<br />
oxygen atoms), it would come out of the engine in the form of carbon dioxide<br />
(CO2). CO2 is a harmless gas. But carbon often combines with insufficient<br />
oxygen (one carbon atom with one oxygen atom). This forms carbon<br />
monoxide, CO.<br />
Carbon monoxide is the product of incomplete combustion and is a<br />
dangerous, potentially lethal gas.<br />
90-898311 1-4<br />
6
Oxides of Nitrogen - NOx<br />
NOx is a slightly different byproduct of combustion. Nitrogen is one of the<br />
elements that makes up the air going into the engine. Under extremely high<br />
temperatures it combines with oxygen to form oxides of nitrogen (NOx). This<br />
happens in the engine’s combustion chambers when temperatures are too<br />
high. NOx itself is not harmful, but when exposed to sunlight it combines with<br />
unburned hydrocarbons to create the visible air pollutant known as smog.<br />
Smog is a serious problem in California as well as many other heavily<br />
populated areas of the United States.<br />
Controlling Emissions<br />
There are two principle methods of reducing emissions from a two-strokecycle<br />
marine engine. The first method is to control the air/fuel ratio that goes<br />
into the combustion chamber. The second is to control the time when this<br />
air/fuel mixture enters the combustion chamber. Timing is important, to<br />
prevent any unburned mixture from escaping out of the exhaust port.<br />
Stoichiometric (14.7:1) Air/Fuel Ratio<br />
In the search to control pollutants and reduce exhaust emissions, engineers<br />
have discovered that they can be reduced effectively if a gasoline engine<br />
operates at an air/fuel ratio of 14.7:1. The technical term for this ideal ratio is<br />
stoichiometric. An air/fuel ratio of 14.7:1 provides the best control of all three<br />
elements in the exhaust under almost all conditions.<br />
The HC and CO content of the exhaust gas is influenced significantly by the<br />
air/fuel ratio. At an air/fuel ratio leaner than 14.7:1, HC and CO levels are low,<br />
but with a ratio richer than 14.7:1 they rise rapidly. It would seem that<br />
controlling HC and CO by themselves might not be such a difficult task; the<br />
air/fuel ratio only needs to be kept leaner than 14.7:1. However, there is also<br />
NOx to consider.<br />
As the air/fuel ratio becomes leaner, combustion temperatures increase.<br />
Higher combustion temperatures raise the NOx content of the exhaust. But,<br />
enrichening the air/fuel ratio to decrease combustion temperatures and reduce<br />
NOx also increases HC and CO, as well as lowering fuel economy. So the<br />
solution to controlling NOx - as well as HC and CO - is to keep the air/fuel<br />
ratio as close to 14.7:1 as possible.<br />
1-5 90-898311<br />
Notes<br />
_______________________<br />
_______________________<br />
_______________________<br />
_______________________<br />
_______________________<br />
_______________________<br />
_______________________<br />
_______________________<br />
_______________________<br />
_______________________<br />
_______________________<br />
_______________________<br />
_______________________<br />
_______________________<br />
_______________________<br />
_______________________<br />
_______________________<br />
_______________________<br />
_______________________<br />
_______________________<br />
_______________________<br />
_______________________<br />
_______________________<br />
_______________________<br />
_______________________<br />
_______________________<br />
_______________________<br />
_______________________<br />
7
Notes<br />
_______________________<br />
_______________________<br />
_______________________<br />
_______________________<br />
_______________________<br />
_______________________<br />
_______________________<br />
_______________________<br />
_______________________<br />
_______________________<br />
_______________________<br />
_______________________<br />
_______________________<br />
_______________________<br />
_______________________<br />
_______________________<br />
_______________________<br />
_______________________<br />
_______________________<br />
_______________________<br />
_______________________<br />
_______________________<br />
_______________________<br />
_______________________<br />
_______________________<br />
_______________________<br />
_______________________<br />
_______________________<br />
_______________________<br />
<strong>Outboard</strong> Hydrocarbon Emissions<br />
Reductions<br />
8 1/3% _ PER YEAR OVER 9 MODEL YEARS<br />
90-898311 1-6<br />
8
Notes<br />
_______________________<br />
_______________________<br />
_______________________<br />
_______________________<br />
_______________________<br />
_______________________<br />
_______________________<br />
_______________________<br />
_______________________<br />
_______________________<br />
_______________________<br />
_______________________<br />
_______________________<br />
_______________________<br />
_______________________<br />
_______________________<br />
_______________________<br />
_______________________<br />
_______________________<br />
_______________________<br />
_______________________<br />
_______________________<br />
_______________________<br />
_______________________<br />
_______________________<br />
_______________________<br />
_______________________<br />
_______________________<br />
Emissions Information<br />
Manufacturer’s Responsibility<br />
Beginning with 1998 model year engines, manufacturers of all marine<br />
propulsion engines must determine the exhaust emission levels for each<br />
engine horsepower family and certify these engines with the United States<br />
Environmental Protection Agency (EPA). A certification decal/emissions<br />
control information label, showing emission levels and engine specifications<br />
directly related to emissions, must be placed on each engine at the time of<br />
manufacture.<br />
Dealer Responsibility<br />
When performing service on all 1998 and later outboards that carry a<br />
certification, attention must be given to any adjustments that are made that<br />
affect emission levels.<br />
Adjustments must be kept within published factory specifications.<br />
Replacement or repair of any emission related component must be executed<br />
in a manner that maintains emission levels within the prescribed certification<br />
standards.<br />
Dealers are not to modify the engine in any manner that would alter the<br />
horsepower or allow emission levels to exceed their predetermined factory<br />
specifications. Exceptions include manufacturers prescribed changes, such as<br />
that for altitude adjustments.<br />
Owner Responsibility<br />
The owner/operator is required to have engine maintenance performed to<br />
maintain emission levels within prescribed certification standards.<br />
The owner/operator is not to modify the engine in any manner that would alter<br />
the horsepower or allow emissions levels to exceed their predetermined<br />
factory specifications.<br />
Exceptions:<br />
Carburetor jets may be changed for high altitude use in accordance with<br />
factory recommendations.<br />
Single engine exceptions may be allowed with permission from the EPA for<br />
racing and testing.<br />
90-898311 1-8<br />
9
EPA Emission Regulations<br />
All new 1998 and later outboards manufactured by Mercury Marine are<br />
certified to the United States Environmental Protection Agency as conforming<br />
to the requirements of the regulations for the control of air pollution from new<br />
outboard motors. This certification is contingent on certain adjustments being<br />
set to factory standards. For this reason, the factory procedure for servicing<br />
the product must be strictly followed and, whenever practicable, the product<br />
returned to the original intent of the design.<br />
The responsibilities listed above are general and in no way a complete listing<br />
of the rules and regulations pertaining to the EPA laws on exhaust emissions<br />
for marine products. For more detailed information on this subject, you may<br />
contact the following locations:<br />
VIA U.S. POSTAL SERVICE:<br />
Office of Mobile Sources<br />
Engine Programs and Compliance Division<br />
Engine Compliance Programs Group (6403J)<br />
401 M St. NW<br />
Washington, DC 20460<br />
VIA EXPRESS OR COURIER MAIL:<br />
Office of Mobile Sources<br />
Engine Programs and Compliance Division<br />
Engine Compliance Programs Group (6403J)<br />
501 3rd St. NW<br />
Washington, DC 20001<br />
EPA INTERNET WEB SITE:<br />
http:/www.epa.gov/omswww<br />
1-9 90-898311<br />
Notes<br />
_______________________<br />
_______________________<br />
_______________________<br />
_______________________<br />
_______________________<br />
_______________________<br />
_______________________<br />
_______________________<br />
_______________________<br />
_______________________<br />
_______________________<br />
_______________________<br />
_______________________<br />
_______________________<br />
_______________________<br />
_______________________<br />
_______________________<br />
_______________________<br />
_______________________<br />
_______________________<br />
_______________________<br />
_______________________<br />
_______________________<br />
_______________________<br />
_______________________<br />
_______________________<br />
_______________________<br />
_______________________<br />
10
Notes<br />
_______________________<br />
_______________________<br />
_______________________<br />
_______________________<br />
_______________________<br />
_______________________<br />
_______________________<br />
_______________________<br />
_______________________<br />
_______________________<br />
_______________________<br />
_______________________<br />
_______________________<br />
_______________________<br />
_______________________<br />
_______________________<br />
_______________________<br />
_______________________<br />
_______________________<br />
_______________________<br />
_______________________<br />
_______________________<br />
_______________________<br />
_______________________<br />
_______________________<br />
_______________________<br />
_______________________<br />
_______________________<br />
Engine Emission Certification Label<br />
Your outboard has been labeled on the cowl with one of the following star<br />
labels.<br />
The Star Label means Cleaner Marine Engines.<br />
The Symbol for Cleaner Marine Engines Means:<br />
Cleaner Air and Water – for a healthier lifestyle and environment.<br />
Better Fuel Economy – burns up to 30-40 percent less gas and oil than<br />
conventional carbureted two-stroke engines, saving money and resources.<br />
Longer Emission Warranty – Protects consumer for worry free operation.<br />
90-898311 1-10<br />
The one-star label identifies<br />
engines that meet the CARB's 2001<br />
exhaust emission standards.<br />
Engines meeting these standards<br />
have 75% lower emissions than<br />
conventional carbureted 2-stroke<br />
engines. These engines are<br />
equivalent to the U.S. EPA's 2006<br />
standards<br />
The two-star label identifies engines<br />
that meet the CARB's 2004 exhaust<br />
emission standards. Engines<br />
meeting these standards have 20%<br />
lower emissions than One Star -<br />
Low Emission engines.<br />
The three-star label identifies<br />
engines that meet the CARB's 2008<br />
exhaust emission standards.<br />
Engines meeting these standards<br />
have 65% lower emissions than<br />
One Star - Low Emission engines.<br />
NOTE: Mercury’s <strong>FourStroke</strong> technology actually exceeds the EPA’s<br />
emissions standards for the year 2006. And most models meet California’s<br />
stringent “Three-Star” rating, which means they’re in compliance with 2008’s<br />
91% reduction in emissions.<br />
11
Notes<br />
_______________________<br />
_______________________<br />
_______________________<br />
_______________________<br />
_______________________<br />
_______________________<br />
_______________________<br />
_______________________<br />
_______________________<br />
_______________________<br />
_______________________<br />
_______________________<br />
_______________________<br />
_______________________<br />
_______________________<br />
_______________________<br />
_______________________<br />
_______________________<br />
_______________________<br />
_______________________<br />
_______________________<br />
_______________________<br />
_______________________<br />
_______________________<br />
_______________________<br />
_______________________<br />
_______________________<br />
_______________________<br />
Inspection And Maintenance Schedule<br />
To keep your outboard in the best operating condition, it is important that your<br />
outboard receive the periodic inspections and maintenance listed in the<br />
Inspection and Maintenance Schedule. We urge you to keep it maintained<br />
properly to ensure the safety of you and your passengers and retain its<br />
dependability.<br />
WARNING<br />
Neglected inspection and maintenance service of your outboard or<br />
attempting to perform maintenance or repair on your outboard if you are<br />
not familiar with the correct service and safety procedures could cause<br />
personal injury, death, or product failure.<br />
Before Each Use<br />
1) Check engine oil level.<br />
2) Check that lanyard stop switch stops the engine.<br />
3) Visually inspect the fuel system for deterioration or leaks.<br />
4) Check outboard for tightness on transom.<br />
5) Check steering system for binding or loose components.<br />
6) Visually check steering link rod fasteners for proper tightness.<br />
7) Check propeller blades for damage.<br />
After Each Use<br />
1) Flush out the outboard cooling system if operating in salt or polluted water.<br />
2) Wash off all salt deposits and flush out the exhaust outlet of the propeller<br />
and gear case with fresh water if operating in salt water.<br />
90-898311 1-12<br />
12
Every 100 Hours Of Use Or Once Yearly, Whichever<br />
Occurs First<br />
1) Lubricate all lubrication points. Lubricate more frequently when used in<br />
salt water.<br />
2) Change engine oil and replace the oil filter. The oil should be changed<br />
more often when the engine is operated under adverse conditions such as<br />
extended trolling.<br />
3) Inspect thermostat visually for corrosion, broken spring, and to determine<br />
that the valve is completely closed at room temperature. If questionable,<br />
inspect thermostat as outlined in service manual.<br />
4) Replace spark plugs after first 100 hours.<br />
5) Check fuel line filter for contaminants.<br />
6) Check corrosion control anodes. Check more frequently when used in salt<br />
water.<br />
7) Drain and replace gear case lubricant.<br />
8) Lubricate splines on the drive shaft.<br />
9) Check and adjust valve clearance, if necessary (60 HP and smaller)<br />
10) Remote Control Models-Check control cable adjustments.<br />
11) Inspect timing belt.<br />
12) Check tightness of bolts, nuts, and other fasteners.<br />
Every 300 Hours of Use or Three Years<br />
1) Replace water pump impeller (more often if overheating occurs or reduced<br />
water pressure is noted).<br />
Before Periods of Storage<br />
1) Refer to Storage Procedure in Service Manual.<br />
1-13 90-898311<br />
Notes<br />
_______________________<br />
_______________________<br />
_______________________<br />
_______________________<br />
_______________________<br />
_______________________<br />
_______________________<br />
_______________________<br />
_______________________<br />
_______________________<br />
_______________________<br />
_______________________<br />
_______________________<br />
_______________________<br />
_______________________<br />
_______________________<br />
_______________________<br />
_______________________<br />
_______________________<br />
_______________________<br />
_______________________<br />
_______________________<br />
_______________________<br />
_______________________<br />
_______________________<br />
_______________________<br />
_______________________<br />
_______________________<br />
13
Notes<br />
_______________________<br />
_______________________<br />
_______________________<br />
_______________________<br />
_______________________<br />
_______________________<br />
_______________________<br />
_______________________<br />
_______________________<br />
_______________________<br />
_______________________<br />
_______________________<br />
_______________________<br />
_______________________<br />
_______________________<br />
_______________________<br />
_______________________<br />
_______________________<br />
_______________________<br />
_______________________<br />
_______________________<br />
_______________________<br />
_______________________<br />
_______________________<br />
_______________________<br />
_______________________<br />
_______________________<br />
_______________________<br />
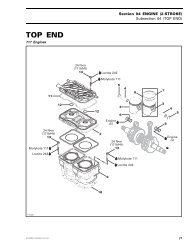
Timing Belt Inspection 15 HP Only<br />
1) Inspect the timing belt and replace if any of the following conditions are<br />
found.<br />
a. Cracks in the back of the belt or in the base of the belt teeth.<br />
b. Excessive wear at the roots of the cogs.<br />
c. Rubber portion swollen by oil.<br />
d. Belt surfaces roughened.<br />
e. Signs of wear on edges or outer surfaces of belt.<br />
f. Stretching by 0.39 in. (10 mm) or more when belt is pushed in<br />
with your finger.<br />
a) Timing Belt<br />
90-898311 1-14<br />
14
Changing Engine Oil<br />
Oil Draining Procedure (15 HP shown)<br />
1) Tilt the outboard up to the trailer position.<br />
2) Turn the steering on the outboard so that the drain hole is facing<br />
downward. Remove drain plug and drain engine oil into an appropriate<br />
container. Lubricate the seal on the drain plug with oil and reinstall.<br />
a) Drain Hole<br />
Changing Oil Filter<br />
1) Place a rag or towel below the oil filter to absorb any spilled oil.<br />
2) Unscrew old filter by turning the filter to the left.<br />
3) Clean the mounting base. Apply film of clean oil to filter gasket. Do not use<br />
grease. Screw new filter on until gasket contacts base, then tighten 3/4 to<br />
1 turn.<br />
a) OilFilter (Turn Left)<br />
Oil Filling<br />
IMPORTANT: Do not overfill. Be sure that the outboard is upright (not<br />
tilted) when checking oil.<br />
Remove the oil fill cap and refill with specified amount of oil. Reinstall the oil fill<br />
cap. Idle engine for five minutes and check for leaks. Stop engine and check<br />
oil level on dipstick. Add oil if necessary.<br />
1-15 90-898311<br />
Notes<br />
_______________________<br />
_______________________<br />
_______________________<br />
_______________________<br />
_______________________<br />
_______________________<br />
_______________________<br />
_______________________<br />
_______________________<br />
_______________________<br />
_______________________<br />
_______________________<br />
_______________________<br />
_______________________<br />
_______________________<br />
_______________________<br />
_______________________<br />
_______________________<br />
_______________________<br />
_______________________<br />
_______________________<br />
_______________________<br />
_______________________<br />
_______________________<br />
_______________________<br />
_______________________<br />
_______________________<br />
_______________________<br />
15
Notes<br />
_______________________<br />
_______________________<br />
_______________________<br />
_______________________<br />
_______________________<br />
_______________________<br />
_______________________<br />
_______________________<br />
_______________________<br />
_______________________<br />
_______________________<br />
_______________________<br />
_______________________<br />
_______________________<br />
_______________________<br />
_______________________<br />
_______________________<br />
_______________________<br />
_______________________<br />
_______________________<br />
_______________________<br />
_______________________<br />
_______________________<br />
_______________________<br />
_______________________<br />
_______________________<br />
_______________________<br />
_______________________<br />
Storage Preparation<br />
The major consideration in preparing your outboard for storage is to protect it<br />
from rust, corrosion, and damage caused by freezing of trapped water.<br />
The following storage procedures should be followed to prepare your outboard<br />
for out-of-season storage or prolonged storage (two months or longer).<br />
CAUTION<br />
Never start or run your outboard (even momentarily) without water<br />
circulating through the cooling water intake in the gear case to prevent<br />
damage to the water pump (running dry) or overheating of the engine.<br />
Fuel System<br />
IMPORTANT: Gasoline containing alcohol (ethanol or methanol) can<br />
cause a formation of acid during storage and can damage the fuel<br />
system. If the gasoline being used contains alcohol, it is advisable to<br />
drain as much of the remaining gasoline as possible from the fuel tank,<br />
remote fuel line, and engine fuel system.<br />
Fill the fuel system (tank, hoses, fuel pump, and carburetor) with treated<br />
(stabilized) fuel to help prevent formation of varnish and gum. Proceed with<br />
following instructions.<br />
1) Portable Fuel Tank – Pour the required amount of Quicksilver Gasoline<br />
Stabilizer (follow instructions on container) into fuel tank. Tip fuel tank<br />
back and forth to mix stabilizer with the fuel.<br />
2) Permanently Installed Fuel Tank – Pour the required amount of<br />
Quicksilver Gasoline Stabilizer (follow instructions on container) into a<br />
separate container and mix with approximately one quart (one liter) of<br />
gasoline. Pour this mixture into fuel tank.<br />
3) Place the outboard in water or connect flushing attachment for circulating<br />
cooling water. Run the engine for ten minutes to allow treated fuel to reach<br />
the carburetor.<br />
Protecting External <strong>Outboard</strong> Components<br />
1) Lubricate all outboard components listed in the Inspection and<br />
Maintenance Schedule.<br />
2) Touch up any paint nicks.<br />
3) Spray Quicksilver Corrosion Guard on external metal surfaces (except<br />
corrosion control anodes).<br />
Protecting Internal Engine Components<br />
1) Remove the spark plugs and inject a small amount of engine oil inside of<br />
each cylinder.<br />
2) Rotate the flywheel manually several times to distribute the oil in the<br />
cylinders. Reinstall spark plugs.<br />
3) Change the engine oil.<br />
90-898311 1-16<br />
16
Gear Case<br />
1) Drain and refill the gear case lubricant (refer to maintenance procedure).<br />
Positioning <strong>Outboard</strong> for Storage (15 HP shown)<br />
• To prevent problems which can be caused by oil entering the cylinders<br />
from the sump, store the outboard only in one of the three positions shown<br />
below.<br />
a) Upright<br />
b) Tiller Side Down<br />
c) Back Side Down<br />
Note: Reference Owner Manual for specific applications.<br />
Conditions Affecting Performance<br />
Weather<br />
It is a known fact that weather conditions exert a profound effect on power<br />
output of internal combustion engines. Therefore, established horsepower<br />
ratings refer to the power that the engine will produce at its rated RPM under a<br />
specific combination of weather conditions.<br />
Corporations internationally have settled on adoption of I.S.O. (International<br />
Standards Organization) engine test standards, as set forth in I.S.O. 3046<br />
standardizing the computation of horsepower from data obtained on the<br />
dynamometer, correcting all values to the power that the engine will produce<br />
at sea level, at 30% relative humidity at 77 o � F (25 o �C) temperature and a<br />
barometric pressure of 29.61 inches of mercury.<br />
Summer Conditions of high temperature, low barometric pressure and high<br />
humidity all combine to reduce the engine power. This, in turn, is reflected in<br />
decreased boat speeds—as much as 2 or 3 miles-per-hour (3 or 5 Km perhour)<br />
in some cases. Nothing will regain this speed for the boater, but the<br />
coming of cool, dry weather.<br />
1-17 90-898311<br />
Notes<br />
_______________________<br />
_______________________<br />
_______________________<br />
_______________________<br />
_______________________<br />
_______________________<br />
_______________________<br />
_______________________<br />
_______________________<br />
_______________________<br />
_______________________<br />
_______________________<br />
_______________________<br />
_______________________<br />
_______________________<br />
_______________________<br />
_______________________<br />
_______________________<br />
_______________________<br />
_______________________<br />
_______________________<br />
_______________________<br />
_______________________<br />
_______________________<br />
_______________________<br />
_______________________<br />
_______________________<br />
_______________________<br />
17
Notes<br />
_______________________<br />
_______________________<br />
_______________________<br />
_______________________<br />
_______________________<br />
_______________________<br />
_______________________<br />
_______________________<br />
_______________________<br />
_______________________<br />
_______________________<br />
_______________________<br />
_______________________<br />
_______________________<br />
_______________________<br />
_______________________<br />
_______________________<br />
_______________________<br />
_______________________<br />
_______________________<br />
_______________________<br />
_______________________<br />
_______________________<br />
_______________________<br />
_______________________<br />
_______________________<br />
_______________________<br />
_______________________<br />
In pointing out the practical consequences of weather effects, an engine<br />
running on a hot, humid summer day may encounter a loss of as much as<br />
14% of the horsepower it would produce on a dry, brisk spring or fall day. The<br />
horsepower, that any internal combustion engine produces, depends upon the<br />
density of the air that it consumes and, in turn, this density is dependent upon<br />
the temperature of the air, its barometric pressure and water vapor (or<br />
humidity) content.<br />
Accompanying this weather-inspired loss of power is a second but more<br />
subtle loss. At rigging time in early spring, the engine was equipped with a<br />
propeller that allowed the engine to turn within its recommended RPM range<br />
at full throttle. With the coming of the summer weather and the consequent<br />
drop in available horsepower, this propeller will, in effect, become too large.<br />
Consequently, the engine operates at less than its recommended RPM.<br />
Due to the horsepower/RPM characteristics of an engine, this will result in<br />
further loss of horsepower at the propeller with another decrease in boat<br />
speed. This secondary loss, however, can be regained by switching to a<br />
smaller pitch propeller that allows the engine to again run at recommended<br />
RPM.<br />
For boaters to realize optimum engine performance under changing weather<br />
conditions, it is essential that the engine have the proper propeller to allow it to<br />
operate at or near the top end of the recommended maximum RPM range at<br />
wide-open-throttle with a normal boat load.<br />
Not only does this allow the engine to develop full power, but equally<br />
important is the fact that the engine also will be operating in an RPM range<br />
that discourages damaging detonation. This, of course, enhances overall<br />
reliability and durability of the engine.<br />
90-898311 1-18<br />
18
Propeller Selection<br />
For in-depth information on marine propellers and boat performance - written<br />
by marine engineers - see your Authorized Dealer for the illustrated “What<br />
You Should Know About Quicksilver Propellers... and Boat Performance<br />
Information” (Part No. 90-86144).<br />
For best all around performance from your outboard/boat combination, select<br />
a propeller that allows the engine to operate in the upper half of the<br />
recommended full throttle RPM range with the boat normally loaded (refer to<br />
Specifications). This RPM range allows for better acceleration while<br />
maintaining maximum boat speed.<br />
If changing conditions cause the RPM to drop below the recommended range<br />
(such as warmer, more humid weather, operation at higher elevations,<br />
increased boat load or a dirty boat bottom/gear case) a propeller change or<br />
cleaning may be required to maintain performance and ensure the outboard’s<br />
durability.<br />
Check full-throttle RPM using an accurate tachometer with the engine trimmed<br />
out to a balanced-steering condition (steering effort equal in both directions)<br />
without causing the propeller to “break loose”.<br />
Refer to “Quicksilver Accessory Guide” for a complete list of available<br />
propellers.<br />
1) Select a propeller that will allow the engine to operate at or near the top of<br />
the recommended full throttle RPM range (listed in “Specifications,”<br />
preceding) with a normal load. Maximum engine speed (RPM) for<br />
propeller selection exists when boat speed is maximum and trim is<br />
minimum for that speed. (High RPM, caused by an excessive trim angle,<br />
should not be used in determining correct propeller.) Normally, there is a<br />
150-350RPM change between propeller pitches.<br />
2) If full throttle operation is below the recommended range, the propeller<br />
MUST BE changed to one with a lower pitch to prevent loss of<br />
performance and possible engine damage.<br />
3) After initial propeller installation, the following common conditions may<br />
require that the propeller be changed to a lower pitch:<br />
a) Warmer weather and great humidity will cause an RPM loss.<br />
b) Operating in a higher elevation causes an RPM loss.<br />
c) Operating with a damaged propeller or a dirty boat bottom or gear<br />
housing will cause an RPM loss.<br />
d) Operation with an increased load (additional passengers, equipment,<br />
pulling skiers, etc.).<br />
Tip: All 4-Stroke engines should be propped to the top of recommended<br />
RPM range for best overall performance and customer satisfaction.<br />
1-19 90-898311<br />
Notes<br />
_______________________<br />
_______________________<br />
_______________________<br />
_______________________<br />
_______________________<br />
_______________________<br />
_______________________<br />
_______________________<br />
_______________________<br />
_______________________<br />
_______________________<br />
_______________________<br />
_______________________<br />
_______________________<br />
_______________________<br />
_______________________<br />
_______________________<br />
_______________________<br />
_______________________<br />
_______________________<br />
_______________________<br />
_______________________<br />
_______________________<br />
_______________________<br />
_______________________<br />
_______________________<br />
_______________________<br />
_______________________<br />
19
Notes<br />
_______________________<br />
_______________________<br />
_______________________<br />
_______________________<br />
_______________________<br />
_______________________<br />
_______________________<br />
_______________________<br />
_______________________<br />
_______________________<br />
_______________________<br />
_______________________<br />
_______________________<br />
_______________________<br />
_______________________<br />
_______________________<br />
_______________________<br />
_______________________<br />
_______________________<br />
_______________________<br />
_______________________<br />
_______________________<br />
_______________________<br />
_______________________<br />
_______________________<br />
_______________________<br />
_______________________<br />
_______________________<br />
Special Aluminum Propellers Required for<br />
40/50/60 Bigfoot 4-Stroke Models<br />
Models Affected<br />
MERCURY/MARINER 2001 50/60 Bigfoot 4-Stroke USA OT178500 and<br />
Above<br />
<strong>Outboard</strong>s listed, require the use of specially designed rubber hub aluminum<br />
propellers to reduce both the instances and severity of gear case clutch rattle.<br />
The use of other propellers, (including stainless steel propellers) it is<br />
recommended to use the Flow Torq III hub.<br />
IMPORTANT: These specially designed rubber hub aluminum propellers<br />
are now rated for 60 horsepower MAXIMUM. This new 60 rating applies<br />
to aProp Rattle and Flo-Torq III Propeller Hub<br />
Prop Rattle<br />
Crankshaft and driveshaft speed varies during rotation due to power strokes.<br />
This is the result of the piston coming up on its power stroke and combustion<br />
occurring, which in turn causes the crankshaft and prop shaft speed to<br />
increase. In between power strokes the crankshaft speed slows down due to<br />
normal drag in the system, while inertia of the prop causes the propeller shaft<br />
to remain rotating close to the same speed.<br />
Prop rattle is seen more often in engines that use stainless steel props. The<br />
increased weight, and the resulting increased inertial force generated by these<br />
stainless steel props allow the props to maintain more of a constant speed, as<br />
compared with that of the crankshaft’s speed. Consequently, the stainless<br />
steel prop does not slow down at the same rate as the crankshaft, and<br />
accordingly the clutch dogs separate slightly between the clutch and the gear.<br />
On the next power stroke, the crankshaft will again accelerate and create a<br />
slight noise when the clutch dogs on the drive gear catch up with the dogs on<br />
the clutch/prop shaft. When this is repeated over and over it results in prop<br />
rattle.<br />
IMPORTANT: This prop rattle does not damage the clutch dogs or lower<br />
unit, and is normally only heard at idle or just off idle speeds.<br />
FLO-TORQ III PROP HUB<br />
The Flo-Torq III plastic drive sleeve assembly has a small forward/aft<br />
clearance so that it or the prop is not locked to the prop shaft. This allows the<br />
two hub pieces to rotate ± 10° relative to each other, and allows the springs to<br />
absorb the impacts from the combustion cycles instead of the clutch dogs.<br />
The plastic drive sleeve assembly has clearance, which allows it to move<br />
forward and aft slightly over the inner brass hub that is supplied with the Flo-<br />
Torq III hub kit. This free movement, along with the spring wires between the<br />
forward and aft section of the plastic hub, act as a shock absorber, reducing<br />
the noise. Do not shorten the inner brass hub of a Flo-Torq III prop hub; the<br />
prop must be allowed to have a slight forward and aft clearance.<br />
90-898311 1-20<br />
20
Aluminum props do not have the weight and mass (inertia) to remain at a<br />
constant speed. Generally aluminum props tend to remain at crankshaft<br />
speed. Because of this, the clutch dogs do not separate and there is very little<br />
or no prop rattle.<br />
Diagnostic Tip: Customer complaining of low pitch whine from gearcase<br />
at 1200-2400 RPM.<br />
Models: 1997 and newer 25-60hp fourstrokes usually on pontoon<br />
applications using 8, 9, or 10.5 inch pitch propellers.<br />
Possible cause: is propeller vibration which will not effect the gearcase<br />
durability.<br />
Correction: install propeller that has trailing edge tapered in the form of<br />
chisel point.<br />
1-21 90-898311<br />
Notes<br />
_______________________<br />
_______________________<br />
_______________________<br />
_______________________<br />
_______________________<br />
_______________________<br />
_______________________<br />
_______________________<br />
_______________________<br />
_______________________<br />
_______________________<br />
_______________________<br />
_______________________<br />
_______________________<br />
_______________________<br />
_______________________<br />
_______________________<br />
_______________________<br />
_______________________<br />
_______________________<br />
_______________________<br />
_______________________<br />
_______________________<br />
_______________________<br />
_______________________<br />
_______________________<br />
_______________________<br />
_______________________<br />
21
Diameter<br />
Pitch<br />
No. of<br />
Blades<br />
Mercury/Mariner 40 and 50 Bigfoot 4–Stroke 2.31:1<br />
Wide Open Throttle RPM : 5500-6000<br />
Recommended Transom Heights : 20”, 25”<br />
Right Hand Rotation Standard<br />
Gear Reduction : 2.31:1<br />
Material Approx.<br />
Gross Boat<br />
Weight (lbs)<br />
Approx. Boat<br />
Length<br />
90-898311 1-22<br />
Speed<br />
Range<br />
(mph)<br />
Propeller Part<br />
Number<br />
13-3/4” 15” 3 Alum. 1500-2000 14-16’ 25-32 48-77342A33<br />
14” 13” 3 Alum. 1800-2600 16-18’ 23-27 48-77340A33<br />
14” 11” 3 Alum. 2800-4000 Pontoon 17-21 48-77338A33<br />
14” 10” 3 Alum. 3000+ Pontoon/work 14-19 48-854342A33<br />
14” 9” 3 Alum. 5000+ Houseboat/work 1-16 48-854340A33<br />
Diameter<br />
Pitch<br />
No. of<br />
Blades<br />
Mercury/Mariner 60 Bigfoot 4–Stroke 2.31:1<br />
Wide Open Throttle RPM : 5500-6000<br />
Recommended Transom Heights : 20”, 25”<br />
Right Hand Rotation Standard<br />
Gear Reduction : 2.31:1<br />
Material Approx.<br />
Gross Boat<br />
Weight (lbs)<br />
Approx. Boat<br />
Length<br />
Speed<br />
Range<br />
(mph)<br />
Propeller Part<br />
Number<br />
13-3/4” 15” 3 Alum. 2000-2500 16-18’ 25-32 48-77342A33<br />
14” 13” 3 Alum. 2300-3200 17-20’ 23-27 48-77340A33<br />
14” 11” 3 Alum. 3000-4300 Pontoon 17-21 48-77338A33<br />
14” 10” 3 Alum. 3500+ Pontoon/work 14-19 48-854342A33<br />
14” 9” 3 Alum. 5500+ Houseboat/work 1-16 48-854340A33<br />
When using Mercury stainless steel propellers on 40-60 HP 4-stroke Bigfoot<br />
and 75-115 4-stroke engines, use Flo-Torq III hub kit P/N 835257A9.<br />
This hub kit is specially designed to reduce gearcase operating sound and to<br />
increase customer satisfaction.<br />
.<br />
22
Props for Pontoons<br />
Diameter &<br />
Pitch<br />
Note: Portable fourstoke 2005 Modle Year and newer are shipped with<br />
• 8hp fourstroke = 7.5 pitch<br />
• 9hp fourstroke= 8-3/8 pitch<br />
• 9.9 Bigfoot fourstroke = 4 blade black 7 pitch<br />
• 9.9 Pro Kicker = 4 blade silver 7 pitch<br />
#<br />
Blades Material Feature<br />
Style Part Number<br />
Mercury 9.9 - 15 HP<br />
Black<br />
48-<br />
Max 850204A12 9 3/4" x 6 4 Aluminum Large blade area used on Pro Kicker<br />
Mercury 9.9 - 15 HP BigFoot, 20 - 25 HP<br />
Black<br />
Max 48-19636A10 10 3/8" x 9 1/2" 3 Aluminum Large blade area with cup<br />
Mercury 25 HP BigFoot, 30-40 & 50-60 HP<br />
Black<br />
Max 48-42738A13 12 1/2" x 8" 3 Aluminum Large blade area with extra cup<br />
Black<br />
Max 48-42738A11 12 1/2" x 8" 3 Aluminum Large blade area with cup<br />
Black<br />
Max 48-87818A11 12 1/4" x 9" 3 Aluminum Large blade area with cup<br />
Black<br />
Max 48-42740A11 12" x 10 1/2" 3 Aluminum Large blade area with cup<br />
Mercury 40 - 60 HP BigFoot<br />
Black<br />
48-<br />
Max 854340A33 14" x 9" 3 Aluminum<br />
Black<br />
48-<br />
Max<br />
Black<br />
854342A33 14" x 10" 3 Aluminum<br />
Max 48-77338A33 14" x 11" 3 Aluminum<br />
1-23 90-898311<br />
Large blade area with special rubber<br />
hub<br />
Large blade area with special rubber<br />
hub<br />
Large blade area with special rubber<br />
hub<br />
23
Notes<br />
_______________________<br />
_______________________<br />
_______________________<br />
_______________________<br />
_______________________<br />
_______________________<br />
_______________________<br />
_______________________<br />
_______________________<br />
_______________________<br />
_______________________<br />
_______________________<br />
_______________________<br />
_______________________<br />
_______________________<br />
_______________________<br />
_______________________<br />
_______________________<br />
_______________________<br />
_______________________<br />
_______________________<br />
_______________________<br />
_______________________<br />
_______________________<br />
_______________________<br />
_______________________<br />
_______________________<br />
_______________________<br />
Remote Control Cables<br />
Remote control cables are the mechanical connection between the control box<br />
and engine, selection and use of the high quality cables are imperative in<br />
maintaining this connection. Control cables are designed with a hard<br />
composite outer shell (casing) and with a solid inner core (wire). This core<br />
moves back and forth inside the casing each time the control is operated. A<br />
tighter tolerance between the core and casing, results in less lost motion<br />
(sideways travel) over the length of the cable. The greater the length of the<br />
cable, the greater the lost motion. For longer cable runs where “lost<br />
motion” is a problem, try using the MMP 877774A__ (denotes length)<br />
Platinum throttle and shift cables.<br />
Measuring Throttle and Shift Cables<br />
Panel Mount Remote Control<br />
1. Add boat measurements A-B in inches (mm) and add 18 in. (457 mm) to<br />
the total. Dimension B represents the distance from the remote control<br />
location measured along the gunwale to the transom. In dual engine<br />
installations, dimension A is measured from the gunwale to each engine<br />
center-line.<br />
2. Divide by 12 in. (304 mm).<br />
3. This is the length of the throttle and shift cables in feet.<br />
4. For left hand (Port) remote control installations follow the same measuring<br />
procedure, only on the opposite side of the boat.<br />
90-898311 1-24<br />
24
Console Mount Remote Controls<br />
1. When measuring cable length for a console mount remote control, measure<br />
along theactual selected cable routing path and add 18 inches (457 mm) to<br />
the total.<br />
2. Divide by 12 in. (304 mm).<br />
3. This is the length of the throttle and shift cables in feet.<br />
NOTE: Allow for clearance of cables directly behind panel mount remote<br />
control and under console mount remote control. The Commander 3000<br />
Series Panel Mount Remote Control mounting surface must not exceed 1 in.<br />
(25.4 mm) thickness. Cable radius at any point must not be less than 12 in.<br />
(304.8 mm). On boats with considerable freeboard drop or unusual routing of<br />
cables, it may be necessary to add extra length to cables.<br />
1-25 90-898311<br />
Notes<br />
_______________________<br />
_______________________<br />
_______________________<br />
_______________________<br />
_______________________<br />
_______________________<br />
_______________________<br />
_______________________<br />
_______________________<br />
_______________________<br />
_______________________<br />
_______________________<br />
_______________________<br />
_______________________<br />
_______________________<br />
_______________________<br />
_______________________<br />
_______________________<br />
_______________________<br />
_______________________<br />
_______________________<br />
_______________________<br />
_______________________<br />
_______________________<br />
_______________________<br />
_______________________<br />
_______________________<br />
_______________________<br />
25
Notes<br />
_______________________<br />
_______________________<br />
_______________________<br />
_______________________<br />
_______________________<br />
_______________________<br />
_______________________<br />
_______________________<br />
_______________________<br />
_______________________<br />
_______________________<br />
_______________________<br />
_______________________<br />
_______________________<br />
_______________________<br />
_______________________<br />
_______________________<br />
_______________________<br />
_______________________<br />
_______________________<br />
_______________________<br />
_______________________<br />
_______________________<br />
_______________________<br />
_______________________<br />
_______________________<br />
_______________________<br />
_______________________<br />
SHIFT EFFORT TOOL<br />
Part Numbers (current at time of print)<br />
• MPC 4000 Gen II 91-892535A01<br />
• MCC 4500 Gen II, 91-892539A01<br />
• MSC Commander 4000 Side Mount Tool OB, 91-892542A01<br />
• MPC 4000 Gen II Panel Mount Tool with lock bar 91-892547A01<br />
Tool Installation<br />
1. With the engine off, push the throttle button and move the remote control<br />
into the FORWARD (F) gear position.<br />
90-898311 1-26<br />
26
2. Remove the throttle only button covering the hex nut in the base of the<br />
remote control using a screwdriver or similar tool.<br />
3. Move the remote control into the NEUTRAL (N) position.<br />
4. Install the appropriate shift tool on the hex nut at the base of the remote<br />
control.<br />
a. If the neutral lock button is on the bottom of the handle, push the<br />
neutral lock button in and install the clevis pin.<br />
1-27 90-898311<br />
Notes<br />
_______________________<br />
_______________________<br />
_______________________<br />
_______________________<br />
_______________________<br />
_______________________<br />
_______________________<br />
_______________________<br />
_______________________<br />
_______________________<br />
_______________________<br />
_______________________<br />
_______________________<br />
_______________________<br />
_______________________<br />
_______________________<br />
_______________________<br />
_______________________<br />
_______________________<br />
_______________________<br />
_______________________<br />
_______________________<br />
_______________________<br />
_______________________<br />
_______________________<br />
_______________________<br />
_______________________<br />
_______________________<br />
27
Notes<br />
_______________________<br />
_______________________<br />
_______________________<br />
_______________________<br />
_______________________<br />
_______________________<br />
_______________________<br />
_______________________<br />
_______________________<br />
_______________________<br />
_______________________<br />
_______________________<br />
_______________________<br />
_______________________<br />
_______________________<br />
_______________________<br />
_______________________<br />
_______________________<br />
_______________________<br />
_______________________<br />
_______________________<br />
_______________________<br />
_______________________<br />
_______________________<br />
_______________________<br />
_______________________<br />
_______________________<br />
_______________________<br />
b. If the neutral lock button is on the side of the handle, firmly push<br />
the clip down. You may feel some resistance as the button is<br />
pushed in.<br />
5. Install an inch pound torque wrench at the 3/8 in. drive connection on the<br />
back of the Shift Effort Tool.<br />
90-898311 1-28<br />
28
Torque Specifications<br />
Engine Not Running<br />
CABLES NOT CONNECTED (OUTBOARD MODELS)<br />
NOTE: The torque specifications do not reflect the force required to move the<br />
handle through the detent.<br />
1. Measure the torque by moving the remote control handle to the detent. If<br />
the torque is not within specifications, inspect the cable routing and ensure<br />
that it is not binding.<br />
2005/2006 Model Year Changes14 Pin Adapter and<br />
Control Harnesses<br />
Models Affected<br />
4-stroke models 9.9 thru 225 HP V-6 EFI (Excluding Verado)<br />
2-stroke V-6 <strong>Outboard</strong>s 135 thru 250 HP (Excluding Jet Drive)<br />
The 2006 models listed above will be changing to a 14 pin connector for the<br />
main engine to boat control harness connection. A number of harness<br />
adapters have been developed to allow the use of older controls on new<br />
engines that use the 14 pin connector. Some of the new adapters will also<br />
allow the 2005 and prior models to use the new style 14 pin controls and<br />
key/choke harnesses.<br />
1-29 90-898311<br />
Notes<br />
_______________________<br />
_______________________<br />
_______________________<br />
_______________________<br />
_______________________<br />
_______________________<br />
_______________________<br />
_______________________<br />
_______________________<br />
_______________________<br />
_______________________<br />
_______________________<br />
_______________________<br />
_______________________<br />
_______________________<br />
_______________________<br />
_______________________<br />
_______________________<br />
_______________________<br />
_______________________<br />
_______________________<br />
_______________________<br />
_______________________<br />
_______________________<br />
_______________________<br />
_______________________<br />
_______________________<br />
_______________________<br />
29
Notes<br />
_______________________<br />
_______________________<br />
_______________________<br />
_______________________<br />
_______________________<br />
_______________________<br />
_______________________<br />
_______________________<br />
_______________________<br />
_______________________<br />
_______________________<br />
_______________________<br />
_______________________<br />
_______________________<br />
_______________________<br />
_______________________<br />
_______________________<br />
_______________________<br />
_______________________<br />
_______________________<br />
_______________________<br />
_______________________<br />
_______________________<br />
_______________________<br />
_______________________<br />
_______________________<br />
_______________________<br />
_______________________<br />
• New engine harness requires a new 14 pin key/choke harnesses &<br />
controls. CAN # 1 & 3 built into harness with separate terminator<br />
locations. Old will NOT supersede to new.<br />
• Reference Current Parts Catalogue for part numbers.<br />
84-896541T_<br />
Adapts the 2005 model and newer 8/9.9 HP (209cc) 4-Stroke engines to the<br />
new 14 pin control or key/choke harness.<br />
84-858740T_<br />
Adapts the 2005 model year and prior 75/90 HP 4-Stroke Carb/EFI, 115 HP<br />
and 225 HP V-6 EFI 4-Stroke engines; and the 2006 model and newer<br />
75/90/115 HP (International 80/100 HP) EFI, 225 V-6 EFI 4-Stroke to the new<br />
14 pin control or key/choke harness.<br />
90-898311 1-30<br />
30
84-898142T_<br />
Adapts engines with the round 8 pin to controls with the Amp 8 pin connector.<br />
Battery Specification<br />
4-Stroke<br />
Model Cold Cranking Amps (CCA) Marine Cranking Amps (MCA)<br />
8.0 – 25 350 465<br />
30-90/115/225 Carb & EFI<br />
Models<br />
350 Above 32° F (0°C)<br />
775 Below 32° F (0°C)<br />
NOTE: Battery specifications listed are minimum requirements for the<br />
outboard motor only, boats with additional electrical accessories will require<br />
larger batteries than listed.<br />
1-31 90-898311<br />
465 Above 32° F (0°C)<br />
1000 Below 32° F (0°C)<br />
31
Notes<br />
_______________________<br />
_______________________<br />
_______________________<br />
_______________________<br />
_______________________<br />
_______________________<br />
_______________________<br />
_______________________<br />
_______________________<br />
_______________________<br />
_______________________<br />
_______________________<br />
_______________________<br />
_______________________<br />
_______________________<br />
_______________________<br />
_______________________<br />
_______________________<br />
_______________________<br />
_______________________<br />
_______________________<br />
_______________________<br />
_______________________<br />
_______________________<br />
_______________________<br />
_______________________<br />
_______________________<br />
_______________________<br />
Battery Rating System<br />
There are two major rating systems used in the USA for marine engine<br />
cranking batteries. The most common is CCA (cold cranking amps) which<br />
rates the cranking amps at 0° F. The second system, mca (marine cranking<br />
amps), rates the cranking amps at 32° F. The mca rating of a given battery is<br />
always higher than the cca rating.<br />
Cold Cranking Amps (CCA)<br />
This figure represents in amps the current flow the battery can deliver for 30<br />
seconds at 0º Fahrenheit without dropping below 1.2 volts per cell (7.2 volts<br />
on a standard 12 volt battery). The higher the number, the more amps it can<br />
deliver to crank the engine. (CCA x 1.3 = MCA).<br />
Marine Cranking Amps (MCA)<br />
This figure is similar to the CCA test figure except that the test is run at 32º<br />
Fahrenheit instead of ”0”. (MCA x.77 = CCA). This is more in line with actual<br />
boat operating conditions.<br />
Reserve Capacity<br />
This figure represents the time in minutes that a fully charged battery at 80º<br />
Fahrenheit can deliver 25 amps, without dropping below 1.75 volts per cell<br />
(10.5 volts on a standard 12 volt battery). The reserve capacity rating defines<br />
the length of time that a typical vehicle can be driven after the charging<br />
system fails. The 25 amp figure takes into account the power required by the<br />
ignition, lighting and other accessories. The higher the reserve capacity rating,<br />
the longer the vehicle could be driven after a charging system failure.<br />
Amperage/Hour Rating<br />
The ampere hour rating method is also called the 20 hour rating method. This<br />
rating represents the steady current flow that the battery will deliver for 20<br />
hours while at 80º Fahrenheit without dropping below 1.75 volts per cell (10.5<br />
volts on a standard 12 volt battery). The rating is actually the steady current<br />
flow times the 20 hours.<br />
Example: A 60 amp–hour battery will deliver 3 amps continuously for 20<br />
hours.<br />
90-898311 1-32<br />
32
Charging Guide<br />
12 Volt Battery Recommended Rate* and Time for Fully Discharged<br />
Condition<br />
* Initial rate for constant voltage taper rate charger<br />
To avoid damage, charging rate must be reduced or temporarily halted, if:<br />
1. Electrolyte temperature exceeds 125° F (52° C).<br />
2. Violent gassing or spewing of electrolyte occurs.<br />
Battery is fully charged when, over a two hour period at a low charging rate in<br />
amperes, all cells are gassing freely and no change in specific gravity occurs.<br />
For the most satisfactory charging, the lower charging rates in amperes<br />
are recommended. Full charge specific gravity is 1.260-1.280, corrected for<br />
temperature with electrolyte level at split ring.<br />
Effects of Temperature on a Standing Battery<br />
The parasitic drain will be fairly constant over a range of temperatures. The<br />
important temperature is that of the boat at the time a start is attempted.<br />
Colder temperature raises the threshold of a no-start by increasing the<br />
residual power needed. When the temperature falls to 0°C (32°F), the battery<br />
will be able to put out only about 85% of its normally available starting power,<br />
and the engine may need as much as 165% of the usual power to start.<br />
The combined effect of these two factors is to reduce the number of days the<br />
battery can stand with a parasitic drain. At 0°C (32°F), the battery can stand<br />
only half as long as it could at 25°C (77°F). And at -19°C (0°F), the standing<br />
days are reduced to one-fourth.<br />
Temperatures above the moderate climate of 25°C (77°F) increase the<br />
battery's internal self discharge. If the battery is in a location where the<br />
temperature is averaging 32°C (90°F), an additional 5% to 10% of the<br />
available ampere-hours will be lost in a month due to self-discharge within the<br />
battery. At temperatures below the moderate range, self-discharge will be low<br />
enough to be insignificant compared to the parasitic loss.<br />
Discharged batteries can freeze at temperatures as high as 0°C (32°F),<br />
causing permanent damage. Other permanent damage may result from<br />
allowing batteries to stand discharged for extended periods.<br />
1-33 90-898311<br />
Notes<br />
_______________________<br />
_______________________<br />
_______________________<br />
_______________________<br />
_______________________<br />
_______________________<br />
_______________________<br />
_______________________<br />
_______________________<br />
_______________________<br />
_______________________<br />
_______________________<br />
_______________________<br />
_______________________<br />
_______________________<br />
_______________________<br />
_______________________<br />
_______________________<br />
_______________________<br />
_______________________<br />
_______________________<br />
_______________________<br />
_______________________<br />
_______________________<br />
_______________________<br />
_______________________<br />
_______________________<br />
_______________________<br />
33
Notes<br />
_______________________<br />
_______________________<br />
_______________________<br />
_______________________<br />
_______________________<br />
_______________________<br />
_______________________<br />
_______________________<br />
_______________________<br />
_______________________<br />
_______________________<br />
_______________________<br />
_______________________<br />
_______________________<br />
_______________________<br />
_______________________<br />
_______________________<br />
_______________________<br />
_______________________<br />
_______________________<br />
_______________________<br />
_______________________<br />
_______________________<br />
_______________________<br />
_______________________<br />
_______________________<br />
_______________________<br />
_______________________<br />
IMPORTANT: The battery specification listed below is generic<br />
specification.<br />
The battery run down time will vary depending on cold cranking amperage<br />
(CCA) and reserve capacity (RC). If the CCA and RC are higher, then the<br />
battery run down time would be longer. If the CCA and RC are lower, then the<br />
battery run down time would be shorter. The graph below indicates roughly<br />
how many days a 690 CCA battery with at 110 min. RC (60.5 AH) starting at<br />
80 percent state of charge will last with a constant current draw until it reaches<br />
50 percent state of charge. Differences in battery rating and temperature will<br />
affect the results.<br />
90-898311 1-34<br />
Current Drain Days<br />
25 mA 30.5<br />
50 mA 16.5<br />
75 mA 11<br />
100 mA 8.25<br />
250 mA 3.3<br />
500 mA 1.65<br />
750 mA 1<br />
1 A 0.8<br />
2 A 0.4<br />
34
Battery Cable Wire Gauge Size<br />
Only use copper battery cables. See chart below for correct wire gage size.<br />
1. Standard (original) cable length and wire gauge size.<br />
1-35 90-898311<br />
35
Notes<br />
_______________________<br />
_______________________<br />
_______________________<br />
_______________________<br />
_______________________<br />
_______________________<br />
_______________________<br />
_______________________<br />
_______________________<br />
_______________________<br />
_______________________<br />
_______________________<br />
_______________________<br />
_______________________<br />
_______________________<br />
_______________________<br />
_______________________<br />
_______________________<br />
_______________________<br />
_______________________<br />
_______________________<br />
_______________________<br />
_______________________<br />
_______________________<br />
_______________________<br />
_______________________<br />
_______________________<br />
_______________________<br />
Warning System<br />
Warning System Operation<br />
If the engine overheats or the oil pressure drops too low, the warning system<br />
will be activated. Prior to 2006 model year the warning horn will sound<br />
continuously if the engine is ran at or above 2000 RPM and engine speed will<br />
be limited to 2000 RPM.<br />
Warning System Activated<br />
If the warning system is activated, immediately reduce engine speed to idle.<br />
Shift outboard into neutral and visually check for a steady flow of water (d)<br />
discharging from the water pump indicator hole. If no water is flowing out, the<br />
water pump is not working and the engine is overheating.<br />
If water is discharging from the water pump indicator hole, stop engine and<br />
check the oil level. A low oil pressure problem may exist.<br />
Engine Overheat<br />
Stop the engine. If no water is coming out of the water pump indicator hole or<br />
flow is intermittent, check the cooling water intake holes for obstruction. If no<br />
obstruction is found, there may be a blockage in the cooling system or a water<br />
pump problem. Have your dealer check the outboard. Operating an<br />
overheated engine will cause engine damage.<br />
If a steady flow of water is coming out of the water pump indicator hole and<br />
the engine continues to overheat, consult your dealer. Operating an<br />
overheated engine will cause engine damage. See the following note.<br />
NOTE: Should overheating occur and you are stranded, stop the engine and<br />
allow it to cool down this will usually allow some additional low speed (idle)<br />
running time before the engine starts to overheat again.<br />
90-898311 1-36<br />
___<br />
___<br />
___<br />
___
Oil Dilution<br />
All <strong>FourStroke</strong> outboards will have some degree of oil dilution. Normally, the<br />
oil level fluctuates a small degree without notice. In some cases the dilution<br />
rate exceceds the normal amount and causes an issue when the oil pan<br />
completely fills and restricts crankcase ventilation.<br />
There are serveral possible causes to keep in mind when diagnosing an<br />
excessive oil dilution complaint. Engine temperature is very critical to obtain<br />
proper piston ring sealing. Verify proper heat range of spark plugs and engine<br />
operating temperature. Excessive fuel in the combustion chamber and<br />
overpropping could also contribute. Most often the problem is caused by<br />
improper breakin procedure during the first hours of engine run<br />
operation. During this phase the rings are seating into their final<br />
position in the ring land of the piston. If the engine is run at a very low<br />
RPM for long durations the rings may never seat.<br />
1-37 90-898311
Section 2 - Powerheads<br />
2-1 90-898311
Table of Contents<br />
Table of Contents..............................................................................................2<br />
Table of Contents..............................................................................................3<br />
Compression Check..........................................................................................4<br />
Cylinder Leakage Testing .................................................................................5<br />
Cylinder Leakage Testing .................................................................................6<br />
Cylinder Leakage Tester (Snap-On Tools EEPV309A).................................6<br />
Analysis .........................................................................................................6<br />
Four-Cycle Engine Principle of Operation.........................................................8<br />
Intake.............................................................................................................8<br />
Compression .................................................................................................8<br />
Power ............................................................................................................9<br />
Exhaust .........................................................................................................9<br />
Pre-Ignition and Detonation - Piston Failures .................................................10<br />
Pre-Ignition ..................................................................................................10<br />
Detonation ...................................................................................................11<br />
4-Stroke Cylinder Head - Single Overhead Cam ............................................13<br />
4-Stroke Cylinder Head - Single Overhead Cam ............................................14<br />
4-Stroke Components - Dual Overhead Cam .................................................15<br />
4-Stroke Components - Dual Overhead Cam .................................................16<br />
Compression Release Camshaft ....................................................................17<br />
All 25 HP, 30/40 Manual Start Models & Newer 9.9/15 Models ..................17<br />
Valve Clearance..............................................................................................18<br />
Checking Valve Clearance ..........................................................................18<br />
Valve Clearance Measurement Steps:........................................................22<br />
Changing Pad Thickness ............................................................................23<br />
75/90/115 Valve Clearance Work Sheets .......................................................24<br />
75/90/115 Valve Clearance Work Sheets .......................................................25<br />
Measurement ..............................................................................................25<br />
Adjustment ..................................................................................................25<br />
Timing Belt (Single Cam) Removal and Installation........................................26<br />
Timing Belt (Dual Cam) Removal and Installation ..........................................27<br />
Cylinder Head Removal 75/90 & 115..............................................................28<br />
Cylinder Head Removal 75/90 & 115..............................................................29<br />
Selecting New Connecting Rod Bearings .......................................................30<br />
Checking Connecting Rod Bearing Clearance............................................30<br />
Cylinder Block Reassembly ............................................................................32<br />
Selecting New Main Bearings......................................................................32<br />
Flywheel With Load Ring and Spacer .........................................................33<br />
Drive Sprocket Installation...........................................................................34<br />
Drive Shaft Bushing Removal (75/90/115 4-Stroke Models).......................35<br />
Oil Flow Description ........................................................................................36<br />
30/40 Oil System.............................................................................................37<br />
2-3 90-898311
Notes<br />
_______________________<br />
_______________________<br />
_______________________<br />
_______________________<br />
_______________________<br />
_______________________<br />
_______________________<br />
_______________________<br />
_______________________<br />
_______________________<br />
_______________________<br />
_______________________<br />
_______________________<br />
_______________________<br />
_______________________<br />
_______________________<br />
_______________________<br />
_______________________<br />
_______________________<br />
_______________________<br />
_______________________<br />
_______________________<br />
_______________________<br />
_______________________<br />
_______________________<br />
_______________________<br />
_______________________<br />
_______________________<br />
Compression Check<br />
1) Remove spark plugs.<br />
2) Install compression gauge in spark plug hole.<br />
3) Hold throttle plate at W.O.T.<br />
4) Crank the engine over until the compression reading peaks on the gauge.<br />
Record the reading.<br />
5) Check and record compression of each cylinder. The highest and lowest<br />
reading recorded should not differ by more than 15% (see example chart<br />
below). A reading below 120 psi might indicate a total engine wear<br />
problem.<br />
Important: All Mercury manual start engine have compression relief if active<br />
false reading will be obtained.<br />
Example of compression test differences<br />
Maximum (psi) Minimum (psi)<br />
180 153<br />
150 127.5<br />
6) Compression check is important because an engine with low or uneven<br />
compression cannot be tuned successfully to give peak performance. It is<br />
essential, therefore, that improper compression be corrected before<br />
proceeding with an engine tuneup.<br />
7) Cylinder scoring: If powerhead shows any indication of overheating, such<br />
as discolored or scorched paint, visually inspect cylinders for scoring or<br />
other damage as outlined in Service Manual.<br />
a) Compression Gauge (EEPV303A - Snap-on)<br />
b) Adaptor (MT26-18 - Snap-on)<br />
90-898311<br />
2-4
Notes<br />
_______________________<br />
_______________________<br />
_______________________<br />
_______________________<br />
_______________________<br />
_______________________<br />
_______________________<br />
_______________________<br />
_______________________<br />
_______________________<br />
_______________________<br />
_______________________<br />
_______________________<br />
_______________________<br />
_______________________<br />
_______________________<br />
_______________________<br />
_______________________<br />
_______________________<br />
_______________________<br />
_______________________<br />
_______________________<br />
_______________________<br />
_______________________<br />
_______________________<br />
_______________________<br />
_______________________<br />
_______________________<br />
Cylinder Leakage Testing<br />
90-898311<br />
CAUTION<br />
Compression/Cylinder Leakage Tests Must be performed with the<br />
ignition/injection system disabled. To do this, the lanyard stop switch<br />
MUST BE placed to the “OFF” position.<br />
NOTE: Cylinder leakage testing, along with compression testing, can help the<br />
mechanic pinpoint the source of a mechanical failure by gauging the amount<br />
of leakage in an engine cylinder. Refer to the manufactures tester instructions<br />
for proper testing procedures.<br />
Cylinder Leakage Tester (Snap-On Tools EEPV309A)<br />
NOTE: Spark plug hole is a 12 mm diameter. Use Snap-On Tool MT26-18<br />
adapter with valve core removed.<br />
Analysis<br />
Due to standard engine tolerances and engine wear, no cylinder will maintain<br />
a 0% of leakage. It is important only that cylinders have somewhat consistent<br />
reading between them. Differences of 15 to 30% indicate excessive leakage.<br />
Larger engines tend to have a larger percentage of cylinder leakage than<br />
smaller engines.<br />
If excessive leakage is present, first check that the piston is at top dead center<br />
of it’s compression stroke. Leakage will naturally occur if the exhaust or intake<br />
valve is open.<br />
2-6
To determine the cause of high percentage leaks, you must locate where the<br />
air is escaping from. Listen for air escaping thru the carburetor intake,<br />
adjacent spark plug holes, exhaust pipe, crankcase fill plug. Use the following<br />
table to aid in locating the source of cylinder leakage:<br />
Air Escaping From: Indicates Possible Defective:<br />
Carburetor Intake Valve<br />
Exhaust System Exhaust Valve<br />
Crankcase Fill Plug Piston and rings<br />
Adjacent Cylinders Head Gasket<br />
NOTE: Prevent engine from rotating when performing leak down test to<br />
ensure accuracy.<br />
2-7 90-898311<br />
Notes<br />
_______________________<br />
_______________________<br />
_______________________<br />
_______________________<br />
_______________________<br />
_______________________<br />
_______________________<br />
_______________________<br />
_______________________<br />
_______________________<br />
_______________________<br />
_______________________<br />
_______________________<br />
_______________________<br />
_______________________<br />
_______________________<br />
_______________________<br />
_______________________<br />
_______________________<br />
_______________________<br />
_______________________<br />
_______________________<br />
_______________________<br />
_______________________<br />
_______________________<br />
_______________________<br />
_______________________<br />
_______________________
Notes<br />
_______________________<br />
_______________________<br />
_______________________<br />
_______________________<br />
_______________________<br />
_______________________<br />
_______________________<br />
_______________________<br />
_______________________<br />
_______________________<br />
_______________________<br />
_______________________<br />
_______________________<br />
_______________________<br />
_______________________<br />
_______________________<br />
_______________________<br />
_______________________<br />
_______________________<br />
_______________________<br />
_______________________<br />
_______________________<br />
_______________________<br />
_______________________<br />
_______________________<br />
_______________________<br />
_______________________<br />
_______________________<br />
Four-Cycle Engine Principle of Operation<br />
Intake<br />
a) Inlet Valve Open<br />
b) Air and Gasoline Intake Port<br />
c) Spark Plug<br />
d) Cylinder<br />
e) Piston<br />
f) Connecting Rod<br />
g) Crankshaft<br />
h) Exhaust Valve Closed<br />
i) Head<br />
The intake valve opens as the piston is on its first downward (intake stroke),<br />
allowing atmospheric pressure to force the fuel-air mixture from the fuel<br />
system into the cylinder.<br />
Compression<br />
j) Both valves Closed<br />
With both valves closed, the piston on its first upward (compression) stroke,<br />
compressing the fuel-air mixture in the top (combustion chamber) of the<br />
cylinder.<br />
90-898311<br />
2-8
Power<br />
j) Both Valve Closes<br />
With both valves still closed and the piston near the top of its upward stroke, a<br />
spark across electrodes of the spark plug ignites the fuel-air mixture. The<br />
burning fuel-air mixture expands, from the heat of combustion, forcing the<br />
piston on its second downward (power) stroke.<br />
Exhaust<br />
k) Inlet Valve Closed<br />
l) Exhaust Valve Open<br />
m) Exhaust Port<br />
The exhaust valve opens and the piston, on its second upward (exhaust)<br />
stroke, forces the burned gases from cylinders. A new cycle again starts with<br />
the intake stroke.<br />
2-9 90-898311<br />
Notes<br />
_______________________<br />
_______________________<br />
_______________________<br />
_______________________<br />
_______________________<br />
_______________________<br />
_______________________<br />
_______________________<br />
_______________________<br />
_______________________<br />
_______________________<br />
_______________________<br />
_______________________<br />
_______________________<br />
_______________________<br />
_______________________<br />
_______________________<br />
_______________________<br />
_______________________<br />
_______________________<br />
_______________________<br />
_______________________<br />
_______________________<br />
_______________________<br />
_______________________<br />
_______________________<br />
_______________________<br />
_______________________
Notes<br />
_______________________<br />
_______________________<br />
_______________________<br />
_______________________<br />
_______________________<br />
_______________________<br />
_______________________<br />
_______________________<br />
_______________________<br />
_______________________<br />
_______________________<br />
_______________________<br />
_______________________<br />
_______________________<br />
_______________________<br />
_______________________<br />
_______________________<br />
_______________________<br />
_______________________<br />
_______________________<br />
_______________________<br />
_______________________<br />
_______________________<br />
_______________________<br />
_______________________<br />
_______________________<br />
_______________________<br />
_______________________<br />
Pre-Ignition and Detonation - Piston Failures<br />
Pre-Ignition<br />
Pre-ignition is abnormal fuel ignition, caused by combustion chamber hot<br />
spots. Control of the start of ignition is lost, as combustion pressure rises too<br />
early, causing power loss and rough running. The upward motion on the<br />
piston is opposed by the pressure rise. This can result in extensive damage to<br />
the internal parts from the high increase in combustion chamber temperature.<br />
PRE-IGNITION DAMAGE<br />
a) Ignition By Hot Deposits<br />
b) Regular Ignition Spark<br />
c) Ignites Remaining Fuel<br />
d) Flame Fronts Collide<br />
90-898311<br />
2-10
PRE-IGNITION CAUSES<br />
1) Hot spots in the combustion chamber from glowing deposits (due in turn to<br />
the use of improper oils and/or fuels).<br />
2) Overheated spark plug electrodes (improper heat range or defective plug).<br />
3) Any other protuberance (obstruction of designed flow) in the combustion<br />
chamber, such as an overhanging piece of gasket, an improperly seated<br />
valve or any other inadequately cooled section of material which can serve<br />
as a source for pre-ignition problems.<br />
Engine failures, which result from the foregoing conditions, are beyond the<br />
control of Mercury Marine; therefore, no warranty will apply to failures which<br />
occur under these conditions.<br />
Detonation<br />
Detonation, commonly called “fuel knock,” “spark knock” or “carbon knock,” is<br />
abnormal combustion of the fuel which causes the fuel to explode violently.<br />
The explosion, in turn, causes overheating or damage to the spark plugs,<br />
pistons, valves and, in severe cases, results in pre-ignition.<br />
Use of low octane gasoline is one of the most common causes of detonation.<br />
Even with high octane gasoline, detonation could occur if engine maintenance<br />
is neglected.<br />
OTHER CAUSES OF DETONATION<br />
IMPORTANT: Use of improper fuels will cause engine damage and poor<br />
performance.<br />
1) Over-advanced ignition timing.<br />
2) Lean fuel mixture at or near full throttle (could be caused by carburetor or<br />
leaking intake manifold).<br />
3) Cross-firing spark plugs.<br />
4) Excess accumulation of deposits on piston and/ or combustion chamber<br />
(results in higher compression ratio).<br />
5) Inadequate cooling of engine by deterioration of cooling system.<br />
2-11 90-898311<br />
Notes<br />
_______________________<br />
_______________________<br />
_______________________<br />
_______________________<br />
_______________________<br />
_______________________<br />
_______________________<br />
_______________________<br />
_______________________<br />
_______________________<br />
_______________________<br />
_______________________<br />
_______________________<br />
_______________________<br />
_______________________<br />
_______________________<br />
_______________________<br />
_______________________<br />
_______________________<br />
_______________________<br />
_______________________<br />
_______________________<br />
_______________________<br />
_______________________<br />
_______________________<br />
_______________________<br />
_______________________<br />
_______________________
Notes<br />
_______________________<br />
_______________________<br />
_______________________<br />
_______________________<br />
_______________________<br />
_______________________<br />
_______________________<br />
_______________________<br />
_______________________<br />
_______________________<br />
_______________________<br />
_______________________<br />
_______________________<br />
_______________________<br />
_______________________<br />
_______________________<br />
_______________________<br />
_______________________<br />
_______________________<br />
_______________________<br />
_______________________<br />
_______________________<br />
_______________________<br />
_______________________<br />
_______________________<br />
_______________________<br />
_______________________<br />
_______________________<br />
NOTE: Engine failures, which result from the foregoing conditions, are beyond<br />
the control of Mercury; therefore, no warranty will apply to failures which occur<br />
under these conditions.<br />
DETONATION DAMAGE<br />
a) Spark Occurs<br />
b) Combustion Begins<br />
c) Combustion Continues<br />
d) Detonation Occurs<br />
90-898311<br />
2-12
Notes<br />
_______________________<br />
_______________________<br />
_______________________<br />
_______________________<br />
_______________________<br />
_______________________<br />
_______________________<br />
_______________________<br />
_______________________<br />
_______________________<br />
_______________________<br />
_______________________<br />
_______________________<br />
_______________________<br />
_______________________<br />
_______________________<br />
_______________________<br />
_______________________<br />
_______________________<br />
_______________________<br />
_______________________<br />
_______________________<br />
_______________________<br />
_______________________<br />
_______________________<br />
_______________________<br />
_______________________<br />
_______________________<br />
4-Stroke Cylinder Head - Single Overhead<br />
Cam<br />
1) Rocker Shaft<br />
2) Rocker Arm<br />
3) Adjusting Screw<br />
4) Lock Nut<br />
5) Valve Spring<br />
6) Cam Shaft<br />
7) Cylinder Head<br />
8) Intake Valve<br />
9) Exhaust Valve<br />
10) Valve Guide<br />
11) Valve Guide Seal<br />
12) Valve Spring Retainer<br />
13) Valve Spring Keeper<br />
14) Cam Shaft Drive Belt<br />
90-898311<br />
2-14
Notes<br />
_______________________<br />
_______________________<br />
_______________________<br />
_______________________<br />
_______________________<br />
_______________________<br />
_______________________<br />
_______________________<br />
_______________________<br />
_______________________<br />
_______________________<br />
_______________________<br />
_______________________<br />
_______________________<br />
_______________________<br />
_______________________<br />
_______________________<br />
_______________________<br />
_______________________<br />
_______________________<br />
_______________________<br />
_______________________<br />
_______________________<br />
_______________________<br />
_______________________<br />
_______________________<br />
_______________________<br />
_______________________<br />
4-Stroke Components - Dual Overhead Cam<br />
90-898311<br />
2-16
Compression Release Camshaft<br />
All 25 HP, 30/40 Manual Start Models & Newer 9.9/15<br />
Models<br />
Manual start models are equipped with a cam shaft featuring a compression<br />
release mechanism. The compression relief mechanism releases a<br />
percentage of the cylinder compression during engine cranking which lowers<br />
the starter rope pull force.<br />
At cranking speeds (RPM) the cam shaft decompression levers rest against<br />
the side of the exhaust cam lobes, protruding out from the heal of the lobe.<br />
This protrusion contacts the exhaust valve rocker arms during the<br />
compression stroke, slightly opening the exhaust valve.<br />
With the increase of centrifugal force at engine running speeds, the<br />
decompression levers swing out of contact with the exhaust valve rocker<br />
arms, allowing the exhaust valves to operate normally (fully closed) during the<br />
compression stroke.<br />
a) Exhaust Valve Rocker Arm<br />
b) Decompression Lever<br />
2-17 90-898311<br />
Notes<br />
_______________________<br />
_______________________<br />
_______________________<br />
_______________________<br />
_______________________<br />
_______________________<br />
_______________________<br />
_______________________<br />
_______________________<br />
_______________________<br />
_______________________<br />
_______________________<br />
_______________________<br />
_______________________<br />
_______________________<br />
_______________________<br />
_______________________<br />
_______________________<br />
_______________________<br />
_______________________<br />
_______________________<br />
_______________________<br />
_______________________<br />
_______________________<br />
_______________________<br />
_______________________<br />
_______________________<br />
_______________________
Notes<br />
_______________________<br />
_______________________<br />
_______________________<br />
_______________________<br />
_______________________<br />
_______________________<br />
_______________________<br />
_______________________<br />
_______________________<br />
_______________________<br />
_______________________<br />
_______________________<br />
_______________________<br />
_______________________<br />
_______________________<br />
_______________________<br />
_______________________<br />
_______________________<br />
_______________________<br />
_______________________<br />
_______________________<br />
_______________________<br />
_______________________<br />
_______________________<br />
_______________________<br />
_______________________<br />
_______________________<br />
_______________________<br />
1) Inspect the camshaft for pitting, heat discoloration and scratches. Replace<br />
camshaft if worn or not within specification. Reference the service manual<br />
for current specifications.<br />
2) Inspect the compression relief cam lever (if equipped) for free movement.<br />
Replace camshaft if necessary.<br />
a) Compression Relief Cam<br />
Valve Clearance<br />
NOTE: Valves should be adjusted when engine is cold.<br />
90-898311<br />
WARNING<br />
Engine could possibly start when turning flywheel during adjustment. To<br />
prevent this type of accidental engine starting and possible serious<br />
injury, always remove spark plug leads from spark plugs.<br />
1) Remove flywheel cover.<br />
2) Remove cylinder head cover.<br />
Checking Valve Clearance<br />
IMPORTANT: Timing belt must be properly installed with timing marks<br />
on the drive gear and the driven gear aligned with corresponding marks<br />
on powerhead.<br />
1) Position the driven gear for cylinder #1 or #2 (see instructions following).<br />
2) Measure the valve clearance using a feeler gauge. If out of specification<br />
refer to Adjusting Valves following.<br />
2-18
POSITIONING OF TOP CYLINDER (#1)<br />
Position the #1 piston (top) at top dead center (TDC) on the compression<br />
stroke.<br />
1) Rotate the driven gear clockwise to align the “1” mark on the driven gear<br />
with the cylinder head mark “�”.<br />
a) Cylinder Head Mark<br />
b) Driven Gear Mark<br />
2-19 90-898311<br />
Notes<br />
_______________________<br />
_______________________<br />
_______________________<br />
_______________________<br />
_______________________<br />
_______________________<br />
_______________________<br />
_______________________<br />
_______________________<br />
_______________________<br />
_______________________<br />
_______________________<br />
_______________________<br />
_______________________<br />
_______________________<br />
_______________________<br />
_______________________<br />
_______________________<br />
_______________________<br />
_______________________<br />
_______________________<br />
_______________________<br />
_______________________<br />
_______________________<br />
_______________________<br />
_______________________<br />
_______________________<br />
_______________________
Notes<br />
_______________________<br />
_______________________<br />
_______________________<br />
_______________________<br />
_______________________<br />
_______________________<br />
_______________________<br />
_______________________<br />
_______________________<br />
_______________________<br />
_______________________<br />
_______________________<br />
_______________________<br />
_______________________<br />
_______________________<br />
_______________________<br />
_______________________<br />
_______________________<br />
_______________________<br />
_______________________<br />
_______________________<br />
_______________________<br />
_______________________<br />
_______________________<br />
_______________________<br />
_______________________<br />
_______________________<br />
_______________________<br />
POSITIONING OF BOTTOM CYLINDER (#2)<br />
Position the #2 piston (bottom) at top dead center (TDC) on the compression<br />
stroke.<br />
1) Rotate the driven gear clockwise 180 o to align the “�” mark on the driven<br />
gear with the cylinder head mark “�”.<br />
a) Cylinder Head Mark<br />
b) Driven Gear Mark<br />
90-898311<br />
2-20
75/90/115 HP Valve Clearance<br />
Valve Clearance Measurement Steps:<br />
1) Turn flywheel clockwise until cylinder #1’s piston is at TDC.<br />
2) Measure and record the intake valve clearance for cylinders #1 and #2.<br />
3) Measure and record the exhaust valve clearance for cylinders #1 and #3.<br />
4) Turn the flywheel 360° �clockwise.<br />
5) Measure and record the intake valve clearance for cylinders #3 and #4.<br />
6) Measure and record the exhaust valve clearance for cylinders #2 and #4.<br />
Intake cylinderrs #1 and # 2 Intake cylinderrs #3 and # 4<br />
Exhaust cylinders #1 and # 3 Exhaust cylinders #2 and # 4<br />
90-898311<br />
2-22<br />
Intake Exhaust
Changing Pad Thickness<br />
1) Align timing marks on driven cams.<br />
2) Loosen timing belt tensioner and remove tensioner spring.<br />
NOTE: Do not mix valve train parts (valve pads, camshaft caps, camshafts),<br />
keep individual cylinder parts together.<br />
a) Timing Marks<br />
b) Timing Belt Tensioner (M10 x 45 mm<br />
c) Tensioner Spring<br />
1) Remove timing belt and driven sprockets.<br />
2) Remove camshaft caps and camshafts.<br />
IMPORTANT: Remove camshaft cap bolts in reverse sequence (ex. #20<br />
to #1) to prevent warpage.<br />
a) Driven Sprocket Bolt (2) M10 x<br />
35 mm<br />
b) Washer<br />
c) Driven Sprocket (2)<br />
d) Pin (2)<br />
e) Bolt (4) M7 x 48 mm<br />
f) Bolt (16) M7 x 37 mm<br />
g) Camshaft Cap - Top (2)<br />
h) Camshaft Cap (8)<br />
i) Oil Seal (2)<br />
j) Camshaft (2)<br />
2-23 90-898311
75/90/115 Valve Clearance Work Sheets<br />
NOTE: Photocopy this page for extra valve clearance measurement work<br />
sheets.<br />
Measurement<br />
1) Turn flywheel clockwise until cylinder #1’s piston is at TDC.<br />
2) Measure and record the intake valve clearance for cylinders #1 and #2.<br />
3) Measure and record the exhaust valve clearance for cylinders #1 and #3.<br />
4) Turn the flywheel 360°�clockwise.<br />
5) Measure and record the intake valve clearance for cylinders #3 and #4.<br />
6) Measure and record the exhaust valve clearance for cylinders #2 and #4.<br />
Adjustment<br />
1) If clearance is out of specification, remove and measure the pad.<br />
2) Add or subtract to that measurement a number to put the valve back into<br />
specification.<br />
3) Use that measurement to select a new pad.<br />
Remove Pad Thickness<br />
+<br />
Measured Valve Clearance<br />
-<br />
Specified Valve Clearance<br />
= New Pad Thickness<br />
Intake Cylinders #1 and #2 Intake Cylinders #3 and #4<br />
Exhaust Cylinders #1 and #3 Exhaust Cylinders #2 and #4<br />
CYL<br />
.<br />
#1<br />
#2<br />
#3<br />
#4<br />
Measurement Table<br />
INTAKE (Cold)<br />
0.007 – 0.009 in. (0.17 – 0.23 mm)<br />
Clearance Old<br />
Pad<br />
New<br />
Pad<br />
New<br />
Clearance<br />
2-25 90-898311<br />
EXHAUST (Cold)<br />
0.012 – 0.014 in. (0.31 – 0.37 mm)<br />
CYL.<br />
#1<br />
Clearance Old<br />
Pad<br />
#2<br />
#3<br />
#4<br />
New<br />
Pad<br />
New<br />
Clearance
Notes<br />
_______________________<br />
_______________________<br />
_______________________<br />
_______________________<br />
_______________________<br />
_______________________<br />
_______________________<br />
_______________________<br />
_______________________<br />
_______________________<br />
_______________________<br />
_______________________<br />
_______________________<br />
_______________________<br />
_______________________<br />
_______________________<br />
_______________________<br />
_______________________<br />
_______________________<br />
_______________________<br />
_______________________<br />
_______________________<br />
_______________________<br />
_______________________<br />
_______________________<br />
_______________________<br />
_______________________<br />
_______________________<br />
Timing Belt (Single Cam) Removal and<br />
Installation<br />
Align marks on driver and driven gear with marks on cylinder block as shown.<br />
a) Drive Gear Mark<br />
b) Driven Gear Mark<br />
c) Cylinder Block Marks<br />
Tip: Flywheel key slot can be used as a timing mark.<br />
a) Belt Tensioner Fastening Bolt<br />
b) Timing Belt<br />
90-898311<br />
2-26
Timing Belt (Dual Cam) Removal and<br />
Installation<br />
1) Align marks on driven gears as shown.<br />
2) Align mark on drive gear as shown.<br />
3) Follow sequence in note below and install timing belt onto drive gear. Slide<br />
timing belt onto driven sprockets.<br />
4) Install belt tensioner spring.<br />
5) Tighten belt tensioner bolt.<br />
NOTE: Install timing belt with parts name up.<br />
NOTE: Install timing belt over drive gear first (1), then around driven gear (2)<br />
making sure belt is tight from drive gear to driven gear. Continue to keep belt<br />
tight while installing belt around other driven gear (3). Make sure timing marks<br />
are lined up on drive gear and driven gears, then place belt around belt<br />
tensioner (4). Install spring and tighten bolt.<br />
a) Timing Mark on Driven Gears<br />
b) Timing Belt Tensioner Spring<br />
c) Timing Belt Tensioner Bolt<br />
d) Timing Mark on Drive Gear<br />
e) Parts Name Up On Timing Belt<br />
Belt Tensioner Bolt Torque<br />
29 lb-ft (40 Nm)<br />
2-27 90-898311<br />
Notes<br />
_______________________<br />
_______________________<br />
_______________________<br />
_______________________<br />
_______________________<br />
_______________________<br />
_______________________<br />
_______________________<br />
_______________________<br />
_______________________<br />
_______________________<br />
_______________________<br />
_______________________<br />
_______________________<br />
_______________________<br />
_______________________<br />
_______________________<br />
_______________________<br />
_______________________<br />
_______________________<br />
_______________________<br />
_______________________<br />
_______________________<br />
_______________________<br />
_______________________<br />
_______________________<br />
_______________________<br />
_______________________
Cylinder Head Removal 75/90 & 115<br />
IMPORTANT: Remove cylinder head bolts in reverse order of torque<br />
sequence (ex. #15 → #1) to prevent warpage<br />
a) Spark Plugs<br />
b) Bolt (10) M10 x145 mm<br />
c) Bolt (5) M8 x 55 mm<br />
d) Cylinder Head<br />
e) Head Gasket<br />
f) Dowel Pin<br />
2-29 90-898311
Notes<br />
_______________________<br />
_______________________<br />
_______________________<br />
_______________________<br />
_______________________<br />
_______________________<br />
_______________________<br />
_______________________<br />
_______________________<br />
_______________________<br />
_______________________<br />
_______________________<br />
_______________________<br />
_______________________<br />
_______________________<br />
_______________________<br />
_______________________<br />
_______________________<br />
_______________________<br />
_______________________<br />
_______________________<br />
_______________________<br />
_______________________<br />
_______________________<br />
_______________________<br />
_______________________<br />
_______________________<br />
_______________________<br />
Selecting New Connecting Rod Bearings 30-<br />
40HP.<br />
1) Locate the connecting rod bearing code letter that is scribed on the side of<br />
the connecting rod.<br />
2) Refer to the following reference chart to select the correct connecting rod<br />
bearings.<br />
3) Use the color coded connecting rod bearings that match the connecting<br />
rod bearing code letter.<br />
Connecting Rod Bearing Code<br />
Letter<br />
90-898311<br />
2-30<br />
Connecting Rod Bearing Code<br />
Color<br />
A Blue<br />
B Black<br />
C Brown<br />
a) Connecting Rod Bearing Code Letters<br />
b) Connecting Rod Bearing Identification Color Location<br />
Checking Connecting Rod Bearing Clearance<br />
IMPORTANT: Do not interchange used connecting rod bearings.<br />
Reinstall bearings in their original position.<br />
1) Clean all the oil from the connecting rod bearing surfaces and connecting<br />
rod journals on the crankshaft.<br />
NOTE: Refer to instructions in Cylinder Block Reassembly for selecting and<br />
installing connecting rod bearings.
2) Place a piece of Plastigauge on the connecting rod journals.<br />
a) Plastigauge<br />
IMPORTANT: Do not rotate connecting rod when checking clearance.<br />
3) Install the connecting rod to the respective journal. Tighten connecting rod<br />
bolts in sequence and in two steps to the specified torque.<br />
a) Connecting Rod Bolts<br />
4) Remove the connecting rod cap. Measure the compressed plastigauge to<br />
check the connecting rod oil clearance. Replace bearings if oil clearance is<br />
not in specification.<br />
2-31 90-898311<br />
Notes<br />
_______________________<br />
_______________________<br />
_______________________<br />
_______________________<br />
_______________________<br />
_______________________<br />
_______________________<br />
_______________________<br />
_______________________<br />
_______________________<br />
_______________________<br />
_______________________<br />
_______________________<br />
_______________________<br />
_______________________<br />
_______________________<br />
_______________________<br />
_______________________<br />
_______________________<br />
_______________________<br />
_______________________<br />
_______________________<br />
_______________________<br />
_______________________<br />
_______________________<br />
_______________________<br />
_______________________<br />
_______________________
Notes<br />
_______________________<br />
_______________________<br />
_______________________<br />
_______________________<br />
_______________________<br />
_______________________<br />
_______________________<br />
_______________________<br />
_______________________<br />
_______________________<br />
_______________________<br />
_______________________<br />
_______________________<br />
_______________________<br />
_______________________<br />
_______________________<br />
_______________________<br />
_______________________<br />
_______________________<br />
_______________________<br />
_______________________<br />
_______________________<br />
_______________________<br />
_______________________<br />
_______________________<br />
_______________________<br />
_______________________<br />
_______________________<br />
Cylinder Block Reassembly 30-40 HP<br />
Selecting New Main Bearings<br />
1) Locate the main bearing code letters on the cylinder block.<br />
2) Refer to the following reference chart to select the correct main bearings.<br />
3) Use the color coded main bearings that match the main bearing code<br />
letter.<br />
Main Bearing Code Letter Main Bearing Code Color<br />
A Blu<br />
90-898311<br />
B Black<br />
C Brown<br />
a) Main Bearing Code Letters (A, B, or C)<br />
b) Main Bearing Identification Color Location<br />
Tip: To obtain correct rotation of crankcase cover bolts (after initial<br />
torque has been set) put a paint mark on corner point of the bolt head<br />
and a second paint mark one corner point clockwise on crankcase cover<br />
as shown. Rotate bolt until paint marks align.<br />
a) Paint Mark On Bolt Head<br />
b) Paint Mark On Crankcase Cover<br />
2-32
Flywheel With Load Ring and Spacer<br />
Tip: DO NOT apply oil to flywheel hub or crankshaft taper. Flywheel hub<br />
damage may occur if oil is applied.<br />
a) Flywheel Key<br />
b) Washer<br />
c) Nut<br />
d) Apply Oil to Threads<br />
e) Spacer<br />
f) Load Ring<br />
NOTE: Load ring is for one time use and must be replaced if flywheel is<br />
removed.<br />
2-33 90-898311<br />
Notes<br />
_______________________<br />
_______________________<br />
_______________________<br />
_______________________<br />
_______________________<br />
_______________________<br />
_______________________<br />
_______________________<br />
_______________________<br />
_______________________<br />
_______________________<br />
_______________________<br />
_______________________<br />
_______________________<br />
_______________________<br />
_______________________<br />
_______________________<br />
_______________________<br />
_______________________<br />
_______________________<br />
_______________________<br />
_______________________<br />
_______________________<br />
_______________________<br />
_______________________<br />
_______________________<br />
_______________________<br />
_______________________
Drive Sprocket Installation<br />
1) Install drive sprocket nut.<br />
NOTE: Use 46 mm, 76 mm deep socket to hold drive sprocket nut and<br />
crankshaft holder tool (P/N 91-804776A1) to hold crankshaft.<br />
a) Key<br />
b) Pick-up Coil rotor<br />
c) Drive Sprocket<br />
d) Drive Sprocket Nut<br />
e) 46 mm, 76 mm Deep Socket (91-881847A1)<br />
f) Crankshaft Holder Tool (P/N 91-804770A1)<br />
NOTE: Refer to Service Bulletin 2001-6 for 115 flywheel retorque information<br />
90-898311<br />
2-34
Drive Shaft Bushing Removal (75/90/115 4-Stroke<br />
Models)<br />
1) Using a suitable punch, drive roll pin to inside of drive shaft housing.<br />
2) Remove drive shaft bushing with Driveshaft Bushing Installation Tool 91-<br />
875215.<br />
a) Roll Pin<br />
b) Driveshaft Bushing Installation Tool 91-875215<br />
c) Water Hose<br />
a) Crankshaft/Driveshaft Splines<br />
b) Oil Pump Drive Splines (75/90/115 4-Stroke Only)<br />
2-35 90-898311
Notes<br />
_______________________<br />
_______________________<br />
_______________________<br />
_______________________<br />
_______________________<br />
_______________________<br />
_______________________<br />
_______________________<br />
_______________________<br />
_______________________<br />
_______________________<br />
_______________________<br />
_______________________<br />
_______________________<br />
_______________________<br />
_______________________<br />
_______________________<br />
_______________________<br />
_______________________<br />
_______________________<br />
_______________________<br />
_______________________<br />
_______________________<br />
_______________________<br />
_______________________<br />
_______________________<br />
_______________________<br />
_______________________<br />
Oil Flow Description<br />
The engine lubrication system is of the forced–feed type in which oil is<br />
supplied under controlled pressure to the crankshaft, connecting rods,<br />
camshaft bearings, and rocker arms. All other moving parts are lubricated by<br />
gravity flow or splash.<br />
Oil for lubrication is stored in a cast in oil pan inside the drive shaft housing.<br />
Cooling water from the adaptor plate is directed at the oil pan to reduce the oil<br />
temperature and salt build up.<br />
A positive displacement Gerotor type oil pump is mounted below the cylinder<br />
head and is driven by the cam shaft. Oil from the bottom of the oil pan is<br />
drawn into the oil pump through an oil pickup screen, pipe assembly and<br />
passages inside the adaptor plate, cylinder block and cylinder head. Once the<br />
oil reaches the pump, the pump forces the oil through the lubrication system.<br />
After leaving the pump, the pressurized oil flows into the adaptor plate. A<br />
spring-loaded pressure relief valve below the adaptor plate limits the<br />
maximum pressure inside the system. Excess oil is directed through the relief<br />
valve back into the oil pan.<br />
After leaving the adaptor plate, the pressurized oil flows through a full-flow oil<br />
filter before entering the powerhead main oil galley. An oil pressure switch is<br />
located in this galley warns the operator of an oil pressure drop and (on some<br />
models) limit the engine rpm through interaction with the ignition system.<br />
Some of the oil inside the main oil galley is routed to the crankshaft main<br />
bearings. The remainder of the oil is routed to the cylinder head.<br />
The oil which reaches the crankshaft main bearings is forced through a hole in<br />
the cylinder side of each bearing and flows in-between the bearings and the<br />
crankshaft journals. Some of the oil is then routed to the connecting rod<br />
bearings through grooves in the main bearing and oil passages in the<br />
crankshaft. Oil which is forced out the ends of the connecting rod bearings<br />
and crankshaft main bearings is splashed onto the crankshaft, cylinder walls,<br />
pistons and piston pins, keeping them lubricated.<br />
Oil which reaches the distribution channel to the cylinder head is forced<br />
through the upper cam shaft bearing (to provide lubrication) and into the<br />
rocker arm shaft. The rocker arm shaft distributes the oil to each of the<br />
remaining cam shaft bearings and (through machined holes) to each rocker<br />
arm. Oil splash from the rocker arm lubricates the cam shaft lobes,<br />
intake/exhaust valves and fuel pump plunger. After lubrication the valve train,<br />
oil drains back to the oil pan through oil return holes in the cylinder block,<br />
head and adaptor plate.<br />
90-898311<br />
2-36
30/40 Oil System<br />
1) Sump - 3 qts.<br />
2) Pick-Up Tube<br />
3) Oil Pump - Cam Driven (gerotor)<br />
4) Pressure Relief - 55 PSI<br />
5) Adaptor Plate<br />
6) Oil Filter<br />
7) Low Pressure Switch 3-4 PSI<br />
8) Main Bearings<br />
9) Rod Bearings<br />
10) Cam Bearings<br />
11) Rocker Shaft<br />
12) Rocker Arm Feed Holes<br />
13) Cylinder Block<br />
14) Cylinder Head<br />
2-37 90-898311<br />
Notes<br />
_______________________<br />
_______________________<br />
_______________________<br />
_______________________<br />
_______________________<br />
_______________________<br />
_______________________<br />
_______________________<br />
_______________________<br />
_______________________<br />
_______________________<br />
_______________________<br />
_______________________<br />
_______________________<br />
_______________________<br />
_______________________<br />
_______________________<br />
_______________________<br />
_______________________<br />
_______________________<br />
_______________________<br />
_______________________<br />
_______________________<br />
_______________________<br />
_______________________<br />
_______________________<br />
_______________________<br />
_______________________
Section 3 - Electrical Systems<br />
90-898311 3-1
Table of Contents<br />
Table of Contents..............................................................................................2<br />
Table of Contents..............................................................................................3<br />
Battery Charging System ..............................................................................4<br />
10 Ampere Charging System Description (Higher Amperage Models<br />
Similar) ..........................................................................................................4<br />
Flywheel ........................................................................................................5<br />
Stator Charging Coils ....................................................................................5<br />
Trigger ...........................................................................................................6<br />
Crank Position Sensor (Single Unit Shown – Others Similar) .......................6<br />
Ignition Coil .......................................................................................................7<br />
Description ....................................................................................................7<br />
Operation.......................................................................................................7<br />
Capacitor Discharge Unit (CDI).....................................................................8<br />
8/9.9 4-Stroke Ignition – Small Displacement (2005 MY ) ..............................9<br />
8/9.9 4-Stroke Ignition – Small Displacement (2005 MY ) ............................10<br />
8/9.9 4-Stroke Ignition - Small Displacement (2005 MY) ...............................11<br />
Description ..................................................................................................11<br />
9.9/15 4–Stroke Ignition – Large Displacement Model ..................................12<br />
9.9/15 4-Stroke Ignition – Large Displacement...............................................13<br />
Ignition Description......................................................................................13<br />
25 (2 Cyl.) 4-Stroke Ignition ............................................................................14<br />
Description ..................................................................................................15<br />
30/40 (3 Cyl. Carb.) 4-Stroke Ignition System.................................................16<br />
Description ..................................................................................................17<br />
40/50/60 (4 Cyl. Carb.) 4-Stroke Ignition System............................................18<br />
Description ..................................................................................................19<br />
75/90 4-Stroke Ignition....................................................................................20<br />
Theory of Operation ....................................................................................20<br />
Ignition Component Description ..................................................................21<br />
Start Mode...................................................................................................21<br />
Warm-up Mode............................................................................................21<br />
Normal Operation ........................................................................................21<br />
Protection Controls......................................................................................22<br />
Throttle Position Sensor (TPS)....................................................................22<br />
Engine Temperature Sensor .......................................................................22<br />
Shift Interrupt Switch ...................................................................................23<br />
75/90 ECM Changes ...................................................................................23<br />
Low Oil Pressure Control ............................................................................24<br />
90-898311 3-3
Battery Charging System<br />
10 Ampere Charging System Description (Higher<br />
Amperage Models Similar)<br />
The battery charging system components are the stator lighting coils,<br />
rectifier/regulator and battery. Alternating current (generated in stator lighting<br />
coils) flows to the rectifier/regulator, which changes the alternating current to a<br />
regulated direct current for charging the battery.<br />
a) Stator<br />
b) 20 Ampere Fuse<br />
c) Rectifier/Regulator<br />
d) Battery<br />
e) Starter Solenoid<br />
f) Auto Starter<br />
90-898311 3-4
Flywheel<br />
The flywheel assembly contains one permanently charged magnet which is<br />
bonded and retained to the inner wall of the flywheel. The small bore 9.9<br />
magnet is segmented with 3 positive and 3 negative poles. (6 pole) (3 positive<br />
pulses per revolution). All other magnets are segmented with 6 positive and 6<br />
negative poles (12 pole) 6 positive pulses per revolution).<br />
Stator Charging Coils<br />
a) Ignition Charge Coil<br />
b) Lighting System Coils and Electrothermal Valve Coils<br />
The stator assembly located under the flywheel contains the Ignition Charge<br />
Coils, and lighting system Coils. All of these coils make up the stator<br />
assembly.<br />
As the flywheel permanent magnets pass the respective stator coil windings,<br />
an AC pulse current is produced at each coil winding when magnet polarity<br />
changes. (South to North), (North to South) etc.<br />
90-898311 3-5<br />
Notes<br />
_______________________<br />
_______________________<br />
_______________________<br />
_______________________<br />
_______________________<br />
_______________________<br />
_______________________<br />
_______________________<br />
_______________________<br />
_______________________<br />
_______________________<br />
_______________________<br />
_______________________<br />
_______________________<br />
_______________________<br />
_______________________<br />
_______________________<br />
_______________________<br />
_______________________<br />
_______________________<br />
_______________________<br />
_______________________<br />
_______________________<br />
_______________________<br />
_______________________<br />
_______________________<br />
_______________________<br />
_______________________
Notes<br />
_______________________<br />
_______________________<br />
_______________________<br />
_______________________<br />
_______________________<br />
_______________________<br />
_______________________<br />
_______________________<br />
_______________________<br />
_______________________<br />
_______________________<br />
_______________________<br />
_______________________<br />
_______________________<br />
_______________________<br />
_______________________<br />
_______________________<br />
_______________________<br />
_______________________<br />
_______________________<br />
_______________________<br />
_______________________<br />
_______________________<br />
_______________________<br />
_______________________<br />
_______________________<br />
_______________________<br />
_______________________<br />
Current is therefore induced in a back and forth, alternating flow in the<br />
conductor. This is called alternating current.<br />
a) 0 Volts<br />
b) Positive Voltage<br />
c) Voltage Induced by North Pole<br />
d) Negative Voltage<br />
e) Voltage Induced by South Pole<br />
Trigger<br />
a) Trigger Coil<br />
A single wound coil with magnet core mounted to one side of the stator<br />
mounting base. The trigger is positioned on the outside of the flywheel<br />
assembly and is charged when a raised boss on the flywheel passes the<br />
trigger/magnet winding. A pulse voltage is then sent to an (SCR) switch within<br />
the CDI unit. The trigger is mounted in a fixed timing position.<br />
Crank Position Sensor (Single Unit Shown – Others<br />
Similar)<br />
Contains a permanent magnet and is positioned along side of the flywheel<br />
teeth. The timed passing of the flywheel teeth through the sensor’s magnetic<br />
field enables the ECM to determine engine RPM and crankshaft angle.<br />
90-898311 3-6
Ignition Coil<br />
Description<br />
a) Ignition Coil and High Tension Lead Assembly<br />
The primary (+) side of the ignition coil receives voltage discharged from a<br />
capacitor in the ignition (CDI) unit. The voltage is multiplied by the coil until it<br />
can jump the spark plug gap. The ignition coil will produce a high voltage<br />
current each crankshaft revolution, producing a spark at each cylinder at the<br />
same time (Wasted Spark Ignition). Ignition coil maximum output is<br />
approximately 40,000 volts.<br />
Operation<br />
The ignition system uses both aspects of the magnetism-electricity<br />
relationship. A magnetic field is generated around the secondary coil of wire<br />
by passing electrical current through a primary coil. When the flow of<br />
electricity to the primary coil is interrupted, the collapsing lines of magnetic<br />
force passing over the secondary coil, induce a current which is directed to the<br />
spark plug where it then jumps the spark plug gap.<br />
a) To Spark Plug<br />
b) Primary Windings<br />
c) Secondary Windings<br />
90-898311 3-7<br />
Notes<br />
_______________________<br />
_______________________<br />
_______________________<br />
_______________________<br />
_______________________<br />
_______________________<br />
_______________________<br />
_______________________<br />
_______________________<br />
_______________________<br />
_______________________<br />
_______________________<br />
_______________________<br />
_______________________<br />
_______________________<br />
_______________________<br />
_______________________<br />
_______________________<br />
_______________________<br />
_______________________<br />
_______________________<br />
_______________________<br />
_______________________<br />
_______________________<br />
_______________________<br />
_______________________<br />
_______________________<br />
_______________________
Notes<br />
_______________________<br />
_______________________<br />
_______________________<br />
_______________________<br />
_______________________<br />
_______________________<br />
_______________________<br />
_______________________<br />
_______________________<br />
_______________________<br />
_______________________<br />
_______________________<br />
_______________________<br />
_______________________<br />
_______________________<br />
_______________________<br />
_______________________<br />
_______________________<br />
_______________________<br />
_______________________<br />
_______________________<br />
_______________________<br />
_______________________<br />
_______________________<br />
_______________________<br />
_______________________<br />
_______________________<br />
_______________________<br />
Many more turns of wire are used in the secondary coil winding connected to<br />
the spark plug, than the primary winding. Passing the magnetic force over the<br />
windings of the secondary coil, induces a very high voltage in the secondary<br />
coil, which is then sufficient to jump the spark plug gap. Switching the flow of<br />
current through the primary coil is accomplished with mechanical points, or<br />
solid state switches. A condenser is also used in the circuit to absorb high<br />
voltage surges or pulses in the ignition primary circuit.<br />
Capacitor Discharge Unit (CDI)<br />
a) CDI Unit<br />
The CDI unit contains the necessary circuitry to control the ignition system.<br />
The CDI contains a capacitor to store the stator voltage, internal SCR(s)<br />
release this voltage as a result of the trigger signal. These circuits can modify<br />
the trigger signal to advance and retard the ignition timing. Additional circuits<br />
can limit the engine RPM under certain operating conditions.<br />
NOTE: The CDI unit controls all timing operations. There is no timing<br />
adjustment required on this outboard engine.<br />
90-898311 3-8
8/9.9 4-Stroke Ignition – Small<br />
Displacement (2005 MY )<br />
a - Alternator coil<br />
b - Ignition charge coil<br />
c - Crank position sensor<br />
d - Lanyard stop switch<br />
e - Tiller handle stop switch<br />
f - Starter<br />
g - Solenoid<br />
h - Fuse<br />
i - Battery<br />
90-898311 3-10<br />
j - Switch, neutral<br />
k - Start button<br />
l - Warning lamp, low oil pressure<br />
m -Oil pressure switch<br />
n - Ignition coil<br />
o - ECU<br />
p - Regulator, rectifier<br />
q - Harness
8/9.9 4-Stroke Ignition - Small Displacement<br />
(2005 MY)<br />
Description<br />
The ignition system uses CDI (Capacitor Discharge Ignition). This system<br />
provides quick voltage buildup and strong spark required for high power and<br />
high performance engines.<br />
As the flywheel rotates, electrical power (alternating current) is produced by<br />
the ignition charging coil. This power is rectified by diodes so that direct<br />
current voltage is utilized by the ignition system. When the ignition driver is off,<br />
the direct current (DC) voltage is stored by the capacitor. Once capacitor<br />
voltage is charged to its potential, a gate signal is applied on the SCR and the<br />
residual current is dissipated through the capacitor charging coils.<br />
The Electronic Control Module (ECM) activates the ignition driver in the ECM<br />
which allows the capacitor to discharge, causing the spark to occur. Ignition<br />
timing is regulated by the ECM which receives status input from a variety of<br />
sensors. These sensors include the crank position sensor and oil pressure<br />
sender.<br />
The voltage discharged to the primary winding of the ignition coil causes a<br />
surge of high voltage to be induced in the secondary winding of the ignition<br />
coil. This induced voltage of sufficient amplitude causes the spark plugs to<br />
fire.<br />
90-898311 3-11<br />
Notes<br />
_______________________<br />
_______________________<br />
_______________________<br />
_______________________<br />
_______________________<br />
_______________________<br />
_______________________<br />
_______________________<br />
_______________________<br />
_______________________<br />
_______________________<br />
_______________________<br />
_______________________<br />
_______________________<br />
_______________________<br />
_______________________<br />
_______________________<br />
_______________________<br />
_______________________<br />
_______________________<br />
_______________________<br />
_______________________<br />
_______________________<br />
_______________________<br />
_______________________<br />
_______________________<br />
_______________________<br />
_______________________
9.9/15 4–Stroke Ignition – Large<br />
Displacement Model<br />
a) Crank Position Sensor<br />
b) Ignition Charge Coil<br />
c) Oil Pressure Switch<br />
d) Ignition Coil<br />
e) Battery Charging Coils<br />
f) Rectifier/ Regulator<br />
g) Push Button Stop Switch<br />
h) Lanyard Stop Switch<br />
i) Oil Lamp<br />
j) ECM<br />
90-898311 3-12
9.9/15 4-Stroke Ignition – Large<br />
Displacement<br />
Ignition Description<br />
The ignition system uses CDI (Capacitor Discharge Ignition). This system<br />
provides quick voltage buildup and strong spark required for high power and<br />
high performance engines.<br />
The CDI ignition system does not incorporate mechanically operated points,<br />
therefore making this CDI unit virtually maintenance free.<br />
As the flywheel rotates, electrical power (alternating current) is produced by<br />
the capacitor charging coil. This power is rectified by diodes so that direct<br />
current voltage is utilized by the ignition system. When the ignition driver is off,<br />
the D.C. voltage is stored by the capacitor. Once capacitor voltage is charged<br />
to its potential, a gate signal is applied on the SCR and the residual current is<br />
dissipated through the capacitor charging coils.<br />
The electronic control module (ECM) activates the ignition driver in the ECM<br />
which allows the capacitor to discharge, causing the spark to occur. Ignition<br />
timing is regulated by the ECM which receives status input from a variety of<br />
sensors. These sensors include the crank position sensor, engine temperature<br />
and oil pressure sender.<br />
The voltage discharged to the primary winding of the ignition coil causes a<br />
surge of high voltage to be induced in the secondary winding of the ignition<br />
coil. This induced voltage of sufficient amplitude causes the spark plugs to<br />
fire.<br />
90-898311 3-13<br />
Notes<br />
_______________________<br />
_______________________<br />
_______________________<br />
_______________________<br />
_______________________<br />
_______________________<br />
_______________________<br />
_______________________<br />
_______________________<br />
_______________________<br />
_______________________<br />
_______________________<br />
_______________________<br />
_______________________<br />
_______________________<br />
_______________________<br />
_______________________<br />
_______________________<br />
_______________________<br />
_______________________<br />
_______________________<br />
_______________________<br />
_______________________<br />
_______________________<br />
_______________________<br />
_______________________<br />
_______________________<br />
_______________________
25 (2 Cyl.) 4-Stroke Ignition<br />
90-898311 3-14
Description<br />
The Ignition System uses CDI (Capacitor Discharge Ignition). This system<br />
provides quick voltage buildup and strong spark required for high power and<br />
high performance engines. The CDI ignition system does not incorporate<br />
mechanically operated points, therefore making this CDI unit virtually<br />
maintenance free.<br />
As the flywheel rotates, electrical power (alternating current) is produced by<br />
the capacitor charging coil. This power is rectified by diodes so that direct<br />
current voltage is utilized by the ignition system. When the ignition driver is off,<br />
the D.C. voltage is stored by the capacitor.<br />
The electronic control module (ECM) activates the ignition driver in the ECM<br />
which allows the capacitor to discharge, causing the spark to occur. Ignition<br />
timing is regulated by the ECM which receives status input from a variety of<br />
sensors. These sensors include the crank position sensor, engine temperature<br />
and oil pressure sender.<br />
The voltage discharged to the primary winding of the ignition coil causes a<br />
surge of high voltage to be induced in the secondary winding of the ignition<br />
coil. This induced voltage of sufficient amplitude causes the spark plugs to<br />
fire.<br />
90-898311 3-15<br />
Notes<br />
_______________________<br />
_______________________<br />
_______________________<br />
_______________________<br />
_______________________<br />
_______________________<br />
_______________________<br />
_______________________<br />
_______________________<br />
_______________________<br />
_______________________<br />
_______________________<br />
_______________________<br />
_______________________<br />
_______________________<br />
_______________________<br />
_______________________<br />
_______________________<br />
_______________________<br />
_______________________<br />
_______________________<br />
_______________________<br />
_______________________<br />
_______________________<br />
_______________________<br />
_______________________<br />
_______________________<br />
_______________________
30/40 (3 Cyl. Carb.) 4-Stroke Ignition System<br />
a) ECM<br />
b) DDT<br />
c) Crank Position Sensor<br />
d) Temperature Sensor<br />
e) Oil Switch<br />
f) Warning Horn<br />
g) Lanyard Stop Switch<br />
h) Push Button Stop Switch<br />
i) Auto Enrichener<br />
90-898311 3-16<br />
j) Stator<br />
k) Ignition Coil #1<br />
l) Ignition Coil #2<br />
m) Ignition Coil #3<br />
n) Diode Harness (Early<br />
Production) Ground<br />
o) Connects to Upper Fuel Pump<br />
Bolt
Description<br />
The ignition system uses CDI (Capacitor Discharge Ignition). This system<br />
provides quick voltage buildup and strong spark required for high power and<br />
high performance engines.<br />
The CDI ignition system does not incorporate mechanically operated points,<br />
therefore making this CDI unit virtually maintenance free.<br />
As the flywheel rotates, electrical power (alternating current) is produced by<br />
the capacitor charging coil. This power is rectified by diodes so that direct<br />
current voltage is utilized by the ignition system. When the ignition driver is off,<br />
the D.C. voltage is stored by the capacitor. Once capacitor voltage is charged<br />
to its potential, a gate signal is applied on the SCR and the residual current is<br />
dissipated through the capacitor charging coils.<br />
The electronic control module (ECM) activates the ignition driver in the ECM<br />
which allows the capacitor to discharge, causing the spark to occur. Ignition<br />
timing is regulated by the ECM which receives status input from a variety of<br />
sensors. These sensors include the crank position sensor, engine temperature<br />
and oil pressure sender.<br />
The voltage discharged to the primary winding of the ignition coil causes a<br />
surge of high voltage to be induced in the secondary winding of the ignition<br />
coil. This induced voltage of sufficient amplitude causes the spark plugs to<br />
fire.<br />
Tip: Spark Gap Tester 91-850439 used with Spark Tester Extension Kit<br />
91-877870A1 will allow resister type plug boots to be installed on spark<br />
tester.<br />
90-898311 3-17<br />
Notes<br />
_______________________<br />
_______________________<br />
_______________________<br />
_______________________<br />
_______________________<br />
_______________________<br />
_______________________<br />
_______________________<br />
_______________________<br />
_______________________<br />
_______________________<br />
_______________________<br />
_______________________<br />
_______________________<br />
_______________________<br />
_______________________<br />
_______________________<br />
_______________________<br />
_______________________<br />
_______________________<br />
_______________________<br />
_______________________<br />
_______________________<br />
_______________________<br />
_______________________<br />
_______________________<br />
_______________________<br />
_______________________
40/50/60 (4 Cyl. Carb.) 4-Stroke Ignition<br />
System<br />
a - ECM<br />
b - DDT<br />
c - Crank Position Sensor<br />
d - Temperature Sensor<br />
e - Oil Switch<br />
f - Auto Enrichener<br />
g - Stator<br />
h - Voltage Regulator<br />
i - Starter<br />
j - Start Solenoid<br />
k - 12V Battery<br />
90-898311 3-18<br />
l - To Trim Pump<br />
m - Trim Up Relay<br />
n - Trim Down Relay<br />
o - Cowl Mounted Trim Switch<br />
p - Fuse-20A Acc. and Trim<br />
q - To Remote Trim Switch<br />
r - To Remote Control<br />
s - To Over-Heat Lamp<br />
t - To Oil Pressure Lamp<br />
u - Ignition Coil #1 & 4<br />
v - Ignition Coil #2 & 3
Description<br />
The ignition system uses CDI (Capacitor Discharge Ignition). This system<br />
provides quick voltage buildup and strong spark required for high power and<br />
high performance engines. The CDI ignition system does not incorporate<br />
mechanically operated points, therefore making this CDI unit virtually<br />
maintenance free.<br />
As the flywheel rotates, electrical power (alternating current) is produced by<br />
the capacitor charging coil. This power is rectified by diodes so that direct<br />
current voltage is utilized by the ignition system. When the ignition driver is off,<br />
the D.C. voltage is stored by the capacitor. Once capacitor voltage is charged<br />
to its potential, a gate signal is applied on the SCR and the residual current is<br />
dissipated through the capacitor charging coils.<br />
The electronic control module (ECM) activates the ignition driver in the ECM<br />
which allows the capacitor to discharge, causing the spark to occur. Ignition<br />
timing is regulated by the ECM which receives status input from a variety of<br />
sensors. These sensors include the crank position sensor, engine temperature<br />
and oil pressure sender.<br />
The voltage discharged to the primary winding of the ignition coil causes a<br />
surge of high voltage to be induced in the secondary winding of the ignition<br />
coil. This induced voltage of sufficient amplitude causes the spark plugs to<br />
fire.<br />
90-898311 3-19<br />
Notes<br />
_______________________<br />
_______________________<br />
_______________________<br />
_______________________<br />
_______________________<br />
_______________________<br />
_______________________<br />
_______________________<br />
_______________________<br />
_______________________<br />
_______________________<br />
_______________________<br />
_______________________<br />
_______________________<br />
_______________________<br />
_______________________<br />
_______________________<br />
_______________________<br />
_______________________<br />
_______________________<br />
_______________________<br />
_______________________<br />
_______________________<br />
_______________________<br />
_______________________<br />
_______________________<br />
_______________________<br />
_______________________
Notes<br />
_______________________<br />
_______________________<br />
_______________________<br />
_______________________<br />
_______________________<br />
_______________________<br />
_______________________<br />
_______________________<br />
_______________________<br />
_______________________<br />
_______________________<br />
_______________________<br />
_______________________<br />
_______________________<br />
_______________________<br />
_______________________<br />
_______________________<br />
_______________________<br />
_______________________<br />
_______________________<br />
_______________________<br />
_______________________<br />
_______________________<br />
_______________________<br />
_______________________<br />
_______________________<br />
_______________________<br />
_______________________<br />
75/90 4-Stroke Ignition<br />
Theory of Operation<br />
The ignition system uses a microcomputer-controlled CDI (Capacitor<br />
Discharge Ignition) system. This system provides quick voltage buildup and<br />
strong spark required for high power and high performance engines. The CDI<br />
ignition system does not incorporate mechanically operated points, therefore<br />
making this CDI unit virtually maintenance free.<br />
As the flywheel rotates, electrical power (alternating current) is produced by<br />
the stator coils (lighting coil). This power is rectified by diodes so that direct<br />
current voltage is utilized by the ignition system. When the ignition driver is off,<br />
the D.C. voltage is stored by the capacitor. Once capacitor voltage is charged<br />
to its potential, a gate signal is applied on the SCR and the residual current is<br />
dissipated through the capacitor charging coils.<br />
Ignition timing is regulated by the CDI which receives status input from three<br />
different signals. These signals include the crankshaft position, engine<br />
revolution and throttle position.<br />
The voltage discharged to the primary winding of the ignition coil causes a<br />
surge of high voltage to be induced in the secondary winding of the ignition<br />
coil. This induced voltage of sufficient amplitude causes the spark plugs to<br />
fire.<br />
a) Ignition Coils<br />
b) Engine Temperature Sensor<br />
c) Throttle Position Sensor (TPS)<br />
d) CDI Unit<br />
e) Pick-Up Coil<br />
f) Stator Coil<br />
g) Pick-Up Coil<br />
h) Oil Pressure Switch<br />
90-898311 3-20
Ignition Component Description<br />
CAPACITOR DISCHARGE IGNITION (CDI)<br />
Under normal operating conditions the microcomputer-controlled CDI system<br />
has three basic modes of operation: start, warm-up, and normal operation.<br />
Start Mode<br />
Ignition timing is fixed at 10° �BTDC. The start mode cuts off when the engine<br />
is started and the engine speed is over 600 rpm.<br />
Warm-up Mode<br />
During this mode ignition timing is fixed at 10° BTDC and the engine speed is<br />
approximately 1100 rpm. There are four main situation (based on atmospheric<br />
temperatures) that this mode operates in.<br />
1) Below 32°F (0°C), this mode lasts approximately 300 seconds.<br />
2) From 32°F (0°C) - 68°F (20°C), this mode lasts approximately 180<br />
seconds.<br />
3) From 68°F (20°C) - 104°F (40°C), this mode lasts approximately 120<br />
seconds.<br />
4) Over 104°F (40°C), this mode does not operate.<br />
The warm-up mode will cut off if the engine speed exceeds 4000 rpm.<br />
Normal Operation<br />
This mode operates between 5° ATDC and 25° �BTDC. The ignition timing is<br />
automatically adjusted by the microcomputer. The microcomputer receives<br />
three signals (i.e, crankshaft position, engine revolution, and throttle position)<br />
every 5ms (microseconds) and then adjusts the ignition timing accordingly.<br />
Two pickup coils send signals to the microcomputer which then determines<br />
the crankshaft position and engine revolution.<br />
The throttle position sensor (TPS) also sends signals to the microcomputer<br />
which then determines the throttle position. The microcomputer uses these<br />
three signals to determine the proper ignition timing.<br />
90-898311 3-21<br />
Notes<br />
_______________________<br />
_______________________<br />
_______________________<br />
_______________________<br />
_______________________<br />
_______________________<br />
_______________________<br />
_______________________<br />
_______________________<br />
_______________________<br />
_______________________<br />
_______________________<br />
_______________________<br />
_______________________<br />
_______________________<br />
_______________________<br />
_______________________<br />
_______________________<br />
_______________________<br />
_______________________<br />
_______________________<br />
_______________________<br />
_______________________<br />
_______________________<br />
_______________________<br />
_______________________<br />
_______________________<br />
_______________________
Notes<br />
_______________________<br />
_______________________<br />
_______________________<br />
_______________________<br />
_______________________<br />
_______________________<br />
_______________________<br />
_______________________<br />
_______________________<br />
_______________________<br />
_______________________<br />
_______________________<br />
_______________________<br />
_______________________<br />
_______________________<br />
_______________________<br />
_______________________<br />
_______________________<br />
_______________________<br />
_______________________<br />
_______________________<br />
_______________________<br />
_______________________<br />
_______________________<br />
_______________________<br />
_______________________<br />
_______________________<br />
_______________________<br />
Protection Controls<br />
This ignition system incorporates three protection controls that are described<br />
below.<br />
Over revolution control - Over 6200 rpm, the ignition to either cylinder #1 or<br />
#4 is cut. At 6250 rpm, the ignition to both cylinders #1 and #4 is cut. Over<br />
6300 rpm, the ignition to both cylinders #1 and #4, and either #2 or #3 is cut.<br />
Over 6350 rpm, the ignition to cylinders #1, 2, 3, and 4 is cut.<br />
Overheat control -From 0 - 2000 rpm (after starting the engine), this mode<br />
will not operate for 75 seconds.<br />
From 2000 rpm, it will not operated for 24 seconds.<br />
When the cooling water temperature is 140°F (60°C) or above, this mode<br />
starts. The buzzer will sound. Ignition to cylinders #1 and #4 will cut off and<br />
the engine speed will gradually lower to approximately 3000 rpm.<br />
This mode will stop when the cooling water temperature is 118°F (48°C) and<br />
the throttle is fully closed. The buzzer will then stop.<br />
Low oil pressure control - Two seconds after staring the engine, this mode<br />
does not operate. If the cooling water temperature is 104°F (40°C) or above,<br />
and the throttle is quickly closed so the engine speed drops below 1700 rpm,<br />
this mode will not operate for 540 seconds (9 min.).<br />
When the oil pressure switch turns on [oil pressure is 2.2 psi (15 kPa) or<br />
below], this mode starts. The buzzer will sound. Ignition to cylinders #1 and #4<br />
will cut off and the engine speed will gradually lower to approximately 3000<br />
rpm.<br />
This mode will stop when the oil pressure is 2.2 psi (15 kPa) or above, and the<br />
throttle is fully closed. The buzzer will then stop.<br />
Throttle Position Sensor (TPS)<br />
If the TPS is faulty, the ignition timing will automatically be fixed at 10°�BTDC.<br />
Engine Temperature Sensor<br />
If the engine temperature sensor is faulty, the ignition timing will automatically<br />
be fixed at 10° �BTDC.<br />
Tip: The Water Pressure Gauge Adapter Fitting for 75-115 4-Stroke is P/N<br />
22-86306A01<br />
90-898311 3-22
Shift Interrupt Switch<br />
NOTE: <strong>Outboard</strong>s built after serial number 0T145221 utilize a shift interrupt as<br />
a standard feature.<br />
As the remote control handle is shifted from forward gear to neutral (idle<br />
position) the switch will momentarily cut spark to cylinders number 1 and 4.<br />
This decreases the shift load and allows for easier shifting.<br />
NOTE: If switch activation occurs in the neutral position, the engine will run<br />
rough. Reposition switch to the alternate (forward) set of mounting holes on<br />
the bracket.<br />
a) Shift Interrupt Switch<br />
b) Bracket<br />
c) Alternate Mounting Holes<br />
75/90 ECM Changes<br />
IMPORTANT: The Temperature sensor remains the same for 2001 model<br />
year, but the location is changed from the lower exhaust cover to the<br />
upper portion of the cover. The switch is in a hotter position for 2001<br />
model year. The CDI module (ECM) is changed to accommodate the<br />
higher temperature.<br />
When the engine speed is less than 2000 rpm, this control mode is delayed 75<br />
seconds after the engine is started. When the engine speed is 2000 rpm or<br />
more, this control mode is delayed 24 seconds after the engine is started.<br />
When the cooling water reaches warning activation temperature, the overheat<br />
alarm (constant tone) will activate. Ignition to cylinders #1 and #4 will cut off<br />
and the engine speed will gradually reduce to approximately 3000 rpm. Once<br />
the cooling water decreases to reset temperature, the alarm can be<br />
deactivated by bringing the remote control handle to neutral position and<br />
turning the ignition key to the off position (then back to the start position).<br />
2000 Model Year S/N 0T178499 and<br />
Below<br />
90-898311 3-23<br />
Note: Refer to Service<br />
Bulletin 2000-03<br />
2001 Model Year S/N 0T178500 and<br />
Above<br />
ECM – P/N 804269 ECM – P/N 804269T1<br />
Warning Activation Temp.<br />
Warning Activation Temp.<br />
140 F° (60 C°)<br />
194 F° (90 C°)<br />
Reset Temp.118 F° (48 C°) Reset Temp.167 F° (75 C°)<br />
Notes<br />
_______________________<br />
_______________________<br />
_______________________<br />
_______________________<br />
_______________________<br />
_______________________<br />
_______________________<br />
_______________________<br />
_______________________<br />
_______________________<br />
_______________________<br />
_______________________<br />
_______________________<br />
_______________________<br />
_______________________<br />
_______________________<br />
_______________________<br />
_______________________<br />
_______________________<br />
_______________________<br />
_______________________<br />
_______________________<br />
_______________________<br />
_______________________<br />
_______________________<br />
_______________________<br />
_______________________<br />
_______________________
Notes<br />
_______________________<br />
_______________________<br />
_______________________<br />
_______________________<br />
_______________________<br />
_______________________<br />
_______________________<br />
_______________________<br />
_______________________<br />
_______________________<br />
_______________________<br />
_______________________<br />
_______________________<br />
_______________________<br />
_______________________<br />
_______________________<br />
_______________________<br />
_______________________<br />
_______________________<br />
_______________________<br />
_______________________<br />
_______________________<br />
_______________________<br />
_______________________<br />
_______________________<br />
_______________________<br />
_______________________<br />
_______________________<br />
Low Oil Pressure Control<br />
Two seconds after staring the engine, this mode does not operate. If the<br />
cooling water temperature is 104°F (40°C) or above, and the throttle is quickly<br />
closed so the engine speed drops below 1700 rpm, this mode will not operate<br />
for 9 minutes.<br />
When the oil pressure switch turns on (due to low oil pressure), this mode<br />
starts. The alarm (constant tone) will sound. Ignition to cylinders #1 and #4 will<br />
cut off and the engine speed will gradually reduce to approximately 3000 rpm.<br />
Once the oil pressure increases to an acceptable level (specified in table<br />
below), the alarm can be deactivated by bringing the remote control handle to<br />
neutral position and turning the ignition key to the off position (then back to the<br />
start position).<br />
2000 Model Year S/N 0T178499 and<br />
Below<br />
90-898311 3-24<br />
2001 Model Year S/N 0T178500 and<br />
Above<br />
P/N 87-804307 P/N 804307--1<br />
Stamped P-.15 Stamped P-1.5<br />
Warning Activates @ 2.2 psi<br />
(15 kPa) and below<br />
Warning Activates @ 21.78 psi<br />
(150 kPa) and below
Section 4 - Fuel Systems<br />
4-1 90-898311
Table of Contents<br />
Table of Contents .............................................................................................1<br />
Table of Contents .............................................................................................2<br />
Typical Fuel System .........................................................................................4<br />
Fuel Pump ........................................................................................................5<br />
General Information ......................................................................................5<br />
4-Stroke Fuel Pump Styles ...........................................................................5<br />
Fuel Starvation..................................................................................................8<br />
Models Affected ............................................................................................8<br />
Inspection/Test..............................................................................................8<br />
Test Procedure..............................................................................................9<br />
Correction:...................................................................................................11<br />
Carburetor for 4-Stroke 4, 5 & 6 .....................................................................12<br />
Idle Circuit ...................................................................................................12<br />
Off-Idle Circuit .............................................................................................13<br />
High Speed Circuit ......................................................................................14<br />
Choke Circuit...............................................................................................15<br />
8/9.9 2005 MY 4-Stroke Carburetor..............................................................16<br />
Idle Circuit ...................................................................................................16<br />
Off-Idle Circuit .............................................................................................17<br />
High Speed Circuit ......................................................................................18<br />
Acceleration Circuit .....................................................................................19<br />
Cold Start Priming Circuit (Tiller Handle Models)........................................20<br />
Choke Circuit...............................................................................................21<br />
9.9/15 4-Stroke Carburetor.............................................................................22<br />
Idle Circuit ...................................................................................................22<br />
Off-Idle Circuit .............................................................................................23<br />
High Speed Circuit ......................................................................................24<br />
Acceleration Circuit (15 HP Only) ...............................................................25<br />
Choke Circuit...............................................................................................26<br />
25, 30/40 (99 and Prior) & 75/90 4-Stroke Carburetor Circuits.......................27<br />
Idle Circuit ...................................................................................................27<br />
Off-Idle Circuit .............................................................................................28<br />
Mid-Range Circuit .......................................................................................29<br />
High Speed Circuit ......................................................................................30<br />
Cold Start Circuit.........................................................................................31<br />
Acceleration Circuit .....................................................................................31<br />
75/90 4-Stroke Carb. Model............................................................................32<br />
PrimeStart System ......................................................................................32<br />
Acceleration ................................................................................................33<br />
2001 MY - 40/50/60 4-Stroke Carburetor Circuits ..........................................34<br />
Idle Circuit ...................................................................................................34<br />
Off-Idle Circuit .............................................................................................35<br />
Mid-Range Circuit .......................................................................................36<br />
High Speed Circuit ......................................................................................37<br />
Cold Start Circuit.........................................................................................38<br />
Acceleration Circuit .....................................................................................39<br />
Balance And PrimeStart System ....................................................................40<br />
Balance System ..........................................................................................41<br />
Prime Start System .....................................................................................41<br />
Carburetor Cleaning .......................................................................................42<br />
Electrothermal Valve Operation......................................................................43<br />
Stator Assembly..........................................................................................43<br />
90-898311 4-2
Testing electro thermo valve .......................................................................43<br />
DDT Overview.................................................................................................44<br />
DDT Screen Detail ..........................................................................................46<br />
Version 5.0 Cartridge ..................................................................................46<br />
LED Indicators ................................................................................................47<br />
DDT Test Port Location ..................................................................................47<br />
CDS - Computer Diagnostic System...............................................................48<br />
Dell Latitude ................................................................................................48<br />
Panasonic Toughbook.................................................................................48<br />
SmartComms Module..................................................................................49<br />
Pin Probe Kit & Loaded Volts Lead .............................................................49<br />
Break-Out Box.............................................................................................50<br />
Carrying Cases............................................................................................50<br />
4-3 90-898311
Notes<br />
_______________________<br />
_______________________<br />
_______________________<br />
_______________________<br />
_______________________<br />
_______________________<br />
_______________________<br />
_______________________<br />
_______________________<br />
_______________________<br />
_______________________<br />
_______________________<br />
_______________________<br />
_______________________<br />
_______________________<br />
_______________________<br />
_______________________<br />
_______________________<br />
_______________________<br />
_______________________<br />
_______________________<br />
_______________________<br />
_______________________<br />
_______________________<br />
_______________________<br />
_______________________<br />
_______________________<br />
_______________________<br />
Typical Fuel System<br />
The fuel system consists of:<br />
1). Fuel tank<br />
2). Fuel hose<br />
3). Fuel Pump<br />
4). Carburetor(s)<br />
90-898311 4-4
Fuel Pump<br />
General Information<br />
FUEL PUMP DESCRIPTION/OPERATION<br />
The fuel pump is a diaphragm pump which is mechanically driven off of the<br />
rocker arm.<br />
The black mounting block (insulator) and the two outlets on the fuel pump help<br />
prevent vapor lock.<br />
If the engine runs out of fuel, or has a restriction preventing adequate fuel<br />
flow, the pump will make a “clicking” noise.<br />
4-Stroke Fuel Pump Styles<br />
4/5/6<br />
9.9/15<br />
4-5 90-898311<br />
Notes<br />
_______________________<br />
_______________________<br />
_______________________<br />
_______________________<br />
_______________________<br />
_______________________<br />
_______________________<br />
_______________________<br />
_______________________<br />
_______________________<br />
_______________________<br />
_______________________<br />
_______________________<br />
_______________________<br />
_______________________<br />
_______________________<br />
_______________________<br />
_______________________<br />
_______________________<br />
_______________________<br />
_______________________<br />
_______________________<br />
_______________________<br />
_______________________<br />
_______________________<br />
_______________________<br />
_______________________<br />
_______________________
Notes<br />
_______________________<br />
_______________________<br />
_______________________<br />
_______________________<br />
_______________________<br />
_______________________<br />
_______________________<br />
_______________________<br />
_______________________<br />
_______________________<br />
_______________________<br />
_______________________<br />
_______________________<br />
_______________________<br />
_______________________<br />
_______________________<br />
_______________________<br />
_______________________<br />
_______________________<br />
_______________________<br />
_______________________<br />
_______________________<br />
_______________________<br />
_______________________<br />
_______________________<br />
_______________________<br />
_______________________<br />
_______________________<br />
SMALL BORE 9.9 2005 MODEL YEAR<br />
BIG BORE 9.9 / 15<br />
25 THRU 60 CARBURETED<br />
Tip: 25/30 HP 4-Stroke 2001 MY & Prior – Vapor Lock Kit P/N is<br />
883729A1. The kit contains water cooled fuel pump, 2002 carburetor with<br />
external float bowl vent, fuel lines, and fuel line insulator.<br />
90-898311 4-6
30 THRU 60 EFI AND 25 THRU 60 CARBURETED (WATER<br />
COOLED)<br />
75 / 90<br />
115 EFI<br />
4-7 90-898311<br />
Notes<br />
_______________________<br />
_______________________<br />
_______________________<br />
_______________________<br />
_______________________<br />
_______________________<br />
_______________________<br />
_______________________<br />
_______________________<br />
_______________________<br />
_______________________<br />
_______________________<br />
_______________________<br />
_______________________<br />
_______________________<br />
_______________________<br />
_______________________<br />
_______________________<br />
_______________________<br />
_______________________<br />
_______________________<br />
_______________________<br />
_______________________<br />
_______________________<br />
_______________________<br />
_______________________<br />
_______________________<br />
_______________________
Notes<br />
_______________________<br />
_______________________<br />
_______________________<br />
_______________________<br />
_______________________<br />
_______________________<br />
_______________________<br />
_______________________<br />
_______________________<br />
_______________________<br />
_______________________<br />
_______________________<br />
_______________________<br />
_______________________<br />
_______________________<br />
_______________________<br />
_______________________<br />
_______________________<br />
_______________________<br />
_______________________<br />
_______________________<br />
_______________________<br />
_______________________<br />
_______________________<br />
_______________________<br />
_______________________<br />
_______________________<br />
_______________________<br />
Fuel Starvation<br />
See Service Bulletin 2001-17<br />
Models Affected<br />
MERCURY/MARINER<br />
1987 and Later, 30 Thru 250 HP, (with square fuel pump)<br />
FORCE<br />
1994-1/2 and later 40 Thru 120 HP, 1997 and later 175 Sport Jet<br />
It is important that fuel supply restrictions/vacuum levels do not exceed<br />
specification. High restrictions may result in the engine stalling at low speed,<br />
and /or a lean fuel condition at high RPM, that could cause non-warrantable<br />
engine damage. It is recommended to check fuel system vacuum on all new<br />
boats/engines being prepared for delivery to ensure customer satisfaction and<br />
engine durability.<br />
Inspection/Test<br />
The purpose of the following tests is to check the vacuum level required to<br />
draw fuel from the fuel tank to the pulse driven fuel pump, check for air leaks<br />
in the fuel supply system, and the condition of the pulse driven pump. The<br />
following items will be required to perform these tests.<br />
• Short piece of clear hose __ .250 [6.35mm] I.D.<br />
• Vacuum gauge, (digital gauge is preferred) obtain locally<br />
• “TEE” fitting that will fit __ .250 [6.35mm] I.D. fuel hose<br />
• Tubing clamp P/N 91-804063<br />
Make vacuum gauge, “TEE” fitting, and hose connection as shown.<br />
NOTE: Prior to performing the following tests, squeeze the primer bulb to<br />
determine if there is sufficient lift capability. If engine runs, confirm this by<br />
performing the tests on the following page.<br />
90-898311 4-8
NOTE: Make the “TEE” fitting connection as close to the fuel pump as<br />
possible.<br />
a) Pulse driven fuel pump<br />
b) Clear hose connected between pulse pump and “TEE” fitting<br />
c) Vacuum gauge (digital)<br />
d) Tubing clamp P/N 91-804063<br />
e) Fuel supply hose from fuel tank<br />
Test Procedure<br />
PUMP CAPABILITY TEST<br />
Before proceeding with the system vacuum test, confirm that the pulse fuel<br />
pump is capable of supplying the required vacuum. To do this, start the engine<br />
and run at idle speed, pinch off/restrict the fuel supply hose between the<br />
vacuum gauge and fuel tank, using tubing clamp.<br />
Normal Reading 2.5 in. of vacuum (mercury) or higher,<br />
proceed to fuel system leak test.<br />
Reading below 2.5 in. vacuum<br />
(mercury)<br />
• Pump check valves defective,<br />
replace valves<br />
• Pump diaphragm defective,<br />
replace diaphragms<br />
• Air leak in pump, rebuild pump<br />
with new gasket,<br />
• check fitting for leaks<br />
• Low crankcase pressure, check<br />
for crankcase<br />
• leaks or plugged pulse pump<br />
pressure/vacuum<br />
• passageways.<br />
4-9 90-898311<br />
Notes<br />
_______________________<br />
_______________________<br />
_______________________<br />
_______________________<br />
_______________________<br />
_______________________<br />
_______________________<br />
_______________________<br />
_______________________<br />
_______________________<br />
_______________________<br />
_______________________<br />
_______________________<br />
_______________________<br />
_______________________<br />
_______________________<br />
_______________________<br />
_______________________<br />
_______________________<br />
_______________________<br />
_______________________<br />
_______________________<br />
_______________________<br />
_______________________<br />
_______________________<br />
_______________________<br />
_______________________<br />
_______________________
Notes<br />
_______________________<br />
_______________________<br />
_______________________<br />
_______________________<br />
_______________________<br />
_______________________<br />
_______________________<br />
_______________________<br />
_______________________<br />
_______________________<br />
_______________________<br />
_______________________<br />
_______________________<br />
_______________________<br />
_______________________<br />
_______________________<br />
_______________________<br />
_______________________<br />
_______________________<br />
_______________________<br />
_______________________<br />
_______________________<br />
_______________________<br />
_______________________<br />
_______________________<br />
_______________________<br />
_______________________<br />
_______________________<br />
FUEL SYSTEM LEAK TEST<br />
This test is done with the engine running, and the tubing clamp removed. The<br />
clear hose that was installed previously is used to view the fuel flow to the<br />
pulse pump.<br />
No air bubbles seen in clear hose No air leaks, perform vacuum test<br />
(following)<br />
Air bubbles seen in clear hose Air leak on intake side of fuel system<br />
VACUUM TEST<br />
90-898311 4-10<br />
• Pick up tube in fuel tank leaking<br />
• Outlet fitting at fuel tank leaking<br />
• Fuel inlet hose not properly<br />
clamped at fitting<br />
• Leaking fuel tank valve<br />
• Fuel line from kicker engine<br />
connected into fuel line of main<br />
engine.<br />
The system vacuum test is normally performed at an idle speed. As engine<br />
RPM increases, there will be a slight increase in vacuum; this increase should<br />
not exceed normal readings at any RPM.<br />
Normal Reading Below 2.5 in. of Vacuum (mercury)<br />
Reading above 2.5 in. of vacuum<br />
(mercury)<br />
Restriction within the fuel system<br />
• Restricted anti-siphon valve<br />
• Restricted or malfunctioning<br />
primer bulb<br />
• Kinked or collapsed fuel hose<br />
• Plugged water separating fuel<br />
filter (in the boat)<br />
• Restriction in fuel line thru-hull<br />
fitting<br />
• Restriction in fuel tank switching<br />
valves<br />
• Plugged fuel tank pick-up screen
Correction:<br />
If the fuel capability test indicated good vacuum level (2.5 in. mercury or<br />
higher) proceed to PRIMER BULB replacement.<br />
If the fuel pump capability test indicate low vacuum, proceed with the following<br />
two upgrades to the fuel system to prevent low speed stalling.<br />
PULSE FUEL PUMP:<br />
The new repair kits contain check valves made of a plastic material,<br />
impervious to damage from fuel additives. When repairing the fuel pump<br />
discard old rubber and small plastic check valve disks, and install one new<br />
plastic disk under each retainer. Caution must be taken not to push the check<br />
valve retainer too tightly against the check valve, this may cause the valve to<br />
deform.<br />
NOTE: Before driving the check valve pin into the retainer, support the pump<br />
housing on the opposite side, directly below the check valve retainer using a<br />
socket or spacer. This will prevent distortion or cracking of the pump housing.<br />
a) Check Valve Retainer<br />
b) Check Valve<br />
CORRECT INCORRECT<br />
4-11 90-898311
Notes<br />
_______________________<br />
_______________________<br />
_______________________<br />
_______________________<br />
_______________________<br />
_______________________<br />
_______________________<br />
_______________________<br />
_______________________<br />
_______________________<br />
_______________________<br />
_______________________<br />
_______________________<br />
_______________________<br />
_______________________<br />
_______________________<br />
_______________________<br />
_______________________<br />
_______________________<br />
_______________________<br />
_______________________<br />
_______________________<br />
_______________________<br />
_______________________<br />
_______________________<br />
_______________________<br />
_______________________<br />
_______________________<br />
Carburetor for 4-Stroke 4, 5 & 6<br />
Idle Circuit<br />
1) Choke Plate<br />
2) Main Discharge Air Inlet<br />
3) Pilot Jet<br />
4) Throttle Plate<br />
5) Idle Discharge Port<br />
6) Off-Idle Discharge Ports<br />
7) Idle Mixture Screw (Not Shown)<br />
8) Inlet Needle<br />
9) Float<br />
10) Float Bowl Drain<br />
11) Main Jet<br />
12) Main Discharge Tube<br />
13) Air Flow<br />
As the engine rotates, the piston travel moves away from the open intake<br />
valve. This movement creates a low pressure area behind the throttle valve.<br />
Atmospheric pressure pushes air through the carburetor throat (venturi), past<br />
the throttle valve and into the low pressure area inside the intake/cylinder.<br />
Atmospheric pressure enters the float bowl chamber through the bowl vents.<br />
This pressure forces fuel toward the low pressure area behind the throttle<br />
valve. Fuel flows:<br />
Through the main fuel jet into the main fuel well,<br />
Up the idle tube,<br />
Through the pilot jet,<br />
Past the off-idle passages,<br />
Past the idle mixture jet (not shown),<br />
Into the idle passage,<br />
And into the carburetor throat.<br />
Air enters the idle circuit through the off-idle ports, before the air/fuel mixture is<br />
discharged into the engine.<br />
90-898311 4-12
Off-Idle Circuit<br />
1) Choke Plate<br />
2) Main Discharge Air Inlet<br />
3) Pilot Jet<br />
4) Throttle Plate<br />
5) Idle Discharge Port<br />
6) Off-Idle Discharge Ports<br />
7) Idle Mixture Screw (Not Shown)<br />
8) Inlet Needle<br />
9) Float<br />
10) Float Bowl Drain<br />
11) Main Jet<br />
12) Main Discharge Tube<br />
13) Air Flow<br />
As the throttle valve rotate past the off-idle ports, the ports are exposed to the<br />
low pressure area behind the throttle valve. Additional fuel flows through the<br />
off-idle passage; through the rear port; and as the throttle valve continues to<br />
rotate, through the forward ports.<br />
NOTE: The idle circuit will continue to supply fuel into the engine.<br />
4-13 90-898311<br />
Notes<br />
_______________________<br />
_______________________<br />
_______________________<br />
_______________________<br />
_______________________<br />
_______________________<br />
_______________________<br />
_______________________<br />
_______________________<br />
_______________________<br />
_______________________<br />
_______________________<br />
_______________________<br />
_______________________<br />
_______________________<br />
_______________________<br />
_______________________<br />
_______________________<br />
_______________________<br />
_______________________<br />
_______________________<br />
_______________________<br />
_______________________<br />
_______________________<br />
_______________________<br />
_______________________<br />
_______________________<br />
_______________________
Notes<br />
_______________________<br />
_______________________<br />
_______________________<br />
_______________________<br />
_______________________<br />
_______________________<br />
_______________________<br />
_______________________<br />
_______________________<br />
_______________________<br />
_______________________<br />
_______________________<br />
_______________________<br />
_______________________<br />
_______________________<br />
_______________________<br />
_______________________<br />
_______________________<br />
_______________________<br />
_______________________<br />
_______________________<br />
_______________________<br />
_______________________<br />
_______________________<br />
_______________________<br />
_______________________<br />
_______________________<br />
_______________________<br />
High Speed Circuit<br />
1) Choke Plate<br />
2) Main Discharge Air Inlet<br />
3) Pilot Jet<br />
4) Throttle Plate<br />
5) Idle Discharge Port<br />
6) Off-Idle Discharge Ports<br />
7) Idle Mixture Screw (Not Shown)<br />
8) Inlet Needle<br />
9) Float<br />
10) Float Bowl Drain<br />
11) Main Jet<br />
12) Main Discharge Tube<br />
13) Air Flow<br />
As the throttle-valve rotates past the off-idle ports, the low pressure area<br />
extends to the main discharge nozzle. In addition, the increased air flow<br />
through the carburetor bore creates a low pressure area inside the venturi.<br />
These combined forces create a strong suction over the main discharge tube.<br />
Fuel flows:<br />
Through the main jet into the main fuel well,<br />
Up the main discharge nozzle,<br />
Into the venturi.<br />
Air is mixed with the fuel to make it lighter, air enters the main fuel well<br />
through the main discharge air inlet tube. Cross holes (air bleeds) are drilled in<br />
the main discharge tube, allowing the air to mix with the fuel inside the main<br />
well. As the throttle valve continues to open, additional fuel is drawn out of the<br />
main discharge tube, exposing additional cross holes. At full throttle, the fuel<br />
mixture is controlled by the size of the main fuel jet.<br />
NOTE: Both the idle and off-idle circuits will continue to supply fuel into the<br />
engine.<br />
90-898311 4-14
Choke Circuit<br />
1) Choke Plate<br />
2) Main Discharge Air Inlet<br />
3) Pilot Jet<br />
4) Throttle Plate<br />
5) Idle Discharge Port<br />
6) Off-Idle Discharge Ports<br />
7) Idle Mixture Screw (Not Shown)<br />
8) Inlet Needle<br />
9) Float<br />
10) Float Bowl Drain<br />
11) Main Jet<br />
12) Main Discharge Tube<br />
13) Air Flow<br />
The choke system consists of a choke valve, position detent and a push/pull<br />
cable. The choke operation is controlled by the operator to determine engine<br />
requirement and correctly position the handle on the cable.<br />
When the engine is cold, the operator pulls the cable to close the choke valve.<br />
A mechanical linkage between the choke valve and throttle plate slightly<br />
opens the throttle plate, allowing manifold low pressure into the venturi. As the<br />
engine is started, a low pressure area develops inside the carburetor venturi.<br />
Atmospheric pressure flows through the opening in the choke valve into the<br />
low pressure area. Fuel is drawn into the air stream through the:<br />
Main discharge nozzle,<br />
Off-Idle discharge ports, and<br />
Idle discharge ports.<br />
As the engine warms up the operator can reposition the choke valve as<br />
desired. After the engine reaches operating temperature, the valve is returned<br />
to the fully open position.<br />
4-15 90-898311<br />
Notes<br />
_______________________<br />
_______________________<br />
_______________________<br />
_______________________<br />
_______________________<br />
_______________________<br />
_______________________<br />
_______________________<br />
_______________________<br />
_______________________<br />
_______________________<br />
_______________________<br />
_______________________<br />
_______________________<br />
_______________________<br />
_______________________<br />
_______________________<br />
_______________________<br />
_______________________<br />
_______________________<br />
_______________________<br />
_______________________<br />
_______________________<br />
_______________________<br />
_______________________<br />
_______________________<br />
_______________________<br />
_______________________
Notes<br />
_______________________<br />
_______________________<br />
_______________________<br />
_______________________<br />
_______________________<br />
_______________________<br />
_______________________<br />
_______________________<br />
_______________________<br />
_______________________<br />
_______________________<br />
_______________________<br />
_______________________<br />
_______________________<br />
_______________________<br />
_______________________<br />
_______________________<br />
_______________________<br />
_______________________<br />
_______________________<br />
_______________________<br />
_______________________<br />
_______________________<br />
_______________________<br />
_______________________<br />
_______________________<br />
_______________________<br />
_______________________<br />
8/9.9 2005 MY 4-Stroke Carburetor<br />
Idle Circuit<br />
a - Air flow<br />
b - Float bowl vent inlet<br />
c - Air bleed inlet<br />
d - Idle air bleed restrictor<br />
e - Off idle discharge ports<br />
f - Idle discharge port<br />
g - Throttle valve<br />
h - Fuel inlet<br />
i - Fuel bowl drain<br />
j - Main jet<br />
k - Slow jet<br />
l - Discharge passage check valve<br />
m -Choke valve<br />
As the engine rotates, the piston travel moves away from the open intake<br />
valve. This movement creates a low pressure area behind the throttle valve.<br />
Atmospheric pressure pushes air through the carburetor throat venturi, past<br />
the throttle valve and into the low pressure area inside the intake/cylinder.<br />
Atmospheric pressure enters the float bowl chamber through the bowl vents.<br />
This pressure forces fuel toward the low pressure area behind the throttle<br />
valve. Fuel flows through the main fuel jet into the main fuel well, up the idle<br />
tube, through the pilot jet, past the off-idle passages, into the idle passage,<br />
and into the carburetor throat.<br />
Air enters the idle circuit through the off-idle ports, before the air/fuel mixture is<br />
discharged into the engine.<br />
90-898311 4-16
Off-Idle Circuit<br />
a - Air flow<br />
b - Float bowl vent inlet<br />
c - Air bleed inlet<br />
d - Idle air bleed restrictor<br />
e - Off idle discharge ports<br />
f - Idle discharge port<br />
g - Throttle valve<br />
h - Fuel inlet<br />
i - Fuel bowl drain<br />
j - Main jet<br />
k - Slow jet<br />
l - Discharge passage check valve<br />
m -Choke valve<br />
As the throttle valve rotates past the off-idle ports, the ports are exposed to<br />
the low pressure area behind the throttle valve. Additional fuel flows through<br />
the off-idle passage, through the rear port, and as the throttle valve continues<br />
to rotate, through the forward ports. The idle circuit will continue to supply fuel<br />
to the engine.<br />
4-17 90-898311<br />
Notes<br />
_______________________<br />
_______________________<br />
_______________________<br />
_______________________<br />
_______________________<br />
_______________________<br />
_______________________<br />
_______________________<br />
_______________________<br />
_______________________<br />
_______________________<br />
_______________________<br />
_______________________<br />
_______________________<br />
_______________________<br />
_______________________<br />
_______________________<br />
_______________________<br />
_______________________<br />
_______________________<br />
_______________________<br />
_______________________<br />
_______________________<br />
_______________________<br />
_______________________<br />
_______________________<br />
_______________________<br />
_______________________
Notes<br />
_______________________<br />
_______________________<br />
_______________________<br />
_______________________<br />
_______________________<br />
_______________________<br />
_______________________<br />
_______________________<br />
_______________________<br />
_______________________<br />
_______________________<br />
_______________________<br />
_______________________<br />
_______________________<br />
_______________________<br />
_______________________<br />
_______________________<br />
_______________________<br />
_______________________<br />
_______________________<br />
_______________________<br />
_______________________<br />
_______________________<br />
_______________________<br />
_______________________<br />
_______________________<br />
_______________________<br />
_______________________<br />
High Speed Circuit<br />
a - Air flow<br />
b - Float bowl vent inlet<br />
c - Air bleed inlet<br />
d - Idle air bleed restrictor<br />
e - Idle discharge ports<br />
f - Main discharge nozzle<br />
g - Main jet<br />
h - Slow jet<br />
As the throttle valve rotates past the off-idle ports, the low pressure area<br />
extends to the main discharge nozzle. In addition, the increased air flow<br />
through the carburetor bore creates a low pressure area inside the venturi.<br />
These combined forces create a strong suction over the main discharge tube.<br />
Fuel flows through the main jet into the main fuel well, up the main discharge<br />
nozzle, into the venturi.<br />
Air is mixed with the fuel to make it lighter, air enters the main fuel well<br />
through the main discharge air inlet tube. Cross holes (air bleeds) are drilled in<br />
the main discharge tube, allowing the air to mix with the fuel inside the main<br />
well. As the throttle valve continues to open, additional fuel is drawn out of the<br />
main discharge tube, exposing additional cross holes. At full throttle, the fuel<br />
mixture is controlled by the size of the main fuel jet.<br />
Both the idle and off-idle circuits will continue to supply fuel into the engine.<br />
90-898311 4-18
Acceleration Circuit<br />
a - Air flow<br />
b - Inlet passage check valve<br />
c - Discharge passage check valve<br />
d - Drain<br />
e - Return spring<br />
f - Diaphragm<br />
g - Diaphragm plunger<br />
h - Discharge passage outlet check valve<br />
i - Pump discharge jet<br />
During quick acceleration when the throttle is open rapidly, the air flow and<br />
vacuum change almost instantaneously, while the heavier fuel tends to lag<br />
behind causing momentary leanness. The accelerator pump is used to provide<br />
the fuel necessary for smooth operation during this time.<br />
Fuel for acceleration is supplied by a spring loaded diaphragm operated by a<br />
pump shaft and lever assembly. The spring provides assistance for the<br />
diaphragm to return to the relaxed position.<br />
When the throttle valve is opened, the connecting linkage forces the pump<br />
plunger downward in the fuel well. The downward motion of the plunger closes<br />
the inlet check valves, forces fuel into the pump discharge passage and opens<br />
the discharge passage outlet check valve. Fuel then passes on through the<br />
check valve to the pump discharge jet where it sprays into the venturi area.<br />
When the pump plunger moves upward as happens during throttle closing,<br />
fuel enters the pump cavities through the inlet check valves and fills the pump<br />
well.<br />
After the pump discharge, the discharge passage outlet check valve closes,<br />
preventing additional fuel flow.<br />
4-19 90-898311<br />
Notes<br />
_______________________<br />
_______________________<br />
_______________________<br />
_______________________<br />
_______________________<br />
_______________________<br />
_______________________<br />
_______________________<br />
_______________________<br />
_______________________<br />
_______________________<br />
_______________________<br />
_______________________<br />
_______________________<br />
_______________________<br />
_______________________<br />
_______________________<br />
_______________________<br />
_______________________<br />
_______________________<br />
_______________________<br />
_______________________<br />
_______________________<br />
_______________________<br />
_______________________<br />
_______________________<br />
_______________________<br />
_______________________
Notes<br />
_______________________<br />
_______________________<br />
_______________________<br />
_______________________<br />
_______________________<br />
_______________________<br />
_______________________<br />
_______________________<br />
_______________________<br />
_______________________<br />
_______________________<br />
_______________________<br />
_______________________<br />
_______________________<br />
_______________________<br />
_______________________<br />
_______________________<br />
_______________________<br />
_______________________<br />
_______________________<br />
_______________________<br />
_______________________<br />
_______________________<br />
_______________________<br />
_______________________<br />
_______________________<br />
_______________________<br />
_______________________<br />
Cold Start Priming Circuit (Tiller Handle Models)<br />
a - Air flow<br />
b - Inlet passage check valve<br />
c - Discharge passage check valve<br />
d - Cold start primer bulb line inlet<br />
e - Return spring<br />
f - Diaphragm<br />
g - Diaphragm plunger<br />
h - Discharge passage outlet check valve<br />
i - Pump discharge jet<br />
When the cold start priming bulb on the front cowl is pushed in, the fuel inside<br />
the cold start priming bulb and line is forced into the same chamber area and<br />
circuitry as the accelerator pump.<br />
The pushing in motion of the cold start priming bulb closes the inlet check<br />
valves, forces fuel into the pump discharge passage and opens the discharge<br />
passage outlet check valve. Fuel then passes on through the check valve to<br />
the pump discharge jet where it sprays into the venturi area.<br />
90-898311 4-20
Choke Circuit<br />
a - Air flow<br />
b - Choke valve<br />
c - off idle discharge ports<br />
d - Idle discharge ports<br />
e - Main discharge nozzle<br />
The choke system consists of a choke valve, detent and a push/pull cable or<br />
electric solenoid. The choke operation is controlled by the operator to<br />
determine engine requirement and correctly position the handle on the cable<br />
or activate the electric solenoid.<br />
When the engine is cold, the operator pulls the cable or activates the solenoid<br />
to close the choke valve. As the engine is started, a low pressure area<br />
develops inside the carburetor venturi. Atmospheric pressure flows through<br />
the opening in the choke valve into the low pressure area. Fuel is drawn into<br />
the air stream through the main discharge nozzle, off-Idle discharge ports, and<br />
idle discharge ports.<br />
As the engine warms up the operator can reposition the choke valve or<br />
solenoid as desired. After the engine reaches operating temperature, the<br />
valve is returned to the full open position.<br />
4-21 90-898311<br />
Notes<br />
_______________________<br />
_______________________<br />
_______________________<br />
_______________________<br />
_______________________<br />
_______________________<br />
_______________________<br />
_______________________<br />
_______________________<br />
_______________________<br />
_______________________<br />
_______________________<br />
_______________________<br />
_______________________<br />
_______________________<br />
_______________________<br />
_______________________<br />
_______________________<br />
_______________________<br />
_______________________<br />
_______________________<br />
_______________________<br />
_______________________<br />
_______________________<br />
_______________________<br />
_______________________<br />
_______________________<br />
_______________________
Notes<br />
_______________________<br />
_______________________<br />
_______________________<br />
_______________________<br />
_______________________<br />
_______________________<br />
_______________________<br />
_______________________<br />
_______________________<br />
_______________________<br />
_______________________<br />
_______________________<br />
_______________________<br />
_______________________<br />
_______________________<br />
_______________________<br />
_______________________<br />
_______________________<br />
_______________________<br />
_______________________<br />
_______________________<br />
_______________________<br />
_______________________<br />
_______________________<br />
_______________________<br />
_______________________<br />
_______________________<br />
_______________________<br />
9.9/15 4-Stroke Carburetor<br />
Idle Circuit<br />
1) Air Bleed Inlet<br />
2) Float Bowl Vent Inlet<br />
3) Idle Air Bleed Restrictor<br />
4) Off-Idle Discharge Ports<br />
5) Idle Discharge Port<br />
6) Throttle Valve<br />
7) Inlet Filter<br />
8) Fuel Inlet<br />
9) Bowl Drain<br />
10) Main Jet<br />
11) Pilot Jet<br />
12) Choke Valve<br />
13) Air Flow<br />
As the engine rotates, the piston travel moves away from the open intake<br />
valve. This movement creates a low pressure area behind the throttle valve.<br />
Atmospheric pressure pushes air through the carburetor throat (venturi), past<br />
the throttle valve and into the low pressure area inside the intake/cylinder.<br />
Atmospheric pressure enters the float bowl chamber through the bowl vents.<br />
This pressure forces fuel toward the low pressure area behind the throttle<br />
valve. Fuel flows:<br />
1) Through the main fuel jet into the main fuel well,<br />
2) Through the pilot jet,<br />
3) Up the idle tube,<br />
4) Through the off-idle passages,<br />
5) Past the idle mixture jet (not shown),<br />
6) Into the idle passage,<br />
7) And into the carburetor throat.<br />
Air enters the idle circuit through the idle air bleed and air mixes with the fuel<br />
inside the pilot jet before the air/fuel mixture is drawn up the idle tube.<br />
Additional air enters the idle circuit through the off-idle ports, before the air/fuel<br />
mixture is discharged into the engine.<br />
90-898311 4-22
Off-Idle Circuit<br />
1) Air Bleed Inlet<br />
2) Float Bowl Vent Inlet<br />
3) Idle Air Bleed Restrictor<br />
4) Off-Idle Discharge Ports<br />
5) Idle Discharge Port<br />
6) Throttle Valve<br />
7) Inlet Filter (Inside Fuel Bowl)<br />
8) Bowl Drain<br />
9) Main Jet<br />
10) Pilot Jet<br />
11) Choke Valve<br />
12) Air Flow<br />
As the throttle valve rotate past the off-idle ports, the ports are exposed to the<br />
low pressure area behind the throttle valve. Additional fuel flows through the<br />
off-idle passage; through the rear port; and as the throttle valve continues to<br />
rotate, through the forward ports.<br />
NOTE: The idle circuit will continue to supply fuel into the engine.<br />
4-23 90-898311<br />
Notes<br />
_______________________<br />
_______________________<br />
_______________________<br />
_______________________<br />
_______________________<br />
_______________________<br />
_______________________<br />
_______________________<br />
_______________________<br />
_______________________<br />
_______________________<br />
_______________________<br />
_______________________<br />
_______________________<br />
_______________________<br />
_______________________<br />
_______________________<br />
_______________________<br />
_______________________<br />
_______________________<br />
_______________________<br />
_______________________<br />
_______________________<br />
_______________________<br />
_______________________<br />
_______________________<br />
_______________________<br />
_______________________
Notes<br />
_______________________<br />
_______________________<br />
_______________________<br />
_______________________<br />
_______________________<br />
_______________________<br />
_______________________<br />
_______________________<br />
_______________________<br />
_______________________<br />
_______________________<br />
_______________________<br />
_______________________<br />
_______________________<br />
_______________________<br />
_______________________<br />
_______________________<br />
_______________________<br />
_______________________<br />
_______________________<br />
_______________________<br />
_______________________<br />
_______________________<br />
_______________________<br />
_______________________<br />
_______________________<br />
_______________________<br />
_______________________<br />
High Speed Circuit<br />
1) Air Bleed Inlet<br />
2) Float Bowl Vent Inlet<br />
3) Main Nozzle Air Bleed Restrictor<br />
4) Throttle Valve<br />
5) Inlet Filter (Inside Fuel Bowl)<br />
6) Main Discharge Nozzle<br />
7) Main Jet<br />
8) Choke Valve<br />
9) Air Flow<br />
As the throttle-valve rotates past the off-idle ports, the low pressure area<br />
extends to the main discharge nozzle. In addition, the increased air flow<br />
through the carburetor bore creates a low pressure area inside the venturi.<br />
These combined forces create a strong suction over the main discharge tube.<br />
Fuel flows:<br />
1) Through the main jet into the main fuel well,<br />
2) Up the main discharge nozzle,<br />
3) Into the venturi.<br />
Air is mixed with the fuel to make it lighter, air enters the main fuel well<br />
through the main discharge air inlet tube. Cross holes (air bleeds) are drilled in<br />
the main discharge tube, allowing the air to mix with the fuel inside the main<br />
well. As the throttle valve continues to open, additional fuel is drawn out of the<br />
main discharge tube, exposing additional cross holes. At full throttle, the fuel<br />
mixture is controlled by the size of the main fuel jet.<br />
NOTE: Both the idle and off-idle circuits will continue to supply fuel into the<br />
engine.<br />
90-898311 4-24
Acceleration Circuit (15 HP Only)<br />
1) Air Flow<br />
2) Accelerator Pump Discharge Jet (15 HP Only)<br />
3) Discharge Passage Outlet Check Valve (15 HP Only)<br />
4) Discharge Passage Inlet Check Valve<br />
5) Inlet Passage Check Valve<br />
6) Drain<br />
7) Return Spring (15 HP Only)<br />
8) Diaphragm (15 HP Only)<br />
9) Plunger (15 HP Only)<br />
During quick acceleration when the throttle is opened rapidly, the air flow and<br />
vacuum change almost instantaneously, while the heavier fuel tends to lag<br />
behind causing momentary leanness. The accelerator pump is used to provide<br />
the fuel necessary for smooth operation during this time.<br />
Fuel for acceleration is supplied by a spring loaded diaphragm operated by a<br />
pump shaft and lever assembly. The spring provides two functions, one to<br />
return the diaphragm to the relaxed position, and the second to provide a<br />
smooth sustained charge of fuel.<br />
When the pump plunger moves upward as happens during throttle closing,<br />
fuel enters the pump cavities through the inlet check valves and fills the pump<br />
well.<br />
When the throttle valve is opened, the connecting linkage forces the pump<br />
plunger downward in the fuel well. The downward motion of the plunger closes<br />
the inlet check valves, forces fuel into the pump discharge passage and opens<br />
the outlet check valve. Fuel then passes on through the check valve to the<br />
pump jet where it sprays into the venturi area.<br />
After pump discharge, the discharge passage discharge check valve close,<br />
preventing additional fuel flow.<br />
4-25 90-898311<br />
Notes<br />
_______________________<br />
_______________________<br />
_______________________<br />
_______________________<br />
_______________________<br />
_______________________<br />
_______________________<br />
_______________________<br />
_______________________<br />
_______________________<br />
_______________________<br />
_______________________<br />
_______________________<br />
_______________________<br />
_______________________<br />
_______________________<br />
_______________________<br />
_______________________<br />
_______________________<br />
_______________________<br />
_______________________<br />
_______________________<br />
_______________________<br />
_______________________<br />
_______________________<br />
_______________________<br />
_______________________<br />
_______________________
Notes<br />
_______________________<br />
_______________________<br />
_______________________<br />
_______________________<br />
_______________________<br />
_______________________<br />
_______________________<br />
_______________________<br />
_______________________<br />
_______________________<br />
_______________________<br />
_______________________<br />
_______________________<br />
_______________________<br />
_______________________<br />
_______________________<br />
_______________________<br />
_______________________<br />
_______________________<br />
_______________________<br />
_______________________<br />
_______________________<br />
_______________________<br />
_______________________<br />
_______________________<br />
_______________________<br />
_______________________<br />
_______________________<br />
Choke Circuit<br />
1) Choke Valve<br />
2) Off-Idle Discharge Ports<br />
3) Idle Discharge Port<br />
4) Main Discharge Tube<br />
5) Air Flow<br />
The choke system consists of a choke valve, position detent and a push/pull<br />
cable. The choke operation is controlled by the operator to determine engine<br />
requirement and correctly position the handle on the cable.<br />
When the engine is cold, the operator pulls the cable to close the choke valve<br />
(1). As the engine is started, a low pressure area develops inside the<br />
carburetor venturi. Atmospheric pressure flows through the opening in the<br />
choke valve into the low pressure area. Fuel is drawn into the air stream<br />
through the:<br />
1) Main discharge nozzle,<br />
2) Off-Idle discharge ports, and<br />
3) Idle discharge ports.<br />
As the engine warms up the operator can reposition the choke valve as<br />
desired. After the engine reaches operating temperature, the valve is returned<br />
to the fully open position.<br />
90-898311 4-26
25, 30/40 (99 and Prior) & 75/90 4-Stroke<br />
Carburetor Circuits<br />
Idle Circuit<br />
1) Air Bleed Inlet<br />
2) Float Bowl Vent Inlet<br />
3) Idle Air Bleed Restrictor<br />
4) Idle Jet<br />
5) Throttle Plate<br />
6) Pilot Jet<br />
7) Main Jet<br />
8) Air Flow<br />
As the engine rotates, the piston moves away from the open intake valve. This<br />
movement creates a low pressure area behind the throttle plate. Atmospheric<br />
pressure pushes air through the carburetor throat (venturi), past the throttle<br />
plate and into the low pressure area inside the intake/ cylinder.<br />
Atmospheric pressure enters the float bowl chamber through the bowl vents.<br />
This pressure forces fuel toward the low pressure area behind the throttle<br />
plate.<br />
Fuel flows:<br />
Through the main fuel jet into the main fuel well,<br />
Through the pilot jet<br />
Up the idle tube,<br />
Through the off-idle passages,<br />
Into the idle passage<br />
Through the idle jet<br />
And into the carburetor throat.<br />
Air enters the idle circuit through the idle air bleed. This air mixes with the fuel<br />
inside the pilot jet before the air/fuel mixture is discharged into the engine.<br />
Rotating the idle mixture screw will change the air/fuel mixture at idle speeds.<br />
NOTE: Some Keihin carbs have loose idle jet.<br />
Tip: Idle jet is available as a replacement part.<br />
4-27 90-898311<br />
Notes<br />
_______________________<br />
_______________________<br />
_______________________<br />
_______________________<br />
_______________________<br />
_______________________<br />
_______________________<br />
_______________________<br />
_______________________<br />
_______________________<br />
_______________________<br />
_______________________<br />
_______________________<br />
_______________________<br />
_______________________<br />
_______________________<br />
_______________________<br />
_______________________<br />
_______________________<br />
_______________________<br />
_______________________<br />
_______________________<br />
_______________________<br />
_______________________<br />
_______________________<br />
_______________________<br />
_______________________<br />
_______________________
Notes<br />
_______________________<br />
_______________________<br />
_______________________<br />
_______________________<br />
_______________________<br />
_______________________<br />
_______________________<br />
_______________________<br />
_______________________<br />
_______________________<br />
_______________________<br />
_______________________<br />
_______________________<br />
_______________________<br />
_______________________<br />
_______________________<br />
_______________________<br />
_______________________<br />
_______________________<br />
_______________________<br />
_______________________<br />
_______________________<br />
_______________________<br />
_______________________<br />
_______________________<br />
_______________________<br />
_______________________<br />
_______________________<br />
Off-Idle Circuit<br />
1) Air Bleed Inlet<br />
2) Float Bowl Vent Inlet<br />
3) Idle Air Bleed Restrictor<br />
4) Off-Idle Discharge Ports<br />
5) Idle Jet<br />
6) Throttle Plate<br />
7) Pilot Jet<br />
8) Main Jet<br />
9) Air Flow<br />
As the throttle plates rotate past the off-idle ports, the ports are exposed to the<br />
low pressure area behind the throttle plate. Additional fuel flows through the<br />
off-idle passage; through the rear port; and as the throttle plate continues to<br />
rotate, through the forward ports.<br />
NOTE: The idle circuit will continue to supply fuel into the engine.<br />
90-898311 4-28
Mid-Range Circuit<br />
1) Mid-Range Discharge Ports<br />
2) Mid-Range Jet<br />
3) Throttle Plate<br />
4) Mid-Range Circuit Fuel Inlet<br />
5) Air Flow<br />
As the throttle plate continues to open and the engine rpm’s reach<br />
approximately 3500. The low pressure area inside the carburetor venturi<br />
extends to the mid-range discharge ports. Fuel is drawn: from the carburetor<br />
bowl, through the mid-range restrictor and discharged from the mid-range<br />
discharge ports.<br />
NOTE: Both the idle and off-idle circuits will continue to supply fuel into the<br />
engine.<br />
4-29 90-898311<br />
Notes<br />
_______________________<br />
_______________________<br />
_______________________<br />
_______________________<br />
_______________________<br />
_______________________<br />
_______________________<br />
_______________________<br />
_______________________<br />
_______________________<br />
_______________________<br />
_______________________<br />
_______________________<br />
_______________________<br />
_______________________<br />
_______________________<br />
_______________________<br />
_______________________<br />
_______________________<br />
_______________________<br />
_______________________<br />
_______________________<br />
_______________________<br />
_______________________<br />
_______________________<br />
_______________________<br />
_______________________<br />
_______________________
Notes<br />
_______________________<br />
_______________________<br />
_______________________<br />
_______________________<br />
_______________________<br />
_______________________<br />
_______________________<br />
_______________________<br />
_______________________<br />
_______________________<br />
_______________________<br />
_______________________<br />
_______________________<br />
_______________________<br />
_______________________<br />
_______________________<br />
_______________________<br />
_______________________<br />
_______________________<br />
_______________________<br />
_______________________<br />
_______________________<br />
_______________________<br />
_______________________<br />
_______________________<br />
_______________________<br />
_______________________<br />
_______________________<br />
High Speed Circuit<br />
1) Air Bleed Inlet<br />
2) Main Discharge Bleed Restrictor<br />
3) Throttle Plate<br />
4) Main Jet<br />
5) Main Nozzle Air Bleeds<br />
6) Main Discharge Port<br />
7) Air Flow<br />
As the throttle plate rotates past the mid-range ports, the low pressure area<br />
extends to the main discharge nozzle. In addition, the increased air flow<br />
through the carburetor bore creates a low pressure area inside the venturi.<br />
These combined forces create a strong suction over the main discharge tube.<br />
Fuel flows:<br />
Through the main fuel jet into the main fuel well,<br />
Up the main discharge nozzle,<br />
Into the venturi.<br />
Air is mixed with the fuel to make it lighter, air enters the main fuel well<br />
through the main discharge air inlet tube. Cross holes (air bleeds) are drilled in<br />
the main discharge tube, allowing the air to mix with the fuel inside the main<br />
well. As the throttle plate continues to open, additional fuel is drawn out of the<br />
main discharge tube, exposing additional cross holes. At full throttle, the fuel<br />
mixture is controlled by the size of the main fuel jet.<br />
NOTE: Both the idle, off-idle and mid-range circuits will continue to supply fuel<br />
into the engine.<br />
90-898311 4-30
Cold Start Circuit<br />
1) Enrichener Valve Thermostat<br />
2) Cold Start Discharge Port<br />
3) Enrichener Valve Fuel Discharge Port<br />
4) Wax Pellet<br />
5) Float Bowl Vent Intake Port<br />
6) Cold Start Air Intake Port<br />
7) Accelerator Pump Lever<br />
8) Accelerator Pump Discharge Nozzle<br />
9) Accelerator Pump Discharge Check Valve<br />
10) Accelerator Pump Plunger<br />
11) Accelerator Pump Return Spring<br />
12) Accelerator Pump Inlet Check Valve<br />
13) Enrichener Valve Discharge Tube<br />
14) Throttle Valve<br />
A cold engine will require a richer mixture. When the engine is cold, the<br />
enrichener valve is open, (with the throttle plate closed) air is drawn through<br />
the cold start air passage. The air flow creates a vacuum (low pressure) area<br />
above the enrichener valve discharge nozzle. Fuel is drawn up the discharge<br />
tube and into the air stream through this discharge nozzle. Atmospheric air is<br />
drawn from the carburetor bowl vent system to supply air for the air bleed in<br />
the discharge tube. After the engine has started, stator voltage is supplied to<br />
the enrichener valve. This voltage heats an internal thermostat, which in turn,<br />
closes the enrichener valve, limiting the fuel flow.<br />
Acceleration Circuit<br />
When the throttle valve is open quickly for acceleration, a large amount of air<br />
is allowed to enter the engine. Unless some method is used to provide<br />
additional fuel to maintain a satisfactory air-fuel ratio, the engine will slow<br />
down and possibly stop. When the throttle is advanced, the accelerator pump<br />
lever forces the accelerator pump plunger down inside the carburetor bowl.<br />
Fuel is forced past the spring loaded check valve and into the carburetor<br />
venturi through the accelerator pump discharge nozzle. As the throttle is<br />
returned to a slow speed position, the return spring forces the plunger up<br />
inside the fuel bowl and the inlet check valve opens, allowing fuel from the<br />
float bowl to enter the accelerator pump well. The spring loaded check valve<br />
also prevents fuel from flowing through the accelerator pump circuit at high<br />
engine speeds.<br />
4-31 90-898311
Notes<br />
_______________________<br />
_______________________<br />
_______________________<br />
_______________________<br />
_______________________<br />
_______________________<br />
_______________________<br />
_______________________<br />
_______________________<br />
_______________________<br />
_______________________<br />
_______________________<br />
_______________________<br />
_______________________<br />
_______________________<br />
_______________________<br />
_______________________<br />
_______________________<br />
_______________________<br />
_______________________<br />
_______________________<br />
_______________________<br />
_______________________<br />
_______________________<br />
_______________________<br />
_______________________<br />
_______________________<br />
_______________________<br />
75/90 4-Stroke Carb. Model<br />
PrimeStart System<br />
This carburetor assembly uses the PrimeStart system for precise fuel delivery<br />
during startup, at all temperatures. Two electrothermal valves are installed on<br />
the carburetor assembly. The upper electrothermal valve controls fuel flow for<br />
carburetors #1 and #2, and the lower valve controls fuel flow for carburetors<br />
#3 and #4.<br />
Before start-up, the electrothermal ram (needle) is retracted (the fuel<br />
enrichment valve is opened) according to the temperature, allowing a high<br />
percentage of fuel to flow from the float chamber into the venturi during startup.<br />
During start-up, the electrothermal ram (needle) is still retracted (the fuel<br />
enrichment valve is opened) according to the temperature, allowing a rich<br />
air/fuel mixture to be fed to the cylinders.<br />
After start-up, the current supplied from the electric power source flows to the<br />
electrothermal valves, causing the wax in the valves to heat up.<br />
As the wax heats up, the electrothermal ram (needle) begins to extend,<br />
partially closing the fuel enrichment valve, and reducing the flow of fuel from<br />
the float chamber into the venturi.<br />
After a few minutes, the electrothermal ram (needle) is fully extended, the fuel<br />
enrichment valve is fully closed, and enrichment ceases.<br />
a) Electrothermal Valve<br />
b) Fuel Enrichment Valve<br />
c) Electrothermal Ram (needle)<br />
d) Carburetor #1 and #3<br />
e) Carburetor #2 and #4<br />
90-898311 4-32
Acceleration<br />
This carburetor assembly uses an accelerator pump to ensure that the proper<br />
amount of fuel reaches all of the carburetors during rapid throttle openings<br />
(preventing temporary lean conditions).<br />
As the throttle is opened, the throttle lever rotates and pushes the throttle<br />
lever link rod. The throttle lever link rod then pushes the diaphragm in the<br />
dashpot, forcing out the air. The air flows through the in-line, one-way valve,<br />
and then to all of the carburetors. This additional air flows into the carburetors<br />
and mixes with the fuel from the main jets. This air/fuel mixture is then injected<br />
into the venturi, ensuring that enough fuel reaches the engine.<br />
As the throttle is closed, the throttle lever rotates back and the throttle lever<br />
link rod returns, causing the diaphragm in the dashpot to move back, As the<br />
diaphragm moves back, suction causes the air from the venturi of carburetor<br />
#4 to flow through a one-way valve in the carburetors and back to the<br />
dashpot. The in-line, one-way valve prevents the air in the hoses from flowing<br />
back to the dashpot.<br />
Also, the diaphragm functions as a coasting enrichener during quick<br />
deceleration, preventing the engine from stalling.<br />
Carburetor #4 (Side<br />
View)<br />
a) Throttle Lever<br />
b) Throttle Lever Link Rod<br />
c) Diaphragm<br />
d) Dashpot<br />
e) In-Line, One-Way Valve<br />
Carburetor #4 (Cutaway<br />
View)<br />
Acceleration Deceleration<br />
4-33 90-898311
Notes<br />
_______________________<br />
_______________________<br />
_______________________<br />
_______________________<br />
_______________________<br />
_______________________<br />
_______________________<br />
_______________________<br />
_______________________<br />
_______________________<br />
_______________________<br />
_______________________<br />
_______________________<br />
_______________________<br />
_______________________<br />
_______________________<br />
_______________________<br />
_______________________<br />
_______________________<br />
_______________________<br />
_______________________<br />
_______________________<br />
_______________________<br />
_______________________<br />
_______________________<br />
_______________________<br />
_______________________<br />
_______________________<br />
2001 MY - 40/50/60 4-Stroke Carburetor<br />
Circuits<br />
Idle Circuit<br />
1) Air Bleed Inlet<br />
2) Float Bowl Vent Inlet<br />
3) Idle Air Bleed Restrictor<br />
4) Idle Mixture Screw<br />
5) Throttle Plate<br />
6) Main Jet<br />
7) Pilot Jet<br />
8) Air Flow<br />
As the engine rotates, the piston moves away from the open intake valve. This<br />
movement creates a Vacuum (low pressure) area behind the throttle plate.<br />
Atmospheric pressure pushes air through the carburetor throat (venturi), past<br />
the throttle plate and into the low pressure area inside the intake/ cylinder.<br />
Atmospheric pressure enters the float bowl chamber through the bowl vents.<br />
This pressure forces fuel toward the low pressure area behind the throttle<br />
plate.<br />
Fuel flows:<br />
Through the main fuel jet into the main fuel well,<br />
Through the pilot jet<br />
Up the idle tube,<br />
Through the off-idle passages (transfer ports),<br />
Into the idle passage<br />
Past the idle mixture screw (factory sealed)<br />
And into the carburetor throat.<br />
Air enters the idle circuit through the idle air bleed. This air mixes with the fuel<br />
inside the pilot jet before the air/fuel mixture is discharged into the engine.<br />
Rotating the idle mixture screw will change the air/fuel mixture at idle speeds.<br />
90-898311 4-34
Off-Idle Circuit<br />
1) Air Bleed Inlet<br />
2) Float Bowl Vent Inlet<br />
3) Idle Air Bleed Restrictor<br />
4) Off-Idle Discharge Ports<br />
5) Idle Mixture Screw (Factory Sealed)<br />
6) Throttle Plate<br />
7) Main Jet<br />
8) Pilot Jet<br />
9) Air Flow<br />
As the throttle plates rotate past the off-idle ports, the ports are exposed to the<br />
low pressure area behind the throttle plate. Additional fuel flows through the<br />
off-idle passage; through the rear port; and as the throttle plate continues to<br />
rotate, through the forward ports.<br />
NOTE: The idle circuit will continue to supply fuel into the engine.<br />
4-35 90-898311<br />
Notes<br />
_______________________<br />
_______________________<br />
_______________________<br />
_______________________<br />
_______________________<br />
_______________________<br />
_______________________<br />
_______________________<br />
_______________________<br />
_______________________<br />
_______________________<br />
_______________________<br />
_______________________<br />
_______________________<br />
_______________________<br />
_______________________<br />
_______________________<br />
_______________________<br />
_______________________<br />
_______________________<br />
_______________________<br />
_______________________<br />
_______________________<br />
_______________________<br />
_______________________<br />
_______________________<br />
_______________________<br />
_______________________
Notes<br />
_______________________<br />
_______________________<br />
_______________________<br />
_______________________<br />
_______________________<br />
_______________________<br />
_______________________<br />
_______________________<br />
_______________________<br />
_______________________<br />
_______________________<br />
_______________________<br />
_______________________<br />
_______________________<br />
_______________________<br />
_______________________<br />
_______________________<br />
_______________________<br />
_______________________<br />
_______________________<br />
_______________________<br />
_______________________<br />
_______________________<br />
_______________________<br />
_______________________<br />
_______________________<br />
_______________________<br />
_______________________<br />
Mid-Range Circuit<br />
1) Mid-Range Discharge Ports<br />
2) Mid-Range Jet<br />
3) Throttle Plate<br />
4) Mid-Range Circuit Fuel Inlet<br />
5) Air Flow<br />
As the throttle plate continues to open and the engine rpm’s reach<br />
approximately 3500. The low pressure area inside the carburetor venturi<br />
extends to the mid-range discharge ports<br />
Fuel is drawn: from the carburetor bowl, through the mid-range restrictor and<br />
discharged from the mid-range discharge ports.<br />
NOTE: Both the idle and off-idle circuits will continue to supply fuel into the<br />
engine.<br />
90-898311 4-36
High Speed Circuit<br />
1) Air Bleed Inlet<br />
2) Main Discharge Bleed Restrictor<br />
3) Throttle Plate<br />
4) Main Jet<br />
5) Main Nozzle Air Bleeds<br />
6) Main Discharge Port<br />
7) Air Flow<br />
As the throttle plate rotates past the mid-range ports, the low pressure area<br />
extends to the main discharge nozzle. In addition, the increased air flow<br />
through the carburetor bore creates a low pressure area inside the venturi.<br />
These combined forces create a strong suction over the main discharge tube.<br />
Fuel flows:<br />
4) Through the main fuel jet into the main fuel well,<br />
5) Up the main discharge nozzle,<br />
6) Into the venturi.<br />
Air is mixed with the fuel to make it lighter, air enters the main fuel well<br />
through the main discharge air inlet tube. Cross holes (air bleeds) are drilled in<br />
the main discharge tube, allowing the air to mix with the fuel inside the main<br />
well. As the throttle plate continues to open, additional fuel is drawn out of the<br />
main discharge tube, exposing additional cross holes. At full throttle, the fuel<br />
mixture is controlled by the size of the main fuel jet.<br />
NOTE: Both the idle, off-idle and mid-range circuits will continue to supply fuel<br />
into the engine.<br />
4-37 90-898311<br />
Notes<br />
_______________________<br />
_______________________<br />
_______________________<br />
_______________________<br />
_______________________<br />
_______________________<br />
_______________________<br />
_______________________<br />
_______________________<br />
_______________________<br />
_______________________<br />
_______________________<br />
_______________________<br />
_______________________<br />
_______________________<br />
_______________________<br />
_______________________<br />
_______________________<br />
_______________________<br />
_______________________<br />
_______________________<br />
_______________________<br />
_______________________<br />
_______________________<br />
_______________________<br />
_______________________<br />
_______________________<br />
_______________________
Notes<br />
_______________________<br />
_______________________<br />
_______________________<br />
_______________________<br />
_______________________<br />
_______________________<br />
_______________________<br />
_______________________<br />
_______________________<br />
_______________________<br />
_______________________<br />
_______________________<br />
_______________________<br />
_______________________<br />
_______________________<br />
_______________________<br />
_______________________<br />
_______________________<br />
_______________________<br />
_______________________<br />
_______________________<br />
_______________________<br />
_______________________<br />
_______________________<br />
_______________________<br />
_______________________<br />
_______________________<br />
_______________________<br />
Cold Start Circuit<br />
1) Enrichener Valve Thermostat<br />
2) Cold Start Discharge Port<br />
3) Enrichener Valve Fuel<br />
Discharge Port<br />
4) Wax Pellet<br />
5) Float Bowl Vent Intake Port<br />
6) Cold Start Air Intake Port<br />
7) Accelerator Pump Lever<br />
8) Accelerator Pump Discharge<br />
Nozzle<br />
90-898311 4-38<br />
9) Accelerator Pump Discharge<br />
Check Valve<br />
10) Accelerator Pump Plunger<br />
11) Accelerator Pump Return<br />
Spring<br />
12) Accelerator Pump Inlet Check<br />
Valve<br />
13) Enrichener Valve Discharge<br />
Tube<br />
14) Throttle Valve<br />
A cold engine will require a richer mixture. When the engine is cold, the<br />
enrichener valve is open, (with the throttle plate closed) air is drawn through<br />
the cold start air passage.<br />
The air flow creates a vacuum (low pressure) area above the enrichener valve<br />
discharge nozzle. Fuel is drawn up the discharge tube and into the air stream<br />
through this discharge nozzle. Atmospheric air is drawn from the carburetor<br />
bowl vent system to supply air for the air bleed in the discharge tube. After the<br />
engine has started, stator voltage is supplied to the enrichener valve. This<br />
voltage heats an internal thermostat, which in turn, closes the enrichener<br />
valve, limiting the fuel flow.
Acceleration Circuit<br />
When the throttle valve is open quickly for acceleration, a large amount of air<br />
is allowed to enter the engine. Unless some method is used to provide<br />
additional fuel to maintain a satisfactory air-fuel ratio, the engine will slow<br />
down and possibly stop. When the throttle is advanced, the accelerator pump<br />
lever forces the accelerator pump plunger down inside the accelerator pump<br />
well, cast into the carburetor bowl. Fuel is forced past the spring loaded check<br />
valve and into the carburetor venturi through the accelerator pump discharge<br />
nozzle. As the throttle is returned to a slow speed position, the return spring<br />
forces the plunger up inside the fuel bowl and the inlet check valve opens,<br />
allowing fuel from the float bowl to enter the accelerator pump well. The spring<br />
loaded check valve also prevents fuel from flowing through the accelerator<br />
pump circuit at high engine speeds.<br />
4-39 90-898311<br />
Notes<br />
_______________________<br />
_______________________<br />
_______________________<br />
_______________________<br />
_______________________<br />
_______________________<br />
_______________________<br />
_______________________<br />
_______________________<br />
_______________________<br />
_______________________<br />
_______________________<br />
_______________________<br />
_______________________<br />
_______________________<br />
_______________________<br />
_______________________<br />
_______________________<br />
_______________________<br />
_______________________<br />
_______________________<br />
_______________________<br />
_______________________<br />
_______________________<br />
_______________________<br />
_______________________<br />
_______________________<br />
_______________________
Notes<br />
_______________________<br />
_______________________<br />
_______________________<br />
_______________________<br />
_______________________<br />
_______________________<br />
_______________________<br />
_______________________<br />
_______________________<br />
_______________________<br />
_______________________<br />
_______________________<br />
_______________________<br />
_______________________<br />
_______________________<br />
_______________________<br />
_______________________<br />
_______________________<br />
_______________________<br />
_______________________<br />
_______________________<br />
_______________________<br />
_______________________<br />
_______________________<br />
_______________________<br />
_______________________<br />
_______________________<br />
_______________________<br />
Balance And PrimeStart System<br />
a) Electrothermal Valve<br />
b) Fuel Enrichment Valve<br />
c) Fuel Enrichment Needle<br />
d) Carburetor #1 Discharge Ports<br />
e) Carburetors #2, #3 & #4 Discharge Ports<br />
1) Air<br />
2) Fuel<br />
3) Air/Fuel Mixture<br />
90-898311 4-40
Balance System<br />
The balance system is designed to improve running quality at low engine<br />
speeds by equalizing the intake pressures. After the electrothermal valve has<br />
closed the fuel discharge passage, the balance system uses the same circuits<br />
as the Prime start System. Vacuum from behind the throttle plates flows<br />
through the connecting passages and hoses to lower the effects of cylinder<br />
pulses inside the intake system.<br />
Prime Start System<br />
This carburetor assembly uses the Prime Start system for precise fuel delivery<br />
during startup at all temperatures. One electrothermal valve is installed on<br />
carburetor number one and controls fuel flow for all of the carburetors.<br />
Before start-up, the electrothermal ram (needle) is retracted (the fuel<br />
enrichment valve is opened) according to the temperature, allowing a high<br />
percentage of fuel to flow from the float chamber into the venturi during startup.<br />
During start-up, the electrothermal ram (needle) is still retracted (the fuel<br />
enrichment valve is opened) according to the temperature, allowing a rich<br />
air/fuel mixture to be fed to the cylinders.<br />
After start-up, the current supplied from the electric power source flows to the<br />
electrothermal valve, causing the heater inside the valve to heat the wax<br />
pellet.<br />
As the wax heats up, the electrothermal valve (needle) begins to extend,<br />
partially closing the fuel enrichment valve, and reducing the fuel low from the<br />
float chamber into the venturi.<br />
After a few minutes, the electrothermal ram (needle) is fully extended, the fuel<br />
enrichment valve is fully closed, and enrichment ceases.<br />
Effects of Fuel on Carbureted Models<br />
Carburetors on <strong>FourStroke</strong>s engines are made with great precision (small<br />
passages) to deliver the exact amount of fuel in order to complete very clean<br />
combustion process. Improper storage (causing varnishing) and<br />
contaminated fuel can result in plugging these passages.<br />
4-41 90-898311<br />
Notes<br />
_______________________<br />
_______________________<br />
_______________________<br />
_______________________<br />
_______________________<br />
_______________________<br />
_______________________<br />
_______________________<br />
_______________________<br />
_______________________<br />
_______________________<br />
_______________________<br />
_______________________<br />
_______________________<br />
_______________________<br />
_______________________<br />
_______________________<br />
_______________________<br />
_______________________<br />
_______________________<br />
_______________________<br />
_______________________<br />
_______________________<br />
_______________________<br />
_______________________<br />
_______________________<br />
_______________________<br />
_______________________
Notes<br />
_______________________<br />
_______________________<br />
_______________________<br />
_______________________<br />
_______________________<br />
_______________________<br />
_______________________<br />
_______________________<br />
_______________________<br />
_______________________<br />
_______________________<br />
_______________________<br />
_______________________<br />
_______________________<br />
_______________________<br />
_______________________<br />
_______________________<br />
_______________________<br />
_______________________<br />
_______________________<br />
_______________________<br />
_______________________<br />
_______________________<br />
_______________________<br />
_______________________<br />
_______________________<br />
_______________________<br />
_______________________<br />
Carburetor Cleaning<br />
Models: All<br />
When cleaning carburetors from improper storage or fuel contamination from<br />
a dirty tank be sure to do the job thoroughly.<br />
Just spraying the carburetors bodies with aerosol carburetor cleaner seldom<br />
gets the job done properly. You really need to take the time to disassemble<br />
the carburetors completely and soak all metal parts in automotive carburetor<br />
cleaning solvent obtained locally. Follow the directions recommended by<br />
manufacture of the cleaning solvent. Note: Most cleaning solutions when<br />
new are stronger so soaking time can change for two hours to overnight.<br />
Reminder different solutions required different rinsing techniques. Keep<br />
rubber and plastic parts separated. Some parts may get deformed by the<br />
cleaning agent.<br />
When you get back to the parts rinse completely with parts solvent (not<br />
necessary with all cleaning agents) then again with tap water and verify that<br />
all passages are clean and clear. You can do a visual inspection of jets, but<br />
the passages in the carburetor body need to be verified. You can do this by<br />
spraying with aerosol carburetor cleaner, but in some cases, you may need to<br />
go further.<br />
Take a single strand of copper wire from a multistrand length. Use this to help<br />
ensure all of the passages are clear. Don't use a wire that is to stiff. You may<br />
end up gouging the body or fuel jets resulting in abnormal fuel or air flow. If<br />
you need to clean out a larger passage, take two strands and wrap the<br />
together.<br />
Finally, connect the fuel supply line to water faucet and verify the flow through<br />
all passages. You should see a smooth even flow from all passages. If you<br />
install the float bowl without the floats, you can verify the passages into the<br />
carburetor throat.<br />
Even the best cleaning job can leave some blockage that will guarantee you<br />
have performed the same job twice. Take your time and be thorough.<br />
The main reasons for having to clean carburetors are lack of filter<br />
maintenance, or improper storage procedure leading to varnished fuel<br />
deposits. Be sure all filters are inspected or replaced regularly, and remind<br />
your customers about proper use of fuel stabilizer and the importance of<br />
draining residual fuel completely.<br />
90-898311 4-42
Electrothermal Valve Operation<br />
Stator Assembly<br />
a) Ignition Charge Coil<br />
b) Lighting System Coils and Electrothermal Valve Coils<br />
The stator assembly located under the flywheel contains the Ignition Charge<br />
Coils, Lighting System Coils and the Electrothermal Valve Coils. All of these<br />
coils make up the stator assembly.<br />
Testing electro thermo valve<br />
• Check piston valve height.<br />
• Connect 12V battery<br />
• Wait for several minutes<br />
• Check piston height<br />
Replace if no change.<br />
Tip: Electrothermal Valve should be warm to touch after engine has been<br />
allowed to warm up.<br />
4-43 90-898311<br />
Notes<br />
_______________________<br />
_______________________<br />
_______________________<br />
_______________________<br />
_______________________<br />
_______________________<br />
_______________________<br />
_______________________<br />
_______________________<br />
_______________________<br />
_______________________<br />
_______________________<br />
_______________________<br />
_______________________<br />
_______________________<br />
_______________________<br />
_______________________<br />
_______________________<br />
_______________________<br />
_______________________<br />
_______________________<br />
_______________________<br />
_______________________<br />
_______________________<br />
_______________________<br />
_______________________<br />
_______________________<br />
_______________________
Section 5 - Timing & Synchronizing<br />
90-898311 5-1
Table of Contents<br />
Table of Contents..............................................................................................2<br />
Table of Contents..............................................................................................3<br />
Multi-Cylinder 4-Stroke Carburetor Adjustments...............................................4<br />
Pilot Screw Adjustment .................................................................................5<br />
30/40 Carbureted Engine..................................................................................6<br />
Carburetor Synchronization ..............................................................................9<br />
Installing Carburetor Tuner............................................................................9<br />
Synchronizing Carburetors..........................................................................11<br />
Idle Speed Adjustment....................................................................................13<br />
VacuumMate Overview...................................................................................14<br />
VacuumMate Overview...................................................................................15<br />
Average (AVE) and Dynamic (DYN) Vacuum Measurement Modes...........15<br />
Engine Speed, RPM (Revolutions Per Minute) ...........................................16<br />
Electrical Connections.................................................................................16<br />
Pneumatic Connections ..............................................................................17<br />
How to Proceed...........................................................................................17<br />
Diagnostics: How to Use the “DYN” (Dynamic) Mode.................................18<br />
Background Information ..............................................................................19<br />
90-898311 5-3
Notes<br />
_______________________<br />
_______________________<br />
_______________________<br />
_______________________<br />
_______________________<br />
_______________________<br />
_______________________<br />
_______________________<br />
_______________________<br />
_______________________<br />
_______________________<br />
_______________________<br />
_______________________<br />
_______________________<br />
_______________________<br />
_______________________<br />
_______________________<br />
_______________________<br />
_______________________<br />
_______________________<br />
_______________________<br />
_______________________<br />
_______________________<br />
_______________________<br />
_______________________<br />
_______________________<br />
_______________________<br />
_______________________<br />
Multi-Cylinder 4-Stroke Carburetor<br />
Adjustments<br />
1) Check engine idling speed, adjust if unstable (refer to “Pilot Screw<br />
Adjustment” and “Carburetor Synchronization” below).<br />
2) Check vacuum pressure variation range, adjust if out of specification (refer<br />
to “Pilot Screw Adjustment” and “Carburetor Synchronization” below).<br />
Vacuum Variation Range: within 5 cm Hg<br />
NOTE: The carburetors are synchronized by adjusting the intake manifold<br />
vacuum on the carburetors. Use Carburetor Tuner (91-80964A1) to measure<br />
the vacuum.<br />
CAUTION<br />
Do not adjust the carburetors when they are operating properly, excess<br />
adjustments can cause poor engine performance.<br />
90-898311 5-4
Pilot Screw Adjustment<br />
PILOT SCREW ADJUSTMENT STEPS<br />
For EPA Engines:<br />
1) Pilot screw is plugged for EPA specifications, making pilot screw nonadjustable.<br />
For Non-EPA Engines:<br />
1) After warming up engine, turn in all of the pilot screws until they are lightly<br />
seated.<br />
2) Turn out the pilot screw the specified number of turns.<br />
a) Pilot Screw<br />
b) Lightly Seated Screw<br />
c) Properly Adjusted Screw<br />
3) If the engine operates:<br />
a) Smooth:<br />
(1.)Do not make any further adjustments.<br />
b) Unstable:<br />
(1.)Turn each pilot screw in until the engine idle speed drops<br />
approximately 40 rpm, then back each screw out 3/4 of a turn.<br />
90-898311 5-5<br />
Notes<br />
_______________________<br />
_______________________<br />
_______________________<br />
_______________________<br />
_______________________<br />
_______________________<br />
_______________________<br />
_______________________<br />
_______________________<br />
_______________________<br />
_______________________<br />
_______________________<br />
_______________________<br />
_______________________<br />
_______________________<br />
_______________________<br />
_______________________<br />
_______________________<br />
_______________________<br />
_______________________<br />
_______________________<br />
_______________________<br />
_______________________<br />
_______________________<br />
_______________________<br />
_______________________<br />
_______________________<br />
_______________________
Notes<br />
_______________________<br />
_______________________<br />
_______________________<br />
_______________________<br />
_______________________<br />
_______________________<br />
_______________________<br />
_______________________<br />
_______________________<br />
_______________________<br />
_______________________<br />
_______________________<br />
_______________________<br />
_______________________<br />
_______________________<br />
_______________________<br />
_______________________<br />
_______________________<br />
_______________________<br />
_______________________<br />
_______________________<br />
_______________________<br />
_______________________<br />
_______________________<br />
_______________________<br />
_______________________<br />
_______________________<br />
_______________________<br />
30/40 Carbureted Engine<br />
WARNING<br />
To prevent personal injury or possible death, from loss of balance or<br />
stability while servicing the motor, DO NOT attempt to check timing<br />
while boat is in motion. Failure to follow one of the recommended<br />
servicing procedures may result in the person falling overboard or<br />
causing personal injury from fall in boat.<br />
WARNING<br />
To prevent personal injury from spinning flywheel, Do not attempt to<br />
remove flywheel cover or place hands on top of cover when checking<br />
ignition timing.<br />
Ignition timing is not adjustable. The Electronic Control Module unit<br />
electronically controls the ignition timing.<br />
When initially running the outboard, use a timing light to verify that the ignition<br />
timing falls within the timing windows as described within the following tests. If<br />
the ignition timing does not stay within the timing windows, replace the ignition<br />
E.C.M. unit and retest. (Refer to the Ignition Diagnostic Procedures tests in<br />
Section 2A.)<br />
IMPORTANT: When checking the timing with the engine running, one of<br />
the following test procedures must be followed.<br />
90-898311 5-6
Check maximum timing per specification while running the outboard:<br />
• IN A TEST TANK<br />
• ON A DYNAMOMETER<br />
• ON A BOAT SECURED ON A TRAILER “Backed in Water”<br />
1) Attach timing light to #1 spark plug lead.<br />
a) Timing Light Clamp<br />
b) #1 Spark Plug Lead<br />
c) Timing Window-Electric Start Models<br />
d) Timing Window – Manual Start Models<br />
90-898311 5-7
Notes<br />
_______________________<br />
_______________________<br />
_______________________<br />
_______________________<br />
_______________________<br />
_______________________<br />
_______________________<br />
_______________________<br />
_______________________<br />
_______________________<br />
_______________________<br />
_______________________<br />
_______________________<br />
_______________________<br />
_______________________<br />
_______________________<br />
_______________________<br />
_______________________<br />
_______________________<br />
_______________________<br />
_______________________<br />
_______________________<br />
_______________________<br />
_______________________<br />
_______________________<br />
_______________________<br />
_______________________<br />
_______________________<br />
2) Place the outboard in “Forward” gear and check timing at idle “Retarded.”<br />
(If not within specification window, refer to Diagnostic Test Procedures<br />
Section 2A.)<br />
a) Timing Mark (Full Retarded)<br />
3) Slowly increase the engine RPM while watching the ignition timing marks.<br />
The timing should increase to the maximum timing specification “Full<br />
Advance” at approximately 6000 RPM. (If not within specification window,<br />
refer to Diagnostic Test Procedures Section 2A.)<br />
a) Timing Mark (Full Advance)<br />
90-898311 5-8
Carburetor Synchronization<br />
NOTE: The carburetors are synchronized by adjusting the intake manifold<br />
vacuum on the carburetors. Use Carburetor Tuner (91-809641A1) or<br />
Vacuummate Tuner (p/n 91-809871-1) to measure the vacuum.<br />
Installing Carburetor Tuner<br />
1) Remove spark plugs from the intake manifold.<br />
2) Install intake manifold hose adaptor in each plug hole. Tighten securely.<br />
NOTE: Intake manifold hose adaptors are provided with the Carburetor Tuner.<br />
a) Intake Manifold Plugs (3)<br />
b) Intake Manifold Hose Adaptor (3) From Vacuummate Carb. Tuner<br />
(Available Separately – P/N 91-888324)<br />
c) Intake Manifold Hose Adaptor (3) From Mercury Filled Carb Tuner<br />
90-898311 5-9
3) Connect the Carburetor Tuner to the hose adaptors.<br />
4) Pinch off enrichener lines between carburetors with a tubing clamp.<br />
CAUTION<br />
When using the old style mercury filled carb. tuner (p/n 91-809641)<br />
install filters (4) (p/n 35-18206) in each line. This will prevent mercury<br />
from being drawn into carburetors during an abrupt throttle change.<br />
a) Tubing Clamp (91-804063)<br />
b) Carburetor Tuner (P/N 91-809871-1)<br />
90-898311 5-10
Synchronizing Carburetors<br />
1) With the outboard in water, start engine and allow to warm up. Shift the<br />
outboard to neutral.<br />
2) Connect a tachometer to the engine.<br />
3) Adjust idle RPM screw on bottom carburetor to obtain an idle setting of<br />
1000 RPM in neutral. If necessary, keep adjusting the idle screw.<br />
NOTE: Keep engine speed set at 1000 RPM in neutral while synchronizing<br />
carburetors.<br />
a) Idle RPM Screw<br />
90-898311 5-11
4) Read the vacuum of cylinder #4. It’s not important to be at any specific<br />
vacuum setting.<br />
5) Adjust the carburetor synchronization screws of cylinders #3, #2 and #1 to<br />
match the base vacuum of cylinder #4.<br />
NOTE: Keep viewing the tachometer, as the engine RPM may fluctuate during<br />
adjustments. Keep adjusting the idle RPM screw in order to keep the engine<br />
speed at 1000 RPM.<br />
a) Carburetor Synchronization Screw #1<br />
b) Carburetor Synchronization Screw #2<br />
c) Throttle Cam<br />
90-898311 5-12
CAUTION<br />
When using the old style mercury filled carb. tuner (91-809641) install<br />
filters (4) in each line. This will prevent mercury from being drawn into<br />
carburetors during an abrupt throttle change.<br />
WARNING<br />
When revving the engine move the throttle cam to increase RPM. Do not<br />
use remote control or tiller handle twist throttle to increase RPM. If you<br />
do, the throttle linkage will contact the bottom intake manifold hose<br />
adaptor and damage the fitting.<br />
6) Rev engine a few times and let engine idle for 15 seconds. Check that the<br />
vacuum values remain the same between cylinders. Re-adjust if<br />
necessary.<br />
7) Stop engine, remove adaptors and reinstall plugs. Refer to Idle Speed<br />
Adjustment and adjust the idle RPM back to specification.<br />
Idle Speed Adjustment<br />
NOTE: The engine should be completely warmed up for the adjustment.<br />
Correct adjustments can not be obtained in a cold condition.<br />
1) With the outboard in water, start engine and allow to warm up. Shift the<br />
outboard to forward gear.<br />
2) With the outboard in forward gear, turn the idle adjustment screw located<br />
on the #4 (bottom) carburetor to attain the specified idle RPM.<br />
a) Idle RPM Adjustment Screw<br />
90-898311 5-13
VacuumMate Overview<br />
VacuumMate’s 3-in-1 functions are all essential for rapid, precise and reliable<br />
intake synchronizing.<br />
Use the RPM mode for the essential adjustment of the engine speed to the<br />
correct value as outlined in the service manual, prior to and after<br />
synchronizing. (No need for a separate tachometer) Then accurately<br />
synchronize in the ”AVE” mode to the specified values as outlined in the<br />
service manual. If synchronizing seem difficult to achieve, flick the selector<br />
switch over to the ”DYN” mode for an immediate visual check that the cylinder<br />
seals and valves are functioning correctly. A valve leak or other sealing defect<br />
affecting the manifold pressure will spoil any attempt at a correct<br />
synchronization of the relevant cylinder’s intake.<br />
The purpose of ”synchronizing” throttle valves is to bring the average vacuum<br />
settings in the various intake channels as close to their specified values as<br />
possible. Their specified values are (usually) equal but for some engines one<br />
or more cylinders may need a slightly different value from the others or<br />
specific reasons such as differential heat expansion in control linkages of<br />
differing lengths. It is therefore essential to consult the service manual.<br />
Precise adjustments are essential to ensure a stable engine idle speed and a<br />
good engine response.<br />
VacuumMate has four highly visible LED bar-graph displays for monitoring up<br />
to 4 cylinders.<br />
Average (AVE) and Dynamic (DYN) Vacuum<br />
Measurement Modes<br />
The pressure in the intake system of an engine is not constant, as it is caused<br />
by piston movement which causes the vacuum to oscillate between a<br />
minimum and maximum level in the form of a wave, called the vacuum<br />
waveform. The Average (AVE) setting is used for the synchronization of<br />
throttle valves on carburetors or fuel injected system. However the AVE<br />
setting will lack the speed and precision needed to follow Dynamically the very<br />
fast fluctuations of the vacuum waveform themselves so as to monitor the<br />
heights and relative positions of the crests and troughs of the waveforms for<br />
each cylinder. Only by monitoring and displaying these Dynamic<br />
characteristics that one can reveal the existence and nature of engine seal<br />
defects which will distort and ruin attempts at synchronization.<br />
90-898311 5-15<br />
Notes<br />
_______________________<br />
_______________________<br />
_______________________<br />
_______________________<br />
_______________________<br />
_______________________<br />
_______________________<br />
_______________________<br />
_______________________<br />
_______________________<br />
_______________________<br />
_______________________<br />
_______________________<br />
_______________________<br />
_______________________<br />
_______________________<br />
_______________________<br />
_______________________<br />
_______________________<br />
_______________________<br />
_______________________<br />
_______________________<br />
_______________________<br />
_______________________<br />
_______________________<br />
_______________________<br />
_______________________<br />
_______________________
Notes<br />
_______________________<br />
_______________________<br />
_______________________<br />
_______________________<br />
_______________________<br />
_______________________<br />
_______________________<br />
_______________________<br />
_______________________<br />
_______________________<br />
_______________________<br />
_______________________<br />
_______________________<br />
_______________________<br />
_______________________<br />
_______________________<br />
_______________________<br />
_______________________<br />
_______________________<br />
_______________________<br />
_______________________<br />
_______________________<br />
_______________________<br />
_______________________<br />
_______________________<br />
_______________________<br />
_______________________<br />
_______________________<br />
The VacuumMate’s electronics and LED bar-graph displays react extremely<br />
fast, fast enough to show in Dynamic (DYN) mode the vacuum waveform<br />
heights and relative positions for each connected cylinder. This is displayed as<br />
a column of light on each LED display channel, extending between the crests<br />
and troughs of the waveforms. By comparing the relative heights and positions<br />
of the columns of light for each channel one can detect various problems<br />
which would normally require disassembly and detailed investigation of engine<br />
components such as valves and pistons.<br />
Use the AVE / DYN selector switch to select AVE or DYN mode as required.<br />
In AVE mode the VacuumMate measures average vacuum in 3 ranges: 5-25 /<br />
20-40 / 35-55 cm Hg, selected by the 3-position selector switch. The<br />
overlapping scale ranges help to avoid ”losing sight” of the display on one<br />
channel or other channel if the measured values are somewhat out of<br />
synchronization and close to the end of the scale range. Resolution is a<br />
precise 0.5 cm Hg on all scales.<br />
Use the DYN mode to check for and analyze defective engine seals in case of<br />
apparent difficulty in arriving at a satisfactory synchronization, even after<br />
several attempts and probably associated with an irregular engine rhythm.<br />
The function of the DYN mode is to compare the waveform heights of each<br />
cylinder and the relative positions of their crests and troughs, which should be<br />
similar for each channel. The precise values themselves are not relevant to<br />
this purpose.<br />
Engine Speed, RPM (Revolutions Per Minute)<br />
In RPM mode the VacuumMate monitors the waveform pulses from the<br />
pneumatic engine connections, so no other pick-up or probe is required. As<br />
the waveform pulses are not subjected to interference or other HT parasitic<br />
stray signals they provide a much easier and more reliable signal input than<br />
other methods. The RPM function receives it’s signal input from the waveform<br />
pulses from the #1 channel hose connection, so it is important to connect this<br />
hose in cases where all four hose connections are made.<br />
The RPM mode is displays engine speeds from 500 to 2500 rpm, with 50 rpm<br />
resolution.<br />
The 2stroke / 4-stroke selector switch allows correctly displayed values for<br />
both types of engines. Incorrect selection will display either double the true<br />
RPM (4-stroke selected for 2-stroke) or half of it (2-stroke selected for 4stroke).<br />
Electrical Connections<br />
The VacuumMate requires a 12Vdc external power source using the cord-set<br />
with alligator clips. Connect the red alligator clip to the positive terminal and<br />
the black to the negative terminal of the battery. If the input voltage to the<br />
VacuumMate is below 9Vdc or above 15Vdc or if the connections are incorrect<br />
(inverted), the VacuumMate will not function. In either case, the red battery<br />
warning LED will illuminate.<br />
90-898311 5-16
Pneumatic Connections<br />
To function correctly and give true readings all of the VacuumMate’s hoses<br />
and connections must be absolutely air-tight, including the connections to the<br />
adapters and at the connection points on the engines. Protect the hoses and<br />
connection elements from physical damage and stress and before<br />
synchronizing conduct visual and pneumatic checks to ensure there are no<br />
defects such as holes or cuts in the hoses.<br />
The service manual will indicate where to make the necessary hose<br />
connections on the engine to measure the intake vacuum. The vacuum<br />
connection points are plugged with screws, insert the VacuumMate’s threaded<br />
adapters after removing the sealing screws.<br />
The ”flexi-rigid” guide tubes can be bent slightly. They act as a guide for the<br />
plastic hoses within them, which can be rotated for tightening the thread. This<br />
helps to make connections even where the points are hard to reach. Reverse<br />
thread construction at the junction of the plastic tubes & their threaded metal<br />
end pieces allow he unscrewing of the adapters from hot engines without the<br />
risk of the metal pieces sticking in the threaded ports.<br />
How to Proceed<br />
TO START<br />
After making the necessary pneumatic connections, start the engine and let it<br />
warm up.<br />
Connect the VacuumMate to a suitable electrical input. Check that the red<br />
indicator light is not signaling a bad power input.<br />
ADJUST THE ENGINE SPEED<br />
Select the AVE mode with the AVE/ DYN selector switch. Put the RPM / VAC<br />
switch in the RPM position. Position the 2-stroke/4-stroke selector according<br />
to engine type. The left scale (Channel 1) can now be used to monitor engine<br />
speed from 500-2500 rpm with a scale resolution of 50 rpm per individual LED<br />
segment.<br />
Adjust the engine speed to the rpm specified by the service manual for the<br />
synchronization procedure.<br />
Readjust to maintain engine speed to the rpm if necessary during the<br />
synchronization procedure. When the synchronizing tack has been<br />
satisfactory completed, return the RPM mode to reset the engine speed if<br />
necessary to the correct specified idling speed.<br />
SYNCHRONIZATION<br />
One of the carburetors is called the ”base” or ”fixed” carburetor, sometimes<br />
the ”reference carburetor”. This is the carb actuated directly by the throttle<br />
cable. It is best to connect the rubber hose of channel 1 to this ”fixed” carb for<br />
convenience in synchronization the other to it. The other throttle valves are<br />
linked to the fixed carb. Refer to the service manual to understand in which<br />
sequence synchronization is possible.<br />
90-898311 5-17<br />
Notes<br />
_______________________<br />
_______________________<br />
_______________________<br />
_______________________<br />
_______________________<br />
_______________________<br />
_______________________<br />
_______________________<br />
_______________________<br />
_______________________<br />
_______________________<br />
_______________________<br />
_______________________<br />
_______________________<br />
_______________________<br />
_______________________<br />
_______________________<br />
_______________________<br />
_______________________<br />
_______________________<br />
_______________________<br />
_______________________<br />
_______________________<br />
_______________________<br />
_______________________<br />
_______________________<br />
_______________________<br />
_______________________
Notes<br />
_______________________<br />
_______________________<br />
_______________________<br />
_______________________<br />
_______________________<br />
_______________________<br />
_______________________<br />
_______________________<br />
_______________________<br />
_______________________<br />
_______________________<br />
_______________________<br />
_______________________<br />
_______________________<br />
_______________________<br />
_______________________<br />
_______________________<br />
_______________________<br />
_______________________<br />
_______________________<br />
_______________________<br />
_______________________<br />
_______________________<br />
_______________________<br />
_______________________<br />
_______________________<br />
_______________________<br />
_______________________<br />
Usually you should start adjusting the carburetor next to the fixed one. The<br />
object s to achieve the specified readings on each cylinder during idling unless<br />
the values for a particular engine are slightly different. Start with the scale<br />
range switch in the position 5-25 cm Hg. If necessary shift to the 20-40 cm hg<br />
scale.<br />
Flick over to the RPM display periodically while synchronizing to check that<br />
the engine RPM has not wandered off the setting, in which case readjust to<br />
the correct RPM before continuing.<br />
In case of apparent difficulty in arriving at a satisfactory synchronization even<br />
after several attempts, for example if the LED displays indicate a synchronized<br />
engine but the engine sounds irregular, select the DYN mode to check for<br />
analyze defective engine seals.<br />
FINISHING THE JOB<br />
Once a satisfactory synchronization has been achieved, switch over once<br />
again to the RPM function and reset the engine idling speed as required.<br />
Switch off the engine, disconnect the VacuumMate’s electrical input from the<br />
source and disconnect the pneumatic engine connections.<br />
Diagnostics: How to Use the “DYN” (Dynamic) Mode<br />
By monitoring and displaying the Dynamic intake vacuum waveform<br />
characteristics one can reveal the existence and nature of engine seal defects<br />
which distort and spoil attempts at synchronization. In case of difficulty in<br />
arriving at a satisfactory synchronization, even after several attempts, (in<br />
which case you may also have noticed an irregular engine rhythm), select the<br />
DYN mode (but only after trying as best you can to synchronize in AVE<br />
mode).<br />
Some engine seal defects quickly diagnosed in DYN mode are:<br />
a) Leaking intake or exhaust valves<br />
b) False air entering the intake system<br />
c) Compression loss<br />
90-898311 5-18
Background Information<br />
The following diagrams show some more realistic examples of pressure<br />
waveforms which can occur in the intake manifold of a 4-stroke engine.<br />
Compare with the earlier drawings.<br />
The pressure scale orientation has been deliberately inverted so as to rather<br />
show vacuum scale so as to correlate with the LED displays of the<br />
VacuumMate.<br />
The display appears as a shimmering column of light. In reality a single LED<br />
on each connected display channel follows the wave-form curve (from left to<br />
right) at great speed rather like a very fast roller coaster car, tracing the<br />
vacuum wave-form between troughs and rests. Because the speed of<br />
observation of the human eye cannot match that of the running engine’s<br />
vacuum wave-form your eye sees the resulting displays as a column of light of<br />
height and position equating to the troughs and crests.<br />
NORMAL INTAKE VACUUM WAVE-FORM, ENGINE SEALS O.K.<br />
The LED-column display illustrated with a typical intake pressure wave-form.<br />
During the intake stroke the intake valve is open and the piston moves down,<br />
increasing the vacuum until the crest of the vacuum wave–form (inverted<br />
pressures wave-form) is attained.<br />
When the intake valve closes, suction ceases and the intake mixture coming<br />
through the throttle valve fills up the vacuum, so that the vacuum is ’released’<br />
to atmospheric pressure (“Pa” mark) at the trough of the vacuum wave-form.<br />
The slight apparent ’over-shooting” of the “Pa” mark datum can be thought of<br />
as due to ”shock” effect.<br />
In DYN mode the waveform heights of each connected cylinder and the<br />
relative positions of their crests and troughs are displayed side by side for<br />
direct comparison.<br />
90-898311 5-19<br />
Notes<br />
_______________________<br />
_______________________<br />
_______________________<br />
_______________________<br />
_______________________<br />
_______________________<br />
_______________________<br />
_______________________<br />
_______________________<br />
_______________________<br />
_______________________<br />
_______________________<br />
_______________________<br />
_______________________<br />
_______________________<br />
_______________________<br />
_______________________<br />
_______________________<br />
_______________________<br />
_______________________<br />
_______________________<br />
_______________________<br />
_______________________<br />
_______________________<br />
_______________________<br />
_______________________<br />
_______________________<br />
_______________________
Notes<br />
_______________________<br />
_______________________<br />
_______________________<br />
_______________________<br />
_______________________<br />
_______________________<br />
_______________________<br />
_______________________<br />
_______________________<br />
_______________________<br />
_______________________<br />
_______________________<br />
_______________________<br />
_______________________<br />
_______________________<br />
_______________________<br />
_______________________<br />
_______________________<br />
_______________________<br />
_______________________<br />
_______________________<br />
_______________________<br />
_______________________<br />
_______________________<br />
_______________________<br />
_______________________<br />
_______________________<br />
_______________________<br />
When all carburetors have been correctly synchronized and everything works<br />
normally, the bands should all be the same as listed in the service manual<br />
(typical examples are shown).<br />
The VacuumMate has an auto–ranging feature in DYN mode. The range is<br />
automatically adjusted to achieve optimal resolution for the comparison of the<br />
connected cylinders. The cylinder with the highest waveform crest governs the<br />
auto–ranging adjustment. The bases of the displayed columns of light for<br />
engines without defective seals should normally be almost exactly opposite<br />
the ”Pa” mark (Pa = Atmospheric pressure) on the right hand side of the LED<br />
displays. Other than the Pa mark there are no scale markings for the DYN<br />
mode as the purpose is not to measure but rather to compare the connected<br />
cylinders. A light column extending downwards into the P-zone (below the Pa<br />
level) means Positive pressure (higher than atmospheric), upwards into the P–<br />
zone means vacuum.<br />
Some abnormal display patterns were shown earlier, center and right. The<br />
nature of the waveform anomaly revels the nature of the engine sealing defect<br />
because various different defects give rise to different patterns of waveform<br />
anomaly. The most common anomalous wave-forms are shown following.<br />
EXAMPLE 1:<br />
Exhaust Valve Not Closing<br />
When one of the exhaust valves is not closing completely, a part of the<br />
exhaust gas will be ”sucked back” into the combustion chamber during the<br />
intake stroke. This is evident from the DYN mode LED column displayed for<br />
that cylinder, whose highest point (crest of the vacuum wave-form) will be<br />
lower than that on the other (normal) cylinders.<br />
False Air Intake<br />
“False air” is air which is sucked into the cylinder after the throttle valve. For<br />
example in case of a leak in the intake manifold. The display in DYN mode<br />
looks very similar to that of a leaking exhaust valve. The highest point of the<br />
LED column displayed for that cylinder will also be lower than on the other<br />
cylinders.<br />
90-898311 5-20
A typical anomalous wave-form for these defects is illustrated following.<br />
EXAMPLE 1: Leak Through Exhaust Valve or Intake Manifold<br />
The normal wave-form is shown in a thinner line for comparison with the<br />
darker abnormal wave-form.<br />
EXAMPLE 2:<br />
Intake Valve Not Closing<br />
If one of the intake valves is not closing completely, it means that the<br />
combustion chamber is continuously connected with the intake system. During<br />
the combustion cycle, a high pressure wave will ’blow–back’ to the carburetor<br />
creating positive pressure in the intake manifold. The trough of the vacuum<br />
wave–form (the low point of the displayed dynamic band for that cylinder), will<br />
move under the Pa line towards the P+ side, reflecting this positive pressure.<br />
Example 2: Leaking Intake Valve<br />
The normal wave–form is shown in a thinner line for comparison with the<br />
darker abnormal wave–form.<br />
90-898311 5-21<br />
Notes<br />
_______________________<br />
_______________________<br />
_______________________<br />
_______________________<br />
_______________________<br />
_______________________<br />
_______________________<br />
_______________________<br />
_______________________<br />
_______________________<br />
_______________________<br />
_______________________<br />
_______________________<br />
_______________________<br />
_______________________<br />
_______________________<br />
_______________________<br />
_______________________<br />
_______________________<br />
_______________________<br />
_______________________<br />
_______________________<br />
_______________________<br />
_______________________<br />
_______________________<br />
_______________________<br />
_______________________<br />
_______________________
90-898311 5-22