Buoyancy Compensator Owner's Manual - Aqua Lung
Buoyancy Compensator Owner's Manual - Aqua Lung
Buoyancy Compensator Owner's Manual - Aqua Lung

Create successful ePaper yourself
Turn your PDF publications into a flip-book with our unique Google optimized e-Paper software.
<strong>Buoyancy</strong><br />
<strong>Compensator</strong><br />
<strong>Owner's</strong><br />
<strong>Manual</strong>
Copyright Notice<br />
This owner’s manual is copyrighted, all rights reserved. It may not, in whole<br />
or in part, be copied, photocopied, reproduced, translated, or reduced to any<br />
electronic medium or machine readable form without prior consent in writing from<br />
Sea Quest.<br />
©2006 Sea Quest<br />
<strong>Buoyancy</strong> <strong>Compensator</strong> Owner’s <strong>Manual</strong><br />
P/N 18208, Rev. 6/06<br />
Air Source, QuickDraw, Black Diamond, Balance, Libra, and Diva are registered<br />
trademarks of Sea Quest.<br />
Warnings, Cautions and Notes<br />
Pay special attention to information provided in warnings, cautions,<br />
and notes, that is accompanied by these symbols:<br />
A WARNING indicates a procedure or situation<br />
that, if not avoided, could result in serious injury<br />
or death to the user.<br />
A CAutIoN indicates any situation or technique<br />
that could cause damage to the product, and could<br />
subsequently result in injury to the user.<br />
A Note is used to emphasize important points,<br />
tips, and reminders.<br />
This manual provides essential instructions for the proper<br />
fitting, adjustment, inspection, and care of your new BC.<br />
Because Sea Quest BC's utilize patented technology, it is<br />
very important to take the time to read these instructions<br />
in order to understand and fully enjoy the features that are<br />
unique to your specific model. Improper use of this BC<br />
could result in serious injury or death.
<strong>Buoyancy</strong> <strong>Compensator</strong>s Contents<br />
General Precautions & Warnings 2<br />
Design & Function 3<br />
setup 4<br />
Attachment of the LP Hose to the First Stage Regulator ....................... 4<br />
Attachment of the BC to the Cylinder ..................................................... 5<br />
Rethreading the Tank Band System ....................................................... 5<br />
Adjustments 6<br />
Compensating Elastic Waistband .......................................................... 6<br />
Suspension Waistband System ............................................................ 6<br />
Size-Adjustable Multiset Waistband ................................................... 7<br />
Black Diamond Waistband Adjustment ............................................... 7<br />
optional Chest strap Kit .................................................................8<br />
Double Cylinder setup ....................................................................8<br />
Weight Integration 9<br />
Holster Weight system - setup & Installation ...............................9<br />
Weight Module Installation ................................................................... 0<br />
Releasing the Weight Modules ............................................................<br />
non-Releasable Weight .................................................................12<br />
operation 13<br />
Air Source Inflator/ Second Stage ................................................13<br />
Inflation Methods ...........................................................................13<br />
Oral Inflation ......................................................................................... 3<br />
Power Inflation ..................................................................................... 3<br />
Deflation Methods ..........................................................................13<br />
Deflation Via the Oral Inflator .............................................................. 4<br />
Deflation Via the Dual Exhaust Valve ................................................... 4<br />
Lower OPR/ Dump Valve ..................................................................... 5<br />
Pre-Dive Inspection 16<br />
Maintenance 17<br />
Dealer service 18<br />
Warranty Information 19<br />
Restrictions .......................................................................................... 20<br />
Returning Your BC For Service ............................................................ 20<br />
service Record 21
SAFETY<br />
GENERAL PRECAUTIONS & WARNINGS<br />
2<br />
Before using this buoyancy compensator (BC), you must receive<br />
instruction and certification in SCUBA diving and buoyancy control<br />
from a recognized training agency. Use of SCUBA equipment by<br />
uncertified or untrained persons is dangerous and can result<br />
in injury or death.<br />
Read this owner's manual completely before attempting to use your<br />
BC, and become familiar with it first in a controlled environment<br />
such as a swimming pool, in order to weight yourself properly and<br />
to become comfortable with using its many features and adjustments.<br />
Before every dive, perform a complete pre-dive inspection according<br />
to the procedure prescribed in this manual, to ensure that all<br />
components are functioning properly and no signs of damage or<br />
leaks are present. If you find that your BC is not functioning properly<br />
or is damaged, remove it from service until it can be repaired<br />
by an authorized Sea Quest Dealer.<br />
Your BC is not a lift bag. DO NOT use it to bring heavy objects to<br />
the surface. Doing so may cause permanent damage to the BC,<br />
and could also result in serious injury or death due to embolism or<br />
decompression sickness.<br />
In an emergency such as an out of air situation or uncontrolled<br />
descent, it is important to remove and jettison weight immediately.<br />
DO NOT depend solely on using your BC's power inflator to lift you<br />
to the surface.<br />
In the event of an uncontrolled, rapid ascent, it is important to immediately<br />
begin venting air from the BC. Continue venting air to<br />
slow your ascent rate if neutral buoyancy cannot be reestablished.<br />
DO NOT inhale from your oral inflator. The BC may contain harmful<br />
contaminants or gasses, which could cause suffocation or injury.<br />
Factory prescribed service for this BC must be performed at least<br />
once annually by a factory trained Sea Quest technician who is employed<br />
by an authorized Sea Quest Dealer. Annual service consists<br />
of a complete overhaul of the power inflator, and a general airleak<br />
inspection of the bladder and valve connections.<br />
Disassembly, repair, or lubrication must not be attempted by persons<br />
who are not factory trained and authorized by Sea Quest.<br />
Unauthorized service will render the warranty null and void.
<strong>Buoyancy</strong> <strong>Compensator</strong>s<br />
DesIGn &<br />
FUnCtIon<br />
A buoyancy compensator (BC) is NOT a lifejacket! It is not designed<br />
to provide face-up flotation in all situations, and therefore<br />
it does not meet U.S. Coast Guard regulations for a life preserver<br />
or personal flotation device (PFD). If you become unconscious in<br />
the water without a buddy present to immediately assist you, you<br />
may suffer serious injury or death from drowning.<br />
Your buoyancy compensator is primarily designed to help you maintain<br />
neutral buoyancy while in a comfortably balanced, face-down swimming<br />
position underwater. It is also designed to provide you with flotation so<br />
that you can rest on the surface, but it is not designed to function as a<br />
life preserver or personal flotation device (PFD). In order to meet U.S.<br />
Coast Guard regulations, a PFD must be designed so that it automatically<br />
rights you to a face-up position and holds your head out of the water on<br />
the surface. The design characteristics of a personal flotation device are<br />
therefore different from those of a buoyancy compensator. The ability of<br />
any flotation device to float you in a face-up position can also be affected<br />
by other diving equipment you wear, including a cylinder or exposure suit,<br />
and whether it can be inflated before you lose consciousness.<br />
For this reason, it is important to always dive with a buddy, and maintain<br />
close proximity with them at all times. Do not depend on any flotation<br />
device to hold your face above the surface in the event that you are<br />
rendered unconscious in the water while diving.<br />
Although this manual provides some basic guidelines for certain<br />
buoyancy control techniques, it is not a substitute for training from<br />
a professional diving instructor. Failure to weight yourself properly<br />
may create a hazardous condition that could lead to serious<br />
injury or death. If you are unsure how to weight yourself in order<br />
to achieve optimum buoyancy underwater and on the surface, do<br />
not dive until you have obtained the necessary instruction from<br />
your diving instructor or an authorized Sea Quest Dealer.<br />
If you have any questions regarding your <strong>Buoyancy</strong> <strong>Compensator</strong> or<br />
these instructions, contact your Sea Quest Dealer or Sea Quest at:<br />
(760) 597-5000.<br />
3
SETUP<br />
Sea Quest recommends that you should bring your buoyancy<br />
compensator, together with your regulator, to your Authorized Sea<br />
Quest Dealer for the installation of the LP inflator hose and other<br />
accessories. The retailer can also answer any questions you may<br />
have pertaining to the information in this manual. If it is not possible<br />
to return the BC with your regulator to your Authorized Sea Quest<br />
Dealer, you may install the low pressure quick disconnect inflator<br />
hose by carefully performing the steps in the following procedure.<br />
4<br />
DO NOT connect the inflator hose to a high pressure (HP) port<br />
(greater than 200 psi). This may cause the hose to burst when<br />
pressurized, which can result in serious injury.<br />
Attachment of the BC LP Hose to the First Stage Regulator<br />
Most regulators have low pressure (LP) ports (3/8"/9.5mm) that are<br />
smaller than the high pressure (HP) port(s) (7/16"/11mm). However,<br />
some older regulators have HP and LP ports that are the same size<br />
(3/8"/9.5mm).<br />
All Sea Quest regulators, and most provided by other manufacturers,<br />
have a high pressure port that is clearly marked “HP,” with a small restrictive<br />
orifice that is visible when the port plug has been removed.<br />
If your regulator has all 3/8" (9.5mm) ports and you cannot decide if a<br />
port is LP or HP, use the following procedure:<br />
1. Connect your submersible pressure gauge to the port in question.<br />
2. Attach the regulator to a fully charged cylinder and open the cylinder<br />
valve.<br />
3. Take a pressure reading. If the gauge is connected to an LP port, it will<br />
show less than 200 psi (13.6 bar).<br />
Once you have located the desired LP port, follow this<br />
procedure:<br />
1. Remove the inflator hose from the power inflator body by gripping the<br />
grooved sleeve over the quick disconnect coupling with your thumb<br />
and forefinger and sliding the sleeve back.<br />
2. Remove the port plug from a low pressure port on the regulator using<br />
an appropriate size hex wrench or key.<br />
3. Check to ensure the O-ring is present and in good condition, and screw<br />
the threaded end of the hose into the port. Tighten to 40 inch-pounds<br />
(7kg/cm) with a 9/16" wrench.
<strong>Buoyancy</strong> <strong>Compensator</strong>s<br />
Attachment of the BC to the Cylinder (Figure 6)<br />
note: Sea Quest BC cylinder bands adjust for all standard cylinder<br />
diameters: 6.9" (17.5 cm), 7.25" (18.5 cm), and 8.0" (20.3 cm).<br />
1. Wet the cylinder band and then slide it over the cylinder so that the BC<br />
is at the desired position in relation to the cylinder valve.<br />
2. While holding the cylinder secure, pull the free end of the cylinder band<br />
until there is a very tight fit between the pack and the cylinder.<br />
3. Close the buckle halfway to hold the cylinder band taut, and thread the<br />
end of the band through the open slot in the end of the buckle.<br />
4. Pull the cam buckle closed so that it lies flat against the cylinder.<br />
Attach the loose webbing end to the velcro on the cylinder band.<br />
5. Test the tightness by pushing/pulling the back frame and cradle.<br />
Rethreading the tank Band system<br />
1. Start with the metal bale as close to the pack frame as possible. This<br />
provides the greatest range of adjustment.<br />
2. With the buckle fully open, thread the cylinder band up the middle slot<br />
and back down through the slot closest to the metal bale (Figure 1 and<br />
3). Pull the end to increase the tension in the band.<br />
3. Close the buckle halfway to prevent the webbing from slipping and<br />
thread the webbing through the open slot in the end of the buckle<br />
(Figure 2 and 3).<br />
Figure 1<br />
setUP<br />
The cylinder band may initially stretch as it becomes wet. Always<br />
wet the band prior to making the final adjustment, and apply<br />
enough tension to ensure that the cylinder is held completely secure.<br />
Test this connection before every dive. If the cylinder were<br />
to slip free from the BC while you are diving, you may lose your<br />
air supply, which could lead to serious injury or death.<br />
Figure 2<br />
Figure 3<br />
Complete threading<br />
path of the tank band.<br />
5
ADJUSTMENTS<br />
Compensating Elastic Waistband (Figure 4)<br />
Your BC may feature a padded cummerbund waistband that is connected<br />
to the harness with heavy duty elastic tensioning bands. These<br />
elastic bands allow the waistband to compensate for changes to body size<br />
resulting from exposure suit compression during the dive.<br />
To gain the maximum benefit from this feature, stretch the waistband<br />
snugly around your waist and fasten the Velcro secure with an overlap<br />
of at least 3". Any excess<br />
can be tucked under the Figure 4<br />
pocket area.<br />
On the surface, the<br />
waistband should fit as<br />
snug as possible without<br />
constricting or binding,<br />
while maintaining enough<br />
tension to fit securely at<br />
depth.<br />
Suspension Waistband System (Figure 5)<br />
Your BC may feature a padded compensating cummerbund waistband<br />
suspended by a 1" (2.5 cm) strap that weaves through a series of<br />
channels on the BC and the waistband. The suspension straps provide<br />
for an unchanging comfortable fit through the different stages of inflation<br />
of the BC. When inflating the BC, the air cell will move away from the<br />
body slightly, preventing any uncomfortable squeezing of the torso while<br />
maintaining a secure fit.<br />
6<br />
Figure 5<br />
Suspension strap<br />
and channels<br />
Heavy duty compensating elastic band
<strong>Buoyancy</strong> <strong>Compensator</strong>s<br />
Size-Adjustable Multiset Waistband (Figure 6)<br />
Your BC may feature the Multiset waistband system. Adjustments<br />
to the built-in Multiset waistband, if necessary, should be made prior to<br />
the dive. To shorten or lengthen the waistband, simply unhook the cummerbund<br />
clip and reinsert it into one of the three possible clip channels<br />
to accommodate the proper fit. A clip lock is located on both of the waistband<br />
clips. To open the clip lock, place your forefinger on the underside<br />
of the protruding end waistband clip and apply pressure to the tab with<br />
your thumb. After adjusting the Multiset waistband, close the clip lock by<br />
pushing the end of the waistband clip back into the clip lock. In order to<br />
properly center the Velcro closure at the front of the waistband, the same<br />
adjustment must be made to the other side. Be sure to wear your usual<br />
exposure suit when adjusting the waistband.<br />
Clip Channels<br />
Protruding<br />
end of<br />
waistband clip<br />
Waistband Clip<br />
Clip Lock<br />
(Thumb Tab)<br />
Figure 6<br />
ADjuStMentS<br />
Cummerbund Clip<br />
Black Diamond Waistband Adjustment (Figure 7)<br />
The waistband of the Black Diamond BC consists of two separate sections<br />
which are each attached to the rear panel with two stainless steel<br />
nut and bolt combinations.<br />
Hardware<br />
Attachment points<br />
for twin cylinder bands<br />
Waistband attachment points<br />
Figure 7<br />
7
ADJUSTMENTS<br />
Black Diamond Waistband Adjustment (continued)<br />
If necessary, the waistband can easily be remounted onto one of three<br />
grommeted attachment points by performing the following procedure:<br />
1. To remove the bolts which fasten each section to the rear panel, apply<br />
a medium size phillips screwdriver to loosen and remove each bolt,<br />
while holding the nut secure with a 3/8" open end wrench or socket.<br />
2. Reposition each section behind the rear panel so that the grommeted<br />
holes are aligned with the same adjustment points on either side. Reinstall<br />
both bolts and nuts to securely fasten each section in place.<br />
3. Don the BC over your exposure suit to check the fit.<br />
OPTIONAL CHEST STRAP KIT (FIGURE 8)<br />
Certain model BC's have D-rings which can accept<br />
the addition of a chest strap kit to hold the shoulder<br />
straps together across your sternum. This kit may be<br />
purchased separately from your dealer.<br />
Figure 8<br />
DOUBLE CYLINDER SETUP<br />
Some Sea Quest BC’s are adaptable for double cylinder setup, with<br />
pack frames which feature recessed and predrilled holes to accept retaining<br />
bolts for twin bands. Before adapting your BC for use with double<br />
cylinders, however, it is important to first compare the lift capacity of your<br />
particular size and model with the buoyancy specifications of the cylinders<br />
you intend to use. When fully charged and worn together as doubles,<br />
some cylinders may create enough negative buoyancy to counteract the<br />
amount of lift your BC can provide. At depth, this can lead to a dangerous<br />
situation if your wetsuit becomes compressed and you can no longer<br />
achieve positive buoyancy by jettisoning weight.<br />
Additionally, the structure of the back pack will not support the weight<br />
of an oversized set up. Sea Quest BC’s may only be used with standard<br />
aluminum (maximum 80 cf) or steel (maximum 100 cf, 3,500 psi) tanks.<br />
High volume, low pressure steel tanks can be especially hazardous when<br />
worn as doubles, due to their weight and buoyancy characteristics.<br />
8<br />
The use of oversized double set ups can lead to a dangerous<br />
situation underwater, including your inability to achieve<br />
positive buoyancy, or structural failure of the backpack. Such<br />
an event while diving may separate you from your primary air<br />
source, and could lead to serious injury or death.
<strong>Buoyancy</strong> <strong>Compensator</strong>s<br />
WeiGht inteGrateD buoyancy comPensators<br />
Your BC may feature a built-in weight holster system which can be<br />
used to either supplement or replace a conventional weight belt. This<br />
unique and patented feature allows you to quickly remove and jettison<br />
either one or both of two weight modules in the event of an emergency,<br />
thereby maintaining better control over your rate of ascent. These weight<br />
modules can also be easily reloaded into their respective holsters while<br />
you are wearing the BC. This makes Sea Quest weight integrated BC's<br />
much easier to don than other BC's which must be fully loaded with<br />
weight prior to donning.<br />
If your Sea Quest BC is a weight integrated model, it is very important<br />
to read the following instructions, and become thoroughly familiar with<br />
the correct methods for installing and releasing weight before you dive<br />
with it.<br />
Holster Weight system - setup & Installation<br />
The holster system features two interchangeable weight modules<br />
which can be filled with either block weights or “soft weight” (pouches<br />
containing lead shot), in increments of 5 pounds or less (Figure 9). For<br />
maximum comfort, soft weight is strongly recommended. With the exception<br />
of the Black Diamond *, these weight modules can each hold a<br />
maximum of 10 pounds (20 pounds total).<br />
Figure 9<br />
Release Handle<br />
Front Side<br />
To fill the weight modules, it will<br />
be necessary to first remove them<br />
from their holsters, if they are already<br />
installed, by firmly pulling the release<br />
handle toward the center of the cummerbund<br />
(Figure 10).<br />
Weight Modules<br />
Figure 10<br />
Back Side<br />
Pull handle forward<br />
and away from BC<br />
to release weight<br />
module.<br />
* Black Diamond modules can each hold 6 pounds (32 pounds total).<br />
WeIGHt<br />
InteGRAtIon<br />
Velcro<br />
Closure Flap<br />
9
WEIGHT<br />
INTEGRATION<br />
10<br />
The weight modules in some models are specially pre-formed to<br />
fit the contour of your waist. Do not attempt to bend or straighten<br />
a pre-formed module.<br />
Lift up each module's velcro flap, and<br />
lay it back over the handle. While holding<br />
the module fully open, insert the weight<br />
and then close the velcro flap (Figure 11).<br />
When each module has been loaded with<br />
weight, firmly run your hand over the flaps<br />
to seal the velcro securely in place.<br />
When installing weight, it is important to<br />
give consideration to balance, and to shifting that may occur if the weight<br />
compartments inside each module are partially filled. Always ensure that<br />
the weight is divided equally between the two holsters for optimum balance<br />
in the water. You may otherwise experience a tendency to roll to one<br />
side if one module is more heavily loaded than the other. If the amount of<br />
weight that is needed does not completely fill each module, arrange the<br />
weight within each compartment to minimize any shifting that may occur.<br />
Experiment with different sizes of weight until you arrive at the configuration<br />
that best suits your personal preference and provides maximum<br />
comfort.<br />
Weight Module Installation<br />
The weight modules can easily be installed while you are wearing the<br />
BC fully deflated. In fact, Sea Quest strongly recommends that you do not<br />
attempt to don your BC when it is fully loaded with weight and attached<br />
to a cylinder. You may otherwise risk injury, due to muscle strain or a<br />
temporary loss of balance.<br />
To install either module, deflate<br />
the BC and slide the closed end<br />
of the module into the opening of<br />
the holster, with the smooth panel<br />
facing out. Fold the retaining flap<br />
down over the velcro on the outside<br />
of the BC, and firmly run your<br />
hand over the flap to securely seal<br />
the velcro (Figure 12).<br />
Velcro attachment<br />
on BC<br />
pocket<br />
Velcro attachment<br />
on weight module<br />
is located on the<br />
back of the flap.<br />
Insert the weight<br />
into the weight<br />
module.<br />
Figure 12<br />
Release handle<br />
Figure 11
<strong>Buoyancy</strong> <strong>Compensator</strong>s<br />
Before every dive, it is important to make sure the Velcro flap<br />
of each weight holster is securely closed, in order to prevent<br />
the modules from falling out. Involuntary release of both weight<br />
modules underwater can cause a sudden increase in buoyancy<br />
and rapid ascent, and could lead to serious injury or death due to<br />
arterial gas embolism, decompression sickness, or drowning.<br />
Releasing the Weight Modules<br />
Unlike a weight belt, which has only<br />
one release mechanism, each weight<br />
module is connected to the BC independently<br />
of the other and must be released<br />
accordingly. This provides you<br />
with the option of being able to jettison<br />
one module at a time, and thereby<br />
maintain better control of your ascent<br />
rate in an emergency.<br />
In the event that you need to jet-<br />
Figure 13<br />
Pull handle forward<br />
and away from BC<br />
to release weight.<br />
WeIGHt<br />
InteGRAtIon<br />
tison weight, simply pull the release handle of each module towards the<br />
center of the cummerbund (Figure 13). When the module is completely<br />
disengaged from its holster, hold it out and away from your body before<br />
dropping it.<br />
Ensure that your weight modules are not obstructed by any<br />
straps, lines, etc. DO NOT add weight to the BC's accessory<br />
pockets, as this may interfere with the removal of the modules in<br />
an emergency. Failure to ditch weight in an emergency may lead<br />
to serious injury or death due to drowning.<br />
To avoid injuring other divers, always look below you before dropping<br />
weight.<br />
In addition to becoming familiar with the holster weight system yourself,<br />
it is very important to explain its function and design to your dive<br />
buddy, to ensure that they are equally familiar with it.
OPERATION<br />
NON-RELEASABLE WEIGHT<br />
To supplement the releasable weight you carry<br />
in your BC's holsters or on your weight belt, Sea<br />
Quest weight integrated BC's are also designed<br />
to carry up to 10 pounds of auxiliary weight in two<br />
fixed pouches (maximum 5 pounds each). These<br />
are located on the rear of the BC, on either side of<br />
the cylinder pad (Figure 14).<br />
This weight is non-releasable, however, and<br />
must not be used as your primary source of<br />
ballast. After filling the fixed pouches with weight,<br />
it is extremely important to check your buoyancy in Figure 14<br />
the water while wearing the BC attached to a fully<br />
charged cylinder. (Refer to the cylinder mounting instructions on page 5.)<br />
While standing in chest deep water, deflate the BC completely and check<br />
to ensure that you can easily achieve positive buoyancy by jettisoning<br />
your releasable weight.<br />
12<br />
The non-releasable compartments are intended strictly for containing<br />
auxiliary weight, used in addition to releasable weight. Do<br />
not fill either compartment with weight unless you are certain you<br />
can achieve positive buoyancy at depth by releasing your weight<br />
modules or weight belt while your BC is completely deflated.<br />
POWER INFLATOR OPERATION (FIGURE 15)<br />
Figure 15 Dual Exhaust<br />
Valve<br />
Mouthpiece<br />
Power Inflation<br />
Button<br />
Oral<br />
Inflation/<br />
Deflation<br />
Button<br />
Air Source (optional)<br />
Power Inflation<br />
Button<br />
Oral<br />
Inflation/<br />
Deflation<br />
Button
<strong>Buoyancy</strong> <strong>Compensator</strong>s<br />
air source inFlator/ seconD staGe (oPtional)<br />
To streamline your system with less hoses, you may consider purchasing<br />
the Air Source – a backup second stage regulator with an integrated<br />
power inflator. This option is available separately from your authorized<br />
Sea Quest Dealer, and can be installed onto any Sea Quest BC.<br />
inFlation methoDs<br />
oPeRAtIon<br />
➤ Oral Inflation<br />
To orally inflate your BC, place your lips on the oral inflator mouthpiece<br />
and exhale a small amount of air into the mouthpiece. This will purge any<br />
water that may still be in the housing. While continuing to exhale into the<br />
mouthpiece, depress the oral inflator button to inflate the BC. Immediately<br />
after exhaling, release the oral inflator button to prevent air from escaping.<br />
➤ Power Inflation<br />
To connect the LP hose, grip the grooved sleeve at the connection fitting<br />
with your thumb and forefinger, and slide the sleeve back. Place the<br />
fitting over the quick disconnect plug, and firmly push inward while releasing<br />
the sleeve. Check to ensure that the hose is securely attached.<br />
To inflate your BC with low pressure air, depress the power inflator button.<br />
Do not hold the inflator button depressed continuously underwater,<br />
as this could cause you to become excessively buoyant. Instead, depress<br />
the button in short bursts until you become neutrally buoyant.<br />
Do not rely on the power inflator as the only means to inflate your<br />
BC. It is important to practice the technique for orally inflating<br />
your BC so that you are prepared for any type of malfunction or<br />
out of air situation that could render the power inflator inoperable.<br />
You may otherwise be unable to achieve positive buoyancy in an<br />
emergency, which could lead to serious injury or death.<br />
DeFlation methoDs<br />
Throughout the course of a dive, it will be necessary to release air<br />
from the BC using one of the three methods described in the following<br />
instructions. Each method uses a valve that is in a different location. The<br />
method you choose at any time may depend on whether you are making<br />
your initial descent feet-first, head-first, or maintaining neutral buoyancy<br />
underwater. Always remember to utilize the valve that is at the highest<br />
point on the bladder, depending on your position in the water.<br />
3
OPERATION<br />
14<br />
Whenever you ascend, whether intentionally or accidentally, you<br />
must simultaneously vent air from the BC as needed to maintain<br />
buoyancy control. If air is allowed to expand inside the BC unchecked,<br />
you may experience a rapid, uncontrolled ascent, which<br />
could lead to serious injury or death if not immediately corrected,<br />
due to arterial gas embolism, decompression sickness, or drowning.<br />
To regain buoyancy control during an uncontrolled ascent,<br />
you must continuously exhaust air from the BC until you have<br />
stopped ascending.<br />
➤ Deflation Via the Oral Inflator (Figure 16)<br />
Air can be vented through the inflator by holding<br />
the inflator above your head and depressing<br />
the oral inflator button. This method can be used<br />
for making an initial feet-first descent, but is not<br />
very useful while you are in a facedown swimming<br />
position.<br />
Holding the oral inflator button depressed while the BC is deflated<br />
may allow water and debris to enter the air bladder.<br />
➤ Deflation Via the Dual Exhaust Valve (Figure 17)<br />
Inside the power inflator’s corrugated hose is a cable<br />
that attaches the power inflator to the dual valve at<br />
the top of the airway assembly. You can vent air from<br />
the BC by gently tugging straight down on the power<br />
inflator, or on the Trim Grip handle that is provided<br />
with the Air Source.<br />
This exhaust valve provides an effective and convenient<br />
way to vent air from the BC while in either an<br />
upright or facedown swimming position. It also functions<br />
as an overpressure relief (OPR) valve that will<br />
open automatically to relieve air pressure inside the<br />
bladder when it reaches approximately 2.5 psi over<br />
ambient. This feature is very critical for preventing<br />
stress or damage to the BC's bladder.<br />
Figure 16<br />
Figure 17
<strong>Buoyancy</strong> <strong>Compensator</strong>s<br />
➤ Lower OPR/ Dump Valve (Figure 18)<br />
In addition to the overpressure relief valve<br />
that is integrated into the dual valve, most Sea<br />
Quest BC's also have a redundant overpressure<br />
relief valve that is located on the lower<br />
rear portion of the air bladder. The primary<br />
function of this valve is to relieve excess air<br />
pressure inside the bladder, but it can also be<br />
opened manually by pulling on the ball and<br />
cord assembly to quickly dump air.<br />
This valve is most useful for emptying the<br />
bladder of air as quickly as possible while<br />
making a head-first descent, or swimming in a<br />
face-down position.<br />
oPeRAtIon<br />
Figure 18<br />
The proper function of either overpressure relief valve is vital<br />
to prevent damage to the BC bladder. Unauthorized service or<br />
tampering may render these valves inoperable, and could cause<br />
the bladder to leak or burst. This type of damage is not repairable,<br />
and is not covered under the terms and conditions of Sea<br />
Quest's Warranty.<br />
Most training agencies recommend that you should descend in<br />
an upright, feet-first position, in order to maintain a slower and<br />
more controlled descent. This is especially true if you experience<br />
difficulty equalizing your ears, or if you are descending in low visibility<br />
conditions.<br />
5
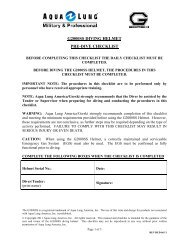
PRE-DIVE<br />
INSPECTION<br />
PRE-DIVE INSPECTION<br />
Before each use, the BC must be given a thorough visual inspection<br />
and functional test. NEVER dive with a BC that shows signs of damage<br />
to its bladder or valving until it has received a complete inspection and<br />
service from an authorized Sea Quest Dealer.<br />
Inspection Checklist:<br />
1. Connect the power inflator to a clean air source, via the LP quick disconnect<br />
hose. Depress and release the inflator button intermittently<br />
to ensure that the airflow is unobstructed, and that the airflow stops<br />
completely when the button is released.<br />
2. <strong>Manual</strong>ly operate the lower overpressure relief (OPR) valve by pulling<br />
on the attached ball and cord to release air from inside the BC, and<br />
then fully inflate the BC until the OPR valves open. Examine the operation<br />
of the OPR valves by repeatedly inflating the BC to ensure that<br />
they open to relieve excess pressure, yet close immediately afterward<br />
to allow the bladder to remain taut and fully inflated.<br />
3. Check the function of the oral inflator button, dual exhaust valve, and<br />
overpressure relief/ manual dump valve (see Deflation Methods) to<br />
ensure a rapid and unobstructed exhaust from each valve. Fully inflate<br />
the BC once again, and disconnect the Power Inflator from the air<br />
source to listen closely for any leakage.<br />
16<br />
If any leakage can be heard, or if the bladder begins to deflate<br />
within 5-10 minutes, DO NOT attempt to use the BC until it has<br />
received service from an authorized Sea Quest Dealer.<br />
4. Make a final check of the cylinder band's tension to ensure that it has<br />
not loosened due to stretching. Retighten if necessary.<br />
5. Before entering the water, check both weight modules to ensure that<br />
they are correctly fastened to the BC. (See Setup & Installation.)<br />
Loss of the releasable weight modules can occur if the velcro<br />
retaining flap is not securely sealed. Involuntary release of both<br />
weight modules can cause a sudden increase in buoyancy and<br />
rapid ascent, and could lead to serious injury or death due to arterial<br />
gas embolism, decompression sickness, or drowning.
<strong>Buoyancy</strong> <strong>Compensator</strong>s<br />
CARe &<br />
MAIntenAnce<br />
Post Dive care & maintenance<br />
With proper care, your Sea Quest BC will provide many years of reliable<br />
service. The following preventative maintenance must be performed<br />
to extend the life of your BC:<br />
● Avoid prolonged exposure to direct sunlight and extreme heat. Nylon<br />
fabric can quickly fade when exposed to the sun's ultraviolet rays, and<br />
extreme heat may damage the welded seams of the BC's bladder.<br />
● Avoid repeated or prolonged use in heavily chlorinated water, which<br />
can cause the BC fabric to discolor and decay prematurely.<br />
● Do not allow the BC to chafe against any sharp objects or rough surfaces<br />
that could abrade or puncture the bladder. Do not set or drop<br />
heavy objects such as block weights on the BC.<br />
● Avoid any contact with oil, gasoline, aerosols, or chemical solvents.<br />
● To preserve the life of the bladder, thoroughly rinse it inside and out<br />
with fresh water after every day of use, using the following procedure:<br />
1) Pressurize the power inflator with low pressure air via the LP hose.<br />
2) Using a garden hose, direct water through the oral inflator to flush the<br />
interior of the bladder, and then thoroughly rinse the exterior of the<br />
BC.<br />
Before rinsing, ensure that the power inflator is pressurized with<br />
air. This will prevent debris and contaminants from entering the<br />
valve mechanism if the inflator button is accidentally depressed.<br />
3) Completely drain the bladder of water, either through the oral inflator or<br />
through the OPR valve, being careful to avoid operating the inflator.<br />
4) Inflate the BC, and allow it to dry inside and out. Then store it partially<br />
inflated, away from direct sunlight, and in a clean, dry area. Do not<br />
store the BC in an enclosed space, such as a car trunk, where temperatures<br />
may fall below 0ºF (-18ºC) or rise above 120ºF (49ºC).<br />
DO NOT attempt to perform any disassembly or service of your<br />
Sea Quest BC. Service requiring disassembly must only be<br />
performed by a factory trained Sea Quest technician. To obtain<br />
service or repair, such as power inflator service or replacement of<br />
the bladder, see your local authorized Sea Quest Dealer.<br />
7
DEALER SERVICE<br />
DEALER INSPECTION & SERVICE<br />
1. It cannot be assumed that the BC is in good working order on the<br />
basis that it has received little use since it was last serviced. Remember<br />
that prolonged or improper storage can still result in internal<br />
corrosion and/or deterioration of O-ring seals and valve springs,<br />
as well as bladder seam degradation.<br />
2. It is imperative that you obtain prescribed dealer service for your<br />
BC at least once a year from an authorized Sea Quest Dealer, including<br />
a general air leak inspection and complete overhaul of the<br />
power inflator and OPR valve. Your BC may require this service<br />
more frequently, depending on the amount of use it receives and<br />
the environmental conditions it is used in.<br />
3. If the BC is used for rental or training purposes in salt, chlorinated,<br />
or silted fresh water, it will require prescribed dealer service every<br />
three to six months. Use in chlorinated water will greatly accelerate<br />
the deterioration of most components, and require more frequent<br />
service.<br />
4. DO NOT attempt to perform any disassembly or overhaul service of<br />
your BC. Doing so may cause the BC to dangerously malfunction,<br />
and will render the Sea Quest Warranty null and void. All service<br />
must be performed by an authorized Sea Quest Dealer.<br />
18<br />
IT IS IMPORTANT TO OBTAIN PRESCRIBED DEALER SERVICE<br />
FOR YOUR BC AT LEAST ONCE ANNUALLY, FROM AN AUTHO-<br />
RIZED SEA QUEST DEALER. YOUR PERSONAL SAFETY AND<br />
THE MECHANICAL INTEGRITY OF YOUR BC DEPEND ON IT.<br />
NOTE: For your convenience, an Annual Service Record is provided<br />
in the rear of this manual.
<strong>Buoyancy</strong> <strong>Compensator</strong>s<br />
WARRAnty<br />
NOTE: To validate your warranty, please complete and return the<br />
enclosed warranty registration card within 15 days of purchase.<br />
Warranty inFormation<br />
All warranty transactions must be accompanied by proof of original<br />
purchase from an authorized Sea Quest Dealer. Be sure to save your<br />
sales receipt, and present it whenever returning your BC for warranty<br />
service.<br />
Limited Lifetime Warranty<br />
sea Quest warrants to the original purchaser that the product will<br />
remain free from defects in material and workmanship throughout<br />
its useful life; provided that it receives normal use, proper care,<br />
and prescribed dealer service subject to those restrictions stated<br />
below..<br />
this warranty does not apply to units subjected to misuse, abuse,<br />
neglect, modification, or unauthorized service.<br />
this limited warranty is extended only to the original purchaser<br />
for products purchased directly from an authorized sea Quest Dealer,<br />
and is not transferable.<br />
this warranty is limited to repair or replacement only at the discretion<br />
of sea Quest.<br />
It is dangerous for untrained and uncertified persons to use the<br />
equipment covered by this warranty. Therefore, use of this equipment<br />
by an untrained person renders any and all warranties null<br />
and void. Use of SCUBA equipment by anyone who is not a<br />
trained and certified diver, or receiving training under the supervision<br />
of an instructor, could lead to serious injury or death.<br />
This warranty gives you specific legal rights. You may have<br />
rights which vary from state to state and country to country.<br />
SEA QUEST DISCLAIMS AND EXCLUDES ANY LIABILITY<br />
FOR INCIDENTAL OR CONSEQUENTIAL DAMAGES. SOME<br />
STATES IN THE U.S. AND CERTAIN FOREIGN COUNTRIES<br />
DO NOT ALLOW EXCLUSIONS OR LIMITATIONS OF LIABILITY<br />
FOR INCIDENTAL OR CONSEQUENTIAL DAMAGES, SO THIS<br />
MAY NOT APPLY TO YOU.<br />
19
WARRANTY<br />
Restrictions<br />
The following restrictions apply to this warranty:<br />
1. This warranty extends to all power inflator parts, and to the seams of<br />
the BC bladder. Factory prescribed annual service by an authorized<br />
Sea Quest Dealer is required.<br />
2. This warranty does not extend to abrasion, punctures, or tears of the<br />
bladder, or seam separation caused by chemical attack; including prolonged<br />
exposure to chlorine.<br />
3. This warranty does not extend to damages caused by improper use,<br />
improper maintenance, neglect, unauthorized repairs, modifications,<br />
accidents, fire, or casualty.<br />
4. Cosmetic damage, such as scratches, fraying, and nicks are not covered<br />
by this warranty.<br />
5. This warranty does not extend to equipment used for rental, commercial,<br />
or military purposes.<br />
6. This warranty covers products purchased in the USA. For warranties<br />
that may apply elsewhere, please contact your local representative.<br />
Returning Your BC For Service<br />
Whenever your BC requires annual service or warranty repair, Sea<br />
Quest recommends that you bring it to an authorized Sea Quest Dealer.<br />
If you need to return products for service, follow these steps:<br />
1. Provide the dealer with photocopies of your original sales receipt and<br />
service records if the product is more than one year old.<br />
2. If you intend to ship directly to Sea Quest for warranty service, you<br />
must first obtain a Return Merchandise Authorization (RMA) number<br />
from the factory by calling 1-760-597-5000.<br />
3. Write the RMA number on the address label. This is important.<br />
4. Send photocopies of your original sales and service receipts, along<br />
with the product and a letter detailing the problem as precisely as possible.<br />
Include your name, address, and daytime telephone number in<br />
the letter.<br />
5. Ship the package to:<br />
Sea Quest<br />
2340 Cousteau Court<br />
Vista, CA 92081<br />
Attention: Repair Dept.<br />
You must prepay all freight charges. Sea Quest does not accept<br />
C.O.D. shipments.<br />
20
<strong>Buoyancy</strong> <strong>Compensator</strong>s<br />
annual service & insPection recorD<br />
Serial Number ___________________________<br />
Purchase Date ___________________________<br />
Store Name ______________________________<br />
SeRVIce RecORD<br />
note: Serial number<br />
is located behind inflator<br />
hold-down<br />
Date Dealer Name City, State Tech's Initials<br />
2
IMpOrtant nOtICe aBOut MaIl Order<br />
sales Of sea Quest prOduCts:<br />
Beware of any retailer that offers to sell and ship our life<br />
supporting products by mail, for orders placed by phone or<br />
the Internet. These retailers are NOT authorized Sea Quest<br />
Dealers. All authorized Sea Quest Dealers must execute a<br />
Dealer Agreement that does not allow the sale of Sea Quest<br />
products except "in-store". Many Sea Quest dealers advertise<br />
on the Internet, but they are not allowed to deliver our products<br />
other than "over-the counter". This is our assurance that you<br />
will receive the proper pre-sale, point-of-sale, and post-sale<br />
assistance, and that only trained and certified divers will use<br />
our products.<br />
If you obtain our product from one of these retailers, your<br />
warranty is therefore not valid and we cannot offer you the<br />
assurances of quality and satisfaction afforded by the Sea<br />
Quest Warranty Program. If you would like to verify whether or<br />
not a retailer is an authorized Sea Quest Dealer, please call:<br />
1-(760) 597-5000
2340 Cousteau Court<br />
Phone 760-597-5000<br />
©<strong>Aqua</strong> <strong>Lung</strong> International<br />
www.sea-quest.com<br />
Vista, CA 92081<br />
Fax 760-597-4900<br />
Doc. No. 18208 rev. 6/06