Chapter 6 Planning science lessons - TEDD
Chapter 6 Planning science lessons - TEDD
Chapter 6 Planning science lessons - TEDD

Create successful ePaper yourself
Turn your PDF publications into a flip-book with our unique Google optimized e-Paper software.
CHAPTER 6<br />
<strong>Planning</strong> <strong>science</strong> <strong>lessons</strong><br />
Those who know, do; those who understand, teach ~<br />
Aristotle (384-322BC)<br />
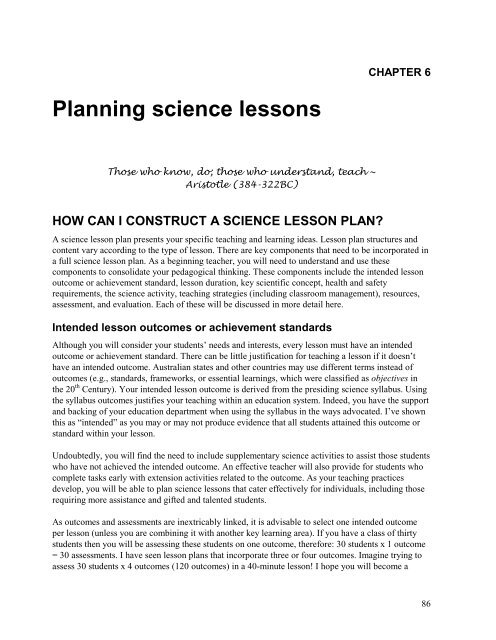
HOW CAN I CONSTRUCT A SCIENCE LESSON PLAN?<br />
A <strong>science</strong> lesson plan presents your specific teaching and learning ideas. Lesson plan structures and<br />
content vary according to the type of lesson. There are key components that need to be incorporated in<br />
a full <strong>science</strong> lesson plan. As a beginning teacher, you will need to understand and use these<br />
components to consolidate your pedagogical thinking. These components include the intended lesson<br />
outcome or achievement standard, lesson duration, key scientific concept, health and safety<br />
requirements, the <strong>science</strong> activity, teaching strategies (including classroom management), resources,<br />
assessment, and evaluation. Each of these will be discussed in more detail here.<br />
Intended lesson outcomes or achievement standards<br />
Although you will consider your students‟ needs and interests, every lesson must have an intended<br />
outcome or achievement standard. There can be little justification for teaching a lesson if it doesn‟t<br />
have an intended outcome. Australian states and other countries may use different terms instead of<br />
outcomes (e.g., standards, frameworks, or essential learnings, which were classified as objectives in<br />
the 20 th Century). Your intended lesson outcome is derived from the presiding <strong>science</strong> syllabus. Using<br />
the syllabus outcomes justifies your teaching within an education system. Indeed, you have the support<br />
and backing of your education department when using the syllabus in the ways advocated. I‟ve shown<br />
this as “intended” as you may or may not produce evidence that all students attained this outcome or<br />
standard within your lesson.<br />
Undoubtedly, you will find the need to include supplementary <strong>science</strong> activities to assist those students<br />
who have not achieved the intended outcome. An effective teacher will also provide for students who<br />
complete tasks early with extension activities related to the outcome. As your teaching practices<br />
develop, you will be able to plan <strong>science</strong> <strong>lessons</strong> that cater effectively for individuals, including those<br />
requiring more assistance and gifted and talented students.<br />
As outcomes and assessments are inextricably linked, it is advisable to select one intended outcome<br />
per lesson (unless you are combining it with another key learning area). If you have a class of thirty<br />
students then you will be assessing these students on one outcome, therefore: 30 students x 1 outcome<br />
= 30 assessments. I have seen lesson plans that incorporate three or four outcomes. Imagine trying to<br />
assess 30 students x 4 outcomes (120 outcomes) in a 40-minute lesson! I hope you will become a<br />
86
<strong>Planning</strong> <strong>science</strong> <strong>lessons</strong><br />
“super” teacher but I am yet to see any teacher successfully assess 120 outcomes in a 40-minute<br />
lesson.<br />
You need to be very selective with your intended outcome/standard. There may well be four outcomes<br />
that suit a particular lesson, nevertheless, your decision to select the most appropriate outcome for a<br />
lesson will be based on this question: What outcome do I want to assess in this lesson? When selecting<br />
an intended outcome, you need to consider the range of student abilities with purposefully selected<br />
<strong>science</strong> activities. It may also be appropriate to assess only half the class on one outcome for a<br />
particular lesson and then, focused on the same outcome, the other half of the class in another lesson<br />
(which will be discussed later).<br />
Lesson duration<br />
Teachers are watchers of the clock. The school day has a broad schedule of times (start, recess, lunch,<br />
end) and further schedules of subject specificity (e.g., sport, art, drama, music). Hence, teachers plan<br />
<strong>lessons</strong> within designated timeframes. The broad school schedule can determine the length of <strong>lessons</strong>.<br />
For example, the duration between recess and lunch in a primary school may not be long enough to<br />
conduct certain <strong>lessons</strong>, while the morning periods may be reserved for particular subjects (e.g.,<br />
English). You have two main questions to ask when planning the timing of your <strong>science</strong> lesson, that is:<br />
(1) When is the most effective time to teach this <strong>science</strong> lesson? (2) What will be the duration of this<br />
<strong>science</strong> lesson?<br />
There is considerable evidence that students are more mentally active during the morning. Indeed,<br />
most primary schools conduct sport, music and art during the afternoon, as students‟ conceptual<br />
learning does not need to be as intense in these subject areas. Science can involve considerable<br />
intellectual interaction and teachers have to make pedagogical decisions to capitalise on the students‟<br />
prime learning time. Most schools conduct English classes in the morning and mathematics <strong>lessons</strong><br />
tend to follow the English prime time.<br />
As the intensity of <strong>science</strong> <strong>lessons</strong> can vary, an astute teacher will plan <strong>science</strong> according to the<br />
intellectual demands of the lesson. For example, designing a mousetrap car or a balloon rocket may be<br />
thought as a “playful scientific endeavour” with group interaction. Engaging and exploring in these<br />
activities may be suitably timetabled in the afternoon. Students can explain the <strong>science</strong> concepts<br />
around these activities through diagrams, illustrations, and verbal discussions. Yet, a <strong>science</strong> lesson<br />
that involves more intense conceptual understandings (e.g., velocity) may need to be conducted earlier<br />
in the day to take advantage of students‟ intellectual capacities.<br />
When considering English as a key subject, <strong>science</strong> can contribute significantly to English-language<br />
development. Hence, learning about the structure of a scientific report may be more suited to a<br />
morning session, where students focus on language and writing development. These are generally a<br />
teacher‟s pedagogical choices, which need to be based around the school‟s timetable and the students‟<br />
needs. Certainly, teachers experiment in timetabling, and this should be one of your decisions when<br />
planning to teach <strong>science</strong> <strong>lessons</strong>. This will help you to determine the most beneficial scenarios for<br />
your class.<br />
87
Hudson’s guide for teaching primary <strong>science</strong><br />
Key scientific concepts<br />
There is a body of scientific knowledge that‟s growing and developing. When you teach a <strong>science</strong><br />
lesson in the primary school it is generally based on predetermined scientific knowledge. For instance,<br />
I was teaching about the human circulatory system to a Year 6 class. I drew upon the scientific body of<br />
knowledge available about the human heart as background knowledge for the lesson. Terminology<br />
such as aorta, ventricles, veins, and arteries were used to get<br />
across scientific concepts. Although I taught students about the<br />
four chambers (left and right atria, left and right ventricles) and<br />
the four types of values that regulate the blood flow through<br />
the heart, the key <strong>science</strong> concept I wanted to students to<br />
understand was: The heart is a pump.<br />
http://www.texasheartinstitute.org/hic/anatomy/anatomy2.cfm<br />
Just as the heart is a pump for the body, key scientific concepts<br />
are at the heart of a well-designed <strong>science</strong> lesson plan. After<br />
deciding on the intended outcome, ask yourself this question:<br />
What key scientific concept(s) do I want my students to<br />
understand at the end of the lesson? Selecting a key concept<br />
from the scientific body of knowledge gives further purpose to<br />
your lesson and students‟ articulation of this concept (e.g.,<br />
through discussions, labelled diagrams) can act as an indicator<br />
on whether your students are achieving the intended outcome. Students may extend beyond this key<br />
scientific concept but at least you have a benchmark as an outcome indicator.<br />
Here is another example of key scientific concepts around electricity for an upper primary class.<br />
Key scientific concepts: Low voltage direct current (DC) electricity is used to power many portable<br />
electrical devices. The most common source of DC electricity is the battery. Batteries have positive<br />
and negative polarities. Batteries contain cells with each cell generally producing 1.5 volts. Simple<br />
electrical circuits can be made using battery power.<br />
You will need to have background information around these key scientific concepts to ensure you are<br />
going to teach the topic with accuracy and confidence. Although lesson introductions can occur in<br />
many different ways, you may want to discuss this information with the students during a lesson<br />
introduction with relevant questioning, to illustrate:<br />
Key Concept Information:<br />
a) As we will be working with low voltage electricity, there is no need to be concerned that you<br />
may be harmed. This is different to the high voltage electricity that is very dangerous and may be<br />
fatal, found in building power points, lights and other locations. D.C. electricity is normally<br />
obtained via batteries although occasionally it comes directly from a transformer which is<br />
plugged into a power point. Can you name some examples of devices that use DC electricity in<br />
the form of batteries? (remote controls, toys, mobile phones, torches, cars, trucks, boats).<br />
88
<strong>Planning</strong> <strong>science</strong> <strong>lessons</strong><br />
b) A standard cell in a battery produces 1.5 volts. Typical AAA, AA, C, D type batteries contain<br />
a single cell which means they all provide 1.5 volts. Although they all put out 1.5 volts, the<br />
bigger batteries last longer whilst the smaller batteries take up less room. This means the<br />
designers of remote controls and other battery powered equipment have to consider how much<br />
power their device is going to use and how small the batteries can be to save space. Some<br />
batteries produce more than 1.5 volts, which is achieved by adding cells in the battery. Some<br />
common batteries provide 3V, 6V, 9V and 12V. How many cells would each of these batteries<br />
contain?<br />
c) In many situations it is necessary to connect several batteries together in a special way to<br />
provide the voltage required for a particular application. When connecting two or more batteries<br />
together to increase the voltage, the positive terminal of one battery must be connected to the<br />
negative terminal of the next battery. Now for a torch light bulb to glow, electricity must be able<br />
to flow along an unbroken path, called a circuit, from the negative terminal of the battery to the<br />
positive terminal of the battery. Electricity will flow through materials called conductors that<br />
include most metals. However, insulators are materials that electricity cannot travel through, such<br />
as wood, plastic, and rubber. What do you think may be other good conductors or insulators?<br />
You may have a student activity sheet that focuses on the key concepts around simple DC electrical<br />
circuits. Some of the questions on this activity sheet may include:<br />
Q1. What is the most common source of DC electricity for portable devices?<br />
Q2. Name six devices that use DC electricity.<br />
Q3. What is the voltage of a single cell in a battery?<br />
Q4. A typical car battery produces twelve volts. How many cells does it have?<br />
Q5. What is the name of the material that electricity can travel through and what are some examples?<br />
Q6. What does an insulator do and what are some examples of insulators?<br />
Q7. When batteries are joined together to produce a higher voltage, how must they be connected?<br />
Q8. What is the name of the path that electricity travels along?<br />
Q9. What do you think a switch does in a circuit?<br />
Q10. Many trucks use 24V for their electrical systems yet they use 12V batteries. Draw a simple<br />
circuit diagram showing the battery or batteries including polarities (negative / positive), a switch (key<br />
ignition) and the engine.<br />
Now let‟s see how this key concept information may play out within the structure of a lesson (i.e.,<br />
introduction, body, and conclusion).<br />
89
Hudson’s guide for teaching primary <strong>science</strong><br />
Example 6.1: Lesson plan structure with key concepts for an upper primary class<br />
Introduction: As we will be working with low voltage electricity, there is no need to be concerned<br />
that you may be harmed. This is different to high voltage electricity that is very dangerous and can be<br />
fatal, found in building power points, lights and other locations.<br />
D.C. electricity is normally obtained via batteries although occasionally it comes directly from<br />
a transformer which is plugged into a power point. Can you name some examples of devices<br />
that use D.C. electricity in the form of batteries? (Remote controls, toys, mobile phones,<br />
torches, radios up to larger equipment such as cars, trucks, boats, industrial)<br />
A standard cell in a battery produces 1.5 volts. Typical AAA, AA, C, D type batteries contain<br />
a single cell which means they all provide 1.5 volts. Although they all put out 1.5 volts, the<br />
bigger batteries last longer whilst the smaller batteries take up less room. This means the<br />
designers of remote controls and other battery powered equipment have to consider how<br />
much power their device is going to use and how small the batteries can be to save space.<br />
(Show Internet PowerPoint on different batteries, have real batteries in class)<br />
Some batteries produce more than 1.5 volts and this is achieved by having additional cells within the<br />
battery. Some common batteries provide 3V, 6V, 9V and 12V. How many cells would each of these<br />
batteries contain?<br />
In many situations it is necessary to connect several batteries together to provide the required<br />
voltage. When connecting two or more batteries together to increase the voltage, the positive<br />
terminal of one battery must be connected to the negative terminal of the next battery.<br />
For a light bulb to glow, electricity must be able to flow along an unbroken path, called a<br />
circuit, from the negative terminal of the battery to the positive terminal of the battery.<br />
Electricity will flow through materials called conductors that include most metals. Insulators<br />
are materials that electricity cannot travel through, such as wood, plastic, rubber.<br />
Explanation of task: We are going to form 5 groups to undertake an activity demonstrating a simple<br />
electrical circuit. Each group will have a light bulb which needs 6V to power it correctly. The „D‟ type<br />
batteries I will supply are 1.5V. How can we obtain the necessary voltage using the supplied batteries?<br />
(Connect 4 batteries in series). How must the batteries be connected together?<br />
Body of lesson: Ensure the batteries are inserted into the holder so the positive terminal of one battery<br />
is connected to the negative terminal of the next battery. Leave the skill-test wand about half way<br />
along the test circuit and you should see the lamp glowing. Starting at the negative terminal of the<br />
battery holder, can you trace the circuit the electricity is flowing through? When the wand is resting<br />
against the skill-test frame the lamp glows as the entire circuit consists of conductors. When the wand<br />
is lifted slightly so it doesn‟t have direct contact with the skill-test frame, the lamp goes out. Why?<br />
(Air between the wand and frame becomes an insulator).<br />
Taking turns, each student attempts to move wand from one end of skill-test frame to the other as fast<br />
as they can without making contact with the frame. Each time the student makes contact with the<br />
frame, the light comes on and the student has to stop and answer a question card before proceeding<br />
with the skill test. Another student times how long the skill test takes, including answering the question<br />
cards. Student with shortest time is winner.<br />
Conclusion: Consolidate key concepts around DC electricity.<br />
Devices require different voltages to power them. For the lamp to glow it was necessary to have a<br />
circuit. Electricity travels through conductors, not through insulators. Voltage may be increased by<br />
joining batteries together in series with positive terminal of one battery connected to the negative<br />
terminal of the next battery.<br />
90
<strong>Planning</strong> <strong>science</strong> <strong>lessons</strong><br />
Selecting a <strong>science</strong> activity<br />
Selecting a <strong>science</strong> activity or group of activities should be related directly to the learning outcome<br />
and key scientific concept(s). It will also provide the basis for assessment. You may find numerous<br />
activities that could suit an outcome and associated key scientific concept. So, how do you decide on<br />
the most appropriate activity? You will need to consider the timeframe, health and safety issues,<br />
resources, and suitability of the activity. Students‟ abilities, needs and interests must also enter this<br />
equation. Note I didn‟t include your own content knowledge, as it is assumed you will learn or revise<br />
the concepts prior to teaching them.<br />
After considering the <strong>science</strong> syllabus and support documents, commercial texts, the Internet, and<br />
other sources, you may now have many appropriate <strong>science</strong> <strong>lessons</strong> that could link to the outcome (and<br />
assessment criteria). With such a choice, and assuming all these activities address the criteria, select<br />
the lesson you think would be highly engaging for the students. Science should be fun and hands on<br />
wherever possible! Keep the other <strong>lessons</strong> as back-ups or extensions or as a resource you may need if<br />
the students require further conceptual understandings or you can use them as workstation activities.<br />
That is, students move from one activity to the next (see Examples 6.2a and 6.2b).<br />
Example 6.2a: A selection of activities for rotational hands-on learning<br />
Workstation 1<br />
Objective: Students learn about a hurricane/cyclone<br />
and how and where they are formed.<br />
Materials: Computer with Internet access<br />
Instructions: Follow the prompts on this website and<br />
investigate the links - http://www.fieldtrips.org/trips.htm<br />
Workstation 2<br />
Objective: Students will understand that static<br />
electricity is the cause of lightning.<br />
Materials: A metal tray with handle, polythene bin<br />
liner and a metal spoon.<br />
Instructions: Lay the bin liner out on a flat surface.<br />
Have metal spoon close and ready to use. Turn the<br />
light out to make the room dark (or use storeroom).<br />
Rub the tray across bin liner for about 30 secs. Don‟t<br />
touch tray, only the handle. Lift tray up and slowly<br />
bring spoon up to it (about 1 cm).<br />
Reference: Weather: Science Projects by C. Oxlade<br />
Workstation 3<br />
Objective: Students will understand that a powerful<br />
sound wave through the air is the cause of thunder.<br />
Materials: A sheet of paper (30 cm x 40cm)<br />
Instructions: Need to follow instructions in the in 101<br />
Great Science Experiments: A step-by-step guide by<br />
N. Ardley.<br />
Workstation 4<br />
Objective: Students observe and articulate the<br />
twirling motion created to form a tornado<br />
Materials: Empty jar, clear liquid soap, vinegar,<br />
water, food colouring.<br />
Instructions: Fill jar 3/4‟s with water. Put a teaspoon<br />
of liquid soap into jar and add a teaspoon of vinegar.<br />
Tighten lid and shake jar to mix ingredients. Swirl jar<br />
in circular motion. Stop and look into the jar. Add<br />
food colouring for better effect.<br />
See http://www.weatherwizkids.com/tornado2.htm<br />
Workstation 5<br />
Objective: Students observe cold air colliding with warm air, the water condenses and forms a fog.<br />
Materials: Beaker, hot water, strainer, ice cubes.<br />
Instructions: Fill up the beaker completely with hot water (safety observed). Leave for 1 minute. Pour out<br />
almost all the water. Leave one quarter of water in jar. Put strainer over the top of the jar. Place several ice<br />
cubes in the strainer. Watch what happens! Be patient!<br />
See http://www.weatherwizkids.com/fog.htm<br />
91
Hudson’s guide for teaching primary <strong>science</strong><br />
Example 6.2b: A selection of activities for rotational hands-on learning<br />
Activity 1<br />
Make rain – Students observe that a cloud forms<br />
from water vapour. The vapour condenses and<br />
becomes heavy.<br />
Materials: Large Pyrex jar, hot water, a cover for<br />
the jar, an empty tin can filled with ice cubes<br />
Instructions: Pour hot water into jar. Cover the jar<br />
with the lid. Place empty tin can filled with ice on<br />
top of jar lid.<br />
Activity 2<br />
Make a rainbow – Students observe how the light<br />
bends when it enters the water and leaves the<br />
water.<br />
Materials: Bright light, clear drinking glass, piece<br />
of white paper.<br />
Instructions: Partially fill the glass with water.<br />
Place a glass of water near light beam. Place the<br />
white paper under the light beam.<br />
Activity 3<br />
Make lightning – Students will observe that static electricity is lightning. The flash they will see jump<br />
is just like lightning<br />
Materials: Inflated balloons. Wool clothing - like a wool sweater - or a piece of real fur<br />
A metal surface like a filing cabinet or a metal doorknob (group 1 – Metal bar, fork. Group 2 –<br />
Dumbbell and pot).<br />
Instructions: Inflate balloons. Darken the room as much as possible. Rub the balloon(s) rapidly<br />
against a wool sweater or a piece or real fur about ten times or more. Move the balloon close to<br />
something metal.<br />
Activity 6.1: Justifying your activity choices<br />
Let‟s assume you have found seven or so activities for your Year 4 class<br />
around the topic “Resources for Living Things”.<br />
You have considered the various sub-topics and activities. You have<br />
already determined that the activities align with the Year 4 syllabus<br />
outcomes. However, you can only choose three activities that will fit with<br />
the rest of your program.<br />
Discuss the following questions in relation to the activities suggested:<br />
1. What three activities would you choose?<br />
2. Why did you select these activities?<br />
3. What else would you need to know to make a better choice?<br />
92
<strong>Planning</strong> <strong>science</strong> <strong>lessons</strong><br />
Example 6.3: Resources for Living Things<br />
Topic Activities for Year 4<br />
Earth and sun<br />
(60 mins)<br />
Soil and its<br />
uses<br />
(90 mins)<br />
Earthworms<br />
(90 mins)<br />
Mud bricks<br />
(90 mins)<br />
Effect of the<br />
sun on plant<br />
growth<br />
(90 mins)<br />
Growing a<br />
seedling<br />
(3 x 30 mins)<br />
Greenhouses<br />
(3 x 30 mins)<br />
• Local area walk – identify Earth‟s natural resources that can be used by people • Draw diagrams<br />
to illustrate links (resource → uses) then categorise • Explore how using components of Earth<br />
may change the Earth<br />
• Brainstorm words that describe the sun • Discuss a bulb thermometer & Celsius scale • In<br />
playground, fill 2 trays with water (one in direct sunlight, one in shade) • Record predictions<br />
• Feel water temperature with hands and measure with thermometer (record in table) • Every hour<br />
return and record temperature • On final visit allow students to feel the water with their hands •<br />
Create a time/ temperature graph • Draw conclusions.<br />
• Students record ideas about soil with partner (concept map) • Groups – collect soil samples from<br />
around school & examine on trays (add new ideas to concept map) • Reflect on activity and<br />
suggest researchable questions about soil • Brainstorm ways of finding answers then investigate<br />
questions • Report results to class – modify concept map.<br />
• In pairs, investigate 3 soil types (sand, loam, clay) adding water to see how soil behaves – record<br />
observations in a table, repeat and record with excess water • Reflect and discuss how different<br />
properties of soil have different uses • In groups discuss ideas – create concept map of possible<br />
uses of soil by animals, plants or people.<br />
• Discuss what they know about earthworms and brainstorm ideas for creating a wormery • Set up<br />
wormery • Record observations before worms have been added • Add worms and food.<br />
• Add food and water to wormery everyday • After 7 and 14 days, record observations (layers,<br />
soil, food changes) • Discuss observations and develop a list of researchable questions.<br />
• Discuss the criteria by which bricks could be judged as suitable for building & how aspects<br />
could be investigated • Discuss ways of making bricks (materials, size, method) • In groups, make<br />
bricks according to their recipe • Design fair tests for strength, water resistance, mass • Test mud<br />
bricks • Record results in a table.<br />
• Discuss ideas about plants – need for sunlight, what happens with little sunlight? • Brainstorm<br />
ways to investigate effect of sun on growth of plants • Design and perform investigation in groups.<br />
• Over next week record observations on investigation on worksheet • Report results back to class<br />
• Students write conclusive statement and reflect on results – consider implications for people,<br />
animals, plants that live in places that only receive a few hours of sunlight.<br />
1. Read the book „One Bean‟ • Students place a few socked beans on wet paper towel in 2 glass<br />
jars • Predict how they think it will grow (direction/ how fast) – draw/ describe on worksheet.<br />
2. Over the next week record observations on worksheet • Measure the seedling each day -<br />
recording in a table and graph.<br />
3. Compare results to predictions • In groups of 4, enter highest measurement of each student and<br />
create column graph to represent data • As a class collect the tallest and shortest measurements<br />
from each group and graph as a class • Find the range of the data – discuss possibilities for the<br />
different heights.<br />
1. Students observe a mini greenhouse – predict effects on microclimate and growth of plants • In<br />
groups discuss design for greenhouse and how to investigate its use • Perform investigation using<br />
their seedling.<br />
2. Over the next few days let air in, water plants, record observations • Compare observations in<br />
greenhouse and open air.<br />
3. Reflect on results and consider how using greenhouse changes microclimate & effect on plant<br />
growth • Suggest changes that could improve investigation • List advantages/ disadvantages found<br />
from growing plants in a greenhouse (PMI chart) – would this be the same in different areas of<br />
Australia/ world?<br />
93
Hudson’s guide for teaching primary <strong>science</strong><br />
Health and safety requirements<br />
There is no doubt that your students‟ wellbeing must be your first priority in a school. I can‟t<br />
emphasise enough that teaching can only occur after you have considered your students‟ health and<br />
safety. Every <strong>science</strong> lesson must take into account health and safety requirements. As each lesson is<br />
different, you will need to think about the specific health and safety requirements applicable to that<br />
particular lesson. Indeed, you will need to be a forward thinker on a student‟s health and safety<br />
regardless of the subject area. For example, while on playground duty I would identify potential<br />
dangers and quickly address these with the students concerned. Use this type of predictive behaviour<br />
for conducting your <strong>science</strong> <strong>lessons</strong>. You will then need to manage potential health and safety hazards.<br />
Here‟s an outdoors <strong>science</strong> lesson experience…<br />
When I had conducted bushwalking activities for students to investigate flora and fauna, I<br />
would ensure all students had food and drink, appropriate clothing including hats and covered<br />
footwear, and I would outline the procedures for the bushwalk (e.g., stay as a group, be with a<br />
partner, do not touch any creature, be wary of potential dangers themselves).<br />
I would carry in my backpack a mobile phone, torch, thermal sheet, and a basic first aid kit,<br />
which I knew how to use through a St John‟s Ambulance First Aid course (or you could have<br />
a parent who knows how to use it and has attended such a course).<br />
It‟s important to know the site before taking students for an outdoor <strong>science</strong> activity. In this<br />
case, I explored the bushwalking area with my colleague (and friend) the weekend prior to the<br />
lesson. This helped me to identify potential hazards through first-hand experience. Finally, as<br />
a back-up plan, I discussed the area with a Parks and Wildlife ranger and notified him of our<br />
field trip details.<br />
Always remember your number one priority:<br />
No child should be hurt or placed in danger during the process of learning.<br />
There are potential hazards outside the classroom, there are also potential hazards inside the<br />
classroom, which must be identified. In its simplest form, you need to think about the basic steps of<br />
your <strong>science</strong> activity where you recognise potential hazards and state how you will manage these<br />
potential hazards. This doesn‟t need to be lengthy but it does need to show you have considered the<br />
students‟ health and safety in your planning. This consideration is part of your duty of care and legal<br />
obligations. You will find many primary <strong>science</strong> <strong>lessons</strong> have few hazards, nevertheless, even<br />
seemingly innocuous aspects such as handling scissors, water spillage, or using magnifying glasses<br />
have potential danger. Other <strong>lessons</strong> may require protective gear such as goggles, gloves, or dust coats,<br />
and all <strong>science</strong> <strong>lessons</strong> should have students with covered footwear (unless there is a special case to be<br />
bare footed).<br />
I taught at one country school where many kids came to school without shoes! This didn‟t appear to<br />
present a problem as these little feet had toughened up walking on dirt roads, through bush tracks, or<br />
chasing cows across paddocks. Nevertheless, teaching <strong>science</strong> can involve using equipment and it<br />
doesn‟t take much to drop a piece of equipment, which tends to land at or on the feet. A pair of<br />
scissors can do damage. So I had students bring their shoes in their bags if they were not wearing them<br />
94
<strong>Planning</strong> <strong>science</strong> <strong>lessons</strong><br />
to school. Science <strong>lessons</strong> meant students had to put on their shoes first. Health and safety was party of<br />
my legal responsibility.<br />
Your lesson plan should include the identification and management of potential risks associated with<br />
the lesson. I always articulated these potential risks to the students after the lesson introduction which<br />
was just before they commenced the hands-on activity. I would monitor students‟ health and safety<br />
during the lesson and act quickly if a student was not adhering to my instructions. You may find<br />
students who disregard or forget about the health and safety instructions at times. Repeat offenders are<br />
suitably and respectfully managed, as I never beat around the bush when it came to ensuring the<br />
wellbeing of each and every student. Try Activity 6.1 to see how you would manage the health and<br />
safety aspects of a <strong>science</strong> lesson.<br />
Activity 6.2: Health and safety management<br />
Write the title of a <strong>science</strong> lesson: ________________________________<br />
Now under the following three subheadings record in point form the basic<br />
procedures of students‟ involvement in the <strong>science</strong> activity, potential and<br />
identifiable hazards (use predictive behaviour), and how you will manage these<br />
hazards.<br />
Basic Procedures Identifiable Hazards Management of Hazards<br />
ADDITIONAL NOTES:<br />
95
Hudson’s guide for teaching primary <strong>science</strong><br />
Teaching strategies<br />
After selecting an appropriate <strong>science</strong> activity with consideration of your students‟ health and safety,<br />
you can enjoy designing the structure and form of your lesson. Never underestimate the power of an<br />
effective teaching strategy. If you select a teaching strategy purposefully, you will minimise classroom<br />
management problems, maximise student engagement, and capitalise on the teaching and learning<br />
environment. Each teaching strategy creates a new dimension for structuring your <strong>science</strong> lesson and<br />
provides considerable variety for students.<br />
A person may have outstanding content knowledge but may not know how to impart this knowledge,<br />
which can make it difficult for a learner to understand the concepts. As a teacher, the term<br />
“pedagogical knowledge” highlights the importance of your role to know how to teach, and teaching<br />
strategies provide a way to engage students in learning about a chosen topic. Teaching strategies are so<br />
crucial to an effective <strong>science</strong> lesson that a whole chapter has been dedicated to this topic. Apart from<br />
the suggested literature in Reading 6.1, teaching strategies will be discussed in a later chapter.<br />
Resources<br />
Reading 6.1: Effective teaching strategies<br />
Here are some sources for considering effective <strong>science</strong> teaching strategies:<br />
Education Queensland (2002). Productive pedagogies classroom reflection<br />
manual. Brisbane: Queensland Government.<br />
Frangenheim, E. (2004). Reflections on classroom teaching strategies.<br />
Loganholme, QLD: Rodin Educational Publishing.<br />
Killen, R. (2003). Effective teaching strategies: Lessons from research and<br />
practice (4th ed.). Social Science Press: Wentworth Falls, NSW.<br />
NSW Department of Education and Training (2003). Quality teaching in NSW<br />
public schools. Sydney: Professional Support and Curriculum Directorate.<br />
Also search websites such as:<br />
https://www.det.nsw.edu.au/proflearn/links/ts.htm<br />
You have selected an activity that has suitable and manageable resources. These resources can include<br />
humans, renewable and non-renewable resources, environments, and the knowledge economy. Human<br />
resources can involve those with expertise on a particular topic. Renewable resources can include<br />
<strong>science</strong> equipment and other technologies that can be re-used. The word technology in its broadest<br />
sense means anything that has been constructed from raw materials. Hence, some technologies are<br />
renewable (e.g., whiteboard, desk, microscope) yet others may be non-renewable (e.g., most writing<br />
equipment such as whiteboard markers, pens).<br />
Environments are invaluable resources, as they present unique situations for students to learn about<br />
<strong>science</strong>. A classroom environment can be created to construct a “real world” experience. For example,<br />
study rocks and minerals would entail setting up the classroom with a good selection of rocks and<br />
minerals (and the use of other equipment e.g., magnifying glasses) for hands-on investigations.<br />
96
<strong>Planning</strong> <strong>science</strong> <strong>lessons</strong><br />
Environments beyond the classroom such as the school grounds, local community and other more<br />
distant locations can open opportunities for students‟ explorations. Wetlands, farmlands, factories,<br />
rock pools, sand dunes and so forth provide first-hand contexts for investigations. These experiences<br />
are appreciated greatly by students if they are well organised and focused on their learning.<br />
Resources incorporate library books, journals and magazines, computer programs and the Internet as<br />
part of the knowledge economy. It is ideal to have access to as many resources as possible; however a<br />
school‟s location and its situation (e.g., public, private, socio-economic) may impose limitations for<br />
accessing resources, such as broadband Internet connections. Without doubt, the Internet has the<br />
widest range of resources for schools, which is particularly useful for explaining key <strong>science</strong> concepts<br />
and interactivity with <strong>science</strong> at appropriate levels. For instance, Brainpop (www.brainpop.com)<br />
presents a broad selection of <strong>science</strong> topics with pictorial representations and explanations of the key<br />
<strong>science</strong> concepts. There are competing Internet programs that can be downloaded for scientific<br />
exploration (e.g., www.stellarium.org and http://www.nova-astro.com/ecupro.html show different ways<br />
to investigate astronomy). These resources can build students‟ understandings though preference<br />
should be given to first-hand experiences wherever possible.<br />
There are two key factors for resource access, namely, budget and constructive alternatives. A large<br />
budget may allow students access to the latest <strong>science</strong> equipment and cut costs for involvement in field<br />
trips. Those with limited budgets (and that is generally most schools) will need to consider<br />
constructive alternatives. For example, I wanted to take my upper primary students on a rainforest<br />
excursion that was different to the coastal rainforest in my district. I had planned a three-day excursion<br />
but the cost of a bus and bus driver made the excursion too expensive for some students. I realised<br />
early in my career that having a bus licence to seat 25 students would come in handy. So, taking my<br />
class on rainforest excursions and camping for three days at places such as Mount Warning area<br />
became viable propositions, which agreed with parents and received considerable parental support.<br />
Other constructive alternatives may include assistance from the community. For instance, I wanted an<br />
overnight camp on the school grounds to view the evening sky. Purchasing a telescope was out of<br />
reach for my school but, fortunately, a community member offered a telescope and his services at the<br />
school for the evening. I learnt with the students! This shouldn‟t really come as a surprise, as I learn<br />
every time I investigate <strong>science</strong> with my students; although my learning is enhanced greatly when<br />
experts in specific fields are involved in educating my students.<br />
Assessment<br />
Don‟t get assessment and evaluation confused. Here‟s a definition of assessment for education<br />
purposes and the next section will discuss evaluation.<br />
Assessment is the process of collecting, analysing, and recording information about a student’s<br />
progress that indicates the level of achieving predetermined syllabus standards.<br />
This definition is analysed in more detail in <strong>Chapter</strong> 10. In broad terms though, think of assessment as<br />
information about a student‟s learning. Assessment, outcomes, key concepts, and the <strong>science</strong> activity<br />
are very closely related. Both the process and the product of students‟ involvement in the <strong>science</strong><br />
activity can be assessed. Your lesson plan needs to locate process and product inputs and outputs that<br />
97
Hudson’s guide for teaching primary <strong>science</strong><br />
can adequately determine a student‟s learning achievements. Pinpointing a student‟s achievements<br />
aligned with an outcome will require evidence or indicators for verifying this attainment.<br />
Evaluation<br />
Fundamentally, assessment is about data collection while evaluation is about making a determination<br />
on the quality of the teaching and learning.<br />
Evaluation is an ongoing reflective judgement on<br />
the quality of teaching practices and the learning environment.<br />
Growth as a professional occurs through first-hand experiences followed by critical self reflection.<br />
After implementing a lesson, you need to reflect on your teaching and the learning environment. This<br />
reflection is then translated into an evaluation of the teaching and learning. You can evaluate any<br />
assessment you have conducted, particularly in terms of achieving the outcome with evidence of<br />
students‟ learning of the key <strong>science</strong> concepts. Evaluation can enter all aspects of students‟<br />
involvement in a <strong>science</strong> activity. A later chapter presents evaluation in far more detail.<br />
For example, even though a teacher considers health and safety before implementing a lesson, the<br />
teacher would always evaluate this aspect during the lesson and after the lesson. There may be a need<br />
to enforce safety procedures that were not considered in the planning. Experienced teachers comment<br />
on aspects of a <strong>science</strong> lesson‟s health and safety such as: “I‟d change the location of this activity next<br />
time because it was too long in the sun” or “I quickly realised that some kids were not wearing gloves,<br />
so I stopped the activity and made sure they put them on”. These judgements help to advance the<br />
teacher‟s practices for current and future work.<br />
Refer to Figure 6.1 to see the relationship between evaluation and other components of a lesson. There<br />
are a few aspects to note. First, you can assess students‟ learning of the outcomes, key concepts, and<br />
their involvement in the activities. Second, you can evaluate students‟ achievement of outcomes and<br />
key concepts in terms of the teaching and learning environment. Third, you can evaluate all the<br />
components of an activity including the health and safety, duration of the lesson, resources, and<br />
teaching strategies, which can also involve classroom management. Finally, you can evaluate the<br />
processes and products of an assessment linked to students‟ “zone of proximal development” (ZPD).<br />
Figure 6.1 shows the connections for planning a <strong>science</strong> lesson. You can also discuss Activity 6.2<br />
towards setting up your <strong>science</strong> lesson plan.<br />
98
<strong>Planning</strong> <strong>science</strong> <strong>lessons</strong><br />
Figure 6.1: <strong>Planning</strong> a <strong>science</strong> lesson<br />
Activity 6.3: Setting up your classroom lesson plan<br />
You have just arrived at your new school and shown your new classroom.<br />
What steps would you take for teaching <strong>science</strong>? Also you should be noticing<br />
the connections between the <strong>science</strong> overviews and lesson planning.<br />
Science topics from the syllabus and school‟s policy<br />
Lesson timeframe and duration<br />
Intended syllabus outcome or achievement standard<br />
Health and safety issues and management of potential hazards<br />
Resources (e.g., support documents, texts, Internet sites, materials and<br />
equipment)<br />
Prior knowledge (students‟ abilities, needs and interests)<br />
Content knowledge – key scientific concepts<br />
Teaching strategies<br />
Classroom management<br />
Engaging hands-on <strong>science</strong> activity or activities<br />
Assessment considerations<br />
Evaluation questions<br />
99
Hudson’s guide for teaching primary <strong>science</strong><br />
WHAT TYPE OF SCIENCE ACTIVITIES CAN I DO?<br />
Science learning can be designed in many forms. The type of activities is limited by the age and stage<br />
of the group, syllabus outcomes, health and safety requirements, resources, and lesson appropriateness.<br />
Below are sample activities that I have facilitated in classrooms and with my preservice teachers.<br />
These activities target primary students in years 5 and 6, although it is easy to simplify and complicate<br />
the activities for lower or upper grades, respectively. These rotational activities are conducted with 2-4<br />
students in each group. For preservice teachers, it takes about 10-15 minutes to complete an activity<br />
while discussing pedagogical possibilities before rotating to the next activity. In a primary classroom<br />
each activity can be converted into a full lesson.<br />
A “Science and Society” component that investigates historical and current developments of concepts<br />
can be included within many of these activities. For example, reading star maps may also entail<br />
investigating the development of astronomy (e.g., archaeoastronomy – Stonehenge and early<br />
astronomers such as Plato, Copernicus, Galileo) and current astronomical developments (see NASA;<br />
Neil Armstrong walking on the moon, Hubble, Voyagers I & II, galaxies).<br />
Concise steps are provided to activities for investigation and critical analysis. You will note that a<br />
teaching approach also has been assigned to each activity. I would recommend having at least one<br />
computer connected to the Internet (ideally one computer per group allows for easier access to<br />
informative websites). If not, print out some details from a website for the groups. Activity 6.4 refers<br />
to the outline of <strong>science</strong> activities in Example 6.4.<br />
Activity 6.4: Advancing your lesson plan<br />
Refer to activities in Example 6.4 and the expanded activities that follow.<br />
Discuss these points:<br />
1. Discuss some of these activities and their assigned teaching strategies.<br />
2. How would you change/advance one of these activities?<br />
3. Are there other strategies you would use for teaching a particular activity?<br />
4. How would you translate one of these activities into a <strong>science</strong> lesson plan?<br />
A few key concepts require further clarification within Example 6.4. Rocks are in three broad<br />
categories (i.e., igneous – from the volcano, sedimentary – layers of rocks deposited as a result of<br />
erosion, and metamorphic – rocks that have undergone pressure). Erosion can be in four categories,<br />
namely, wind, water, wave, and glacial or ice. Constellations are groups of stars, which allows for easy<br />
identification (e.g., Leo the Lion or Orion are constellations). Soluble means being able to dissolve<br />
(i.e., chlorine will dissolve in water). However, if you have a bag of chlorine and a jug of water there<br />
will be too much chlorine to dissolve so there will be a point where it reaches saturation.<br />
100
<strong>Planning</strong> <strong>science</strong> <strong>lessons</strong><br />
Example 6.4: Outline of <strong>science</strong> activities for pedagogical discussions<br />
Strand Set 1 Set 2<br />
Earth and<br />
Beyond<br />
Identify rocks and minerals, testing<br />
mineral hardness, and use streak plates<br />
Erosion: Explore, identify and record an<br />
outside environment; Sketch and label erosion<br />
Earth and<br />
Beyond<br />
Energy<br />
and<br />
Change<br />
Energy<br />
and<br />
Change<br />
Life and<br />
Living<br />
Life and<br />
Living<br />
Natural<br />
and<br />
Processed<br />
Materials<br />
Natural<br />
and<br />
Processed<br />
Materials<br />
to test the colours of minerals<br />
Identify constellations and stars using<br />
star maps<br />
Investigate power sources such as<br />
wind, hydro, and solar<br />
Test various insulators and conductors<br />
using a battery-bulb circuit<br />
Camouflage: Use magnifying glasses<br />
to explore, identify and record;<br />
investigate Internet sources<br />
Measuring lung capacity: Hypothesise<br />
measure and graph (e.g., age, height,<br />
pulse rate); Use spirometers<br />
Solubility: Do a fair test with 2 sets of<br />
substances (1. various substances such<br />
as flour, salt; 2. types of sugars) and<br />
present it in a table<br />
Optics: Look at a newspaper with a<br />
variety of concave and convex lenses<br />
and record observations<br />
sites with concluding statements<br />
Anemometer: Record wind speeds using<br />
different anemometers; Investigate scientists<br />
who have invented anemometers; Design and<br />
make an anemometer<br />
Magnetism: Devise a test to determine the<br />
strongest magnet<br />
Explore motion with push and pull activities<br />
Identify, discuss, and illustrate functions and<br />
features of a creature<br />
Use microscopes to investigate minibeasts then<br />
sketch and label features<br />
Determine the density of different liquids<br />
Acid/Alkaline: Use a cabbage pH indicator on<br />
household products; record the pH alongside a<br />
pH scale<br />
Density is mass divided by volume. Get a cereal packet – its mass might be say 750g. The cereal will<br />
be close to the top of the packet, which is how much volume it takes up inside the plastic bag. Now<br />
shake the packet. You will note that the cereal takes up less space, yet you still have 750g of cereal. So<br />
it is now more dense than what it was in the first place. If you used a machine and squashed the cereal<br />
it may take up only a very small space. It is now even more dense. So the same mass of cereal (750g)<br />
is in a much smaller space. Hence, it has the same mass in a smaller volume making it denser than<br />
originally observed. You can measure the density by taking the mass and dividing it by the volume. So<br />
you can see the smaller the volume the more dense it will be. Water has a density of 1 (e.g., d=m/v; d<br />
of water=1g/1mL; d of water=1).<br />
The following presents further activity notes for Table 6.1. Try these activities in either pairs or small<br />
groups (i.e., 3 or 4 people). These activities are some I facilitate for my preservice teachers towards<br />
learning how to teach <strong>science</strong>.<br />
101
Hudson’s guide for teaching primary <strong>science</strong><br />
Activity Notes<br />
Earth and Beyond: Identifying rocks, testing mineral hardness<br />
(Process-Skills Approach)<br />
1. Identify rocks and minerals with the chart/book or investigate a website (e.g., Rockhounds at<br />
http://www.fi.edu/fellows/payton/rocks/index2.html)<br />
2. Feel the rocks and minerals and discuss texture, shape and colour<br />
3. Refer to Mohs Hardness Scale (http://www.amfed.org/t_mohs.htm or<br />
http://www.allaboutgemstones.com/mohs_hardness_scale.html) to determine the hardness of<br />
minerals.<br />
4. Use the back of a kitchen tile (as a streak plate) to test the true colours of different minerals<br />
5. Design a chart for students to record their investigative data (e.g., texture, shape colour)<br />
6. What other lesson ideas could you include with minerals? Consider testing minerals with<br />
vinegar – what do you think might happen to some minerals?<br />
Earth and Beyond: Reading star maps<br />
(Process-Skills Approach)<br />
1. Refer to a sky chart (e.g., http://www.skymaps.com/downloads.html) and discuss some of the<br />
stars<br />
2. Locate the Southern Cross constellation<br />
3. Identify the two pointers to the Southern Cross (Alpha and Beta Centauri)<br />
4. Discuss other constellations on this chart<br />
5. Use the Internet to investigate these constellations (e.g., history, location in galaxy, distances,<br />
pictorial representations)<br />
6. Find the brightest stars on the map. What are their names? What constellations are they in?<br />
7. What makes these stars appear so bright? Look at this YouTube video of a star (our Sun!)<br />
http://www.youtube.com/watch?v=rb9jTeFcatU&feature=related and/or this shot from<br />
Hubble: http://seds.org/hst/hst.html<br />
8. Are there any planets on the sky chart? Where are they? Do they connect in a line somehow?<br />
Energy and Change: Power sources: wind, hydro, solar<br />
(Plus, Minus, Interesting - PMI)<br />
1. Connect solar panel as per instruction booklet<br />
2. How have solar panels been used?<br />
3. Brainstorm other ways solar panels can be used<br />
4. Discuss other forms of power (e.g., wind, hydro), particularly the PMI points for these forms<br />
of power<br />
5. Any other lesson ideas for power sources (e.g., constructing and testing a water wheel)?<br />
102
<strong>Planning</strong> <strong>science</strong> <strong>lessons</strong><br />
Energy and Change: Insulators and conductors using circuits<br />
(Bybee‟s 5 Es)<br />
1. Engage: How can you troubleshoot to find globes or batteries that do not work using circuits?<br />
Test that bulbs and batteries work.<br />
2. Explore: Test objects around the room and determine if they are conductors or insulators<br />
3. Explain: Record your information in a table with the column headings Conductors and<br />
Insulators.<br />
4. Elaborate: Discuss why some objects may be conductors and others insulators. How else<br />
could you test conductors and insulators? How many different ways can you make a circuit?<br />
5. Evaluate: How could you use this information in real life?<br />
Life and Living: Camouflage<br />
(Discovery Approach)<br />
1. Discuss charts and pictures provided<br />
2. When is a creature well camouflaged? When and where have you seen such creatures? Can<br />
you say the names of these creatures?<br />
3. Use the magnifying glass to search for a creature that is camouflaged in a designated outside<br />
area. Good luck! If you find one do a quick sketch and/or make notes<br />
4. Back in classroom: Discuss the location of this creature. How does it compare with any of the<br />
other creatures on the charts? Pinpoint the reasons for the creature‟s camouflage.<br />
Life and Living: Measuring lung capacity<br />
(Predict, Observe, Explain - POE)<br />
1. Discuss reasons for increased lung capacity<br />
2. What else may be associated with large lung capacity?<br />
3. Draw a graph (x axis on horizontal, and y as vertical) and record one variable on the x axis<br />
(e.g., age OR height OR amount of exercise each week OR amount of sleep OR pulse rate OR<br />
… ) and place lung capacity on the y axis<br />
4. Predict: What do you think will happen? Draw it on the graph in a coloured pencil/pen.<br />
5. Observe: Use the Spirometer to test lung capacity.<br />
6. Explain: Record information on graph with another colour and discuss<br />
Natural and Processed Materials: Solubility<br />
(Fair Testing)<br />
1. Examine and describe the various types of sugars (e.g., refer to size of granules, smell,<br />
colour)<br />
2. Discuss and set up an experiment to test the solubility of these sugars<br />
3. Record your information in a table or represent it as a line graph<br />
4. What did you have to consider in order to make the experiment fair?<br />
5. What conclusions can you draw from this experiment?<br />
6. What else would you like to investigate with solubility?<br />
103
Hudson’s guide for teaching primary <strong>science</strong><br />
Natural and Processed Materials: Optics – using lenses<br />
(Discovery Approach)<br />
1. Look at the different types of lenses<br />
2. Record everything you can find out about these lenses<br />
3. What do you conclude?<br />
4. Have a look at the <strong>science</strong> and human endeavour link (i.e., people who have been<br />
instrumental in lens development)<br />
5. Design, make and test a telescope using the lenses and cardboard cylinder. Which ones are<br />
most effective?<br />
6. How would you construct a periscope using the lenses and mirrors?<br />
7. What other experiments would you like to try out?<br />
Earth and Beyond: Erosion<br />
(Discovery Approach)<br />
1. Discuss erosion. How does erosion occur? Where have you found erosion?<br />
2. Take 5 minutes (time yourself) to go outside and look for signs of erosion<br />
3. Sketch and label or write notes about any erosion noted outside<br />
4. Back in the classroom: Discuss how the erosion may have occurred outside. What were the<br />
effects of this erosion? How could this erosion be prevented?<br />
5. Design an experiment that shows the effects of water erosion. Also consider how you can<br />
minimise the erosion through human intervention.<br />
Earth and Beyond: Weather – anemometer<br />
(Discovery and Process Skills Approach)<br />
1. Discuss anemometers<br />
2. Take 5 minutes with your partner (time yourself) and test the wind speed in an open area<br />
3. Back in the classroom: Record your wind speed on the whiteboard. Discuss the differences<br />
and similarities<br />
4. Work in groups of four to design a homemade anemometer, make a list of materials required.<br />
How will you determine the wind speed? Review the Beaufort Wind Scale.<br />
5. Make the connection with Science and Society and people who have been responsible for<br />
developing weather instruments<br />
Energy and Change: Magnetism<br />
(Fair Testing)<br />
1. Examine the different types of magnets<br />
2. Identify the differences and the possible usages of these magnets<br />
3. Devise a fair test to determine the strongest magnet<br />
4. Place the magnets in order of strength<br />
5. What is another way to test each magnet‟s strength?<br />
6. Discuss other <strong>lessons</strong> that could be conducted using magnets<br />
7. Read about magnets and usage within society<br />
104
<strong>Planning</strong> <strong>science</strong> <strong>lessons</strong><br />
Energy and Change: Motion<br />
(Science should be fun! Fair Testing)<br />
1. In small groups, take 5 minutes (time yourself) to play with the toy cars and track, observe<br />
how they move<br />
2. Use a stop watch to time how fast it takes the car to travel the course<br />
3. What happens to the speed of the car at different points on the track?<br />
4. Now use a ruler to measure the height at different points along the track<br />
5. Test the height of the track with the ramp provided (adjust the ramp to the height of the track<br />
you are measuring). Use your stop watch to record how long it takes the car to travel from<br />
beginning to the end of the ramp<br />
6. Test the speed of the car with different heights and record these measures on a graph<br />
7. What can slow the car down?<br />
8. Explore friction and other push and pull activities<br />
Life and Living: Identify and discuss functions of a creature<br />
(Discovery Approach)<br />
1. Examine and discuss the creatures on your table<br />
2. Illustrate and label the features of one creature<br />
3. Examine the features of this creature and discuss the possible functions of these features<br />
4. Go outside and find a creature (do not touch it, just observe and write a description of it and<br />
record what it does)<br />
5. Read about this creature and use the Internet to discover further information<br />
Life and Living: Mini-beasts and microscopes<br />
(Guided Discovery Approach)<br />
1. Refer to the sheet outlining how to use a microscope<br />
2. Place the slide under the microscope and describe what you see<br />
3. Sketch and label with further discussion<br />
4. What questions do you have about mini-beasts?<br />
5. What else would you like to investigate?<br />
6. Read about people who have had an influence on developing the microscope<br />
Natural and Processed Materials: pH scale<br />
(POE)<br />
1. Read and discuss acids and bases<br />
2. Refer to the pH scale and discuss<br />
3. Make sure you follow safety procedures (use goggles, protective clothing, and gloves)<br />
4. Place cabbage pH indicator into the ice cube container<br />
5. Predict: What do you think will happen when you put 5 mL of a household product in one ice<br />
cube container (Predict for each of the household products whether each is an acid or base)<br />
6. Observe: Put a different household product in each ice cube section<br />
7. Explain: Make a connection to the household usages of these materials<br />
8. What else would you like to investigate with acids and bases?<br />
105
Hudson’s guide for teaching primary <strong>science</strong><br />
Natural and Processed Materials: Density<br />
(POE)<br />
1. Discuss qualities of each liquid<br />
2. Predict what will happen if you pour 10mL of each liquid into the same tube<br />
3. Observe what happens when you pour each liquid into the tube<br />
4. Explain the situation.<br />
Example 6.5 outlines a basic lesson plan structure around a natural and processed materials topic<br />
“Building bridges”. There‟s introduction with a stimulus and body of the lesson where students are<br />
involved in hands-on experiences. You will note that the key concepts are a thread throughout the<br />
lesson, and lead to a purposeful conclusion around these concepts.<br />
Example 6.5: Basic lesson structure<br />
NATURAL AND PROCESSED MATERIALS – Upper Primary<br />
Building Bridges (50 minutes)<br />
Learning outcome: Science (Queensland Studies Authority [QSA] Essential Learning) - Properties of<br />
a material will vary according to the type and quantity of components that make up its structure.<br />
Key concept: Materials used for making bridges need to be tested for compression and tension.<br />
Safety: Explain safe use of scissors and sun protection when held outside.<br />
Resources include: straws, paddle pop sticks, sticky tape. Sticky tape usage must be limited.<br />
Teaching and learning activities<br />
Introduction: ( 10mins) Teachers provide a stimulus on the topic about building bridges with a<br />
selection of introductory, hands-on activities (e.g., see www.TeachEngineering.org). Teachers<br />
question students on their prior knowledge and understanding of these concepts and then ensure clarity<br />
of new terms (e.g., bridges – compression, tension).<br />
Body: (30mins) Students are provided with cooperative learning roles and interact with hands-on<br />
activities to construct a truss bridge (www.TeachEngineering.org). Teachers monitor students‟<br />
thinking and progress and use higher-order thinking questioning throughout the hands-on task.<br />
Students continue making a truss bridge and write notes on their discussion, particularly when they test<br />
their bridge design for compression and tension.<br />
Conclusion: (5-10mins) The conclusion consolidates the key concepts about compression and<br />
tension. Students are asked to demonstrate these concepts (e.g., through discussion, diagram, practical<br />
demonstration, written statements). Assessment: Teachers listen to students‟ articulation of key<br />
concepts (throughout the lesson and also in the conclusion). Work supplied by the students (i.e.,<br />
written notes and bridge construction) will be assessed in terms of quality and understanding of key<br />
concepts.<br />
Evaluation: Students reflect upon their learning experiences and the learning environment. Teacher<br />
also reflects on the teaching practices for enhancing strategies in subsequent <strong>lessons</strong>.<br />
Extension: Students illustrate and label their products and write scientific statements about their<br />
bridges.<br />
106
<strong>Planning</strong> <strong>science</strong> <strong>lessons</strong><br />
Activity 6.5: Reviewing ideas for setting up <strong>science</strong> lesson plans<br />
Examples 6.6 and 6.7 present the considerations for structuring a lesson.<br />
1. Review and discuss Examples 6.6 & 6.7 and critically analyse these<br />
considerations. What else would you include/exclude?<br />
2. Look at the questions associated with Examples 6.6 & 6.7. What<br />
questions would you ask?<br />
3. What do you think the <strong>lessons</strong> are about? What could be the hands-on<br />
activities?<br />
Example 6.6: Setting up a <strong>science</strong> lesson plan<br />
Pond Studies<br />
Science: Life and living<br />
Level: 1 2 3 4<br />
Learning outcome: Students will be able to group living things in different ways based on observable<br />
features.<br />
Organisation The students begin the lesson as a whole class. The activity will be conducted<br />
having the students in mixed ability groups of four. The lesson will conclude with a<br />
whole class discussion.<br />
Inclusivity Gender: The groups will consist of a mixture of males and females.<br />
Behaviour problems: Each student within the groups will be allocated a particular<br />
role to facilitate responsibility. The roles include the doer (collects things and<br />
conducts the activity), the talker (tells the class what happened when they performed<br />
the activity), the writer (writes down anything important in the activity) and the teller<br />
(tells the group what they are meant to be doing).<br />
Disability: The students with hearing impairments will be situated toward the<br />
teacher to ensure that they can see the teachers lips at all times during the lesson,<br />
especially when instructions are being given.<br />
ESL: Instructions will be delivered orally and the students will also be drawing<br />
diagrams to display ideas.<br />
Safety The safety precautions used for this particular lesson includes being:<br />
sensible around the water and with the equipment.<br />
aware of any allergies of the students<br />
careful of small creatures in case they bite: NO TOUCHING creatures<br />
Resources: Materials that will be used include: nets, plastic containers, pond worksheet, pens / pencils<br />
Introductory questions include:<br />
a) What is a pond? What is a habitat?<br />
b) Where would you find a pond?<br />
c) What types of animals live in ponds?<br />
d) What types of animals live around ponds?<br />
107
Hudson’s guide for teaching primary <strong>science</strong><br />
Example 6.7: Setting up a <strong>science</strong> lesson plan<br />
KLA Lesson Topic Grade / Level Duration Time<br />
Science Cloud formation Year Three / 45 minutes 2.00-2.45pm<br />
Level 2<br />
Key scientific concept: The water cycle includes evaporation, condensation and precipitation.<br />
Learning Outcome: The Earth, solar system and universe are dynamic systems<br />
Level 2. Students identify and describe changes in the obvious features of the Earth and sky.<br />
Reference: Queensland Studies Authority. (2002). Science Syllabus. Retrieved April 25, 2008, from<br />
http://www.qsa.qld.edu.au/yrs1_10/kla/<strong>science</strong>/pdf/syllabus/outcomes.pdf<br />
Resources:<br />
Experiment Resources:<br />
White board and white board markers<br />
Experiment worksheets<br />
Frozen bottle of water<br />
Large clear container<br />
Computer and projector<br />
Warm water<br />
Various resource weather charts<br />
Large tray<br />
Switched on students<br />
Ice<br />
Worksheets for early finishers<br />
Matches, powder/flour, salt, cotton wool<br />
Peer evaluation sheets<br />
Safety needs: Fire blanket, water, fire extinguisher<br />
Time Teaching and Learning Activities Resource<br />
Possible questions during the lesson: What do you think clouds are made of? What is rain? How does<br />
rain occur? What is evaporation? What would cause this process to start? Why does the water vapour<br />
rise? How do you know the air is cooler higher up in the sky, the sun is up there shouldn‟t it be hotter?<br />
How does water condense? What small particles could be in the air? How do they get there? What<br />
makes the water drop from the sky? Do all clouds make rain? Which ones? Why?<br />
Activity 6.6: Analysing <strong>science</strong> lesson plans<br />
1. The next set of lesson plan examples has different structures.<br />
2. Analyse Example 6.8 and note the introduction relates to the students‟<br />
level with a stimulus around some familiarity (i.e., Three Little Pigs).<br />
3. Decide what you would assess in Example 6.8, and what else needs to<br />
be included.<br />
4. What do you think are the key scientific concepts for Examples 6.8<br />
and 6.9?<br />
5. Consider the inclusions discussed in this chapter and in particular<br />
Figure 6.1 and Activity 6.4.<br />
108
<strong>Planning</strong> <strong>science</strong> <strong>lessons</strong><br />
Example 6.8: Natural and processed materials for Year 2<br />
Building Teaching strategies and actions<br />
materials<br />
INTRODUCTION<br />
Gaining learner<br />
interest,<br />
establishing<br />
conceptual basis.<br />
5-10 mins<br />
EXPERIMENT<br />
Student inquiry<br />
and investigation<br />
20-25 mins<br />
CONCLUSION<br />
Bringing<br />
together ideas,<br />
reinforcing key<br />
concepts and<br />
intended<br />
outcomes<br />
5-10 mins<br />
Read the Three Little Pigs<br />
Ask questions about the materials used to build each<br />
house. What did the pigs use to build their houses? Why<br />
do you think the first two houses blew away? Which house<br />
was most stable? Why?<br />
Ask students to list the properties of each material (straw,<br />
sticks, bricks) and suggest why they were suitable for<br />
building or not. What are the properties of the materials<br />
that did not work? What about the materials that did?<br />
List in a table on the overhead transparency (OHT) three<br />
materials. Consider hard/soft, heavy/light.<br />
Introduce experiment by posing questions: What other<br />
materials might be good for building? How can we find<br />
out?<br />
Hand out playing cards and split class into five groups.<br />
Ask students to move to their groups.<br />
Explain experiment… what they will be doing generally.<br />
MODEL how to use the hair dryer.<br />
Outline group expectations: co-operative work, everyone<br />
has a go, discuss results, record on sheets. If early finished<br />
then ask students to work out how far it moved.<br />
During experiment, circulate through class monitoring<br />
behaviour and eliciting students‟ understandings by asking<br />
questions: What have you noticed about the materials in<br />
each category? Why do you think you need to make sure<br />
the hair dryer is at the same place each time?<br />
Can you tell me something about the materials that you<br />
think may be good or bad for building? Call class back to<br />
whole group scenario<br />
Ask each group to identify which materials were in each<br />
category, record results on a chart, in the case of<br />
disagreements – discuss why, ask students to give a reason<br />
for their choice.<br />
Create a table of properties of good building materials, use<br />
questions to elicit responses: What do you notice about all<br />
the materials that are good? What do they have in<br />
common? Would you say they are hard/soft, heavy/light?<br />
Do they move/bend? Did they pass the blow test?<br />
Use questions to guide discussion about why some<br />
materials are suitable for building and others are not: Why<br />
do you think this material was/was not suitable? What do<br />
you think are the best materials for building/why? If you<br />
were going to build a house what would you use? Why?<br />
Classroom<br />
management<br />
Sit on floor and<br />
listen to story<br />
Reflect on story,<br />
answer questions.<br />
Split into groups<br />
Observe<br />
teacher‟s use of<br />
hair dryer<br />
Do experiment in<br />
groups<br />
Record results<br />
Discuss reasons<br />
why the materials<br />
are suitable or<br />
not for building<br />
Discuss results<br />
with whole class<br />
Provide reasons<br />
for choices<br />
regarding<br />
suitable and<br />
unsuitable<br />
materials<br />
109
Hudson’s guide for teaching primary <strong>science</strong><br />
Assessment: Observe participation of group discussions. Observe appropriate behaviours. Ask<br />
questions to elicit understandings. Collect results sheets for marking (not summative) to gain<br />
awareness of each student‟s understanding.<br />
“THREE LITTLE PIGS” EXPERIMENT: Which materials are<br />
best for building?<br />
MATERIALS: 5 hair dryers<br />
1 x container of 10 different materials<br />
1 x metre ruler<br />
5 x results sheets for the Pigs<br />
METHOD:<br />
1. Teacher plugs in hair dryers and ensure all are on cold<br />
2. Outline safety procedures<br />
3. One by one take the materials out of the container and<br />
place them about 30 centimetres from the end of the<br />
hair dryer<br />
4. Blow air for 10 seconds at the material; which materials<br />
moved, which didn’t.<br />
5. Place the material in a group: Good for building/ Bad for<br />
building<br />
6. Pack away hair dryers and materials<br />
7. Discuss results with the class<br />
If you finish early, try measuring exactly how far each object moves to<br />
find out which materials are least suitable for building.<br />
Example 6.9: Life in a drop of pond water - Year 5<br />
Outcome: Upper primary students will demonstrate the ability to work scientifically by collecting a<br />
sample of local pond water and investigating, through their ability to mount a wet slide and correct use<br />
of a microscope, to identify and draw living animals.<br />
Standard: Students will be able to examine living things and account for observed similarities and<br />
differences.<br />
Resources: 10 microscopes, 10 small plastic containers, 10 pairs of plastic gloves (one glove per<br />
pair), 10 eye droppers, slides and cover slips for each group, powerpoint presentation, worksheet,<br />
observational checklist, website: http://www.<strong>science</strong>netlinks.com/matrix.php<br />
Classroom Organisation<br />
Reflection and introduction: Students sit at their desks for discussion and instructions.<br />
Collection of samples: Students are paired up and the teacher leads the class to the pond while they<br />
observe a demonstration of collecting pond water.<br />
Microscope and wet slide instructions: Students sit at desks.<br />
110
<strong>Planning</strong> <strong>science</strong> <strong>lessons</strong><br />
Microscope use: Students in pairs, work at the microscopes placed on the benches around the<br />
classroom.<br />
Teacher Procedures/Student Activities<br />
Introduction: The lesson starts with a recap of what the students have already learnt. The students will<br />
be required to reflect upon their knowledge through answering the teachers‟ questions. For example,<br />
“What lives in ponds?” and “Why are ponds good for the environment?” (5mins). After reflection, the<br />
teacher introduces the lesson that will be taking place that day. The teacher states that the students will<br />
be acting as field scientists and stresses the importance of investigation in <strong>science</strong>. The class and<br />
teacher collaborate to form a collective hypothesis. The teacher can start this process when he/she is<br />
telling the class what they are going to do during the activity, by asking them questions such as “Do<br />
you think anything can live in a drop of water?” and “If so, what do you think might live in it?” The<br />
teacher outlines the rules for the field trip (5 mins), which is on a neighbouring property to the school<br />
(all parental consent forms were supplied the day before). Safety procedures are ensured such as shoes,<br />
hats, and water wise behaviour.<br />
Body: The teacher leads the students the local pond and questions students about living and non-living<br />
things around the pond. Students record the interactions. The students observe a teacher demonstration<br />
of collecting pond water. All students carefully collect a water sample using an eye dropper. The<br />
teacher needs to ensure that students collect water near the vegetation. Once the samples have been<br />
collected, the students are taken back to class (15-20 mins). Back in the classroom, the teacher<br />
presents a power point to the students to remind them about how to use a microscope (e.g.,<br />
http://www.microscopy_uk.org.uk) and teach them how to mount a wet slide. The teacher also<br />
physically demonstrates this procedure. Students are made fully aware about the risks involved with<br />
handling glass and microscopes. The teacher briefly outlines the worksheet before students commence<br />
the activity (5 mins). While the students are working the teacher monitors the room, observing students<br />
work and asking questions such as “How do you know if something is alive?” The teacher gets each<br />
group to reflect on their hypothesis by asking: “Did you think anything could live in a drop or water?”<br />
and “What did you discover?” Students who cannot locate an animal in their water can move to share<br />
with another pair. Students record their findings on the worksheet with illustrations and written<br />
comments (15mins). Once students are finished, they must pack up their equipment.<br />
Conclusion: Students sit together on the classroom floor with their worksheets. Teacher asks questions<br />
about their findings. Students are also asked to make scientific statements about their findings: “What<br />
is one thing that you know to be true now?” Teacher asks other questions that will lead the students<br />
into the next <strong>science</strong> lesson, for example: “What would you now write as a hypothesis about pond<br />
water?” and “What else would you like to know about animals in pond water?”<br />
Extension activity for early finishers:<br />
http://www.teachers.ash.org.au/jmresources/pond/life.html#ponds<br />
Assessment: Two forms of formative assessment will be employed. First, an observational checklist<br />
will be used to determine students‟ collaborative interaction, values and attitudes. Second, worksheets<br />
will be collected to provide evidence of students learning.<br />
Evaluation: The teacher will evaluate the benefits of going to the pond, any other safety hazards that<br />
may not have been considered, students‟ use of the microscopes and handling of slides, and the<br />
appropriateness of worksheets.<br />
111
Hudson’s guide for teaching primary <strong>science</strong><br />
HOW CAN I IMPROVE MY PLAN?<br />
Evaluating your plan before implementation can provide a way to constructively refine the plan<br />
towards more effective teaching. Generally, teachers work collaboratively; they understand the value<br />
of interdependence. Many form collegial groups or partnerships as discussion forums for advancing<br />
their teaching practices (e.g., troubleshooting issues and bouncing ideas off each other). Another<br />
teacher can act as a critical friend, someone who can provide an objective account. Discussing or<br />
showing your teaching plans to a valued critical friend can help you to advance your teaching ideas.<br />
References<br />
Groundwork. (2001). How to measure the weather. Retrieved April 27, 2009, from<br />
http://www.4seasons.org.uk/projects/weather/measure.htm<br />
Commonwealth Bureau of Meteorology. (2004). Worksheet 16. Retrieved April 25, 2009 from<br />
http://www.bom.gov.au/lam/Students_Teachers/Worksheet16.shtml<br />
The Franklin Institute Online. (2002). The Wind: Our Fierce Friend. Retrieved April 27, 2009, from<br />
http://sln.fi.edu/tfi/units/energy/wind.html<br />
Danish Wind Industry Association. (2003). Wind Speed Measurement: Anemometers. Retrieved April<br />
28, 2009, from http://www.windpower.org/en/tour/wres/wndspeed.htm<br />
112