Create successful ePaper yourself
Turn your PDF publications into a flip-book with our unique Google optimized e-Paper software.
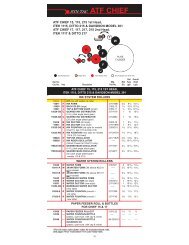
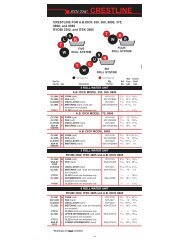
Crestline ® Dampening System<br />
Installation Instructions<br />
<strong>Ryobi</strong> <strong>500N</strong><br />
X88-33<br />
7/98
GENERAL INFORMATION<br />
ATTENTION<br />
CRESTLINE®<br />
DAMPENER<br />
OWNER!<br />
Accel Graphic Systems provides parts and service through its<br />
authorized distributors and dealers. Therefore, all requests for<br />
parts and service should be directed to your local dealer.<br />
The philosophy of Accel Graphic Systems is to continually improve<br />
all of its products. Written notices of changes and improvements<br />
are sent to Accel Graphic System's Dealers.<br />
If the operating characteristics or the appearance of your product<br />
differs from those described in this manual, please contact your<br />
local Accel Graphic System's Dealer for updated information and<br />
assistance.<br />
Always update your dampener when improvements are made<br />
available, especially those related to safety.<br />
YOUR AUTHORIZED CRESTLINE DEALER IS:<br />
THE SERIAL NUMBER OF YOUR<br />
CRESTLINE DAMPENER(S) IS:<br />
2<br />
SAFETY<br />
INFORMATION<br />
TECHNICAL<br />
ASSISTANCE<br />
FOR YOUR SAFETY, DO NOT DISENGAGE OR REMOVE<br />
ANY GUARDS FROM THE CRESTLINE DAMPENER. THE<br />
DAMPENER CONTAINS SOME INWARD ROTATING<br />
ROLLER NIPS THAT CAN CAUSE INJURY IF LEFT<br />
UNGUARDED.<br />
For technical assistant during the installation, please contact:<br />
ACCEL GRAPHIC SYSTEMS<br />
11103 Indian Trail Dallas, TX 75229<br />
Phone (972) 484-6808<br />
Fax (800) 365-6510<br />
E-Mail accel@dallas.net<br />
Web Site accelgraphicsystems.<strong>com</strong><br />
Crestline® is covered by U.S. Patents and patents pending.
GENERAL INFORMATION<br />
BASIC<br />
CONFIGURATION<br />
OF CRESTLINE®<br />
Metering To Pan Pressure<br />
3/16"<br />
Metering Roller<br />
Metering To Intermediate Pressure<br />
1/8" - 5/32"<br />
Pan Roller<br />
Intermediate Roller<br />
Oscillator<br />
Water Form Roller<br />
Form To Plate Pressure<br />
5/32"<br />
REQUIRED TOOLS 1. Phillips Screwdriver<br />
2. Standard Screwdriver<br />
3. 3/32" Allen Wrench<br />
4. 1/8" Allen Wrench<br />
5. 5/32" Allen Wrench<br />
6. 7/16" Open End Wrench<br />
7. 1/2" Open End Wrench<br />
8. 2.5 mm Allen Wrench<br />
9. 3 mm Allen Wrench<br />
10. 4 mm Allen Wrench<br />
11. 8 mm Open End Wrench<br />
12. Spring Hook Tool<br />
3
DISASSEMBLY<br />
1<br />
AT OPS & NOPS, remove operating handles and side covers.<br />
Also remove molleton covered rollers from existing dampener.<br />
2<br />
Remove plate at OPS (subject arrow). Save the following<br />
pieces for use in the Crestline installation:<br />
A. Small black block and bolt securing it to the plate.<br />
B. Phillips head cover screw.<br />
C. Bolts and lock washers securing plate to press frame.<br />
ATTENTION! The newer model <strong>Ryobi</strong> <strong>500N</strong> presses do not<br />
use the small black block to attach the side cover. Accel is<br />
now providing these blocks as well as the hardware to attach<br />
it to the plate.<br />
3<br />
Remove the plate at the NOPS (subject arrow) Save the same<br />
pieces listed in Step 4 for future use. Loosen clip (subject arrow)<br />
and remove water hose from holder (subject arrow).<br />
5
DISASSEMBLY<br />
4<br />
Remove "E" clip and washer (subject arrow) and save for later use.<br />
Loosen set screw (subject arrow) and remove linkage.<br />
5<br />
Remove the four bolts securing existing dampener to the press<br />
frames. Dampener should then be lifted off the press.<br />
6<br />
There are two recessed screws (subject arrow) at OPS & NOPS<br />
which secure guide pins. Replace them with the provided long set<br />
screws #05-157M25, making sure to push guide pins inward when<br />
tightening. Screws will protrude above press frame when installed.<br />
YOU ARE NOW READY TO INSTALL CRESTLINE.<br />
7
INSTALLATION<br />
1<br />
The dampener is shipped attached to the mounting assembly.<br />
Remove the two extension springs and pivot bolts to separate the<br />
assembly from the dampener. Place the assembly on the press<br />
frame as shown. The two protruding set screws will pass through<br />
the lower slots in the mounting brackets (subject arrow). Install<br />
provided countersunk screws #05-147M12 (subject arrow) at OPS<br />
and NOPS and tighten. Install provided nuts #05-217 on the set<br />
screws (subject arrow) and tighten. Make sure the lift shaft turns<br />
freely.<br />
2<br />
Install provided linkage as shown. Use washer and "E" clip from old<br />
single lever linkage to attach to press arm (subject arrow). Do not<br />
tighten set screw in control block (subject arrow) at this time.<br />
NOTE: Behind arm (subject arrow) there may be a bearing . Push<br />
3<br />
the bearing inward to position the arm as shown.<br />
Place the dampener on the frame work. Install the bolts #05-<br />
114075 and pivot spools #12-999 (subject arrow) and springs #09-<br />
0101 between the studs (subject arrow). Make sure the dampener<br />
form roller is centered relative to the ink form rollers.<br />
9
INSTALLATION<br />
4<br />
Install the OPS press cover mounting plate #18-0311 (subject<br />
arrow). Make sure that the cover screw block is on the outside as<br />
shown in the picture. Position and angle the plate as shown when<br />
installing.<br />
5<br />
Install the NOPS press cover mounting plate #18-0312 (subject<br />
arrow). Make sure that the cover screw block is on the outside as<br />
shown in the picture. Angle the plate as shown when installing.<br />
Route the water hose #99-29 from the pan through the clip (subject<br />
arrow). Tighten clip. Replace the metal cap from the end of the old<br />
water hose onto the new one.<br />
YOUR ARE NOW READY TO MAKE FINAL ADJUSTMENTS.<br />
11
FINAL ADJUSTMENTS<br />
1<br />
LIFT ADJUSTMENT<br />
Operate the single lever a few time and make sure things are<br />
moving smoothly. Place the single lever in the "dampener on"<br />
position. Position the cam (subject arrow) so that the flat side is<br />
approximately parallel with the top of the mounting block and<br />
tighten set screw in black control block. Return single lever to the<br />
"Off" position. The lift cams should then rotate and the round<br />
portion should pass underneath adjusting eccentrics (subject<br />
arrow). Adjust the eccentrics on the OPS & NOPS to get an even<br />
.030" - .040" gap between the dampener form and plate cylinder.<br />
WARNING: Do no change the position of the cams on the<br />
shaft. They are paralleled at the factory.<br />
P<br />
M<br />
I<br />
F<br />
O<br />
2<br />
FORM ROLLER TO PLATE CYLINDER PRESSURE<br />
Mount a plate on the press. Dab some ink on the dampener<br />
oscillator and turn on the press to distribute. Turn off the press and<br />
lower the dampener to the plate to check the stripe. The proper<br />
setting is an even 5/32" (4mm) across the plate. Adjust the stripe<br />
by turning the screws (subject arrow) in the blocks. Turning the<br />
screws down makes a thinner stripe and vice versa. Adjust to 5/32"<br />
(4mm) and secure the screws with the lock nuts.<br />
5/32"<br />
(4mm)<br />
Plate Cylinder<br />
P<br />
M<br />
I<br />
F<br />
1/8"<br />
(3mm)<br />
O<br />
3<br />
INTERMEDIATE TO METERING ROLLER PRESSURE<br />
Next check the stripe between the intermediate and metering<br />
rollers by dropping the dampener to the plate and turning the press<br />
backwards by hand. The strip should be parallel and between 1/8"<br />
and 5/32" (3-4mm). If not, loosen top screw in hanger brackets.<br />
Also loosen bottom screws, but keep a little tension against the<br />
hanger brackets. The hangers will pivot around bottom screw since<br />
the top screw hole is oversize. Reset brackets as needed and<br />
retighten all screws.<br />
Plate Cylinder<br />
13
3/16"<br />
(5mm)<br />
P<br />
M<br />
I<br />
F<br />
Plate Cylinder<br />
O<br />
4<br />
FINAL ADJUSTMENTS<br />
MAXIMUM METERING TO PAN ROLLER PRESSURE<br />
Place the dampener in the "Off" position. Turn the press on and let<br />
the press idle for 20 seconds. After the press sits still for 20<br />
seconds, check the stripe between the pan and metering rollers by<br />
bumping hand wheel. It should be 3/16" (5mm). Adjust by turning<br />
the knurled knobs (subject arrow). Turning the knobs down makes<br />
a wider stripe. The ratchet gear (subject arrow) is not locked to the<br />
knob at this time.<br />
Once the pan to metering roller has been set at 3/16", spin ratchet<br />
gears down (while holding the knobs still) until they bottom out on<br />
the stud and lock in place with set screws. This position is minimum<br />
water.<br />
5<br />
Apply a small amount of grease on the dampener gears, lift cams,<br />
and springs.<br />
6<br />
Reinstall the upper press side covers and adjust the cover screw<br />
blocks on the plates (plates installed in Steps 4 & 5, Dampener<br />
Installation Instructions) to hold the covers properly. Tighten<br />
phillips head cover screws.<br />
15
FINAL ADJUSTMENTS<br />
7<br />
LEVEL OF WATER PAN<br />
Place full water bottle in dampener pan and check water level. It<br />
should be about half way up the pan. Adjust bottle if necessary.<br />
Raising bottle bracket will raise the water level and vice-versa.<br />
8<br />
Remove old plate cylinder guard. Install new, shorter cylinder guard<br />
#18-0205 using the same hinges as before.<br />
9<br />
Attach inker extension guard #18-0325 as shown using 3 flanged<br />
nuts #05-244 provided. (View is from ink fountain looking back<br />
toward feeder.)<br />
17
FINAL ADJUSTMENTS<br />
10<br />
Attach dampener guard #18-0120 by sliding pivot rod through the<br />
1/4" holes nearest the thumb screws and center guard on dampener.<br />
11<br />
Place trip cam #14-06 at the NOPS (subject arrow). A set collar<br />
#13-2531 is provided to secure the OPS.<br />
12<br />
Remove press microswitch cover at NOPS. Disconnect the <strong>com</strong>mon<br />
wire from the press microswitch and run the new wires as<br />
diagrammed. Secure new wires with provided zip ties making sure<br />
they are clear of all gears and moving parts. Replace press switch<br />
cover when finished. Install dampener side covers. The one with the<br />
cutout goes to the NOPS.<br />
THE DAMPENER IS NOW READY TO RUN.<br />
NOTE: For a better view of the wiring diagram, see parts section<br />
drawing #SK11591A in the back of this manual.<br />
19
BASIC OPERATION<br />
START OF DAY<br />
A. Make sure all rollers are secure in their proper position.<br />
B. Turn knurled knob on ratchet assembly clockwise until it<br />
stops.<br />
C. Before adding water, ink-up the dampener. This is done either<br />
by applying a small amount of ink directly to the dampener<br />
oscillator, or by dropping both water and ink form rollers to the<br />
plate and allowing the dampener to ink-up from the plate.<br />
D. Place water bottle in bracket. Accel re<strong>com</strong>mend using the<br />
proper fountain solution formulated for the specific plate type<br />
being run on the press.<br />
RUNNING<br />
DURING THE DAY<br />
A. Typically, the Crestline Dampener should not have to be<br />
adjusted from job to job. The form roller setting should never<br />
be changed unless it has deviated from the factory specification<br />
of 5/32" to the plate.<br />
B. If necessary, the amount of water fed to the plate can be<br />
adjusted by turning the knurled ratchet knob. You are running<br />
minimum water with the knob turned fully clockwise. If you<br />
need more water, loosen the lock-knob, turn ratchet assembly<br />
counterclockwise one "click" at a time until proper moisture is<br />
achieved, then retighten lock knob. Make sure the arm on the<br />
pan roller shaft follows the black eccentric on the ratchet<br />
assembly. If necessary, turn the knurled knob on the pan<br />
roller shaft until the aluminum arm stops against the<br />
eccentric.<br />
20
CLEANING & MAINTENANCE<br />
WASH UPS<br />
DURING THE DAY<br />
1. Remove bottle and drain the excess water from the pan.<br />
2. Mount a cleanup mat to the press.<br />
3. Turn on the press and squirt a small amount of press wash on<br />
the ink rollers and dampener oscillator. Avoid excessiveapplication<br />
of wash to the dampener or most of it will end up in<br />
the water pan. Do not use an extremely fast drying wash on<br />
the dampener as this can damage soft rubber. Fast-dry<br />
washes should only be used on blankets!<br />
4. Drop both the dampener and ink forms to the cleanup mat.<br />
5. Remove water pan and clean any solution left in it.<br />
6. Be sure to wipe excess clean up solution from the ends of the<br />
dampener metering and pan rollers.<br />
END OF THE DAY<br />
1. Wash up dampener as describe above. Pay close attention to<br />
cleaning the ends of the pan and metering rollers that extend<br />
past the form rollers.<br />
2. Spin the knurled knob counterclockwise and relieve pressure<br />
between the metering and pan rollers.<br />
3. Remove any excess wash that may remain on dampener<br />
metering and pan rollers.<br />
21
CLEANING & MAINTENANCE<br />
DEGLAZING THE<br />
DAMPENER<br />
Periodic deglazing of water-soluble contaminants will be necessary<br />
with the Crestline ® . Typically, once every 2-3 weeks will be<br />
sufficient, unless you are running electrostatic plates on a daily<br />
basis whereas deglazing should be performed weekly. A 50/50<br />
solution of household ammonia and hot water can be used for<br />
deglazing purposes. If you prefer a <strong>com</strong>mercially available deglazer,<br />
avoid those containing pumice or gritty substances. Always<br />
follow deglazing with straight water and then roller wash<br />
OILING AND<br />
GREASING THE<br />
DAMPENER<br />
A. Place a small amount of grease on the gears once a month.<br />
B. Inject grease into the oscillator grease fitting one a month.<br />
22
CLEANING & MAINTENANCE<br />
CRESTLINE ®<br />
CLEANING & MAINTENANCE CHART<br />
Daily Weekly Bi-Weekly Monthly<br />
Wash Rollers<br />
✔<br />
Deglaze Rollers<br />
Metal Plate Users<br />
Silvermaster Plate Users<br />
✔<br />
✔<br />
Electrostatic Plate Users<br />
✔<br />
Grease Gears<br />
Inspect Ball Bearings<br />
Check Roller Pressures<br />
Check Roller Surfaces<br />
✔<br />
✔<br />
✔<br />
✔<br />
23
11103 Indian Trail Dallas, TX 75229 Phone 972-484-6808, Fax 800-365-6510<br />
E-Mail accel@dallas.net, Web Site accelgraphicsystems.<strong>com</strong>