User Manual Quad Ku Band TVRO Antenna (9497B - Livewire ...
User Manual Quad Ku Band TVRO Antenna (9497B - Livewire ...
User Manual Quad Ku Band TVRO Antenna (9497B - Livewire ...

You also want an ePaper? Increase the reach of your titles
YUMPU automatically turns print PDFs into web optimized ePapers that Google loves.
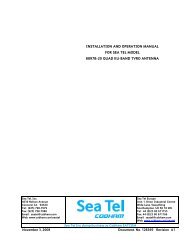
INSTALLATION AND OPERATION MANUAL<br />
FOR SEA TEL MODEL<br />
<strong>9497B</strong>-20 QUAD KU-BAND <strong>TVRO</strong> ANTENNA<br />
Sea Tel, Inc.<br />
4030 Nelson Avenue<br />
Concord, CA 94520<br />
Tel: (925) 798-7979<br />
Fax: (925) 798-7986<br />
Email: seatel@cobham.com<br />
Web: www.cobham.com\seatel<br />
November 3, 2008<br />
Sea Tel Europe<br />
Unit 1, Orion Industrial Centre<br />
Wide Lane, Swaythling<br />
Southampton, UK S0 18 2HJ<br />
Tel: 44 (0)23 80 671155<br />
Fax: 44 (0)23 80 671166<br />
Email: seatel@cobham.com<br />
Web: www.cobham.com\seatel<br />
Sea Tel Inc doing business as Cobham SATCOM<br />
Document. No. 128371 Revision A1
These commodities, technology or software were exported from the United<br />
States in accordance with the Export Administration Regulations. Diversion<br />
contrary to U.S. law is prohibited.<br />
Sea Tel Marine Stabilized <strong>Antenna</strong> systems are manufactured in the United<br />
States of America.<br />
Sea Tel is an ISO 9001:2000 registered company. Certificate Number 19.2867 was issued<br />
August 12, 2005. Sea Tel was originally registered on November 09, 1998.<br />
The Series 00 Family of Marine Stabilized <strong>Antenna</strong> Pedestals with DAC-97 or DAC-03<br />
<strong>Antenna</strong> Control Unit complied with the requirements of European Norms and European<br />
Standards EN 60945 (1997) and prETS 300 339 (1998-03) on April 6, 2004. Sea Tel<br />
document number 122982 European Union Declaration of Conformity for Marine<br />
Navigational Equipment is available on request.<br />
Copyright Notice<br />
All Rights Reserved. The information contained in this document is proprietary to Sea Tel, Inc.. This<br />
document may not be reproduced or distributed in any form without the consent of Sea Tel, Inc. The<br />
information in this document is subject to change without notice.<br />
Copyright © 2008 Sea Tel, Inc.<br />
ii
Revision History<br />
REV ECO# Date Description By<br />
A N/A September 2, 2008 Initial Production Release MDN<br />
A1 N/A October 30, 2008 Updated logo and font MDN<br />
iv
Table of Contents<br />
1. INTRODUCTION ..........................................................................................................................................................................................1-1<br />
1.1. GENERAL DESCRIPTION OF SYSTEM............................................................................................................................................................ 1-1<br />
1.2. PURPOSE .......................................................................................................................................................................................................... 1-1<br />
1.3. SYSTEM COMPONENTS................................................................................................................................................................................. 1-1<br />
1.4. GENERAL SCOPE OF THIS MANUAL.............................................................................................................................................................. 1-2<br />
1.5. QUICK OVERVIEW OF CONTENTS................................................................................................................................................................ 1-2<br />
2. OPERATION.....................................................................................................................................................................................................2-1<br />
2.1. SYSTEM POWER-UP....................................................................................................................................................................................... 2-1<br />
2.1. ANTENNA INITIALIZATION .......................................................................................................................................................................... 2-1<br />
2.2. ANTENNA STABILIZATION ........................................................................................................................................................................... 2-1<br />
2.3. STABILIZED PEDESTAL ASSEMBLY OPERATION........................................................................................................................................ 2-1<br />
2.4. TRACKING OPERATION ................................................................................................................................................................................. 2-1<br />
2.5. ANTENNA POLARIZATION OPERATION...................................................................................................................................................... 2-2<br />
2.6. LOW NOISE BLOCK CONVERTER OPERATION ........................................................................................................................................... 2-2<br />
2.7. RADOME ASSEMBLY OPERATION ................................................................................................................................................................ 2-2<br />
3. BASIC SYSTEM INFORMATION........................................................................................................................................................3-1<br />
3.1. SATELLITE BASICS ......................................................................................................................................................................................... 3-1<br />
3.1.1. <strong>Ku</strong>-<strong>Band</strong> Receive Frequency (10.95-12.75GHz) ........................................................................................................3-1<br />
3.1.2. Blockage .........................................................................................................................................................................................3-1<br />
3.1.3. Rain Fade........................................................................................................................................................................................3-1<br />
3.1.4. Signal level.....................................................................................................................................................................................3-1<br />
3.1.5. Satellite Footprints ...................................................................................................................................................................3-2<br />
3.1.6. Linear Satellite polarization..................................................................................................................................................3-2<br />
3.2. ANTENNA BASICS.......................................................................................................................................................................................... 3-2<br />
3.2.1. Unlimited Azimuth ....................................................................................................................................................................3-2<br />
3.2.2. Elevation.........................................................................................................................................................................................3-2<br />
3.2.3. Feed Assembly............................................................................................................................................................................3-3<br />
3.2.4. <strong>Antenna</strong> polarization ...............................................................................................................................................................3-3<br />
3.2.5. Stabilization..................................................................................................................................................................................3-3<br />
3.2.6. Search Pattern.............................................................................................................................................................................3-3<br />
3.2.7. Tracking Receiver - Satellite Identification Receiver..............................................................................................3-3<br />
3.2.8. Tracking ..........................................................................................................................................................................................3-3<br />
3.3. COMPONENTS OF THE SYSTEM CONFIGURATION ................................................................................................................................... 3-4<br />
3.3.1. <strong>Antenna</strong> ADE Assembly..........................................................................................................................................................3-5<br />
3.3.2. <strong>Antenna</strong> Control Unit ..............................................................................................................................................................3-5<br />
3.3.3. Above Decks AC Power Supply...........................................................................................................................................3-6<br />
3.3.4. Satellite Receivers .....................................................................................................................................................................3-6<br />
3.3.5. Television/Monitor....................................................................................................................................................................3-6<br />
3.3.6. Matrix Switch...............................................................................................................................................................................3-6<br />
4. INSTALLATION.............................................................................................................................................................................................4-1<br />
4.1. GENERAL CAUTIONS & WARNINGS ........................................................................................................................................................... 4-1<br />
4.2. SITE SURVEY................................................................................................................................................................................................... 4-2<br />
4.3. PREPARING FOR THE INSTALLATION.......................................................................................................................................................... 4-2<br />
4.3.1. Unpack Shipping Crates.........................................................................................................................................................4-2<br />
4.3.2. Inspect / Inventory...................................................................................................................................................................4-2<br />
4.3.3. Prepare ADE Mounting Location ......................................................................................................................................4-2<br />
4.3.4. Preparing BDE Location.........................................................................................................................................................4-2<br />
v
Table of Contents<br />
4.3.5. Installing The System Cables ............................................................................................................................................. 4-2<br />
4.4. ASSEMBLING THE ADE .................................................................................................................................................................................4-2<br />
4.4.1. 144” Radome, Baseframe and <strong>Antenna</strong> Pedestal System Assembly............................................................. 4-2<br />
4.4.2. Preparing the ADE for Lift .................................................................................................................................................... 4-4<br />
4.5. INSTALLING THE ADE...................................................................................................................................................................................4-4<br />
4.5.1. Hoist\ ............................................................................................................................................................................................... 4-4<br />
4.5.2. Install <strong>Antenna</strong>/Radome/Baseframe .............................................................................................................................. 4-4<br />
4.6. INSTALL BDE EQUIPMENT ...........................................................................................................................................................................4-4<br />
4.6.1. ACU & TMS................................................................................................................................................................................... 4-4<br />
4.6.2. Other BDE Equipment ............................................................................................................................................................ 4-4<br />
4.7. CABLE TERMINATIONS..................................................................................................................................................................................4-4<br />
4.7.1. At The Radome........................................................................................................................................................................... 4-4<br />
4.7.2. ACU & TMS................................................................................................................................................................................... 4-5<br />
4.7.3. Other BDE Equipment ............................................................................................................................................................ 4-5<br />
4.8. FINAL ASSEMBLY............................................................................................................................................................................................4-5<br />
4.8.1. Remove Stow Braces/Restraints........................................................................................................................................ 4-5<br />
4.8.2. Verify all assembly and Wiring connections............................................................................................................... 4-5<br />
4.8.3. Balance <strong>Antenna</strong> Pedestal.................................................................................................................................................... 4-5<br />
4.9. POWER-UP THE ADE....................................................................................................................................................................................4-5<br />
4.9.1. Initialization................................................................................................................................................................................. 4-5<br />
4.9.2. Home Flag Position.................................................................................................................................................................. 4-5<br />
4.9.3. BDE ................................................................................................................................................................................................... 4-5<br />
4.10. SETUP ...............................................................................................................................................................................................................4-5<br />
5. SETUP.................................................................................................................................................................................................................. 5-1<br />
5.1. OPERATOR SETTINGS.....................................................................................................................................................................................5-1<br />
5.2. OPTIMIZING TARGETING..............................................................................................................................................................................5-1<br />
5.3. OPTIMIZING AUTO-POLARIZATION <strong>TVRO</strong>..............................................................................................................................................5-1<br />
5.4. CALIBRATING RELATIVE ANTENNA POSITION (HOME FLAG OFFSET).................................................................................................5-1<br />
5.4.1. To Calculate HFO: ..................................................................................................................................................................... 5-2<br />
5.4.2. To Enter the HFO value: ........................................................................................................................................................ 5-3<br />
5.5. RADIATION HAZARD AND BLOCKAGE MAPPING (AZ LIMIT PARAMETERS) .....................................................................................5-4<br />
5.6. TX POLARITY SETUP......................................................................................................................................................................................5-4<br />
5.7. TRACK DISP.................................................................................................................................................................................................5-4<br />
5.8. ACU FACTORY DEFAULT PARAMETER SETTINGS – SERIES 97A & SERIES 00 ANTENNAS ...........................................................5-5<br />
6. FUNCTIONAL TESTING.......................................................................................................................................................................... 6-1<br />
6.1. ACU / ANTENNA SYSTEM CHECK...............................................................................................................................................................6-1<br />
6.2. LATITUDE/LONGITUDE AUTO-UPDATE CHECK ........................................................................................................................................6-1<br />
6.3. SHIP HEADING – GYRO COMPASS FOLLOWING CHECK..........................................................................................................................6-1<br />
6.4. AZIMUTH & ELEVATION DRIVE...................................................................................................................................................................6-1<br />
6.5. FOUR QUADRANT TRACKING TEST.............................................................................................................................................................6-1<br />
6.6. BLOCKAGE SIMULATION TEST.....................................................................................................................................................................6-2<br />
7. MAINTENANCE AND TROUBLESHOOTING.............................................................................................................................. 7-1<br />
7.1. WARRANTY INFORMATION ..........................................................................................................................................................................7-1<br />
7.2. RECOMMENDED PREVENTIVE MAINTENANCE ..........................................................................................................................................7-1<br />
7.2.1. Check ACU Parameters.......................................................................................................................................................... 7-1<br />
7.2.2. Latitude/Longitude Auto-Update check........................................................................................................................ 7-1<br />
7.2.3. Heading Following.................................................................................................................................................................... 7-1<br />
vi
Table of Contents<br />
7.2.4. Azimuth & Elevation Drive....................................................................................................................................................7-2<br />
7.2.5. Test Tracking................................................................................................................................................................................7-2<br />
7.2.6. Visual Inspection - Radome & Pedestal ......................................................................................................................7-2<br />
7.2.7. Mechanical Checks ...................................................................................................................................................................7-2<br />
7.2.8. Check Balance .............................................................................................................................................................................7-2<br />
7.2.9. Observe <strong>Antenna</strong> Initialization...........................................................................................................................................7-2<br />
7.3. TROUBLESHOOTING....................................................................................................................................................................................... 7-2<br />
7.3.1. Theory Of Stabilization Operation....................................................................................................................................7-2<br />
7.3.2. Series 97B-20 <strong>Quad</strong> <strong>Ku</strong>-<strong>Band</strong> <strong>TVRO</strong> RF Flow..............................................................................................................7-3<br />
7.3.3. <strong>Antenna</strong> Initialization (Series 97B & Series 00 ) .......................................................................................................7-4<br />
7.3.4. Troubleshooting using DacRemP......................................................................................................................................7-4<br />
7.3.5. <strong>Antenna</strong> Loop Error Monitoring ........................................................................................................................................7-5<br />
7.3.6. Reference Sensor Monitoring.............................................................................................................................................7-6<br />
7.3.7. Open Loop Rate Sensor Monitoring ................................................................................................................................7-8<br />
7.3.8. Open Loop Motor Test............................................................................................................................................................7-9<br />
7.3.9. To Disable/Enable DishScan ................................................................................................................................................7-9<br />
7.3.10. Satellite Reference Mode......................................................................................................................................................7-9<br />
7.3.11. To Read/Decode an ACU Error Code 0008 (Pedestal Function Error): .....................................................7-10<br />
7.3.12. Remote GPS LAT/LON Position:.......................................................................................................................................7-12<br />
7.4. MAINTENANCE.............................................................................................................................................................................................7-14<br />
7.4.1. Balancing the <strong>Antenna</strong>.........................................................................................................................................................7-14<br />
7.4.2. To Adjust Tilt: ............................................................................................................................................................................7-14<br />
7.4.3. To Reset/Reinitialize the <strong>Antenna</strong>:.................................................................................................................................7-16<br />
7.5. PEDESTAL CONTROL UNIT CONFIGURATION (XX97B & XX00).........................................................................................................7-17<br />
7.5.1. MODEL CONFIGURATION NUMBERS ........................................................................................................................7-17<br />
7.6. ANTENNA STOWING PROCEDURE.............................................................................................................................................................7-18<br />
8. <strong>9497B</strong>-20 TECHNICAL SPECIFICATIONS..................................................................................................................................8-1<br />
8.1. 9497 ANTENNA REFLECTOR....................................................................................................................................................................... 8-1<br />
8.2. FEED ASSEMBLIES.......................................................................................................................................................................................... 8-1<br />
8.2.1. <strong>TVRO</strong> <strong>Quad</strong> <strong>Ku</strong>-<strong>Band</strong> Feed Assembly .............................................................................................................................8-1<br />
8.3. PEDESTAL CONTROL UNIT (PCU).............................................................................................................................................................. 8-1<br />
8.4. STABILIZED ANTENNA PEDESTAL ASSEMBLY........................................................................................................................................... 8-2<br />
8.5. UNLIMITED AZIMUTH MODEMS (3 CHANNEL)....................................................................................................................................... 8-2<br />
8.6. 144” RADOME ASSEMBLY ........................................................................................................................................................................... 8-3<br />
8.7. ENVIRONMENTAL CONDITIONS (ADE)..................................................................................................................................................... 8-3<br />
8.8. CABLES............................................................................................................................................................................................................. 8-4<br />
8.8.1. <strong>Antenna</strong> Control Cable (Provided from ACU-MUX) ................................................................................................8-4<br />
8.8.2. <strong>Antenna</strong> L-<strong>Band</strong> <strong>TVRO</strong> IF Coax Cables (Customer Furnished)..........................................................................8-4<br />
8.8.3. AC Power Cable (Pedestal & Rf Equipment)................................................................................................................8-4<br />
8.8.4. Gyro Compass Interface Cable (Customer Furnished).........................................................................................8-4<br />
8.8.5. Fiber Optic Transmitter (CFE Optional).........................................................................................................................8-4<br />
9. MODEL <strong>9497B</strong>-20 DRAWINGS............................................................................................................................................................9-1<br />
9.1. MODEL SPECIFIC DRAWINGS...................................................................................................................................................................... 9-1<br />
9.2. SERIES 97A & 00 GENERAL DRAWINGS .................................................................................................................................................. 9-1<br />
vii
Table of Contents<br />
This Page Intentionally Left Blank<br />
viii
<strong>9497B</strong>-20 <strong>Ku</strong>-<strong>Band</strong> <strong>TVRO</strong> Introduction<br />
1. Introduction<br />
1.1. General Description of system<br />
Your Series 00 system is a fully stabilized antenna that has been designed and manufactured so as to be inherently<br />
reliable, easy to maintain, and simple to operate. Except for start-ups, or when changing to operate with different<br />
transponders or satellites, the equipment essentially permits unattended operation.<br />
1.2. Purpose<br />
This shipboard Television Receive Only (<strong>TVRO</strong>) system provides you with satellite TV programming while inport or<br />
underway. Your Series 00 <strong>Antenna</strong> system will receive signals of adequately high E.I.R.P. levels (see the Specifications<br />
section of this manual), in linear or circular polarization mode from any of the geosynchronous TV satellites at C-<strong>Band</strong><br />
or <strong>Ku</strong>-band frequencies (dependant upon currently installed feed assembly). This input will be distributed to all of your<br />
satellite TV receivers which will provide the Audio/Video to your Televisions. Many satellites also provide CD quality<br />
audio programming which may also be routed to your stereo equipment.<br />
1.3. System Components<br />
Your Series 00 <strong>TVRO</strong> <strong>Antenna</strong> system consists of two major groups of equipment; an above-decks group and a belowdecks<br />
group. Each group is comprised of, but is not limited to, the items listed below. All equipment comprising the<br />
Above Decks is incorporated inside the radome assembly and is integrated into a single operational entity. For inputs,<br />
this system requires only an unobstructed line-of-sight view to the satellite, Gyro Compass input and AC electrical<br />
power. Video and Audio outputs from your satellite receivers are available for distribution and monitoring.<br />
For more information about these components, refer to the Basic System Information section of this manual.<br />
A. Above-Decks Equipment (ADE) Group<br />
1. Stabilized antenna pedestal<br />
2. <strong>Antenna</strong> Reflector<br />
3. Feed Assembly with LNB(s)<br />
4. Radome Assembly<br />
B. Below-Decks Equipment Group<br />
5. <strong>Antenna</strong> Control Unit<br />
6. 2 or 4 input Matrix Switch with desired number of outputs (one output to the ACU plus enough outputs for<br />
the installed satellite receivers).<br />
7. Satellite Video Receiver(s) & Television(s)<br />
8. Control, RF and Video cables<br />
1-1
Introduction<br />
<strong>9497B</strong>-20 <strong>Ku</strong>-<strong>Band</strong> <strong>TVRO</strong><br />
Figure 1-1 Series 00 <strong>TVRO</strong> Simplified Block Diagram<br />
1.4. General scope of this manual<br />
This manual describes the Sea Tel Series 00 <strong>Antenna</strong> (also called the Above Decks Equipment), its’ operation and<br />
installation. Refer to the manual provided with your <strong>Antenna</strong> Control Unit for its’ installation and operating<br />
instructions.<br />
1.5. Quick Overview of contents<br />
The information in this manual is organized into chapters. Operation, basic system information, installation, setup,<br />
functional testing, maintenance, specifications and drawings relating to this <strong>Antenna</strong> are all contained in this manual<br />
1-2
<strong>9497B</strong>-20 <strong>Ku</strong>-<strong>Band</strong> <strong>TVRO</strong> Operation<br />
2. Operation<br />
2.1. System Power-up<br />
Turn the Power switch on the louvered panel of the antenna pedestal ON. This will energize the antenna pedestal and<br />
the associated RF equipment.<br />
Turn the Power switch on rear panel of the <strong>Antenna</strong> Control Unit (ACU) ON.<br />
2.1. <strong>Antenna</strong> Initialization<br />
A functional operation check can be made on the antenna stabilization system by observing its behavior during the 4<br />
phases of initialization.<br />
Turn the pedestal power supply ON. The PCU will initialize the stabilized portion of the mass to be level with the<br />
horizon and at a prescribed Azimuth and Elevation angles. The antenna will go through the specific sequence of steps<br />
(listed below) to initialize the antenna. These phases initialize the level cage, elevation, cross-level and azimuth to<br />
predetermined starting positions.<br />
Initialization is completed in the following phases, each phase must complete properly for the antenna to operate<br />
properly (post-initialization).<br />
1. Level Cage is driven CCW, issuing extra steps to assure that the cage is all the way to the mechanical stop.<br />
Then the Level cage will be driven exactly 45.0 degrees CW.<br />
2. Elevation axis activates - Input from the LV axis of the tilt sensor is used to drive the Elevation of the<br />
equipment frame to bring the tilt sensor LV axis to level (this results in the dish being at an elevation angle of<br />
45.0 degrees).<br />
3. Cross-Level axis activates - Input from the CL axis of the tilt sensor is used to drive Cross-Level of the<br />
equipment frame to bring the cross-level axis of the tilt sensor to level (this results in the tilt of the Cross-<br />
Level Beam being level).<br />
4. Azimuth axis activates - <strong>Antenna</strong> drives in azimuth until the “Home Flag” signal is produced. This signal is<br />
produced by a Home Switch hitting a cam or by a Hall Effect sensor in close proximity to a Magnet.<br />
This completes the phases of initialization. At this time the antenna elevation should 45.0 degrees and Relative<br />
azimuth should be at be at home flag (home switch engaged on the home flag cam).<br />
If any of theses steps fail, or the <strong>Antenna</strong> Control Unit reports model number as "xx97" re-configure the PCU as<br />
described in section the Setup section of this manual. If initialization still fails, refer to the troubleshooting section of<br />
this manual.<br />
2.2. <strong>Antenna</strong> Stabilization<br />
After initialization has completed, real-time stabilization of the antenna is an automatic function of the PCU.<br />
2.3. Stabilized Pedestal Assembly Operation<br />
Operation of the stabilized antenna Pedestal Control Unit (PCU) is accomplished remotely by the <strong>Antenna</strong> Control<br />
Unit (ACU). Refer to the Operation section of the <strong>Antenna</strong> Control Unit manual for more specific operation details.<br />
There are no other operating instructions applicable to the pedestal assembly by itself.<br />
2.4. Tracking Operation<br />
Tracking optimizes the antenna pointing, in very fine step increments, to maximize the level of the satellite signal<br />
being received. The mode of tracking used in this antenna is a variation of Conical Scanning called DishScan.<br />
DishScan continuously drives the antenna in a very small circular pattern at 60 RPM. The ACU evaluates the received<br />
signal throughout each rotation to determine where the strongest signal level is (Up, Right, Down or Left) and issues<br />
the appropriate Azimuth and/or Elevation steps to the antenna, as needed.<br />
You cannot control tracking from the pedestal itself. Refer to the ACU manual for tracking operation information.<br />
2-1
Operation<br />
<strong>9497B</strong>-20 <strong>Ku</strong>-<strong>Band</strong> <strong>TVRO</strong><br />
2.5. <strong>Antenna</strong> Polarization Operation<br />
Linear feeds are equipped with a polarization motor and potentiometer feedback and are controlled from the <strong>Antenna</strong><br />
Control Unit. Auto-Polarization mode is the default polarization mode of operation from the ACU. Polarization may<br />
be operated manually from the ACU for diagnostic or alignment purposes. Refer to the <strong>Antenna</strong> Control Unit manual<br />
for more operation information.<br />
2.6. Low Noise Block Converter Operation<br />
There are no operating instructions or controls applicable to the LNB. This unit is energized whenever the matrix<br />
switch and satellite receiver(s) have AC power connected to them.<br />
Satellite signals are either circular polarized (spiraling plane down from the satellite) or linear polarized (fixed plane<br />
down from the satellite). The pedestal will receive circular polarization signals when a circular LNB is installed on the<br />
back of the dish. Conversely, the pedestal will only receive linear polarized signals when a linear LNB is installed.<br />
2.7. Radome Assembly Operation<br />
When operating the system it is necessary that the radome access hatch (and/or side door) be closed and secured in<br />
place at all times. This prevents rain, salt water and wind from entering the radome. Water and excessive<br />
condensation promote rust & corrosion of the antenna pedestal. Wind gusts will disturb the antenna pointing.<br />
There are no other operating instructions applicable to the radome assembly by itself.<br />
2-2
<strong>9497B</strong>-20 <strong>Ku</strong>-<strong>Band</strong> <strong>TVRO</strong> Basic System Information<br />
3. Basic System Information<br />
This section provides you with some additional information about the satellites you will be using, basics of your Series antenna<br />
system and some of the other equipment within your system configuration.<br />
3.1. Satellite Basics<br />
The satellites are in orbit at an altitude of 22,754 miles and are positioned directly above the equator. Their orbital<br />
velocity matches the Earth’s rotational speed, therefore, each appears to remain at a fixed position in the sky (as<br />
viewed from your location).<br />
Your antenna can be used with any of the satellites in this orbit that have a strong enough receive signal level. Your<br />
antenna is capable of being fitted with a Linear or Circular feed assembly. The feed may be designed to operate at C-<br />
<strong>Band</strong> frequencies, <strong>Ku</strong>-<strong>Band</strong> frequencies or be capable of operation in both bands. With the correct feed assembly you<br />
will be able to receive the linear or circular signal at the specific frequency range of the desired satellite.<br />
3.1.1. <strong>Ku</strong>-<strong>Band</strong> Receive Frequency (10.95-12.75GHz)<br />
At these frequencies the signal from the satellite travels only in a straight line and is affected by weather<br />
changes in the atmosphere. There are several conditions that can cause a temporary loss of satellite signal,<br />
even within an area where the signal level is known to be adequate. The most common of these normal<br />
temporary losses are blockage and rain fade. They will interrupt services only as long as the cause of the<br />
loss persists.<br />
3.1.2. Blockage<br />
Blockage is loss due to an object in the path of the signal from the satellite to the dish. If an object that is<br />
large and dense is positioned in the path of the signal from the satellite, it will prevent sufficient signal from<br />
arriving at the dish. The signal can not bend around, or penetrate through, these objects and the reception<br />
will be degraded or completely interrupted. The dish is actively driven to remain pointed at the satellite<br />
(toward the equator) so, as the ship turns a mast or raised structure of your ship may become positioned<br />
between the satellite and the dish. Blockage may also be caused a anything standing near the radome, tall<br />
mountains, buildings, bridges, cranes or other larger ships near your ship. Moving or rotating the ship to<br />
position the antenna where it has an unobstructed view to the desired satellite will restore the antennas’<br />
ability to receive the satellite signal.<br />
3.1.3. Rain Fade<br />
Atmospheric conditions that may cause sufficient loss of signal level include rain, snow, heavy fog and some<br />
solar activities (sun spot and flare activity). The most common of these is referred to as “rain fade”. Rain<br />
drops in the atmosphere reduce the signal from the satellite. The heavier the rain the higher the amount of<br />
signal loss. When the amount of loss is high enough, the antenna will not be able to stay locked onto the<br />
satellite signal. When the amount of rain has decreased sufficiently, the antenna will re-acquire the satellite<br />
signal. In a strong signal area, rain fall of about four inches per hour will cause complete loss of signal. In<br />
weaker signal areas the effects would be more pronounced.<br />
3.1.4. Signal level<br />
The level of the receive signal is dependant upon how powerful the transmission is, how wide the signal beam<br />
is, and what the coverage area is. Focusing the signal into a narrower beam concentrates its energy over a<br />
smaller geographic area, thereby increasing the signal level throughout that area of coverage. This makes it<br />
possible for you to use a smaller antenna size to receive that satellite signal. The antenna system must be<br />
geographically located in an area where the signal level from the satellite meets (or exceeds) the minimum<br />
satellite signal level required for your size of antenna (refer to the Specifications section of this manual) to<br />
provide suitable reception. This limits the number of satellites that can be used and the geographic areas<br />
where the ship can travel where the signal level is expected to be strong enough to continue providing<br />
uninterrupted reception. When traveling outside this minimum signal coverage area, it is normal for the<br />
system to experience an interruption in its ability to provide the desired satellite services until entering (or reentering)<br />
an area of adequate signal level.<br />
3-1
Basic System Information<br />
<strong>9497B</strong>-20 <strong>Ku</strong>-<strong>Band</strong> <strong>TVRO</strong><br />
3.1.5. Satellite Footprints<br />
The focused beam(s) from the satellites are normally aimed at the major land masses where there are large<br />
population centers. Footprint charts graphically display the signal level expected to be received in different<br />
geographic locations within the area of coverage. The signal will always be strongest in the center of the<br />
coverage area and weaker out toward the outer edges of the pattern. The coverage areas are intended to be<br />
a guide to reception, however, the actual coverage area and signal level and vary. Also the signal strength is<br />
affected by weather.<br />
3.1.6. Linear Satellite polarization<br />
Satellites may transmit their signals in<br />
one of two different polarization<br />
modes. The feed installed on your<br />
antenna must be designed to operate<br />
with linear polarized satellite<br />
transmissions.<br />
Circular polarized satellite<br />
transmissions do not require<br />
polarization adjustment to optimize<br />
the reception.<br />
Linear polarized satellite transmissions<br />
require periodic adjustment of<br />
Figure 3-1 Satellite Signal Polarization<br />
“polarization” to optimize the<br />
alignment of the LNB to the angle of the signal from the satellite.<br />
When you are at the same longitude as the satellite, its’ horizontal and vertical signals will be aligned to your<br />
local horizon. When you are east or west of the satellite, the signals will appear to be rotated clockwise or<br />
counter-clockwise from your local horizontal and vertical. Both horizontal and vertical signals from a satellite<br />
will appear to be rotated the same amount and are always perpendicular to each other. The amount of<br />
rotation is dependent on how far east or west you are form the satellite and how close you are to the<br />
Equator.<br />
3.2. <strong>Antenna</strong> Basics<br />
The following information is provided to explain some of the basic functions of the antenna:<br />
3.2.1. Unlimited Azimuth<br />
Azimuth rotation of the antenna is unlimited (no mechanical stops). Azimuth drive, provided by the azimuth<br />
motor, is required during stabilization, searching and tracking operations of the antenna. When the ship<br />
turns, azimuth is driven in the opposite direction to remain pointed at the satellite. The actual azimuth<br />
pointing angle to the satellite is determined by your latitude & longitude and the longitude of the satellite. It<br />
is important to know that the antenna should be pointed (generally) toward the equator.<br />
The azimuth angle to the satellite would be 180 degrees true (relative to true north) if the satellite is on the<br />
same longitude that you are on. If the satellite is east, or west, of your longitude the azimuth will be less<br />
than, or greater than 180 degrees respectively.<br />
When checking for blockage you can visually look over the antenna radome toward the equator to see if any<br />
objects are in that sighted area. If you are not able to find any satellites it may also be useful to remove the<br />
radome hatch to visually see if the dish is aimed the correct direction (towards the equator).<br />
3.2.2. Elevation<br />
In normal operation the elevation of the antenna will be between 00.0 (horizon) and 90.0 (zenith). The<br />
antenna can physically be rotated in elevation below horizon and beyond zenith to allow for ship motion.<br />
Elevation drive, provided by the elevation motor, is required during stabilization, searching and tracking<br />
operations of the antenna. The actual elevation pointing angle to the satellite is determined by your latitude<br />
& longitude and the longitude of the satellite. In general terms the elevation angle will be low when you are<br />
at a high latitudes and will increase as you get closer to the equator.<br />
Additionally, from any given latitude, the elevation will be highest when the satellite is at the same longitude<br />
that you are on. If the satellite is east, or west, of your longitude the elevation angle will be lower.<br />
3-2
<strong>9497B</strong>-20 <strong>Ku</strong>-<strong>Band</strong> <strong>TVRO</strong> Basic System Information<br />
3.2.3. Feed Assembly<br />
The scalar section of the feed is fitted with a polarization motor and a potentiometer for position feedback<br />
required for linear signal operation. The feed may be fitted for Linear or Circular reception. The appropriate<br />
LNA, LNB or LNC must be installed on the Linear or Circular section of the feed to receive the frequencies of<br />
the desired satellite.<br />
When a Linear feed is installed, the ACU automatically adjusts the feed by remotely controlling the 24 volt<br />
DC motor, using the potentiometer feedback for Linear polarization position (Auto-Polarization mode).<br />
When a Circular feed is installed, no polarization adjustment is required because the circular feed receives the<br />
signal properly regardless of its polarization position.<br />
The feed may be dual band (C-<strong>Band</strong> and <strong>Ku</strong>-<strong>Band</strong>) allowing you to use either band. The Tracking - <strong>Band</strong><br />
Selection remotely controls coax switches mounted on the antenna pedestal to select which LNB outputs are<br />
routed through the antenna pedestal to the Below Decks Equipment.<br />
3.2.4. <strong>Antenna</strong> polarization<br />
You have a linear polarization feed installed, the system should have been adjusted properly and set-up to<br />
operate in Auto-Polarization mode. The ACU will then automatically adjust the polarization of the feed, as<br />
necessary, while the ship travels in Latitude and Longitude.<br />
3.2.5. Stabilization<br />
Your antenna is stabilized in all three axes of motion. Stabilization is the process of de-coupling the ships’<br />
motion from the antenna. Simply put, this allows the antenna to remain pointed at a point in space while the<br />
boat turns, rolls or pitches under it. To accomplish this, the Pedestal Control Unit (PCU) on the antenna<br />
pedestal assembly senses the motion and applies drive to the appropriate motor(s) in opposition to the<br />
sensed motion. Azimuth (AZ), Elevation (EL) and Cross-Level (left-right tilt) are actively stabilized<br />
automatically by the PCU as part of its normal operation.<br />
3.2.6. Search Pattern<br />
Whenever the desired satellite signal is lost (such as when the antenna is blocked) the <strong>Antenna</strong> Control Unit<br />
will automatically initiated a Search to re-acquire the desired signal.<br />
Search is conducted in a two-axis pattern consisting of alternate movements in azimuth and elevation. The<br />
size and direction of the movements are increased and reversed every other time resulting in an expanding<br />
square pattern.<br />
When the antenna is able to re-acquire the desired signal the ACU will automatically stop searching and<br />
begin Tracking the signal to optimize the pointing of the antenna to get the highest signal level from the<br />
satellite.<br />
3.2.7. Tracking Receiver - Satellite Identification Receiver<br />
The Satellite Identification Receiver located in the <strong>Antenna</strong> Control Unit (ACU) is used to acquire, identify<br />
and track a specific satellite by its unique hexadecimal ID code. When properly setup, the settings for the<br />
satellite are saved to expedite future acquisition of the desired satellite.<br />
When searching for the selected satellite this receiver compares the present satellite ID to the targeted<br />
satellite ID code. If the ID code does not match the antenna will continue searching until the correct satellite<br />
is found. The system must have adequate satellite signal level, AND the matching NID, to stop searching (and<br />
begin tracking the desired satellite).<br />
3.2.8. Tracking<br />
Your <strong>Antenna</strong> Control Unit actively optimizes the pointing of the dish for maximum signal reception. This<br />
process is called tracking and is accomplished by continuously making small movements of the dish while<br />
monitoring the level of the received signal. Evaluation of this information is used to continuously move the<br />
stabilization point toward peak satellite signal reception. These minor pointing corrections keep the signal<br />
level “peaked” as part of normal operation.<br />
3-3
Basic System Information<br />
<strong>9497B</strong>-20 <strong>Ku</strong>-<strong>Band</strong> <strong>TVRO</strong><br />
3.3. Components of the System Configuration<br />
Figure 3-2 Series 00 <strong>TVRO</strong> Simplified Block Diagram<br />
The following text provides a basic functional overview of the system components and component interconnection as<br />
referred to in the simplified block diagram for your Series 00 antenna. Also, refer to the appropriate page of the<br />
System Block Diagram which depicts your system configuration.<br />
3-4
<strong>9497B</strong>-20 <strong>Ku</strong>-<strong>Band</strong> <strong>TVRO</strong> Basic System Information<br />
3.3.1. <strong>Antenna</strong> ADE Assembly<br />
The Above Decks Equipment consists of an <strong>Antenna</strong> Pedestal inside a Radome assembly. The pedestal<br />
consists of a satellite antenna dish & feed with a linear, or a circular Low Noise Block converter (LNB) with<br />
polarization motor mounted on a stabilized antenna pedestal. The radome provides an environmental<br />
enclosure for the antenna pedestal assembly<br />
inside it. This keeps wind, water<br />
condensation and salt-water spray off the<br />
antenna pedestal assembly. This prevents<br />
damage and corrosion that would shorten<br />
the expected life span of the equipment.<br />
The antenna control cable is connected<br />
between the antenna radome assembly and<br />
the antenna control panel. This cable<br />
provides DC voltage to the antenna and all<br />
control signals to and from the antenna.<br />
Six RG-6 (or better) coax cables are<br />
connected from the antenna radome<br />
assembly to the below decks equipment.<br />
One of these cables is the <strong>Antenna</strong> Control<br />
Cable, which has the DC operating voltage<br />
for the antenna and the antenna control<br />
communication between the <strong>Antenna</strong><br />
Control Unit and the Pedestal Control Unit.<br />
Four cables carry the intermediate frequency<br />
(950-2050MHz) signals from the antenna<br />
assembly directly to the matrix switch and<br />
the DC Voltage & Tone switching from the<br />
Matrix Switch to the a the LNB. All four are<br />
Figure 3-3 Series 97 <strong>TVRO</strong> Above Decks Equipment<br />
provided, even if you are only currently<br />
using two for the LNB you presently have installed on your antenna. These cables ultimately provide the<br />
input signal into the satellite receiver(s). And finally, one coax is installed as a spare.<br />
3.3.2. <strong>Antenna</strong> Control Unit<br />
The <strong>Antenna</strong> Control Unit allows the operator to control and monitor the antenna pedestal with dedicated<br />
function buttons, LED’s and a 2 line display. The ACU and its Terminal Mounting Strip are normally mounted<br />
in a standard 19” equipment rack. The ACU should be mounted in the front of the equipment rack where it is<br />
easily accessible. The Terminal Mounting Strip is normally mounted on the rear of the equipment rack. It is<br />
recommended that the antenna control unit be mounted near the Satellite modem location where you can<br />
see the LED indicators while you are controlling the antenna.<br />
The <strong>Antenna</strong> Control Unit is connected to the antenna, ships Gyro Compass and Satellite modem.<br />
Figure 3-4 <strong>Antenna</strong> Control Unit<br />
The <strong>Antenna</strong> Control Unit (ACU) communicates via an RS-422 full duplex data link with the Pedestal Control<br />
Unit (PCU) located on the antenna. This control signal to/from the antenna is on the Coax cable along with<br />
the 24VDC Pedestal power. The Pedestal Control Unit stabilizes the antenna against the ship's roll, pitch, and<br />
turning motions. The ACU is the operator interface to the PCU and provides the user with a choice of<br />
positioning commands to point the antenna, search commands to find the satellite signal and tracking<br />
functions to maintain optimum pointing angle. The operator may choose to work from either the front<br />
panel, using the M&C Port in conjunction with DacRemP remote diagnostic software, or the built in Ethernet<br />
port and a internal HTML page using a standard internet browser.<br />
3-5
Basic System Information<br />
<strong>9497B</strong>-20 <strong>Ku</strong>-<strong>Band</strong> <strong>TVRO</strong><br />
3.3.3. Above Decks AC Power Supply<br />
Pedestal Power - An appropriate source of AC Voltage (110 VAC 60 Hz OR 220 VAC 50 Hz) is required for<br />
the above decks equipment. Refer to the Specifications section of this manual for the power consumption of<br />
the antenna pedestal.<br />
3.3.4. Satellite Receivers<br />
The <strong>TVRO</strong> <strong>Antenna</strong> system, with the appropriate LNB installed, can be used with standard European satellite<br />
receivers, and Integrated Receiver-Decoders (IRD). Both can receive “free” programming, but an IRD is<br />
required when the desired programming is encrypted. When authorized, it will decode the encrypted signals<br />
for use. Authorizing the receiver-decoder is a process of registering your receiver(s) and paying subscription<br />
fees to the service provider. The service provider then arranges for a signal to be sent through the satellite to<br />
your receiver-decoder, which will “enable” it to decode the programming you subscribed to.<br />
A coax connection from the antenna (via the matrix switch) provides signal input to the receiver. The<br />
receiver also outputs voltage and tone control to the matrix switch to select the correct band and<br />
polarization signal for the channel you want to watch. A coax connection from the TV OUTPUT jack on the<br />
satellite receiver is connected to the ANTENNA INPUT on the television. Alternately, individual audio/video,<br />
Audio & S-Video, or SCART cable connections may be made between the satellite receiver and the television.<br />
3.3.5. Television/Monitor<br />
An appropriate television monitor is used to view the satellite television programming and to view the on<br />
screen displays from the receiver.<br />
3.3.6. Matrix Switch<br />
A matrix switch must be installed with all of the antenna IF coax cables connected to its’ LNB inputs. A coax<br />
cable (RG-6 OR greater) is connected from each matrix switch output to each satellite receiver. Sea Tel<br />
recommends that an ACTIVE Matrix be used in all installations. Matrix switches with 4, 8, 12 and 16 outputs<br />
are available.<br />
Each of the outputs can be connected to a satellite receiver, one of these outputs must be connected the<br />
tracking receiver in the ACU. Each output of the matrix switch is controlled by voltage, and/or tone, from the<br />
satellite connected to that output connector. This voltage, and/or tone, selects which of the input signals<br />
gets routed to that output connector, therefore, to that receiver. Each output of the matrix switch operates<br />
independently of the others, therefore, allows the satellite receivers to operate independently also. As you<br />
change channels on the satellite receiver, it uses the voltage, and/or tone, to select the correct signal input for<br />
the channel you have selected.<br />
3-6
<strong>9497B</strong>-20 <strong>Ku</strong>-<strong>Band</strong> <strong>TVRO</strong> Installation<br />
4. Installation<br />
This section contains instructions for unpacking, final assembly and installation of the equipment. It is highly recommended<br />
that final assembly and installation of the <strong>Antenna</strong> system be performed by trained technicians. Read this complete section<br />
before starting.<br />
4.1. General Cautions & Warnings<br />
WARNING: Assure that all nut & bolt assemblies are tightened according the tightening<br />
torque values listed below:<br />
Bolt Size<br />
Inch Pounds<br />
1/4-20 75<br />
5/l6-18 132<br />
3/8-16 236<br />
1/2-13 517<br />
NOTE: All nuts and bolts should be assembled using the appropriate Loctite thread-locker<br />
product number for the thread size of the hardware.<br />
Loctite # Description<br />
222 Low strength for small fasteners.<br />
243 Medium strength, oil tolerant.<br />
680 High strength for Motor Shafts & Sprockets.<br />
271 Permanent strength for up to 1” diameter fasteners.<br />
290 Wicking, High strength for fasteners which are already assembled.<br />
WARNING: Hoisting with other than a webbed four-part sling may result in catastrophic<br />
crushing of the radome. Refer to the specifications and drawings for the fully assembled weight<br />
of your model <strong>Antenna</strong>/Radome and assure that equipment used to lift/hoist this system is<br />
rated accordingly.<br />
CAUTION: The antenna/radome assembly is very light for its size and is subject to large<br />
swaying motions if hoisted under windy conditions. Always ensure that tag lines, attached to<br />
the radome base frame, are attended while the antenna assembly is being hoisted to its<br />
assigned location aboard ship.<br />
WARNING: Electrical Hazard – Dangerous AC Voltages exist inside the <strong>Antenna</strong> Pedestal<br />
Breaker Box. Observe proper safety precautions when working inside the Pedestal Breaker Box.<br />
WARNING: Electrical Hazard – Dangerous AC Voltages exists on the side of the <strong>Antenna</strong><br />
Pedestal Power Supply. Observe proper safety precautions when working inside the Pedestal<br />
Power Supply.<br />
4-1
Installation<br />
<strong>9497B</strong>-20 <strong>Ku</strong>-<strong>Band</strong> <strong>TVRO</strong><br />
4.2. Site Survey<br />
The radome assembly should be installed at a location aboard ship where:<br />
1. The antenna has a clear line-of-sight to as much of the sky (horizon to zenith at all bearings) as is practical.<br />
2. Direct radiation into the antenna from ships radar, especially high power surveillance radar arrays, is<br />
minimized. The radome should be as far away from the ships Radar as possible and should NOT be mounted<br />
on the same plane as the ships Radar (so that it is not directly in the Radar beam path).<br />
3. The radome should be as far away from the ships high power short wave (MF & HF) transmitting antennas as<br />
possible.<br />
4. The Above Decks Equipment (ADE) and the Below Decks Equipment (BDE) should be positioned as close to<br />
one another as possible. This is necessary to reduce the losses associated with long cable runs.<br />
5. The mounting location is rigid enough that it will not flex, or sway, in ships motion or vibration. If the<br />
radome is to be mounted on a raised pedestal, it MUST have adequate gussets, or be well guyed, to prevent<br />
flexing or swaying in ships motion.<br />
If these conditions cannot be entirely satisfied, the site selection will inevitably be a “best” compromise between the<br />
various considerations.<br />
4.3. Preparing For The Installation<br />
4.3.1. Unpack Shipping Crates<br />
Exercise caution when unpacking the equipment.<br />
4.3.2. Inspect / Inventory<br />
Carefully inspect the radome panel surfaces for evidence of shipping damage. Inspect the pedestal assembly<br />
and reflector for signs of shipping damage.<br />
4.3.3. Prepare ADE Mounting Location<br />
Prepare the mounting location for the Radome. If the radome is to be bolted to the deck (or a platform)<br />
assure that the mounting holes have been drilled. Assure that the mounting hardware has obtained and is<br />
readily available.<br />
4.3.4. Preparing BDE Location<br />
Prepare the mounting location for the Below Decks Equipment. These equipments would normally be<br />
installed in a standard 19” equipment rack. Refer to the <strong>Antenna</strong> Control Unit manual for installation of the<br />
ACU and the Terminal Mounting Strip.<br />
Refer to the vendor supplied manuals for installation of the other below decks equipments.<br />
Prepare other locations throughout ship for any other equipment which is not co-located with the ACU.<br />
4.3.5. Installing The System Cables<br />
Install appropriate cables from Below Decks Equipment to the ADE Location(s).<br />
The cables must be routed from the above-decks equipment group through the deck and through various<br />
ship spaces to the vicinity of the below-decks equipment group. When pulling the cables in place, avoid the<br />
use of excessive force. Exercise caution during the cable installation to assure that the cables are not<br />
severely bent (proper bend radius), kinked or twisted and that connectors are not damaged.<br />
Assure that the cables have been run through watertight fittings and/or will not permit water entry into the<br />
ship when the installation is completed. After cables have been routed and adjusted for correct cable length<br />
at each end, seal the deck penetration glands and tie the cables securely in place.<br />
4.4. Assembling the ADE<br />
The assembly procedure described below begins by sub-assembling sections of the baseframe, radome and pedestal.<br />
Then these are assembled to form the ADE.<br />
4.4.1. 144” Radome, Baseframe and <strong>Antenna</strong> Pedestal System Assembly<br />
Refer to the System Block diagram, General Assembly, Radome Assembly and Baseframe Assembly drawings<br />
for your system.<br />
4-2
<strong>9497B</strong>-20 <strong>Ku</strong>-<strong>Band</strong> <strong>TVRO</strong> Installation<br />
NOTE: Unless otherwise indicated, all nuts and bolts should be assembled<br />
with Loctite 271 or its equivalent.<br />
WARNING: Assure that all nut & bolt assemblies are tightened according the tightening torque<br />
values listed below:<br />
Bolt Size<br />
Inch Pounds<br />
1/4-20 75<br />
5/l6-18 132<br />
3/8-16 236<br />
1/2-13 517<br />
1. Select a secure assembly site that provides enough area to work with the large radome panels. Place<br />
the radome base pan on temporary support blocks at least 22 inches high.<br />
2. Assemble the radome base frames eight legs and eight braces using the hardware provided. Loosely<br />
assemble all legs and braces aligning all matching marks before tightening any of the bolts. Insure<br />
that a split washer is used under each nut.<br />
3. Refer to the radome assembly drawing. Observe the painted numbers on the radome panels that<br />
clearly identify their positions respective to each other and the base pan assembly.<br />
4. Loosely assemble the 6 lower side panels, using the hardware provided, to form the bottom half of<br />
the radome. Do NOT tighten the bolts at this time. Open each seam wide enough to install a good<br />
bead of silicone caulk, then firmly tighten all the bolts in that flange. Repeat until all flanges are<br />
sealed.<br />
5. Loosely assemble the 6 upper side panels, using the hardware provided, to form the upper half of<br />
the radome. Do NOT tighten the bolts at this time. Open each seam wide enough to install a good<br />
bead of silicone caulk, then firmly tighten all the bolts in that flange. Repeat until all flanges are<br />
sealed.<br />
6. Apply a good bead of silicone caulk all the way around the top cap. Install the cap into the upper<br />
radome panel assembly using the hardware provided and tighten all the bolts.<br />
7. Set the lower half of the radome assembly on the base pan aligning the painted numbers on the<br />
radome panels. Loosely attach the lower side panel assembly to the base frame using the hardware<br />
provided. Do NOT tighten the bolts at this time. Lift the lower side panel assembly wide enough to<br />
install a good bead of silicone caulk between it and the base pan, then firmly tighten all the bolts.<br />
8. Fasten the antenna pedestal assembly, complete with base stand, to the base pan using the 1/2-13 x<br />
1 1/2 (or the 3/8-16 x 1 1/2) inch bolts inserted from the bottom up and install a flat washer, a lock<br />
washer and a nut in each mounting hole. Apply Loctite 271 and tighten securely.<br />
9. Attach the antenna assembly (reflector, struts and feed) to the stabilized pedestal, by using the<br />
reflector mounting hardware provided. Position the antenna over the four antenna support struts<br />
(the antenna and the dish mounting clips are numbered or color coded make sure they match).<br />
Insert the four mounting bolts, washers and nuts, apply Loctite 271 and tighten.<br />
10. Attach the 15 pin connector on the antenna reflector harness to the shielded Polang Aux Relay box.<br />
Connect the IF receive coax cables from the feed to the pedestal Modem or coax relay/switch panel<br />
according to the block diagram.<br />
11. Using a four point web lifting sling and lifting clips, lift the upper half of the radome up over the<br />
antenna pedestal and set it onto the lower side panels aligning the painted numbers on the radome<br />
panels. Loosely attach the upper and lower halves of the radome using the hardware provided. Do<br />
NOT tighten the bolts at this time. Insert wedges between the upper side panel assembly and the<br />
lower side panel assembly to hold open a space wide enough to install a good bead of silicone caulk<br />
between it and the lower side panels, then remove the wedges and firmly tighten all the bolts.<br />
12. Gently restrain the antenna prior to lifting the ADE onto the ship to restrict movement inside the<br />
radome during the lift.<br />
4-3
Installation<br />
<strong>9497B</strong>-20 <strong>Ku</strong>-<strong>Band</strong> <strong>TVRO</strong><br />
4.4.2. Preparing the ADE for Lift<br />
Install Stow Braces, or other restraints, on the <strong>Antenna</strong> Pedestal. Attach shackles and web type lifting harness<br />
to the four lifting holes in the base-frame.<br />
4.5. Installing The ADE<br />
4.5.1. Hoist\<br />
WARNING: Hoisting with other than a webbed four-part sling may result in<br />
catastrophic crushing of the radome. Refer to the specifications and drawings for the<br />
fully assembled weight of your model <strong>Antenna</strong>/Radome and assure that equipment used<br />
to lift/hoist this system is rated accordingly.<br />
CAUTION: The antenna/radome assembly is very light for its size and is subject to<br />
large swaying motions if hoisted under windy conditions. Always ensure that tag lines,<br />
attached to the radome base frame, are attended while the antenna assembly is being<br />
hoisted to its assigned location aboard ship.<br />
1. Assure that the antenna is restrained before hoisting. Check that all nuts on the base frame assembly<br />
are tightened according the torque values listed below:<br />
2. Using a four-part lifting sling, and with a tag line attached to the radome base frame, hoist the<br />
antenna assembly to its assigned location aboard ship by means of a suitably-sized crane or derrick.<br />
3. The radome assembly should be positioned with the BOW marker aligned as close as possible to the<br />
ship centerline. Any variation from actual alignment can be compensated with the AZIMUTH TRIM<br />
adjustment in the ACU, so precise alignment is not required.<br />
4.5.2. Install <strong>Antenna</strong>/Radome/Baseframe<br />
Bolt, or weld, the legs of the radome base frame directly to the ship's deck. If the deck is uneven or not level,<br />
weld clips to the deck and attach them to the legs of the radome base frame. When completed the radome<br />
base must be level.<br />
4.6. Install BDE Equipment<br />
4.6.1. ACU & TMS<br />
Refer to the <strong>Antenna</strong> Control Unit manual for installation of the ACU and the Terminal Mounting Strip.<br />
4.6.2. Other BDE Equipment<br />
Refer to the vendor supplied manuals for installation of the other below decks equipment.<br />
4.7. Cable Terminations<br />
4.7.1. At The Radome<br />
The TX and RX, or <strong>TVRO</strong> IF, cables must be inserted through the cable strain reliefs at the base of the radome.<br />
Apply RTV to the strain relief joints and tighten the compression fittings to make them watertight. Attach<br />
the pedestal cable adapters to the TX and RX, or <strong>TVRO</strong> IF, cables from below decks. Refer to the System<br />
Block Diagram.<br />
AC Power cable for the <strong>Antenna</strong> Pedestal and RF Equipment is routed into the AC Power Breaker box and<br />
connected to the breaker terminals.<br />
4-4
<strong>9497B</strong>-20 <strong>Ku</strong>-<strong>Band</strong> <strong>TVRO</strong> Installation<br />
Sea Tel recommends that separate, dedicated, AC Power be provided for the Marine Air Conditioner (Do NOT<br />
combine with the AC Power provided for the <strong>Antenna</strong> Pedestal and RF Equipment). This AC Power cable is<br />
routed into the Marine Air Conditioner and terminated to the AC terminals inside.<br />
4.7.2. ACU & TMS<br />
To Connect AC Power, Gyro Compass Connection and IF Input refer to the <strong>Antenna</strong> Control Unit manual.<br />
Installation of optional (remote) Pedestal, and /or Radio, Monitor & Control connection(s) from a PC<br />
Computer are also contained in the ACU manual.<br />
4.7.3. Other BDE Equipment<br />
Refer to the vendor supplied manuals for installation of the other below decks equipment.<br />
4.8. Final Assembly<br />
4.8.1. Remove Stow Braces/Restraints<br />
Remove the restraints from the antenna and verify that the antenna moves freely in azimuth, elevation, and<br />
cross level without hitting any flanges on the radome.<br />
4.8.2. Verify all assembly and Wiring connections<br />
Verify that all pedestal wiring and cabling is properly dressed and clamped in place.<br />
4.8.3. Balance <strong>Antenna</strong> Pedestal<br />
Assure that the antenna assembly is balanced front to back, top to bottom and side to side by observing that<br />
it remains stationary when positioned in any orientation. Refer to the Maintenance section for complete<br />
information on balancing the antenna.<br />
4.9. Power-Up The ADE<br />
Turn Pedestal AC power breaker ON.<br />
4.9.1. Initialization<br />
Turn the pedestal power supply ON. The PCU will initialize the stabilized portion of the mass to be level with<br />
the horizon and at a prescribed Azimuth and Elevation angles. The antenna will go through the specific<br />
sequence of steps to initialize the level cage, elevation, cross-level and azimuth to predetermined starting<br />
positions. Each phase must complete properly for the antenna to operate properly (post-initialization). Refer<br />
to the initialization text in the Troubleshooting section in this manual. Observe the Initialization of the<br />
antenna pedestal.<br />
If any of these steps fail, or the ACU reports model "xx97", re-configure the PCU as described in the Setup<br />
section of this manual. If initialization still fails, this indicates a drive or sensor problem, refer to the<br />
Troubleshooting section.<br />
4.9.2. Home Flag Position<br />
Note the approximate position of the antenna relative to the bow of the ship while it is at the home switch<br />
position. This information will be used later to calibrate the relative position display of the antenna.<br />
4.9.3. BDE<br />
Turn Power ON to the ACU. Record the power-up display, Master (ACU) Model & Software version and the<br />
Remote (PCU) Model & Software version.<br />
4.10. Setup<br />
Refer to the Setup information in the next section of this manual and in the Setup section of your ACU <strong>Manual</strong>.<br />
4-5
Installation<br />
<strong>9497B</strong>-20 <strong>Ku</strong>-<strong>Band</strong> <strong>TVRO</strong><br />
This Page Intentionally Left Blank<br />
4-6
<strong>9497B</strong>-20 <strong>Ku</strong>-<strong>Band</strong> <strong>TVRO</strong> Setup<br />
5. Setup<br />
Below are basic steps to guide you in setting up the ACU for your specific antenna pedestal. Assure that the <strong>Antenna</strong> Pedestal<br />
(ADE) has been properly installed before proceeding. Refer to the Setup section of you ACU manual for additional parameter<br />
setting details.<br />
5.1. Operator Settings<br />
Refer to the Operation chapter of this manual to set the Ship information. Latitude and Longitude should<br />
automatically update when the GPS engine mounted above decks triangulates an accurate location, but you may enter<br />
this information manually to begin. If your gyro source is providing Heading information in any format other than<br />
NMEA-0183 format, you will have to enter in the initial Ship’s Heading position, the Gyro Compass will then keep the<br />
ACU updated.<br />
Set the Satellite information, for the satellite you will be using. The receiver settings are especially important. At this<br />
point you should be able to target the desired satellite. Continue with the setup steps below to optimize the<br />
parameters for your installation.<br />
5.2. Optimizing Targeting<br />
First, assure that all of your Ship & Satellite settings in the ACU are correct. Target the desired satellite, immediately<br />
turn Tracking OFF, and record the Azimuth and Elevation positions in the “ANTENNA“ display of the ACU (these are<br />
the Calculated positions). Turn Tracking ON, allow the antenna to “Search” for the targeted satellite and assure that<br />
it has acquired (and peaks up on) the satellite that you targeted. Allow several minutes for the antenna to “peak” on<br />
the signal, and then record the Azimuth and Elevation positions while peaked on satellite (these are the Peak<br />
positions). Again, assure that it has acquired the satellite that you targeted!<br />
Subtract the Peak Positions from the Calculated Positions to determine the amount of Trim which is required. Refer to<br />
the ACU Setup information to key in the required value of Elevation Trim. Continue with Azimuth trim, then re-target<br />
the satellite several times to verify that targeting is now driving the antenna to a position that is within +/- 1.0 degrees<br />
of where the satellite signal is located.<br />
EXAMPLE: The ACU targets to an Elevation position of 30.0 degrees and an Azimuth position of 180.2 (Calculated),<br />
you find that Peak Elevation while ON your desired satellite is 31.5 degrees and Peak Azimuth is 178.0. You would<br />
enter an EL TRIM value of –1.5 degrees and an AZ TRIM of +2.2 degrees. After these trims values had been set, your<br />
peak on satellite Azimuth and Elevation displays would be very near 180.2 and 30.0 respectively.<br />
5.3. Optimizing Auto-Polarization <strong>TVRO</strong><br />
If your system is fitted with a circular feed you do not need to optimize the polarity angle and can skip this procedure.<br />
This procedure optimizes the linear polarization of the feed. Verify that tracking is ON and that the antenna is peaked<br />
on your targeted satellite (targeting calculates the azimuth, elevation and polarization angles). Assure that you are in<br />
Auto-Pol mode (POL TYPE parameter in the ACU is set to 0072) and set one of your satellite receivers to view its signal<br />
level display. Go to the POL OFFSET parameter in the Setup menu of the ACU.<br />
Default setting is 0030 and may be incremented, or decremented, to adjust polarization while in Auto-Pol mode. Each<br />
increment equals one degree of polarization rotation (0038 = +8 degrees), decrement below 30 for minus polarization<br />
(0022 = -8 degrees). Press the UP arrow to increment or the DOWN arrow to decrement the value and then hit the<br />
ENTER key to adjust the feed to the new value.<br />
Adjust the polarization UP until you see the signal level on the receiver fall. Note the “high” offset value and adjust the<br />
offset DOWN until you see the signal peak and then begin to fall. Note this “low” offset value. Set POL OFFSET to a<br />
value that is mid-way between the high & low values you just observed. Save your new POL OFFSET value (refer to<br />
Save New Parameters in your ACU manual).<br />
5.4. Calibrating Relative <strong>Antenna</strong> Position (Home Flag Offset)<br />
During initialization, azimuth drives the CW antenna until the Home Switch is contacted, which “presets” the relative<br />
position counter to the value stored in the Home Flag Offset. This assures that the encoder input<br />
increments/decrements from this initialization value so that the encoder does not have to be precision aligned.<br />
The Home Switch is a micro switch with a roller arm which is actuated by cam mounted on the azimuth driven<br />
sprocket, or it is a hall sensor which is actuated by a magnet mounted on the azimuth driven sprocket, which produces<br />
the “Home Flag” signal.<br />
5-1
Setup<br />
<strong>9497B</strong>-20 <strong>Ku</strong>-<strong>Band</strong> <strong>TVRO</strong><br />
The Home Flag Offset is a value saved in NVRam (Non-Volatile RAM) in the PCU. This value is the relative position of<br />
the antenna when the home switch is engaged. Presetting the counter to this value assures that when the antenna is<br />
pointed in-line with the bow of the ship the counter will read 000.0 Relative (360.0 = 000.0).<br />
In most cases when the antenna stops at the home<br />
flag, it will be pointed in-line with the Bow of the ship.<br />
In these cases Home Flag Offset (HFO) should be set<br />
to zero. When “Optimizing Targeting” small variations<br />
(up to +/- 5.0 degrees) in Azimuth can be corrected<br />
using If it AZ TRIM as described in the Optimizing<br />
Targeting procedure above.<br />
Large variations in Azimuth position indicate that the<br />
Relative position is incorrect and should be<br />
“calibrated” using the correct HFO value instead of an<br />
Azimuth Trim offset. This is especially true if sector<br />
blockage mapping is used.<br />
If the antenna stops at the home flag, but it is NOT<br />
pointed in-line with the Bow of the ship, it is<br />
important to assure that the antennas actual<br />
position (relative to the bow of the ship) is the value<br />
that gets “preset” into the Relative position counter.<br />
By saving the antennas actual Relative position when<br />
at the home flag into HFO, you have calibrated the<br />
antenna to the ship.<br />
Figure 5-1 <strong>Antenna</strong> stops In-line with Bow<br />
5.4.1. To Calculate HFO:<br />
If Targeting has been optimized by entering a large value of AZ TRIM; First, verify that you are able to<br />
repeatably accurately target a desired satellite (within +/- 1.0 degrees). Then you can use the AZ TRIM value<br />
to calculate the value of HFO you should use (so you can set AZ TRIM to zero). AZ Trim is entered as the<br />
number of tenths of degrees. You will have to convert the AZ TRIM value to the nearest whole degree<br />
(round up or down as needed). Calculated HFO value is also rounded to the nearest whole number.<br />
If AZ TRIM was a plus value: HFO = (TRIM / 360) x 255 Example: AZ TRIM was 0200 (plus 20<br />
degrees). HFO = (20/360) x 255 = (0.0556) x 255 = 14.16 round off to 14.<br />
If AZ TRIM was a negative value: HFO = ((360-TRIM) / 360)) x 255 Example: AZ TRIM = -0450<br />
(minus 45 degrees). HFO = ((360 – 45) / 360)) x 255 = (315 / 360) x 255 = 0.875 x 255 = 223.125<br />
round of to 223.<br />
If Targeting has NOT been optimized, allow the antenna to initialize to its home flag position. Visually<br />
compare the antennas pointing to the bow-line of the ship (parallel to the Bow). Note the antennas position<br />
relative to the Bow. If it appears to be very close to being parallel to the bow, HFO will probably not be<br />
needed and you can proceed with Optimizing<br />
Targeting. If it is NOT close, initialization was<br />
driving the azimuth CW, note if the antenna<br />
appears to have stopped before it got to the<br />
Bow or if it went past the Bow. You may be able<br />
to guess an approximate amount of how many<br />
degrees the antenna is from the bow. This is<br />
only intended to help you initially find the<br />
satellite (which direction you will have to drive<br />
and approximately how far you will have to<br />
drive). Refer, in general terms, to the Optimizing<br />
Targeting procedure.<br />
If the antenna stopped before it got to<br />
the bow-line; When you initially target<br />
a satellite, the antenna will also stop<br />
prior to the satellite position, so you<br />
that will have to drive the Azimuth of<br />
the antenna UP to actually find the<br />
satellite. Using the same basic<br />
procedure as in the Optimizing<br />
Figure 5-2 <strong>Antenna</strong> stopped before the Bow<br />
Targeting paragraph, target the satellite<br />
5-2
<strong>9497B</strong>-20 <strong>Ku</strong>-<strong>Band</strong> <strong>TVRO</strong> Setup<br />
and record the “Calculated” Azimuth position that the antenna was driven to. Drive UP until you<br />
find the satellite, positively identify that you are on the satellite you targeted and allow tracking to<br />
peak the antenna position. Record the “Peak” Azimuth position. Subtract the “Peak” position from<br />
the “Calculated” position to determine the number of degrees of AZ TRIM that would be required.<br />
Example: In this new installation, I target my desired satellite and record the Calculated Azimuth<br />
to be 180.5. I drive UP and finally find my desired satellite at a Peak Azimuth of 227.0 degrees. I<br />
subtract Peak from Calculated and difference to be –46.5 degrees, therefore the actual Relative<br />
position that needs to be preset into the counter when the antenna is at the Home Flag is 313.5.<br />
HFO = ((360-46.5) / 360)) x 255 = (313.5 / 360) x 255 = 0.87 x 255 = 222.06 which I round down to<br />
222.<br />
If the antenna went past the bow-line; When you initially target a satellite, the antenna will also go<br />
past the satellite position, so that<br />
you will have to drive the<br />
Azimuth of the antenna DOWN<br />
to actually find the satellite.<br />
Using the same basic procedure<br />
as in the Optimizing Targeting<br />
paragraph, target the satellite and<br />
record the “Calculated” Azimuth<br />
position that the antenna was<br />
driven to. Drive DOWN until you<br />
find the satellite, positively<br />
identify that you are on the<br />
satellite you targeted and allow<br />
tracking to peak the antenna<br />
position. Record the “Peak”<br />
Azimuth position. Subtract the<br />
“Peak” position from the<br />
“Calculated” position to<br />
determine the number of degrees<br />
of AZ TRIM that would be<br />
Figure 5-3 <strong>Antenna</strong> stops past the Bow<br />
required. . Refer to the<br />
calculations above to determine the HFO you should use for this antenna.<br />
Example: In this new installation, I target my desired satellite and record the Calculated Azimuth<br />
to be 180.0. I drive DOWN and finally find my desired satellite at a Peak Azimuth of 90.0 degrees. I<br />
subtract Peak from Calculated and difference to be +90.0 degrees, therefore the actual Relative<br />
position that needs to be preset into the counter when the antenna is at the Home Flag is 90.0.<br />
HFO = ((90.0) / 360)) x 255 = 0.25 x 255 = 63.75 which I round up to 64.<br />
5.4.2. To Enter the HFO value:<br />
To enter the calculated HFO value, press & hold both LEFT and RIGHT arrows for six seconds to enter the<br />
parameter menu at the EL TRIM parameter window. Press DOWN arrow key numerous times (about 21) until<br />
you have selected the REMOTE COMMAND window.<br />
In the REMOTE COMMAND window, press the LEFT arrow key until you have underscored the left most<br />
character in the displayed value (ie the A in "A0000"). Use the UP/DOWN arrow keys to<br />
increment/decrement the underscored character until it is upper case N (“N0000” should appear in the<br />
command window). Press the RIGHT arrow key to move the cursor under the most significant digit, then use<br />
the UP arrow key to increment it to a value of 6 (the display is now “N6000”). Set the three digits to the right<br />
of the 6 to the three digit HFO value from 000 to 255 (corresponding to 0 to 360 degrees) that you<br />
calculated above. Use the LEFT/RIGHT keys to underscore the desired digit(s) then use the UP/DONW arrow<br />
keys to increment/decrement the underscored value. When you have finished editing the display value, press<br />
ENTER to send the HFO value command to the PCU (but it is not save yet).<br />
If you want to find out what the current HFO value is key in N6999 and hit ENTER.<br />
When completed, you must save the desired HFO value. Press ENTER several times to select the REMOTE<br />
PARAMETERS display. Press the LEFT or RIGHT arrow key to enter writing mode and then press the ENTER to<br />
save the HFO value in the PCUs NVRAM.<br />
EXAMPLE: In the “<strong>Antenna</strong> stopped before the Bow” example above, the HFO calculated was 222. To enter<br />
this value:<br />
5-3
Setup<br />
<strong>9497B</strong>-20 <strong>Ku</strong>-<strong>Band</strong> <strong>TVRO</strong><br />
1. Set the Remote Command value to "N6222".<br />
2. Press ENTER to send this HFO to the PCU. The display should now show "N0222".<br />
3. When completed, you must save the desired HFO value. Press ENTER several times to select the<br />
REMOTE PARAMETERS display. Press the LEFT or RIGHT arrow key to enter writing mode and<br />
then press the ENTER to save the HFO value in the PCUs NVRAM.<br />
You have to drive the antenna CW in azimuth until the home switch is actuated, or re-initialize the antenna<br />
to begin using the new HFO value you have entered and saved. To re-initialize the antenna from the<br />
REMOTE COMMAND window of the ACU;<br />
1. Press UP arrow key several times to return to the REMOTE COMMAND display.<br />
2. Press the LEFT or RIGHT arrow key to enter edit mode. Use the LEFT/RIGHT and UP/DOWN<br />
arrow keys to set the character and digits to "^0090" and then press the ENTER key.<br />
This resets the PCU on the antenna. The antenna will reinitialize with this command (Performs a similar<br />
function as a power reset of the antenna) and the new home flag offset value will be used to calibrate the<br />
Relative position of the antenna.<br />
5.5. Radiation Hazard and Blockage Mapping (AZ LIMIT parameters)<br />
The ACU can be programmed with relative azimuth sectors (zone) where blockage exists or where transmit power<br />
would endanger personnel who are frequently in that area.<br />
Refer to your ACU <strong>Manual</strong> for instructions on programming of these zones.<br />
5.6. TX Polarity Setup<br />
To prevent inadvertent switching of the transmit polarity, the user can lock out NS/EW toggle feature and force the<br />
transmit polarity to be fixed horizontal or vertical with the TX POLARITY parameter.<br />
With the feed in the center of its polarization adjustment range, observe the transmit port polarity (vector across the<br />
short dimension of the transmit wave-guide).<br />
If the transmit polarity in the center of the travel range is vertical, use the following entries:<br />
2 Vertical Transmit Polarity<br />
4 Horizontal Transmit Polarity<br />
If the Transmit polarity in the center of the travel range is horizontal, use the following entries:<br />
2 Horizontal Transmit Polarity<br />
4 Vertical Transmit Polarity<br />
5.7. TRACK DISP<br />
This parameter set the selections that the user will see in the Tracking - <strong>Band</strong> Selection menu. <strong>Band</strong> Selection must be<br />
set to the appropriate selection for Tracking to operate properly.<br />
<strong>Band</strong> selection controls the local logic output state of SW1 output terminal on the Terminal Mounting Strip PCB and<br />
remote C/<strong>Ku</strong> relays (or other switches) on the antenna pedestal.<br />
The factory default selections and SW1 status for your 9797B is listed in the following table:<br />
Setting<br />
0000 C<br />
X<br />
<strong>Ku</strong>Lo<br />
<strong>Ku</strong>Hi<br />
Displayed band<br />
selection<br />
ADE <strong>Band</strong> Select Parameters<br />
(Tone, Voltage & Aux Status)<br />
Tone OFF, Volt 13, Aux 0<br />
Tone OFF, Volt 18, Aux 0<br />
Tone OFF, Volt 13, Aux 1<br />
Tone OFF, Volt 18, Aux 1<br />
TMS SW1<br />
Status<br />
Open<br />
Short<br />
Open<br />
Short<br />
When the SW1 output is shorted to ground a current sink of 0.5 amps max is provided to control below<br />
decks band selection tone generators or coax switches. When SW1 output is open it is a floating output.<br />
5-4
<strong>9497B</strong>-20 <strong>Ku</strong>-<strong>Band</strong> <strong>TVRO</strong> Setup<br />
5.8. ACU Factory Default Parameter Settings – Series 97A & Series 00 <strong>Antenna</strong>s<br />
The following table shows the factory default parameters for the ACU interfaced to a Series 97A <strong>Antenna</strong>. You may<br />
need to optimize some of these parameters. Refer to the individual parameter setting information in the Setup<br />
section of your ACU manual.<br />
PARAMETER<br />
C-<strong>Band</strong><br />
DishScan<br />
<strong>Ku</strong>-<strong>Band</strong><br />
DishScan<br />
My Parameters<br />
EL TRIM 0<br />
AZ TRIM 0<br />
AUTO THRES 100<br />
EL STEP SIZE 0 1<br />
AZ STEP SIZE 0 1<br />
STEP INTEGRAL 0<br />
SEARCH INC 10 5<br />
SEARCH LIMIT 200 100<br />
SEARCH DELAY 30<br />
SWEEP INC (DAC-03) 0040<br />
SYSTEM TYPE<br />
TXRX=5 * <strong>TVRO</strong>=69<br />
GYRO TYPE 2<br />
POL TYPE 72<br />
POL OFFSET 30<br />
POL SCALE 90<br />
AZ LIMIT 1 0<br />
AZ LIMIT 2 0<br />
AZ LIMIT 3 0<br />
AZ LIMIT 4 0<br />
AZ LIMIT 5 0<br />
AZ LIMIT 6 0<br />
5V OFFSET 0<br />
5V SCALE 0<br />
TRACK DISP 0000<br />
TX POLARITY 2 or 4<br />
* Modem Lock input & Modem TX Mute functions are NOT set, refer to SYSTEM TYPE<br />
parameter information.<br />
5-5
<strong>9497B</strong>-20 <strong>Ku</strong>-<strong>Band</strong> <strong>TVRO</strong> Functional Testing<br />
6. Functional Testing<br />
If not already ON, Turn ON the Power switch on the front panel of the ACU.<br />
6.1. ACU / <strong>Antenna</strong> System Check<br />
1. Press RESET on the ACU front panel to initialize the system. Verify the display shows "SEA TEL INC -<br />
MASTER" and the ACU software version number. Wait 10 seconds for the display to change to "SEA TEL INC<br />
- REMOTE" and the PCU software version number.<br />
2. If the display shows "REMOTE INITIALIZING” wait for approximately 2 minutes for the antenna to complete<br />
initialization and report the <strong>Antenna</strong> Model and PCU software version. If “REMOTE NOT RESPONDING" is<br />
displayed, refer to the Troubleshooting Section of this manual.<br />
3. Press the NEXT key repeatedly to display the Ship, Satellite, <strong>Antenna</strong> and Status menu displays. This<br />
verifies that the displays change in the correct response to the keys.<br />
6.2. Latitude/Longitude Auto-Update check<br />
This verifies that the GPS position information is automatically updating..<br />
1. Press the NEXT key repeatedly to display the Ship menu. Press ENTER to access edit mode and view the<br />
current Latitude value.<br />
2. Press the LEFT arrow key to bring the cursor up under the ones digit, press UP and then hit ENTER. The<br />
display should immediately show a latitude value one degree higher, but then will be overwritten within<br />
several seconds (back to the previous value) by the GPS engine.<br />
This test does not need to be repeated in the Longitude menu.<br />
6.3. Ship Heading – Gyro Compass Following Check<br />
This verifies that the Heading display is actually following the Ships Gyro Compass.<br />
1. Press the NEXT key repeatedly to display the Ship menu. If the boat is underway, monitor the Heading<br />
value to verify that the display changes in the correct response to the Gyro Compass input (Heading value<br />
should always be exactly the same as the Gyro Compass repeater value).<br />
2. If the ship is NOT underway, most ships will turn +/- 1-2 degrees at the pier, monitor the Heading value to<br />
verify that the display changes in the correct response to the Gyro Compass input (Heading value should<br />
always be exactly the same as the Gyro Compass repeater value).<br />
6.4. Azimuth & Elevation Drive<br />
This verifies that the antenna moves in the correct response to the keys.<br />
1. Press the NEXT key several times to display the <strong>Antenna</strong> menu.<br />
2. Press the Tracking key to toggle Tracking OFF. Press the UP arrow key repeatedly and verify that the antenna<br />
moves up in elevation.<br />
3. Press the DOWN arrow key repeatedly and verify that the antenna moves down in elevation.<br />
4. Press the RIGHT arrow key repeatedly and verify that the antenna moves up (CW) in azimuth.<br />
5. Press the LEFT arrow key repeatedly and verify that the antenna moves down (CCW) in azimuth.<br />
6.5. Four <strong>Quad</strong>rant Tracking Test<br />
This verifies that the antenna moves in the correct response to the keys, that Tracking is signaling correctly and that<br />
the Tracking commands are being carried out (antenna drives to peak).<br />
1. Verify antenna is locked onto and tracking a satellite<br />
2. Press the NEXT key several times to display the <strong>Antenna</strong> menu.<br />
3. Note the current peak AGC value. Press the Tracking key to toggle Tracking OFF, press the UP arrow key<br />
repeatedly to move the antenna up in elevation until AGC falls about 100 counts. Turn Tracking ON and<br />
verify that the antenna moves back down in elevation and that the AGC rises to its’ previous high value.<br />
6-1
Functional Testing<br />
<strong>9497B</strong>-20 <strong>Ku</strong>-<strong>Band</strong> <strong>TVRO</strong><br />
4. Note the current peak AGC value. Press the Tracking key to toggle Tracking OFF, press the DOWN arrow<br />
key repeatedly to move the antenna down in elevation until AGC falls about 100 counts. Turn Tracking ON<br />
and verify that the antenna moves back up in elevation and that the AGC rises to its’ previous high value.<br />
5. Note the current peak AGC value. Press the Tracking key to toggle Tracking OFF, press the RIGHT arrow<br />
key repeatedly to move the antenna up in azimuth until AGC falls about 100 counts. Turn Tracking ON and<br />
verify that the antenna moves back down in azimuth and that the AGC rises to its’ previous high value.<br />
6. Note the current peak AGC value. Press the Tracking key to toggle Tracking OFF, press the LEFT arrow key<br />
repeatedly to move the antenna down in azimuth until AGC falls about 100 counts. Turn Tracking ON and<br />
verify that the antenna moves back up in azimuth and that the AGC rises to its’ previous high value.<br />
6.6. Blockage Simulation Test<br />
Blockage output function is used to modify the behavior of Tracking and Searching when there is a known blockage<br />
zone. The ACU provides a contact closure to ground on the SW2 terminal of the Terminal Mounting Strip when the<br />
antenna is pointed within any one of the blockage/hazard zones or the system is searching, targeting, unwrapping or is<br />
mis-pointed by 0.5 degrees or more (FCC TX Mute function for Transmit/Receive systems only). The contact closure<br />
is a transistor switch with a current sinking capability of 0.5 Amp. This logic output control signal is used for:<br />
• When used as simple “BLOCKED” logic output for a single Sea Tel antenna, this output could be used to light a<br />
remote LED and/or sound a buzzer to alert someone that the antenna is blocked, and signal is lost.<br />
• In a “Dual <strong>Antenna</strong>” installation, this logic output(s) is used to control Dual <strong>Antenna</strong> Arbitrator panel of coax<br />
switches to switch the source inputs to the matrix switch from <strong>Antenna</strong> “A” to <strong>Antenna</strong> “B”, and vice versa.<br />
• When used as simple “RF Radiation Hazard” logic output for a single Sea Tel TX/RX antenna, this output<br />
could be used to suppress RF transmissions while the antenna is pointed where people would be harmed by<br />
the transmitted microwave RF power output. The SW2 output would be interfaced to the satellite modem to<br />
disable the TX output signal from the Satellite TXRX Modem whenever the antenna is within the RF<br />
Radiation Hazard zone(s).<br />
• When used for “FCC TX Mute” logic output for a single Sea Tel TX/RX antenna, this output could be used to<br />
suppress RF transmissions whenever the antenna is mis-pointed 0.5 degrees or more, is blocked, searching,<br />
targeting or unwrapping. The SW2 output would be interfaced to the satellite modem to disable/mute the<br />
TX output signal from the Satellite TX/RX Modem. When the mute condition is due to antenna mis-pointing,<br />
it will not un-mute until the pointing error of the antenna is within 0.2 degrees. The default output is<br />
contact closure to ground when the antenna is mis-pointed, therefore provides a ground to “Mute” the<br />
satellite modem on the SW2 terminal of the Terminal Mounting Strip. If your satellite modem requires an<br />
open to “Mute”, refer to SYSTEM TYPE parameter 16 value to reverse the output logic from the ACU.<br />
To Test the blockage function:<br />
7. Press the NEXT key until you are at the Status menu. Press ENTER to access the Tracking menu.<br />
8. Press the RIGHT arrow key to bring up and move the cursor to the far right. Press the UP arrow to simulate a<br />
manual BLOCKED condition. BLOCKED will appear in the Tracking display.<br />
9. Verify that SW2 terminal shorts to ground (or open circuit if you have SYSTEM TYPE configured to reverse<br />
the output logic) and that the external alarms actuate OR the Dual <strong>Antenna</strong> Arbitrator coax switches toggle<br />
(if antenna B is not blocked) OR the Satellite Modem TX is disabled/muted.<br />
10. Press the LEFT arrow key and then press the UP arrow key to turn the simulated blocked condition OFF.<br />
BLOCKED will disappear from the Tracking display.<br />
11. Verify that SW2 terminal is open circuit (or ground if you have logic reversed) and that the external alarms<br />
deactivate OR the Satellite Modem TX is un-muted. The Dual <strong>Antenna</strong> Arbitrator coax switches should not<br />
toggle until you manually block <strong>Antenna</strong> B ACU.<br />
6-2
<strong>9497B</strong>-20 <strong>Ku</strong>-<strong>Band</strong> <strong>TVRO</strong> Functional Testing<br />
This Page Intentionally Left Blank<br />
6-3
<strong>9497B</strong>-20 <strong>Ku</strong>-<strong>Band</strong> <strong>TVRO</strong> Maintenance and Troubleshooting<br />
7. Maintenance and Troubleshooting<br />
This section describes the theory of operation to aid in troubleshooting and adjustments of the antenna system. Also refer to<br />
the Troubleshooting section of your ACU manual for additional troubleshooting details.<br />
WARNING: Electrical Hazard – Dangerous AC Voltages exist inside the <strong>Antenna</strong> Pedestal<br />
Breaker Box. Observe proper safety precautions when working inside the Pedestal Breaker Box.<br />
WARNING: Electrical Hazard – Dangerous AC Voltages exists on the side of the <strong>Antenna</strong><br />
Pedestal Power Supply. Observe proper safety precautions when working inside the Pedestal<br />
Power Supply.<br />
7.1. Warranty Information<br />
Sea Tel Inc. supports its Series 00 systems with a ONE YEAR warranty on parts and labor.<br />
What’s Covered by the Limited Warranty?<br />
The Sea Tel Series 00 Limited Warranty is applicable for parts and labor coverage to the complete antenna system,<br />
including all above-decks equipment (radome, pedestal, antenna, motors, electronics, wiring, etc.) and the <strong>Antenna</strong><br />
Control Unit (ACU).<br />
What’s NOT Covered by the Limited Warranty?<br />
It does not include Television sets, DBS/DTH receivers, multi-switches or other distribution equipment, whether or not<br />
supplied by Sea Tel commonly used in <strong>TVRO</strong> Systems. Televisions, DBS/DTH receivers and accessories are covered by<br />
the applicable warranties of the respective manufacturers.<br />
It does not include Transmit & Receive RF Equipment, Modems, Multiplexers or other distribution equipment, whether<br />
or not supplied by Sea Tel commonly used in Satellite Communications (TXRX) Systems. These equipments are<br />
covered by the applicable warranties of the respective manufacturers.<br />
Factory refurbished components used to replace systems parts under this warranty are covered by this same warranty<br />
as the original equipment for the balance of the original warranty term, or ninety (90) days from the date of<br />
replacement, whichever occurs last. Original Installation of the Series 00 system must be accomplished by or under<br />
the supervision of an authorized Sea Tel dealer for the Sea Tel Limited Warranty to be valid and in force.<br />
Should technical assistance be required to repair your system, the first contact should be to the agent/dealer you<br />
purchased the equipment from.<br />
Please refer to the complete warranty information included with your system.<br />
7.2. Recommended Preventive Maintenance<br />
Ensure that all of the normal operating settings (LAT, LON, HDG, SAT and al of the Tracking Receiver settings) are set<br />
correctly. Refer to the Functional Testing section to test the system.<br />
7.2.1. Check ACU Parameters<br />
Assure that the parameters are set correctly (you may wish to record them in the Factory Default Settings, in<br />
section 5 of this manual).<br />
7.2.2. Latitude/Longitude Auto-Update check<br />
Refer to the Latitude & Longitude Update check procedure in the Functional Testing section of this manual.<br />
7.2.3. Heading Following<br />
Refer to the Heading Following verification procedure in the Functional Testing section of this manual.<br />
7-1
Maintenance and Troubleshooting<br />
<strong>9497B</strong>-20 <strong>Ku</strong>-<strong>Band</strong> <strong>TVRO</strong><br />
7.2.4. Azimuth & Elevation Drive<br />
Refer to the Azimuth & Elevation Drive check procedure in the Functional Testing section of this manual.<br />
7.2.5. Test Tracking<br />
Refer to the four quadrant Tracking check procedure in the Functional Testing section of this manual.<br />
7.2.6. Visual Inspection - Radome & Pedestal<br />
Conduct a good, thorough, visual inspection of the radome and antenna pedestal. Visually inspect the inside<br />
surface of the radome top and of the antenna pedestal. Look for water or condensation, rust or corrosion,<br />
white fiberglass powder residue, loose wiring connections, loose hardware, loose or broken belts or any other<br />
signs of wear or damage.<br />
1. Radome Inspection - All the radome flanges are properly sealed to prevent wind, saltwater spray<br />
and rain from being able to enter the radome. Re-seal any open (“leaky”) areas with marine<br />
approved silicone sealant. If heavy condensation, or standing water, is found inside the radome,<br />
isolate and seal the leak, and then dry out the radome. Small (1/8 inch) holes may be drilled in the<br />
base pan of the radome to allow standing water to “weep” out.<br />
2. <strong>Antenna</strong> Pedestal Inspection - The shock/vibration springs and/or wire rope Isolators should not be<br />
frayed, completely compressed, or otherwise damaged. The plated and painted parts should not be<br />
rusted or corroded. The harnesses should not be frayed and all the connectors should be properly<br />
fastened and tightened. All hardware should be tight (no loose assemblies or counter-weights).<br />
Replace, re-coat, repair and/or tighten as necessary.<br />
7.2.7. Mechanical Checks<br />
Turn the pedestal power supply OFF<br />
1. Inspect inside of radome for signs that the dish or feed have been rubbing against the inside of the<br />
fiberglass radome.<br />
2. Rotate the pedestal through its full range of azimuth motion. The antenna should rotate freely and<br />
easily with light finger pressure.<br />
3. Rotate the pedestal through full range of elevation rotation. The antenna should rotate freely and<br />
easily with light finger pressure.<br />
4. Rotate the pedestal through full range of cross-level rotation. The antenna should rotate freely and<br />
easily with light finger pressure.<br />
5. Rotate the level cage through the full 90 degrees of rotation from CCW stop to CW stop. The level<br />
cage antenna should rotate freely and easily with light finger pressure. Attached cables should not<br />
cause the cage to spring back more that a few degrees from either stop when released.<br />
6. Inspect all drive belts for wear (black dust on/under the area of the belt).<br />
7. Inspect AZ Drive chain. IF chain is beginning to show signs of rust or corrosion, apply a light coat<br />
of light duty oil to the chain. Wipe excess oil off to leave a light coating on the chain. DO NOT<br />
over-lubricate.<br />
7.2.8. Check Balance<br />
Check the balance of the antenna, re-balance as needed (refer to the Balancing the <strong>Antenna</strong> procedure<br />
below).<br />
7.2.9. Observe <strong>Antenna</strong> Initialization<br />
Observe the <strong>Antenna</strong> Initialization as described in the Troubleshooting section below.<br />
7.3. Troubleshooting<br />
7.3.1. Theory Of Stabilization Operation<br />
The antenna system is mounted on a three axis stabilization assembly that provides free motion with 3<br />
degrees of freedom. This assembly allows the inertia of the antenna system to hold the antenna pointed<br />
motionless in inertial space while the ship rolls, pitches and yaws beneath the assembly. Three low friction<br />
torque motors attached to each of the three free axes of the assembly provide the required force to<br />
overcome the disturbing torque imposed on the antenna system by cable restraints, bearing friction and<br />
7-2
<strong>9497B</strong>-20 <strong>Ku</strong>-<strong>Band</strong> <strong>TVRO</strong> Maintenance and Troubleshooting<br />
small air currents within the radome. These motors are also used to re-position the antenna in azimuth and<br />
elevation.<br />
The Pedestal Control Unit (PCU) uses inputs from the level cage sensors to calculate the amount of torque<br />
required in each axis to keep the antenna pointed within +/-0.2 degrees. The primary sensor input for each<br />
loop is the rate sensor mounted in the Level Cage Assembly. This sensor reports all motion of the antenna to<br />
the PCU. The PCU immediately responds by applying a torque in the opposite direction to the disturbance to<br />
bring the antenna back to its desired position. Both the instantaneous output of the rate sensor (Velocity<br />
Error) and the integrated output of the rate sensor (Position Error) are used to achieve the high pointing<br />
accuracy specification.<br />
The calculated torque commands are converted to a 5 volt differential analog signal by a Digital to Analog<br />
converter (D/A) and sent to each of three Brush-Less Servo Amplifiers. These amplifiers provide the proper<br />
drive polarities and commutation required to operate the Brush-Less DC Servo Motors in torque mode. The<br />
Torque acting on the mass of the antenna cause it to move, restoring the rate sensors to their original<br />
position, and closing the control loop.<br />
Since the rate sensors only monitor motion and not absolute position, a second input is required in each axis<br />
as a long term reference to keep the antenna from slowly drifting in position. The Level and Cross Level<br />
reference is provided by a two axis tilt sensor in the level cage assembly. The Azimuth reference is provided<br />
by combining the ships gyro compass input and the antenna relative position.<br />
7.3.2. Series 97B-20 <strong>Quad</strong> <strong>Ku</strong>-<strong>Band</strong> <strong>TVRO</strong> RF Flow<br />
Refer to the System Block Diagram in the Drawings section of this manual. The feed has a 24VDC motor to<br />
rotate the body of the OMT to optimize the linear polarization angle of the LNBs to the polarization angle of<br />
the signal coming from the targeted satellite. The 24VDC motor is remotely controlled by the ACU (<strong>Manual</strong><br />
OR Auto-Polarization) through the PCU and Shielded Polang Relay Assy.<br />
One <strong>Quad</strong> <strong>Ku</strong>-<strong>Band</strong> LNB is installed. All four <strong>Ku</strong>-<strong>Band</strong> polarizations (High and Low <strong>Band</strong> H&V) are routed<br />
through the four channels of the rotary joint.<br />
7.3.2.1. Channel 1 (White)<br />
HORIZ <strong>Ku</strong> low-band coax has +18 VDC Voltage supplied by Matrix Switch plus <strong>Ku</strong>-<strong>Band</strong> IF (950-<br />
1950MHz) output from the <strong>Ku</strong> low-band horizontal LNB output. The <strong>Ku</strong> low-band IF output passes<br />
through this channel of the 75 ohm coaxial rotary joint, to the base of the radome, down the ADE-<br />
BDE coax to the <strong>Ku</strong> low-band HORIZ input of the four port Matrix Switch. The ACUs’ Tracking<br />
Receiver and each of the <strong>Ku</strong>-<strong>Band</strong> Satellite Receivers is connected by coax cable to one of the<br />
available IF outputs of the Matrix Switch. Total signal loss of this path is the accumulation of the<br />
coax cable losses from antenna to receiver, plus the loss in the Matrix Switch.<br />
7.3.2.2. Channel 2 (Blue)<br />
VERT <strong>Ku</strong> low-band coax has +13 VDC Voltage supplied by Matrix Switch plus <strong>Ku</strong>-<strong>Band</strong> IF (950-<br />
1950MHz) output from the <strong>Ku</strong> low-band vertical LNB output AND <strong>Antenna</strong> Control RF (Pedestal<br />
TX at 1.1 & Base TX at 1.5 MHz) which is added onto this coax by the Pedestal FSK Modem<br />
(connected to the PCU). The <strong>Ku</strong> low-band IF output passes through this channel of the 75 ohm<br />
coaxial rotary joint, to the base of the radome, down the ADE-BDE coax to the Base FSK Modem<br />
(connected to the ACU) and then to the <strong>Ku</strong> low-band VERT input of the four port Matrix Switch.<br />
Total signal loss of this path is the accumulation of the coax cable losses from antenna to receiver,<br />
plus the loss in the Pedestal & Base Modems (1 dB max loss each) and the Matrix Switch.<br />
7.3.2.3. Channel 3 (Red)<br />
HORIZ <strong>Ku</strong> high-band coax has +18 VDC Voltage supplied by Matrix Switch plus <strong>Ku</strong>-<strong>Band</strong> IF (1100-<br />
2150MHz) output from the <strong>Ku</strong> high-band horizontal LNB output. The <strong>Ku</strong> high-band IF output passes<br />
through this channel of the 75 ohm coaxial rotary joint, to the base of the radome, down the ADE-<br />
BDE coax to the <strong>Ku</strong> high-band HORIZ input of the four port Matrix Switch. The ACUs’ Tracking<br />
Receiver and each of the <strong>Ku</strong>-<strong>Band</strong> Satellite Receivers is connected by coax cable to one of the<br />
available IF outputs of the Matrix Switch. Total signal loss of this path is the accumulation of the<br />
coax cable losses from antenna to receiver, plus the loss in the Matrix Switch.<br />
7.3.2.4. Channel 4 (Green)<br />
VERT <strong>Ku</strong> high-band coax has +13 VDC Voltage supplied by Matrix Switch plus <strong>Ku</strong>-<strong>Band</strong> IF (1100-<br />
2150MHz) output from the <strong>Ku</strong> high-band vertical LNB output. The <strong>Ku</strong> high-band IF output passes<br />
through this channel of the 75 ohm coaxial rotary joint, to the base of the radome, down the ADE-<br />
BDE coax to the <strong>Ku</strong> high-band VERT input of the four port Matrix Switch. The ACUs’ Tracking<br />
7-3
Maintenance and Troubleshooting<br />
<strong>9497B</strong>-20 <strong>Ku</strong>-<strong>Band</strong> <strong>TVRO</strong><br />
Receiver and each of the <strong>Ku</strong>-<strong>Band</strong> Satellite Receivers is connected by coax cable to one of the<br />
available IF outputs of the Matrix Switch. Total signal loss of this path is the accumulation of the<br />
coax cable losses from antenna to receiver, plus the loss in the Matrix Switch.<br />
7.3.3. <strong>Antenna</strong> Initialization (Series 97B & Series 00 )<br />
Turn the pedestal power supply ON. The PCU will initialize the stabilized portion of the mass to be level with<br />
the horizon and at a prescribed Azimuth and Elevation angles. The antenna will go through the specific<br />
sequence of steps (listed below) to initialize the level cage, elevation, cross-level and azimuth to<br />
predetermined starting positions.<br />
Initialization is completed in the following phases, each phase must complete properly for the antenna to<br />
operate properly (post-initialization). Observe the Initialization of the antenna pedestal.<br />
Step 1. The brakes on the Elevation and Cross-Level motors release.<br />
Step 2. The level platform motor drives the Level Cage CW, issuing extra steps to assure that the<br />
cage is all the way to the mechanical stop. Then the Level Cage will be driven exactly 45.0 degrees<br />
CCW.<br />
Step 3. Elevation axis then activates - Input from the LV axis of the tilt sensor is used to drive the<br />
Elevation of the equipment frame to bring the tilt sensor LV axis to level. This step takes<br />
approximately 10 seconds and will result in the dish being at 45.0 degrees in elevation. The level<br />
cage may still be tilted left or right at this time.<br />
Step 4. Cross-Level axis activates - Input from the CL axis of the tilt sensor is used to drive Cross-<br />
Level of the equipment frame to bring the cross-level axis of the tilt sensor to level (this results in<br />
the tilt of the Cross-Level Beam being level). This step takes approximately 10 seconds.<br />
Step 5. Azimuth axis activates - <strong>Antenna</strong> drives CW in azimuth until the “Home Flag” signal is<br />
produced. This signal is produced by a Home Switch hitting a cam (or by a Hall Effect sensor in<br />
close proximity to a Magnet). After another 10 second wait, the antenna will report its version<br />
number at the <strong>Antenna</strong> Control Unit (ACU).<br />
This completes the phases of initialization. At this time the antenna elevation should 45.0 degrees and<br />
Relative azimuth should be at home flag (home switch engaged on the home flag cam).<br />
If any of these steps fail, or the ACU reports model "xx97", re-configure the PCU as described in the this<br />
chapter. If initialization still fails, this indicates a drive or sensor problem, refer to the Troubleshooting<br />
section.<br />
7.3.4. Troubleshooting using DacRemP<br />
While troubleshooting a Sea Tel 3-Axis <strong>Antenna</strong> System, you must classify the fault you are dealing with as a<br />
failure within one of 3 major system functions, Targeting, Stabilization, and Tracking. Should there be a<br />
failure with any one of these functions, your system will not operate properly. A few simple checks may help<br />
determine which fault (if any) that you are dealing with. The matrix below lists some test(s) and which of the<br />
DacRemP graph selection would be best to use to identify a fault. The end of this chapter contains examples<br />
on how to use DacRemP to diagnose a fault.<br />
Targeting: is the ability to accurately point the antenna to an angular position in free space and is<br />
controlled by the ACU. (Does the system drive to the Azimuth, Elevation, and Polarity positions within 1<br />
degree of the desired satellite?)<br />
Stabilization: is the process of de-coupling the ships motion from the antenna and is controlled by the<br />
PCU. (Does the system maintain the satellite link after turning off TRACKING?)<br />
Tracking: is the process of issuing fine adjustments to the pointing angle of the antenna to optimize the<br />
received signal level and is controlled by the ACU. (Does the system pass a four quadrant-tracking test?)<br />
Functional Test(s)<br />
7-4<br />
DacRemP Graph<br />
Selection to use<br />
Four <strong>Quad</strong>rant Tracking. ADMC (Position) Tracking<br />
Azimuth Encoder Verification. ADMC (Position) Targeting<br />
System Function(s)<br />
Sea Trial ADMC (Position) Targeting<br />
Tracking<br />
Stabilization
<strong>9497B</strong>-20 <strong>Ku</strong>-<strong>Band</strong> <strong>TVRO</strong> Maintenance and Troubleshooting<br />
Side Lobe Plots ADMC (Position) Tracking<br />
Targeting Alignment (AZ & EL Trims) ADMC (Position) Targeting<br />
Determine Blockage Mapping ADMC (Position) Tracking<br />
Unwrap recovery (Limited Az systems only) ADMC (Position) Stabilization<br />
Pedestal Gain Verification DISPIVC (Loop Error) Stabilization<br />
Home switch (flag) verification (Unlimited Az<br />
systems only)<br />
DISPV (Ref)<br />
Stabilization<br />
Remote Tilt Verification DISPV (Ref) Targeting<br />
Stabilization<br />
Level cage alignment Verification (sensor<br />
alignment)<br />
DISPV (Ref)<br />
Targeting<br />
Stabilization<br />
Rate Sensor Output Verification DISPW (Rate) Stabilization<br />
Level and CL fine balance Verification DISPTC (Drive) Stabilization<br />
AZ Friction Torque Test DISPTC (Drive) Stabilization<br />
DishScan Drive/Phase DishScan XY Tracking<br />
Stabilization<br />
7.3.5. <strong>Antenna</strong> Loop Error Monitoring<br />
The DacRemP DISPIVC graph chart provides a means for monitoring the accumulated velocity errors of the<br />
antenna for diagnostic purposes. If this error is excessive, it indicates external forces are acting on the<br />
antenna. These forces may be the result of but not restricted to static imbalance, excessive bearing friction,<br />
cable binding, or wind loading. If these forces cause the antenna to mis-point by more than 0.5° from the<br />
desired position the PCU will flag a “Stab Limit” error.<br />
• To view the position error, select the graph chart.<br />
• This chart displays sensed axis errors via three traces, CL (Cross Level), LV (Elevation), and AZ<br />
(Azimuth), at a fixed 0.05º/ vertical division.<br />
• The normal trace average will plots it’s display ± 3 divisions from the red reference line. Any trace<br />
line average plotted above this is of concern and troubleshooting required. The example below<br />
shows the forces exerted onto the antenna as a resultant of DishScan Drive.<br />
• The example below shows the results of various forces put upon antenna.<br />
7-5
Maintenance and Troubleshooting<br />
<strong>9497B</strong>-20 <strong>Ku</strong>-<strong>Band</strong> <strong>TVRO</strong><br />
• Cross-Level Axis physically moved CCW (down to the left.) and then CW (up to the right.)<br />
• Elevation Axis physically moved CW. (reflector slightly pushed up) and then physically moved CCW.<br />
(reflector slightly pushed down.) At the end of chart recording shows DishScan Drive turned Off,<br />
notice the lack of accumulated IVC errors.<br />
7.3.6. Reference Sensor Monitoring<br />
The DacRemP DISPV graph chart provides a means for monitoring the output of the 2 Axis Tilt Sensor and<br />
the Home Switch sensor for diagnostic purposes. The Tilt sensor (located inside the Level Cage Assembly) is<br />
the primary input for the antenna’s reference to the horizon (0° Elevation and 90° Cross-Level). While the<br />
Home Switch Sensor (located at the antenna base) is used to calibrate the antenna’s position relative to the<br />
vessels BOW.<br />
• To view the reference sensors, select the graph chart.<br />
• This chart displays the output of the Tilt Sensor via two traces, CL (Cross Level), LV (Elevation) at a<br />
fixed 1º/ vertical division, and the home flag logic level via a single trace, AZ (Azimuth).<br />
• The normal trace display for the Tilt Sensor, after performing remote tilt calibration, will be ± 4<br />
divisions from the red reference line. Any trace line average plotted above this is of concern and<br />
troubleshooting required. See below for a screen capture of an antenna that is Level in both the<br />
Cross-Level and Elevation Axis.<br />
7-6
<strong>9497B</strong>-20 <strong>Ku</strong>-<strong>Band</strong> <strong>TVRO</strong> Maintenance and Troubleshooting<br />
• The Cross Level Tilt display should plot on the red reference line when the level cage is level,<br />
referenced to the horizon. It should decrease (plots below red line) when the antenna is tilted to<br />
the left and increase (plots above red line) when tilted to the right. See below for a screen capture<br />
of an abnormal CL trace Plot, it is an indication that the antenna that is either listed to the right<br />
approx. 4 degrees or the PCU requires to much CL tilt bias.<br />
• The Level tilt display should plot on the red reference line when the level cage is level, referenced to<br />
the horizon. It should decrease (plots below red line) when the antenna is tilted forward (EL down)<br />
and increase (plots above red line) when tilted back (EL up).<br />
• The Azimuth display for the Home Switch will normally display a logic level high (plots directly on<br />
Red reference line after clicking on the<br />
button) when the home flag is NOT engaged and<br />
changing to a logic level low when engaged. See below for a screen capture of an antenna that was<br />
driven so that the Home Flag switch is engaged.<br />
7-7
Maintenance and Troubleshooting<br />
<strong>9497B</strong>-20 <strong>Ku</strong>-<strong>Band</strong> <strong>TVRO</strong><br />
7.3.7. Open Loop Rate Sensor Monitoring<br />
The DacRemP DISPW graph chart provides a means for monitoring the output of the 3 solid state rate<br />
sensors (located inside the Level Cage Assembly) for diagnostic purposes. The rate sensors are the primary<br />
inputs to the PCU for stabilization.<br />
• To monitor the rate sensors, select the graph chart<br />
• This chart displays sensed output from the 3 rate sensors via three traces, CL (Cross Level), LV<br />
(Elevation), and AZ (Azimuth), at a fixed 1º/Second/vertical division.<br />
• A normal trace display will be ± 1 divisions from the red reference line. The example shown below<br />
shows an antenna that is NOT currently sensing motion in any axis.<br />
• The Cross Level display should decrease (plots below red line) as the antenna is tilted to the left and<br />
increase (plots above red line) as the antenna tilted to the right.<br />
• The Level display should decrease (plots below red line) as the antenna is tilted forward and increase<br />
(plots above red line) as the antenna is tilted back.<br />
• The Azimuth display should decrease (plots below red line) as the antenna is rotated CCW and<br />
increase (plots above red line) as the antenna is rotated CW. In the example below, the output of<br />
the Azimuth rate sensor is plotted above the reference line, indicating that the antenna was driven<br />
CW in Azimuth. Due to the in-practicality of driving an axis at a consistent rate, verification of rate<br />
sensor output is, for the most part restricted to a positive or negative response of the Level Cage<br />
movement (plotting above or below the red reference line of each axis).<br />
7-8
<strong>9497B</strong>-20 <strong>Ku</strong>-<strong>Band</strong> <strong>TVRO</strong> Maintenance and Troubleshooting<br />
7.3.8. Open Loop Motor Test<br />
The DacRemP Comm Diagnostics Window provides a means to enter in Remote Commands for driving<br />
each individual torque motor to test that motors functionality. By driving each axis and observing the<br />
resulting motion of the antenna, a coarse operational status of the motor and motor driver may be<br />
established.<br />
• To manually drive the motors, select the “Comm Diagnostics” window under to the Tools<br />
submenu or Press “CTRL + C”<br />
• Using the small field in the upper left hand corner of<br />
the window, type in the remote command and verify<br />
the motor appropriately drives in the direction<br />
commanded.<br />
• To drive the Cross Level motor, key in ^1064, ^1128 or<br />
^1192 and press ENTER to drive the Cross Level axis<br />
LEFT, OFF or RIGHT respectively.<br />
• To drive the Level motor, key in ^2064, ^2128 or ^2192<br />
and press ENTER to drive the level axis FORWARD,<br />
OFF or BACKWARD respectively.<br />
• To drive the Azimuth motor, key in ^3064, ^3128 or<br />
^3192 and press ENTER to drive the azimuth axis CW,<br />
OFF or CCW.<br />
7.3.9. To Disable/Enable DishScan<br />
To be able to use Step Track, or to revert to Conscan, as your active tracking mode you will have to disable<br />
DishScan.<br />
Select the DISHSCAN parameter window on the ACU:<br />
1. Press the RIGHT arrow, then press the UP arrow and last press the ENTER key to turn DishScan mode<br />
ON.<br />
2. Press the RIGHT arrow, then press the DOWN arrow and last press the ENTER key to turn DishScan<br />
Mode OFF.<br />
If you change this remote parameter, you must save the change using REMOTE PARAMETERS.<br />
If DishScan is OFF and the Step Integral parameter is set to 0000, you will get a constant ERROR 0016<br />
(DishScan error) and you will see zeros flashing in the lower left of the Azimuth and Elevation ENTRY menu<br />
displays. This is a visual indication that DishScan is turned OFF.<br />
7.3.10. Satellite Reference Mode<br />
The ships gyro compass input to the ACU may be accurate and stable in static conditions and yet may NOT<br />
be accurate or stable enough in some underway dynamic conditions. If there is no gyro compass or if the<br />
7-9
Maintenance and Troubleshooting<br />
<strong>9497B</strong>-20 <strong>Ku</strong>-<strong>Band</strong> <strong>TVRO</strong><br />
input is corrupt, not stable or not consistently accurate the tracking errors will become large enough to cause<br />
the antenna to be mis-pointed off satellite.<br />
Satellite Reference Mode will uncouple the gyro reference from the azimuth rate sensor control loop. This<br />
decoupling of the Gyro source only happens 5 minutes after an azimuth command has been sent to the<br />
antenna by means of an AZ target command, a search pattern initiated, or the a Satellites longitudinal<br />
position is targeted. When operating in Satellite Reference Mode changes in ships gyro reading will reflect its<br />
changes to the ACU’s display but will not directly affect the azimuth control loop. The Pedestal Control Unit<br />
will stabilize the antenna based entirely on the azimuth rate sensor loop and the tracking information from<br />
DishScan. This will keep the azimuth rate sensor position from eventually drifting away at a rate faster than<br />
the tracking loop can correct by using the tracking errors to regulate the rate sensor bias.<br />
Satellite Reference Mode can be used as a diagnostic mode to determine if tracking errors are caused by<br />
faulty gyro inputs.<br />
Satellite Reference Mode MUST be used when:<br />
• No Gyro Compass is available<br />
• Frequent or constant ACU Error Code 0001 (Gyro Compass has failed)<br />
• Gyro Compass output is NMEA heading<br />
• Flux Gate Compass is being used<br />
• GPS Satellite Compass is being used<br />
To view, or change, the Satellite Reference Mode status, select the SAT REF remote parameter:<br />
1. Press the RIGHT arrow, then press the UP arrow and last press the ENTER key to turn Satellite<br />
Reference Mode ON.<br />
2. Press the RIGHT arrow, then press the DOWN arrow and last press the ENTER key to turn Satellite<br />
Reference Mode OFF.<br />
If you change this remote parameter, you must save the change using REMOTE PARAMETERS.<br />
7.3.11. To Read/Decode an ACU Error Code 0008 (Pedestal Function Error):<br />
An Error Code 8 as reported by the ACU is an indication that the above decks equipment has experienced an<br />
error. One of the functions available within the “Comm Diagnostics” tool window provides the means to<br />
read and decode the actual discreet Pedestal Function Error.<br />
1. Select the “Comm<br />
Diagnostics” window<br />
under to the Tools<br />
submenu or Press “CTRL +<br />
C”<br />
7-10
<strong>9497B</strong>-20 <strong>Ku</strong>-<strong>Band</strong> <strong>TVRO</strong> Maintenance and Troubleshooting<br />
2. Left mouse click on the<br />
icon.<br />
3. Right mouse click on the<br />
icon.<br />
This will display a list box with<br />
the status of the above decks<br />
pedestal filtered into 3<br />
sections. Items preceded with<br />
a check marks indicate a<br />
flagged status. See matrix<br />
below for further information<br />
on each state.<br />
State<br />
Description<br />
PCU Status (Word 1)<br />
Slow Scan<br />
Sat Reference<br />
DishScan<br />
Unwrap<br />
Data 3<br />
Data 2<br />
Indicates antenna is in a specialized mode, Slow Scan, which is required when<br />
ever a test requires driving the antenna >5°/sec<br />
Indicates that satellite reference mode is enabled.<br />
Indicates that DishScan Drive is enabled.<br />
Indicates that the antenna is currently in an “Unwrap” state.<br />
This is not a valid error for unlimited azimuth antenna systems<br />
Indicates active communication between above decks and below decks<br />
equipment<br />
Indicates active communication between above decks and below decks<br />
equipment<br />
7-11
Maintenance and Troubleshooting<br />
<strong>9497B</strong>-20 <strong>Ku</strong>-<strong>Band</strong> <strong>TVRO</strong><br />
PCU Status (Word 2)<br />
Az Target<br />
Az Velocity<br />
Valid Heading (PCU)<br />
PCU Error<br />
PCU Init<br />
Hi Elevation<br />
Indicates the antenna is currently targeting a pre-determined azimuth position<br />
**Not a valid state**<br />
Indicates that the PCU has received and integrated the heading value from the<br />
ACU into the Azimuth Stabilization Loop. This is NOT an indication of a proper<br />
Heading integration into ACU.<br />
Indicates that one or more errors have been reported by the above decks<br />
equipment.<br />
Indicates that the above decks equipment is currently performing an<br />
Initialization sequence<br />
Indicates that the above decks equipment is operating an Elevation Position<br />
higher than 83°<br />
PCU Error Status (Word 3)<br />
Sensor Limit<br />
Stability Limit<br />
AZ Reference Error<br />
AZ Servo Limit<br />
LV Servo Limit<br />
CL Servo Limit<br />
**Not a valid state**<br />
Indicates that the above decks equipment is mis-pointed from its intended<br />
target by more than 0.5°. (FCC Tx Mute requirements)<br />
Indicates a failure to integrate one the reference inputs within the Azimuth<br />
Stabilization Loop.<br />
Indicates the current draw through the Azimuth Servo Amplifier (motor driver<br />
PCB) has exceeded what is required during normal operation<br />
Indicates the current draw through the Elevation Servo Amplifier (motor driver<br />
PCB) has exceeded what is required during normal operation<br />
Indicates the current draw through the Cross-Level Servo Amplifier (motor<br />
driver PCB) has exceeded what is required during normal operation<br />
7.3.12. Remote GPS LAT/LON Position:<br />
The above decks equipment has an integrated on board Furuno GPS antenna system. The Latitude and<br />
Longitude position information provided are utilized to calculate the Azimuth, Elevation, Cross-level and<br />
Polarity pointing angles of the desired satellite. The DacRemP “Comm Diagnostics” Window provides a<br />
means to query the GPS antenna to verify proper operation. The procedure below describes this process.<br />
1. Select the “Comm<br />
Diagnostics” window<br />
under to the Tools<br />
submenu or Press “CTRL +<br />
C”<br />
7-12
<strong>9497B</strong>-20 <strong>Ku</strong>-<strong>Band</strong> <strong>TVRO</strong> Maintenance and Troubleshooting<br />
2. Left mouse click on the<br />
icon.<br />
3. Left Mouse click on the<br />
“?@ PCU GPS position, 1<br />
min (1 Nm)”<br />
4. In the “Response” window<br />
verify proper GPS position<br />
to within 1 nautical mile<br />
of your current position.<br />
The Latitude & Longitude position<br />
of the GPS will be displayed in the<br />
following format:<br />
“@ LAT,N,LON,E,A”<br />
Where LAT and LON are in degrees<br />
and minutes, LAT will be followed<br />
by N or S (North or South), LON will<br />
be followed by E or W (East or<br />
West), then a status character and<br />
finally a checksum character.<br />
7-13
Maintenance and Troubleshooting<br />
<strong>9497B</strong>-20 <strong>Ku</strong>-<strong>Band</strong> <strong>TVRO</strong><br />
Furuno default value is in Japan at<br />
34.4N 135.2E<br />
(@3444,N,13521,E,,_).<br />
After acquiring a good fix at Sea<br />
Tel the string is<br />
@3800,N,12202,W,A^<br />
for our 38N 122W Latitude and<br />
Longitude position.<br />
The status character tells you the<br />
status of the GPS.<br />
“,” (Comma) = GPS has NOT<br />
acquired a proper fix,<br />
“N” = GPS fix is NOT valid<br />
“A” = GPS has acquired a valid fix.<br />
7.4. Maintenance<br />
7.4.1. Balancing the <strong>Antenna</strong><br />
The antenna and equipment frame are balanced at the factory however, after disassembly for shipping or<br />
maintenance, balance adjustment may be necessary. The elevation and cross-level motors have a brake<br />
mechanism built into them, therefore, power must be ON to release the brakes and antenna drive must be<br />
OFF to balance the antenna. . Do NOT remove any of the drive belts. Balancing is accomplished by<br />
adding or removing balance trim weights at strategic locations to keep the antenna from falling<br />
forward/backward or side to side. The antenna system is not pendulous so 'balanced' is defined as the<br />
antenna remaining at rest when left in any position. The antenna should be balanced within one ounce at<br />
the typical trim weight location of 10 inches from the axis of rotation.<br />
1. Turn <strong>Antenna</strong> power breaker ON<br />
2. To turn OFF antenna drive (AZ, EL & CL) follow the Pedestal Control Unit Configuration procedure in<br />
this chapter to set the PCU configuration to (N0000) but do NOT save.<br />
3. Balance the antenna elevation axis with the elevation near horizon (referred to as front to back<br />
balance) by adding, or subtracting, small counter-weights.<br />
4. Then balance Cross Level axis (referred to as left-right balance) by moving existing counterweights.<br />
Do NOT add counter-weight during this step.<br />
5. Last, balance the Elevation Axis with the antenna pointed at zenith (referred to as top to bottom<br />
balance) by moving existing counter-weights. Do NOT add counter-weight during this step.<br />
6. When completed, the antenna will stay at any position it is pointed in for at least 5 minutes (with<br />
little, to no, ship motion).<br />
7. Turn antenna power OFF, and then back ON, to re-Initialize the antenna. This will also turn antenna<br />
drive (AZ, EL & CL) back ON.<br />
7.4.2. To Adjust Tilt:<br />
A REMOTE TILT calibration is required to align the level cage assembly correctly so that all sensors will be<br />
aligned accurately to the axis they relate to. The fluid filled tilt sensor provides a two dimensional horizon<br />
reference. The system is not able to automatically calculate the exact center value, therefore it is necessary<br />
to perform this procedure to manually enter any offset required to make sure the PCU receives a true<br />
reference to the horizon. The procedures below describes the process of performing this calibration from<br />
either the ACU front panel or DacRemP diagnostic software by connecting the ACU’s RS-422 M&C Port to an<br />
available serial port on a Laptop/Desktop computer using a standard 9 pin serial cable.<br />
Step 1 Turn Off DishScan Drive.<br />
Using the DAC2202 ACU Front Panel:<br />
7-14
<strong>9497B</strong>-20 <strong>Ku</strong>-<strong>Band</strong> <strong>TVRO</strong> Maintenance and Troubleshooting<br />
1. Go to Remote Command window by pressing and holding the two LEFT & RIGHT arrows<br />
until the EL TRIM parameter is displayed.<br />
2. Press and release both Left & Right arrow keys again. The “SAVE NEW PARAMETERS”<br />
window should now be displayed.<br />
3. Press either the ENTER key or the DOWN key until the “REMOTE DishScan<br />
TG” parameter is displayed.<br />
4. Press the “RIGHT arrow to activate selection, then press the Up arrow to toggle<br />
state to OFF. Press the ENTER key (Note: You will see that an error code 16 is<br />
generated when DishScan movement is off.)<br />
Using DacRemP:<br />
1. Click on the icon in the Comm Diagnostics window. (Verify that DishScan<br />
is turned off by clicking the Error LED on main display panel, there should be a check mark<br />
next to Conscan/DishScan)<br />
(Steps 2-7 will require assistance to observe and operate antenna simultaneously)<br />
Step 2: At <strong>Antenna</strong>, If not already installed, place a circular level bubble on top lid of level cage.<br />
Step 3: On the ACU front Panel, press either the ENTER key or the DOWN arrow key until<br />
the REMOTE TILT window is displayed<br />
Step 4: Push the RIGHT arrow key to activate the Remote Tilt Mode.<br />
Step 5: Based on the feedback from the technician observing the circular bubble, the technician which<br />
operating the ACU will need to use the arrow keys to rotate the stabilized antenna mass from front to<br />
back and left to right. You should wait at least 10 seconds between commands to allow time for sensor<br />
to settle.<br />
Left arrow will rotate antenna mass down to the left in the Cross-Level axis ½ degree<br />
Right arrow will rotate antenna mass up to the right in the Cross-Level axis ½ degree<br />
Up arrow will rotate antenna mass up in the Level axis ½ degree<br />
Down arrow will rotate antenna mass down in the Level axis ½ degree<br />
When correct the Bubble should be as close to the center of the fluid as possible.<br />
Step 6: Press ENTER key to exit Remote Tilt Mode.<br />
Step 7: Verify Tilt Bias entered is within specifications.<br />
From antenna:<br />
2. Observe the bubble for approximately 3-5 minutes to ensure it remains centered.<br />
Using DacRemP:<br />
• Select the reference sensor graph.<br />
7-15
Maintenance and Troubleshooting<br />
<strong>9497B</strong>-20 <strong>Ku</strong>-<strong>Band</strong> <strong>TVRO</strong><br />
3. Verify the CL and LV displays are steady and within 4 divisions of nominal. (Anything more<br />
than 4 divisions above or below red reference line should be of concern and<br />
troubleshooting is required)<br />
Step 8: Save Level and Cross-Level Tilt Bias values.<br />
Using the DAC2202 ACU Front Panel:<br />
4. Press DOWN arrow or enter until you see “REMOTE PARAMETERS” window is<br />
displayed<br />
• Press RIGHT arrow and then press ENTER key (you will see a confirmation<br />
saying ‘SAVED’)<br />
Using DacRemP:<br />
5. Click icon on the Remote Command window. (Verify ^0087 is displayed in<br />
the “Last Sent Command” window)<br />
This saves the new tilt bias settings in the PCU. Reset or re-initialize the antenna to verify that the Level cage<br />
is properly level with the new settings.<br />
7.4.3. To Reset/Reinitialize the <strong>Antenna</strong>:<br />
Pressing Reset on the ACU front panel does NOT cause a reset of the above decks equipment. To Re-initialize<br />
the antenna from the REMOTE COMMAND window on the ACU:<br />
1. Using the LEFT/RIGHT and UP/DOWN arrow keys set the Remote Command value to "^0090"<br />
and press ENTER.<br />
This resets the PCU on the antenna. The antenna will reinitialize with this command (Performs a similar<br />
function as a power reset of the antenna).<br />
7-16
<strong>9497B</strong>-20 <strong>Ku</strong>-<strong>Band</strong> <strong>TVRO</strong> Maintenance and Troubleshooting<br />
7.5. Pedestal Control Unit Configuration (xx97B & xx00)<br />
The PCU is designed to be used with a variety of antenna pedestal configurations. The configuration information that<br />
is unique to each pedestal type is stored in a Non Volatile Random Access Memory (NVRAM) in the PCU enclosure. If<br />
the PCU is replaced or the NVRAM in the PCU should become corrupt, the PCU must be re-configured to operate with<br />
the pedestal it is installed on. The default configuration for the PCU is model xx97B. In this configuration the PCU will<br />
not drive any of the three torque motors to prevent damage to the unknown pedestal.<br />
To configure the PCU, select the REMOTE COMMAND window on the DAC-97 by pressing the MODE key until this<br />
window appears (if the DAC-97 will not advance beyond the REMOTE AUX window, enter 7979 and press ENTER). In<br />
the REMOTE COMMAND window, key in ". 7 8 ENTER". An "N" should now appear in the command window. Refer to<br />
the table below to key in the appropriate value for you model antenna.<br />
EXAMPLE: For an 9797B Model <strong>Antenna</strong>:<br />
1. Key in "0208" to select system type 208. The display should now show "N0208".<br />
2. Press ENTER to send this system type command to the PCU.<br />
3. Press ENTER several times to select REMOTE PARAMETERS. Press UP arrow and then ENTER to save the<br />
system type in the PCU.<br />
4. Press ANTENNA, MODE, N/S to display the Remote Version Number. It should now display "9797B VER 1.8x".<br />
7.5.1. MODEL CONFIGURATION NUMBERS<br />
The following table shows the current mode configuration values for Series 97A pedestals.<br />
MODEL<br />
Configuration Number<br />
xx97B N 0000 Turns off all drive motors<br />
9797B N 0208<br />
8797B N 0209<br />
9997B N 0210<br />
8897B N 0211<br />
12097B N 0212<br />
14497B N 0213<br />
14600B N 0214<br />
<strong>9497B</strong> N 0215<br />
9697B N 0216<br />
14400B N 0217<br />
7-17
Maintenance and Troubleshooting<br />
<strong>9497B</strong>-20 <strong>Ku</strong>-<strong>Band</strong> <strong>TVRO</strong><br />
7.6. <strong>Antenna</strong> Stowing Procedure<br />
WARNING: <strong>Antenna</strong> Pedestal must be properly restrained (stowed) to<br />
prevent damage to wire rope isolators, isolator springs and/or antenna pedestal<br />
mechanism during underway conditions when power is removed from the<br />
antenna assembly.<br />
The normal operating condition for the Sea Tel <strong>Antenna</strong> system is to remain powered up at all times. This ensures<br />
that the antenna remains actively stabilized to prevent physical damage to the antenna pedestal and reduce<br />
condensation and moisture in the radome to prevent corrosion. If, for some reason, the antenna must be powered<br />
down during underway transits, it should be secured with nylon straps regardless of sea conditions to prevent damage<br />
to the antenna system. Refer to the procedure below to secure the antenna pedestal.<br />
Equipment & Hardware needed:<br />
• Two (2) ½-13 x 2-inch Stainless Steel bolts.<br />
• Two (2) Nylon straps with ratchet mechanism. Nylon straps must be rated to 300 lbs. Working load<br />
capacity and 900 lbs. Max rated capacity.<br />
Stowing procedure:<br />
1. Point the antenna to Zenith, (90 degree elevation angle),<br />
straight up.<br />
2. Install one (1) ½-13 x 2-inch bolt into the inside of each<br />
elevation beam as shown in Figure 1.<br />
7-18
<strong>9497B</strong>-20 <strong>Ku</strong>-<strong>Band</strong> <strong>TVRO</strong> Maintenance and Troubleshooting<br />
3. Hook one end hook of the nylon strap to bolt in elevation<br />
beam as shown in Figure 2.<br />
4. Hook the other end hook of the nylon strap to the pedestalmounting<br />
frame as shown in Figure 3.<br />
5. Use the ratchet of the strap to tighten nylon straps. As the<br />
straps are tightened, observe the vertical isolation canister<br />
assembly as shown in Figure 4.<br />
6. Tighten straps until the canister has been pulled down<br />
approx. ¼ to ½ inch. Do not over-tighten. You must leave<br />
approximately 1/8 inch clearance between the rubber stops<br />
and the azimuth driven sprocket to allow the vertical<br />
vibration isolation to function properly.<br />
NOTE: Remove both the straps and the bolts before applying power and returning the antenna<br />
to normal operating condition.<br />
7-19
<strong>9497B</strong>-20 <strong>Ku</strong>-<strong>Band</strong> <strong>TVRO</strong> <strong>9497B</strong>-20 Technical Specifications<br />
8. <strong>9497B</strong>-20 Technical Specifications<br />
The technical specifications for your Series Above Decks Equipment subsystems are listed below: Refer to your ACU manual for<br />
its’ Specifications.<br />
8.1. 9497 <strong>Antenna</strong> Reflector<br />
Type<br />
Diameter (D)<br />
Focal Length<br />
f/D<br />
Weight (bare)<br />
RX Gain:<br />
RX Gain:<br />
Hydro Formed Aluminum Parabola<br />
2.4 Meter (94 inches)<br />
0.92 Meter (35.4 inches)<br />
0.375 inch<br />
26 kg (57 pounds)<br />
39.5 dB at 4.2 GHz<br />
47.5 dB at 12.5 GHz<br />
8.2. Feed Assemblies<br />
8.2.1. <strong>TVRO</strong> <strong>Quad</strong> <strong>Ku</strong>-<strong>Band</strong> Feed Assembly<br />
Type:<br />
Prime focus<br />
Receive frequency:<br />
10.7-11.7 GHz <strong>Ku</strong> Low <strong>Band</strong><br />
11.7-12.75 GHz <strong>Ku</strong> High <strong>Band</strong><br />
<strong>Quad</strong> <strong>Ku</strong>-<strong>Band</strong> LNB Assembly<br />
Type:<br />
<strong>Quad</strong> output<br />
LNB Manufacturer: Brainwave, but may vary<br />
Low <strong>Band</strong> High <strong>Band</strong><br />
RF Frequencies: 10.7 - 11.7 GHz 11.7 - 12.75 GHz<br />
IF Frequencies:<br />
950 - 1950 MHz 1100 - 2150 MHz<br />
LO Frequencies: 9.75 GHz 10.6 GHz<br />
Noise Figure:<br />
0.7 dB typical<br />
Polarization modes: 2 Horiz., 2 Vert. Outputs<br />
<strong>Band</strong> Selection:<br />
2 Hi, 2 Lo band outputs<br />
Polarization:<br />
Linear, Simultaneous Dual <strong>Band</strong>-Dual Polarity <strong>Ku</strong>-<strong>Band</strong> (Horizontal &<br />
Vertical High band AND Horizontal & Vertical Low band)<br />
Polang control:<br />
24 volt DC motor with position feedback for Linear Mode<br />
8.3. Pedestal Control Unit (PCU)<br />
The PCU Assembly contains 1 Printed Circuit Board (PCB). It is the main control board.<br />
Connectors<br />
<strong>Antenna</strong> Pedestal 44 Pin D-Sub connector<br />
M&C Interface<br />
15 Pin D-Sub connector<br />
GPS Input<br />
BNC connector<br />
Controls<br />
None<br />
M&C Interface<br />
9600 Baud RS-422<br />
8-1
<strong>9497B</strong>-20 Technical Specifications <strong>9497B</strong>-20 <strong>Ku</strong>-<strong>Band</strong> <strong>TVRO</strong><br />
8.4. Stabilized <strong>Antenna</strong> Pedestal Assembly<br />
Type:<br />
Three-axis (Level, Cross Level and Azimuth)<br />
Stabilization:<br />
Torque Mode Servo<br />
Stab Accuracy:<br />
0.3 degrees MAX, 0.15 degrees RMS in presence of specified ship<br />
motions (see below).<br />
LV & CL motors:<br />
Size 34 Brushless DC Servo motor with integrated brake.<br />
AZ motor: Size 34 Brushless DC Servo motor with integrated encoder .<br />
Inertial Reference:<br />
Solid State Rate Sensors<br />
Gravity Reference:<br />
Two Axis Fluid Tilt Sensor<br />
AZ transducer:<br />
256 line optical encoder (integrated in AZ motor) / home switch<br />
Range of Motion:<br />
Elevation<br />
-15 to +110 degrees<br />
Cross Level<br />
+/- 25 degrees<br />
Azimuth<br />
Unlimited<br />
Polarization<br />
+/- 90 degrees<br />
Elevation Pointing:<br />
0 to +90 degrees (with 15 degree Roll)<br />
+5 to +90 degrees (with 20 degree Roll)<br />
+10 to +85 degrees (with 25 degree Roll)<br />
Relative Azimuth Pointing<br />
Unlimited<br />
Specified Ship Motions (for stabilization accuracy tests):<br />
Roll:<br />
+/-15 degrees at 8-12 sec periods<br />
Pitch:<br />
+/-10 degrees at 6-12 sec periods<br />
Yaw:<br />
+/-8 degrees at 15 to 20 sec periods<br />
Turning rate:<br />
Up to 12 deg/sec and 15 deg/sec/sec<br />
Headway:<br />
Up to 50 knots<br />
Mounting height:<br />
Up to 150 feet.<br />
Heave 0.5G<br />
Surge 0.2G<br />
Sway 0.2G<br />
Maximum ship motion:<br />
Roll<br />
+/- 25 degrees (Roll only)<br />
+/- 20 degrees (combined with Pitch)<br />
Pitch<br />
+/- 15 degrees<br />
Yaw Rate<br />
12 deg/sec, 15 deg/sec/sec<br />
8.5. Unlimited Azimuth Modems (3 Channel)<br />
Combined Signals 950-3000 MHz <strong>Ku</strong>-<strong>Band</strong> RX IF (less if not stacked), 3.7-4.2 GHz C-<br />
<strong>Band</strong> RX RF, 1.1/1.5, or 0.7/1.9, MHz FSK Pedestal M&C<br />
Connectors:<br />
TX / RX IF<br />
SMA Connector<br />
Rotary Joint<br />
SMA Connector<br />
<strong>TVRO</strong> option<br />
Type F<br />
DC / Ped M&C<br />
9 pin D-Sub Connector<br />
8-2
<strong>9497B</strong>-20 <strong>Ku</strong>-<strong>Band</strong> <strong>TVRO</strong> <strong>9497B</strong>-20 Technical Specifications<br />
8.6. 144” Radome Assembly<br />
Type<br />
Rigid dome<br />
Material<br />
Composite foam/fiberglass<br />
Size<br />
144" Diameter x 142" High<br />
Base Hatch size<br />
18" high x 34" wide<br />
Side Door<br />
18” wide x 36” high<br />
Number of panels<br />
Twelve panels (6 upper & 6 lower panels), one top cap and one base<br />
pan<br />
Installed height:<br />
164" including base frame if mounted with standard Legs, 148” if<br />
Flush-mounted<br />
Installed weight<br />
MAX 1800 LBS (including <strong>Antenna</strong> Pedestal Assembly)<br />
RF attenuation<br />
1.5 dB @ 6 GHz, dry<br />
1.5 dB @ 12 GHz, dry<br />
1.5 dB @ 14 GHz, dry<br />
Wind:<br />
Withstand relative average winds up to 100 MPH from any<br />
direction.<br />
Ingress Protection Rating All Sea Tel radomes have an IP rating of 56<br />
NOTE: Radome panels can absorb up to 50% moisture by weight. Soaked panels will also have<br />
higher attenuation.<br />
8.7. Environmental Conditions (ADE)<br />
Temperature: -20 degrees C to 55 degrees C.<br />
Humidity:<br />
Up to l00% @ 40 degrees C, Non-condensing.<br />
Spray:<br />
Resistant to water penetration sprayed from any direction.<br />
Icing:<br />
Survive ice loads of 4.5 pounds per square foot. Degraded RF<br />
performance will occur under icing conditions.<br />
Rain:<br />
Up to 4 inches per hour. Degraded RF performance may occur<br />
when the radome surface is wet.<br />
Wind:<br />
Withstand relative average winds up to 100 MPH from any<br />
direction.<br />
Vibration:<br />
Withstand externally imposed vibrations in all 3 axes, having<br />
displacement amplitudes as follows:<br />
Frequency Range, Hz<br />
Peak Single Amplitude<br />
4 - 10 0.100 inches (0.1G to 1.0G)<br />
10 - 15 0.030 inches (0.3G to 0.7G)<br />
15 - 25 0.016 inches (0.4G to 1.0G)<br />
25 - 33 0.009 inches (0.6G to 1.0G)<br />
Corrosion<br />
Parts are corrosion resistant or are treated to endure effects of salt<br />
air and salt spray. The equipment is specifically designed and<br />
manufactured for marine use.<br />
8-3
<strong>9497B</strong>-20 Technical Specifications <strong>9497B</strong>-20 <strong>Ku</strong>-<strong>Band</strong> <strong>TVRO</strong><br />
8.8. Cables<br />
8.8.1. <strong>Antenna</strong> Control Cable (Provided from ACU-MUX)<br />
RS-422 Pedestal Interface<br />
Type<br />
Shielded Twisted Pairs<br />
Number of wires<br />
Wire Gauge<br />
24 AWG or larger<br />
Communications Parameters: 9600 Baud, 8 bits, No parity<br />
Interface Protocol:<br />
RS-422<br />
Interface Connector:<br />
DE-9P<br />
8.8.2. <strong>Antenna</strong> L-<strong>Band</strong> <strong>TVRO</strong> IF Coax Cables (Customer Furnished)<br />
2, 4 or 6 cables are required dependant upon which feed/LNB configuration your antenna is fitted with.<br />
Due to the dB losses across the length of the RF coaxes at L-<strong>Band</strong>, Sea Tel recommends the following 75<br />
ohm coax cable types (and their equivalent conductor size) for our standard pedestal installations:<br />
Run Length Coax Type Conductor Size<br />
up to 75 ft LMR-300-75 18 AWG<br />
up to 150 ft RG-11 or LMR-400-75 14 AWG<br />
up to 200 ft LDF4-75 Heliax 10 AWG<br />
Up to 300 ft LMR-600-75 6 AWG<br />
For runs longer that 300 feet, Sea Tel recommends Single-mode Fiber Optic Cables with Fiber Optic<br />
converters.<br />
8.8.3. AC Power Cable (Pedestal & Rf Equipment)<br />
Voltage:<br />
110 or 220 volts AC (220 VAC Recommended)<br />
Pedestal Power:<br />
100 VA MAX<br />
RF Equipment Power:<br />
1500 VA MAX<br />
8.8.4. Gyro Compass Interface Cable (Customer Furnished)<br />
Type:<br />
Multi-conductor, Shielded<br />
Number of wires<br />
4 Conductors for Step-By-Step Gyro, 5 Conductors for Synchro<br />
Wire Gauge:<br />
see Multi-conductor Cables spec above<br />
Insulation:<br />
600 VAC<br />
8.8.5. Fiber Optic Transmitter (CFE Optional)<br />
Model:<br />
Ortel Model 3112A<br />
Frequency Range:<br />
950-2050 MHz<br />
Noise Figure:<br />
45 dB<br />
Impedance:<br />
75 ohm<br />
Connectors:<br />
RF<br />
Type F<br />
Fiber<br />
FC/APC "Tight Fit”<br />
8-4
<strong>9497B</strong>-20 <strong>Ku</strong>-<strong>Band</strong> <strong>TVRO</strong> Model <strong>9497B</strong>-20 Drawings<br />
9. Model <strong>9497B</strong>-20 Drawings<br />
The drawings listed below are provided as apart of this manual for use as a diagnostic reference. Spare Parts kits listings are<br />
provided as part number reference for replaceable parts and common assemblies.<br />
Drawing<br />
9.1. Model Specific Drawings<br />
Title<br />
1282271-1_A System, Model <strong>9497B</strong>-20 9-3<br />
128276-2_A System Block Diagram – Model <strong>9497B</strong>-20 9-5<br />
128265-1_A General Assembly – Model <strong>9497B</strong>-20 9-8<br />
128278_A <strong>Antenna</strong> System Schematic – Model <strong>9497B</strong>-20 9-10<br />
128269-1_A <strong>Antenna</strong> Assembly, 2.4M, Dual C/<strong>Quad</strong> <strong>Ku</strong> 9-11<br />
125425-1_B Feed Assembly, Dual C/<strong>Quad</strong> <strong>Ku</strong> 9-13<br />
111365-17_N1 144” Radome Assembly 9-15<br />
123723-1_B1 Radome Base Frame Assembly 9-17<br />
123908_B1 Installation Arrangement 9-19<br />
Drawing<br />
9.2. Series 97A & 00 General Drawings<br />
Title<br />
128545-1_A Belt Kit, xx97B/xx00B 9-21<br />
128546-1_A Motor Kit, xx97B/xx00B 9-22<br />
128547-1_A Comprehensive Spare Parts Kit, xx97B/xx00B 9-23<br />
126374_A Pedestal Harness Schematic Model xx97B/xx00B 9-24<br />
128303-1_A Base MUX Rack Panel Assembly 9-25<br />
9-1
Model <strong>9497B</strong>-20 Drawings<br />
<strong>9497B</strong>-20 <strong>Ku</strong>-<strong>Band</strong> <strong>TVRO</strong><br />
This Page Intentionally Left Blank<br />
9-2
SINGLE LEVEL MFG BILL OF MATERIAL<br />
FIND QTY PART NO REV DESCRIPTION REFERENCE DESIGNATOR<br />
1 1 EA 128265-2 A GENERAL ASS'Y, <strong>9497B</strong>-20, <strong>TVRO</strong><br />
2 1 EA 111365-17 N1 RADOME ASS'Y, 144 INCH, WHITE/SIDE A<br />
3 1 EA 123723-1 B1 RADOME BASE ASS'Y, 75 IN., STL, NO AC,<br />
4 1 EA 128273-1 A ANTENNA ASS'Y, <strong>9497B</strong>-20 <strong>TVRO</strong><br />
5 1 EA 125411-2 G DAC-2202, DVB RCVR, 9 WIRE IF (NOT SHOWN)<br />
6 1 EA 128279-1 X1 BELOW DECK KIT, 4CH, <strong>TVRO</strong> (NOT SHOWN)<br />
11 1 EA 128188-3 CUSTOMER DOC PACKET, <strong>9497B</strong>-20, TVR (NOT SHOWN)<br />
12 1 EA 122539-1 B SHIP STOWAGE KIT, XX97 (NOT SHOWN)<br />
13 1 EA 114569 D BALANCE WEIGHT KIT (NOT SHOWN)<br />
14 1 EA 124877-1 A DECAL KIT, XX97, SEATEL (126 IN/144 IN R (NOT SHOWN)<br />
SYSTEM, <strong>9497B</strong>-20, <strong>TVRO</strong><br />
PROD FAMILY EFF. DATE<br />
DRAWING NUMBER<br />
SHT 1 OF 1<br />
97 <strong>TVRO</strong> 02-Sep-08<br />
128271-1<br />
REV<br />
A
SINGLE LEVEL MFG BILL OF MATERIAL<br />
FIND QTY PART NO REV DESCRIPTION REFERENCE DESIGNATOR<br />
1 1 EA 128265-2 A GENERAL ASS'Y, <strong>9497B</strong>-20, <strong>TVRO</strong><br />
2 1 EA 111365-17 N1 RADOME ASS'Y, 144 INCH, WHITE/SIDE A<br />
3 1 EA 128273-1 A ANTENNA ASS'Y, <strong>9497B</strong>-20 <strong>TVRO</strong><br />
4 1 EA 124143-1 A1 FEED ASS'Y, KU-DISHSCAN, DUAL RX, 97<br />
5 2 EA 122386 D FILTERED LNB ASS'Y, QUAD, XX98, XX04<br />
20 1 EA 117168-1 N1 MODEM ASS'Y, PEDESTAL, 3 CH, 75 OHM<br />
21 1 EA 115708-3 H3 CIRCUIT BREAKER BOX ASS'Y, 97 220V<br />
22 1 EA 125570-4 E POWER SUPPLY ASS'Y, COSEL 150W, RH<br />
23 1 EA 127513-1 B PCU ASS'Y, XX97B, STD<br />
24 1 EA 116024-1 J2 SHIELDED POLANG RELAY ASS'Y<br />
25 3 EA 116000-1 J1 SERVO AMPLIFIER ASS'Y<br />
26 1 EA 122208-1 J LEVEL CAGE ASS'Y, 90 DEG EL RANGE, IN<br />
27 1 EA 121966-6 D1 GPS ANTENNA, RETERMINATED, 32.0 L<br />
28 1 EA 116034 F HOME SWITCH ASS'Y, SHIELDED<br />
30 1 EA 121425-3 D4 HARNESS ASS'Y, INTERFACE, 4006<br />
31 1 EA 126375-3 X2 HARNESS ASS'Y, PEDESTAL<br />
32 1 EA 121485-1 F HARNESS ASS'Y, REFLECTOR<br />
33 1 EA 125726-3 A3 HARNESS ASS'Y, BRAKE, 56 IN, XX07<br />
40 1 EA 127940-2 A POWER RING ASS'Y, 22 IN, 96 IN. CONTAC<br />
41 1 EA 124288-96 F CABLE ASS'Y, AC POWER, 96 IN<br />
50 7 EA 109391 A F BULLET<br />
51 1 EA 127968-1 A1 ROTARY JOINT, 4RF-2DC<br />
60 1 EA 128252-14 HARNESS ASS'Y, 4 CH, RG-6, F(M) TO F(M)<br />
61 1 EA 128385-60BLU X1 CABLE ASS'Y, RG-179, COAX, SMA (RA) T<br />
62 1 EA 127963-60GRN A CABLE ASS'Y, RG-179 COAX, F TO F(RA), 6<br />
63 1 EA 127963-60WHT A1 CABLE ASS'Y, RG-179 COAX, F TO F(RA), 6<br />
64 1 EA 127963-60RED A CABLE ASS'Y, RG-179 COAX, F TO F(RA), 6<br />
100 1 EA 125411-2 G DAC-2202, DVB RCVR, 9 WIRE IF<br />
101 1 EA 128279-1 X1 BELOW DECK KIT, 4CH, <strong>TVRO</strong><br />
SYSTEM BLOCK DIAGRAM, <strong>9497B</strong>-20<br />
PROD FAMILY EFF. DATE<br />
DRAWING NUMBER<br />
SHT 1 OF 2<br />
LIT 02-Sep-08<br />
128276-2<br />
REV<br />
A
SINGLE LEVEL MFG BILL OF MATERIAL<br />
FIND QTY PART NO REV DESCRIPTION REFERENCE DESIGNATOR<br />
102 1 EA 128303-1 A BASE MODEM RACK PANEL ASS'Y, 4CH T<br />
103 1 EA 116676 B2 TERMINAL MOUNTING STRIP ASS'Y, ACU<br />
105 1 EA 117168-2 N1 MODEM ASS'Y, BASE, 3 CH, 75 OHM<br />
110 1 EA 120643-25 A CABLE ASS'Y, RS232, 9-WIRE, STRAIGHT,<br />
111 1 EA 116298-1 F4 HARNESS ASS'Y, ACU TO MUX<br />
112 1 EA 119479-10 B CABLE ASS'Y, CAT5 JUMPER, 10 FT.<br />
116 1 EA 128001-8BLU A CABLE ASS'Y, RG-179 COAX, F(M) TO SMA<br />
117 1 EA 128253-6 X2 HARNESS ASS'Y, 4 CH, RG-59, F(M) TO F(<br />
118 1 EA 111115-6 B CABLE ASS'Y, F(M)-F(M), 6 FT.<br />
120 4 EA 109391 A F BULLET<br />
SYSTEM BLOCK DIAGRAM, <strong>9497B</strong>-20<br />
PROD FAMILY EFF. DATE<br />
DRAWING NUMBER<br />
SHT 2 OF 2<br />
LIT 02-Sep-08<br />
128276-2<br />
REV<br />
A
SINGLE LEVEL MFG BILL OF MATERIAL<br />
FIND QTY PART NO REV DESCRIPTION REFERENCE DESIGNATOR<br />
1 1 EA 128286-1 X1 PEDESTAL ASS'Y, 94/96/99 FOR 97B<br />
2 1 EA 128515-2 X1 POWER ASS'Y, 220V, 45 IN. SHROUD<br />
3 1 EA 128267-2 A ELECT. EQ. FRAME, XX97B-20, <strong>TVRO</strong><br />
9 1 EA 121655-1 C1 LABELS INSTALLATION<br />
10 1 EA 123530-2 B GROUND BONDING KIT, XX97 (NOT SHOWN)<br />
GENERAL ASS'Y, <strong>9497B</strong>-20, <strong>TVRO</strong><br />
PROD FAMILY EFF. DATE<br />
DRAWING NUMBER<br />
SHT 1 OF 1<br />
97 <strong>TVRO</strong> 02-Sep-08<br />
128265-2<br />
REV<br />
A
SINGLE LEVEL MFG BILL OF MATERIAL<br />
FIND QTY PART NO REV DESCRIPTION REFERENCE DESIGNATOR<br />
1 1 EA 110174-3 REFLECTOR, 2.4M, CUSTOM BACKFRAME<br />
2 4 EA 115446-2 P2 FEED STRUT ASS'Y, 45.00 IN<br />
3 1 EA 125425-1 B FEED ASS'Y, DUAL C/QUAD KU, DISHSCA<br />
5 4 EA 126433-2 A BLOCK, REFLECTOR MOUNTING<br />
6 1 EA 123331-1 B3 HARNESS ASS'Y, REFLECTOR (NOT SHOWN)<br />
7 1 EA 128254-14 X2 HARNESS ASS'Y, 6 CH, RG-6, F(M) TO F(M) (NOT SHOWN)<br />
8 10 EA 119801-019 B CABLE TIE, NYLON, 7.5 IN, NATURAL (NOT SHOWN)<br />
51 4 EA 114586-541 SCREW, HEX HD, 1/4-20 x 1-1/2, S.S.<br />
52 4 EA 114586-542 SCREW, HEX HD, 1/4-20 x 1-3/4, S.S.<br />
53 4 EA 114583-029 NUT, HEX, 1/4-20, S.S.<br />
54 12 EA 114580-029 WASHER, FLAT, 1/4, S.S.<br />
60 8 EA 114586-627 SCREW, HEX HD, 3/8-16 x 1-3/4, S.S.<br />
61 16 EA 114580-031 A WASHER, FLAT, 3/8, S.S.<br />
62 8 EA 114583-031 NUT, HEX, 3/8-16, S.S.<br />
ANTENNA ASS'Y, <strong>9497B</strong>-21 <strong>TVRO</strong><br />
PROD FAMILY EFF. DATE<br />
DRAWING NUMBER<br />
SHT 1 OF 1<br />
COMMON 02-Sep-08<br />
128269-1<br />
REV<br />
A
SINGLE LEVEL MFG BILL OF MATERIAL<br />
FIND QTY PART NO REV DESCRIPTION REFERENCE DESIGNATOR<br />
1 1 EA 124141-1 B FEED ASS'Y, BASIC KU-DISHSCAN, 96/97<br />
2 1 EA 122386 D FILTERED LNB ASS'Y, QUAD, XX98, XX04<br />
3 1 EA 113648-1 J FEED ADAPTER PLATE<br />
4 4 EA 114576-148 SCREW, FLAT HD, PHIL, 6-32 x 1/2 S.S.<br />
5 3 EA 114590-189 SCREW, SOCKET SET-CUP, 8-32 x 3/16, S.<br />
6 1 EA 120560 B FILTER, MICROWAVE<br />
7 4 EA 114593-123 SCREW, SOCKET HD, 6-32 x 7/16, S.S.<br />
8 8 EA 114581-007 WASHER, LOCK, #6, S.S.<br />
9 4 EA 114583-007 NUT, HEX, 6-32, S.S.<br />
10 8 EA 114580-008 WASHER, FLAT, #6, SMALL PATTERN, S.S.<br />
FEED ASS'Y, KU-DISHSCAN, DUAL RX, 97<br />
PROD FAMILY EFF. DATE<br />
DRAWING NUMBER<br />
SHT 1 OF 1<br />
COMMON 02-Sep-08<br />
124143-1<br />
REV<br />
A1
SINGLE LEVEL MFG BILL OF MATERIAL<br />
FIND QTY PART NO REV DESCRIPTION REFERENCE DESIGNATOR<br />
12 EA 117762-1 B SILICONE ADHESIVE, WHT RTV 122, 10.1 NOT SHOWN<br />
1 EA 110327 M HARDWARE KIT, 144 INCH RADOME NOT SHOWN<br />
1 1 EA 109119-17 F2 RADOME FAB ASS'Y, 144 INCH, WHITE/SID<br />
9 3 EA 124903-1 B1 STRAIN RELIEF ASS'Y<br />
11 0 EA 114586-538 SCREW, HEX HD, 1/4-20 x 1, S.S. INCLUDED IN HARDWARE KIT<br />
12 0 EA 114586-541 SCREW, HEX HD, 1/4-20 x 1-1/2, S.S. INCLUDED IN HARDWARE KIT<br />
14 0 EA 114625-107 WASHER, FENDER, 1/4, (1 IN OD), S.S. INCLUDED IN HARDWARE KIT<br />
17 0 EA 114583-029 NUT, HEX, 1/4-20, S.S. INCLUDED IN HARDWARE KIT<br />
28 1 EA 109783-2 WRENCH, L<br />
RADOME ASS'Y, 144 INCH, WHITE/SIDE ACCESS<br />
PROD FAMILY EFF. DATE<br />
DRAWING NUMBER<br />
SHT 1 OF 1<br />
COMMON 02-Sep-08<br />
111365-17<br />
REV<br />
N1
SINGLE LEVEL MFG BILL OF MATERIAL<br />
FIND QTY PART NO REV DESCRIPTION REFERENCE DESIGNATOR<br />
1 1 EA 123724-1 B RADOME BASE FRAME ASS'Y, 75 IN, STEE<br />
2 1 EA 123726-1 B1 RADOME BASE PAN FAB, WHITE<br />
3 1 EA 123728-2 A RADOME PAN ACCESS ASS'Y, WHITE<br />
50 6 EA 114586-540 SCREW, HEX HD, 1/4-20 x 1-1/4, S.S.<br />
52 12 EA 114580-029 WASHER, FLAT, 1/4, S.S.<br />
53 6 EA 114583-029 NUT, HEX, 1/4-20, S.S.<br />
RADOME BASE ASS'Y, 75 IN., STL, NO AC, WHT PAN<br />
PROD FAMILY EFF. DATE<br />
DRAWING NUMBER<br />
SHT 1 OF 1<br />
COMMON 02-Sep-08<br />
123723-1<br />
REV<br />
B1
NOTES: (UNLESS OTHERWISE SPECIFIED)<br />
1. APPLY ADHESIVE PER SEA TEL SPEC. 121730.<br />
REV. ECO# DATE DESCRIPTION<br />
BY<br />
A N/A 1-14-05 RELEASED TO PRODUCTION AMN<br />
A1 NONE 04-13-05 -9 ADDED AEF<br />
A2 NONE 04-29-05 -9 BASE FRAME WS STL. LG. FOOT, BASE PAN WS P/N 123726-2 MSF<br />
B 4888 05-31-05 FOR -5, -6, -8, -9 BASE PAN WAS P/N 123726-1. V.S.<br />
B1 N/A 01-24-07 ADD INTERNAL AC PAN FAB CUTOUTS ( NOT PREVOUSLY SHOWN). SL.<br />
3<br />
50<br />
52<br />
52<br />
53<br />
6X<br />
3<br />
2<br />
1<br />
HEX SCREW, 1/4-20 X 1.25<br />
FLAT WASHER<br />
FLAT WASHER<br />
NUT<br />
6 PLCS.<br />
2<br />
1<br />
EXTERNAL AC<br />
BASE PAN<br />
DASH # BASE FRAME AC OPTION COLOR BASE PAN ACCESS<br />
ASSY<br />
-1 STL. NO WHITE 123726-1 123728-2<br />
-2 AL. NO WHITE 123726-1 123728-2<br />
-3 STL. NO US NAVY GREY 123726-2 123728-3<br />
-4 STL. NO BRT GREY 123726-3 123728-4<br />
-5 STL. EXTERNAL WHITE 124458-1 123728-2<br />
-6 AL. EXTERNAL WHITE 124458-1 123728-2<br />
-7 STL. LG. FOOT NO WHITE 123726-1 123728-2<br />
-8 STL. LG. FOOT EXTERNAL WHITE 124458-1 123728-2<br />
-9 STL INTERNAL WHITE 124459-1 123728-2<br />
4<br />
TOLERANCES<br />
UNLESS OTHERWISE SPECIFIED<br />
X.X = -+ .050"<br />
X.XX = + - .020"<br />
X.XXX = +- .005"<br />
ANGLES = +- 30'<br />
3rd ANGLE<br />
PROJECTION<br />
SCALE:<br />
DATE:<br />
TITLE:<br />
MODEL:<br />
XX97<br />
1:16<br />
12-14-04<br />
INTERNAL AC (REF. ONLY)<br />
APPROVED BY:<br />
RADOME BASE ASSY, 75 IN.<br />
SHEET:<br />
DRAWN BY:<br />
DRAWING SIZE:<br />
DRAWING NUMBER<br />
SCC<br />
B<br />
REVISION<br />
1 OF 1 123723<br />
B1<br />
DOCUMENT NO. 117084 REV. C<br />
DRAWING CREATED IN SOLIDWORKS
DETAIL A<br />
SCALE: NONE<br />
FLUSH MOUNT RADOME<br />
MOUNTING HOLE PATTERN<br />
SEE DETAIL A<br />
MOUNTING HOLE PATTERN<br />
W/LEGS
ITEM DESCRIPTION<br />
NET* ITEM DESCRIPTION<br />
WEIGHT (Lb.) **<br />
WEIGHT (LB.)<br />
ITEM DESCRIPTION<br />
WEIGHT (Lb.) ***
SINGLE LEVEL MFG BILL OF MATERIAL<br />
FIND QTY PART NO REV DESCRIPTION REFERENCE DESIGNATOR<br />
1 1 EA 123907-14569 BELT, TIMING, 1/5 PITCH, 145 GROOVES, 1<br />
2 1 EA 123907-17269 A1 BELT, TIMING, 1/5 PITCH, 172 GROOVES, 1<br />
3 1 EA 116430-17525 BELT, TIMING, .080 PITCH, 175 GROOVES,<br />
BELT KIT, XX97B / XX00B<br />
PROD FAMILY EFF. DATE<br />
DRAWING NUMBER<br />
SHT 1 OF 1<br />
COMMON 30-Jun-08<br />
128545-1<br />
REV<br />
A
SINGLE LEVEL MFG BILL OF MATERIAL<br />
FIND QTY PART NO REV DESCRIPTION REFERENCE DESIGNATOR<br />
1 1 EA 127903-1 A EL MOTOR ASS'Y, WITH BRAKE, 9797B-76<br />
2 1 EA 127901-1 X4 MOTOR ASS'Y, CROSS LEVEL, 9797B-76<br />
3 1 EA 125081-2 A2 AZ TRAIN MOTOR ASS'Y, XX07, LH TERMI<br />
4 1 EA 122532-1 D2 SHIELDED LEVEL CAGE MOTOR ASS'Y, .0<br />
5 1 EA 121880-1 A1 MOTOR ASS'Y, POLANG, (PRI-FOCUS)<br />
6 1 EA 116463 D1 GEAR, SPUR, 12T<br />
7 1 EA 114590-144 SCREW, SOCKET SET-CUP, 6-32 x 1/4, S.S.<br />
8 1 EA 117319-10 C2 LOCTITE, 271 THREADLOCKER, 0.5ML<br />
MOTOR KIT, XX97B / XX00B<br />
PROD FAMILY EFF. DATE<br />
DRAWING NUMBER<br />
SHT 1 OF 1<br />
COMMON 30-Jun-08<br />
128546-1<br />
REV<br />
A
SINGLE LEVEL MFG BILL OF MATERIAL<br />
FIND QTY PART NO REV DESCRIPTION REFERENCE DESIGNATOR<br />
1 1 EA 127513-1 A PCU ASS'Y, XX97B, STD<br />
2 1 EA 117168-1 M MODEM ASS'Y, PEDESTAL, 3 CH, 75 OHM<br />
3 1 EA 117168-2 M MODEM ASS'Y, BASE, 3 CH, 75 OHM<br />
4 1 EA 122208-1 J LEVEL CAGE ASS'Y, 90 DEG EL RANGE, IN<br />
5 1 EA 116024-3 J2 SHIELDED POLANG RELAY ASS'Y<br />
6 1 EA 127602-2 X3 SERVO AMPLIFIER INSTALL, 5 AMP<br />
7 1 EA 121966-6 D1 GPS ANTENNA, RETERMINATED, 32.0 L<br />
8 1 IN 124077-4 A1 TAPE, 3M VHB #4952, SYNTHETIC ADHESI<br />
9 1 EA 115767 F3 POT ASS'Y (MECH.), POLANG<br />
10 1 EA 127946-1 X2 HYBRID POWER RING ASS'Y, 4 CH<br />
11 1 EA 128204-1 X3 RF SWITCH ASSEMBLY<br />
12 1 EA 114540 B1 LNB, C-BAND<br />
13 1 EA 122386 D FILTERED LNB ASS'Y, QUAD, XX98, XX04<br />
14 1 EA 128545-1 A BELT KIT, XX97B / XX00B<br />
15 1 EA 114789-810 TRANSPORT CONTAINER<br />
SPARE PARTS KIT, XX97B / XX00B, COMPREHENSIVE<br />
PROD FAMILY EFF. DATE<br />
DRAWING NUMBER<br />
SHT 1 OF 1<br />
COMMON 30-Jun-08<br />
128547-1<br />
REV<br />
A
SINGLE LEVEL MFG BILL OF MATERIAL<br />
FIND QTY PART NO REV DESCRIPTION REFERENCE DESIGNATOR<br />
1 1 EA 116880 F PANEL MACHINING, RACK, BASE MUX<br />
2 1 EA 117168-2 M MODEM ASS'Y, BASE, 3 CH, 75 OHM<br />
3 1 EA 118429 O BRACKET, CONNECTOR<br />
4 1 EA 128001-8BLU CABLE ASS'Y, RG-179 COAX, F(M) TO SMA<br />
5 4 EA 114178 O ADAPTER, F(F)-F(F) (BULLET), 1.0 IN L<br />
50 6 EA 114588-144 SCREW, PAN HD, PHIL, 6-32 x 1/4, S.S.<br />
51 6 EA 114580-007 WASHER, FLAT, #6, S.S.<br />
60 4 EA 119967 A NUT, HEX, PANEL, 3/8-32<br />
61 4 EA 119952-031 A1 WASHER, STAR, INTERNAL TOOTH, 3/8, S.<br />
BASE MODEM RACK PANEL ASS'Y, 4CH <strong>TVRO</strong><br />
PROD FAMILY EFF. DATE<br />
DRAWING NUMBER<br />
SHT 1 OF 1<br />
COMMON 01-Jul-08<br />
128303-1<br />
REV<br />
A
8 7 6 5 4 3 2 1<br />
REVISION HISTORY<br />
REV ECO# DATE DESCRIPTION<br />
A<br />
N/A 6-30-08 RELEASED TO PRODUCTION; WAS REV X2<br />
BY<br />
SMS<br />
D<br />
D<br />
3<br />
4<br />
2<br />
1<br />
4X 60<br />
C<br />
C<br />
B<br />
B<br />
61<br />
4X<br />
NOTES: UNLESS OTHERWISE SPECIFIED<br />
1. APPLY ADHESIVE PER SEATEL SPEC. 121730.<br />
2. TORQUE THREADED FASTENERS PER SEATEL SPEC. 122305.<br />
3 IDENTIFY PER SEA TEL SPEC. 122930, APPROX. WHERE SHOWN.<br />
A<br />
5 4X 51 50 2X<br />
3 4X 50 51<br />
UNLESS OTHERWISE SPECIFIED<br />
DIMENSIONS ARE IN INCHES.<br />
X.X = .050<br />
X.XX = .020<br />
X.XXX = .005<br />
ANGLES: .5<br />
INTERPRET TOLERANCING PER ASME Y14.5M - 1994<br />
MATERIAL:<br />
N/A<br />
FINISH:<br />
N/A<br />
3rd ANGLE<br />
PROJECTION<br />
DRAWN BY:<br />
SMS<br />
DRAWN DATE:<br />
5-20-08<br />
APPROVED BY:<br />
APPROVED DATE:<br />
SIZE SCALE:<br />
B 1:1.5<br />
FIRST USED:<br />
TITLE:<br />
Sea<br />
Tel<br />
4030 NELSON AVENUE<br />
CONCORD, CA 94520<br />
Tel. 925-798-7979 Fax. 925-798-7986<br />
BASE MODEM RACK<br />
PANEL ASS'Y, 4CH <strong>TVRO</strong><br />
DRAWING NUMBER<br />
REV<br />
128303<br />
A<br />
SHEET NUMBER<br />
1 OF 1<br />
A<br />
8<br />
7<br />
6<br />
5<br />
4<br />
3<br />
2<br />
1