Backpacker_Plus_Manual - DiscoverMyMobility.com
Backpacker_Plus_Manual - DiscoverMyMobility.com
Backpacker_Plus_Manual - DiscoverMyMobility.com

Create successful ePaper yourself
Turn your PDF publications into a flip-book with our unique Google optimized e-Paper software.
III. INSTALLATION<br />
BACKPACKER PLUS LIFT SYSTEM INSTALLATION<br />
WARNING! The <strong>Backpacker</strong> <strong>Plus</strong> Lift should be installed by an authorized service technician<br />
only.<br />
NOTE: Use only the supplied hardware to install the <strong>Backpacker</strong> <strong>Plus</strong> Lift System.<br />
Follow these steps to install the <strong>Backpacker</strong> <strong>Plus</strong>:<br />
1. Remove the rear seat from the vehicle according to the vehicle manufacturer’s removal instructions.<br />
2. Route the <strong>Backpacker</strong> <strong>Plus</strong> wiring harness through the vehicle. See “Wiring Harness Installation.”<br />
WARNING! Route the wiring harness through the vehicle rather than under the vehicle to<br />
avoid <strong>com</strong>ing in contact with sharp edges, extreme temperatures, moving parts, and<br />
roadway debris. Power shorts may occur if wires <strong>com</strong>e in contact with hot exhaust parts<br />
or sharp edges.<br />
WARNING! Never attach the wiring harness to a secondary power source. Do not attempt<br />
to use trailer wiring to power the lift system. The wiring harness must be connected directly<br />
to the vehicle’s battery.<br />
NOTE: If your lift is equipped with an optional onboard battery, refer to “Onboard Battery Installation.”<br />
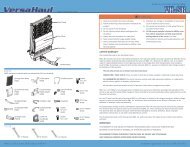
3. Position a securement system floor plate over each set of floor locks that hold the rear seat to the floor of the<br />
vehicle. See figure1.<br />
NOTE: Securement systems vary depending on<br />
vehicle manufacturer. While these instructions<br />
describe basic installation for most vehicles,<br />
your securement system may require separate<br />
parts based on the make of your vehicle. Refer<br />
to the installation instructions supplied with<br />
your securement system or contact your authorized<br />
Pride Provider for more information.<br />
FLOOR PLATE<br />
MID-RISER BAR<br />
4. Secure each floor plate to the floor of the vehicle<br />
using the supplied mounting hardware. See figure1.<br />
Do not fully tighten the mounting hardware at this<br />
time.<br />
5. Position the mid-riser bar over the floor plate<br />
closest to the rear of the vehicle, aligning the<br />
mounting holes in the mid-riser bar with those in<br />
the floor plate. See figure 1.<br />
6. Connect the <strong>Backpacker</strong> <strong>Plus</strong> wiring harness to<br />
the hand control.<br />
7. Place the <strong>Backpacker</strong> <strong>Plus</strong> up on blocks, so that<br />
there is at least 1 ft. (0.3 meter) of clearance under<br />
the frame.<br />
MOUNTING HARDWARE<br />
Figure 1. Basic Securement System Installation<br />
8 www.silverstarmobility.<strong>com</strong> <strong>Backpacker</strong> <strong>Plus</strong>