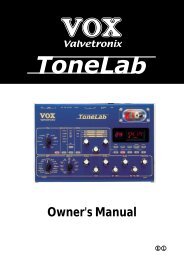
ToneLab LE's manual - Vox
ToneLab LE's manual - Vox
ToneLab LE's manual - Vox
You also want an ePaper? Increase the reach of your titles
YUMPU automatically turns print PDFs into web optimized ePapers that Google loves.
using a crunch or high gain lead sound then it makes much more sense to add effects like<br />
ROTARY, ROOM (reverb), or DELAY after it’s been distorted, rather than before.<br />
1.2 INSERT button<br />
Use this button to turn the insert effect on/off. This will be lit if the signal input/output to the<br />
external effect is ON, or dark if it is OFF. The external effect is placed before the pedal effect.<br />
1.3 CAB (CABINET) button<br />
Use this button to select a cabinet model or turn the cabinet model on and off.<br />
While this button is blinking, you can use value knob 1 to select a cabinet model.<br />
If you press the CAB button while holding down the AMP button, then you can use value<br />
knob 3 to adjust the presence, and value knob 4 to adjust the noise reduction, and value<br />
knob 6 to adjust the volume level of the programs.<br />
1.4 PEDAL selector, select button<br />
This lets you select one of the sixteen pedal effect models <strong>ToneLab</strong> LE offers. When you<br />
turn the PEDAL selector, the PEDAL select button will blink, and you can use value knobs<br />
1–6 to adjust the pedal effect parameters. (For an explanation of each effect, refer to p.34–.)<br />
As stated before, pedal effects are connected before the amp.<br />
NOTE: The parameters will be initialized when you switch effect types.<br />
1.5 AMP selector, select button<br />
This lets you select from sixteen types of classic amp models, including the legendary VOX<br />
AC30TBX. (For details, see p.27.) When you turn the AMP selector, the AMP select button<br />
will blink, and you can use value knobs 1–6 to adjust its parameters.<br />
If you press the CAB button while holding down the AMP button, you can use value knob 3<br />
to adjust presence and value knob 4 to adjust the NR (noise reduction) effect, and value<br />
knob 6 to adjust the volume level of the programs.<br />
The operating mode of the preamp and power amp, the response of the tone controls, and<br />
their placement within the circuit will change depending on the type of amp you select here,<br />
precisely replicating the exact gain and tonal character of the original amp. The all-important<br />
power amp stage (class A or AB) and negative-feedback circuit (or lack thereof) are also<br />
carefully simulated.<br />
1.6 MODULATION selector, select button<br />
This selects one of eleven modulation effect models. When you turn the MODULATION<br />
selector, the MODULATION select button will blink, and you can use value knobs 1–6 to<br />
adjust the parameters of the modulation effect. (For details on each effect, refer to p.37–.)<br />
NOTE: The parameters will be initialized when you switch effect types.<br />
1.7 DELAY selector, select button<br />
This selects one of eleven delay effect models. When you turn the DELAY selector, the<br />
DELAY select button will blink, and you can use value knobs 1–6 to adjust the parameters of<br />
the delay effect. (For details on each effect, refer to p.41–.)<br />
NOTE: The parameters will be initialized when you switch effect types.<br />
1.8 REVERB selector, select button<br />
This selects one of eleven reverb effect models. When you turn the REVERB selector, the<br />
REVERB select button will blink, and you can use value knobs 1–6 to adjust the parameters<br />
of the reverb effect. (For details on each effect, refer to p.44–.)<br />
NOTE: The parameters will be initialized when you switch effect types.<br />
Introduction<br />
Panel Tour<br />
Setup<br />
Playing<br />
Creating<br />
and Storing<br />
13


