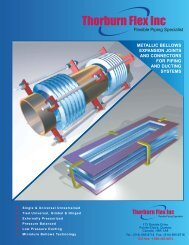
Fittings & Adapters - Thorburn Flex Inc
Fittings & Adapters - Thorburn Flex Inc
Fittings & Adapters - Thorburn Flex Inc

You also want an ePaper? Increase the reach of your titles
YUMPU automatically turns print PDFs into web optimized ePapers that Google loves.
Precision Machined 37° Flare Tube<br />
<strong>Fittings</strong> and Hose <strong>Adapters</strong><br />
ASSEMBLY INSTRUCTIONS FOR THORBURN 37° FLARE TUBE<br />
STAINLESS STEEL AND CARBON STEEL FITTINGS<br />
RECOMMENDED TUBING<br />
Use fully annealed type 304 or 316 stainless steel seamless or welded tubing suitable for bending or flaring.<br />
PREPARATION<br />
• Cut tube to length using fine blade hacksaw or abrasive saw. Do not use a tube cutter because it may work harden tubing as it cuts and<br />
cause flares to split. Be sure each cut is square.<br />
• Remove burrs with deburring tool, fine file or emery paper. Clean tubing to be sure it is free of dirt, grit, metal filings and other foreign<br />
material that might scratch or mar the flare. Chips, burrs or filings not removed before flaring can be pressed into the tube during<br />
flaring, causing pock marks, scratches, draw marks, and other surface irregularities on tube surface. These defects make a tight<br />
seal uncertain and can cause split flares. Flare will have to be cut off and tube reflared.<br />
• Place nut and then sleeve on tube with open threaded end of nut and larger tapered opening of sleeve toward the end of the tube.<br />
FLARING<br />
• Flare tube end to 37° using a block and pin flaring tool or power flaring equipment (see photos 1, 2, 3).<br />
1- Flaring tool in position. 2- Flare being created. 3- Completed flare 4- Inspect flare before<br />
Installing<br />
• Inspect flare to be certain flare dimensions (see drawings and chart this page) are correct and flare is not split or cracked (see<br />
photo 4). To seat properly, flare must be perfectly smooth, free of any scratches or surface imperfections of any kind, and square<br />
and concentric with fitting sleeve (i.e., amount of flare must be equal all around tube and not cocked or uneven). If tubes flared<br />
too short, full clamping area of the fitting is not utilized, resulting in flare being squeezed thin by pressure on the smaller area;<br />
joints may fail because of leakage, breaks at flare or pullout strains. Tubes flared too long may stick and jam on the nut’s threads<br />
when assembling the fitting.<br />
Maximum Flare<br />
Minimum Flare<br />
Tube A B W<br />
OD Radius Wall<br />
inches Maximum Minimum ±0.02 Maximum<br />
<br />
<br />
<br />
<br />
<br />
<br />
<br />
<br />
<br />
<br />
<br />
<br />
<br />
<br />
<br />
<br />
<br />
<br />
<br />
<br />
<br />
<br />
14