Uniden TRU346 2.4 GHz Cordless Phone with Caller ID/Call Waiting
Uniden TRU346 2.4 GHz Cordless Phone with Caller ID/Call Waiting
Uniden TRU346 2.4 GHz Cordless Phone with Caller ID/Call Waiting

You also want an ePaper? Increase the reach of your titles
YUMPU automatically turns print PDFs into web optimized ePapers that Google loves.
<strong>2.4</strong><strong>GHz</strong> Owners Manual <strong>TRU346</strong> 8/9/00 12:42 Page 2<br />
OWNER’S MANUAL<br />
<strong>TRU346</strong>
<strong>TRU346</strong> 8/9/00 12:35 Page 2<br />
W elcome / Features inside front cover<br />
Controls and Functions 2, 3<br />
Getting Started<br />
Read this first 4<br />
Step 1: Checking the package contents 5<br />
Step 2: Setting up the base unit 6<br />
Step 3: Preparing the battery pack 9<br />
Adjusting the ringer and earpiece volume 11<br />
Basics<br />
Making a call 12<br />
Receiving a call 14<br />
Redialing a call 15<br />
Traveling out-of-range 16<br />
Telephone Features<br />
Memory dialing<br />
Storing phone numbers and names 17<br />
Making calls <strong>with</strong> memory dialing 19<br />
Chain dialing 20<br />
Editing a stored name and/or<br />
phone number 21<br />
Contents<br />
Erasing a stored name and phone number 24<br />
Paging 25<br />
<strong><strong>Call</strong>er</strong> <strong>ID</strong> Features<br />
<strong><strong>Call</strong>er</strong> <strong>ID</strong> 26<br />
When the telephone rings 28<br />
Viewing the <strong><strong>Call</strong>er</strong> <strong>ID</strong> Message list 29<br />
Deleting information from the <strong><strong>Call</strong>er</strong> <strong>ID</strong> list 30<br />
Using the <strong><strong>Call</strong>er</strong> <strong>ID</strong> list 32<br />
Using “<strong><strong>Call</strong>er</strong> <strong>ID</strong> on call waiting“ service 34<br />
<strong>Call</strong> <strong>Waiting</strong> features 35<br />
Additional Information<br />
Changing the digital security code 36<br />
Beltclip installation 37<br />
Headset installation 37<br />
Note on power sources 38<br />
Maintenance 38<br />
Troubleshooting 39<br />
General Information 41<br />
Index 42
<strong>TRU346</strong> 8/9/00 12:35 Page 1<br />
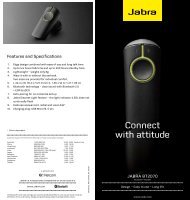
W elcome<br />
Features<br />
Congratulations on your purchase of the TRU 346 cordless telephone. This phone is<br />
designed for reliability, long life, and outstanding performance utilizing the latest in<br />
<strong>2.4</strong> <strong>GHz</strong> Spread Spectrum technology.<br />
Note:<br />
Some illustrations in this manual may differ from the actual unit for<br />
explanation purposes.<br />
• <strong>2.4</strong> <strong>GHz</strong> Spread Spectrum Technology<br />
• <strong><strong>Call</strong>er</strong> <strong>ID</strong> and <strong>Call</strong> <strong>Waiting</strong> <strong><strong>Call</strong>er</strong> <strong>ID</strong><br />
• 50 Number <strong><strong>Call</strong>er</strong> <strong>ID</strong> Memory<br />
• Advanced <strong><strong>Call</strong>er</strong> <strong>ID</strong> <strong>with</strong> <strong>Call</strong> <strong>Waiting</strong> Options<br />
• Lighted Keypad<br />
• 3-Line, 16 Character Backlit Handset Display<br />
• 20 Enhanced Memory Dial Locations<br />
• 32 Digit Redial<br />
• 3 Redial Memories<br />
• Flash<br />
• Pause<br />
• Pulse/Tone Dialing<br />
• Page/Find<br />
• 10 Day Standby Battery Life<br />
• 6 Hour Talk Time<br />
• Handset Earpiece and<br />
Ringer Volume Control<br />
• Hearing Aid Compatible<br />
Digital Spread Spectrum Technology utilizes a “wider frequency band“ vs. a “single<br />
narrow band“ used in standard digital transmissions. The <strong>2.4</strong> <strong>GHz</strong> frequency range was<br />
recently released to commercial communications. The result is a more secure conversation<br />
<strong>with</strong> the clarity of digital sound, extended range, and minimal interference from other<br />
cordless phones.<br />
Random Code TM digital security automatically selects one of approx. 65,000 codes for the<br />
handset and base.<br />
These features enhance your phone´s security and also prevent unauthorized calls as a<br />
result of your phone being activated by other equipment.<br />
<strong>Uniden</strong> ® is a registered trademark of <strong>Uniden</strong> America Corporation.<br />
Random Code and AutoTalk are trademarks of <strong>Uniden</strong> America Corporation.
<strong>TRU346</strong> 8/9/00 12:35 Page 2<br />
Controls and Functions<br />
1. Handset antenna<br />
2. Headset jack cover<br />
3. Handset battery compartment<br />
4. Handset earpiece<br />
5. LCD display<br />
6. Memory key<br />
7. Talk key<br />
8. Volume/Cursor down key<br />
9. */tone key<br />
10. Redial/Pause key<br />
11. Options key<br />
12. Handset microphone<br />
13. Volume/Cursor up key<br />
14. Flash key<br />
15. <strong><strong>Call</strong>er</strong> <strong>ID</strong> key<br />
16. # key<br />
17. Delete key<br />
18. Select/Channel key<br />
19. Handset charging contacts<br />
[2 ]<br />
CONTROLS AND FUNCTIONS
<strong>TRU346</strong> 8/9/00 12:36 Page 3<br />
20. Pulse-Tone switch<br />
21. DC power input<br />
22. <strong>Phone</strong> jack<br />
23. Base charging contacts<br />
24. Base antenna<br />
25. Status LED<br />
26. Page key<br />
CONTROLS AND FUNCTIONS [3]
<strong>TRU346</strong> 8/9/00 12:36 Page 4<br />
Read This First<br />
This cordless telephone must be set up before use. Follow these steps;<br />
Step 1 (page 5)<br />
Unpack and check the telephone<br />
and accessories.<br />
Step 2 (page 6 to 8)<br />
Next, choose the best location<br />
to set up the base unit.<br />
Step 3 (page 9 to 10)<br />
Then, insert the battery pack into<br />
the handset. You must charge the<br />
battery pack for 15 hours before<br />
using the phone.<br />
Base<br />
Handset<br />
About the digital security code<br />
This cordless telephone uses a digital<br />
security code to prevent unauthorized<br />
access to your base unit. This security<br />
code prevents other cordless handsets<br />
from making calls through your base unit.<br />
A random security code will be assigned<br />
automatically between your base unit and<br />
handset when you charge the battery pack<br />
for the first time.<br />
If you want to reset the security code,<br />
see page 36.<br />
[4 ]<br />
GETTING STARTED
<strong>TRU346</strong> 8/9/00 12:36 Page 5<br />
Checking the Package Contents<br />
Make sure you have received the following items in the package.<br />
GETTING STARTED<br />
• Rechargeable battery<br />
• AC adapter<br />
• Base unit<br />
• Handset<br />
• This Owner´s Manual<br />
• Precautions and Important Safety Instructions<br />
• Quick Reference Guide<br />
• Registration Card<br />
• Beltclip<br />
• Telephone cord<br />
<strong>Uniden</strong> Parts Department<br />
(800) 554-3988<br />
Hours: M-F 7:00 AM to 5:00 PM CST.<br />
We can also be reached on the web at www.uniden.com<br />
GETTING STARTED [5]
<strong>TRU346</strong> 8/9/00 12:36 Page 6<br />
Setting up the Base Unit<br />
Do the following steps.<br />
• Choose the best location<br />
• Connect the base unit<br />
• Choose the dialing mode<br />
Choose the best location<br />
Before choosing a location for your new phone, read the INSTALLATION<br />
CONS<strong>ID</strong>ERATIONS included in the PRECAUTIONS AND IMPORTANT SAFETY<br />
INSTRUCTIONS brochure. Here are some important guidelines you should consider:<br />
Avoid heat sources, such as<br />
radiators, air ducts, and sunlight<br />
Avoid television sets and<br />
other electronic equipment<br />
Avoid noise sources such as a window<br />
by a street <strong>with</strong> heavy traffic<br />
Avoid microwave ovens<br />
Avoid excessive moisture,<br />
extremely low temperatures,<br />
dust, mechanical vibration, or shock<br />
Choose a central location<br />
Avoid personal computers<br />
Avoid other cordless telephones<br />
[6 ]<br />
GETTING STARTED
<strong>TRU346</strong> 8/9/00 12:36 Page 7<br />
• After installing the battery pack in the handset, charge your handset at<br />
least 15 hours before using the phone. Once the handset battery pack is<br />
fully charged, connect the telephone line cord to the base and telephone<br />
wall outlet.<br />
• The location should be close to both a phone jack and a continuous power<br />
outlet which is not switchable.<br />
• Keep the base and handset away from sources of electrical noise such as<br />
motors and fluorescent lighting.<br />
• Be sure there is sufficient space to raise the base antenna to a<br />
vertical position.<br />
Connect the base unit<br />
Place the power cord so it<br />
does not create a trip<br />
hazard or where it could<br />
become chafed and<br />
create a fire or<br />
electrical hazard.<br />
GETTING STARTED<br />
1 Connect the telephone line cord<br />
to the TEL LINE jack and to a<br />
telephone outlet.<br />
2 Connect the AC adapter to the<br />
DC IN 9V jack and to a standard<br />
120V AC wall outlet.<br />
3 Set the base unit on a desk or tabletop and place the<br />
handset on the base unit as shown.<br />
Then raise the antenna to a vertical position.<br />
GETTING STARTED [7]
<strong>TRU346</strong> 8/9/00 12:36 Page 8<br />
Use only the supplied AD-311 AC adapter. Do not use any other<br />
AC adapter.<br />
Connect the AC adapter to a continuous power supply.<br />
Place the base unit close to the AC outlet so that you can unplug the<br />
AC adapter easily.<br />
If your telephone outlet isn´t modular,<br />
contact your telephone company for assistance.<br />
Modular<br />
Choose the dialing mode<br />
Depending on your dialing system,<br />
set the PULSE-TONE switch as follows:<br />
If your dialing system is<br />
Tone<br />
Pulse<br />
Set the switch to<br />
TONE<br />
PULSE<br />
If you aren´t sure of your dialing system<br />
Make a trial call <strong>with</strong> the PULSE-TONE switch set to TONE.<br />
If the call connects, leave the switch as is; otherwise, set to PULSE.<br />
[8 ]<br />
GETTING STARTED
<strong>TRU346</strong> 8/9/00 12:36 Page 9<br />
Preparing the Battery Pack<br />
Charge the battery pack for at least 15 hours before you start using your phone.<br />
1 Press in on the battery cover release and slide the<br />
cover down until it comes off.<br />
2 Connect the battery pack connector <strong>with</strong> the correct<br />
polarity (black and red wires), then insert the<br />
battery pack into the battery compartment.<br />
GETTING STARTED<br />
3 Securely close the battery compartment cover by<br />
sliding it up until it snaps into place.<br />
4 Place the handset on the base as shown.<br />
5 Make sure that the status LED lights. If the LED doesn´t<br />
light, check to see that the AC adapter is plugged in<br />
and that the handset makes good contact <strong>with</strong> the base<br />
charging contacts.<br />
4, 5<br />
Use only the <strong>Uniden</strong> Battery (BT-905) supplied<br />
<strong>with</strong> your phone. Replacement batteries are also<br />
available through the <strong>Uniden</strong> Parts Department.<br />
(see page 5)<br />
status LED<br />
GETTING STARTED [9]
<strong>TRU346</strong> 8/9/00 12:36 Page 10<br />
• Even when the battery<br />
pack is not being used,<br />
it will gradually<br />
discharge over a long<br />
period of time.<br />
For optimum<br />
performance, be sure<br />
to return the handset<br />
to the base unit after a<br />
telephone call for<br />
charging the battery.<br />
• The redial memory<br />
numbers backup for up<br />
to 2 minutes while you<br />
replace the battery pack.<br />
• If you must replace<br />
the battery pack<br />
during a telephone<br />
call, complete the<br />
replacement of the<br />
battery pack <strong>with</strong>in<br />
30 seconds, and you<br />
can return to the<br />
original call.<br />
Battery use time (per charge)<br />
From fully charged<br />
• Six hours continuous use.<br />
• Ten days when the handset is in the standby mode.<br />
When the battery charge becomes low<br />
When the battery pack is very low and needs to be<br />
charged, the phone is programmed to eliminate functions<br />
in order to save power. If the phone is not in use, “Low<br />
Battery“ flashes and none of the keys will operate.<br />
If the phone is in use, “Low Battery“ flashes and the handset beeps.<br />
Complete your conversation as quickly as possible and return the handset to<br />
the base unit for charging.<br />
The built-in memory backup can hold numbers and names stored in<br />
the memory even if the battery pack is completely discharged.<br />
Cleaning the battery contacts<br />
To maintain a good charge, it is important to<br />
clean the battery contacts on the handset and<br />
base unit <strong>with</strong> a dry cloth or a pencil eraser<br />
about once a month.<br />
Do not use any liquids or solvents.<br />
[10 ]<br />
GETTING STARTED<br />
contacts
<strong>TRU346</strong> 8/9/00 12:36 Page 11<br />
Adjusting the Ringer and Earpiece Volume<br />
Ringer tone and volume<br />
The phone has four ringer tone and volume combinations.<br />
In the standby mode, press or on the handset repeatedly.<br />
The display shows the setting.<br />
GETTING STARTED<br />
Earpiece volume<br />
Pressing or during a call will change the earpiece volume of the<br />
handset. This setting will remain in effect after the telephone call has ended.<br />
When you press in Loud mode or press in Normal mode, the error<br />
tone sounds.<br />
GETTING STARTED [11 ]
<strong>TRU346</strong> 8/9/00 12:36 Page 12<br />
Making a <strong>Call</strong><br />
Dialing from standby<br />
• Press if you<br />
enter a wrong number<br />
in step 1. To delete all<br />
the numbers that you<br />
have entered, press<br />
and hold until<br />
the display clears.<br />
• You must press a key<br />
<strong>with</strong>in 20 seconds or<br />
the phone will return<br />
to standby.<br />
1 Enter the phone number.<br />
(Up to 32 digits.)<br />
Example: Enter 8178583300<br />
2 Press .<br />
“ Talk“ flashes on the display.<br />
Then the volume setting is displayed.<br />
Example: Volume level High<br />
3 The number is dialed.<br />
After about 5 seconds, the call-time<br />
display appears.<br />
4 To hang up, press or place the<br />
handset on the base. The call-time will<br />
be displayed for about 5 seconds.<br />
[12 ]<br />
BASICS
<strong>TRU346</strong> 8/9/00 12:36 Page 13<br />
Other Operations<br />
To<br />
Do this<br />
To adjust the earpiece volume Press or during a call.<br />
To temporarily switch to tone dial Press . The following numbers<br />
(When the base is set to pulse mode) will be sent as tone dialing.<br />
To enter a pause <strong>with</strong>in the Press . “P“ appears in the display<br />
dialing sequence<br />
which represents a pause.<br />
To improve the reception Press during a call.<br />
“ Scanning“ appears on the display.<br />
If the operation fails, the error tone sounds.<br />
Dialing from talk mode<br />
1 Press .<br />
“ Talk“ flashes on the display.<br />
Then the volume setting is displayed.<br />
Example: Volume level High<br />
BASICS<br />
2 Dial the phone number.<br />
Example: Enter 8178583300<br />
3 To hang up, press or place the<br />
handset on the base. The call-time will<br />
be displayed for about 5 seconds.<br />
BASICS [13 ]
<strong>TRU346</strong> 8/9/00 12:36 Page 14<br />
Receiving a <strong>Call</strong><br />
From the handset<br />
1 The phone rings. “ Incoming call“<br />
appears on the display.<br />
2 Press . “Talk“ and volume setting<br />
appear on the display.<br />
3 Talk <strong>with</strong> the caller.<br />
4 To hang up, press or place the<br />
handset on the base.<br />
The call time will be displayed for about<br />
5 seconds.<br />
AutoTalk when ringing<br />
When the AutoTalk setting is on and there is an incoming call, simply lift the<br />
handset from the base unit to answer the phone. See “Setting <strong><strong>Call</strong>er</strong> <strong>ID</strong><br />
options“ on page 26 for more details.<br />
Any key answer when ringing<br />
When the AutoTalk setting is on and the handset is off the base, press any<br />
handset key to answer the incoming call.<br />
<strong>Call</strong> <strong>Waiting</strong><br />
Note: You must subscribe to <strong>Call</strong> <strong>Waiting</strong> service to use this feature.<br />
When a call is received during a telephone call already in progress, press<br />
to switch to the new call. If you also subscribe to <strong>Call</strong> <strong>Waiting</strong> on <strong><strong>Call</strong>er</strong> <strong>ID</strong>,<br />
you will see the name and number of the caller in call waiting. (See page 34.)<br />
[14 ]<br />
BASICS
<strong>TRU346</strong> 8/9/00 12:36 Page 15<br />
Redialing a <strong>Call</strong><br />
The last three phone numbers dialed can be quickly redialed.<br />
Redial from standby<br />
1 Press .<br />
The phone number that was last dialed appears<br />
on the display.<br />
2 Press again.<br />
Each press of<br />
numbers dialed.<br />
Most<br />
recent<br />
will display one of the last three<br />
• If the number exceeds<br />
32 digits, only the<br />
first 32 digits are<br />
retained for redialing.<br />
• Press and hold<br />
to delete the displayed<br />
redial number.<br />
BASICS<br />
3 Press . The number will be dialed.<br />
BASICS [15 ]
<strong>TRU346</strong> 8/9/00 12:36 Page 16<br />
Redial from talk mode<br />
1 Press .<br />
“ Talk“ and the volume setting appear<br />
on the display.<br />
2 Press .<br />
The last number dialed will be displayed<br />
and redialed.<br />
3 To hang up, press or place the<br />
handset on the base. The call-time will<br />
be displayed for about 5 seconds.<br />
Only the last number dialed can be<br />
accessed after has been pressed.<br />
Traveling Out-of-Range<br />
During a call, as you begin to move your handset too far from your base unit,<br />
noise increases. If you pass the range limits of the base unit, your call will<br />
terminate <strong>with</strong>in 30 seconds.<br />
[16 ]<br />
BASICS
<strong>TRU346</strong> 8/9/00 12:36 Page 17<br />
Storing <strong>Phone</strong> Numbers and Names<br />
Memory Dialing allows you to dial a number using just a few key strokes. You<br />
can store up to 20 phone numbers in the memory.<br />
1 Press and hold until “Memory<br />
Store“ is displayed.<br />
2 Press and or enter a two-digit<br />
number (01 - 20) to select the memory<br />
location where you would like to store<br />
the number.<br />
3 Press .<br />
The following screen appears and a cursor<br />
flashes indicating that the display is<br />
ready for the name to be entered.<br />
If this screen appears, the selected<br />
memory location is already stored. Then,<br />
you must either change the entry in this<br />
location, clear the location, or select<br />
“ Go Back“ to choose another location.<br />
4 Use , , or to enter the name.<br />
The name cannot exceed 13 characters.<br />
• Use and to scroll through the character menu.<br />
It contains upper and lower case letters and<br />
various characters.<br />
• Use and to move the cursor to the<br />
desired location.<br />
• Use to delete characters as needed.<br />
TELEPHONE FEATURES [17 ]<br />
TELEPHONE FEATURES
<strong>TRU346</strong> 8/9/00 12:36 Page 18<br />
5 Press .<br />
“ Store Number“ is displayed. The cursor flashes<br />
indicating that the display is ready for the number to<br />
be entered.<br />
6 Use the number keypad to enter the phone number.<br />
The phone number cannot exceed 20 digits.<br />
• Use to enter a pause in the dialing sequence. The<br />
display shows a “P“. Each pause counts as one digit and<br />
represents a two second delay in time between digits.<br />
The pause feature is useful for long distance calling,<br />
credit card dialing, or sequences that require a pause<br />
between digits.<br />
• Use<br />
to delete digits as needed.<br />
7 Press .<br />
The handset beeps and displays the confirmation screen.<br />
Memory storage is complete.<br />
For example, if you store a name and number into memory<br />
location number 07, the display shows “Memory07<br />
Stored“.<br />
After about 2 seconds, “Memory Store“ is displayed.<br />
8 Press to return to standby mode.<br />
[18 ]<br />
TELEPHONE FEATURES
<strong>TRU346</strong> 8/9/00 12:36 Page 19<br />
Making <strong>Call</strong>s <strong>with</strong> Memory Dialing<br />
Memory dialing from standby<br />
Display a Programmed Number<br />
1 Press .<br />
The handset displays your programmed<br />
memory locations.<br />
2 Press and or enter a two-digit<br />
number (01 - 20) to select the memory<br />
location you would like to dial.<br />
3 Press . “Talk“ and the volume<br />
setting appear on the display.<br />
Then the displayed number is dialed.<br />
Use and to toggle between the<br />
names display and the numbers display.<br />
Program name<br />
Program number<br />
When the stored phone number<br />
has 14 or more digits, “\“ is<br />
displayed next to the 12th digit.<br />
Press to see the extra digits<br />
and to return.<br />
• If you press<br />
before<br />
, you can confirm<br />
the name and number<br />
stored in the selected<br />
memory location.<br />
To exit this mode,<br />
press and hold .<br />
The handset returns<br />
to standby.<br />
• To exit the memory<br />
function <strong>with</strong>out<br />
dialing, press .<br />
The handset returns<br />
to standby.<br />
TELEPHONE FEATURES [19 ]<br />
TELEPHONE FEATURES
<strong>TRU346</strong> 8/9/00 12:36 Page 20<br />
Memory dialing from talk mode<br />
If you select a memory<br />
location that does not<br />
have a stored number,<br />
the handset will beep<br />
rapidly and the phone<br />
will not dial.<br />
1 Press .<br />
“ Talk“ and the volume setting appear<br />
on the display.<br />
2 Press .<br />
3 Enter a two-digit number (01 - 20) to<br />
select the memory location of the desired<br />
phone number.<br />
The selected phone number is displayed.<br />
Then the number is dialed.<br />
Chain Dialing<br />
On certain occasions after dialing a number, you may be requested to enter<br />
an access code, such as your account number. You can enter this number into<br />
a memory location for later use by doing the following:<br />
1 Store the access code into one of the memory locations (01-20) following<br />
the steps on page 17.<br />
2 Dial the party or service main number.<br />
3 When you need to enter the special number, press followed by the<br />
memory location (01-20).<br />
[20 ]<br />
TELEPHONE FEATURES
<strong>TRU346</strong> 8/9/00 12:37 Page 21<br />
Editing a Stored Name and/or <strong>Phone</strong> Number<br />
1 Press and hold until “Memory<br />
Store“ is displayed.<br />
2 Press and or enter a two-digit<br />
number (01 - 20) to select the memory<br />
location you would like to edit.<br />
3 Press .<br />
The following screen appears <strong>with</strong> the<br />
memory location number that you have<br />
selected in the display.<br />
4 Press or to select “Edit<br />
Memory“, then press .<br />
The following screen appears.<br />
The cursor flashes indicating that the<br />
display is ready for the name to be<br />
edited. When a name has not been<br />
stored, the cursor appears at the<br />
beginning of the second line.<br />
5 Press , , , , or to<br />
edit the name. (See page 17.) To edit only<br />
the phone number, skip this step.<br />
TELEPHONE FEATURES [21 ]<br />
TELEPHONE FEATURES
<strong>TRU346</strong> 8/9/00 12:37 Page 22<br />
6 Press .<br />
The following screens appears.<br />
The cursor flashes indicating that the<br />
display is ready for the number to<br />
be edited.<br />
7 Use the number keypad, or<br />
to edit the phone number.<br />
The phone number cannot exceed 20<br />
digits. (See page 18.)<br />
If you don´t want to change the phone<br />
number, skip this step.<br />
8 Press . The handset beeps and<br />
displays the confirmation screen. The<br />
memory storage is complete.<br />
For example, if you store a name and<br />
number into memory location number 01,<br />
the display shows<br />
“ Memory01 Stored“.<br />
After about 2 seconds, “Memory<br />
Store“ is displayed.<br />
9 Press to return to standby mode.<br />
[22 ]<br />
TELEPHONE FEATURES
<strong>TRU346</strong> 8/9/00 12:37 Page 23<br />
Display a Programmed Number<br />
Use and to toggle between the names display and the<br />
numbers display.<br />
Program name<br />
Program number<br />
• When the stored phone number has 14 or more digits, “\“ is displayed next<br />
to the 12th digit. Press to see the extra digits and to return.<br />
TELEPHONE FEATURES [23 ]<br />
TELEPHONE FEATURES
<strong>TRU346</strong> 8/9/00 12:37 Page 24<br />
Erasing a Stored Name and <strong>Phone</strong> Number<br />
1 Press and hold until “Memory<br />
Store“ is displayed.<br />
2 Press and or enter a two-digit<br />
number (01 - 20) to select the memory<br />
location you would like to edit.<br />
3 Press .<br />
The following screen appears <strong>with</strong> the<br />
memory location number that you have<br />
selected in the display<br />
4 Press to move the pointer down to the<br />
“ Delete Memory“ command line.<br />
5 Press . The following<br />
confirmation screen appears.<br />
6 Press to move the pointer to “Yes“.<br />
7 Press or .<br />
There is a confirmation tone and the<br />
entry is deleted. The following screen<br />
appears.<br />
8 After a few seconds the display returns<br />
to the “Memory Store“ screen.<br />
You may select another number to delete<br />
(return to step 2) or press to<br />
return to standby.<br />
[24 ]<br />
TELEPHONE FEATURES
<strong>TRU346</strong> 8/9/00 12:37 Page 25<br />
Paging<br />
To locate the handset<br />
1 Press on the base.<br />
2 The handset beeps for 5 seconds.<br />
The following screen appears;<br />
3 Press any key except on the<br />
handset to end the page.<br />
By holding for more<br />
than 2 seconds, the<br />
handset beeps for<br />
60 seconds.<br />
When an incoming call is received during paging, paging is canceled<br />
and the telephone is switched to the incoming call.<br />
If you press during paging, the handset will be placed in<br />
off-hook (talk) mode.<br />
TELEPHONE FEATURES [25 ]<br />
TELEPHONE FEATURES
<strong>TRU346</strong> 8/9/00 12:37 Page 26<br />
You must subscribe to<br />
<strong><strong>Call</strong>er</strong> <strong>ID</strong> on <strong>Call</strong> <strong>Waiting</strong> in<br />
order to use this feature.<br />
<strong><strong>Call</strong>er</strong> <strong>ID</strong><br />
You must subscribe to <strong><strong>Call</strong>er</strong> <strong>ID</strong> service to use this feature.<br />
When the telephone rings, the <strong><strong>Call</strong>er</strong> <strong>ID</strong> feature allows you to view the<br />
caller´s name and phone number on the display before you answer the phone.<br />
The handset displays the phone number of the incoming call, the name, time,<br />
and the number of calls. Additionally, you can dial the displayed number and<br />
store the information for memory dialing.<br />
Setting <strong><strong>Call</strong>er</strong> <strong>ID</strong> options<br />
There are three <strong><strong>Call</strong>er</strong> <strong>ID</strong> setup options available; they are AutoTalk, C<strong>ID</strong>CW<br />
(<strong><strong>Call</strong>er</strong> <strong>ID</strong> on <strong>Call</strong> <strong>Waiting</strong>), and Area Code.<br />
AutoTalk allows you to answer the phone <strong>with</strong>out pressing . If the phone<br />
rings when AutoTalk is on, simply remove the handset from the base and the<br />
phone automatically answers the call. Or, if the handset is not on the base,<br />
press any key to answer the call. If the phone rings when AutoTalk is off, you<br />
must press to answer the call.<br />
<strong><strong>Call</strong>er</strong> <strong>ID</strong> on <strong>Call</strong> <strong>Waiting</strong> (C<strong>ID</strong>CW) performs the same as regular <strong><strong>Call</strong>er</strong> <strong>ID</strong> on a<br />
call waiting number. <strong>Call</strong> <strong>Waiting</strong> options allow you to handle call waiting<br />
calls in seven different ways. (See page 35.)<br />
If you enter a 3-digit area code number in the Area Code option, your local<br />
area code does not appear in <strong><strong>Call</strong>er</strong> <strong>ID</strong> messages. When reviewing <strong><strong>Call</strong>er</strong> <strong>ID</strong><br />
messages, you will see only the local seven digit number. For calls received<br />
from outside your local area code, you will see a full 10-digit number.<br />
If your calling area requires 10-digit dialing, do not program this option.<br />
[26 ]<br />
CALLER <strong>ID</strong> FEATURES
<strong>TRU346</strong> 8/9/00 12:37 Page 27<br />
To change your <strong><strong>Call</strong>er</strong> <strong>ID</strong> options:<br />
1 Press . The following screen appears.<br />
2 Use , , or a number key (1-3) to move the pointer to the selection<br />
that you would like to change.<br />
CALLER <strong>ID</strong> FEATURES<br />
Press<br />
to toggle between “On“ and “Off“ for “Auto<br />
Talk“. For “C<strong>ID</strong>CW“, choose “On“, “Off“, or “Opt“, depending<br />
upon the type of service to which you subscribe.<br />
3 When you wish to enter Area Code, press or the number key to move<br />
the pointer to select “Area Code“. Then press<br />
and enter<br />
the 3 digits area code by using the number keypad - . After entering<br />
the area code, press .<br />
4 After you have made your selections, press and return the handset<br />
to the base.<br />
CALLER <strong>ID</strong> FEATURES [27 ]
<strong>TRU346</strong> 8/9/00 12:37 Page 28<br />
• If you answer a call<br />
before the <strong><strong>Call</strong>er</strong> <strong>ID</strong><br />
message is received<br />
(Example: before the<br />
second ring), the <strong><strong>Call</strong>er</strong><br />
<strong>ID</strong> message will<br />
not appear.<br />
When the Telephone Rings<br />
1 When the <strong><strong>Call</strong>er</strong> <strong>ID</strong> message is received, the display shows the caller´s<br />
phone number along <strong>with</strong> the date and time. The incoming call information<br />
is stored in the <strong><strong>Call</strong>er</strong> <strong>ID</strong> record.<br />
If the <strong><strong>Call</strong>er</strong> <strong>ID</strong> service includes the caller´s name, the caller´s name<br />
appears on the display (up to 15 letters).<br />
• When the call is<br />
received via a<br />
telephone company<br />
that does not offer<br />
<strong><strong>Call</strong>er</strong> <strong>ID</strong> service, the<br />
caller´s phone number<br />
and name do not<br />
appear. (This includes<br />
international calls.)<br />
Here are some typical displays;<br />
When the phone number<br />
and name data are received<br />
When a private name is received<br />
When invalid data is received<br />
When a private number is received<br />
• When the call is via a<br />
private branch<br />
exchange (PBX),<br />
the caller´s phone<br />
number and name may<br />
not appear.<br />
When an unknown name is received<br />
When an unknown number is received<br />
2 When you pick up the phone, the display changes to “Talk“. (See page 14.)<br />
Data errors appear as “ 2 2“.<br />
[28 ]<br />
CALLER <strong>ID</strong> FEATURES
<strong>TRU346</strong> 8/9/00 12:37 Page 29<br />
V iewing the <strong><strong>Call</strong>er</strong> <strong>ID</strong> Message List<br />
The <strong><strong>Call</strong>er</strong> <strong>ID</strong> list stores information for up to 50 incoming calls - even<br />
unanswered calls.<br />
1 Press .<br />
The summary screen appears.<br />
The screen shows the number of new<br />
messages and total messages.<br />
2 Press to display the latest <strong><strong>Call</strong>er</strong><br />
<strong>ID</strong> message.<br />
3 Press to see the next message, or<br />
press to see previous message.<br />
4 Press to return to standby.<br />
• In <strong><strong>Call</strong>er</strong> <strong>ID</strong> operation,<br />
if no key is pressed for<br />
more than 20 seconds,<br />
an error tone sounds<br />
and the telephone<br />
returns to the<br />
standby mode.<br />
• If a call comes in via a<br />
telephone system that<br />
does not offer <strong><strong>Call</strong>er</strong> <strong>ID</strong><br />
service, no information<br />
is stored.<br />
•“End“ appears when<br />
you have reviewed all<br />
messages in the <strong><strong>Call</strong>er</strong><br />
<strong>ID</strong> list. Press<br />
repeatedly to return to<br />
the summary screen.<br />
• Each message can be<br />
up to 15 characters for<br />
the phone number and<br />
the name.<br />
CALLER <strong>ID</strong> FEATURES<br />
CALLER <strong>ID</strong> FEATURES [29 ]
<strong>TRU346</strong> 8/9/00 12:37 Page 30<br />
Deleting Information from the <strong><strong>Call</strong>er</strong> <strong>ID</strong> List<br />
The TRU 346 stores up to 50 messages. If the phone receives the 51st<br />
message, the oldest one in the list is automatically deleted.<br />
<strong><strong>Call</strong>er</strong> <strong>ID</strong> data can also be deleted manually.<br />
If you get an incoming<br />
call or page, the deleting<br />
operation is canceled.<br />
The telephone returns to<br />
standby so you can<br />
answer the call or page.<br />
Deleting a <strong><strong>Call</strong>er</strong> <strong>ID</strong> message<br />
1 Press .<br />
Display the message to be deleted from<br />
the <strong><strong>Call</strong>er</strong> <strong>ID</strong> list by pressing or .<br />
2 Press .<br />
3 Press or to select “Yes“ or “No“ .<br />
4 Press or .<br />
When the pointer is at “ Yes“:<br />
A tone sounds and the <strong><strong>Call</strong>er</strong> <strong>ID</strong> message<br />
is deleted. The next <strong><strong>Call</strong>er</strong> <strong>ID</strong> message is<br />
then displayed.<br />
When the pointer is at “No“:<br />
The display returns to the <strong><strong>Call</strong>er</strong><br />
<strong>ID</strong> display.<br />
[30 ]<br />
CALLER <strong>ID</strong> FEATURES
<strong>TRU346</strong> 8/9/00 12:37 Page 31<br />
Deleting all <strong><strong>Call</strong>er</strong> <strong>ID</strong> names/numbers<br />
1 Press .<br />
2 Press .<br />
3 Press or to select “Yes“ or “No“ .<br />
4 Press or .<br />
When the pointer is at “ Yes“:<br />
A tone sounds and all stored <strong><strong>Call</strong>er</strong> <strong>ID</strong><br />
messages are deleted.<br />
When the pointer is at “ No“:<br />
The display returns to the<br />
summary screen.<br />
If you get an incoming<br />
call or page, the deleting<br />
operation is canceled and<br />
the telephone returns to<br />
standby so you can<br />
answer the call or page.<br />
CALLER <strong>ID</strong> FEATURES<br />
CALLER <strong>ID</strong> FEATURES [31 ]
<strong>TRU346</strong> 8/9/00 12:37 Page 32<br />
Using the <strong><strong>Call</strong>er</strong> <strong>ID</strong> List<br />
<strong>Call</strong>ing a party from the <strong><strong>Call</strong>er</strong> <strong>ID</strong> list<br />
You can place a call from the <strong><strong>Call</strong>er</strong> <strong>ID</strong> list. The TRU 346 stores up to 50 messages.<br />
• You cannot make a call<br />
from the <strong><strong>Call</strong>er</strong> <strong>ID</strong> list if<br />
your TRU 346 is<br />
connected to private<br />
branch exchange (PBX).<br />
• When a long distance<br />
call has been set, “1“<br />
appears in the display.<br />
1 Press .<br />
Select the phone number that you want<br />
to dial by pressing or .<br />
2 Press .<br />
The displayed phone number will be<br />
dialed automatically.<br />
Long Distance call and Area Code setting<br />
Pressing while the incoming call information is displayed (in step 1) will<br />
set or cancel a Long Distance call. Pressing will set or cancel the area<br />
code setting.<br />
Dial edit<br />
You can edit the phone number of <strong><strong>Call</strong>er</strong> <strong>ID</strong> data when you press<br />
after step 1.<br />
[32 ]<br />
CALLER <strong>ID</strong> FEATURES
<strong>TRU346</strong> 8/9/00 12:37 Page 33<br />
Storing <strong><strong>Call</strong>er</strong> <strong>ID</strong> messages in Memory dialing<br />
The phone number of the party on the <strong><strong>Call</strong>er</strong> <strong>ID</strong> list can be stored in<br />
memory dialing.<br />
1 Press .<br />
Select the phone number to be stored from<br />
the <strong><strong>Call</strong>er</strong> <strong>ID</strong> list by pressing or .<br />
2 Press .<br />
3 Press and or enter a two-digit<br />
number (01 - 20) to select the<br />
memory location.<br />
4 Press .<br />
A confirmation tone will sound.<br />
The number is stored in memory, and<br />
the display returns to the <strong><strong>Call</strong>er</strong> <strong>ID</strong> list.<br />
Long Distance call and Area Code setting<br />
When you need to store Long Distance call prefix “1“ and area code, edit the<br />
number at step 1. Press for Long Distance call and for area code setting.<br />
If a message has already been stored in the selected<br />
memory number location, a confirmation screen is<br />
displayed. Press to select “Yes“. Press<br />
to overwrite. The display returns to the <strong><strong>Call</strong>er</strong> <strong>ID</strong> list.<br />
• You can not store a<br />
<strong><strong>Call</strong>er</strong> <strong>ID</strong> message if no<br />
phone number appears<br />
in the message.<br />
• If there is an incoming<br />
call or page, memory<br />
storage is canceled and<br />
the telephone is set to<br />
receive the incoming<br />
call or page.<br />
CALLER <strong>ID</strong> FEATURES<br />
CALLER <strong>ID</strong> FEATURES [33 ]
<strong>TRU346</strong> 8/9/00 12:38 Page 34<br />
Using <strong><strong>Call</strong>er</strong> <strong>ID</strong> on <strong>Call</strong> <strong>Waiting</strong> Service<br />
“<strong><strong>Call</strong>er</strong> <strong>ID</strong>“ and “<strong>Call</strong> waiting“ are separate services. C<strong>ID</strong>CW (<strong><strong>Call</strong>er</strong> <strong>ID</strong> on<br />
<strong>Call</strong> <strong>Waiting</strong>) performs the same as regular <strong><strong>Call</strong>er</strong> <strong>ID</strong> on a call waiting number.<br />
You must subscribe to the “<strong><strong>Call</strong>er</strong> <strong>ID</strong> on call waiting (C<strong>ID</strong>CW) services“ before<br />
you can use the following features. The “<strong>Call</strong> waiting“ service can also be<br />
used independently. Please contact your local telephone company for details.<br />
1 When a new incoming call is received<br />
during your current telephone call, the<br />
phone number and the name of the caller<br />
are displayed.<br />
2 Press .<br />
You will be able to talk <strong>with</strong> the<br />
second caller. The first caller will be put<br />
on hold.<br />
3 To return to the first caller,<br />
press again.<br />
When C<strong>ID</strong>CW is set to Opt in the <strong><strong>Call</strong>er</strong> <strong>ID</strong> setup menu (see page 27),<br />
you can press the key after receiving a call waiting call and<br />
view a list of ways to handle the new call. Choose an option using the<br />
and keys and press to activate.<br />
[34 ]<br />
CALLER <strong>ID</strong> FEATURES
<strong>TRU346</strong> 8/9/00 12:38 Page 35<br />
<strong>Call</strong> <strong>Waiting</strong> Features<br />
Your TRU 346 gives you new options for call waiting. At the touch of a<br />
button, you can ask the caller to hold, send them to your voice mail service,<br />
or conference them into your current call. You may be required to subscribe<br />
to a voice mail service, call waiting, and call waiting options to use these<br />
features. Not all features are available in all areas. Check <strong>with</strong> your local<br />
telephone company for details.<br />
Selecting an Option<br />
CALLER <strong>ID</strong> FEATURES<br />
1 When you receive a call waiting call,<br />
press for a list of options.<br />
2 Press and keys or a number key<br />
(1-7) to select an option.<br />
3 Press .<br />
A confirmation screen will appear.<br />
You can also answer a call<br />
waiting call immediately<br />
by pressing the key.<br />
The first caller will be<br />
placed on hold. To return<br />
to the original caller,<br />
press again.<br />
Your TRU 346 is pre-programmed <strong>with</strong> seven call waiting options. You may<br />
select to ask the calling party to hold, send them a busy message, forward<br />
them to your voice mail service or conference them into the current call. You<br />
may also select to answer and drop the first caller or, at any time, choose to<br />
drop the first or drop the last caller.<br />
Check <strong>with</strong> your local telephone company for a full list of options.<br />
CALLER <strong>ID</strong> FEATURES [35 ]
<strong>TRU346</strong> 8/9/00 12:38 Page 36<br />
If the handset battery<br />
pack is completely<br />
discharged or the battery<br />
pack is removed, the<br />
digital security code will<br />
be lost. If this happens,<br />
a new security code is<br />
set automatically next<br />
time the battery pack<br />
is charged.<br />
Changing the Digital Security Code<br />
The digital security code is an identification code used to connect the<br />
handset and the base unit. Normally, setting the code is not necessary.<br />
The first time you charge your handset, the security code is automatically set.<br />
(See page 4.)<br />
In the rare situation that you suspect another cordless telephone is using the<br />
same security code, you can change the code.<br />
1 Remove the handset from the<br />
base unit. Press and hold .<br />
2 While the handset is emitting the<br />
paging sound, replace the<br />
handset on the base unit. The<br />
paging tone stops.<br />
Leave the handset on the base for<br />
more than 3 seconds. A random,<br />
new security code is set.<br />
[36 ]<br />
ADDITIONAL INFORMATION
<strong>TRU346</strong> 8/9/00 12:38 Page 37<br />
Beltclip Installation<br />
To attach the beltclip<br />
Insert the beltclip into<br />
the holes on each side<br />
of the handset.<br />
Press down until<br />
it clicks.<br />
To remove the beltclip<br />
Pull both sides of the<br />
beltclip to release the<br />
tabs from the holes.<br />
ADDITIONAL INFORMATION<br />
Headset Installation<br />
Your phone may be used <strong>with</strong> an optional headset,<br />
the <strong>Uniden</strong> HS910. To use this feature, simply plug<br />
the headset plug into the headset jack. Your phone<br />
is ready for hands-free conversation. (Headsets<br />
may be purchased by calling the <strong>Uniden</strong> Parts<br />
Department or visiting the website. See page 5)<br />
ADDITIONAL INFORMATION [37 ]
<strong>TRU346</strong> 8/9/00 12:38 Page 38<br />
Note on Power Sources<br />
Battery replacement and handling<br />
When the operating time becomes short, even after a battery<br />
is recharged, please replace the battery.<br />
With normal usage, your battery should last about one year.<br />
Please contact your place of purchase or the <strong>Uniden</strong> Parts<br />
Department for a replacement battery. (See page 5)<br />
Power Failure<br />
During the period that the power is off, you will not<br />
be able to make or receive calls <strong>with</strong> the telephone.<br />
RECYCLING NICKEL-CADMIUM BATTERIES<br />
Nickel-cadmium cells are used in the battery<br />
pack. Please take your used nickel-cadmium<br />
battery packs to a store that recycles nickelcadmium<br />
batteries.<br />
Caution<br />
• Use the specified battery pack.<br />
• Do not remove the battery from the handset to charge it.<br />
• Never throw the battery into a fire, disassemble it, or heat it.<br />
• Do not remove or damage the battery casing.<br />
Maintenance<br />
When slightly dirty<br />
Wipe <strong>with</strong> a soft, dry cloth.<br />
When very dirty<br />
Wipe <strong>with</strong> a soft cloth that has been dampened <strong>with</strong><br />
diluted, neutral detergent. Dry <strong>with</strong> a dry cloth.<br />
When the charging terminals become dirty<br />
Wipe <strong>with</strong> a dry cloth or a pencil eraser, if necessary.<br />
Caution<br />
Do not use paint thinner,<br />
benzene, alcohol, or other<br />
chemical products.<br />
Doing so may discolor the<br />
surface of the telephone and<br />
damage the finish.<br />
[38 ]<br />
ADDITIONAL INFORMATION
<strong>TRU346</strong> 8/9/00 12:38 Page 39<br />
Troubleshooting<br />
If your phone is not performing to your expectations, please try these simple steps first.<br />
Symptom<br />
Suggestion<br />
The status LED won´t light • Make sure the AC adapter is plugged into the base unit<br />
when the handset is placed and wall outlet.<br />
in the base unit.<br />
• Make sure the handset is properly seated in the base unit.<br />
• Make sure the charging contacts on the handset and<br />
base unit are clean.<br />
The audio sounds weak • Press during a call to help eliminate<br />
and/or scratchy.<br />
background noise.<br />
• Make sure that the base unit antenna is in a vertical position.<br />
• Move the handset and or base unit to a different location<br />
away from metal objects or appliances and try again.<br />
• Make sure that you are not too far from the base.<br />
Can´t make or receive calls. • Check both ends of the base unit telephone line cord.<br />
• Make sure the AC adapter is plugged into the base unit<br />
and wall outlet.<br />
• Disconnect the AC adapter for a few minutes,<br />
then reconnect it.<br />
• Reset the digital security code (See page 36).<br />
• Make sure is pressed.<br />
ADDITIONAL INFORMATION<br />
ADDITIONAL INFORMATION [39 ]
<strong>TRU346</strong> 8/9/00 12:38 Page 40<br />
Symptom<br />
The handset doesn´t ring<br />
or receive a page.<br />
Suggestion<br />
• The battery pack may be weak.<br />
Charge the battery on the base unit for more than 15 hours.<br />
• The handset may be too far away from the base unit.<br />
• Place the base unit away from appliances or metal objects.<br />
• Reset the digital security code (See page 36).<br />
The <strong><strong>Call</strong>er</strong> <strong>ID</strong> does not display. • The handset was picked up before the second ring.<br />
• The call was placed through a switch board.<br />
• <strong>Call</strong> your local telephone company to verify your <strong><strong>Call</strong>er</strong> <strong>ID</strong><br />
service is current.<br />
Severe noise interference. • Keep the handset away from microwave ovens, computers,<br />
remote control toys, wireless microphones, alarm systems,<br />
intercoms, room monitors, fluorescent lights, and<br />
electrical appliances.<br />
• Move to another location or turn off the source<br />
of interference.<br />
[40 ]<br />
ADDITIONAL INFORMATION
<strong>TRU346</strong> 8/9/00 12:38 Page 41<br />
General Information<br />
The TRU 346 complies <strong>with</strong> FCC Parts 15 and 68.<br />
Operating Temperature: -10 ºC to +50 ºC (+14ºF to +122 ºF)<br />
AC Adapter Information<br />
AC Adapter part number:<br />
Input Voltage:<br />
Output Voltage:<br />
AD-311<br />
120V AC 60Hz<br />
9V DC 210 mA<br />
Battery Information<br />
Battery part number: BT-905<br />
Capacity: 600 mAH, 3.6V<br />
Battery Use Time (per charge)<br />
From fully charged:<br />
Talk Mode duration 6 hours<br />
Standby Mode duration 10 days<br />
If the handset is left off of the base, the actual Talk mode duration will be reduced respective to<br />
the amount of time the handset is off the base.<br />
ADDITIONAL INFORMATION<br />
Recharge your phone on a regular basis about once a week by placing the handset on the base for 15<br />
hours. When the operating time becomes short, even after the battery is recharged, please replace the<br />
battery. With normal usage, the battery should last about one year.<br />
Replacement batteries may be purchased at your local <strong>Uniden</strong> dealer or by contacting the <strong>Uniden</strong> Parts<br />
Department (800) 554-3988. Hours are from 7:00 a.m. to 5:00 p.m. Central Time, Monday through Friday.<br />
We can also be reached on the web at www.uniden.com<br />
Specifications, features, and availability of optional accessories are all subject to change <strong>with</strong>out prior notice.<br />
ADDITIONAL INFORMATION [41 ]
<strong>TRU346</strong> 8/9/00 12:38 Page 42<br />
Index<br />
A<br />
Adjusting ringer and earpiece volume ............11<br />
B<br />
Battery pack<br />
Preparing and charging ............................ 9<br />
Replacement and handling ...................... 38<br />
Beltclip installation.................................. 37<br />
C<br />
<strong><strong>Call</strong>er</strong> <strong>ID</strong><br />
<strong><strong>Call</strong>er</strong> <strong>ID</strong> service ...................................... 26<br />
<strong>Call</strong> <strong>Waiting</strong>.......................................... 34<br />
Deleting .............................................. 30<br />
Setting <strong><strong>Call</strong>er</strong> <strong>ID</strong> options ........................ 26<br />
Using.................................................. 32<br />
Viewing .............................................. 29<br />
Connection .............................................. 7<br />
D<br />
Dialing mode ............................................ 8<br />
Digital security code .............................. 4,36<br />
E, F, G<br />
Earpiece volume ...................................... 11<br />
H, I, J, K, L<br />
Headset installation ................................ 37<br />
M, N, O<br />
Maintenance .......................................... 38<br />
Making a call .......................................... 12<br />
Memory dialing<br />
Making calls <strong>with</strong> memory dialing.............. 19<br />
Erasing a stored name<br />
and phone number ................................ 24<br />
Storing phone<br />
numbers and names .............................. 17<br />
P, Q<br />
Package contents ...................................... 5<br />
Paging .................................................. 25<br />
R<br />
Receiving a call ...................................... 14<br />
Redialing a call ...................................... 15<br />
Ringer tone and volume ............................ 11<br />
S<br />
Setting up the Base unit ............................ 6<br />
Setting up the Handset .............................. 9<br />
T, U, V, W, X, Y,Z<br />
Troubleshooting ...................................... 39<br />
[42 ]<br />
ADDITIONAL INFORMATION
<strong>TRU346</strong> 8/9/00 12:38 Page 43<br />
At <strong>Uniden</strong>, we´ll take care of you!<br />
If you need any assistance <strong>with</strong> this product, please call our Customer Hotline at<br />
1-800-297-1023<br />
PLEASE DO NOT RETURN THIS PRODUCT TO THE PLACE OF PURCHASE.<br />
Our <strong>Uniden</strong> representatives will be happy to help you <strong>with</strong> any matters regarding<br />
the operation of this unit, available accessories, or any other related matters.<br />
Thank you for purchasing a <strong>Uniden</strong> product.<br />
Hours: M-F 7:00 AM to 7:00 PM CST.<br />
[43 ]
<strong>TRU346</strong> 8/9/00 12:38 Page 44<br />
Memo<br />
[44 ]
<strong>TRU346</strong> 8/9/00 12:38 Page 45<br />
Memo<br />
[45 ]
<strong>2.4</strong><strong>GHz</strong> Owners Manual <strong>TRU346</strong> 8/9/00 12:42 Page 1<br />
THANK YOU FOR PURCHASING A UN<strong>ID</strong>EN CORDLESS PHONE<br />
Covered under one or more of the following U.S. patents:<br />
4,511,761 4,523,058 4,595,795 4,797,916 5,381,460 5,426,690<br />
5,434,905 5,491,745 5,533,010 5,574,727 5,650,790 5,660,269<br />
5,661,780 5,663,981 5,671,248 5,717,312 5,754,407 5,768,345<br />
5,787,356 5,838,721 5,864,619 5,893,034 5,912,968 5,915,227<br />
5,929,598 5,930,720 5,960,358 5,987,330<br />
© 2000 <strong>Uniden</strong> America Corporation, Fort Worth, TX<br />
All rights reserved.<br />
Printed in China<br />
UCZZ01716BZ