Instruction Manual - Minka Group
Instruction Manual - Minka Group
Instruction Manual - Minka Group

Create successful ePaper yourself
Turn your PDF publications into a flip-book with our unique Google optimized e-Paper software.
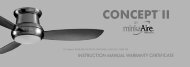
STRATA<br />
BY<br />
INSTRUCTION MANUAL WARRANTY CERTIFICATE
This product is protected by United States Federal and/or State Law, including Patent, Trademark and/or Copyright laws.<br />
<strong>Manual</strong> design and all elements of manual design are protected by U.S. Federal and/or State Law, including Patent, Trademark and/or Copyright laws.
The <strong>Minka</strong>-Aire® warranty is for one (1) year from the date of purchase from an authorized <strong>Minka</strong>-Aire® dealer.<br />
This warranty is only valid to the original purchaser or user against all defects in material and workmanship (light bulbs<br />
excluded) for one (1) full year. Additionally, <strong>Minka</strong>-Aire® warrants the motor only for the lifetime of the <strong>Minka</strong> Aire ceiling<br />
fan (excluding wall controls and electrical components), to the original purchaser or user.<br />
* The warranty is voided with the use of any non- <strong>Minka</strong>-Aire®electrical devices, E.g., wall controls or electrical dimmer switches, etc…<br />
* The warranty is void once the original purchaser or user ceases to own the fan or the fan is moved from its original point of installation.<br />
* The warranty is void with the use of any hanger bracket (non-<strong>Minka</strong> Aire or non-fan specific) other than the hanger bracket supplied & installed<br />
with this specific fan.
Warranty Service Information<br />
To obtain warranty service during the warranty period, the purchaser should return the fan with the sales receipt to the original place of<br />
purchase. The authorized <strong>Minka</strong>-Aire® dealer, at its sole discretion, will either repair or replace the fan after verifying the legitimacy of the warranty<br />
claim. Replacement is subject to availability of the same model. If the model is unavailable it will be replaced by one of equal value. This is a<br />
limited warranty; the original purchaser or user is responsible for the cost of removal and reinstallation of repaired or replacement product.<br />
To obtain the name of the <strong>Minka</strong>-Aire® authorized dealer nearest you call the <strong>Minka</strong>-Aire® customer care department at 1-800-307-3267, or<br />
contact <strong>Minka</strong>-Aire® through www.minkagroup.net and write to: “Ask Mr. <strong>Minka</strong>” to answer any questions or if you require assistance.<br />
Date Purchased Store Purchased Model Number F734 Serial Number
SAFETY RULES........................................................................................... 1<br />
PACKAGE CONTENTS............................................................................ 2<br />
INSTALLING THE FAN............................................................................ 3<br />
HANGING THE FAN................................................................................ 4<br />
ELECTRICAL CONNECTIONS.............................................................. 5<br />
FINISHING THE INSTALLATION....................................................... 6<br />
ATTACHING THE FAN BLADES.......................................................... 7<br />
INSTALLING THE MOUNTING PLATE..................................................... 8<br />
INSTALLING THE LIGHT BULB & GLASS SHADE ............................ 9<br />
OPERATING THE REMOTE CONTROL/WALL CONTROL............. 10<br />
CARE OF YOUR FAN...................................................................................... 11<br />
TROUBLESHOOTING................................................................................... 12<br />
SPECIFICATIONS............................................................................................ 13<br />
CONTENTS<br />
UR<br />
L<br />
1151 W. Bradford Court, Corona, CA 92882 For Customer Assistance Call: 1-800-307-3267<br />
LISTED<br />
E75795
1<br />
SAFETY RULES<br />
1. Before you begin installing the fan, shut power off at the circuit breaker of the fuse box.<br />
2. Be cautious! Read all instructions and safety information before installing your new fan. Review accompanying assembly diagrams.<br />
3. Make sure that all electrical connections comply with local codes, ordinances, or National Electrical Codes. Hire a qualified electrician or consult a<br />
do-it-yourself wiring handbook if you are unfamiliar with installing electrical wiring.<br />
4. Make sure the installation site you choose allows the fan blades to rotate without any obstructions. Allow a minimum clearance of 7 feet from the<br />
floor and 18 inches from the tip of the blades to the wall.<br />
5. If you are mounting the fan to a ceiling fan outlet box, use a U.L. Listed metal octagonal outlet box marked "Acceptable for Fan Support". Secure the<br />
box directly to the building structure. The outlet box and its support must be able to support the moving weight of the fan (at least 50 pounds) Do<br />
not use a plastic box.<br />
6. Caution: To reduce the risk of injury use only the screws provided with the outlet box in conjunction with the lock washers provided with the fan.<br />
7. If you are mounting the fan to a joist, make sure it is able to support the moving weight of the fan (at least 50 pounds).<br />
8. After you install the fan, make sure that all mounting components are secured to prevent the fan from falling.<br />
9. Do not insert anything into the fan blades while the fan is operating.<br />
10. Turn the fan off and wait for the blades to stop completely before performing any maintenance or cleaning.<br />
SUITABLE FOR USE IN<br />
WET LOCATIONS
ATTENTION: The Energy Policy Act of 2005 requires this fan to be equipped with a 190 watt limiting device. If lamping exceeds 190 watts, the<br />
ceiling fan's light kit will shut off automatically.<br />
NOTE: The important safeguards and instructions appearing in this manual are not meant to cover all possible conditions and situations that may<br />
occur. It must be understood that common sense, caution and care are factors which can not be built into this product. These factors must be<br />
supplied by the person (s) installing, caring for and operating the unit.<br />
NOTE: READ AND SAVE ALL INSTRUCTIONS!<br />
WARNING<br />
TO REDUCE THE RISK OF FIRE, ELECTRIC SHOCK OR OTHER PERSONAL INJURY, MOUNT FAN ONLY TO A U.L. LISTED OUTLET BOX OR SUPPORTING SYSTEM MARKED<br />
ACCEPTABLE FOR FAN SUPPORT AND USE MOUNTING SCREWS PROVIDED WITH THE OUTLET BOX IN CONJUCTION WITH THE LOCK WASHERS PROVIDED WITH THE<br />
FAN. MOST OUTLET BOXES COMMONLY USED FOR FAN SUPPORT OF LIGHTING FIXTURES ARE NOT ACCEPTABLE FOR FAN SUPPORT AND NEED TO BE REPLACED.<br />
CONSULT A QUALIFIED ELECTRICIAN IF IN DOUBT.<br />
TO REDUCE THE RISK OF PERSONAL INJURY, DO NOT BEND THE BLADE HOLDERS WHILE INSTALLING, BALANCING THE BLADES OR CLEANING THE FAN. DO NOT<br />
INSERT FOREIGN OBJECTS BETWEEN ROTATING FAN BLADES.<br />
TO REDUCE THE RISK OF FIRE OR ELECTRONIC SHOCK, THIS FAN ONLY CAN USE CFR-3T SOLID-STATE SPEED CONTROL WITH TR111A WALL CONTROL ONLY.
2<br />
PACKAGE CONTENTS<br />
Unpack your fan and check the contents.<br />
You should have the following items:<br />
1. Fan blades (4)<br />
2. Blade support plates (4 )<br />
3. Hanger bracket<br />
4. Canopy<br />
5. Canopy cover<br />
6a. Standard downrod assembly<br />
6b. Minimum-length downrod (for close to<br />
ceiling mounting only)<br />
7. Coupling cover<br />
8. Fan motor/housing assembly<br />
9. Mounting plate<br />
10. Glass Shade<br />
11. Metal light cover (for optional use)<br />
12. Receiver with 6 wire nuts<br />
13. Transmitter+holder+2 mounting<br />
screws<br />
14. Balancing kit<br />
15. 75W halogen bulb<br />
16. 12V MN21/A23 battery<br />
A. Mounting hardware:<br />
#10 x 1.5" Wood screws (2 PCs.)<br />
#8 x 3/4" Machine screws (2 PCs.)<br />
Lock washers (2 PCs.)<br />
4mm Star washers (2 PCs.)<br />
Wire nuts (3 PCs. )<br />
Washers (2 PCs.)<br />
B. Blade attachment hardware:<br />
3/16" x 15 mm Screws with lock<br />
washers (13 PCs.)<br />
C. Downrod Rubber Cover<br />
2<br />
1<br />
3 9<br />
10<br />
4<br />
5<br />
11<br />
6a<br />
12<br />
6b<br />
13<br />
7<br />
8 B<br />
14<br />
15<br />
16<br />
A<br />
C
Tools Required: Phillips screw driver; slotted screw driver; step-ladder; wire cutters; electrical tape.<br />
INSTALLING THE FAN<br />
3<br />
MOUNTING OPTIONS<br />
If there isn't an existing mounting box, then read the following instructions. Disconnect the<br />
power by removing fuses or turning off circuit breakers.<br />
CROSS BRACE<br />
CEILING<br />
JOIST<br />
OUTLET BOX<br />
PARALLEL WOOD BRACE<br />
(MIN. 2" THICK)<br />
OUTLET<br />
BOX<br />
Secure the outlet box directly to the building structure. Use appropriate fasteners and building<br />
materials. The outlet box and its support must be able to fully support the moving weight of<br />
the fan (at least 50 lbs.). Use a UL Listed metal outlet box. Do not use a plastic outlet box.<br />
CEILING<br />
jOIST<br />
FIG. 1<br />
CEILING JOIST OR<br />
CROSS BRACE<br />
FIG. 2<br />
Figure 1, 2 and 3 are examples of different ways to mount the outlet box.<br />
Note: You may need a longer downrod to maintain proper blade clearance when installing on a<br />
steep, sloped ceiling. Longer downrods are available from your <strong>Minka</strong>-Aire ® dealer.<br />
To hang your fan where there is an existing fixture but no ceiling joist, you may need to install<br />
a hanger bar as shown in Fig. 4 (available at your <strong>Minka</strong>-Aire ® dealer).<br />
ANGLED CEILING<br />
MAXIMUM 29 ANGLE<br />
RECESSED<br />
OUTLET BOX<br />
FIG. 3<br />
PROVIDE<br />
STRONG<br />
SUPPORT<br />
HANGER<br />
OPENING<br />
must be<br />
FACING<br />
UPSIDE<br />
HANGER BAR<br />
(OPTIONAL)<br />
OUTLET BOX<br />
FIG. 4<br />
CEILING<br />
JOIST<br />
HANGER<br />
BRACKET
4<br />
HANGING THE FAN<br />
WARNING: All of the parts, hardware and components such as the<br />
hanger bracket and hanger ball have been provided for your safety and<br />
the proper installation of your new ceiling fan. The use of other parts,<br />
hardware or components not supplied by <strong>Minka</strong> Aire ® with the fan will<br />
void the <strong>Minka</strong> Aire ® Warranty.<br />
REMEMBER to turn off the power. Follow the steps below to hang your<br />
fan properly:<br />
Step 1. Secure the Hanger Bracket to the ceiling outlet box using the screws<br />
provided with your outlet box in conjunction with the lock-washers<br />
provided with the fan. (Fig. 5)<br />
Step 2. Loosen the two Set Screws and remove the Hitch Pin and Lock Pin<br />
from the coupling located on the top of the Motor Assembly. (Fig. 6)<br />
Step 3. Remove the Hanger Ball from the Downrod Assembly by loosening<br />
the Set Screw and removing the Cross Pin. (Fig. 7)<br />
Step 4. Carefully feed fan wires up through the downrod. (Fig. 8) Thread<br />
Downrod into the Coupling until the holes are lined up and secure with<br />
the Lock Pin and Hitch Pin previously removed, tighten Set Screws. (Fig. 9)<br />
Step 5. Slip coupling cover, canopy cover and canopy onto downrod. (Fig.<br />
9) Carefully reinstall hanger ball onto rod being sure that cross pin is in<br />
correct position, set screws are tighten and wires are not twisted.<br />
Step 6. Place downrod rubber cover onto the hanger ball. (Fig. 9)<br />
Step 7. Lift the Motor Assembly and place the Hanger Ball into the Hanger<br />
Bracket. Rotate the Motor Assembly as needed until the check groove<br />
from the Hanger Ball rests firmly over the registration tab from the<br />
Hanger Bracket. Motor Assembly should not rotate if this is done<br />
correctly. (Fig. 10)
DOWNROD<br />
DOWNROD<br />
RUBBER COVER<br />
OUTLET BOX<br />
HITCH<br />
PIN<br />
SET SCREWS<br />
LOCK<br />
PIN<br />
HANGER<br />
BALL<br />
CROSS PIN<br />
SET SCREW<br />
DOWNROD<br />
SUPPLY<br />
WIRES<br />
COUPLING<br />
*OMIT COUPLING<br />
COVER WHEN<br />
THE MINIMUM-LENGTH<br />
DOWNROD<br />
CANOPY<br />
CANOPY<br />
COVER<br />
SET SCREWS<br />
REGISTRATION<br />
SLOT<br />
DOWNROD<br />
HANGER BRACKET<br />
Fig. 5 Fig. 6 Fig. 7 Fig. 8<br />
LOCK PIN<br />
HITCH PIN Fig. 10<br />
Fig. 9
5<br />
ELECTRICAL CONNECTIONS<br />
WARNING: To avoid possible electrical shock be sure electricity is<br />
turned off at the main fuse or breaker box before wiring.<br />
NOTE: The Aire Control® System is equipped with a learning frequency<br />
function which has 256 code combinations to prevent potential<br />
interference from other remote units. The frequency on your Receiver<br />
and Transmitter units have been preset at the factory. (Fig. 11) No<br />
frequency change is necessary, should you desire to install another fan<br />
within the same home or area with a seperate frequency code please see<br />
the "frequency interference" troubleshooting section of this instruction<br />
manual to learn how to change the frequency.<br />
Step 1. Insert Receiver into Hanger Bracket with the flat side of the<br />
Receiver facing the ceiling. (Fig. 12)<br />
Step 2. Motor to Receiver Electrical Connections: Connect the WHITE<br />
wire from the fan to the WHITE wire marked "TO MOTOR N" from the<br />
Receiver. Connect the BLACK wire from the fan to the BLACK wire<br />
marked "TO MOTOR L" from the Receiver. Connect the BLUE wire from<br />
the fan to the BLUE wire marked "For Light" from the Receiver.<br />
NOTE: If your ceiling fan features an UP Light: Connect the ORANGE wire<br />
from the fan to the ORANGE wire marked "For Up Light" from the<br />
Receiver. Otherwise disregard this step and proceed to secure all wire<br />
connections with the plastic wire nuts provided. (Fig. 13)<br />
Note: Fan must be installed from a maximum distance of 40 feet from<br />
the transmitting unit for proper signal transmission between the<br />
transmitting unit and the fan's receiving unit.
Step 3. Receiver to House Supply Wires Electrical Connections:<br />
Connect the WHITE wire (Neutral) from the outlet box to the WHITE<br />
wire marked "AC in N" from the receiver. Connect the BLACK wire<br />
(Hot) from the outlet box to the BLACK wire marked "AC in L" from<br />
the receiver. Secure all wire connections with the plastic wire nuts<br />
provided. (Fig. 13)<br />
RECEIVER<br />
Step 4. If your outlet box has a GROUND wire (Green or Bare Copper)<br />
connect this wire to the Hanger Ball and Hanger Bracket Ground<br />
wires. If your outlet box does not have a Ground Wire, then connect<br />
the Hanger Ball and Hanger Bracket Ground Wires together. Secure<br />
wire connection with the plastic wire nut provided. (Fig. 13)<br />
Fig. 11<br />
HANGER BRACKET<br />
After all splices are made, check to make sure there are no loose<br />
strands. As an additional precaution we suggest to secure the plastic<br />
wire connectors to the wires with electrical tape.<br />
Fig. 12
OUTLET BOX<br />
BLACK (HOT)<br />
BLACK ("AC IN L")<br />
WHITE (NEUTRAL)<br />
GREEN OR BARE<br />
COPPER (GROUND)<br />
WHITE ("AC IN N")<br />
RECEIVER<br />
BLACK ("TO MOTOR L")<br />
BLUE (FOR LIGHT)<br />
ORANGE<br />
(FOR UPPER LIGHT)<br />
BLUE (FOR LIGHT)<br />
BLACK (MOTOR)<br />
ORANGE<br />
(FOR UPPER LIGHT)<br />
WHITE ("TO MOTOR N")<br />
GROUND-(CONNECT TO<br />
(GREEN) GROUND WIRE ON<br />
HANGER BRACKE<br />
IF NO HOUSE<br />
GROUND WIRE<br />
EXISTS.)<br />
WHITE (NEUTRAL)<br />
Fig. 13
FINISHING THE INSTALLATION<br />
6<br />
Step 1. Remove 1 of the 2 screws from the bottom of the hanger bracket and loosen the other<br />
one half a turn from the screw head.<br />
Step 2. Slide the canopy up towards the hanger bracket and place the key hole on the canopy<br />
over the screw on the hanger bracket, turn canopy until it locks in place at the narrow section of<br />
the key holes. (Fig. 14)<br />
Step 3. Align the circular hole on canopy with the remaining hole on the hanger bracket, secure<br />
by tightening the two set screws.<br />
Note: Adjust the canopy screws as necessary until the canopy and canopy cover are snug.<br />
OUTLET BOX<br />
HANGER<br />
BRACKET<br />
HANGER<br />
BALL<br />
CANOPY<br />
Fig. 14<br />
CANOPY<br />
COVER
7 ATTACHING THE FAN BLADES<br />
Insert one fan blade into the blade slot on the motor housing and secure<br />
with the blade support plates and screws. Securely tighten screws. Repeat<br />
process with other blades. (Fig. 15)<br />
SLOT<br />
FAN BLADE<br />
BLADE SUPPORT PLATES<br />
Fig. 15<br />
SCREWS
INSTALLING THE MOUNTING PLATE<br />
Step 1. Remove 1 of 3 screws from the mounting ring and loosen the other 2 screws. (Do not<br />
remove)<br />
8<br />
Step 2. Place the key holes from the mounting plate over the 2 screws previously loosened<br />
from the mounting ring, turn mounting plate until it locks in place at the narrow section of the<br />
key holes. Secure by tightening the 2 screws previously loosened and the one previously<br />
removed. (Fig. 16)<br />
MOUNTING RING<br />
MOUNTING<br />
PLATE<br />
Fig. 16<br />
SCREWS
9<br />
INSTALLING THE LIGHT BULB & GLASS SHADE<br />
WARNING: Shut off the power supply before removing or replacing lamp. In handling of halogen<br />
bulb, care should be taken not to touch it with your bare hands. Oil residue will shorten the life of the<br />
halogen bulb. If you accidentally come into contact, wipe thoroughly with a clean, lint-free, cotton cloth.<br />
Allow the bulb to cool for 10 minutes before changing the bulb. Use light bulb in accordance with the<br />
fan's specification. DO NOT EXCEED THE MAXIMUM WATTAGE RATING.<br />
ATTENTION: The Energy Policy Act of 2005 requires this fan to be equipped with a 190 watt limiting<br />
device. If lamping exceeds 190 watts, the ceiling fan's light kit will shut off automatically.<br />
Step 1. Install 1x75W halogen bulb (included) into bulb socket.<br />
Step 2. Raise glass shade up against bottom of fan housing and secure it to the fan by turning the glass<br />
shade clockwise until snug. DO NOT OVERTIGHTEN. (Fig. 17)<br />
NOTE: The metal light cover included with your fan is an option to replace the glass for the light in the<br />
event that you prefer not to use the light feature of your fan. The metal light cover is not necessary for<br />
the light operation; it can be saved for later use if desired.<br />
Fig. 17<br />
<br />
<br />
75 W HALOGEN BULB<br />
GLASS<br />
SHADE
OPERATING THE REMOTE CONTROL/WALL CONTROL<br />
Remote Control only: Install a A23 12 volt battery (included). To prevent damage to transmitter remove the battery if not used for long periods of time.<br />
10<br />
Restore Power to Ceiling Fan.<br />
A. Buttons:<br />
These buttons are used to set the fan speeds as follows;<br />
= Low Speed<br />
= Medium Speed<br />
= High Speed<br />
B. Button:<br />
This button turns the fan off.<br />
C. Button:<br />
These buttons turn the light ON or OFF and also control<br />
the brightness settings of the light. The following<br />
instructions apply to ceiling fans that feature a DOWN<br />
light ( button) only or ceiling fans that feature an UP<br />
light ( button) and a DOWN light ( button) that are<br />
controlled independent of each other;<br />
Press and release the button for the desired light to turn<br />
the light ON or OFF. Press and hold the button to set the<br />
desired light brightness. The light will cycle between<br />
bright and dim settings as long as the button is pressed.<br />
The light key has an automatic auto-resume feature that<br />
allows the light to remain at the same brightness as the<br />
last time it was turned off.<br />
D. OFF-ON Slide Button (Wall Control Fans Only)<br />
This button turns the power Off and On to the Fan and<br />
Light(s).<br />
E. Button: (Full Function Remote Control Units Only)<br />
This button is used to change the direction of the<br />
rotation of the blades; forward for warm weather or<br />
reverse for cool weather.<br />
NOTE: If your Remote Control or Wall Control does not<br />
have a " " button, Please look for a slide reverse<br />
switch on the motor housing.
Speed settings for warm or cold weather<br />
depend on factors such as room size, ceiling<br />
height and number of fans.<br />
NOTE: wait for fan to stop before changing the<br />
setting of the slide switch.<br />
Warm Weather (forward)<br />
A DOWNWARD airflow creates a cooling effect<br />
as shown in Figure 18. This allows you to set<br />
your air conditioner on a warmer setting<br />
without affecting your comfort.<br />
Cool Weather (Reverse)<br />
An UPWARD airflow moves warmer air off the<br />
ceiling area as shown in Figure 19. This allows<br />
you to set your heating unit on a cooler setting<br />
without affecting your comfort.<br />
SUMMER OPERATION<br />
Fig 18 Fig 19<br />
WINTER OPERATION
Here are some suggestions to help maintain your fan.<br />
1. Because of the fan's natural movement some connections may become<br />
loose. Check the support connections, brackets and blade attachments<br />
twice a year. Make sure they are secure. (It is not necessary to remove<br />
fan from the ceiling).<br />
2. Clean your fan periodically to help maintain its new appearance over<br />
the year. CAUTION; many common household cleaning products contain<br />
chemicals that could damage the finish of your fan. Use only a soft lint<br />
free cloth and soapy water.<br />
3. If your fan is provided with wood veneer blades; you can apply a light<br />
coat of furniture polish for additional protection and enhanced beauty.<br />
Cover small scratches with a light application of shoe polish.<br />
CARE OF YOUR FAN<br />
4. Use a lint free lightly damp cloth or duster to remove dust from<br />
the blades.<br />
5. There is no need to oil your fan. The motor has permanently lubricated<br />
bearings.<br />
6. If your fan is provided with glass shades, clean with lukewarm soapy water<br />
and a soft cloth or sponge. DO NOT IMMERSE GLASS SHADES IN HOT WATER.<br />
DO NOT PUT GLASS SHADES INTO AN AUTOMATIC DISHWASHER.<br />
WARNING!<br />
MAKE SURE THE POWER IS OFF AT THE<br />
ELECTRICAL PANEL BOX BEFORE YOU ATTEMPT<br />
ANY REPAIRS. REFER TO THE SECTION,<br />
"ELECTRICAL CONNECTIONS".<br />
11
12 TROUBLESHOOTING<br />
SYMPTOM<br />
Fan will not start<br />
SOLUTION<br />
Check to make sure the wall switch is turned on.<br />
Check circuit fuses or breakers.<br />
Caution! Make sure the power is turned off before performing the<br />
following steps.<br />
Remove canopy and check wire connections.<br />
Check wall control transmitter connections (if applicable).<br />
Note: Fan must be installed at a maximum distance of 40 feet from<br />
the transmitting unit for proper signal transmission between the<br />
transmitting unit and the fan's receiving unit.<br />
SYMPTOM<br />
Fan Sounds Noisy<br />
SOLUTION<br />
Allow a 24-hour "break in" period. Most noises associated with a new<br />
fan will go away during this time.<br />
Make sure the screws that attach the fan blade holder to the motor<br />
hub is tight.<br />
Make sure outlet box is secured to building structure, if necessary<br />
use the wood screws provided to further secure outlet box to joist.<br />
Make sure hanger bracket is secure to the outlet box, screws are<br />
tight.
SYMPTOM<br />
Fan Wobble<br />
SOLUTION<br />
NOTE: All blade sets are grouped by weight. Because wood and<br />
plastic blades vary in density, the fan may wobble even though<br />
blades are matched.<br />
Make sure outlet box is secured to building structure, if necessary<br />
use the wood screws provided to further secure outlet box to joist.<br />
Make sure hanger bracket is secure to the outlet box, screws are<br />
tight.<br />
Use the balancing kit provided if the wobble is excessive (follow<br />
instructions included with balancing kit.)<br />
SYMPTOM<br />
Lights shut off and will not come back on.<br />
SOLUTION<br />
This unit is equipped with a wattage limiting device. Lamping in<br />
excess of 190 watts will disable your ceiling fan’s light kit. To reset<br />
your light kit you must turn the power off and re lamp, keeping the<br />
wattage under 190 watts. Restore power to your ceiling fan and<br />
continue normal operation.<br />
SYMPTOM<br />
Fans/Light Turn On and Off Unexpectedly<br />
SOLUTION<br />
This is caused by interference, Please see "Frequency interference" for<br />
steps to change the frequency.
SYMPTOM<br />
Frequency Interference<br />
SOLUTION<br />
1. Turn the power off to your ceiling fan.<br />
2. Please use a small size tool to change the frequency settings on the control system.<br />
3. Return power to the unit.<br />
Note: After the AC power is on, do not press any other button on the transmitter before pressing the "Stop" button, doing so will cause the<br />
procedure to fail.<br />
4. Within 60 seconds of turning the Fan's AC power ON. Press the transmitter's "Stop" button and hold the "Stop¡" button for 10 seconds.<br />
5. Once the receiver has detected the set frequency, the down light of your fan if applicable will blink twice. (there is no indication if your fan is not<br />
equipped with a light).<br />
6. The receiver has now learn the frequency which has been selected on the transmitter. After completing the steps above, you should be able to<br />
operate the ceiling fan and light. If the fan is not responding to the transmitter, please turn the power off to the receiver, and repeat the process.
SPECIFICATIONS<br />
13<br />
These are typical readings. Your actual fan may vary.<br />
They do not include amps and wattage used by the<br />
light(s).<br />
Fan Size<br />
52"<br />
Speed Volts Amps Watts<br />
Low<br />
Medium<br />
High<br />
120<br />
120<br />
120<br />
0.25<br />
0.35<br />
0.40<br />
14<br />
26.7<br />
47.6<br />
RPM CFM N.W. G.W. C.F.<br />
80<br />
112<br />
158<br />
2080<br />
3597.3<br />
5097.87<br />
9.63<br />
kgs<br />
11.31<br />
kgs<br />
2.15'