- Page 1:
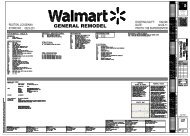
PROJECT MANUAL 1807 Ross Avenue Sui
- Page 5 and 6:
Napa Century Centter XD 12 - Napa,
- Page 7:
Napa Century Center XD 12 - Napa, C
- Page 13:
Section 15000 Section 15034 Section
- Page 16 and 17:
TABLE OF CONTENTS Page 2 DIVISION 4
- Page 19 and 20:
1.01 PROJECT NAPA CENTURY CENTER XD
- Page 21:
E. See also Section 01600 paragraph
- Page 25 and 26:
BID FORM FROM: ____________________
- Page 27 and 28:
Document 00300 Page 3 CONTRACTOR: T
- Page 29 and 30:
Document 00300 Page 5 Start plumbin
- Page 31:
BID GUARANTEE Document 00300 Page 7
- Page 35:
SECTION 00700 GENERAL CONDITIONS PA
- Page 38 and 39:
Document 00800 Page 2 “Contractor
- Page 40 and 41:
Document 00800 Page 4 3.18.1 In the
- Page 42 and 43:
Document 00800 Page 6 7.4 In the fi
- Page 44 and 45:
Document 00800 Page 8 Add Paragraph
- Page 46 and 47:
A. Workers Compensation Insurance i
- Page 48 and 49:
Document 00800 Page 12 Contractor i
- Page 50 and 51:
Document 00800 Page 14 B. Commercia
- Page 52 and 53:
Document 00800 Page 16 13.8 NO THIR
- Page 54 and 55:
Document 00800 Page 18 EXHIBIT "C'
- Page 56 and 57:
Document 00800 Page 20 EXHIBIT "C"
- Page 58 and 59:
e. Training for Contractor personne
- Page 60 and 61:
Section 01020 Page 2 1.05 ADJUSTMEN
- Page 62 and 63:
Section 01340 Page 2 F. Notify Arch
- Page 64 and 65:
Section 01340 Page 4 50. Painting 5
- Page 66 and 67:
Appendix B REGIONALLY MANUFACTURED
- Page 68 and 69:
Appendix D CERTIFIED WOOD INFORMATI
- Page 70 and 71:
PART 3 EXECUTION Section 01351 Page
- Page 72 and 73:
NAPA CENTURY CENTER XD 12 #165582 S
- Page 74 and 75:
Section 01352 Page 2 a. Identify po
- Page 76 and 77:
Section 01352 Page 4 Appendix A SAM
- Page 79 and 80:
PART 1 - GENERAL SECTION 01410 TEST
- Page 81 and 82:
PART 1 - GENERAL SECTION 01500 CONS
- Page 83 and 84:
PART 1 - GENERAL SECTION 01600 MATE
- Page 85 and 86:
Section 01600 Page 3 PROJECT: CENTU
- Page 87 and 88:
PART 1 - GENERAL 1.01 REQUIREMENTS
- Page 89:
PART 1 - GENERAL 1.01 RELATED WORK
- Page 92 and 93:
Section 01730 Page 2 1.07 MANUAL FO
- Page 94 and 95:
1.05 SUBMITTALS REQUIRED A. Submit
- Page 97 and 98:
Section 01810 Page 1 SECTION 01810
- Page 99 and 100:
Section 01811 Page 1 SECTION 01811
- Page 101 and 102:
Section 01811 Page 3 P. Perform fie
- Page 103:
END OF SECTION Section 01811 Page 5
- Page 106 and 107:
Section 02200 Page 2 G. Erect batte
- Page 108 and 109:
Section 02200 Page 4 I. Place engin
- Page 111 and 112:
SECTION 02362 TERMITE CONTROL PART
- Page 113 and 114:
SECTION 02351 CONCRETE FOOTINGS PAR
- Page 115 and 116:
SECTION 02810 PLANTING IRRIGATION P
- Page 117:
3. Micro-sprinklers. 4. Bubbler-sty
- Page 120 and 121:
NAPA CENTURY CENTER XD 12 #165582 S
- Page 122 and 123:
Section 02825 Page 4 3.06 PROTECTIO
- Page 124 and 125:
Section 02810 Page 2 4. Agenda: a.
- Page 126 and 127:
2.6 SOIL CONDITIONERS Section 02810
- Page 129 and 130:
SECTION 03100 STRUCTURAL CONCRETE F
- Page 131 and 132:
2.08. MANUFACTURED UNITS A. Round c
- Page 133 and 134:
SECTION 03200 CONCRETE REINFORCING
- Page 135: 3.02. PLACEMENT Section 03200 Page
- Page 138 and 139: Section 03250 Page 2 D. Local / Reg
- Page 141 and 142: SECTION 03300 STRUCTURAL CONCRETE P
- Page 143 and 144: PART 2 - PRODUCTS Section 03300 Pag
- Page 145 and 146: Section 03300 Page 5 D. Documentati
- Page 147 and 148: Section 03300 Page 7 mixing water a
- Page 149: Section 03300 Page 9 truck during p
- Page 152 and 153: Section 03411 Page 2 Accepted sampl
- Page 155 and 156: SECTION 03600 GROUTING STEEL BASE P
- Page 157 and 158: Section 04100 Page 1 SECTION 04100
- Page 159: Section 04100 Page 3 D. Provide mat
- Page 162 and 163: Section 04210 Page 2 d. Product Com
- Page 164 and 165: Section 04210 Page 4 B. Lay only dr
- Page 166 and 167: Section 04210 Page 6 A. Contractor
- Page 168 and 169: 2. Steel Structures Painting Manual
- Page 170 and 171: Section 05100 Page 4 C. Provide pro
- Page 172 and 173: Section 05100 Page 6 (1) In accorda
- Page 175 and 176: SECTION 05200 STEEL JOISTS PART 1 -
- Page 177: PART 3 - EXECUTION Section 05200 Pa
- Page 180 and 181: Section 05300 Page 2 product during
- Page 183 and 184: SECTION 05320 METAL FLOOR DECK PART
- Page 185: SECTION 05330 COMPOSITE METAL FLOOR
- Page 189 and 190: PART 1 - GENERAL NAPA CENTURY CENTE
- Page 191: Section 05400 Page 3 F. Protective
- Page 194 and 195: Section 05500 Page 2 I. Bilco: LU-1
- Page 197 and 198: PART 1 - GENERAL SECTION 05510 STEE
- Page 199: Section 05510 Page 3 H. Dimensions
- Page 202 and 203: Section 05520 Page 2 PART 2 - PRODU
- Page 205 and 206: PART 1 - GENERAL SECTION 05721 PRE-
- Page 207: Section 05721 Page 3 3.03 FINISHING
- Page 210 and 211: Section 05810 Page 2 1.4 QUALITY AS
- Page 212 and 213: Section 05810 Page 4 3.7 SCHEDULE A
- Page 214 and 215: Section 06100 Page 2 4. Product Com
- Page 217 and 218: PART 1 - GENERAL NAPA CENTURY CENTE
- Page 219 and 220: PART 1 - GENERAL SECTION 07110 MEMB
- Page 221: 8. If application is not complete a
- Page 224 and 225: Section 07210 Page 2 3. Black Matt
- Page 226 and 227: Section 07410 Page 2 3. Product Val
- Page 229 and 230: PART 1 - GENERAL SECTION 07420 COMP
- Page 231: Section 07420 Page 3 2.04 FABRICATI
- Page 234 and 235: Section 07535 Page 2 will be requir
- Page 236 and 237:
Section 07535 Page 4 C. The roofing
- Page 239 and 240:
Section 07610 Page 1 SECTION 07610
- Page 241 and 242:
Section 07610 Page 3 B. PANEL DESIG
- Page 243 and 244:
PART 1 - GENERAL SECTION 07620 SHEE
- Page 245 and 246:
A PART 1 - GENERAL SECTION 07920 SE
- Page 247:
D. Test adhesion to materials in th
- Page 250 and 251:
Section 08100 Page 2 PART 3 - EXECU
- Page 253 and 254:
PART 1 - GENERAL NAPA CENTURY CENTE
- Page 255:
Section 08212 Page 3 C. Accessories
- Page 258 and 259:
A. Schedule deliveries to avoid del
- Page 260 and 261:
2.03 FINISH HARDWARE SCHEDULE Furni
- Page 262 and 263:
Section 08625 Page 2 4. Interior Fl
- Page 264 and 265:
Section 08625 Page 4 years, or afte
- Page 267 and 268:
PART 1 - GENERAL 1.01 SCOPE A. Prov
- Page 269 and 270:
NAPA CENTURY CENTER XD 12 #165582 S
- Page 271:
Section 08710 Page 5 17B Storefront
- Page 274 and 275:
B. Perform glazing on dry surfaces
- Page 277 and 278:
SECTION 08920 GLAZED ALUMINUM CURTA
- Page 279 and 280:
Section 08920 Page 3 1.05 QUALITY A
- Page 281 and 282:
PART 1- GENERAL SECTION 09220 LATH
- Page 283 and 284:
O. Strip Mesh: Expanded galvanized
- Page 285 and 286:
Section 09220 Page 5 7. Do plasteri
- Page 287 and 288:
PART 1 - GENERAL SECTION 09250 GYPS
- Page 289 and 290:
Section 09250 Page 3 2. Erect studs
- Page 291 and 292:
PART 1 - GENERAL 1.01 SCOPE A. Prov
- Page 293:
Section 09310 Page 3 4. Method #4 (
- Page 296 and 297:
Section 09510 Page 2 C. Deliver mat
- Page 299 and 300:
PART 1 - GENERAL SECTION 09650 RESI
- Page 301:
Section 09650 Page 3 B. Provide 6%
- Page 304 and 305:
Section 09680 Page 2 A. Inspect the
- Page 306 and 307:
Section 09800 Page 2 A. Protect adj
- Page 308 and 309:
Section 09800 Page 4 3.04 CLEANING
- Page 310 and 311:
NAPA CENTURY CENTER XD 12 #165582 S
- Page 313 and 314:
PART 1 - GENERAL 1.01 SCOPE A. Prov
- Page 315:
Section 09950 Page 3 6. Ribs run ve
- Page 318 and 319:
NAPA CENTURY CENTER XD 12 #165582 S
- Page 320 and 321:
Section 09960 Page 4 D. Ferrous Met
- Page 322 and 323:
Section 09960 Page 6 Coat 1: Coat 2
- Page 324 and 325:
NAPA CENTURY CENTER XD 12 #165582
- Page 326 and 327:
Section 10150 Page 2 1. Toilet for
- Page 328 and 329:
Section 10200 Page 2 B. Shop Drawin
- Page 330 and 331:
3.03 PROTECTION A. Protect installe
- Page 332 and 333:
C. Attach securely using black pan
- Page 334 and 335:
NAPA CENTURY CENTER XD 12 #165582
- Page 336 and 337:
Section 10800 Page 2 H. Soap Dispen
- Page 338 and 339:
Section 11201 Page 2 a. Landscaping
- Page 340 and 341:
Section 11201 Page 4 PART 3 - EXECU
- Page 342 and 343:
Section 11202 Page 2 3. Review cond
- Page 345 and 346:
PART 1 - GENERAL SECTION 11400 CONC
- Page 347:
2.03 ITEMIZED LIST OF EQUIPMENT A.
- Page 350 and 351:
Section 12484 Page 2 1.05 QUALITY A
- Page 353 and 354:
Section 12494 Page 1 SECTION 12494
- Page 355 and 356:
Section 12494 Page 3 1. Hem Pockets
- Page 357 and 358:
Section 12494 Page 5 maintenance fr
- Page 359 and 360:
Section 12494 Page 7 PART 3 EXECUTI
- Page 361 and 362:
PART 1 GENERAL SECTION 13600 PV ELE
- Page 363 and 364:
PART 1 - GENERAL SECTION 14240 HYDR
- Page 365 and 366:
Section 14240 Page 3 5. Elevator Ma
- Page 367 and 368:
Section 14240 Page 5 B. Cab Interio
- Page 369 and 370:
Section 14240 Page 7 G. Emergency P
- Page 371:
Section 14240 Page 9 A. General Con
- Page 374 and 375:
J. When drawing revisions are issue
- Page 376 and 377:
dates in accordance with the Genera
- Page 378 and 379:
F. Starters: All starters shall be
- Page 380 and 381:
A. Exterior surfaces of pipes, duct
- Page 383 and 384:
SECTION 15034 HVAC TESTING AND BALA
- Page 385:
satisfaction of the Architect and t
- Page 388 and 389:
1.07 COORDINATION WITH OTHER WORK A
- Page 390 and 391:
iron bodies for 125 lbs. WWP, all b
- Page 392 and 393:
2.08 SIGNS A. Approved enameled met
- Page 395 and 396:
SECTION 15400 PLUMBING PART 1 - GEN
- Page 397 and 398:
C. Piping shall not penetrate demis
- Page 399 and 400:
shall be responsible for structural
- Page 401 and 402:
2.19 DRAINS: Refer to schedule on d
- Page 403 and 404:
introduced into each line or stack.
- Page 405 and 406:
SECTION 15500 HEATING, VENTILATING
- Page 407 and 408:
E. Sealants within the building env
- Page 409 and 410:
G. External duct insulation shall b
- Page 411 and 412:
not acceptable. 5. Bearings shall b
- Page 413 and 414:
2.15 START-UP OF OWNER FURNISHED IC
- Page 415:
END OF SECTION Cinemark 15500 - 11
- Page 418 and 419:
for further details on start-up pla
- Page 420 and 421:
Temperature Controls Plumbing Recla
- Page 423 and 424:
SECTION 16000 GENERAL CONDITIONS FO
- Page 425 and 426:
fees required; he shall also obtain
- Page 427 and 428:
. Materials of Construction c. Gage
- Page 429 and 430:
A. When the Engineer has reviewed e
- Page 431 and 432:
A. All necessary cutting and patchi
- Page 433 and 434:
SECTION 16050 BASIC ELECTRICAL MATE
- Page 435 and 436:
6. Breakers shall be bolt-on. 7. Ea
- Page 437 and 438:
D. At the completion of the project
- Page 439 and 440:
F. Where connection is made to any
- Page 441 and 442:
C. For areas designated by Architec
- Page 443 and 444:
S. The contractor shall furnish the
- Page 445:
maximum time delay shall be one (1)
- Page 448 and 449:
CEC California Electrical Code 1.04
- Page 450 and 451:
. Calpico, Inc. c. Metraflex Co. d.
- Page 452 and 453:
3.04 FIRESTOPPING A. Apply firestop
- Page 455 and 456:
SECTION 16060 SITE GROUNDING AND BO
- Page 457 and 458:
E. Underground Conductors: Bare, ti
- Page 459 and 460:
1. Drive ground rods until tops are
- Page 461:
. Equipment Rated More Than 1000 kV
- Page 464 and 465:
B. Comply with 29 CFR 1910.145. 1.0
- Page 466 and 467:
C. Fasteners for Labels and Signs:
- Page 468 and 469:
j. Contactors. k. Remote-controlled
- Page 471 and 472:
SECTION 16120 SITE CONDUCTORS AND C
- Page 473 and 474:
PART 3 - EXECUTION 3.01 CONDUCTOR A
- Page 475 and 476:
SECTION 16130 SITE RACEWAYS AND BOX
- Page 477 and 478:
1. Alflex Inc. 2. Electri-Flex Co.
- Page 479 and 480:
10. Thomas & Betts Corporation. 11.
- Page 481 and 482:
1. Install concealed raceways with
- Page 483 and 484:
SECTION 16140 SITE WIRING DEVICES P
- Page 485 and 486:
. Pass & Seymour/Legrand; Wiring De
- Page 487 and 488:
1. Service Outlet Assembly: Flush t
- Page 489 and 490:
SECTION 16400 AUXILIARY ELECTRICAL
- Page 491:
. The detectors shall be designed t
- Page 494 and 495:
1. Dimensioned plans, elevations, s
- Page 496 and 497:
2.02 MANUFACTURED UNITS A. Enclosur
- Page 498 and 499:
2.07 ACCESSORY COMPONENTS AND FEATU
- Page 501 and 502:
SECTION 16900 AUTOMATIC TEMPERATURE
- Page 503:
Guaranty-Warranty. END OF SECTION C
- Page 506 and 507:
procedures and other requested equi
- Page 509:
GEOTECHNICAL INVESTIGATION REPORT o
- Page 512 and 513:
Geotechnical Investigation South Ri
- Page 514 and 515:
Geotechnical Investigation South Ri
- Page 516 and 517:
Geotechnical Investigation South Ri
- Page 518 and 519:
Geotechnical Investigation South Ri
- Page 520 and 521:
Geotechnical Investigation South Ri
- Page 522 and 523:
Geotechnical Investigation South Ri
- Page 524 and 525:
Geotechnical Investigation South Ri
- Page 526 and 527:
Geotechnical Investigation South Ri
- Page 528 and 529:
Geotechnical Investigation South Ri
- Page 530 and 531:
Geotechnical Investigation South Ri
- Page 532 and 533:
Geotechnical Investigation South Ri
- Page 534 and 535:
Geotechnical Investigation South Ri
- Page 536 and 537:
N Project Site KC ENGINEERING COMPA
- Page 538:
N Not to Scale Project Site PARTIAL
- Page 541 and 542:
LOG OF TEST BORING BORING NO.: 1 PR
- Page 543 and 544:
LOG OF TEST BORING BORING NO.: 2 PR
- Page 545 and 546:
LOG OF TEST BORING BORING NO.: 3 PR
- Page 547 and 548:
LOG OF TEST BORING BORING NO.: 4 PR
- Page 549 and 550:
LOG OF TEST BORING BORING NO.: 5 PR
- Page 551 and 552:
LOG OF TEST BORING BORING NO.: 6 PR
- Page 553 and 554:
LOG OF TEST BORING BORING NO.: 7 PR
- Page 555 and 556:
Client: Gasser Foundation Client No
- Page 557 and 558:
120 110 100 90 80 70 60 50 40 30 20
- Page 559 and 560:
Particle Size Distribution Report 1
- Page 561 and 562:
Particle Size Distribution Report 1
- Page 563 and 564:
Particle Size Distribution Report 1
- Page 565 and 566:
Particle Size Distribution Report 1
- Page 567:
Particle Size Distribution Report 1
- Page 577:
N KC ENGINEERING COMPANY 865 Cottin
- Page 581 and 582:
LOG OF TEST BORING BORING NO.: 1 PR
- Page 583 and 584:
LOG OF TEST BORING BORING NO.: 2 PR
- Page 585 and 586:
LOG OF TEST BORING BORING NO.: 3 PR
- Page 587 and 588:
LOG OF TEST BORING BORING NO.: 4 PR
- Page 589 and 590:
LOG OF TEST BORING BORING NO.: 5 PR
- Page 591 and 592:
LOG OF TEST BORING BORING NO.: 7 PR
- Page 593 and 594:
LOG OF TEST BORING BORING NO.: 8 PR
- Page 595 and 596:
865 Cotting Lane, Suite A Vacaville
- Page 597:
TEST PIT NO. DEPTH (feet) 10A 0-4
- Page 633:
APPENDIX B - STORMWATER MANAGEMENT
- Page 636 and 637:
STORMWATER POND MODIFICATION SOUTH
- Page 638 and 639:
STORMWATER POND MODIFICATION SOUTH
- Page 640 and 641:
STORMWATER POND MODIFICATION SOUTH
- Page 642 and 643:
STORMWATER POND MODIFICATION SOUTH
- Page 644 and 645:
STORMWATER POND MODIFICATION SOUTH
- Page 647:
APPENDIX C - LEED CHECKLIST NAPA CE
- Page 650 and 651:
LEED 2009 New Construction Project
- Page 652:
LEED 2009 New Construction Project