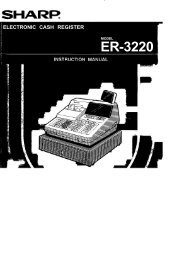
ER-A520/ER-A530 INSTRUCTION MANUAL
ER-A520/ER-A530 INSTRUCTION MANUAL
ER-A520/ER-A530 INSTRUCTION MANUAL

Create successful ePaper yourself
Turn your PDF publications into a flip-book with our unique Google optimized e-Paper software.
ELECTRONIC CASH REGIST<strong>ER</strong><br />
<strong>INSTRUCTION</strong> <strong>MANUAL</strong><br />
MODEL<br />
<strong>ER</strong>-<strong>A520</strong>A<br />
<strong>ER</strong>-<strong>A530</strong>A<br />
The above illustration shows the model <strong>ER</strong>-<strong>A520</strong>A.
CAUTION<br />
The AC outlet shall be installed near the equipment and shall be easily<br />
accessible.
INTRODUCTION<br />
Thank you very much for your purchase of the SHARP Electronic Cash Register, Model <strong>ER</strong>-<strong>A520</strong>A/<strong>A530</strong>A.<br />
Please read this manual carefully before operating your machine to gain a thorough understanding of the<br />
functions and features offered by this model ECR.<br />
Please keep this manual for future reference, it may help you if you encounter operational problems.<br />
IMPORTANT<br />
• Install your register in a location that is not subject to direct radiation, unusual temperature changes,<br />
high humidity or exposed to water sources.<br />
Installation in such locations could cause damage to the cabinet and the electrical components.<br />
• The register should not be operated by an individual with wet hands.<br />
The water could seep into the interior of the register and cause component failure.<br />
• When cleaning your register, use a dry, soft cloth. Never use solvents, such as benzine and/or thinner.<br />
The use of such chemicals will lead to discoloration or deterioration of the cabinet.<br />
• The register plugs into any standard wall outlet (120V ±10% AC) which utilizes a dedicated ground<br />
circuit.<br />
Please note that other electrical devices on the same electrical circuit could cause the register to malfunction.<br />
• If the register malfunctions, call your local dealer for service - do not try to repair the register yourself.<br />
• For a complete electrical disconnection, the AC power cord must be removed from the wall outlet.<br />
• Never disconnect the peripheral while the register remains plugged into the AC outlet.<br />
PRECAUTION<br />
This Electronic Cash Register has a built-in memory protection circuit which is supported by rechargeable<br />
batteries.<br />
It is important to know that all batteries will, in time, dissipate their charge even if not used. Therefore to insure<br />
an adequate charge in the protection circuit, and to prevent any possible loss of memory during or after<br />
installation, it is recommended that each unit be allowed to recharge for a period of 24 to 48 hours prior to and<br />
during use by the customer.<br />
In order to charge the batteries, the machine must be plugged in. This recharging precaution can prevent<br />
unnecessary equipment malfunctions or service calls.<br />
1
CONTENTS<br />
INTRODUCTION····················································································································································1<br />
IMPORTANT··························································································································································1<br />
PRECAUTION························································································································································1<br />
CONTENTS····························································································································································2<br />
EXT<strong>ER</strong>NAL VIEW OF THE <strong>ER</strong>-<strong>A520</strong>A·················································································································8<br />
Front view···············································································································································8<br />
Rear view················································································································································8<br />
EXT<strong>ER</strong>NAL VIEW OF THE <strong>ER</strong>-<strong>A530</strong>A·················································································································9<br />
Front view···············································································································································9<br />
Rear view················································································································································9<br />
PRINT<strong>ER</strong>······························································································································································10<br />
KEYBOARD·························································································································································11<br />
1 <strong>ER</strong>-<strong>A520</strong>A standard keyboard layout ······································································································11<br />
2 <strong>ER</strong>-<strong>A530</strong>A standard keyboard layout ······································································································13<br />
3 Standard key number layout····················································································································15<br />
4 Installing the keyboard sheet (<strong>ER</strong>-<strong>A530</strong>A) ······························································································16<br />
KEYS AND SWITCHES·······································································································································17<br />
1 Mode switch and mode keys ···················································································································17<br />
2 Drawer lock key·······································································································································17<br />
3 Printer cover lock key ······························································································································18<br />
4 Cashier/Server code entry key ················································································································18<br />
5 Receipt ON/OFF function ························································································································18<br />
DISPLAYS ···························································································································································19<br />
1 Operator display ······································································································································19<br />
2 Customer display (Pop-up type)··············································································································19<br />
FOR THE OP<strong>ER</strong>ATOR<br />
PRIOR TO ENTRIES ···········································································································································20<br />
1 Preparations for entries ···························································································································20<br />
2 Power save mode····································································································································21<br />
3 Error warning···········································································································································21<br />
ENTRIES······························································································································································22<br />
1 Item entries··············································································································································22<br />
Single item entries································································································································22<br />
Repeat entries ······································································································································23<br />
Multiplication entries·····························································································································24<br />
Successive multiplication entries··········································································································25<br />
Split-pricing entries·······························································································································26<br />
Single item cash sale (SICS)/single item finalize (SIF) entries·····························································27<br />
Scale entries·········································································································································28<br />
PLU level shift (for direct PLU) ·············································································································30<br />
PLU/UPC price level shift ·····················································································································32<br />
Set PLU entries ····································································································································33<br />
Link PLU/UPC entries···························································································································34<br />
Age verification (Birthday entry) ···········································································································34<br />
Mix-and-match entries··························································································································35<br />
Condiment entries (for PLUs)···············································································································35<br />
Price inquiry (view) function (for PLU/UPCs)························································································36<br />
UPC learning function···························································································································37<br />
Price change function (for PLU/UPCs)·································································································38<br />
2 Displaying and printing subtotals·············································································································40<br />
Merchandise subtotal ···························································································································40<br />
2
Taxable subtotal ···································································································································40<br />
Including-tax subtotal (full subtotal)······································································································40<br />
Food stamp-eligible subtotal·················································································································40<br />
Tray subtotal·········································································································································40<br />
Eat-in subtotal·······································································································································40<br />
Gasoline discount subtotal ···················································································································40<br />
3 Finalization of transaction························································································································41<br />
Cash or Check tendering······················································································································41<br />
Mixed tendering (check + cash)············································································································41<br />
Cash or Check sale that does not need any tender entry ····································································42<br />
Charge (credit) sale······························································································································42<br />
Mixed-tender sale (cash or check tendering + charge tendering) ························································42<br />
4 Food stamp calculations··························································································································43<br />
Food stamp tendering···························································································································43<br />
Food stamp status shift ························································································································44<br />
5 Tax calculations·······································································································································45<br />
Automatic tax········································································································································45<br />
Manual tax············································································································································45<br />
Automatic-tax delete·····························································································································46<br />
Tax status shift ·····································································································································47<br />
6 Guest check (GLU/PBLU) ·······················································································································48<br />
GLU/PBLU system ·······························································································································48<br />
Deposit entries······································································································································51<br />
Transferring guest checks out or in (Transfer-out/in) ···········································································52<br />
Bill totalizing/bill transfer·······················································································································53<br />
Bill separating·······································································································································54<br />
Manual Previous Balance(PB) and Credit Balance(CB) entry······························································55<br />
7 Auxiliary entries ·······································································································································57<br />
Percent calculations (premium or discount) ·························································································57<br />
Discount entries····································································································································58<br />
Refund entries ······································································································································59<br />
Return entries·······································································································································59<br />
Refund sales mode·······························································································································60<br />
Printing of non-add code numbers ·······································································································60<br />
Gratuity·················································································································································61<br />
8 Payment treatment ··································································································································62<br />
Tip-in entries·········································································································································62<br />
Tip editing·············································································································································63<br />
Tip paid entries·····································································································································63<br />
Currency conversion·····························································································································64<br />
Received on account entries ················································································································65<br />
Paid out entries·····································································································································65<br />
No sale (exchange) ······························································································································65<br />
Cashing a check···································································································································66<br />
Bottle return··········································································································································66<br />
9 Automatic sequencing key entries···········································································································66<br />
10 WASTE mode··········································································································································67<br />
CORRECTION ·····················································································································································68<br />
1 Correction of the last entry (direct void)···································································································68<br />
2 Correction of the next-to-last or earlier entries (indirect void)··································································68<br />
3 Subtotal void············································································································································69<br />
4 Correction of incorrect entries not handled by the direct or indirect void function···································69<br />
CORRECTION AFT<strong>ER</strong> FINALIZING A TRANSACTION (AFT<strong>ER</strong> GEN<strong>ER</strong>ATING A RECEIPT)························70<br />
OV<strong>ER</strong>RIDE ENTRIES··········································································································································71<br />
OV<strong>ER</strong>LAPPED CASHI<strong>ER</strong>/S<strong>ER</strong>V<strong>ER</strong> ENTRY ······································································································72<br />
SPECIAL PRINTING FUNCTIONS······················································································································73<br />
1 Copy receipt printing································································································································73<br />
3
2 Validation printing function (Slip printer)··································································································74<br />
3 Bill printing···············································································································································74<br />
4 Printing of the employee’s arrival and departure times (Slip printer)·······················································74<br />
5 Printing of header and footer graphic logos·····························································································75<br />
6 Remote printer send function ··················································································································75<br />
TIME DISPLAY AND AUTOMATIC UPDATING OF THE DATE ········································································76<br />
1 Time display ············································································································································76<br />
2 Automatic updating of the date················································································································76<br />
4<br />
FOR THE MANAG<strong>ER</strong><br />
PRIOR TO PROGRAMMING·······························································································································77<br />
1 Programming keyboard layout·················································································································77<br />
2 How to program alphanumeric characters·······························································································78<br />
Using character keys on the keyboard ·································································································78<br />
Entering character codes······················································································································78<br />
PROGRAMMING ·················································································································································80<br />
Basic instructions··································································································································80<br />
Preparations for programming··············································································································80<br />
Direct Programming···········································································································································80<br />
1 Setting the date and time·························································································································80<br />
Date······················································································································································80<br />
Time······················································································································································81<br />
2 Programming for departments·················································································································81<br />
Unit price ··············································································································································81<br />
Functional selection······························································································································82<br />
3 PLU/UPC programming···························································································································84<br />
Unit price ··············································································································································84<br />
Functional selection······························································································································85<br />
Associated department·························································································································86<br />
4 Programming for discount keys (-) ······································································································87<br />
Discount amount ··································································································································87<br />
Functional programming·······················································································································87<br />
5 Programming for percent keys (% )········································································································88<br />
Percent rate··········································································································································88<br />
Functional programming·······················································································································89<br />
6 Programming for conversion keys (ç ) ··································································································90<br />
Currency conversion rate ·····················································································································90<br />
keys ···························································································90<br />
High amount lockout (HALO)················································································································90<br />
7 Programming for the r , p , and †<br />
8 Programming for the a , CA , ' , and k keys···················································································91<br />
High amount lockout (HALO) and function selection············································································91<br />
9 Programming for the automatic tax calculation function··········································································93<br />
The tax table (applicable to the add-on tax) ·························································································93<br />
Job-Code-Based Programming ························································································································96<br />
1 Setting the date and time·························································································································96<br />
Setting the date (#2610)·······················································································································96<br />
Setting the time (#2611) ·······················································································································96<br />
2 Setting the register and consecutive numbers ························································································97<br />
Setting the register number (#2612)·····································································································97<br />
Setting the consecutive number (#2613)······························································································97<br />
3 Programming for the automatic tax calculation function··········································································98<br />
The tax table (#2710) ···························································································································98<br />
The tax rate (#2711)···························································································································100<br />
Doughnut tax exempt (for the Canadian tax system) (#2715)····························································101<br />
4 Programming for departments···············································································································102<br />
Functional programming 1 (#2110) ····································································································102
Functional programming 2 (#2111) ····································································································104<br />
A limit amount (HALO) of entry (#2112) ·····························································································105<br />
Item label (#2114)·······························································································································105<br />
Unit price (#1110)·······························································································································106<br />
Commission group assignment (#2115)·····························································································106<br />
Group number (#2116)·······················································································································107<br />
Group text (#2350) ·····························································································································107<br />
Age limitation (#2180)·························································································································108<br />
Print station assignment (#2118)········································································································108<br />
Department key positioning (#2119)···································································································109<br />
Color Video Monitor (CVM) control character (#2158) ·······································································109<br />
5 PLU/UPC programming·························································································································110<br />
Associated department (#1200, 2230, 1050) ·····················································································111<br />
Unit prices (#1210, 1060) ···················································································································113<br />
Base quantity (#1211, 1061) ··············································································································114<br />
Functional programming 1 (#2210, 2231, 2060) ················································································114<br />
Functional programming 2 (#2211, 2232, 2061) ················································································116<br />
Item label (#2214, 2064)·····················································································································118<br />
Commission groups (#2215, 2235, 2065) ··························································································119<br />
Group number (#2216, 2066)·············································································································120<br />
Group text (#2351) ·····························································································································120<br />
Age limitation (#2280, 2236, 2081)·····································································································121<br />
Stock quantity (#1222, 1220, 1221)····································································································122<br />
Set PLU (#2221)·································································································································123<br />
Mix-and-match table (#2217, 2225, 2067)··························································································124<br />
PLU condiment table (#2222, #2223)·································································································125<br />
Print station to PLU/UPC assignment (#2218, 2068) ·········································································127<br />
Delete period for non-accessed UPC codes (#2029)·········································································128<br />
Programming Non-PLU code format (#2025)·····················································································129<br />
Link PLU/UPC link (#2220)·················································································································130<br />
Programming of PLU levels and direct PLU keys (#2219) ·································································130<br />
Item label for remote printer (#2244, 2094)························································································131<br />
Color Video Monitor (CVM) control character (#2258, 2234, 2059) ···················································132<br />
6 Programming for miscellaneous keys····································································································133<br />
Rate (% , ç , commission, gratuity, CA<br />
, CH<br />
) and discount ( TIP TIP -) (#1310) ····································133<br />
Gas discount unit price (#1311)··········································································································134<br />
Currency description text (ç ) (#2334)······························································································134<br />
A limit amount (HALO) of entry (- , † (for manual tax), CA<br />
, CH<br />
, r , TIP TIP<br />
p ) (#2312) ····················135<br />
+/– sign, food stamp status and tax status (% , -, gratuity) (#2311)··············································136<br />
Percent entry type (%) (#2310) ········································································································137<br />
Item % or subtotal % selection (% ) (#2315)·····················································································138<br />
Percent rate limitation (% ) (#2313)···································································································138<br />
Vendor or store coupon selection (-) (#2316)·················································································139<br />
7 Programming for the media keys···········································································································140<br />
Functional programming 1 (#2320) ····································································································140<br />
Functional programming 2 (#2326) ····································································································142<br />
High amount lockout (HALO) for check cashing, check change, and cash in drawer (#2321)···········143<br />
High amount lockout (HALO) of entry for media keys (#2322)···························································143<br />
Print station assignment (#2328)········································································································144<br />
CAT programming (#2330)·················································································································145<br />
8 Programming of function text·················································································································146<br />
Programming (#2314)·························································································································146<br />
List of function texts····························································································································146<br />
9 Server/Cashier programming ················································································································150<br />
Server/Cashier code (#1400) ·············································································································150<br />
Server/Cashier name (#1414) ············································································································150<br />
5
Functional programming (#2410) ·······································································································151<br />
GLU/PBLU code range assignment (#2411)······················································································151<br />
Net sales % rate (#2413)····················································································································152<br />
10 Programming various functions·············································································································152<br />
Programming for optional feature selection (#2616) ··········································································152<br />
Programming the parameter of the slip printer (#2615)······································································157<br />
Setting the time limit for THE TILL TIM<strong>ER</strong> TM (#2617) ·········································································158<br />
Scale tare table (#2618) ·····················································································································158<br />
Programming of logo messages (#2614) ···························································································159<br />
Selection of X1/Z1 and X2/Z2 reports to be printed in the stacked report sequence (#2620)············160<br />
Setting the time range for hourly reports (#2619)···············································································161<br />
Programming of power save mode (#2689) ·······················································································161<br />
Available GLU/PBLU codes (#2810) ··································································································162<br />
Bill number (#2636) ····························································································································162<br />
Functional programming for the printer (#2990)·················································································163<br />
Editing guidance/error messages (#2641)··························································································163<br />
Validation message (#2642)···············································································································165<br />
Slip printer’s logo message (#2643)···································································································165<br />
RS-232C channel assignment (#2690) ······························································································166<br />
Barcode reader programming (#2691) ·······························································································167<br />
Remote printer assignment (#2692)···································································································168<br />
Second remote printer assignment (#3653) ·······················································································168<br />
Remote printer name (#3654) ············································································································169<br />
Print format for remote printer (#3655)·······························································································169<br />
Chit receipt format (#3656)·················································································································170<br />
RS-232C interface (#6110, 6111, 6112, 6113, 6115, 6212, 6213, 6220)···········································171<br />
Programming the CAT interface (#7110, 7111, 7112, 7113, 7114, 7115, 7116)································173<br />
Secret codes to control access to the PGM1 mode, X1/Z1 mode and X2/Z2 mode<br />
(#2630, 2631, 2632) ···························································································································175<br />
Loading dynamic UPCs to the main UPC file (#2099)········································································175<br />
Setting the AUTO key (#2900) ···········································································································176<br />
11 TRAINING mode ···································································································································177<br />
12 Reading stored programs······················································································································178<br />
Program details and procedures for their reading ··············································································178<br />
Sample printouts·································································································································180<br />
13 Universal Product Code (UPC) or European Article Number (EAN) ·····················································188<br />
UPC or EAN code·······························································································································188<br />
Add-on code ·······································································································································189<br />
READING (X) AND RESETTING (Z) OF SALES TOTALS···············································································190<br />
1 Summary of reading (X) and resetting (Z) reports and the key operations to obtain the reports ··········190<br />
2 Daily sales totals····································································································································195<br />
General report ····································································································································195<br />
Cashier/Server report ·························································································································199<br />
Hourly report·······································································································································200<br />
Full department report ·······················································································································201<br />
Individual group total report on department························································································201<br />
Full group total report on department ·································································································201<br />
PLU/UPC report (by designated range or pick up list)········································································202<br />
PLU/UPC report by associated department ·······················································································204<br />
Individual group total report on PLU/UPC ··························································································204<br />
Full group total report on PLU/UPC····································································································204<br />
PLU/UPC zero sales report by department ························································································205<br />
PLU/UPC price category report··········································································································205<br />
PLU/UPC stock report (by designated range or pick up list) ······························································205<br />
Commission sales report····················································································································205<br />
GLU/PBLU report ·······························································································································206<br />
GLU/PBLU report by cashier/server···································································································206<br />
6
Closed GLU/PBLU report ···················································································································207<br />
Closed GLU/PBLU report by cashier/server·······················································································208<br />
Transaction report ······························································································································209<br />
Tax report ···········································································································································209<br />
Cash in drawer report·························································································································209<br />
Dynamic UPC report (by designated range or pick up list)·································································210<br />
Dynamic UPC report by associated department ················································································210<br />
Dynamic UPC clear (by designated range or pick up list) ··································································210<br />
Dynamic UPC clear by associated department··················································································210<br />
X1/Z1 stacked report ··························································································································210<br />
Deleting of non-accessed UPCs·········································································································211<br />
3 Periodic consolidation····························································································································212<br />
General Overview·······························································································································212<br />
Daily net report ···································································································································212<br />
X2/Z2 stacked report ··························································································································212<br />
COMPULSORY CASH/CHECK DECLARATION······························································································213<br />
OP<strong>ER</strong>ATOR MAINTENANCE ···························································································································215<br />
1 In case of power failure ·························································································································215<br />
2 In case of printer error ···························································································································215<br />
3 Thermal printing·····································································································································215<br />
Cautions in handling the printer··········································································································215<br />
Cautions in handling the recording paper (thermal paper) ·································································216<br />
4 Installing and removing the paper roll····································································································217<br />
Recording paper specifications ··········································································································217<br />
Installing the paper roll ·······················································································································217<br />
Removing the paper roll ·····················································································································218<br />
Removing a paper jam ·······················································································································220<br />
5 Cleaning the print head ·························································································································221<br />
6 Removing the till and the drawer···········································································································222<br />
7 Opening the drawer by hand ·················································································································222<br />
8 Before calling for service ·······················································································································223<br />
Error message table ···························································································································223<br />
LIST OF OPTIONS ············································································································································224<br />
SPECIFICATIONS ·············································································································································225<br />
7
EXT<strong>ER</strong>NAL VIEW OF THE <strong>ER</strong>-<strong>A520</strong>A<br />
Front view<br />
Customer display (Pop-up type)<br />
Printer cover<br />
Receipt paper<br />
Operator display<br />
Journal window<br />
Keyboard<br />
Mode switch<br />
Drawer<br />
Drawer lock<br />
Rear view<br />
Printer cover lock<br />
(left side)<br />
Rear cover<br />
8
EXT<strong>ER</strong>NAL VIEW OF THE <strong>ER</strong>-<strong>A530</strong>A<br />
Front view<br />
Customer display (Pop-up type)<br />
Printer cover<br />
Receipt paper<br />
Operator display<br />
Journal window<br />
Keyboard<br />
Mode switch<br />
Drawer<br />
Drawer lock<br />
Rear view<br />
Printer cover lock<br />
(left side)<br />
Rear cover<br />
9
PRINT<strong>ER</strong><br />
The printer is a receipt/journal dual station type thermal printer which delivers fast, quiet and high quality<br />
printing. The average life of the printer is approximately 5 million lines.<br />
When opening the printer cover, unlock the printer cover<br />
using the printer cover lock key, and lift up the cover as<br />
shown in the diagram to the right.<br />
Printer cover<br />
Printer lock key<br />
Your register is shipped with the print head release lever<br />
held in the up position by a white shipping retainer. Be sure<br />
to remove this retainer (see the figure at the right) and<br />
push down the print head release lever before you use the<br />
register.<br />
Retainer<br />
Print head release lever<br />
The print head can be lifted by<br />
the green lever on the right side<br />
of the printer. Pulling the lever<br />
forward, lifts the print head up. If<br />
the paper becomes jammed and<br />
you need to move the print head<br />
farther forward, you can pull the<br />
lever even further toward you<br />
and proceed with the removal of<br />
the jammed paper.<br />
Paper roll location<br />
Take-up spool<br />
Paper chute<br />
Print head<br />
release lever<br />
Note<br />
Do not attempt to remove the paper roll with the head in the down position. This may result in<br />
damage to the printer and print head.<br />
10
KEYBOARD<br />
1<br />
<strong>ER</strong>-<strong>A520</strong>A standard keyboard layout<br />
SLIP<br />
CONV<br />
RCPT<br />
RA<br />
NC<br />
PBLU<br />
FINAL<br />
CASH<br />
#<br />
@<br />
FOR<br />
7<br />
PLU/UPC<br />
.L<br />
8 9<br />
PRICE<br />
CHANGE<br />
5<br />
4<br />
10<br />
9<br />
AMT<br />
15<br />
14<br />
INQ<br />
20<br />
19<br />
FS<br />
SHIFT<br />
FS<br />
TEND<br />
NS<br />
AUTO<br />
1<br />
AUTO<br />
2<br />
CH1<br />
%1<br />
PO<br />
TAX<br />
4<br />
5 6<br />
3<br />
8<br />
13<br />
18<br />
CHK<br />
CH2<br />
%2<br />
TAX<br />
SHIFT<br />
1<br />
2<br />
3<br />
2<br />
7<br />
12<br />
17<br />
MDSE<br />
SBTL<br />
SBTL<br />
RFND<br />
VOID<br />
#/TM<br />
0 00<br />
1<br />
6<br />
11<br />
16<br />
CA/AT<br />
Note<br />
All keys except the receipt paper feed and journal paper feed keys can be re-positioned.<br />
If you want to change the layout, please consult your authorized SHARP dealer.<br />
RECEIPT<br />
Receipt paper feed key<br />
Discount 1 key<br />
JOURNAL<br />
Journal paper feed key<br />
%1 %2 Percent 1 and 2 keys<br />
0 9<br />
00<br />
Numeric keys<br />
NC<br />
PBLU<br />
New check key<br />
Previous balance key<br />
•<br />
Decimal point key<br />
FINAL<br />
Final key<br />
CL<br />
Clear key<br />
NS<br />
No-sale key<br />
@<br />
FOR<br />
Multiplication key<br />
TAX<br />
SHIFT<br />
TAX 1 shift key<br />
RFND<br />
Refund key<br />
TAX<br />
Manual tax key<br />
VOID<br />
Void key<br />
MDSE<br />
SBTL<br />
Merchandise subtotal key<br />
AMT<br />
Amount entry key<br />
1 20 Department keys<br />
CASH<br />
#<br />
Cashier code entry key<br />
AUTO<br />
1<br />
AUTO<br />
2<br />
Automatic sequencing<br />
1 and 2 keys<br />
PLU/UPC<br />
PLU/UPC key<br />
RA<br />
Received-on-account 1 key<br />
INQ<br />
PLU/UPC inquiry key<br />
PO<br />
Paid-out 1 key<br />
PRICE<br />
CHANGE<br />
UPC price change key<br />
FS<br />
SHIFT<br />
Food stamp shift key<br />
11
FS<br />
TEND<br />
Food stamp tender key<br />
CA/AT<br />
Cash/amount tendered key<br />
CH<br />
1<br />
CH<br />
2 Charge 1and 2 keys<br />
RCPT<br />
Receipt print key<br />
CONV<br />
Currency conversion key<br />
SLIP<br />
Slip printer key<br />
CHK<br />
Check 1 key<br />
#/TM<br />
Non-add code/Date & time<br />
display key<br />
SBTL<br />
Subtotal key<br />
Note<br />
The following function keys can optionally be mounted in place of those shown in the figure of the<br />
standard keyboard layout. For details, please consult your authorized SHARP dealer.<br />
Optional keys<br />
DEPT<br />
#<br />
Dept. number key<br />
TIP<br />
PAID<br />
Tip paid key<br />
EAT IN<br />
1<br />
EAT IN<br />
3<br />
%3 %5 Percent 3 thru 5 keys Eat in 1 thru 3 keys<br />
- 2 - 5 Discount 2 thru 5 keys<br />
TAX2<br />
SHIFT<br />
TAX4<br />
SHIFT<br />
Tax 2 thru 4 shift keys<br />
CH3 CH9 Charge 3 thru 9 keys<br />
DEPO<br />
Deposit key<br />
CA2<br />
CA5<br />
Cash 2 thru 5 keys<br />
DEPO<br />
RFND<br />
Deposit refund key<br />
CONV2<br />
CONV4<br />
Currency conversion 2 thru 4 keys<br />
LEVEL<br />
#<br />
PLU level shift number key<br />
RA2<br />
Received-on-account 2 key<br />
RP<br />
SEND<br />
Remote printer send key<br />
PO2<br />
Paid-out 2 key<br />
GRT<br />
EXEMPT<br />
Gratuity exempt key<br />
AUTO<br />
3<br />
AUTO<br />
10<br />
Automatic sequencing<br />
3 thru 10 keys<br />
OPEN<br />
TARE<br />
Tare entry key<br />
SRVC<br />
Service key<br />
REPEAT<br />
Repeat entry key<br />
TRAY<br />
SBTL<br />
Tray subtotal key<br />
GAS<br />
SBTL<br />
Gasoline sales subtotal key<br />
RETURN<br />
Return key<br />
P-SHIFT<br />
#<br />
Price shift number key<br />
CHK2 CHK5 Check 2 through 5 keys<br />
SCALE<br />
Scale entry key<br />
TRANS<br />
OUT<br />
Transfer out key<br />
L1<br />
L5<br />
PLU level shift 1 thru 5 keys<br />
TRANS<br />
IN<br />
Transfer in key<br />
P1<br />
P6<br />
Price level shift 1 thru 6 keys<br />
CA<br />
TIP<br />
Cash tip key<br />
PRINT<br />
Validation print key<br />
CH<br />
TIP<br />
Charge tip key<br />
CV<br />
CNT<br />
Cover count entry key<br />
12
NO DEL<br />
No delete key<br />
C<br />
NEXT<br />
Condiment next key<br />
BS<br />
Bill separation key<br />
C<br />
CANCEL<br />
Condiment cancel key<br />
BT<br />
Bill totalize/Bill transfer key<br />
(CHECK-ADD)<br />
EDIT<br />
TIP<br />
Edit tip key<br />
BIRTH<br />
Birthday entry key<br />
GLU<br />
RECALL<br />
Table# recall key<br />
RFND<br />
SALES<br />
Refund sales key<br />
000 Numeric key<br />
WASTE<br />
Waste mode key<br />
Note<br />
The department and direct PLU keys may be expanded. If you require expansion of the department<br />
or direct PLU keys, please contact your dealer.<br />
2<br />
<strong>ER</strong>-<strong>A530</strong>A standard keyboard layout<br />
RECEIPT<br />
JOURNAL<br />
91<br />
92<br />
93<br />
94<br />
95<br />
96<br />
97<br />
98<br />
99<br />
100<br />
L1 L2 L3<br />
AUTO<br />
1<br />
79<br />
80<br />
81<br />
82<br />
83<br />
84<br />
85<br />
86<br />
87<br />
88<br />
89<br />
90<br />
RCPT<br />
%<br />
AUTO<br />
2<br />
67<br />
68<br />
69<br />
70<br />
71<br />
72<br />
73<br />
74<br />
75<br />
76<br />
77<br />
78<br />
VOID<br />
INQ<br />
RP<br />
SEND<br />
AUTO<br />
3<br />
56<br />
45<br />
34<br />
23<br />
12<br />
1<br />
57<br />
46<br />
35<br />
24<br />
13<br />
2<br />
58<br />
47<br />
36<br />
25<br />
14<br />
3<br />
59<br />
48<br />
37<br />
26<br />
15<br />
4<br />
60<br />
49<br />
38<br />
27<br />
16<br />
5<br />
61<br />
50<br />
39<br />
28<br />
17<br />
6<br />
62<br />
51<br />
40<br />
29<br />
18<br />
7<br />
63<br />
52<br />
41<br />
30<br />
19<br />
8<br />
64<br />
53<br />
42<br />
31<br />
20<br />
9<br />
65<br />
54<br />
43<br />
32<br />
21<br />
10<br />
66<br />
55<br />
44<br />
33<br />
22<br />
11<br />
S<strong>ER</strong>V<br />
#<br />
@<br />
FOR<br />
RFND<br />
PLU/<br />
SUB<br />
CL<br />
7 8 9<br />
4 5 6<br />
1 2 3<br />
0 00 000<br />
NC<br />
PBAL<br />
SRVC<br />
FINAL<br />
MDSE<br />
SBTL<br />
SBTL<br />
CONV<br />
CH1<br />
CH2<br />
CH3<br />
CHK<br />
CA/AT<br />
Note<br />
• All keys except the receipt paper feed and journal paper feed keys may be re-positioned.<br />
If you want to change the keyboard layout, please consult your dealer.<br />
• Please note that the price lookup/subdepartment/UPC key (P) and the previous balance key<br />
PLU/<br />
( PBAL ) are shown as UPC and u respectively in this manual.<br />
RECEIPT<br />
Receipt paper feed key<br />
@<br />
FOR<br />
Multiplication key<br />
JOURNAL<br />
Journal paper feed key<br />
RCPT<br />
Receipt print key<br />
0 9<br />
00 000<br />
Numeric keys<br />
RFND<br />
VOID<br />
Refund key<br />
Void key<br />
•<br />
Decimal point key<br />
PLU/<br />
SUB<br />
Price lookup/subdepartment/<br />
UPC key<br />
CL<br />
Clear key<br />
1 100<br />
Direct price lookup keys<br />
13
L1<br />
L3<br />
PLU level shift 1 thru 3 keys<br />
AUTO<br />
1<br />
AUTO<br />
3<br />
Automatic sequencing<br />
1 thru 3 keys<br />
NC<br />
New check key<br />
CONV<br />
Currency conversion key<br />
SRVC<br />
Service key<br />
CH<br />
1<br />
CH<br />
3<br />
Charge 1 thru 3 keys<br />
FINAL<br />
Final key<br />
CHK<br />
Check 1 key<br />
PBAL<br />
Previous balance key<br />
MDSE<br />
SBTL<br />
Merchandise subtotal key<br />
Discount 1 key<br />
SBTL<br />
Subtotal key<br />
% Percent 1 key<br />
CA/AT<br />
Cash/amount tendered key<br />
INQ<br />
PLU/UPC inquiry key<br />
RP<br />
SEND<br />
Remote printer send key<br />
S<strong>ER</strong>V<br />
#<br />
Server code entry key<br />
Note<br />
The following function keys can optionally be added in place of those shown in the figure of the<br />
standard keyboard layout. For details, please consult your authorized SHARP dealer.<br />
Optional keys<br />
DEPT<br />
#<br />
Dept. number key<br />
CH<br />
TIP<br />
Charge tip key<br />
%2 %5 Percent 2 thru 5 keys<br />
TIP<br />
PAID<br />
Tip paid key<br />
- 2 - 5 Discount 2 thru 5 keys<br />
EAT IN<br />
1<br />
EAT IN<br />
3<br />
Eat in 1 thru 3 keys<br />
CH4 CH9 Charge 4 thru 9 keys<br />
TAX1<br />
SHIFT<br />
TAX4<br />
SHIFT<br />
Tax 1 thru 4 shift keys<br />
CA2<br />
CA5<br />
Cash 2 thru 5 keys<br />
DEPO<br />
Deposit key<br />
CONV2<br />
CONV4<br />
Currency conversion 2 thru 4 keys<br />
DEPO<br />
RFND<br />
Deposit refund key<br />
RA1<br />
RA2<br />
Received-on-account 1 and 2 keys<br />
TAX<br />
Manual tax key<br />
PO1<br />
PO2<br />
Paid-out 1 and 2 keys<br />
TRAY<br />
SBTL<br />
Tray subtotal key<br />
AUTO<br />
4<br />
AUTO<br />
10<br />
Automatic sequencing<br />
4 thru 10 keys<br />
RETURN<br />
Return key<br />
CHK2 CHK5 Check 2 through 5 keys<br />
GAS<br />
SBTL<br />
Gasoline sales subtotal key<br />
TRANS<br />
OUT<br />
Transfer out key<br />
#/TM<br />
Non-add code/Date & time<br />
display key<br />
TRANS<br />
IN<br />
Transfer in key<br />
NS<br />
No-sale key<br />
CA<br />
TIP<br />
Cash tip key<br />
SCALE<br />
Scale entry key<br />
14
LEVEL<br />
#<br />
PLU level shift number key<br />
REPEAT<br />
Repeat entry key<br />
L4<br />
L5<br />
PLU level shift 4 and 5 keys<br />
AMT<br />
Amount entry key<br />
P-SHIFT<br />
#<br />
Price shift number key<br />
PRICE<br />
CHANGE<br />
UPC price change key<br />
P1<br />
P6<br />
Price level shift 1 thru 6 keys<br />
BIRTH<br />
Birthday entry key<br />
PRINT<br />
Validation print key<br />
RFND<br />
SALES<br />
Refund sales key<br />
CV<br />
CNT<br />
Cover count entry key<br />
WASTE<br />
Waste mode key<br />
SLIP<br />
Slip printer key<br />
C<br />
NEXT<br />
Condiment next key<br />
BS<br />
Bill separation key<br />
C<br />
CANCEL<br />
Condiment cancel key<br />
BT<br />
Bill totalize/Bill transfer key<br />
(CHECK-ADD)<br />
EDIT<br />
TIP<br />
Edit tip key<br />
NO DEL<br />
No delete key<br />
GLU<br />
RECALL<br />
Table# recall key<br />
GRT<br />
EXEMPT<br />
Gratuity exempt key<br />
FS<br />
SHIFT<br />
Food stamp shift key<br />
OPEN<br />
TARE<br />
Tare entry key<br />
FS<br />
TEND<br />
Food stamp tender key<br />
Note<br />
Department and direct PLU keys can be expanded. If you require expansion of the department or<br />
direct PLU keys, please contact your authorized SHARP dealer.<br />
3<br />
Standard key number layout<br />
These key numbers are used for positioning of department keys and direct PLU keys. For further details with<br />
positioning departments and PLU keys, please refer to pages 109 and 130.<br />
This layout can be changed by your dealer.<br />
For <strong>ER</strong>-<strong>A520</strong>A<br />
005 010 015 020<br />
004 009 014 019<br />
003 008 013 018<br />
002 007 012 017<br />
001 006 011 016<br />
15
For <strong>ER</strong>-<strong>A530</strong>A<br />
111 112 113 114 115 116 117<br />
118 119 120<br />
099 100<br />
087 088<br />
101 102 103 104 105 106 107<br />
089 090 091 092 093 094 095<br />
108 109 110<br />
096 097 098<br />
076 077<br />
078 079 080 081 082<br />
083 084 085 086<br />
065 066 067 068 069 070 071<br />
054 055 056 057 058 059 060<br />
043 044 045 046 047 048 049<br />
032 033 034 035 036 037 038<br />
021 022 023 024 025 026 027<br />
072 073 074 075<br />
061 062 063 064<br />
050 051 052 053<br />
039 040 041 042<br />
028 029 030 031<br />
4<br />
Installing the keyboard sheet (<strong>ER</strong>-<strong>A530</strong>A)<br />
Insert the keyboard sheet between the keyboard cover and the cabinet as illustrated below. Then press the<br />
claws at the top of the keyboard cover into the slots in the cabinet.<br />
Keyboard<br />
sheet<br />
Keyboard cover<br />
Cabinet<br />
Note<br />
• Do not spread the keyboard cover too far to avoid tearing the tabs.<br />
• Replace the keyboard sheet with a new one if by chance it gets wet. Use of a wet keyboard<br />
sheet may cause problems.<br />
• Be sure to use only SHARP-supplied keyboard sheets. Thick or hard sheets can make key<br />
operations difficult.<br />
• Place the keyboard sheet evenly under the keyboard cover.<br />
• If you require a new keyboard sheet, please contact your dealer.<br />
• The keyboard cover will eventually wear out. If your keyboard cover is dirty or broken, replace the<br />
cover with a new one. For details, please contact your authorized SHARP dealer.<br />
16
KEYS AND SWITCHES<br />
1<br />
Mode switch and mode keys<br />
The mode switch can be operated by inserting one of the three supplied mode keys – manager (MA),<br />
submanager (SM), and operator (OP) keys. These keys can be inserted or removed only when the switch is in<br />
the “REG” or “OFF” position.<br />
Operative range<br />
• Manager key (MA)<br />
• Submanager key (SM)<br />
The mode switch has these settings:<br />
MA<br />
• Operator key (OP)<br />
SM OP<br />
OFF:<br />
OP X/Z:<br />
REG:<br />
PGM1:<br />
PGM2:<br />
MGR:<br />
X1/Z1:<br />
X2/Z2:<br />
This mode locks all register operation.<br />
No change occurs to register data.<br />
This setting allows cashiers to take X or Z reports for their sales<br />
information. It can also be used for displaying the date/time and<br />
printing the employee’s arrival/departure times. And it can be used to toggle receipt state “ON” and<br />
“OFF” by pressing the q key. (This setting may be used only when your register has been<br />
programmed for “OP X/Z mode available” in the PGM2 mode.)<br />
For entering sales<br />
To program those items that need to be changed often: e.g., unit prices of departments, PLUs or<br />
UPCs, and percentages.<br />
To program all PGM1 programs and those items that do not require frequent changes: e.g., date,<br />
time, or a variety of register functions.<br />
For manager’s and submanager’s entries<br />
The manager can use this mode to make entries that are not permitted to be made by cashiers – for<br />
example, after-transaction voiding and override entries.<br />
To take the X/Z report for various daily totals.<br />
To take the X/Z report for various periodic (weekly or monthly) consolidation of totals.<br />
2<br />
Drawer lock key<br />
This key locks and unlocks the drawer. To lock it, turn 90 degrees counterclockwise. To unlock it, turn 90<br />
degrees clockwise.<br />
SK1-1<br />
17
3<br />
Printer cover lock key<br />
This key locks and unlocks the printer cover. To lock it, turn 90 degrees<br />
counterclockwise. To unlock, turn 90 degrees clockwise.<br />
4<br />
Cashier/Server code entry key<br />
The <strong>ER</strong>-<strong>A520</strong>A provides a cashier system and the <strong>ER</strong>-<strong>A530</strong>A provides a server system. The cashier/server<br />
codes are available in two variants: Variant 1, the codes are displayed (“0000” to “9999”), and Variant 2, the<br />
codes are not displayed (always “ ”).<br />
✱<br />
✱<br />
✱<br />
✱<br />
When the cashier/server code is assigned by Variant 2 (codes not displayed), the register prints<br />
cashier/server code and the cashier/server name are printed both on the receipt and journal for every<br />
transaction.<br />
✱<br />
✱<br />
✱<br />
✱<br />
as the<br />
Procedure<br />
■ Sign-on<br />
Variant 1 :<br />
(Code is displayed.)<br />
Variant 2 :<br />
(Code is not displayed.)<br />
To display the current cashier/server code<br />
Cashier/server<br />
code<br />
S<strong>ER</strong>V<br />
‹‹ /<br />
Cashier/server<br />
‹‹ / S<strong>ER</strong>V<br />
code ‹‹ /<br />
S<strong>ER</strong>V<br />
■ Sign-off<br />
Variant 1 / Variant 2 :<br />
‹‹ / ‹‹ S<strong>ER</strong>V<br />
/<br />
S<strong>ER</strong>V<br />
Note<br />
All settings depend on how the register has been programmed. For the available selection of these<br />
settings, please consult your authorized SHARP dealer.<br />
5<br />
Receipt ON/OFF function<br />
You can disable receipt printing in the REG mode to save paper using the receipt function. To disable receipt<br />
printing, press the q key in the OP X/Z position. This key toggles the receipt printing status ON and OFF. To<br />
check the receipt printing status, turn the mode switch to the OP X/Z position or press the c key in the REG<br />
mode. When the function is in the OFF status, the receipt off indicator “_” illuminates.<br />
Note<br />
Your register will print reports regardless of the receipt status. This means that the receipt roll must<br />
be installed even when the receipt state is “OFF” when taking reports.<br />
18
DISPLAYS<br />
1 Operator display<br />
The operator display consists of a two-line dot-matrix display (16 characters/line).<br />
Price level / PLU level (e.g. P2L3)<br />
Dept. name / PLU or UPC name / function text<br />
Cashier/server code or mode name<br />
Function message display area<br />
Numeric entry display area<br />
Receipt OFF indicator (“_”) / Stock alarm indicator (“ • ”)<br />
Repeat / Sentinel mark / Power save mark<br />
• Cashier/server code or mode name<br />
The mode you are in is displayed. When a cashier/server is assigned, the cashier/server code is<br />
displayed in the REG or OP X/Z mode. For example, “0001” is displayed when cashier/server 0001 is<br />
assigned.<br />
• Repeat<br />
The number of repeats is displayed, starting at “2” and increments with each repeat. When you have<br />
registered an item ten times, the display will show “0”. (2 ➞ 3 ......9 ➞ 0 ➞ 1 ➞ 2...)<br />
• Sentinel mark<br />
When amounts in the drawer reaches the amount you preprogrammed, the sentinel mark “X” is<br />
displayed to advice you to remove the money to a safe place.<br />
• Power save mark<br />
When the cash register goes into the power save mode, the power save mark (decimal point) is<br />
displayed.<br />
• Stock alarm indicator<br />
When the stock counter of the PLU or UPC which you entered is zero or negative, the alarm indicator<br />
(decimal point) is displayed.<br />
• Function message display area<br />
Item labels of departments and PLU/subdepartments/UPC and function text you use, such as %1, (–)<br />
and CASH are displayed here. For the details of function texts, please refer to pages 146 to 149.<br />
When an amount is to be entered or entered, “AMOUNT” is displayed: When an amount is to be<br />
entered, – – – – – – – is displayed in the numeric entry display area with “AMOUNT”. When a preset<br />
price has been set, the price is displayed in the numeric entry display area with “AMOUNT”.<br />
• Numeric entry display area<br />
Numbers entered using numeric keys are displayed here.<br />
Date and time display<br />
Date and time appear on the display in the OP X/Z, REG, or MGR mode. In the REG or MGR mode, press<br />
#/<br />
the TM key to display the date and time.<br />
Error messages<br />
When an error occurs, the corresponding error message is displayed in the function message display area.<br />
For the details of error messages, please refer to the “Error message table” on page 223.<br />
2<br />
Customer display (Pop-up type)<br />
19
FOR THE OP<strong>ER</strong>ATOR<br />
PRIOR TO ENTRIES<br />
1<br />
Preparations for entries<br />
Before registrations, insert the operator key into the mode switch and turn it to the REG position and check the<br />
following items:<br />
Receipt and journal paper rolls<br />
If the receipt and journal paper rolls are not set in the machine or there are low rolls, install new ones according<br />
to section “4. Installing and removing the paper rolls” under “OP<strong>ER</strong>ATOR MAINTENANCE.”<br />
Receipt ON/OFF function<br />
You can disable receipt printing in the REG mode to save paper using the receipt function. To disable receipt<br />
printing, press the q key in the OP X/Z position. This key toggles the receipt printing status ON and OFF.<br />
To check the receipt printing status, turn the mode switch to the OP X/Z position or press the c key in the REG<br />
mode. When the function is in the OFF status, the receipt off indicator “_” illuminates.<br />
Note<br />
Your register will print reports regardless of the receipt state. This means that the receipt roll must<br />
be installed even when the receipt state is “OFF” when taking reports.<br />
Cashier/Server assignment<br />
The <strong>ER</strong>-<strong>A520</strong>A requires a cashier to be assigned prior to operational item entries. The <strong>ER</strong>-<strong>A530</strong>A enforces that a<br />
server must enter their code into the register. Depending on register settings, it is possible to keep the same<br />
cashier/server code assigned when the same cashier/server is to be used for all transactions within a set period.<br />
As previously mentioned, there are two variants to consider for the display and print of the cashier/server codes.<br />
Logo message or graphic logo<br />
(varies depending on<br />
programming.)<br />
Cashier/Server code<br />
(“ ” is printed in Variant 2.)<br />
✱ ✱✱<br />
✱<br />
Cashier/Server name<br />
Note<br />
The operation entries depend on how the register has been programmed. To determine which<br />
selections should be considered, please consult your local dealer.<br />
20
Procedure<br />
■ Sign-on<br />
Variant 1 :<br />
(Code is displayed.)<br />
Variant 2 :<br />
(Code is not displayed.)<br />
To display the current cashier/server code<br />
Cashier/server<br />
code<br />
S<strong>ER</strong>V<br />
‹‹ /<br />
Cashier/server<br />
‹‹ / S<strong>ER</strong>V<br />
code ‹‹ /<br />
S<strong>ER</strong>V<br />
■ Sign-off<br />
Variant 1 / Variant 2 :<br />
‹‹ / ‹‹ S<strong>ER</strong>V<br />
/<br />
S<strong>ER</strong>V<br />
Note<br />
• If you want to enter a cashier/server code before every transaction, please consult your authorized<br />
SHARP dealer.<br />
• For the display type selection of the cashier/server code, “Variant 1” has been preset. For the<br />
selection of the “Variant 2”, consult your authorized SHARP dealer.<br />
• The cashier/server can be changed during a transaction. Please consult your authorized SHARP<br />
dealer.<br />
2<br />
Power save mode<br />
The register will enter into the power save mode when no entries are performed based on the pre-programmed<br />
time limit (by default, 30 minutes).<br />
When the register goes to the power save mode, the operator and customer displays will turn off. This is<br />
indicated by a decimal point at the left most position of the lower line. The register will return to normal operation<br />
mode when any key is pressed or a mode is changed with the mode key. Please note when the register is<br />
recovered by any key entry the initial key entry is ignored. After the recovery, you may start the key entries from<br />
the beginning.<br />
3<br />
Error warning<br />
In the following examples, your register will go into an error state accompanied with a warning beep and a<br />
corresponding error message. Clear the error state by pressing the c key and take proper action.<br />
Please refer to the error message table on page 223.<br />
• When you enter an over 32-digit number (entry limit overflow): Cancel the entry and re-enter a valid number.<br />
• When you make an error in key operation: Clear the error and continue entries.<br />
• When you make an entry beyond a programmed amount entry limit: Check to see if the entered amount is<br />
correct. If it is correct, it be possible to make the entry in the MGR mode. Contact your manager.<br />
• When an including-tax subtotal exceeds eight digits: Clear the subtotal by pressing the c key and press the<br />
a, Å thru É, k, CHK2 thru CHK5 , or h thru CH9 key to finalize the transaction.<br />
21
ENTRIES<br />
Note<br />
The example entries provided within this manual describe the function key labeled<br />
used for the model <strong>ER</strong>-<strong>A520</strong>A. For the model <strong>ER</strong>-<strong>A530</strong>A, please substitute the<br />
P function key.<br />
PLU/<br />
UPC<br />
which is<br />
key with the<br />
PLU/<br />
UPC<br />
1<br />
Item entries<br />
Single item entries<br />
Procedure<br />
Department entries (direct department entries)<br />
Enter a unit price and press a department key. If you use a programmed unit price, press a department key only.<br />
When using a programmed unit price<br />
Unit price *<br />
(max. 7 digits)<br />
Department key<br />
*Less than the programmed upper limit amounts<br />
Note<br />
When those departments for which the unit price has been programmed as zero (0) are entered,<br />
only the sales quantity is added.<br />
Department entries (indirect department entries)<br />
Dept. code<br />
(1–99)<br />
à<br />
When using a programmed unit price<br />
or<br />
å<br />
Unit price *<br />
(max. 7 digits)<br />
à<br />
*Less than the programmed upper limit<br />
amounts<br />
When [preset only dept.] is entered.<br />
PLU entries (indirect PLU entries)<br />
Enter a PLU code and press the<br />
PLU/<br />
UPC<br />
key.<br />
PLU code<br />
PLU/<br />
UPC<br />
Note<br />
When those PLU’s for which the unit price has been programmed as zero (0) are entered, only the<br />
sales quantity is added.<br />
Subdepartment (open PLU, open and preset PLU) entries<br />
When using a programmed unit price<br />
PLU code PLU/ Unit price *<br />
UPC<br />
(max. 7 digits)<br />
PLU/<br />
UPC<br />
or<br />
å<br />
*Less than the programmed upper limit<br />
amounts<br />
PLU entries (direct PLU entries)<br />
When using a programmed unit price<br />
Unit price *<br />
(for subdept.)<br />
Direct PLU key<br />
22
UPC entries<br />
Scan UPC code<br />
Ä<br />
UPC code<br />
(max.13 digits)<br />
To cancel the learing function entry<br />
To set “auto-delete”<br />
Unit price<br />
(max. 6 digits)<br />
PLU/<br />
UPC<br />
NON<br />
DELETE<br />
(Registration)<br />
When the dept. key is depressed directly c<br />
å<br />
(<br />
1 ~ 99 )<br />
Dept. no.<br />
(1 - 99)<br />
DEPT<br />
#<br />
Example<br />
Key operation<br />
Print<br />
1200 3<br />
5<br />
8 à<br />
5 à 680 à<br />
PLU/<br />
2 PUPC<br />
PLU/<br />
PLU/<br />
11 PUPC<br />
1200 PUPC<br />
ô<br />
PLU/<br />
5012345678900 PUPC<br />
a<br />
Repeat entries<br />
You can use this function for entering a sale of two or more same items.<br />
You can use the è key to repeat entry instead of department, å, direct PLU or<br />
PLU/<br />
UPC<br />
key.<br />
Example<br />
Repeated<br />
department<br />
entry (direct)<br />
Repeated<br />
department entry<br />
(indirect)<br />
Repeated PLU<br />
entry<br />
(indirect)<br />
Repeated PLU<br />
entry<br />
(direct)<br />
Repeated<br />
subdepartment<br />
entry<br />
Repeated UPC<br />
entry<br />
Repeated<br />
department entry<br />
(direct) using the<br />
repeat key<br />
Key operation<br />
Print<br />
200 8<br />
88<br />
5 à 680 à<br />
à<br />
PLU/<br />
10 PUPC<br />
PPóó<br />
PLU/<br />
UPC<br />
PLU/<br />
UPC<br />
PLU/<br />
60 PUPC<br />
PLU/<br />
500 PUPC<br />
P<br />
PLU/<br />
UPC<br />
PLU/<br />
5012345678900 PUPC<br />
P<br />
PLU/<br />
UPC<br />
600 2<br />
èèa<br />
23
Multiplication entries<br />
Use this feature when you need to enter two or more same items.<br />
This feature helps when you sell a large quantity of items or need to enter quantities that contain decimals.<br />
Procedure<br />
Q’ty<br />
@<br />
When using a programmed<br />
unit price<br />
Unit price<br />
Dept. code<br />
PLU code<br />
Department key<br />
à<br />
PLU/<br />
UPC<br />
Unit price<br />
à or å<br />
When [preset only dept.] is entered.<br />
PLU/<br />
PLU/<br />
PLU code Unit price or<br />
UPC<br />
UPC å<br />
Dept. entry (direct)<br />
Dept. entry (indirect)<br />
PLU entry (indirect)<br />
PLU/subdept. entry (indirect)<br />
Unit price<br />
UPC code<br />
Direct PLU key<br />
Ä<br />
Scan UPC code<br />
PLU/<br />
UPC<br />
PLU/subdept. entry (direct)<br />
UPC entry<br />
• After scanning a UPC code or pressing the<br />
PLU/<br />
UPC<br />
key, when the item does not exist in the file, the display will<br />
show “NO RECORD”. Enter the unit price using the å key and department no. with the à key.<br />
• Q’ty: Up to four digits integer + three digits decimal<br />
• Unit price: Less than a programmed upper limit<br />
• Q’ty × unit price: Up to seven digits<br />
Example<br />
Department<br />
entry (direct)<br />
Department<br />
entry<br />
(indirect)<br />
PLU entry<br />
(indirect)<br />
PLU entry<br />
(direct)<br />
Subdepartment<br />
entry<br />
UPC entry<br />
Key operation<br />
Print<br />
7 . 500 @<br />
165 8<br />
2 @<br />
5 à<br />
250 à<br />
15 @<br />
PLU/<br />
13 PUPC<br />
8 . 250 @<br />
ò<br />
3 @<br />
PLU/<br />
60 PUPC<br />
PLU/<br />
100 PUPC<br />
5 @<br />
PLU/<br />
5012345678900 PUPC<br />
a<br />
Note<br />
You must use a decimal point (.) key when entering quantities that are fractional.<br />
24
Successive multiplication entries<br />
This function may be desired when you enter a sale of items sold by area (square feet).<br />
Procedure<br />
Length<br />
@<br />
Width<br />
Dept. code<br />
@<br />
à<br />
When using a<br />
programmed unit price<br />
Unit price<br />
Unit price<br />
Department key<br />
à or å<br />
Dept. entry (direct)<br />
Dept. entry (indirect)<br />
When [preset only dept.] is entered.<br />
PLU code<br />
PLU code<br />
PLU/<br />
UPC<br />
PLU/<br />
UPC<br />
Unit price<br />
PLU/<br />
UPC<br />
or<br />
å<br />
PLU entry (indirect)<br />
PLU/subdept. entry (indirect)<br />
Unit price<br />
UPC code<br />
Direct PLU key<br />
Ä<br />
Scan UPC code<br />
PLU/<br />
UPC<br />
PLU/subdept. entry (direct)<br />
UPC entry<br />
• After scanning a UPC code or pressing the<br />
PLU/<br />
UPC<br />
key, when the item does not exist in the file, the display will<br />
show “NO RECORD”. Enter the unit price using the å key and department no. with the à key.<br />
• Length or width: Up to seven digits (4-digit integer + 3-digit decimal)<br />
• Unit price: Less than a programmed upper limit<br />
• Length × Width × Unit price: Up to seven digits<br />
Note<br />
• For actual use of this function, please consult your dealer.<br />
• You must use a decimal point (.) key when entering quantities that are fractional.<br />
Example<br />
Department entry<br />
PLU entry<br />
Subdepartment entry<br />
UPC entry<br />
Key operation<br />
Print<br />
3 @<br />
4 @<br />
400 5<br />
1 . 500 @<br />
2 . 500 @<br />
PLU/<br />
8 PUPC<br />
1 . 750 @<br />
1 . 750 @<br />
PLU/<br />
6 PUPC<br />
PLU/<br />
600 PUPC<br />
4 @<br />
5 @<br />
PLU/<br />
5099887654302 P<br />
a UPC<br />
25
Split-pricing entries<br />
You may use this function when your customer wants to purchase items normally sold in bulk.<br />
Procedure<br />
Selling q’ty<br />
@<br />
Base q’ty<br />
@<br />
When using a<br />
programmed unit price<br />
Unit price<br />
per base q’ty<br />
Dept. code<br />
à<br />
Department key<br />
Unit price<br />
à or å<br />
When [preset only dept.] is entered.<br />
PLU code<br />
PLU code<br />
PLU/<br />
UPC<br />
PLU/<br />
UPC<br />
Unit price<br />
per base q’ty<br />
PLU/<br />
UPC<br />
or<br />
å<br />
Unit price<br />
per base q’ty<br />
UPC code<br />
Direct PLU key<br />
Ä<br />
PLU/<br />
UPC<br />
Only when you use a<br />
base q’ty programmed<br />
for PLU code<br />
PLU code<br />
PLU code<br />
PLU/<br />
UPC<br />
PLU/<br />
UPC<br />
Unit price<br />
per base q’ty<br />
PLU/<br />
UPC<br />
orå<br />
Unit price<br />
per base q’ty<br />
UPC code<br />
Direct PLU key<br />
Ä<br />
PLU/<br />
UPC<br />
• After scanning a UPC code or pressing the<br />
PLU/<br />
UPC<br />
key, when the item does not exist in the file, the display will<br />
show “NO RECORD”. Enter the unit price using the å key and department no. with the à key.<br />
• Selling quantity: Up to four digits integer + three digits decimal<br />
• Base quantity: Up to two digits (integer)<br />
Example<br />
Department<br />
entry<br />
PLU entry<br />
UPC entry<br />
Key operation<br />
Print<br />
7 @<br />
10 @<br />
600 7<br />
8 @<br />
5 @<br />
PLU/<br />
35 PUPC<br />
5 @<br />
6 @<br />
PLU/<br />
5045678912304 P<br />
a UPC<br />
26<br />
Note<br />
You must use the decimal point (.) key when entering selling quantities that are fractional.
Single item cash sale (SICS)/single item finalize (SIF) entries<br />
SICS entries<br />
• This function is useful when a sale is for only one item and is for cash; such as a pack of cigarettes. This<br />
function is applicable only to those departments that have been set for SICS or to their associated PLUs,<br />
subdepartments or UPCs.<br />
PLU/<br />
• The transaction is finalized and the drawer opens as soon as you press the department key, å key, UPC key,<br />
the direct PLU key or scanning a UPC code.<br />
Example<br />
Key operation<br />
250<br />
For finishing 9<br />
the transaction<br />
Print<br />
Note<br />
If an entry to a department, PLU/subdepartment or UPC set for SICS follows entries to<br />
departments, PLUs/subdepartments or UPC not set for SICS, it does not finalize and results in a<br />
normal sale.<br />
SIF entries<br />
• If an entry to a department, PLU/subdepartment or UPC set for SIF follows entries to departments,<br />
PLUs/subdepartments or UPC not set for SIF, the transaction is finalized immediately as a cash sale.<br />
• Like the SICS function, this function is available for single-item cash settlement.<br />
Example<br />
Key operation<br />
1745 8<br />
1500<br />
For finishing 9<br />
the transaction<br />
Print<br />
27
Scale entries<br />
For making entries for weighed items, a scale may be connected where by the weight is automatically read from<br />
the scale. To make refund or return entries, the weight is entered manually while the scale platter is empty and<br />
reads zero.<br />
i) Auto scale entries<br />
OPEN<br />
TARE<br />
Procedure<br />
When you use a<br />
programmed tare no.<br />
Tare number<br />
(1-9)<br />
Open tare<br />
weight<br />
SCALE<br />
When base wt. is<br />
1 LB (or 1 KG)<br />
Base wt.<br />
`<br />
When using a<br />
programmed unit price<br />
Unit price<br />
per base wt.<br />
Dept. code<br />
Unit price<br />
per base wt.<br />
Dept. code<br />
Department<br />
à<br />
Unit price<br />
When [preset only dept.] is entered.<br />
Department<br />
à<br />
Unit price<br />
à or å<br />
à or å<br />
When [preset only dept.] is entered.<br />
PLU code<br />
PLU/<br />
UPC<br />
PLU code<br />
PLU/<br />
UPC<br />
Unit price<br />
per base wt.<br />
PLU/<br />
UPC<br />
or<br />
å<br />
Unit price<br />
per base wt.<br />
UPC code<br />
Direct PLU key<br />
Ä<br />
PLU/<br />
UPC<br />
Only when you use a<br />
base wt. programmed<br />
for PLU code<br />
PLU code<br />
PLU code<br />
PLU/<br />
UPC<br />
PLU/<br />
UPC<br />
Unit price<br />
per base wt.<br />
PLU/<br />
UPC<br />
or<br />
å<br />
Unit price<br />
per base wt.<br />
UPC code<br />
Direct PLU key<br />
Ä<br />
PLU/<br />
UPC<br />
• Open tare weight: Up to 5 digits (integer + decimal)<br />
• Net weight: Up to 5 digits (integer + decimal)<br />
• Base weight: Up to 2 digits (integer)<br />
Note<br />
• The register can be programmed with up to nine tare tables and allows different tares to be<br />
assigned to them.<br />
• When the S key is pressed, the weight is automatically read from the connected scale (option)<br />
and the net weight appears in the register display.<br />
• When the item is programmed for “Scale compulsory”, it is not necessary to press the S key.<br />
Example<br />
Key operation<br />
S 200 1<br />
PLU/<br />
S 1 P<br />
c<br />
UPC<br />
Print<br />
28
ii) Manual scale entries of refunded items<br />
Procedure<br />
When using a<br />
programmed unit price<br />
When base wt. is<br />
1 LB (or 1 KG) Unit price<br />
per base wt.<br />
Dept. code<br />
Department<br />
à<br />
Unit price<br />
à or å<br />
Net weight<br />
Ï<br />
Ï RET<strong>ER</strong>N<br />
SCALE<br />
Base wt.<br />
`<br />
Unit price<br />
per base wt.<br />
Dept. code<br />
When [preset only dept.] is entered.<br />
Department<br />
à<br />
Unit price<br />
à or å<br />
When [preset only dept.] is entered.<br />
PLU code<br />
PLU/<br />
UPC<br />
PLU code<br />
PLU/<br />
UPC<br />
Unit price<br />
per base wt.<br />
PLU/<br />
UPC<br />
or<br />
å<br />
Unit price<br />
per base wt.<br />
UPC code<br />
Direct PLU key<br />
Ä<br />
PLU/<br />
UPC<br />
Only when you use a<br />
base wt. programmed<br />
for PLU code<br />
PLU code<br />
PLU code<br />
PLU/<br />
UPC<br />
PLU/<br />
UPC<br />
Unit price<br />
per base wt.<br />
PLU/<br />
UPC<br />
or<br />
å<br />
Unit price<br />
per base wt.<br />
UPC code<br />
Direct PLU key<br />
Ä<br />
PLU/<br />
UPC<br />
• Net weight: Up to 5 digits (integer + decimal) which is from the customer’s receipt.<br />
• Base weight: Up to 2 digits (integer)<br />
Example<br />
Key operation<br />
Print<br />
32 . 85 Ï S 200 1<br />
PLU/<br />
37 . 25 Ï S 1 PUPC<br />
c<br />
29
PLU level shift (for direct PLU)<br />
This shift function can allow access to PLUs on your register without adding additional direct PLU keys. You can<br />
use direct PLUs in five levels by utilizing PLU level shift keys l thru L5 . The level shift key shifts the PLU<br />
level from the other four to the required level. (The normal level is level 1.) You can also shift PLU level by<br />
entering a level number and pressing the PLU level shift number key, ä.<br />
You must program your machine in the PGM2 mode to select one of the two PLU level shift modes — automatic<br />
return mode* and lock shift mode** — and decide whether to allow PLU level shift in both the REG and MGR<br />
modes or in the MGR mode alone.<br />
* The automatic return mode automatically shifts the PLU level back to level 1 after a direct PLU key is pressed.<br />
You can select whether the PLU level should return each time you enter one item or each time you finalize<br />
one transaction.<br />
** The lock shift mode holds the current PLU level until a PLU level shift key is pressed.<br />
Automatic return mode (for PLU levels)<br />
If you shift the PLU level while in the automatic return mode, press the desired PLU level shift key before<br />
numeric entries.<br />
Procedure<br />
• each item<br />
¬<br />
thru<br />
Level no.<br />
(1 to 5)<br />
L5<br />
ä<br />
Numeric entry<br />
(Q’ty,<br />
@ )<br />
Direct PLU<br />
(Returning to level 1)<br />
• each transaction<br />
¬<br />
thru<br />
Level no.<br />
(1 to 5)<br />
L5<br />
ä<br />
Numeric entry<br />
(Q’ty,<br />
@ )<br />
Direct PLU<br />
Payment<br />
(Returning to level 1)<br />
Lock shift mode (for PLU levels)<br />
If you shift the PLU level while in the lock shift mode, press the desired PLU level shift key before numeric<br />
entries.<br />
Procedure<br />
l<br />
thru<br />
Level no.<br />
(1 to 5)<br />
To shift the level of another PLU<br />
L5<br />
ä<br />
Numeric entry<br />
(Q’ty,<br />
@ )<br />
Direct PLU<br />
(Staying in the current level)<br />
Note<br />
If you select the automatic return mode, it is not necessary to use the l key on the keyboard, but<br />
if you select the lock shift mode, it is necessary to use the key.<br />
30
Example<br />
Direct PLU1: PLU code 1 (PLU level 1), PLU code 65 (PLU level 2)<br />
Direct PLU2: PLU code 2 (PLU level 1), PLU code 66 (PLU level 2)<br />
• When your machine has been programmed for the automatic return mode:<br />
Key operation<br />
Print<br />
1<br />
¬ 1<br />
21a<br />
• When your machine has been programmed for the lock shift mode:<br />
Key operation<br />
Print<br />
l 1<br />
¬ 1<br />
21a<br />
31
PLU/UPC price level shift<br />
Six different price level shifts can be programmed for each PLU or UPC.<br />
The price levels can be changed for PLU or UPC registrations.<br />
You can change a PLU/UPC price among six prices by utilizing the price level shift keys P1 thru P6 , the level<br />
shift key shifts the price level from the other five to the required level. (The normal level is level 1.) You can<br />
also a shift price level by entering level number and pressing the price level shift number key, ¥.<br />
You must program the price level shift mode (i.e. automatic return mode* or lock shift mode**) and the operating<br />
mode to be used for the price level shift (i.e. both REG/MGR modes or MGR mode alone).<br />
* The automatic return mode automatically shifts the PLU/UPC price level back to level 1 after a PLU/UPC shift<br />
entry. You can select whether the price level should return each time you enter one item or each time you<br />
finalize one transaction.<br />
** The lock shift mode holds the current PLU/UPC price level until pressing the price level shift key.<br />
Automatic return mode (for price levels)<br />
If your register has been programmed for the price level shift in the automatic return mode, press a desired price<br />
level shift key before a numeric type entry.<br />
Procedure<br />
(each item)<br />
P2<br />
thru<br />
Level no.<br />
(1 to 6)<br />
P6<br />
¥<br />
Numeric entry<br />
(Q ty,<br />
@ etc.)<br />
PLU/UPC code<br />
Direct PLU<br />
Ä<br />
PLU/<br />
UPC<br />
(Returning to<br />
price level 1)<br />
(each transaction)<br />
P2<br />
thru<br />
Level no.<br />
(1 to 6)<br />
P6<br />
¥<br />
Numeric entry<br />
(Q ty,<br />
@ etc.)<br />
PLU/UPC code<br />
Direct PLU<br />
Ä<br />
PLU/<br />
UPC<br />
Payment<br />
(Returning to<br />
price level 1)<br />
Lock shift mode (for price levels)<br />
If your register has been programmed for the price level shift in the lock shift mode, press a desired price level<br />
shift key before a numeric type entry.<br />
Procedure<br />
P1<br />
thru<br />
Level no.<br />
(1 to 6)<br />
P6<br />
¥<br />
To shift the price level of another PLU/UPC<br />
Numeric entry<br />
(Q ty,<br />
@ etc.)<br />
Ä<br />
PLU/UPC code<br />
Direct PLU<br />
PLU/<br />
UPC<br />
Note<br />
• If you select the automatic return mode, it is not necessary to use the P1 key on the keyboard,<br />
but if you select the lock shift mode, it is necessary to use the key.<br />
• You can program “printing of the price level text. Please refer to “Programming for optional feature<br />
selection” described in the “PROGRAMMING” section of this manual.<br />
32
Example<br />
PLU price level 1: PLU 1 ($1.91), PLU 2 ($0.79)<br />
PLU price level 2: PLU 1 ($2.00), PLU 2 ($0.99)<br />
• When your register has been programmed for the automatic return mode (by one item):<br />
Key operation2 P<br />
a<br />
Print<br />
P2<br />
PLU/<br />
1 PUPC<br />
PLU/<br />
1 PUPC<br />
PLU/<br />
UPC<br />
• When your register has been programmed for the lock shift mode:<br />
Key operation2 P<br />
a<br />
Print<br />
P2<br />
PLU/<br />
1 UPC<br />
P<br />
PLU/<br />
1 PUPC<br />
PLU/<br />
UPC<br />
Set PLU entries<br />
Operations are the same as normal PLU’s.<br />
When a set PLU is entered, an entered or preset amount is printed as the unit price and then those PLUs linked<br />
to the set PLU are printed automatically.<br />
Example<br />
Key operation<br />
p<br />
a<br />
Print<br />
Note<br />
The unit price of the set PLU (ex. PLU 20) is the registered amount of the set PLU. The tied PLU’s<br />
memory is updated only by the entered quantity.<br />
33
Link PLU/UPC entries<br />
The operation is the same as normal PLU’s/UPC’s. When this PLU/UPC is entered, the linked PLU’s amount is<br />
included and the linked PLU’s label is printed automatically. Only the 1st PLU is affected by the status shift keys<br />
TAX<br />
( SHIFT , |, «, » or ˛ key). The percent calculation is in effect for the amount of the 1st ranking PLU.<br />
Example<br />
When PLU 21 is linking PLU 25,26,27 as follows<br />
Key operation<br />
Print<br />
PLU/<br />
21 P<br />
a UPC<br />
Age verification (Birthday entry)<br />
The age verification function is used for prohibiting the sale of goods (departments, PLUs or UPCs) for certain<br />
aged persons based on a registered birthday.<br />
When a department/PLU/UPC for which a figure other than zero (01 to 99) has been programmed as the age<br />
limitation is entered, a birthday entry must be completed.<br />
Procedure<br />
XXXXXX BIRTH<br />
Birthday (five or six digits)<br />
Note<br />
• A birthday entry can be performed two or more times at any point during a transaction, however<br />
the last entered birthday remains in effect.<br />
• You can enter the date as far back as 98 years.<br />
[Ex.] When the current year is 2005 : you can enter the year 1907-2005.<br />
Example<br />
Oct. 2, 1985 (When dept. 7 is programmed as the age limitation “17”.)<br />
Key operation<br />
Print<br />
100285 BIRTH<br />
300 7<br />
a<br />
7<br />
When birthday printing is allowed, through programming (Job no. 2616), the birthday date is printed.<br />
34
Mix-and-match entries<br />
This function is convenient for matching several PLU/UPC items and selling them in a lump (e.g. bundle sale,<br />
multi-packed sale, etc.). The matching q’ty and adjusted amount are assigned to a mix-and-match table. All<br />
items that are programmed into the same table are treated as if they belong to one group.<br />
Example<br />
Selling on a mix-and-match basis the following items in table no. 1 to which the matching q’ty<br />
“3” and the adjusted amount “$10.00” are assigned:<br />
• PLU 40 (Unit price: $5.00)<br />
• PLU 41 (Unit price: $3.00)<br />
• PLU 42 (Unit price: $2.50)<br />
Key operation<br />
Treated as $5.00 item ➝ /<br />
Treated as $3.00 item ➝ !<br />
Treated as $2.00 item ➝ @<br />
a<br />
Print<br />
Condiment entries (for PLUs)<br />
Your register may be programmed for prompting condiment and preparatory instructions for a menu-item PLU.<br />
Example:<br />
When you enter a menu-item PLU, a prompting message such as “HOWCOOK?” will appear. You must specify<br />
a PLU such as “RARE” to meet a special order of the guest.<br />
In an example of the condiment table show below, it is assumed the condiment table #1 and #4 is assigned to<br />
PLU 210 (item label: STEAK/unit price: $13:00).<br />
When you enter PLU 210, the message “HOWCOOK?” will appear. You are allowed to enter one of the PLU<br />
code, 221, 222 and 223. When you enter PLU 221, “RARE” is registered and the next message “POTATO?” will<br />
appear. When you enter PLU 226, “P.CHIPS” is registered. Then press the a key to end this entry.<br />
Table number PLU codes for condiment entry (programmed text, price) Next table no.<br />
1<br />
4<br />
220 221 222 223<br />
(HOWCOOK?) (RARE 0.00) (MED.RARE 0.00) (WELLDONE 0.00)<br />
225 226 227 228<br />
(POTATO?) (P. CHIPS 0.60) (MASHED.P 0.60) (BAKED.P 0.50)<br />
4<br />
Menu-item PLUs<br />
(PLU210 is linked<br />
to table #1)<br />
Message text<br />
Condiment PLUs (preset price entry is allowed.)<br />
Example<br />
Key operation<br />
“HOWCOOK?” appears.<br />
“POTATO?” appears.<br />
Print<br />
PLU/<br />
210 PUPC<br />
PLU/<br />
221 PUPC<br />
PLU/<br />
226 P<br />
c UPC<br />
35
Note<br />
• Your register will continue to prompt for the condiment entry until you finish the entire condiment<br />
entry programmed for the PLU. During the condiment entry, if you enter a normal PLU, which is<br />
not in the condiment table, an error message will appear in case the condiment entry is<br />
compulsory.<br />
C<br />
• When the NEXT key is pressed, the entry skips to the next table which is programmed.<br />
• When the<br />
C<br />
key is pressed, its condiment entry is canceled in the programmed mode<br />
CANCEL<br />
(REG/MGR or MGR).<br />
• When you enter a PLU priced at “0.00,” only the text will be printed on the receipt.<br />
• No refund entry is possible for any condiment entries. When you perform a refund entry with a<br />
menu-item PLU and the condiment PLUs assigned to the menu-item PLU are automatically<br />
registered as a refund entry.<br />
• You may omit the compulsory condiment entry by pressing the<br />
C<br />
NEXT<br />
key.<br />
Price inquiry (view) function (for PLU/UPCs)<br />
You can use this function when you want to know the unit price of the PLU/UPC item during sales transactions<br />
while in the REG/MGR mode.<br />
Procedure<br />
"VIEW" is displayed.<br />
Ù<br />
Numeric entry<br />
(Q'ty )<br />
`<br />
Scan UPC code<br />
Ä<br />
UPC code<br />
PLU code<br />
Unit price<br />
PLU/<br />
UPC<br />
PLU/<br />
UPC<br />
Direct PLU<br />
Unit price<br />
PLU/<br />
UPC<br />
or<br />
å<br />
The total sales amount of<br />
the PLU/UPC is displayed.<br />
*<br />
c<br />
1<br />
*<br />
å<br />
2<br />
* 3<br />
(MGR mode)<br />
Unit price<br />
å<br />
*1: Press the c key to cancel the inquiring (view) mode.<br />
*2: Press the å key when you want to register the unit price of the PLU/UPC displayed.<br />
*3: You can change the unit price temporarily in the MGR mode. The unit price which is programmed in PGM<br />
mode is not changed (Price override entry).<br />
Note<br />
For the repeat entry, use the è key.<br />
Example<br />
Price is displayed.<br />
Key operation<br />
Print<br />
PLU/<br />
5 PUPC<br />
Ù<br />
PLU/<br />
5089123456708 PUPC<br />
åc<br />
36
UPC learning function<br />
When you enter or scan an undefined code, you are required to enter the unit price “amount” and the associated<br />
department. The UPC code, unit price and the department entered are stored in the dynamic UPC file (if<br />
opened, and if not opened, in the PLU/UPC file) and is used for future sales entries.<br />
Note<br />
• When there is no capacity remaining in the file, the data is not stored in the file.<br />
• The text of the entered department is applied to the entered UPC code.<br />
• You can use the UPC learning function in the training mode. This may be convenient to practice<br />
when installing the scanning system.<br />
Procedure<br />
"NO RECORD" is displayed and the beep sound occurs three times.<br />
Then, "PRICE -> DEPT" is displayed to guide you to enter unit price<br />
and associated department code.<br />
Scan an undefined UPC code<br />
Ä<br />
Undifined<br />
UPC code<br />
PLU/<br />
UPC<br />
When the unit price is zero, or in case of<br />
non-PLU type UPC code having price info.<br />
or press code.<br />
Unit price<br />
c<br />
To cancel the operation<br />
Ì * Department key<br />
Dept. no.<br />
à<br />
å<br />
"ENT<strong>ER</strong> DEPT#"<br />
is displayed<br />
* Press the Ì key when you want to exempt the UPC code entered from the non-accessed UPC delete<br />
function (deletion occurs by executing #105 in Z1 mode).<br />
Note<br />
For the repeat entry, use the è key.<br />
Example<br />
“NO RECORD”, “PRICE -><br />
DEPT” are displayed.<br />
Key operation<br />
PLU/<br />
5056789123404 ÛUPC<br />
750<br />
5<br />
c<br />
Print<br />
37
Price change function (for PLU/UPCs)<br />
You can use this function when you need to change the unit price or associated department of a PLU/UPC item<br />
in REG/MGR mode.<br />
There are two methods for price changes:<br />
1. Price change mode<br />
You can change the preset price and/or the associated department of a PLU/UPC item without entering PGM<br />
mode.<br />
2. Changing a price during a transaction<br />
When a wrong PLU/UPC price and/or associated department is found during transaction, you can correct<br />
them at the time of the transaction. With the entry of a new price and/or associated department, the preset<br />
price and/or associated department is automatically changed to the new price and/or associated department.<br />
Note<br />
For the Non-PLU type price embedded UPC-A codes, the prices in the codes have the priority over<br />
the preset prices. So, for these codes, a changed price is valid only when the price change is<br />
executed.<br />
Procedure<br />
Price change mode<br />
"PRICE CHANGE" is displayed.<br />
Ê<br />
Scan UPC code<br />
Ä<br />
UPC code<br />
PLU code<br />
PLU/<br />
UPC<br />
PLU/<br />
UPC<br />
Direct PLU<br />
Changing a price during a transaction<br />
Scan UPC code<br />
Ä<br />
UPC code<br />
PLU/<br />
UPC<br />
Ê<br />
"PRICE & DEPT" is displayed.<br />
PLU code<br />
PLU/<br />
UPC<br />
Unit price<br />
PLU/<br />
UPC<br />
or<br />
å<br />
Unit price<br />
Direct PLU<br />
To enter 0<br />
Ê<br />
To change the unit price only<br />
Unit price<br />
c<br />
To cancel<br />
Department key<br />
å<br />
Dept no.<br />
à<br />
To change the associated dept.<br />
directly by depressing the<br />
corresponding key<br />
To change the associated dept.<br />
using the dept. no. entry key<br />
"ENT<strong>ER</strong> DEPT#" is displayed.<br />
38
Example<br />
• Price change mode<br />
Key operation<br />
Ê<br />
PLU/<br />
5087654321106 ÛUPC<br />
600 Ê<br />
Print<br />
• Changing a price during a transaction<br />
Key operation Print<br />
PLU/<br />
5087654321106 Û<br />
Ê<br />
UPC<br />
600 Ê<br />
c<br />
The journal printer prints the<br />
following format in this position.<br />
Associated dept. no.<br />
Note<br />
• When an undefined code is entered in the price change mode, the register results in an error.<br />
• When you press the Ê key during a transaction, the UPC entry is voided upon the 1st<br />
depression of the Ê key, then you are allowed to enter a correct price and/or associated<br />
department.<br />
• In case the item label of the UPC is the same as the associated department, the item label is<br />
changed to the item label of the new associated department when the associated department is<br />
changed.<br />
• For the repeat entry, use the è key.<br />
39
40<br />
2<br />
Displaying and printing subtotals<br />
Your register provides these five types of subtotals:<br />
Merchandise subtotal<br />
Press the  key at any point during a transaction. The net sale subtotal - not including tax - will appear in the<br />
display.<br />
Taxable subtotal<br />
Taxable 1 subtotal<br />
Press the<br />
TAX<br />
SHIFT<br />
(') and ı keys in this order at any point during a transaction. The sale subtotal of<br />
taxable 1 items will appear in the display.<br />
Taxable 2 subtotal<br />
Press the | and ı keys in this order at any point during a transaction. The sale subtotal of taxable 2<br />
items will appear in the display.<br />
Taxable 3 subtotal<br />
Press the « and ı keys in this order at any point during a transaction. The sale subtotal of taxable 3<br />
items will appear in the display.<br />
Taxable 4 subtotal<br />
Press the » and ı keys in this order at any point during a transaction. The sale subtotal of taxable 4<br />
items will appear in the display.<br />
Including-tax subtotal (full subtotal)<br />
Press the ı key at any point during a transaction. The sale subtotal including tax will appear in the display.<br />
Food stamp-eligible subtotal<br />
Press the f key at any point during a transaction. The sale subtotal of items eligible for food stamp payment<br />
will appear in the display.<br />
Tray subtotal<br />
Press the y key during a transaction in the REG or MGR mode.<br />
The contents of the tray total itemizer which include tax are printed and displayed.<br />
Eat-in subtotal<br />
You may press an eat-in key prior to entering a payment. Your register will calculate a subtotal according to the<br />
programmed tax exemption status and display the subtotal, the symbol “EAT IN,” and a corresponding caption<br />
(“EAT IN 1,” “EAT IN 2,” or “EAT IN 3”).<br />
For the transaction with the eat-in subtotal, you must finalize the transaction by making a payment entry.<br />
Just after pressing the eat-in key, however, you can cancel the entry of that key by pressing the c key or<br />
another eat-in function key.<br />
Gasoline discount subtotal<br />
Use the following procedure to get a gasoline discount subtotal; amount after gas discount amount is deducted.<br />
The gasoline discount subtotal will appear in the display.<br />
Number of media to be used for finalization*<br />
(1-19)<br />
GAS<br />
SBTL<br />
*:<br />
a : 1 k : 6 ( : 11 , 6 : 16<br />
Å : 2 k<br />
CHK2 : 7 ) : 12 , 7 : 17<br />
Å 3 : 3 k<br />
CHK3 : 8 * : 13 , 8 : 18<br />
Å 4 : 4 k<br />
CHK4 : 9 + : 14 , 9 : 19<br />
É : 5 k<br />
CHK5 : 10 , : 15
3<br />
Finalization of transaction<br />
Cash or Check tendering<br />
Press the ı key to get an including-tax subtotal, enter the amount tendered by your customer, then press the<br />
a or one of the Å thru É keys if it is a cash tender or press the k or one of the CHK2 thru CHK5 key if it is a<br />
check tender. When the amount tendered is greater than the amount of the sale, your register will show the<br />
change due amount and the text “CHANGE”. Otherwise your register will show the text “DUE” and a deficit.<br />
Make a correct tender entry.<br />
Example<br />
Cash tendering<br />
Your customer pays $10.00 for an including-tax subtotal of $7.35.<br />
Key operation<br />
Print<br />
ı<br />
1000 a<br />
Check tendering<br />
Key operation<br />
ı<br />
1000 k<br />
Print<br />
Mixed tendering (check + cash)<br />
Example<br />
Your customer pays $10.00 by check and $5.00 in cash for an including-tax subtotal of $14.56.<br />
Key operation<br />
Print<br />
ı<br />
1000 k<br />
500 a<br />
41
Cash or Check sale that does not need any tender entry<br />
Enter items and press the a or one of the Å thru É keys if it is a cash sale or press the k<br />
CHK2<br />
thru<br />
CHK5<br />
keys if it is a check sale. Your register will display the total sale amount.<br />
or one of the<br />
Example<br />
Selling a $3.00 item (dept. 6) and another $7.15 item (PLU 10) for cash<br />
Key operation<br />
300 6<br />
Print<br />
PLU/<br />
10 PUPC<br />
a<br />
In the case of check 1 sale<br />
Charge (credit) sale<br />
Enter items and press the corresponding charge keys (h<br />
thru CH9 ).<br />
Example<br />
Selling a $25.00 item (dept. 5) and a $32.50 item (dept. 6) and accepting the payment by<br />
charge 1 account<br />
Key operation<br />
Print<br />
2500 5<br />
3250 6<br />
h<br />
Amount tendering operations (i.e., change calculations) can be achieved by the h thru<br />
been preset in PGM2 job #2320.<br />
CH9<br />
key when it has<br />
Mixed-tender sale (cash or check tendering + charge tendering)<br />
Example<br />
Your customer pays $9.50 in cash and $40.00 by charge 1 for an including-tax subtotal of<br />
$49.50.<br />
Key operation<br />
Print<br />
ı<br />
950 a<br />
h<br />
42
4<br />
Food stamp calculations<br />
Food stamp tendering<br />
If your customer makes payment (or tendering) in food stamps, obtain the food stamp-eligible subtotal* by<br />
pressing the f key and make a food stamp tender entry before entering a cash or check tender.<br />
Note<br />
The food stamp-eligible subtotal* depends upon how your register is programmed based on the<br />
food stamp-eligibility of the automatic tax on a sale of items eligible for food stamp payment, or<br />
whether your register is programmed to allow the automatic tax to be paid with food stamps or not<br />
or to exempt taxation. The example below presupposes that your register has been programmed<br />
to exempt taxation.<br />
When the amount tendered in food stamps is greater than the food stamp-eligible subtotal:<br />
Your register shows two change due amounts in its display.<br />
The food stamp change due appears at the left of the display in dollars and the cash change at the right in cents.<br />
• When you enter only items eligible for food stamp payment.<br />
Example<br />
Your customer purchases a $4.25 item (dept.4, taxable 1, eligible for food stamp payment)<br />
and another $4.00 item (PLU 34, taxable 2, eligible for food stamp payment) and tenders<br />
$10.00 food stamps for them.<br />
Key operation<br />
425 4<br />
Print<br />
To display<br />
the food<br />
stamp-eligible<br />
subtotal<br />
Display shows:<br />
34 PUPC<br />
f<br />
1000 f<br />
Food stamp<br />
change due<br />
Cash change<br />
due<br />
Food stamp<br />
change<br />
Cash<br />
change<br />
• Mixed sale of an item eligible for food stamps and another item not eligible for food stamps<br />
Example<br />
Your customer purchases a $2.48 item (dept. 5, taxable 1, eligible for food stamps) and<br />
another $5.42 item (dept. 8, nontaxable, ineligible for food stamps) and pays $5.00 in food<br />
stamps and $5.00 in cash.<br />
Key operation<br />
Display shows:<br />
248 5<br />
542 8<br />
f<br />
500 f<br />
500 a<br />
Print<br />
Food stamp<br />
change due<br />
Cash change<br />
due<br />
Food stamp<br />
change<br />
Cash<br />
change<br />
43
When the food stamp tender is smaller than the food stamp-eligible subtotal:<br />
• Accept the remainder in food stamps or in cash or check. If your register is programmed to exempt taxation,<br />
additional food stamp tender is not allowed.<br />
Example<br />
Your customer buys a $3.18 item (dept. 5, taxable 1, eligible for food stamps) and another<br />
$1.24 item (dept.7, taxable 2, eligible for food stamps) and pays $4.00 in food stamps and the<br />
remainder - $1.00 in cash.<br />
Key operation<br />
To enter the<br />
cash tendering<br />
of the remainder<br />
318 5<br />
124 7<br />
f<br />
400 f<br />
100 a<br />
Print<br />
Food stamp status shift<br />
Your machine allows you to shift the programmed food-stamp status of each department, PLU/UPC or - thru<br />
±, percent key by pressing the ˛ key prior to those keys. After each entry is completed, the programmed<br />
food stamp status is resumed.<br />
Example<br />
You sell a $2.32 item of dept. 2 (food-stamp eligible) as a food-stamp ineligible item and<br />
another $3.18 item of PLU 86 (food-stamp ineligible) as a food-stamp eligible item and accept<br />
$4.00 in food stamps and $2.00 in cash.<br />
Key operation<br />
232 ˛2<br />
PLU/<br />
86 ˛ PUPC<br />
f<br />
Print<br />
400 f<br />
200 a<br />
44
5<br />
Tax calculations<br />
Automatic tax<br />
When your register is programmed with a tax table (or tax rate) and the tax status of an individual department<br />
and PLU/UPC is set for taxable, it computes the automatic tax on any item that is entered directly into the<br />
department or indirectly via a related PLU/UPC.<br />
Example<br />
Selling five $6.70 items (dept. 1, taxable 1) and one $7.15 item (PLU 85, taxable 2) for cash<br />
Key operation<br />
5 @<br />
670 1<br />
Print<br />
PLU/<br />
85 PUPC<br />
a<br />
Manual tax<br />
Your machine allows you to enter tax manually after item entries.<br />
Example<br />
Selling an $8.00 item (dept. 7) for cash with 50 cents as tax<br />
Key operation<br />
800 7<br />
50 †<br />
a<br />
Print<br />
45
Automatic-tax delete<br />
You can delete the automatic tax on the taxable 1, taxable 2, taxable 3 and taxable 4 subtotal of each<br />
transaction by pressing the † key after the subtotal is displayed.<br />
Example<br />
Selling a $7.25 item (dept. 1, taxable 1) and another $5.15 item (dept. 3, taxable 2) for cash<br />
and entering the sale as a non-taxable one<br />
Key operation<br />
Print<br />
725 1<br />
515 3<br />
TAX<br />
* \ SHIFT ı<br />
†<br />
|ı<br />
†a<br />
* TAX1<br />
SHIFT for <strong>ER</strong>-<strong>A530</strong>A<br />
If any of the media keys (i.e. cash, check or charge 1 thru charge 5) are programmed as tax delete in PGM2<br />
mode, the tax can be deleted without using the procedures above. In this case, depressing a corresponding<br />
media key alone will always cause the programmed tax to be deleted.<br />
Example<br />
When the Å key is programmed as tax delete for the same case with the above example<br />
Key operation<br />
Print<br />
725 1<br />
515 3<br />
Å<br />
46
Tax status shift<br />
Your machine allows you to shift the programmed tax status of each department, - thru ≠, percent key or<br />
TAX TAX1<br />
the PLU/UPC key by pressing the SHIFT ( SHIFT ), |, « and/or » keys before those keys. After each entry is<br />
completed, the programmed tax status of each key is resumed.<br />
Example<br />
Selling the following items for cash with their programmed tax status reversed<br />
• One $13.45 item of dept. 7 (non-taxable) as a taxable 1 item<br />
• One $7.00 item of dept. 2 (non-taxable) as a taxable 1 and 2 item<br />
• One $4.00 item of dept. 3 (taxable 2) as a non-taxable item<br />
• Two $10.50 items of dept. 1 (taxable 1) as taxable 2 items<br />
Key operation<br />
Print<br />
TAX<br />
1345 \ SHIFT 7<br />
TAX<br />
700 \<br />
SHIFT<br />
|2<br />
400 |3<br />
TAX<br />
1050 \<br />
SHIFT<br />
|1<br />
1a<br />
Note<br />
The entry of a multi-taxable item for PST or GST will be prohibited as follows (for Canada).<br />
In case of; Tax 1: PST, Tax 2: PST,<br />
Tax 3: PST, Tax 4: GST<br />
Taxable 1 and 2 item ········· prohibited<br />
Taxable 1 and 3 item ········· prohibited<br />
Taxable 2 and 3 item ········· prohibited<br />
Taxable 1 and 4 item ············· allowed<br />
Taxable 2 and 4 item ············· allowed<br />
Taxable 3 and 4 item ············· allowed<br />
In case of; Tax 1: PST, Tax 2: PST,<br />
Tax 3: GST, Tax 4: GST<br />
Taxable 1 and 2 item ········· prohibited<br />
Taxable 1 and 3 item ············· allowed<br />
Taxable 2 and 3 item ············· allowed<br />
Taxable 1 and 4 item ············· allowed<br />
Taxable 2 and 4 item ············· allowed<br />
Taxable 3 and 4 item ········· prohibited<br />
47
6<br />
Guest Check (GLU/PBLU)<br />
Note<br />
Please note that the previous balance key (ufor <strong>ER</strong>-<strong>A520</strong>A and<br />
u.<br />
PBAL<br />
for <strong>ER</strong>-<strong>A530</strong>A) is shown as<br />
Two different guest check entry systems are available: the GLU system and previous balance lookup (PBLU)<br />
system. It depends on how your register has been programmed which of these is used. Please contact your<br />
authorized SHARP dealer for more information about this selection.<br />
GLU system: If this system is selected, the balance due and the details of the order are placed in the guest<br />
GLU<br />
check file. The information can be automatically recalled by pressing the RECALL key, or enteringa<br />
GLU code when additional ordering or finalization is required.<br />
PBLU system: If this system is selected, the previous balance is stored in the previous balance lookup file<br />
(PB lookup file). The information can be automatically recalled by entering a previous balance<br />
lookup code (a PBLU code) when additional ordering occurs.<br />
GLU/PBLU system<br />
New guest<br />
For a new guest;<br />
Procedure<br />
For automatic GLU/PBLU<br />
code generation<br />
GLU/PBLU code<br />
(1-9999)<br />
n<br />
Cover count entry<br />
Partial tendering<br />
[Item entries]<br />
S<br />
f<br />
Amount<br />
r or<br />
A [Payment operations] Ω<br />
∏<br />
Note<br />
• The GLU/PBLU code refers to a number/code that will be used whenever the guest check must be<br />
accessed for re-ordering or final payment.<br />
• The available range of GLU or PBLU codes can be programmed for each chashier/server.<br />
• Your register can be programmed to generate GLU/PBLU codes in a sequential fashion. If your<br />
register has not been programmed to do so, each GLU/PBLU code can be entered manually.<br />
• The cover count refers to the number of people in the party. When the cover count entry is<br />
compulsory, you must enter the cover count (max. 2 digits). When cover count is not compulsory,<br />
enter the cover count and press the<br />
CV<br />
CNT<br />
key.<br />
• When the S key is pressed, the tax is not calculated.<br />
• You can temporarily finalize a guest check by pressing the f key. In the GLU system the check<br />
will show the current balance including tax while the tax amount is not added to the GLU/PBLU<br />
file, and when an additional order is made, the tax amount is recalculated. In the PBLU system,<br />
the check will show the current balance including tax and the tax amount is added to the<br />
GLU/PBLU file (charge posting), while the guest check is still open.<br />
48
Example<br />
Key operation<br />
Print<br />
111 n<br />
CV<br />
2 2CNT<br />
3500 2<br />
2700 3<br />
f<br />
Not printed when the S key is<br />
pressed instead of the f key.<br />
GLU recall<br />
GLU<br />
Each cashier/server can recall their GLU/PBLUs for reorder or settlement by pressing the RECALL key. The register<br />
display GLU/PBLUs from the smallest GLU/PBLU number. Follow the procedure to recall GLUs and select a<br />
desired GLU/PBLU code.<br />
Procedure<br />
GLU<br />
RECALL<br />
A GLU/PBLU code and the total<br />
amount are displayed.<br />
GLU/PBLU<br />
code<br />
#/<br />
TM<br />
u<br />
:To go to the following GLU/PBLU*<br />
:To select<br />
L :To cancel GLU recall<br />
* When the largest opened GLU/PBLU number is displayed, the smallest GLU/PBLU number is displayed when<br />
#/<br />
the TM key is pressed.<br />
Example<br />
Opened GLU: #111/#112/#113<br />
Selecting GLU#113 and making sales entry of two dept. 7 items ($3.00 and #5.00)<br />
Get ready for sales entry<br />
Key operation<br />
Print<br />
GLU<br />
RECALL<br />
#/ #/<br />
TM TM<br />
u<br />
300 7<br />
500 7<br />
f<br />
49
Reorder entries<br />
For making additional guest check entries, use the following procedure:<br />
Procedure<br />
u<br />
GLU/PBLU code<br />
(1-9999)<br />
Partial tendering<br />
Amount<br />
[Item entries]<br />
r or<br />
S<br />
f<br />
A [Payment operations] Ω<br />
∏<br />
Example<br />
Key operation<br />
Print<br />
111 u<br />
1400 5<br />
1600 6<br />
3000 r<br />
c<br />
Settlement<br />
Use the following procedure:<br />
Procedure<br />
GLU/PBLU code<br />
(1-9999)<br />
u [Item entries] [Payment operations] Ω<br />
∏<br />
Example<br />
Key operation<br />
111 u<br />
5000 k<br />
2000 c<br />
Print<br />
Note<br />
• You can make a tip-in entry before a tender entry. If a tip-in entry is made, the tip amount must be<br />
tendered by using the associated media key e.g. CH1 thru CH9 for the charge tip and CASH 1 or<br />
CASH 5 for the cash tip.<br />
• Partial tendering is prohibited after tip-in entry operation.<br />
50
Deposit entries<br />
Deposit refers to a payment on a charge account. It can be received in cash, check or by charge. You can make<br />
the deposit entry only while in a guest check transaction. It cannot be done during handling of a tendered<br />
amount.<br />
A received deposit can be refunded by pressing the<br />
than the deposit balance.<br />
Procedure<br />
DEPO<br />
RFND<br />
thru<br />
k CHK5<br />
DEPO<br />
Deposit<br />
amount c<br />
thru<br />
É<br />
DEPO<br />
RFND<br />
thru<br />
h CH9<br />
key. You cannot attempt to refund an amount larger<br />
Example<br />
To record a $50.00 deposit in cash made by a customer with PBLU code 111<br />
Key operation<br />
Print<br />
111 u<br />
5000 5DEPO<br />
ÅS<br />
Example<br />
To refund a $50.00 deposit made by a customer with PBLU code 111<br />
Key operation<br />
Print<br />
111 u<br />
DEPO<br />
5000 5RFND<br />
ÅS<br />
51
Transferring guest checks out or in (Transfer-out/in)<br />
Transferring guest checks out<br />
At the end of a cashier/server shift or whenever a cashier/server is relieved, one or more open guest checks can<br />
be transferred from the cashier/server to the open check file until the responsibility for the check(s) is assigned<br />
to another cashier/server.<br />
Procedure<br />
(cashier/server sign-on)<br />
GLU/PBLU code<br />
’ (1-9999) u ’<br />
For the next guest check<br />
Example<br />
GLU#111 is transferred out.<br />
Key operation<br />
Print<br />
’<br />
111 u<br />
’<br />
Transferring guest checks in<br />
When the second cashier/server is assigned to be responsible for guest checks that have been transferred out:<br />
Procedure<br />
(new cashier/server<br />
sign-on)<br />
Only when cover count entry is non-compulsory<br />
GLU/PBLU code<br />
Cover count entry<br />
” (1-9999) u ”<br />
(2 digits)<br />
CNT<br />
CV<br />
For the next guest check<br />
Example<br />
GLU#111 is transferred in.<br />
Key operation<br />
Print<br />
”<br />
111 u<br />
”<br />
52
Bill totalizing/bill transfer<br />
Bill totalizing<br />
The bill totalizing function is used to totalize multiple bills when, for example, a particular guest pays not only his<br />
or her bill, but also the bills of other guests.<br />
Procedure<br />
GLU/PBLU code<br />
j u<br />
GLU/PBLU code<br />
s<br />
#1 bill<br />
#2 bill<br />
[Sales entries]<br />
S<br />
f<br />
[Payment operations]<br />
Example<br />
Totalizing GLU#112 and GLU#113 to GLU#111<br />
Key operation<br />
Print<br />
j<br />
112 u<br />
113 u<br />
111 s<br />
S<br />
Note<br />
• All #1 bills are added to a #2 bill. A maximum of 5 bills may be added to a #2 bill.<br />
• The GLU/PBLU code of #1 must be in use. If the guest check(s) of #1 or #2 has already been<br />
handled by another server, the guest check(s) must have been made “Transferring out.”<br />
53
Bill transfer<br />
This function is used to change the GLU/PBLU code of a particular bill.<br />
Procedure<br />
GLU/PBLU code<br />
j u<br />
GLU/PBLU code<br />
s<br />
#1 bill<br />
#2 bill<br />
[Sales entries]<br />
S<br />
f<br />
[Payment operations]<br />
Example<br />
GLU#111 is transferred to GLU #120.<br />
Key operation<br />
Print<br />
j<br />
111 u<br />
120 s<br />
S<br />
Note<br />
• This function requires that the current GLU/PBLU code be entered for #1 and a new GLU/PBLU<br />
code be entered for #2.<br />
• A #1 bill is transferred to a #2 bill. The #1 bill is then cleared and set free.<br />
Bill separating<br />
The function is used when each guest of a group pays his or her own order. With this function, you can select<br />
some items from a guest check and make an entry for the payment. Also, you can transfer the items you have<br />
selected to other guest checks. This function is available only in the GLU system.<br />
Procedure<br />
To terminate<br />
An item of the original GLU<br />
and its quantity are displayed.<br />
b<br />
b<br />
GLU code<br />
(Original GLU code)<br />
u<br />
GLU code<br />
(For receiving)<br />
u<br />
To go to the following item<br />
#/<br />
TM<br />
To enter total q'ty<br />
Q'ty<br />
S<br />
f<br />
@<br />
[Payment operations]<br />
To terminate<br />
b<br />
54
Example<br />
One of the dept. 9 items is separated from GLU111 (three dept. 7 items and three dept. 9<br />
items are entered.)<br />
Key operation<br />
Dept. 7 item label and the q’ty are displayed.<br />
To skip dept. 7 items<br />
Dept. 9 item label and the q’ty are displayed.<br />
To select one of dept. 9 items<br />
Print<br />
b<br />
111 u<br />
117 u<br />
#/<br />
TM<br />
1 @<br />
Sb<br />
Manual Previous Balance (PB) and Credit Balance (CB) entry<br />
The register allows you to make manual PB/CB entries. If you use this function, the previous balance amount is<br />
entered manually when making new entries that will adjust the original total.<br />
Note<br />
This function is not available when you use GLU or PBLU system. To use this function, please<br />
contact your authorized SHARP dealer.<br />
New customers<br />
For a new customer, use the following procedure:<br />
n<br />
Procedure<br />
[Item entries]<br />
or<br />
S f<br />
Note<br />
When the S or f key is pressed, the tax is automatically calculated and printed. The tax is then<br />
added to the balance and the new balance is printed.<br />
Example<br />
Making a service entry for a dept. 5 item ($87.50) and a dept. 6 item ($62.50) item for a new<br />
customer. (A non-add code is used to identify the customer.)<br />
Key operation<br />
Print<br />
n<br />
#/<br />
TM<br />
8750 5<br />
6250 6<br />
S<br />
13579 u<br />
55
Customer with previous or credit balance<br />
To enter a charge to a customer with a previous or credit balance, use the following procedure:<br />
Procedure<br />
Check digit *1<br />
(Optional)<br />
Previous balance *2<br />
Credit balance *3<br />
u<br />
n<br />
[Item entries ]<br />
or<br />
S f<br />
*1 Check digit: The number which is printed at the right of the word “S<strong>ER</strong>VICE” on the receipt of the previous<br />
entry. (See the previous page. Check with your authorized SHARP dealer for activation of the<br />
check digit feature.)<br />
*2 Previous balance: In case that the balance is plus or zero<br />
*3 Credit balance: In case that the balance is negative<br />
Example<br />
To make a service entry of 5 dept 7 items (unit price $25.00) for the customer account from<br />
the previous example. (non add code number 13579), which has the previous balance<br />
$150.00.<br />
Check digit<br />
Key operation<br />
3 15000 u<br />
#/<br />
13579 5TM<br />
5 @<br />
2500 7<br />
S<br />
Print<br />
Settlement<br />
Use the following procedure:<br />
Procedure<br />
Check digit<br />
(Optional)<br />
Previous balance<br />
Credit balance<br />
u<br />
n<br />
[Item entries ]<br />
[Payment operation]<br />
Example<br />
The customer (the non add code number 13579) whose previous balance is $275.00 is<br />
$27500 pays $200.00 in check and $75.00 in cash.<br />
Check digit<br />
Key operation<br />
3 27500 u<br />
#/<br />
13579 5TM<br />
20000 k<br />
7500 a<br />
Print<br />
56
7<br />
Auxiliary entries<br />
Percent calculations (premium or discount)<br />
• Your register provides the percent calculation for the merchandise subtotal and item entries. You need to<br />
specify in advance whether the register should perform the percent calculation based on the merchandise<br />
subtotal or each item entered.<br />
• Percentage: 0.01 to 99.99%<br />
Percent calculation for the merchandise subtotal<br />
Example<br />
Selling four $1.40 items of dept. 5 and two $2.25 items of dept. 6; all these items are sold for<br />
cash at a premium of 10%<br />
(This example presumes that a premium of 10% has been programmed for the % key.)<br />
Key operation<br />
Print<br />
4 @<br />
140 5<br />
225 6<br />
6Â%a<br />
Percent calculation for item entries<br />
Example<br />
Selling for cash an $8.00 item of dept. 6 at a discount of 15% and another $5.00 item of PLU<br />
90 at a discount of 7.5%<br />
(This example presumes that a discount of 15% has been programmed for the § key.)<br />
Key operation<br />
Print<br />
800 6<br />
§<br />
PLU/<br />
90 PUPC<br />
7 . 5 §<br />
a<br />
57
Discount entries<br />
For discount or coupon tenderings, you may use the - thru ± key.<br />
If the discount or tendered coupon is the one applicable to sales, use the vendor coupon or if it is applicable to<br />
each department key, use the store coupon.<br />
Discount for the merchandise subtotal<br />
Example<br />
Selling a $5.75 item of dept. 6 and another $7.50 item of PLU 80 for cash after subtracting the<br />
discount amount $1.00 from the total sale amount<br />
(This example presumes that the vendor coupon has been programmed for the – key.)<br />
Key operation<br />
Print<br />
575 6<br />
PLU/<br />
80 PUPC<br />
100 –<br />
a<br />
Discount for item entries<br />
Procedure<br />
Amount<br />
- thru ±<br />
Dept.<br />
Direct PLU<br />
Dept. code<br />
- ±<br />
thru<br />
PLU code<br />
- ±<br />
thru<br />
UPC code<br />
- ±<br />
thru<br />
- ±<br />
thru<br />
à<br />
PLU/<br />
UPC<br />
PLU/<br />
UPC<br />
Ä<br />
Amount<br />
Amount<br />
à<br />
PLU/<br />
UPC<br />
or<br />
å<br />
or<br />
å<br />
Example<br />
Selling a $6.75 item of dept. 5 for cash after subtracting the coupon amount 75¢<br />
(This example presumes that the store coupon has been programmed for the - key.)<br />
Key operation<br />
*<br />
675 5<br />
75 -<br />
5a<br />
Print<br />
Note<br />
* The - is entered as a modifier for the department which will be netted by the coupon amount.<br />
Such item netting coupon entries may generally be entered at any point within a transaction. Two<br />
lines are printed for each entry: The first is the label programmed for the - function and the<br />
second is related department and - amount.<br />
58
Refund entries<br />
If a refund item is the one entered into a department, enter the amount of the refund, then press the Ï key and<br />
the corresponding department key in this order; and if an item entered into a PLU (or UPC) is returned, enter the<br />
PLU/<br />
corresponding PLU (or UPC) code, then press the Ï and UPC keys, or press the Ï and direct PLU keys<br />
without entry of PLU code, in this order.<br />
Example<br />
Receiving the following items returned:<br />
One $2.50 item of dept.5 and seven $2.10 items of PLU 13<br />
Key operation<br />
250 Ï5<br />
7 @<br />
Print<br />
PLU/<br />
13 Ï P<br />
a UPC<br />
Return entries<br />
If a return item is the one entered into a department, enter the amount of the return, then press the RETURN key and<br />
the corresponding department key in this order; and if an item entered into a PLU (or UPC) is returned, enter the<br />
PLU/<br />
corresponding PLU (or UPC) code, then press the RETURN and keys, or press the RETURN and direct PLU keys<br />
without entry of PLU code, in this order.<br />
Example<br />
Receiving the following items returned:<br />
One $3.00 item of dept 1 and one $3.25 item of PLU15<br />
Key operation<br />
Print<br />
300 ÏRETURN<br />
1<br />
PLU/<br />
15 ÏRETURN<br />
t<br />
a UPC<br />
Note<br />
The returned items are not subjected to the calculation for dept./PLU/UPC items (quantity and<br />
amount) on the sales reports.<br />
59
Refund sales mode<br />
This function is used for those item return entries relating to departments, PLUs/subdepartments and UPCs.<br />
Pressing the ˜ key at the beginning of a transaction causes the register to enter the REFUND SALES mode.<br />
All of the REFUND SALES mode entries are automatically handled as refund entries. This mode cannot be<br />
finalized by check payment entry.<br />
Example<br />
Receiving the following items returned:<br />
One $2.50 item of dept.5 and seven $2.10 items of PLU 13<br />
Key operation<br />
Print<br />
˜<br />
250 5<br />
7 @<br />
PLU/<br />
13 PUPC<br />
a<br />
Printing of non-add code numbers<br />
Enter a non-add code number such as a customer’s reference number within a maximum of 16 digits and press<br />
#/<br />
the TM key at any point during the entry of a sale. Your register will print it at the time of entry.<br />
Example<br />
Selling a $15.00 item of dept. 5 by charge account to a customer whose code number is 1230<br />
Key operation<br />
Print<br />
#/<br />
1230 TM<br />
=<br />
1500 5<br />
h<br />
60
Gratuity<br />
Calculation<br />
When the payment operation is made for sales registrations, the gratuity amount is calculated and printed.<br />
You can program a percent rate for calculating the gratuity.<br />
If the percent rate is programmed as 0%, the register does not print any gratuity.<br />
You can program a tax status (taxable 1/taxable 2/taxable 3/taxable 4/non-taxable) for gratuity.<br />
Example<br />
When a percent rate of the gratuity is programmed as 10%:<br />
Key operation<br />
500 5<br />
a<br />
Print<br />
Exemption<br />
Your register allows you to exempt a customer from the gratuity by pressing the<br />
operation.<br />
GRT<br />
EXEMPT<br />
key prior to a payment<br />
Example<br />
When a percent rate of the gratuity is programmed as 10%:<br />
Key operation<br />
1250 5<br />
1000 6<br />
GRT<br />
EXEMPT<br />
a<br />
Print<br />
61
8<br />
Payment treatment<br />
Tip-in entries<br />
Your register allows the entry of tips that your guests give to cashiers/servers in cash or by credit card.<br />
A tip entry must be done before a payment entry.<br />
You must use the corresponding media key e.g. CH1 thru CH9 for the charge tip and CASH 1 or CASH 5 for the<br />
cash tip.<br />
Two different tip-in entry systems are available: the tip amount entry system and the tip percent rate entry<br />
system. It depends on how your register has been programmed which of these systems is used.<br />
Procedure<br />
Tip amount entry system:<br />
Tip amount<br />
CA<br />
TIP<br />
CH<br />
TIP<br />
When you use a programmed percent rate<br />
Tip percent rate entry system:<br />
Tip percent rate<br />
(0.01 - 99.99)<br />
CA<br />
TIP<br />
CH<br />
TIP<br />
Example<br />
Receiving $3.00 by cash as a tip<br />
Key operation<br />
Print<br />
300<br />
a<br />
CA<br />
TIP<br />
62
Tip editing<br />
This function is used for entering tip amounts after finalizing a guest check with a charge tender. This is only<br />
available when the guest check transaction is finalized through CAT authorization and the tip is to be paid in<br />
charge tender. The bill number which is issued when the S or f key is pressed in guest check entry must be<br />
used in order to identify the guest to edit or add tip amount. For the operation, press the<br />
key. When the<br />
display prompt appears, enter the bill number and press the u key, then enter tip amount and press the<br />
key again.<br />
To use the tip editing function, please consult your authorized SHARP dealer.<br />
ED<br />
TIP<br />
ED<br />
TIP<br />
Tip paid entries<br />
This operation is used when tips that guests have paid by using credit card are paid to respective<br />
cashiers/servers in cash. To perform a tip paid entry, enter the cashier/server code, then press the † key.<br />
You can prohibit the tip paid operation in the REG mode by the PGM2 programming.<br />
Note<br />
When the tip amount remains unchanged in Individual Server Resetting, the tip paid function is<br />
automatically executed and tip receipt is issued to the report printer prior to report printing.<br />
63
Currency conversion<br />
Your register allows payment entries of foreign currency. Pressing the ç thru $ key creates a subtotal in<br />
foreign currency. Cash payment is the only media that can be handled after currency conversion.<br />
Procedure<br />
After an entry<br />
is completed<br />
or<br />
After the amount<br />
tendered is found<br />
smaller than the<br />
sales amount in<br />
a sales entry.<br />
For an additional payment in foreign currency<br />
For direct finalization<br />
Preset rate<br />
*Rate<br />
ç<br />
"<br />
#<br />
$ c<br />
Reentry<br />
Amount<br />
tendered<br />
(max. 8 digits)<br />
a<br />
Å<br />
thru<br />
Next registration<br />
or<br />
payment in<br />
domestic currency<br />
É<br />
*Rate: 0.000000 to 999.999999<br />
Note<br />
When the amount tendered is short, the deficit is shown in domestic currency.<br />
Example<br />
To convert the amount owed ($69.50) into the designated foreign currency<br />
Preset rate (1.325) - CONV 1<br />
Currency<br />
conversion<br />
Amount<br />
tendered in<br />
foreign currency<br />
Key operation<br />
2300 6<br />
4650 7<br />
ç<br />
10000 a<br />
Print<br />
Domestic<br />
currency<br />
Conversion rate<br />
Foreign currency<br />
Domestic<br />
currency<br />
Manual rate - CONV 4 (The $ key can be used only for the manual entry.)<br />
Key operation<br />
2300 6<br />
4650 7<br />
1 . 275 $<br />
10000 a<br />
Print<br />
Conversion<br />
rate<br />
64
Received on account entries<br />
Procedure<br />
Amount<br />
(max. 8 digits)<br />
Example<br />
r<br />
or<br />
®<br />
k a Å ,<br />
CH1<br />
f<br />
A customer whose reference number is 12345 tenders $48.00 by check for received on<br />
account.<br />
Key operation<br />
#/<br />
12345 = TM<br />
É<br />
, CHK2 thru CHK5<br />
thru<br />
CH9<br />
thru<br />
4800 r<br />
k<br />
Print<br />
Paid out entries<br />
Procedure<br />
Amount<br />
(max. 8 digits)<br />
Example<br />
p<br />
or<br />
π<br />
You pay $30.00 by check to a vendor whose code number is 6789.<br />
Key operation<br />
k a Å ,<br />
CH1<br />
f<br />
thru<br />
É<br />
, CHK2 thru CHK5<br />
thru<br />
CH9<br />
Print<br />
#/<br />
6789 =<br />
TM<br />
3000 p<br />
k<br />
No sale (exchange)<br />
Simply press the n key without any entry. The drawer will open and the printer will print “NO SALE” on both<br />
the journal and the receipt. If your machine is preset to print a non-add code number before pressing the n<br />
key, a no sale entry is achieved with a non-add code number printed.<br />
65
Cashing a check<br />
Enter the check amount, then press a check key (k, CHK1 thru CHK5 ).<br />
Procedure<br />
Non-add code<br />
#/ Check<br />
TM<br />
number amount k<br />
, CHK2 thru CHK5<br />
Example<br />
Cashing a check of a $30.00 amount<br />
Key operation<br />
#/<br />
6789 =<br />
3000 k<br />
TM<br />
Print<br />
Bottle return<br />
This function is used to handle the payment (paid out) for returned empty bottles or cans.<br />
Example<br />
You pay for ten 15¢ returned empty bottles. (This example presupposes that dept. 10 has<br />
been programmed as bottle return department.)<br />
Key operation<br />
10 @<br />
15<br />
a<br />
10<br />
Print<br />
9 Automatic sequencing key entries<br />
You can achieve many different key sequences automatically with a single key depression by using an<br />
automatic sequencing key (~ thru<br />
10<br />
).<br />
Example<br />
Performing the transaction “Selling a $5.00 item (dept. 7) for cash” programmed for the ¡<br />
(¡ = 500 7a )<br />
Key operation<br />
¡<br />
Print<br />
66
10<br />
WASTE mode<br />
This mode is used to throw away an article which has already been prepared and is no longer serviceable.<br />
Procedure<br />
WASTE<br />
[Item entries ]<br />
WASTE<br />
WASTE mode<br />
Example<br />
Wasting 10 PLU 35 items<br />
Key operation<br />
Print<br />
WASTE<br />
10 @ 35 PLU/<br />
UPC<br />
WASTE<br />
Note<br />
• PLU/UPC entries are only allowed in the WASTE mode, and direct and indirect void operations<br />
are also allowed in this mode.<br />
• When a WASTE mode transaction is finalized, the drawer does not open.<br />
• The consecutive number is incremented every WASTE mode transaction.<br />
• When the WASTE mode is activated by pressing the WASTE key, the mode caption “WAST” is<br />
displayed.<br />
67
CORRECTION<br />
1<br />
Correction of the last entry (direct void)<br />
If you make an incorrect entry relating to a department, PLU/subdepartment, UPC, percentage (% through<br />
•), deduction (- through ≠) or refund, you can correct this entry by pressing the v key immediately after<br />
the incorrect entry.<br />
Example<br />
Key operation<br />
Print<br />
1250 6<br />
v<br />
PLU/<br />
2 PUPC<br />
v<br />
PLU/<br />
5012345678900 PUPC<br />
v<br />
600 8<br />
§v<br />
328 9<br />
28 -9<br />
v<br />
250 Ï 8<br />
va<br />
2<br />
Correction of the next-to-last or earlier entries (indirect void)<br />
With the v key, you can void any incorrect department, PLU/subdepartment, UPC or item refund entry made<br />
during a transaction if you find it before finalizing the transaction (e.g. pressing the a key). This function is<br />
applicable to department, PLU/subdepartment, UPC and item refund entries only.<br />
For the operation, press the v key just before you press a department key, à key, direct PLU key,<br />
just before you scan a UPC code. For the refund indirect void, press the v key after you press the<br />
Ï key.<br />
Example<br />
Key operation<br />
Print<br />
1310 6<br />
1755 7<br />
PLU/<br />
10 PUPC<br />
ô<br />
PLU/<br />
58 PUPC<br />
825 7<br />
PLU/<br />
5012345678900 PUPC<br />
1310 v6<br />
v ô<br />
PLU/<br />
58 v PUPC<br />
PLU/<br />
5012345678900 v PUPC<br />
a<br />
PLU/<br />
UPC<br />
key or<br />
68
3<br />
Subtotal void<br />
You can void an entire transaction. Once the subtotal void is executed, the transaction is aborted and the<br />
register issues a receipt.<br />
Example<br />
Key operation<br />
Subtotal void<br />
1310 1<br />
1755 6<br />
PLU/<br />
10 PUPC<br />
Print<br />
PLU/<br />
35 PUPC<br />
ıvı<br />
4<br />
Correction of incorrect entries not handled by the direct or indirect void<br />
function<br />
Any errors found after the entry of a transaction has been completed or during an amount tendered entry, cannot<br />
be voided. These errors must be handled by the manager.<br />
The following steps should be observed:<br />
1. If you are in the middle of making an amount tendered entry, you must first finalize the transaction before<br />
making corrections.<br />
2. Try to make correct entries from the beginning.<br />
3. Hand the incorrect receipt to your manager for its cancellation.<br />
69
CORRECTION AFT<strong>ER</strong> FINALIZING A<br />
TRANSACTION<br />
(AFT<strong>ER</strong> GEN<strong>ER</strong>ATING A RECEIPT)<br />
When you need to void incorrect entries that are found after finalizing a transaction or cannot be corrected by<br />
direct or indirect void, follow this procedure in the MGR mode.<br />
1. Turn the mode switch to the MGR position.<br />
2. Press the v key to put your register in the VOID mode.<br />
3. Repeat the entries that are recorded on an incorrect receipt. (All data for the incorrect receipt are removed<br />
from register memory; the voided amounts are added to the void register totalizer.)<br />
Incorrect receipt<br />
Cancellation receipt<br />
Note<br />
Your machine leaves the VOID mode whenever a transaction is canceled (i.e. finalized in the VOID<br />
mode.) To void additional transactions repeat steps 2. and 3. above.<br />
70
OV<strong>ER</strong>RIDE ENTRIES<br />
Programmed limits (such as maximum amounts) for functions can be overridden by making the entry in the<br />
MGR mode.<br />
Procedure<br />
1. Turn the mode switch to the MGR position.<br />
2. Make the override entry.<br />
Example<br />
Selling a $15.00 item (dept. 2) for cash and subtracting the coupon amount $2.50 from the<br />
sale amount (This example presumes that the register has been programmed not to allow<br />
coupon entries over $2.00.)<br />
Key operation<br />
1500 2<br />
REG-mode250 –2 ...Error<br />
entries c<br />
Print<br />
Turn the mode switch<br />
to the MGR position.<br />
250 –<br />
Return the mode switch<br />
to the REG position.<br />
a<br />
71
OV<strong>ER</strong>LAPPED CASHI<strong>ER</strong>/S<strong>ER</strong>V<strong>ER</strong><br />
ENTRY<br />
This function allows you to switch from one cashier/server to another interrupting the first cashier/server’s entry.<br />
The second cashier/server can make a sales entry, then the first cashier/server may continue.<br />
Example<br />
Cashier 1: Entry started<br />
Cashier 2: Cashier/server change (1 to 2), interruption initiated<br />
Cashier 2: Transaction finished (2)<br />
Cashier 1: Cashier/server change (2 to 1), entry restart<br />
Note<br />
• The overlapped cashier/server entry is not available while the tendering sale.<br />
• If any cashier/server is still making an entry (or has not finalized the transaction yet), the machine<br />
does not run in any mode other than REG and MGR and X/Z reports can not be performed. The<br />
error message “S<strong>ER</strong>V<strong>ER</strong> <strong>ER</strong>R.” and the corresponding cashier/server code(s) are displayed at<br />
this time.<br />
Key operation<br />
Comments<br />
1. Cashier/server 1 is assigned.<br />
The entry by cashier/server 1 is started.<br />
(1‹)<br />
100 1<br />
360 3<br />
3<br />
2. Cashier/server 2 is assigned.<br />
The entry by cashier/server 2 is started.<br />
2 ‹ (The entry by cashier/server 1 is interrupted.)<br />
3 @<br />
150 2<br />
a The transaction by cashier/server 2 is finalized.<br />
3. Cashier/server 1 is assigned.<br />
1‹ The entry by cashier/server 1 is restarted.<br />
100 1<br />
360 3<br />
a<br />
The transaction by cashier/server 1 is finalized.<br />
72
SPECIAL PRINTING FUNCTIONS<br />
1<br />
Copy receipt printing<br />
If your customer wants a receipt after you have finalized a transaction with the receipt ON-OFF function in the<br />
“OFF” status (no receipting), press the q key. This will make a copy receipt. Your register can also print a<br />
copy receipt when the receipt ON-OFF function is in the “ON” status.<br />
Note<br />
Pressing the q key in the OP X/Z mode before registration toggles the status “ON” and “OFF”.<br />
Example<br />
Printing a copy receipt after making the entries shown below with the receipt ON-OFF function<br />
in the “OFF” status<br />
Key operation<br />
850 2<br />
3 @<br />
150 1<br />
a<br />
Print on the<br />
journal<br />
Print<br />
For receipting→ q<br />
Print on the<br />
receipt<br />
When the receipt ON-OFF function is in the “ON” status and you press<br />
the q key to make a second copy<br />
When the receipt ON-OFF function is in the ON status,<br />
the COPY symbol will be printed on the receipt.<br />
73
2<br />
Validation printing function (Slip printer)<br />
Your register can perform validation printing when it is connected with the slip printer. For the details about the<br />
slip printer, contact your authorized SHARP dealer.<br />
1. Set a validation slip to the slip printer.<br />
2. Press the ∏ key. The validation printing will start.<br />
Note<br />
When you make an entry for which compulsory validation printing can be overridden by performing<br />
the following operation. If you need this function, Contact your authorized SHARP dealer.<br />
3<br />
1. Move the mode key to the MGR position.<br />
2.<br />
Bill printing<br />
. ∏<br />
This function is used for issuing bills to customers/guests. Your register can print bills on a slip printer or<br />
receipts on the register depending on the programming. You can issue bills when GLU/PBLU/Manual PB/CB<br />
entries are done only, for every entry or when a media key is pressed. For this selection, please consult your<br />
authorized SHARP dealer.<br />
When bill printing is compulsory, the register will print a bill automatically in case it is to be printed on receipts<br />
and when a slip is inserted in case it is to be on a slip printer.<br />
When bill printing is non-compulsory, use the following procedure to print a bill.<br />
Bill on receipts<br />
Bill on the slip (auto feed)<br />
XX<br />
No. of lines of<br />
slip feed<br />
Ω<br />
Note<br />
This function is available immediately after the finalization of transaction (including after pressing<br />
the S or the f key).<br />
4<br />
Printing of the employee’s arrival and departure times (Slip printer)<br />
Your register can print the employee’s arrival and departure time when it is connected with the slip printer.<br />
For the details for connecting a slip printer, please contact your authorized SHARP dealer.<br />
For printing of the arrival and departure times, you must be in the OP X/Z mode.<br />
Printing of arrival time<br />
1 ∏<br />
Printing of departure time<br />
2 ∏<br />
74
5<br />
Printing of header and footer graphic logos<br />
As an optional setting, your register can print a graphic logo on the top of each receipt (header graphic logo). If<br />
preset to do so, a graphic logo can be printed on the bottom of each receipt (footer graphic logo) with the job<br />
code #2616. You can also print the graphic logos with the combination of 3-line header logo message or 3-line<br />
footer logo message. Printing only logo messages without the graphic logo is possible. Please consult your<br />
dealer when you want to change the setting.<br />
• Sample receipt with a header graphic logo and a footer graphic logo<br />
Header graphic logo<br />
Footer graphic logo<br />
6<br />
Remote printer send function<br />
This function enables a partial order to be sent to the kitchen for preparation while the remaining order is still<br />
being placed.<br />
Example<br />
Item entry<br />
RP<br />
SEND<br />
Data transfer to the remote printer<br />
Remaining items will be sent to the remote printer when the transaction is finalized.<br />
When this function is used, the subtotal void operation is not allowed.<br />
75
TIME DISPLAY AND AUTOMATIC<br />
UPDATING OF THE DATE<br />
1<br />
Time display<br />
When you need the time displayed, turn the mode switch to the OP X/Z position after the preceding transaction<br />
or operation is finalized.<br />
#/<br />
You can also display the time by pressing the TM key in the REG or MGR mode.<br />
The time display disappears as soon as you press the c key in the REG or MGR mode or begin the<br />
subsequent entry.<br />
Sample display of 10:25 AM<br />
Date<br />
Time<br />
2<br />
Automatic updating of the date<br />
Once the internal clock unit is started at the correct time, it continues to run as long as the built-in battery is<br />
charged, and updates the date (month, day, year) automatically.<br />
76
FOR THE MANAG<strong>ER</strong><br />
PRIOR TO PROGRAMMING<br />
1<br />
Programming keyboard layout<br />
When you are in the PGM1 or PGM2 mode, the keyboard layout will be set to one of the programming layouts<br />
as shown below.<br />
For <strong>ER</strong>-<strong>A520</strong>A<br />
For <strong>ER</strong>-<strong>A530</strong>A<br />
RECEIPT<br />
( )<br />
JOURNAL<br />
( ) PO ( )<br />
( )<br />
( )<br />
( )<br />
(%<br />
)<br />
( )<br />
(SHIFT) (SHIFT-2) (SPACE)<br />
➞<br />
cl æ<br />
(NUM) (DC)<br />
BACK<br />
( )<br />
@<br />
FOR<br />
7 8 9<br />
4 5 6<br />
1 2 3<br />
0<br />
CL<br />
00<br />
RECEIPT JOURNAL Ñ<br />
➞<br />
➞<br />
➞<br />
▲<br />
”<br />
”<br />
▲<br />
?<br />
A<br />
’<br />
B<br />
:<br />
C<br />
+<br />
D<br />
<<br />
E<br />
” F<br />
G<br />
;<br />
H<br />
-<br />
I<br />
><br />
J<br />
” ’ ? < ><br />
#<br />
K<br />
@<br />
L<br />
,<br />
M<br />
=<br />
N<br />
P t<br />
O<br />
$<br />
P<br />
/<br />
Q<br />
.<br />
R<br />
Ç<br />
S<br />
£<br />
T<br />
{ } [ ]<br />
%<br />
U<br />
(<br />
V<br />
!<br />
W<br />
Æ<br />
SPACE<br />
&<br />
X<br />
)<br />
Y<br />
?<br />
Z<br />
SBTL<br />
CA/AT/NS<br />
BACK<br />
( SPACE)<br />
!<br />
L2<br />
DEPT<br />
@<br />
^<br />
# $ % & ( ) =<br />
1 œ2 3 4 5 6 CR2 7 8 9 0<br />
5 12 19<br />
Q AUTO W E R T Y CR1 U I O P<br />
4 11 18<br />
A S D F G H J K L<br />
(SHIFT)<br />
Z”<br />
(DC)<br />
X<br />
C V B N M<br />
(SPACE) (SPACE) (SPACE) (SPACE) (SPACE)<br />
#<br />
6 13<br />
27<br />
3<br />
2<br />
,<br />
10<br />
;<br />
.<br />
17<br />
-<br />
–<br />
:<br />
–<br />
26<br />
25<br />
+<br />
33<br />
@<br />
FOR<br />
CL<br />
7 8 9<br />
4 5 6<br />
1 2 3<br />
0<br />
00<br />
SBTL<br />
CA/AT<br />
Î<br />
Ó<br />
• The programming keyboard sheet is transparent, allowing placement over the standard keyboard<br />
sheet.<br />
• The shaded area contains the character keys which are used for programming characters.<br />
: Used to enter the double-size character.<br />
: Used to change a lower-case letter/upper-case letter.<br />
é: Used to select a symbol. (<strong>ER</strong>-<strong>A520</strong>A only)<br />
apple<br />
/<br />
(NUM)<br />
Note<br />
: Used to back up the cursor for deleting.<br />
: Used to enter a space.<br />
: Used to enter a numeric character. (<strong>ER</strong>-<strong>A520</strong>A only)<br />
cl<br />
æ<br />
Æ<br />
cl<br />
To enter the letter “ cl cl ”, press é Æ é<br />
æ<br />
To enter the upper-case letter “Æ Æ”, press<br />
To enter the lower-case letter “æ æ”, press Ó<br />
cl<br />
æ<br />
Æ<br />
cl<br />
cl<br />
cl<br />
æ<br />
Æ<br />
æ<br />
Æ<br />
æ<br />
Æ<br />
cl<br />
æ<br />
Æ<br />
Ó<br />
77
2<br />
How to program alphanumeric characters<br />
You can program alphanumeric characters for departments, PLUs, UPCs, functions, etc. while in the character<br />
entry mode.<br />
There are two ways for programming characters: using character keys on the keyboard and entering character<br />
codes with the numeric keys on the keyboard.<br />
Using character keys on the keyboard (keys on the shaded area)<br />
Enter a character according to the position in the programming keyboard layout.<br />
Entering alphanumeric characters<br />
To enter a character, simply press a corresponding character key.<br />
ˆ<br />
In case of <strong>ER</strong>-<strong>A520</strong>A, “( )”, “( ˆ )”, “( ¨ )”, “ ( ` )”, “( ´ )”, “( ´´ )”, “( ° )”, and “( )” keys can be used in<br />
˜<br />
combination with a character key. If the combination is unavailable, only a character key is entered.<br />
[Ex.] “Å” : ➞ ( ° ) ➞ A<br />
To enter a numeric character:<br />
(<strong>ER</strong>-<strong>A520</strong>A) Press (NUM) key and enter a number by ten keys (0 – 9).<br />
[Ex.] Entering the character “135” : (NUM) ➞ 135 ➞ (NUM)<br />
(<strong>ER</strong>-<strong>A530</strong>A) Simply press a corresponding numeric key in the shaded area.<br />
To enter a space, press the / key.<br />
Entering double-size characters<br />
Î : This key toggles the double-size character mode and normal-size character mode. The default is the<br />
normal-size character mode. The double-size character is displayed with the letter “=” (ex. =S).<br />
[Ex.] To program the name “SHARP” in double size :<br />
Î ➞ SHARP ➞ Î<br />
Entering lower-case letters<br />
Ó : You can enter a lower-case letter by using this key. Press Ó key just before you enter the lower-case<br />
letter. This key also allows you to enter the characters/symbols shown at the upper right of keys.<br />
[Ex.] To program the name “Sharp” : ➞ S ➞ Ó ➞ harp ➞ Ó<br />
Entering symbols shown at the upper left of keys (<strong>ER</strong>-<strong>A520</strong>A only)<br />
é : You can enter symbols by using this key. Press é key just before you enter the symbol.<br />
[Ex.] To program the symbol “ cl cl ” : ➞ é ➞ cl ➞é ➞ cl<br />
Editing text<br />
You can edit the text you have entered by deleting characters.<br />
apple : Backs up the cursor for deleting the character or figure at the left of the cursor.<br />
Entering character codes<br />
Numerals, letters and symbols are programmable by entering the º key and character codes. See the<br />
“Alphanumeric character code table” on the next page. In this way, you can program characters other than the<br />
characters shown in the programming keyboard layout.<br />
XXX ➞ º XXX: Character code (3 digits)<br />
Note<br />
• Double-size characters can be made by entering the character code 253.<br />
[Ex.] To program the name “SHARP” in double size<br />
253 º 083 º 072 º 065 º 082 º 080 º<br />
(DC) S H A R P<br />
78
79<br />
Alphanumeric character code table<br />
(DC) : Double-size character code<br />
: The shaded character cannot be displayed (will be displayed as space).<br />
The character “ !! ” (code: 128) is displayed as “ ! ”.<br />
Note<br />
✱<br />
✱<br />
Code<br />
001<br />
002<br />
003<br />
004<br />
005<br />
006<br />
007<br />
008<br />
009<br />
010<br />
011<br />
012<br />
013<br />
014<br />
015<br />
016<br />
017<br />
018<br />
019<br />
020<br />
021<br />
022<br />
023<br />
024<br />
025<br />
026<br />
027<br />
028<br />
029<br />
030<br />
031<br />
032<br />
033<br />
034<br />
035<br />
036<br />
037<br />
038<br />
039<br />
040<br />
041<br />
042<br />
043<br />
044<br />
045<br />
Character<br />
á<br />
â<br />
ê<br />
î<br />
ì<br />
í<br />
ô<br />
ó<br />
û<br />
ú<br />
œ<br />
u<br />
ú<br />
o<br />
ó<br />
<br />
<br />
<br />
¨<br />
<br />
<br />
<br />
<br />
<br />
<br />
<br />
<br />
U<br />
Ú<br />
O<br />
Ó<br />
(space)<br />
!<br />
”<br />
#<br />
$<br />
%<br />
&<br />
’<br />
(<br />
)<br />
+<br />
,<br />
-<br />
Code<br />
046<br />
047<br />
048<br />
049<br />
050<br />
051<br />
052<br />
053<br />
054<br />
055<br />
056<br />
057<br />
058<br />
059<br />
060<br />
061<br />
062<br />
063<br />
064<br />
065<br />
066<br />
067<br />
068<br />
069<br />
070<br />
071<br />
072<br />
073<br />
074<br />
075<br />
076<br />
077<br />
078<br />
079<br />
080<br />
081<br />
082<br />
083<br />
084<br />
085<br />
086<br />
087<br />
088<br />
089<br />
090<br />
Character<br />
.<br />
/<br />
0<br />
1<br />
2<br />
3<br />
4<br />
5<br />
6<br />
7<br />
8<br />
9<br />
:<br />
;<br />
<<br />
=<br />
><br />
?<br />
@<br />
A<br />
B<br />
C<br />
D<br />
E<br />
F<br />
G<br />
H<br />
I<br />
J<br />
K<br />
L<br />
M<br />
N<br />
O<br />
P<br />
Q<br />
R<br />
S<br />
T<br />
U<br />
V<br />
W<br />
X<br />
Y<br />
Z<br />
Code<br />
091<br />
092<br />
093<br />
094<br />
095<br />
096<br />
097<br />
098<br />
099<br />
100<br />
101<br />
102<br />
103<br />
104<br />
105<br />
106<br />
107<br />
108<br />
109<br />
110<br />
111<br />
112<br />
113<br />
114<br />
115<br />
116<br />
117<br />
118<br />
119<br />
120<br />
121<br />
122<br />
123<br />
124<br />
125<br />
126<br />
127<br />
128<br />
129<br />
130<br />
131<br />
132<br />
133<br />
134<br />
135<br />
Character<br />
Ä<br />
Ö<br />
Ü<br />
^<br />
_<br />
a<br />
b<br />
c<br />
d<br />
e<br />
f<br />
g<br />
h<br />
i<br />
j<br />
k<br />
l<br />
m<br />
n<br />
o<br />
p<br />
q<br />
r<br />
s<br />
t<br />
u<br />
v<br />
w<br />
x<br />
y<br />
z<br />
{<br />
|<br />
}<br />
ß<br />
¢<br />
!!<br />
1<br />
2<br />
3<br />
4<br />
1/2<br />
F/T<br />
←<br />
Code<br />
136<br />
137<br />
138<br />
139<br />
140<br />
141<br />
142<br />
143<br />
144<br />
145<br />
146<br />
147<br />
148<br />
149<br />
150<br />
151<br />
152<br />
153<br />
154<br />
155<br />
156<br />
157<br />
158<br />
159<br />
160<br />
161<br />
162<br />
163<br />
164<br />
165<br />
177<br />
178<br />
180<br />
181<br />
182<br />
183<br />
184<br />
185<br />
186<br />
187<br />
188<br />
189<br />
190<br />
191<br />
192<br />
Character<br />
→<br />
F<br />
T<br />
↓<br />
ç<br />
°<br />
¿<br />
Ù<br />
à<br />
Æ<br />
ø<br />
Å<br />
¤<br />
é<br />
è<br />
Pt<br />
i<br />
Ñ<br />
ò<br />
£<br />
¥<br />
°<br />
Á<br />
Í<br />
A<br />
a<br />
E<br />
e<br />
I<br />
i<br />
U<br />
u<br />
N<br />
n<br />
C<br />
S<br />
C<br />
▲<br />
▲<br />
´´<br />
´´<br />
´´<br />
´´<br />
193<br />
194<br />
195<br />
196<br />
197<br />
198<br />
199<br />
200<br />
201<br />
202<br />
203<br />
204<br />
205<br />
206<br />
207<br />
208<br />
209<br />
210<br />
211<br />
212<br />
213<br />
214<br />
215<br />
216<br />
217<br />
218<br />
219<br />
224<br />
225<br />
226<br />
227<br />
228<br />
229<br />
230<br />
231<br />
232<br />
233<br />
234<br />
235<br />
236<br />
237<br />
238<br />
253<br />
I<br />
G<br />
S<br />
G<br />
g<br />
K<br />
k<br />
L<br />
l<br />
Z<br />
D<br />
d<br />
C<br />
c<br />
P<br />
e<br />
s<br />
c<br />
z<br />
y<br />
u<br />
n<br />
r<br />
§<br />
Ø<br />
↑<br />
]<br />
[<br />
ä<br />
ö<br />
ü<br />
æ<br />
å<br />
É<br />
ñ<br />
*(DC)<br />
’<br />
.<br />
.<br />
.<br />
.<br />
.<br />
.<br />
.<br />
.<br />
.<br />
.<br />
.<br />
.<br />
”<br />
Code<br />
Character
PROGRAMMING<br />
This chapter illustrates how to program your cash register.<br />
Basic instructions<br />
All the programming items can be programmed by the Job-Code-Based Programming described later.<br />
Also your machine allows you to program some items using the Direct Programming, which does not require<br />
you to enter the job code. However, object keys (shown below) must be allocated on the keyboard. For the keys<br />
not allocated on the keyboard, you cannot use the direct programming.<br />
Job-Code-Based Programming<br />
Simplified procedure :<br />
Direct Programming<br />
Sample procedure :<br />
XXX Data entry<br />
. @ Ç<br />
(Job code)<br />
Data entry<br />
–<br />
(Object key)<br />
Ç<br />
Preparations for programming<br />
1. Plug your machine into a standard grounded AC outlet.<br />
2. Turn the mode switch to the PGM1 or PGM2 position.<br />
To set the mode switch to the PGM1 position, use the manager or submanager key; and to set it to the<br />
PGM2 position, use the manager key.<br />
3. Check to see whether both journal and receipt rolls are present in the machine. If they are missing, install<br />
journal and receipt paper rolls correctly referring to the procedure in “4. Installing and removing the paper<br />
roll” under “OP<strong>ER</strong>ATOR MAINTENANCE”.<br />
4. Program the necessary items into your machine.<br />
1<br />
Direct Programming<br />
Setting the date and time<br />
Date<br />
PGM 1 PGM 2<br />
Enter the month (one or two digits), day (two digits), and year (four digits : 2000 – 2099) in this sequence.<br />
Procedure<br />
XXXXXXXX<br />
#/<br />
TM<br />
Date (seven or eight digits)<br />
Example<br />
Key operation<br />
#/<br />
08262004 = TM<br />
Print<br />
Date<br />
80
Time<br />
Set the time using the military time (24-hour) system. For example, when the time is set to 2:30 AM, enter 230;<br />
and when it is set to 2:30 PM, enter 1430. The time will be printed and displayed using a real-time system. Once<br />
you set the time, the internal clock unit will continue to run as long as the built-in battery is alive and update the<br />
date (day, month, year) properly.<br />
Procedure<br />
PGM 1<br />
PGM 2<br />
#/<br />
XXXX<br />
TM<br />
Time (max. four digits)<br />
Example<br />
Key operation<br />
#/<br />
1430 =<br />
TM<br />
Print<br />
Time<br />
2<br />
Programming for departments<br />
Your machine is equipped with 20 (<strong>ER</strong>-<strong>A520</strong>A)/10 (<strong>ER</strong>-<strong>A530</strong>A) standard departments and a maximum of 99<br />
departments. Your machine allows you to perform the following programming for each department.<br />
Unit price<br />
Procedure<br />
PGM 1<br />
PGM 2<br />
To program any dept.<br />
To program zero<br />
Unit price (max. 6 digits)<br />
Dept. code (1 — 99)<br />
à<br />
1<br />
·99<br />
Unit price (max. 6 digits)<br />
To program zero<br />
ı<br />
Ç<br />
To program the next sequential dept.<br />
Example<br />
Key operation<br />
1000 1<br />
Ç<br />
Print<br />
Unit price<br />
81
Functional selection<br />
PGM 2<br />
Procedure<br />
To program any dept.<br />
To set all zeros<br />
* 1 ABCDEFGHIJKLMNOP<br />
Dept. code (1 — 99)<br />
à<br />
@<br />
1 ·99<br />
* 1 ABCDEFGHIJKLMNOP<br />
To set all zeros<br />
@<br />
Ç<br />
To program the next sequential dept.<br />
* 1 Item: Selection: Entry:<br />
A Group number 0 thru 9 (0: Non group)<br />
B Commission group number 0 thru 9 (0: Non commission)<br />
C Sign (plus/minus) Plus 0<br />
Minus 1<br />
D Food stamp status Ineligible 0<br />
Eligible 1<br />
E Tax 4 status Non-taxable 0<br />
Taxable 1<br />
F Tax 3 status Non-taxable 0<br />
Taxable 1<br />
G Tax 2 status Non-taxable 0<br />
Taxable 1<br />
H Tax 1 status Non-taxable 0<br />
Taxable 1<br />
I Item validation printing Non-compulsory 0<br />
Compulsory 1<br />
J Tare table number 0 thru 9 (0: not used)<br />
K Scale entry Inhibit 0<br />
Enable 1<br />
Compulsory 2<br />
L Registration type Normal 0<br />
SICS (Single Item Cash Sale) 1<br />
SIF (Single Item Finalization) 2<br />
M Department type Normal department 0<br />
Hash department 1<br />
Bottle return department 2<br />
Gas department 3<br />
N Type of unit price entry Inhibit department key 0<br />
Open only 1<br />
Preset only 2<br />
Open and preset 3<br />
O Significant digit for HALO 1 thru 9<br />
P Number of zeros to follow the significant digit for HALO 0 thru 7<br />
82
Note<br />
Group number<br />
You can assign a department to a maximum of nine groups. This programming enables you to take<br />
group sales reports.<br />
Commission group number<br />
A commission group number (0–9, 0: non commission) can be assigned to each department.<br />
Sign (plus/minus)<br />
• Assign a plus sign to departments for normal sales transactions.<br />
• Assign a minus sign to departments for minus transactions.<br />
Food stamp status<br />
• Assign a food stamp status (food stamp eligible or food stamp ineligible) to each department.<br />
Tax status (taxable 1 thru 4/non-taxable)<br />
• When an entry of a taxable department is made in a transaction, tax is automatically computed<br />
according to the associated tax table or rate.<br />
• Tax 4 is prohibited if you use the food stamp function.<br />
Item validation printing<br />
If item entries must be validated, program corresponding departments for compulsory validation<br />
printing.<br />
Tare table number<br />
Tare table number associated with scale entry (1 thru 9).<br />
Scale entry<br />
Program a department for scale entry when your store requires items to be sold by weight and are<br />
placed on a scale connected to the register.<br />
Registration type<br />
• If an entry of a department programmed for SICS is made first, the sale will be finalized as soon<br />
as the department key is pressed. If the entry is made after entering a department not<br />
programmed for SICS, the sale will not be finalized until the Ç key is pressed.<br />
• Whenever a sale is made to a department programmed for SIF, the sale is finalized as soon as<br />
the department key is pressed.<br />
Department type<br />
You may program each department as one of the following three types.<br />
• Normal department<br />
• Hash department<br />
A hash department is used to enter the amount of a special “sale”, such as a gift certificate sale or<br />
for the receipt of payment for utility bills, theatre tickets, etc., i.e. “non-sales” registrations. Any<br />
amounts entered in this department are not added to the grand total except tax amounts.<br />
• Bottle Return (BR)<br />
• Gas department<br />
The gas department enables you calculate the quantity of gas sold in gallon by using a preset unit<br />
price when the sale amount of gas is entered. (quantity of gas = sales amount entered / preset<br />
unit price)<br />
Also gas discount can be automatically applied to the sales. (discount amount = total amount of<br />
gas x reduced unit price for each media; cash/check/charge)<br />
Type of unit price entry<br />
You may select one of the following four types of unit price entry for each department.<br />
• Open and preset<br />
• Preset only<br />
• Open only<br />
• Inhibit department key<br />
HALO (High Amount Lockout)<br />
You can set an upper limit amount (HALO) for each department. The limit is affective for the REG<br />
mode operations and can be overridden in the MGR mode.<br />
• “OP” is the same as O × 10 P<br />
For example, presetting 14 ($100.00) here means that amount entries of up to $100.00 are<br />
allowed in the REG mode. When you preset 17, the upper limit amount is 99999.99.<br />
83
Example<br />
Key operation<br />
Print<br />
1000000100000317 @ 1<br />
Ç<br />
Taxable1<br />
Commission<br />
group no.<br />
HALO<br />
IJKLMN<br />
Group no.<br />
Food stampstatus F:Eligible<br />
(None):Ineligible<br />
3<br />
PLU/UPC programming<br />
Your machine is equipped with 2000 standard PLU/UPC codes. Your machine allows you to perform the<br />
following programming for each PLU/UPC.<br />
Note<br />
PLU/<br />
• Please note that the price lookup/subdepartment/UPC key (P for <strong>ER</strong>-<strong>A520</strong>A) is shown as UPC .<br />
• To review the UPC codes available to this register, please refer to the chapter 13 in “Universal<br />
Product Code(UPC) or European Article Number(EAN)”.<br />
• Ä in Procedures indicates that you scan a barcode.<br />
Unit price<br />
Procedure<br />
PGM 1<br />
PGM 2<br />
l<br />
5<br />
Level no.<br />
(1 to 5) ä<br />
PLU code (max. 5 digits)<br />
UPC code (6 to 13 digits)<br />
To program any PLU/UPC<br />
Ä<br />
Direct PLU key<br />
PLU/<br />
UPC<br />
To keep current setting<br />
Unit price 1<br />
(max. 6 digits)<br />
* In case that price shift function is allowed, the register prompts to enter a unit price for the following level by<br />
displaying “P2” thru “P6” on the display, and when a unit price of level 6 is entered, the register goes to the<br />
status for programming the following PLU/UPC. When you press the Ç on the way of programming multiple<br />
prices for a PLU/UPC code, prices for the remained levels are kept unchanged.<br />
In case that single price entry is allowed for a PLU/UPC code, the register goes to the status for programming<br />
the following PLU/UPC.<br />
ı<br />
Ç<br />
* To program unit price 2 thru 6 (only when price shift function is allowed.)<br />
To program for the following PLU/UPC<br />
Example<br />
Key operation<br />
Print<br />
PLU/<br />
1 P 1000 ı UPC<br />
Ç<br />
Unit price<br />
84<br />
(In case of single price entry)
Functional selection<br />
PGM 2<br />
Procedure<br />
l<br />
5<br />
Level no.<br />
(1 to 5) ä<br />
To program any PLU/UPC<br />
Ä<br />
Direct PLU key<br />
To program zero<br />
* 1 ABCDEFGHIJ<br />
@<br />
To program for the following PLU/UPC<br />
Ç<br />
PLU code (max. 5 digits)<br />
UPC code (6 to 13 digits)<br />
PLU/<br />
UPC<br />
* 1 Item: Selection: Entry:<br />
A Commission group number 0 thru 9 (0: Non commission)<br />
B Sign (plus/minus) Plus 0<br />
Minus 1<br />
C Food stamp status Ineligible 0<br />
Eligible 1<br />
D Tax 4 status Non-taxable 0<br />
Taxable 1<br />
E Tax 3 status Non-taxable 0<br />
Taxable 1<br />
F Tax 2 status Non-taxable 0<br />
Taxable 1<br />
G Tax 1 status Non-taxable 0<br />
Taxable 1<br />
H Tare table number 0 thru 9 (0: Not used)<br />
I Scale entry Inhibit 0<br />
Enable 1<br />
Compulsory 2<br />
J Type of unit price entry Prohibit mode 0<br />
Open price only 1<br />
Preset price only 2<br />
Open price and preset price 3<br />
Delete mode 4<br />
Note<br />
Commission group number<br />
A commission group number (0–9, 0: non commission) can be assigned to each department.<br />
Sign (plus/minus)<br />
The function of every PLU/UPC varies according to the combination of its sign and the sign of its<br />
associated department as follows:<br />
Sign<br />
Department PLU/UPC<br />
Function of PLU/UPC<br />
+ + Serves as a normal plus PLU/UPC<br />
– – Serves as a normal minus PLU/UPC<br />
+ – Accepts store coupon entries, but not split-pricing entries<br />
– + Not valid; not accepted<br />
Food stamp status<br />
• Assign a food stamp status (food stamp eligible or food stamp ineligible) to each PLU/UPC.<br />
85
Tax status (taxable 1 thru 4/non-taxable)<br />
• When an entry of a taxable PLU/UPC is made in a transaction, tax is automatically computed<br />
according to the associated tax table or rate.<br />
• Tax 4 is prohibited if you use the food stamp function.<br />
Tare table number<br />
Tare table number associated with scale entry (1 thru 9).<br />
Scale entry<br />
Program a PLU/UPC for scale entry when your store requires items to be sold by weight and are<br />
placed on a scale connected to the register.<br />
Type of unit price entry<br />
You may select one of the following four types of unit price entry for each PLU/UPC.<br />
• Open price and preset price (for only PLU)<br />
• Preset price only<br />
• Open price only (for only PLU)<br />
• Prohibit mode: Prohibits the entry of any assigned PLU/UPC code.<br />
• Delete mode: Deletes data programmed for each PLU/UPC.<br />
Example<br />
Key operation<br />
Print<br />
PLU/<br />
1 P 0000001003 @ UPC<br />
Ç<br />
Taxable1<br />
Commission<br />
group no.<br />
(HIJ)<br />
Associated department<br />
Procedure<br />
PGM 1<br />
PGM 2<br />
l<br />
5<br />
Level no.<br />
(1 to 5) ä<br />
PLU code (max. 5 digits)<br />
UPC code (6 to 13 digits)<br />
To program any PLU/UPC<br />
Ä<br />
Direct PLU key<br />
PLU/<br />
UPC<br />
To delete the entered PLU/UPC<br />
v<br />
Associated department code<br />
(1 – 99)<br />
1 ·99<br />
à<br />
To program for the following PLU/UPC<br />
Ç<br />
Example<br />
Key operation<br />
Print<br />
PLU/<br />
1 PUPC<br />
1<br />
Ç<br />
Associated<br />
dept. code<br />
86
4 Programming for discount keys (-)<br />
Discount amount<br />
Procedure<br />
PGM 1 PGM 2<br />
To program zero<br />
Discount amount (max. 6 digits)<br />
- ± Ç<br />
Example<br />
Key operation<br />
1000 -<br />
Ç<br />
Print<br />
Discount<br />
amount<br />
Functional programming<br />
PGM 2<br />
Procedure<br />
To program zero<br />
*ABCDEFGHI<br />
@ - ± Ç<br />
To program any coupon function<br />
* Item: Selection: Entry:<br />
A Food stamp status Ineligible 0<br />
Eligible 1<br />
B Tax 4 status Non-taxable 0<br />
Taxable 1<br />
C Tax 3 status Non-taxable 0<br />
Taxable 1<br />
D Tax 2 status Non-taxable 0<br />
Taxable 1<br />
E Tax 1 status Non-taxable 0<br />
Taxable 1<br />
F Sign (+/-) Plus 0<br />
Minus 1<br />
G Vendor/store coupon selection Vendor coupon (subtotal _) 0<br />
Store coupon (item _) 1<br />
H Significant digit for HALO 1 thru 9<br />
I Number of zeros to follow the significant digit for HALO 0 thru 7<br />
87
Note<br />
Tax status (taxable 1 thru 4/non-taxable)<br />
Tax 4 is prohibited if you use the food stamp function.<br />
HALO (High amount lockout)<br />
“HI” is the same as H x 10 I .<br />
For example, presetting 14 ($100.00) here means that amount entries of up to $100.00 are allowed<br />
in the REG mode. When you preset 17, however, the upper limit amount is 99999.99.<br />
When you preset 00, the open amount entry is prohibited.<br />
Example<br />
Key operation<br />
000011013 @-<br />
Ç<br />
Print<br />
HALO<br />
Taxable 1<br />
Food stamp status F:Eligible<br />
(None):Ineligible<br />
Subtotal _<br />
5<br />
Programming for percent keys (%)<br />
Percent rate<br />
PGM 1 PGM 2<br />
Procedure<br />
To program zero<br />
* Rate<br />
)¡ ( ) ∞ Ç<br />
* Rate: Percent rate: 0.00 – 100.00<br />
Note<br />
You must use a decimal point key when setting percentage rates that are fractional.<br />
Example<br />
Key operation<br />
10 . 25 %<br />
Ç<br />
Print<br />
Percent<br />
rate<br />
88
Functional programming<br />
PGM 2<br />
Procedure<br />
To program zero<br />
*ABCDEFGHIJ<br />
@ )¡ ( ) ∞<br />
Ç<br />
* Item: Selection: Entry:<br />
A Type of amount entry Inhibit percent key 0<br />
Open only 1<br />
Preset only 2<br />
Open and preset 3<br />
B Food stamp status Ineligible 0<br />
Eligible 1<br />
C Tax 4 status Non-taxable 0<br />
Taxable 1<br />
D Tax 3 status Non-taxable 0<br />
Taxable 1<br />
E Tax 2 status Non-taxable 0<br />
Taxable 1<br />
F Tax 1 status Non-taxable 0<br />
Taxable 1<br />
G Sign (+/-) Plus 0<br />
Minus 1<br />
H item%/subtotal% selection Subtotal % 0<br />
Item % 1<br />
I Always enter 0. 0<br />
J Always enter 0. 0<br />
Note<br />
Tax status (taxable 1 thru 4/non-taxable)<br />
Tax 4 is prohibited if you use the food stamp function.<br />
Example<br />
Key operation<br />
Print<br />
3000011000 @%<br />
Ç<br />
Taxable 1<br />
Subtotal %<br />
89
6 Programming for conversion keys (ç)<br />
Currency conversion rate<br />
Procedure<br />
PGM 1 PGM 2<br />
To program zero<br />
* Conversion rate<br />
ç # Ç<br />
* Conversion rate: 0.0000 – 9999.9999<br />
Note<br />
You must use a decimal point key when setting conversion rates that are fractional.<br />
Example<br />
Key operation<br />
0 . 8063 ç<br />
Ç<br />
Print<br />
7<br />
Programming for the r, p, and † keys<br />
High amount lockout (HALO)<br />
PGM 2<br />
The HALO limit effects REG mode operations but can be overridden in the MGR mode.<br />
The HALO limit is represented by two figures as follows:<br />
Procedure<br />
To program zero<br />
AB<br />
@<br />
or<br />
r A<br />
or<br />
p π<br />
†<br />
(Only for manual entry)<br />
Ç<br />
“AB” is the same as A × 10 B .<br />
A: Significant digit (0 through 9)<br />
B: Number of zeros to follow significant digit: (for RA or PO: 0 thru 9), (for manual tax: 0 thru 7)<br />
Example<br />
Key operation<br />
13 @ r<br />
Ç<br />
Print<br />
90
Programming for the Ç, Å, ', and k keys<br />
8<br />
CA<br />
High amount lockout (HALO) and functional selection<br />
PGM 2<br />
Procedure<br />
To program zero<br />
* ABCDEFGHIJKL<br />
h CH9<br />
@ k CHK5<br />
Å É<br />
s<br />
(For<br />
Ç key)<br />
Ç<br />
* Item: Selection: Entry:<br />
A GLU/PBLU/Manual PB/CB entry Enable 0<br />
Inhibit 1<br />
Compulsory 2<br />
B Short amount tender entry Enable 0<br />
Disable 1<br />
C Retention of closed GLU/PBLU file No 0<br />
Yes 1<br />
D Bill (slip) printing Non-compulsory 0<br />
Compulsory 1<br />
E Footer printing on receipt No 0<br />
Yes 1<br />
F Non-add code entry Non-compulsory 0<br />
Compulsory 1<br />
G Change enable (over tender enable) Enable 0<br />
Disable 1<br />
H Validation printing Non-compulsory 0<br />
Compulsory 1<br />
I Drawer opening Yes 0<br />
No 1<br />
J Amount tendered operation Optional amount tendered for cash or check 0<br />
Inhibit amount tendered for charge 0<br />
Compulsory amount tendered 1<br />
K Significant digit for HALO 0 thru 9<br />
L Number of zeros to follow the significant digit for HALO 0 thru 8<br />
Note<br />
HALO (High amount lockout)<br />
“KL” is the same as K × 10 L .<br />
For example, presetting 13 ($10.00) here means that amount entries of up to $10.00 are allowed in<br />
the REG mode. When you preset 18, however, the upper limit amount is 999999.99.<br />
91
Example<br />
Key operation<br />
Print<br />
000000000015 @)<br />
Ç<br />
HALO<br />
A thru J<br />
92
9<br />
Programming for the automatic tax calculation function<br />
Your machine has an automatic tax calculation feature which allows you to program four tax tables to avoid<br />
calculating incorrect tax amounts.<br />
Automatic tax calculations require you to program, in addition to the tax table, the tax status of each pertinent<br />
department, PLU/UPC, and function key.<br />
The tax table (applicable to the add-on tax)<br />
Sample tax table<br />
PGM 2<br />
New Jersey tax table: 6%<br />
Taxes<br />
.00<br />
.01 T<br />
.02<br />
.03<br />
.04<br />
.05<br />
.06<br />
.07<br />
.08<br />
.09<br />
.10<br />
.11<br />
.12<br />
.13<br />
Range of sales amount<br />
Minimum breakpoint Maximum breakpoint<br />
.01<br />
to .10<br />
.11 Q to .22<br />
.23<br />
to .38<br />
.39<br />
to .56<br />
.57<br />
to .72<br />
.73<br />
to .88<br />
.89<br />
to 1.10<br />
1.11 M1 to 1.22<br />
1.23<br />
to 1.38<br />
1.39<br />
to 1.56<br />
1.57<br />
to 1.72<br />
1.73<br />
to 1.88<br />
1.89<br />
to 2.10<br />
2.11 M2 to 2.22<br />
A: Difference between the<br />
minimum breakpoint and<br />
the next one (¢)<br />
–<br />
10 (0.11 - 0.01)<br />
12 (0.23 - 0.11)<br />
16 (0.39 - 0.23)<br />
18 (0.57 - 0.39)<br />
16 (0.73 - 0.57)<br />
16 (0.89 - 0.73)<br />
22 (1.11 - 0.89)<br />
12 (1.23 - 1.11)<br />
16 (1.39 - 1.23)<br />
18 (1.57 - 1.39)<br />
16 (1.73 - 1.57)<br />
16 (1.89 - 1.73)<br />
22 (2.11 - 1.89)<br />
B: Non-cyclic<br />
C: Cyclic-1<br />
D: Cyclic-2<br />
To program a tax table, first make a table like the right table shown above.<br />
From the tax table, calculate the differences between a minimum break point and the next one (A). Then, from<br />
the differences, find irregular cycles (B) and regular cycles (C and D). These cycles will show you the following<br />
items necessary to program the tax table:<br />
T: The tax amount collected on the minimum taxable amount (Q)<br />
Q: The minimum taxable amount<br />
M1: The maximum value of the minimum breakpoint on a regular cycle (C).<br />
We call this point “MAX point.”<br />
M2: The maximum value of the minimum breakpoint on a regular cycle (D).<br />
We call this point “MAX point.”<br />
M: Range of the minimum breakpoint on a regular cycle: difference between Q and M1 or between M1 and<br />
M2<br />
93
Procedure<br />
One- or two-*digit<br />
number<br />
Rate<br />
*2<br />
† @ @<br />
@<br />
M<br />
T<br />
max. three<br />
digits<br />
@<br />
max. six digits<br />
(0.0001 - 99.9999%)<br />
To delete a tax table, use the following sequence:<br />
One- or two-*digit<br />
number<br />
Rate<br />
*2<br />
@<br />
max. six digits<br />
(0.0001 - 99.9999%)<br />
max. four<br />
digits<br />
Q Minimum breakpoint<br />
@<br />
@ Ç<br />
max. five digits<br />
max. five<br />
digits<br />
Repeat until the MAX point is entered.<br />
† @<br />
M<br />
@ t<br />
max. four<br />
digits<br />
*1 First figure: The first figure to be entered depends upon whether the difference between a minimum<br />
breakpoint to be entered and the preceding minimum breakpoint is not less than $1.00 or<br />
more than 99¢. When the difference is not less than $1.00, enter “1,” and when it is not more<br />
than 99¢, enter “0” or nothing.<br />
Second figure: The second figure depends upon whether your tax table is to be programmed as tax table 1,<br />
2, 3 or 4. When your tax table is to be programmed as tax table 1, enter “1”; when it is to be<br />
programmed as tax table 2, enter “2”; when it is to be programmed as tax table 3, enter “3”;<br />
and when it is to be programmed as tax table 4, enter “4”.<br />
*2 If the rate is fractional (e.g. 4-3/8%), then the fractional portion (3/8) would be converted to its decimal<br />
equivalent (i.e. .375) and the resulting rate of 4.375 would be entered. Note that the nominal rate (R) is<br />
generally indicated on the tax table.<br />
Note<br />
If you make an incorrect entry before entering the M in programming a tax table, cancel it with the<br />
c key; and if you make an error after entering the M, cancel it with the ı key. Then program<br />
again from the beginning correctly.<br />
• Limitations to the entry of minimum breakpoints<br />
Your register can support a tax table consisting of no more than 72 breakpoints. (The number of breakpoints is<br />
36 maximum when the breakpoint difference is $1.00 or more.) If the number of breakpoints exceeds the<br />
register’s table capacity, then the manual entry approach should be used.<br />
Example<br />
Programming the sample tax table shown on the previous page as tax table 1<br />
Tax rate →<br />
M →<br />
T →<br />
Q →<br />
The first<br />
cyclic<br />
portion<br />
M1<br />
(MAX point)→<br />
Key operation<br />
Print<br />
†<br />
1 @<br />
6 @<br />
100 @<br />
1 @<br />
11 @<br />
23 @<br />
39 @<br />
57 @<br />
73 @<br />
89 @<br />
111 @<br />
a<br />
94<br />
Note<br />
You do not need to enter the trailing zeros of the tax rate (after the decimal point) but you do need<br />
to enter the decimal point for fractions.
• If the tax is not provided for every cent, modify the tax table by setting the tax for every cent in the<br />
following way.<br />
When setting the tax, consider the minimum breakpoint corresponding to unprovided tax to be the same as the<br />
one corresponding to the tax provided on a large amount.<br />
Sample tax table<br />
Example 8%<br />
Modification of the left tax table<br />
Tax<br />
Minimum<br />
breakpoint<br />
Tax<br />
Minimum<br />
breakpoint<br />
Breakpoint<br />
difference (¢)<br />
.00<br />
.01<br />
.02<br />
.03<br />
.04<br />
.06<br />
.09<br />
.10<br />
.11<br />
.12<br />
.14<br />
.17<br />
.01<br />
.11<br />
.26<br />
.47<br />
.68<br />
.89<br />
1.11<br />
1.26<br />
1.47<br />
1.68<br />
1.89<br />
2.11<br />
.00<br />
.01<br />
.02<br />
.03<br />
.04<br />
.05<br />
.06<br />
.07<br />
.08<br />
.09<br />
.10<br />
.11<br />
.12<br />
.13<br />
.14<br />
.15<br />
.16<br />
.17<br />
T<br />
.01<br />
.11<br />
.26<br />
.47<br />
.68<br />
.89<br />
.89<br />
1.11<br />
1.11<br />
1.11<br />
1.26<br />
1.47<br />
1.68<br />
1.89<br />
1.89<br />
2.11<br />
2.11<br />
2.11<br />
Q<br />
M1<br />
M2<br />
1<br />
10 (0.11-0.01)<br />
15 (0.26-0.11)<br />
21 (0.47-0.26)<br />
21 (0.68-0.47)<br />
21 (0.89-0.68)<br />
0 (0.89-0.89)<br />
22 (1.11-0.89)<br />
0 (1.11-1.11)<br />
0 (1.11-1.11)<br />
15 (1.26-1.11)<br />
21 (1.47-1.26)<br />
21 (1.68-1.47)<br />
21 (1.89-1.68)<br />
0 (1.89-1.89)<br />
22 (2.11-1.89)<br />
0 (2.11-2.11)<br />
0 (2.11-2.11)<br />
B: Non-cyclic<br />
C: Cyclic-1<br />
D: Cyclic-2<br />
From the modified tax table above;<br />
Rate = 8(%), T = $0.01 = 1¢, Q = $0.11 = 11¢, M1 = 1.11, M2 = 2.11, M = 100<br />
95
Job-Code-Based Programming<br />
This section illustrates how to program items using job codes. Using job codes allows you to program a wide<br />
variety of items in comparison with direct programming.<br />
Start this programming by entering a corresponding job code as shown below.<br />
2110<br />
. @<br />
All the items which can be programmed by the job-code-based programming are listed on this page and the<br />
following, and those which can also be programmed by the direct programming are marked with the symbol<br />
“ Direct ” that follows job codes.<br />
1<br />
Setting the date and time<br />
Setting the date<br />
PGM 2 2610 Direct<br />
Enter the month (one or two digits), day (two digits), and year (four digits: 2000 – 2099) in this sequence.<br />
Procedure<br />
2610 Date (seven or eight digits)<br />
. @ Ç<br />
Example<br />
Key operation<br />
2610 .@<br />
08262004 Ç<br />
Print<br />
Date<br />
Setting the time<br />
PGM 2 2611 Direct<br />
Set the time using the military time (24-hour) system. For example, when the time is set to 2:30 AM, enter 230;<br />
and when it is set to 2:30 PM, enter 1430. The time is printed and displayed on the real time system.<br />
Procedure<br />
2611 Time (max. four digits)<br />
. @ Ç<br />
Example<br />
Key operation<br />
2611 .@<br />
1430 Ç<br />
Print<br />
Time<br />
96
2<br />
Setting the register and consecutive numbers<br />
Setting the register number<br />
When your store has two or more registers, it is practical to set separate register numbers for their identification.<br />
You may set them with a maximum of six digits.<br />
Procedure<br />
PGM 2<br />
To set the register number “0”<br />
2612<br />
Register number<br />
2612<br />
. @ (one to six digits) Ç<br />
Example<br />
To set the register number as “123456”<br />
Key operation<br />
2612 .@<br />
123456 Ç<br />
Print<br />
Register<br />
number<br />
Setting the consecutive number<br />
The consecutive number is increased by one each time a receipt is issued.<br />
Enter a number (one to four digits) that is one less than the desired starting number.<br />
Procedure<br />
. @<br />
PGM 2<br />
2613<br />
To begin the count from 0001<br />
Ç<br />
2613 A number (one to four digits) that is one<br />
less than the desired starting number<br />
Example<br />
Setting the count start number as “1001”<br />
Key operation<br />
2613 .@<br />
1000 Ç<br />
Print<br />
Consecutive<br />
number<br />
97
3<br />
Programming for the automatic tax calculation function<br />
Your machine has an automatic tax calculation feature which allows you to program four tax tables or rates to<br />
avoid calculating incorrect tax amounts.<br />
Automatic tax calculations require you to program, in addition to the tax table and rate, the tax status of each<br />
pertinent department, PLU/UPC, and function key.<br />
The tax table (applicable to the add-on tax)<br />
PGM 2<br />
2710<br />
Direct<br />
Sample tax table<br />
New Jersey tax table: 6%<br />
Taxes<br />
.00<br />
.01 T<br />
.02<br />
.03<br />
.04<br />
.05<br />
.06<br />
.07<br />
.08<br />
.09<br />
.10<br />
.11<br />
.12<br />
.13<br />
Range of sales amount<br />
Minimum breakpoint Maximum breakpoint<br />
.01<br />
to .10<br />
.11 Q to .22<br />
.23<br />
to .38<br />
.39<br />
to .56<br />
.57<br />
to .72<br />
.73<br />
to .88<br />
.89<br />
to 1.10<br />
1.11 M1 to 1.22<br />
1.23<br />
to 1.38<br />
1.39<br />
to 1.56<br />
1.57<br />
to 1.72<br />
1.73<br />
to 1.88<br />
1.89<br />
to 2.10<br />
2.11 M2 to 2.22<br />
A: Difference between the<br />
minimum breakpoint and<br />
the next one (¢)<br />
–<br />
10 (0.11 - 0.01)<br />
12 (0.23 - 0.11)<br />
16 (0.39 - 0.23)<br />
18 (0.57 - 0.39)<br />
16 (0.73 - 0.57)<br />
16 (0.89 - 0.73)<br />
22 (1.11 - 0.89)<br />
12 (1.23 - 1.11)<br />
16 (1.39 - 1.23)<br />
18 (1.57 - 1.39)<br />
16 (1.73 - 1.57)<br />
16 (1.89 - 1.73)<br />
22 (2.11 - 1.89)<br />
B: Non-cyclic<br />
C: Cyclic-1<br />
D: Cyclic-2<br />
To program a tax table, first make a table like the right table shown above.<br />
From the tax table, calculate the differences between a minimum break point and the next one (A). Then, from<br />
the differences, find irregular cycles (B) and regular cycles (C and D). These cycles will show you the following<br />
items necessary to program the tax table:<br />
T: The tax amount collected on the minimum taxable amount (Q)<br />
Q: The minimum taxable amount<br />
M1: The maximum value of the minimum breakpoint on a regular cycle (C).<br />
We call this point “MAX point.”<br />
M2: The maximum value of the minimum breakpoint on a regular cycle (D).<br />
We call this point “MAX point.”<br />
M: Range of the minimum breakpoint on a regular cycle: difference between Q and M1 or between M1 and<br />
M2<br />
98
Procedure<br />
One- or two-*digit<br />
number<br />
*2<br />
2710<br />
. @<br />
Rate<br />
@ @<br />
M<br />
@<br />
T<br />
max. three<br />
digits<br />
@<br />
To delete a tax table, use the following sequence:<br />
One- or two-*digit<br />
number<br />
max. six digits<br />
(0.0001 - 99.9999%)<br />
*2<br />
2710 Rate<br />
. @ @ @<br />
M<br />
@ t<br />
max. six digits<br />
(0.0001 - 99.9999%)<br />
max. four<br />
digits<br />
max. four<br />
digits<br />
Q Minimum breakpoint<br />
@<br />
@ Ç<br />
max. five digits<br />
max. five<br />
digits<br />
Repeat until the MAX point is entered.<br />
*1 First figure: The first figure to be entered depends upon whether the difference between a minimum<br />
breakpoint to be entered and the preceding minimum breakpoint is not less than $1.00 or<br />
more than 99¢. When the difference is not less than $1.00, enter “1,” and when it is not more<br />
than 99¢, enter “0” or nothing.<br />
Second figure: The second figure depends upon whether your tax table is to be programmed as tax table 1,<br />
2, 3 or 4. When your tax table is to be programmed as tax table 1, enter “1”; when it is to be<br />
programmed as tax table 2, enter “2”; when it is to be programmed as tax table 3, enter “3”;<br />
and when it is to be programmed as tax table 4, enter “4”.<br />
*2 If the rate is fractional (e.g. 4-3/8%), then the fractional portion (3/8) would be converted to its decimal<br />
equivalent (i.e. .375) and the resulting rate of 4.375 would be entered. Note that the nominal rate (R) is<br />
generally indicated on the tax table.<br />
Note<br />
If you make an incorrect entry before entering the M in programming a tax table, cancel it with the<br />
c key; and if you make an error after entering the M, cancel it with the ı key. Then program<br />
again from the beginning correctly.<br />
• Limitations to the entry of minimum breakpoints<br />
Your register can support a tax table consisting of no more than 72 breakpoints. (The number of breakpoints is<br />
36 maximum when the breakpoint difference is $1.00 or more.) If the number of breakpoints exceeds the<br />
register's table capacity, then the manual entry approach should be used.<br />
Example<br />
Programming the sample tax table shown on the previous page as tax table 1<br />
Tax rate →<br />
M →<br />
T →<br />
Q →<br />
The first<br />
cyclic<br />
portion<br />
M1<br />
(MAX point)→<br />
Key operation<br />
2710 .@<br />
1 @<br />
6 @<br />
100 @<br />
1 @<br />
11 @<br />
23 @<br />
39 @<br />
57 @<br />
73 @<br />
Print<br />
89 @<br />
111 @<br />
a<br />
Note<br />
You do not need to enter the trailing zeros of the tax rate (after the decimal point) but you do need<br />
to enter the decimal point for fractions.<br />
99
• If the tax is not provided for every cent, modify the tax table by setting the tax for every cent in the<br />
following way.<br />
When setting the tax, consider the minimum breakpoint corresponding to unprovided tax to be the same as the<br />
one corresponding to the tax provided on a large amount.<br />
Sample tax table<br />
Example 8%<br />
Modification of the left tax table<br />
Tax<br />
Minimum<br />
breakpoint<br />
Tax<br />
Minimum<br />
breakpoint<br />
Breakpoint<br />
difference (¢)<br />
.00<br />
.01<br />
.02<br />
.03<br />
.04<br />
.06<br />
.09<br />
.10<br />
.11<br />
.12<br />
.14<br />
.17<br />
.01<br />
.11<br />
.26<br />
.47<br />
.68<br />
.89<br />
1.11<br />
1.26<br />
1.47<br />
1.68<br />
1.89<br />
2.11<br />
.00<br />
.01<br />
.02<br />
.03<br />
.04<br />
.05<br />
.06<br />
.07<br />
.08<br />
.09<br />
.10<br />
.11<br />
.12<br />
.13<br />
.14<br />
.15<br />
.16<br />
.17<br />
T<br />
.01<br />
.11<br />
.26<br />
.47<br />
.68<br />
.89<br />
.89<br />
1.11<br />
1.11<br />
1.11<br />
1.26<br />
1.47<br />
1.68<br />
1.89<br />
1.89<br />
2.11<br />
2.11<br />
2.11<br />
Q<br />
M1<br />
M2<br />
1<br />
10 (0.11-0.01)<br />
15 (0.26-0.11)<br />
21 (0.47-0.26)<br />
21 (0.68-0.47)<br />
21 (0.89-0.68)<br />
0 (0.89-0.89)<br />
22 (1.11-0.89)<br />
0 (1.11-1.11)<br />
0 (1.11-1.11)<br />
15 (1.26-1.11)<br />
21 (1.47-1.26)<br />
21 (1.68-1.47)<br />
21 (1.89-1.68)<br />
0 (1.89-1.89)<br />
22 (2.11-1.89)<br />
0 (2.11-2.11)<br />
0 (2.11-2.11)<br />
B: Non-cyclic<br />
C: Cyclic-1<br />
D: Cyclic-2<br />
From the modified tax table above;<br />
Rate = 8(%), T = $0.01 = 1¢, Q = $0.11 = 11¢, M1 = 1.11, M2 = 2.11, M = 100<br />
The tax rate<br />
PGM 2<br />
2711<br />
Procedure<br />
*<br />
2711<br />
. @<br />
A<br />
@<br />
1 to 4<br />
Tax rate<br />
max. six digits:<br />
0.0001 to<br />
99.9999%<br />
When the lowest taxable amount is zero<br />
@<br />
Lowest taxable amount<br />
a<br />
max. five digits:<br />
1¢ to $999.99 (Note: A minimum value of 1 must be entered.)<br />
To delete a tax rate, use the following sequence:<br />
*<br />
2711<br />
. @<br />
A<br />
Tax rate<br />
@<br />
1 to 4<br />
max. six digits:<br />
@ t<br />
0.0001 to<br />
99.9999%<br />
*A: When you program a tax rate as tax rate 1, enter “1”; when you program it as tax rate 2, enter “2”; when you<br />
program it as tax rate 3, enter “3”; and when you program it as tax rate 4, enter “4”.<br />
100
Example<br />
Programming the tax rate 4% as tax rate 2 with tax exempt as 12¢<br />
Key operation<br />
2711 .@<br />
2 @<br />
4 @<br />
12 a<br />
Print<br />
Note<br />
• If you make an incorrect entry before pressing the third @ key in programming a tax rate, cancel<br />
it with the c key; and if you make an error after pressing the third @ key, cancel it with the ı<br />
key. Then program again from the beginning correctly.<br />
• You do not need to enter the trailing zeros of the tax rate (after the decimal point), but you do<br />
need to enter the decimal for fractions.<br />
Doughnut tax exempt (for the Canadian tax system)<br />
Procedure<br />
To program zero<br />
PGM 2<br />
2715<br />
Quantity for doughnut<br />
2715 tax exempt<br />
. @ a<br />
(max. 2 digits: 1 to 99)<br />
Note<br />
This option is available only when your register has been set up with the Canadian tax system.<br />
Example<br />
To program the quantity “6”<br />
Key operation<br />
2715 .@<br />
6 a<br />
Print<br />
101
4<br />
Programming for departments<br />
Your machine is equipped with 20 (<strong>ER</strong>-<strong>A520</strong>A)/10 (<strong>ER</strong>-<strong>A530</strong>A) standard departments and a maximum of 99<br />
departments. Your machine allows you to perform the following programming for each department.<br />
Functional programming 1<br />
PGM 2<br />
2110<br />
Direct<br />
You can set each department for:<br />
Item validation printing<br />
If item entries must be validated, program corresponding departments for compulsory validation printing.<br />
Tare table number<br />
Tare table number associated with scale entry (0 thru 9, 0: not used)<br />
Scale entry<br />
Program a department for scale entry allowed when your store needs automatic scale entries.<br />
Registration type<br />
• If an entry of a department programmed for SICS is made first, the scale will be finalized as soon as the<br />
department key is pressed. If the entry is made after entering a department not programmed for SICS, the<br />
sale will not be finalized until the Ç key is pressed.<br />
• Whenever a sale is made to a department programmed for SIF, the sale is finalized as soon as the<br />
department key is pressed.<br />
Department type<br />
You may program each department as one of the following three types.<br />
• Normal department<br />
• Hash department<br />
A hash department is used to enter the amount of a special “sale”, such as a gift certificate sale or for the<br />
receipt of payment for utility bills, theatre tickets, etc., i.e. “non-sales” registrations. Any amounts entered in<br />
this department are not added to the grand total except tax amounts.<br />
• Bottle Return (BR)<br />
• Gas department<br />
The gas department enables you calculate the quantity of gas sold in gallon by using a preset unit price when<br />
the sale amount of gas is entered. (quantity of gas = sales amount entered / preset unit price)<br />
Also gas discount can be automatically applied to the sales. (discount amount = total amount of gas x reduced<br />
unit price for each media; cash/check/charge)<br />
Note<br />
If your register has not been set for “Bottle return, Hash and gas dept.” by your dealer, you cannot<br />
program the department for those operations. So contact your dealer if you need them.<br />
Type of unit price entry<br />
You may select one of the following four types of unit price entry for each department.<br />
• Open and preset<br />
• Preset only<br />
• Open only<br />
• Inhibit department key<br />
102
Procedure<br />
2110 Dept. code<br />
*ABCDEF<br />
. @ @ t Ç<br />
(1 - 99)<br />
To program any dept.<br />
To program zero<br />
To program the next sequential dept.<br />
* 1 Item: Selection: Entry:<br />
A Item validation printing Non-compulsory 0<br />
Compulsory 1<br />
B Tare table number 0 thru 9 (0: not used)<br />
C Scale entry Inhibit 0<br />
Enable 1<br />
Compulsory 2<br />
D Registration type Normal 0<br />
SICS (Single Item Cash Sale) 1<br />
SIF (Single Item Finalization) 2<br />
E Department type Normal department 0<br />
Hash department 1<br />
Bottle return department 2<br />
Gas department 3<br />
F Type of unit price entry Inhibit department key 0<br />
Open only 1<br />
Preset only 2<br />
Open and preset 3<br />
Example<br />
Programming for department 3<br />
Enter ABCDEF=000003 for department 3.<br />
Key operation<br />
Print<br />
2110 .@<br />
3 @ 000003 t<br />
Ç<br />
A thru F<br />
103
Functional programming 2<br />
PGM 2<br />
2111<br />
Direct<br />
Sign (plus/minus)<br />
• Assign a plus sign to departments for normal sales transactions.<br />
• Assign a minus sign to departments for minus transactions.<br />
Food stamp status<br />
• Assign a food stamp status (food stamp eligible or food stamp ineligible) to each department.<br />
Tax status (taxable 1 thru 4/non-taxable)<br />
• When an entry of a taxable department is made in a transaction, tax is automatically computed according to<br />
the associated tax table or rate.<br />
Note<br />
Tax 4 is prohibited if you use the food stamp function.<br />
Procedure<br />
2111 Dept. code<br />
*ABCDEF<br />
. @ @ t Ç<br />
(1 - 99)<br />
To program any dept.<br />
To program zero<br />
To program the next sequential dept.<br />
* Item: Selection: Entry:<br />
A Sign (+/-) Plus 0<br />
Minus 1<br />
B Food stamp status Ineligible 0<br />
Eligible 1<br />
C Tax 4 status Non-taxable 0<br />
Taxable 1<br />
D Tax 3 status Non-taxable 0<br />
Taxable 1<br />
E Tax 2 status Non-taxable 0<br />
Taxable 1<br />
F Tax 1 status Non-taxable 0<br />
Taxable 1<br />
Example<br />
Programming for department 4 and 10<br />
Enter ABCDEF=010001 for department 4.<br />
Enter ABCDEF=100000 for department 10.<br />
Key operation<br />
Print<br />
2111 .@<br />
4 @ 010001 t<br />
10 @ 100000 t<br />
Ç<br />
Food stamp<br />
eligible and<br />
taxable 1<br />
Minus dept.<br />
104<br />
Note<br />
When you program the last dept. code you are allowed to program, the programming sequence will<br />
be complete with a press of the t key.
A limit amount (HALO) of entry<br />
You can set limit amounts (HALO: High Amount Lockout) for each department. The limit is effective for the REG<br />
mode operations and can be overridden in the MGR mode. The HALO limit is represented by two figures as<br />
follows:<br />
Procedure<br />
2112 Dept. code<br />
*AB<br />
. @ @ t Ç<br />
(1 - 99)<br />
PGM 2<br />
“AB” is the same as A × 10 B .<br />
A: Significant digit (0 through 9)<br />
B: Number of zeros to follow significant digit (0 through 7)<br />
For example, presetting 13 ($10.00) here means that amount entries of up to $10.00 are allowed in the REG<br />
mode. When you preset 17, however, the upper limit amount is 99999.99.<br />
2112<br />
To program any dept.<br />
Direct<br />
To program zero<br />
To program the next sequential dept.<br />
Example<br />
Programming HALO limit of 9000.00 (95) for dept. 1<br />
Key operation<br />
2112 .@<br />
1 @ 95 t<br />
Ç<br />
Print<br />
HALO<br />
Item label<br />
PGM 2 2114<br />
You can program a maximum of 16 characters (item label) for each department.<br />
Select the characters you want to program, referring to section “2 How to program alphanumeric characters” in<br />
chapter “PRIOR TO PROGRAMMING”.<br />
Procedure<br />
2114 Dept. code<br />
Character keys<br />
. @ @ t Ç<br />
(1 - 99)<br />
To program any dept.<br />
To keep the current setting<br />
(max. 16 digits)<br />
To program the next sequential dept.<br />
Example<br />
Programming STEAK (steak) for dept. 1<br />
Key operation<br />
Print<br />
2114 .@<br />
1 @ STEAK t<br />
Ç<br />
105
Unit price<br />
You can program unit prices up to a maximum of six digits ($9999.99). Even if a department is not programmed<br />
to allow the entry of preset unit prices in functional programming 1 (job #2110), the department is automatically<br />
changed to allow the entry of preset unit prices by this programming entry.<br />
Procedure<br />
PGM 1<br />
PGM 2<br />
1110<br />
1110 Dept. code<br />
Unit price<br />
. @ @ t Ç<br />
(1 - 99)<br />
Direct<br />
To program any dept.<br />
To program zero<br />
(max. 6 digits)<br />
To program the next sequential dept.<br />
Example<br />
Programming $10.00 for dept. 1<br />
Key operation<br />
Print<br />
1110 .@<br />
1 @ 1000 t<br />
Ç<br />
Unit price<br />
Commission group assignment<br />
Your machine allows you to assign a commission group (1 – 9, 0: non commission) to each department.<br />
Procedure<br />
To program any dept.<br />
2115 Dept. code<br />
Commission group<br />
. @ @ t Ç<br />
(1 - 99)<br />
PGM 2 2115 Direct<br />
To program zero (for non commission)<br />
(1 - 9)<br />
To program the next sequential dept.<br />
Example<br />
Programming commission group 1 for dept. 1 and commission group 2 for dept. 5<br />
Key operation<br />
Print<br />
2115 .@<br />
1 @ 1 t<br />
5 @ 2 t<br />
Ç<br />
Commission<br />
group no.<br />
106
Group number<br />
You can assign departments to a maximum of 9 groups (1 thru 9).<br />
This programming enables you to take the group department sales reports.<br />
Procedure<br />
PGM 2<br />
2116<br />
2116 Dept. code<br />
Group number<br />
. @ @ t Ç<br />
(1 - 99)<br />
Direct<br />
To program any dept.<br />
To program zero (For non group)<br />
(0 - 9, 0: non group)<br />
To program the next sequential dept.<br />
Example<br />
Programming the group number 1 for dept. 1 and the group number 2 for dept. 2<br />
Key operation2 t<br />
Ç<br />
Print<br />
2116 .@<br />
1 @ 1 t<br />
Group no.<br />
Group text<br />
PGM 2 2350<br />
You can program a maximum of 8 characters (group name) for each department group.<br />
Select the characters you want to program, referring to section “2 How to program alphanumeric characters” in<br />
chapter “PRIOR TO PROGRAMMIN”.<br />
Procedure<br />
2350 Group number<br />
Character keys<br />
. @ @ t Ç<br />
(1-9)<br />
To program any group number<br />
To keep the current setting<br />
(max. 8 digits)<br />
Example<br />
Programming DINN<strong>ER</strong> for group number 1<br />
Key operation<br />
Print<br />
2350 .@<br />
1 @ DINN<strong>ER</strong> t<br />
Ç<br />
107
Age limitation<br />
If an item sold is not allowed to be sold to certain aged persons by law, program the age limitation for the<br />
corresponding department.<br />
Procedure<br />
PGM 2<br />
2180<br />
2180 Dept. code<br />
Age limitation<br />
. @ @ t Ç<br />
(1 - 99)<br />
To program any dept.<br />
To program zero (for no limitation)<br />
(1 - 99)<br />
To program the next sequential dept.<br />
Note<br />
When a department for which a setting other than zero (1 to 99) has been programmed as the age<br />
limitation is entered, the birthday entry will be enforced.<br />
Example<br />
Programming the age limitation “18” for dept. 2<br />
Key operation<br />
2180 .@<br />
2 @ 18 t<br />
Ç<br />
Print<br />
Age limitation<br />
Print station assignment<br />
When you use a remote printer, please consult your dealer.<br />
Procedure<br />
PGM 2<br />
2118<br />
To program zero<br />
2118 Dept. code<br />
*ABC<br />
. @ @ t Ç<br />
To program for the<br />
following dept.<br />
* Item: Selection: Entry:<br />
A Remote printer 1 output Output 1<br />
Not output 0<br />
B Remote printer 2 output Output 1<br />
Not output 0<br />
C Printing on the chit receipt Yes 1<br />
No 0<br />
Example<br />
Key operation<br />
Print<br />
2118 .@<br />
9 @ 101 t<br />
Ç<br />
Print station<br />
108
Department key positioning<br />
PGM 2<br />
You can assign a department code to each key position. Each key position has a corresponding key number.<br />
Departments may be freely selected for the number of department keys and their positions.<br />
To assign the department to a key position, select the key number of the position.<br />
For key number positions, refer to section “3 Standard key number layout” in chapter “KEYBOARD”.<br />
2119<br />
Procedure<br />
To program any key number<br />
2119 Key number<br />
Dept. code<br />
. @ @ t Ç<br />
(max. 3 digits)<br />
Cancellation<br />
(1 - 99)<br />
To program the next sequential key number<br />
Note<br />
The key number placement is determined by your local authorized SHARP dealer.<br />
Example<br />
Key operation2 t<br />
Ç<br />
Print<br />
2119 .@<br />
1 @ 1 t<br />
Key no.<br />
Color Video Monitor (CVM) control character<br />
PGM 2 2158<br />
This programming enables you to assign each department with a number that can be used as a CVM control<br />
character. This number is converted to a two-digit character code that is transmitted for use with a CVM device.<br />
Procedure<br />
2158 Dept. code<br />
CVM control character<br />
. @ @ t Ç<br />
(1 - 99)<br />
To program any dept.<br />
To program zero<br />
(0 - 255)<br />
To program for the following dept.<br />
Example<br />
Programming 16 as CVM control character for department 1<br />
Key operation<br />
2158 .@<br />
1 @ 16 t<br />
Ç<br />
Print<br />
Character code converted<br />
109
5<br />
PLU/UPC programming<br />
The cash register can deal PLU codes and UPC codes.<br />
A PLU code consist of 5-digits number and leading zeros can be applied to the PLU code.<br />
Your machine has two kinds of PLU registration methods:<br />
Direct PLU registration: Accomplished by pressing item key (direct PLU key) directly.<br />
Indirect PLU registration: Accomplished by making an entry of PLU code and pressing the<br />
PLU/<br />
UPC<br />
key.<br />
UPC codes are basically codes for barcode reading. With regard to the UPC codes available for this register,<br />
please refer to "Universal Product Code(UPC) or European Article Number(EAN)" in this chapter.<br />
For UPC codes, the cash register has a UPC master file as a standard and a dynamic UPC file as an option.<br />
Normally you use the UPC master file for saving the data programmed for UPC codes by using job numbers.<br />
For the data entered in the UPC learning function mode, which is details in "UPC learning function", is stored in<br />
the dynamic UPC file if your register has (if not, the register stores the data in the UPC master file). With regard<br />
to data stored in the dynamic UPC file, you can edit the data or if necessary you can create programming data in<br />
the dynamic file. The data in the dynamic UPC file can download into the UPC master file.<br />
The phrase of “Dynamic UPC file” is indicated at the right side of job codes for the programming jobs whose<br />
data is stored in the dynamic UPC file.<br />
Your machine provides 2000 PLU/UPC codes as a standard, and a maximum of 15000 PLU/UPC codes.<br />
Each PLU/UPC allows you to program the following:<br />
PLU/UPC code (PLU: max. 5 digits, UPC: 6 to 13 digits)<br />
Associated department<br />
When a PLU/UPC is associated with a department, the following functions of the PLU/UPC depend on the<br />
programming for the corresponding department.<br />
• Type (Bottle return/Hash/Normal)<br />
• Single item cash sale/Single item finalization<br />
• HALO (for “Open” type)<br />
• Item validation print compulsory/non-compulsory<br />
Unit price (max. six digits)<br />
You will usually have unit prices programmed for individual PLUs/UPCs as PLU/UPC unit prices.<br />
If you program unit price “0.00” for a PLU/UPC, you can enter only the selling quantity into the PLU/UPC, i.e.<br />
the PLU/UPC can be used only as a counter.<br />
When your register is allowed to enter multiple prices (up to 6), you can program 6 different prices for one<br />
PLU/UPC code.<br />
Base quantity for split-pricing entries – two digits<br />
Program a base quantity for each PLU/UPC dedicated to split-pricing entries.<br />
Type of unit price entry<br />
• If “Preset only” is selected, individual PLU/UPC entries can be made by entering the assigned code and<br />
PLU/<br />
pressing the UPC key (or by pressing a direct PLU key without any PLU code entry, or by scanning the UPC<br />
code).<br />
PLU/<br />
• If “Open only” is selected, the UPC key must be pressed after the price entry followed by the PLU code and<br />
PLU/<br />
the UPC entry (, or the unit price must be entered before pressing a direct PLU key).<br />
• If “Open and preset” is selected, the entries in both “Preset” and “Open” types are available.<br />
• If the delete mode is selected, the corresponding program data for each PLU/UPC is deleted.<br />
• If the prohibit mode is selected, the PLU/UPC code cannot be entered. This mode does not clear the<br />
PLU/UPC program data.<br />
110
Sign (+/-)<br />
The function of every PLU/UPC varies according to the combination of its sign and its associate<br />
department’s sign as follows:<br />
Sign<br />
Function of PLU/UPC<br />
Dept.<br />
+<br />
PLU/UPC<br />
+<br />
Serves as a normal plus PLU/UPC<br />
– –<br />
Serves as a normal minus PLU/UPC<br />
+ –<br />
Accepts store coupon entries, but not split-pricing entries.<br />
–<br />
+ Not valid; not accepted.<br />
Food stamp status and tax status (taxable 1, 2, 3 and/or 4, non-taxable)<br />
Item label (max. 16 characters)<br />
Tare table number and scale entry<br />
Age limitation<br />
Commission group (1 to 9)<br />
PLU/UPC group (1 to 99) and group text (max. 8 characters)<br />
Mix-and-match table (max. 10 tables)<br />
Condiment table (max. 99 tables)<br />
Set PLU (for only PLU)<br />
You can link a maximum of 10 PLUs to a particular PLU.<br />
Link PLU/UPC link<br />
A PLU/UPC is able to link to any other PLU (e.g. bottle deposit). However, the number of links is a<br />
maximum of 5. Even if more than 5 PLUs are linked, the sixth or higher link is not actualized (ignored).<br />
Print station<br />
Delete period for non-accessed UPC codes<br />
Non-PLU code format<br />
PLU level assignment and direct PLU key positioning<br />
Stock quantity<br />
Item label for remote printer (max. 12 characters)<br />
Control character for color video monitor<br />
Note<br />
For some items, you can program in two ways: programming an individual PLU code and for a<br />
range of sequential PLU codes. The procedure marked “For each PLU” shows individual PLU<br />
programming. The procedure marked “For a range of PLUs” shows sequential range PLU<br />
programming.<br />
Associated department<br />
PGM 1<br />
PGM 2<br />
1200<br />
2230<br />
Direct<br />
1050<br />
(Dynamic UPC file)<br />
Procedure<br />
For each PLU/UPC<br />
To program any PLU/UPC<br />
Associated<br />
1200<br />
PLU code<br />
. @ @ dept. code t Ç<br />
1050 (max. 5 digits)<br />
UPC code<br />
(6 to 13 digits)<br />
Ä<br />
(max. 2 digits)<br />
To program for the following PLU/UPC<br />
Note<br />
As soon as the programming is completed for one PLU/UPC, the next code appears in the display.<br />
111
For a range of PLUs<br />
2230<br />
. @<br />
Start PLU code<br />
(max. 5 digits)<br />
Associated<br />
End PLU code<br />
@ @ t Ç<br />
dept. code<br />
(max. 5 digits)<br />
To apply the current<br />
setting of start PLU code<br />
to PLUs within the range<br />
(1 - 99)<br />
Note<br />
PLU codes must have already been defined. If not, an error message "NO RECORD" will appear<br />
on the display.<br />
Example Programming for PLU 1 for “Associate department 2”<br />
For each PLU/UPC Key operation<br />
1200 .@<br />
1 @ 2 t<br />
Ç<br />
Print<br />
Dept. code<br />
Example<br />
For a range<br />
of PLUs<br />
Programming the PLU 11 thru 20 for “Associate department 3”<br />
Key operation3 t<br />
Ç<br />
Print<br />
2230 .@<br />
11 @ 20 @<br />
112
Unit prices<br />
PGM 1<br />
PGM 2<br />
1210<br />
Direct<br />
1060<br />
(Dynamic UPC file)<br />
Procedure<br />
Ä<br />
1210<br />
PLU code<br />
. @<br />
1060 (max. 5 digits)<br />
@<br />
UPC code<br />
(6 to 13 digits)<br />
To program for the following PLU/UPC<br />
To keep current setting<br />
Unit price<br />
(max. 6 digits)<br />
ı<br />
* To program unit price 2 thru 6<br />
(only when price shift function is allowed)<br />
To program for the following PLU/UPC<br />
Ç<br />
To program any PLU/UPC<br />
* In case that price shift function is allowed, the register prompts to enter a unit price for the following level by<br />
displaying “P2” thru “P6” on the display, and when a unit price of level 6 is entered, the register goes to the<br />
status for programming the following PLU/UPC. When you press the Ç on the way of programming multiple<br />
prices for a PLU/UPC code, prices for the remained levels are kept unchanged.<br />
In case that single price entry is allowed for a PLU/UPC code, the register goes to the status for programming<br />
the following PLU/UPC.<br />
Note<br />
The preset amount will work as the unit price for the “Preset” type and as the HALO amount for the<br />
“Open” type. In the case of the “Open” type, zero preset prevents amount entry and a 9999.99<br />
preset is the maximum limitation. In the case of the “Preset” type zero and 9999.99 preset have no<br />
special meaning. (i.e. 0 amount preset is available.)<br />
Example<br />
Programming “$1.25, $1.50, $2.00, $2.50, $3.00, $4.00” for price level 1 thru 6 of PLU1<br />
Key operation400 t<br />
Ç<br />
Print<br />
1210 .@<br />
1 @ 125 t<br />
150 t<br />
200 t<br />
250 t<br />
300 t<br />
Unit price<br />
113
Base quantity<br />
PGM 1<br />
PGM 2<br />
1211<br />
Direct<br />
1061<br />
(Dynamic UPC file)<br />
Procedure<br />
1211<br />
PLU code<br />
Base q’ty<br />
. @ @ t Ç<br />
1061<br />
(max. 5 digits)<br />
(max. 2 digits)<br />
UPC code<br />
(6 to 13 digits)<br />
To program any PLU/UPC<br />
Ä<br />
To program zero<br />
To program for the following PLU/UPC<br />
Example<br />
Programming “12” for PLU 2<br />
Key operation<br />
1211 .@<br />
2 @ 12 t<br />
Ç<br />
Print<br />
Base q'ty<br />
Functional programming 1<br />
PGM 2<br />
2210<br />
2231<br />
Direct<br />
2060<br />
(Dynamic UPC file)<br />
Procedure<br />
For each PLU/UPC<br />
2210<br />
2060<br />
PLU code<br />
*ABCDEFG<br />
. @ @ t Ç<br />
(max. 5 digits)<br />
UPC code<br />
(6 to 13 digits)<br />
To program any PLU/UPC<br />
Ä<br />
To program zero<br />
To program for the following PLU/UPC<br />
For a range of PLUs<br />
2231<br />
. @<br />
Start PLU code<br />
(max. 5 digits)<br />
End PLU code<br />
*ABCDEFG<br />
@ @ t Ç<br />
(max. 5 digits)<br />
To apply the current<br />
setting of start PLU code<br />
to PLUs within the range<br />
Note<br />
When new PLU codes are created in the range specified, the default values are applied to the<br />
programming items other than the items set in this programming.<br />
114
* Item: Selection: Entry:<br />
A Delete method (for only UPC) Delete in non-accessed UPC 0<br />
For PLU, always enter 1.<br />
deleting job (#105 in Z1 mode)<br />
Inhibit to delete in non-accessed 1<br />
UPC deleting job (#105 in Z1 mode)<br />
B Condiment type PLU (for only PLU) Disable 0<br />
For UPC, always enter 0. Enable 1<br />
C Condiment entry (for only PLU) Allowed 0<br />
For UPC, always enter 0. Compulsory 1<br />
D Price shift entry Enable 0<br />
Inhibit 1<br />
Compulsory 2<br />
E Tare table number 0 thru 9 (0: Not used)<br />
F Scale entry Inhibit 0<br />
Enable 1<br />
Compulsory 2<br />
G Type of unit price entry Prohibit mode 0<br />
Open price only (for only PLU) 1<br />
Preset price only 2<br />
Open price and preset price (for only PLU) 3<br />
Delete mode 4<br />
Example To program ABCDEFG=1000003 for PLU1<br />
For each PLU/UPC Key operation<br />
Print<br />
2210 .@<br />
1 @ 1000003 t<br />
Ç<br />
A thru G<br />
For a range<br />
of PLUs<br />
To program ABCDEFG=1000003 for PLU11 thru 20<br />
Key operation<br />
Print<br />
2231 .@<br />
11 @ 20 @<br />
1000003 t<br />
Ç<br />
115
Functional programming 2<br />
PGM 2<br />
2211<br />
2232<br />
Direct<br />
2061<br />
(Dynamic UPC file)<br />
Procedure<br />
For each PLU/UPC<br />
2211<br />
2061<br />
For a range of PLUs<br />
PLU code<br />
*ABCDEF<br />
. @ @ t Ç<br />
2232<br />
. @<br />
Start PLU code<br />
(max. 5 digits)<br />
(max. 5 digits)<br />
UPC code<br />
(6 to 13 digits)<br />
End PLU code<br />
*ABCDEF<br />
@ @ t Ç<br />
(max. 5 digits)<br />
To program any PLU/UPC<br />
Ä<br />
To program zero<br />
To program for the following PLU/UPC<br />
To apply the current<br />
setting of start PLU code<br />
to PLUs within the range<br />
Note<br />
For a range of PLUs: PLU codes must have already been defined. If not, an error message "NO<br />
RECORD" will appear on the display.<br />
* Item: Selection: Entry:<br />
A Sign (+/-) Plus 0<br />
Minus 1<br />
B Food stamp status Ineligible 0<br />
Eligible 1<br />
C Tax 4 status Non-taxable 0<br />
Taxable 1<br />
D Tax 3 status Non-taxable 0<br />
Taxable 1<br />
E Tax 2 status Non-taxable 0<br />
Taxable 1<br />
F Tax 1 status Non-taxable 0<br />
Taxable 1<br />
Note<br />
Tax status (taxable 1 thru 4/non-taxable)<br />
Tax 4 is prohibited if you use the food stamp function.<br />
A PLU/UPC not programmed for Tax 1 thru Tax 4 statuses is registered depending on the tax<br />
status of the department which the PLU/UPC belongs to.<br />
116
Example Programming ABCDEF=010001 for PLU 1<br />
For each PLU/UPC Key operation<br />
Print<br />
2211 .@<br />
1 @ 010001 t<br />
Ç<br />
Taxable 1<br />
Food stamp<br />
eligible<br />
For a range<br />
of PLUs<br />
Programming the range PLU 11 thru 20 for ABCDEF=000001<br />
Key operation<br />
Print<br />
2232 .@<br />
11 @ 20 @<br />
000001 t<br />
Ç<br />
117
Item label<br />
PGM 2<br />
2214<br />
2064<br />
(Dynamic UPC file)<br />
You can program a maximum of 16 characters (item label) for each PLU/UPC.<br />
Select the characters you want to program, referring to section “2 How to program alphanumeric characters” in<br />
chapter “PRIOR TO PROGRAMMING”.<br />
Procedure<br />
2214<br />
PLU code<br />
Character keys<br />
. @ @ t Ç<br />
2064 (max. 5 digits)<br />
(max. 16 digits)<br />
UPC code<br />
(6 to 13 digits)<br />
To program any PLU/UPC<br />
Ä<br />
To keep the current setting<br />
*To program for price levels 2 thru 6<br />
(only when price shift function is allowed)<br />
To program for the following PLU/UPC<br />
* In case that price shift function is allowed, the register prompts to enter an item level for the following level by<br />
displaying "P2" thru "P6" on the display, and when an item level of level 6 is entered, the register goes to the<br />
status for programming the following PLU/UPC. You must enter texts for all price levels.<br />
In case that single price entry is allowed for a PLU/UPC code, the register goes to the status for programming<br />
the following PLU/UPC.<br />
Example<br />
Programming “MILK_1, MILK_2, MILK_3, MILK_4, MILK_5, MILK_6” for price levels 1 thru 6<br />
of PLU1<br />
Key operation<br />
2214 .@<br />
1 @ MILK_1 t<br />
MILK_2 t<br />
MILK_3 t<br />
MILK_4 t<br />
MILK_5 t<br />
MILK_6 t<br />
Ç<br />
Print<br />
118
Commission groups<br />
PGM 2<br />
2215<br />
2235<br />
Direct<br />
2065<br />
(Dynamic UPC file)<br />
You can assign PLUs/UPCs to commission groups (1 to 9).<br />
Procedure<br />
For each PLU/UPC<br />
2215<br />
PLU code<br />
Commission group<br />
. @ @ t Ç<br />
2065 (max. 5 digits)<br />
(0 - 9, 0: non commision)<br />
For a range of PLUs<br />
2235<br />
. @<br />
Start PLU code<br />
(max. 5 digits)<br />
UPC code<br />
(6 to 13 digits)<br />
To program any PLU/UPC<br />
Ä<br />
To program zero<br />
To program for the following PLU/UPC<br />
End PLU code<br />
Commission group<br />
@ @ t Ç<br />
(max. 5 digits)<br />
To apply the current setting of<br />
start PLU code to PLUs within the range<br />
(0 - 9, 0:non commision)<br />
Note<br />
For a range of PLUs: PLU codes must have already been defined. If not, an error message "NO<br />
RECORD" will appear on the display.<br />
Example<br />
Programming the commission group 1 for PLU 1<br />
For each PLU/UPC<br />
Key operation<br />
2215 .@<br />
1 @ 1 t<br />
Ç<br />
Print<br />
Commission<br />
group no.<br />
For a range<br />
of PLUs<br />
Programming all of PLU 11 thru 20 for the commission group 1<br />
Key operation1 t<br />
Ç<br />
Print<br />
2235 .@<br />
11 @ 20 @<br />
119
Group number<br />
(Dynamic UPC file)<br />
You can assign PLU/UPCs to a maximum of 99 groups. Each PLU/UPC can belong to a maximum of three<br />
groups.<br />
Procedure<br />
PGM 2<br />
2216<br />
* AB: Group number (0 to 99) for group 1<br />
CD: Group number (0 to 99) for group 2<br />
EF: Group number (0 to 99) for group 3<br />
2066<br />
2216<br />
PLU code<br />
*ABCDEF<br />
. @ @ t Ç<br />
2066 (max. 5 digits)<br />
UPC code<br />
(6 to 13 digits)<br />
To program any PLU/UPC<br />
Ä<br />
To program zero<br />
To program for the following PLU/UPC<br />
Example<br />
Programming 01/10/50 (Group 1/2/3) for PLU1<br />
Key operation<br />
Print<br />
2216 .@<br />
1 @ 011050 t<br />
Ç<br />
Group nos.<br />
120<br />
Group text<br />
You can program a maximum of 8 characters (group name) for each PLU/UPC group.<br />
Select the characters you want to program, referring to section “2 How to program alphanumeric characters” in<br />
chapter “PRIOR TO PROGRAMMING”.<br />
Procedure<br />
Example<br />
PGM 2<br />
2351<br />
2351 Group number<br />
Character keys<br />
. @ @ t Ç<br />
(1-99)<br />
Programming DRINK for group number 1<br />
Key operation<br />
To program any group number<br />
To keep the current setting<br />
(max. 8 digits)<br />
Print<br />
2351 .@<br />
1 @ DRINK t<br />
Ç
Age limitation<br />
PGM 2 2280 2236 2081 (Dynamic UPC file)<br />
If an item sold is not allowed to be sold to certain aged persons by law, program the age limitation for the<br />
corresponding PLU/UPC.<br />
Procedure<br />
For each PLU/UPC<br />
2280<br />
PLU code<br />
Age limitation<br />
. @ @ t Ç<br />
2081 (max. 5 digits)<br />
(1 - 99)<br />
UPC code<br />
(6 to 13 digits)<br />
To program any PLU/UPC<br />
Ä<br />
To program zero (for no limitation)<br />
To program for the following PLU/UPC<br />
For a range of PLUs<br />
2236<br />
. @<br />
Start PLU code<br />
(max. 5 digits)<br />
End PLU code<br />
Age limitation<br />
@ @ t Ç<br />
(max. 5 digits)<br />
To apply the current<br />
setting of start PLU code<br />
to PLUs within the range<br />
(0 - 99, 0: no limitation)<br />
Note<br />
• PLU codes must have already been defined. If not, an error message "NO RECORD" will appear<br />
on the display.<br />
• When a PLU/UPC for which a setting other than zero (1 to 99) has been programmed as the age<br />
limitation is entered, the birthday entry will be enforced.<br />
Example Programming the age limitation “18” for PLU 2<br />
For each PLU/UPC Key operation<br />
2280 .@<br />
2 @ 18 t<br />
Ç<br />
Print<br />
Age limitation<br />
121
For a range<br />
of PLUs<br />
Programming the PLU 11 thru 20 for the age limitation “18”<br />
Key operation<br />
2236 .@<br />
11 @ 20 @<br />
18 t<br />
Ç<br />
Print<br />
Stock quantity<br />
PGM 1 PGM 2 1222 1220 1221<br />
You can assign a stock quantity to each PLU/UPC code. (If you want to control a stock quantity, please consult<br />
your dealer.) When you assign it for the first time, follow the below procedure:<br />
Procedure<br />
1222 PLU code<br />
Stock q’ty<br />
. @ @ t Ç<br />
(max. 5 digits)<br />
UPC code<br />
(6 to 13 digits)<br />
To program any PLU/UPC<br />
Ä<br />
To clear the stock quantity<br />
(max. 7 digits)<br />
To program for the following PLU/UPC<br />
Example<br />
To program the stock quantity “10” for PLU 2<br />
Key operation<br />
1222 .@<br />
2 @ 10 t<br />
Ç<br />
Print<br />
Stock q ty<br />
Note<br />
• If you assign another stock quantity to the PLU/UPC code which you have assigned a stock<br />
quantity to, it will be overridden.<br />
• You must use a decimal point (.) key when setting quantities that are fractional.<br />
If you need to add or subtract a stock quantity, follow the below procedure:<br />
Procedure<br />
Addition: 1220<br />
Subtraction: 1221<br />
PLU code<br />
Stock q ty to be<br />
. @ @ added or subtracted t Ç<br />
(max. 5 digits)<br />
UPC code<br />
(6 to 13 digits)<br />
To program any PLU/UPC<br />
Ä<br />
(max. 7 digits)<br />
To program for the following PLU/UPC<br />
122
Adding the stock quantity<br />
Example<br />
To add the stock quantity “4” to the current stock quantity “10” of PLU2<br />
Key operation<br />
1220 .@<br />
2 @ 4 t<br />
Ç<br />
Print<br />
Added stock<br />
q’ty<br />
Subtracting the stock quantity<br />
Example<br />
To subtract the stock quantity “1.5” from the current stock quantity “14” of PLU 2<br />
Key operation<br />
Print<br />
1221 .@<br />
2 @ 1 . 5 t<br />
Ç<br />
Subtracted<br />
stock q’ty<br />
Set PLU<br />
Procedure<br />
PGM 2<br />
2221<br />
To program any PLU<br />
Cancellation<br />
t<br />
To repeat up to 10 times<br />
2221 PLU code<br />
Tied PLU code<br />
. @ @ t Ç<br />
(max. 5 digits)<br />
(max. 5 digits)<br />
t<br />
To program the next sequential PLU<br />
Note<br />
PLU codes must have already been defined.<br />
You can program a maximum of 15 set PLUs. A set PLU can be tied to a maximum of 10 PLUs.<br />
Example<br />
Programming the set PLU 20 (tied PLUs: PLU 201 and PLU 202)<br />
Key operation<br />
2221 .@<br />
20 @ 201 t<br />
202 t<br />
Ç<br />
Print<br />
Tied PLUs<br />
123
Mix-and-match table<br />
PGM 2 2217 2225 2067 (Dynamic UPC file)<br />
The mix-and-match table consists of the adjustment amount and the matching count for discount (satisfying the<br />
count of entered items). You can program a maximum of 99 mix-and-match tables. One table can be assigned<br />
maximum of 5 kind of items.<br />
[Ex.] Mix-and-match table no. 1: matching count=3, adjustment amount $7.00<br />
Mix-and-match items of table no. 1: Item-A ($2.30), Item-B ($3.10), Item-C ($2.50)<br />
<br />
Item-A $2.30 Item-C $2.50 Item-A $2.30<br />
Item-A $2.30 Item-C $2.50 Item-B $3.10<br />
Item-B $3.10 Item-C $2.50 Item-C $2.50<br />
Subtotal $7.70 Subtotal $7.50 Subtotal $7.90<br />
(Discount $0.70) (Discount $0.50) (Discount $0.90)<br />
Total $7.00 Total $7.00 Total $7.00<br />
Programming of matching count and adjustment amount<br />
Procedure<br />
2225 Table no.<br />
*ABCDEFGH<br />
. @ @ t Ç<br />
(1 - 99)<br />
* AB: Matching count (1 - 99)<br />
CDEFGH: Adjustment amount (max. 6 digits)<br />
To program any other table<br />
Cancellation<br />
Example<br />
Programming mix-and-match table no.1 (matching count=3, adjustment amount $5.00)<br />
Key operation<br />
Print<br />
2225 .@<br />
1 @ 03000500 t<br />
Ç<br />
Adjustment<br />
amount<br />
Matching count<br />
Assigning items to the mix-and-match tables<br />
2217<br />
2067<br />
Procedure<br />
PLU code<br />
Table no.<br />
. @ @ t Ç<br />
(max. 5 digits)<br />
UPC code<br />
(6 to 13 digits)<br />
To program any PLU/UPC<br />
Ä<br />
To program zero<br />
(1 - 99)<br />
To program for the following PLU/UPC<br />
124
Example<br />
Programming mix-and-match table no.1 for PLU 1<br />
Key operation<br />
2217 .@<br />
1 @ 1 t<br />
Ç<br />
Print<br />
Mix-andmatch<br />
table no.<br />
PLU condiment table<br />
PGM 2<br />
2222<br />
The “condiment entry” is intended to guide the operator in making menu entries which require special cooking<br />
instructions. For example, a cashier/server can make such entries as “garnishing potato,” “with salad,” and<br />
“grilling steak rate.” When a cashier/server enters a menu-item PLU to which PLUs for the condiment entry have<br />
been assigned, these orders (such as “garnishing potato”) will be printed on the receipt and conveyed to the<br />
kitchen.<br />
Before you program for the condiment entry, prepare a condiment table. The following shows an example of<br />
a condiment table:<br />
2223<br />
Condiment table<br />
Table<br />
number<br />
Message text<br />
01<br />
(HOWCOOK?)<br />
Message text<br />
02<br />
(WITH?)<br />
04<br />
99<br />
Message text<br />
(POTATO?)<br />
Message text<br />
(DRINK?)<br />
PLU codes for condiment entry (programmed text)<br />
23<br />
(RARE)<br />
44<br />
(SALAD)<br />
33<br />
(P.CHIPS)<br />
63<br />
(TEA)<br />
25<br />
(MED.RARE)<br />
45<br />
(FRUITS)<br />
37<br />
(MASHED.P)<br />
65<br />
(MILK)<br />
PLUs (Up to 15 for a table)<br />
27<br />
(WELLDONE)<br />
38<br />
(BAKED.P)<br />
67<br />
(A.JUICE)<br />
02<br />
99<br />
Next condiment<br />
table number<br />
Condiment<br />
tables<br />
(Up to 99)<br />
125
The condiment table should contain the following:<br />
Condiment table: The condiment table is a group of condiment PLUs, which is assigned to each menuitem PLU.<br />
A table consists of a message text and up to 15 PLUs. Also, you can assign the next<br />
condiment table number to a condiment table to link them.<br />
The message text is used for displaying a prompting message. The PLU is used for the<br />
special order setting. For example, when a server enters a menu-item PLU, a display<br />
message programmed for the message text such as “HOWCOOK?.” will appear. Then specify<br />
one of the PLU programmed for text such as “RARE.”<br />
Table number: The table number is intended to identify each condiment table.<br />
Assigning PLU condiment table number<br />
Procedure<br />
2222 PLU code<br />
Condiment table#<br />
. @ @<br />
t Ç<br />
(max. 5 digits)<br />
To program zero<br />
(0 - 99, 0: not used )<br />
To program for the following PLU code<br />
To program any PLU<br />
Example<br />
Programming condiment table #1 for PLU 15<br />
Key operation<br />
2222 .@<br />
15 @ 1 t<br />
Ç<br />
Print<br />
Condiment<br />
table #<br />
126
Assigning PLUs for condiment entry<br />
Procedure<br />
2223<br />
. @<br />
Condiment table#<br />
(1 - 99)<br />
@<br />
*ABC<br />
To delete<br />
@<br />
PLU code<br />
(max. 5 digits)<br />
After repeating 15 times<br />
t t Ç<br />
To program any other table<br />
To repeat up to 15 times<br />
*A: Repeat times (1 to 9)<br />
BC: Next table# (00 to 99: 00: not applied)<br />
Example<br />
Programming repeat time 1 and next condiment table #2 and PLU 23/24/25 for PLUs for<br />
condiment entry for condiment table #1.<br />
Key operation25 t<br />
tÇ<br />
Print<br />
2223 .@<br />
1 @<br />
102 @<br />
23 t<br />
24 t<br />
Matching count Next table #<br />
Repeat times<br />
Note<br />
PLU codes must have been already defined.<br />
Print station to PLU/UPC assignment<br />
PGM 2<br />
2218<br />
2068<br />
(Dynamic UPC file)<br />
When you use a remote printer, consult your dealer.<br />
Procedure<br />
Scan UPC code<br />
Ä<br />
To program zero<br />
2218<br />
PLU code<br />
*ABC<br />
. @ @ t Ç<br />
2068 (max. 5 digits)<br />
UPC code<br />
(6 to 13 digits)<br />
To program for the following PLU/UPC<br />
To program any PLU/UPC<br />
* Item: Selection: Entry:<br />
A Remote printer 1 output Output 1<br />
Not output 0<br />
B Remote printer 2 output Output 1<br />
Not output 0<br />
C Printing on the chit receipt Yes 1<br />
No 0<br />
127
Example<br />
Key operation<br />
101 t<br />
Ç<br />
Print<br />
2218 .@<br />
9 @<br />
Print<br />
station<br />
Delete period for non-accessed UPC codes<br />
You can delete the UPC codes which have not been accessed during the period you set in this program when<br />
you execute the job #105 in Z1 mode when you set “Delete in non-accessed UPC deleting job” in the UPC<br />
delete method (#2210).<br />
Procedure<br />
To program “00”<br />
Delete period *<br />
2029<br />
. @ (1 to 99 days) Ç<br />
PGM 2<br />
2029<br />
* When you select “00” for the period, no UPC code is deleted by the non-accessed UPC deleting job.<br />
Example<br />
Key operation<br />
2029 .@<br />
60 Ç<br />
Print<br />
128
Programming Non-PLU code format<br />
PGM 2<br />
2025<br />
The register allows you to specify the Non-PLU code format (flag code: 2, 02, 20 -29).<br />
The format data is as follows:<br />
Flag<br />
(02 or 20-29)<br />
Free format<br />
C D<br />
2<br />
Flag<br />
Free format<br />
C D<br />
Price check digit<br />
Field 1<br />
Field 2<br />
Free format area<br />
Procedure<br />
To delete<br />
2025<br />
.<br />
`<br />
* 1<br />
Flag code<br />
(max. 2 digits)<br />
`<br />
* 2<br />
ABCDEF<br />
ı<br />
c<br />
* 1 Flag code: 2, 02, 20 - 29<br />
* 2 Item: Selection: Entry:<br />
A Length of field 1 (number of digits) 0 - 9<br />
B Length of field 2 (number of digits) 0 - 9<br />
C Always enter 0. (Fixed position) 0<br />
D Meaning of field 2* 3 Quantity 2<br />
Price 0<br />
E Price check digit used Yes 1<br />
No 0<br />
F TAB or decimal point of field 2 (0, 1, 2, 3) 0 - 3<br />
* 3 : When you preset a quantity, the sales amount is calculated as follows: quantity x unit price programmed in<br />
#1210.<br />
Example<br />
2 0<br />
Flag<br />
code<br />
PLU no.<br />
P D<br />
Price check digit<br />
Price<br />
(TAB2)<br />
C D<br />
Key operation<br />
Print<br />
2025 . `<br />
20 `<br />
540012 ı<br />
c<br />
ABCDEF<br />
Flag code<br />
129
Link PLU/UPC link<br />
Procedure<br />
PGM 2<br />
2220<br />
Ä<br />
To program any PLU/UPC<br />
Cancellation<br />
2220 PLU code<br />
Linked PLU code<br />
. @ @ t Ç<br />
(max. 5 digits)<br />
(max. 5 digits)<br />
UPC code<br />
(6 to 13 digits)<br />
t<br />
t<br />
To repeat up to 5 times<br />
To program for the following PLU/UPC<br />
Note<br />
PLU/UPC codes must have already been defined.<br />
You can program a maximum of 15 link PLUs/UPCs. A link PLU/UPC can be linked to a maximum<br />
of 5 PLUs.<br />
Example<br />
Programming so that PLU 25, 26 and 27 are linked to PLU 21<br />
Key operation<br />
Print<br />
2220 .@<br />
21 @ 25 t<br />
26 t<br />
27 t<br />
Ç<br />
Linked<br />
PLUs<br />
Programming of PLU levels and direct PLU keys<br />
PGM 2 2219<br />
You can assign PLU codes to fixed keys in each PLU level and use those keys as direct PLU key.<br />
For assigning a PLU level, press the l, ¬, Ò, L4 or L5 key or enter level number and press the ä key.<br />
For example, if you want to assign PLU level 1 and key no. 1 to a PLU code, press the l key and enter 1<br />
before entering the PLU code.<br />
For key no. position, refer to section “3 Standard key number layout” in chapter “KEYBOARD”.<br />
Procedure<br />
To program any key no.<br />
Level no.<br />
(1-5) ä<br />
l<br />
Cancellation<br />
2219 Key no.<br />
PLU code<br />
. @ ¬ @ t Ç<br />
(max. 3 digits)<br />
(max. 5 digits)<br />
Ò<br />
To program the next sequential key no.<br />
L4<br />
L5<br />
130<br />
Note<br />
To keep the current level<br />
• PLU codes must have already been defined.<br />
• The key number placement is determined by your local Authorized SHARP Dealer.
Example<br />
Programming of PLU 1 (level 1) and PLU 65 (level 2) are assigned to key no. 21<br />
Key operation<br />
Print<br />
2219 .@<br />
l 21 @ 1 t<br />
¬ 21 @ 65 t<br />
Ç<br />
Key no.<br />
Item label for remote printer<br />
PGM 2<br />
(Dynamic UPC file)<br />
You can program a maximum 12 characters (item label) for each PLU/UPC which are printed by remote printers.<br />
Select the characters you want to program, referring to section “2 How to program alphanumeric characters” in<br />
chapter “PRIOR TO PROGRAMMING”.<br />
2244<br />
2094<br />
Procedure<br />
To program any PLU/UPC<br />
To keep the current setting<br />
2244<br />
PLU code<br />
Character keys<br />
. @ @ t Ç<br />
2094 (max. 5 digits)<br />
(max. 12 digits)<br />
UPC code<br />
(6 to 13 digits)<br />
Ä<br />
*To program for price levels 2 thru 6<br />
(only when price shift function is allowed)<br />
To program for the following PLU/UPC<br />
* In case that price shift function is allowed, the register prompts to enter a remote printer item level for the<br />
following level by displaying “P2” thru “P6” on the display, and when an item level of level 6 is entered, the<br />
register goes to the status for programming the following PLU/UPC. You must enter texts for all price levels.<br />
In case that single price entry is allowed for a PLU/UPC code, the register goes to the status for programming<br />
the following PLU/UPC.<br />
Example<br />
Programming “MILK_K1, MILK_K2, MILK_K3, MILK_K4, MILK_K5, MILK_K6” for price levels<br />
1 thru 6 of PLU1<br />
Key operation<br />
2244 .@<br />
1 @ MILK_K1 t<br />
MILK_K2 t<br />
MILK_K3 t<br />
MILK_K4 t<br />
MILK_K5 t<br />
MILK_K6 t<br />
Ç<br />
Print<br />
131
Color Video Monitor (CVM) control character<br />
2059 (Dynamic UPC file)<br />
This programming enables you to assign each PLU/UPC with a number that can be used as a CVM control<br />
character. This number is converted to a two-digit character code that is transmitted for use with a CVM device.<br />
Procedure<br />
For each PLU/UPC<br />
2258<br />
PLU code<br />
CVM control character<br />
. @ @ t Ç<br />
2059 (max. 5 digits)<br />
(0 - 255)<br />
For a range of PLUs<br />
2234<br />
. @<br />
Start PLU code<br />
(max. 5 digits)<br />
UPC code<br />
(6 to 13 digits)<br />
PGM 2<br />
To program any PLU/UPC<br />
Ä<br />
2258<br />
To program zero<br />
2234<br />
To program for the following PLU/UPC<br />
End PLU code<br />
CVM control character<br />
@ @ t Ç<br />
(max. 5 digits)<br />
To apply the current setting of<br />
start PLU code to PLUs within the range<br />
(0 - 255)<br />
Note<br />
For a range of PLUs: PLU codes must have already been defined. If not, an error message "NO<br />
RECORD" will appear on the display.<br />
Example<br />
Programming 16 as CVM control character for PLU1<br />
For each PLU/UPC<br />
Key operation<br />
2258 .@<br />
1 @ 16 t<br />
Ç<br />
Print<br />
Character code<br />
converted<br />
Programming the range PLU11 through 20 for CVM control character 16<br />
132<br />
For a range<br />
of PLUs<br />
Key operation<br />
2234 .@<br />
11 @ 20 @<br />
16 t<br />
Ç<br />
6<br />
Programming for miscellaneous keys<br />
Only function keys which you have allocated on the keyboard will allow this programming.<br />
CA CH<br />
Rate (%, ç, commission, gratuity, TIP , TIP ) and discount (-)<br />
1310<br />
You can program percent rates, currency conversion rates, commission rate, gratuity rate, tip-in rate and<br />
discount amount.<br />
Procedure<br />
Direct<br />
1310 Function no.<br />
Rate or amount<br />
. @ @ s a<br />
*1: Function no.<br />
1: For the - key 7: For the § key 173: For the commission sale 1 180: For the commission sale 8<br />
2: For the – key 8: For the key 174: For the commission sale 2 181: For the commission sale 9<br />
3: For the — key 9: For the • key 175: For the commission sale 3 87: For the gratuity<br />
CA<br />
CH<br />
4: For the ≠ key 10: For the ∞ key 176: For the commission sale 4 141: For the TIP and TIP keys<br />
5: For the ± key 106: For the ç key 177: For the commission sale 5 (tip-in)<br />
6: For the % key 107: For the " key 178: For the commission sale 6<br />
(∞) 108: For the # key 179: For the commission sale 7<br />
*2: Rate or amount<br />
0 — 999999 (Discount amount)<br />
0.00 — 100.00 (% rate)<br />
0.0000 — 9999.9999 (Currency conversion rate)<br />
0.00 — 999.99 (Commission rate)<br />
0.00 — 100.00 (Gratuity rate)<br />
0.00 — 100.00 (Tip-in rate)<br />
To program zero<br />
*1 *2<br />
To program any function<br />
PGM 1<br />
PGM 2<br />
Example<br />
Assigning $10.00 to the - key, 10.25% to the % key, and 1.325 to the ç key.<br />
Key operation<br />
Print<br />
1310 .@<br />
1 @ 1000 ı<br />
6 @ 10 . 25 ı<br />
106 @ 0 . 8063 ı<br />
a<br />
Discount amount<br />
Percent rate<br />
Conversion rate<br />
Note<br />
• You must use a decimal point when setting percentage rates that are fractional.<br />
• When amount entry is selected for tip-in entry on the programming job #2616, you cannot<br />
program for function number 141.<br />
133
Gas discount unit price<br />
PGM 1<br />
PGM 2<br />
1311<br />
Procedure<br />
To program any function<br />
*: Function no.<br />
11:Gas discount when finalized by a 21:Gas discount when finalized by (<br />
12:Gas discount when finalized by Å 22:Gas discount when finalized by )<br />
13:Gas discount when finalized by 3 23:Gas discount when finalized by *<br />
14:Gas discount when finalized by 4 24:Gas discount when finalized by +<br />
15:Gas discount when finalized by É 25:Gas discount when finalized by ,<br />
16:Gas discount when finalized by k<br />
17:Gas discount when finalized by CHK2<br />
18:Gas discount when finalized by CHK3<br />
19:Gas discount when finalized by CHK4<br />
20:Gas discount when finalized by CHK5<br />
To program zero<br />
Price *<br />
1311 *Function no.<br />
. @ @ (0.0 - 99.9 cent) t Ç<br />
26:Gas discount when finalized by<br />
27:Gas discount when finalized by<br />
28:Gas discount when finalized by<br />
29:Gas discount when finalized by<br />
*Decimal point is not necessary.<br />
6<br />
7<br />
8<br />
9<br />
Example<br />
Programming 50.5 cents for gas discount unit price when finalized by a<br />
Key operation<br />
Print<br />
1311 .@<br />
11 @ 505 t<br />
Ç<br />
Currency description text (ç)<br />
You can program a maximum of 4 characters for each of the ç thru $ keys.<br />
Procedure<br />
Character keys<br />
2334 *Function no.<br />
. @ @ (max. 4 digits) t Ç<br />
*: Function no.<br />
106: For the ç key 108: For the # key<br />
107: For the " key 109: For the $ key<br />
PGM 2<br />
2334<br />
To program any conv. function<br />
To keep the current setting<br />
134
Example<br />
Programming “Ÿ” for the " key<br />
⎞<br />
⎠<br />
Entry using ⎞<br />
character code ⎠<br />
Key operation<br />
Print<br />
2334 .@<br />
106 @///<br />
207 º<br />
tÇ<br />
Currency description text<br />
CA CH<br />
A limit amount (HALO) of entry (-, † (for manual tax), TIP , TIP , r, p)<br />
2312<br />
The HALO limit is in effect for the REG-mode operations but can be overridden in the MGR mode. The HALO<br />
limit is represented by two figures as follows:<br />
Procedure<br />
*1<br />
*2<br />
2312 Function no.<br />
AB<br />
. @ @ s a<br />
*1: Function no.<br />
Direct<br />
CA<br />
CH<br />
1: For the - key 53: For the † key 141:For the TIP and TIP key<br />
2: For the – key 95: For the r key<br />
3: For the — key 96: For the ® key<br />
4: For the ≠ key 97: For the p key<br />
5: For the ± key 98: For the π key<br />
*2: AB is the same as A x 10 B .<br />
A: Significant digit (0 through 9)<br />
B: Number of zeros to follow significant digit<br />
CA<br />
CH<br />
0 through 7 (for the - thru ±, †, TIP and TIP keys)<br />
0 through 8 (for the r, ®, p, and π keys)<br />
To program zero<br />
To program any function<br />
For example, presetting 13 ($10.00) here means that amount entries of up to $10.00 are allowed in the REG<br />
mode.<br />
CA<br />
CH<br />
You can set up AB = 17 for no limitation (for the - thru ±, †, TIP and TIP keys).<br />
You can set up AB = 18 for no limitation (for the r, ®, p, and π keys).<br />
PGM 2<br />
Example<br />
Programming 13 for the - key.<br />
Key operation<br />
2312 .@<br />
1 @ 13 ı<br />
a<br />
Print<br />
HALO limit<br />
135
+/- sign, food stamp status, and tax status (%, -, gratuity)<br />
Direct<br />
PGM 2<br />
+/- sign: Programming of the +/- sign assigns the premium or discount function for each key.<br />
Food stamp status: Programming of the food stamp status decides whether a premium or discount should be<br />
dealt with as a food stamp-eligible amount or not.<br />
Tax status: Programming of the tax status decides whether a premium or discount should be dealt with<br />
as a taxable (taxable 1/2/3/4) or non-taxable amount.<br />
2311<br />
Note<br />
Tax 4 is prohibited if you use the food stamp function.<br />
Procedure<br />
To program any function<br />
To program zero<br />
*1 *2<br />
2311 Function no.<br />
ABCDEF<br />
. @ @ s a<br />
*1: Function no.<br />
1: For the - key 6: For the %(∞) key 87: For the gratuity<br />
2: For the – key 7: For the § key<br />
3: For the — key 8: For the key<br />
4: For the ≠ key 9: For the • key<br />
5: For the ± key 10: For the ∞ key<br />
*2: Item: Selection: Entry:<br />
A (+/-) sign Plus 0<br />
Minus 1<br />
B Food stamp status Ineligible 0<br />
Eligible 1<br />
C Tax 4 status Non-taxable 0<br />
Taxable 1<br />
D Tax 3 status Non-taxable 0<br />
Taxable 1<br />
E Tax 2 status Non-taxable 0<br />
Taxable 1<br />
F Tax 1 status Non-taxable 0<br />
Taxable 1<br />
Example<br />
Programming ABCDEF=100001 for the % key and ABCDEF=000000 for the § key<br />
Key operation<br />
Print<br />
2311 .@<br />
6 @ 100001 ı<br />
7 @ 000000 ı<br />
a<br />
Taxable 1<br />
136
Percent entry type (%)<br />
PGM 2 2310<br />
You can program the entry type of rates for percent entries.<br />
Procedure<br />
To program any percent function<br />
To program zero<br />
*1 *2<br />
2310 Function no.<br />
Entry type<br />
. @ @ s a<br />
*1: Function no. *2: Entry type<br />
6: For the %(∞) key 0: Inhibited entry<br />
7: For the § key 1: Open rate only<br />
8: For the key 2: Preset rate only<br />
9: For the • key 3: Open rate and preset rate<br />
10: For the ∞ key<br />
Example<br />
Programming “Preset rate only” for the § key<br />
Key operation<br />
2310 .@<br />
7 @ 2 ı<br />
a<br />
Print<br />
Preset rate only<br />
137
Item% or subtotal% selection (%)<br />
Item%: Select this when a percent calculation is desired for the individual department and PLU/UPC.<br />
Subtotal%: Select this when a percent calculation is desired for merchandise subtotals.<br />
Procedure<br />
PGM 2<br />
*1 *2<br />
2315 Function no.<br />
. @ @<br />
A<br />
s a<br />
2315<br />
To program any percent function<br />
To program zero<br />
Direct<br />
*1: Function no. *2: A<br />
6: For the %(∞) key 0: Subtotal%<br />
7: For the § key 1: Item%<br />
8: For the key<br />
9: For the • key<br />
10: For the ∞ key<br />
Example<br />
Programming “Item%” for the § key<br />
Key operation<br />
2315 .@<br />
7 @ 1 ı<br />
a<br />
Print<br />
Item%<br />
Percent rate limitation (%)<br />
PGM 2 2313<br />
You can program the upper limit of percent rates for percent entries.<br />
Percent entries that use the upper limit may be overridden in the MGR mode.<br />
Procedure<br />
To program any percent function<br />
To program zero<br />
*1 *2<br />
2313 Function no.<br />
Rate limitation<br />
. @ @ s a<br />
*1: Function no.<br />
6: For the %(∞) key 8: For the key<br />
7: For the § key 9: For the • key<br />
10: For the ∞ key<br />
*2: Rate limitation<br />
0.00 – 100.00 (Entering 0.00 inhibits the<br />
open percent rate entry)<br />
Note<br />
The . key is needed only for fractional entry.<br />
Example<br />
Programming the limit to 15.5% for the § key<br />
Key operation<br />
Print<br />
2313 .@<br />
7 @ 15 . 5 ı<br />
a<br />
138<br />
Limitation
Vendor or store coupon selection (-)<br />
PGM 2<br />
Vendor coupon: Select this when the coupon is to be applied to the total sales amount.<br />
Store coupon: Select this when the coupon is to be applied to an individual department or PLU.<br />
2316<br />
Direct<br />
Procedure<br />
To program any coupon function<br />
To program zero<br />
*1 *2<br />
2316<br />
. @<br />
Function no.<br />
@<br />
A<br />
s a<br />
*1: Function no. *2: A<br />
1: For the - key 4: For the ≠ key 0: Vendor coupon (subtotal â)<br />
2: For the – key 5: For the ± key 1: Store coupon (item â)<br />
3: For the — key<br />
Example<br />
Programming the “Store coupon” for the – key.<br />
Key operation<br />
2316 .@<br />
2 @ 1 ı<br />
a<br />
Print<br />
Item â<br />
139
7 Programming for the media keys<br />
Functional programming 1<br />
You can set each media for:<br />
PGM 2<br />
2320<br />
Direct<br />
GLU/PBLU/Manual PB/CB entry compulsory<br />
Short amount tender entry<br />
Retention of closed GLU/PBLU file<br />
Bill (slip) print compulsory<br />
Footer printing on receipt<br />
This programming decides whether or not your machine should print a message at the foot of a receipt when a<br />
specified media key is used.<br />
Non-add code compulsory<br />
You can enforce the non-add code entry when a media entry is accepted.<br />
Change enable (over tender enable)<br />
Either change enable or disable can be selected for a corresponding media key.<br />
Validation printing compulsory<br />
If media entries must be validated, set the corresponding media for compulsory validation print.<br />
Drawer opening<br />
You can program each media key to or not to open the drawer.<br />
Amount tendered compulsory<br />
You may select amount tendered compulsory or optional for the a, Å thru É, k, and CHK2 thru CHK5 keys.<br />
You may select amount tendered compulsory or inhibited for the ( thru CH9 keys.<br />
Procedure<br />
To program any media function<br />
To program zero<br />
*1 *2<br />
2320 Function no.<br />
ABCDEFGHIJ<br />
. @ @ s a<br />
*1: Function no.<br />
89: For the a key 120: For the + key 134: For the ,<br />
CHK3 key<br />
90: For the Å key 122: For the , key 135: For the ,<br />
CHK4 key<br />
91: For the Å 3 key 124: For the , 6 key 136: For the ,<br />
CHK5 key<br />
92: For the Å 4 key 126: For the , 7 key 82: For the S key<br />
93: For the É key 128: For the , 8 key 94: For the f key<br />
114: For the ( key 130: For the , 9 key 238: For the ≥ key<br />
116: For the ) key 132: For the k key<br />
118: For the * key 133: For the ,<br />
CHK2 key<br />
140
*2: Item: Selection: Entry:<br />
A GLU/PBLU/Manual PB/CB entry Enable 0<br />
Inhibit 1<br />
Compulsory 2<br />
B Short amount tender entry Enable 0<br />
Disable 1<br />
C Retention of closed GLU/PBLU file No 0<br />
Yes 1<br />
D Bill (slip) printing Non-compulsory 0<br />
Compulsory 1<br />
E Footer printing on receipt No 0<br />
Yes 1<br />
F Non-add code entry Non-compulsory 0<br />
Compulsory 1<br />
G Change enable (over tender enable) Enable 0<br />
Disable 1<br />
H Validation printing Non-compulsory 0<br />
Compulsory 1<br />
I Drawer opening Yes 0<br />
No 1<br />
J Amount tendered operation Optional amount tendered for cash or check 0<br />
Inhibit amount tendered for charge 0<br />
Compulsory amount tendered 1<br />
Note<br />
• For the S or ≥ key, always enter 0 as A thru C and E thru J.<br />
• For the f key, always enter 0 as B, G, and J.<br />
Example<br />
Programming of the * key for ABCDEFGHIJ=0000000001<br />
Key operation<br />
Print<br />
2320 .@<br />
118 @<br />
0000000001 ı<br />
a<br />
A thru J<br />
141
Functional programming 2<br />
PGM 2 2326<br />
You can program each media key for gas discount availability and tax status (tax 1 thru 4).<br />
Procedure<br />
To program any media function<br />
To program zero<br />
*1 *2<br />
2326 Function no.<br />
ABCDE<br />
. @ @ s a<br />
*1: Function no.<br />
89: For the a key 120: For the + key 134: For the ,<br />
CHK3 key<br />
90: For the Å key 122: For the , key 135: For the ,<br />
CHK4 key<br />
91: For the Å 3 key 124: For the , 6 key 136: For the ,<br />
CHK5 key<br />
92: For the Å 4 key 126: For the , 7 key 110: For the / key<br />
93: For the É key 128: For the , 8 key 111: For the ? key<br />
114: For the ( key 130: For the , 9 key 112: For the ≥ 3 key<br />
116: For the ) key 132: For the k key<br />
118: For the * key 133: For the ,<br />
CHK2 key<br />
*2: Item: Selection: Entry:<br />
A Gas discount Disable 0<br />
Enable 1<br />
B Tax 4 calculation status calculate tax 4 0<br />
delete tax 4 1<br />
C Tax 3 calculation status calculate tax 3 0<br />
delete tax 3 1<br />
D Tax 2 calculation status calculate tax 2 0<br />
delete tax 2 1<br />
E Tax 1 calculation status calculate tax 1 0<br />
delete tax 1 1<br />
Note<br />
EAT IN<br />
For the /, ? and keys, always enter 0 as A.<br />
3<br />
Example<br />
Programming the */ key to enable gas discount<br />
Key operation<br />
Print<br />
2326 .@<br />
118 @ 10000 ı<br />
a<br />
A thru E<br />
142
High amount lockout (HALO) for check cashing, check change,<br />
and cash in drawer PGM 2 2321<br />
You can program the upper limit amounts for check cashing, check change, and cash in drawer.<br />
Procedure<br />
To program any function<br />
To program zero<br />
*1 *2<br />
2321 Function no.<br />
Limit amount<br />
. @ @ s a<br />
*1: Function no.<br />
99: For check 1 cashing<br />
100: For check 2 cashing<br />
101: For check 3 cashing<br />
102: For check 4 cashing<br />
103: For check 5 cashing<br />
104: For check change<br />
138: For cash in drawer (sentinel)<br />
*2: Limit amount<br />
0 thru 999999.99 (check cashing and check change)<br />
0 thru 9999999.99 (cash in drawer)<br />
Example<br />
Setting the limit to $99.99 for check 1 cashing.<br />
Key operation<br />
Print<br />
2321 .@<br />
99 @ 9999 ı<br />
a<br />
High amount lockout (HALO) of entry for media keys<br />
The HALO limit is in effect for REG mode operations but can be overridden in the MGR mode. The HALO limit<br />
is represented by two figures as follows:<br />
Procedure<br />
To program any media function<br />
To program zero<br />
PGM 2<br />
*1 *2<br />
2322 Function no.<br />
AB<br />
. @ @ s a<br />
2322<br />
Direct<br />
*1: Function no.<br />
89: For the a key 118: For the * key 132: For the k key<br />
90: For the Å key 120: For the + key 133: For the ,<br />
CHK2 key<br />
91: For the Å 3 key 122: For the , key 134: For the ,<br />
CHK3 key<br />
92: For the Å 4 key 124: For the , 6 key 135: For the ,<br />
CHK4 key<br />
93: For the É key 126: For the , 7 key 136: For the ,<br />
CHK5 key<br />
114: For the ( key 128: For the , 8 key<br />
116: For the ) key 130: For the , key<br />
9<br />
*2: AB<br />
A: Significant digit (1 thru 9)<br />
B: Number of zeros to follow significant digit (0 thru 8)<br />
You can set up AB = 18 for no limitation.<br />
143
Example<br />
Setting the HALO limit to $1000.00 (15) for the * key<br />
Key operation<br />
Print<br />
2322 .@<br />
118 @ 15 ı<br />
a<br />
HALO<br />
Print station assignment<br />
PGM 2 2328<br />
When you use a remote printer, consult your dealer.<br />
Procedure<br />
*1 *2<br />
2328 Function no.<br />
ABC<br />
. @ @ s a<br />
*1: Function no.<br />
To program any media function<br />
To program zero<br />
89: For the a key 120: For the + key 134: For the ,<br />
CHK3 key<br />
90: For the Å key 122: For the , key 135: For the ,<br />
CHK4 key<br />
91: For the Å 3 key 124: For the , 6 key 136: For the ,<br />
CHK5 key<br />
92: For the Å 4 key 126: For the , 7 key 82: For the S key<br />
93: For the É key 128: For the , 8 key 94: For the f key<br />
114: For the ( key 130: For the , 9 key 238: For the ≥ key<br />
116: For the ) key 132: For the k key<br />
118: For the * key 133: For the ,<br />
CHK2 key<br />
*2: Item: Selection: Entry:<br />
A Remote printer 1 output Output 1<br />
Not output 0<br />
B Remote printer 2 output Output 1<br />
Not output 0<br />
C Printing on the chit receipt Yes 1<br />
No 0<br />
Example<br />
Programming of the * key for selecting “remote printer 1 output/remote printer 2 not<br />
output/printing on chit receipt”<br />
Key operation<br />
Print<br />
2328 .@<br />
118 @<br />
101 ı<br />
a<br />
Print station<br />
144
CAT programming<br />
When you use a credit card authorization terminal, please consult your authorized SHARP dealer.<br />
Procedure<br />
*1: Function no.<br />
PGM 2<br />
89: For the a key 120: For the + key 134: For the ,<br />
CHK3 key<br />
90: For the Å key 122: For the , key 135: For the ,<br />
CHK4 key<br />
91: For the Å 3 key 124: For the , 6 key 136: For the ,<br />
CHK5 key<br />
92: For the Å 4 key 126: For the , 7 key 82: For the S key<br />
93: For the É key 128: For the , 8 key 238: For the ≥ key<br />
114: For the ( key 130: For the , 9 key<br />
116: For the ) key 132: For the k key<br />
118: For the * key 133: For the ,<br />
CHK2 key<br />
*2: Item: Selection: Entry:<br />
A CAT transaction Non-compulsory 0<br />
Compulsory 1<br />
B CAT action POST-AUTH 0<br />
DIAL 1<br />
Authorization only 2<br />
C CAT type CREDIT 0<br />
DEBIT 1<br />
CHECK 2<br />
D Card number printing Yes 0<br />
No 1<br />
E Card number print format Partial (printing only part of the card number) 0<br />
Full (printing the entire card number) 1<br />
F CAT signature line print Yes 0<br />
No 1<br />
G CAT expiration printing Yes 0<br />
No 1<br />
H Always enter 0. 0<br />
I Tip and total amount printing on Yes 0<br />
authorization receipt No 1<br />
J Receipt and authorization receipt Yes 0<br />
printing when the CAT entry is made No 1<br />
at receipt OFF status<br />
K Number of CAT authorization receipt 0 to 9<br />
Number of CAT authorization receipt<br />
Even when 0 is set, 1 receipt is issued.<br />
2330<br />
To program any media function<br />
To program zero<br />
*1 *2<br />
2330 Function no.<br />
ABCDEFGHIJK<br />
. @ @ s a<br />
Example<br />
Programming of the * key for ABCDEFGHIJK = 00000000000.<br />
Key operation<br />
Print<br />
2330 .@<br />
118 @<br />
00000000000 ı<br />
a<br />
A thru K<br />
145
8<br />
Programming of function text<br />
Programming<br />
PGM 2<br />
2314<br />
You can program a maximum of 8 characters for each function key and other functions using the table on the<br />
following pages. Select the characters you want to program referring to section “2 How to program alphanumeric<br />
characters” in chapter “PRIOR TO PROGRAMMING”.<br />
Procedure<br />
To program any function<br />
To keep the current setting<br />
* Function no.<br />
Character keys<br />
2314<br />
. @ (max. 3 digits) @ (max. 8 digits) s a<br />
* Function no.: See “List of function texts” shown below (until function no. 289).<br />
Example<br />
Programming CARD for * key<br />
Key operation<br />
Print<br />
2314 .@<br />
118 @ CARD ///<br />
ıa<br />
List of function texts<br />
Function<br />
no.<br />
Key or function<br />
1 1 (–) 1<br />
2 2 (–) 2<br />
3 3 (–) 3<br />
4 4 (–) 4<br />
5 5 (–) 5<br />
6 %1 % 1<br />
7 %2 % 2<br />
8 %3 % 3<br />
9 %4 % 4<br />
10 %5 % 5<br />
In default of<br />
proramming<br />
11 Gas discount for cash 1 GAS (–)1<br />
12 Gas discount for cash 2 GAS (–)2<br />
13 Gas discount for cash 3 GAS (–)3<br />
14 Gas discount for cash 4 GAS (–)4<br />
15 Gas discount for cash 5 GAS (–)5<br />
16 Gas discount for check 1 GAS (–)6<br />
Function<br />
no.<br />
Key or function<br />
In default of<br />
proramming<br />
17 Gas discount for check 2 GAS (–)7<br />
18 Gas discount for check 3 GAS (–)8<br />
19 Gas discount for check 4 GAS (–)9<br />
20 Gas discount for check 5 GAS (–)10<br />
21 Gas discount for charge 1 GAS (–)11<br />
22 Gas discount for charge 2 GAS (–)12<br />
23 Gas discount for charge 3 GAS (–)13<br />
24 Gas discount for charge 4 GAS (–)14<br />
25 Gas discount for charge 5 GAS (–)15<br />
26 Gas discount for charge 6 GAS (–)16<br />
27 Gas discount for charge 7 GAS (–)17<br />
28 Gas discount for charge 8 GAS (–)18<br />
29 Gas discount for charge 9 GAS (–)19<br />
30 Net sales tota N E T 1<br />
31 Net taxable 1 subtotal TAX1 ST<br />
32 Gross tax 1 total GRS TAX1<br />
146
Function<br />
no.<br />
Key or function<br />
In default of<br />
proramming<br />
33 Tax 1 total of refund entries RFD TAX1<br />
34 Net tax 1 total TAX1<br />
35 Exempt tax 1 TX1 EXPT<br />
36 Net taxable 2 subtotal TAX2 ST<br />
37 Gross tax 2 total GRS TAX2<br />
38 Tax 2 total of refund entries RFD TAX2<br />
39 Net tax 2 tota TAX2<br />
40 Exempt tax 2 TX2 EXPT<br />
41 Net taxable 3 subtotal TAX3 ST<br />
42 Gross tax 3 total GRS TAX3<br />
43 Tax 3 total of refund entries RFD TAX3<br />
44 Net tax 3 total TAX3<br />
45 Exempt tax 3 TX3 EXPT<br />
46 Net taxable 4 subtotal TAX4 ST<br />
47 Gross tax 4 total GRS TAX4<br />
48 Tax 4 total of refund entries RFD TAX4<br />
49 Net tax 4 total TAX4<br />
50 Exempt tax 4 TX4 EXPT<br />
51 Gross manual tax total GRS MTAX<br />
52 Refund manual tax total RFD MTAX<br />
53 Net manual tax total M–TAX<br />
*54 Exempt total from GST GST EXPT<br />
*55 PST total PST TTL<br />
*56 GST total GST TTL<br />
57 FS1 forgive FS TX1<br />
58 FS2 forgive FS TX2<br />
59 FS3 forgive FS TX3<br />
60 Tax total TTL TAX<br />
61 Net N E T<br />
62 Sales total including tax total N E T 2<br />
63 Coupon-like PLU CP PLU<br />
64 Vender coupon UPC V. CP UPC<br />
65 Item void VOID<br />
66 Subtotal void SBTL VD<br />
67 Manager void MGR VD<br />
68 Void mode V O I D<br />
69 Refund REFUND<br />
70 Return RETURN<br />
71 Hash item void HASH VD<br />
72 Hash item refund HASH RF<br />
73 Hash item return HASH RT<br />
74 No sale NO SALE<br />
75 Validation print counter VP CNT<br />
76 Bill (slip) counter BILL CNT<br />
77 Drawer counter DRW CNT<br />
78 Dray total counter TRAY CNT<br />
79 Transfer out TRAN.OUT<br />
Function<br />
no.<br />
Key or function<br />
In default of<br />
proramming<br />
80 Transfer in TRAN.IN<br />
81 PBAL PBAL<br />
82 Service S<strong>ER</strong>VICE<br />
83 Deposit DEPOSIT<br />
84 Deposit refund DPST RF<br />
85 Cover count COV<strong>ER</strong> CT<br />
86 Customer counter TRANS CT<br />
87 Gratuity GRATUITY<br />
88 Sales total N E T 3<br />
89 Cash C ASH<br />
90 Cash 2 C ASH2<br />
91 Cash 3 C ASH3<br />
92 Cash 4 C ASH4<br />
93 Cash 5 C ASH5<br />
94 Food stamp sales FSSALE<br />
95 RA RA<br />
96 RA2 RA2<br />
97 PO PO<br />
98 PO2 PO2<br />
99 Check cashing 1 CA/CHK1<br />
100 Check cashing 2 CA/CHK2<br />
101 Check cashing 3 CA/CHK3<br />
102 Check cashing 4 CA/CHK4<br />
103 Check cashing 5 CA/CHK5<br />
104 Check change CHK/CG<br />
105 Food stamp change FS/CG<br />
106 Currency conversion 1 CONV 1<br />
107 Currency conversion 2 CONV 2<br />
108 Currency conversion 3 CONV 3<br />
109 Currency conversion 4 CONV 4<br />
110 Eat-in 1 EAT IN 1<br />
111 Eat-in 2 EAT IN 2<br />
112 Eat-in 3 EAT IN 3<br />
113 Food stamp in drawer FS/ID<br />
114 Gross charge 1 CHARGE1<br />
115 Refund charge 1 CHARGE1–<br />
116 Gross charge 2 CHARGE2<br />
117 Refund charge 2 CHARGE2–<br />
118 Gross charge 3 CHARGE3<br />
119 Refund charge 3 CHARGE3–<br />
120 Gross charge 4 CHARGE4<br />
121 Refund charge 4 CHARGE4–<br />
122 Gross charge 5 CHARGE5<br />
123 Refund charge 5 CHARGE5–<br />
124 Gross charge 6 CHARGE6<br />
125 Refund charge 6 CHARGE6–<br />
126 Gross charge 7 CHARGE7<br />
147
Function<br />
no.<br />
Key or function<br />
In default of<br />
proramming<br />
127 Refund charge 7 CHARGE7–<br />
128 Gross charge 8 CHARGE8<br />
129 Refund charge 8 CHARGE8–<br />
130 Gross charge 9 CHARGE9<br />
131 Refund charge 9 CHARGE9–<br />
132 Check 1 CHECK1<br />
133 Check 2 CHECK2<br />
134 Check 3 CHECK3<br />
135 Check 4 CHECK4<br />
136 Check 5 CHECK5<br />
137 Cash + check in drawer CA/CH ID<br />
138 Cash in drawer CID<br />
139 Cash tip CA TIP<br />
140 Charge tip CH TIP<br />
141 Tip-in (used only for PGM mode) TIP IN<br />
142 Tip paid TIP PAID<br />
*143 Exempt VAT VAT EXPT<br />
144 Sales average AVE.<br />
145 Price level 1 for PLU/UPC LEVEL 1<br />
146 Price level 2 for PLU/UPC LEVEL 2<br />
147 Price level 3 for PLU/UPC LEVEL 3<br />
148 Price level 4 for PLU/UPC LEVEL 4<br />
149 Price level 5 for PLU/UPC LEVEL 5<br />
150 Price level 6 for PLU/UPC LEVEL 6<br />
151 (+) Dept. total DEPT TL<br />
152 (–) Dept. total DEPT(–)<br />
153 Hash (+) dept. total HASH TL<br />
154 Hash (–) dept. total HASH(–)<br />
155 (+) Bottle return total BTTL TL<br />
156 (–) Bottle return total BTTL(–)<br />
157 Gas (+) dept. total GAS TL<br />
158 Gas (–) dept. total GAS(–)<br />
159 Hash net total (for trans. report) HASH TTL<br />
160 Waste total (for PLU/trans. report) WASTE TL<br />
161 Subtotal (–) total (for trans. report) ST(–) TL<br />
162 Subtotal % tota (for trans. report) ST% TL<br />
163 Item (–) total (for trans. report) (–) TL<br />
164 Item % total (for trans. report) % TL<br />
165 Gas discount total (for trans. report) GASDISTL<br />
166 RA total (for trans. report) RA TL<br />
167 PO total (for trans. report) PO TL<br />
168 Check cashing total (for trans. report) CA/CK TL<br />
169 Cash total (for trans. report) CASH TL<br />
170 Check total (for trans. report) CHECK TL<br />
171 Charge total (for trans. report) CHR TL<br />
172 Currency conversion total (for trans. report) CONV TL<br />
173 Commission sale 1 COM.SAL1<br />
Function<br />
no.<br />
Key or function<br />
In default of<br />
proramming<br />
174 Commission sale 2 COM.SAL2<br />
175 Commission sale 3 COM.SAL3<br />
176 Commission sale 4 COM.SAL4<br />
177 Commission sale 5 COM.SAL5<br />
178 Commission sale 6 COM.SAL6<br />
179 Commission sale 7 COM.SAL7<br />
180 Commission sale 8 COM.SAL8<br />
181 Commission sale 9 COM.SAL9<br />
182 Non commission sale NON COM.<br />
183 Commission amount 1 COM.AMT1<br />
184 Commission amount 2 COM.AMT2<br />
185 Commission amount 3 COM.AMT3<br />
186 Commission amount 4 COM.AMT4<br />
187 Commission amount 5 COM.AMT5<br />
188 Commission amount 6 COM.AMT6<br />
189 Commission amount 7 COM.AMT7<br />
190 Commission amount 8 COM.AMT8<br />
191 Commission amount 9 COM.AMT9<br />
192 Commission amount total COM.TTL<br />
193 Waste (for PLU/UPC report) WASTE<br />
194 Net sales (for PLU/UPC report) NET SLS<br />
195 Net sales total (for PLU/UPC report) NET TL<br />
196 Free GLU/PBLU (for GLU/PBLU report) FREE GLU<br />
197 Closed check (for server report) CLOSE CK<br />
198 Open check (for server report) OPEN CK<br />
199 Percent of net sales (for server report) (%)SALES<br />
200 Cash/check is CA/CH IS<br />
201 Conversion1 is CONV1 IS<br />
202 Conversion2 is CONV2 IS<br />
203 Conversion3 is CONV3 IS<br />
204 CCD differ CCD DIF.<br />
205 CCD differ total DIF. TL<br />
206 Subtotal SUBTOTAL<br />
207 Merchandise subtotal MDSE ST<br />
208 Tray subtotal TRAY TL<br />
209 Total TOTAL<br />
210 Change CHANGE<br />
211 Food stamp subtotal FS ST<br />
212 Food stamp tender FS TEND<br />
213 Food stamp change FS CG<br />
214 Items ITEMS<br />
215 Copy receipt title D E P T<br />
216 Group report title GROUP<br />
217 PLU/UPC report title PLU/UPC<br />
218 Stock report title STOCK<br />
219 Zero sales report title Z<strong>ER</strong>O SAL<br />
220 Category report title CATEGORY<br />
148
Function<br />
no.<br />
Key or function<br />
In default of<br />
proramming<br />
221 Transaction report title TRANS.<br />
222 Cash in drawer report title C I D<br />
223 Commission sales report title SALES<br />
224 CCD report title C C D<br />
225 Server/cashier report title S<strong>ER</strong>V<strong>ER</strong><br />
226 Hourly report title HOURLY<br />
227 Daily net report title DAILY<br />
228 GLU/PBLU report title G L U<br />
229 Non-accessed UPC report title NO ACCES<br />
230 Dynamic UPC report title DYN.UPC<br />
231 Tax report title T A X<br />
232 Non-add code text #<br />
233 GLU/PBLU code text T B L #<br />
234 Copy receipt title C O P Y<br />
235 Waste receipt title WASTE<br />
236 Bill transfer receipt title B. T.<br />
237 Bill separate receipt title B. S.<br />
238 Final (used only for PGM mode) FINAL<br />
239 Balance BALANCE<br />
240 Slip print message on journal SLIP PR.<br />
241 Slip next page NEXT P.<br />
242 Balance forward BAL FWD<br />
243 Tare weight TARE WT.<br />
244 DUE (text on display) DUE<br />
245 Tip due (text on display) TIP DUE<br />
246 TAX ST (text on display) TAX ST<br />
247 Gas sales subtotal (for cash 1) GAS1 ST<br />
248 Gas sales subtotal (for cash 2) GAS2 ST<br />
249 Gas sales subtotal (for cash 3) GAS3 ST<br />
250 Gas sales subtotal (for cash 4) GAS4 ST<br />
251 Gas sales subtotal (for cash 5) GAS5 ST<br />
252 Gas sales subtotal (for check 1) GAS6 ST<br />
253 Gas sales subtotal (for check 2) GAS7 ST<br />
254 Gas sales subtotal (for check 3) GAS8 ST<br />
255 Gas sales subtotal (for check 4) GAS9 ST<br />
Function<br />
no.<br />
Key or function<br />
In default of<br />
proramming<br />
256 Gas sales subtotal (for check 5) GAS10 ST<br />
257 Gas sales subtotal (for charge 1) GAS11 ST<br />
258 Gas sales subtotal (for charge 2) GAS12 ST<br />
259 Gas sales subtotal (for charge 3) GAS13 ST<br />
260 Gas sales subtotal (for charge 4) GAS14 ST<br />
261 Gas sales subtotal (for charge 5) GAS15 ST<br />
262 Gas sales subtotal (for charge 6) GAS16 ST<br />
263 Gas sales subtotal (for charge 7) GAS17 ST<br />
264 Gas sales subtotal (for charge 8) GAS18 ST<br />
265 Gas sales subtotal (for charge 9) GAS19 ST<br />
266 AMOUNT (text on display) AMOUNT<br />
267 WEIGHT (text on display) WEIGHT<br />
268 Refund type of sales (text on display) RF SALE<br />
269 Price change title PR. CHNG<br />
270 Tip amount for tip edit TIP AMT<br />
271 Final balance (for closed GLU report) FIN. BAL<br />
272 Edit tip EDIT TIP<br />
273 Bill on receipt title B I L L<br />
274 RA cash total (for trans. report) RA CASH<br />
275 RA2 cash total (for trans. report) RA2 CASH<br />
276 RA check total (for trans. report) RA CHK<br />
277 RA2 check total (for trans. report) RA2 CHK<br />
278 RA charge total (for trans. report) RA CHR<br />
279 RA2 charge total (for trans. report) RA2 CHR<br />
280 RA food stamp total (for trans. report) RA FS<br />
281 RA2 food stamp total (for trans. report) RA2 FS<br />
282 PO cash total (for trans. report) PO CASH<br />
283 PO2 cash total (for trans. report) PO2 CASH<br />
284 PO check total (for trans. report) PO CHK<br />
285 PO2 check total (for trans. report) PO2 CHK<br />
286 PO charge total (for trans. report) PO CHR<br />
287 PO2 charge total (for trans. report) PO2 CHR<br />
288 PO food stamp total (for trans. report) PO FS<br />
289 PO2 food stamp total (for trans. report) PO2 FS<br />
Note<br />
• The items marked with “ * ” are for Canada only.<br />
• The function no. 143 “Exempt VAT” is only effective for the Canadian tax system (2 GST, VAT<br />
type).<br />
149
9<br />
Server/Cashier programming<br />
The <strong>ER</strong>-<strong>A520</strong>A provides a cashier system and the <strong>ER</strong>-<strong>A530</strong>A provides a server system.<br />
Please note that texts for cashiers/servers are printed as servers (SRV/S<strong>ER</strong>V) on the receipts.<br />
Server/Cashier code<br />
PGM 1<br />
PGM 2<br />
You can assign a server/cashier code to each server/cashier. For more details, please contact your authorized<br />
SHARP dealer.<br />
1400<br />
Procedure<br />
To program any cashier no.<br />
* Programming code “0” inhibits entries of the selected server/cashier no.<br />
To program zero<br />
Server/Cashier no.<br />
* Code<br />
1400<br />
. @ (1 - 20) @ (1 - 9999) s a<br />
Example<br />
To program 1111 for server/cashier no.1 and 1014 for server/cashier no. 4<br />
Key operation<br />
Print<br />
1400 .@<br />
1 @ 1111 ı<br />
4 @ 1014 ı<br />
a<br />
Server/<br />
Cashier<br />
code<br />
Server/Cashier name<br />
You can program a maximum of 8 characters (server/cashier name) for each server/cashier. Select the<br />
characters you want to program referring to section “2 How to program alphanumeric characters” in chapter<br />
“PRIOR TO PROGRAMMING”.<br />
Procedure<br />
PGM 1<br />
PGM 2<br />
To program any server/cashier code<br />
To keep the current setting<br />
Server/Cashier code<br />
Character keys<br />
1414<br />
. @ (1 - 9999) @ (max. 8 digits) s a<br />
1414<br />
Note<br />
The server/cashier code must be programmed for the server/cashier by job #1400 prior to assigning<br />
text.<br />
Example<br />
To program “DICK” for server/cashier code 1111 and “PET<strong>ER</strong>” for server/cashier code 1014<br />
Key operation<br />
Print<br />
1414 .@<br />
1111 @ DICK ı<br />
1014 @ PET<strong>ER</strong> ı<br />
a<br />
150<br />
Server/Cashier name
Functional programming<br />
Procedure<br />
PGM 2<br />
2410<br />
To program any server/cashier code<br />
To program zero<br />
Server/cashier code<br />
2410<br />
. @ (1 - 9999)<br />
* AB<br />
@ s a<br />
Note<br />
The server/cashier code must be programmed for the server/cashier by job #1400 prior to the<br />
programming.<br />
* Item: Selection: Entry:<br />
A GLU/PBLU/Manual PB/CB entry Non-compulsory 0<br />
Compulsory 1<br />
B Drawer no. Use no drawer 0<br />
Set the drawer no. 1 or 2 1 or 2<br />
Example<br />
Programming AB=01 for server/cashier code 1111<br />
Key operation<br />
Print<br />
2410 .@<br />
1111 @ 01 ı<br />
a<br />
GLU/PBLU code range assignment<br />
Procedure<br />
2411<br />
. @<br />
PGM 2<br />
2411<br />
To program zero (no assignment)<br />
Server/cashier<br />
GLU/PBLU start<br />
code (1 - 9999) @ code (1 - 9999) @<br />
To assign start code only<br />
GLU/PBLU end<br />
code (1 - 9999)<br />
s<br />
a<br />
Note<br />
The server/cashier code must be programmed for the server/cashier by job #1400 prior to the<br />
programming.<br />
Example<br />
Assigning GLU/PBLU code 1 to 100 for server/cashier code 1111<br />
Key operation<br />
Print<br />
2411 .@<br />
1111 @ 1 @ 100 ı<br />
a<br />
GLU/PBLU range<br />
151
Net sales % rate<br />
Procedure<br />
PGM 2<br />
2413<br />
To program any server/cashier code<br />
To program zero<br />
Server/cashier code<br />
Net sale % rate<br />
2413<br />
. @ (1 - 9999) @ (0.00 to 100.00) s a<br />
Note<br />
• You must enter the decimal for fractional rates.<br />
• The server/cashier code must be programmed for the server/cashier by job #1400 prior to the<br />
programming.<br />
Example<br />
Programming 20% for server/cashier code 1111<br />
Key operation<br />
Print<br />
2413 .@<br />
1111 @ 20 ı<br />
a<br />
10<br />
Programming various functions<br />
Programming for optional feature selection<br />
Your register enables you to select the following options:<br />
PGM 2<br />
2616<br />
OP X/Z mode availability<br />
When a cashier needs to take the cashier X/Z report, he or she will use the OP X/Z mode.<br />
This programming determines whether he or she will be allowed to use this mode.<br />
Note<br />
You can take the cashier X and Z reports in the X1/Z1 mode regardless of the above programming.<br />
152<br />
Paid-out in the REG mode<br />
Refund type of sale in the REG mode<br />
Refund in the REG mode<br />
Direct void in the REG mode<br />
Indirect void in the REG mode<br />
Subtotal void in the REG mode<br />
Validation printing in a refund/return entry<br />
First item direct void<br />
PLU level shift mode<br />
• Automatic return mode: This mode automatically shift the PLU level back to level 1 (ordinary level) after a<br />
direct PLU entry.<br />
• Lock shift mode: This mode holds the current PLU level until making a level shift operation<br />
(pressing a level shift key).
Available mode for PLU level shift<br />
Printing of the number of purchased items<br />
Time printing on the receipt/journal<br />
Journal print form<br />
You may choose either of the following forms.<br />
• Detailed journal print that shows the details of all entries – the same information as printed on the receipt.<br />
• Summary journal print that shows information about all entries other than normal department entries<br />
(entries into “+” departments and their associated “+” PLUs).<br />
Availability of the item validation printing<br />
Validation printing in a discount (â) entry<br />
Zero skip for various reports<br />
Share % printing in dept. report<br />
Tip entry method<br />
Cover count entry<br />
Automatic return mode for PLU level<br />
• By one receipt: Returns the PLU level to level 1 after each receipt.<br />
• By one item: Returns the PLU level to level 1 after each item entry.<br />
Available mode for PLU/UPC price shift<br />
PLU/UPC price shift mode<br />
• Automatic return mode: This mode automatically shifts the price level back to price 1 (ordinary level) after<br />
the entry.<br />
• Lock shift mode: This mode holds the current price level until making a price shift selection<br />
(pressing the price shift key).<br />
Automatic return mode for PLU/UPC price level<br />
• By one receipt: Returns the price level to price 1 after each receipt.<br />
• By one item: Returns the price level to price 1 after each item entry.<br />
No sale in REG mode<br />
Void mode in REG mode<br />
Finalization when the subtotal amount is zero in the REG mode<br />
Item printing in PBLU transactions on the slip<br />
Tip-paid operation in REG mode<br />
Transfer-in/out operation in REG mode<br />
Usability of the RA entry<br />
Validation printing in a check cashing entry<br />
Validation printing in a RA entry<br />
Validation printing in a PO entry<br />
Birthday date printing for the age limitation<br />
Footer graphic logo printing<br />
Learning function of UPC entry<br />
Price change function in REG mode<br />
Printing of the price shift text on the receipt/journal<br />
Treating the EAN8 code (200XXXXC/D)<br />
Price entry after ISBN/ISSN code entry<br />
153
Procedure<br />
2616 ** P<br />
*ABCDEFGH<br />
. @ @ s a<br />
(1 - 13)<br />
To program any function no. (**P: 1-13)<br />
To program zero<br />
**P: 1<br />
* Item: Selection: Entry:<br />
A OP X/Z mode Enable 0<br />
Disable 1<br />
B Paid-out in REG mode Enable 0<br />
Disable 1<br />
C Refund type of sale in the REG mode Enable 0<br />
Disable 1<br />
D Refund and return in the REG mode Enable 0<br />
Disable 1<br />
E Direct void in REG mode Enable 0<br />
Disable 1<br />
F Indirect void in the REG mode Enable 0<br />
Disable 1<br />
G Subtotal void in REG mode Enable 0<br />
Disable 1<br />
H Validation printing in a refund and return entry Non-compulsory 0<br />
Compulsory 1<br />
**P: 2<br />
* Item: Selection: Entry:<br />
A The first item direct void Enable 0<br />
Disable 1<br />
B PLU level shift mode Automatic return mode 0<br />
Lock shift mode 1<br />
C Available mode for PLU level shift REG and MGR modes 0<br />
MGR mode only 1<br />
D Printing of the number of purchased items No 0<br />
Yes 1<br />
E Time printing on the receipt/journal Yes 0<br />
No 1<br />
F Journal print form Detailed 0<br />
Limited 1<br />
G Availability of the item validation printing Enable 0<br />
Disable 1<br />
H Validation printing in a discount (â) entry Non-compulsory 0<br />
Compulsory 1<br />
154
**P: 3<br />
* Item: Selection: Entry:<br />
A Always enter 0. 0<br />
B Always enter 0. 0<br />
C Zero skip in server/cashier report Yes 0<br />
No 1<br />
D Zero skip in transaction report Yes 0<br />
No 1<br />
E Zero skip in department report Yes 0<br />
No 1<br />
F Zero skip in PLU/UPC report Yes 0<br />
No 1<br />
G Zero skip in hourly report Yes 0<br />
No 1<br />
H Zero skip in daily net report Yes 0<br />
No 1<br />
**P: 4<br />
* Item: Selection: Entry:<br />
A Share % printing in dept. report Yes 0<br />
No 1<br />
B Tip entry method Amount entry 0<br />
Fixed rate entry 1<br />
C Always enter 0. 0<br />
D Always enter 0. 0<br />
E Always enter 0. 0<br />
F Cover count entry Non-compulsory 0<br />
Compulsory 1<br />
G Always enter 0. 0<br />
H Automatic return mode for PLU level shift After each item 0<br />
After each receipt 1<br />
Note<br />
Automatic return mode for PLU level shift: This setting is available only when available mode for<br />
PLU level shift is set to automatic return mode. (See P:2/parameter B shown above.)<br />
**P: 5<br />
* Item: Selection: Entry:<br />
A Always enter 0. 0<br />
B Always enter 0. 0<br />
C Always enter 0. 0<br />
D Always enter 0. 0<br />
E Always enter 0. 0<br />
F Available mode for PLU/UPC price shift REG and MGR modes 0<br />
MGR mode only 1<br />
G PLU/UPC price shift mode Automatic return mode 0<br />
Lock shift mode 1<br />
H Automatic return mode for PLU/UPC price level After each item 0<br />
After each receipt 1<br />
Note<br />
Automatic return mode for PLU/UPC price level: This setting is available only when PLU/UPC price<br />
shift mode is set to automatic return mode (parameter G).<br />
**P: 6 (ABCDEFGH: Always enter 0.)<br />
155
**P: 7<br />
* Item: Selection: Entry:<br />
A Void mode in REG mode Enable 0<br />
Disable 1<br />
B Always enter 0. 0<br />
C No sale in REG mode Enable 0<br />
Disable 1<br />
D Finalization when the subtotal amount is zero Enable 0<br />
in the REG mode Disable 1<br />
E Item printing in GLU/PBLU transaction Yes 0<br />
on the slip No 1<br />
F Tip-paid operation in REG mode Enable 0<br />
Disable 1<br />
G Transfer-in/out operation in REG mode Enable 0<br />
Disable 1<br />
H Always enter 0. 0<br />
**P: 8<br />
* Item: Selection: Entry:<br />
A Always enter 0. 0<br />
B Always enter 0. 0<br />
C Always enter 0. 0<br />
D Usability of the received-account entry Without limitation 0<br />
Only for GLU/PBLU transaction 1<br />
E Validation printing in a check cashing Non-compulsorly 0<br />
Compulsory 1<br />
F Validation printing in a received-account entry Non-compulsorly 0<br />
Compulsory 1<br />
G Validation printing in a paid-out entry Non-compulsorly 0<br />
Compulsory 1<br />
H Validation printing in tip-in/tip-paid operation Non-compulsorly 0<br />
Compulsory 1<br />
**P: 9<br />
* Item: Selection: Entry:<br />
A Always enter 0. 0<br />
B Always enter 0. 0<br />
C Birthday date printing for the age limitation Yes 0<br />
No 1<br />
D Always enter 0. 0<br />
E Always enter 0. 0<br />
F Always enter 0. 0<br />
G Always enter 0. 0<br />
H Footer graphic logo printing No 0<br />
Yes 1<br />
**P: 10<br />
* Item: Selection: Entry:<br />
A and B Always enter 0. 0<br />
C Learning function of UPC entry Yes 0<br />
No 1<br />
156<br />
D to H Always enter 0. (Fixed position) 0
**P: 11 (ABCDEFGH: Always enter 0.)<br />
**P: 12<br />
* Item: Selection: Entry:<br />
A to G Always enter 0. 0<br />
H Price change function in REG mode Enable 0<br />
Disable 1<br />
**P: 13<br />
* Item: Selection: Entry:<br />
A to C Always enter 0. 0<br />
D Printing of the price shift text on the Yes 0<br />
receipt/journal No 1<br />
E Always enter 0. 0<br />
F Treating the EAN8 code (200XXXXC/D) Yes 0<br />
No 1<br />
G Always enter 0. 0<br />
H Price entry after ISBN/ISSN code entry Compulsory 0<br />
Inhibited 1<br />
Example<br />
Programming to select zero suppression for the server/cashier report, transaction report,<br />
dept. report, PLU/UPC report and daily net report, and to select non-skip printing for an hourly<br />
report.<br />
Key operation<br />
Print<br />
2616 .@<br />
3 @ 00000010 ı<br />
a<br />
P: 1 thru 13<br />
A thru H<br />
Programming the parameter of the slip printer<br />
Procedure<br />
When A thru F are zeroes<br />
2615<br />
. @<br />
*ABCDEF<br />
a<br />
PGM 2<br />
2615<br />
* AB: Initial slip feed line (0 to 64)<br />
CD: Slip print max. line no. (0 to 99)<br />
E: Validation printing counter (1 thru 9 times)<br />
To inhibit validation printing, enter 0.<br />
F: Feed lines after printing of a tray subtotal (0 thru 9 lines)<br />
Example<br />
Entering 009910 to ABCDEF<br />
Key operation<br />
2615 .@<br />
009910 a<br />
Print<br />
157
Setting the time limit for THE TILL TIM<strong>ER</strong> TM<br />
The machine counts the number of times the drawer is left open for longer than a programmed time limit. The<br />
counter will be incremented by one each time a programmed time limit is reached. The time limit for THE TILL<br />
TIM<strong>ER</strong> TM can be preset for 0 to 255 seconds. The count is printed on the general report and cashier report.<br />
Procedure<br />
To program 0<br />
Time limit<br />
2617<br />
. @ 1 to 255 seconds a<br />
PGM 2<br />
2617<br />
Example<br />
Setting the time limit as 30 (seconds).<br />
Key operation<br />
2617 .@<br />
30 a<br />
Print<br />
Scale tare table<br />
The register can be programmed with up to nine tare tables and allows different tares to be assigned to them<br />
(for auto scale entries).<br />
Procedure<br />
PGM 2<br />
2618<br />
To program 0<br />
Table no.<br />
Tare weight<br />
2618<br />
. @ (1 to 9) @ (0.01 to 99.99) s a<br />
To program any tare table no.<br />
Example<br />
To assign the tare weight 0.20 lbs to tare table no. 1<br />
Key operation<br />
2618 .@<br />
1 @ 20 ı<br />
a<br />
Print<br />
Table no.<br />
Tare weight<br />
158
Programming of logo messages<br />
Your register can print programmed messages for customers on every receipt. On the standard model, the<br />
<strong>ER</strong>-<strong>A520</strong>A prints a graphic logo/the <strong>ER</strong>-<strong>A530</strong>A is set to print a header 3-line message on the receipt. (If you<br />
want a graphic logo customerized for your store, please consult your dealer.)<br />
If you want to print logo message, please consult your dealer too. You have five options described below.<br />
Select the characters you want to program, referring to section “2 How to program alphanumeric characters” in<br />
chapter “PRIOR TO PROGRAMMING.”<br />
Procedure<br />
PGM 2<br />
To program any line no.<br />
To keep the current setting<br />
*Line number<br />
Character keys<br />
2614<br />
. @ (1 to 6) @ (max. 30 digits) s a<br />
* “Header 3-line message” type: 1 to 3<br />
“Footer 3-line message” type : 4 to 6<br />
“Header 6-line message” type: 1 to 6<br />
“Header 3-line and footer 3-line message” type: 1 to 6 (1 to 3 as header, 4 to 6 as footer)<br />
2614<br />
Graphic logo<br />
Text 1st line<br />
Text 2nd line<br />
Text 3rd line<br />
Graphic logo<br />
Text 1st line<br />
Text 2nd line<br />
Text 3rd line<br />
Graphic logo<br />
Text 1st line<br />
Text 2nd line<br />
Text 3rd line<br />
Text 4th line<br />
Text 5th line<br />
Text 6th line<br />
Text 1st line<br />
Text 2nd line<br />
Text 3rd line<br />
Text 4th line<br />
Text 5th line<br />
Text 6th line<br />
Text 4th line<br />
Text 5th line<br />
Text 6th line<br />
Graphic logo only<br />
Header 3-line message<br />
Footer 3-line<br />
message<br />
Header 6-line<br />
message<br />
Header 3-line<br />
message and<br />
footer 3-line<br />
messages<br />
Example<br />
To program the following logo message by using 3 lines:<br />
YOUR<br />
STORE<br />
MESSAGE<br />
Key operation<br />
2614 .@<br />
1 @//////////<br />
Î Y O U R Î<br />
///////t<br />
2 @/////////<br />
Î S T O R E Î<br />
//////t<br />
3 @///////<br />
Î M E S S A G E Î<br />
///t<br />
Ç<br />
(/:Space key)<br />
Print<br />
159
Selection of X1/Z1 and X2/Z2 reports to be printed in the stacked report<br />
sequence PGM 2 2620<br />
Your register is equipped with the stacked report printing function that enables multiple X/Z reports to be printed<br />
in sequence with only a single request.<br />
Procedure<br />
2620<br />
. @<br />
To cancel the stacked report sequence<br />
For full reporting (non-range report)<br />
*1<br />
Job no.<br />
For individual reporting<br />
*2<br />
Start range<br />
*2 End range<br />
@ parameter @ parameter s a<br />
To program any Job no.<br />
Note<br />
• A maximum of 70 steps are programmable. “1 step” means the memory size used for one norange<br />
type job no. The range type reports needs 6, 8 or 16 steps to execute the printing. Find<br />
how many steps are required at the column of Note to calculate total number of steps for the<br />
reports you want to print in sequence.<br />
• When the Z of stacked report is initiated, X only reports will be skipped.<br />
Job code numbers to be used are as follows.<br />
*1: Job no. Report name *2: Start/End range parameter Note<br />
00<br />
10<br />
13<br />
General<br />
Full department<br />
Full department group<br />
20<br />
24<br />
27<br />
29<br />
30<br />
31<br />
32<br />
33<br />
40<br />
60<br />
PLU/UPC<br />
PLU/UPC stock<br />
PLU/UPC zero sales<br />
PLU/UPC price category<br />
Transaction<br />
Cash in drawer<br />
Commission sale<br />
Tax<br />
Full server/cashier<br />
Hourly sales information<br />
*3 Start code/End code (max. 5/13 digits)<br />
*3 Start code/End code (max. 5/13 digits)<br />
*3 Start price amount/End price amount<br />
*3 Start time/End time (0 thru 2330)<br />
16 steps<br />
16 steps<br />
8 steps<br />
Range report is available<br />
only in the X1 mode.<br />
6 steps for a range report.<br />
69<br />
70<br />
80<br />
Dynamic UPC<br />
Daily net report<br />
GLU/PBLU report<br />
*3 Start code/End code (max. 13 digits)<br />
*3 Start GLU/PBLU code/End GLU/PBLU code<br />
(1 thru 9999)<br />
16 steps<br />
6 steps<br />
*3: Both range setting and full setting are allowed.<br />
160<br />
Example<br />
To print reports 10 and 13 as a stacked report.<br />
Key operation<br />
2620 .@<br />
10 ı<br />
13 ı<br />
a<br />
Setting the time range for hourly reports<br />
You can set the time range for the hourly report.<br />
Procedure<br />
When A thru C are all zeros.<br />
2619 *ABC<br />
. @ a<br />
PGM 2<br />
2619<br />
*A: Time range<br />
To set the time range to 30 minutes (in the 24-hour system), enter 0.<br />
To set the time range to 60 minutes (in the 24-hour system), enter 1.<br />
BC: Starting time (hour = 00 to 23)<br />
Example<br />
Setting the time range to 60 minutes with the starting time being set at 7:00<br />
Key operation<br />
2619 .@<br />
107 a<br />
Print<br />
Note<br />
To change this setting, an hourly Z report (#160) must be taken prior to the changes.<br />
Programming of power save mode<br />
Procedure<br />
2689 *ABCD<br />
. @ a<br />
PGM 2<br />
2689<br />
* Item: Selection: Entry:<br />
A Entering power save mode when time is Enable 0<br />
displayed. Disable 1<br />
BCD Time (min.) to entering power save mode 1 through 254 (min.)<br />
since no operation is made.<br />
(999: The power save mode is inhibited.)<br />
Example<br />
Key operation<br />
2689 .@<br />
0030 a<br />
Print<br />
161
Available GLU/PBLU codes<br />
You can specify the range of GLU/PBLU codes available for the register.<br />
Procedure<br />
To program only one code<br />
2810 Start code<br />
End code<br />
. @ @ a<br />
(1 - 9999)<br />
PGM 2 2810<br />
(1 - 9999)<br />
Example<br />
Programming 1 for start code and 1000 for end code<br />
Key operation<br />
2810 .@<br />
1 @<br />
1000 a<br />
Print<br />
Bill number<br />
A consecutive bill number is automatically increased by one each time a GLU/PBLU entry is finalized.<br />
Specify a number that one less than a desired starting number.<br />
Procedure<br />
PGM 2<br />
2636<br />
To program zero<br />
2636 Bill number<br />
. @<br />
Ç<br />
(0-9999)<br />
Example<br />
Starting bill number from 1<br />
Key operation<br />
2636 .@<br />
0 Ç<br />
Print<br />
162
Functional programming for the printer<br />
You can program the printing density of the receipt/journal printer.<br />
PGM 2<br />
2990<br />
Procedure<br />
To program zero<br />
2990 *AB<br />
. @ Ç<br />
*AB: Printing density (00 – 99)<br />
00 = 89% for standard density<br />
50 = 100% for standard density<br />
99 = 111% for standard density<br />
Example<br />
Programming “100% for standard density”<br />
Key operation<br />
2990 .@<br />
50 Ç<br />
Print<br />
Editing guidance/error messages<br />
PGM 2 2641<br />
Your register has standard guidance/error messages as indicated in the following list. For more information<br />
about the alphanumeric characters programming, see section “2 How to program alphanumeric characters”<br />
under the chapter “PRIOR TO PROGRAMMING”.<br />
Procedure<br />
2641 * Text no.<br />
Character keys<br />
. @ @ t Ç<br />
(1 - 94)<br />
To program any text no. (1 - 94)<br />
To keep the current setting<br />
(max. 12 digits)<br />
* Text no.: See “LIST OF GUIDANCE/<strong>ER</strong>ROR MESSAGES” shown on the following page.<br />
Example<br />
Programming “ENTRY <strong>ER</strong>ROR” for text no. 1<br />
Key operation<br />
2641 .@<br />
1 @<br />
Print<br />
ENTRY / <strong>ER</strong>ROR t<br />
Ç<br />
163
LIST OF GUIDANCE/<strong>ER</strong>ROR MESSAGES<br />
Text<br />
no.<br />
Description<br />
In default of<br />
programming<br />
1 Registration error ENTRY <strong>ER</strong>ROR<br />
2 Misoperation error MISOP<strong>ER</strong>ATION<br />
3<br />
Desired code is not<br />
programmed yet.<br />
NO RECORD<br />
4 (Reserved)<br />
5 Secret code error SECRET CODE<br />
6 Code is not free NOT FREE<br />
7 Memory is full. MEMORY FULL<br />
8 Insert slip paper. INS<strong>ER</strong>T SLIP<br />
9<br />
The entered server/cashier’s code<br />
is not authorized.<br />
NO AUTHORITY<br />
10 Stock is empty. OUT OF STOCK<br />
11<br />
Compulsory pushing<br />
the subtotal key<br />
SBTL COMPUL.<br />
12 Compulsory tendering TEND COMPUL.<br />
13 Compulsory GLU/PBLU entry PB COMPUL.<br />
14 (Reserved)<br />
15 Compulsory cover count entry COV CNT COMP<br />
16 Check edit error<br />
(for manual PB entry)<br />
C/D <strong>ER</strong>ROR<br />
17-19 (Reserved)<br />
20 Remote printer off line OFF LINE<br />
21 (Reserved)<br />
22 Overlapped server/cashier error S<strong>ER</strong>V<strong>ER</strong> <strong>ER</strong>R.<br />
23-26 (Reserved)<br />
27 Power off POW<strong>ER</strong> OFF<br />
28-29 (Reserved)<br />
30 Compulsory tender entry for tip TIP <strong>ER</strong>ROR<br />
31 Compulsory non-add code # COMPULSORY<br />
32 The server/cashier is not assigned. NOT ASSIGNED<br />
33 (Reserved)<br />
34 Overflow limitation OV<strong>ER</strong> LIMIT.<br />
35<br />
The open price entry is<br />
inhibited.<br />
INH. OPEN PR<br />
36<br />
The unit price entry is<br />
inhibited.<br />
INH. UNIT PR<br />
The direct non-tendering<br />
37 finalization after previous NOT NON-TEND<br />
tender entry is inhibited.<br />
38 Read error of scale data SCALE <strong>ER</strong>ROR<br />
Text<br />
no.<br />
Description<br />
In default of<br />
programming<br />
39-47 (Reserved)<br />
48 Enter check number ENT<strong>ER</strong> CHECK#<br />
49 Enter cover count COV<strong>ER</strong> COUNT<br />
50 (Reserved)<br />
51 Weight on scale WEIGHT<br />
52 Closed check file is full. C.FILE FULL<br />
53 (Reserved)<br />
54 Entry of tare weight ENTR TARE WT<br />
55-60 (Reserved)<br />
61<br />
Desired code is not programmed<br />
yet. (learning function)<br />
NO RECORD<br />
62 Enter price and dept. no. PRICE → DEPT<br />
63 Enter price and dept. no. PRICE & DEPT<br />
64 Enter dept. no. ENT<strong>ER</strong> DEPT#<br />
65-66 (Reserved)<br />
67 REG buffer is full. BUFF<strong>ER</strong> FULL<br />
68-69 (Reserved)<br />
70 Price entry at UPC refund ENT<strong>ER</strong> PRICE<br />
71 PLU/UPC file is full. UPC FULL<br />
72-73 (Reserved)<br />
74 Non-accessed UPC delete job D E L E T E<br />
75 (Reserved)<br />
76<br />
Closing the drawer is<br />
compulsory.<br />
CLOSE DRAW<strong>ER</strong><br />
77 Price level shift error ENT<strong>ER</strong> P.SFT<br />
78 (Reserved)<br />
79<br />
Reading of undefined vender<br />
coupon UPC<br />
OP ENT<strong>ER</strong><br />
80 (Reserved)<br />
81<br />
Message for prompting entry<br />
of secret code<br />
ENTR SECRET#<br />
82-83 (Reserved)<br />
84 Data backup send success SEND OK<br />
85 Data backup receive success RECEIVE OK<br />
86<br />
Data backup communication<br />
error<br />
COM. <strong>ER</strong>ROR<br />
87 Backup data format error DATA <strong>ER</strong>ROR<br />
88 Data backup time out error TIME OUT<br />
89-93 (Reserved)<br />
94 Age limitation error AGE <strong>ER</strong>ROR<br />
164
Validation message<br />
You can program the text (3 lines) to be printed on validation slip. Up to 30 characters can be programmed per<br />
line.<br />
Procedure<br />
PGM 2<br />
2642 Line no.<br />
Character keys<br />
. @ @ t Ç<br />
(1 - 3)<br />
2642<br />
To program any line no.<br />
To keep the current setting<br />
(max. 30 digits)<br />
Example<br />
Programming “FOR DEPOSIT ONLY” for the check validation message<br />
Key operation<br />
2642 .@<br />
3 @<br />
Print<br />
FOR / DEPOSIT / ONLY t<br />
Ç<br />
Note<br />
The ∏ key must be placed on the keyboard.<br />
Slip printer’s logo message<br />
You can program the text (3 lines) to be printed on slip. Up to 30 characters can be programmed per line.<br />
Procedure<br />
To program any line no.<br />
2643 Line no.<br />
Character keys<br />
. @ @ t Ç<br />
(1 - 3)<br />
PGM 2 2643<br />
To keep the current setting<br />
(max. 30 digits)<br />
Example<br />
Programming “TEXT1” for the slip printer’s logo message<br />
Key operation<br />
2643 .@<br />
1 @<br />
TEXT1 t<br />
Ç<br />
Print<br />
Note<br />
The Ω key must be placed on the keyboard.<br />
165
RS-232C channel assignment<br />
PGM 2<br />
Your register is equipped with two RS-232C interfaces. If you use the communication functions, the channel<br />
number of each RS-232C interface must be programmed by using the following procedure.<br />
To activate the communication functions, please consult your dealer.<br />
2690<br />
Procedure<br />
To program any function no. (**P: 1 - 3)<br />
2690 ** P<br />
*ABCD<br />
. @ @ t Ç<br />
** P: 1<br />
(1 - 3)<br />
To program zero<br />
* Item: Selection: Entry:<br />
A Channel no. for the ON-LINE communication Not connected 0<br />
Standard channel 1 1<br />
Standard channel 2 2<br />
B Channel no. for print data sending (CVM) Not connected 0<br />
Standard channel 1 1<br />
Standard channel 2 2<br />
C Channel no. for the scale Not connected 0<br />
Standard channel 1 1<br />
Standard channel 2 2<br />
D Channel no. for the coin dispenser Not connected 0<br />
Standard channel 1 1<br />
Standard channel 2 2<br />
** P: 2<br />
* Item: Selection: Entry:<br />
A Channel no. for the barcode reader Not connected 0<br />
Standard channel 1 1<br />
Standard channel 2 2<br />
B Channel no. for the remote printer 1 Not connected 0<br />
Standard channel 1 1<br />
Standard channel 2 2<br />
C Channel no. for the remote printer 2 Not connected 0<br />
Standard channel 1 1<br />
Standard channel 2 2<br />
D Always enter 0. 0<br />
Note<br />
For the barcode reader, when you use the model <strong>ER</strong>-A6HS1, always select the standard channel 1.<br />
166<br />
** P: 3<br />
* Item: Selection: Entry:<br />
A Always enter 0. 0<br />
B Channel no. for the slip printer TM-295 Not connected 0<br />
(see below for the selection) Standard channel 1 1<br />
Standard channel 2 2<br />
C Always enter 0. 0<br />
D Channel no. for CAT Not connected 0<br />
Standard channel 1 1<br />
Standard channel 2 2<br />
Channel no. for the slip printer TM-295<br />
Select “Not connected” for internal printer (printing bills on receipt)<br />
Set “standard channel 1” or “standard channel 2” for TM-295 printer.<br />
Note<br />
• Never enter any number other than 0, 1 and 2.<br />
• The data backup function always uses standard channel 1.
Example<br />
Assigning channel 1 to the slip printer TM-295<br />
Key operation<br />
Print<br />
2690 .@<br />
3 @ 0100 t<br />
Ç<br />
Barcode reader programming<br />
PGM 2<br />
2691<br />
Procedure<br />
To program zero<br />
2691<br />
. @<br />
*ABCD<br />
Ç<br />
* Item: Selection: Entry:<br />
A Data bit 7 bits 1<br />
8 bits 0<br />
B Parity bit Non parity 2<br />
Odd parity 1<br />
Even parity 0<br />
C Stop bit 1 bit 1<br />
2 bits 0<br />
D Transmission speed 19200 bps 2<br />
9600 bps 1<br />
4800 bps 0<br />
Example<br />
Key operation<br />
2691 .@<br />
1110 Ç<br />
Print<br />
ABCD<br />
167
Remote printer assignment<br />
Procedure<br />
PGM 2<br />
2692<br />
2692 Remote printer no.<br />
*ABC<br />
. @ @ t Ç<br />
(1 or 2)<br />
To program zero<br />
* Item: Selection: Entry:<br />
A Logo text printing Not print 0<br />
Print 1<br />
B Auto cutter function Disable 0<br />
Enable 1<br />
C Type of the printer TM-U200 or TM-U230 0<br />
TM-U220 (type B only) 1<br />
TM-T88(3) 2<br />
TM-T88(3)+Logo 3<br />
Example<br />
Key operation<br />
Print<br />
2692 .@<br />
1 @ 100 t<br />
Ç<br />
Second remote printer assignment<br />
Procedure<br />
PGM 2<br />
3653<br />
3653 Remote printer no.<br />
*A<br />
. @ @ t Ç<br />
(1 or 2)<br />
To program zero<br />
* Item: Selection: Entry:<br />
A Second remote printer Nothing 0<br />
Remote printer 1 1<br />
Remote printer 2 2<br />
Example<br />
Key operation<br />
3653 .@<br />
1 @ 2 t<br />
Ç<br />
Print<br />
Remote printer 2<br />
168
Remote printer name<br />
Procedure<br />
PGM 2<br />
3654<br />
3654 Remote printer no.<br />
Printer name<br />
. @ @ t Ç<br />
(1 or 2)<br />
To keep current setting<br />
(max. 12 characters)<br />
Example<br />
Key operation<br />
Print<br />
3654 .@<br />
1 @ KP1 t<br />
Ç<br />
Printer name<br />
Print format for remote printer<br />
Procedure<br />
PGM 2<br />
3655<br />
3655 Remote printer no.<br />
*ABCDE<br />
. @ @ t Ç<br />
(1 or 2)<br />
To program zero<br />
* Item: Selection: Entry:<br />
A Taxable status print Not print 0<br />
Print 1<br />
B Q’ty print when q’ty is “1”. Not print 0<br />
Print 1<br />
C Dept./PLU/UPC code print Not print 0<br />
Print 1<br />
D Unit price print Not print 0<br />
Print 1<br />
E Amount print Not print 0<br />
Print 1<br />
Taxable status print<br />
Taxable status printing is allowed only when “amount print” (parameter E) is set to “Print”.<br />
Example<br />
Key operation<br />
Print<br />
3655 .@<br />
1 @ 00000 t<br />
Ç<br />
Print format<br />
169
Chit receipt format<br />
PGM 2<br />
3656<br />
Procedure<br />
To program zeros<br />
3656<br />
. @<br />
*ABCDE<br />
Ç<br />
* Item: Selection: Entry:<br />
A Taxable status print Not print 0<br />
Print 1<br />
B Q’ty print when q’ty is “1”. Not print 0<br />
Print 1<br />
C Dept./PLU/UPC code print Not print 0<br />
Print 1<br />
D Unit price print Not print 0<br />
Print 1<br />
E Amount print Not print 0<br />
Print 1<br />
Taxable status print<br />
Taxable status printing is allowed only when “amount print” (parameter E) is set to “Print”.<br />
Example<br />
Key operation<br />
3656 .@<br />
00000 Ç<br />
Print<br />
170
RS-232C interface<br />
PGM 2<br />
6110<br />
6111<br />
6112<br />
6113<br />
6115<br />
6212<br />
6213<br />
6220<br />
Online terminal number<br />
Procedure<br />
Transmission line form system<br />
Procedure<br />
To program zero<br />
6110 Terminal no.<br />
. @ Ç<br />
(max. 6 digits)<br />
To program zero<br />
6111 *AB<br />
. @ Ç<br />
* Item: Selection: Entry:<br />
A Sending of the CI signal No 0<br />
Sending 1<br />
B Line form Full duplex system 0<br />
Half duplex system 1<br />
Functional programming<br />
Procedure<br />
6112 *A<br />
. @ Ç<br />
* Item: Selection: Entry:<br />
A Baud rate (38400/19200/9600/4800 bps) 4800 bps 4<br />
The selected baud rate is used for on-line 9600 bps 5<br />
communications. 19200 bps 6<br />
It is not used for the data backup function. 38400 bps 7<br />
Start code and end code<br />
Procedure<br />
6113 *ABCDEF<br />
. @ Ç<br />
* ABC: Start code (000 – 127)<br />
DEF: End code (000 – 127)<br />
Time out setting<br />
Procedure<br />
To program zero<br />
6115 Time out time<br />
. @<br />
Ç<br />
(1 – 255 sec)<br />
171
Baud rate specification for print data sending<br />
Procedure<br />
6212 *Baud rate<br />
. @ Ç<br />
* Baud rate<br />
4: 4800 bps 5: 9600 bps 6: 19200 bps 7: 38400 bps<br />
Start/end code specification for print data sending<br />
Procedure<br />
6213 *ABCDEF<br />
. @ Ç<br />
* ABC: Start code - 000 to 127<br />
DEF: End code - 000 to 127<br />
To program zero<br />
Functional selection for print data sending<br />
Procedure<br />
To program zero<br />
6220 *ABC<br />
. @ Ç<br />
* Item: Selection: Entry:<br />
A Sensing of DR signal Yes 0<br />
No 1<br />
B Sensing of CS signal Yes 0<br />
No 1<br />
C Sending of all print data Disable 0<br />
Enable 1<br />
172
Programming the CAT interface<br />
7116<br />
PGM 2<br />
7110<br />
7111<br />
7112<br />
7113<br />
7114<br />
7115<br />
Phone number for dial out<br />
Procedure<br />
To keep the current setting<br />
7110 * Character keys<br />
. @<br />
Ç<br />
(max. 25 digits)<br />
* The valid characters for dialing are “0 – 9”, “W” and “,”.<br />
Password for dial out<br />
Procedure<br />
To program zero<br />
7111 * Password<br />
. @ Ç<br />
(max. 8 digits)<br />
* The password can be programmed with zero suppression, however it is<br />
used without zero suppression (00000000 - 99999999) for dialing.<br />
Functional selection<br />
Procedure<br />
To program zero<br />
7112 *ABCD<br />
. @ Ç<br />
* Item: Selection: Entry:<br />
A Food stamp mode Disable 0<br />
Enable 1<br />
B PIN PAD on CAT for DEBIT CARD Yes 0<br />
No 1<br />
C Key type for PIN PAD STATIC 0<br />
DUKPT 1<br />
INDEX 2<br />
D Dial mode for dial out Tone 0<br />
Pulse 1<br />
Time out setting for time 1 (reading a credit/debit card)<br />
Procedure<br />
7113 Time out time<br />
. @ Ç<br />
(1 – 255 sec)<br />
173
Time out setting for time 2 (for the response of authorization)<br />
Procedure<br />
7114 Time out time<br />
. @<br />
Ç<br />
(1 – 255 sec)<br />
Time out setting for time 3 (for the reading of dial in/out)<br />
Procedure<br />
7115 Time out time<br />
. @<br />
Ç<br />
(1 – 3000 sec)<br />
Allowed cash tip rate for authorization<br />
Procedure<br />
To program zero<br />
7116 *Rate<br />
. @<br />
Ç<br />
(0.00 - 100.00)<br />
* You need a decimal point for fractional rate entry.<br />
174
Secret codes to control access to the PGM1 mode, X1/Z1 mode and X2/Z2<br />
mode PGM 2 2630 2631 2632<br />
When a secret code has been set for that specific mode operation, before performing any PGM1 mode, X1/Z1<br />
mode or X2/Z2 mode operation, you must enter a secret code according to the following procedure.<br />
Operating<br />
Procedure<br />
Ç<br />
Secret code<br />
(max. 4 digits)<br />
Ç<br />
Note<br />
• Once a secret code is entered, it does not need to be entered again unless the mode switch<br />
setting is changed or an operation is performed.<br />
• In case a secret code is forgotten, enter zero to cancel a secret code entry.<br />
Programming<br />
*<br />
2630<br />
2631<br />
Procedure<br />
Secret code<br />
. @ Ç<br />
2632 (max. 4 digits)<br />
* 2630 for the PGM1 mode<br />
2631 for the X1/Z1 mode<br />
2632 for the X2/Z2 mode<br />
To program zero (no code)<br />
Example<br />
Programming secret code 1234 for X1/Z1 mode<br />
Key operation<br />
2631 .@<br />
1234 Ç<br />
Print<br />
Loading dynamic UPCs to the main UPC file<br />
The UPC master file can be updated by loading the data recorded in the dynamic UPC file to the UPC master<br />
file. Execute the following job.<br />
Procedure<br />
2099<br />
. @ Ç<br />
PGM 2<br />
2099<br />
175
Setting the AUTO key — Automatic sequencing key —<br />
If you program frequently performed transactions or report sequences for the AUTO keys, you can enter those<br />
transactions simply by pressing the corresponding AUTO keys during key operations. This programming can be<br />
done when your machine is in the X2/Z2 mode.<br />
Procedure<br />
X2/Z2<br />
2900<br />
2900<br />
. @<br />
` ˇ<br />
( )thru<br />
Delete<br />
ˇ10 Transaction<br />
`( ˇ) ˇ thru 10<br />
max. 50 times<br />
Ç<br />
Example<br />
Programming for the ` key and ¡ key as follows:<br />
`; entering a $1.50 item (PLU2) and a $1.00 item (dept. 3)<br />
; selling a $5.00 -programmed- item (dept. 2) for cash<br />
¡<br />
AUTO1<br />
setting<br />
AUTO2<br />
setting<br />
Key operation<br />
2900 . @<br />
`<br />
˘ 100 3<br />
`<br />
¡<br />
2 Ç<br />
¡Ç<br />
Print<br />
Note<br />
• When the AUTO key has been programmed to execute a report job function etc., the mode switch<br />
must be in the corresponding position.<br />
• The AUTO sequence key can not be preset to another AUTO sequence key.<br />
176
11<br />
TRAINING mode<br />
The training mode is used when the operator or the manager practices register operations.<br />
When a training cashier has been selected, the machine automatically enters the training mode. When a<br />
training cashier has not been selected, the register automatically enters the ordinary REG mode. (For<br />
programming of a training cashier, please consult your local dealer.)<br />
The training operations are valid only in REG, MGR, and VOID mode.<br />
The training cashier memory is updated in the training mode. Other memories are not updated.<br />
Example<br />
Key operation<br />
Print<br />
1000 2<br />
3 @3<br />
Ç<br />
177
12<br />
Reading stored programs<br />
Your machine allows you to read program stored in the PGM1 and PGM2 modes.<br />
Program details and procedures for their reading<br />
1<br />
Program for:<br />
Departments<br />
Mode<br />
switch<br />
position<br />
PGM2 or<br />
PGM1<br />
Job<br />
code no.<br />
1100<br />
1100<br />
Start<br />
dept. code<br />
@<br />
Procedure<br />
For reading all codes<br />
For individual reading<br />
@<br />
End<br />
dept. code<br />
Ç<br />
Related job<br />
code nos.<br />
1110, 2110,<br />
2111, 2112,<br />
2114, 2115,<br />
2116, 2180,<br />
2118, 2158<br />
2<br />
PLUs/UPCs<br />
PGM2 or<br />
PGM1<br />
1200<br />
1200<br />
Start PLU/<br />
UPC code<br />
@<br />
For reading all codes<br />
For individual reading<br />
@<br />
For the last picking list<br />
Scan UPC code<br />
PLU/UPC code<br />
Ä<br />
End PLU/<br />
UPC code<br />
MDSE<br />
SBTL<br />
MDSE<br />
SBTL<br />
Ç<br />
1200, 1210,<br />
1211, 2210,<br />
2211, 2217,<br />
2214, 2215,<br />
2222, 2230,<br />
2231, 2232,<br />
2235, 2236,<br />
2280, 2218,<br />
2216, 2234,<br />
2244, 2258<br />
3<br />
4<br />
Key nos. for<br />
departments and<br />
PLUs<br />
Link PLUs/UPC<br />
link<br />
PGM2<br />
2119<br />
PGM2 2220<br />
5 Set PLUs<br />
PGM2 2221<br />
2119 @ Ç<br />
2220<br />
Start PLU/<br />
UPC code<br />
2221<br />
Start<br />
PLU code<br />
To pick up PLU/UPC codes<br />
@<br />
For reading all codes<br />
For individual reading<br />
@<br />
End PLU/<br />
UPC code<br />
Ç<br />
2119, 2219<br />
6<br />
Mix-and-match<br />
PGM2 2225<br />
2225<br />
table<br />
@ Ç<br />
2225<br />
7<br />
Condiment<br />
table<br />
PGM2 2223<br />
2223 @ Ç<br />
2223<br />
8 UPC’s function PGM2 2025 2025 @ Ç<br />
2025, 2029<br />
@<br />
For reading all codes<br />
For individual reading<br />
@<br />
End<br />
PLU code<br />
Ç<br />
2220<br />
2221<br />
178
Program for:<br />
Mode<br />
switch<br />
position<br />
Job<br />
code no.<br />
Procedure<br />
Related job<br />
code nos.<br />
1050 @<br />
PGM2 or<br />
9 Dynamic UPCs<br />
PGM1<br />
1050<br />
Start<br />
UPC code<br />
For reading all codes<br />
@<br />
For the last picking list<br />
Scan UPC code<br />
UPC code<br />
For individual reading<br />
End<br />
UPC code<br />
Ä<br />
MDSE<br />
SBTL<br />
MDSE<br />
SBTL<br />
Ç<br />
1050, 1060,<br />
1061, 2059,<br />
2060, 2061,<br />
2064, 2065,<br />
2066, 2067,<br />
2068, 2081,<br />
2094<br />
10<br />
11<br />
12<br />
Dept. /PLU/UPC<br />
group text<br />
PGM2 or<br />
PGM1<br />
2350<br />
Function<br />
PGM2 or<br />
13<br />
preset 1<br />
PGM1<br />
1300<br />
14<br />
Function<br />
PGM2 2600<br />
preset 2<br />
Tax tables and PGM2 or<br />
16 2700<br />
rates<br />
PGM1<br />
@<br />
2700 @ Ç<br />
17 Auto keys PGM2 2900<br />
2900 @ Ç<br />
2900<br />
19 Remote printer PGM2 3650<br />
PGM2 or<br />
20 On-line preset<br />
6110<br />
PGM1<br />
2600 @ Ç<br />
15 Messages PGM2 2640<br />
2640 Ç<br />
21 CAT preset PGM2 7110<br />
To pick up UPC codes<br />
2350 @ Ç<br />
PGM2 or<br />
Servers/cashiers<br />
PGM1<br />
1400<br />
1400 @ Ç<br />
1300 @ Ç<br />
3650 @ Ç<br />
6110 @ Ç<br />
7110 @ Ç<br />
1310, 1311,<br />
2310, 2311,<br />
2312, 2313,<br />
2314, 2315,<br />
2316, 2320,<br />
2321, 2322,<br />
2326, 2334,<br />
2328, 2330<br />
2614, 2615,<br />
2616, 2617,<br />
2618, 2619,<br />
2620, 2630,<br />
2631, 2632,<br />
2636, 2689,<br />
2690, 2691,<br />
2692<br />
18 Thermal printer PGM2 2990<br />
2990 @ Ç<br />
2990<br />
2350, 2351<br />
1400, 1414,<br />
2410, 2411<br />
2413<br />
GLU/PBLU code PGM2 2800 2800 @ Ç<br />
2810<br />
2641, 2642,<br />
2643<br />
2710, 2711<br />
3653, 3654,<br />
3655, 3656<br />
6110, 6111,<br />
6112, 6113,<br />
6115, 6212,<br />
6213, 6220<br />
7110, 7111,<br />
7112, 7113,<br />
7114, 7115,<br />
7116<br />
179
Sample printouts<br />
1 Reading of programmed items for departments<br />
(Reading in the PGM1 and PGM2 modes)<br />
2 Reading of programmed items for PLUs/UPCs<br />
(Reading in the PGM1 and PGM2 modes)<br />
Job code no.<br />
Range<br />
Dept. code<br />
Item label<br />
Mode switch<br />
position*<br />
Commission group<br />
PLU code<br />
Mode switch<br />
position*<br />
Range<br />
Associated<br />
dept. code<br />
Food stamp<br />
status<br />
Group no.<br />
HALO limit.<br />
Tax status<br />
Item label<br />
for price<br />
level 1 thru 6<br />
Unit price for<br />
price level<br />
1 thru 6<br />
Tax status<br />
Print station<br />
Function<br />
Function programming<br />
programming<br />
CVM control<br />
character<br />
Remote printer<br />
item label<br />
for price level<br />
Age limitation 1 thru 6<br />
Commission<br />
group<br />
Group<br />
Base q’ty<br />
Minus department<br />
CVM control character<br />
Age limitation<br />
Condiment<br />
table no.<br />
Stock<br />
Mix and match<br />
table no.<br />
* When you take this report in the PGM1 mode, the PGM2<br />
indication is replaced by “PGM1”.<br />
Set PLU<br />
L: Link PLU<br />
180
3 Reading of programmed key nos. for<br />
departments and PLUs<br />
(Reading in the PGM2 mode)<br />
5 Reading of programmed set PLUs<br />
(Reading in the PGM2 mode)<br />
Key no.<br />
Dept. code<br />
Tied<br />
PLU code<br />
6 Reading of mix-and-match table<br />
(Reading in the PGM2 mode)<br />
PLU code<br />
Mix-and-match<br />
table no.<br />
Adjustment amount<br />
Matching count<br />
7 Reading of condiment table<br />
(Reading in the PGM2 mode)<br />
Table no.<br />
Assigned<br />
PLU code<br />
Next condiment table no.<br />
Number of repeats<br />
4 Reading of programmed items for link PLUs<br />
(Reading in the PGM2 mode)<br />
8 Reading of programmed UPC’s function<br />
(Reading in the PGM2 mode)<br />
Leading<br />
PLU code<br />
Range<br />
Linked<br />
PLU code<br />
Non-PLU code<br />
format<br />
Delete period for<br />
non-accessed UPC<br />
181
9 Reading of programmed Dynamic UPC<br />
(Reading in the PGM1 and PGM2 mode)<br />
11 Reading of programmed items for servers/cashiers<br />
(Reading in the PGM1 and PGM2 modes)<br />
The subsequent printout occurs in the same<br />
format as in the sample reading of<br />
programmed items for PLUs/UPCs.<br />
Mode switch<br />
position*<br />
* When you take this report in the PGM1 mode,<br />
the PGM2 indication is replaced by “PGM1”.<br />
Server/cashier<br />
name<br />
Server/cashier<br />
no.<br />
Mode switch<br />
position*<br />
Server/cashier<br />
code<br />
Drawer no.<br />
GLU/PBLU/<br />
manual PC/CB<br />
entry<br />
Net sale %<br />
* When you take this report in the PGM1 mode, the<br />
PGM2 indication is replaced by “PGM1”.<br />
10 Reading of programmed department and<br />
PLU/UPC group text<br />
(Reading in the PGM2 mode)<br />
12 Reading of programmed GLU/PBLU code<br />
(Reading in the PGM2 modes)<br />
Department<br />
group no.<br />
Text<br />
PLU group no.<br />
182
13 Reading of programmed items for functions - 1<br />
(Reading in the PGM1 and PGM2 modes)<br />
To be continued on the next page<br />
* When you take this report in the PGM1 mode,<br />
the PGM2 indication is replaced by “PGM1”.<br />
183
184
14 Reading of programmed items for functions - 2<br />
(Reading in the PGM2 mode)<br />
Logo message<br />
Line feed for tray subtotal<br />
Optional feature selection<br />
Drawer open alarm time<br />
Scale tare tables<br />
Hourly report format/start<br />
hour<br />
Stacked report<br />
Secret code<br />
Bill number<br />
Power saving mode<br />
RS-232C channel data<br />
Barcode reader data<br />
Remote printer data<br />
185
15 Reading of programmed messages<br />
(Reading in the PGM2 mode)<br />
Guidance/error<br />
messages<br />
Check validation<br />
message<br />
Slip printer’s logo<br />
message<br />
To be continued<br />
186
16 Reading of programmed tax tables and rates<br />
(Reading in the PGM2 mode)<br />
19 Reading of remote printer preset<br />
(Reading in the PGM2 mode)<br />
Tax rate<br />
Tax table<br />
Tax rate<br />
Lowest taxable<br />
amount<br />
20 Reading of ON-LINE preset<br />
(Reading in the PGM2 mode)<br />
17 Reading of programmed items<br />
for auto keys<br />
(Reading in the PGM2 mode)<br />
21 Reading of CAT preset<br />
(Reading in the PGM2 mode)<br />
18 Reading of programmed items for the thermal<br />
printer (Reading in the PGM2 mode)<br />
Printing density<br />
Entered Value<br />
Printing density<br />
example<br />
187
13<br />
Universal Product Code (UPC) or European Article Number (EAN)<br />
UPC or EAN code<br />
Your machine can support the following codes:<br />
• UPC-A (Number system character: 0, 2, 3, 4, 5) • UPC-E<br />
• EAN-8 • EAN-13 • Internal code EAN-8/EAN-13<br />
For the codes used in-store marking, there are two types of PLU type (treated as a code like PLU no.) and Non-<br />
PLU type (price/quantity information is included in the code).<br />
When a code is non-PLU type, the price/quantity in the code is read for sales entry (in case of quantity, “quantity<br />
multiplys preset unit price” is processed to obtain price.)<br />
UPC-A<br />
• Number system character: 0 <br />
• Number system character: 3 <br />
• Number system character: 5 <br />
0<br />
Maker code<br />
Number system character<br />
Item code<br />
C D<br />
Check digit<br />
For entry, a full 12 digit number or 11 digit number (omitting the<br />
check digits) must be entered.<br />
3<br />
5<br />
NCD (or HRI) format<br />
Maker code<br />
Family<br />
code<br />
C D<br />
C D<br />
Coupon<br />
price table<br />
• Number system character: 2 <br />
You can program the format by the job #2025.<br />
• Number system character: 4 <br />
2 * * * * * C D<br />
Item code<br />
Price<br />
Price check digit<br />
For entry, a full 12 digit number, 11 digit number (omitting the 4<br />
check digit), or a leading zero plus 12 digit number must be<br />
(Free code)<br />
entered.(Any numbers are allowed for the digits marked with *,<br />
and on the receipt/journal, non-PLU type code is printed like 2020008**** (****: price information).)<br />
C D<br />
UPC-E<br />
• UPC-E is a zero-suppressed version of UPC-A that conforms to<br />
the UPC-E Standards. This code is used for marking small<br />
packages.<br />
For entry, a 6 digit number or a leading zero plus 6 digits number<br />
must be entered.<br />
EAN 8<br />
• Ordinary EAN-8 code (flag: neither 0 nor 2) <br />
188<br />
For entry, a full 8 digit number must be entered.<br />
• Internal code (flag 2) <br />
Program the format by the job #2025.<br />
• Internal code (flag 0) <br />
For entry, a full 8 digit number must be entered. On the<br />
receipt/journal, non-PLU type code is printed like 208**** (****:<br />
price/quantity information)<br />
C D<br />
Maker code<br />
Nation code<br />
Item code<br />
C<br />
2<br />
D<br />
(Free format)<br />
Program the format by the job#2025.<br />
0<br />
(Free code)<br />
C D
EAN-13<br />
• Ordinary EAN-13 code (used in the source marking)<br />
• Specific EAN-13 code (flag 977, 978, 979) (used in the source<br />
marking: ISBM, ISSN)<br />
Maker code<br />
Nation code<br />
Item code<br />
C D<br />
For entry, you must enter a full of 13 digits number.<br />
• Internal code (used in the in-store marking, the flag character<br />
number: 20 through 29 and 02)<br />
Program the format by the job# 2025.<br />
Flag<br />
02, 20-29<br />
C D<br />
(Free format)<br />
Program the format by the job #2025.<br />
Add-on code<br />
UPC-A and EAN-13 may be followed by a two digits number or a five digits number as add-on code, excepting<br />
UPC-A without a check digit plus two or five digits add-on code.<br />
Therefore, the total number of digits enterable for sales entries are as shown below:<br />
Code entry No add-on code 2-digit add-on code 5-digit add-on code<br />
UPC-A 12 14 17<br />
UPC-A w/leading zero 13 15 18<br />
UPC-A w/o check digit 11 – –<br />
UPC-E 6 – –<br />
EAN-8 8 – –<br />
EAN-13 13 15 18<br />
Note<br />
Your register automatically judges the add-on code in an UPC/EAN code entered from the total<br />
number of digits and the flag.<br />
189
READING (X) AND RESETTING (Z)<br />
OF SALES TOTALS<br />
• Use the reading function (X) when you need to take a reading of sales information entered since the last<br />
resetting. You can take this reading any number of times. It does not affect the register’s memory.<br />
• Use the resetting function (Z) when you need to clear the register’s memory. Resetting prints all sales<br />
information and clears the entire memory except for the GT1 thru GT3 and training GT, reset count, and<br />
consecutive number.<br />
• If you want to stop the printing report, turn the mode switch to the MGR position. The symbol (“ ”) is<br />
printed.<br />
1<br />
Summary of reading (X) and resetting (Z) reports and the key operations<br />
to obtain the reports<br />
X1 and Z1 reports: Daily sales reports<br />
X2 and Z2 reports: Periodic (monthly) consolidation reports<br />
Item<br />
Mode switch<br />
position<br />
X1/Z1<br />
X2/Z2<br />
Job<br />
code<br />
Key operation<br />
Flash report:<br />
(Only display)<br />
To clear the display,<br />
press the c key<br />
or turn the mode<br />
switch to another<br />
position.<br />
General report<br />
Individual cashier/<br />
server report<br />
Full cashier/server<br />
report<br />
Full department<br />
report<br />
Individual group<br />
total report on<br />
department<br />
X1 — —<br />
X1, Z1 X1, Z1<br />
X2, Z2<br />
X1, Z1 X1, Z1<br />
X2, Z2<br />
100<br />
200<br />
141<br />
241<br />
X, Z 41<br />
X1, Z1<br />
X1, Z1<br />
X2, Z2<br />
140<br />
240<br />
X1 X1 110<br />
X2 210<br />
X1 X1 112<br />
X2 212<br />
Dept. key ( 1 to ÿ )<br />
Dept. code à<br />
@ key: Amount of cash in drawer<br />
t key: Paid total<br />
Reading<br />
100<br />
200 . @ Ç<br />
Resetting<br />
Reading<br />
141<br />
241 . @<br />
Resetting<br />
Reading<br />
41 . @ Ç<br />
Resetting<br />
Reading<br />
140<br />
240 . @ Ç<br />
110<br />
210 @ Ç<br />
112<br />
212<br />
Resetting<br />
@<br />
99<br />
: Department total amount<br />
Group number<br />
For assigned cashier/server<br />
Cashier/server code<br />
Ç<br />
Ç<br />
Full group total<br />
report on<br />
department<br />
X1 X1 113<br />
X2<br />
213<br />
113<br />
213 @ Ç<br />
190<br />
PLU/UPC<br />
report by<br />
designated range<br />
X1, Z1 X1, Z1<br />
X2, Z2<br />
120<br />
220<br />
120<br />
220<br />
Reading<br />
. @<br />
Resetting<br />
Start PLU/<br />
UPC code<br />
Scan UPC code<br />
All PLUs/UPCs<br />
@<br />
Ä<br />
End PLU/<br />
UPC code<br />
Scan UPC code Ä<br />
Ç
Item<br />
Mode switch<br />
position<br />
X1/Z1<br />
X2/Z2<br />
Job<br />
code<br />
Key operation<br />
PLU/UPC report<br />
by pick up list<br />
X1, Z1 X1, Z1 109<br />
X2, Z2 209<br />
109<br />
209<br />
Reading<br />
.<br />
Resetting<br />
@<br />
For full reading and resetting<br />
For the last picking list<br />
Scan UPC code<br />
PLU/UPC<br />
code<br />
Ä<br />
MDSE<br />
SBTL<br />
MDSE<br />
SBTL<br />
Ç<br />
To pick up PLU/UPC codes<br />
PLU/UPC report<br />
by associated<br />
department<br />
X1, Z1 X1, Z1<br />
X2, Z2<br />
121<br />
221<br />
121<br />
221<br />
Reading<br />
.<br />
Resetting<br />
@<br />
Dept. code<br />
Ç<br />
Individual group<br />
total report on<br />
PLU/UPC<br />
X1<br />
X1 122<br />
X2 222<br />
122<br />
222 @<br />
Group number<br />
Ç<br />
Full group total<br />
report on PLU/UPC<br />
PLU/UPC zero<br />
sales report by<br />
department<br />
PLU/UPC price<br />
category report<br />
PLU/UPC stock<br />
report<br />
X1<br />
X1<br />
X1<br />
X1<br />
X1 123<br />
123<br />
@ Ç<br />
X2 223 223<br />
X1<br />
X1<br />
X2<br />
X1<br />
127<br />
X2 227<br />
129<br />
229<br />
124<br />
127<br />
227 @<br />
129<br />
229<br />
124<br />
@<br />
Start price<br />
amount<br />
@<br />
Start PLU/<br />
UPC code<br />
Scan UPC code<br />
Full reading<br />
Dept. code<br />
All prices<br />
@<br />
All PLUs/UPCs<br />
@<br />
Ä<br />
Ç<br />
End price<br />
amount<br />
End PLU/<br />
UPC code<br />
Scan UPC code Ä<br />
Ç<br />
Ç<br />
For full reading<br />
PLU/UPC stock<br />
report by pick up list<br />
X1<br />
X1<br />
104<br />
104 @<br />
For the last picking list<br />
Scan UPC code<br />
PLU/UPC<br />
code<br />
Ä<br />
MDSE<br />
SBTL<br />
MDSE<br />
SBTL<br />
Ç<br />
To pick up PLU/UPC codes<br />
191
Item<br />
GLU/PBLU report<br />
Mode switch<br />
position<br />
X1/Z1<br />
X2/Z2<br />
X1, Z1 X1, Z1<br />
Job<br />
code<br />
180<br />
180<br />
Reading<br />
. @<br />
Resetting<br />
Start GLU/<br />
PBLU code<br />
Key operation<br />
All GLU/PBLUs<br />
@<br />
End GLU/<br />
PBLU code<br />
Ç<br />
GLU/PBLU report by<br />
cashier/server<br />
X1, Z1 X1, Z1<br />
181<br />
Reading<br />
. Cashier/server code Ç<br />
181 @<br />
Resetting<br />
For assigned cashier/server<br />
Closed GLU/PBLU<br />
report<br />
Closed GLU/PBLU<br />
report by cashier/<br />
server<br />
Commission sales<br />
report<br />
Tax report<br />
Transaction report<br />
Cash in drawer<br />
report<br />
X1, Z1 X1, Z1 182<br />
X1, Z1 X1, Z1 183<br />
X1 X1 132<br />
X2 232<br />
X1 X1 133<br />
X2 233<br />
X1 X1 130<br />
X2 230<br />
X1 X1 131<br />
X2 231<br />
182<br />
132<br />
232 @ Ç<br />
133<br />
233 @ Ç<br />
130<br />
230 @ Ç<br />
131<br />
231<br />
Reading<br />
. @<br />
Resetting<br />
Start bill #<br />
Reading<br />
183 @<br />
Resetting<br />
@<br />
Ç<br />
All bills<br />
@<br />
End bill #<br />
For assigned cashier/server<br />
Ç<br />
. Cashier/server code Ç<br />
169<br />
Reading<br />
. @<br />
Resetting<br />
Dynamic UPC report<br />
by designated range<br />
X1, Z1 X1, Z1<br />
169<br />
Start UPC<br />
code<br />
Scan UPC code<br />
All UPCs<br />
@<br />
Ä<br />
End UPC<br />
code<br />
Scan UPC code<br />
Ä<br />
Ç<br />
Dynamic UPC report<br />
by pick up list<br />
X1, Z1 X1, Z1 165<br />
165<br />
Reading<br />
.<br />
Resetting<br />
@<br />
For full reading and resetting<br />
For the last picking list<br />
Scan UPC code<br />
UPC code<br />
Ä<br />
MDSE<br />
SBTL<br />
MDSE<br />
SBTL<br />
Ç<br />
192<br />
To pick up UPC codes
Item<br />
Dynamic UPC report<br />
by associated<br />
department<br />
Mode switch<br />
position<br />
X1/Z1<br />
X2/Z2<br />
Job<br />
code<br />
X1, Z1 X1, Z1 166<br />
Key operation<br />
Reading<br />
166 . @ Dept. code<br />
Resetting<br />
Ç<br />
Dynamic UPC clear<br />
report by<br />
designated range<br />
X1, Z1 X1, Z1<br />
168<br />
168<br />
Reading<br />
. @<br />
Resetting<br />
Start UPC<br />
code<br />
Scan UPC code<br />
All UPCs<br />
@<br />
Ä<br />
End UPC<br />
code<br />
Scan UPC code<br />
Ä<br />
Ç<br />
Dynamic UPC clear<br />
report by pick up list<br />
X1, Z1 X1, Z1 164<br />
164<br />
Reading<br />
.<br />
Resetting<br />
@<br />
For full reading and resetting<br />
For the last picking list<br />
Scan UPC code<br />
UPC code<br />
Ä<br />
MDSE<br />
SBTL<br />
MDSE<br />
SBTL<br />
Ç<br />
To pick up UPC codes<br />
Dynamic UPC clear<br />
report by associated<br />
department<br />
Hourly report<br />
X1, Z1 X1, Z1 167<br />
X1<br />
X1<br />
Reading<br />
167 . @ Dept. code<br />
Resetting<br />
Reading: 160<br />
(For individual<br />
time range)<br />
@<br />
Start*<br />
time<br />
@<br />
Ç<br />
End*<br />
Ç<br />
160 time<br />
* Enter the time in the 24-hour system.<br />
X1, Z1 X1, Z1<br />
Reading<br />
and<br />
Resetting: 160<br />
Reading<br />
. @ Ç<br />
Resetting<br />
X1, Z1 X1, Z1 190<br />
Stacked report 190<br />
X2, Z2 290<br />
Reading<br />
290 . @ Ç<br />
Resetting<br />
When Z of stacked report<br />
is initiated, X only reports<br />
will be skipped.<br />
Daily net report<br />
X2, Z2 270<br />
Reading<br />
270 . @ Ç<br />
Resetting<br />
193
Non-accessed UPC deleting<br />
Item<br />
Mode switch<br />
position<br />
X1/Z1<br />
X2/Z2<br />
Job<br />
code<br />
Key operation<br />
Reading of<br />
non-accessed UPCs<br />
X1<br />
X1<br />
105<br />
105 @ Ç<br />
For full deleting<br />
Deleting of<br />
non-accessed UPCs<br />
Z1<br />
Z1<br />
105<br />
105 . @<br />
For the last UPC picking list<br />
Scan UPC code<br />
Ä<br />
MDSE<br />
SBTL<br />
Ç<br />
UPC code<br />
MDSE<br />
SBTL<br />
To pick up UPC codes<br />
Note<br />
When you execute the job #105 in Z1 mode, not only the sales data, but also the UPC code(s) (the<br />
related data files) themselves will be deleted.<br />
194
2<br />
Daily sales totals<br />
General report<br />
You can take X and Z reports in the X1/Z1 mode. The use of the decimal (.) key determines when the report<br />
will actually reset the totals.<br />
• Sample X report<br />
• Sample Z report<br />
Report no.<br />
Read symbol<br />
Dept. code Ratio of dept. 1<br />
sales amount to<br />
Sales q'ty<br />
“+” real dept. total<br />
Sales amount<br />
Reset symbol<br />
Reset counter<br />
Net grand total<br />
(GT2 - GT3)<br />
Grand total of<br />
plus registration<br />
Grand total of<br />
minus registration<br />
Grand total of training<br />
mode registration<br />
“+” real dept.<br />
counter and total<br />
The subsequent printout occurs in the<br />
same format as in the X report.<br />
“-” real dept.<br />
counter and total<br />
“+” hash dept.<br />
counter and total<br />
“-” hash dept.<br />
counter and total<br />
“+” bottle return dept.<br />
counter and total<br />
“-” bottle return dept.<br />
counter and total<br />
gas q'ty<br />
“+” gas dept. counter, quantity sold<br />
and amount total<br />
“-” gas dept. counter, quantity sold<br />
and amount total<br />
To be continued on the next page<br />
Note<br />
Not all reports provide the resetting capability. Please refer to the chart on pages 190-194.<br />
195
Subtotal<br />
4 counter and total<br />
Subtotal total<br />
Subtotal % 3 counter and total<br />
Subtotal % total<br />
Gas discount counter and total (cash 1 - 5)<br />
Gas discount counter and total (check 1 - 5)<br />
Gas discount counter and total (charge 1 - 9)<br />
Gas discount total<br />
Net sales total<br />
Net taxable 1 total<br />
Gross tax 1 total<br />
Refund tax 1 total<br />
Net tax 1 total<br />
Exempt total from tax 1<br />
*1<br />
Gross manual tax total<br />
Refund manual tax total<br />
Net manual tax total<br />
FS tax 1 forgiveness total<br />
FS tax 2 forgiveness total<br />
FS tax 3 forgiveness total<br />
Tax total<br />
Sale total excluding tax<br />
Sales total<br />
including tax<br />
(When the Canadian tax system is selected)<br />
Exempt<br />
total from<br />
GST<br />
PST total<br />
GST total<br />
To be continued on the next page<br />
*1 When food stamp function is allowed, tax 4 items are not printed.<br />
196
Item<br />
1 counter and total<br />
Item 1 total<br />
Item % 1 counter and total<br />
Item % total<br />
Coupon-like PLU counter<br />
and total<br />
Vender coupon UPC counter and total<br />
Eat-in 1 counter and total<br />
Item void counter and total<br />
Subtotal void counter and total<br />
Manager item void counter and total<br />
Void-mode transaction<br />
Refund counter and total<br />
Return counter and total<br />
Hash item void counter and total<br />
Hash item refund counter and total<br />
Hash item return counter and total<br />
*<br />
No-sale (exchange) counter<br />
Validation print counter<br />
Bill counter<br />
Drawer counter<br />
Tray subtotal counter<br />
GLU/PBAL counter<br />
Service counter<br />
Cover counter<br />
Trans-out counter and total<br />
Trans-in counter and total<br />
Customer counter<br />
Average of sales amount<br />
Gratuity total<br />
Sales total (including hash dept. total)<br />
Hash net sales total<br />
Waste total<br />
Cash counter and total<br />
Cash total<br />
Sales for food stamp counter and total<br />
RA1 by cash counter and total<br />
RA1 by check counter and total<br />
RA1 by charge counter ant total<br />
RA1 by food stamp counter and total<br />
RA1 total<br />
RA total<br />
* When manual PB/CB function is enabled, amount is also printed for each print item.<br />
197
PO1 by cash counter and total<br />
PO total<br />
Check cashing 1 counter and total<br />
Check cashing total<br />
Cash change total for check and charge tendering<br />
Cash change total for food stamp tendering<br />
Currency conversion 1 total (by programmed rate)<br />
Currency conversion 4 total (by manual rate)<br />
Currency conversion total<br />
Food stamp in drawer total<br />
Charge 1 counter and total<br />
Charge 1 refund/return counter and total<br />
Charge total<br />
Check 1 counter and total<br />
Check total<br />
Cash + check in drawer<br />
Cash in drawer<br />
Deposit counter and total<br />
Deposit refund counter and total<br />
Tip-paid counter and total<br />
Cash tip counter and total<br />
Charge tip counter and total<br />
198
Cashier/Server report<br />
Using this function, you can take X and Z reports for individual cashiers/servers or all cashiers/servers.<br />
Individual cashier/server reading and resetting<br />
The OP X/Z-mode reading and resetting is allowed only when your machine has been programmed<br />
Note<br />
for "OP X/Z mode available" in the PGM2 mode.<br />
• Sample X report<br />
• Sample Z report<br />
Cashier<br />
no.<br />
Cashier/server code<br />
Cashier/server name<br />
Sales total<br />
Vender coupon UPC<br />
counter and total<br />
Gratuity total<br />
Cash tip total<br />
Charge tip total<br />
Tip-paid total<br />
Customer counter<br />
Cover counter<br />
The subsequent printout occurs in the<br />
same format as in the sample X report.<br />
* When you take these reports in the OP X/Z mode,<br />
the X report shows an “OP X” and the Z report<br />
shows an “OP Z”.<br />
Commission 1 sales total<br />
Commission 1 amount<br />
(commission 1 sales<br />
total x commission 1 rate)<br />
Commission amount total<br />
Non-commission sales<br />
total<br />
Full cashier/server reading and resetting<br />
The printout occurs in the same format as in the sample report of individual cashier/server, but all<br />
cashiers/servers' sales data are printed in the order of cashier/server code number (from #1 to #20), and then<br />
the total of all cashiers/servers is printed.<br />
199
Hourly report<br />
You can take X and Z reports for sales totals and transaction (customer) counters for 48 half hours, or 24 hours.<br />
If both quantity and amount are zero, their print is skipped.<br />
• Sample X report<br />
• Sample Z report<br />
The subsequent printout occurs in the<br />
same format as in the sample X report.<br />
Customer counter<br />
Sales total<br />
Cover counter<br />
Average sales amount per customer<br />
(sales total ÷ customer counter)<br />
200
Full department report<br />
Individual group total report on<br />
department<br />
Sales q’ty<br />
Amount<br />
Ratio of dept. 1 sales<br />
amount to + real<br />
dept. total<br />
Group 1 total<br />
Full group total report on<br />
department<br />
Group 1 total<br />
201
PLU/UPC report (by designated range or pick up list)<br />
This function provides you with X and Z reports for sales information of PLUs/UPCs.<br />
You can select either of the designated range operation or pick up list operation. The range may represent all or<br />
part of the PLUs/UPCs in your register.<br />
• Sample X report<br />
• Sample Z report<br />
Range* 1<br />
PLU code<br />
Item label for<br />
price level 1<br />
Item label for<br />
price level 2<br />
Sales q'ty and total<br />
(for price level 1)<br />
Waste mode q'ty and total* 2<br />
Net sales q'ty and total* 2<br />
Net sales %<br />
The subsequent printout occurs in the same<br />
format as in the sample X report.<br />
Note<br />
*1: The PLU/UPC range is not printed in pick<br />
up report (#109).<br />
*2: Not printed when waste mode is disabled<br />
PLU total for price level 1<br />
PLU total for price level 2<br />
202
UPC code<br />
UPC total for price level 1<br />
UPC total for price level 6<br />
203
PLU/UPC report by associated department<br />
• Sample X report<br />
• Sample Z report<br />
The subsequent printout occurs in the<br />
same format as th ePLU/UPC report by<br />
designated range.<br />
The subsequent printout occurs in the same<br />
format as in the sample X report.<br />
Individual group total report on<br />
PLU/UPC<br />
Full group total report on<br />
PLU/UPC<br />
PLU code<br />
Item label<br />
for price<br />
level 1<br />
Sales q'ty and<br />
amount for<br />
price level 1<br />
Group text<br />
Sales q’ty and<br />
amount for<br />
PLU group 11<br />
Group 1 sales q'ty<br />
and amount<br />
204
PLU/UPC zero sales report by<br />
department<br />
PLU/UPC stock report (by<br />
designated range or pick up list)<br />
PLU code<br />
Associated<br />
dept. code*<br />
Item label<br />
Range<br />
Current stock<br />
* When printing full zero sale report,<br />
no associated dept. code is printed.<br />
PLU/UPC price category report<br />
Note<br />
The PLU/UPC range is not printed in pick<br />
up report (#104).<br />
Price amount<br />
range<br />
Sales q’ty<br />
and total<br />
(for price<br />
level 1)<br />
Commission sales report<br />
Commission 1<br />
(sales total)<br />
Commission 1<br />
(amount)<br />
Commission amount<br />
total<br />
Non-commission sales<br />
Net sales total<br />
205
GLU/PBLU report<br />
• Sample X report<br />
• Sample Z report<br />
GLU/PBLU<br />
code<br />
Cover<br />
counter<br />
Range<br />
Cashier/server<br />
code<br />
The subsequent printout occurs in the same<br />
format as in the sample X report.<br />
GLU/PBLU report by cashier/server<br />
• Sample X report<br />
• Sample Z report<br />
The subsequent printout occurs in the same<br />
format as in the sample X report.<br />
206
Closed GLU/PBLU report<br />
• Sample X report<br />
• Sample Z report<br />
The subsequent printout occurs in the same<br />
format as in the sample X report.<br />
207
Closed GLU/PBLU report by cashier/server<br />
• Sample X report<br />
• Sample Z report<br />
The subsequent printout occurs in the same<br />
format as in the sample X report.<br />
208
Transaction report<br />
Cash in drawer report<br />
You can take full cashier X reports for cash in<br />
drawer.<br />
Cashier no.<br />
Cashier name<br />
Customer counter<br />
Sales total<br />
Cash in drawer<br />
In this report the same transaction data as those<br />
printed when general reading is taken are printed<br />
except department sales totals.<br />
Tax report<br />
*1<br />
*2<br />
*3<br />
*1 Not printed when food stamp function is allowed.<br />
*2 Printed only when Canadian tax is selected.<br />
*3 Not printed when Canadian tax is selected.<br />
209
Dynamic UPC report (by designated range or pick up list)<br />
The printout occurs in the same format as in the sample report of PLU/UPC report (by designated range or pick<br />
up list) .<br />
Dynamic UPC report by associated department<br />
The printout occurs in the same format as in the sample report of PLU/UPC report by associated department.<br />
Dynamic UPC clear (by designated range or pick up list)<br />
Please note that the UPCs specified for this report are deleted from the dynamic UPC file when Z report is<br />
issued.<br />
The printout occurs in the same format as in the sample report of PLU/UPC report (by designated range or pick<br />
up list) .<br />
Dynamic UPC clear by associated department<br />
Please note that the UPCs specified for this report are deleted from the dynamic UPC file when Z report is<br />
issued.<br />
The printout occurs in the same format as in the sample report of PLU/UPC report by associated department.<br />
X1/Z1 stacked report<br />
You can print multiple X1/Z1 reports in sequence at a single time. In this case, you need to program in advance<br />
what X1/Z1 reports should be printed in the stacked report sequence.<br />
Note<br />
The following job code numbers (only) can be used for stacked report printing.<br />
Job code number: 100, 110, 113, 120, 124, 127, 129, 130, 131, 132, 140, 160, 180<br />
Refer to “Selection of X1/Z1 and X2/Z2 reports to be printed in the stacked report sequence” for<br />
further details.<br />
210
Deleting of non-accessed UPCs<br />
• Sample X report (Reading)<br />
• Sample Z report (Deleting)<br />
UPC code<br />
Item label<br />
Periodic sales*<br />
The subsequent printout occurs in the same<br />
format as in the sample X report.<br />
*: When there is any sales data of the UPC for #209 report, the data in printed here.<br />
When you delete the UPC in Z1 mode under the this situation, the data for #209 is also deleted.<br />
211
3<br />
Periodic consolidation<br />
Your register allows you to take consolidation X and Z reports of a chosen period (normally one week or a<br />
month).<br />
General Overview<br />
The periodic reading or resetting reports are the same in format as those in the X1/Z1 report for daily total<br />
except job code no. (#2xx) and mode indication (“X2” or “Z2”.)<br />
• Sample X report<br />
• Sample Z report<br />
Read symbol<br />
Reset symbol<br />
Reset counter of daily total<br />
Reset counter of periodic<br />
consolidation<br />
Grand total<br />
The subsequent printouts are the same in format as<br />
those in the X/Z report for daily total.<br />
Daily net report<br />
• Sample X report<br />
• Sample Z report<br />
*<br />
The subsequent printout occurs in the<br />
same format as in the sample X report.<br />
*: Overflowed data will be printed with the<br />
indication of / at the date column.<br />
X2/Z2 stacked report<br />
You can print multiple X2/Z2 reports in sequence at a single time. In this case, you need to program in advance<br />
what X2/Z2 reports should be printed in the stacked report sequence.<br />
Note<br />
The following job code numbers (only) can be used for stacked report printing.<br />
Job code number: 200, 210, 213, 220, 227, 229, 230, 231, 232, 240, 270<br />
Refer to “Selection of X1/Z1 and X2/Z2 reports to be printed in the stacked report sequence” for<br />
further details.<br />
212
COMPULSORY CASH/CHECK<br />
DECLARATION<br />
If you want to make the declaration of the cash and check amount in the drawer mandatory before<br />
performing cashier Z reports, please consult your dealer and have your register programmed for<br />
compulsory cash/check declaration.<br />
If your register is programmed for compulsory cash/check declaration (CCD), a cashier must first count and<br />
declare the cash and check amounts (of domestic and foreign currency) in the drawer, before he or she can<br />
performing a cashier report. The procedure for outputting a CCD report is shown below.<br />
Types of compulsory cash/check declarations<br />
• Compulsory declaration prior to individual cashier resetting<br />
• Compulsory declaration prior to full cashier resetting<br />
Note<br />
• Compulsory cash/check declaration is available in the above two types. You can choose either of<br />
these. Please consult your dealer for further details.<br />
• When the cash/check declaration is compulsory, flash reports are not available.<br />
Key operation<br />
After the Ç key is pressed, the register prompts the cashier to input the cash and check accounts for both<br />
domestic and foreign currency. The cashier can simply input the total amounts of each currency unit, or the<br />
number of bills or coins of each denomination of each currency unit.<br />
• Individual cashier report<br />
OP X/Z mode<br />
41<br />
X1/Z1 mode<br />
. @<br />
141 Q’ty<br />
. @ Ç @<br />
• Full cashier report<br />
X1/Z1 mode<br />
140<br />
. @<br />
The drawer opens and the cashier is prompted to<br />
enter the cash and check amounts. (“CCD” is displayed.)<br />
Amount<br />
Input the total<br />
amount of cash<br />
or check<br />
Input the check or<br />
currency denomination<br />
X<br />
=<br />
ç #<br />
to<br />
To repeat<br />
t<br />
=<br />
ç<br />
to#<br />
v<br />
To cancel<br />
previous<br />
entry<br />
Ç<br />
To display cash/check subtotal<br />
= : When inputting the cash or check amount (domestic currency) in the drawer<br />
ç to # : When inputting the amount of a foreign currency in the drawer<br />
213
CCD entry amount<br />
Currency conversion 1 in drawer to be obtained<br />
Total of entered (declared) conversion 1 in drawer<br />
Difference<br />
Check 1 (in domestic currency) in drawer to be obtained<br />
Cash/check in drawer to be obtained<br />
Total of entered (declared) cash/check in drawer<br />
Difference<br />
Total of difference<br />
Cash in drawer to be obtained<br />
214
OP<strong>ER</strong>ATOR MAINTENANCE<br />
1<br />
In case of power failure<br />
When power is lost, the machine retains its memory contents and all information on sales entries.<br />
• When a power failure is encountered in register idle state or during an entry, the machine returns to the normal<br />
state of operation after power recovery.<br />
• When a power failure is encountered during a printing cycle, the register<br />
prints “========” and then carries out the correct printing procedure<br />
after power recovery. (See the sample print.)<br />
2<br />
In case of printer error<br />
If the printer runs out of paper, the printer will hault, “PAP<strong>ER</strong> EMPTY” error will appear on the display. Key<br />
entries will not be accepted. Referring to “4. Installing and removing the paper roll” in this chapter, install a new<br />
roll paper in the proper position, then press the c key. The printer will print the power failure symbol and<br />
resume printing.<br />
If the print head is up, the printer haults, “HEAD UP” error will appear on the display. Key entries will not be<br />
accepted. Bring the print head to the correct position, then press the c key. The printer will print the power<br />
failure symbol and resume printing.<br />
3<br />
Thermal printing<br />
Your register prints by means of thermal printing. The print head applies heat to thermal paper which is<br />
chemically treated to change color when heated to a certain level. This creates the printed text.<br />
Cautions in handling the printer<br />
Printing position<br />
• If you are not going to use the register for an extended<br />
period of time, pull the print head release lever toward you<br />
so that the print head is set apart from the plate.<br />
Head-up<br />
position<br />
215
• Avoid the following environments:<br />
Dusty and humid places<br />
Direct sunlight<br />
Iron powder (A permanent magnet and electromagnet are used in this machine.)<br />
• Use the print head release lever only when necessary.<br />
• Never pull the paper when it is in contact with the print head. First release the head with the print head release<br />
lever, and then remove the paper.<br />
• Never touch the surface of the print head.<br />
• Never touch around the print head and the motor during printing or before they have had sufficient time to cool.<br />
Cautions in handling the recording paper (thermal paper)<br />
• Use only the paper specified by SHARP.<br />
• Do not unpack the thermal paper until you are ready to use it.<br />
• Avoid heat. The paper will color at around 70°C.<br />
• Avoid dusty and humid places for storage. Avoid direct sunlight.<br />
• The printed text on the paper can discolor under the following conditions:<br />
Exposure to high humidity and temperature<br />
Exposure to the direct sunlight<br />
Contact with glue, thinner or a freshly copied blueprint<br />
Heat caused by friction from scratching or other such means<br />
Contact with a rubber eraser or adhesive tape<br />
• Be very careful when handling the thermal paper. If you want to keep a permanent record, copy the printed text<br />
with a photocopier.<br />
• For the storage of thermal paper, it is recommended to store the paper in a box with a dark and dry<br />
atmosphere of the room temperature 5 to 25°C having no rapid temperature change.<br />
216
4<br />
Installing and removing the paper roll<br />
Recording paper specifications<br />
Be sure to use paper rolls specified by SHARP.<br />
The use of any other paper rolls than specified could cause paper jamming, resulting in register malfunction.<br />
Paper specification<br />
Paper width:<br />
2.26 ± 0.02 in. (57.5 ± 0.5 mm)<br />
Max. outside diameter: 3.15 in. (80 mm)<br />
Quality:<br />
Thermal paper<br />
Paper tube:<br />
0.71 in. (18 mm)<br />
• Be sure to set paper roll(s) prior to using your machine, otherwise it may cause a malfunction.<br />
Install the paper roll in the printer. Be careful then to set the roll and cut the paper end correctly.<br />
Note<br />
If the top end of the paper roll is fixed with paste or tape, the paper may lose its color development<br />
ability in the pasted or taped area due to the deterioration of the heat-sensitive color development<br />
component of the paper surface. This may result in nothing appearing at this location when printing<br />
is performed. Therefore, when setting a new paper roll in the machine, be sure to cut off<br />
approximately one revolution (approx. 25 cm long).<br />
(How to set the paper roll)<br />
(How to cut the paper end)<br />
To the printer<br />
To the printer<br />
Incorrect<br />
Correct<br />
Correct<br />
Incorrect<br />
Installing the paper roll<br />
Installing the receipt paper roll<br />
Printing<br />
position<br />
1. Turn the mode switch to the “REG” position with the AC cord<br />
connected.<br />
2. Remove the printer cover.<br />
3. Check that the print head release lever is in its printing<br />
position.<br />
4. Set the paper correctly as illustrated above in the receipt<br />
side of the printer.<br />
5. Insert the end of the paper into the paper chute as shown on<br />
the left. It will automatically be fed through the printer.<br />
6. Cut off the excess paper that comes out of the printer with<br />
the manual cutter.<br />
7. Replace the printer cover.<br />
217
Installing the journal paper roll<br />
Printing<br />
position<br />
1. Turn the mode switch to the “REG” position with the AC<br />
cord connected.<br />
2. Remove the printer cover.<br />
3. Check that the print head release lever is in its printing<br />
position.<br />
4. Set the paper correctly as illustrated on the previous page in<br />
the journal side of the printer.<br />
5. Insert the end of the paper into the paper chute as shown<br />
on the left. It will automatically be fed through the printer.<br />
6. Insert the end of the paper into the slit in the paper take-up<br />
spool. (Press the Ô key to feed more paper through if<br />
required.)<br />
7. Wind the paper two or three turns around the spool shaft.<br />
8. Set the spool on the bearing.<br />
9. Replace the printer cover.<br />
• When you want to manually install a new roll of paper while your machine is turned off, follow the steps shown<br />
below:<br />
1. Pull the print head release lever toward you to lift up the print head.<br />
2. Correctly place the new paper roll into the receipt/journal paper roll location.<br />
3. Insert the paper end into the paper chute until it comes out of the printer.<br />
4. Cut or roll the paper onto the take-up spool as described for automatic installation.<br />
5. Return the print head release lever to its original position.<br />
Note<br />
If nothing is printed when printing is performed, check the printing face of the paper is at the outer<br />
side. Also in case nothing is printed on the receipt side, please check if the receipt on/off function is<br />
set to on.<br />
Removing the paper roll<br />
When a colored dye appears on the paper roll, it is time to replace the existing paper roll. Replace the paper roll<br />
with a new one. If you plan not to use your register for an extended period of time, remove the paper roll, and<br />
store it in the appropriate place.<br />
Removing the receipt paper roll<br />
1. Remove the printer cover.<br />
2. Cut the paper behind the printer and near the paper roll.<br />
3. Press the ‰ key until the paper remaining in the printer<br />
comes out completely.<br />
4. Remove the paper roll from the back of the printer.<br />
Note<br />
Do not pull the paper through the printer.<br />
218
Removing the journal paper roll<br />
Area to cut<br />
1. Remove the printer cover.<br />
2. Press the Ô key to advance the journal paper until its<br />
printed part is out of the way.<br />
3. Cut the paper and remove the take-up spool.<br />
4. Cut the paper behind the printer and near the paper roll.<br />
5. Press the Ô key until the paper remaining in the printer<br />
comes out completely.<br />
6. Remove the paper roll from the back of the printer.<br />
Note<br />
Do not pull the paper through the printer.<br />
7. Remove the outer side of the take-up spool as shown on the<br />
left.<br />
8. Remove the printed journal roll from the take-up spool.<br />
219
Removing a paper jam<br />
Precaution: Be very careful with the manual paper cutter, so as not to cut yourself. Never touch the<br />
print head immediately after printing, because the head may still be hot.<br />
Pull all the<br />
way forward<br />
1. Remove the printer cover.<br />
2. Pull the print head release lever all the way forward (after it<br />
stops at one position, continue pulling forward until it stops<br />
again and cannot be pulled forward any further).<br />
3. Remove the paper jam. Check for and remove any shreds<br />
of paper that may remain in the printer.<br />
4. Return the print head release lever to its original position.<br />
5. Reset the paper roll(s) correctly by following the steps in<br />
“Installing the paper roll”.<br />
6. Replace the printer cover.<br />
220
5<br />
Cleaning the print head<br />
When the printed text is getting dark or faint, paper dust may be stuck to the print head. Clean the print head as<br />
follows:<br />
Pull all the<br />
way forward<br />
1. Turn the mode switch to the “OFF” position.<br />
2. Remove the printer cover.<br />
3. Pull the print head release lever all the way forward (after it<br />
stops at one position, continue pulling forward until it stops<br />
again and cannot be pulled forward any further).<br />
Print head<br />
4. Clean the print head with a soft rag moist with ethyl alcohol<br />
or isopropyl alcohol.<br />
5. Return the print head release lever to its original position<br />
immediately after cleaning.<br />
6. Reset the paper roll correctly by following the steps in<br />
“Installing the paper roll”.<br />
7. Replace the printer cover.<br />
Caution:<br />
• Never touch the print head with a tool or anything hard as<br />
it may damage the head.<br />
• The paper cutter is mounted on the printer (receipt side).<br />
Be careful not to cut yourself.<br />
221
6<br />
Removing the till and the drawer<br />
The till in the register is detachable. After closing your business for the day, remove the till from the drawer and<br />
keep the drawer open. To detach the drawer, pull it forward fully with the till removed, and remove it by lifting it<br />
up. The 6-denomination coin case is detachable.<br />
Coin case<br />
Till<br />
Drawer<br />
7<br />
Opening the drawer by hand<br />
The drawer automatically opens normally. However, when power failure is encountered or the machine<br />
becomes out of order, slide the lever located on the machine bottom toward the rear. (See the figure below.)<br />
The drawer will not open if it is locked with a drawer lock key.<br />
Lever<br />
222
8<br />
Before calling for service<br />
The malfunctions shown in the left-hand column below, labelled “Fault,” do not necessarily indicate functional<br />
faults of the machine. It is therefore advisable to refer to the “Checking” shown in the right-hand column before<br />
calling for service.<br />
Fault<br />
(1) The display won’t be illuminated even when<br />
the mode switch is turned to any other<br />
position than “OFF”.<br />
(2) The display is illuminated, but the whole machine<br />
refuses registrations.<br />
(3) No receipt is issued.<br />
(4) No journal paper is taken up.<br />
(5) Printing is unusual.<br />
Checking<br />
• Is power supplied to the electrical outlet?<br />
• Is the power cord plug out or loosely connected to the<br />
electrical outlet?<br />
• Is a cashier code assigned to the register?<br />
• Is the mode switch set properly at the “REG” position?<br />
• Is the receipt paper roll properly installed?<br />
• Is there a paper jam?<br />
• Is the receipt function in the “OFF” status?<br />
• Is the print head release lever at the printing position?<br />
• Is the take-up spool installed on the bearing properly?<br />
• Is there a paper jam?<br />
• Is the print head release lever at the printing position?<br />
• Is the paper roll properly installed?<br />
Error message table<br />
Text<br />
no.<br />
Description<br />
In default of<br />
programming<br />
1 Registration error ENTRY <strong>ER</strong>ROR<br />
2 Misoperation error MISOP<strong>ER</strong>ATION<br />
3<br />
Desired code is not<br />
programmed yet.<br />
NO RECORD<br />
4 (Reserved)<br />
5 Secret code error SECRET CODE<br />
6 Code is not free NOT FREE<br />
7 Memory is full. MEMORY FULL<br />
8 Insert slip paper. INS<strong>ER</strong>T SLIP<br />
9<br />
The entered server/cashier’s code<br />
is not authorized.<br />
NO AUTHORITY<br />
10 Stock is empty. OUT OF STOCK<br />
11<br />
Compulsory pushing<br />
the subtotal key<br />
SBTL COMPUL.<br />
12 Compulsory tendering TEND COMPUL.<br />
13 Compulsory GLU/PBLU entry PB COMPUL.<br />
14 (Reserved)<br />
15 Compulsory cover count entry COV CNT COMP<br />
16 Check edit error<br />
(for manual PB entry)<br />
C/D <strong>ER</strong>ROR<br />
17-19 (Reserved)<br />
20 Remote printer off line OFF LINE<br />
21 (Reserved)<br />
22 Overlapped server/cashier error S<strong>ER</strong>V<strong>ER</strong> <strong>ER</strong>R.<br />
23-26 (Reserved)<br />
27 Power off POW<strong>ER</strong> OFF<br />
28-29 (Reserved)<br />
30 Compulsory tender entry for tip TIP <strong>ER</strong>ROR<br />
31 Compulsory non-add code # COMPULSORY<br />
32 The server/cashier is not assigned. NOT ASSIGNED<br />
33 (Reserved)<br />
34 Overflow limitation OV<strong>ER</strong> LIMIT.<br />
35<br />
The open price entry is<br />
inhibited.<br />
INH. OPEN PR<br />
36<br />
The unit price entry is<br />
inhibited.<br />
INH. UNIT PR<br />
The direct non-tendering<br />
37 finalization after previous NOT NON-TEND<br />
tender entry is inhibited.<br />
38 Read error of scale data SCALE <strong>ER</strong>ROR<br />
Text<br />
no.<br />
Description<br />
In default of<br />
programming<br />
39-47 (Reserved)<br />
48 Enter check number ENT<strong>ER</strong> CHECK#<br />
49 Enter cover count COV<strong>ER</strong> COUNT<br />
50 (Reserved)<br />
51 Weight on scale WEIGHT<br />
52 Closed check file is full. C.FILE FULL<br />
53 (Reserved)<br />
54 Entry of tare weight ENTR TARE WT<br />
55-60 (Reserved)<br />
61<br />
Desired code is not programmed<br />
yet. (learning function)<br />
NO RECORD<br />
62 Enter price and dept. no. PRICE → DEPT<br />
63 Enter price and dept. no. PRICE & DEPT<br />
64 Enter dept. no. ENT<strong>ER</strong> DEPT#<br />
65-66 (Reserved)<br />
67 REG buffer is full. BUFF<strong>ER</strong> FULL<br />
68-69 (Reserved)<br />
70 Price entry at UPC refund ENT<strong>ER</strong> PRICE<br />
71 PLU/UPC file is full. UPC FULL<br />
72-73 (Reserved)<br />
74 Non-accessed UPC delete job D E L E T E<br />
75 (Reserved)<br />
76<br />
Closing the drawer is<br />
compulsory.<br />
CLOSE DRAW<strong>ER</strong><br />
77 Price level shift error ENT<strong>ER</strong> P.SFT<br />
78 (Reserved)<br />
79<br />
Reading of undefined vender<br />
coupon UPC<br />
OP ENT<strong>ER</strong><br />
80 (Reserved)<br />
81<br />
Message for prompting entry<br />
of secret code<br />
ENTR SECRET#<br />
82-83 (Reserved)<br />
84 Data backup send success SEND OK<br />
85 Data backup receive success RECEIVE OK<br />
86<br />
Data backup communication<br />
error<br />
COM. <strong>ER</strong>ROR<br />
87 Backup data format error DATA <strong>ER</strong>ROR<br />
88 Data backup time out error TIME OUT<br />
89-93 (Reserved)<br />
94 Age limitation error AGE <strong>ER</strong>ROR<br />
223
LIST OF OPTIONS<br />
For your register, the following Sharp options are available.<br />
For further details on additional options that may be considered, please contact your dealer.<br />
•Remote drawer models <strong>ER</strong>-03DW and <strong>ER</strong>-04DW<br />
•Key kit models<br />
By using the following key kits, the keyboard layout can be changed on your register including the<br />
expansion of the number of departments.<br />
<strong>ER</strong>-11KT7: 30 regular size key kits<br />
<strong>ER</strong>-12KT7: 30 1 x 2 size key kits<br />
<strong>ER</strong>-22KT7: 10 2 x 2 size key kits<br />
for <strong>ER</strong>-<strong>A520</strong>A only<br />
<strong>ER</strong>-11DK7G: 30 regular size dummy key kits<br />
<strong>ER</strong>-51DK7G: 10 5 x 1 size dummy key kits<br />
•Display model UP-P16DP<br />
•RAM board model UP-S02MB<br />
•Barcode roader model <strong>ER</strong>-A6HS1 (only for the standard channel 1)<br />
224
SPECIFICATIONS<br />
Model:<br />
<strong>ER</strong>-<strong>A520</strong>A/<strong>A530</strong>A<br />
Dimensions:<br />
16.6 (W) x 16.8 (D) x 11.7 (H) in. (421 (W) x 427 (D) x 297 (H) mm)<br />
Weight:<br />
31.7 lbs (14.4 kg)<br />
Power source:<br />
120V ± 10% AC, 60Hz<br />
Power consumption:<br />
Stand-by 11 W<br />
Operating 47 W (max.)<br />
Working temperature: 32 to 104°F (0 to 40°C)<br />
Electronics:<br />
LSI (CPU) etc.<br />
Built-in battery:<br />
Rechargeable battery, memory holding time about 1 month<br />
(with fully charged built-in battery, at room temperature)<br />
Display:<br />
Operator display:<br />
LCD dot-matrix display (16 positions x 2 lines)<br />
Customer display: 7-segment display (7 positions)<br />
Printer:<br />
Type:<br />
2-station thermal printer<br />
Printing speed:<br />
Approx. 17 lines/second<br />
Printing capacity:<br />
30 digits each for receipt and journal paper<br />
Other functions:<br />
• Graphic logo printing function<br />
• Logo text printing function<br />
• Receipt (ON-OFF) function, journal selective function<br />
• Receipt and journal independent paper feed function<br />
Paper roll:<br />
Width: 2.26 ± 0.02 in. (57.5 ± 0.5 mm)<br />
Max. diam.: 3.15 in. (80 mm)<br />
Quality: High quality (0.06 to 0.08 mm thickness)<br />
Cash drawer:<br />
5 slots for bill and 6 for coin denominations<br />
Accessories: Manager key 2<br />
Submanager key 2<br />
Operator key 2<br />
Drawer lock key 2<br />
Printer cover lock key 2<br />
Paper roll 2<br />
Take-up spool 1<br />
Standard key sheet<br />
1 (provided with the keyboard)<br />
Programming key sheet 1 (provided with the keyboard)<br />
for <strong>ER</strong>-<strong>A530</strong>A only<br />
Ferrite cores<br />
2 (used for connection cabling installation)<br />
Leaflet<br />
1 copy<br />
* Specifications and appearance subject to change without notice for improvement.<br />
225
SHARP CORPORATION<br />
Printed in Japan<br />
<strong>ER</strong><strong>A520</strong>A/<strong>A530</strong>A_MIE10