
You also want an ePaper? Increase the reach of your titles
YUMPU automatically turns print PDFs into web optimized ePapers that Google loves.
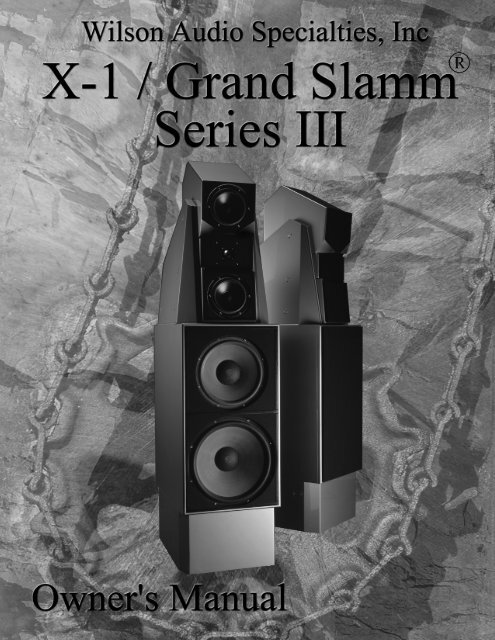
W I L S O N A U D I O S P E C I A L T I E S , I N C .
WILSON AUDIO SPECIALTIES<br />
X-1/GRAND<strong>SLAMM</strong><br />
OWNER’S MANUAL<br />
W I L S O N A U D I O S P E C I A L T I E S , I N C .
<strong>Wilson</strong> <strong>Audio</strong> is a registered trademark of <strong>Wilson</strong> <strong>Audio</strong> Specialties Inc.<br />
X-1/<strong>Grand</strong> Slamm is a registered trademark of <strong>Wilson</strong> <strong>Audio</strong> Specialties Inc.<br />
This manual was produced by the <strong>Wilson</strong> <strong>Audio</strong> Engineering Department in cooperation with Sales and Marketing. The information<br />
contained here in is subject to change without notice. Current Revision 2.0, Feb. 2000 if you are in need of a more recent<br />
manual please contact your dealer.<br />
W I L S O N A U D I O S P E C I A L T I E S , I N C .
T A B L E O F C O N T E N T S<br />
TABLE OF GRAPHICS ............................................................................................................................................III<br />
COMPONENTS AND DIMENSIONS ............................................................................................................................................. IV<br />
SECTION 1.0- ROOM ACOUSTICS ........................................................................................................................... 1-1<br />
FINAL LISTENING ROOM SETUP (VOICING) ............................................................................................................................. 1-1<br />
SECTION 1.1-ROOM REFLECTIONS ....................................................................................................................... 1-2<br />
SLAP-ECHO .......................................................................................................................................................................... 1-2<br />
STANDING WAVES ................................................................................................................................................................. 1-3<br />
COMB FILTER EFFECT ............................................................................................................................................................ 1-4<br />
SECTION 1.2-RESONANCE’S .................................................................................................................................... 1-5<br />
STRUCTURAL RESONANCE ..................................................................................................................................................... 1-5<br />
AIR VOLUME RESONANCE .................................................................................................................................................... 1-5<br />
SECTION 1.3-IN YOUR ROOM .................................................................................................................................. 1-6<br />
ROOM SHAPES ..................................................................................................................................................................... 1-6<br />
SPEAKER PLACEMENT VS. LISTENING POSITION ....................................................................................................................... 1-7<br />
CHOOSING A LISTENING POSITION ......................................................................................................................................... 1-7<br />
SPEAKER ORIENTATION ......................................................................................................................................................... 1-8<br />
SUMMARY ............................................................................................................................................................................ 1-9<br />
SECTION 2.0-CARE OF THE X-1/GRAND <strong>SLAMM</strong> ............................................................................................... 2-1<br />
PAINTED OR WOOD FINISH .................................................................................................................................................... 2-1<br />
BREAK IN PERIOD ................................................................................................................................................................ 2-2<br />
SECTION 2.1 ENCLOSURE CONSTRUCTION ....................................................................................................... 2-2<br />
MATERIAL ........................................................................................................................................................................... 2-2<br />
ADHESIVE ............................................................................................................................................................................ 2-3<br />
DEPTH OF DESIGN ................................................................................................................................................................ 2-3<br />
CONLCUSION ........................................................................................................................................................................ 2-3<br />
SECTION 3.0-UNCRATING THE X-1/GRAND <strong>SLAMM</strong> ........................................................................................ 3-1<br />
INITIAL CHECK ..................................................................................................................................................................... 3-1<br />
UNCRATING THE WOOFER CABINETS ...................................................................................................................................... 3-1<br />
MATERIALS REQUIRED .......................................................................................................................................................... 3-1<br />
UNPACKING THE WOOFER ..................................................................................................................................................... 3-1<br />
UNCRATING THE FASCIA ASSEMBLY ....................................................................................................................................... 3-2<br />
UNCRATING THE UPPER ARRAY MODULES .............................................................................................................................. 3-2<br />
CRATE CONTENTS: CHECKLIST .............................................................................................................................................. 3-4<br />
ASSEMBLE YOUR SPIKES FOLLOWING THESE STEPS: .................................................................................................................. 3-5<br />
SECTION 4.0- X-1/GRAND<strong>SLAMM</strong> INITIAL ASSEMBLY .................................................................................... 4-1<br />
TIMING BLADES ................................................................................................................................................................... 4-1<br />
CONNECT THE TIMING BLADES TO THE WOOFER CABINET AS FOLLOWS: ..................................................................................... 4-2<br />
W I L S O N A U D I O S P E C I A L T I E S , I N C .<br />
i
M A X X O W N E R ’ S M A N U A L<br />
TABLE OF CONTENTS CONT.<br />
SECTION 4.1-MOUNTING THE UPPER ARRAY MODULES ......................................................................... 4-3<br />
MATERIALS REQUIRED .................................................................................................................................................... 4-3<br />
MOUNTING PROCEDURE .................................................................................................................................................. 4-3<br />
MOUNTING THE UPPER CROSSOVER ................................................................................................................................. 4-5<br />
CONNECTING THE UPPER RANGE SIGNAL CABLE .............................................................................................................. 4-7<br />
CONNECTOR PLATE JUMPER ............................................................................................................................................ 4-8<br />
SECTION 4.2- GEOMETRIC TIME DOMAIN ALIGNMENT ......................................................................... 4-9<br />
MATERIALS REQUIRED .................................................................................................................................................... 4-9<br />
PULSE ALIGNMENT ......................................................................................................................................................... 4-9<br />
ROOM SETUP ................................................................................................................................................................. 4-9<br />
ALIGNMENT PROCEDURE ............................................................................................................................................... 4-10<br />
SECTION 4.3- TIME ALIGNMENT EXAMPLE ............................................................................................... 4-12<br />
GIVEN: ........................................................................................................................................................................ 4-12<br />
SECTION 4.4- LOCKING DOWN UPPER ARRAY .......................................................................................... 4-14<br />
MATERIALS REQUIRED .................................................................................................................................................. 4-14<br />
LOCKING DOWN THE UPPER ARRAY ............................................................................................................................... 4-14<br />
SECTION 4.5- SPIKE INSTALLATION ............................................................................................................. 4-15<br />
MATERIALS REQUIRED .................................................................................................................................................. 4-15<br />
INSTALLATION PROCEDURE ............................................................................................................................................ 4-15<br />
LEVELING THE X-1 GRAND <strong>SLAMM</strong> ............................................................................................................................... 4-18<br />
SECTION 4.6-CHECKING THE IMAGE HEIGHT ......................................................................................... 4-19<br />
SECTION 4.7-ATTACHING THE FASCIA’S ..................................................................................................... 4-20<br />
REQUIRED MATERIALS: ................................................................................................................................................. 4-20<br />
ATTACHMENT PROCEDURE: ........................................................................................................................................... 4-20<br />
SECTION-5.0 WARRANTY INFORMATION ..................................................................................................... 5-1<br />
SECTION 6.0 SETTING UP DIFFICULTIES AND TROUBLESHOOTING ................................................... 6-1<br />
SECTION 7.0- SPECIFICATIONS ........................................................................................................................ 7-1<br />
APPENDIX A- TIMING CHARTS ........................................................................................................................ A-1<br />
ii<br />
W I L S O N A U D I O S P E C I A L T I E S , I N C .
T A B L E O F G R A P H I C S<br />
TABLE OF GRAPHICS<br />
FIGURE 1- WOOFER, STAND, AND MAIN CROSSOVER ........................................................................................... 3-1<br />
FIGURE 2- TIMING BLADE AND FASCIA ............................................................................................................... 3-2<br />
FIGURE 3- UPPER ARRAY MODULES ................................................................................................................... 3-3<br />
FIGURE 4- UPPER ARRAY MODULES ................................................................................................................... 3-3<br />
FIGURE 5- UPPER ARRAY MODULES ................................................................................................................... 3-3<br />
FIGURE 6- UPPER CROSSOVER ............................................................................................................................ 3-3<br />
FIGURE 7- TILTING POLES .................................................................................................................................. 3-3<br />
FIGURE 8- X-1 SPIKES ...................................................................................................................................... 3-5<br />
FIGURE 9- NUMBER LOCATIONS ON FASCIA ......................................................................................................... 4-1<br />
FIGURE 10- EXPLODED VIEW OF FASCIA ............................................................................................................. 4-1<br />
FIGURE 11- ATTACHING THE TIMING BLADE TO WOOFER ..................................................................................... 4-2<br />
FIGURE 12- UPPER BOLT ASSEMBLY ................................................................................................................... 4-3<br />
FIGURE 13- INSTALLING THE UPPER ARRAY ........................................................................................................ 4-3<br />
FIGURE 14- INSTALLED UPPER ARRAY MODULES. ............................................................................................... 4-4<br />
FIGURE 15- TIGHTENING THE UPPER ARRAY BOLT ............................................................................................... 4-4<br />
FIGURE 16- INSTALLING THE UPPER CROSSOVER.. ............................................................................................... 4-5<br />
FIGURE 17- POSITIONING THE UPPER CROSSOVER ................................................................................................ 4-5<br />
FIGURE 18- WIRING THE UPPER ARRAY .............................................................................................................. 4-6<br />
FIGURE 19- MAIN CONNECTOR PLATE ................................................................................................................ 4-7<br />
FIGURE 20- LISTENING DISTANCE AND EAR HEIGHT ............................................................................................ 4-9<br />
FIGURE 21- READING THE MARKINGS ON THE TIMING BLADE ............................................................................ 4-11<br />
FIGURE 22- LMRM ALIGNMENT CHART .......................................................................................................... 4-13<br />
FIGURE 23- TIGHTENING THE UPPER ARRAY BOLTS ........................................................................................... 4-14<br />
FIGURE 24- HOLE COVER LOCATIONS ON BASE/STAND ...................................................................................... 4-15<br />
FIGURE 25- TILTING THE X-1 FOR SPIKE INSTALLATION ..................................................................................... 4-15<br />
FIGURE 26- INSTALLING THE SPIKES. ................................................................................................................ 4-16<br />
FIGURE 27- SPIKES INSTALLED FIRST SIDE ........................................................................................................ 4-16<br />
FIGURE 28- INSTALLING SPIKES SECOND SIDE ................................................................................................... 4-17<br />
FIGURE 29- FASCIA BOLT LOCATIONS ............................................................................................................... 4-20<br />
FIGURE 30- FINISHED UPPER ARRAY ................................................................................................................ 4-20<br />
W I L S O N A U D I O S P E C I A L T I E S , I N C .<br />
iii
X-1/ GRAND <strong>SLAMM</strong> - COMPONENTS AND DIMENSIONS<br />
UPPER ARRAY<br />
CROSSOVER<br />
9 IN.<br />
23 CM<br />
15.25 IN.<br />
39 CM<br />
UPPER MID-FRE-<br />
QUENCY<br />
MODULE<br />
HIGH FREQUENCY<br />
MODULE<br />
LOWER MID- FRE-<br />
QUENCY MODULE<br />
UPPER ARRAY<br />
CROSSOVER<br />
72 IN.<br />
183 CM<br />
FASCIA ASSEMBLY<br />
WOOFER ENCLO-<br />
SURE<br />
16.5 IN.<br />
42 CM<br />
STAND/BASE<br />
ENCLOSURE<br />
25.25 IN.<br />
64 CM<br />
iv<br />
W I L S O N A U D I O S P E C I A L T I E S , I N C .
W I L S O N A U D I O S P E C I A L T I E S , I N C .
R O O M A C O U S T I C S<br />
1
W I L S O N A U D I O S P E C I A L T I E S , I N C .
S e c t i o n 1 - R o o m A c o u s t i c s<br />
SECTION 1.0 ROOM ACOUSTICS<br />
You are surely excited about setting up your X-1/<strong>Grand</strong><strong>SLAMM</strong> loudspeakers and doing some listening,<br />
but before you begin we would like to discuss some of the important room acoustical information<br />
that will help you set up your loudspeakers properly.<br />
FINAL LISTENING ROOM SETUP (VOICING)<br />
Your X-1/<strong>Grand</strong><strong>SLAMM</strong> loudspeakers will give you years of music satisfaction. However, their<br />
high performance characteristics and abilities can only be fully appreciated with the proper acoustical setup.<br />
The following section will present some guidelines on room acoustics and their interactions with<br />
loudspeakers. We will also offer some detailed suggestions on the setup of the X-1/<strong>Grand</strong><strong>SLAMM</strong>s, but<br />
we strongly suggest that you have your local <strong>Wilson</strong> <strong>Audio</strong> dealer perform the final speaker “voicing” for<br />
you. They are specially trained in setting up <strong>Wilson</strong> loudspeakers and will ensure that you realize the full<br />
value of your purchase.<br />
W I L S O N A U D I O S P E C I A L T I E S , I N C .<br />
1-1
X-1/ GRAND <strong>SLAMM</strong> OWNER’S MANUAL<br />
SECTION 1.1 ROOM REFLECTIONS<br />
There are 3 commonly encountered room reflection problems: slap echoʼs, standingwaves,<br />
and comb filter effect.<br />
SLAP ECHO<br />
Probably the most obnoxious form of reflection is called “slap echo.” With slap echo, primarily midrange<br />
and high frequency sounds reflect off of two parallel hard surfaces. The sound literally reverberates<br />
back and forth until it is finally dissipated over time. You can test for slap echo in any room by clapping<br />
your hands sharply in the middle of the room and listening for the characteristic sound of the echo in the<br />
mid-range. Slap echo destroys the sound quality of a stereo system in two ways:<br />
§ It adds harshness to the upper mid-range and treble through energy time storage.<br />
§ It destroys the delicate phase relationships, which help to establish an accurate sound stage.<br />
Slap echo is a common acoustical problem in the typical domestic listening room because most of<br />
these rooms have walls with a hard, reflective nature, usually being only occasionally interrupted by curtains<br />
or drapes. The best solution to eliminate slap echo is non-parallel walls, this is because non-parallel walls do<br />
not support slap echo, but rather allow the sound to diffuse. Otherwise, slap echo can be controlled entirely<br />
by the application of absorptive materials to the hard surfaces, such as:<br />
§ Sonex<br />
§ Airduct board<br />
§ Cork panels to the hard surfaces.<br />
§ Large ceiling to floor drapes<br />
§ Carpeting to wall surfaces.<br />
In many domestic listening environments, heavy stuffed furnishings are the primary structural control<br />
to slap echo. Unfortunately, their effectiveness is not predictable. Diffusers are<br />
1-2<br />
W I L S O N A U D I O S P E C I A L T I E S , I N C .
S E C T I O N 1 . 1 - R O O M R E F L E C T I O N S<br />
sometimes also used to very good subjective effect, particularly in quite large rooms. Sound absorbent materials<br />
such as described above will alter the tonal characteristic of the room by making it sound “deader,”<br />
less “bright and alive” and “quieter.” These changes also make the room more pleasant for conversation.<br />
Diffusers, on the other hand, tend to not change the tonal balance characteristic of the room, but make the<br />
sound smoother and more open.<br />
STANDING WAVES<br />
Another type of reflection phenomenon is “standing waves.” Standing waves cause the unnatural<br />
boosting or accentuation of certain frequencies, typically in the bass, to be found at certain discreet locations<br />
on the room. A room generating severe standing waves will tend to make a loudspeaker sound one way<br />
when placed in one location and entirely different when placed in another. The effects of standing waves on<br />
a loudspeaker’s performance primarily as follows:<br />
§ Tonal balance<br />
§ Resolution of low-level detail<br />
§ Sound-staging<br />
Standing waves are more difficult to correct than slap echo because they tend to occur at a lower<br />
frequency, whose wavelength is long enough to be ineffectively controlled by absorbent materials such as<br />
Sonex. Moving speakers about slightly in the room is, for most people, their only control over standing<br />
waves. Sometimes a change of placement of as little as two or three inches can dramatically alter the tonal<br />
balance of a small system. Fortunately, minor low frequency standing waves are well controlled by positioning<br />
ASC tube traps in the corners of the room. Very serious low frequency accentuation usually requires<br />
a custom-designed bass trap system.<br />
Low frequency standing waves can be particularly troublesome in rooms constructed of concrete or<br />
brick. These materials trap the bass in the room, unless it is allowed to leak out of the room, through windows<br />
and doors.<br />
W I L S O N A U D I O S P E C I A L T I E S , I N C .<br />
1-3
X-1/ GRAND <strong>SLAMM</strong> OWNER’S MANUAL<br />
In general, placement of the speaker in a corner will excite the maximal number of standing waves<br />
in a room, and is to be avoided for most direct radiator, full range loudspeaker systems. Some benefit is<br />
achieved by placing the stereo pair of loudspeakers slightly asymmetrically in the listening room. This is so<br />
that the standing waves caused by the distance between one speaker, its adjacent walls and floors are not the<br />
same as the standing wave frequencies excited by the dimensions in the other channel.<br />
COMB FILTER EFFECT<br />
The comb filter effect is a special type of standing wave noticeable primarily at higher frequencies<br />
and shorter wavelengths.<br />
Acoustical comb filtering occurs when sound from a single source, such as a loudspeaker, is directed<br />
toward a microphone or listener from a distance. The first sound to reach the microphone is the<br />
direct sound, followed by a delayed, reflected sound. At certain frequencies cancellation occurs, because<br />
the reflected sound lags in phase relative to the direct sound. This cancellation is most apparent where the<br />
two are 180 degrees out of phase. Further, there is augmentation at other frequencies where the direct and<br />
the reflected sounds arrive in phase. Because it is a function of wavelength, the comb filter effect will notch<br />
out portions of the audio spectrum at regular octave-spaced intervals. The subjective effect of comb filter<br />
effects is as follows:<br />
§ Added roughness to the sound<br />
§ Reduction of harmonic richness<br />
§ Smearing of lateral sound stage image focus and placement<br />
Comb filter effects are caused by side wall reflections. These are best controlled by careful speaker<br />
placement and by the placement of Sonex or air duct panels to the part of the wall where the reflection occurs.<br />
1-4<br />
W I L S O N A U D I O S P E C I A L T I E S , I N C .
S E C T I O N 1 . 2 - RESONANCE’S<br />
SECTION 1.2 RESONANCE’S<br />
Resonance in listening rooms is generally caused by two sources:<br />
§ Structures within the listening room<br />
§ The volume of the air itself in the listening room<br />
STRUCTURAL RESONANCE<br />
Structural resonance’s are familiar to most people as buzzes and rattles, but this type of resonance<br />
usually only occurs at extremely high volume levels, and is usually masked by the music. In many wood<br />
frame rooms the most common type of structural resonance problem is “booming” of walls and floors. You<br />
can test for these very easily by tapping the wall with the palm of your hand or stomping on the floor. To<br />
give you an idea of what the perfect wall would sound like, imagine rapping your hand against the side of<br />
a mountain. Structural wall resonance’s generally occur in the low to mid-bass frequencies and add tonal<br />
balance fullness to any system played in that room. They too are more prominent at louder levels, but<br />
their contribution to the sound of the speaker is more progressive. Rattling windows, picture frames, lamp<br />
shades, etc. can generally be silenced with small pieces of caulk or with blocks of felt. However, short of<br />
actually adding additional layers of sheet rock to flimsy walls, there is little that can be done to eliminate<br />
wall resonance’s.<br />
AIR VOLUME RESONANCE<br />
The volume of air in a room will also resonate at a frequency determined by the size of the<br />
room. Larger rooms will resonate at a lower frequency than will smaller rooms. Air volume resonanceʼs,<br />
wall panel resonanceʼs, and low frequency standing waves, together, combine to form<br />
a low frequency coloration in the sound. At its worst, it is a grossly exaggerated fullness, which<br />
tends to obscure detail and distort the natural tonal balance of the speaker system.<br />
W I L S O N A U D I O S P E C I A L T I E S , I N C .<br />
1-5
X-1/ GRAND <strong>SLAMM</strong> OWNER’S MANUAL<br />
Occasionally, however, there is just enough resonance to give a little added warmth to the sound… an addition<br />
some listeners prefer. Tube traps manufactured by the ASC Corporation are effective in reducing some<br />
of this low frequency room coloration. While, custom designed bass traps, such as perforated Helmholtz<br />
resonators, provide the greatest degree of low frequency control.<br />
SECTION 1.3- IN YOUR ROOM<br />
ROOM SHAPES<br />
There are three basic shapes for most rooms: square, rectangular, and L-shaped. A perfectly square<br />
room is the most difficult room to set up speakers in because, by virtue of its shape, square rooms are the<br />
perfect medium for building and sustaining standing waves. Standing waves are pressure waves created by<br />
the integration of sound and opposing, parallel walls which accentuate particular frequencies. They heavily<br />
influence the music played by loudspeakers, greatly diminishing the listening experience.<br />
Long, narrow rectangular rooms also pose their own special acoustical problems for speaker setup.<br />
They have the ability to set up several standing wave nodes, which will have different standing wave frequency<br />
exaggerations depending on where you are sitting. Additionally, these long rooms are often quite<br />
lean in the bass near the center of the room. Rectangular rooms are still preferred to square rooms because<br />
by having two sets of dissimilar length walls, standing waves are not as strongly reinforced and will dissipate<br />
more quickly than in a square room. In these rooms the preferred speaker position for spatial placement<br />
and midrange resolution would be on the longer walls. Bass response would be reinforced by speaker<br />
placement on the short walls.<br />
In many cases L-shaped rooms offer the best environment for speaker setup. Ideally, speakers<br />
should be set up along the primary (longest) leg of the room. They should fire from the end of the leg (short<br />
wall) toward the bend, or they should be along the longest wall, with the speaker furthest to the bend being<br />
inside of the bend. In this way both speakers are firing the same distance to the back wall. The asymmetry<br />
of the walls in L-shaped rooms resists the buildup of standing waves.<br />
1-6<br />
W I L S O N A U D I O S P E C I A L T I E S , I N C .
S E C T I O N 1 . 3 - I N Y O U R ROOM<br />
SPEAKER PLACEMENT VS. LISTENING POSITION<br />
The location of your listening position is as important as the careful setup of your X-1/<br />
<strong>Grand</strong><strong>SLAMM</strong> speakers in your room. The listening position should ideally be no more than 1.1<br />
to 1.25 times the distance between the tweeters on each speaker. Therefore, in a long rectangular<br />
room of 12ʼ x 18ʼ, if the speaker tweeters are going to be 9ʼ apart, you should be sitting 9ʼ11ʼʼ<br />
to 11ʼ3ʼʼ from the speaker. This would be about halfway down the long axis of the room.<br />
Many people place the speakers on one end and sit at the other end of the room, this will not yield<br />
the finest sound. Carefully consider your listening position. Our experience has shown that any listening<br />
position which places your head closer than 14” to a room boundary will diminish the sonic results of your<br />
listening.<br />
CHOOSING A LISTENING POSITION<br />
Decide where you want your favorite listening position to be. Please remember that your X-1/<br />
<strong>Grand</strong><strong>SLAMM</strong> will fill almost any room with the most beautiful sound available. However, for the phase<br />
delay correction advantage, we want to ensure that you get all the benefits that are built into this design. For<br />
this purpose we have designed the following questions:<br />
What is the main purpose of your X-1/<strong>Grand</strong><strong>SLAMM</strong>? Is it for a listening room dedicated to<br />
2-channel audio? If yes, you should choose your position carefully to yield the finest sound. <strong>Wilson</strong> <strong>Audio</strong><br />
uses a formula: The distance between the 2 woofers of each channel times 1.2 equals the distance you<br />
should sit from each loudspeaker.<br />
For instance, if you measure the distance between the center of the left channel woofer to the corresponding<br />
right channel woofer and it is equal to 10 feet, multiply it by 1.2. This means that you should sit<br />
12 feet from each X-1/<strong>Grand</strong><strong>SLAMM</strong>.<br />
W I L S O N A U D I O S P E C I A L T I E S , I N C .<br />
1-7
X-1/ GRAND <strong>SLAMM</strong> OWNER’S MANUAL<br />
Are your X-1/<strong>Grand</strong><strong>SLAMM</strong>’s dedicated for a home theater?<br />
Are you going to sit on a couch, or will there be multiple rows of chairs?<br />
If it is a couch, you should center the loudspeakers on the center position of the couch.<br />
Multiple rows of chairs - In this case you should dedicate the 1.2 times equation on your second row<br />
of seating. Now more people will enjoy the power of your X-1/<strong>Grand</strong><strong>SLAMM</strong>s .<br />
Do you still want to listen to 2 channel music at its highest quality? In this way you can enjoy a<br />
great time aligned sound from that second seat.<br />
SPEAKER ORIENTATION<br />
Speaker placement and orientation are two of the most important considerations in obtaining superior<br />
sound. The first thing you need to do is eliminate the side walls as a sonic influence in your system.<br />
Speakers placed too close to the side walls will suffer from a strong primary reflection. This can cause outof-phase<br />
cancellations, or comb filtering, which will cancel some frequencies and change the tonal balance<br />
of the music. A good place to start is with the speakers about 18” from each wall and, if you need to move<br />
them relative to the side wall, move them away from the wall, not closer.<br />
A very important aspect of speaker placement is how far from the back wall to place the speakers.<br />
The closer to the back wall the more pronounced the low bass energy and centering of the image will be.<br />
However, this comes at a definite reduction in stage size and bloom, as well as a deterioration of upper bass<br />
quality. You must find the proper balance of these two factors, but remember, if you are partial to bass response<br />
or air and bloom, do not overcompensate your adjustments to maximize their effects. Overbalanced<br />
systems are sometime pleasing in the short term, but long term satisfaction is always achieved through<br />
proper balance.<br />
The X-1/<strong>Grand</strong><strong>SLAMM</strong> is designed for maximum phase coherence and pulse replication<br />
accuracy when they are aimed directly at the listener or microphone. Thus, your X-1/<strong>Grand</strong>-<br />
<strong>SLAMM</strong> should be “toed in.” In other words, the listener, when seated in the listening position,<br />
should just barely see the surface of the inner side of X-1/<strong>Grand</strong><strong>SLAMM</strong>. Toeing in the speakers<br />
provides dramatic improvements in resolution of low level detail in the midrange, as well as dramatic<br />
improvements in sound staging performance.<br />
1-8<br />
W I L S O N A U D I O S P E C I A L T I E S , I N C .
S E C T I O N 1 . 4 - S U M M A R Y<br />
SUMMARY<br />
In summary, for optimal tonal balance accuracy, resolution of low level detail, and sound staging<br />
performance, the X-1/<strong>Grand</strong><strong>SLAMM</strong> should be positioned as outlined in this section. Ideally, the speakers<br />
should not be positioned too far from the listener, if maximum resolution of low level detail is required. If<br />
possible the speakers should be positioned out into the room, slightly asymmetrically away from side and<br />
rear walls. The speakers should be “toed in” toward the listener, preferably so that the listener at his seated<br />
position can barely see the surface of the inner side of the X-1/<strong>Grand</strong><strong>SLAMM</strong> as he/she faces the speaker.<br />
It is recommended that a distance of 2-3 feet, and possibly more, be maintained between the X-1/<strong>Grand</strong>-<br />
<strong>SLAMM</strong> and the rear walls and a distance of at least 2 feet be maintained between the front panel of the X-<br />
1/<strong>Grand</strong><strong>SLAMM</strong> and reflective side walls. However, use of sound absorbent materials will reduce the space<br />
requirement depending on the room.<br />
By following the guidelines in this manual and your own common judgment, your new X-1/<strong>Grand</strong>-<br />
<strong>SLAMM</strong> loudspeakers can provide you with a lifetime of pure music reproduction.<br />
W I L S O N A U D I O S P E C I A L T I E S , I N C .<br />
1-9
C A R E F O R T H E X-1/<strong>Grand</strong><strong>SLAMM</strong><br />
2
W I L S O N A U D I O S P E C I A L T I E S , I N C .
C A R E F O R T H E X-1/<strong>Grand</strong>-<br />
SECTION 2.0 - PAINTED FIN-<br />
Your X-1/<strong>Grand</strong><strong>SLAMM</strong> loudspeakers are hand painted with <strong>Wilson</strong>gloss paint and hand polished to<br />
a high luster. While the finish seems quite dry to the touch, final curing and complete hardening takes place<br />
over a period of several weeks. To protect the finish of the X-1/<strong>Grand</strong><strong>SLAMM</strong> during final manufacture,<br />
shipment, and setup in your listening room, we have applied a removable layer of protective film over the<br />
finish. We recommend that this film be left in place until the speakers are in their final location in your listening<br />
room. Once you have determined their final position, remove the film by peeling it off. Do not leave<br />
this film on indefinitely, as it may leave impressions on the paint.<br />
It is important that the delicate paint finish of the X-1/<strong>Grand</strong><strong>SLAMM</strong> be dusted carefully with the<br />
dust cloth, which has been provided. We recommend that the following procedure be observed when dusting<br />
the speakers:<br />
§ Blow off all loose dust.<br />
§ Using the special dust cloth as a brush, gently whisk off any remaining loose dust.<br />
§ Shake out the dust cloth.<br />
§ Dust the finish, using linear motions in one direction parallel to the floor. Avoid using circular or<br />
vertical motions.<br />
Because the paint requires a period of several weeks to fully cure, we recommend that no cleaning<br />
fluids such as glass cleaners be used during this initial period of time. When the paint is fully cured, heavy<br />
fingerprints and other minor smudges may be removed with a glass cleaner. Always use the dust cloth.<br />
Stronger solvents are not recommended under any circumstances. Consult your dealer for further information<br />
if required. Periodic polishing may be desired over the years to maintain the high luster of the finish.<br />
We recommend a non-abrasive carnauba-based wax and soft cloth.<br />
W I L S O N A U D I O S P E C I A L T I E S , I N C .<br />
2-1
X-1/ GRAND <strong>SLAMM</strong> OWNER’S MANUAL<br />
BREAK IN PERIOD<br />
All audio equipment will sound its best after its components have been broken in for some period<br />
of use. <strong>Wilson</strong> <strong>Audio</strong> breaks in all woofers and mid-range drivers for a 12 hour period. All drivers are then<br />
tested, calibrated, and matched for their acoustical properties. In your listening room, expect 25 to 50% of<br />
break-in to be complete after two hours of playing music fairly loudly. Ninety percent of break-in is complete<br />
after 24 hours of playing. Playing a “disc repeat” overnight can accomplish this task quickly. <strong>Wilson</strong><br />
<strong>Audio</strong> recommends chamber music for this task.<br />
SECTION 2.1- ENCLOSURE CONSTRUCTION<br />
At the core of each <strong>Wilson</strong> <strong>Audio</strong> loudspeaker design is the knowledge that to achieve the best performance<br />
in the world, you must start with the best materials. Here are a few of the products that comprise<br />
the X-1/<strong>Grand</strong><strong>SLAMM</strong> enclosure.<br />
MATERIAL<br />
The X-1/<strong>Grand</strong><strong>SLAMM</strong> cabinet is constructed from a high-density, phenolic resin based composite.<br />
This composite meets and exceeds the highest of ANSI test standards for its use, while offering very tight<br />
tolerances, high hardness, uniform density, and dimensional stability. The high hardness of this composite<br />
not only offers excellent acoustical properties but it also provides an ideal surface for painting. Thus, your<br />
high gloss finish will be as durable as it is beautiful.<br />
2-2<br />
W I L S O N A U D I O S P E C I A L T I E S , I N C .
S E C T I O N 2 . 1 - E N C L O S U R E C O N S T R U C T I O N<br />
ADHESIVE<br />
What’s in an adhesive? Everything. This often over looked element is crucial to the proper performance<br />
of a loudspeaker. Correct modulus of elasticity, co-efficient thermal expansion and natural frequency<br />
response are just a few of the important elements.<br />
A highly cross-linked, thermo-set adhesive is used for the construction of the enclosure. It was also<br />
chosen for its excellent bond strength, solvent resistance, hardness and optimum vibrational characteristics.<br />
DEPTH OF DESIGN<br />
The combination of the best in composite materials and adhesive technology, provided to us by the<br />
leaders in their industry, allow us to design an enclosure with unmatched performance. The X-1/<strong>Grand</strong>-<br />
<strong>SLAMM</strong> upper and lower cabinet modules have been designed to eliminate vibration and cabinet signature,<br />
while maintaining an internal acoustical integrity that is simply, the best.<br />
Further, the X-1/<strong>Grand</strong><strong>SLAMM</strong> loudspeaker has over 1,450 constraining relationships defining the<br />
placement of over 550 parts. These relationships ensure both dimensional stability and repeatability. In<br />
short, the first X-1/<strong>Grand</strong><strong>SLAMM</strong> built will be as good as the hundredth.<br />
CONCLUSION<br />
All of these structural aspects combine to allow <strong>Wilson</strong> <strong>Audio</strong> to deliver a product that maintains the<br />
strictest structural tolerances, durability and reliability. This also means that you will have consistent, repeatable<br />
performance, unaffected by the climatic conditions, anywhere in the world.<br />
W I L S O N A U D I O S P E C I A L T I E S , I N C .<br />
2-3
U N C R A T I N G T H E X - 1 / G R A N D S L A M M<br />
3
W I L S O N A U D I O S P E C I A L T I E S , I N C .
S E C T I O N 3 . 0 - U N C R A T I N G T H E X - 1 / G R A N D S L A M M<br />
Note: You will have many modules to unpack that will need to be separated into right and left channels.<br />
Clear out 2 spaces, one for your left and one for your right channel modules. Place the ODD numbered<br />
modules in the LEFT channel section and the EVEN in the RIGHT channel section.<br />
SECTION 3.0 UNCRATING THE X-1/GRAND<strong>SLAMM</strong><br />
INITIAL CHECK<br />
The X-1/<strong>Grand</strong> <strong>SLAMM</strong>s are sent to you in 8 wooden crates and one cardboard box. Upon receiving<br />
these crates, please check their condition. If any of the crates are damaged, please report it to the shipping<br />
company for insurance verification.<br />
MATERIALS REQUIRED<br />
• Metal shears<br />
• Electric screw driver<br />
• Phillips head drive bit<br />
UNCRATING THE WOOFER CABINETS<br />
A minimum of two strong adults is required to set<br />
up the system. Locate the two largest crates numbered 1 and 2.<br />
These contain the woofer enclosures and are the first components<br />
of the systems to unpack (see Figure 1).<br />
Note: These two woofer enclosures are very heavy, and care<br />
should be taken to prevent injury.<br />
UNPACKING THE WOOFER<br />
1 Open the top of each crate and determine the side<br />
where the casters are connected to the bottom of<br />
the woofer module.<br />
FIGURE<br />
1- TWO WOOFER AND BASE<br />
2 Remove the packing material from between the casters and set the crate up so that the casters<br />
on the woofer are toward the floor.<br />
3 While one person holds the crate, the other person should roll the woofer enclosure out of the<br />
crate. Be very careful not to scratch the module during this process.<br />
W I L S O N A U D I O S P E C I A L T I E S , I N C .<br />
3-1
X-1/ GRAND <strong>SLAMM</strong> OWNER’S MANUAL<br />
Finally, move the woofer cabinets over to the “ zone of neutrality” as determined by the <strong>Wilson</strong><br />
<strong>Audio</strong> set-up procedure. If you have not yet performed this room analysis please refer to section 1 of this<br />
manual.<br />
UNCRATING THE FASCIA ASSEMBLY<br />
Next you should unpack the 2 long and narrow<br />
crates. These contain the fascia panels. Place them on the<br />
ground with the aluminum side DOWN.<br />
UNCRATING THE UPPER ARRAY MODULES<br />
Remember to place the odd numbered modules in<br />
the LEFT channel section and the even numbered in the<br />
RIGHT channel section. Now unpack the remaining crates.<br />
FIGURE 2- CRATES #3 AND #4,<br />
TIMING BLADE AND FASCIA<br />
Be very careful the remaining modules are made of a Methacrylic<br />
Ceramic compound and are very prone to chipping.<br />
Figures, 3-7, show the contents of each of the remaining crates.<br />
3-2<br />
W I L S O N A U D I O S P E C I A L T I E S , I N C .
S E C T I O N 3 . 0 - U N C R A T I N G T H E X - 1 / G R A N D S L A M M<br />
FIGURE 3- CRATES #5 AND #6,<br />
ARRAY MODULES<br />
FIGURE 4- CRATES #5 AND #6<br />
CONT., ARRAY MODULES<br />
FIGURE 5- CRATES #5 AND #6<br />
CONT. , ARRAY MODULES<br />
FIGURE 6- CRATES #7 AND #8,<br />
UPPER CROSSOVER<br />
FIGURE 7 CRATE # 9, TILTING<br />
POLES<br />
W I L S O N A U D I O S P E C I A L T I E S , I N C .<br />
3-3
X-1/ GRAND <strong>SLAMM</strong> OWNER’S MANUAL<br />
CRATE CONTENTS: CHECKLIST<br />
Now that you have everything unpacked you can inventory your items.<br />
1- Owners manual<br />
2- Base modules (left & right channel)<br />
2- Lower mid-range modules (left & right channel)<br />
2- High frequency modules (left & right channel)<br />
2- Upper mid-range modules (left & right channel)<br />
4- Fascia plates with aluminum timing blades attached<br />
2- 4’ aluminum poles<br />
8- Diode bodies<br />
8- 3/8-16x 1.5 set screw<br />
8- Spikes, with nuts<br />
2- “T” handle wrenches, size 1/4”, 5/32”, 3/32”<br />
1- ¾” Combo wrench<br />
1- 9/16” Combo wrench<br />
8- Flat aluminum washers<br />
12- Plastic washers (for timing blades)<br />
2- 3.9 ohm resistors<br />
3- Polishing cloths<br />
8- Brass spike pads<br />
2- Taps, 5/16”-18, 3/8”-16<br />
1- Tap Handle<br />
48- ¼”-20x ¾” Button headed capscrew<br />
25- 5/16”-18x 1¾” Socket headed capscrew<br />
3-4<br />
W I L S O N A U D I O S P E C I A L T I E S , I N C .
S E C T I O N 3 . 0 - U N C R A T I N G T H E X - 1 / G R A N D S L A M M<br />
ASSEMBLE YOUR SPIKES FOLLOWING THESE STEPS:<br />
• Remove the diodes and move the nut to about 2 threads from the point. This will allow for<br />
greater movement when leveling the loudspeaker systems.<br />
• Screw the spikes into the diode until the nut is against the spike body. Be careful that the<br />
nuts do not turn while inserting and threading into the diode. Note: Do not tighten these<br />
assembled spikes. You will need to unscrew them when you level the X-1 / <strong>Grand</strong><br />
<strong>SLAMM</strong>s.<br />
• Place the set screw into the other end of the diode. Note: Place the Allen (hex key) end into<br />
the diode. This will ensure that if for any reason you have to move your <strong>Grand</strong> <strong>SLAMM</strong>s,<br />
you will be able to withdraw the set without grabbing them with pliers, ruining the threads in<br />
the process. Screw the set screw into the diode until it meets the spike.<br />
• Place the assembly aside until it is needed during the installation<br />
SET SCREW<br />
DIODE<br />
HEX KEY END<br />
3/8” NUT<br />
SPIKE<br />
FIGURE 8 SPIKE ASSEMBLY<br />
W I L S O N A U D I O S P E C I A L T I E S , I N C .<br />
3-5
X - 1 / G R A N D S L A M M S Y S T E M S E T U P<br />
4
W I L S O N A U D I O S P E C I A L T I E S , I N C .
S E C T I O N 4 . 0 X - 1 / G R A N D S L A M M S Y S T E M S E T U P<br />
SECTION 4.0- INITIAL ASSEMBLY<br />
In order to realize the capabilities of the<br />
X-1/<strong>Grand</strong> <strong>SLAMM</strong> we recommend that you have it<br />
installed by a trained <strong>Wilson</strong> <strong>Audio</strong> installer. Your<br />
dealer will have a person trained in the art of the<br />
X-1/<strong>Grand</strong> <strong>SLAMM</strong> installation. If you choose to<br />
do this installation yourself, here are some guidelines<br />
to assist you. These guidelines come from<br />
many years of experience and should be followed<br />
closely.<br />
MATCHED NUMBER<br />
LOCATIONS<br />
The first step in building your <strong>Grand</strong><br />
<strong>SLAMM</strong>s is to remove protective film. To remove,<br />
FIGURE 9 MATCHED NUMBER LOCATIONS<br />
ON FASCIA ASSEMBLY<br />
just start at the edge and peel it off.<br />
TIMING BLADES<br />
Each timing blade has been marked with<br />
two numbers on the bottom surface. There are corresponding<br />
numbers on the woofer enclosure(see<br />
Figure 9). Set the timing blades near the respective<br />
woofer enclosure. Remove the fascia from the<br />
timing blades, noting how they fit together and the<br />
lengths of the screws in the holes (see Figure 10).<br />
Each fascia and blade are a matched set, be sure<br />
to keep them together. The bottom surface of each<br />
fascia and the corresponding surface of the timing<br />
blade have been marked A-D, Fascia A matches timing<br />
blade A, etc.<br />
FIGURE 10 EXPLODED VIEW OF FASCIA<br />
W I L S O N A U D I O S P E C I A L T I E S , I N C .<br />
4-1
X-1/ GRAND <strong>SLAMM</strong> OWNER’S MANUAL<br />
CONNECT THE TIMING BLADES TO THE WOOFER CABINET AS FOLLOWS:<br />
• Place the timing blades on the X-1/<strong>Grand</strong> <strong>SLAMM</strong>s.<br />
• Tighten all of the screws in each timing blade so that there is some “movement” in<br />
position. Note: Do not tighten the screws completely (see Figure 11)<br />
• Slide your finger along the outside edge and make sure that the timing blade is flush to the<br />
outside edge of the woofer enclosure.<br />
• Finish tightening all the screws.<br />
1/4”-20X 3/4” BUT-<br />
TON HEAD CAP-<br />
SCREW<br />
FIGURE 11 ATTACHING TIMING BLADE TO<br />
WOOFER TOP<br />
4-2<br />
W I L S O N A U D I O S P E C I A L T I E S , I N C .
S E C T I O N 4 . 1 M O U N T I N G U P P E R A R R A Y M O D U L E S<br />
SECTION 4.1 MOUNTING UPPER ARRAY MODULES<br />
MATERIALS REQUIRED<br />
ALIGNMENT<br />
WASHER<br />
• ¼” T handled Allen wrench<br />
• 20, 5/16”-18 x 1 ¾” bolts<br />
• 12, 5/16 washers<br />
• 8, 1 ¼” washer<br />
• 12, alignment washers<br />
MOUNTING PROCEDURE<br />
5/16-18 X 1 3/4”<br />
5/16” WASHER<br />
BOLT<br />
FIGURE 12 UPPER BOLT ASSEMBLY<br />
Locate the crates marked 5 and 6. These<br />
crates contain the upper array modules. Each crate<br />
contains matched UMRM, HFM, and LMRM<br />
modules (see Figure 13). The serial number on each<br />
module matches the serial number on the back of<br />
UMRM<br />
the woofer cabinet.<br />
The lower mid-range module (LMRM) is<br />
installed first. Install the module as follows:<br />
HFM<br />
• With the brass cones pointing<br />
down, carefully lower<br />
LMRM<br />
LMRM<br />
blades and<br />
between the timing<br />
set it on top of the<br />
woofer enclo sure (see Figure 13).<br />
Note: Take special care not to scratch or damage<br />
the freshly painted surface.<br />
FIGURE 13 INSTALLING THE UPPER ARRAY<br />
MODULES<br />
W I L S O N A U D I O S P E C I A L T I E S , I N C .<br />
4-3
X-1/ GRAND <strong>SLAMM</strong> OWNER’S MANUAL<br />
• Center the LMRM between the<br />
timing blades.<br />
• Insert the two 5/16” -18 X 1 ¾”<br />
bolts, washers, and alignment<br />
washers. Only tighten the<br />
bolt half way (see Figure 15).<br />
Repeat the same steps with the high<br />
frequency module (HFM), and again with the<br />
upper mid-range module (UMRM). If you have<br />
not worked on both channels, repeat the above<br />
steps on the other channel at this time<br />
FIGURE 14 UPPER ARRAY MODULES<br />
INSTALLED<br />
DO NOT TIGHTEN<br />
BOLT ALL THE WAY<br />
FIGURE 15 UPPER BOLT TIGHTENED<br />
HALFWAY.<br />
4-4<br />
W I L S O N A U D I O S P E C I A L T I E S , I N C .
S E C T I O N 4 . 1 M O U N T I N G U P P E R A R R A Y M O D U L E S<br />
MOUNTING THE UPPER CROSSOVER<br />
The upper crossover sub-assemblies<br />
(U C/O S-A) are matched to each woofer. For<br />
example, if the serial number of the X-1 pair<br />
is 135 and 136, attach the U C/O S-A to the<br />
woofer with the same serial number. Install the<br />
U C/O S-A as follows:<br />
• Insert the upper range signal<br />
cable through the hole on the top of the woofer<br />
enclosure (see Figure 16).<br />
Note: It may take two or three tries for<br />
UPPER<br />
RANGE<br />
SIGNAL<br />
CABLE<br />
the cable to come out near the main connector<br />
plate.<br />
FIGURE 16 INSTALLING UPPER CROSSOVER<br />
• Position the U C/O S-A as shown in Figure 17<br />
5/16”-18 X 1<br />
3/4” BOLT<br />
FIGURE 17 POSITIONING UPPER CROSSOVER<br />
W I L S O N A U D I O S P E C I A L T I E S , I N C .<br />
4-5
X-1/ GRAND <strong>SLAMM</strong> OWNER’S MANUAL<br />
• Center the U C/O S-A between the timing blades such that there is equal space be<br />
tween the U C/O S-A and the adjacent blade.<br />
• Attach the labeled wires from to U C/O S-A to the correct upper array modules (see Figure<br />
18 below)<br />
• Insert four 5/16”-18 X 1 ¾” bolts and 1 1/4” washers through the four holes in the timing<br />
blades to the side of the crossover, about 1/2 the length of the bolts - Do not tighten at<br />
this time.<br />
UMRM WIRES<br />
LMRM AND<br />
HFM WIRES (NOT<br />
SHOWN)<br />
FIGURE 18 ATTACHING THE WIRING TO<br />
THE UPPER ARRAY<br />
4-6<br />
W I L S O N A U D I O S P E C I A L T I E S , I N C .
S E C T I O N 4 . 1 M O U N T I N G U P P E R A R R A Y M O D U L E S<br />
CONNECTING THE UPPER RANGE SIGNAL CABLE<br />
The X-1/<strong>Grand</strong> <strong>SLAMM</strong>s use binding posts that were design in house and are manufactured exclusivly<br />
for <strong>Wilson</strong> <strong>Audio</strong>, they are superior to most common connectors. A note about these connectors: These<br />
connectors should be tighted to snug, if they are over tightened they will break. Once they are secure, they<br />
will remain that way.<br />
The upper range signal cable is connected to the connector plate at the rear of the X-1 base. This is<br />
accomplished as follows:<br />
• Carefully remove the protective sleeve from the end of the cable<br />
• Connect the cable to the “array out” terminals on the connector plate (see Figure 19).<br />
AMPLIFIER INPUT<br />
CONNECTION<br />
UPPER RANGE<br />
SIGNAL CABLE<br />
FIGURE 19 MAIN CONNECTOR PLATE<br />
W I L S O N A U D I O S P E C I A L T I E S , I N C .<br />
4-7
X-1/ GRAND <strong>SLAMM</strong> OWNER’S MANUAL<br />
CONNECTOR PLATE JUMPER<br />
A jumper has been provided for pulse alignment purposes. This jumper is on the main connector<br />
plate, and when removed, the woofers are no longer active. The jumper has been installed correctly at the<br />
factory. At all times, except during instrument pulse aligning the system, the jumper is to remain connected<br />
between jumper terminals.<br />
The X-1 system is now ready to be positioned in your room. NOTE: Until the X-1/<strong>Grand</strong> Slamm’s<br />
final position in your room is determined fully, do not tighten the hardware in the upper array.<br />
4-8<br />
W I L S O N A U D I O S P E C I A L T I E S , I N C .
S E C T I O N 4 . 2 G E O M E T R I C P H A S E D E L A Y C O R R E C -<br />
T I O N<br />
SECTION 4.2- GEOMETRIC TIME DOMAIN ALIGNMENT<br />
MATERIALS REQUIRED<br />
• Tape measure<br />
• Known listening position<br />
• Geometric timing charts (Appendix A)<br />
PULSE ALIGNMENT<br />
Pulse alignment accuracy of the X-1/<strong>Grand</strong> <strong>SLAMM</strong> has been established and verified at <strong>Wilson</strong><br />
<strong>Audio</strong>’s R&D laboratory. The graphs and charts used in this section are a result of this testing.<br />
ROOM SETUP<br />
The X-1/<strong>Grand</strong> <strong>SLAMM</strong> system allows for different listening distances (away from the speakers)<br />
and listening ear heights (measured distances from the floor up to your ear), see Figure 20 below. For each<br />
distance/ear height combination there is a unique alignment geometry.<br />
To make correct in home set up of the X-1/<strong>Grand</strong> <strong>SLAMM</strong> possible without test equipment, <strong>Wilson</strong><br />
<strong>Audio</strong> has measured the correct geometric time domain alignment for different distance/ear height combinations.<br />
This information is provided in Appendix A. By measuring the ear height and the distance from the<br />
speaker to the listening position, you will be able to align the system for your listening position. Section 4.3<br />
gives an example of this alignment procedure.<br />
LISTENING EAR<br />
HEIGHT<br />
LISTENING DISTANCE<br />
FIGURE 20 UPPER BOLT ASSEMBLY<br />
W I L S O N A U D I O S P E C I A L T I E S , I N C .<br />
4-9
X-1/ GRAND <strong>SLAMM</strong> OWNER’S MANUAL<br />
Note: Following these steps there is an example of the alignment procedure, please refer to this example if<br />
you need a more detailed explanation.<br />
ALIGNMENT PROCEDURE<br />
The timing sheets are set into precise increments. The vertical axis is numbered 1-10 with 4 “tics”<br />
between each number. They correspond to the timing blade marks. Find the proper intersections and align<br />
the module for your setup.<br />
1. Repeat each step of this procedure on the left and right channels simultaneously.<br />
2. Remove the timing sheets from this booklet and place them on a tabletop.<br />
3. Make sure that you are in your exact listening position. Be certain that your ear is aligned<br />
with your measured distance (as was stated of in the <strong>Wilson</strong> <strong>Audio</strong> setup procedure).<br />
4. While sitting, have someone measure your ear height from the floor. You should be relaxed<br />
in your chair, as you would be when listening to music.<br />
5. Look toward the bottom of your timing sheets to the measured listening distance. Place a<br />
small dot {•} on your listening distance - On all three sheets.<br />
6. Place the timing sheet marked LOWER MID RANGE MODULE in front of you. Using a<br />
piece of paper from left to right, place it over your listening distance.<br />
7. Move your eyes up till you reach your ear height curve. Place a small dot {•} on that inter<br />
section. Now remove the paper and find just where you should place your LOWER MID-<br />
RANGE MODULE. Gently slide your LOWER MID-RANGE MODULE to line up the<br />
plastic hash mark on the washer that is attached to your module with the marks on the timing<br />
blade (see Figure 21). Note: Make sure the module is centered in between the timing blades.<br />
If it is not, center it and then move the module to line up again. These modules are extremely<br />
sensitive. You must be absolutely certain that they are lined up to within 1/2 of a mark on<br />
the timing blade. Any deviation from this procedure will be audible.<br />
4-10<br />
W I L S O N A U D I O S P E C I A L T I E S , I N C .
T I O N<br />
S E C T I O N 4 . 2 G E O M E T R I C P H A S E D E L A Y C O R R E C -<br />
FIGURE 21 READING THE TIMING BLADE<br />
6. When you are certain that you have it correct, you should hand tighten both sides at once.<br />
Tighten the modules till the washer cannot move. The module will be secure from<br />
this point<br />
pull the module<br />
on. Note: You must tighten both sides at the same time, otherwise you will<br />
off center.<br />
7. Repeat step 6 through 8 for the ULTRA HIGH FREQUENCY and UPPER MID-RANGE<br />
MODULES.<br />
10. Check your time aligned modules again. Sometimes tightening the crossover bolts will<br />
loosen the modules.<br />
W I L S O N A U D I O S P E C I A L T I E S , I N C .<br />
4-11
X-1/ GRAND <strong>SLAMM</strong> OWNER’S MANUAL<br />
SECTION 4.3- TIME ALIGNMENT EXAMPLE<br />
For this example the word “Tic” will be defined as one of the smaller marks between the numbered<br />
marks on the timing blades (see Figure 21).<br />
GIVEN:<br />
• Right channel listening distance is 12 feet.<br />
• Left channel listening distance is 12 feet 3 inches.<br />
• Ear height is 40 inches above the floor.<br />
The proper time alignment for the right channel begins by locating the 40 inch ear height line on Figure<br />
22 (next page), which is the geometric graph for the lower mid-range module. The ear height is shown<br />
on the right side of the page.<br />
At the listening position of 12 feet the geometric alignment position for the center of the 5/16”- 18<br />
X 1 ¾” bolt reads 6 plus 1 tics. The high frequency module data are given in Appendix A. The geometric<br />
alignment position for this module reads 7 plus 1 tic. The upper mid-range module data are given in Appendix<br />
A, the geometric alignment position for this unit reads 4 plus 2 ½ tics<br />
For the left channel, the procedure is the same. The geometric alignment for the left channel is:<br />
• Lower mid-range module: 6 plus 1 tic.<br />
• High frequency module: 7 plus 1 ½ tics.<br />
• Upper mid-range module: 4 plus 3 tics.<br />
For this example the X-1 <strong>Grand</strong> <strong>SLAMM</strong>s system have been properly aligned for the listening position<br />
and after final assembly will be ready for use.<br />
4-12<br />
W I L S O N A U D I O S P E C I A L T I E S , I N C .
S E C T I O N 4 . 3 P H A S E D E L A Y C O R R E C T I O N E X A M P L E<br />
6 PLUS 1 TIC<br />
FIGURE 22 LMRM ALIGNMENT CHART<br />
W I L S O N A U D I O S P E C I A L T I E S , I N C .<br />
4-13
X-1/ GRAND <strong>SLAMM</strong> OWNER’S MANUAL<br />
SECTION 4.4- LOCKING DOWN UPPER ARRAY<br />
MATERIALS REQUIRED<br />
¼” T-handled Allen wrench<br />
LOCKING DOWN THE UPPER ARRAY<br />
Being careful not to change the alignment settings of the array modules tighten the 5/16” -18 X 1 ¾”<br />
bolts as follows (see Figure 23):<br />
• Four U C/O S-A bolts. Finger tighten the top two first, then add a 1/4 turn with the wrench.<br />
Finger tighten the bottom two.<br />
• Finger tighten the upper mid-range module bolts.<br />
• Finger tighten the high frequency module bolts.<br />
• Finger tighten the lower mid-range module bolts.<br />
Remember to only finger tighten the array modules. Over tightening can damage the array modules.<br />
3<br />
4<br />
1<br />
5<br />
2<br />
4-14<br />
FIGURE 23 TIGHTENING ORDER FOR UPPER ARRAY BOLTS<br />
W I L S O N A U D I O S P E C I A L T I E S , I N C .
S E C T I O N 4 . 5 S P I K E I N S T A L L A T I O N<br />
SECTION 4.5- SPIKE INSTALLATION<br />
Note: This is a 2 person job. Do not attempt this with a single person. The X-1/<strong>Grand</strong> <strong>SLAMM</strong>s<br />
weigh over 650-lbs. and may seriously injure someone if tipped over.<br />
MATERIALS REQUIRED<br />
• 3/32 T-handled Allen wrench<br />
• 8 sets of spikes<br />
• 2, 6 foot set-up poles<br />
• ¾” open ended wrench<br />
INSTALLATION PROCEDURE<br />
BASE HOLE<br />
• Using the supplied 3/32 T-<br />
handled allen wrench, Re-<br />
FIGURE 24 BASE HOLE COVERS<br />
move the hole covers located<br />
on the base by remov ing the 4-40 screws (see Figure 24).<br />
• Insert the two metal poles through the holes as shown in Figure 25.<br />
• Have one<br />
person slowly push down<br />
HOLD WITH HANDS<br />
on the 2 poles. This will<br />
tip the <strong>Grand</strong> <strong>SLAMM</strong>s to<br />
the proper angle for caster<br />
removal and spike insertion.<br />
While one person holds the<br />
poles down have the other<br />
person stand on those poles.<br />
STEP HERE<br />
SET-UP POLES<br />
FLOOR<br />
FIGURE 25 TILTING FOR SPIKE INSTALLATION<br />
W I L S O N A U D I O S P E C I A L T I E S , I N C .<br />
4-15
X-1/ GRAND <strong>SLAMM</strong> OWNER’S MANUAL<br />
• Use the open-ended<br />
wrench to loosen the casters and<br />
insert the finished spike assembly.<br />
REMOVE CASTOR<br />
Screw in the spike assembly. Hand<br />
INSTALL SPIKE<br />
tighten only! Note: Be very careful<br />
NOT TO CROSS THREAD the<br />
spikes. The base of the X-1/<strong>Grand</strong><br />
<strong>SLAMM</strong>s are made of “X” material<br />
and are prone to cross threading.<br />
Note: The spike will go into a different<br />
hole than the caster. (see Figure<br />
CASTOR HOLE<br />
26)<br />
SPIKE HOLE<br />
Perform this operation on the<br />
2 casters that are lifted by the poles.<br />
FIGURE 26 INSTALLING SPIKES<br />
With one person holding the<br />
<strong>Grand</strong> <strong>SLAMM</strong>s, have the person<br />
standing on the poles grasp<br />
them in their hands. This person<br />
will now lower the X-1/ <strong>Grand</strong><br />
<strong>SLAMM</strong> onto the spikes.<br />
Note: The X-1 G<br />
FIGURE 27 X-1 TILTED WITH SPIKE INSTALLED<br />
4-16<br />
W I L S O N A U D I O S P E C I A L T I E S , I N C .
S E C T I O N 4 . 5 S P I K E I N S T A L L A T I O N<br />
Repeat the previous process of the caster removal/spike insertion on the opposite side of the enclosure.<br />
Then continue the process on the other channel (see Figure 28).<br />
REMOVE CASTERS<br />
FIGURE 28 INSTALLING SPIKES ON SECOND SIDE<br />
W I L S O N A U D I O S P E C I A L T I E S , I N C .<br />
4-17
X-1/ GRAND <strong>SLAMM</strong> OWNER’S MANUAL<br />
LEVELING THE X-1/GRAND <strong>SLAMM</strong>S<br />
• Place a level on the left to right oriented axis. If it is level, move on to the next section.<br />
• If the bubble is leaning toward the center of the room, you will have to bring one of the<br />
outside spikes down toward the floor. If the bubble is leaning toward the outside of the<br />
room, you will have to bring one of the inside spikes down toward the floor.<br />
Note: To find out which spike to lower grasp the <strong>Grand</strong> <strong>SLAMM</strong> channel and rock it back and forth.<br />
• Place a level on the front to back oriented axis. If it is level then your X-1 <strong>Grand</strong> <strong>SLAMM</strong>s<br />
are level. If the bubble is leaning toward the front of the room you will have to bring one of<br />
the front spikes down toward the floor. If the bubble is leaning toward the back of the room<br />
(behind the loudspeakers) you will have to bring one of the front spikes down toward the<br />
floor.<br />
• Your X-1/<strong>Grand</strong> <strong>SLAMM</strong>s should now be level<br />
4-18<br />
W I L S O N A U D I O S P E C I A L T I E S , I N C .
S E C T I O N 4 . 6 C H E C K I N G F O R P R O P E R I M A G E Height<br />
SECTION 4.6-CHECKING FOR THE IMAGE HEIGHT<br />
Once the X-1/<strong>Grand</strong> <strong>SLAMM</strong>s are properly spiked, check for the proper image height. Small differences<br />
in measurement of the listening distance can cause the image height to be too high. Check X-1 <strong>Grand</strong><br />
<strong>SLAMM</strong>s for the correct height as follows:<br />
1 Sit in your listening position and listen to a piece of vocal performance that you know well.<br />
Is the image height too high? If it is not too high, then proceed to installing the fascia on<br />
your X-1/<strong>Grand</strong> <strong>SLAMM</strong>s. If it is too high follow the next few steps.<br />
Note: Perform the following steps on both channels of your system.<br />
2 Loosen the bolts that are holding your modules in place. You should also loosen the bolts<br />
holding the crossovers in place.<br />
3 Write down the number of increments that each module is set at (i.e. lower frequency module<br />
is at 6 and 2 1/2 tics).<br />
4 Starting from the lower frequency modules on each channel, move the arrays 1 1/2 incre-<br />
ments to the front of the X-1/<strong>Grand</strong> <strong>SLAMM</strong>s. So in the case that I have stated, it would be<br />
6 and 4 tics.<br />
Note: If you are careful, the entire array (all 3 modules) will move 1½.<br />
5 Check to see that all 3 modules are correctly placed and then tighten them down on each<br />
channel.<br />
Note: Remember to tighten all of the crossover bolts, then check the modules for tightness.<br />
W I L S O N A U D I O S P E C I A L T I E S , I N C .<br />
4-19
X-1/ GRAND <strong>SLAMM</strong> OWNER’S MANUAL<br />
SECTION 4.7-ATTACHING THE FASCIA’S<br />
REQUIRED MATERIALS:<br />
• 2, 10-32x1” screws<br />
• 8, 10-32x1¾” screws<br />
• 10, Fascia Hole Covers<br />
• 1, 5/32 T-handled Allen wrench<br />
FASCIA HOLE<br />
10-32X1 3/4”<br />
SOCKET HEADED<br />
CAPSCREW<br />
ATTACHMENT PROCEDURE:<br />
• Insert the 10-32x1¾” screws<br />
into the 4 lower holes on each<br />
FIGURE 29 SCREW LOCATIONS ON THE<br />
fascia.<br />
• Insert the 10-32x1” screws into the upper hole on each fascia.<br />
• Tighten each screw firmly but do not over tighten them.<br />
• Place the fascia hole covers over the screw<br />
heads.<br />
Lastly, reinstall the base hole covers using the 4-40x ¼”<br />
screws and 3/32 T-handled wrench. Again, make sure to not over<br />
tighten the screws. Store the crates for future use, sending speakers<br />
back to the factory for upgrades, moving, etc.<br />
FIGURE 30 FINISHED UPPER ARRAY<br />
4-20<br />
W I L S O N A U D I O S P E C I A L T I E S , I N C .
W I L S O N A U D I O S P E C I A L T I E S , I N C .<br />
4-21
W A R R A N T Y I N F O R M A T I O N<br />
5
X-1/ GRAND <strong>SLAMM</strong> OWNER’S MANUAL<br />
W I L S O N A U D I O S P E C I A L T I E S , I N C .
S E C T I O N 5 . 0 W A R R A N T Y I N F O R M A T I O N<br />
WILSON AUDIO LOUDSPEAKER<br />
L I M I T E D W A R R A N T Y<br />
TERMS AND CONDITIONS<br />
LIMITED WARRANTY<br />
<strong>Wilson</strong> <strong>Audio</strong> warrants its loudspeakers to be free of manufacturing defects in material and workmanship,<br />
subject to the conditions hereinafter set forth for a period of 90 days from the date of purchase by<br />
the original purchaser, of five (5) years, if a Warranty Registration Form has been correctly filed at <strong>Wilson</strong><br />
<strong>Audio</strong>, no later than 30 days after product delivery to the customer.<br />
CONDITIONS<br />
This warranty is subject to the following conditions and limitations. The Warranty is void and inapplicable<br />
if the product has been used or handled other than in accordance with the instructions in the<br />
owner’s manual, abused or misused, damaged by accident or neglect or in being transported or the<br />
defect is due to the product being repaired or tampered with by anyone other than <strong>Wilson</strong> <strong>Audio</strong>, or an<br />
authorized repair center. Most repairs can be made in the field by an authorized <strong>Wilson</strong> <strong>Audio</strong> agent. In<br />
instances when return to <strong>Wilson</strong> <strong>Audio</strong>’s factory is required, a return authorization must first be obtained<br />
by the dealer or customer. <strong>Wilson</strong> <strong>Audio</strong> will pay return freight of its choice. A RETURNED PRODUCT<br />
MUST BE ACCOMPANIED BY A WRITTEN DESCRIPTION OF THE DEFECT. <strong>Wilson</strong> <strong>Audio</strong> reserves the right<br />
to modify the design of any product without obligation to purchasers of previously manufactured products<br />
and to change the prices or specifications of any product without notice or obligation to any person.<br />
REMEDY<br />
In the event that the above product fails to meet the above Warranty and the above conditions have<br />
been met, the purchaser’s sole remedy under this Limited Warranty shall be to return the product to<br />
<strong>Wilson</strong> <strong>Audio</strong> or to an authorized <strong>Wilson</strong> <strong>Audio</strong> repair center where the defect will be rectified without<br />
charge for parts or labor.<br />
W I L S O N A U D I O S P E C I A L T I E S , I N C .<br />
5-1
X-1/ GRAND <strong>SLAMM</strong> OWNER’S MANUAL<br />
LIMITED TO ORIGINAL PURCHASER<br />
This Warranty is for the sole benefit of the original purchaser of the covered product and shall not be<br />
transferred to a subsequent purchaser of the product. Any subsequent purchaser should contact a <strong>Wilson</strong><br />
<strong>Audio</strong> dealer to request a new warranty.<br />
DEMONSTRATION EQUIPMENT<br />
Equipment used by an authorized dealer for demonstration purposes is warranted to be free of manufacturing<br />
defects in materials and workmanship for a period of five (5) years from the date of shipment<br />
to the dealer. Demo equipment needing warranty service may be repaired on-site or, if necessary, correctly<br />
packed and returned to <strong>Wilson</strong> <strong>Audio</strong> by the dealer at his sole expense. <strong>Wilson</strong> <strong>Audio</strong> will pay<br />
return freight of its choice. A returned product must be accompanied by a written description of the<br />
defect. Dealer owned demonstration equipment sold at retail within two (2) years of date of shipment<br />
to the dealer is warranted to the first retain customer to be free of manufacturing defects in materials<br />
and workmanship for the same time periods as if the product had originally been bought for immediate<br />
resale to the retail customer. In other words, 90 Day basic warranty, unless extended to 5 years by<br />
return of completed Warranty Registration.<br />
MISCELLANEOUS<br />
ANY IMPLIED WARRANTIES RELATING TO THE ABOVE PRODUCT SHALL BE LIMITED TO THE DURATION OF<br />
THIS WARRANTY. THE WARRANTY DOES NOT EXTEND TO ANY INCIDENTAL OR CONSEQUENTIAL COSTS<br />
OR DAMAGES TO THE PURCHASER. Some states do not allow limitations on how long an implied warranty<br />
lasts or an exclusion or limitation of incidental or consequential damages, so the above limitations<br />
or exclusions may not apply to you. This Warranty gives you specific legal rights, and you may also have<br />
other rights which vary from state to state<br />
5-2<br />
W I L S O N A U D I O S P E C I A L T I E S , I N C .
S E C T I O N 5 . 0 W A R R A N T Y I N F O R M A T I O N<br />
W I L S O N A U D I O S P E C I A L T I E S , I N C .<br />
5-3
T R O U B L E S H O O T I N G<br />
6
FBar<br />
W I L S O N A U D I O S P E C I A L T I E S , I N C .
S E C T I O N 6 . 0 T R O U B L E S H O O T I N G<br />
SECTION 6.0 TROUBLESHOOTING SETUP DIFFICULTIES<br />
Problem<br />
Reason<br />
One channel is not operating... Check inter-connects from source.<br />
Check the connections on the speaker cables. Both at amplifier<br />
and speaker ends. Watch especially for connector touching<br />
each other.<br />
Check the Upper Range Signal Cable, you may have forgotten<br />
to connect them, or they may have shorted or come loose during<br />
setup (see Figure 19, page 4-7).<br />
Imaging is off center...<br />
Check your connections. One of the connections to the modules<br />
may have slipped off. When a tweeter or mid-range driver<br />
is not working, or is out of phase, the imaging will be off. Double<br />
check your connections for red-to-red and black-to-black.<br />
Play music at a low level, and listen to each driver in each<br />
channel. You may have a driver that is not operating correctly.<br />
If you find a driver that is silent please go to the “Driver Out<br />
section” of this troubleshooting guide.<br />
A chronic lack of bass energy... Check the input cable connections on your woofer enclosure.<br />
If one channel is out of phase (connections reversed),<br />
bass will be cancelled.<br />
Driver out not playing after<br />
connections have been<br />
verified.<br />
Note: Turn off your amplifier, and unplug it from the wall.<br />
If you have found a driver that would not play, move to the rear<br />
of this particular loudspeaker.<br />
Using the appropriate Allen key, Open the small aluminum door<br />
on<br />
the back of the upper crossover. You will find<br />
some resistor connec<br />
tions, which are labeled “Lower<br />
Midrange”, “Ultra High Frequency”, and “Upper Midrange”.<br />
W I L S O N A U D I O S P E C I A L T I E S , I N C .<br />
6-1
X-1/ GRAND <strong>SLAMM</strong> OWNER’S MANUAL<br />
Replace the resistor with the supplied matching resistor. Tighten<br />
the new resistor in the old ones place.<br />
Note: An improper resistor value will deteriorate your speaker<br />
perfor mance<br />
Plug your amplifier into the wall and turn it on.<br />
Listen to the channel at a low level. The driver should now be<br />
operat ing correctly.<br />
Amplifier shuts off as soon<br />
as it is turned on:<br />
Check to see if your speaker cables are properly secured. Look<br />
for frayed ends, loose connections, a conductor contact-<br />
amplifier chassis.<br />
ing the<br />
Turn the amplifier off and disconnect it from the AC wall outlet.<br />
Dis connect the preamplifier leads to the amplifier.<br />
Now turn back on the<br />
amplifier.<br />
If the problem is solved: There is something wrong with your<br />
pream plifier or interconnect. Call your dealer.<br />
If the problem persists: Leave the pre-amp leads disconnected<br />
and<br />
continue on to the next step.<br />
Turn the amplifier off and disconnect it from the AC wall outlet.<br />
Dis connect the speaker leads at the main input to the<br />
speaker . Now turn the amplifier on.<br />
6-2<br />
W I L S O N A U D I O S P E C I A L T I E S , I N C .
S E C T I O N 6 . 0 T R O U B L E S H O O T I N G<br />
If the problem is solved: Call your <strong>Wilson</strong> <strong>Audio</strong> dealer. There<br />
may be a problem with the crossover or the speakerʼs internal<br />
wiring.<br />
If the problem persists continue on to the next step.<br />
Turn the amplifier off and disconnect it from the AC wall outlet.<br />
Disconnect the speaker cable leads to the amplifier and turn<br />
the amplifier on again.<br />
If the problem is solved: You have a short in your speaker<br />
cables. Check for frayed ends, holes (from spike feet), or make<br />
sure that your spade lug is not touching the chassis while it is<br />
connected to the binding post.<br />
If the problem persists: Call the dealer where you bought your<br />
W I L S O N A U D I O S P E C I A L T I E S , I N C .<br />
6-3
S P E C I F I C A T I O N S<br />
7
W I L S O N A U D I O S P E C I A L T I E S , I N C .
S E C T I O N 7 . 0 S P E C I F I C A T I O N S<br />
SECTION 7.0- SPECIFICATIONS<br />
Enclosure Type:<br />
Ported - Woofer<br />
Closed - Mid Frequency<br />
Closed - High Frequency<br />
Woofer Diameter:<br />
1 - 12 Inch, 30.5 cm<br />
1 - 15 Inch, 38 cm<br />
Mid Frequency Diameter:<br />
Tweeter Diameter:<br />
2 - 7 Inch, 18 cm<br />
1 - 1 Inch Forward Firing<br />
2 - 1 Inch Rearward Firing<br />
Sensitivity:<br />
Frequency Response:<br />
Minimum Amp Power:<br />
Standard Finishes:<br />
95 dB (2.83 Volts at 1 meter)<br />
19.5 Hz to 22.5 kHz (-3dB SPL)<br />
20 Watts/per channel<br />
<strong>Wilson</strong> Gloss<br />
Overall Dimensions:<br />
Height - 72 Inches, 183 cm<br />
Width - 16 1/2 Inches, 42 cm<br />
Depth - 25 1/4 Inches, 64 cm<br />
Approximate shipping weight complete system: 1808 lbs., 824 kilograms<br />
Approximate channel weight: 600 lbs., 272 kilograms<br />
Warranty: 5 year transferable<br />
W I L S O N A U D I O S P E C I A L T I E S , I N C .<br />
7-1
A P P E N D I X<br />
A
W I L S O N A U D I O S P E C I A L T I E S , I N C .
A P P E N D I X A T I M I N G T A B L E S<br />
W I L S O N A U D I O S P E C I A L T I E S , I N C .<br />
A-1