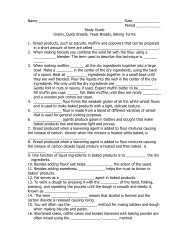
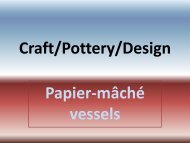
Copper Tooling and Block Printing
Copper Tooling and Block Printing
Copper Tooling and Block Printing

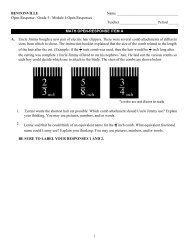
Create successful ePaper yourself
Turn your PDF publications into a flip-book with our unique Google optimized e-Paper software.
• Students will create repeated patterns within an<br />
original Zendoodle/tangle drawing.<br />
• Students will use a viewfinder to select a strong<br />
design for both their block print <strong>and</strong> copper tooling.<br />
• Students will use proper techniques for creating a<br />
tooled piece of copper foil, homemade embossed<br />
paper <strong>and</strong> printed block frame.<br />
• Students will use low relief <strong>and</strong> recessed areas within<br />
all aspects of this project.
Printmaking Terms:<br />
• <strong>Block</strong> printing: printing from h<strong>and</strong>-carved blocks of wood or linoleum<br />
• <strong>Tooling</strong>: the process of creating designs in sheet metal by emboss<br />
drawing, stamping, denting, piercing, rub-transferring, folding <strong>and</strong><br />
hammering.<br />
• <strong>Printing</strong> plate: surface on which the design is carved (ours is rubber)<br />
• <strong>Printing</strong> palette: surface on which the ink is rolled.<br />
• Brayer: device used to roll ink evenly from the palette to the printing block.<br />
• Burnish: to rub the back of your paper (usually with a baren) to lift the<br />
image from the inked printing plate.<br />
• Relief: the area of the printing block that is raised <strong>and</strong> will print the color<br />
of the ink. (ours is black)<br />
• Recessed: the area of the printing block that is carved away <strong>and</strong> will print<br />
the color of the paper. (ours is white)<br />
• Liner: h<strong>and</strong>-held tool with flat blade used in printmaking. This tool is used<br />
for outlining area of printing block before gouging.
Terms Continued<br />
• Proof: Test sheet made to reveal errors or flaws…shows how<br />
printing job is intended to appear when finished.<br />
• Gouger: h<strong>and</strong>-held tool with beveled blade used in printmaking. It<br />
is used to carve out printing block material. Comes in a variety of<br />
widths for thinner <strong>and</strong> thicker grooves.<br />
• Bench hook: a device with a hook-like part fitting over the front<br />
edge of a table as a means of preventing the printing block from<br />
slipping on the table.
Papermaking Terms:<br />
• Pulp: to reduce (printed papers, books, etc.) to pulp for use in<br />
making new paper.<br />
• Couch sheet: felt sheets used to absorb water from<br />
freshly made sheet of paper.<br />
• Mould: In papermaking, the wooden frame covered<br />
with either a laid or wove wire surface used for<br />
forming sheets of paper by h<strong>and</strong>.<br />
• Deckle: In papermaking, the upper frame that encloses<br />
the wet pulp on the mold. Unlike the mold, the deckle<br />
is a frame which is entirely open. (no wire)<br />
• Embossed paper: a raised impression or pattern on the<br />
surface of a sheet of paper.<br />
• Slushing: first dispersion of raw materials in water by<br />
agitation. (making pulp in blender)
Printmaking origin:<br />
• <strong>Block</strong> <strong>Printing</strong><br />
An important event for the Eastern world that<br />
took place during the Tang (618-906) dynasty was<br />
the invention of printing, possibly between the<br />
4th <strong>and</strong> 7th century AD. It began as blocks cut<br />
from wood used to print textiles <strong>and</strong> then used to<br />
reproduce short Buddhist religious texts that<br />
were carried as charms by believers. Later, long<br />
scrolls <strong>and</strong> books were produced, first by woodblock<br />
printing <strong>and</strong> then, beginning in the 11th<br />
century, by using movable type.
Papermaking Origin<br />
• Egypt 3,000 BC (over 5000 years ago)<br />
• It was there that a marsh grass called Papyrus flourished. The<br />
Egyptians cut thin strips from the plant's stem <strong>and</strong> softened<br />
them in the muddy waters of the Nile. These strips were then<br />
layered in right angles to form a kind of mat. The mat was then<br />
pounded into a thin sheet <strong>and</strong> left in the sun to dry. The<br />
resulting sheets were ideal for writing on. Since they were also<br />
lightweight <strong>and</strong> portable they became the writing medium of<br />
choice of Egyptians, Greeks <strong>and</strong> Romans for record keeping,<br />
spiritual texts <strong>and</strong> works of art. It is from papyrus that the word<br />
paper comes from. Although papyrus sheets were similar to<br />
paper in terms of function, being laminated sheets they were<br />
technically more like a mat <strong>and</strong> therefore not the same as the<br />
papers of today.<br />
• Paper as we know it today comes from another source - China
Zendoodle/Zentangle<br />
• an easy to learn method of creating beautiful images from<br />
repetitive patterns. It is a fascinating new art form that is<br />
fun <strong>and</strong> relaxing. It increases focus <strong>and</strong> creativity.<br />
Zentangle provides artistic satisfaction <strong>and</strong> an<br />
increased sense of personal well being. It does not need to<br />
look like anything else <strong>and</strong> has no up or down. Zentangle<br />
is an unusual approach to art because you have no idea<br />
what its result will be when you begin. Your creation is not<br />
restricted by your expectations. Zentangle is an artistic<br />
meditation that supports relaxation, focus <strong>and</strong> inspiration<br />
<strong>and</strong> can be a wonderful daily ritual.
Benefits <strong>and</strong> Uses of Zentangle/doodle<br />
It is fascinating to learn how other people are using Zentangle. Here's a list of ways others are enjoying<br />
Zentangle's benefits. This list continues to grow as people apply Zentangle in ways we never considered.<br />
• Relaxation<br />
• Journaling<br />
• Insomnia (Improved sleep by creating a Zentangle before bedtime)<br />
• Self-esteem<br />
• Inspiration<br />
• Panic attacks (For fear of flying, creating a Zentangle during takeoff <strong>and</strong> l<strong>and</strong>ing)<br />
• Modify behavior<br />
• Create beautiful works of art<br />
• Nurture <strong>and</strong> develop creative abilities<br />
• Relieve stress<br />
• Improve eye/h<strong>and</strong> coordination<br />
• Develop/rehabilitate fine motor skills<br />
• Team building <strong>and</strong> group focus<br />
• Therapy<br />
• Anger management<br />
• Addiction therapy tool<br />
• Early artist development <strong>and</strong> appreciation<br />
• Increase attention span <strong>and</strong> ability to concentrate<br />
• Home schooling<br />
• Design inspiration<br />
• Stretching <strong>and</strong> warm-up for artists<br />
• Stress reduction
Notice the movement of line<br />
throughout the doodles.
Solid black negative space within patterns<br />
provides high contrast.
This is a doodle that has been cut from a block <strong>and</strong> printed.
Color can be added fro emphasis.
Divide up your paper into shapes then fill<br />
with repeated patterns.
Don’t start with a plan…. Be<br />
spontaneous <strong>and</strong> let your<br />
imagination lead you.
Writing can become part of the pattern.
Can be cut into fun shapes.
Divide a familiar shape into<br />
smaller sections to fill with<br />
pattern.
shaded<br />
linear
Inspired by nature.
Step 1<br />
• Complete the repeated pattern worksheet. Look<br />
around your environment to get ideas for patterns.<br />
• Use the worksheet in your packet to create 4<br />
practice Zentangles/doodles <strong>and</strong> one final<br />
Zentangle.<br />
• Cut out your viewfinder <strong>and</strong> find the strongest<br />
5”x5” area of your doodle. Trace around with<br />
colored pencil.
Step 2<br />
• Trace your 5”x5” area of doodle using tracing<br />
paper.<br />
• Lay tracing paper on top of copper foil <strong>and</strong><br />
outline with pointed stylus.<br />
• Lay copper foil on cushion <strong>and</strong> begin to<br />
create relief <strong>and</strong> recessed areas with the<br />
various styluses.
Step 3<br />
• Lay copper foil on newspaper <strong>and</strong><br />
brush India ink over entire surface.<br />
• Use paper towels to buff away ink<br />
from the relief areas (raised) <strong>and</strong><br />
leave ink in the recessed areas<br />
(deep).
Step 4<br />
• Get a piece of poster board <strong>and</strong> cut a 9”x9”<br />
square.<br />
• Cut out window from center leaving a 2.25”<br />
border. (see example)<br />
• Lay copper underneath window <strong>and</strong> secure<br />
with masking tape.
Step 5<br />
• Cut out 2”x1.5” viewfinder <strong>and</strong> use to find strong<br />
area of design from your 5”x5” tracing paper.<br />
• Transfer this to your rubber printing block.<br />
• Trace your outlines with an x-acto knife.<br />
• Begin gouging out half of your design being careful<br />
not to cut toward your free h<strong>and</strong>….use a rubber<br />
mat underneath or a bench hook to keep your<br />
block from sliding.
Step 6<br />
• After a printing demonstration, begin printing your<br />
rubber block on your white mat. Leave the corners<br />
blank. You will have 12 prints. (3 on each side)<br />
• Begin tearing paper into pieces for the homemade<br />
paper.
Step 7<br />
• After a papermaking demonstration, make 4<br />
squares of embossed, homemade paper.<br />
• While paper is drying, cut out 8”x8” piece of tag<br />
board <strong>and</strong> tape over backside of copper to create<br />
a secure backing.<br />
• If you’d like, s<strong>and</strong>wich a wire between the backing<br />
<strong>and</strong> the mat <strong>and</strong> decorate with beads.<br />
• Once paper is dry, trim edges <strong>and</strong> glue into<br />
corners of mat.<br />
YOU ARE FINISHED!
<strong>Copper</strong> <strong>Tooling</strong><br />
Drawing into the metal can be<br />
done to create a impressed<br />
design which becomes a<br />
raised design on the other<br />
side. This is done by placing<br />
the metal on a soft surface<br />
such as a foam or rubber<br />
sheet or a stack of<br />
newspapers <strong>and</strong> firmly<br />
'drawing' into the metal with<br />
a blunt tool or 'stylus'.<br />
(shown) The pointed <strong>and</strong><br />
blunt stylus shown are for<br />
drawing, the flat spatulas<br />
Shown are for flattening <strong>and</strong><br />
the curved tool ends are for<br />
raising metal.
• The capped end of a ball point<br />
pen works well to start with. A<br />
bit of experimentation with<br />
technique, different styli <strong>and</strong><br />
pressures will yield <strong>and</strong> infinite<br />
variety of results. Drawing tools<br />
should be blunt so as not to cut<br />
through the metal. The finished<br />
piece can be easily colored or<br />
darkened with prepared<br />
patinas. A similar effect can<br />
obtained with paint or stain<br />
that has been brushed on <strong>and</strong><br />
then wiped off. Subsequent<br />
buffing of the high lights with<br />
an abrasive pad can give <strong>and</strong><br />
'antique' look. As a piece is<br />
worked it will become stiffer.
Painted with oils to add color
“I really liked this project because it is the most complex project<br />
with a lot of steps, <strong>and</strong> I got to learn many different styles of art <strong>and</strong><br />
turn them into one project. “- Whitney Freeman
Drawing Zentangles/doodles tutorials<br />
• Collaborative pattern hunt (You tube)<br />
• http://www.youtube.com/watch?v=u7vL4WeEOgQ<br />
• http://www.youtube.com/watch?v=XBYLmn7bfy4&playnext=1&list=PL88F14ADC<br />
D44319FA<br />
• http://www.youtube.com/watch?v=56n7_1FGgiw&playnext=1&list=PL88F14ADC<br />
D44319FA<br />
• http://www.youtube.com/watch?v=R_t_34mchtw&feature=fvsr<br />
• http://www.youtube.com/watch?v=C4Nlz4XMxcs<br />
• http://www.youtube.com/watch?v=IiP5YXj9t6E<br />
• http://www.youtube.com/watch?v=CE2NgL2ovFA&feature=fvsr<br />
• http://www.youtube.com/watch?v=hscfey5N-pY<br />
• http://www.youtube.com/watch?v=TEjXxGjnrg0<br />
• http://www.youtube.com/watch?v=0XrpE0vUtP8