Printrex Ethernet Rack Mount User Guide - TransAct
Printrex Ethernet Rack Mount User Guide - TransAct
Printrex Ethernet Rack Mount User Guide - TransAct

Create successful ePaper yourself
Turn your PDF publications into a flip-book with our unique Google optimized e-Paper software.
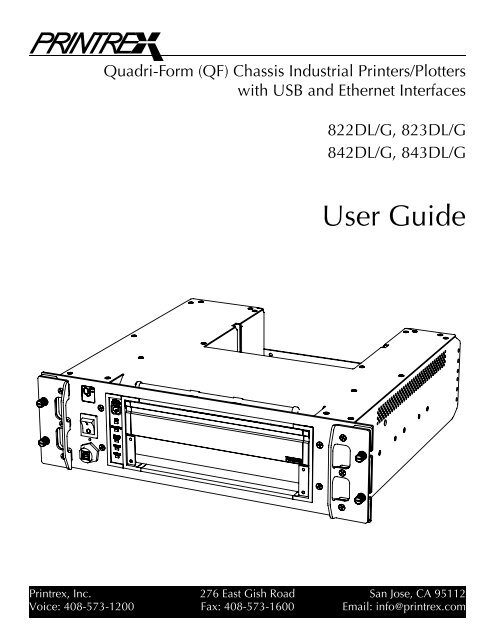
Quadri-Form (QF) Chassis Industrial Printers/Plotters<br />
with USB and <strong>Ethernet</strong> Interfaces<br />
822DL/G, 823DL/G<br />
842DL/G, 843DL/G<br />
<strong>User</strong> <strong>Guide</strong><br />
<strong>Printrex</strong>, Inc. 276 East Gish Road San Jose, CA 95112<br />
Voice: 408-573-1200 Fax: 408-573-1600 Email: info@printrex.com
Table of Contents<br />
1 Introduction ........................................................................................... 4<br />
Overview.................................................................................................................. 4<br />
Firmware (Software) Information............................................................................... 4<br />
Package Contents ..................................................................................................... 5<br />
Getting Familiar........................................................................................................ 6<br />
2 System Setup.......................................................................................... 9<br />
OEM Integrated Systems ........................................................................................... 9<br />
End-<strong>User</strong> Installation................................................................................................. 9<br />
Getting the Right Drivers .......................................................................................... 9<br />
Connecting the Power Cord...................................................................................... 9<br />
Connecting the USB Cable ....................................................................................... 9<br />
Installing the Printer Driver ..................................................................................... 10<br />
Configuring the <strong>Ethernet</strong> Settings ............................................................................ 10<br />
3 Operation............................................................................................. 11<br />
Loading Paper (Internal Roll)................................................................................... 11<br />
Loading Paper (External Media) .............................................................................. 12<br />
Tearing Paper ......................................................................................................... 13<br />
Forms Marks ........................................................................................................... 13<br />
Running Self-Test.................................................................................................... 14<br />
Advancing Paper .................................................................................................... 14<br />
Printing................................................................................................................... 14<br />
Clearing a Paper Jam .............................................................................................. 15<br />
Additional Controls................................................................................................. 15<br />
Errors and Error Handling ....................................................................................... 15<br />
Troubleshooting...................................................................................................... 16<br />
4 Care and Cleaning................................................................................ 18<br />
General Cleaning.................................................................................................... 18<br />
Protecting the Thermal Head .................................................................................. 18<br />
Cleaning the Thermal Head .................................................................................... 18<br />
Cleaning the Form Sensor ....................................................................................... 18<br />
Long Term Storage.................................................................................................. 18<br />
5 Support/Service .................................................................................... 19<br />
<strong>Printrex</strong> Warranty ................................................................................................... 19<br />
Consumables Warranty .......................................................................................... 19<br />
Obtaining Service ................................................................................................... 19<br />
Self Service ............................................................................................................. 19<br />
Spare Parts.............................................................................................................. 19<br />
2<br />
<strong>Printrex</strong>,<br />
Inc.
Table of Contents<br />
Supplies.................................................................................................................. 20<br />
Accessories............................................................................................................. 20<br />
Windows Drivers.................................................................................................... 20<br />
6 Safety ................................................................................................... 21<br />
Restrictions on Use ................................................................................................. 21<br />
Grounding .............................................................................................................. 21<br />
Power Cord ............................................................................................................ 21<br />
7 Specifications....................................................................................... 22<br />
General .................................................................................................................. 22<br />
Performance ........................................................................................................... 22<br />
Forms Compatibility ............................................................................................... 22<br />
Environmental ........................................................................................................ 22<br />
Regulatory .............................................................................................................. 22<br />
<strong>Printrex</strong>,<br />
Inc<br />
3
Introduction<br />
Introduction<br />
Overview<br />
This <strong>User</strong> <strong>Guide</strong> describes the general operation and care of the QF (Quadri-Form) Chassis<br />
series of industrial printers/plotters. The specific QF Chassis models covered by this guide are<br />
the 822DL/G, 823DL/G, 842DL/G, and 843DL/G.<br />
These products are designed for use in a variety of environments, including rugged mobile<br />
data logging and exploration systems. While highly durable and reliable in service, best performance<br />
and product life will be assured if some degree of care is taken when installing the<br />
printers and when providing routine maintenance. Reading the following sections describing<br />
the setup, operation, and basic care of the printer should answer questions about these<br />
aspects of using <strong>Printrex</strong> products. If you have further questions, please contact <strong>Printrex</strong> support<br />
at 1-408-573-1200 or email support@printrex.com and we will make every effort to<br />
provide a solution.You can also contact us at our website, http://www.printrex.com.<br />
The following table lists QF Chassis printer features by model.<br />
Model 822DL/G 823DL/G 842DL/G 843DL/G<br />
Print speed (ips) 2 2 4 4<br />
Integrated internal roll Yes Yes Yes Yes<br />
Bottom feed fan-fold Yes Yes Yes Yes<br />
Film/mylar media support Yes Yes Yes Yes<br />
Vertical line adjustment Yes Yes Yes Yes<br />
Extended media controls Yes Yes Yes Yes<br />
Resolution (dpi) 203 300 203 300<br />
32 level grey scale printing Yes Yes Yes Yes<br />
Autorange 115/220 VAC power Yes Yes Yes Yes<br />
Fan-cooled Yes Yes Yes Yes<br />
CE certification (ITE, Safety, and EMC) Yes Yes Yes Yes<br />
FCC Class A Yes Yes Yes Yes<br />
Firmware (Software) Information<br />
The Firmware (Software) resident in the Printer is owned by <strong>Printrex</strong> or its suppliers and is<br />
licensed for used only on a single printer in the user’s Trade or Business. The <strong>User</strong> agrees not<br />
to, and not to authorize or permit, any other person or party to duplicate or copy the Firmware<br />
or the information contained in the nonvolatile or programmable memory. The firmware<br />
(Software) is protected by applicable copyright laws and <strong>Printrex</strong> retains all rights not<br />
expressly granted. In no event will <strong>Printrex</strong> or its suppliers be liable for any damages or loss,<br />
including direct, incidental, economic, special, or consequential damages arising out of the<br />
use or inability to use the Firmware (Software).<br />
4 <strong>Printrex</strong>, Inc.
Introduction<br />
Package Contents<br />
The following items are packed with your printer. If any of these items are missing, please<br />
contact <strong>Printrex</strong> Customer Service immediately.<br />
Quadri-Form Chassis Printer<br />
8 3/4 Inch Paper Carrier<br />
Paper Rods (two)<br />
<strong>Ethernet</strong> I/O Cable<br />
USB I/O Cable<br />
Power Cord (US, UK, Central Europe, or China<br />
plug type, according to the order number suffix)<br />
US<br />
UK<br />
CE<br />
CN<br />
Thermal paper roll<br />
This <strong>User</strong> <strong>Guide</strong><br />
There is also a styrene spacer that keeps the print head pressure off the platen during shipment<br />
and storage. This spacer is not required for operation and may be discarded.<br />
<strong>Printrex</strong>, Inc 5
Introduction<br />
Getting Familiar<br />
Refer to Figures 1 through 5 to familiarize yourself with the names of the features of the<br />
printer, which you will see throughout this guide.<br />
Feature Description Figure<br />
AC Connector IEC power connection for power cord 2<br />
Bottom Feed Slot<br />
Paper entrance slot for bottom paper feed<br />
3<br />
applications<br />
Chassis Label<br />
Indicates Part Number, Revision, Full Model and 2<br />
Serial Number<br />
Door Latches For securing doors 1<br />
Error Indicator<br />
Indicates error conditions (see Errors and Error 4<br />
Handling)<br />
<strong>Ethernet</strong> Connector<br />
Accepts an <strong>Ethernet</strong> cable connected to the 2<br />
host.<br />
<strong>Ethernet</strong> Indicator<br />
When lit, shows <strong>Ethernet</strong> is connected to a host.<br />
When flashing, shows data being transferred to<br />
the printer.<br />
4<br />
Fan-fold Removal Hole<br />
Push hole to remove partial stacks of fan-fold 3<br />
paper<br />
Form Sensor Window Form detector window to view form mark 5<br />
Front Panel Operator controls and indicators 1, 4<br />
Handles<br />
For pulling the printer out when on slides or 1<br />
carrying the printer<br />
Paper Advance Button Advance paper and used to enter self-test 4<br />
Paper Empty Indicator Indicates a paper empty condition 4<br />
Paper Empty Switch Paper empty detection switch 5<br />
Paper Rod Center spindle for internal roll paper supply 2,5<br />
Paper Carrier Internal roll paper holder 5<br />
Paper Roll Paper roll on paper holder 5<br />
Paper Tear Edge Paper tearing bar 1<br />
Platen Printer platen roller 5<br />
Power Indicator Indicates power is applied to the printer 4<br />
Power Switch Controls power to the printer 1, 4<br />
Quick-release <strong>Mount</strong>ing Screws <strong>Rack</strong> securing screws for slide mount<br />
1<br />
applications<br />
Rear Feed Slot<br />
Paper entrance slot for rear, roll or fan-fold<br />
2<br />
paper applications<br />
Rear Paper Rod Slots<br />
Accepts Rear Paper Rod for rear paper roll<br />
2<br />
applications<br />
Rear Paper Tray Accepts fan-fold (API sheet) paper 2<br />
USB Connector Accepts a USB cable connected to the host. 1, 2, 4<br />
USB Indicator<br />
When lit, shows USB is connected to a host.<br />
When flashing, shows data being transferred to<br />
the printer.<br />
4<br />
6 <strong>Printrex</strong>, Inc.
Introduction<br />
Getting Familiar<br />
(continued) 1 Printer Front<br />
Paper tray<br />
Handle<br />
Model label<br />
Quick release<br />
mounting screws<br />
Handle<br />
Power Switch<br />
USB Connector<br />
Front Panel<br />
Paper tear edges<br />
Door latches<br />
Quick release<br />
mounting screws<br />
2 Rear Panel and Paper Roll 3 Bottom Panel<br />
Rear paper rod<br />
Rear paper<br />
feed slot<br />
Rear paper<br />
rod slots<br />
Bottom paper<br />
feed slot<br />
Fan fold removal hole<br />
<strong>Ethernet</strong> connector<br />
USB connector<br />
AC connector<br />
Chassis label<br />
Rear paper tray<br />
<strong>Printrex</strong>, Inc 7
Introduction<br />
Getting Familiar<br />
(continued)<br />
4 Front Panel Indicators<br />
5 Print Mechanism and Paper Roll<br />
Print head assembly<br />
Paper advance button<br />
USB indicator<br />
Power switch<br />
<strong>Ethernet</strong> indicator<br />
Paper empty indicator<br />
Error indicator<br />
Platen<br />
Paper empty<br />
sensor<br />
Form mark<br />
sensor<br />
Power indicator<br />
Paper rod<br />
USB connector<br />
Paper<br />
carrier<br />
8 <strong>Printrex</strong>, Inc.
System Setup<br />
System Setup<br />
OEM Integrated<br />
Systems<br />
End-<strong>User</strong> Installation<br />
Getting the Right<br />
Drivers<br />
These complete-solution products are built into enclosed physical packaging or racks, and<br />
may consist of pre-configured computer hardware using either a UNIX operating system variant<br />
or a Microsoft operating system.<br />
While <strong>Printrex</strong> has experience in supporting the development of a variety of these OEM systems,<br />
it is impossible for us to maintain the information and knowledge necessary to provide<br />
detailed support for your specific installation. If you have questions about the use of a specific<br />
integrated system, consult support services provided by the OEM.<br />
For clients directly receiving <strong>Printrex</strong> products to install into existing or new systems, we can<br />
help to make the installation process as trouble-free as possible.<br />
The following section describes the general procedure for setup, which may be sufficient for<br />
many users to complete the process. If you have further questions, we maintain several reference<br />
documents online (in the Support area of the website) which describe a variety of<br />
installation scenarios in detail, including different Microsoft, UNIX, and Linux operating systems.<br />
For Plug-And-Play operating systems, installation goes more smoothly if the correct driver<br />
files are available when the device is first connected. Be sure you have the <strong>Printrex</strong> driver<br />
software for your particular operating system and its version. If a driver disk is not available,<br />
download the latest version from the <strong>Printrex</strong> website, in the Support section.<br />
When you download the driver file, create a folder on your desktop (named PrxDrivers, for<br />
example) and save the file in this location.<br />
Note that this file will be in ZIP format. You will need to extract the driver files in order to use<br />
them. For many operating systems, right-clicking on the ZIP file presents an option to Extract<br />
All; do so into the desktop folder. Now the system will have access to drivers when the system<br />
installer needs them.<br />
Connecting the Power Cord<br />
Caution! Do not use a “cheater” connector in order to use an inexpensive two-wire<br />
outlet or extension cord. This defeats grounding protection and may be a serious<br />
electrocution hazard in wet environments.<br />
1. Locate the Power Switch on the front panel of the printer (see Figures 1and 4).<br />
2. Turn the Power Switch to the off position (indicated by the international symbol “O”).<br />
3. Connect the IEC female end of the cord to the power connector on the rear of the printer chassis.<br />
4. Plug the male connector into a properly grounded three-pin AC main power outlet.<br />
Connecting the USB Cable For best results, only use cables bearing the USB blue and red logo. Keep in mind that maximum<br />
cable length is 5 meters; do not use inexpensive extension cables. (Active extension<br />
cables, with integrated USB hubs, may be used, up to the limit of 5 levels.)<br />
With printer power off, connect the printer to an available USB port on the host computer.<br />
<strong>Printrex</strong>,<br />
Inc<br />
9
System Setup<br />
Installing the Printer Driver This process varies in specific details depending on operating system.<br />
In general, when the printer is first turned on, a device installer wizard will detect the printer<br />
on a USB port.<br />
Direct the installer to search for the driver in the desktop folder containing the extracted files.<br />
In the case of Windows systems, you may see a warning regarding 'unsigned' or 'untested'<br />
drivers. Continue the installation anyway.<br />
When the installer wizard has finished, verify the installation by printing a test page. For<br />
Windows systems, the printer Properties dialog provides a 'Print Test Page' button.<br />
If you have any questions regarding installation on a particular OS, or experience errors in<br />
the process, please check the detailed documentation available on the <strong>Printrex</strong> website.<br />
Configuring the<br />
<strong>Ethernet</strong> Settings<br />
If you are installing the printer for use over an <strong>Ethernet</strong>-based network, the printer must be<br />
correctly configured before connecting via <strong>Ethernet</strong>. After the driver has been installed as<br />
described above, this is done over a USB connection. Open the printer Properties dialog,<br />
and select the 'TCP/IP Address Setup' tab. Follow the instructions on the dialog page; when<br />
finished, connect the printer to your network.<br />
Note that the host computer must also be set up to use a network TCP/IP port to communicate<br />
with the printer. While the details of this process vary, for most Windows systems the<br />
following applies:<br />
1. Go to the printer Properties dialog, Ports tab. Click the button 'Add Port...'.<br />
2. From the list, select 'Standard TCP/IP Port', then click 'New Port'.<br />
3. Enter the IP address of the printer and continue.<br />
4. Select a Device Type of Generic, and complete the wizard.<br />
5. Close the port-type dialog.<br />
Now the driver will print to the network port instead of the USB port, so you may disconnect<br />
the USB cable and move the printer to another location on your network.<br />
It is important to consider the network architecture when setting up a printer to be shared<br />
among several users, particularly when a variety of operating systems are in use. There are<br />
advantages to designating one system as a job management and queuing print server versus<br />
allowing each workstation to send jobs directly to the printer. Note that this affects the topology,<br />
but not the physical connection, of computers and printers.<br />
For more detailed descriptions of this issue and the installation procedure, please refer to the<br />
online documentation.<br />
10<br />
<strong>Printrex</strong>,<br />
Inc.
Operation<br />
Operation<br />
Loading Paper<br />
(Internal Roll)<br />
1 Unlock door<br />
Press the open circles printed on the<br />
two latches at the lower corners of the<br />
door.<br />
Pull up on the latches to open the door.<br />
2 Remove paper carrier<br />
Remove the paper carrier from the<br />
printer and remove the paper rod<br />
from the carrier.<br />
Slip the empty core off the paper<br />
rod.<br />
3 Install roll in printer<br />
3<br />
Slip the paper rod through the core of<br />
the new paper roll and install the<br />
paper roll on the carrier so the paper<br />
feeds from the top of the roll toward<br />
the front of the carrier.<br />
Feed a few inches of paper from the<br />
roll so it will extend over the platen<br />
after insertion. Insert the paper carrier<br />
in the printer and close the door with<br />
the latches unlocked.<br />
4 Lock door<br />
Refer to the illustration.<br />
Lock the door latches by pressing on<br />
the solid circles painted onto them.<br />
Tear off the extra paper.<br />
<strong>Printrex</strong>, Inc 11
Operation<br />
Loading Paper<br />
(External Media)<br />
An external stack or roll of paper is threaded through either the rear feed slot or the bottom<br />
feed slot.<br />
1 Remove the paper carrier.<br />
Unlock the door and remove the paper<br />
carrier.<br />
2 Thread paper through rear or bottom.<br />
Insert the paper through the<br />
bottom (or rear) of the printer<br />
and out through the door.<br />
Rear roll paper path - use paper rod in rear slot.<br />
Rear fan fold paper path -<br />
stack paper in rear bay.<br />
The fan fold removal hole may<br />
be used to help remove a partial<br />
stack of fan fold paper (see<br />
“3 Bottom Panel” on page 7.)<br />
<br />
Fan fold paper stacked in rear paper bay.<br />
Bottom fan fold paper path.<br />
The top of the paper stack<br />
should allow sufficient clearance<br />
for the paper to unfold.<br />
<br />
12 <strong>Printrex</strong>, Inc.
Operation<br />
3 Insert the paper carrier.<br />
Position the paper squarely out of the front of the<br />
printer with enough paper to extend over the<br />
platen after the paper carrier is inserted. Insert the<br />
paper carrier over the top of the paper.<br />
The paper carrier must be installed to position<br />
the paper over the paper empty sensor<br />
and the form mark sensor (see “5 Print Mechanism<br />
and Paper Roll” on page 8.)<br />
4 Lock door.<br />
Refer to the illustration.<br />
Lock the door latches by pressing on the solid circles<br />
painted onto them.<br />
Tearing Paper<br />
There are two tear bars, one on the bottom of the front door for tearing up, and one on the<br />
printer housing for tearing down. Pull up or down at approximately a 45 degree angle and<br />
slightly to the right or left to tear the paper.<br />
Forms Marks<br />
The forms mark sensor is located in the front right side of the printer.<br />
• Be sure the paper is loaded as shown below for correct top of form (TOF) detection.<br />
• Be sure the paper size is correctly selected in the Windows driver.<br />
A list of media providers who supply paper with the correct form marker location can be<br />
found on the <strong>Printrex</strong> website (http://www.printrex.com) . Most other media suppliers can<br />
supply compatibly marked forms provided they receive the marker specifications shown<br />
below.<br />
<strong>Printrex</strong>, Inc 13
Operation<br />
Insert into printer<br />
0.5 In.<br />
Perforation<br />
0.25 In.<br />
0.5 In.<br />
Perforation<br />
Forms mark<br />
Uncoated side<br />
of paper<br />
Coated side<br />
of paper<br />
Forms mark<br />
Running Self-Test<br />
Advancing Paper<br />
Printing<br />
To perform self-test, press and hold the Paper Advance button while turning on power. Once<br />
self-test has started, release the Paper Advance button. In self test, the ERROR indicator lights<br />
and the model, interface type, firmware version, and various test patterns are printed. After<br />
the last test pattern finishes printing, the test printout stops, the printer exits self test and<br />
returns to normal operation.<br />
There are times when it is useful to have the test pattern repeated. If the Paper Advance button<br />
is held while the first self test pattern is finishing, the printer will enter a repeating self test<br />
mode where the entire self test pattern is repeated until the unit is powered off.<br />
After loading paper, or any time you wish to advance the paper, press the Paper Advance<br />
button on the front panel. The printer feeds paper as long as the button is pressed, but will<br />
stop when either of two conditions occurs:<br />
• If the paper has form markers printed on the back surface, the printer stops when a marker is<br />
detected.<br />
• The printer stops feeding paper if the logical page length has passed without a form marker being<br />
detected.<br />
The powerup default page length is 16.7 inches. This length may be changed by sending the<br />
printer control codes in software.<br />
Releasing the button and pressing again repeats the cycle of feeding and stopping.<br />
Note: The Paper Advance button is inhibited when the printer is executing<br />
a print command.<br />
When print jobs are sent to the printer continuously, there is no mechanical duty cycle limitation;<br />
some users report 10 hours a day of nonstop printing as normal usage. However, if the<br />
print data contains an unusually high proportion of black areas, the printer may go into an<br />
over-temperature condition.<br />
This may also occur when printing less dense print jobs if the ambient temperature is very<br />
high. Refer to “Errors and Error Handling” on page 15 for information about temperature<br />
errors indicated on the front panel. Recovery from temperature errors is automatic, and you<br />
need do nothing to resume printing.<br />
14 <strong>Printrex</strong>, Inc.
Operation<br />
Clearing a Paper Jam<br />
Additional Controls<br />
If paper has been loaded askew, has been torn off forcefully, or is damp, the paper may feed<br />
abnormally and wrap around the platen roller. These occurrences are extremely rare, but it is<br />
important to know how to clear the jam:<br />
1. Turn off power to the printer.<br />
2. Open the printer door and remove the paper holder.<br />
3. Tear off the incoming paper (either from the roll, or fanfold supply).<br />
4. Pull on the free end of paper with one hand, while turning the platen roller with the other hand to<br />
unroll paper from the platen.<br />
5. Do not use a razor, knife or sharp object of any kind to cut the paper off of the platen roller. Nicking<br />
or cutting the roller surface will result in progressive damage to the platen with continued use of<br />
the printer.<br />
6. Be very careful not to damage the print head exposed on the underside of the door. Use bare hands<br />
to free the paper to avoid accidental contact with metal or hard surfaces<br />
The Front Panel controls are intentionally minimal. This helps to prevent users in a networked<br />
environment from making unannounced or inadvertent changes to your print jobs.<br />
The <strong>Printrex</strong> Windows drivers send control codes to the printer for each print job, so it is<br />
important to check driver settings before printing.<br />
Note that some geotechnical applications bypass the Windows drivers, and provide a<br />
limited subset of printer controls. Check with your application’s documentation to determine<br />
if this is the case. If so, settings made in the Windows driver will not affect printing from<br />
these applications.<br />
Errors and Error<br />
Handling<br />
The Error Indicator on the Front Panel indicates a problem with the printer. This indication is<br />
a two digit error code expressed as a series of long flashes (for the tens digit) then short<br />
flashes (for the ones digit). The tens digit flash is twice as long as the ones digit flash. Example:<br />
One long flash followed by two short flashes indicates an error code of 12 (Door Open).<br />
The Error Indicator will continue to flash the error code while the error condition exists.<br />
Refer to the following table for a list of error codes and their meaning.<br />
Error<br />
Code<br />
Name Description Fix<br />
11 Paper Empty The printer is out of paper. Load paper.<br />
12 Door Open One or both of the door latches<br />
are open.<br />
Close both door latches.<br />
21 Under Voltage The internal DC supply voltage<br />
is too low to print properly.<br />
22 Over Voltage The internal DC supply voltage<br />
is too high to print properly.<br />
24 Over Temperature The thermal head is<br />
overheated.<br />
Service is generally required to<br />
clear this condition.<br />
Service is generally required to<br />
clear this condition.<br />
Cleared when the thermal head<br />
cools off.<br />
-- Under Temperature <strong>Printrex</strong> printers/plotters do not have an under temperature error.<br />
The low operating temperature is specified as 5°C to ensure good<br />
quality, but printers are often used where it is necessary to print,<br />
even with reduced quality. Under these conditions, the print quality<br />
may be less than optimal. When printing, the print head<br />
temperature quickly reaches normal operating range.<br />
<strong>Printrex</strong>, Inc 15
Operation<br />
Troubleshooting<br />
This section lists a few common questions that are received by <strong>Printrex</strong> support staff and the<br />
answers most likely to fix the problem. For further information, see the <strong>Printrex</strong> System<br />
Administrator’s <strong>Guide</strong>.<br />
The printer seems to be working, but nothing is printed.<br />
The thermal paper has one side that has a thermal sensitive coating while the other side is<br />
not coated. Be sure the thermally coated side is facing upward (as the paper is exiting the<br />
printer).<br />
I’m using fanfold paper with form markers, but the printer stops in the<br />
wrong place. What driver settings should I use?<br />
Be sure to set Paper Size to the actual size of the paper (e.g., 8.75” x 6.25”), and enable<br />
End-of-Job Form Feed.<br />
Also, see that the Form Marker setting (in the Windows XP/Vista driver) matches the actual<br />
printed location of the marker.<br />
Check that the paper is loaded correctly: looking at the front of the printer, the marker<br />
should be on the right side, on the bottom of the paper.<br />
I’m trying to print TIFF files, but the printed output is clipped off. How do<br />
I print the whole log?<br />
Commonly, users view TIFF logs in Windows Imaging, the free viewer provided in the<br />
Accessories folder. Unfortunately, this is a single-page application. It is designed for simple<br />
photograph-size viewing and printing.<br />
In addition, the Windows printing subsystem formerly limited printer pages to 32,766 raster<br />
lines (approximately 163 inches long for 200 dpi <strong>Printrex</strong> printers, or 109 inches for<br />
300 dpi <strong>Printrex</strong> printers), so the longest log that could be printed from Windows Imaging<br />
was just 13 feet long.<br />
In Windows XP, the Imaging applet was replaced by a new Paint applet that uses multiple<br />
printer pages. In this case, set the printer page size to the paper’s page size (e.g., 8.75” x<br />
6.25” half page), and Paint will generate as many printer pages as needed to print the log.<br />
In most of the larger geotechnical organizations, proprietary viewers have been written for<br />
internal use by staff and customers. There are very few options for users of TIFF log files<br />
who are not using Windows XP, or who find the XP Paint application too primitive.<br />
<strong>Printrex</strong> welcomes comments regarding requirements and features for log viewing tools, to<br />
help us evaluate customer viewer application needs.<br />
Every time I start my program, I have to change printer settings. How do<br />
I change the default driver settings?<br />
Changes to the printer settings done from within an application are generally not saved<br />
unless some unusual program coding is done.<br />
Self test prints out OK but when I print from the computer I get garbage.<br />
The most common culprits for this symptom are the printer cable or printer driver. Be sure<br />
the cable is appropriately connected (see “Connecting the USB Cable” on page 10). Also,<br />
be sure the printer driver is for the specific model of printer in use.<br />
16 <strong>Printrex</strong>, Inc.
Operation<br />
Some times the fan-fold paper skews to one side or the other. How do I<br />
correct this?<br />
The <strong>Printrex</strong> printers work with a wide variety of media. A paper skewing problem is normally<br />
corrected by realigning the paper manually, by opening the door, straightening the<br />
paper, and closing the door.<br />
In some cases (generally with very thin paper) the problem may persist. If this is the case,<br />
thread the paper over a full internal roll of paper (as shown) to remedy the situation.<br />
<strong>Printrex</strong>, Inc 17
Care and Cleaning<br />
Care and Cleaning<br />
General Cleaning<br />
Protecting the Thermal<br />
Head<br />
There is no regular cleaning required for proper operation of the printer, however the printer<br />
surfaces are designed and manufactured to permit cleaning with the following cleaning<br />
agents:<br />
• Isopropyl alcohol<br />
• Ammonia<br />
• Chlorine bleach (1:10 concentration with water)<br />
• Hexachlorophene (PhisoHex)<br />
• Glutaraldehyde (Cidex)<br />
Use a soft cloth dampened with the cleaning agent to clean the surfaces of the printer. Do<br />
NOT submerse the printer or allow spills onto or into it.<br />
The thermal head incorporates a protective glaze coating and is generally resistant to harsh<br />
environments, but follow these guidelines to protect it:<br />
• Do not allow the thermal head to come into contact with sharp or hard objects.<br />
• Do not allow thermal paper debris to accumulate on the thermal head. See below.<br />
• Do not allow condensation to accumulate on the thermal head.<br />
• Use only <strong>Printrex</strong> approved thermal paper.<br />
• Do not use abrasive cleaning substances on the thermal head. See below.<br />
Cleaning the Thermal Head Paper dust or other foreign material may occasionally accumulate on the thermal print head.<br />
This will be indicated by light printing or no printing in a narrow band down the length of<br />
the paper. In order to eliminate the thermal paper debris buildup, use a soft cloth moistened<br />
with one of the following cleaning agents:<br />
• Isopropyl alcohol<br />
• Ethanol<br />
A light wiping along the length of the print head is adequate. Allow the print head to dry<br />
before resuming printing. It can be wiped dry with a soft, clean cloth. Do NOT submerse the<br />
print head or allow spills onto it.<br />
Cleaning the Form<br />
Sensor<br />
Long Term Storage<br />
Paper dust or other foreign material may occasionally accumulate on the form sensor. This<br />
will be indicated by paper advances missing the top of form position (some time after it has<br />
been correctly stopping at the top of form). The form sensor can be cleaned with an aerosol<br />
air spray or soft bristled brush. It is located just under the form sensor window.<br />
With the paper door closed, the thermal head applies considerable pressure on the platen<br />
(approximately 12 lbs). If the printer is stored for long periods of time with the paper door<br />
closed (especially in cold temperatures), a slight flat area may develop on the platen. To<br />
avoid this, keep the paper door in an unlatched condition if you anticipate an extended<br />
period of disuse or storage.<br />
If a flat spot on the platen occurs, it is not permanent and the platen will return to its normal<br />
roundness after 10 minutes (on average) of resumed operation.<br />
18 <strong>Printrex</strong>, Inc.
Support/Service<br />
Support/Service<br />
<strong>Printrex</strong> Warranty<br />
Consumables Warranty<br />
Obtaining Service<br />
Self Service<br />
<strong>Printrex</strong> products are warranted to be free from failures due to defects in material or workmanship<br />
for twelve (12) months from the date of purchase. During this 12 month period, <strong>Printrex</strong> will, at its<br />
sole discretion, repair or replace at no charge the product, which in its opinion, is defective.<br />
If the product has been modified without <strong>Printrex</strong> consent or if the failure is the result of misuse,<br />
abuse or misapplication, this warranty obligation is void.<br />
<strong>Printrex</strong> warrants that the thermal print head will be free from defects in material or workmanship<br />
for the expected life of the print head but for not more than one (1) year from the date of purchase.<br />
The print head is a consumable because it wears as media passes under it and as it receives<br />
electrical pulses. The expected life of a thermal print head is the passage of 50 KM (approximately<br />
31 miles) of media (paper or film) or 100 million pulses in any head element. Therefore the<br />
warranty is pro rated over the expected life of the head.<br />
Print heads returned for warranty replacement will have the following credits applied<br />
Up to 3 months use = 100%<br />
Between 3 and 6 months = 75%<br />
Between 6 and 9 months = 50%<br />
Between 9 and 12 months = 25%<br />
More than 12 months = expired warranty<br />
Except as provided above, the hardware and accompanying written material, including this <strong>User</strong><br />
<strong>Guide</strong>, are provided “as is” without warranty of any kind, including the implied warranties of<br />
merchantability and fitness for a particular purpose, even if <strong>Printrex</strong> has been advised of that<br />
purpose. In no event will <strong>Printrex</strong> be liable for any direct, indirect, consequential or incidental<br />
damages arising out of the use or inability to use such product even if <strong>Printrex</strong> has been advised of<br />
such damages.<br />
Before returning a failed unit, the buyer must first obtain a Return Material Authorization<br />
(RMA) number by contacting <strong>Printrex</strong>’s Customer Service. The RMA number should be<br />
prominently displayed on the outside of the returned package and on the accompanying<br />
packing list. <strong>Printrex</strong> cannot be held responsible for any package returned without an RMA<br />
number. The model and serial number of the printer are on the chassis label, which is<br />
located on the rear of the printer. Please have this information available when service is<br />
required.<br />
You are responsible for packing the failed product in original or equivalent packaging for<br />
shipment, and for the charges to ship the failed product to <strong>Printrex</strong>. <strong>Printrex</strong> is responsible for<br />
charges to ship the repaired or replaced product if under warranty. If any charge to you is<br />
involved, <strong>Printrex</strong>, at its sole option, will bill you or return the product C.O.D.<br />
<strong>Printrex</strong> recognizes that some customers have service departments that are capable of servicing<br />
the <strong>Printrex</strong> products. For this case, <strong>Printrex</strong> offers a Self Service Reference. This reference<br />
includes assembly drawings with bills of material so that replaceable internal<br />
components can be identified and ordered. Please contact <strong>Printrex</strong> Customer Service to<br />
obtain a Self Service Reference for your product(s). For self service, the owner assumes the<br />
risk of damage to the unit which may void the warranty.<br />
Spare Parts Description Part Number<br />
Paper Carrier.........................................................................................................2111-0189<br />
Paper Rod .............................................................................................................2012-0008<br />
Power Cord (Central Europe plug).........................................................................2237-0004<br />
<strong>Printrex</strong>,<br />
Inc<br />
19
Support/Service<br />
Power Cord (United Kingdom plug) ......................................................................2237-0061<br />
Power Cord (United States plug ............................................................................2237-0007<br />
Power Cord (Chinese plug) ...................................................................................2237-0107<br />
<strong>Ethernet</strong> I/O Cable ............................................................................................... 2112-0195<br />
USB I/O Cable......................................................................................................2112-0196<br />
Print Head Assembly (822DL/G and 842DL/G).....................................................2111-0175<br />
Print Head Assembly (823DL/G and 843DL/G).....................................................2111-0249<br />
Supplies Description Part Number<br />
Roll Paper, 150’ length..........................................................................................2316-0001<br />
Roll-FF Paper, 150’ roll (6 1/4” Perf. Intervals) .......................................................2316-0013<br />
Fan-Fold Paper, 8.75 x 6.25 inch, 800 sheet box ...................................................2316-0011<br />
Roll Matte Film, 117’ length .................................................................................2316-0009<br />
Accessories Description Part Number<br />
Output Stacker/Basket...........................................................................................2012-0027<br />
Windows Drivers<br />
Windows drivers are available from the <strong>Printrex</strong> Web Site, at (http://www.printrex.com/html/<br />
support.html.<br />
20<br />
<strong>Printrex</strong>,<br />
Inc.
Safety<br />
Safety<br />
Restrictions on Use<br />
Grounding<br />
Power Cord<br />
Use this equipment only for the intended use described in this guide.<br />
• Do not use power supplies outside the specified voltage/hertz range.<br />
• Do not block any openings on the equipment.<br />
• Do not use corrosive chemicals or vapors on or near the equipment.<br />
• Do not expose equipment to rain, spills, or moisture.<br />
This equipment must be grounded to conform with legal and safety standards. Connect only<br />
to a properly grounded outlet.<br />
The power cord supplied with the equipment is rated and approved for service to this equipment.<br />
• Do not use a power cord other than that supplied with the equipment.<br />
• Do not operate the equipment if it has a damaged power cord or plug.<br />
• Do not immerse the power cord or plug in water.<br />
FCC Compliance<br />
This unit has been tested and found to comply with the limits for a Class A digital device, pursuant to Part 15 of the FCC<br />
Rules. These limits are designed to provide reasonable protection against harmful interference when the equipment is<br />
operated in a commercial environment. This equipment generates, uses, and can radiate radio frequency energy and,<br />
if not installed and used in accordance with the instruction manual, may cause harmful interference to radio communications.<br />
Operation of this equipment in a residential area is likely to cause harmful interference in which case the<br />
user will be required to correct the interference at his own expense.<br />
CE Compliance<br />
The manufacturer declares that this product conforms to the following standards or other normative documents:<br />
EMC:<br />
Safety:<br />
EN 55022:1998 Limits and Methods of Measurements of Radio Interference Characteristics of Information Technology<br />
Equipment, Class A, including amendments A1:2000, A2:2003<br />
EN 50024:1998 Limits and method of measurement of Immunity characteristics of Information technology<br />
equipment, including amendments A1:2001, A2:2003<br />
EN 60950-1:2001 Safety of information technology equipment including electrical business equipment, including<br />
amendments A11:2004<br />
<strong>Printrex</strong>,<br />
Inc.<br />
21
Specifications<br />
Specifications<br />
General<br />
Performance<br />
Forms Compatibility<br />
Environmental<br />
Power Requirements (822DL/G, 823DL/G) ....................... 100-240 VAC, 240 VA, 50~60 Hz<br />
Power Requirements (842DL/G, 843DL/G) ....................... 100-240 VAC, 500 VA, 50~60 Hz<br />
Height ................................................................................................... 5.25 inch (133 mm)<br />
Width ......................................................................................................... 19 inch (483mm)<br />
Overall Depth....................................................................................... 17.33 inch (440 mm)<br />
Rear Depth (rear surface face of front panel to rear of unit) ...................... 16.2 inch (411mm)<br />
Front Depth (rear surface of front panel to front of unit) ............................ 1.13 inch (29 mm)<br />
Unit Weight ....................................................................................................18 lbs (8.2 kg)<br />
Shipping Weight ............................................................................................25 lbs (11.4 kg)<br />
Interfaces.................................................................................... USB 2.0, 100 Mbit <strong>Ethernet</strong><br />
Print Speed (822DL/G, 823DL/G) ................................................................ 0.5 to 2 inch/sec<br />
Print Speed (842DL/G, 843DL/G) ................................................................ 0.5 to 4 inch/sec<br />
Horizontal Resolution (822DL/G, 842DL/G).......................................... 203 dpi (8 dots/mm)<br />
Vertical Resolution (822DL/G, 842DL/G)............................................... 203 dpi (8 dots/mm)<br />
Horizontal Resolution (823DL/G, 843DL/G ......................................... 300 dpi (12 dots/mm)<br />
Vertical Resolution (823DL/G, 843DL/G.............................................. 300 dpi (12 dots/mm)<br />
Overall Forms Width .............................................................................. 8.75 inch (222 mm)<br />
Internal Roll Capacity ............................................................ 2.6 inch (66 mm) diameter roll<br />
Bottom Feed Roll Capacity ..................................................... 5 inch (152 mm) diameter roll<br />
Bottom Feed Fan-fold Capacity ..................................................................No practical limit<br />
Rear Feed Roll Capacity.......................................................... 5 inch (152 mm) diameter roll<br />
Rear Feed Fan-fold Capacity ...................................................3.5 inch (89 mm) stack height<br />
Rear Feed Fan-fold Sheet Length ............................................................ 6.25 inch (159 mm)<br />
Forms Marks ............................ see “Forms Marks” on page 13 for Forms Mark specifications<br />
Storage Temperature ................................................................ -40°C (-40°F) to 60°C (140°F)<br />
Operating Temperature (non-condensing) .....................................5°C (41°F) to 40°C (104°F)<br />
Shock and Vibration (non-operational)................................................3G, 0 to 50 Hz, 3 axes<br />
Environmental Ingress (IEC 529)<br />
<strong>Mount</strong>ed in suitable rack..........................................................................................IP54<br />
Free standing............................................................................................................IP52<br />
Regulatory See page 21.<br />
22<br />
<strong>Printrex</strong>, Inc
Information in this document is subject to change without notice and does not represent a<br />
commitment on the part of <strong>Printrex</strong>, Inc. No part of this manual may be reproduced or<br />
transmitted in any form or by any means, for any purpose other than the purchaser is personal<br />
use, without the expressed written permission of <strong>Printrex</strong>, Inc.<br />
All rights reserved. Printed in the United States of America.<br />
© Copyright 2009 by <strong>Printrex</strong>, Inc.<br />
Part Number: 1028-0103-R2<br />
<strong>Printrex</strong>, Inc. 276 East Gish Road San Jose, CA 95112<br />
Voice: 408-573-1200 Fax: 408-573-1600 Email: info@printrex.com