MPH Manual - Columbia Heating
MPH Manual - Columbia Heating
MPH Manual - Columbia Heating

You also want an ePaper? Increase the reach of your titles
YUMPU automatically turns print PDFs into web optimized ePapers that Google loves.
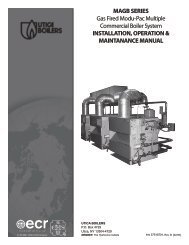
COLUMBIA<br />
MULTI-PASS HORIZONTAL BOILER<br />
<strong>MPH</strong> SERIES<br />
INSTALLATION,<br />
OPERATION and<br />
MAINTENANCE MANUAL<br />
COLUMBIA BOILER COMPANY<br />
POTTSTOWN, PENNSYLVANIA
Table Of Contents<br />
PARTS WARRANTY . . . . . . . . . . . . . . . . . . . . . . . . . . . . . . . . . . . . . . . . . . . . . . . . . . . . . . . . .2<br />
INTRODUCTION . . . . . . . . . . . . . . . . . . . . . . . . . . . . . . . . . . . . . . . . . . . . . . . . . . . . . . . . . . . .3<br />
SERVICE POLICY . . . . . . . . . . . . . . . . . . . . . . . . . . . . . . . . . . . . . . . . . . . . . . . . . . . . . . . . . . .4<br />
INSTALLATION . . . . . . . . . . . . . . . . . . . . . . . . . . . . . . . . . . . . . . . . . . . . . . . . . . . . . . . . . . . . .5<br />
BOILER ROOM . . . . . . . . . . . . . . . . . . . . . . . . . . . . . . . . . . . . . . . . . . . . . . . . . . . . . . . . . .5<br />
VENTING . . . . . . . . . . . . . . . . . . . . . . . . . . . . . . . . . . . . . . . . . . . . . . . . . . . . . . . . . . . . . . .5<br />
JACKET ASSEMBLY . . . . . . . . . . . . . . . . . . . . . . . . . . . . . . . . . . . . . . . . . . . . . . . . . . . . .6<br />
BURNER MOUNTING . . . . . . . . . . . . . . . . . . . . . . . . . . . . . . . . . . . . . . . . . . . . . . . . . . . . .6<br />
BOILER CONNECTIONS . . . . . . . . . . . . . . . . . . . . . . . . . . . . . . . . . . . . . . . . . . . . . . . . . .7<br />
FUEL CONNECTIONS . . . . . . . . . . . . . . . . . . . . . . . . . . . . . . . . . . . . . . . . . . . . . . . . . . . .9<br />
CLEANING AND FILLING A NEW STEAM BOILER . . . . . . . . . . . . . . . . . . . . . . . . . . . . . . .14<br />
OPERATING THE BOILER . . . . . . . . . . . . . . . . . . . . . . . . . . . . . . . . . . . . . . . . . . . . . . . . . . .16<br />
STARTING THE BOILER . . . . . . . . . . . . . . . . . . . . . . . . . . . . . . . . . . . . . . . . . . . . . . . . .17<br />
STOPPING THE BOILER . . . . . . . . . . . . . . . . . . . . . . . . . . . . . . . . . . . . . . . . . . . . . . . . .17<br />
BURNER START UP AND TEST INFORMATION . . . . . . . . . . . . . . . . . . . . . . . . . . . . . .18<br />
CONTROL DESCRIPTIONS . . . . . . . . . . . . . . . . . . . . . . . . . . . . . . . . . . . . . . . . . . . . . . .19<br />
MAINTENANCE . . . . . . . . . . . . . . . . . . . . . . . . . . . . . . . . . . . . . . . . . . . . . . . . . . . . . . . . . . .22<br />
Daily Boiler Check & Maintenance List . . . . . . . . . . . . . . . . . . . . . . . . . . . . . . . . . . . . .22<br />
Weekly Boiler Check & Maintenance List . . . . . . . . . . . . . . . . . . . . . . . . . . . . . . . . . . .22<br />
Monthly Boiler Check & Maintenance List . . . . . . . . . . . . . . . . . . . . . . . . . . . . . . . . . .23<br />
Semiannual Boiler Check & Maintenance List . . . . . . . . . . . . . . . . . . . . . . . . . . . . . . .23<br />
Annual Boiler Check & Maintenance List . . . . . . . . . . . . . . . . . . . . . . . . . . . . . . . . . . .23<br />
WATER TREATMENT . . . . . . . . . . . . . . . . . . . . . . . . . . . . . . . . . . . . . . . . . . . . . . . . . . . . . .25
IMPORTANT<br />
1. Read and familiarize yourself with this installation, operation, and mainte<br />
nance manual before installing, operating, or servicing your boiler.<br />
2. All cover plates, enclosures, and safety devices must be installed at all<br />
times except while performing maintenance and service.<br />
3. Only trained service technicians should do any work on your boiler.<br />
4. All state and local codes take precedence over any recommendations given<br />
in this manual.<br />
5. <strong>Columbia</strong> Boiler performed testing on the <strong>MPH</strong> boiler line using specific<br />
makes and models of burners. Should you choose to supply your own burner,<br />
please contact the burner manufacturer to confirm compatibility with the<br />
<strong>MPH</strong> boiler design.<br />
6. A barometric damper or draft regulator may be required on <strong>MPH</strong> installations.<br />
A draft regulating device is required on all multiple boiler installations<br />
where the boilers utilize common breaching. One regulator is required per<br />
boiler. Regulators can be installed in each individual boiler breach (Location<br />
A) or in the common breach, just upstream of each connection between the<br />
boiler breach and the common breach. (Location B) One regulator (Location<br />
C) is not acceptable.<br />
1<br />
<strong>MPH</strong> COLUMBIA BOILER COMPANY
LIMITED PARTS WARRANTY<br />
The <strong>Columbia</strong> Boiler Company (hereinafter <strong>Columbia</strong>) warrants the burner components<br />
and controls installed on its boiler/burner units to be free from defects in material and workmanship<br />
under normal use and service for 12 months from the date of installation or 18<br />
months from the date of manufacture, whichever date occurs first, and is subject to warranty<br />
approval by the manufacturer of the specific components. This warranty does not extend to<br />
equipment subjected to misuse, neglect, accident or improper installation. Equipment which<br />
is defective in material or workmanship and is removed within 12 months from the date of<br />
installation will be repaired or replaced as follows:<br />
a. Motors, fuel units, controls, and transformers should be sent for repair or replacement<br />
to an authorized service point or distributor of the manufacturer of such component<br />
when reasonably available in Customer’s locality.<br />
b. Where such local service is not available with respect to the above listed components, or<br />
where other components are involved, such defective equipment should be returned after<br />
receiving authorization from your dealer, freight prepaid, to the <strong>Columbia</strong> Boiler Co.,<br />
390 Old Reading Pike, Pottstown PA 19464. The use of the <strong>Columbia</strong> returned goods<br />
form is mandatory when returning defective material.<br />
c. <strong>Columbia</strong> is not responsible for any labor cost for the removal and replacement of<br />
equipment.<br />
d. Equipment which is repaired or replaced will carry a warranty equal to the unexpired<br />
portion of the original equipment warranty.<br />
e. If inspection by <strong>Columbia</strong> does not disclose any defect covered by this warranty, the<br />
equipment will be repaired or replaced at the expense of the Customer, and <strong>Columbia</strong>’s<br />
regular charges will apply.<br />
THIS WARRANTY IS LIMITED TO THE PRECISE TERMS SET FORTH ABOVE,<br />
AND PROVIDES EXCLUSIVE REMEDIES EXPRESSLY IN LIEU OF ALL OTHER<br />
REMEDIES. ALL IMPLIED WARRANTIES, INCLUDING BUT NOT LIMITED TO<br />
ANY IMPLIED WARRANTY OF MERCHANTABILITY OR FITNESS FOR A PAR-<br />
TICULAR PURPOSE OR USE,ARE EXCLUDED. IN NO EVENT WILL COLUMBIA<br />
BOILER CO. BE LIABLE FOR ANY INCIDENTAL OR CONSEQUENTIAL DAM-<br />
AGES OF ANY NATURE. <strong>Columbia</strong> neither assumes nor authorizes any person to assume<br />
for <strong>Columbia</strong> any other liability or obligation in connection with the sale of this equipment.<br />
<strong>Columbia</strong>’s liability and Customer’s exclusive remedy being limited to repairs or replacement<br />
as set forth above.<br />
March 10, 1997<br />
<strong>MPH</strong> COLUMBIA BOILER COMPANY 2
INTRODUCTION<br />
Series <strong>MPH</strong> Modified Scotch Boiler<br />
The <strong>Columbia</strong> Multi-Pass Horizontal (<strong>MPH</strong>) boiler is a modified scotch boiler<br />
designed for hot water, and/or low pressure steam applications. The pressure vessel<br />
is available as a welded pipe boiler or a rolled tube boiler. These units are manufactured<br />
to the specifications set forth by Section IV of the ASME Boiler and Pressure<br />
Vessel Code. Boilers are inspected and stamped for conformity to requirements of<br />
the National Board of Boiler and Pressure Vessel Inspectors. All boilers are designed<br />
to be fired using No. 2 fuel oil, and/or natural, manufactured, or liquid propane (LP)<br />
gas, and are powered by standard AC electrical service.<br />
<strong>Columbia</strong> <strong>MPH</strong> hot water and low pressure steam boilers are typically shipped<br />
knocked down (unassembled), but are also available factory packaged. All boilers are<br />
furnished with a burner and boiler trim (the jacket is factory installed). Boiler trim consists<br />
of the operating and limit controls, pump control and/or low water cut off<br />
(LWCO) controls, and a safety valve. Factory packaged boilers are fully assembled<br />
and test fired.<br />
3<br />
<strong>MPH</strong> COLUMBIA BOILER COMPANY
SERVICE POLICY<br />
Steam and hot water boilers are routinely serviced by the installer or another boiler<br />
maintenance company. Occasionally the service technician may be unable to determine<br />
the cause of the problem. In this situation, the dealer or service organization<br />
should contact the selling distributor for help.<br />
Should the problem persist, the distributor will contact the sales representative for<br />
assistance. Depending on the extent of the problem, the representative may request<br />
technical assistance from the factory.<br />
If the problem cannot be resolved by the representative, the representative or serviceman<br />
should contact the Technical Service/Engineering Department at the factory.<br />
The following information will be needed. It is essential that this information be available<br />
to assure prompt service.<br />
Boiler Model and Size (HP) _____________________________________________<br />
Boiler Serial Number __________________________________________________<br />
Boiler National Board Number ___________________________________________<br />
Date Installed _______________________________________________________<br />
Burner Type and Model ________________________________________________<br />
Primary Burner Control Type ____________________________________________<br />
Installer's Name ______________________________ Phone (___)____________<br />
Address ____________________________________________________________<br />
Distributors Name ____________________________ Phone (___)_____________<br />
Address ____________________________________________________________<br />
Sales Representative __________________________ Phone (___)_____________<br />
Address ____________________________________________________________<br />
Specific Problem - Detailed<br />
<strong>MPH</strong> COLUMBIA BOILER COMPANY 4
INSTALLATION<br />
BEFORE BEGINNING INSTALLATION, CAREFULLY STUDY THESE<br />
INSTRUCTIONS AND ALL CHARTS, DRAWINGS, AND DIAGRAMS<br />
SHIPPED WITH THE BOILER.<br />
Installation must follow all state and local code requirements, Fire and Underwriters regulations,<br />
and standard plumbing practices. The electrical installation shall be in accordance with the<br />
National Electrical Code.<br />
Remove all boiler components from packaging and inspect prior to assembly to ensure that<br />
damage has not occurred in shipping.<br />
BOILER ROOM<br />
Locate the boiler in a well lit area on a noncombustible, level floor. Make available a convenient<br />
water supply and allow adequate drainage, including unobstructed floor drains, for flushing and<br />
filling the boiler. Provide sufficient make-up air for combustion at all times. See section on “Combustion<br />
Air” later in this manual. Power the boiler using a properly rated electrical service.<br />
Include fused disconnects for control circuits, blower motor circuits, and feed pump circuits that<br />
require a motor contactor or motor starter relay.<br />
Where possible, place the boiler on a 3 inch concrete pad. Allow adequate clearance between<br />
the boiler and any walls or obstructions to permit inspection and service on burner, boiler piping,<br />
controls, or combustion vent.<br />
DO NOT install exhaust fans in or near the boiler room. Exhaust fans consume available makeup<br />
air during burner operation. More importantly, when the boiler cycles off, exhaust fans pull<br />
hot flue gases back through the burner causing burner parts to deteriorate, and possibly fail.<br />
Maintain a positive pressure in the boiler room at all times. Refer to the combustion air section<br />
of this manual for additional information.<br />
Do not allow your boiler room to become a storage room.<br />
VENTING<br />
Locate the boiler as close as possible to the chimney or other approved exhaust vent. Attach all<br />
flue piping to the round flue connection and make each connection secure. The flue pipe should<br />
not be inserted beyond the inside wall of the chimney.<br />
DO NOT REDUCE THE SIZE OF THE FLUE OUTLET OR FLUE PIPING.<br />
<strong>Columbia</strong> Boiler recommends the use of galvanized “B” Type vent for stack connections suitable<br />
for temperatures to 550F. The flue pipe should be pitched upward at least 1/4" per foot of<br />
run. Avoid the use of tees, sharp bends, and long horizontal runs. Install a draft regulator if<br />
required. See page 4 for draft regulator installation on multiple boilers with common breaching.<br />
All <strong>Columbia</strong> boiler models utilize a pressure fired burner and need only to be properly vented.<br />
For situations where unusual conditions may exist, consult the factory for proper venting.<br />
5<br />
<strong>MPH</strong> COLUMBIA BOILER COMPANY
COLUMBIA BOILER COMPANY OF POTTSTOWN SHALL NOT BE HELD LIABLE FOR<br />
DAMAGE TO THE BOILER CAUSED BY INCORRECT VENT CONDITIONS AND/OR<br />
INSUFFICIENT BURNER MAKEUP AIR.<br />
JACKET ASSEMBLY<br />
The jacket for the <strong>MPH</strong> boiler is factory installed and should not have to be removed for installation<br />
of the boiler.<br />
BURNER MOUNTING<br />
If the burner is to be installed on site, first apply a gasketing material between the burner flange<br />
and the burner mounting plate to seal the burner. Use a non-asbestos fiber rope, or a wet insulating<br />
material for a gasket, as shown in Figure 2. Wet insulation is the preferred gasketing<br />
material because it compresses into a flat gasket which conforms to and fills any and all voids.<br />
Secure the burner in the boiler using the four bolts supplied with the burner. See the Burner Section<br />
of this manual for proper electrical wiring, and fuel supply piping.<br />
Note: All factory packaged boilers use a wet insulation material as a gasket.<br />
Figure 1<br />
<strong>MPH</strong> COLUMBIA BOILER COMPANY 6
BOILER CONNECTIONS<br />
Drains<br />
All <strong>Columbia</strong> Boiler <strong>MPH</strong> units have (2) 1-1/4" drains. These are located in the front and rear of<br />
the boiler below the fire chamber. Install a pipe nipple and ball valve in a least one for use as a<br />
drain. If a drain is not needed, plug it by using the proper size nipple and a pipe cap. DO NOT<br />
use a pipe plug.<br />
Low Water Cut-Offs<br />
All <strong>Columbia</strong> boilers are supplied with at least one low water cut-off (LWCO) as standard equipment.<br />
Some boiler applications may require a secondary LWCO. The standard equipment is as<br />
follows:<br />
Hot Water Boilers - McDonnell & Miller 750-MT-120 Probe Type Low Water Cut-Off with<br />
Remote Sensor - Thread the Remote Sensor into the 3/4" NPT fitting located on top of the boiler.<br />
Mount the Control Box near the top of the side jacket panel.<br />
Steam Boilers - McDonnell & Miller Model 157 Low Water Cut-Off/Pump Control - Install this<br />
device into the 1" NPT welded couplings found on the top and either side of the boiler. Only two<br />
of the three 1" NPT will be used. The 157 can be piped to either side of the boiler.<br />
Secondary Low Water Cut-Offs<br />
Secondary LWCO’s may be required to meet local codes or CSD-1 requirements. A Warrick<br />
26C1D1C Probe Type Low Water Cut-Off is used in steam applications to meet CSD-1 requirements<br />
and is also standard on steam units. Thread the remote sensor into the 1/2” NPT fitting<br />
located on top of the boiler using a 1/2” x 3/8" bushing. See Table 1. for proper probe rod length.<br />
Mount the control box to a side jacket panel on the boiler.<br />
LENGTH OF PROBE ROD IN “<strong>MPH</strong>” SERIES BOILERS<br />
BOILER MODEL <strong>MPH</strong> <strong>MPH</strong> <strong>MPH</strong> <strong>MPH</strong><br />
30/40 50/60 70/80 90/100<br />
ROD LENGTH 14" 14" 14" 12"<br />
TABLE 1<br />
Other secondary LWCO’s include combination LWCO / Water Feeders. These devices are typically<br />
connected externally using an equalizing line, and piped into the available 1" NPT fittings<br />
found in boiler top, and left side or front. Most commonly used combination units are McDonnell<br />
& Miller 42 Series Pump Controls and Low Water Cut-Off or McDonnell & Miller No. 247-2 Feeder<br />
Combination. For piping diagram, see the List of Figures on the Table of Contents Page of<br />
this manual.<br />
7<br />
<strong>MPH</strong> COLUMBIA BOILER COMPANY
NOTE:<br />
Mount a combination unit so the low water cut-off line on the device is approximately 3 inches<br />
above the lowest permissible water level plate found on the left side jacket panel of the<br />
boiler. This point is also the center line of the 2" opening on the left side of the boiler.<br />
Water Gauge<br />
The water gauge is piped into the (2) 1/2” NPT fittings located on the M & M 157. During operation,<br />
the boiler’s water level should always be above the Lowest Permissible Water Level. Hot<br />
water boilers do not require a Water Gauge.<br />
Pressure Controllers<br />
Low pressure, 15 PSI controls are supplied with steam units only. These controls consist of an<br />
Operating Control and a Safety Limit. An additional operating control may also be supplied for<br />
burners that function with low-high-low operation. Pipe the Pressure Controls and the 30 PSI<br />
Steam Gauge using the supplied steam syphon to the 1/2" NPT fittings on the front of the boiler.<br />
Aquastat Controllers®<br />
Aquastat® Controllers are used to regulate boiler water temperature. <strong>Columbia</strong> supplies an<br />
Operating Control and a Safety Limit Aquastat® with all hot water boilers and water heaters. An<br />
additional Operating Aquastat® may also be supplied for burners that function with low-high-low<br />
operation and/or steam boilers using an optional coil. Aquastat®’s are mounted in the 3/4" NPT<br />
fittings located on the front of the boiler.<br />
Safety Valve / Relief Valve<br />
All safety or relief valves are located in the rear center fitting on top of the boiler. A 15 PSI Steam<br />
Safety Valve is supplied for steam boiler and water heater applications. A 30 PSI Water Relief<br />
Valve is used for hot water applications. The <strong>MPH</strong> 90/100 steam boiler will have two Safety<br />
Valves. All safety and relief valves should be safely piped away from the boiler without reducing<br />
the valve’s outlet port size.<br />
Steam<br />
Pipe the steam lines to the largest fitting or flange located on top of the boiler. Pipe the hot water<br />
supply to the largest fitting or flange located on the top of the boiler.<br />
<strong>MPH</strong> COLUMBIA BOILER COMPANY 8
Hot Water Connections<br />
Use the fittings located on either side in the lower front of the boiler for the hot water return<br />
from the system. Hot water applications also require the use of an expansion tank in the system<br />
piping, to compensate for fluctuations in the water volume during heating and cooling cycles.<br />
NOTE: Do not use lower rear fittings for returns.<br />
Feed Water Supply<br />
Virtually any unused port on the heat exchanger can be used for the feed water supply. In situations<br />
where make up water is needed, the water supply must be treated before it enters the<br />
boiler to prevent the formation of scale, and to protect the boiler surfaces from the corrosive<br />
effects of oxygenated water. Water treatment and a water treatment program must be adhered<br />
to, or the life of the boiler will be effected. If a Condensate Return / Feedwater Tank is used,<br />
connect the feedwater source to the float valve on the tank. Return to the section on water treatment<br />
later in this manual.<br />
Boilers with Coils<br />
When ordered with coils, boilers are shipped with the coil(s) assembled to the coil plate(s), and<br />
mounted in the boiler. <strong>MPH</strong> boilers 30 thru 80 HP can be furnished with one or two coils.<br />
When making coil connections for twin coil units, manifold indirect water piping using copper<br />
tubing and fittings connected in parallel. Pipe the outside coil openings together for cold water<br />
inlets, and the inside coil openings for hot water outlets. If necessary, temper the hot water supply<br />
by using a mixing valve. Connect the hot water outlet source and a cold water supply line to<br />
a mixing valve, to temper the hot water supply to the proper temperature requirements for<br />
process equipment.<br />
Whenever boilers are supplied with one or two coils, the coils must be covered by a minimum<br />
of two inches of water, during normal operation, to allow proper heat transfer through the coil.<br />
Adjust all LWCO piping to keep the coil(s) submerged in the event of a low water situation.<br />
FUEL CONNECTIONS<br />
OIL SUPPLY PIPING<br />
Connect burner to oil supply. Refer to fuel unit manufacturer literature for piping, connections,<br />
lift and tank installation. If such information is unavailable use the following guidelines:<br />
Fuel supply “level with” or “above” burner: A single stage fuel unit connected to the fuel supply<br />
with a single supply line is the most common type of installation for these conditions. <strong>Manual</strong><br />
venting of the fuel oil is usually required on initial start up. Failure to vent air could result in<br />
air lock/oil starvation.(One Pipe)<br />
Fuel supply below the level of the burner: Use a single stage fuel pump in lift conditions of<br />
up to 10 feet and a two stage pump when lift exceeds 10 feet. Both conditions require the use<br />
of a return line which purges the fuel pump of air, returning it to the fuel tank. The “by-pass” plug<br />
must be inserted into the fuel pump when installing a return line. (Two Pipe)<br />
9<br />
<strong>MPH</strong> COLUMBIA BOILER COMPANY
Fuel line installation: Consult the burner section of this manual for oil line type and sizing<br />
requirements for proper operation. The size of oil lines is extremely important for proper operation.<br />
Continuous lengths of heavy wall copper tubing are recommended and should be installed<br />
under the floor whenever possible. Fuel lines should not chaff the appliance or building structure.<br />
All oil feed lines must be air tight. Use as few fittings as possible when assembling the oil lines.<br />
Compression fittings allow more of a chance for air to be introduced into the oil supply and are<br />
NOT recommended for use. The slightest air leak, usually caused by loose fittings or bad gaskets,<br />
can cause poor starts, smoky starts, sooting of burner parts, inefficient operation, and a<br />
dangerous combustion condition. Always install fittings in accessible locations.<br />
WARNING:<br />
TEFLON ® TAPE SHOULD NEVER BE USED WITH ANY OIL LINE CONNECTIONS. THE<br />
USE OF TEFLON ® TAPE ON BURNER COMPONENTS OR OIL SERVICE LINES WILL<br />
VOID MOST BURNER WARRANTIES.<br />
A vacuum test should be done on all installations to ensure that all fittings are tight and the oil<br />
lines are of proper size. Suction vacuums must be held to acceptable limits. This is available<br />
with the pump information supplied with the burner.<br />
Fuel line valve and filter: (Not supplied) Install two high quality shutoff valves in accessible<br />
locations on the oil supply line. Locate one close to the tank and the other close to the burner<br />
ahead of the filter. Some filters come with built-in shutoff valves. Install a generous capacity filter<br />
inside the building between the fuel tank shutoff and burner.<br />
For additional information consult the burner section of this manual.<br />
GAS SUPPLY PIPING<br />
Contact your local gas company to ensure that adequate gas service is available, and to review<br />
applicable installation codes for your area.<br />
The minimum gas supply pressure required by the burner is seven inches water column for all<br />
Power Flame <strong>MPH</strong> Series burners. The maximum gas supply pressure to the Power Flame<br />
burner is fourteen inches water column. Gas pressure greater than fourteen inches water column<br />
will require an additional gas pressure regulator to prevent damage to the primary gas regulator.<br />
Gas pressure below the minimum will cause combustion efficiency problems and should<br />
be avoided if possible. Low gas pressure may also prevent the boiler from obtaining the desired<br />
input rate, which will cause the boiler to be unable to produce the desired output. Consult the<br />
factory if your gas supply pressure is not in the recommended range, or for pressure requirements<br />
for other burner manufacturers.<br />
Use the following tables to determine the size of the main gas line required for the boiler that is<br />
being installed. First determine the required input volume of gas needed at the gas manifold,<br />
then determine the correct pipe size for the length of run needed.<br />
<strong>MPH</strong> COLUMBIA BOILER COMPANY 10
REQUIRED INPUT - CUBIC FEET OF GAS PER HOUR<br />
GAS TYPE<br />
<strong>MPH</strong> <strong>MPH</strong> <strong>MPH</strong> <strong>MPH</strong> <strong>MPH</strong> <strong>MPH</strong> <strong>MPH</strong> <strong>MPH</strong><br />
30 40 50 60 70 80 90 100<br />
NATURAL 1260 1680 2100 2520 2940 3360 3780 4200<br />
PROPANE 495 659 824 989 1153 1318 1483 1647<br />
CAPACITY OF PIPE - CUBIC FEET OF GAS OER HOUR AT 0.2" W.C. PRESSURE DROP<br />
Equivalent<br />
Length (ft)<br />
1" 1-1/4" 1-1/2" 2" 2-1/2" 3" 4"<br />
10 425 725 1170 2360 4300 6250 12800<br />
20 300 520 800 1700 3000 4500 9300<br />
30 250 425 690 1400 2500 3750 7500<br />
40 210 360 560 1200 2100 3200 6400<br />
50 190 325 500 1100 1900 2850 5800<br />
60 180 300 480 1000 1800 2300 4800<br />
80 150 260 410 850 1550 2000 4200<br />
100 135 230 370 750 1375 1680 3500<br />
150 110 190 300 600 1100 1200 2750<br />
200 75 165 260 540 950 1000 2000<br />
Fitting Equivalent Lengths of Standard Pipe in Feet for Listed Fittings<br />
Std. Tee 5.5 7.5 9.0 12.0 13.5 15 20<br />
Std. Elbow 2.7 3.7 4.5 5.5 6.1 8 11<br />
Vent lines, if required, are to be run outside the building, stopping clear of windows or<br />
fresh air intakes. The vent should terminate in a way that will not allow the possibility of<br />
water, dirt, insects, animals, and other matter from entering and clogging the vent pipe.<br />
11<br />
<strong>MPH</strong> COLUMBIA BOILER COMPANY
Gas lines should be tested for leaks using a soap solution. Your gas company may wish to witness<br />
this test. Do not exceed the maximum pressures allowed by the valve train.<br />
Additional gas piping information is included in the burner section of this manual.<br />
COMBUSTION AIR<br />
It is essential that provisions are made for a fresh supply of outside air into the boiler room to<br />
insure complete combustion, proper boiler efficiency, and a clean fire. Sufficient makeup air also<br />
helps prevent nuisance shut-downs due to excessive combustion byproduct build-up on burner<br />
parts. Outside air may be provided through ducts, fixed louvers or motorized louvers.<br />
A rule of thumb for calculating fresh air openings to the outside is 63 sq. in. for every 100,000<br />
BTUH gross output, or 21 sq. in. per boiler horsepower. The result of the above calculation is<br />
expressed as free area, meaning no restrictions of any kind. If louvers or screens are used over<br />
combustion air openings, calculate the percentage of free area to allow for these restrictions.<br />
Do not have exhaust fans in the immediate proximity of the boiler room if at all possible, as<br />
they will cause a reversal of draft through the boiler when the burner is cycled off. This draft<br />
reversal draws heat from the combustion chamber back through the burner. This heat will deteriorate<br />
burner components prematurely, and eventually, burner operation will fail. The boiler<br />
room should experience a positive pressure when the burner is not firing.<br />
In situations where a boiler room experiences a negative pressure, use a direct air intake. A<br />
direct air intake uses an adapter over the burner fan intake housing to draw in outside air<br />
through duct work, from an external source. Consult burner manufacturer for parts and availability.<br />
<strong>MPH</strong> COLUMBIA BOILER COMPANY 12
REQUIRED BOILER MAKE-UP AIR<br />
OPENING SQUARE HOLE ROUND PIPE<br />
BTU INPUT MIN. SQUARE SQUARE HOLE ROUND PIPE<br />
INCHES (APPROXIMATE) (APPROXIMATE)<br />
<strong>MPH</strong> 30 1,260,000 630 26 X 26 30<br />
<strong>MPH</strong> 40 1,680,000 840 30 x 30 34<br />
<strong>MPH</strong> 50 2,100,000 1050 34 X 34 38<br />
<strong>MPH</strong> 60 2,520,000 1260 36 X 36 40<br />
<strong>MPH</strong> 70 2,940,000 1470 40 x 40 42<br />
<strong>MPH</strong> 80 3,360,000 1680 42 X 42 46<br />
<strong>MPH</strong> 90 3,780,000 1890 44 X 44 50<br />
<strong>MPH</strong> 100 4,200,000 2100 46 X 46 52<br />
13<br />
<strong>MPH</strong> COLUMBIA BOILER COMPANY
CLEANING AND FILLING A NEW STEAM BOILER<br />
Note: The following procedures are for steam boilers only.<br />
In order to minimize the corrosive effects of raw water oxidation on the boiler, the water must be<br />
heated to at least 180F immediately after entering the boiler, in order to drive off the corrosive<br />
dissolved gases. This applies to all water - whether from a well, a spring, or from the local<br />
municipal water system.<br />
The oil and grease that accumulate in a new steam boiler can usually be washed out by either<br />
procedure.<br />
A. Skimming:<br />
Since oil floats on water, skimming removes these oils from the water surface.<br />
1. The 1" tapping on the back of the boiler can be used for skimming the water surface.<br />
Install a ball valve and piping to a nearby drain.<br />
2. Fill the boiler to the normal waterline.<br />
3. With the boiler firing slowly open the ball valve installed at the skimmer port on the back<br />
of the boiler.<br />
4. Add water to the boiler at a rate that will allow the boiler to maintain a water temperature<br />
between 180-200 F. Note do not add too much water so that the water level rises<br />
above the skimmer tapping.<br />
5. Continue to allow water to flow from the skim tapping until it appears to be oil free.<br />
6. Once the water appears to be oil free, close the ball valve. The ball valve and piping to<br />
the drain can be left in place or removed is so desired. If the skimming piping is to be<br />
remove the water level must be lowered so that the piping can be removed safely. After<br />
the skimming piping is removed plug the 1" fitting and fill the boiler back to it’s proper<br />
water operating level.<br />
B. Cleaning Compound:<br />
1. Fill the boiler to the normal waterline.<br />
2. Remove the safety valve.<br />
3. Provide a boilout compound of caustic soda and trisodium phosphate in the proportions<br />
of 2-1/2 lbs. of each chemical per 120 gallons of water.<br />
<strong>MPH</strong> COLUMBIA BOILER COMPANY 14
CAUTION:<br />
USE CARE IN HANDLING THESE CHEMICALS. THE CAUSTIC SODA IS<br />
EXTREMELY CORROSIVE TO SKIN AND CLOTHING. DO NOT PERMIT<br />
EITHER THE DRY MATERIAL OR THE CONCENTRATED SOLUTION TO<br />
CONTACT SKIN OR CLOTHING.<br />
BOILER MODEL<br />
<strong>MPH</strong> 30<br />
<strong>MPH</strong> 40<br />
<strong>MPH</strong> 50<br />
<strong>MPH</strong> 60<br />
<strong>MPH</strong> 70<br />
<strong>MPH</strong> 80<br />
<strong>MPH</strong> 90<br />
<strong>MPH</strong> 100<br />
EQUAL AMOUNTS<br />
CAUSTIC SODA AND<br />
TRISODIUM PHOSPHATE<br />
3 lbs. 7 oz<br />
4 lbs. 9 oz<br />
5 lbs. 6 oz<br />
6 lbs. 14 oz<br />
7 lbs. 10 oz<br />
8 lbs. 11 1/3 oz<br />
10 lbs. 13 oz<br />
10 lbs. 13 oz<br />
4. Mix the chemicals with water and pour into the boiler through the safety valve<br />
opening.<br />
5. Replace the safety valve.<br />
6. Start the firing equipment.<br />
7. Boil the water for at least five hours.<br />
8. Stop the firing equipment.<br />
9. Drain the boiler to a location where hot water can be discharged safely.<br />
10. Wash the boiler thoroughly using a hose with sufficient pressure.<br />
11. Fill the boiler to the normal waterline.<br />
12. Add boiler water treatment as prescribed by a water treatment specialist.<br />
13. Boil or bring water temperature to at least 180°F immediately.<br />
14. The boiler is ready to put into service or on standby.<br />
15<br />
<strong>MPH</strong> COLUMBIA BOILER COMPANY
OPERATING THE BOILER<br />
NOTE:<br />
Whether the boiler was purchased knockdown or factory packaged test fired,<br />
each boiler must be "set up" for the conditions on location. Improper combustion<br />
settings may cause the burner to operate erratically, resulting in boiler<br />
shutdowns, lost time, and unnecessary service expenses.<br />
PRE-START CHECKS AND INFORMATION<br />
A new or relocated boiler should not be put into service until it has been inspected by an authorized<br />
inspector for the jurisdiction or the insurance company, and the required certificates have<br />
been issued.<br />
Whenever a new boiler is placed in service, operating data should be recorded and saved for<br />
future reference. This information is extremely valuable for diagnosing problems if abnormal<br />
operation occurs. Record all operating parameters such as pressures, stack temperatures, oxygen<br />
or carbon dioxide levels, flows, draft, motor amps, damper positions, and interlock set<br />
points. A burner start up and test information sheet has been included at the end of this section<br />
for your convenience.<br />
All cover plates, enclosures, and safety devices must be installed at all times during operation<br />
and should only be removed while performing maintenance and/or service.<br />
The fuel supply should not be turned on until the combustion chamber has been vented and the<br />
pilot light (if gas ignited) checked for proper operation.<br />
All drain valves including blowdown valves for stream boilers, water column drain valves, gauge<br />
glass drain valves, and gauge cocks should be closed.<br />
The safety/relief valves should be inspected externally to see that they are free to operate, and<br />
that the discharge piping and drain piping are open to the atmosphere, and free to expand without<br />
imposing a load on the safety valve bodies. Make sure the safety valve is piped to a safe<br />
location to prevent injury.<br />
The boiler feed pump(s) for steam applications should be checked to ensure that they are ready<br />
for service. Check the data on rating plates of all electrical equipment to be certain the electrical<br />
characteristics match those of the electric supply to which they are connected.<br />
Before attempting start-up, carefully study the instructions included in the burner section of this<br />
manual.<br />
It is important to have the proper test equipment in order to adjust the combustion and pilot if<br />
equipped. Those items that may be required include a manometer, micro ammeter, multimeter,<br />
vacuum gauge, 0-300 PSI pressure gauge, carbon dioxide or oxygen analyzer, carbon monoxide<br />
tester, smoke gun, and stack thermometer.<br />
<strong>MPH</strong> COLUMBIA BOILER COMPANY 16
STARTING THE BOILER<br />
WARNING:<br />
NEVER OPERATE A BOILER WITHOUT BEING SURE IT IS FILLED WITH<br />
WATER AND THAT PROPER WATER TREATMENT CHEMICALS HAVE BEEN<br />
ADDED.<br />
Allow the boiler to fill with water to its normal operating level.<br />
Supply power to the boiler disconnects.<br />
NOTE:<br />
NOTE:<br />
The burner will not operate when the boiler has reached its normal water level, until<br />
the reset button on the manually reset, probe type, low water cutoff is pushed.<br />
Combustion efficiency must be checked at this time. See the burner manufacturers<br />
instructions for correct settings and more detailed information.<br />
Follow the adjustment procedures outlined in the burner section of this manual to set up the<br />
burner for proper operation.<br />
STOPPING THE BOILER<br />
To stop the boiler turn the main disconnect to the OFF position.<br />
17<br />
<strong>MPH</strong> COLUMBIA BOILER COMPANY
BURNER START UP AND TEST INFORMATION<br />
For a new boiler start up, or for troubleshooting an existing installation, the following<br />
information is essential for effective service assistance.<br />
Boiler Model__________________ Serial No.________________ N.B. No._____________________<br />
Burner Model_________________ Invoice No._______________ Serial No.____________________<br />
Installation Name___________________________________________ Start Up Date_________________<br />
Start Up Contractor_________________________________________ Phone No.____________________<br />
Name of Technician Performing Start Up_____________________________________________________<br />
Fuel Type: q Natural Gas q LP Gas q Fuel Oil (#2) q Other________________________________<br />
Gas Firing<br />
Gas Pressure At Train Inlet Flame Signal Readings Stack Outlet Test Point Draft<br />
Burner In Off Position_______ "W.C. Pilot____________________________ Low Fire__________________ "W.C.<br />
High Fire__________________ "W.C.<br />
Gas Pressure At Train Inlet CO2 Over Fire Draft<br />
High Fire__________________ "W.C. Low Fire_________________________ Low Fire__________________ "W.C.<br />
High Fire_________________________ High Fire__________________ "W.C.<br />
Gas Pressure At Main Orifice CO Net Stack Temperature<br />
Low Fire__________________ "W.C. Low Fire_________________________ Low Fire___________________°F<br />
High Fire__________________ "W.C. High Fire_________________________ High Fire___________________°F<br />
Gas Pressure At Pilot Orifice<br />
__________________ W.C.<br />
Oil Firing<br />
Measured Input Rate - BTU/HR<br />
Low Fire__________________BTU/HR<br />
High Fire__________________BTU/HR<br />
High Fire Vacuum Reading At Oil CO2 Stack Outlet Test Point Draft<br />
Pump Inlet_______________ "H.G. Low Fire__________________ _______ Low Fire__________________ "W.C.<br />
High Fire_________________________ High Fire__________________ "W.C.<br />
Oil Nozzle Supply Pressure Bachrach Scale Smoke Number Net Stack Temperature<br />
Low Fire__________________PSI Low Fire_________________________ Low Fire___________________°F<br />
High Fire__________________PSI High Fire_________________________ High Fire___________________°F<br />
Firing Rate - GPH<br />
Low Fire__________________<br />
High Fire__________________<br />
Over Fire Draft<br />
Low Fire___________________ "W.C.<br />
High Fire___________________ "W.C.<br />
Operational Check of Controls<br />
Operating Limit__________________q Aux LWCO______________________q Flame Safeguard________________q<br />
Safety Limit_____________________q Low Gas Pressure_______________q Ignition Failure q<br />
Low Water Cut Off_______________q High Gas Pressure_______________q Flame Failure q<br />
Motor Amps ____________________q Damper Position_________________q Interlock Set Points ____________ q<br />
Comments<br />
___________________________________________________________________________________________________________<br />
___________________________________________________________________________________________________________<br />
___________________________________________________________________________________________________________<br />
___________________________________________________________________________________________________________<br />
___________________________________________________________________________________________________________<br />
___________________________________________________________________________________________________________<br />
<strong>MPH</strong> COLUMBIA BOILER COMPANY 18
CONTROL DESCRIPTIONS<br />
STEAM BOILERS<br />
Pressure Controllers<br />
All <strong>Columbia</strong> steam boilers are controlled by both operating Pressure Controllers. Both devices<br />
are adjustable. These switches open when pressure reaches the main scale set point value,<br />
cycling the boiler off.<br />
The operating Pressure Control also has an adjustable differential feature. Differential settings<br />
values are subtractive from the main scale set point value, indicating the change in pressure for<br />
when the boiler will refire. Always adjust the differential set point above the required steam pressure<br />
for the system. Make the differential value as large as possible to prevent short cycling.<br />
The safety limit Pressure Control does not have an adjustable differential, and has a manual<br />
reset feature. The safety limit Pressure Control breaks the control circuit if the operating Pressure<br />
Control becomes inoperable, and steam pressure continues to climb. The burner will not<br />
start until the excessive pressure situation is corrected and the reset button is pushed.<br />
Adjust the safety limit value higher than the operating limit under normal operating conditions.<br />
This setup allows the operating control to function properly and reduces the need to reset the<br />
control circuit constantly. Set the safety limit value less than the error margin of the safety relief<br />
valve, so the Pressure Control can safely control boiler pressure. Make set point value adjustments<br />
by turning the adjusting screws found on top of the Pressure Control casing.<br />
For additional information on either controllers see the Publication following this booklet.<br />
Low Water Cut-offs<br />
Low water cut-offs safely control boiler operation in the event of a low water condition. The standard<br />
LWCO’s for steam applications is a McDonnell & Miller #157, and the Warrick 26C1D1C<br />
probe type LWCO. Other optional equipment used in place of, or in addition to, one of the aforementioned<br />
LWCO’s includes water feeders and combination LWCO/ feeders, which is required<br />
to meet csd-1 code requirements.<br />
The McDonnell & Miller #157 is a LWCO and pump control. The low water switch opens in a low<br />
water condition. In the same instance, the McDonnell & Miller #157 has an extra set of contacts<br />
that close with a drop in water level activating the water feeder(pump). This control is mounted<br />
on the left or right side of the boiler using the 1" tappings found in the side and on top of the<br />
boiler, as part of an equalizing line.<br />
19<br />
<strong>MPH</strong> COLUMBIA BOILER COMPANY
A Warrick 26C1D1C “Probe” type LWCO is used only as a Secondary low water cut-off device.<br />
Its primary function is to protect the boiler against low water situations where the primary LWCO<br />
fails to break the control circuit. The probe mounts in the top head of the boiler and has a rod<br />
length lower than that of the primary LWCO. This relay must be manually reset if power is interrupted<br />
to the control circuit for any reason. During operation, if the water level falls below the<br />
probe rod, the energized circuit breaks, causing the relay to open, disconnecting power to the<br />
burner. Restore the water level to the normal operating level, then manually reset the control to<br />
resume operation.<br />
For additional information on the appropriate Low Water Cut-Off, see the LWCO cut sheets following<br />
this booklet.<br />
Safety Valve<br />
Safety valves shall be piped so that any discharge cannot cause injury to people or damage to<br />
property. The discharge piping must be supported so that the weight of the piping is not transmitted<br />
to the safety valve body. The weight supported by the valve outlet should not exceed that<br />
of a drip pan elbow. Installations requiring long discharge piping should not be connected directly<br />
to the safety valve. Refer to Drawing PL-049 in the Appendix.<br />
Always maintain a proper operating gap between the set pressure of the safety valve and the<br />
maximum operating pressure of the boiler.<br />
If the valve discharges on its own, contact a qualified service technician to determine the cause.<br />
This may be an indication of equipment or system malfunction.<br />
<strong>MPH</strong> COLUMBIA BOILER COMPANY 20
HOT WATER BOILERS<br />
Aquastat® Controllers<br />
All <strong>Columbia</strong> water boilers and indirect water heaters are controlled by both operating and safety<br />
limit Aquastat® Controllers. The safety limit should always be adjusted higher than the operating<br />
limit under normal operating conditions. If for any reason the water temperature would<br />
exceed the operating limit and not trip the control, the safety limit should break the circuit to the<br />
burner.<br />
The operating Aquastat® consists of an adjustable thermostatic control and separate temperature<br />
sensing immersion well. The immersion well mounts either in the boiler’s coil plate or in the<br />
3/4" tappings on rolled tube units. Adjust the indicating dial to set the maximum operating temperature.<br />
The differential wheel setting is subtractive from the operating limit indicating the refire<br />
temperature. This differential set point should be adjusted above the required water temperature<br />
for the system. The differential wheel can be adjusted for 3 to 5F .<br />
The safety limit like the operating Aquastat®, consists of an adjustable thermostatic control and<br />
separate temperature sensing immersion well. This controller has a manual reset switch which<br />
must be depressed in the event that the operating circuit reached and shut off on safety.<br />
For additional information on either controllers, see the Publication following this booklet.<br />
Low Water Cut-off<br />
Hot water boilers utilize the McDonnell & Miller 750-MT-120 Probe Type Low Water Cut-Off with<br />
Remote Sensor. The 750-MT-120 has a test feature that allows this control to meet CSD-1<br />
requirements. Similar to the Warrick 26C1C1C, this control breaks the control circuit in the event<br />
of a low water condition and must be manually reset once the proper water level is restored.<br />
For additional information on the McDonnell & Miller 750-MT-120 Probe Type Low Water Cut-<br />
Off with Remote Sensor see McDonnell & Miller Bulletin MM-212(A) and Installation and Maintenance<br />
Instructions MM-213(C).<br />
Relief Valve<br />
Relief valves are a safety devices to relieve boiler water pressure. Like safety valves, relief<br />
valves should be piped so any discharge cannot cause injury to people or damage property.<br />
See the “Safety Valve” description in the Control Descriptions, Steam Boiler section of this booklet.<br />
21<br />
<strong>MPH</strong> COLUMBIA BOILER COMPANY
MAINTENANCE<br />
RECORD KEEPING<br />
All manufacturers’ literature, spare parts lists, operating and maintenance procedures should be<br />
maintained in the boiler room at all times. A log book should also be provided to record maintenance<br />
work, inspections, and other performance test results.<br />
General<br />
Clean the boiler and heating surfaces whenever required. The frequency of the cleaning<br />
required to maintain the boiler at peak efficiency will be determined only by frequent inspections.<br />
It cannot be predicted. Your operating conditions might be different from your neighbors’.<br />
When in doubt - check it out.<br />
WARNING:<br />
DISCONNECT ALL INCOMING ELECTRICAL POWER BEFORE SERVICING<br />
THE BOILER. USE EXTREME CAUTION AROUND BOILER PIPING THE LOW<br />
WATER CUT OFFS, SINCE THEY MAY BE VERY HOT.<br />
The life of your boiler will be determined by the level of care given it by those who are responsible<br />
for maintenance. A log of the following items should be maintained in the boiler room at all<br />
times.<br />
Daily Boiler Check & Maintenance List<br />
1. Water Level Controls and Cut Offs are operating normally.<br />
2. Instrument and equipment settings are normal.<br />
3. Gauge glass is clean. If leaks are detected, replace glass, gaskets, and brass washers<br />
immediately. When replacing gauge glass use only 5/8" O.D. Pyrex® red line, high<br />
pressure, high temperature, glass tubing, with fire polished ends. See gauge glass<br />
maintenance section for proper method when installing this gauge glass.<br />
4. Boiler water at proper operating level.<br />
5. Blow down boiler as instructed under BLOWDOWN if required by application.<br />
Remember, the life of your boiler is drastically reduced by sludge, scale, and corrosion. By proper<br />
treatment of the boiler water and systematic blow down procedures your boiler will provide<br />
years of service.<br />
Weekly Boiler Check & Maintenance List<br />
1. Check flame failure detection system.<br />
A. Gas boilers: Close fuel supply to pilot and main gas and check shut down timing.<br />
B. Oil boilers: Remove cad cell leads and check shut down timing.<br />
2. Check fuel valves; Open limit switch and make aural and visual check.<br />
3. Check ignition system flame signal.<br />
<strong>MPH</strong> COLUMBIA BOILER COMPANY 22
Monthly Boiler Check & Maintenance List<br />
1. Test all fan interlocks.<br />
2. Check main burner safety shut off valve(s) for operational closure.<br />
3. Oil fired; check fuel pressure interlocks when provided.<br />
4. Gas fired; check high and low fuel pressure switches.<br />
5. Flue or stack dampers; make visual inspection for proper operation.<br />
6. Inspect heating surfaces for cleanness.<br />
Semiannual Boiler Check & Maintenance List<br />
1. Inspect burner components; Refer to burner manufacturers’ instructions.<br />
2. Check the flame failure system components; Refer to the burner section of this manual.<br />
3. Check piping and wiring of all interlocks and shut off valves.<br />
4. Internal boiler plate inspection. Remove hand-hole assemblies; use new gaskets when<br />
replacing covers.<br />
Annual Boiler Check & Maintenance List<br />
1. Check operating Pressure Control or Aquastat® Controller.<br />
2. Check high limit Pressure Control or Aquastat® Controller.<br />
3. Test safety valves.<br />
4. Remove the Low Water Cut Off and clean inside casting.<br />
5. Oil fired - clean/replace oil filters or strainers if equipped<br />
6. Oil fired - replace ignition electrodes if equipped.<br />
7. Gas pilots - conduct pilot turndown test.<br />
8. Gas fired - replace ignition and flame rods.<br />
9. Gas fired - check drip leg/strainer.<br />
10. Oil fired - check for refractory hold in.<br />
11. Check Automatic Change Over Control if equipped.<br />
12. Gas fired - perform valve leakage test.<br />
Gauge Glass - Not required on hot water boilers only.<br />
The water gauge glass must be kept clean. Dirt on, or in, the glass may be mistaken for the<br />
water level. Do not allow steam or water to leak from the water glass, as this may effect the<br />
accuracy of the level indication. Leaking of the gauge glass will also reduce the wall thickness<br />
of the glass to the point where it may explode.<br />
WARNING:<br />
DO NOT OPERATE THE BOILER WITHOUT THE GAUGE GLASS PROTEC-<br />
TOR INSTALLED. NEVER ATTEMPT TO WORK ON THE GAUGE GLASS<br />
WHILE THE BOILER IS UNDER PRESSURE. ALWAYS CLOSE GAUGE<br />
VALVES PRIOR TO TIGHTENING GASKETS ON WATER LEVEL GAUGE<br />
GLASS. SERIOUS INJURY COULD RESULT.<br />
23<br />
<strong>MPH</strong> COLUMBIA BOILER COMPANY
Gauge Glass Replacement Instructions:<br />
1. Make absolutely certain that the new water level gauge glass is 5/8"O.D. and is the<br />
correct length glass tubing with fire polished ends.<br />
2. Close gauge glass valves.<br />
3. Remove gauge glass protector.<br />
4. Remove the old glass, gaskets, brass washers, and brass nuts. Be sure threads on the<br />
gauge valves are clean.<br />
5. Install brass nuts, brass washers, and gaskets on each end of the gauge glass.<br />
6. Insert glass tube into top gauge valve and lower the glass tube into the bottom gauge<br />
valve which contains a seat. Then raise glass 1/16". Do not allow glass to rest directly<br />
on the valve.<br />
7. Hand tighten the lower glass nut and then the upper nut. While tightening these nuts, be<br />
sure to keep the red line opposite the viewing side.<br />
8. With a wrench, snug up the bottom nut and then the top nut.<br />
9. Replace gauge glass protector.<br />
10. Open gauge glass valves fully. Failure to completely open the gauge glass valves<br />
renders the ball check safety feature inoperative.<br />
11. Without pressure on boiler and with gauge valves closed, snug up the bottom nut and<br />
then the top nut with a wrench, after 1 day of operation.<br />
Blowdown<br />
Perform blowdown procedures on boilers that require make-up water such as steam boilers.<br />
Hot water boiler are closed loop systems that recirculate the same water. These boilers should<br />
require minimal make-up water.<br />
Blowing down the boiler is done to remove excess total dissolved solids. The actual amount of<br />
blowdown should be determined through boiler water analysis, done by a water treatment specialist.<br />
Until an analysis of your boiler water is made, the following guidelines should be used.<br />
Blow down the boiler after firing equipment has been shut down for the evening. Allow boiler<br />
water to settle for approximately 10 minutes. Then open blowdown valve at a pressure between<br />
5 and 10 psi for 30 seconds then close. Use this same procedure with the low water cut off blowdown<br />
ball valve. Then go back to the boiler blowdown valve, open and close the valve, very fast,<br />
two more times. Repeat this procedure with the low water cut off valve. This will rid the boiler of<br />
most precipitated sediment. DO NOT EMPTY THE BOILER OF ALL ITS WATER.<br />
<strong>MPH</strong> COLUMBIA BOILER COMPANY 24
WATER TREATMENT<br />
Proper treatment of make-up water and boiler water is necessary to prevent scale, or other<br />
deposits, and corrosion within the boiler. The absence of adequate external and internal treatments<br />
can lead to operational upsets or total boiler failure. Where a choice is available, pretreatment<br />
external to the boiler is always preferred and more reliable than treatment within the boiler.<br />
Obtain, and follow, Instructions for feedwater treatment, prepared by a competent feedwater<br />
chemist. Do not experiment with homemade treatment methods or compounds.<br />
Representative samples of feedwater and boiler water must be analyzed frequently to<br />
ensure that they are in specification. The following terms and guidelines are to be used in<br />
conjunction with the advice of a water treatment specialist.<br />
ANALYSIS<br />
Recommended Guidelines for Boiler Water Treatment<br />
RECOMMENDED<br />
RANGE<br />
COMMENTS<br />
pH 10-11 Low pH promotes corrosion<br />
Total Alkalinity 200-700 ppm Low; promotes corrosion<br />
Phosphates 30-100 ppm Prevents scale formation<br />
Total Hardness 0-50 ppm Prevents scale formation<br />
Chlorides 60-200 ppm A measure of proper blow down<br />
Total Dissolved Solids 2000 ppm Maximum High solids may cause surging<br />
Sulfites 20-30 ppm A good oxygen scavenger<br />
Specific Conductance < 700 micro ohms cm A measure of proper blowdown<br />
Oxygen < .007 mg/liter Prevents corrosion and pitting<br />
ppm = parts per million<br />
Use proper water treatment to prevent the buildup of scale on the boiler. After scale has built<br />
up on the walls of the boiler it is almost impossible to remove it from the boiler. The introduction<br />
of acids into the pressure vessel is thoroughly discouraged, since virtually any solution that will<br />
chemically attack the scale will also attack the boiler metal.<br />
pH<br />
The pH value of the boiler water is a number between zero and fourteen. Values below seven<br />
are acidic, seven is neutral, and values above seven are alkaline.<br />
The pH factor is the most important factor influencing scale formation and the corrosive tendencies<br />
of boiler water. The pH should be maintained between a minimum of 10.5, and a maximum<br />
of 11.0 to prevent acidic corrosion of boiler tubes and plates, and to provide for the precipitation<br />
of scale forming salts before scale is deposited.<br />
25<br />
<strong>MPH</strong> COLUMBIA BOILER COMPANY
Below a pH of 5.0 the water is acidic enough to dissolve the steel boiler plates. Under these<br />
conditions the steel gradually becomes thinner and thinner until its destruction. At a pH between<br />
5 and 9.4 pitting of shell plates will occur at a rate depending on the amount of dissolved oxygen<br />
in the boiler.<br />
Dissolved Oxygen<br />
Dissolved oxygen is caused by the solubility of atmospheric oxygen into the supply water. Aeration<br />
of the city water supply is frequently used to remove other noxious gasses. Efficient aeration<br />
results in saturation of the water with oxygen.<br />
The majority of corrosion problems are directly related to the quantity of dissolved oxygen in the<br />
boiler water. Elimination of the corrosive effect of dissolved oxygen can be accomplished both<br />
directly or chemically.<br />
Direct or mechanical removal of dissolved oxygen is accomplished through the use of a deaerator<br />
or by heating the water to a temperature above 180°F. <strong>Heating</strong> the water can be done with<br />
a preheater or a sparge tube installed in the return system.<br />
Chemical deaeration is done through the introduction of specific chemicals in the boiler to react<br />
with the oxygen. The dissolved oxygen content should be maintained at a minimum but at no<br />
time should it exceed 0.007 mg/l.<br />
Sulfites<br />
Sodium sulfite is generally used for the chemical removal of dissolved oxygen within the boiler<br />
water. To assure the rapid and complete removal of the oxygen entering the boiler feedwater<br />
system the concentration of sulfite in the boiler must be maintained at a minimum of 20 PPM.<br />
(parts per million)<br />
Solids<br />
Solids can be broken up into two categories: suspended solids, and dissolved solids. Suspended<br />
solids are those which can be removed by filtration, while dissolved solids are in solution with<br />
the water. The best test for the determination of solids content of the boiler water is through a<br />
conductance test.<br />
The conductance value of boiler water varies by the various ionized salts present. The conductance<br />
can be used to measure the total dissolved solids in the boiler water and to serve as an<br />
accurate means for the control of solids through the use of blowdown.<br />
Another test which is sometimes used as a gauge of solids is to measure the chloride present<br />
in the boiler water. The ratio of chlorides in the boiler water to that of the feed water can be used<br />
as a means to determine the amount of blowdown required. The chloride test is unsuitable for<br />
feedwater with low incoming concentrations and the concentrations in the feedwater must be<br />
averaged over time for accuracy.<br />
High boiler solids will lead to foaming, priming, surging and carry over. These problems can be<br />
overcome by proper, daily blowdown of the boiler.<br />
<strong>MPH</strong> COLUMBIA BOILER COMPANY 26
Alkalinity<br />
The alkalinity of boiler water should be sufficiently high enough to protect shell and plates<br />
against acidic corrosion, but not high enough to produce carryover. A minimum value for alkalinity<br />
for adequate protection is 200 PPM.<br />
High boiler alkalinity, which is in excess of 700 PPM. should be avoided. Values higher than this<br />
can lead to embrittlment of the steel.<br />
Phosphates<br />
Phosphates are used to react with calcium hardness in the boiler water. In order for this reaction<br />
to take place it is important to maintain a pH at a minimum value of 9.50. It is desirable to<br />
keep the concentration of phosphates in the water to 30-50 PPM in order for complete reaction<br />
of the phosphates with the calcium hardness entering the boiler through the feedwater.<br />
Hardness<br />
The hardness of water is caused by calcium and magnesium ions which will vary greatly<br />
throughout the country depending on the source of the water.<br />
In boilers the hardness of the water can cause the formation of scale and sludge or mud. The<br />
hardness must be removed in the makeup water to the return system. Total hardness should not<br />
exceed 50 PPM.<br />
Oils<br />
Every effort should be made to prevent oils from getting into the boiler water. Oil causes foaming,<br />
or combines with suspended solids to form a sludge which can cause the overheating of<br />
boiler plates. If oil does get into the boiler, the boiler should be taken out of service immediately,<br />
and thoroughly cleaned.<br />
27<br />
<strong>MPH</strong> COLUMBIA BOILER COMPANY
MET-224