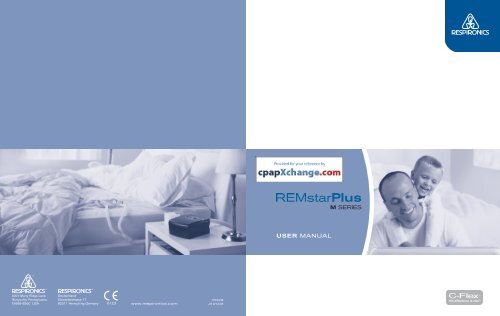
USER MANUAL - DASCO Home Medical Equipment
USER MANUAL - DASCO Home Medical Equipment
USER MANUAL - DASCO Home Medical Equipment

Create successful ePaper yourself
Turn your PDF publications into a flip-book with our unique Google optimized e-Paper software.
1016438<br />
JH 9/12/05<br />
<strong>USER</strong> <strong>MANUAL</strong>
IMPORTANT! Fill in the information below when you receive the REMstar ®<br />
Plus M Series system.<br />
Serial No.: _______________________________ (located on the bottom of the device)<br />
System Prescribed for: __________________________________________<br />
Date of Purchase or Rental: ______________________________________<br />
Pressure Setting: _____ cm H 2<br />
O<br />
Mask Type: __________________________________________________<br />
Mask Size: ___________________________________________________<br />
If you have any questions concerning the system, contact:<br />
• <strong>Home</strong> Care Company: _______________________________________<br />
Telephone Number: _________________________________________<br />
• Health Care Professional: _____________________________________<br />
Telephone Number: _________________________________________<br />
• Respironics, Inc.<br />
1001 Murry Ridge Lane<br />
Murrysville, Pennsylvania<br />
15668-8550 USA<br />
Customer Service<br />
Telephone Number: 1-724-387-4000<br />
The REMstar® Plus M Series with C-Flex system is covered by one or more of the following patents:<br />
5,148,802; 5,313,937; 5,433,193; 5,632,269; 5,803,065; 6,029,664; 6,305,374; 6,539,940, 5,535,738;<br />
5,794,615; 6,105,575; 6,609,517; 6,629,527; 6,622,724; and 6,427,689. Other patents pending.<br />
REMstar, Whisper Swivel, Encore Pro, and Encore Pro SmartCard are trademarks of Respironics, Inc.<br />
NOTE: The C-Flex mark is used under license.<br />
© 2005 Respironics, Inc. All rights reserved.
eply_card1.pdf 9/19/05 10:52:10 AM<br />
C<br />
M<br />
Y<br />
CM<br />
MY<br />
CY<br />
CMY<br />
K<br />
FIRST-CLASS MAIL PERMIT NO. 231 GRAND RAPIDS MN<br />
PO BOX 7014<br />
GRAND RAPIDS MN 55744-8029
eply_card2.pdf 9/19/05 11:22:20 AM<br />
®<br />
C<br />
M<br />
Y<br />
CM<br />
MY<br />
CY<br />
CMY<br />
K<br />
Please complete the following or register online at: www.mseries.respironics.com<br />
Product Identification Information Model #:<br />
(Numbers located on the bottom<br />
of the device)<br />
Serial #:<br />
Name<br />
Address<br />
City State Zip<br />
Phone ( )<br />
E-mail<br />
Where did you first hear about your M Series device?<br />
<strong>Home</strong>care Provider Sleep Lab Internet/Website Tradeshow Friend/Colleague<br />
Other (please specify)<br />
Would you like to receive information regarding new products from Respironics?<br />
Yes No<br />
If Yes, Preferred Method?<br />
Direct Mail Phone Email
An application to join the American Sleep Apnea Association should be attached here.<br />
If it is not, you can contact the American Sleep Apnea Association at 1-202-293-3650.<br />
Name ______________________________________________ Phone No. (<br />
) ___________________________<br />
Address _________________________________ City ____________________ State _________ Zip ___________<br />
Please check: _____$1000 _____$500 _____$250 _____$100 _____$50 _____$25 annual membership*<br />
All memberships include a one year subscription to the newsletter. Membership and contributions are deductible for income tax<br />
purposes within IRS rules. Membership includes a free medical alert necklace or bracelet.<br />
_____I would like to become a member of the ASAA.<br />
Please send me a free medical alert _____bracelet or _____necklace.<br />
_____I am undecided, but please send me a free copy of the newsletter.<br />
_____I would like to know if there is an A.W.A.K.E. group near me.<br />
PLEASE SEND TO:<br />
American Sleep Apnea Association<br />
1424 K Street NW, Suite 302, Washington D.C. 20005<br />
Respironics, Inc. provided a grant to and is recognized as a founding sponsor of the American Sleep Apnea Association. As a<br />
non-profit organization, the American Sleep Apnea Association does not endorse or recommend any company or product.<br />
*For addresses outside the United States, the minimum contribution is U.S. $50.00.
Join the American Sleep Apnea Association<br />
As a member of the American Sleep Apnea Association, you will receive a newsletter, WAKE-UP CALL,<br />
six times each year. This newsletter will inform you about the latest in medical advances, new technology,<br />
human interest stories of individual accomplishment, home care tips, and legislative affairs. Also, you will<br />
receive a medical alert identification bracelet.<br />
You are also invited to participate in the A.W.A.K.E. (Alert, Well And Keeping Energetic) Network, which<br />
is a nationwide system of local mutual help/support groups. A.W.A.K.E. meetings provide the opportunity<br />
to share information and support with others who have been affected by sleep apnea.<br />
To reduce disability and<br />
death from Sleep<br />
Apnea and other<br />
breathing disorders<br />
during sleep.<br />
To improve the clinical<br />
care of Sleep Apnea by<br />
educating the public and<br />
medical profession<br />
about the disorder.<br />
G O A L S<br />
To provide Sleep<br />
Apnea sufferers with<br />
information about new<br />
advances in the treatment<br />
of Sleep Apnea.<br />
To establish and<br />
nurture mutual<br />
help/support groups<br />
for apnea sufferers<br />
and their families.<br />
To raise money for<br />
and to sponsor<br />
research on the<br />
causes and treatment<br />
of Sleep Apnea.
TABLE OF CONTENTS<br />
Chapter 1: Introduction ..................................................................................................................1-1<br />
1.1 System Contents ........................................................................................................1-1<br />
1.2 Intended Use ...............................................................................................................1-2<br />
1.3 Warnings, Cautions, and Contraindications .....................................................1-2<br />
1.3.1 Warnings ...........................................................................................................1-2<br />
1.3.2 Cautions ............................................................................................................1-4<br />
1.3.3 Contraindications ..........................................................................................1-4<br />
1.4 System Overview .......................................................................................................1-5<br />
1.4.1 Breathing Circuit Overview ........................................................................1-7<br />
1.5 Glossary .........................................................................................................................1-8<br />
1.6 Symbol Key ..................................................................................................................1-9<br />
1.7 How to Contact Respironics ............................................................................... 1-10<br />
Chapter 2: Device Controls and Displays .................................................................................2-1<br />
2.1 Controls and Displays ..............................................................................................2-1<br />
2.1.1 Control Panel Inactivity ...............................................................................2-2<br />
2.2 Rear Panel .....................................................................................................................2-3<br />
Chapter 3: Setup ................................................................................................................................3-1<br />
3.1 Installing the Air Filters ............................................................................................3-1<br />
3.2 Where to Place the Device ......................................................................................3-2<br />
3.3 Connecting the Breathing Circuit .......................................................................3-2<br />
3.4 Supplying Power to the Device ............................................................................3-5<br />
3.4.1 Using AC Power .............................................................................................3-5<br />
3.4.2 Using DC Power .............................................................................................3-6<br />
3.5 Complete Assembly Example ...............................................................................3-7<br />
Chapter 4: Device Operation ........................................................................................................4-1<br />
4.1 Starting the Device ...................................................................................................4-1<br />
4.2 Using the Ramp and C-Flex Features .................................................................4-3<br />
4.2.1 Ramp Feature ..................................................................................................4-3<br />
4.2.2 C-Flex Comfort Feature ...............................................................................4-4<br />
4.2.2.1 C-Flex Enabled ....................................................................................4-4<br />
4.2.2.2 C-Flex Disabled ..................................................................................4-4<br />
REMSTAR PLUS M SERIES <strong>USER</strong> <strong>MANUAL</strong><br />
i
4.3 Changing the Device Settings .............................................................................. 4-5<br />
4.3.1 Navigating the Display Screens ............................................................... 4-5<br />
4.3.1.1 Viewing Data on the Patient Data Screens ............................... 4-5<br />
4.3.1.2 Viewing and Modifying Patient Setup Screens ...................... 4-7<br />
4.4 Completing the FOSQ Questionnaire ..............................................................4-10<br />
4.5 Patient Reminder Screen ......................................................................................4-11<br />
Chapter 5: Alerts and Troubleshooting ..................................................................................... 5-1<br />
5.1 Device Alerts ............................................................................................................... 5-1<br />
5.2 Troubleshooting ......................................................................................................... 5-4<br />
Chapter 6: Accessories .................................................................................................................... 6-1<br />
6.1 Adding a Humidifier ................................................................................................. 6-1<br />
6.2 Using the SmartCard .............................................................................................. 6-2<br />
6.3 Adding Supplemental Oxygen ............................................................................. 6-2<br />
Chapter 7: Cleaning and Maintenance ..................................................................................... 7-1<br />
7.1 Cleaning the Device ................................................................................................. 7-1<br />
7.2 Cleaning or Replacing the Filters ......................................................................... 7-1<br />
7.3 Cleaning the Tubing ................................................................................................. 7-3<br />
7.4 Service ........................................................................................................................... 7-3<br />
7.5 Traveling with the System ...................................................................................... 7-4<br />
7.5.1 International Travel ....................................................................................... 7-4<br />
Chapter 8: Specifications ................................................................................................................ 8-1<br />
Appendix A: EMC Information .....................................................................................................A-1<br />
ii<br />
REMSTAR PLUS M SERIES <strong>USER</strong> <strong>MANUAL</strong>
CHAPTER 1: INTRODUCTION<br />
This chapter provides information on:<br />
• REMstar Plus M Series system contents<br />
• Intended Use<br />
• Warnings, cautions, and contraindications<br />
• System overview<br />
• Glossary and symbol key<br />
• How to contact Respironics<br />
1.1 SYSTEM CONTENTS<br />
Your REMstar Plus M Series system includes the following items:<br />
Carrying Case<br />
User Manual<br />
Quickstart Guide<br />
Flexible Tubing<br />
Power Supply<br />
Reusable Gray Foam<br />
Filter<br />
Disposable Ultra-fine<br />
Filter<br />
AC Power Cord<br />
REMstarPlus M Series Device<br />
FIGURE 1–1 SYSTEM CONTENTS<br />
Note:<br />
Note:<br />
If your system includes a humidifier, you will receive additional items with your<br />
package. See the instructions included with your humidifier for more information.<br />
If any of the above items are missing, contact your home care provider.<br />
REMSTAR PLUS M SERIES <strong>USER</strong> <strong>MANUAL</strong><br />
1-1
1.2 INTENDED USE<br />
The Respironics REMstar Plus M Series system is a CPAP (Continuous Positive Airway Pressure)<br />
device designed for the treatment of Obstructive Sleep Apnea only in spontaneously breathing<br />
patients weighing >30 kg.<br />
The device is to be used only on the instruction of a licensed physician. Your home care provider<br />
will make the correct pressure settings according to your health care professional’s prescription.<br />
Several accessories are available to make your OSA treatment with the REMstar Plus M Series<br />
system as convenient and comfortable as possible. To ensure that you receive the safe,<br />
effective therapy prescribed for you, use only Respironics accessories.<br />
1.3 WARNINGS, CAUTIONS, AND CONTRAINDICATIONS<br />
Caution: U.S. federal law restricts this device to sale by or on the order of a physician.<br />
1.3.1 WARNINGS<br />
A warning indicates the possibility of injury to the user or the operator.<br />
• This manual serves as a reference. The instructions in this manual are not intended to supersede<br />
the health care professional’s instructions regarding the use of the device.<br />
• The operator should read and understand this entire manual before using the device.<br />
• This device is not intended for life support.<br />
• The device should be used only with masks and connectors recommended by Respironics<br />
or with those recommended by the health care professional or respiratory therapist. A mask<br />
should not be used unless the device is turned on and operating properly. The exhalation<br />
port(s) associated with the mask should never be blocked.<br />
Explanation of the Warning: The device is intended to be used with special masks or connectors<br />
that have exhalation ports to allow continuous flow of air out of the mask. When the<br />
device is turned on and functioning properly, new air from the device flushes the exhaled air<br />
out through the mask exhalation port. However, when the device is not operating, enough<br />
fresh air will not be provided through the mask, and exhaled air may be rebreathed. Rebreathing<br />
of exhaled air for longer than several minutes can in some circumstances lead to<br />
suffocation.<br />
• If oxygen is used with the device, the oxygen flow must be turned off when the device is not<br />
in use.<br />
Explanation of the Warning: When the device is not in operation and the oxygen flow is left<br />
on, oxygen delivered into the tubing may accumulate within the device’s enclosure. Oxygen<br />
accumulated in the device enclosure will create a risk of fire.<br />
• Oxygen supports combustion. Oxygen should not be used while smoking or in the presence<br />
of an open flame.<br />
1-2 REMSTAR PLUS M SERIES <strong>USER</strong> <strong>MANUAL</strong>
• When using oxygen with this system, a Respironics Pressure Valve (Part Number 302418)<br />
must be placed in-line with the patient circuit. Failure to use the pressure valve could result<br />
in a fire hazard.<br />
• Do not use the device in the presence of a flammable anaesthetic mixture in combination<br />
with oxygen or air, or in the presence of nitrous oxide.<br />
• Do not use this device if the room temperature is warmer than 95° F (35° C). If the device is<br />
used at room temperatures warmer than 95° F (35° C), the temperature of the airflow may<br />
exceed 106° F (41° C). This could cause irritation or injury to your airway.<br />
• Do not operate the device in direct sunlight or near a heating appliance because these conditions<br />
can increase the temperature of the air coming out of the device.<br />
• Contact your health care professional if symptoms of sleep apnea recur.<br />
• If you notice any unexplained changes in the performance of this device, if it is making unusual<br />
or harsh sounds, if the device or the power supply are dropped or mishandled, if water<br />
is spilled into the enclosure, or if the enclosure is broken, discontinue use and contact your<br />
home care provider.<br />
• Repairs and adjustments must be performed by Respironics-authorized service personnel<br />
only. Unauthorized service could cause injury, invalidate the warranty, or result in costly<br />
damage.<br />
• Periodically inspect electrical cords, cables, and the power supply for damage or signs of wear.<br />
Discontinue use and replace if damaged.<br />
• To avoid electric shock, unplug the device before cleaning it. DO NOT immerse the device<br />
in any fluids.<br />
• Using this device at an incorrect elevation setting could result in airflow pressures higher than<br />
the prescribed setting. Always verify the elevation setting when traveling or relocating.<br />
• Pins of connectors identified with the ESD warning symbol ( )should not be touched.<br />
Connections should not be made to these connectors unless ESD precautionary procedures<br />
are used. Precautionary procedures include methods to prevent build-up of electrostatic<br />
discharge (e.g., air conditioning, humidification, conductive floor coverings, non-synthetic<br />
clothing), discharging one’s body to the frame of the equipment or system or to earth or a<br />
large metal object, and bonding oneself by means of a wrist strap to the equipment or system<br />
or to earth.<br />
REMSTAR PLUS M SERIES <strong>USER</strong> <strong>MANUAL</strong><br />
1-3
1.3.2 CAUTIONS<br />
A Caution indicates the possibility of damage to the device.<br />
• The device may only be operated at temperatures between 41° F (5° C) and 95° F (35° C).<br />
• If this device has been exposed to either very hot or very cold temperatures, allow it to adjust<br />
to room temperature before starting therapy. Condensation may damage the device.<br />
• Do not immerse the device or allow any liquid to enter the enclosure or the inlet filter.<br />
• A properly installed, undamaged reusable foam inlet filter is required for proper operation.<br />
• Tobacco smoke may cause tar build-up within the device, which may result in the device<br />
malfunctioning.<br />
Note:<br />
Additional warnings, cautions, and notes are located throughout this manual.<br />
1.3.3 CONTRAINDICATIONS<br />
When assessing the relative risks and benefits of using this equipment, the clinician should<br />
understand that this device can deliver pressures up to 20 cm H 2<br />
O. In the event of certain fault<br />
conditions, a maximum pressure of 30 cm H 2<br />
O is possible. Studies have shown that the following<br />
pre-existing conditions may contraindicate the use of CPAP therapy for some patients:<br />
• Bullous Lung Disease<br />
• Pathologically Low Blood Pressure<br />
• Bypassed Upper Airway<br />
• Pneumothorax<br />
• Pneumocephalus has been reported in a patient using nasal Continuous Positive Airway Pressure.<br />
Caution should be used when prescribing CPAP for susceptible patients such as those<br />
with: cerebral spinal fluid (CSF) leaks, abnormalities of the cribriform plate, prior history of<br />
head trauma, and/or pneumocephalus. (Chest 1989; 96:1425-1426)<br />
The use of positive airway pressure therapy may be temporarily contraindicated if you exhibit<br />
signs of a sinus or middle ear infection. Not for use with patients whose upper airways are bypassed.<br />
Contact your physician if you have any questions concerning your therapy.<br />
1-4 REMSTAR PLUS M SERIES <strong>USER</strong> <strong>MANUAL</strong>
1.4 SYSTEM OVERVIEW<br />
The REMstar Plus M Series device, shown in Figure 1–2, is a sleep apnea system that<br />
delivers Continuous Positive Airway Pressure (CPAP). CPAP maintains a constant level of pressure<br />
throughout the breathing cycle.<br />
When prescribed for you, the device provides several special features to help make your therapy<br />
more comfortable. The ramp function allows you to lower the pressure when you are trying to fall<br />
asleep. The air pressure will gradually increase until your prescription pressure is reached. You also<br />
have the option of not using the ramp feature at all.<br />
Additionally, the C-Flex comfort feature provides you with pressure relief during the expiratory<br />
phase of breathing.<br />
Several accessories are also available for use with your REMstar Plus M Series device. Contact<br />
your home care provider to purchase any accessories not included with your system.<br />
FIGURE 1–2 REMSTAR PLUS M SERIES DEVICE<br />
REMSTAR PLUS M SERIES <strong>USER</strong> <strong>MANUAL</strong><br />
1-5
lex<br />
Figure 1–3 illustrates many of the device features, described in the table below.<br />
Ramp Button Start/Stop<br />
Button<br />
C-Flex<br />
Button<br />
Display Screen<br />
(under door)<br />
Power Inlet<br />
Air Outlet<br />
<strong>Medical</strong><br />
<strong>Equipment</strong> Note<br />
(on bottom)<br />
Accessory<br />
Module<br />
Filter Area<br />
FIGURE 1–3 SYSTEM OVERVIEW<br />
DEVICE FEATURE DESCRIPTION<br />
Accessory Module<br />
Air Outlet<br />
C-Flex Button<br />
Display Screen<br />
Filter Area<br />
If applicable, insert optional accessory module here.<br />
Connect the flexible tubing here.<br />
This button allows you to change the C-Flex comfort<br />
setting, if C-Flex is prescribed for you. See Chapter 4<br />
for more information about C-Flex.<br />
Shows therapy settings, patient data, instructions,<br />
and error messages.<br />
A reusable, gray foam filter must be placed in the<br />
filter area to screen out normal household dust and<br />
pollens. An optional, white ultra-fine filter can also<br />
be used for more complete filtration of very fine<br />
particles.<br />
<strong>Medical</strong> <strong>Equipment</strong> Note<br />
Power Inlet<br />
Ramp Button<br />
Start/Stop Button<br />
For ease at airport security stations, there is a note<br />
on the bottom of the device stating that it is medical<br />
equipment. It may help if you also take this manual<br />
with you when you travel.<br />
Connect the power cord here.<br />
This button starts or restarts the ramp cycle.<br />
This button starts or stops the airflow.<br />
1-6 REMSTAR PLUS M SERIES <strong>USER</strong> <strong>MANUAL</strong>
1.4.1 BREATHING CIRCUIT OVERVIEW<br />
The patient breathing circuit, shown in Figure 1–4, consists of the following:<br />
• Circuit tubing to deliver air from the device to your interface (e.g., mask)<br />
• A mask or other patient interface device to deliver the prescribed pressure to your nose or<br />
nose and mouth, depending on which interface has been prescribed for you<br />
• An exhalation device to vent exhaled air from the circuit<br />
Patient Interface<br />
Exhalation<br />
Device<br />
Exhalation<br />
Port<br />
Circuit<br />
Tubing<br />
Mask's<br />
Connector<br />
Flexible<br />
Tubing<br />
Connector<br />
Circuit with Separate<br />
Exhalation Device<br />
Circuit with Mask with<br />
Integrated Exhalation Port<br />
FIGURE 1–4 TYPICAL BREATHING CIRCUITS<br />
Note:<br />
The exhalation port may be part of the interface or may be part of a separate<br />
exhalation device, but is required to minimize the potential for CO 2<br />
rebreathing.<br />
REMSTAR PLUS M SERIES <strong>USER</strong> <strong>MANUAL</strong><br />
1-7
1.5 GLOSSARY<br />
The following terms and acronyms appear throughout this manual:<br />
TERM/ACRONYM<br />
Active State<br />
Apnea<br />
Auto-Off<br />
Auto-On<br />
BPM<br />
C-Flex<br />
CPAP<br />
FOSQ<br />
LPM<br />
OSA<br />
Patient Data Menu<br />
Patient Setup Menu<br />
Ramp<br />
Safe State<br />
Standby State<br />
DEFINITION<br />
The state of the device when power is applied, the airflow is on, and<br />
the device is providing therapy.<br />
A condition marked by the cessation of spontaneous breathing.<br />
When this feature is enabled, the device automatically discontinues<br />
therapy whenever the mask is removed.<br />
With this feature, the device automatically initiates therapy when you<br />
begin breathing on the device. This feature is always enabled.<br />
Breaths Per Minute<br />
A therapy feature that provides pressure relief during exhalation, if<br />
enabled by your home care provider.<br />
Continuous Positive Airway Pressure<br />
Functional Outcomes of Sleep Questionnaire – A “quality of life” questionnaire<br />
designed specifically for people with sleep disorders. The<br />
results allow health care professionals to assess how CPAP therapy has<br />
improved the quality of their patients’ lives.<br />
Liters Per Minute<br />
Obstructive Sleep Apnea<br />
The display mode in which you can view certain stored information,<br />
such as therapy usage hours.<br />
The display mode in which you can change patient-adjustable device<br />
settings, such as the ramp starting pressure.<br />
A feature that may increase patient comfort when therapy is started.<br />
The ramp feature reduces pressure and then gradually increases the<br />
pressure to the prescription setting so you can fall asleep more comfortably.<br />
The state in which the device does not provide therapy. The device<br />
enters this state if an error is detected.<br />
The state of the device when power is applied but the airflow is<br />
turned off.<br />
1-8 REMSTAR PLUS M SERIES <strong>USER</strong> <strong>MANUAL</strong>
1.6 SYMBOL KEY<br />
The following symbols appear on the device and power supply:<br />
SYMBOL<br />
DEFINITION<br />
Consult accompanying instructions for use.<br />
DC Power<br />
Type BF Applied Part<br />
Class II (Double Insulated)<br />
IPX1<br />
Drip Proof <strong>Equipment</strong><br />
Electrostatic Discharge<br />
European Declaration of Conformity<br />
Canadian/US Certification<br />
Notified Body Approval for Standards Compliance<br />
TUV Safety Standard Compliance<br />
UL Recognized for Canada and the United States<br />
No User Serviceable Parts<br />
REMSTAR PLUS M SERIES <strong>USER</strong> <strong>MANUAL</strong><br />
1-9
1.7 HOW TO CONTACT RESPIRONICS<br />
To have your device serviced, contact your home care provider. If you need to contact<br />
Respironics directly, call the Respironics Customer Service department at 1-800-345-6443 or<br />
1-724-387-4000. You can also use the following address:<br />
Visit Respironics web site at: www.respironics.com<br />
1-10 REMSTAR PLUS M SERIES <strong>USER</strong> <strong>MANUAL</strong>
CHAPTER 2: DEVICE CONTROLS AND DISPLAYS<br />
This chapter describes the device’s control buttons and displays, patient circuit connections, and<br />
rear panel connections.<br />
2.1 CONTROLS AND DISPLAYS<br />
Figure 2–1 shows the three primary control buttons on the REMstar Plus M Series device.<br />
C-Flex<br />
These buttons are described below.<br />
FIGURE 2–1 PRIMARY CONTROL BUTTONS<br />
BUTTON<br />
C-Flex<br />
DESCRIPTION<br />
Ramp – When the airflow is on, this button allows you to<br />
activate or restart the ramp function. Ramp lowers the<br />
airflow pressure and then gradually increases it, allowing<br />
you to fall asleep more easily.<br />
Start/Stop – This button starts the device’s airflow and<br />
places the device in the Active state, or stops the airflow,<br />
and places the device in Standby. You can also press this<br />
button to exit any setting screen.<br />
C-Flex – This button adjusts the C-Flex comfort setting.<br />
If you do not want to modify the settings that your home care provider has set for you, you only<br />
need these three buttons to start and stop therapy and do not need to use the display buttons located<br />
under the device cover door.<br />
Figure 2–2 shows the device display and navigation buttons that are under the cover door.<br />
– FOSQ Setup +<br />
FIGURE 2–2 DISPLAY BUTTONS<br />
REMSTAR PLUS M SERIES <strong>USER</strong> <strong>MANUAL</strong><br />
2-1
The display buttons are described below:<br />
BUTTON<br />
DESCRIPTION<br />
Allows you to access the Data screens. Also allows you to<br />
navigate to the previous screen when in the Data, FOSQ, or<br />
Setup menu.<br />
Allows you to access the Data screens. Also allows you to<br />
navigate to the next screen when in the Data, FOSQ, or Setup<br />
menu.<br />
Allows you to enter the FOSQ screens. Also allows you to<br />
decrease the settings on the patient setup screens.<br />
Allows you to enter the Setup screens. Also allows you to<br />
increase the settings on the patient setup screens.<br />
The device’s display screen shows the set pressure, patient data, instructions, and error messages.<br />
See Chapter 4 for instructions on navigating the display screens.<br />
Figure 2–3 provides a view of the entire device control panel, with the cover door open.<br />
Placement Area<br />
for Optional Quick<br />
Reference Label<br />
Cover Door<br />
Previous<br />
Screen<br />
Button<br />
Next<br />
Screen<br />
Button<br />
Decrease<br />
Button<br />
Increase<br />
Button<br />
C-Flex<br />
Ramp<br />
Button<br />
Start/Stop<br />
Button<br />
C-Flex<br />
Button<br />
FIGURE 2–3 DEVICE CONTROL PANEL<br />
2.1.1 CONTROL PANEL INACTIVITY<br />
Some screens have time-out periods. The screen’s timer starts when the screen is initially displayed<br />
and is restarted whenever a button is pressed. The screen times out after one minute if there is no<br />
activity and returns to the Standby screen.<br />
2-2 REMSTAR PLUS M SERIES <strong>USER</strong> <strong>MANUAL</strong>
2.2 REAR PANEL<br />
Figure 2–4 shows the REMstar Plus M Series device’s rear panel (without a humidifier).<br />
DC Power Inlet<br />
Air Outlet Port<br />
Accessory Slot<br />
Filter Area<br />
The rear panel contains the following:<br />
FIGURE 2–4 REAR PANEL<br />
• An accessory slot for optional accessories such as the SmartCard or modem (see Chapter 6,<br />
Accessories, for more information).<br />
• A filter area where the filter(s) supplied with your device should be inserted.<br />
• A DC power inlet where the power cord is connected (see Chapter 3, Setup, for complete<br />
information on supplying power to the device).<br />
• The air outlet port where the breathing circuit’s flexible tubing is attached.<br />
REMSTAR PLUS M SERIES <strong>USER</strong> <strong>MANUAL</strong><br />
2-3
2-4 REMSTAR PLUS M SERIES <strong>USER</strong> <strong>MANUAL</strong>
CHAPTER 3: SETUP<br />
This chapter provides instructions on how to:<br />
• Install the air filters<br />
• Position the device<br />
• Connect the breathing circuit<br />
• Supply power to the device<br />
3.1 INSTALLING THE AIR FILTERS<br />
Caution: A properly installed, undamaged foam filter is required for proper operation.<br />
The device uses a gray foam filter that is washable and reusable, and an optional white ultra-fine<br />
filter that is disposable. The reusable filter screens out normal household dust and pollens, while<br />
the optional ultra-fine filter provides more complete filtration of very fine particles. The gray<br />
reusable filter must be in place at all times when the device is operating. The ultra-fine filter is<br />
recommended for people who are sensitive to tobacco smoke or other small particles.<br />
Two reusable gray foam filters and one disposable ultra-fine filter are supplied with the device.<br />
If your filters are not already installed when you receive your device, you must at least install the<br />
reusable gray foam filter before using the device.<br />
To install the filter(s):<br />
1. If you are using the white disposable ultra-fine filter, insert it into the filter area first, meshside<br />
facing in, towards the device.<br />
2. Insert the gray foam filter into the filter area as shown in Figure 3–1.<br />
Note:<br />
If you are not using the white disposable filter, simply insert the gray foam filter<br />
into the filter area.<br />
REMSTAR PLUS M SERIES <strong>USER</strong> <strong>MANUAL</strong><br />
3-1
Filter Area<br />
Disposable Ultra-Fine<br />
Filter (optional)<br />
Reusable Gray<br />
Foam Filter<br />
(required)<br />
FIGURE 3–1 INSTALLING THE AIR FILTER<br />
Note:<br />
See Chapter 7, Cleaning and Maintenance, for information on how to clean or<br />
replace the air filters.<br />
3.2 WHERE TO PLACE THE DEVICE<br />
Place the device on a firm, flat surface somewhere within easy reach of where you will use it. Make<br />
sure the filter area on the back of the device is not blocked by bedding, curtains, or other items.<br />
Air must flow freely around the device for the system to work properly. Make sure the device is<br />
away from any heating or cooling equipment (e.g., forced air vents, radiators, air conditioners).<br />
3.3 CONNECTING THE BREATHING CIRCUIT<br />
To use the system, you will need the following accessories in order to assemble the recommended<br />
circuit:<br />
• Respironics interface (e.g, nasal mask) with integrated exhalation port (or Respironics interface<br />
with a separate exhalation device such as the Whisper Swivel® II)<br />
• Respironics 1.83 m (6 ft.) flexible tubing (with optional swivel)<br />
• Respironics headgear (for the patient interface)<br />
Warning:<br />
If the device is used by multiple persons (e.g., rental devices), a lowresistance,<br />
main flow bacteria filter should be installed in-line between<br />
the device and the circuit tubing to prevent contamination.<br />
3-2 REMSTAR PLUS M SERIES <strong>USER</strong> <strong>MANUAL</strong>
To connect your breathing circuit to the device, complete the following steps:<br />
1. Connect the flexible tubing to the air outlet on the back of the device, as shown in<br />
Figure 3–2. You can use the optional, detachable swivel that is provided with your device and<br />
already attached to the tubing (shown in Figure 3–2), or you can remove the swivel and connect<br />
the tubing directly to the air outlet.<br />
Detachable<br />
Swivel<br />
Note:<br />
FIGURE 3–2 CONNECTING THE FLEXIBLE TUBING<br />
If required, connect a bacteria filter to the device air outlet, and then connect<br />
the flexible tubing to the outlet of the bacteria filter.<br />
2. Connect the tubing to the mask:<br />
a. If you are using a mask with a built-in exhalation port, connect the mask’s connector to<br />
the flexible tubing, as shown in Figure 3–3.<br />
Exhalation Port<br />
Mask's<br />
Connector<br />
Flexible<br />
Tubing<br />
Connector<br />
FIGURE 3–3 CONNECTING A MASK WITH BUILT-IN EXHALATION PORT<br />
REMSTAR PLUS M SERIES <strong>USER</strong> <strong>MANUAL</strong><br />
3-3
. If you are using a mask with a separate exhalation device, connect the open end of the<br />
flexible tubing to the exhalation device as shown in Figure 3–4. Position the exhalation<br />
device so that the vented air is blowing away from your face. Connect the mask’s connector<br />
to the exhalation device.<br />
Exhalation<br />
Device<br />
Flexible<br />
Tubing<br />
Connector<br />
FIGURE 3–4 CONNECTING A MASK WITH A SEPARATE EXHALATION DEVICE<br />
Warning:<br />
The exhalation device (e.g., Whisper Swivel II) or exhalation port (on<br />
masks with an integrated exhalation port) is designed to exhaust CO 2<br />
from the patient circuit. Do not block or seal the ports on the exhalation<br />
device.<br />
Warning:<br />
If you are using a full face mask (i.e., a mask covering both your mouth<br />
and your nose), the mask must be equipped with a safety (entrainment)<br />
valve.<br />
3. Attach the headgear to the mask. See the instructions that came with your headgear.<br />
3-4 REMSTAR PLUS M SERIES <strong>USER</strong> <strong>MANUAL</strong>
3.4 SUPPLYING POWER TO THE DEVICE<br />
You can power the device using AC or DC power.<br />
Caution: If this device has been exposed to either very hot or very cold temperatures,<br />
allow it to adjust to room temperature before beginning the following<br />
setup procedures.<br />
Warning:<br />
Warning:<br />
Important!<br />
Route the wires to avoid tripping.<br />
This device is activated when the power cord is connected. Pressing<br />
the button turns the airflow on or off.<br />
If you are using your device with a humidifier, refer to the Quickstart<br />
Guide included with your device or the instructions included with your<br />
humidifier for details on how to power the device and humidifier.<br />
3.4.1 USING AC POWER<br />
Complete the following steps to operate the device using AC power.<br />
1. Plug the socket end of the AC power cord into the power supply, as shown in Figure 3–5.<br />
FIGURE 3–5 CONNECTING THE POWER CORD TO THE POWER SUPPLY<br />
2. Plug the pronged end of the AC power cord into an electrical outlet that is not controlled by<br />
a wall switch.<br />
3. Plug the power supply cord’s connector into the power inlet on the back of the device, as<br />
shown in Figure 3–6.<br />
REMSTAR PLUS M SERIES <strong>USER</strong> <strong>MANUAL</strong><br />
3-5
FIGURE 3–6 CONNECTING THE POWER SUPPLY CORD TO THE DEVICE<br />
4. Ensure that all connections are secure.<br />
Important!<br />
Warning:<br />
To remove AC power, disconnect the power supply cord from the electrical<br />
outlet.<br />
Inspect the power cord often for any signs of damage. Replace a damaged<br />
power cord immediately.<br />
3.4.2 USING DC POWER<br />
The Respironics DC Power Cord (Reorder Number 1001956) can be used to operate this device<br />
in a stationary recreational vehicle, boat, or motor home. The Respironics DC Battery Adapter<br />
Cable (Reorder Number 532209), when used with the DC Power Cord, enables the device to be<br />
operated from a 12 VDC free-standing battery.<br />
Caution: When DC power is obtained from a vehicle battery, the device should not<br />
be used while the vehicle’s engine is running. Damage to the vehicle or the<br />
device may occur.<br />
Caution: Only use a Respironics DC Power Cord and Battery Adapter Cable. Use of<br />
any other system may cause damage to the device or vehicle.<br />
Refer to the instructions supplied with the DC Power Cord and adapter cable for information on<br />
how to operate the device using DC power.<br />
3-6 REMSTAR PLUS M SERIES <strong>USER</strong> <strong>MANUAL</strong>
3.5 COMPLETE ASSEMBLY EXAMPLE<br />
Figure 3–7 shows an example of how a complete assembly will look, with breathing circuit connected<br />
and power applied to the device.<br />
FIGURE 3–7 FINAL ASSEMBLY EXAMPLE (SHOWN WITH OPTIONAL ACCESSORY MODULE)<br />
Figure 3–8 shows an example of how you should route your tubing and situate your device on<br />
your nightstand for the best setup possible. This will help prevent the device from falling off your<br />
nighstand or table.<br />
FIGURE 3–8 RECOMMENDED DEVICE AND TUBING PLACEMENT<br />
REMSTAR PLUS M SERIES <strong>USER</strong> <strong>MANUAL</strong><br />
3-7
3-8 REMSTAR PLUS M SERIES <strong>USER</strong> <strong>MANUAL</strong>
CHAPTER 4: DEVICE OPERATION<br />
This chapter explains how to start the device and change the settings.<br />
4.1 STARTING THE DEVICE<br />
1. Plug the device in to an AC or DC power source. The three primary buttons light up and the<br />
Software Version screen momentarily appears, shown in Figure 4–1.<br />
V 1.0<br />
Note:<br />
FIGURE 4–1 SOFTWARE VERSION SCREEN<br />
Version 1.0 shown in Figure 4–1 is an example. Your device may have a different<br />
software version installed.<br />
2. The next screen to appear is the Standby screen, shown in Figure 4–2. You can access the<br />
FOSQ questionnaire or patient settings and data from this screen. See Section 4.3 for instructions<br />
on how to navigate the display screens.<br />
– FOSQ + Setup<br />
FIGURE 4–2 STANDBY SCREEN<br />
Note:<br />
The FOSQ option only appears if a SmartCard is inserted or a modem is connected<br />
to the device.<br />
REMSTAR PLUS M SERIES <strong>USER</strong> <strong>MANUAL</strong><br />
4-1
3. Press the button to turn on the airflow. The Active Display screen appears, shown in<br />
Figure 4–3.<br />
15.0 cmH 2O<br />
FIGURE 4–3 ACTIVE DISPLAY (WITH SMARTCARD)<br />
The Active Display screen shows the set pressure.<br />
Symbols also appear on the Active Display screen or Standby screen to indicate when certain<br />
conditions are turned on or detected. These symbols are described below:<br />
SYMBOL<br />
Mask<br />
Leak<br />
Auto<br />
Off<br />
DESCRIPTION<br />
Ramp – You can initiate the ramp feature by pressing the Ramp button.<br />
The ramp symbol displays on the Active Display screen when the ramp<br />
function is active.<br />
Mask Leak Alert – This flashing text displays on the Active Display screen<br />
if the Mask Alert setting is enabled and the device detects an excessive<br />
mask leak.<br />
Auto-Off – This flashing text displays on the Standby screen if the Auto-<br />
Off setting is enabled and the device detects a mask disconnect.<br />
SmartCard – This symbol appears if a SmartCard is inserted in the device.<br />
If the SmartCard is inserted incorrectly, this symbol will flash intermittently.<br />
Modem – This symbol appears if a modem is connected to the device.<br />
(Note: This symbol will vary in appearance depending on the type of<br />
modem being used.)<br />
4. Put on your mask assembly when the air starts to flow.<br />
5. Make sure that no air is leaking from your mask into your eyes. If it is, adjust the mask and<br />
headgear until the air leak stops. See the instructions provided with your mask for more<br />
information.<br />
Note:<br />
A small amount of mask leak is normal and acceptable. Correct large mask<br />
leaks or eye irritation from an air leak as soon as possible.<br />
6. If you are using the device while sleeping, try placing the tubing from the device over your<br />
headboard. This may reduce tension on the mask.<br />
Note:<br />
If you are having trouble with your mask, refer to the instructions supplied with<br />
the mask.<br />
4-2 REMSTAR PLUS M SERIES <strong>USER</strong> <strong>MANUAL</strong>
4.2 USING THE RAMP AND C-FLEX FEATURES<br />
You can press the (Ramp) button to activate the Ramp feature, or the C-Flex button to<br />
change the C-Flex setting, if your provider has enabled these features.<br />
4.2.1 RAMP FEATURE<br />
The device is equipped with an optional ramp feature that your home care provider can enable or<br />
disable. This feature reduces the air pressure when you are trying to fall asleep and then gradually<br />
increases (ramps) the pressure until your prescription setting is reached, allowing you to fall asleep<br />
more comfortably.<br />
If ramp is enabled on your device, after you turn on the airflow, press the button on the top of<br />
the device. You can use the Ramp button as often as you wish during the night.<br />
Note: If the ramp feature is disabled, nothing will happen when you press the button.<br />
REMSTAR PLUS M SERIES <strong>USER</strong> <strong>MANUAL</strong><br />
4-3
4.2.2 C-FLEX COMFORT FEATURE<br />
The C-Flex comfort feature allows you to adjust the level of air pressure relief that you feel when<br />
you exhale during therapy. Your home care provider can enable or disable this feature.<br />
4.2.2.1 C-FLEX ENABLED<br />
When your provider enables C-Flex, a C-Flex level will already be set for you on the device. If this<br />
is not comfortable for you, you can increase or decrease the setting.<br />
To change the C-Flex setting, press the C-Flex button. The screen shown in Figure 4–4 appears,<br />
with an arrow above the current C-Flex setting.<br />
C-Flex Setting<br />
1 2 3<br />
FIGURE 4–4 C-FLEX SETTING SCREEN<br />
The setting of 1 provides a small amount of pressure relief, with higher numbers providing additional<br />
relief. To change the pressure relief, press the + or – buttons to increase or decrease the<br />
setting.<br />
Note:<br />
You can also view and change the C-Flex setting by navigating to the C-Flex Setting<br />
screen from the Patient Setup menu (see Section 4.3).<br />
4.2.2.2 C-FLEX DISABLED<br />
If C-Flex has not been prescribed for you and your provider has disabled the C-Flex feature, the<br />
following screen appears when you press the C-Flex button, and you cannot enable or adjust the<br />
setting.<br />
C-Flex Setting<br />
FLEX comfort has been<br />
disabled on this unit.<br />
FIGURE 4–5 C-FLEX DISABLED SCREEN<br />
4-4 REMSTAR PLUS M SERIES <strong>USER</strong> <strong>MANUAL</strong>
4.3 CHANGING THE DEVICE SETTINGS<br />
You can view the set pressure on the Active Display screen, and the following information on the<br />
Patient Data screens:<br />
• Therapy usage hours<br />
• Number of sessions greater than 4 hours<br />
Additionally, you can view and modify the following settings on the Patient Setup screens:<br />
• C-Flex (if enabled by your home care provider)<br />
• Altitude<br />
• Ramp starting pressure (if enabled by your home care provider)<br />
• Mask alert (enable/disable)<br />
• Auto off (enable/disable)<br />
4.3.1 NAVIGATING THE DISPLAY SCREENS<br />
Use the button to navigate to the next screen and the button to navigate to the previous<br />
screen.<br />
Use the + and — buttons to adjust the settings on the Patient Setup screens.<br />
4.3.1.1 VIEWING DATA ON THE PATIENT DATA SCREENS<br />
Figure 4–6 shows how to navigate the Patient Data screens.<br />
Press<br />
Press<br />
– FOSQ Setup +<br />
Sessions > 4<br />
7 Days: 5 Sessions<br />
30 Days: 8 Sessions<br />
Therapy Usage<br />
Hrs/Night<br />
7 Day Avg: 5:00<br />
30 Day Avg: 8:00<br />
FIGURE 4–6 NAVIGATING THE PATIENT DATA SCREENS<br />
REMSTAR PLUS M SERIES <strong>USER</strong> <strong>MANUAL</strong><br />
4-5
Press the button to scroll forward through the data screens, or press the button to scroll<br />
through the screens in the reverse order. The Patient Data screens are described below.<br />
– FOSQ + Setup<br />
Therapy Usage<br />
Hrs/Night<br />
7 Day Avg: 5:00<br />
30 Day Avg: 8:00<br />
7 Days: 5 Sessions<br />
30 Days: 8 Sessions<br />
1. Standby Screen<br />
The Standby screen appears when you first apply power to the<br />
device. You can access the Patient Data menu from this screen by<br />
pressing the or buttons.<br />
Note: You can also access the Patient Setup screens by pressing<br />
the + button, and the FOSQ questionnaire by pressing the<br />
— button, as described later in this chapter.<br />
Note: The FOSQ option only appears if a SmartCard is inserted or<br />
a modem is connected to the device.<br />
2. Therapy Usage Screen<br />
This screen displays the number of hours that the device provided<br />
therapy, as 7-day and 30-day averages. The maximum value that can<br />
be displayed for both averages is 24 hours.<br />
Note: This screen is only for reference. Your home care<br />
provider may periodically ask you for this information.<br />
Sessions > 4<br />
3. Sessions Greater than 4 Hours Screen<br />
This screen displays the number of device therapy sessions that<br />
exceeded 4 hours in 7-day and 30-day periods. The maximum value<br />
for the 7-day period is 35 sessions, while the maximum value for the<br />
30-day period is 150 sessions.<br />
Note: This screen is only for reference. Your home care<br />
provider may periodically ask you for this information.<br />
4-6 REMSTAR PLUS M SERIES <strong>USER</strong> <strong>MANUAL</strong>
4.3.1.2 VIEWING AND MODIFYING PATIENT SETUP SCREENS<br />
Figure 4–7 shows how to navigate the Patient Setup screens.<br />
– FOSQ Setup +<br />
Press +<br />
Press<br />
C-Flex Setting<br />
1 2 3<br />
Press<br />
Auto Off<br />
Feature: ON<br />
Altitude<br />
1 2 3<br />
Mask Alert<br />
Feature: ON<br />
Ramp Start Pres<br />
4.0 cmH2O<br />
FIGURE 4–7 NAVIGATING THE PATIENT SETUP SCREENS<br />
REMSTAR PLUS M SERIES <strong>USER</strong> <strong>MANUAL</strong><br />
4-7
The Patient Setup screens are described below.<br />
– FOSQ + Setup<br />
C-Flex Setting<br />
1 2 3<br />
C-Flex Setting<br />
FLEX comfort has been<br />
disabled on this unit.<br />
1. Standby Screen<br />
The Standby screen appears when you first apply power to the<br />
device. You can access the Patient Setup menu from this screen by<br />
pressing the + button. Once inside the Setup menu, press the<br />
or buttons to cycle through the screens.<br />
2. C-Flex Setting Screen<br />
This screen displays the C-Flex level set by your home care<br />
provider. This setting allows you to adjust the level of air pressure<br />
relief that you feel when you exhale during therapy. Your home<br />
care provider will either enable, lock, or disable C-Flex.<br />
– If C-Flex is enabled and the setting is not comfortable for you,<br />
you can increase or decrease the setting by pressing the + or<br />
– buttons. The setting of 1 provides a small amount of pressure<br />
relief, with higher numbers providing additional relief.<br />
Press the + or – buttons to increase or decrease the setting.<br />
– If your provider has disabled C-Flex, you cannot enable or adjust<br />
the setting. The screen shown at left displays to indicate<br />
that C-Flex is disabled.<br />
Altitude<br />
1 2 3<br />
Ramp Start Pres<br />
4.0 cmH2O<br />
3. Altitude Setting Screen<br />
This screen allows you to modify the altitude adjustment setting.<br />
Press the + or – buttons to increase or decrease the setting by<br />
increments of 1:<br />
• 1 = less than 2500 ft. (
Mask Alert<br />
Feature: ON<br />
Auto Off<br />
Feature: ON<br />
5. Mask Alert Screen<br />
You can enable or disable the mask alert setting by pressing the +<br />
or – buttons to select OFF or ON. If this feature is enabled, then the<br />
words Mask Leak appear on the Active display screen if a significant<br />
mask leak is detected, and an audible alert sounds.<br />
Note: If your physician indicates that the Mask Alert is necessary<br />
for you, do not disable it.<br />
6. Auto Off Screen<br />
You can enable this feature if you want the device to automatically<br />
turn the airflow off whenever you remove the interface (e.g.,<br />
mask) from your airway.<br />
Press the + or – buttons to select OFF or ON. If this feature is enabled,<br />
then the words Auto Off appear on the Standby screen if<br />
the device detects that you have removed your mask. The airflow<br />
shuts off, and the Auto Off message continues to appear on the<br />
Standby screen until the condition is corrected.<br />
After you have finished modifying the Patient Setup screens, press the<br />
Standby screen.<br />
Note:<br />
button to return to the<br />
The Setup menu automatically times out and returns to the Standby screen<br />
after one minute of inactivity.<br />
REMSTAR PLUS M SERIES <strong>USER</strong> <strong>MANUAL</strong><br />
4-9
4.4 COMPLETING THE FOSQ QUESTIONNAIRE<br />
Note:<br />
The FOSQ option only appears on the Standby screen if a SmartCard is<br />
inserted or a modem is connected to the device.<br />
From the Standby screen, you can access the FOSQ questionnaire by pressing the – button. The<br />
FOSQ test is a ‘quality of life’ questionnaire designed specifically for people with sleep disorders.<br />
The results allow health care professionals to see how therapy has improved the quality of your<br />
life. By completing the questionnaire periodically, you can provide valuable information about<br />
the effectiveness of your treatment. The device can record your answers on the SmartCard or via a<br />
wired or wireless modem for later review by the health care professional. Contact your home care<br />
provider for further instructions.<br />
Note:<br />
If your health care professional or home care provider instructs you to<br />
complete the questionnaire, he or she will provide you with the questions,<br />
and you can enter your answers into the device. Make sure a<br />
SmartCard or modem is installed before answering the questions. The<br />
FOSQ screens will not display if a SmartCard or modem is not present<br />
and able to store data.<br />
To answer the FOSQ questionnaire, complete the following steps:<br />
1. Make sure that the SmartCard or modem is properly installed. Answers to the questionnaire<br />
are saved onto the SmartCard or sent to the health care professional via a wired or wireless<br />
modem (when available). If you are using a SmartCard, a SmartCard symbol ( ) appears<br />
in the upper right corner of the Active Display screen. The symbol will flash if the SmartCard<br />
is inserted incorrectly, and the FOSQ questionnaire will not be available.<br />
2. From the Standby screen, press the – button to access the first FOSQ screen, shown in Figure<br />
4–9.<br />
FOSQ 1/30<br />
ENGLISH<br />
0 1 2 3 4<br />
FIGURE 4–9 FOSQ SCREEN 1 OF 30<br />
Press the + or – button to select your answer to the first question, and an arrow appears over<br />
your answer:<br />
– 0 indicates that you choose 0 as the answer to the question.<br />
– 1 indicates that you choose 1 as the answer to the question.<br />
– 2 indicates that you choose 2 as the answer.<br />
– 3 indicates that you choose 3 as the answer.<br />
– 4 indicates that you choose 4 as the answer.<br />
REMSTAR PLUS M SERIES <strong>USER</strong> <strong>MANUAL</strong><br />
4-11
3. After you answer the first question, press the button to access the next FOSQ screen and<br />
continue answering each question. If you need to go back to a previous screen, press the<br />
button.<br />
4. There are 30 FOSQ questions. Once you have reached the last question, press the button<br />
to save your answers and exit the questionnaire.<br />
4.5 PATIENT REMINDER SCREEN<br />
Your home care provider may set a patient reminder that will appear periodically to alert you<br />
to take certain actions, such as replacing your mask. A message will appear whenever the device<br />
transitions from the Active Display to the Standby state if the period of time specified by your<br />
provider has expired.<br />
You can acknowledge the message by pressing any of the display buttons (+, –, or ). If you<br />
do not acknowledge the message within six minutes of it appearing on the screen, it will time<br />
out and disappear. The message will continue to display for three consecutive days whenever the<br />
device transitions from Active to Standby until it is acknowledged. If, after three days, you still<br />
have not acknowledged the message, then the reminder period will reset and no more reminders<br />
will display until the next time the patient reminder setting expires.<br />
Figure 4–9 shows an example of a patient reminder message.<br />
Attention<br />
Check your mask. A replacement<br />
may be available.<br />
Call (XXX) XXX-XXXX.<br />
FIGURE 4–9 PATIENT REMINDER SCREEN<br />
REMSTAR PLUS M SERIES <strong>USER</strong> <strong>MANUAL</strong><br />
4-11
4-12 REMSTAR PLUS M SERIES <strong>USER</strong> <strong>MANUAL</strong>
CHAPTER 5: ALERTS AND TROUBLESHOOTING<br />
This chapter describes the device alerts and also provides troubleshooting information for issues<br />
you may run into when using the device.<br />
5.1 DEVICE ALERTS<br />
The device provides two alert levels, high and medium priority.<br />
• High Priority – These alerts require immediate operator response. The alert signal consists<br />
of a high priority sound, which is a continuous two-beep pattern (indicated in the following<br />
table as: • • • •). Additionally, the backlights on the buttons will provide a high priority<br />
flashing pattern consisting of a continuous, bright-to-off, two-flash pattern (indicated in the<br />
following table as: ◊◊ ◊◊ ◊◊).<br />
• Medium Priority – These alerts require prompt operator response. The alert signal consists of<br />
a medium priority sound, which is a continuous one-beep pattern (indicated in the following<br />
table as: • •). Additionally, the backlights on the buttons will provide a medium priority<br />
flashing pattern consisting of a continuous, bright-to-dim, one-flash pattern (indicated in the<br />
following table as: ◊ ◊ ◊).<br />
REMSTAR PLUS M SERIES <strong>USER</strong> <strong>MANUAL</strong><br />
5-1
ALERT SUMMARY TABLE<br />
The following table summarizes the high and medium priority alerts.<br />
ALERT<br />
AUDIBLE<br />
INDICATOR<br />
VISUAL<br />
INDICATOR<br />
System Error • • • • Backlights:<br />
◊◊ ◊◊ ◊◊<br />
SmartCard<br />
Error<br />
Screen displays the<br />
following message:<br />
Service Required<br />
• • Backlights:<br />
◊ ◊ ◊<br />
Screen displays the<br />
following flashing<br />
error symbol:<br />
DEVICE ACTION POSSIBLE CAUSE PATIENT ACTION<br />
The device enters the<br />
“Safe state” in which<br />
the device power<br />
remains on, but the<br />
airflow is disabled.<br />
The device continues<br />
to operate and<br />
provide therapy., but<br />
data logging is unavailable<br />
and FOSQ<br />
is deactivated.<br />
Device failure<br />
A problem exists<br />
with the Smart-<br />
Card inserted in<br />
the accessory<br />
slot. The card may<br />
be improperly inserted<br />
or the data<br />
may be corrupt.<br />
Press any of the display<br />
screen buttons to silence<br />
the alert. Remove the<br />
power supply cord from<br />
the device to remove<br />
power. Plug the cord back<br />
into the device’s power<br />
inlet to restore power. If the<br />
alert continues to occur,<br />
contact your home care<br />
provider.<br />
Remove the SmartCard<br />
to clear the alert. Confirm<br />
that the card is properly<br />
oriented, with the arrow<br />
pointing towards the device,<br />
as shown below, and<br />
reinsert the SmartCard.<br />
If the alert continues to<br />
occur, remove the Smart-<br />
Card from the device and<br />
contact your home care<br />
provider. The card may be<br />
corrupt and need to be<br />
replaced.<br />
5-2 REMSTAR PLUS M SERIES <strong>USER</strong> <strong>MANUAL</strong>
ALERT<br />
AUDIBLE<br />
INDICATOR<br />
VISUAL<br />
INDICATOR<br />
Mask Leak • • Backlights:<br />
◊ ◊ ◊<br />
The words Mask<br />
Leak flash on the<br />
Active Display<br />
screen.<br />
DEVICE ACTION POSSIBLE CAUSE PATIENT ACTION<br />
The device continues<br />
to operate.<br />
The breathing<br />
circuit is disconnected<br />
or there is<br />
a large air leak.<br />
Check your breathing<br />
circuit connections and reconnect<br />
the tubing if it has<br />
come loose. Press any of<br />
the display buttons to clear<br />
the alarm. Make sure your<br />
mask is on properly before<br />
you press the button to<br />
restart the airflow.<br />
Auto Off None The words Auto<br />
Off flash on the<br />
Standby screen,<br />
indicating that a<br />
mask disconnect<br />
has been detected.<br />
Patient<br />
Reminder<br />
None Backlights:<br />
◊ ◊ ◊<br />
Screen displays<br />
a customized<br />
reminder message<br />
whenever the device<br />
transitions from<br />
the Active state to<br />
the Standby state.<br />
The airflow shuts<br />
off and the device<br />
enters the Standby<br />
state approximately<br />
45-60 seconds after<br />
a mask disconnect is<br />
detected.<br />
The device continues<br />
to operate.<br />
The mask has<br />
been removed.<br />
Your home care<br />
provider may<br />
set a patient<br />
reminder scheduled<br />
to pop up at<br />
a particular time<br />
to remind you<br />
to replace your<br />
mask, change<br />
your filters, etc.<br />
If the alert continues to<br />
occur, disable the mask<br />
alert setting following the<br />
instructions in Chapter 4,<br />
and continue your therapy<br />
overnight. Contact your<br />
home care provider the<br />
next morning to have your<br />
mask checked. You may<br />
need a mask refitting.<br />
Put your mask back on<br />
and press the button<br />
to turn the airflow on and<br />
resume therapy.<br />
Press any of the display<br />
buttons to acknowledge<br />
the message and clear it. If<br />
you do not acknowledge<br />
the reminder, it will disappear<br />
after 6 minutes, and<br />
then reappear for three<br />
consecutive days whenever<br />
the device transitions from<br />
the Active state to the<br />
Standby state. If you still do<br />
not acknowledge the message,<br />
the reminder period<br />
will reset and the message<br />
will not reappear until<br />
the next time the Patient<br />
Reminder setting expires.<br />
REMSTAR PLUS M SERIES <strong>USER</strong> <strong>MANUAL</strong><br />
5-3
5.2 TROUBLESHOOTING<br />
The table below lists some of the problems you may experience with your device or mask and possible<br />
solutions to those problems.<br />
PROBLEM WHY IT HAPPENED WHAT TO DO<br />
Nothing happens when<br />
you apply power to<br />
the device. The audible<br />
indicator does not sound<br />
and the backlights on the<br />
buttons do not light.<br />
There’s no power<br />
at the outlet or<br />
the device is unplugged.<br />
If you are using AC power, check the outlet<br />
power and verify that the device is properly<br />
plugged in. Make sure the AC power cord is<br />
connected correctly to the power supply and<br />
the power supply cord is securely connected to<br />
the device’s power inlet. If the problem continues<br />
to occur, contact your home care provider.<br />
Return both the device and power supply to<br />
your provider, so they can determine if the<br />
problem is with the device or power supply.<br />
If you are using DC power, make sure your DC<br />
power cord and battery adaptor cable connections<br />
are secure. Check your battery. It may<br />
need recharged or replaced. If the problem<br />
persists, check the DC cord’s fuse following the<br />
instructions supplied with your DC cord. The<br />
fuse may need to be replaced. If the problem<br />
still occurs, contact your home care provider.<br />
If you are using a humidifier, make sure you<br />
follow the instructions for applying power that<br />
are provided with your humidifier.<br />
The device does not operate<br />
when you press the<br />
button. The airflow<br />
does not turn on.<br />
There may be a<br />
problem with the<br />
blower.<br />
Make sure the device is powered correctly, following<br />
the instructions on the previous page.<br />
If the audible indicator sounds and the button<br />
backlights turn on when you apply power, but<br />
the airflow does not turn on, there may be a<br />
problem with your device. Contact your home<br />
care provider for assistance.<br />
Note:<br />
When the device is functioning correctly,<br />
after you press the button,<br />
the device beeps and the airflow turns<br />
on after a slight delay. This brief delay<br />
is normal.<br />
5-4 REMSTAR PLUS M SERIES <strong>USER</strong> <strong>MANUAL</strong>
PROBLEM WHY IT HAPPENED WHAT TO DO<br />
The device’s display is<br />
erratic.<br />
Device Resets/Reboots:<br />
The device shuts down<br />
and restarts automatically<br />
during therapy.<br />
(This is unlikely to occur.)<br />
The device or<br />
power supply has<br />
been dropped<br />
or mishandled,<br />
or the device or<br />
power supply is in<br />
an area with high<br />
Electromagnetic<br />
Interference (EMI)<br />
emissions.<br />
The device comes<br />
installed with<br />
troubleshooting<br />
software that automatically<br />
monitors<br />
performance.<br />
Unplug the device and the power supply.<br />
Reapply power to the device. If the problem<br />
continues, relocate the device to an area with<br />
lower EMI emissions (e.g., away from electronic<br />
equipment such as cellular phones, cordless<br />
phones, computers, TVs, electronic games, hair<br />
dryers, etc.).<br />
If the problem still occurs, contact your home<br />
care provider for assistance.<br />
Such a reset poses no danger to the patient<br />
and assures that the patient receives prescribed<br />
therapy throughout the night. If there<br />
is a possibility of damage to the device, the<br />
device will shut down permanently. The product<br />
will then display the following system error<br />
alert to indicate that the device be returned to<br />
the home care provider for service:<br />
Service Required<br />
The Ramp feature does<br />
not work when you press<br />
the Ramp button<br />
( ).<br />
Your home care<br />
provider did not<br />
prescribe Ramp for<br />
you, or your CPAP<br />
pressure is already<br />
set to the minimum<br />
setting.<br />
If Ramp has not been prescribed for you, discuss<br />
this feature with your home care provider<br />
to see if they will change your prescription.<br />
If your provider has enabled Ramp, but the feature<br />
still does not work, check the CPAP setting<br />
on your Active Display screen. If CPAP is set to<br />
the minimum setting (4.0 cm H 2<br />
O), the Ramp<br />
feature will not work.<br />
REMSTAR PLUS M SERIES <strong>USER</strong> <strong>MANUAL</strong><br />
5-5
PROBLEM WHY IT HAPPENED WHAT TO DO<br />
The device has fallen off<br />
your table or nightstand.<br />
The device may<br />
not have been<br />
properly seated<br />
on the nightstand,<br />
or the placement<br />
of the tubing may<br />
have caused the<br />
device to fall.<br />
Always make sure your device is placed on<br />
a hard, flat surface so the rubber feet on the<br />
bottom of the device can adhere to the surface<br />
(make sure there is no fabric under the device).<br />
The device (and humidifier, if using) must be<br />
level for proper operation.<br />
Also, place the device away from the edge of<br />
the nightstand or table, so it doesn’t accidentally<br />
get knocked off the table.<br />
If you are using a humidifier with the device,<br />
make sure that the device and humidifier are<br />
placed below your head and mask, so that any<br />
condensation in the tubing drains back into<br />
the water chamber.<br />
If the device and humidifier fall and water gets<br />
into the device, drain all water out of the device<br />
and make sure it is completely dry before reapplying<br />
power.<br />
If the placement of the tubing causes the device<br />
to fall, make sure that you use proper hose<br />
management when setting up your device.<br />
Route the tubing behind the bed’s headboard,<br />
as shown in Chapter 3, Setup.<br />
If the device falls or water gets into the device<br />
upon falling, let the device dry completely before<br />
restarting it. If the device does not operate<br />
correctly after falling, contact your home care<br />
provider.<br />
5-6 REMSTAR PLUS M SERIES <strong>USER</strong> <strong>MANUAL</strong>
PROBLEM WHY IT HAPPENED WHAT TO DO<br />
You are having problems<br />
connecting the tubing to<br />
the device.<br />
You have lost the<br />
air outlet port or<br />
are traveling and<br />
forgot to bring the<br />
port with you.<br />
If you are not using a humidifier, you cannot<br />
connect your tubing to the device without the<br />
detachable air outlet port, shown below.<br />
You are experiencing<br />
excessive air leaks where<br />
the tubing connects to<br />
the device.<br />
The air outlet port<br />
is not installed correctly<br />
and doesn’t<br />
seal properly.<br />
You must have the port attached properly<br />
before connecting your tubing.<br />
Remove the port and reattach it to make sure<br />
it’s properly installed.<br />
To remove the port:<br />
a. Put your thumb underneath the port<br />
and insert your index finger into the port<br />
opening.<br />
b. Pivoting from the bottom, unsnap the<br />
port and pull it away from the device.<br />
To properly reattach the port:<br />
a. Make sure it is correctly oriented (with the<br />
port opening at the top), and insert the<br />
two latches at the bottom of the port into<br />
the openings on the bottom of the device.<br />
b. Push the top of the port down to snap it<br />
into place.<br />
Reattach your tubing, turn on the airflow, and<br />
check to make sure you do not still feel air coming<br />
out of the port area.<br />
REMSTAR PLUS M SERIES <strong>USER</strong> <strong>MANUAL</strong><br />
5-7
PROBLEM WHY IT HAPPENED WHAT TO DO<br />
The air out of the mask is<br />
much warmer than usual.<br />
The air filters may<br />
be dirty.<br />
Clean or replace the air filters as described in<br />
Chapter 7.<br />
The mask feels uncomfortable<br />
to wear, there<br />
is significant air leakage<br />
around the mask, or you<br />
experience other maskrelated<br />
issues.<br />
You have a runny nose.<br />
You have throat or nose<br />
dryness.<br />
You experience nasal,<br />
sinus, or ear pain.<br />
The device may be<br />
operating in direct<br />
sunlight or near a<br />
heater.<br />
This could be due<br />
to improper headgear<br />
adjustment<br />
or improper mask<br />
fitting, etc.<br />
This is caused by<br />
a nasal reaction to<br />
the airflow.<br />
The air is too dry.<br />
You may have a<br />
sinus or middle ear<br />
infection.<br />
The temperature of the air may vary somewhat<br />
based on your room temperature. Make sure<br />
that the device is properly ventilated. Keep<br />
the device away from bedding or curtains that<br />
could block the flow of air around the device.<br />
Make sure the device is away from direct sunlight<br />
and heating equipment.<br />
If the problem continues, contact your home<br />
care provider.<br />
If you experience any issues with your mask,<br />
refer to your mask instructions for information<br />
on proper fitting, etc. If the problem continues,<br />
contact your home care provider.<br />
Call your health care professional.<br />
Increase the room humidity. Consult with your<br />
health care professional about using a Respironics<br />
humidifier with the device. If you have<br />
a humidifier, refer to the instructions included<br />
with your humidifier to make sure it is working<br />
properly.<br />
Stop using the device and contact your health<br />
care professional.<br />
5-8 REMSTAR PLUS M SERIES <strong>USER</strong> <strong>MANUAL</strong>
CHAPTER 6: ACCESSORIES<br />
Contact your home care provider for additional information on the accessories available for your<br />
REMstar Plus M Series system. When using optional accessories, always follow the instructions<br />
enclosed with the accessories.<br />
6.1 ADDING A HUMIDIFIER<br />
You can use the M Series Heated humidifier or the M Series Passover humidifier with your<br />
device. They are available from your home care provider. A humidifier may reduce nasal dryness<br />
and irritation by adding moisture (and heat, if applicable) to the airflow. Figure 6–1 shows the<br />
humidifier by itself and attached to the REMstar Plus M Series device.<br />
Caution: For safe operation, the humidifier must always be positioned below the<br />
breathing circuit connection at the mask. The humidifier must be level for<br />
proper operation.<br />
Humidifer without Device<br />
Humidifer Device Attached<br />
FIGURE 6–1 HUMIDIFIER ALONE AND ATTACHED TO THE DEVICE<br />
Refer to the humidifier’s instructions for complete setup information.<br />
REMSTAR PLUS M SERIES <strong>USER</strong> <strong>MANUAL</strong><br />
6-1
6.2 USING THE SMARTCARD<br />
Some REMstar Plus M Series systems come with a SmartCard accessory module installed in the<br />
accessory slot on the back of the device to record information for the home care provider. Your<br />
home care provider may ask you to periodically remove the SmartCard and send it to him/her for<br />
evaluation.<br />
Note:<br />
The SmartCard does not need to be installed for the device to work properly.<br />
The SmartCard records device usage information for use by your home care<br />
provider. Contact your provider if you have any questions about the SmartCard.<br />
6.3 ADDING SUPPLEMENTAL OXYGEN<br />
Oxygen may be added at the mask connection. Please note the warnings listed below when using<br />
oxygen with the device.<br />
WARNINGS<br />
• When using oxygen with this system, the oxygen supply must comply with local regulations<br />
for medical oxygen.<br />
• When using oxygen with this system, a Respironics Pressure Valve (Part number 302418)<br />
must be placed in-line with the patient circuit. Failure to use the pressure valve could result<br />
in a fire hazard.<br />
• Oxygen accelerates fires. Keep the device and the oxygen container away from heat, open<br />
flames, any oily substance, or other sources of ignition. Do not smoke in the area near the<br />
device or the oxygen.<br />
• When using oxygen with this system, turn the device on before turning on the oxygen. Turn<br />
the oxygen off before turning the device off. This will prevent oxygen accumulation in the<br />
device.<br />
• If administering fixed-flow supplemental oxygen, the oxygen concentration may not be constant.<br />
The inspired oxygen concentration will vary, depending on the CPAP setting, patient<br />
breathing pattern, and leak rate. Substantial leaks around the mask may reduce the inspired<br />
oxygen concentration to less than the expected concentrations. Appropriate patient monitoring<br />
should be implemented.<br />
6-2 REMSTAR PLUS M SERIES <strong>USER</strong> <strong>MANUAL</strong>
CHAPTER 7: CLEANING AND MAINTENANCE<br />
This chapter describes how to clean the device and its filters and provides tips on traveling with<br />
your REMstar Plus M Series system.<br />
7.1 CLEANING THE DEVICE<br />
Warning:<br />
Caution:<br />
To avoid electrical shock, always unplug the power cord from the wall<br />
outlet or DC power source before cleaning the device.<br />
Do not immerse the device in liquid or allow any liquid to enter the<br />
enclosure, inlet filter, or any opening.<br />
1. Unplug the device, and wipe the outside of the device with a cloth slightly dampened with<br />
water and a mild detergent. Let the device dry completely before plugging in the power cord.<br />
2. Inspect the device and all circuit parts for damage after cleaning. Replace any damaged parts.<br />
7.2 CLEANING OR REPLACING THE FILTERS<br />
Caution: Operating the device with a dirty filter may keep the system from working<br />
properly and may damage the device.<br />
Under normal usage, you should clean the gray foam filter at least once every two weeks and<br />
replace it with a new one every six months. The white ultra-fine filter is disposable and should be<br />
replaced after 30 nights of use or sooner if it appears dirty. DO NOT clean the ultra-fine filter.<br />
Caution: Dirty inlet filters may cause high operating temperatures that may affect<br />
device performance. Regularly examine the inlet filters as needed for integrity<br />
and cleanliness.<br />
1. If the device is operating, stop the airflow by pressing the button. Disconnect the device<br />
from the power source.<br />
2. Remove the filter(s) from the enclosure by gently squeezing the filter in the center and pulling<br />
it away from the device, as shown in Figure 7–1.<br />
REMSTAR PLUS M SERIES <strong>USER</strong> <strong>MANUAL</strong><br />
7-1
FIGURE 7–1 REMOVING THE FILTERS<br />
3. Examine the filter(s) for cleanliness and integrity.<br />
4. Wash the gray foam filter in warm water with a mild detergent. Rinse thoroughly to remove<br />
all detergent residue. Allow the filter to air dry completely before reinstalling it. If the foam<br />
filter is torn, replace it. (Only Respironics-supplied filters should be used as replacement<br />
filters.)<br />
5. If the white ultra-fine filter is dirty or torn, replace it.<br />
6. Reinstall the filters, inserting the white ultra-fine filter first if applicable, as shown in Figure<br />
7–2.<br />
Filter Area<br />
Disposable Ultra-Fine<br />
Filter (optional)<br />
Reusable Gray<br />
Foam Filter<br />
(required)<br />
FIGURE 7–2 REINSTALLING THE FILTERS<br />
Caution:<br />
Never install a wet filter into the device. It is recommended that you<br />
clean the filter in the morning and alternate using the two foam<br />
filters provided with the system to ensure sufficient drying time for the<br />
cleaned filter.<br />
7-2 REMSTAR PLUS M SERIES <strong>USER</strong> <strong>MANUAL</strong>
7.3 CLEANING THE TUBING<br />
Clean the tubing daily. Disconnect the flexible tubing from the device. Gently wash the tubing in<br />
a solution of warm water and a mild detergent. Rinse thoroughly. Air dry.<br />
7.4 SERVICE<br />
The REMstar Plus M Series device does not require routine servicing.<br />
Warning:<br />
If you notice unexplained changes in the performance of this device,<br />
if it is making unusual or harsh sounds, if the device or power supply<br />
have been dropped or mishandled, if the enclosure is broken, or if<br />
water has entered the device, discontinue use, and contact your home<br />
care provider.<br />
REMSTAR PLUS M SERIES <strong>USER</strong> <strong>MANUAL</strong><br />
7-3
7.5 TRAVELING WITH THE SYSTEM<br />
When traveling, the carrying case is for carry-on luggage only. The carrying case will not protect<br />
the system if it is put through checked baggage.<br />
For your convenience at security stations, there is a note on the bottom of the device stating that<br />
it is medical equipment. It may be helpful to bring this manual along with you to help security<br />
personnel understand the REMstar Plus M Series device.<br />
If you typically use a humidifier with your device, but leave the humidifier home when traveling,<br />
make sure you attach the air outlet port to your device when you remove the humidifier from the<br />
device. You need the port to connect the tubing directly to your device. Figure 7–3 illustrates how<br />
to remove the humidifier from the device and attach the air outlet port.<br />
Remove the Device<br />
From the Humidifier<br />
Attach Air Outlet Port<br />
to the Device<br />
FIGURE 7–3 ATTACHING THE AIR OUTLET PORT TO THE DEVICE<br />
7.5.1 INTERNATIONAL TRAVEL<br />
If you are traveling to a country with a line voltage different than the one you are currently using,<br />
a different power cord or an international plug adaptor may be required to make your power cord<br />
compatible with the power outlets of the country to which you are traveling. Contact your home<br />
care provider for additional information.<br />
7-4 REMSTAR PLUS M SERIES <strong>USER</strong> <strong>MANUAL</strong>
CHAPTER 8: SPECIFICATIONS<br />
ENVIRONMENTAL<br />
OPERATING<br />
STORAGE<br />
TEMPERATURE 41° F (5° C) to 95° F (35° C) -4° F (-20° C) to 140° F (60° C)<br />
RELATIVE HUMIDITY 15 to 95% (non-condensing) 15 to 95% (non-condensing)<br />
ATMOSPHERIC PRESSURE 77 to 101kPa (0 - 7500 ft) N/A<br />
PHYSICAL<br />
Dimensions:<br />
Weight:<br />
7.5” L x 5.0” W x 3.125” H (19 x 12.7 x 7.9 cm)<br />
Approximately 2.2 lbs. (without a humidifier)<br />
STANDARDS COMPLIANCE<br />
This device is designed to conform to the following standards:<br />
– IEC 60601-1 General Requirements for Safety of <strong>Medical</strong> Electrical <strong>Equipment</strong><br />
– EN ISO 17510-1 Sleep Apnea Breathing Therapy Devices<br />
ELECTRICAL<br />
AC Power Consumption:<br />
100 – 240 VAC, 50/60 Hz, 1.0 A max.<br />
DC Power Consumption:<br />
12 VDC, 3.0 A max.<br />
Type of Protection Against Electric Shock: Class II <strong>Equipment</strong><br />
Degree of Protection Against Electric Shock: Type BF Applied Part<br />
Degree of Protection against Ingress of Water: Device: Drip Proof, IPX1<br />
AC Power Supply: (Reorder number 1015642):<br />
Drip Proof, IPX1<br />
Mode of Operation:<br />
Continuous<br />
Electromagnetic Compatibility: The device meets the requirements of EN 60601-<br />
1-2, 2nd edition.<br />
Fuses:<br />
There are no user-replaceable fuses.<br />
REMSTAR PLUS M SERIES <strong>USER</strong> <strong>MANUAL</strong><br />
8-1
PRESSURE<br />
Pressure Increments:<br />
4.0 to 20.0 cm H 2<br />
O (in 0.5 cm H 2<br />
O increments)<br />
Pressure Stability:<br />
4.0 to 20 cm H 2<br />
O (±1.0 cm H 2<br />
O)<br />
Measured in accordance with EN ISO 17510-1 @ 1/3, 2/3, and Pmax with BPM set to 10, 15,<br />
and 20 BPM @ 20° C (±5° C), 50% RH (±5%).<br />
Maximum Flow: 35 LPM<br />
Measured in accordance with EN ISO 17510-1 @ 1/3, 2/3, and Pmax with BPM set to 10, 15,<br />
and 20 BPM @ 23° C (±2° C), 50% RH (±5%).<br />
DISPOSAL<br />
Dispose of the device in accordance with local regulations.<br />
8-2 REMSTAR PLUS M SERIES <strong>USER</strong> <strong>MANUAL</strong>
APPENDIX A: EMC INFORMATION<br />
GUIDANCE AND MANUFACTURER’S DECLARATION - ELECTROMAGNETIC EMISSIONS<br />
This device is intended for use in the electromagnetic environment specified below. The user of<br />
this device should make sure it is used in such an environment.<br />
EMISSIONS TEST COMPLIANCE ELECTROMAGNETIC ENVIRONMENT - GUID-<br />
ANCE<br />
RF emissions<br />
CISPR 11<br />
RF emissions<br />
CISPR 11<br />
Harmonic emissions<br />
IEC 61000-3-2<br />
Voltage fluctuations/Flicker<br />
emissions<br />
IEC 61000-3-3<br />
Group 1<br />
Class B<br />
Class A<br />
Complies<br />
The device uses RF energy only for<br />
its internal function. Therefore, its RF<br />
emissions are very low and are not<br />
likely to cause any interference in<br />
nearby electronic equipment.<br />
The device is suitable for use in all<br />
establishments, including domestic<br />
establishments and those directly<br />
connected to the public low-voltage<br />
power supply network.<br />
REMSTAR PLUS M SERIES <strong>USER</strong> <strong>MANUAL</strong><br />
A-1
GUIDANCE AND MANUFACTURER’S DECLARATION - ELECTROMAGNETIC IMMUNITY<br />
This device is intended for use in the electromagnetic environment specified below. The user of<br />
this device should make sure it is used in such an environment.<br />
IMMUNITY TEST<br />
Electrostatic<br />
Discharge (ESD)<br />
IEC 61000-4-2<br />
Electrical fast<br />
Transient/burst<br />
IEC 61000-4-4<br />
Surge<br />
IEC 61000-4-5<br />
Voltage dips, short<br />
interruptions and<br />
voltage variations on<br />
power supply input<br />
lines<br />
IEC 61000-4-11<br />
IEC 60601 TEST<br />
LEVEL<br />
±6 kV contact<br />
±8 kV air<br />
±2 kV for power supply<br />
lines<br />
±1 kV for input-output<br />
lines<br />
±1 kV differential<br />
mode<br />
±2 kV common mode<br />
95% dip in U T<br />
) for<br />
0.5 cycle<br />
40% U T<br />
(60% dip in U T<br />
) for<br />
5 cycles<br />
70% U T<br />
(30% dip in<br />
U T<br />
) for 25 cycles<br />
95% dip in<br />
U T<br />
) for 5 sec<br />
COMPLIANCE LEVEL<br />
±6 kV contact<br />
±8 kV air<br />
±2 kV for supply<br />
mains<br />
±1 kV for input/output<br />
lines<br />
±1 kV differential<br />
mode<br />
±2 kV for common<br />
mode<br />
95% dip in U T<br />
) for<br />
0.5 cycle<br />
40% U T<br />
(60% dip in U T<br />
) for 5<br />
cycles<br />
70% U T<br />
(30% dip in<br />
U T<br />
) for 25 cycles<br />
95% dip in<br />
U T<br />
) for 5 sec<br />
NOTE: U T<br />
is the a.c. mains voltage prior to application of the test level.<br />
ELECTROMAGNETIC<br />
ENVIRONMENT -<br />
GUIDANCE<br />
Floors should be<br />
wood, concrete or<br />
ceramic tile. If floors<br />
are covered with<br />
synthetic material,<br />
the relative humidity<br />
should be at least<br />
30%.<br />
Mains power quality<br />
should be that of a<br />
typical home or hospital<br />
environment.<br />
Mains power quality<br />
should be that of a<br />
typical home or hospital<br />
environment.<br />
Mains power quality<br />
should be that<br />
of a typical home<br />
or hospital environment.<br />
If the user of<br />
the device requires<br />
continued operation<br />
during power mains<br />
interruptions, it is recommended<br />
that the<br />
device be powered<br />
from an uninterruptible<br />
power supply or<br />
a battery.<br />
A-2 REMSTAR PLUS M SERIES <strong>USER</strong> <strong>MANUAL</strong>
GUIDANCE AND MANUFACTURER’S DECLARATION - ELECTROMAGNETIC IMMUNITY<br />
This device is intended for use in the electromagnetic environment specified below. The user of<br />
this device should make sure it is used in such an environment.<br />
IMMUNITY TEST IEC 60601<br />
Power frequency (50/60<br />
Hz) magnetic field<br />
IEC 61000-4-8<br />
TEST LEVEL<br />
COMPLIANCE<br />
LEVEL<br />
ELECTROMAGNETIC ENVIRONMENT -<br />
GUIDANCE<br />
3 A/m 3 A/m Power frequency magnetic fields should be<br />
at levels characteristic of a typical location in a<br />
typical hospital or home environment.<br />
Portable and mobile RF communications<br />
equipment should be used no closer to any<br />
part of the device, including cables, than the<br />
recommended separation distance calculated<br />
from the equation applicable to the frequency<br />
of the transmitter.<br />
Conducted RF<br />
IEC 61000-4-6<br />
Radiated RF<br />
IEC 61000-4-3<br />
3 Vrms<br />
150 kHz to 80<br />
MHz<br />
3 V/m<br />
80 MHz to 2.5 GHz<br />
3 Vrms<br />
3 V/m<br />
Recommended separation distance<br />
d = 1.2 P<br />
d = 1.2 P<br />
d = 2.3 P<br />
80 MHz to 800 MHz<br />
800 MHz to 2.5 GHz<br />
where P is the maximum output power rating<br />
of the transmitter in watts (W) according to the<br />
transmitter manufacturer and d is the recommended<br />
separation distance in meters (m).<br />
Field strengths from fixed RF transmitters, as<br />
determined by an electromagnetic site survey a ,<br />
should be less than the compliance level in<br />
each frequency range. b<br />
Interference may occur in the vicinity of equipment<br />
marked with the following<br />
symbol:<br />
NOTE 1 At 80 MHz and 800 MHz, the higher frequency range applies.<br />
NOTE 2 These guidelines may not apply in all situations. Electromagnetic propagation is affected by absorption and<br />
reflection from structures, objects, and people.<br />
a Field strengths from fixed transmitters, such as base stations for radio (cellular/cordless) telephones and land<br />
mobile radios, amateur radio, AM and FM radio broadcast and TV broadcast cannot be predicted theoretically<br />
with accuracy. To assess the electromagnetic environment due to fixed RF transmitters, an electromagnetic site<br />
survey should be considered. If the measured field strength in the location in which the device is used exceeds<br />
the applicable RF compliance level above, the device should be observed to verify normal operation. If abnormal<br />
performance is observed, additional measures may be necessary, such as re-orienting or relocating the device.<br />
b Over the frequency range 150 kHz to 80 MHz, the field strengths should be less than 3 V/m.<br />
REMSTAR PLUS M SERIES <strong>USER</strong> <strong>MANUAL</strong><br />
A-3
RECOMMENDED SEPARATION DISTANCES BETWEEN PORTABLE AND MOBILE RF<br />
COMMUNICATIONS EQUIPMENT AND THIS DEVICE<br />
The device is intended for use in an electromagnetic environment in which radiated RF disturbances<br />
are controlled. The customer or the user of this device can help prevent electromagnetic<br />
interference by maintaining a minimum distance between portable and mobile RF communications<br />
equipment (transmitters) and this device as recommended below, according to the maximum<br />
output power of the communications equipment.<br />
RATED MAXIMUM<br />
POWER OUTPUT OF<br />
TRANSMITTER<br />
W<br />
SEPARATION DISTANCE ACCORDING TO FREQUENCY OF TRANSMITTER<br />
M<br />
150 KHZ TO 80 MHZ<br />
d = 1.2 P<br />
80 MHZ TO 800 MHZ<br />
d = 1.2 P<br />
800 MHZ TO 2.5 GHZ<br />
d = 2.3 P<br />
0.01 0.12 0.12 0.23<br />
0.1 0.38 0.38 0.73<br />
1 1.2 1.2 2.3<br />
10 3.8 3.8 7.3<br />
100 12 12 23<br />
For transmitters rated at a maximum output power not listed above, the recommended<br />
separation distance d in meters (m) can be estimated using the equation applicable to the<br />
frequency of the transmitter, where P is the maximum output power rating of the transmitter<br />
in watts (W) according to the transmitter manufacturer.<br />
Note 1: At 80 MHz and 800 MHz, the separation distance for the higher frequency range applies.<br />
Note 2: These guidelines may not apply in all situations. Electromagnetic propagation is affected<br />
by absorption and reflection from structures, objects, and people.<br />
A-4 REMSTAR PLUS M SERIES <strong>USER</strong> <strong>MANUAL</strong>
LIMITED WARRANTY<br />
Respironics, Inc. warrants that the system shall be free from defects of workmanship and materials<br />
and will perform in accordance with the product specifications for a period of two (2) years from<br />
the date of sale by Respironics, Inc. to the dealer. If the product fails to perform in accordance<br />
with the product specifications, Respironics, Inc. will repair or replace – at its option – the defective<br />
material or part. Respironics, Inc. will pay customary freight charges from Respironics, Inc. to<br />
the dealer location only. This warranty does not cover damage caused by accident, misuse, abuse,<br />
alteration, and other defects not related to material or workmanship.<br />
Respironics, Inc. disclaims all liability for economic loss, loss of profits, overhead, or consequential<br />
damages which may be claimed to arise from any sale or use of this product. Some states do<br />
not allow the exclusion or limitation of incidental or consequential damages, so the above limitation<br />
or exclusion may not apply to you.<br />
This warranty is given in lieu of all other express warranties. In addition, any implied warranties<br />
– including any warranty of merchantability or fitness for the particular purpose – are limited<br />
to two years. Some states do not allow limitations on how long an implied warranty lasts, so the<br />
above limitation may not apply to you. This warranty gives you specific legal rights, and you may<br />
also have other rights which vary from state to state.<br />
To exercise your rights under this warranty, contact your local authorized Respironics, Inc. dealer<br />
or contact Respironics, Inc. at:<br />
1001 Murry Ridge Lane<br />
Murrysville, Pennsylvania 15668-8550<br />
1-724-387-4000