Monsoon Series & Hurricane - Aussie Pumps
Monsoon Series & Hurricane - Aussie Pumps Monsoon Series & Hurricane - Aussie Pumps
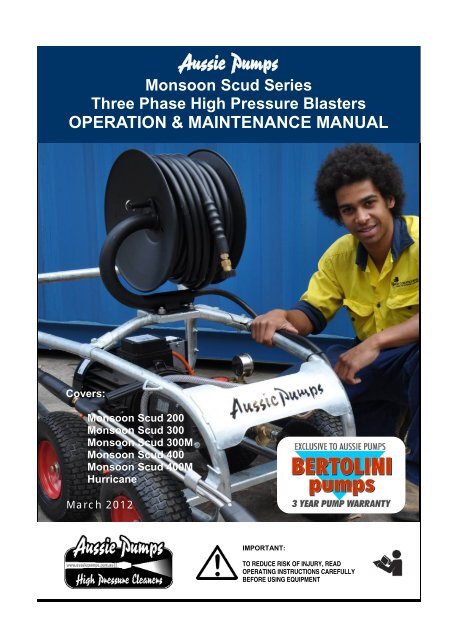
Aussie Pumps Monsoon Scud Series Three Phase High Pressure Blasters OPERATION & MAINTENANCE MANUAL Covers: Monsoon Scud 200 Monsoon Scud 300 Monsoon Scud 300M Monsoon Scud 400 Monsoon Scud 400M Hurricane March 2012 IMPORTANT: TO REDUCE RISK OF INJURY, READ OPERATING INSTRUCTIONS CAREFULLY BEFORE USING EQUIPMENT
- Page 2 and 3: Aussie Pumps March 2012 AUSSIE ECO
- Page 4 and 5: Aussie Pumps March 2012 Fitting ins
- Page 6 and 7: Aussie Pumps March 2012 TROUBLE SHO
- Page 8 and 9: Aussie Pumps March 2012 PUMP PARTS
- Page 10 and 11: Aussie Pumps March 2012 PUMP PARTS
- Page 12: WARNING OVERSPEEDING Do not operate
<strong>Aussie</strong> <strong>Pumps</strong><br />
<strong>Monsoon</strong> Scud <strong>Series</strong><br />
Three Phase High Pressure Blasters<br />
OPERATION & MAINTENANCE MANUAL<br />
Covers:<br />
<strong>Monsoon</strong> Scud 200<br />
<strong>Monsoon</strong> Scud 300<br />
<strong>Monsoon</strong> Scud 300M<br />
<strong>Monsoon</strong> Scud 400<br />
<strong>Monsoon</strong> Scud 400M<br />
<strong>Hurricane</strong><br />
March 2012<br />
IMPORTANT:<br />
TO REDUCE RISK OF INJURY, READ<br />
OPERATING INSTRUCTIONS CAREFULLY<br />
BEFORE USING EQUIPMENT
<strong>Aussie</strong> <strong>Pumps</strong><br />
March 2012<br />
AUSSIE ECO CLEAN BLASTER OPERATING AND MAINTENANCE INSTRUCTIONS<br />
* * W A R N I N G * *<br />
AUSSIE SCUD SERIES HIGH PRESSURE WATER BLASTERS ARE DESIGNED<br />
FOR PROFESSIONAL OPERATORS ONLY<br />
IMPORTANT<br />
INSTRUCT OPERATORS IN CARE AND USE OF THE MACHINE BEFORE USE!<br />
Before attempting to operate your machine please read this Instruction Manual thoroughly following all<br />
directions carefully. By doing so you will ensure safe operation of the unit and will enjoy long and<br />
trouble free service from your heavy duty water blaster.<br />
GUARANTEE … EXCLUSIVE 3 YEAR PUMP<br />
This <strong>Aussie</strong> Eco Clean product is guaranteed against faults in manufacture for two years from purchase. The Bertolini pump<br />
has a three year warranty, but must be serviced by an authorised service agent every six months to maintain this warranty.<br />
Keep your receipt as proof of purchase and all service receipts. This guarantee is invalid if the product is found to have been<br />
abused in any way, or not used for the purpose for which it was intended.<br />
Routine maintenance is the owner=s responsibility. Failure to maintain the machine in line with the services outlined on the<br />
back page will invalidate warranty. High pressure accessories carry a 3 month warranty.<br />
Where possible return faulty goods to the place of purchase. No products can be returned to us without our prior permission.<br />
The reason for return must be clearly state.<br />
N.B. Warranty is not transferrable to third parties in the event of sale of the machine within the warranty period.<br />
Please note that any parts used in warranty repairs are guaranteed for a period limited by the original<br />
warranty of the parent product.<br />
Our goods come with guarantees that cannot be excluded under the Australian Consumer Law. You are entitled to a<br />
replacement or refund for a major failure and for compensation for any other reasonably foreseeable loss or damage. You are<br />
also entitled to have the goods repaired or replaced if the goods fail to be of acceptable quality and the failure does not<br />
amount to a major failure.<br />
The benefits under the <strong>Aussie</strong> Pump warranty are in addition to other rights under Australian Consumer Law.<br />
SAFETY PRECAUTIONS - IMPORTANT<br />
1. NEVER direct the spray jet at any person or animal. Keep hands and feet clear of the cleaning<br />
nozzle at all times.<br />
2. NEVER direct spray jet at any surface that may contain asbestos material.<br />
3. NEVER hold a finger over the high pressure nozzle.<br />
4. NEVER direct the spray jet at the machine itself or any electrical equipment.<br />
5. After use release the pressure in the high pressure hose by operating the gun trigger.<br />
6. DO NOT attempt any mechanical repair. If you have a problem with your machine contact your local <strong>Aussie</strong><br />
Eco Clean Service Division, phone (02) 8865 3500.<br />
7. NEVER supply any liquid other than water to the pump inlet.<br />
8. DO NOT run dry<br />
9. NEVER pull the high pressure hose if it has formed kinks or nooses.<br />
10. NEVER pull the hose over sharp objects.<br />
11. DO NOT attempt to disconnect any hose or coupling with pressure still in the hose.<br />
12. DO NOT operate the machine whilst standing on ladders, use a platform tower or scaffolding.<br />
13. Operate in well ventilated areas only.<br />
14. DO NOT operate if power cable is damaged, contact a certified electrician for replacement.<br />
15. DO NOT try to repair a leak in the hose or connection while the system is under pressure.<br />
16. DO NOT substitute any component part on this machine. Use of incorrect parts could cause<br />
serious personal injury.<br />
17. Children should NOT be allowed to use the machine.<br />
18. We recommend the use of safety goggles and steel cap boots when using the machine.<br />
2<br />
<strong>Aussie</strong> <strong>Monsoon</strong> & <strong>Hurricane</strong> … Operation & Maintenance Manual
<strong>Aussie</strong> <strong>Pumps</strong><br />
March 2012<br />
STANDARD EQUIPMENT<br />
Before proceeding with assembly of your new <strong>Aussie</strong> Eco Clean blaster, check that all parts listed<br />
below are included.<br />
1 Gun handle assembly<br />
1 High pressure hose<br />
1 Lance and nozzle assembly<br />
A. Machine Preparation (initial start-up)<br />
1. Check the oil in the pump.<br />
With the machine on a level surface the oil lever should cover the<br />
red spot in the oil level sight glass on the side of the machine. If<br />
necessary, top up with SAE 75W-90. Do not mix different grades<br />
of oil as this may affect the machines performance. If alternative<br />
oil is used, first empty out oil by unscrewing drain plug in bottom<br />
of machine.<br />
2. Ensure breather plug is fitted to pump.<br />
Breather plug<br />
WARNING: Before operation ensure top mounted travel plug is<br />
replaced by breather plug. Failure to fit breather and keep clean<br />
can result in over pressuring of oil chamber (crank case) and can<br />
blow oil seals. This will void warranty.<br />
3. Assemble gun/lance assembly.<br />
HEAVY DUTY LANCE:<br />
To assemble the lance,<br />
insert Section B into Section A<br />
and screw together. Check nozzles<br />
are fitted to end of lance (C & D).<br />
B<br />
C<br />
D<br />
<strong>Aussie</strong> Safety Protection Kit<br />
HP hose<br />
connection<br />
Unloader -<br />
factory set,<br />
DO NOT<br />
adjust<br />
Detergent injector<br />
A<br />
Supply hose<br />
connection<br />
Y strainer<br />
B. Hose Connections<br />
Thermal dump<br />
1. Connect high pressure hose to machine outlet.<br />
2. If optional low pressure downstream, in-line chemical injector is to be used, connect the injector tube to the<br />
detergent inlet and place the other end of the tube, with the strainer attached, in the chemical container<br />
(not supplied).<br />
3. Connect gun/lance assembly to high pressure hose.<br />
4. Check inlet water filter is clean then connect water supply hose to machine. Use a 25mm (minimum)<br />
hose .<br />
Incoming water supply must deliver double the flow of the machine. If questionable, check supply at<br />
machine. If supply is insufficient, do not operate from this outlet. For residential use, the outlet closest to<br />
the meter will usually deliver the highest flow rate. Connect only to clean town water supply.<br />
Warning: Do not operate from tank or pond. Doing so will cavitate the pump causing damage. Cavitation<br />
or pump starvation is not covered by warranty. Cavitation is a phenomenon causing vacuum pockets to<br />
form within the pump that eventually implode under pressure pitting the internal pump surfaces.<br />
<strong>Aussie</strong> <strong>Monsoon</strong> & <strong>Hurricane</strong> … Operation & Maintenance Manual<br />
3
<strong>Aussie</strong> <strong>Pumps</strong><br />
March 2012<br />
Fitting instructions for optional hose reel<br />
, Securely clamp the hose reel mounting bar across the top of the Scud<br />
frame using the two sets of nuts and bolts supplied. <strong>Aussie</strong> <strong>Pumps</strong><br />
recommends using Loctite on the bolts to prevent them vibrating loose.<br />
Fit hose reel to the mounting bar using the four sets of nuts and bolts<br />
supplied. Ensure all bolts are securely tightened and use Loctite to<br />
prevent them vibrating loose.<br />
The reel should be positioned so that it rotates fore/aft to aid fitting whip<br />
hose.<br />
, Connect whip hose to high pressure outlet on pump.<br />
, Fit handle to reel.<br />
, Fit gun to hose using C1500.24 nipple.<br />
Start up machine (see below) and check for leaks.<br />
All leaks must be rectified before using machine.<br />
C. Before starting the machine<br />
1. Ensure machine is level<br />
2. Connect & turn on water supply.<br />
3. Pull gun trigger until water starts to flow in a steady steam then release trigger.<br />
D. Starting the blaster<br />
1. Ensure unit is plugged into a suitable power outlet.<br />
2. Turn switch on blaster to ON, the unit is now ready to use.<br />
HIGH PRESSURE SPRAY CAN PENETRATE THE SKIN & CAUSE SERIOUS INJURY!<br />
NEVER POINT THE SPRAY GUN AT YOURSELF, OTHER PEOPLE OR ANIMALS.<br />
E. Pressure washing<br />
WEAR PROPER FACE PROTECTION WHEN OPERATING PRESSURE WASHER!<br />
1. For high pressure jetting rotate side grip on dual lance backwards until it stops. Fine control of pressure/<br />
flow can be made with small adjustments to the rotation of the grip. There is no pressure adjustment<br />
available on single lance options.<br />
2. When low pressure and high flow is required, including detergent application, unwind grip two complete<br />
turns. Adjust the detergent control on the pump as required.<br />
NOTE: Check the system for water leaks, oil leaks, hose kinks, etc. Correct any problems before proceeding.<br />
Machine is now ready for operation. Pull trigger on gun to release jet of water.<br />
WARNING .... DO NOT RUN EXCESSIVE BY-PASS<br />
Switch machine off within two minutes of ceasing operation as excessive by-pass can<br />
cause heat build up in pump and subsequent damage.<br />
UNLOADER SETTING<br />
The high pressure unloader on the machine is factory set to operate the pump at it’s rated<br />
pressure. DO NOT ADJUST. Tampering with the unloader will void warranty and can be<br />
dangerous.<br />
4<br />
<strong>Aussie</strong> <strong>Monsoon</strong> & <strong>Hurricane</strong> … Operation & Maintenance Manual
<strong>Aussie</strong> <strong>Pumps</strong><br />
March 2012<br />
F. Applying detergent (not available on <strong>Hurricane</strong>)<br />
1. Prepare pressure washer detergent solution as required by manufacturer.<br />
2. Place detergent siphon tub/filter into solution.<br />
3. Adjust double lance to low pressure setting.<br />
4. Apply cleaning solution to a dry surface, starting at lower portion of areas to be washed and work upward,<br />
using long overlapping strokes.<br />
5. Allow time to detergent to activate and then rinse off. DO NOT allow detergent to dry on.<br />
IMPORTANT; You must flush the injection system after each use by placing siphon hose into a bucket of clean<br />
water, then run pressure washer in low pressure for 2 minutes.<br />
G. Stopping the machine<br />
1. If using the detergent injector, flush out the chemical by running clean water through the system.<br />
2. Allow machine to run for 1 minute without load to cool before stopping.<br />
3. Turn switch to OFF & turn off water supply.<br />
4. Pull gun trigger to release all pressure in the system, then LOCK THE TRIGGER.<br />
5. Hoses may now be disconnected from the machine. Failure to release pressure before disconnecting the<br />
hose quick coupler will result in the quick coupler o-ring seal blowing out. This o-ring must be replaced<br />
before operating machine.<br />
CARE AND MAINTENANCE:<br />
AFTER EACH USE<br />
, If detergent injector has been used, it is essential to flush the machine with clean water after use.<br />
, Regularly check the power cable for damage and get a certified electrician to replace it if required.<br />
STORAGE<br />
Store the washer in an upright position, preferably drained of water if there is a danger of freezing. If there is a<br />
danger of freezing anti-freeze should be mixed with the flush water or the machine must be completely drained.<br />
After the final flush stop the machine. DO NOT allow the machine to idle for more than 15 seconds. Do not run<br />
for longer without water supply.<br />
PUMP CRANKCASE LUBRICATION<br />
Proper pressure washer pump crankcase lubrication will help extend the working life of the machine. Follow<br />
these important guidelines. We recommend keeping a simple service log book.<br />
, Change oil in pump after initial 50 hour run-in period. (SAE 75W-90)<br />
, Change pump oil every 3 months, use high quality oil. (SAE 75W-90)<br />
, Pump oil level can be checked with the dip stick under the breather cap or by viewing the oil sight gauge<br />
where fitted. The oil level is correct if level is in the centre of the gauge. If oil level is low, fill to correct level<br />
with recommended oil (SAE 75W-90). DO NOT OVERFILL CRANKCASE!<br />
PREVENTATIVE MAINTENANCE<br />
, Keep filter in supply hose connection clean, rinse regularly.<br />
, Use correct size nozzles for machine and replace when worn, check serial tag for correct size.<br />
, Drain water from pressure hoses, gun/lance assembly and accessories after use.<br />
, Protect pump from freezing. Failure to remove water from the pump in freezing temperatures will result in<br />
damaged pump manifold.<br />
, DO NOT tamper with unloader valve adjustment or alter motor speed.<br />
, DO NOT siphon chemicals through the pump, it is designed for water only.<br />
, Incoming water supply must not exceed 60ºC, otherwise pumps seal damage could result<br />
WARNING: CHECK NOZZLES AND REPLACE OF WORN<br />
If pressure drops off, check nozzle for wear. Nozzles should be replaced on a regular<br />
basis (every month for machines in regular use, every 3 months for machines used<br />
intermittently. Using the machine with the incorrect nozzle size or worn nozzle will void<br />
warranty and can be dangerous to the operator.<br />
<strong>Aussie</strong> <strong>Monsoon</strong> & <strong>Hurricane</strong> … Operation & Maintenance Manual<br />
5
<strong>Aussie</strong> <strong>Pumps</strong><br />
March 2012<br />
TROUBLE SHOOTING GUIDE<br />
FAULT CAUSE REMEDY<br />
Pump running normally but<br />
pressure low on installation<br />
Fluctuating Pressure<br />
Pump sucking air<br />
Valves sticking<br />
Unloader valve seat faulty<br />
Nozzle incorrectly sized<br />
Worn piston packing<br />
Valves worn<br />
Valves blocked<br />
Pump sucking air<br />
Worn piston packing<br />
Check water supply and possibility of air<br />
ingress.<br />
Check and clean or replace if necessary<br />
Check and replace<br />
Check and replace<br />
Check and replace<br />
Check and replace<br />
Check and replace<br />
Check water supply and air ingress at joints<br />
in suction line<br />
Check and replace<br />
Pressure low after period of<br />
normal use<br />
Nozzle worn<br />
Check valves worn<br />
Check valves blocked<br />
Unloader valve seat worn<br />
Worn piston packing<br />
Pistons cracked as a result of dry running<br />
Check and replace<br />
Check and replace<br />
Check and clean<br />
Check and replace<br />
Check and replace<br />
Replace pistons<br />
Pump Noisy<br />
Air in suction<br />
Broken or weak suction or delivery valve<br />
spring<br />
Foreign matter in valves<br />
Worn bearing<br />
Excessive temperature of liquid<br />
Check water supply and connections on<br />
suction line<br />
Check and replace<br />
Check and clean<br />
Check and replace<br />
Reduce temperature<br />
Presence of water in oil<br />
Oil seal worn<br />
High humidity in air<br />
Piston packing worn<br />
Check and replace<br />
Check and change oil twice as often<br />
Check and replace<br />
Water dripping below pump<br />
Piston packing worn<br />
O.R plunger retainer worn<br />
Check and replace<br />
Check and replace<br />
Oil Dripping<br />
Unloader switches<br />
repeatedly when gun is off<br />
Travel plug in use on pump<br />
Oil seal worn<br />
Leaking gun and/or pressure pipe.<br />
Leaky sleeve<br />
Worn out kick-back valve body<br />
Leaky seals<br />
Replace with breather plug<br />
Check and replace if necessary<br />
Renew gun, seal pressure pipe<br />
Renew sleeve<br />
Check and renew as necessary kick-back<br />
valve plate and seat<br />
Renew seals<br />
Leaky piston rod Defective O-Ring/Support Ring Renew piston rod seals and examine<br />
surfaces in guide case<br />
Leaky by-pass at nominal<br />
pressure<br />
Nozzle too small, too much water.<br />
Worn out by-pass valves<br />
Install larger nozzle<br />
Examine and renew as necessary<br />
Pressure gauge shows high<br />
pressure fluctuations when<br />
shutting off gun<br />
Pressure in supply line when<br />
running on by-pass<br />
Motor hums when switched<br />
on but does not start<br />
Valve set too high above operating<br />
pressure<br />
Dirty valve<br />
Dirty or worn low pressure valves<br />
Main voltage too low<br />
Spray gun not activated<br />
Cross section of extension lead too small<br />
Adjust the unloader at the operating<br />
pressure.<br />
Clean valve (removing lime deposits etc).<br />
Grease parts before installing.<br />
Remove & clean or replace low pressure<br />
valves<br />
Check electrical connection<br />
Activate spray gun when switching on<br />
Use correct dimension extension lead<br />
6<br />
<strong>Aussie</strong> <strong>Monsoon</strong> & <strong>Hurricane</strong> … Operation & Maintenance Manual
<strong>Aussie</strong> <strong>Pumps</strong><br />
March 2012<br />
PARTS IDENTIFICATION<br />
Detergent injector (J)<br />
Gauge (I)<br />
Unloader (F)<br />
C<br />
A<br />
B<br />
Y strainer (H)<br />
D<br />
E<br />
Thermal dump (G)<br />
Use motor size & pump model to identify your machine:<br />
Model Motor Pump Model Pump Pressure<br />
(psi)<br />
EWP<br />
Flow rate<br />
(lpm)<br />
<strong>Monsoon</strong> Scud 200 7.5HP, 5.5kW, IP56 TTV2012TTL1520 3000 4785 15 1450<br />
<strong>Monsoon</strong> Scud 300 10HP, 7.5 kW, IP56 TTV2021TTL2120 3000 4785 21 1450<br />
<strong>Monsoon</strong> Scud 300 Maxi 15HP, 10 kW, IP56 KKV2028/TTK3021 3000 4785 28 1450<br />
<strong>Monsoon</strong> Scud 400 10HP, 7.5 kW, IP56 KTV3015/ TTL1530 4000 6400 15 1450<br />
<strong>Monsoon</strong> Scud 400 Maxi 15HP, 10 kW, IP56 KTV3021/TTL2030 4000 6400 20 1450<br />
<strong>Hurricane</strong> 17HP,12.5kW, IP56 HDS5057/RAL2035H 5000 8500 18 1725<br />
<strong>Monsoon</strong> Scud<br />
Position Part No Description 200 300 300m 400 400m <strong>Hurricane</strong><br />
Nozzles<br />
C915045M HP NOZZLE (15º ANGLE, TIP SIZE 45) x<br />
C915065M HP NOZZLE (15º ANGLE, TIP SIZE 65) x<br />
A C915085M HP NOZZLE (15º ANGLE, TIP SIZE 85) x<br />
C915035M HP NOZZLE (15º ANGLE, TIP SIZE 35) x<br />
C915055M HP NOZZLE (15º ANGLE, TIP SIZE 55) x<br />
C915040M HP NOZZLE (15º ANGLE, TIP SIZE 40) x<br />
B C915500MSS LP DETERGENT NOZZLE x x x x x<br />
Lance & Gun<br />
C<br />
C3924.01 684MM SS DUAL LANCE x x x x x<br />
C3905.15 900 MM SS SINGLE LANCE x<br />
D<br />
C4326.23 AL5 GUN WITH MELTED HANDLE & QC x x x x x<br />
C4344.12 5000 PSI RATED AL35 GUN & QC x<br />
Hose<br />
E<br />
R206K2214MB6X10 10 MTR HP HOSE (R2, 4500 PSI) x x x x x<br />
HW06FB6FB6X10 10 MTR HP HOSE (R2, 5800 PSI) x<br />
Unloader<br />
C4910.10 UNLOADER VALVE (3600 PSI) x<br />
F BVB80/280 UNLOADER VALVE (4000 PSI) x x<br />
BVB350 UNLOADER VALVE (5100 PSI) x x x<br />
Thermal Dump Valves<br />
G MPA60063070 THERMAL DUMP VALVE 1/2" x x x x x x<br />
Inlet Strainer<br />
H AYSTRAINER3/4” 3/4” Y STRAINER x x x x x x<br />
Gauge<br />
I AGCDR0102 6,000 PSI PRESSURE GAUGE x x x x x x<br />
Chemical Injector<br />
J MTM00029143 CHEMICAL INJECTOR x x x x x<br />
Switch<br />
ASWITCH25A ON/OFF SWITCH (25 AMP) x x x x x x<br />
Electric Motor<br />
A140060T001 7.5HP MOTOR (5.5 KW) 24MM x<br />
A140060T002 10HP MOTOR (7.5 KW) 24MM x x<br />
A140060T003 15HP MOTOR (11 KW) 30MM x x<br />
A140060T009 17HP MOTOR (12.5 KW) x<br />
Pump<br />
TTL1520 BERTOLINI 200 BAR PUMP, 15 LPM FLOW x<br />
TTL2120 BERTOLINI 200 BAR PUMP, 21 LPM FLOW x<br />
KKV2028/TTK3021 BERTOLINI 210 BAR PUMP, 28 LPM FLOW x<br />
KTV3015/ TTL1530 BERTOLINI 300 BAR PUMP, 15 LPM FLOW x<br />
KTV3021/TTL2030 BERTOLINI 300 BAR PUMP, 20 LPM FLOW x<br />
HDS5057/RAL2035H BERTOLINI 350 BAR PUMP, 20 LPM FLOW x<br />
Pump<br />
rpm<br />
<strong>Aussie</strong> <strong>Monsoon</strong> & <strong>Hurricane</strong> … Operation & Maintenance Manual<br />
7
<strong>Aussie</strong> <strong>Pumps</strong><br />
March 2012<br />
PUMP PARTS TTV 2015 2021 (<strong>Monsoon</strong> 200, 300)<br />
Kit No. Part No. Description<br />
127 B069872973 Oil Seal & Sight Glass Kit<br />
123 B069867973 Valve Kit<br />
89 B069839973 Seal Kit Minor<br />
86 B069836973 Seal Kit Major<br />
37 B069814973 Oil Seal Kit<br />
PUMP PARTS TTL 1520, TTL 2220 (<strong>Monsoon</strong> 200, 300 - 2012 onwards)<br />
Kit No. Part No. Description Pieces<br />
127 B069872973 Oil Seal & Sight Glass Kit 10<br />
123 B069867973 Valve Kit 12<br />
89 B069839973 Seal Kit Minor 18<br />
86 B069836973 Seal Kit Major 24<br />
37 B069814973 Oil Seal Kit 3<br />
67 B049839973 Valve cap kit 12<br />
Check out our spares and customer service page on the web for full parts breakdowns and<br />
to download our Bertolini Pump Blaster Service Essential handbook …..www.aussiepumps.com.au<br />
8<br />
<strong>Aussie</strong> <strong>Monsoon</strong> & <strong>Hurricane</strong> … Operation & Maintenance Manual
<strong>Aussie</strong> <strong>Pumps</strong><br />
March 2012<br />
PUMP PARTS KKV 2028 (<strong>Monsoon</strong> 300 Maxi)<br />
Kit No. Part No. Description<br />
98 B069842973 Oil seal & Sight Glass kit<br />
40 B069817973 Valve Kit<br />
90 B069840973 Seal Kit Minor<br />
87 B069837973 Seal Kit Major<br />
37 B069813973 Oil Seal Kit<br />
PUMP PARTS TTK 3021 (<strong>Monsoon</strong> 300 Maxi - late 2012)<br />
Kit No. Part No. Description Pieces<br />
98 B069842973 Full Oil seal 9<br />
148 B089818973 Valve Kit 12<br />
90 B069840973 Seal Kit Minor 18<br />
87 B069837973 Seal Kit Major 24<br />
37 B069814973 Oil Seal Kit 3<br />
67 B049839973 Valve cap kit 12<br />
Check out our spares and customer service page on the web for full parts breakdowns and<br />
to download our Bertolini Pump Blaster Service Essential handbook …..www.aussiepumps.com.au<br />
<strong>Aussie</strong> <strong>Monsoon</strong> & <strong>Hurricane</strong> … Operation & Maintenance Manual<br />
9
<strong>Aussie</strong> <strong>Pumps</strong><br />
March 2012<br />
PUMP PARTS KTV 3015, 3021 (<strong>Monsoon</strong> 400, 400 Maxi )<br />
Kit No. Part No. Description<br />
98 B069842973 Oil seal & Sight Glass kit<br />
123 B069867973 Valve Kit<br />
89 B069839973 Seal Kit Minor<br />
86 B069836973 Seal Kit Major<br />
37 B069814973 Oil Seal Kit<br />
PUMP PARTS TTL 1530, TTL 2030 (<strong>Monsoon</strong> 400, 400m - late 2012)<br />
Kit No. Part No. Description Pieces<br />
127 B069872973 Full Oil seal & Sight Glass kit 10<br />
123 B069867973 Valve Kit 12<br />
95 B069833973 Seal Kit Minor 18<br />
96 B069834973 Seal Kit Major 24<br />
37 B069814973 Oil Seal Kit 3<br />
67 B049839973 Valve cap kit 12<br />
10<br />
Check out our spares and customer service page on the web for full parts breakdowns and<br />
to download our Bertolini Pump Blaster Service Essential handbook …..www.aussiepumps.com.au<br />
<strong>Aussie</strong> <strong>Monsoon</strong> & <strong>Hurricane</strong> … Operation & Maintenance Manual
<strong>Aussie</strong> <strong>Pumps</strong><br />
March 2012<br />
PUMP PARTS HDS 5057 (<strong>Hurricane</strong>)<br />
Kit No. Part No. Description<br />
98 B069842973 Oil seal & Sight Glass kit<br />
95 B069833973 Seal Kit Minor<br />
96 B069834973 Seal Kit Major<br />
37 B069813973 Oil Seal Kit<br />
93 B069829973 Valve Kit<br />
PUMP PARTS RAL2035H (<strong>Hurricane</strong> - 2012 onwards)<br />
Kit No. Part No. Description Pieces<br />
123 B089818973 VALVE KIT 12<br />
164 B089835973 SEAL KIT MINOR 19<br />
165 B089836973 SEAL KIT MAJOR 25<br />
146 B089816973 OIL SEAL KIT 3<br />
67 B049839973 CAP KIT 12<br />
147 B89817973 O-RING & SIGHT GLASS KIT 11<br />
<strong>Aussie</strong> <strong>Monsoon</strong> & <strong>Hurricane</strong> … Operation & Maintenance Manual<br />
11
WARNING<br />
OVERSPEEDING<br />
Do not operate machine over maximum rpm. Over speeding can cause serious pump damage.<br />
EXCESSIVE BYPASS<br />
Do not run on excessive by-pass. Switch machine off within two minutes of ceasing operation<br />
as excessive by-pass can cause heat build up in pump and subsequent damage. Excessive<br />
bypass running voids warranty.<br />
HIGH PRESSURE SETTING<br />
The high pressure pump is factory set to operate at its rated pressure. DO NOT ADJUST.<br />
Tampering with the pressure regulator will void warranty and can be DANGEROUS.<br />
CHECK NOZZLE MONTHLY<br />
If pressure drops off check nozzle for wear. Nozzles should be replaced on a regular basis<br />
(every month for machines in regular use, every three months for machines used intermittently).<br />
Using the machine with the incorrect nozzle size or worn nozzle will void warranty and can be<br />
DANGEROUS to the operator.<br />
PRESSURE CLEANER DAILY CHECK LIST<br />
, Check pump oil level<br />
, Check nozzle for wear<br />
, Check all high pressure components for leaks:<br />
, gun/lance<br />
, HP hose<br />
, all fittings<br />
, Check water filter and clean if necessary<br />
, Check unloader and thermal dump for leaks<br />
THREE MONTHLY REGULAR SERVICE<br />
All professional machines need to be thoroughly serviced every three months. The service involved<br />
should include the following;<br />
, Change pump oil<br />
, Check filter for foreign debris<br />
, Check unloader and thermal dump for leaks<br />
, Check all HP components for leaks: Gun/lance, HP hose and all fittings<br />
, Replace nozzles<br />
SIX MONTHLY REGULAR SERVICE<br />
To maintain the Bertolini pump warranty (three years from date of purchase), the pump must be<br />
serviced by an authorised service agent every six months. Contact <strong>Aussie</strong> for your nearest agent.<br />
LOOK AFTER YOUR MACHINE AND IT WILL LOOK AFTER YOU!<br />
<strong>Aussie</strong> HP Accessories … making light work of cleaning chores<br />
WEAR PROTECTIVE GOGGLES & CLOTHING!<br />
Australian Pump Industries Pty Ltd<br />
7 Gladstone Road, Castle Hill NSW 2154<br />
Ph: (02) 8865 3500 Fax: (02) 9894 4240<br />
www.aussiepumps.com.au info@aussiepumps.com.au


