Google Form Class Tools
In this issue we learn about an add-on called formLimiter. This add-on for Google Forms includes options for setting a date and time limit for forms. With formLimiter we can also set the maximum number of responses we want and can look for a specific value that will prompt the form to stop accepting responses. This is a very useful add-on for teachers looking to create assessments, class assignments or surveys. In this issue we also look at inserting media elements into our assessments.
In this issue we learn about an add-on called formLimiter. This add-on for Google Forms includes options for setting a date and time limit for forms. With formLimiter we can also set the maximum number of responses we want and can look for a specific value that will prompt the form to stop accepting responses. This is a very useful add-on for teachers looking to create assessments, class assignments or surveys.
In this issue we also look at inserting media elements into our assessments.
Create successful ePaper yourself
Turn your PDF publications into a flip-book with our unique Google optimized e-Paper software.
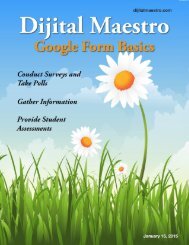
Dijital Maestro<br />
<strong>Google</strong> <strong>Form</strong>s<br />
Add-ons For Education<br />
Use Images and Videos In Assessments<br />
Set Time Limits for Assessments<br />
Set The Maximum Number of Responses<br />
Look For Specific Answers<br />
February 20, 2015
Images and Videos in Assessments<br />
In this issue I’ll look at ways we can use <strong>Google</strong><br />
forms to enhance our assessments. We’ll look<br />
at adding images and videos to assessments.<br />
Images and videos are a great way to add dimensions<br />
to any assessment. With images in our<br />
assessments we can add charts for students to<br />
use as a reference in the question just like paper<br />
versions. We can use any image as long as<br />
it doesn’t violate copyright laws. When inserting<br />
images <strong>Google</strong> <strong>Form</strong>s provides an option<br />
to take a screen shot of something on your<br />
computer. This can be very useful for math<br />
and science teachers that use tools like Mathematica<br />
to develop equations. With the screen<br />
capture utility, take a picture of the equation<br />
that you want students to refer to in a question.<br />
When using images in most web based tools<br />
like <strong>Google</strong> <strong>Form</strong>s, its important to prepare your<br />
images ahead of time. <strong>Google</strong> <strong>Form</strong>s is a tool for<br />
collecting information. It is not very good at editing<br />
images. Before uploading images to use in<br />
<strong>Google</strong> <strong>Form</strong>s, make sure you edit them ahead<br />
of time with software that is designed to re-size,<br />
crop or annotate your image as needed. There<br />
are several free tools out there and your computer<br />
already has some of these tools available.<br />
Videos can be very useful and can add lots of<br />
useful information for any question. Videos can<br />
be used for contextual questions. A typical question<br />
can ask a student to make inferences or to<br />
use context clues. Videos provide visual and<br />
audio clues to help students answer questions.<br />
Many videos include closed captioning which<br />
can be useful when differentiating content.<br />
Any video used in <strong>Google</strong> <strong>Form</strong>s must be accessible<br />
on the Internet. The most common place to<br />
access these videos is with services like YouTube<br />
or Vimeo. There are many other services out<br />
there and they can also be used. To use these<br />
online videos all you need is the link to the video.<br />
There is a wealth of videos out there but you<br />
might encounter a situation where a video is not<br />
available or you don’t care for the way the content<br />
is covered. In this case you can upload one<br />
of your own. There are a variety of tools to help<br />
you create informational and instructional videos<br />
for free. You probably have one available right in<br />
your pocket. That smart phone or tablet has software<br />
to record, edit and upload video to services<br />
like YouTube. Science teachers can record a<br />
chemical reaction, math teachers can record the<br />
steps in a formula, language arts teachers can record<br />
concepts like poetic sound patterns and history<br />
teachers can include images and narration.<br />
There are a few things to keep in mind when using<br />
videos in an assessment. Make sure to keep<br />
videos brief. This is more closely related to the<br />
amount of time your students will need to finish<br />
the assessment. Thirty seconds or less is<br />
usually a good rule of thumb for video length.<br />
Make sure the audio quality is good. Nothing ruins<br />
a video more than bad audio quality. Make<br />
sure the sound is not too loud or too soft. Make<br />
sure there is no disturbing background noise.<br />
Your students will need headphones or earbuds<br />
to listen to the videos during an assessment. Make<br />
sure you have some extra cheap earbuds available<br />
for those students that don’t have some or<br />
forgot them. Hey, they always forget their pencils,<br />
pens and paper, why not headphones or earbuds.
formLimiter Add-on<br />
<strong>Google</strong> provides several useful applications<br />
and services. One of these services is the ability<br />
for anyone to develop scripts that work with<br />
applications like <strong>Google</strong> <strong>Form</strong>s. These scripts<br />
are developed into what are called add-ons.<br />
on a specific date and time can be used to set a<br />
deadline for students to submit some information.<br />
For example, you might give them a week<br />
to select a topic for their science project.<br />
The add-on called formLimiter is one of those<br />
scripts that has been developed by New Visions<br />
Cloud Lab. New Visions Cloud Lab is a community<br />
of people that develop scripts for free.<br />
They are a non-profit organization and work<br />
to develop tools that can be used by teachers<br />
everywhere.<br />
The formLimiter add-on has three useful tools.<br />
With formLimiter you can set the date and time<br />
to automatically stop accepting responses in a<br />
form. Another option allows us to set the maximum<br />
number of responses to accept before<br />
the form stops accepting responses. The third<br />
option is interesting because it looks for a<br />
value that triggers the form to stop accepting<br />
responses.<br />
The first two tools are very easy to setup and<br />
use. The third tool takes a few more steps to<br />
use. You might not use this tool as often as you<br />
would the first two. In my example for this tool,<br />
I look for the first five correct answers before<br />
the script stops accepting responses. This<br />
tool is different from the maximum number of<br />
responses because in this case we are looking<br />
for the number of answers that matches<br />
our criteria. We can have fifty responses but if<br />
only four of them match our criteria it will continue<br />
to accept responses until the fifth answer<br />
matches our criteria.<br />
This can be a useful tool if we are looking for a<br />
specific answer in our assessment or survey and<br />
want to keep it open until we get the number of<br />
answers we need.<br />
In these lessons I’m demonstrating how to use<br />
these tools for assessments, but they can be<br />
used for a varity of reasons when using <strong>Google</strong><br />
<strong>Form</strong>s. The option to stop accepting responses
<strong>Google</strong> <strong>Form</strong> <strong>Class</strong> <strong>Tools</strong><br />
Creating assessments in <strong>Google</strong> <strong>Form</strong>s can<br />
be a rich experience with images, animation<br />
and video. In this first lesson we will learn<br />
how to create a basic assessment which<br />
includes each of these elements. We will also<br />
learn how to use form pages to segment<br />
our assessments into manageable views for<br />
students.<br />
Go to your <strong>Google</strong> account and click on the<br />
apps launcher icon.<br />
Click the red create button on the left and<br />
select <strong>Form</strong>.<br />
Click on the Drive app.<br />
Let’s provide a name to our test. Click once<br />
where it reads untitled form.<br />
Dijital Maestro
Questions With Images<br />
I’ll also place a check mark to allow only one<br />
response per person. This requires the student<br />
to log into their account.<br />
I’ll be using pictures and other media in<br />
my test. When I do this, I can’t shuffle the<br />
questions.<br />
Type a name in the form name field and click<br />
the OK button.<br />
I’ll place a check mark on the first two options<br />
and opt out of shuffling the questions.<br />
We need to make some decisions about our<br />
assessment in the form settings section. I<br />
will be using pages to separate my test by<br />
question.<br />
When we use pages to divide a form into<br />
sections, the student can’t see the form all<br />
at once and can’t see how much is left of the<br />
assessment. A progress bar provides feedback<br />
so they have a visual clue for how much<br />
of the assessment they’ve done or is left. I’ll<br />
place a check mark to show the progress bar.<br />
Let’s provide a short description for our test<br />
and create the first question.<br />
Dijital Maestro
<strong>Google</strong> <strong>Form</strong> <strong>Class</strong> <strong>Tools</strong><br />
We’ll start with a simple question without an<br />
image. This will be a multiple choice question.<br />
Click on the advanced settings option.<br />
Enter the answers for our multiple choice<br />
question.<br />
When we created the form we could not<br />
choose to shuffle the questions because we<br />
will be using images and other media in our<br />
quiz. Under the advanced settings we have<br />
the option to shuffle the answer options<br />
within the question. I’ll place a check mark<br />
in the option to shuffle the answer order.<br />
Remember to make the question required so<br />
students don’t accidentally forget to answer a<br />
question.<br />
Dijital Maestro
Questions With Images<br />
Click on the add item pull down menu.<br />
You’ll be presented with the option to provide<br />
a title and description for the page. Page titles<br />
are a great way to help keep the assessment<br />
organized.<br />
Select the option to add a page break.<br />
Provide a descriptive name for the page and<br />
click the add item pull down menu to add our<br />
question for this page.<br />
Dijital Maestro
<strong>Google</strong> <strong>Form</strong> <strong>Class</strong> <strong>Tools</strong><br />
Click on the image option.<br />
We have the option of either dropping an<br />
image into the upload panel or clicking the<br />
choose image to upload button.<br />
An insert image box will open with several<br />
options for placing an image in the form. The<br />
upload option is automatically selected for<br />
us. Other options include the ability to take a<br />
snapshot of something on your computer, a<br />
link to an image, a photo from your <strong>Google</strong><br />
photo album, or an image in your <strong>Google</strong><br />
Drive. In this first example we’ll select an<br />
image from our computer.<br />
I’ll select an image taken from a screen shot<br />
and saved on my computer. It’s a good idea<br />
to place all the images into a folder ahead of<br />
time for easy access. You can use most image<br />
formats but I recommend using JPEG or PNG<br />
image formats.<br />
I also recommend preparing your images<br />
ahead of time because <strong>Google</strong> <strong>Form</strong>s does<br />
not include tools to edit images.<br />
Let’s see what happens when we don’t prepare<br />
the image ahead of time.<br />
Dijital Maestro
Questions With Images<br />
The image I’ve chosen is very big. This size<br />
can be cumbersome and it might be difficult<br />
to see both the image and the question on<br />
small displays.<br />
We can re-size the image using the blue corner<br />
handles available. There is one on the top<br />
left of this image.<br />
When I talk about preparing your images, I<br />
mean that you should use a program dedicated<br />
to working with images so you can re<br />
size, crop rotate or enhance them before<br />
uploading.<br />
Dijital Maestro
<strong>Google</strong> <strong>Form</strong> <strong>Class</strong> <strong>Tools</strong><br />
Use the handle to shirk the image size. You<br />
can’t enlarge an image without reducing the<br />
image quality.<br />
To swap out the image with another, click the<br />
change image button.<br />
I’ve re sized the image but the quality and<br />
size of the image could make it difficult for my<br />
students to answer the question properly.<br />
We’re presented with the same options to<br />
upload an image.<br />
Now I’ll take the same image and prepare it<br />
for the quiz.<br />
Dijital Maestro
Questions With Images<br />
I’ve cropped the same image to show me a<br />
200 by 300 pixel area that I want the students<br />
to see for the question.<br />
Use one of the alignment buttons to position<br />
your image for the question. I’ll leave the<br />
image aligned to the left.<br />
The image is the size we need and clearly<br />
shows the information our students will need<br />
to answer the question.<br />
Above the image we have the option to provide<br />
a title for the image and some information<br />
when the user hovers the mouse over the<br />
image.<br />
Dijital Maestro
<strong>Google</strong> <strong>Form</strong> <strong>Class</strong> <strong>Tools</strong><br />
I’ll use the question for the image description<br />
and for the hover over text information. This<br />
isn’t the question students will answer. This is<br />
just information for our image. Let’s create the<br />
test question.<br />
Type in the answer choices.<br />
Click the add item pull down menu. Let’s create<br />
a multiple choice question based on this<br />
image.<br />
Place a check mark to shuffle the answer<br />
choices and to make the question required.<br />
That’s it, we’ve added an image and associated<br />
it with a question for our test.<br />
Dijital Maestro
Questions With Video<br />
Let’s add a question that uses a video as part<br />
of the question. We’ll segment this question<br />
by adding a page break.<br />
Click on add item and select video from the<br />
options.<br />
Provide a title and description for the page.<br />
An insert dialogue box will open. A video<br />
search box is automatically presented so we<br />
can search for videos in You Tube. There is<br />
also a URL option where we can type the URL<br />
for the video we want to use. I’ll use the URL<br />
option.<br />
YouTube has missions of great instructional<br />
videos. Type a description for the video<br />
you need and a list of available videos will<br />
appear below the search box.<br />
Dijital Maestro
<strong>Google</strong> <strong>Form</strong> <strong>Class</strong> <strong>Tools</strong><br />
I’ll paste the link to one of my videos in You<br />
Tube.<br />
Let’s provide a title for the video and a<br />
caption.<br />
Click the select button to finish the video<br />
insert process.<br />
Below each YouTube video there is a share<br />
option. Click on this share option to get<br />
a link to the video. This is how I was able<br />
to copy and paste the video link for this<br />
example.<br />
You’ll see a thumbnail of the video display.<br />
Use the buttons below the thumbnail to<br />
adjust the video position.<br />
Dijital Maestro
Questions With Video<br />
Click on the add item menu and select multiple<br />
choice.<br />
This is an assessment so we don’t need a link<br />
to the form results. I don’t want my students to<br />
go back and edit their answers after finishing<br />
the test so I won’t place a check mark on the<br />
second option either.<br />
We can write a message for our students<br />
when they complete the quiz. Replace the<br />
information that reads “Your response has<br />
been recorded”, to something that is a little<br />
more relevant for your students.<br />
I’ll create a question that uses the information<br />
in this video for the answer. Make sure<br />
to shuffle the answer order and to make the<br />
question required.<br />
Click on the view live form link at the top of<br />
the page.<br />
That’s it for this example. We’ll only add one<br />
image and one video for our short quiz. I’ll<br />
click the Done button.<br />
Dijital Maestro
<strong>Google</strong> <strong>Form</strong> <strong>Class</strong> <strong>Tools</strong><br />
We see our first question, which is a multiple<br />
choice. Below the answer options, we see a<br />
continue button. This button is here because<br />
we used pages to separate our questions.<br />
Answer the question and click the continue<br />
button.<br />
Separating our questions with page breaks is<br />
a nice way to separate questions and keep the<br />
questions visible for students.<br />
In our next question we see an image above<br />
the question. The students will use this image<br />
as a reference to help them answer the<br />
question.<br />
Below the answer choices we have a back and<br />
continue button. Answer the question and<br />
click the continue button.<br />
Dijital Maestro
Questions With Video<br />
In the question with a video, the students will<br />
see a thumbnail version of the video above<br />
the question. To see the video, the students<br />
can click the play button and the video will<br />
play in the same box above the question.<br />
When playing the video, students will have<br />
access to the same controls for playing, fast<br />
forwarding, rewinding and re-sizing the video.<br />
On this last question students will answer the<br />
question and click the submit button to finish.<br />
Dijital Maestro<br />
Using images in your assessments is a great<br />
way to include rich media options.
<strong>Google</strong> <strong>Form</strong> <strong>Class</strong> <strong>Tools</strong><br />
In a previous issue I demonstrated some basic ways that <strong>Google</strong> forms can be used to conduct<br />
surveys and assessments. Since that issue, I’ve had several questions about options that might be<br />
available for assessments. One question was about setting a time limit for an assessment or survey.<br />
<strong>Google</strong> provides tools for developers to enhance the functionality of <strong>Google</strong> Apps. In <strong>Google</strong><br />
<strong>Form</strong>s these are called add-ons. For the most part, add-ons are free to use. Let’s look at an add-on<br />
to schedule when an assessment will stop being available to students. This add-on also includes an<br />
option to set the maximum number of responses before the form stops accepting responses. The<br />
third option available with this add-on is where we are looking for a specific value before the form<br />
will stop accepting responses.<br />
I’ll be using a test I created in the last issue. If<br />
you don’t have a test or survey, go ahead and<br />
create one. I want you to be able to use what<br />
you learn here today or tomorrow in your<br />
class.<br />
A panel will open showing several tiles of<br />
add-ons that can be used with <strong>Google</strong> <strong>Form</strong>s.<br />
In the form edit page, click the Add-ons menu<br />
option and click Get add-ons.<br />
On the right side of the panel is a search box.<br />
Search for an add-on called formLimiter.<br />
Dijital Maestro
<strong>Form</strong>Limiter: Timer<br />
You should see the formLimiter add-on information<br />
appear within the panel.<br />
A module will open with information about<br />
the installation of formLimiter. The information<br />
is used by formLimiter to access information<br />
about your account and documents in your<br />
<strong>Google</strong> Drive account. This is essential for<br />
formLimiter to work properly.<br />
On the right side is the installation button.<br />
This add-on is free, click on the button.<br />
To install the add-on you need to accept the<br />
listed options and the agreement. It’s important<br />
to note that <strong>Google</strong> will keep to the terms<br />
of privacy you agreed to when the account<br />
was created.<br />
Dijital Maestro
<strong>Google</strong> <strong>Form</strong> <strong>Class</strong> <strong>Tools</strong><br />
The add-on will be installed in a few seconds<br />
and you will see a message under the Addons<br />
menu to let you know it’s been installed.<br />
Click on the Limit pull down menu. The menu<br />
has the options to select a date and time, the<br />
maximum number of responses and the destination<br />
spreadsheet value.<br />
Select date and time.<br />
On the right side of the form you will see a<br />
panel open. This is the formLimiter configuration<br />
panel.<br />
The panel will show a place where we can add<br />
a date, time and message. Click once inside<br />
the first box.<br />
Dijital Maestro
<strong>Form</strong>Limiter: Timer<br />
A menu will display below the box. Use the<br />
menu to select the day the assessment will<br />
stop or type the date inside the box.<br />
After you enter the date, provide a message<br />
to let your students know the time has expired<br />
and they can no longer submit responses.<br />
After entering the date, click in the next box to<br />
enter the time. Like the date option, you will<br />
get a helpful tool to enter the time. Use this<br />
tool or enter the time manually. Make sure to<br />
include AM or PM.<br />
If you would like to be reminded that the form<br />
is closed, place a check mark to be automatically<br />
e-mailed.<br />
Dijital Maestro
<strong>Google</strong> <strong>Form</strong> <strong>Class</strong> <strong>Tools</strong><br />
If students try to access the form after the day<br />
and time you specify, they will see a message<br />
similar to this one.<br />
If you want the form to accept responses<br />
again, click on Responses in the form builder<br />
and click Not accepting Responses.<br />
Within the <strong>Google</strong> <strong>Form</strong> editor you will see<br />
this message at the top of the page.<br />
You can disable a time limit set on a form by<br />
going back to the panel and clicking the disable<br />
button at the bottom.<br />
If students have already started working<br />
on the assessment, they will be allowed to<br />
finish and submit. They will not be timed<br />
out while taking the assessment.<br />
Dijital Maestro
<strong>Form</strong>Limiter: Max Responses<br />
With form limiter we can also set the form to<br />
stop accepting responses once we’ve reached<br />
the number of responses we want. This is useful<br />
when working with surveys. Click on the<br />
limit menu and select max number of form<br />
responses.<br />
Enter a number for the maximum number of<br />
responses and provide a message to display<br />
when the maximum has been reached.<br />
You will be presented with a box to enter the<br />
maximum number of responses before the<br />
form will no longer accept any more.<br />
This is a great way to have competitions<br />
in your classroom. You can select 1 in the<br />
maximum number for the first team to<br />
submit a response.<br />
In this case it would be a good idea to get<br />
an e-mail letting you know when the form is<br />
closed.<br />
Tip: Create several of these forms<br />
ahead of time and have them ready for<br />
one or more class periods.<br />
Dijital Maestro
<strong>Google</strong> <strong>Form</strong> <strong>Class</strong> <strong>Tools</strong><br />
The third option is destination spreadsheet<br />
cell value. Select this option from the menu.<br />
Click on Responses in the menu and select<br />
view responses.<br />
With this option we need to look for a value in<br />
a cell to stop accepting responses.<br />
It took me a while to see the need of this<br />
option in education but I think I have a good<br />
example for how we can use this in a lesson or<br />
assessment. Before we can enter values here,<br />
we need to setup some instructions in the<br />
spreadsheet that will collect our responses.<br />
In this example I have a quiz with just one<br />
question. I want to stop accepting responses<br />
once one person gets the answer correctly.<br />
This is different from accepting only one<br />
answer because we are looking for the first<br />
correct answer. This means we can accept<br />
multiple answers but the form will only stop<br />
accepting responses once we have the correct<br />
answer.<br />
In this example I’m looking for the first correct<br />
answer, but we could easily set this to stop<br />
accepting responses after any number of correct<br />
answers.<br />
Dijital Maestro
<strong>Form</strong>Limiter: Cell Value<br />
All our responses are automatically collected<br />
in a spreadsheet labeled <strong>Form</strong> Responses<br />
1. We need to create another sheet for our<br />
instructions. Click the plus on the left to create<br />
a new sheet in this workbook.<br />
Let’s begin with the instructions.<br />
In cell A1 I’ll provide a description to help as<br />
a point of reference. You don’t need to do this<br />
but I think it will help us understand what is<br />
going on.<br />
A new sheet will be created next to the <strong>Form</strong><br />
Response 1 sheet. It should be names Sheet2.<br />
If it named something else that’s fine. Just<br />
keep the name of the sheet in mind for later.<br />
Dijital Maestro
<strong>Google</strong> <strong>Form</strong> <strong>Class</strong> <strong>Tools</strong><br />
We’re going to use an instruction that counts<br />
the number of times something takes place.<br />
This instruction is going to count the number<br />
of times we have the correct answer. In cell B2<br />
type =countif.<br />
We’ve written the instructions for which sheet<br />
to use, now we need to tell it where in the<br />
sheet to look for the answers. The answers will<br />
be located in column B. Cell B1 is used for the<br />
question so we need to start looking in cell<br />
B2. The instructions !B2:B tell it to look in column<br />
B and start in cell B2. Type these instructions<br />
after the single quote in ‘<strong>Form</strong> Response<br />
1’.<br />
We need to tell the spreadsheet where to<br />
look for the information to count. We are<br />
collecting all the responses in the <strong>Form</strong><br />
Response 1 sheet.<br />
After =countif, type an open parenthesis followed<br />
by the sheet name, <strong>Form</strong> Response<br />
1. Make sure the sheet name is within single<br />
quotes like this, ‘<strong>Form</strong> Response 1’.<br />
After we’ve told it to look for the answer<br />
in column B, we need to give it the correct<br />
answer we are looking for to stop accepting<br />
responses. After !B2:B, type a comma followed<br />
by the correct answer. In my example<br />
that would be “Hypertext Markup Language”.<br />
Make sure to place text answers in quotation<br />
marks. If the answer is a number, don’t use<br />
quotation marks. Finish the instructions with a<br />
closing parenthesis.<br />
Dijital Maestro
<strong>Form</strong>Limiter: Cell Value<br />
You should see a zero where we entered the<br />
instructions. If you don’t, check the instructions.<br />
Notice how the instructions are color<br />
coded. The form and cell reference should be<br />
in orange and the answer in green,<br />
In the next box, enter the number value we<br />
want to use to stop accepting responses.<br />
In this example I want to stop accepting<br />
responses after I get five correct answers.<br />
Below the box we see that current the number<br />
of correct answers is zero. Let’s start entering<br />
some answer so we can see how this works.<br />
Go back to the form edit page and into<br />
the formLimiter panel. In first box enter<br />
sheet2!B1. This tells form limiter where to look<br />
for the value. This is also where we typed the<br />
instructions. In our example that would be the<br />
number of correct responses.<br />
Type a message to display when the form<br />
is closed. Choose if you want to receive an<br />
e-mail when the form is closed and click the<br />
save and enable button.<br />
Dijital Maestro
<strong>Google</strong> <strong>Form</strong> <strong>Class</strong> <strong>Tools</strong><br />
Let’s enter some responses to see how this<br />
works. Go back to the form editor and select<br />
view live form.<br />
Go back to the form edit page and click the<br />
view responses button, or if the responses<br />
sheet is still open, go to that page.<br />
I’ll select the correct answer and click submit.<br />
In the bottom of the workbook, click on sheet<br />
2 where we have the instructions.<br />
Dijital Maestro
<strong>Form</strong>Limiter: Cell Value<br />
The cell now has the number 1 to record our<br />
first correct answer. I’ll take the quiz a few<br />
more times.<br />
Looking at sheet 2, we can see that the<br />
instructions are recording the four correct<br />
answers and ignoring the wrong answers.<br />
I’ve gone back and entered five more<br />
answers. Of the six answers seen here, only<br />
four are correct.<br />
On the fifth correct answer, the form will stop<br />
accepting responses.<br />
This add-on is a great tool with several useful<br />
features.<br />
Dijital Maestro


