Twister Manual.pdf - Tempest Lighting, Inc.
Twister Manual.pdf - Tempest Lighting, Inc.
Twister Manual.pdf - Tempest Lighting, Inc.
Create successful ePaper yourself
Turn your PDF publications into a flip-book with our unique Google optimized e-Paper software.
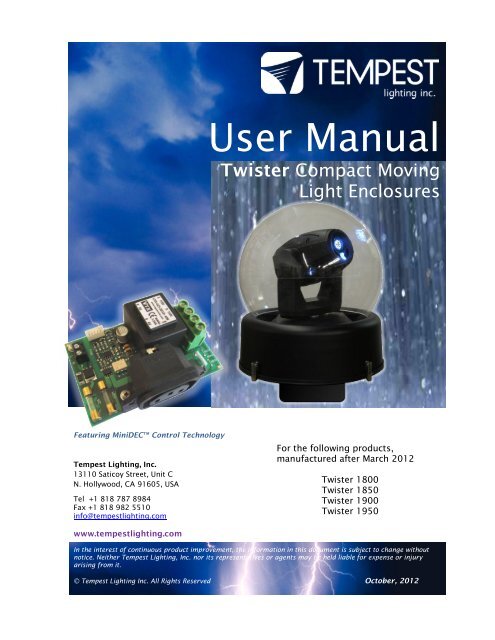
User <strong>Manual</strong> and Installation Guide<br />
User <strong>Manual</strong><br />
<strong>Twister</strong> Compact Moving<br />
Tornado Moving Light Enclosures Light Enclosures<br />
Featuring MiniDEC TM Control Technology<br />
<strong>Tempest</strong> <strong>Lighting</strong>, <strong>Inc</strong>.<br />
13110 Saticoy Street, Unit C<br />
N. Hollywood, CA 91605, USA<br />
Tel +1 818 787 8984<br />
Fax +1 818 982 5510<br />
info@tempestlighting.com<br />
For the following products,<br />
manufactured after March 2012<br />
<strong>Twister</strong> 1800<br />
<strong>Twister</strong> 1850<br />
<strong>Twister</strong> 1900<br />
<strong>Twister</strong> 1950<br />
www.tempestlighting.com<br />
In the interest of continuous product improvement, the information in this document is subject to change without<br />
notice. Neither <strong>Tempest</strong> <strong>Lighting</strong>, <strong>Inc</strong>. nor its representatives or agents may be held liable for expense or injury<br />
arising from it.<br />
© <strong>Tempest</strong> <strong>Lighting</strong> <strong>Inc</strong>. All Rights Reserved October, 2012<br />
<strong>Twister</strong> Enclosure User <strong>Manual</strong> page 1
Declaration of Conformity<br />
This is to certify that the following products<br />
1800.IN <strong>Twister</strong> 1800 Enclosure<br />
1850.IN <strong>Twister</strong> 1850 Enclosure<br />
1900.IN <strong>Twister</strong> 1900 Enclosure<br />
1950.IN <strong>Twister</strong> 1950 Enclosure<br />
are in Compliance with the following standards or specifications according to the Electro<br />
Magnetic Compatibility Directive 2004/108/EC.<br />
EN55015, Cispr 16<br />
and are in compliance with the following standards or specifications according to the Low<br />
Voltage Directive 2006/95/EC.<br />
EN60598-1<br />
This declaration is made by the manufacturer<br />
<strong>Tempest</strong> <strong>Lighting</strong>, <strong>Inc</strong>.<br />
5401 Bevis Avenue<br />
Sherman Oaks, CA 91411, USA<br />
This declaration is based on tests that were conducted on the submitted samples of the above<br />
mentioned products. Detailed results can be referred to test reports C27963_03, C27963_04,<br />
C27963_06, C27963_07<br />
Dated: August 1 st , 2012<br />
Signature . . . . . . . . . . . . . .<br />
<strong>Tempest</strong> <strong>Lighting</strong> <strong>Inc</strong><br />
<strong>Twister</strong> Enclosure User <strong>Manual</strong> page 2
1 Introduction<br />
Thank you for purchasing the <strong>Twister</strong> enclosure. It will serve you for many years, protecting your<br />
stage spotlights and effects equipments from the elements.<br />
Products Covered By this <strong>Manual</strong>:<br />
1800.IN <strong>Twister</strong> 1800 Enclosure 230V<br />
1800.US <strong>Twister</strong> 1800 Enclosure 120V<br />
1850.IN <strong>Twister</strong> 1850 Enclosure 230V<br />
1850.US <strong>Twister</strong> 1850 Enclosure 120V<br />
1900.IN <strong>Twister</strong> 1900 Enclosure 230V<br />
1900.US <strong>Twister</strong> 1900 Enclosure 120V<br />
1950.IN <strong>Twister</strong> 1900 Enclosure 230V<br />
1950.US <strong>Twister</strong> 1900 Enclosure 120V<br />
Using This <strong>Manual</strong><br />
Please read this manual in its entirety before starting work. All the information contained is<br />
important, and should be read carefully before proceeding. Heed all warnings and advisories.<br />
Icon Key:<br />
Valuable information<br />
Electrical Warning<br />
Safety Information<br />
<strong>Twister</strong> Enclosure User <strong>Manual</strong> page 3
2 Installation<br />
2.1 Safety and Warnings<br />
These warnings are for your protection. Failure to comply may result in serious injury or death.<br />
<strong>Tempest</strong> <strong>Lighting</strong>, <strong>Inc</strong>. assumes no responsibility for damages or injury incurred by misuse or<br />
mishandling of product.<br />
<br />
<br />
<br />
<br />
Do not attempt to install or operate the enclosure before fully reading and understanding this<br />
manual<br />
Never allow anyone who has not read this manual to open the enclosure or perform<br />
maintenance on the equipment within.<br />
Never leave the enclosure unattended when open.<br />
Always make sure all bolts and latches are tight and safety locks are in place after performing<br />
any form of maintenance on the unit.<br />
Do not open any electrical boxes until power has been shut off to all supply lines to the<br />
enclosure (including the one powering the equipment).<br />
Do not open the enclosure in wet weather.<br />
2.2 Tools and Equipment<br />
To install the enclosure, you will need the following items:<br />
<br />
<br />
<br />
<br />
<br />
Crescent wrench<br />
Phillips screwdriver<br />
Terminal screwdriver<br />
Proper wiring installation equipment (for line power and signal wiring)<br />
Any equipment listed in the equipment manufacturer’s equipment-specific installation<br />
directions<br />
2.3 Mounting the <strong>Twister</strong> Enclosure<br />
<br />
<br />
The <strong>Twister</strong> enclosure must be mounted on or under a solid structure rated for the weight of<br />
the enclosure, the equipment inside it, and at least one person.<br />
Snow – if installed outside in cold regions, the bottom of the <strong>Twister</strong> enclosure must be at<br />
least 2’ (60cm) above maximum height of any snowfall or drifting snow, subject to local<br />
conditions. If snow is not a consideration, then enclosure may sit on the ground as long as<br />
proper drainage is provided.<br />
<strong>Twister</strong> Enclosure User <strong>Manual</strong> page 4
LEAVE ADEQUATE CLEARANCE BEHIND ENCLOSURE FOR WIRING AND VENTILATION COWLS<br />
<strong>Tempest</strong> <strong>Lighting</strong> recommends the use of stainless steel mounting hardware.<br />
The <strong>Twister</strong> enclosure is provided with two mounting brackets for wall, floor or ceiling mounting.<br />
Wall anchors and screws are not provided and must comply with local building codes and safety<br />
regulations.<br />
<strong>Twister</strong> may also be installed using <strong>Tempest</strong> Pipe Clamps or conventional hanging clamps fitted to<br />
the two holes in the base for either ½” US or M12 hardware.<br />
Dimensions for <strong>Twister</strong> mounting Brackets<br />
A<br />
C<br />
B<br />
Using the mounting<br />
brackets provided,<br />
secure with two screws<br />
or bolts each to a solid<br />
surface or structure.<br />
Max screw size<br />
3/8”/M10.<br />
A B C<br />
<strong>Twister</strong> 1800 8.25”/210 4.75”/121 3.0”/76<br />
<strong>Twister</strong> 1850 15.5”/394 4.75”/121 6.0”/152<br />
<strong>Twister</strong> 1900 15.5”/394 4.75”/121 6.0”/152<br />
It is the responsibility of the installer to ensure that all mounting points are secure and conform to local<br />
safety regulations. <strong>Tempest</strong> <strong>Lighting</strong> <strong>Inc</strong>. accepts no responsibility for damage or injury arising from<br />
inappropriate or unsafe installation.<br />
Mount <strong>Twister</strong> to a pipe or truss using two <strong>Tempest</strong><br />
stainless steel U-bolt kits:<br />
4900.MCT Stainless Steel Unistrut channel nut, bolt<br />
and pipe clamp, for pipes 1.5” (38mm) to 2” (50mm)<br />
OD. Two required per enclosure.<br />
4925.MCT Stainless Steel Unistrut channel nut, bolt<br />
and pipe clamp, for pipes 2” (50mm) to 2.5” (64mm)<br />
OD. Two required per enclosure.<br />
<strong>Twister</strong> Enclosure User <strong>Manual</strong> page 5
2.4 Mounting Orientation<br />
All <strong>Twister</strong> enclosures are designed to be mounted either base-down, base-up or horizontal, on a solid structure,<br />
using the mounting hardware described above.<br />
Base Up Base Down Horizontal<br />
(see 2.5.1 below) (see 2.5.2 below) (see 2.5.3below)<br />
Note that the air inlet and exhaust cowls are trimmed and oriented differently, depending on the mounting<br />
orientation. See next section for detailed instructions.<br />
2.4.1 Weep Holes<br />
For Base up and horizontal installation, it is necessary to drill a drainage hole at the lowest point of the globe.<br />
USE ONLY THE SPECIAL ACRYLIC TAPERED DRILL BIT SUPPLIED WITH YOUR TWISTER MANUAL. A regular<br />
bit may crack the globe. <strong>Tempest</strong> <strong>Lighting</strong> <strong>Inc</strong>. accepts no responsibility for such damage.<br />
NOTE:<br />
Horizontal enclosures –<br />
be sure to always<br />
replace the globe with<br />
the weep holes down.<br />
<strong>Twister</strong> Enclosure User <strong>Manual</strong> page 6
2.5 Air inlet and Exhaust Cowls<br />
<strong>Twister</strong> enclosures are supplied with two plastic cowls and filters for the air inlet and exhaust vents. Use of the<br />
cowls differs according to the orientation of the enclosures<br />
2.5.1 Base-Up Installation<br />
Insert the two filters into the cowl<br />
slots.<br />
Insert two rain guards between the<br />
plastic cowl and the <strong>Twister</strong> base as<br />
shown<br />
Mount the cowls and rain guards onto<br />
the <strong>Twister</strong> base plate, using the<br />
screws provided<br />
Rain guard<br />
Rain guard location<br />
2.5.2 Base-Down Installation<br />
Insert filters and mount as shown.<br />
Using a sharp box-cutter knife, remove the outer chambers of the inlet and exhaust cowls.<br />
2.5.3 Horizontal Installation<br />
First, trim the outer chambers of the inlet<br />
and exhaust cowls, using a sharp knife, as<br />
described above for base-down installation.<br />
Mount both cowls onto the <strong>Twister</strong> base plate, with the filter<br />
end facing DOWN, as shown.<br />
<strong>Twister</strong> Enclosure User <strong>Manual</strong> page 7
2.6 Air Filters<br />
Note that both cowls are fitted with electrostatic air filters, to prevent ingress of dust and insects.<br />
Both filters must always be in place.<br />
You will need to remove the filters periodically for cleaning. How often will depend on local conditions. We<br />
recommend checking every three months and then determining frequency of cleaning depending on what you<br />
find.<br />
To clean the filters, simply run them under a tap or water hose. Replace carefully between the ribs in the air<br />
cowls. Cowls do not need to be removed – this picture is for illustration only.<br />
Inlet/Exhaust Cowl<br />
Filter<br />
2.7 Fan Chimney (<strong>Twister</strong> 1900/1950)<br />
The Fan Chimney is supplied with larger <strong>Twister</strong> enclosures and is required for use with luminaires using the<br />
Philips 5R and 15R lamp, which is very sensitive to elevated temperatures. The fan chimney ducts the<br />
incoming airflow from the fan into the top of the globe for more effective cooling.<br />
Wrap the fan chimney around the fan, high side outside, and secure using the zip ties provided.<br />
The fan chimney is soft, and will conform to the base of the luminaire as well as to the inside of the globe<br />
assembly. It may be trimmed with sharp scissors if<br />
needed.<br />
<strong>Twister</strong> Enclosure User <strong>Manual</strong> page 8
3 Wiring<br />
3.1 Electrical Preparation<br />
<br />
All electrical work must be carried out by a properly licensed electrician. Failure to observe this<br />
point will void the factory warranty for the <strong>Tempest</strong> Enclosure and possibly the equipment housed<br />
inside.<br />
1 Before starting work, switch off power to the branch circuit, carefully following lockout and tag-out<br />
procedures. Failure to do so could cause serious injury or death.<br />
2 Two electrical junction boxes will be required within a short distance of the <strong>Twister</strong> enclosure for:<br />
<br />
<br />
AC supply wiring<br />
DMX control wiring<br />
Your <strong>Twister</strong> enclosure is supplied fitted with two cable entry points, for Power and DMX signal cables.<br />
The cable entries are suitable for use with standard conduit fittings. US size ½”, international 20mm.<br />
<strong>Tempest</strong> recommends the use of flexible, outdoor-rated conduit for the last few feet (1m) to the enclosure.<br />
All junction boxes must be installed in accordance with local electrical codes and should be located near the<br />
permanent installation of the enclosure. Each junction box requires a length of flexible conduit, long<br />
enough to reach from the junction box to the enclosure conduit fittings. Leave slack for positioning of<br />
enclosure, and enough space behind the enclosure for ventilation.<br />
The AC supply must be protected by a fuse or circuit breaker of a rating suitable for the equipment.<br />
The user may connect the fan and the equipment to the same switched supply, or run them separately,<br />
according to need (see below).<br />
Note that for temporary installation, the conduit fittings may be replaced with outdoor-rated cable entry<br />
glands, at the user’s discretion.<br />
<strong>Twister</strong> Enclosure User <strong>Manual</strong> page 9
3.2 Remove the Globe Assembly.<br />
Rewireable<br />
IEC Plug<br />
MiniDEC<br />
Controller<br />
Cover<br />
Airflow<br />
Fan<br />
Fixture<br />
Mount<br />
Finger Guard<br />
3.3 Remove the Fixture Mount and the MiniDEC Cover, and pull AC and DMX control wires through<br />
conduit entries, as shown here.<br />
AC Power<br />
<strong>Twister</strong> Enclosure User <strong>Manual</strong> page 10
3.4 Connect AC Wiring to MiniDEC Controller<br />
Single Feed Operation<br />
Split Feed Operation<br />
NEUTRAL<br />
NEUTRAL<br />
CUT LINK 2<br />
PLACES FOR<br />
SPLIT FEED<br />
OPERATION<br />
NEUTRAL<br />
GROUND<br />
GROUND<br />
LIVE (Light and Fan)<br />
LIVE (Fan)<br />
Single Feed Wiring<br />
LIVE (Light)<br />
Feed the controller with a single maintained supply. The enclosure should be powered 24/7. The light must be<br />
switched off when needed using the lighting control system.<br />
<strong>Twister</strong> ships configured for single feed wiring operation.<br />
Dual Feed Wiring<br />
You may switch off the supply to the light without interfering with the cooling fan operation. Connect feeder wires<br />
as shown, AND CUT THE COPPER LINK ON THE MiniDEC BOARD IN TWO PLACES, AS SHOWN. Fan circuit should<br />
be maintained 24/7.<br />
3.5 Replace MiniDEC Cover<br />
<strong>Twister</strong> Enclosure User <strong>Manual</strong> page 11
MiniDEC Operation<br />
The MiniDEC controller monitors current going to the light fixture inside the <strong>Twister</strong> enclosure, and also heat inside<br />
the enclosure. When it detects that the light is on and/or the internal temperature is getting warm, MiniDEC runs<br />
the enclosure fan. For best results, enclosures must be connected to live power at all times.<br />
MiniDEC Operation is completely automatic.<br />
Summary: MiniDEC detects current to light >1.5amps Fan on<br />
MiniDEC detects current to light drop below 1amp<br />
MiniDEC detects temperature 25-35°C (77-95°F)<br />
MiniDEC detects temperature >35°C (95°F)<br />
5-minute fan cool-down, then fan off<br />
Pulse fan to change air every minute<br />
Switch Fan on<br />
MiniDEC LED Indicator<br />
For information and Faultfinding there is an LED indicator on the MiniDEC control board. Function as follows:<br />
LED OFF: MiniDEC is not powered, or power supply has failed.<br />
LED ON: MiniDEC is functioning normally and luminaire power is < 1amp<br />
LED blinking slowly: Luminaire Power > 1 amp, fan on<br />
LED blinking rapidly: Luminaire power has dropped below 1amp. Fan is running for five minutes<br />
for five-minute cool-down<br />
<strong>Twister</strong> Enclosure User <strong>Manual</strong> page 12
4 Mounting the Luminaire in the <strong>Twister</strong> Enclosure<br />
<br />
If the <strong>Twister</strong> enclosure is suspended from a ceiling or overhang, this must be done by two people.<br />
4.1 Mounting Smaller Luminaires without Omega Clamps<br />
Fixture Bracket<br />
Fixture Bracket<br />
mounting<br />
hardware<br />
Fixture mounting hardware<br />
1. Remove the Fixture bracket from the enclosure base. Keep the fixture bracket mounting hardware safely for re-use.<br />
2. Check that the open side of the Fixture bracket is facing you.<br />
3. Using the fixture mounting hardware supplied with the luminaire, bolt through the underside of the bracket into the<br />
threaded hole in the fixture base.<br />
4. Replace the fixture bracket and the fixture on the <strong>Twister</strong> base, and tighten down the four fixing nuts.<br />
<strong>Twister</strong> Enclosure User <strong>Manual</strong> page 13
4.2 Mounting Luminaires using omega clamps<br />
Many light fixtures are supplied with one or more omega clamps for mounting.<br />
Mount the omega clamp(s) to the fixture base, following the manufacturer’s instructions, and bolt the omega<br />
clamps to the <strong>Twister</strong> fixture bracket, before re-installing the fixture bracket to the fixture base.<br />
Omega Clamp<br />
Fixture Bracket<br />
4.3 – Chauvet Q-Spot 560 LED – Mounting in <strong>Twister</strong> 1900<br />
This luminaire requires a special mounting kit available from <strong>Tempest</strong> <strong>Lighting</strong> or your Chauvet dealer.<br />
Item # 1900.560K.<br />
Fixture Bracket<br />
Flat Omega Adapter (x2)<br />
M8 screws locate in<br />
luminaire base (x 4)<br />
<strong>Twister</strong> Enclosure User <strong>Manual</strong> page 14
4.4 Use of <strong>Twister</strong> 1900 Fan Chimney<br />
The fan chimney accessory is supplied with the <strong>Twister</strong> 1900 enclosure to assist air<br />
circulation in cases where the luminaire base tends to obstruct airflow, or where<br />
particularly temperature-sensitive lamps are used, such as the Philips Platinum<br />
series. The chimney accessory is only needed if the luminaire is overheating, and is<br />
not required for most luminaires.<br />
The Chimney is a flexible duct that helps the incoming cool air from the fan blow<br />
up to the top of the globe.<br />
1 Wrap the chimney around the fan, and fasten with<br />
the two plastic zip-ties supplied. You may trim the<br />
chimney with sharp scissors as needed.<br />
Airflow<br />
Chimney (supplied flat)<br />
Secure with two zip ties<br />
Fan<br />
2 When placing the globe on the <strong>Twister</strong> base, take<br />
care that the chimney is INSIDE the join between<br />
the globe and the aluminum globe collar. The<br />
chimney will spread out to conform to the space<br />
available<br />
Pinch chimney<br />
inside globe<br />
<strong>Twister</strong> Enclosure User <strong>Manual</strong> page 15
4.5 Connect Luminaire power and DMX<br />
Connect the DMX IN and OUT luminaire connections as specified by the luminaire manufacturer<br />
Connect the luminaire power cable to the IEC outlet provided on the MiniDEC controller. If necessary, shorten the<br />
length of the luminaire power cord and install the rewireable IEC plug provided with your <strong>Twister</strong> enclosure.<br />
4.6 Latch Adjustment and Security<br />
The latch tension is<br />
adjusted by turning the<br />
screw – clockwise to<br />
tension, anti-clockwise to<br />
loosen.<br />
Insert a padlock in<br />
<br />
one or more<br />
security rings for<br />
additional security.<br />
<strong>Twister</strong> Enclosure User <strong>Manual</strong> page 16
5 Operation<br />
While there are no specific operational actions required for normal use, the following points should be kept in mind.<br />
<br />
<br />
<br />
The enclosure should be connected to a live circuit at all times except when maintenance is being carried<br />
out.<br />
Unless the enclosure or equipment is undergoing routine maintenance, the enclosure should be closed and<br />
securely latched at all times.<br />
Only authorized personnel should open the enclosure (see maintenance warnings in the next chapter).<br />
<strong>Twister</strong> Enclosure User <strong>Manual</strong> page 17
6 Routine Maintenance<br />
It is very important to perform routine maintenance on both the enclosure and the equipment<br />
inside it. Failure to do so may reduce lifetime for both the enclosure and the equipment.<br />
Note<br />
Maintenance schedules depend on location and environment. The intervals given here are<br />
general minimum guidelines. It is up to the user to judge whether maintenance should be carried<br />
out more frequently. We recommend doing these tasks no less often than mentioned here.<br />
Safety<br />
<br />
<br />
<br />
<br />
As the enclosure is a powered unit with moving parts, it is necessary to keep safety in mind while<br />
performing routine maintenance. Although maintenance can be performed while the enclosure is<br />
powered, it is safer to carry it out with the power disconnected with proper lockout and tag out<br />
procedures followed.<br />
Be aware that once the enclosure has had power applied to it, the fan will start to turn. Make<br />
sure that your hands are clear of the fan before applying power to the enclosure.<br />
Only authorized personnel should perform maintenance on the enclosure or equipment<br />
Do not service the unit in the rain or other adverse weather conditions (snow, sleet, high winds,<br />
etc.).<br />
Inspection Checklist: - Every Three (3) Months<br />
<br />
<br />
<br />
<br />
<br />
<br />
<br />
Glass should be clean and free of cracks<br />
Enclosure should be free of debris both inside and out<br />
Bolts and tie-down straps should be tight<br />
Rubber seals should be in good condition. Check seals inside and out for gaps.<br />
Fan should be functioning and not making excessive noise<br />
Filters should be clean<br />
Drainage holes must be free of obstructions<br />
Air Filter - Every Three (3) Months<br />
Both air filters should be removed and cleaned on a regular basis. To<br />
remove filter, pull pull it directly out of the intake vent. The filters can be<br />
cleaned by running water from a hose and do not require any special<br />
solution.<br />
To reinstall, carefully push filter back into the cowl molding. The filter<br />
should sit snugly between the cowl ribs.<br />
<strong>Twister</strong> Enclosure User <strong>Manual</strong> page 18
Case - As Needed<br />
The outside of the case should be cleaned as needed. The case should be cleaned with a wet<br />
cloth and mild detergent (if necessary). Do not use a direct spray from a hose to clean the case.<br />
Globe – As Needed<br />
Clean using a proprietary acrylic cleaning solution or a mild detergent, and wipe dry. Use only<br />
soft, lint-free cloths for globe cleaning. Never use an abrasive cleaner.<br />
Equipment<br />
Review the manufacturer's instructions for proper maintenance of your Luminaire. Remember,<br />
the enclosure simply protects the equipment inside it and is not a substitute for regular<br />
maintenance.<br />
<strong>Twister</strong> Enclosure User <strong>Manual</strong> page 19
7 Troubleshooting<br />
This is a guide to the general symptoms, problems, and solutions that may occur during the<br />
usage of your enclosure. However, it is important to remember that problems may occur within<br />
the equipment itself and these must also be considered.<br />
Equipment does not have power.<br />
Check power supply wiring and voltage.<br />
Fan is not spinning<br />
Fan cord may have become disconnected. Check connections between fan and cord.<br />
Fan may be obstructed. Shut off power to enclosure and check for obstructions. Turn power back<br />
on to see if fan will start spinning. If fan does not turn then enclosure is not receiving power.<br />
Turn off all power and check wiring. If the wiring is correct, contact technical support.<br />
Equipment does not have power.<br />
Check equipment power switch. If switch is on, check wiring and supply switch/circuit breaker.<br />
Equipment turns on and off repeatedly over short span of time.<br />
Check that vent areas and airways are clear. If so, ambient temperature may be too high, or<br />
equipment may have internal problem.<br />
Excessive water in enclosure.<br />
Seal leak. Repair with silicone sealant, or replace seal.<br />
<strong>Twister</strong> Enclosure User <strong>Manual</strong> page 20
8 Limited Warranty<br />
INSPECTION/WARRANTY/RETURNS.<br />
A. Customer, at its sole expense, shall inspect all Goods promptly upon receipt and accept all Goods that conform<br />
to the specifications or catalog. All claims for any alleged defect in or failure of the Goods or Seller's performance to<br />
conform to the Contract, capable of discovery upon reasonable inspection, must be set forth in a written rejection<br />
notice detailing the alleged non-conformity, and be received by Seller within thirty (30) calendar days of Customer's<br />
receipt of the Goods. Failure by Customer to notify Seller of the alleged non-conformity within thirty (30) days will<br />
be conclusive proof that the Goods have been received by Customer without defects or damage, and in the<br />
quantities specified on the bill of lading and shall constitute an irrevocable acceptance of the Goods and a waiver of<br />
any such claim in connection with the Goods.<br />
B. Seller warrants to Customer only that the Goods will be free from defects in material and workmanship at the<br />
time of delivery and, subject to the exceptions and conditions set forth below, for the following period (the<br />
"Warranty Period"): twelve (12) months from the date of shipment by Seller. Seller may provide additional years of<br />
warranty coverage beyond 12 month, at the rate of 2.5% of the net sale price per year, up to a total of four<br />
additional years’ coverage beyond the standard 12 month warranty period. Seller will remedy a defect as set forth in<br />
paragraph 7 D, below, (the "Warranty"). The Warranty is subject to each of the following exceptions and conditions:<br />
1. Customer must promptly (and in all events within the Warranty Period) notify Seller of any alleged defect in a<br />
written notice (the "Notice") which shall set forth the quantity, catalog number, finish, original purchase order<br />
number, Seller's invoice number on which Goods were originally billed and a statement of the alleged defect, along<br />
with digital photographs showing such defects where feasible.<br />
2. The Warranty shall not apply: (i) to any claimed defect that was capable of discovery upon reasonable inspection<br />
and deemed to be waived under paragraph A, above; (ii) to any Goods that have been subject to misuse, abnormal<br />
service or handling, or altered or modified in design or construction; (iii) to any Goods repaired or serviced by any<br />
person other than Seller's authorized service personnel or to Goods installed other than according to installation<br />
instructions, or (iv) with respect to normal wear and tear.<br />
3. Seller makes no Warranty with respect to parts or components that are not the product of Seller, and specifically<br />
makes no warranty whatsoever for equipment housed inside enclosure products manufactured by Seller.<br />
4. The Warranty is Seller's exclusive warranty with respect to the Goods. Seller makes no warranties, guarantees or<br />
representations, express or implied, to Customer except as set forth in this section. ALL OTHER WARRANTIES,<br />
EXPRESS OR IMPLIED, INCLUDING, WITHOUT LIMITATION ANY IMPLIED WARRANTY OF MERCHANTABILITY OR OF<br />
FITNESS FOR USE OR FOR A PARTICULAR PURPOSE, ARE HEREBY EXCLUDED AND DISCLAIMED.<br />
C. Seller will accept the return of Goods properly rejected under paragraph A, above, or as to which Notice of an<br />
alleged breach of Warranty has been timely given and such Goods may be returned to Seller, freight prepaid, but<br />
only upon Customer's receipt of Seller's written return material authorization ("RMA") and shipping instructions. The<br />
RMA shall be void if the Goods are not received within 45 days after issuance of the RMA. No deduction or credit in<br />
respect of any rejected or returned Goods shall be taken until Customer has received Seller's further written<br />
deduction or credit/authorization following Seller's inspection to confirm nonconformity or defect. Seller will charge<br />
to Customer any and all costs incurred by Seller in connection with the handling, shipping, inspection and<br />
disposition of any returned Goods that are determined by Seller not to have been nonconforming upon Delivery or<br />
as to which the warranty hereunder is not applicable.<br />
D. UPON ANY PROPER RETURN PURSUANT TO PARAGRAPH C, ABOVE, WHETHER IN CONNECTION WITH A REJECTION<br />
OF GOODS OR AN ALLEGED BREACH OF WARRANTY AND BASED UPON THE CONDITIONS SET FORTH IN THIS<br />
PARAGRAPH 7, SELLER AGREES THAT IT WILL, AS THE SOLE AND EXCLUSIVE REMEDY UNDER THE CONTRACT OR<br />
OTHERWISE, FOR ANY NONCONFORMITY OR BREACH OF WARRANTY, AND AT SELLER'S SOLE ELECTION: (i) REPAIR<br />
SUCH GOODS; OR (ii) REPLACE SUCH GOODS.<br />
<strong>Twister</strong> Enclosure User <strong>Manual</strong> page 21
<strong>Tempest</strong> Product Support.<br />
Step 1:<br />
Step 2:<br />
First contact your local Dealer for support. Your dealer is best placed to respond<br />
quickly to your needs.<br />
If your dealer is unable to answer your questions please contact our Sales Office:<br />
<strong>Tempest</strong> <strong>Lighting</strong>, <strong>Inc</strong>.<br />
13110 Saticoy Street, Unit C<br />
North Hollywood, CA 91605, USA<br />
Tel +1 818 787 8984<br />
Fax +1 818 982 5582<br />
support@tempestlighting.com<br />
Visit our web site for current information and specifications:<br />
www.tempestlighting.com<br />
<strong>Twister</strong> Enclosure User <strong>Manual</strong> page 22


