Lesson 5 â Transplanting - 4-H Africa Knowledge Center.
Lesson 5 â Transplanting - 4-H Africa Knowledge Center.
Lesson 5 â Transplanting - 4-H Africa Knowledge Center.

You also want an ePaper? Increase the reach of your titles
YUMPU automatically turns print PDFs into web optimized ePapers that Google loves.
Basic Vegetable Gardening<br />
<strong>Lesson</strong> 5: <strong>Transplanting</strong> Seedlings<br />
<strong>Lesson</strong> Summary: In this activity, members will measure the height of the<br />
plants ready to be transplanted, calculate their growth rate (optional),<br />
and transplant their seedlings into the garden. They will also plant any<br />
other seeds directly into the garden.<br />
Intended Learning Outcomes:<br />
Members know how to handle and transplant seedlings.<br />
Members understand the necessary spacing requirements in a garden.<br />
Members follow a garden plan in planting plants in a garden.<br />
Length: 40-60 minutes<br />
Materials:<br />
Garden plan from <strong>Lesson</strong> 2<br />
Seedlings from <strong>Lesson</strong> 4<br />
Rulers, tape measures, or a piece of string that has been marked off in<br />
equal lengths.<br />
Any additional seeds that will be planted directly into the garden.<br />
Chalkboard or large paper for the leader.<br />
Hoes and other garden tools.<br />
Background: This lesson should take place 3-4 weeks after the seeds were<br />
started in <strong>Lesson</strong> 4. During this lesson, members will transplant seeds to<br />
the garden and plant any remaining seeds directly into the garden. This<br />
lesson is part of Step 3 - Planting the Garden.<br />
The steps are the following:<br />
1. Choosing a site: Where to put your garden<br />
2. Preparing a site: Choose your garden design<br />
3. Planting the garden<br />
4. Tending the garden<br />
5. Harvesting, preparing and eating the food<br />
<strong>Lesson</strong> Steps<br />
1. (5 minutes) – Introduction<br />
Review with the group what was done at the last lesson. Members<br />
should recall that the group started the transplant seeds in containers or<br />
in a covered nursery outdoors to grow.<br />
Ask members why it is helpful to plant seeds in small containers rather<br />
than planting directly into the garden.<br />
Answer: Seeds are often harmed by harsh rains or sun, and that is why<br />
they are planted in small containers or a covered nursery first.<br />
4-H Global <strong>Knowledge</strong> <strong>Center</strong> – Basic Vegetable Gardening – <strong>Lesson</strong> 5: <strong>Transplanting</strong> Seedlings –<br />
detailed
Have a member report about watering and caring for the transplants for<br />
the previous few weeks. Tell the group of any problems, and report on the<br />
growth of the plants.<br />
Tell members that today they will be transplanting the seedlings into the<br />
garden and planting the other seeds directly into the garden soil. First,<br />
they will measure and record the height of the plants they planted during<br />
the last lesson.<br />
2. (20 minutes) – Measure the height of the plants and calculate the<br />
rate of growth. This activity is optional. However, it can provide an<br />
important math lesson.<br />
Question to investigate: Do different plants grow at different rates?<br />
2.1 (5 minutes) Have members form small groups and assign one of<br />
the plants that were planted at the last lesson to each group. For example,<br />
one group will measure the carrots, while another group measures the<br />
beets. Have each member or each group copy the following chart into<br />
their notebook or on a separate sheet of paper.<br />
2.2 (5 minutes) Groups go to the area with the seedlings, measure<br />
the height, and record the data. You may find it easier to have the<br />
members find the tallest plant and only record that height, or, if possible,<br />
they should measure every plant and find the average height. The second<br />
option will take a lot more time, and may be too much work, depending<br />
on how many seeds were planted and the ability of your group.<br />
Have each group turn their sheet of paper over to the back side and make<br />
the following chart. (Write it on the blackboard.) Explain the chart.<br />
Listed below is an example of the growth per day of the tomato plants, if<br />
they were grown in transplant containers for 30 days. Note that the<br />
example calculated the average plant height, not the tallest plant height.<br />
You may choose to record the tallest plant height instead.<br />
Plant<br />
Tallest Plant Average Plant Growth per day<br />
Height<br />
Height<br />
Example: tomato 8 cm 6 cm 6 cm / 30 days =<br />
.5 cm/day<br />
4-H Global <strong>Knowledge</strong> <strong>Center</strong> – Basic Vegetable Gardening – <strong>Lesson</strong> 5: <strong>Transplanting</strong> Seedlings –<br />
detailed
Note: If members will be measuring all of the plant heights, they should<br />
record the height of every plant, add the height of each together, and<br />
divide by the number of plants.<br />
Example for finding averages:<br />
There are 6 tomato plants that have sprouted. Measure and record<br />
the 6 plant heights. They are 10 cm, 13 cm, 13 cm, 13 cm, 14 cm,<br />
and 14 cm. Add 10+13+13+13+14+14 = 77 cm. Then take 77cm / 6<br />
plants = average height of 12.8 cm per plant.<br />
As members begin to measure their plants, walk around and make sure<br />
they are measuring correctly and accurately. Make sure they are starting<br />
to measure at the “0” mark on the ruler or marking device, and accurately <br />
recording the height of the plant.<br />
2.2 (5 minutes) Tell each group that what they are doing is being a<br />
scientist. They will share their data with the class. Each group should<br />
record the data from the other groups. If the members found the average<br />
of the plant heights, then only the average needs to be recorded. If they<br />
are comparing the tallest plant heights among the different types of<br />
plants, then the maximum height should be recorded. As the members are<br />
presenting their data, the leader or a member can fill in the chart on the<br />
chalk board.<br />
2.3 (5 minutes) Discuss the findings with the members. Depending on<br />
the plants, some possible questions to start the discussion with are:<br />
Which plants did you think were going to grow the fastest?<br />
Which plants did grow the fastest?<br />
Today we will transplant these plants into the garden. Do<br />
you expect the rate of growth to remain the same, increase,<br />
or decrease? Why?<br />
What else did you observe about the plants today?<br />
Did all of the plants look healthy?<br />
Do you think we need to thin any of the plants (if too many<br />
seeds were planted in the same container, then they should<br />
be spread out when they are placed into the garden)<br />
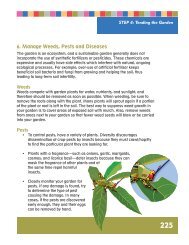
3. (30 minutes) – Members transplant seedlings into the garden<br />
3.1 Now the group will go outside and start transplanting the<br />
seedlings into the garden. You may find it easier to divide the work<br />
among small groups. Don’t forget your garden plan. This is also the time <br />
to plant any seeds that you chose not to plant earlier as transplants.<br />
4-H Global <strong>Knowledge</strong> <strong>Center</strong> – Basic Vegetable Gardening – <strong>Lesson</strong> 5: <strong>Transplanting</strong> Seedlings –<br />
detailed
Although the group has already worked up the soil and marked off the<br />
areas for the different plants, it may be necessary to work up the top part<br />
of the soil again. The soil must be loose and fine before you put the plants<br />
in.<br />
Show the members how to plant the small transplants by following the<br />
guidelines below. It is important that the members handle the plants very<br />
gently. Often times, transplants get damaged while they are being<br />
transplanted. Members must carefully take them out of the small<br />
containers and carefully move them to the garden. Stress that they should<br />
not bend the plants during this time.<br />
1. Dig a hole large enough to hold the transplant roots. Add a<br />
handful or two of compost to the transplant hole to help<br />
seedlings get off to a good start. Fill the hole with water and<br />
allow it to drain. This will ensure that the soil surrounding the<br />
transplant will have adequate moisture.<br />
2. Transplant only the most healthy and vigorous seedlings. This<br />
means the seedlings must have good roots and at least two sets<br />
of well-developed, true leaves.<br />
3. Take special care to handle the transplants. To avoid damaging<br />
the roots or stems, handle them gently by the leaves, not the<br />
stem. Remove the seedlings with a trowel, taking along a good<br />
size root and soil ball. This will help minimize the “transplant <br />
shock” to the seedling. <br />
4. Except for tomatoes, replant all seedlings at a depth that<br />
matches their depth in the seedling container. Tomatoes are an<br />
exception to this and can be planted 4 cm or so deeper than<br />
they were in the seedling bed. Tomatoes will sprout new roots<br />
from the stem and have a stronger, deeper root system.<br />
5. Space the plants according to the guidelines below.<br />
6. Press soil firmly around the roots of the transplants and water<br />
lightly to allow soil to settle around the transplants.<br />
Some plants may not be ready to be transplanted yet. Save those and<br />
plant them when they are ready.<br />
4-H Global <strong>Knowledge</strong> <strong>Center</strong> – Basic Vegetable Gardening – <strong>Lesson</strong> 5: <strong>Transplanting</strong> Seedlings –<br />
detailed
For the groups that will be planting seeds directly into the garden, make<br />
sure they have built up rows for the plants to be planted into. The rows<br />
should be about 15 centimeters apart and 0.5 centimeters deep across the<br />
nursery planting bed. Sow 2 seeds per 1 centimeter in the row, except for<br />
plants that take a lot of space, such as pumpkin, squash, and melon. Those<br />
should be planted in mounds, with 3-4 seeds per mound.<br />
After the garden is planted, water each section well, taking care not to<br />
wash away the new seeds.<br />
After each group has finished their transplanting or direct planting of<br />
seeds, wrap-up the day by having the members clean up their area and<br />
gather together as one big group.<br />
4. (5 minutes) - Summary and Debrief<br />
Ask the members the following questions:<br />
What was the hardest part about transplanting the young<br />
plants?<br />
Did you have any problems with planting the seeds directly<br />
into the garden?<br />
How did the small containers work for the seedlings? Were<br />
there some that worked better than others?<br />
Would it be possible to use small containers to grow the plants<br />
in the whole time, instead of planting them in the garden?<br />
What plants would be best for growing in small containers?<br />
Could you plant some of these seeds into large containers such<br />
as sacks?<br />
Are there weather conditions that would harm the young<br />
plants and seeds in the next few days?<br />
5. (1 minute) - Close<br />
Optional: Tell members that the next lesson they will continue to chart the<br />
growth of their plants.<br />
Members should keep all of their notes and charts in their notebooks to<br />
look at in the future.<br />
4-H Global <strong>Knowledge</strong> <strong>Center</strong> – Basic Vegetable Gardening – <strong>Lesson</strong> 5: <strong>Transplanting</strong> Seedlings –<br />
detailed