warning - KitchenAid Kitchen Appliances & Accessories
warning - KitchenAid Kitchen Appliances & Accessories
warning - KitchenAid Kitchen Appliances & Accessories

Create successful ePaper yourself
Turn your PDF publications into a flip-book with our unique Google optimized e-Paper software.
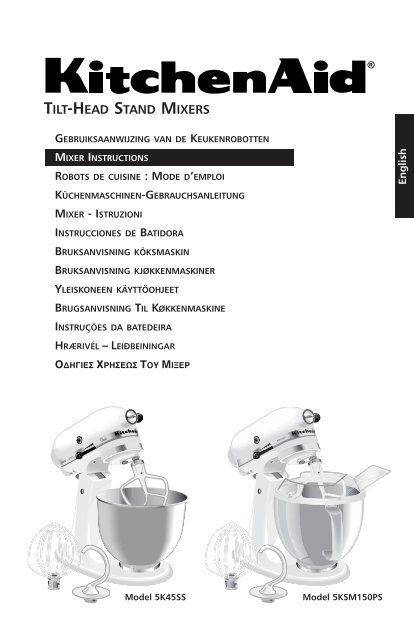
TILT-HEAD STAND MIXERS<br />
GEBRUIKSAANWIJZING VAN DE KEUKENROBOTTEN<br />
MIXER INSTRUCTIONS<br />
ROBOTS DE CUISINE : MODE D’EMPLOI<br />
KÜCHENMASCHINEN-GEBRAUCHSANLEITUNG<br />
MIXER - ISTRUZIONI<br />
INSTRUCCIONES DE BATIDORA<br />
BRUKSANVISNING KÖKSMASKIN<br />
BRUKSANVISNING KJØKKENMASKINER<br />
YLEISKONEEN KÄYTTÖOHJEET<br />
BRUGSANVISNING TIL KØKKENMASKINE<br />
INSTRUÇÕES DA BATEDEIRA<br />
HRÆRIVÉL – LEIÐBEININGAR<br />
�∆ΗΓΙΕΣ �ΡΗΣΕΩΣ Τ�Υ ΜΙ�ΕΡ<br />
<strong><strong>Kitchen</strong>Aid</strong><br />
St. Joseph, Michigan USA<br />
O 1 2 4 6 8 10<br />
CAUTION: Unplug before inserting of removing parts<br />
Model 5K45SS<br />
O 1 2 4 6 8 10<br />
ARTISAN<br />
CAUTION: Unplug before inserting of removing parts<br />
®<br />
Model 5KSM150PS<br />
English
English<br />
Table of Contents<br />
Important Safeguards........................................................................................1<br />
Electrical Requirements......................................................................................2<br />
5K45SS Tilt-Head Stand Mixer Features .............................................................3<br />
5KSM150PS Tilt-Head Stand Mixer Features ......................................................4<br />
Assembling Your Tilt-Head Stand Mixer .............................................................5<br />
Assembling Your Pouring Shield ........................................................................6<br />
Using Your <strong><strong>Kitchen</strong>Aid</strong> ® <strong>Accessories</strong>...................................................................6<br />
Beater to Bowl Clearance...................................................................................7<br />
Care and Cleaning .............................................................................................8<br />
Planetary Mixing Action.....................................................................................8<br />
Stand Mixer Use ................................................................................................8<br />
Speed Control Guide - 10 Speed Mixers ............................................................9<br />
Mixing Tips......................................................................................................10<br />
Mixing and Kneading Yeast Dough..................................................................11<br />
Egg Whites......................................................................................................12<br />
Whipped Cream ..............................................................................................12<br />
Attachments and <strong>Accessories</strong> - General Instructions ........................................13<br />
When You Need Service ..................................................................................14<br />
Household <strong><strong>Kitchen</strong>Aid</strong> ® Tilt-Head Stand Mixer Warranty ..................................15<br />
Service Centers ................................................................................................15<br />
Customer Service .............................................................................................16<br />
Your safety and the safety of others are very important.<br />
We have provided many important safety messages in this manual and on your<br />
appliance. Always read and obey all safety messages.<br />
This is the safety alert symbol.<br />
This symbol alerts you to potential hazards that can kill or hurt<br />
you and others.<br />
All safety messages will follow the safety alert symbol and either<br />
the word “DANGER” or “WARNING.” These words mean:<br />
You can be killed or seriously<br />
injured if you don’t immediately<br />
DANGER follow instructions.<br />
You can be killed or seriously<br />
injured if you don’t follow<br />
WARNING instructions.<br />
All safety messages will tell you what the potential hazard is, tell you how to<br />
reduce the chance of injury, and tell you what can happen if the instructions are<br />
not followed.
IMPORTANT SAFEGUARDS<br />
When using electrical appliances, basic<br />
safety precautions should always be<br />
followed including the following:<br />
1. Read all instructions.<br />
2. To protect against risk of<br />
electrical shock, do not put Stand<br />
Mixer in water or other liquid.<br />
3. Close supervision is necessary<br />
when any appliance is used by or<br />
near children.<br />
4. Unplug Stand Mixer from outlet<br />
when not in use, before putting<br />
on or taking off parts and before<br />
cleaning.<br />
5. Avoid contacting moving parts.<br />
Keep hands, hair, clothing, as<br />
well as spatulas and other<br />
utensils away from beater during<br />
operation to reduce the risk of<br />
injury to persons and/or damage<br />
to the Stand Mixer.<br />
6. Do not operate Stand Mixer with<br />
a damaged cord or plug or after<br />
the Stand Mixer malfunctions, or<br />
1<br />
is dropped or damaged in any<br />
manner. Return appliance to the<br />
nearest Authorized Service Center<br />
for examination, repair or electrical<br />
or mechanical adjustment.<br />
7. The use of attachments not<br />
recommended or sold by<br />
<strong><strong>Kitchen</strong>Aid</strong> may cause fire,<br />
electrical shock or injury.<br />
8. Do not use the Stand Mixer<br />
outdoors.<br />
9. Do not let the cord hang over<br />
edge of table or counter.<br />
10. Remove flat beater, wire whip or<br />
dough hook from Stand Mixer<br />
before washing.<br />
11. This product is designed for<br />
household use only.<br />
12. The appliance is not intended for<br />
use by young children or infirm<br />
persons without supervision.<br />
13. Young children should be<br />
supervised to ensure that they do<br />
not play with the appliance.<br />
SAVE THESE INSTRUCTIONS<br />
This appliance is marked according to<br />
the European directive 2002/96/EC on<br />
Waste Electrical and Electronic<br />
Equipment (WEEE).<br />
By ensuring this product is disposed<br />
of correctly, you will help prevent<br />
potential negative consequences for<br />
the environment and human health,<br />
which could otherwise be caused by<br />
inappropriate waste handling of this<br />
product.<br />
The symbol on the product, or<br />
on the documents accompanying the<br />
product, indicates that this appliance<br />
may not be treated as household<br />
waste. Instead it shall be handed over<br />
to the applicable collection point for<br />
the recycling of electrical and<br />
electronic equipment.<br />
Disposal must be carried out in<br />
accordance with local environmental<br />
regulations for waste disposal.<br />
For more detailed information about<br />
treatment, recovery and recycling of<br />
this product, please contact your local<br />
city office, your household waste<br />
disposal service or the shop where you<br />
purchased the product.<br />
English
English<br />
Your Stand Mixer operates on a<br />
regular 220-240 volt A.C., 50/60 hertz<br />
house current. The wattage rating for<br />
your Stand Mixer is printed on the<br />
trim band. This wattage is determined<br />
by using the attachment which draws<br />
the greatest power. Other<br />
recommended attachments may draw<br />
significantly less power.<br />
Do not use an extension cord. If the<br />
power supply cord is too short, have a<br />
qualified electrician or serviceman<br />
install an outlet near the appliance.<br />
Electrical Requirements<br />
2<br />
WARNING<br />
Electrical Shock Hazard<br />
Plug into a grounded outlet.<br />
Do not remove ground prong.<br />
Do not use an adapter.<br />
Do not use an extension cord.<br />
Failure to follow these<br />
instructions can result in<br />
death, fire, or electrical shock.
5K45SS Tilt-Head Stand Mixer Features<br />
Speed<br />
Control<br />
Lever<br />
Beater Height<br />
Adjustment<br />
Screw<br />
Wire Whip<br />
Motor Head<br />
<strong><strong>Kitchen</strong>Aid</strong><br />
St. Joseph, Michigan USA<br />
O 1 2 4 6 8 10<br />
CAUTION: Unplug before inserting of removing parts<br />
Dough Hook<br />
Attachment Hub<br />
3<br />
Attachment Knob<br />
Motor Head<br />
Locking Lever<br />
(not shown)<br />
Beater Shaft<br />
Bowl Clamping Plate<br />
Flat Beater<br />
4,25 liter<br />
(4.5 qrt)<br />
Stainless<br />
Steel<br />
Bowl<br />
English
English<br />
5KSM150PS Tilt-Head Stand Mixer Features<br />
Speed<br />
Control<br />
Lever<br />
Beater Height<br />
Adjustment<br />
Screw<br />
Wire Whip<br />
Motor Head<br />
O 1 2 4 6 8 10<br />
ARTISAN<br />
CAUTION: Unplug before inserting of removing parts<br />
Dough Hook<br />
Attachment Hub<br />
4<br />
Attachment Knob<br />
Motor Head<br />
Locking Lever<br />
(not shown)<br />
Beater Shaft<br />
Flat Beater<br />
Bowl Clamping Plate<br />
Pouring<br />
Shield<br />
4,8 liter<br />
(5 qrt)<br />
stainless<br />
steel bowl
Assembling Your Tilt-Head Stand Mixer<br />
To Attach Bowl<br />
1. Turn speed control to “O”.<br />
2. Unplug stand mixer or disconnect<br />
power.<br />
3. Hold the locking lever in the<br />
UNLOCK position and tilt motor<br />
head back.<br />
4. Place bowl on bowl clamping plate.<br />
5. Turn bowl gently in clockwise<br />
direction.<br />
To Remove Bowl<br />
1. Turn speed control to “O”.<br />
2. Unplug stand mixer or disconnect<br />
power.<br />
3. Hold the locking lever in the<br />
UNLOCK position and tilt motor<br />
head back.<br />
4. Turn bowl counterclockwise.<br />
Pin<br />
To Attach Flat Beater,<br />
Wire Whip, or Dough Hook<br />
1. Turn speed control to “O”.<br />
2. Unplug stand mixer or disconnect<br />
power.<br />
3. Hold the locking lever in the<br />
UNLOCK position and raise motor<br />
head.<br />
4. Slip beater onto beater shaft and<br />
press upward as far as possible.<br />
5. Turn beater to right, hooking<br />
beater over pin on shaft.<br />
5<br />
To Remove Flat Beater,<br />
Wire Whip, or Dough Hook<br />
1. Turn speed control to “O”.<br />
2. Unplug stand mixer or disconnect<br />
power.<br />
3. Hold the locking lever in the<br />
UNLOCK position and raise motor<br />
head.<br />
4. Press beater upward as far as<br />
possible and turn left.<br />
5. Pull beater from beater shaft.<br />
To Lock Motor Head<br />
1. Make sure motor head is<br />
completely down.<br />
2. Place locking lever in LOCK<br />
position.<br />
3. Before mixing, test lock by<br />
attempting to raise head.<br />
To Unlock Motor Head<br />
1. Place lever in UNLOCK position.<br />
NOTE: Motor head should always be<br />
kept in LOCK position when using<br />
mixer.<br />
O<br />
1 2 4 6 8<br />
To Operate Speed Control<br />
Plug mixer in proper electrical outlet.<br />
Speed control lever should always be<br />
set on lowest speed for starting, then<br />
gradually moved to desired higher<br />
speed to avoid splashing ingredients<br />
out of bowl. See page 9 for Speed<br />
Control Guide.<br />
10<br />
English
English<br />
Tab<br />
Assembling Your Pouring Shield*<br />
Pouring<br />
Chute<br />
To Attach Pouring Shield<br />
1. Turn speed control to “O”.<br />
2. Unplug stand mixer or disconnect<br />
power.<br />
3. Attach flat beater, dough hook or<br />
wire whip and bowl. See page 5.<br />
4. Place the back half of the shield<br />
(without the chute) on rim of<br />
the bowl.<br />
Using Your <strong><strong>Kitchen</strong>Aid</strong> ® <strong>Accessories</strong><br />
Flat Beater for normal to heavy mixtures:<br />
cakes biscuits<br />
creamed frostings quick breads<br />
candies meat loaf<br />
cookies<br />
pie pastry<br />
mashed potatoes<br />
Wire Whip for mixtures that need air incorporated:<br />
eggs sponge cakes<br />
egg whites angel food cakes<br />
heavy cream mayonnaise<br />
boiled frostings some candies<br />
Dough Hook for mixing and kneading yeast doughs:<br />
breads coffee cakes<br />
rolls<br />
pizza dough<br />
buns<br />
6<br />
5. Insert the tabs on the front half of<br />
the shield (with the chute) under<br />
the tab openings on the back half<br />
of the shield, then lower the shield<br />
to lock into place.<br />
To Remove Pouring Shield<br />
1. Turn speed control to “O”.<br />
2. Unplug stand mixer or disconnect<br />
power.<br />
3. Hold the locking lever in the<br />
UNLOCK position and tilt motor<br />
head back.<br />
4. Lift pouring chute from bowl.<br />
5. Slide back half of shield from bowl.<br />
6. Remove attachment and bowl.<br />
To Use Pouring Shield<br />
1. Pour ingredients into bowl through<br />
pouring chute.<br />
* If Pouring Shield is included.
Beater to Bowl Clearance<br />
Your Stand Mixer is adjusted at the factory so the flat beater just clears the<br />
bottom of the bowl. If, for any reason, the flat beater hits the bottom of the<br />
bowl or is too far away from the bowl, you can correct clearance easily.<br />
1. Turn speed control to “O”.<br />
2. Unplug stand mixer or disconnect<br />
power.<br />
3. Lift motor head.<br />
4. Turn screw (A) SLIGHTLY counter<br />
clockwise (left) to raise flat beater<br />
or clockwise (right) to lower flat<br />
beater.<br />
5. Make adjustment with flat beater,<br />
so it just clears surface of bowl.<br />
If you over adjust the screw, the<br />
bowl lock lever may not lock into<br />
place.<br />
NOTE: When properly adjusted, the<br />
flat beater will not strike on the<br />
bottom or side of the bowl. If the flat<br />
beater or the wire whip is so close<br />
that it strikes the bottom of the bowl,<br />
coating may wear off the beater or<br />
wires on whip may wear.<br />
7<br />
A<br />
English
English<br />
Bowl, white flat beater and white<br />
dough hook may be washed in an<br />
automatic dishwasher. Or, clean them<br />
thoroughly in hot sudsy water and<br />
rinse completely before drying. Do not<br />
store beaters on shaft.<br />
During operation, the<br />
flat beater moves<br />
around the<br />
stationary bowl, at<br />
the same time<br />
turning in the<br />
opposite direction on its<br />
own axis. The diagram shows the<br />
NOTE: Do not scrape bowl while<br />
Stand Mixer is operating.<br />
Care and Cleaning<br />
8<br />
NOTE: Always be sure to unplug<br />
Stand Mixer before cleaning. Wipe<br />
Stand Mixer with a soft, damp cloth.<br />
Do not use household/commercial<br />
cleaners. Do not immerse in water.<br />
Wipe off beater shaft frequently,<br />
removing any residue that may<br />
accumulate.<br />
Planetary Mixing Action<br />
WARNING<br />
Injury Hazard<br />
Unplug mixer before touching<br />
beaters.<br />
Failure to do so can result in<br />
broken bones, cuts or bruises.<br />
Stand Mixer Use<br />
complete coverage of the bowl made<br />
by the path of the beater.<br />
Your <strong><strong>Kitchen</strong>Aid</strong> ® Stand Mixer will mix<br />
faster and more thoroughly than most<br />
other electric mixers. Therefore, the<br />
mixing time in most recipes must be<br />
adjusted to avoid overbeating.<br />
The bowl and beater are designed to<br />
provide thorough mixing without<br />
frequent scraping. Scraping the bowl<br />
once or twice during mixing is usually<br />
sufficient. Turn unit off before<br />
scraping.<br />
The Stand Mixer may warm up during<br />
use. Under heavy loads with extended<br />
mixing time, you may not be able to<br />
comfortably touch the top of the unit.<br />
This is normal.
Speed Control Guide – 10 Speed Mixers<br />
All speeds have the Soft Start feature which automatically starts the Stand Mixer<br />
at a lower speed to help prevent ingredient splash-out and “flour puff” at<br />
startup then quickly increases to the selected speed for optimal performance.<br />
Number of Speed<br />
Stir<br />
Speed STIR For slow stirring, combining, mashing,<br />
starting all mixing procedures. Use to<br />
add flour and dry ingredients to batter,<br />
and add liquids to dry ingredients. Do<br />
not use STIR Speed to mix or knead<br />
yeast doughs.<br />
2 SLOW MIXING For slow mixing, mashing, faster<br />
stirring. Use to mix and knead yeast<br />
doughs, heavy batters and candies,<br />
start mashing potatoes or other<br />
vegetables, cut shortening into flour,<br />
mix thin or splashy batters. Use with<br />
Can Opener attachment.<br />
4 MIXING, For mixing semi-heavy batters, such as<br />
BEATING cookies. Use to combine sugar and<br />
shortening and to add sugar to egg<br />
whites for meringues. Medium speed for<br />
cake mixes. Use with: Food Grinder,<br />
Rotor Slicer/Shredder, Pasta Roller, and<br />
Fruit/Vegetable Strainer.<br />
6 BEATING, For medium fast beating (creaming) or<br />
CREAMING whipping. Use to finish mixing cake,<br />
doughnut, and other batters. High speed<br />
for cake mixes. Use with Citrus Juicer<br />
attachment.<br />
8 FAST BEATING, For whipping cream, egg whites, and<br />
WHIPPING boiled frostings.<br />
10 FAST WHIPPING For whipping small amounts of cream,<br />
egg whites or for final whipping of<br />
mashed potatoes. Use with Pasta Maker<br />
and Grain Mill attachments.<br />
NOTE: Will not maintain fast speeds<br />
under heavy loads, such as when using<br />
Pasta Maker or Grain Mill attachments.<br />
NOTE: Do not exceed Speed 2 when preparing yeast doughs as this may cause<br />
damage to the mixer.<br />
9<br />
English
English<br />
Converting Your Recipe<br />
for the Stand Mixer<br />
The mixing instructions found in this<br />
book can be used to convert your<br />
favorite recipes for use with your<br />
<strong><strong>Kitchen</strong>Aid</strong> ® Stand Mixer.<br />
To help determine a mixing<br />
procedure, your own observations<br />
and experience will be needed. Watch<br />
the batter or dough and mix only<br />
until it has the desired appearance<br />
described in your recipe such as<br />
“smooth and creamy.” Use the<br />
“Speed Control Guide,” Page 9, to<br />
help determine proper mixing speeds.<br />
Adding Ingredients<br />
The standard procedure to follow<br />
when mixing most batters, especially<br />
cake and cookie batters, is to add:<br />
1<br />
⁄3 dry ingredients<br />
1<br />
⁄2 liquid ingredients<br />
1<br />
⁄3 dry ingredients<br />
1<br />
⁄2 liquid ingredients<br />
1<br />
⁄3 dry ingredients<br />
Use STIR Speed until ingredients have<br />
been blended. Then gradually increase<br />
to desired speed.<br />
Always add ingredients as close to<br />
side of bowl as possible, not directly<br />
into moving beater. The Pouring<br />
Shield can be used to simplify adding<br />
ingredients.<br />
NOTE: If ingredients in very bottom<br />
of bowl are not thoroughly mixed, the<br />
beater is not far enough into the<br />
bowl. See “Beater to Bowl Clearance,”<br />
page 7.<br />
Mixing Tips<br />
10<br />
Cake Mixes<br />
When preparing packaged cake mixes,<br />
use Speed 4 for medium speed and<br />
Speed 6 for high speed. For best<br />
results, mix for the time stated on the<br />
package directions.<br />
Adding Nuts, Raisins, or<br />
Candied Fruits<br />
Solid materials should be folded in<br />
the last few seconds of mixing on<br />
STIR Speed. The batter should be thick<br />
enough to prevent the fruit or nuts<br />
from sinking to the bottom of the<br />
pan during baking. Sticky fruits<br />
should be dusted with flour for better<br />
distribution in the batter.<br />
Liquid Mixtures<br />
Mixtures containing large amounts of<br />
liquid ingredients should be mixed at<br />
lower speeds to avoid splashing.<br />
Increase speed only after mixture has<br />
thickened.<br />
Kneading Yeast Doughs<br />
ALWAYS use the dough hook to mix<br />
and knead yeast doughs.<br />
Use Speed 2 to mix or knead yeast<br />
doughs. Use of any other speed<br />
creates high potential for unit failure.<br />
NEVER use recipes calling for more<br />
than 0.87 kg (7 cups) all-purpose<br />
flour or 0.81 kg (6 cups) whole wheat<br />
flour when making dough with a<br />
4,25 liter (4.5 qrt) tilt-head mixer.<br />
NEVER use recipes calling for more<br />
than 1.00 kg (8 cups) all-purpose<br />
flour or 0.81 kg (6 cups) whole wheat<br />
flour when making dough with a<br />
4,8 liter (5 qrt) tilt-head mixer.
Mixing and Kneading Yeast Dough<br />
“Rapid Mix” describes a bread baking<br />
method that calls for dry yeast to be<br />
mixed with other dry ingredients<br />
before liquid is added. In contrast, the<br />
traditional method is to dissolve yeast<br />
in warm water.<br />
1. Place all dry ingredients including<br />
yeast into bowl, except last 125 to<br />
250 gr (1 to 2 cups) flour.<br />
2. Attach bowl and dough hook. Lock<br />
mixer head. Turn to Speed 2 and<br />
mix about 15 seconds, or until<br />
ingredients are combined.<br />
O 1 2 4 6 8 10<br />
ARTISAN<br />
3. Continuing on Speed 2, gradually<br />
add liquid ingredients to flour<br />
mixture and mix 1 to 2 minutes<br />
longer.<br />
NOTE: If liquid ingredients are added<br />
too quickly, they will form a pool<br />
around the dough hook and slow<br />
down mixing process.<br />
O 1 2 4 6 8 10<br />
ARTISAN<br />
4. Continuing on Speed 2, gently add<br />
remaining flour, 60 gr ( 1 ⁄2 cup) at a<br />
time. Mix until dough clings to<br />
hook and cleans sides of bowl,<br />
about 2 minutes.<br />
11<br />
O<br />
1 2 4 6 8 10<br />
ARTISAN<br />
5. When dough clings to hook, knead<br />
on Speed 2 for 2 minutes, or until<br />
dough is smooth and elastic.<br />
6. Unlock and tilt back head and<br />
remove dough from hook. Follow<br />
directions in recipe for rising,<br />
shaping, and baking.<br />
When using the traditional method to<br />
prepare a favorite recipe, dissolve<br />
yeast in warm water in warmed bowl.<br />
Add remaining liquids and dry<br />
ingredients, except last 125 to 250 gr<br />
(1 to 2 cups) flour. Turn to Speed 2<br />
and mix about 1 minute, or until<br />
ingredients are thoroughly mixed.<br />
Proceed with Steps 4 through 6.<br />
Both methods work equally well for<br />
bread preparation. However, the<br />
“Rapid Mix” method may be a bit<br />
faster and easier for new bread<br />
bakers. It is slightly more temperature<br />
tolerant because the yeast is mixed<br />
with dry ingredients rather than with<br />
warm liquid.<br />
English
English<br />
Place room temperature egg whites in<br />
clean, dry bowl. Attach bowl and wire<br />
whip. To avoid splashing, gradually turn<br />
to designated speed and whip to<br />
desired stage. See chart below.<br />
AMOUNT SPEED<br />
1 egg white .......GRADUALLY to 10<br />
2-4 egg whites ........GRADUALLY to 8<br />
6 or more<br />
egg whites ........GRADUALLY to 8<br />
Whipping Stages<br />
With your <strong><strong>Kitchen</strong>Aid</strong> ® Stand Mixer,<br />
egg whites whip quickly. So, watch<br />
carefully to avoid overwhipping. This<br />
list tells you what to expect.<br />
Frothy<br />
Large, uneven air bubbles.<br />
Pour cold whipping cream into chilled<br />
bowl. Attach bowl and wire whip. To<br />
avoid splashing, gradually turn to<br />
designated speed and whip to desired<br />
stage. See chart below.<br />
AMOUNT SPEED<br />
59 ml ( 1 ⁄4 cup) ........GRADUALLY to 10<br />
118 ml ( 1 ⁄2 cup) ......GRADUALLY to 10<br />
236 ml (1 cup) ........GRADUALLY to 8<br />
472 ml (1 pint ).......GRADUALLY to 8<br />
Whipping Stages<br />
Watch cream closely during whipping.<br />
Because your <strong><strong>Kitchen</strong>Aid</strong> ® Stand Mixer<br />
whips so quickly, there are just a few<br />
seconds between whipping stages.<br />
Look for these characteristics:<br />
Egg Whites<br />
Whipped Cream<br />
12<br />
Begins to Hold Shape<br />
Air bubbles are fine and compact;<br />
product is white.<br />
Soft Peak<br />
Tips of peaks fall over when wire whip<br />
is removed.<br />
Almost Stiff<br />
Sharp peaks form when wire whip is<br />
removed, but whites are actually soft.<br />
Stiff but not Dry<br />
Sharp, stiff peaks form when wire<br />
whip is removed. Whites are uniform<br />
in color and glisten.<br />
Stiff and Dry<br />
Sharp, stiff peaks form when wire<br />
whip is removed. Whites are speckled<br />
and dull in appearance.<br />
Begins to Thicken<br />
Cream is thick and custard-like.<br />
Holds its Shape<br />
Cream forms soft peaks when wire<br />
whip is removed. Can be folded into<br />
other ingredients when making<br />
desserts and sauces.<br />
Stiff<br />
Cream stands in stiff, sharp peaks<br />
when wire whip is removed. Use for<br />
topping on cakes or desserts, or filling<br />
for cream puffs.
Attachments and <strong>Accessories</strong><br />
General Information<br />
<strong><strong>Kitchen</strong>Aid</strong> ® Attachments are designed to assure long life. The attachment<br />
power shaft and hub socket are of a square design, to eliminate any possibility<br />
of slipping during the transmission of power to the attachment. The hub and<br />
shaft housing are tapered to assure a snug fit, even after prolonged use and<br />
wear. <strong><strong>Kitchen</strong>Aid</strong> ® Attachments require no extra power unit to operate them;<br />
the power unit is built-in.<br />
Attachment<br />
Hub Socket<br />
‡Not part of mixer.<br />
To Attach<br />
1. Turn speed control to “O”.<br />
2. Unplug Stand Mixer or disconnect<br />
power.<br />
3. Loosen attachment knob by<br />
turning it counterclockwise.<br />
4. Remove attachment hub cover.<br />
5. Insert attachment shaft housing<br />
into attachment hub, making<br />
certain that attachment power<br />
shaft fits into square attachment<br />
hub socket. It may be necessary to<br />
rotate attachment back and forth.<br />
When attachment is in proper<br />
position, the pin on the<br />
attachment will fit into the notch<br />
on the hub rim.<br />
6. Tighten attachment knob by<br />
turning clockwise until attachment<br />
is completely secured to Stand<br />
Mixer.<br />
7. Plug into proper electrical outlet.<br />
Attachment<br />
Knob<br />
®<br />
Notch Pin<br />
Attachment Shaft<br />
Housing<br />
General Instructions<br />
13<br />
Attachment<br />
Power Shaft‡<br />
Attachment<br />
Housing<br />
To Remove<br />
1. Turn speed control to “O”.<br />
2. Unplug Stand Mixer or disconnect<br />
power.<br />
3. Loosen attachment knob by<br />
turning it counterclockwise. Rotate<br />
attachment slightly back and forth<br />
while pulling out.<br />
4. Replace attachment hub cover.<br />
Tighten attachment knob by<br />
turning it clockwise.<br />
English
English<br />
Please read the following before<br />
calling your service center.<br />
1. The Stand Mixer may warm up<br />
during use. Under heavy loads with<br />
extended mixing time periods, you<br />
may not be able to comfortably<br />
touch the top of the unit. This is<br />
normal.<br />
2. The Stand Mixer may emit a<br />
pungent odor, especially when new.<br />
This is common with electric motors.<br />
3. If the flat beater hits the bowl,<br />
stop the Stand Mixer. See “Beater<br />
to Bowl Clearance,” page 7.<br />
When You Need Service<br />
WARNING<br />
Electrical Shock Hazard<br />
Unplug before servicing.<br />
Failure to do so can result in<br />
death or electrical shock.<br />
14<br />
If your Stand Mixer should<br />
malfunction or fail to operate,<br />
please check the following:<br />
- Is the Stand Mixer plugged in?<br />
- Is the fuse in the circuit to the Stand<br />
Mixer in working order? If you have<br />
a circuit breaker box, be sure the<br />
circuit is closed.<br />
- Turn the Stand Mixer off for 10-15<br />
seconds, then turn it back on. If the<br />
mixer still does not start, allow it to<br />
cool for 30 minutes before turning it<br />
back on.<br />
- If the problem is not due to one of<br />
the above items, see “Service<br />
Centers.”
Household <strong><strong>Kitchen</strong>Aid</strong> ®<br />
Tilt-Head Stand Mixer Warranty<br />
Length of<br />
Warranty:<br />
Europe, Australia<br />
and New Zealand:<br />
For the Artisan ® mixer<br />
5KSM150PS: Five years<br />
Full Warranty from date<br />
of purchase.<br />
For the <strong><strong>Kitchen</strong>Aid</strong><br />
Classic ® mixer 5K45SS:<br />
Two years Full Warranty<br />
from date of purchase.<br />
Other:<br />
One Year Full Warranty<br />
from date of purchase.<br />
<strong><strong>Kitchen</strong>Aid</strong><br />
Will Pay For:<br />
Replacement parts and<br />
repair labor costs to<br />
correct defects in<br />
materials or<br />
workmanship. Service<br />
must be provided by an<br />
Authorized <strong><strong>Kitchen</strong>Aid</strong><br />
Service Center<br />
KITCHENAID DOES NOT ASSUME ANY RESPONSIBILITY FOR<br />
INDIRECT DAMAGES.<br />
WARNING<br />
Electrical Shock Hazard<br />
Unplug before servicing.<br />
Failure to do so can result in<br />
death or electrical shock.<br />
Service Centers<br />
15<br />
<strong><strong>Kitchen</strong>Aid</strong><br />
Will Not Pay For:<br />
A. Repairs when Stand<br />
Mixer is used for<br />
operations other<br />
than normal<br />
household food<br />
preparation.<br />
B. Damage resulting<br />
from accident,<br />
alterations, misuse,<br />
abuse, or installation/<br />
operation not in<br />
accordance with<br />
local electrical codes.<br />
All service should be handled locally<br />
by an Authorized <strong><strong>Kitchen</strong>Aid</strong> Service<br />
Center. Contact the dealer from<br />
whom the unit was purchased to<br />
obtain the name of the nearest<br />
Authorized <strong><strong>Kitchen</strong>Aid</strong> Service Center.<br />
In the U.K.:<br />
Call: 0845 6011 287<br />
In Ireland:<br />
M.X. ELECTRIC<br />
Service Department<br />
25 Alymer Crescent<br />
Kilcock, CO.KILDARE<br />
Call: 1 679 2398/87 2581574<br />
Fax: 1 628 4368<br />
In Australia:<br />
Call: 1800 990 990<br />
In New Zealand:<br />
Call: 0800 881 200<br />
English
English<br />
Customer Service<br />
In U.K. & Ireland: Tollfree number 00800 38104026<br />
Address: <strong><strong>Kitchen</strong>Aid</strong> Europa, Inc.<br />
PO BOX 19<br />
B-2018 ANTWERP 11<br />
BELGIUM<br />
www.<strong><strong>Kitchen</strong>Aid</strong>.com<br />
FOR THE WAY IT’S MADE. <br />
®Registered Trademark of <strong><strong>Kitchen</strong>Aid</strong>, U.S.A.<br />
Trademark of <strong><strong>Kitchen</strong>Aid</strong>, U.S.A.<br />
The shape of the stand mixer is a trademark of <strong><strong>Kitchen</strong>Aid</strong>, U.S.A.<br />
© 2005. All rights reserved.<br />
Specifications subject to change without notice.<br />
9709309 3977dZw605<br />
16<br />
®