IntelliStripe 350, Desktop Motorized Reader, Technical ... - MagTek
IntelliStripe 350, Desktop Motorized Reader, Technical ... - MagTek
IntelliStripe 350, Desktop Motorized Reader, Technical ... - MagTek

Create successful ePaper yourself
Turn your PDF publications into a flip-book with our unique Google optimized e-Paper software.
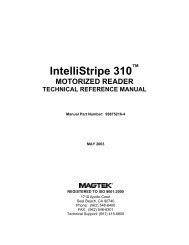
<strong>IntelliStripe</strong> <strong>350</strong><br />
DESKTOP MOTORIZED READER<br />
TECHNICAL REFERENCE MANUAL<br />
Manual Part Number: 99875179 Rev 6<br />
FEBRUARY 2007<br />
REGISTERED TO ISO 9001:2000<br />
1710 Apollo Court<br />
Seal Beach, CA 90740<br />
Phone: (562) 546-6400<br />
FAX: (562) 546-6301<br />
<strong>Technical</strong> Support: (651) 415-6800<br />
www.magtek.com
Copyright © 2000-2007<br />
<strong>MagTek</strong> ® , Inc.<br />
Printed in the United States of America<br />
Information in this document is subject to change without notice. No part of this document may be<br />
reproduced or transmitted in any form or by any means, electronic or mechanical, for any purpose,<br />
without the express written permission of <strong>MagTek</strong>, Inc.<br />
<strong>MagTek</strong> is a registered trademark of <strong>MagTek</strong>, Inc.<br />
<strong>IntelliStripe</strong> is a registered trademark of <strong>MagTek</strong>, Inc.<br />
REVISIONS<br />
Rev Number Date Notes<br />
1 16 Jan 01 Initial Release<br />
2 12 Feb 01 Figure 1-2: added overall dimension<br />
(7.125”), corrected other dimension (“7.11” to “6.125”).<br />
3 16 Aug 01 Front Matter: Changed Warranty Address to<br />
20801.Changed Agency page from CE Class B to Class A.<br />
Editorial Correction To UL/CUL. Added EMV, Level 1.<br />
Section 2: Table 2-1, Changed TRX to TXD.<br />
4 2 May 02 Added JIS to Specifications; added Smartcard functions.<br />
5 27 May 03 Front Matter: added ISO line to logo, changed Tech<br />
Support phone number, added new warranty statement.<br />
6 14 Feb 07 Added new model 16050313; removed RS-232 cable from<br />
unit<br />
ii
LIMITED WARRANTY<br />
<strong>MagTek</strong> warrants that the products sold to Reseller pursuant to this Agreement will perform in accordance with<br />
<strong>MagTek</strong>’s published specifications. This warranty shall be provided only for a period of one year from the date<br />
of the shipment of the product from <strong>MagTek</strong> (the “Warranty Period”). This warranty shall apply only to the<br />
original purchaser unless the buyer is authorized by <strong>MagTek</strong> to resell the products, in which event, this warranty<br />
shall apply only to the first repurchase.<br />
During the Warranty Period, should this product fail to conform to <strong>MagTek</strong>’s specifications, <strong>MagTek</strong> will, at its<br />
option, repair or replace this product at no additional charge except as set forth below. Repair parts and<br />
replacement products will be furnished on an exchange basis and will be either reconditioned or new. All replaced<br />
parts and products become the property of <strong>MagTek</strong>. This limited warranty does not include service to repair<br />
damage to the product resulting from accident, disaster, unreasonable use, misuse, abuse, customer’s negligence,<br />
Reseller’s negligence, or non-<strong>MagTek</strong> modification of the product. <strong>MagTek</strong> reserves the right to examine the<br />
alleged defective goods to determine whether the warranty is applicable.<br />
Without limiting the generality of the foregoing, <strong>MagTek</strong> specifically disclaims any liability or warranty for<br />
goods resold in other than <strong>MagTek</strong>’s original packages, and for goods modified, altered, or treated by customers.<br />
Service may be obtained by delivering the product during the warranty period to <strong>MagTek</strong> (1710 Apollo Court,<br />
Seal Beach, CA 90740). If this product is delivered by mail or by an equivalent shipping carrier, the customer<br />
agrees to insure the product or assume the risk of loss or damage in transit, to prepay shipping charges to the<br />
warranty service location and to use the original shipping container or equivalent. <strong>MagTek</strong> will return the product,<br />
prepaid, via a three (3) day shipping service. A Return Material Authorization (RMA) number must accompany<br />
all returns.<br />
MAGTEK MAKES NO OTHER WARRANTY, EXPRESS OR IMPLIED, AND MAGTEK DISCLAIMS ANY<br />
WARRANTY OF ANY OTHER KIND, INCLUDING ANY WARRANTY OF MERCHANTABILITY OR<br />
FITNESS FOR A PARTICULAR PURPOSE.<br />
EACH PURCHASER UNDERSTANDS THAT THE MAGTEK PRODUCT IS OFFERED AS IS. IF THIS<br />
PRODUCT DOES NOT CONFORM TO MAGTEK’S SPECIFICATIONS, THE SOLE REMEDY SHALL BE<br />
REPAIR OR REPLACEMENT AS PROVIDED ABOVE. MAGTEK’S LIABILITY, IF ANY, TO RESELLER<br />
OR TO RESELLER’S CUSTOMERS, SHALL IN NO EVENT EXCEED THE TOTAL AMOUNT PAID TO<br />
MAGTEK BY RESELLER UNDER THIS AGREEMENT. IN NO EVENT WILL MAGTEK BE LIABLE TO<br />
THE RESELLER OR THE RESELLER’S CUSTOMER FOR ANY DAMAGES, INCLUDING ANY LOST<br />
PROFITS, LOST SAVINGS OR OTHER INCIDENTAL OR CONSEQUENTIAL DAMAGES ARISING OUT<br />
OF THE USE OF OR INABILITY TO USE SUCH PRODUCT, EVEN IF MAGTEK HAS BEEN ADVISED OF<br />
THE POSSIBILITY OF SUCH DAMAGES, OR FOR ANY CLAIM BY ANY OTHER PARTY.<br />
LIMITATION ON LIABILITY<br />
EXCEPT AS PROVIDED IN THE SECTIONS RELATING TO MAGTEK’S LIMITED WARRANTY,<br />
MAGTEK’S LIABILITY UNDER THIS AGREEMENT IS LIMITED TO THE CONTRACT PRICE OF THE<br />
PRODUCTS.<br />
MAGTEK MAKES NO OTHER WARRANTIES WITH RESPECT TO THE PRODUCTS, EXPRESSED OR<br />
IMPLIED, EXCEPT AS MAY BE STATED IN THIS AGREEMENT, AND MAGTEK DISCLAIMS ANY<br />
IMPLIED WARRANTY, INCLUDING WITHOUT LIMITATION ANY IMPLIED WARRANTY OF<br />
MERCHANTABILITY OR FITNESS FOR A PARTICULAR PURPOSE.<br />
MAGTEK SHALL NOT BE LIABLE FOR CONTINGENT, INCIDENTAL, OR CONSEQUENTIAL<br />
DAMAGES TO PERSONS OR PROPERTY. MAGTEK FURTHER LIMITS ITS LIABILITY OF ANY KIND<br />
WITH RESPECT TO THE PRODUCTS, INCLUDING ANY NEGLIGENCE ON ITS PART, TO THE<br />
CONTRACT PRICE FOR THE GOODS.<br />
MAGTEK’S SOLE LIABILITY AND BUYER’S EXCLUSIVE REMEDIES ARE STATED IN THIS SECTION<br />
AND IN THE SECTION RELATING TO MAGTEK’S LIMITED WARRANTY.<br />
........................................................................................... iii
FCC WARNING STATEMENT<br />
This equipment has been tested and found to comply with the limits for a Class A digital device, pursuant to Part<br />
15 of FCC Rules. These limits are designed to provide reasonable protection against harmful interference when<br />
the equipment is operated in a commercial environment. This equipment generates, uses, and can radiate radio<br />
frequency energy and, if not installed and used in accordance with the instruction manual, may cause harmful<br />
interference to radio communications. Operation of this equipment in a residential area is likely to cause harmful<br />
interference in which case the user will be required to correct the interference at his own expense.<br />
FCC COMPLIANCE STATEMENT<br />
This device complies with Part 15 Of The FCC Rules. Operation of this device is subject to the following two<br />
conditions: (1) This device may not cause harmful interference. And (2) This device must accept any interference<br />
received, including interference that may cause undesired operation.<br />
CANADIAN DOC STATEMENT<br />
This digital apparatus does not exceed the Class A limits for radio noise for digital apparatus set out in the Radio<br />
Interference Regulations of the Canadian Department of Communications.<br />
Le présent appareil numérique n’émet pas de bruits radioélectriques dépassant les limites applicables aux<br />
appareils numériques de las classe A prescrites dans le Réglement sur le brouillage radioélectrique édicté par les<br />
ministère des Communications du Canada.<br />
CE STANDARDS<br />
Testing for compliance to CE requirements was performed by an independent laboratory. The unit under test was<br />
found compliant to Class A.<br />
UL/CSA<br />
This product is recognized per Underwriter Laboratories and Canadian Underwriter Laboratories 1950.<br />
EMVCo APPROVAL STATEMENT<br />
EMVCo approval of the interface module (IFM) contained in this Terminal shall mean only that the IFM has been<br />
tested in accordance with the EMV Level 1 Specifications, Version 3.1.1, as of the date of testing. EMVCo<br />
approval does not under any circumstances include any endorsement or warranty regarding the completeness of<br />
the approval process or the functionality, quality or performance of any particular product or service. EMVCo<br />
does not warrant any products or services provided by third parties. EMVCo approval does not under any<br />
circumstances include or imply any product warranties from EMVCo, including, without limitation, any implied<br />
warranties of merchantability, fitness for purpose, or non-infringement, all of which are expressly disclaimed<br />
by EMVCo. All rights and remedies regarding products and services, which have received EMVCo approval,<br />
shall be provided by the party providing such products or services, and not by EMVCo.<br />
iv
TABLE OF CONTENTS<br />
SECTION 1. FEATURES AND SPECIFICATIONS.....................................................................................1<br />
CONFIGURATION....................................................................................................................................1<br />
STANDARD FEATURES ..........................................................................................................................1<br />
SOFTWARE ACCESSORIES...................................................................................................................2<br />
RELATED DOCUMENTS .........................................................................................................................2<br />
SMART CARD INTERFACE.....................................................................................................................3<br />
MAGNETIC STRIPE READER.................................................................................................................3<br />
FLASH UPGRADABLE.............................................................................................................................3<br />
INTERFACE..............................................................................................................................................3<br />
SPECIFICATIONS ....................................................................................................................................3<br />
SECTION 2. INSTALLATION......................................................................................................................7<br />
COMPONENTS ........................................................................................................................................7<br />
PLACEMENT AND CABLE CONNECTIONS...........................................................................................8<br />
REAR PANEL ...........................................................................................................................................9<br />
SECTION 3. OPERATION AND MAINTENANCE ....................................................................................11<br />
OPERATION...........................................................................................................................................11<br />
MAINTENANCE......................................................................................................................................11<br />
FIGURES and TABLES<br />
FIGURE 1-1. INTELLISTRIPE <strong>350</strong>.............................................................................................................VI<br />
TABLE 1-1. SPECIFICATIONS...................................................................................................................4<br />
FIGURE 1-2. INTELLISTRIPE <strong>350</strong> DIMENSIONS......................................................................................5<br />
FIGURE 2-1. INTELLISTRIPE <strong>350</strong> COMPONENTS...................................................................................7<br />
FIGURE 2-2. I/O CABLE WITH PIN LOCATIONS, P/N 16051412.............................................................8<br />
TABLE 2-1. PIN LIST FOR I/O CABLE ......................................................................................................8<br />
FIGURE 2-3. POWER SUPPLY AND AC CABLE......................................................................................9<br />
FIGURE 2-4. REAR PANEL – RS-232 CONNECTION ..............................................................................9<br />
FIGURE 2-5. REAR PANEL – USB CONNECTION .................................................................................10<br />
FIGURE 3-1. EJECTOR ROD REMOVAL ................................................................................................12<br />
FIGURE 3-2. CARD REMOVAL WITH EJECTOR ROD...........................................................................13<br />
.............................................................................................v
vi<br />
Figure 1-1. <strong>IntelliStripe</strong> <strong>350</strong>
SECTION 1. FEATURES AND SPECIFICATIONS<br />
The <strong>IntelliStripe</strong> <strong>350</strong>, <strong>Desktop</strong> <strong>Motorized</strong> <strong>Reader</strong>, can read the mag-stripe data from financial<br />
cards and drivers licenses, as well as provide ISO 7816/ EMV level 1 support for communicating<br />
to T=0, T=1 Smartcards. Support for many popular Memory cards is also provided.<br />
The <strong>Reader</strong> communicates with a Host via an RS-232 serial interface, and uses a proprietary<br />
MCP protocol and command set, which has been developed by <strong>MagTek</strong>. Windows Drivers for<br />
the MCP protocol are available and can support most Windows operating systems.<br />
CONFIGURATION<br />
Part numbers and descriptions for the basic configuration are shown in the table below. All extra<br />
items must be ordered separately.<br />
Part<br />
Description<br />
Number<br />
16050313 <strong>IntelliStripe</strong> <strong>350</strong>, 3TK, C Bezel, RS-232 & USB Interface, Stripe<br />
Down, Chip Up, EMV Compliant, cables ordered separately.<br />
16051412 RS-232 I/O Cable, 7-pin connector connects to host 9-pin<br />
connector with 12V/Ground connector for Power Supply.<br />
16051433 USB Cable, 6’ <strong>MagTek</strong> Gray<br />
64300080 Power Supply, 100V through 240V regulated with 2.5mm plug.<br />
71100001 AC power cord, P/N is for use in North America. Other users must<br />
supply their own cord, or contact <strong>MagTek</strong> for international cords.<br />
STANDARD FEATURES<br />
Standard features of the <strong>IntelliStripe</strong> <strong>350</strong> are as follows:<br />
• <strong>Motorized</strong> transport<br />
• RS-232 and USB interface<br />
• Status LED<br />
• Flash upgradable<br />
• 8 Smart Card Contacts for reading ISO 7816 contact locations<br />
• Supports all popular magnetic stripe track combinations<br />
• Front Card Gate prevents coins, dust, moisture, and debris from entering the unit – gate<br />
resists opening except when ISO-size card enters the unit.<br />
1
<strong>IntelliStripe</strong> <strong>350</strong>, <strong>Desktop</strong> <strong>Motorized</strong> <strong>Reader</strong><br />
SOFTWARE ACCESSORIES<br />
The following Software Modules may be required and will assist in the development of<br />
application software. In addition, this software can provide an initial test platform for checkout<br />
of the <strong>IntelliStripe</strong> <strong>350</strong>.<br />
• <strong>IntelliStripe</strong> Picture Demo with MCP Driver:<br />
P/N 30037435 (Floppy Disks) or P/N 99510015 (Web Release)<br />
This software will install both a Demo program and the MCP driver.<br />
The Demo program is useful for initial checkout of the <strong>Reader</strong>’s functionality. The<br />
MCP driver is recommended for use as the communications interface on Windows<br />
based host systems. Application programmers can interface to the MCP driver via a<br />
<strong>MagTek</strong> defined API.<br />
• Source Code for Picture Demo Program:<br />
P/N 30037436<br />
Visual Basic 6.0 source code for the Picture Demo program.<br />
This will be useful to Application Programmers, as it shows examples of how to<br />
interface with the MCP drivers and how to use the various commands.<br />
• MCP Utility Program:<br />
P/N 30037442 (Floppy Disks) or P/N 99510020 (Web Release)<br />
This is a utility program that interfaces with the MCP driver, and allows engineers to<br />
send commands directly to the <strong>Reader</strong> per the defined <strong>MagTek</strong> Command Set. This is<br />
useful for gaining an understanding of the commands used with the <strong>Reader</strong>. (Note:<br />
This utility requires that the <strong>MagTek</strong> MCP drivers be previously installed.)<br />
RELATED DOCUMENTS<br />
This document, P/N 99875179, is from a hardware perspective only. Other documents that cover<br />
the command set, communications protocol, and API (Application Program Interface) are as<br />
follows:<br />
Part Number Title<br />
99875163 MCP, Serial Transport Protocol, Reference Manual<br />
99875164 Communication Protocol, Driver Reference Manual<br />
99875168 <strong>IntelliStripe</strong> 320, Command Reference Manual<br />
2
Section 1. Features and Specifications<br />
SMART CARD INTERFACE<br />
The <strong>Reader</strong> can provide connections to ICC contacts as defined by ISO 7816 specifications. The<br />
<strong>Reader</strong> supports ISO7816 T=0 and T=1 cards not requiring V PP , with a speed range of 9600 bps<br />
to 115200 bps. It also supports a variety of common memory card types. See <strong>IntelliStripe</strong> 320<br />
Command Reference Manual, Part Number 99875168, for more details.<br />
MAGNETIC STRIPE READER<br />
The <strong>Reader</strong> can read up to three tracks of magnetic stripe card data. See <strong>IntelliStripe</strong> 320<br />
Command Reference Manual, Part Number 99875168, for more details.<br />
FLASH UPGRADABLE<br />
The unit's firmware is in-system Flash Upgradable. This allows the unit’s firmware to be<br />
upgraded when required.<br />
INTERFACE<br />
The unit communicates to the host through either a USB or an RS-232 interface. For RS-232,<br />
the device uses 8 data bits, 1 stop bit, even parity. The unit can automatically sync to baud rates<br />
9600, 14400, 19200, 28800 38400, and 57600. See MCP Driver Reference Manual, Part<br />
Number 99875164, and MCP Serial Transport Protocol Reference Manual, Part Number<br />
99875163, for more details.<br />
SPECIFICATIONS<br />
Specifications for the <strong>Reader</strong> are listed in Table 1-1. Overall dimensions of the unit are shown in<br />
Figure 1-2.<br />
3
<strong>IntelliStripe</strong> <strong>350</strong>, <strong>Desktop</strong> <strong>Motorized</strong> <strong>Reader</strong><br />
Table 1-1. Specifications<br />
<strong>Reader</strong> Configuration<br />
Mag-Stripe Functions<br />
Track 1,2,3 only<br />
DATA FORMAT SPECIFICATIONS<br />
Data Format Specifications*<br />
ISO/ANSI/AAMVA/JIS formats<br />
ISO 7810, 7811, JIS x 6302 Type 2<br />
Smartcard Functions<br />
ISO 7816 T=0 and T=1 protocols, many popular memory cards<br />
EMVCo Level 1 Approval<br />
* ISO (International Standards Organization), ANSI (American National Standards Institute), AAMVA<br />
(American Association of Motor Vehicle Administrators), JIS (Japanese Industrial Standard)<br />
OPERATIONAL<br />
Card Speed:<br />
10 IPS (25,4 cm/sec) typical<br />
Recording Method:<br />
Two-frequency coherent phase (F2F)<br />
MTBF:<br />
Input Voltage<br />
Electronics<br />
Head<br />
SC Contacts<br />
125,000 hours<br />
1,000,000 passes (500,000 Insertion Cycles)<br />
1,000,000 passes<br />
ELECTRICAL<br />
12.0 VDC ± 5%<br />
Current<br />
Dimensions:<br />
Length<br />
Width<br />
Height<br />
1.5 A max<br />
170 mA typical (with motor off)<br />
MECHANICAL<br />
7.125” (181.0 mm)<br />
4.56" (115.82 mm)<br />
2.85" (72.40 mm)<br />
Cable Length (16051412)<br />
Power Supply Cable Length<br />
(64300080)<br />
Power Cord (North American<br />
100-240V) (P/N 71100001)<br />
Weight:<br />
<strong>Reader</strong> with Cable<br />
Power Supply<br />
AC Cord<br />
Temperature<br />
Operating<br />
Storage<br />
Humidity<br />
Operating<br />
Storage<br />
Altitude<br />
Operating<br />
Storage<br />
6’ (1.83 m)<br />
6’ 4” (1.93 m)<br />
7’ 6” (2.28 m)<br />
2 lb 5.33oz (1.05 kg)<br />
6.4 oz (0.2 kg)<br />
6.4 oz (0.2 kg)<br />
ENVIRONMENTAL<br />
32 o F to 122 o F (0 o C to 50 o C)<br />
-40 o F to 158 o F (-40 o C to70 o C)<br />
10% to 95% noncondensing<br />
10% to 95% noncondensing<br />
0 to 10,000 ft. (0 to 3,048 m)<br />
0 to 50,000 ft. (0 to 15,240 m)<br />
4
Section 1. Features and Specifications<br />
Top View<br />
6.125"<br />
(155.6 mm)<br />
7.125"<br />
(181.0 mm)<br />
Front View<br />
2.85"<br />
(72.40 mm)<br />
4.56"<br />
(115.82 mm)<br />
Figure 1-2. <strong>IntelliStripe</strong> <strong>350</strong> Dimensions<br />
5
<strong>IntelliStripe</strong> <strong>350</strong>, <strong>Desktop</strong> <strong>Motorized</strong> <strong>Reader</strong><br />
6
SECTION 2. INSTALLATION<br />
The installation of the <strong>IntelliStripe</strong> <strong>350</strong> <strong>Desktop</strong> <strong>Motorized</strong> <strong>Reader</strong> consists of placing the unit on<br />
a flat surface, plugging the I/O connector into the host serial port, and plugging the Power<br />
Supply into the I/O cable and into a wall receptacle.<br />
COMPONENTS<br />
Components of the unit for installation are shown in Figure 2-1.<br />
Power Supply And Cable<br />
I/O Cable To<br />
<strong>IntelliStripe</strong> <strong>350</strong><br />
AC Cable<br />
9 Pin Connector<br />
To Host<br />
AC Cable<br />
Upper Cover<br />
Lower Cover<br />
3 Prong Connector<br />
Screw Slots (4) For<br />
Retaining Upper<br />
And Lower Covers<br />
Ejector Rod<br />
Magnetic Stripe<br />
Down And<br />
To The Right<br />
Bottom View<br />
Two Of Four<br />
Foot Pads<br />
LED<br />
Figure 2-1. <strong>IntelliStripe</strong> <strong>350</strong> Components<br />
7
<strong>IntelliStripe</strong> <strong>350</strong>, <strong>Desktop</strong> <strong>Motorized</strong> <strong>Reader</strong><br />
PLACEMENT AND CABLE CONNECTIONS<br />
Refer to Figure 2-1, and place and connect the <strong>IntelliStripe</strong> <strong>350</strong> cabling as follows:<br />
Ensure power to the PC is off.<br />
1. Place the unit on a smooth flat surface convenient for operation.<br />
2. Connect the 9-pin I/O connector to the PC.<br />
3. Connect the 12 V power supply plug into the I/O cable.<br />
4. Connect the AC cable into a wall receptacle.<br />
5. Turn power on to the PC.<br />
The I/O cable is shown in Figure 2-2 and the Pin List is shown in Table 2-1<br />
Locking<br />
Tabs<br />
Figure 2-2. I/O Cable with Pin Locations, P/N 16051412<br />
Table 2-1. Pin List for I/O Cable<br />
Molex 7 Pin (51055-0700) DB-9 Female 2.5mm Power Jack<br />
Pin Number Signal Name Pin Number Signal Name<br />
1 TXD 2 RXD<br />
2 +12V CENTER PIN +12V<br />
3 PWR GND SHELL GND<br />
4 RXD 3 TXD<br />
5 RTS 8 CTS<br />
6 CTS 7 RTS<br />
7 SIGNAL GND 5 GND<br />
6 DSR<br />
4 DTR<br />
8
Section 2. Installation<br />
The Power Supply, P/N 64300080, 100V−240V regulated, 12VDC, with 2.5 mm plug is shown<br />
in Figure 2-3. The AC power cord, P/N 71100001, is for use in North America. Other users must<br />
supply their own AC cord, or contact <strong>MagTek</strong> for international cords.<br />
North American<br />
100V–240V<br />
Power Cord<br />
Auto Range<br />
Power Supply<br />
12VDC Plug<br />
GND<br />
3 Prong<br />
Connector<br />
Figure 2-3. Power Supply and AC Cable.<br />
REAR PANEL<br />
The Rear Panel is shown in Figure 2-4 (for the RS-232 connection) and Figure 2-5 (for the USB<br />
connection). The cables and tie wraps must be ordered as separate line items when ordering the<br />
reader. For the RS-232 configuration, the power connector can either be connected to the rear of<br />
the reader or into the power jack on the RS-232 cable.<br />
Tie Wrap<br />
Cable Clamps<br />
Slot For Ejector Rod<br />
To Remove Cards<br />
Tie Wrap<br />
Power Connector<br />
USB Connector<br />
Factory<br />
Use Only<br />
Pin 7<br />
Pin 1<br />
7-Pin<br />
Connector<br />
Back View<br />
Figure 2-4. Rear Panel – RS-232 Connection<br />
9
<strong>IntelliStripe</strong> <strong>350</strong>, <strong>Desktop</strong> <strong>Motorized</strong> <strong>Reader</strong><br />
USB Connector<br />
Power Connector<br />
Slot For Ejector Rod<br />
To Remove Cards<br />
7-Pin<br />
Connector<br />
Back View<br />
Factory Use Only<br />
Figure 2-5. Rear Panel – USB Connection<br />
10
SECTION 3. OPERATION AND MAINTENANCE<br />
The operation of the unit includes inserting and removing the card. Maintenance includes<br />
keeping the unit clean and removing jammed cards from the unit.<br />
OPERATION<br />
The card is inserted with the magnetic stripe down and to the right as illustrated in Figure 2-1.<br />
Remove the card when unit ejects it. Perform any tasks on the PC as directed. The LED gives<br />
status or direction as defined by the institution.<br />
MAINTENANCE<br />
Preventive maintenance includes cleaning the unit periodically with a lint-free cloth. The<br />
cleaning schedule depends on how clean or dirty the environment is.<br />
Corrective maintenance includes removing the card in case of power failure or card jam. In most<br />
cases, resetting the unit will cause the card to automatically eject the card. To reset the unit<br />
unplug the Power Supply connector (Figure 2-3) from the I/O connector and plug it back in.<br />
If the card does not automatically eject, the card may be pushed out with a special tool, the<br />
Ejector Rod, which is located on the bottom of the unit. The Rod is inserted into a slot in the<br />
back of the unit, shown in Figure 3-2.<br />
11
<strong>IntelliStripe</strong> <strong>350</strong>, <strong>Desktop</strong> <strong>Motorized</strong> <strong>Reader</strong><br />
To remove a jammed card proceed as follows:<br />
1. Remove the Ejector Rod by sliding it from under the retaining tabs as shown in Figure 3-1.<br />
Foot Pads (4)<br />
Ejector Rod<br />
Pull Out Ejector Rod<br />
Agency<br />
Approvals<br />
Serial<br />
Number<br />
Sticker<br />
Notch<br />
Bottom View<br />
Figure 3-1. Ejector Rod Removal<br />
2. Look into the slot in the back of the unit, shown in Figure 3-2, to see the jammed card. This<br />
will show the approximate position where the notch on the Ejector Rod will be inserted.<br />
12
Section 3. Operation and Maintenance<br />
1.Observe Position<br />
Of Jammed Card.<br />
2. Insert Rod Into Slot.<br />
Reposition Until Card<br />
Is In Notch In Rod.<br />
3.Push Rod Until Card<br />
Appears In Front.<br />
Then Pull Card Out.<br />
Back View<br />
Figure 3-2. Card Removal with Ejector Rod<br />
3. Insert the Rod into the slot as shown in Figure 3-2.<br />
4. Reposition as required until the card is in the notch.<br />
5. Push the Rod until the card appears in the front, then pull it out.<br />
13
<strong>IntelliStripe</strong> <strong>350</strong>, <strong>Desktop</strong> <strong>Motorized</strong> <strong>Reader</strong><br />
14