Entry Door Owner's Manual - Pella.com
Entry Door Owner's Manual - Pella.com
Entry Door Owner's Manual - Pella.com
You also want an ePaper? Increase the reach of your titles
YUMPU automatically turns print PDFs into web optimized ePapers that Google loves.
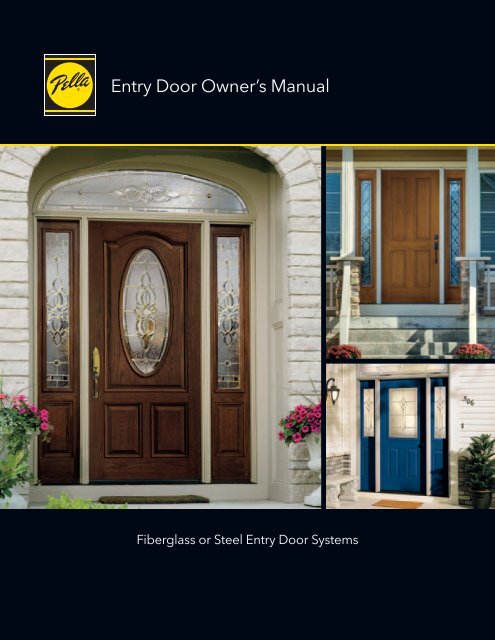
<strong>Entry</strong> <strong>Door</strong> Owner’s <strong>Manual</strong><br />
Fiberglass or Steel <strong>Entry</strong> <strong>Door</strong> Systems
Congratulations on the purchase of your entry door from <strong>Pella</strong>! You have joined<br />
a select group of homeowners who have made their homes more beautiful and <strong>com</strong>fortable with<br />
<strong>Pella</strong> ® products for more than 85 years. No matter which of our three distinctive lines of entry doors<br />
you have selected — Architect Series ® , <strong>Pella</strong> or En<strong>com</strong>pass by <strong>Pella</strong> ® — they all have one thing in<br />
<strong>com</strong>mon: offering you more beauty, performance and value than any other door.<br />
With proper installation, care and operation, your entry door will provide years of<br />
enjoyment. Read this manual thoroughly during your first few days of ownership so you feel<br />
<strong>com</strong>fortable operating, cleaning and maintaining your entry door. Then refer to it in the future,<br />
should a question arise.<br />
<strong>Entry</strong> door systems from <strong>Pella</strong> offer elegant decorative glass, stylish hardware and a variety<br />
of finishes. But the real beauty of our fiberglass and steel entry doors is their outstanding<br />
performance, energy efficiency and low-maintenance features that make your life easier.<br />
Finally, rest assured that <strong>Pella</strong> will be here for you today … and for years to <strong>com</strong>e. Your<br />
<strong>com</strong>plete satisfaction is of utmost importance to us. If you have any questions or concerns — or<br />
would like to learn more about exclusive options available for your entry door — help is as close<br />
as your local <strong>Pella</strong> Window and <strong>Door</strong> Showroom or pella.<strong>com</strong>. A <strong>com</strong>mitment to service that’s as<br />
strong as our windows and doors. Just another way <strong>Pella</strong> is creating a better view.
Architect Series ® , <strong>Pella</strong> ® and En<strong>com</strong>pass by <strong>Pella</strong> ® <strong>Entry</strong> <strong>Door</strong> Owner’s <strong>Manual</strong><br />
How to Use/Table of Contents<br />
How to Use Your Architect Series ® , PELLA ® and<br />
En<strong>com</strong>pass by <strong>Pella</strong> ® entry door Owner’s <strong>Manual</strong><br />
Overview<br />
The <strong>Pella</strong> <strong>Entry</strong> <strong>Door</strong> Owner’s <strong>Manual</strong> contains specific information for troubleshooting and preventive maintenance to keep your entry door<br />
system operating smoothly for years to <strong>com</strong>e.<br />
Quick Reference Guide<br />
1.1 <strong>Door</strong> <strong>com</strong>ponents<br />
Operation<br />
2.1 Multipoint locking system<br />
2.1 Blinds-between-the-glass<br />
Cleaning<br />
3.1 Cleaning the glass<br />
3.1 Spot-cleaning stubborn materials on all glass<br />
3.1 Cleaning the door panel<br />
3.1 Cleaning the exterior aluminum cladding<br />
3.1 Cleaning hardware finishes<br />
Finishing<br />
4.1 Overview<br />
4.1 Before you begin<br />
4.1 Fiberglass vs. steel<br />
4.2 Finishing questions<br />
4.2 Finishing tips<br />
4.2 Cleaning the door panel and sidelights<br />
4.2 Testing the stain<br />
4.3 Staining fiberglass<br />
4.3 Topcoat application — stain<br />
4.4 Painting<br />
4.4 Selecting your door paint<br />
4.4 Painting fiberglass<br />
4.4 Painting steel<br />
4.5 Finishing the frames<br />
4.5 Touch-up and repairs<br />
4.5 Stain and topcoat<br />
4.5 Paint<br />
Re<strong>com</strong>mended Maintenance<br />
5.1 Overview<br />
5.1 Maintaining the interior<br />
5.1 Maintaining the exterior<br />
5.1 Salt spray environments Maintenance<br />
Troubleshooting<br />
6.1 Overview<br />
6.1 Glass breakage or damage<br />
6.1 Difficult operation<br />
6.2 Water and air infiltration<br />
6.2 Preventing roomside condensation<br />
6.2 Understanding condensation<br />
6.2 Humidity and condensation<br />
6.2 Causes of condensation<br />
6.2 Older vs. newer homes<br />
6.3 Measuring and controlling humidity<br />
6.3 Exterior condensation<br />
6.3 Tips for wintertime moisture management<br />
6.3 For more information … Maintenance<br />
Additional Information<br />
7.1 <strong>Pella</strong> Unit ID: Service made simple<br />
7.1 EIFS and synthetic stucco<br />
7.1 Storm door usage re<strong>com</strong>mendation<br />
7.1 NFRC label<br />
Warranty<br />
Go to pella.<strong>com</strong>/warranty.
Architect Series ® , <strong>Pella</strong> ® and En<strong>com</strong>pass by <strong>Pella</strong> ® <strong>Entry</strong> <strong>Door</strong> Owner’s <strong>Manual</strong><br />
Quick Reference Guide<br />
Quick Reference G uide<br />
This diagram will help you identify the <strong>com</strong>ponents of your entry door.<br />
Frame. It’s the framework that surrounds and supports the entire door system.<br />
• Architect Series ® and <strong>Pella</strong> ® entry doors — Wood frame is<br />
dip-treated for longevity. Pine interior frames <strong>com</strong>e fully<br />
primed and ready to paint or are offered unfinished,<br />
ready to be stained or factory-stained. Mahogany<br />
interior frames are unfinished, ready to be stained<br />
or painted. The exterior frame is offered with lowmaintenance<br />
aluminum cladding that doesn’t need<br />
painting, primed Pine (<strong>Pella</strong> doors only), or unfinished<br />
Mahogany that is ready to be stained or painted.<br />
• En<strong>com</strong>pass by <strong>Pella</strong> ® entry doors — The interior<br />
and exterior frame provide the traditional beauty<br />
of authentic wood and are fully primed and<br />
ready to paint.<br />
Frame corner construction. Wood frame corners are<br />
sealed and mechanically fastened three ways — with<br />
a mortise-and-tenon joint, a sealant and a metal<br />
fastener — for exceptional strength and performance.<br />
<strong>Pella</strong> Unit ID. To help save you time if your door ever<br />
needs service or repair, <strong>Pella</strong> products include a special<br />
identification number. On your entry door from <strong>Pella</strong>,<br />
you’ll find the <strong>Pella</strong> Unit ID Number on the top hinge.<br />
Insulated foam core. This insulation material inside the<br />
door panel contributes to the door’s energy efficiency.<br />
Steel deadbolt reinforcement plate. It provides added<br />
security by reinforcing the deadbolt and strengthening<br />
the door frame (single in-swing doors only).<br />
Optional multipoint locking system. Architect Series<br />
and <strong>Pella</strong> entry doors — <strong>Pella</strong>’s multipoint lock features<br />
three dual-action deadbolts that extend into the door<br />
frame when engaged for added security.<br />
Sill/threshold. This is the bottom of the frame that<br />
rests on the floor.<br />
<strong>Door</strong> sweep. This energy-efficient and weather-resistant<br />
weatherstripping system at the bottom of the door<br />
forms a seal against air and water infiltration between<br />
the door and the sill.<br />
Weatherstripping system.<br />
• Architect Series and <strong>Pella</strong> entry doors — <strong>Pella</strong>’s patentpending<br />
PerformaSeal design features exclusive<br />
weathertight seal technology. Bulb-and-leaf<br />
weatherstripping around the door frame prevents air and<br />
water infiltration during even the most extreme wind and rain.<br />
1.1<br />
• En<strong>com</strong>pass by <strong>Pella</strong> entry doors — Foam <strong>com</strong>pression weatherstripping system helps<br />
prevent air and water infiltration around the perimeter of the door panel.
Architect Series ® , <strong>Pella</strong> ® and En<strong>com</strong>pass by <strong>Pella</strong> ® <strong>Entry</strong> <strong>Door</strong> Owner’s <strong>Manual</strong><br />
Operation<br />
Operation<br />
Multipoint locking system<br />
Available on Architect Series ® and <strong>Pella</strong> ® fiberglass (and steel) entry doors.<br />
<strong>Pella</strong>’s multipoint lock features three dual-action deadbolts that extend into the door frame when<br />
engaged. When disengaged, the deadbolts function as latches — disengage from the interior by<br />
pressing down on the interior handle. If your door is equipped with an entrance-grip handle set,<br />
squeeze the “trigger” to operate.<br />
To engage the deadbolts, twist the thumbturn lock on the inside or turn the keylock on the outside.<br />
The three latches will extend to their deadbolt position.<br />
The multipoint lock includes a “panic” feature, which allows you to disengage the deadbolts and<br />
operate the door with one smooth motion by pressing down on the interior handle. From the exterior,<br />
insert the key into the keylock and turn to disengage.<br />
CAUTION: Make sure the door is <strong>com</strong>pletely closed before engaging the multipoint<br />
deadbolts. Failure to do so may damage the door’s finish or frame.<br />
Blinds-between-the-glass<br />
Available on <strong>Pella</strong> entry doors.<br />
The aluminum blinds-between-the-glass are permanently installed between panes of glass so they stay clean and never need to be removed.<br />
Move the operators up and down in a slow and steady motion.<br />
The operators are attached to the operating mechanism with high-powered<br />
magnets. Moving the operators abruptly could cause them to be<strong>com</strong>e<br />
disengaged from the magnet.<br />
NOTE: If a handle be<strong>com</strong>es disengaged from the operator and remains<br />
attached to the track, slide the operator up and down until the magnet<br />
reengages. Slowly slide the handle all the way to the top of the track to fully<br />
engage the handle with the operator.<br />
NOTE: If the blind does not <strong>com</strong>pletely lower on one side, using the tilt<br />
operator, ensure the slats are in the open position, then raise and lower<br />
the blind.<br />
2.1
Architect Series ® , <strong>Pella</strong> ® and En<strong>com</strong>pass by <strong>Pella</strong> ® <strong>Entry</strong> <strong>Door</strong> Owner’s <strong>Manual</strong><br />
Cleaning<br />
Cleaning<br />
Cleaning the glass<br />
To wash the glass:<br />
1. Use a premixed vinegar-based cleaning solution (or make your own with one part white vinegar to 10 parts water), and apply to a soft,<br />
clean, lint-free microfiber cloth or paper towel. Or you may use an ammonia-free glass cleaner such as Windex ® (clear liquid) or Sparkle ®<br />
(purple liquid). Feel free to be generous with the amount of cleaner you apply, but avoid getting any cleaning solution on the door<br />
panel as it may discolor the finish.<br />
2. Rub from several different directions.<br />
3. Rinse with clear water if streaks remain after cleaning.<br />
CAUTION: Do not use glass cleaners that are ammonia- or alcohol-based. They may leave streaks or produce a film that attracts moisture or dust.<br />
Spot-cleaning stubborn materials on all glass<br />
To remove any markings from grease, oil, tape adhesive, crayons or paint, or marks from plastics that may have <strong>com</strong>e in contact with the glass:<br />
1. Apply a small amount of a nonabrasive cleaner such as Bar Keepers Friend ® (SerVaas Laboratories) to a clean, wet cloth — or apply a<br />
solvent such as acetone or mineral spirits to a clean, dry, lint-free microfiber cloth or paper towel.<br />
2. Rub on the areas of glass that need spot-cleaning. Avoid getting any cleanser or solvent on the door panel as it may discolor the finish.<br />
3. Wipe clean using a clean, dry, lint-free microfiber cloth or paper towel.<br />
4. Then clean the glass as instructed above.<br />
CAUTION: Do not use a razor blade to scrape off stubborn materials — doing so may leave permanent marks on the glass or<br />
scratches that could cause glass breakage. Contact the <strong>Pella</strong> Window and <strong>Door</strong> Showroom nearest you for special cleaning<br />
instructions.<br />
Cleaning the door panel<br />
A warm, damp cloth and mild soap may be used on all <strong>Pella</strong> ® fiberglass or steel entry door panels.<br />
Cleaning the exterior aluminum cladding<br />
Clean the surface with warm, soapy water. Stubborn stains and deposits may be removed with mineral spirits. If your cladding be<strong>com</strong>es dull,<br />
you can use a quality car cleaner and wax to restore the shine. Should you need it, touch-up paint is available at the <strong>Pella</strong> Window and <strong>Door</strong><br />
Showroom nearest you.<br />
CAUTION: Do not use abrasive or caustic solvents as they may damage your entry door. Do not scrape or use tools that might damage the surface.<br />
Do not power-wash.<br />
Cleaning hardware finishes<br />
A soft cloth and mild cleaner may be used on most hardware finishes for entry doors from <strong>Pella</strong>.<br />
3.1
Architect Series ® , <strong>Pella</strong> ® and En<strong>com</strong>pass by <strong>Pella</strong> ® <strong>Entry</strong> <strong>Door</strong> Owner’s <strong>Manual</strong><br />
Finishing<br />
FINISHING<br />
Overview<br />
If your entry door from <strong>Pella</strong> was delivered without an interior or exterior finish (paint or stain), you must<br />
finish it within 30 days to protect your investment. Painting or staining and sealing help ensure your entry<br />
door will beautify and protect your home the way it was designed to. Please note that failure to finish<br />
your <strong>Pella</strong> ® products in a timely manner may void their warranty. The <strong>Pella</strong> warranty does not cover issues<br />
associated with improper finishing. Please refer to the warranty at pella.<strong>com</strong>/warranty.<br />
<strong>Pella</strong> Corporation is recognized as a quality manufacturer of entry doors. However, your local paint<br />
professional is the best source for expert advice on finishing your door. Whether you choose to stain your<br />
new entry door or paint it to match your interior décor, be sure to consult your local finishing professional<br />
and follow the re<strong>com</strong>mendations in this manual to achieve maximum beauty and performance from your<br />
entry door.<br />
NOTE: For a professional-looking painted finish, it’s important to use quality brush or spray techniques.<br />
Contact your local paint professional for re<strong>com</strong>mendations.<br />
NOTE: Installation of a steel entry door within five miles of a seacoast is not re<strong>com</strong>mended due to the risk of corrosion, and it will void <strong>Pella</strong>’s<br />
steel entry door warranty.<br />
Before you begin<br />
Before finishing your entry door system from <strong>Pella</strong>, you must know whether your entry door panel and sidelights are fiberglass or steel. If<br />
you’re unsure if your entry door is made of fiberglass or steel, place a small magnet on your door — if it sticks, it is most likely steel. Your <strong>Pella</strong><br />
packaging and/or sales invoice should indicate the door type, or check with your <strong>Pella</strong> representative for specific information on your product.<br />
Fiberglass vs. steel<br />
• Mahogany-, Oak-, Rustic- and Hemlock-grain fiberglass doors and sidelights can be gel-stained for the beautiful look of wood or painted<br />
to <strong>com</strong>plement the colors of your home’s exterior or interior trim. Finishing is required.<br />
• Smooth fiberglass doors and sidelights can be painted but not stained. Painting is required.<br />
• Steel doors are factory-primed and can be painted but not stained. Painting is required.<br />
• Exterior frames are either primed wood or low-maintenance EnduraClad ® aluminum cladding. Primed wood exterior frames must be<br />
painted. Unfinished Mahogany frames are ready to paint or stain. Please consult your <strong>Pella</strong> retailer if you need assistance identifying the<br />
materials used in your entry door system.<br />
Architect Series ®<br />
Prefinished Premium-Grain Finishes<br />
<strong>Pella</strong> ®<br />
Prefinished Fiberglass and Steel<br />
En<strong>com</strong>pass by <strong>Pella</strong> ®<br />
Unfinished Fiberglass and Steel<br />
Mahogany-Grain Fiberglass<br />
Oak-Grain Fiberglass<br />
Mahogany-Grain Fiberglass<br />
Oak-Grain Fiberglass<br />
Smooth Fiberglass<br />
Rustic-Grain Fiberglass<br />
Hemlock-Grain Fiberglass<br />
Painted Smooth Fiberglass<br />
Painted Smooth Steel<br />
Steel<br />
4.1<br />
Unfinished premium-grain fiberglass panels are also available.<br />
Unfinished fiberglass and steel panels are also available.
Architect Series ® , <strong>Pella</strong> ® and En<strong>com</strong>pass by <strong>Pella</strong> ® <strong>Entry</strong> <strong>Door</strong> Owner’s <strong>Manual</strong><br />
Finishing<br />
Finishing questions<br />
Your local paint/finish store representative can best address your specific finishing needs. Here are some questions you should ask:<br />
• What are my finish options<br />
• Which finishes perform best in my region of the country<br />
• How does the temperature and humidity level at the time of finishing affect my results<br />
• Should I use an interior or exterior product<br />
DO NOT remove<br />
weatherstripping,<br />
dust pads<br />
or gaskets.<br />
• What do I need to know about product <strong>com</strong>patibility — for example, between the prestain, stain and finish coats<br />
• What else should be considered to obtain the best results<br />
CAUTION: To maintain proper product performance, DO NOT remove factory-installed weatherstripping, dust pads or gaskets when finishing your<br />
products. Air and water leakage may result and will void the warranty if factory-installed items are removed. Instead, we re<strong>com</strong>mend taping off these items<br />
to protect them during the finishing process.<br />
NOTE: Always wear protective personal equipment when sanding, and read and follow the manufacturer’s directions for proper use and disposal of<br />
paint, stain or other finishing materials.<br />
Finishing tips<br />
• Only stain, paint or apply topcoat when the temperature is between 50° F (10° C) and 90° F (32° C) and humidity is between<br />
30% and 70%.<br />
• Only apply finishes in a well-ventilated area.<br />
• Paint, stain and apply topcoat to all exposed unfinished edges and surfaces of the door and frame.<br />
• All exterior exposed surfaces should be finished within 30 days of initial exposure.<br />
• Do not apply finish of any kind in direct sunlight.<br />
• Do not sand the fiberglass door.<br />
Cleaning the door panel and sidelights<br />
Using a clean, dry rag, wipe the entire surface of the door with mineral spirits for fiberglass panels and water for steel panels. Allow the door<br />
to dry <strong>com</strong>pletely. Then mask all hinges, glass and weatherstripping to prevent the finish from <strong>com</strong>ing in contact with these <strong>com</strong>ponents.<br />
Mask all areas on the unit that you do not wish to finish. Remove or mask any additional hardware on the door (handle, kick plate, etc.) prior<br />
to finishing.<br />
Testing the stain<br />
Prior to finishing your panel, color-test the stain. After stirring the stain well, apply it to a skin sample with a lint-free cloth; then use a 3" brush<br />
to brush out the stain to the desired shade. If you do not like the shade of stain, use mineral spirits and a clean rag to remove the stain and<br />
repeat stain application until desired look is achieved — then allow six to eight hours for stain to dry. When you have achieved the desired<br />
shade of stain, set the practice piece to the side and keep it to match to the final product.<br />
NOTE: A stain shade can be controlled by the amount of dry time before brushing out the stain and the amount of pressure used to brush out the stain.<br />
Apply stain lightly at first. An additional coat of stain may be applied after eight hours. The more stain you apply, the darker the stain will look.<br />
4.2
Architect Series ® , <strong>Pella</strong> ® and En<strong>com</strong>pass by <strong>Pella</strong> ® <strong>Entry</strong> <strong>Door</strong> Owner’s <strong>Manual</strong><br />
Finishing<br />
Staining fiberglass<br />
If a stained wood appearance is desired on wood-grain fiberglass door panels, sidelights and glass frames, apply gel stain and clear finish<br />
according to the stain manufacturer’s directions. For best results, always apply stain in the direction of the grain. Be sure to finish door edges.<br />
1. Stir stain well.<br />
2. Using a stain sponge or brush, apply the stain to the <strong>com</strong>ponents of the door first. The <strong>com</strong>ponents that may be stained include the door<br />
edges, brickmould, jambs, mullions, glazing frames and wood frames (see “Finishing the frames” on page 4.5).<br />
3. For the panel, work the stain first into the flat portions of the grain and then into the grooves surrounding them by rubbing stain in a<br />
circular motion with a stain sponge.<br />
4. Stain the wood edge of the door.<br />
5. Stain all the interior-most section(s) of the door panel, and gradually work toward the outside of the panel.<br />
6. Stain all sections perpendicular to the interior section(s) just stained.<br />
7. Stain the outermost sections of the door panel.<br />
8. After the entire door has been covered with stain, use your sponge and lightly drag it in the same direction as the grain in each section to<br />
remove any swirl marks in the stain.<br />
9. Add texture to the stain for a natural look.<br />
• Mahogany-, Oak-, Rustic- and Hemlock-grain entry doors: After the desired color has been achieved, but before the stain<br />
has dried, “feather” the stain in the direction of the grain using a clean, dry 3" bristle brush to remove any blotchy areas and blend<br />
areas of heavy or light stain. Dab brush in corners and crevices to pull out excess stain.<br />
10. Allow stain to dry <strong>com</strong>pletely (at least eight hours) before proceeding.<br />
11. Remove excess stain on brush by wiping brush on a dry cloth.<br />
12. Clean brush with mineral spirits when finished.<br />
NOTE: Optimal drying conditions are between 50° and 90° F and between 30% and 70% humidity. Since drying time varies depending on temperature<br />
and humidity levels, drying time may increase if staining is done in lower temperatures and/or higher humidity than suggested.<br />
13. If a darker stain color is desired, repeat Steps 3 – 8 to apply a second coat.<br />
NOTE: Be sure to clean brush thoroughly if it will also be used to apply the clear topcoat. Otherwise, dispose of brush.<br />
14. Dispose of waste according to local regulations.<br />
Topcoat application — stain<br />
Allow the stain to dry at least 48 hours prior to applying topcoat. To test for dryness, get stain sample done prior to staining door and place<br />
a piece of masking tape over stain. Rub tape onto surface, and in one quick motion, remove tape. If no stain is removed, the stain is dry. It is<br />
re<strong>com</strong>mended that the door panel is recoated with topcoat every 18 – 24 months. Failure to do so may void manufacturer’s warranty. Please<br />
see your manufacturer’s warranty information for more details.<br />
NOTE: A minimum of two coats is re<strong>com</strong>mended. For exterior exposures, a minimum of three coats is re<strong>com</strong>mended.<br />
1. Stir topcoat well.<br />
2. Wet only the tip of the brush, and apply one thin coat. Brush in the direction of the grain.<br />
3. Apply topcoat to various door <strong>com</strong>ponents and door panel parts in the same sequence as the stain was applied.<br />
4. Clean brush with mineral spirits or paint thinner.<br />
5. Wait at least six hours between each application of the topcoat. Finish must be <strong>com</strong>pletely dry before applying the next coat.<br />
Do not sand between coats.<br />
6. Repeat Steps 1 – 4 for each additional coat applied.<br />
4.3
Architect Series ® , <strong>Pella</strong> ® and En<strong>com</strong>pass by <strong>Pella</strong> ® <strong>Entry</strong> <strong>Door</strong> Owner’s <strong>Manual</strong><br />
Finishing<br />
Painting<br />
Selecting your door paint<br />
If you are going to paint your entry door panel, be sure to ask a qualified paint/finishing professional to re<strong>com</strong>mend a paint with good blocking<br />
resistance. Don’t rely on a paint’s price or brand name in making your selection — an expensive paint may not necessarily offer good blocking<br />
resistance. Failure to use a high-quality paint with good blocking resistance may result in a door that sticks shut even after the paint has dried.<br />
Painting fiberglass<br />
Promptly paint all exterior surfaces, including door panel edges, with two coats of quality exterior paint with good blocking resistance.<br />
Then paint all interior surfaces with two coats of quality interior paint with good blocking resistance.<br />
NOTE: Applying thick layers of paint may hide the texture of the door panel.<br />
1. Stir paint well.<br />
2. Wet only the tip of the brush, and apply one thin coat. Brush in the direction of the grain.<br />
3. Apply paint to various door <strong>com</strong>ponents first, such as the door edges, brickmould, jambs, mullions, glazing frames and wood frames.<br />
Then paint the panel.<br />
4. Clean brush.<br />
5. Wait at least six hours between each coat application of the paint. Finish must be <strong>com</strong>pletely dry before applying the next coat.<br />
Do not sand between coats.<br />
6. Repeat Steps 1 – 4 for each additional coat applied.<br />
NOTE: A primer may be necessary to get proper adhesion. Contact your local paint supplier to determine if a primer is necessary with the selected paint.<br />
CAUTION: Finish all exposed door panel edges, including the top edge. This helps reduce the chance of warping. After finishing the entry door system,<br />
allow the door to dry <strong>com</strong>pletely, in accordance with the paint manufacturer’s directions, before closing it.<br />
Painting steel<br />
Steel doors and sidelights are factory-primed and do not need additional priming. They must be painted promptly after wiping the door<br />
with a clean, damp cloth to remove loose dust and dirt. Paint all exterior surfaces with two coats of quality exterior paint with good blocking<br />
resistance — including the glazing frame, if applicable, and the door panel edges. Paint all interior surfaces with two coats of quality interior<br />
paint with good blocking resistance. Paint can be either brushed or sprayed on.<br />
NOTE: Applying thick layers of paint may hide the grain texture of the door panel.<br />
1. Stir paint well.<br />
2. Wet only the tip of the brush, and apply one thin coat. Brush in the direction of the grain.<br />
3. Apply paint to various door <strong>com</strong>ponents first, such as the door edges, brickmould, jambs, mullions, glazing frames and wood frames.<br />
Then paint the panel.<br />
4. Clean brush.<br />
5. Wait at least six hours between each coat application of the paint. Finish must be <strong>com</strong>pletely dry before applying the next coat.<br />
Do not sand between coats.<br />
6. Repeat Steps 1 – 4 for each additional coat applied.<br />
CAUTION: Finish all exposed door panel edges, including the top edge; this helps reduce the chance of warping. After finishing the entry door system,<br />
allow the door to dry <strong>com</strong>pletely, in accordance with the paint manufacturer’s directions, before closing it.<br />
4.4
Architect Series ® , <strong>Pella</strong> ® and En<strong>com</strong>pass by <strong>Pella</strong> ® <strong>Entry</strong> <strong>Door</strong> Owner’s <strong>Manual</strong><br />
Finishing<br />
Finishing the frames<br />
• Factory-primed interior frames — If you have purchased wood frames with factory-primed interiors, be sure to clean the surface and paint<br />
all surfaces promptly with two coats of quality interior paint.<br />
• Unprimed interior frames — If the interiors of your door and sidelight frames are not factory-primed, they may be stained. Apply stain and<br />
clear finish according to the manufacturer’s directions.<br />
• Primed Pine exterior frames — The exteriors of Pine wood frames are factory-primed, but the factory-applied primer is not intended<br />
for long-term exterior exposure. The exterior wood frame must be painted immediately after installation. Clean the surface, and finish<br />
promptly with two coats of quality exterior paint.<br />
• Mahogany exterior frames — Your unfinished Mahogany door exterior frame may be stained. Apply a stain and clear finish according to<br />
the manufacturer’s directions.<br />
• Aluminum-clad exterior frames — The aluminum-clad exterior protected by the <strong>Pella</strong> ® EnduraClad ® finish doesn’t need painting. Clean the<br />
surface with warm, soapy water. Stubborn stains and deposits may be removed with mineral spirits.<br />
CAUTION: Do not use abrasive or caustic solvents as they may damage your entry door. Do not scrape or use tools that might damage the surface.<br />
Do not power-wash.<br />
If your cladding be<strong>com</strong>es dull, you can use a quality car cleaner and wax to restore the shine. Should you need it, touch-up paint is available<br />
at the <strong>Pella</strong> Window and <strong>Door</strong> Showroom nearest you.<br />
Touch-up and repairs<br />
Stain and topcoat<br />
NOTE: Do not sand damaged area.<br />
1. Wipe damaged area using a clean cotton swab or cotton rag damp with mineral spirits. Allow area to <strong>com</strong>pletely dry before applying stain.<br />
2. Make sure the color-matched stain is shaken/mixed well before using for touch-up.<br />
3. Apply stain to damaged area using an artist brush. DO NOT over-brush the area.<br />
4. Dab at the freshly applied stain with a cotton swab until color match is achieved.<br />
NOTE: Repeat stain application and dabbing until desired look is achieved. Allow newly stained area to dry before applying topcoat.<br />
5. Using a polyurethane varnish, apply a fine coat of topcoat over the restained area with a clean artist’s brush. Blend as necessary.<br />
NOTE: The size of touch-ups should be kept to a minimum.<br />
Paint<br />
NOTE: Do not sand damaged area.<br />
1. Wipe damaged area using a clean cotton swab or cotton rag damp with water. Allow area to <strong>com</strong>pletely dry before applying paint.<br />
2. Make sure the color-matched paint is shaken/mixed well before using for touch-up<br />
3. Apply a thin layer of color-matched paint to damaged area using an artist’s brush.<br />
NOTE: Use a finer brush for smaller scratches or scuffs.<br />
CAUTIONS:<br />
• Avoid inhalation of fumes or ingestion of stains, topcoats or paints. Follow material-specific safety instructions if necessary.<br />
• Only use materials in a well-ventilated area.<br />
• Keep all materials out of the reach of children.<br />
• Close all containers when not in use.<br />
4.5
Architect Series ® , <strong>Pella</strong> ® and En<strong>com</strong>pass by <strong>Pella</strong> ® <strong>Entry</strong> <strong>Door</strong> Owner’s <strong>Manual</strong><br />
Re<strong>com</strong>mended Maintenance<br />
RECOMMENDED M AINTENANCE<br />
Overview<br />
<strong>Pella</strong> re<strong>com</strong>mends you inspect your entry door at least annually as part of a home checkup. Re<strong>com</strong>mended maintenance can prolong the<br />
life of your entry door and will help ensure maximum warranty coverage. It is re<strong>com</strong>mended that the door panel be recoated with a topcoat<br />
every 18 – 24 months. Failure to do so may void manufacturer’s warranty. Please see your manufacturer’s warranty information for more<br />
details. As needed, clean, repaint or restain your entry door, and recaulk around it to help maintain optimal performance. Also, be sure to<br />
regularly check for leaks and improper drainage above or around vents and sprinkler systems that may subject your entry door to prolonged<br />
water exposure. With re<strong>com</strong>mended care, entry doors from <strong>Pella</strong> can reward you with decades of beauty and performance.<br />
Maintaining the interior<br />
At least once a year, inspect the interior finish of your entry door to make certain that the painted or stained finish is in good condition.<br />
Ultraviolet rays from the sun can break down the finish and <strong>com</strong>promise its protective features.<br />
Maintaining the exterior<br />
An annual checkup can help preserve and maintain the beauty of your <strong>Pella</strong> ® products for years to <strong>com</strong>e. Inspect the sealant/caulking on the<br />
exterior perimeter of your entry door at least once a year. The sealant/caulking helps create a watertight seal between the door frame and<br />
the exterior siding (whether it is vinyl, cedar, aluminum, brick, etc.). It is extremely important that the sealant/caulking remains intact and in<br />
good condition at all times. The sealant material should not be cracked, broken or missing — or it may cause premature failure of your entry<br />
door or other parts of your home. Deterioration that occurs as a result of improper or insufficient maintenance is not covered by the <strong>Pella</strong><br />
warranty. At the same time, check the exterior paint for corrosion, peeling and/or cracking. If the exterior surface indicates any deterioration,<br />
problem areas must be touched up as soon as possible to prevent further damage. Instructions and touch-up paint for aluminum-clad<br />
products are available from the <strong>Pella</strong> Window and <strong>Door</strong> Showroom nearest you.<br />
Salt spray environments<br />
The seacoast environment is extremely hard on all sorts of products (automobiles, recreational vehicles, building products, etc.). Any<br />
product used in a seacoast location will require more frequent inspection and maintenance to help it last as long as possible in this harsh<br />
environment. <strong>Entry</strong> doors are no different from other products in this respect.<br />
If your home is in a coastal environment and is subjected to wind-driven salt spray or salt fog, use a mild detergent soap and water to clean exterior cladding<br />
and operating hardware at least quarterly — and more often, if necessary — to prevent salt or other abrasive materials from building up.<br />
CAUTION: Do not power-wash.<br />
NOTE: Installation of a steel entry door within five miles of a seacoast is not re<strong>com</strong>mended due to the risk of corrosion, and it will void <strong>Pella</strong>’s<br />
steel entry door warranty.<br />
5.1
Architect Series ® , <strong>Pella</strong> ® and En<strong>com</strong>pass by <strong>Pella</strong> ® <strong>Entry</strong> <strong>Door</strong> Owner’s <strong>Manual</strong><br />
Troubleshooting<br />
TROUBLESHOOTING<br />
Overview<br />
If you have a concern with your entry door from <strong>Pella</strong> or need additional assistance from an experienced professional, go online and visit pella.<br />
<strong>com</strong> and look under “Where To Buy,” or consult your Yellow Pages (under “Windows) for the <strong>Pella</strong> Window and <strong>Door</strong> Showroom nearest you.<br />
Glass breakage or damage<br />
In the event of glass breakage, consult the <strong>Pella</strong> Window and <strong>Door</strong> Showroom nearest you for assistance. Be sure to have your <strong>Pella</strong> Unit ID<br />
Number handy (see “<strong>Pella</strong> Unit ID: Service made simple” on page 7.1). For safety reasons and to ensure optimum performance, we strongly<br />
advise you consult a professional for glass replacement.<br />
Most U.S. and Canadian local codes require the use of tempered glass in doors and other specific applications. Tempered glass can withstand<br />
greater impact than ordinary glass, but it is sensitive to scratches. Scratches can cause immediate or delayed breakage. If the glass is tempered,<br />
it will break into small, rounded pieces. If tempered glass is broken, likely by law it must be reglazed or replaced with tempered glass.<br />
Difficult operation<br />
Adjusting the threshold — En<strong>com</strong>pass by <strong>Pella</strong> ® entry doors.<br />
If the bottom of the door sweep is not making contact or if it is too tight, adjustments to the threshold may be needed. To lower the threshold,<br />
turn the screw clockwise, and turn counterclockwise to raise it. If the door sweep is damaged, loose or brittle, reattach or replace the sweep.<br />
Frame adjustment<br />
Another possibility is that the frame is not square. Measure the diagonal dimensions. If the two<br />
measurements are more than 1/8" in difference, the door may need to be reinstalled or panels may<br />
need to be adjusted accordingly.<br />
<strong>Door</strong> adjustment<br />
• Hinge shim adjustment<br />
If the screws are loose at the hinge areas, tighten up all screws at the hinges. You may have to replace or add plastic shims as needed in each hinge.<br />
Additional adjustments can be provided by your <strong>Pella</strong> service specialist at the <strong>Pella</strong> Window and <strong>Door</strong> Showroom nearest you.<br />
• Adjustable hinges — optional on Architect Series ® and <strong>Pella</strong> entry doors.<br />
The door panels have adjustable hinge leaves. Using a 1/8" allen wrench, turn the center screw clockwise to increase the space between<br />
the hinge side of the frame and the door panel, or counterclockwise to increase the space between the door panel and the lock side of<br />
the frame. DO NOT turn the screws more than a 3/4 turn in either direction. In some cases, it may be necessary to loosen and then<br />
tighten the top and bottom hinge screws to obtain full hinge adjustment. If necessary, loosen the top and bottom screws and immediately<br />
retighten them. With the screws retightened, turn the adjustment hinge screw. If the hinge will not adjust any further, it is adjusted as far as<br />
it will go. If more clearance is needed, adjust the shims between the frame and rough opening.<br />
NOTE: DO NOT adjust the hinge with the top and bottom screws loose; this could force the hinge to adjust beyond its design capability,<br />
which could cause the hinge to bind, could damage the hinge and/or could pull out the screws. A 3/4 turn of the center screw provides approximately<br />
1/16" adjustment.<br />
6.1
Architect Series ® , <strong>Pella</strong> ® and En<strong>com</strong>pass by <strong>Pella</strong> ® <strong>Entry</strong> <strong>Door</strong> Owner’s <strong>Manual</strong><br />
Troubleshooting<br />
Water and air infiltration<br />
Loose, brittle or damaged weatherstrip<br />
Roll the weatherstrip back into the frame if it is loose; replace the weatherstrip if it’s brittle or damaged. Also make sure that the weatherstrip<br />
joints at the head and jambs are closed. If not, remove the jamb weatherstrip and reinstall it higher up the jamb.<br />
Loose, brittle or damaged door bottom seals<br />
If the panel door bottom seals are missing, misplaced, brittle or damaged, they must be replaced. Contact your <strong>Pella</strong> service specialist.<br />
Frame or panel not square<br />
Infiltration can also be caused by a frame that is not square, preventing adequate slab-to-frame contact. Try tightening or loosening the<br />
hinge screws or adding or subtracting shims. On <strong>Pella</strong> and Architect Series entry doors — if equipped with adjustable hinges — you may also<br />
be able to make simple adjustments. On En<strong>com</strong>pass by <strong>Pella</strong> entry doors, you may replace the current weatherstrip with a long-reach frame<br />
weatherstrip in the head and lock jamb.<br />
If the door panel appears to be bowed, stretch a string from top to bottom straight along the panel. If there’s a 1/4" or larger gap between<br />
the door leaf and the string, the panel has bowed sufficiently to cause operational problems.<br />
Preventing roomside condensation<br />
Understanding condensation<br />
Moisture is present in all homes, but when it be<strong>com</strong>es excessive, homeowners need to take an active role in protecting their investment.<br />
Humidity and condensation<br />
Humidity is a measure of the amount of water vapor in the air.<br />
Condensation is water that forms when warm, moist air hits a cooler surface. In homes, it might occur on surfaces such as windows, doors,<br />
mirrors, bathroom walls and cold-water pipes.<br />
When interior humidity levels are high, relative to cooler outdoor temperatures, condensation can form on the coldest surface in a room —<br />
often the glass in a window or door. While windows and doors do not cause condensation, they may be one of the first places it shows up.<br />
Causes of condensation<br />
Excess humidity is typically the cause of condensation. There are many sources for moisture in a home: showers, dishwashers, clothes<br />
washers and dryers, house plants, humans and pets, among others. In newly built homes, additional moisture may escape from building<br />
materials such as lumber, plaster and masonry for up to three heating seasons, even with proper airflow and temperature management.<br />
Older vs. newer homes<br />
Condensation may be less of an issue in older homes if conditions allow for more air exchange between indoors and out, often from around<br />
aging, loose or poorly installed windows and doors. However, the tradeoff is higher energy costs. When replacement windows and doors are<br />
properly installed and the airflow around them decreases, condensation may form on the glass of the new windows and doors.<br />
Newer homes, on the other hand, are more airtight and energy-efficient. Many have vapor barriers — plastic within the wall cavity blocking<br />
moisture passage in either direction. With tighter-fitting windows and doors, vapor barriers and increased insulation, energy costs are lower,<br />
but humidity levels must be monitored more closely.<br />
No matter when your home was built, the key is to strike the right balance when it <strong>com</strong>es to humidity levels. Air that’s too dry can cause the<br />
following: furniture to dry out and crack; joints and studs to shrink and twist; paint and plaster to crack. Excessive moisture in the home can<br />
cause paint to peel and insulation to deteriorate, and condensation on windows and doors can damage sills and trim.<br />
6.2
Architect Series ® , <strong>Pella</strong> ® and En<strong>com</strong>pass by <strong>Pella</strong> ® <strong>Entry</strong> <strong>Door</strong> Owner’s <strong>Manual</strong><br />
Troubleshooting<br />
Measuring and controlling humidity<br />
To determine how much humidity is present in your home, you can purchase a humidity<br />
gauge from a hardware store or home center. Invest in a quality unit for greater potential<br />
accuracy in assessing humidity levels, or consult an expert. Another way to monitor the<br />
interior humidity level is to watch your windows and doors. When interior condensation<br />
begins to form, wipe it off. To reduce the humidity, open windows, run exhaust fans or<br />
dehumidifiers, or minimize sources of moisture.<br />
Maximum Re<strong>com</strong>mended Humidity Levels<br />
Outside Temperature Inside Humidity<br />
20º F to 40º F Not over 40%<br />
10º F to 20º F Not over 35%<br />
0º F to 10º F Not over 30%<br />
-10º F to 0º F Not over 25%<br />
-20º F to -10º F Not over 20%<br />
-20º F or below Not over 15%<br />
Based on engineering studies at 70º F conducted at the<br />
University of Minnesota Laboratories.<br />
Exterior condensation<br />
Exterior condensation on windows and doors occurs primarily in the morning when days are warm and humid, but nights are cool. Typically, it<br />
clears as the day warms. Exterior condensation can occur at any time, especially in warm, humid climates where interior temperatures are cooler<br />
than outdoor conditions. Exterior condensation means that windows and doors are doing their job properly. However, if you spot excessive<br />
condensation on the inside of your windows or doors, check your inside humidity — it may be a signal of potential problems if not addressed.<br />
Tips for wintertime moisture management<br />
• Open window coverings — such as blinds, shades, drapes and curtains — during daylight hours to increase airflow over the glass.<br />
• Closely monitor the furnace humidifier and any other humidifying devices.<br />
• Be sure louvers and vents for the attic, basement and/or crawl space are open, adequately sized and cross-ventilated.<br />
• Run exhaust fans for kitchen, bathroom and laundry rooms for longer periods.<br />
• Make sure exhaust fans vent directly outside, not into attics or crawl spaces.<br />
• Be sure chimneys are free and clear so moisture in <strong>com</strong>bustion gases can escape.<br />
• Follow the manufacturer’s instructions for venting gas appliances. In most cases, that will mean directing vents to the outside of the home.<br />
• Make sure your furnace is in proper working order and is serviced regularly.<br />
• Store firewood outside or in the garage — as wood dries, it gives off moisture.<br />
• Install energy-efficient products, such as those that have earned the ENERGY STAR ® rating.<br />
For more information on condensation in the home, consult the following:<br />
• Home Moisture Problems (Series 1437), published by the Oregon State University Extension Services,<br />
http://extension.oregonstate.edu/catalog/. Search for “condensation.”<br />
• The University of Minnesota Extensions: http://extensions.umn.edu. Search for “condensation.”<br />
• Window and <strong>Door</strong> Manufacturer’s Association: www.wdma.<strong>com</strong>. Search for “condensation.”<br />
• University Wisconsin Extensions: www.uwex.edu. Search for “condensation.”<br />
• Efficient Windows Collaborative: www.efficientwindows.org. Search for “condensation.”<br />
NOTE: Condensation that forms in between the panes of insulating glass is not considered “roomside” condensation. Instead, this is an indication of glass<br />
seal failure, which cannot be corrected. Contact your <strong>Pella</strong> representative if this occurs.<br />
6.3
WINDOW AND DOOR<br />
MANUFACTURERS ASSOCIATION<br />
Manufacturer Stipulates Conformance to the applicable standards.<br />
Architect Series ® , <strong>Pella</strong> ® and En<strong>com</strong>pass by <strong>Pella</strong> ® <strong>Entry</strong> <strong>Door</strong> Owner’s <strong>Manual</strong><br />
Additional Information<br />
Additional Informat ion<br />
<strong>Pella</strong> Unit ID: Service made simple<br />
To help save you time if your product ever needs service or repair, all entry doors sold by <strong>Pella</strong> include a special<br />
identification number. On your entry door, you’ll find the <strong>Pella</strong> Unit ID Number on the top hinge.<br />
Unit ID Number<br />
EIFS and synthetic stucco<br />
<strong>Pella</strong> ® products should not be used in barrier wall systems that do not allow for proper management of moisture within the wall systems, such<br />
as Exterior Insulated Finish Systems (EIFS) (also known as synthetic stucco) or similar systems. Except in the states of California, New Mexico,<br />
Arizona, Nevada, Utah and Colorado, <strong>Pella</strong> makes no warranty of any kind on and assumes no responsibility for <strong>Pella</strong> windows and doors<br />
installed in barrier wall systems. In the states listed above, the installation of <strong>Pella</strong> products in EIFS or similar barrier systems must be in<br />
accordance with <strong>Pella</strong>’s instructions for that type of construction.<br />
Storm door usage re<strong>com</strong>mendation<br />
<strong>Entry</strong> door systems from <strong>Pella</strong> are designed to be <strong>com</strong>patible with the installation of a <strong>Pella</strong> storm door.<br />
• A ventilating <strong>Pella</strong> storm door is optimal for use with an entry door from <strong>Pella</strong>.<br />
• The use of a storm door of any type in higher temperature climates is not re<strong>com</strong>mended.<br />
• The <strong>com</strong>bination of a darker color and direct sun can affect the panel material of an entry door from <strong>Pella</strong> when a storm door is used.<br />
• The use of the ventilating screen is re<strong>com</strong>mended during the summer months when using a fullview storm door with an entry door<br />
from <strong>Pella</strong>.<br />
NFRC label<br />
What’s so special about the National Fenestration Rating Council (NFRC) label<br />
It represents one standard testing method from an independent source for all kinds and<br />
brands of windows and doors. It replaces a system of individual manufacturers testing their<br />
own products with many different testing standards. With this label, you can make direct<br />
<strong>com</strong>parisons. Keep in mind, energy efficiency is just one of the many important qualities to look<br />
for in windows and doors. The NFRC has one single purpose: to establish and improve upon<br />
uniform energy-rating procedures for all brands of windows and doors.<br />
This nonpartisan coalition of professionals includes home and <strong>com</strong>mercial builders, product<br />
designers and specifiers, manufacturers, consumer advocates, utility <strong>com</strong>pany energy specialists,<br />
and government agencies.<br />
<strong>Pella</strong> Corporation is a member of the NFRC and supports its work on behalf of homeowners<br />
and the building industry. If you have any questions about the NFRC, feel free to write to NFRC,<br />
6350 Ivy Lane, Suite 104, Greenbelt, MD 20770 — or call 301-589-1776, fax 301-589-3884 or<br />
visit nfrc.org.<br />
Remove this label after final inspection; SAVE for future reference<br />
<strong>Pella</strong> Corporation<br />
<strong>Entry</strong> <strong>Door</strong><br />
In-Swing<br />
Not Applicable<br />
PEL – X – XXX<br />
ENERGY PERFORMANCE RATINGS<br />
U-Factor<br />
Solar Heat Gain Coefficient<br />
0.14 5.68 0.005<br />
(U.S./I – P)<br />
ADDITIONAL PERFORMANCE RATINGS<br />
Visible Transmittance<br />
0.00 – –<br />
Manufacturer stipulates that these ratings conform to applicable NFRC procedures for determining<br />
whole product performance. NFRC ratings are determined for a fixed set of environmental conditions<br />
and a specific product size. NFRC does not re<strong>com</strong>mend any products and does not warrant<br />
the suitability of any product for any specific use. For more information, call (641) 621-3114<br />
or visit <strong>Pella</strong>’s web site at www.pella.<strong>com</strong> or visit NFRC’s web site at www.nfrc.org.<br />
Wind Load<br />
Design Pressure<br />
(DP) (psf)<br />
+ 40 / – 40<br />
(Metric/SI)<br />
ENERGY STAR ® Qualified<br />
In All 50 States<br />
(Per ASTM E330)<br />
Does this door meet the criteria<br />
for its glazing level (Check only one box)<br />
Air / Water<br />
Performance For: U-factor SHGC Yes<br />
Air Leakage<br />
Opaque ≤ 0.21 Any X<br />
0.30 CFM/Ft 2<br />
per ASTM E283 ¼ or ½ Lite ≤ 0.27 ≤ 0.30<br />
Water Performance ¾ or Full Lite ≤ 0.32 ≤ 0.30<br />
3.7 psf<br />
per ASTM E547<br />
WDMA DP40 (Design Pressure 40 psf)<br />
ASTM E330<br />
HALLMARK<br />
CERTIFIED<br />
www.wdma.<strong>com</strong><br />
Structural Only<br />
WDMA License Number: XXX-X-XXX<br />
WDMA Hallmark Certification. <strong>Pella</strong> products labeled with the Window & <strong>Door</strong> Manufacturers<br />
Association (WDMA) Hallmark Certification are tested in accordance with applicable WDMA performance<br />
standards, which requires products be tested for air infiltration, water infiltration and structural performance.<br />
Performance of <strong>Pella</strong> products will change over time depending upon the conditions of use. For details on<br />
Hallmark Certification, go to www.wdma.<strong>com</strong>.<br />
Meets or exceeds M.E.C., C.E.C., & I.E.C.C. Air Infiltration Requirements<br />
Glazing type & thickness: Not Applicable3.0MMboth panes, designed per ASTM E1300<br />
Window or <strong>Door</strong> Actual Size: 37.500" wide by 81.500" tall<br />
6210066 – 4 – 1 – NFRC.CCTHERMAUM<br />
Field_Name_6210066 – 4 – 1 – NFRC.ZZTHERMAUM<br />
NOTE: For example purposes only.<br />
NFRC ratings will vary by product.<br />
7.1


