3000P-LPH, PlayList Playout System using Louth ... - DNF Controls
3000P-LPH, PlayList Playout System using Louth ... - DNF Controls
3000P-LPH, PlayList Playout System using Louth ... - DNF Controls

You also want an ePaper? Increase the reach of your titles
YUMPU automatically turns print PDFs into web optimized ePapers that Google loves.
12843 Foothill Blvd.,<br />
Suite D<br />
Sylmar, CA 91342<br />
818 898 3380 voice<br />
818 898 3360 fax<br />
www.dnfcontrols.com<br />
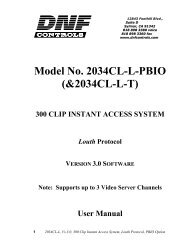
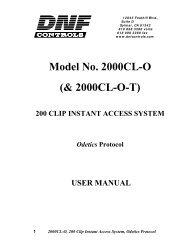
Model <strong>3000P</strong>-<strong>LPH</strong><br />
PLAYLIST PLAYOUT SYSTEM<br />
<strong>Louth</strong>-Philips Protocol<br />
USER MANUAL<br />
1 <strong>3000P</strong>-<strong>LPH</strong>, Playlist <strong>Playout</strong> <strong>System</strong>, <strong>Louth</strong> Philips Protocol
Table of Contents<br />
1. REVISION HISTORY 3<br />
2. DESCRIPTION 4<br />
DEFINITIONS 4<br />
3. INSTALLATION 5<br />
4. VIDEO SERVER SETUP 6<br />
5. PLAYLIST FUNCTIONS 6<br />
A. LCD DISPLAY 6<br />
B. CREATE A PLAYLIST 6<br />
C. TO PLAY A SINGLE CLIP 7<br />
D. TO PLAY MULTIPLE CLIPS 7<br />
E. TO ABORT PLAYING A LIST OF CLIPS 7<br />
F. TO EDIT A PLAYLIST 7<br />
6. SETUP MENU 9<br />
7. SPECIFICATIONS 10<br />
RS422 SERIAL CONNECTOR 10<br />
POWER CONNECTOR 10<br />
8. <strong>DNF</strong> CONTROLS LIMITED WARRANTY 11<br />
Manual Version............…............................. 2.5 120704<br />
Document ID….......….... 3000CL-<strong>LPH</strong> User Manual.doc<br />
2 <strong>3000P</strong>-<strong>LPH</strong>, Playlist <strong>Playout</strong> <strong>System</strong>, <strong>Louth</strong> Philips Protocol
1. REVISION HISTORY<br />
100803 Rev. 2.2 Company header information revised.<br />
112103 Rev. 2.3 Added <strong>DNF</strong> <strong>Controls</strong> Limited Warranty.<br />
020204 Rev. 2.4 Reformatted.<br />
Added Transferring Cue List section.<br />
120704 Rev. 2.5 Removed Transferring Cue List section.<br />
3 <strong>3000P</strong>-<strong>LPH</strong>, Playlist <strong>Playout</strong> <strong>System</strong>, <strong>Louth</strong> Philips Protocol
2. DESCRIPTION<br />
The PLAYLIST Option allows quick and easy creation, editing, and playout of video clips <strong>using</strong><br />
the CLIP ID functions available in the LOUTH-Philips communications protocol.<br />
The user can remotely view the CLIP IDs that exist in the Video Server and enter them into the<br />
PLAYLIST. The ST300 maintains the PLAYLIST in non-volatile memory.<br />
DEFINITIONS<br />
Throughout this document VTR, DDR, VDR & Video Server will be referred to collectively as<br />
“Video Server.”<br />
Words surrounded by brackets, for example [ENTER], are keys on the ST300.<br />
[XXX] + [XXX] means hold the two keys down simultaneously. XXX = Key name.<br />
4 <strong>3000P</strong>-<strong>LPH</strong>, Playlist <strong>Playout</strong> <strong>System</strong>, <strong>Louth</strong> Philips Protocol
3. INSTALLATION<br />
a. Plug one end of a 9-conductor, RS422 serial cable into the 9-pin connector (VTR1,<br />
VTR2, VTR3 or VTR4) on the rear of the ST300.<br />
b. Plug the other end of the cable into the 9-pin REMOTE connector on the Video Server.<br />
c. Plug the power supply into an outlet, 90 VAC to 240 VAC.<br />
d. Assign a <strong>Louth</strong> Port to the ST300 VTR connector.<br />
1) Press [MENU]. The display shows “VTR <strong>Louth</strong> Address “ “Enter 1-9”<br />
2) Press VTR [1], VTR [2], VTR [3] or VTR [4] to select a VTR.<br />
3) Assign a <strong>Louth</strong> Port for that VTR from 1-9 <strong>using</strong> the numeric keypad.<br />
To turn the port off, Enter “0.”<br />
4) Repeat steps 2-3 to assign Port numbers to all desired VTRs.<br />
5) Press [ESC] at anytime to exit the MENU.<br />
Installation is complete.<br />
CONNECTION DIAGRAM<br />
5 <strong>3000P</strong>-<strong>LPH</strong>, Playlist <strong>Playout</strong> <strong>System</strong>, <strong>Louth</strong> Philips Protocol
4. VIDEO SERVER SETUP<br />
Select <strong>Louth</strong> Automation communications protocol on the Video Server to be controlled.<br />
Assign a serial port through which the ST300 will control the VTR.<br />
Select remote mode on the VIDEO SERVER’s control panel (if necessary).<br />
5. PLAYLIST FUNCTIONS<br />
a. LCD DISPLAY<br />
The 4-line display shows the next clip to play, plus the next 2 clips in the PLAYLIST.<br />
The CLIP ID is displayed on the left, start time on the right.<br />
The currently selected clip is identified by an asterisk (*).<br />
The top line of the display shows the running tape time<br />
PLAYLIST<br />
TM 00:00:10:00<br />
CLIP0002*00:00:03:00<br />
CLIP0003 00:12:55:08<br />
CLIP0004 00:21:10:18<br />
^ ^<br />
[CLIP ID Start Time]<br />
b. CREATE A PLAYLIST<br />
1) Press [EDIT LIST] to create a PLAYLIST. The EDIT LIST indicator comes<br />
on.<br />
2) The screen displays “Use WHEEL or KEYPAD.”<br />
3) Turn the wheel clockwise to scroll forward through the list of available CLIP<br />
IDs in the video server.<br />
Turn the wheel counterclockwise to scroll back through the last 10 CLIP IDs<br />
previously viewed.<br />
OR<br />
Use the numeric keypad to directly enter a numeric CLIP ID.<br />
4) When the desired CLIP ID is displayed, press [ENTER] to add the clip to the<br />
PLAYLIST.<br />
5) The screen now displays “Enter Start Time.”<br />
Enter the start time with the numeric keypad<br />
OR<br />
Press [ENTER] to accept the default start time (00:00:00:00)<br />
6) To add additional clips to the Playlist, repeat steps 3 through 5.<br />
7) Press [ESC] to exit creating a Playlist. The EDIT LIST indicator goes out.<br />
6 <strong>3000P</strong>-<strong>LPH</strong>, Playlist <strong>Playout</strong> <strong>System</strong>, <strong>Louth</strong> Philips Protocol
c. TO PLAY A SINGLE CLIP<br />
1) Position the pointer (*) <strong>using</strong> the up arrow [∧] or down arrow [∨] to the clip to<br />
be played.<br />
2) Press [LOAD] to load and cue the clip to the Start Time shown on the display.<br />
The LOAD indicator comes on.<br />
3) Press [PLAY] to play the clip. The LOAD indicator goes out and the PLAY<br />
indicator comes on.<br />
4) The Playlist automatically moves up in the display to the next clip in the<br />
PLAYLIST when [PLAY] is pressed.<br />
d. TO PLAY MULTIPLE CLIPS<br />
1) Position the pointer (*) <strong>using</strong> the up arrow [∧] or down arrow [∨] to the clip<br />
to be played.<br />
2) Press [LIST PLAY]. The LIST PLAY indicator comes on.<br />
3) The first clip selected will load and cue to the start time shown on the display.<br />
4) The next clip will load into the preview position.<br />
5) The list will play continuously until a break or the end of the list is reached.<br />
6) The LIST PLAY indicator will turn off after the play sequence is completed.<br />
e. TO ABORT PLAYING A LIST OF CLIPS<br />
Press [STOP] to abort a playlist sequence.<br />
[STOP] will not abort the sequence while editing the playlist.<br />
f. TO EDIT A PLAYLIST<br />
1) Press [EDIT LIST] to edit a PLAYLIST.<br />
The EDIT LIST indicator comes on.<br />
The display shows the current clip in the PLAYLIST with an asterisk (*).<br />
If no CLIPS were entered, the display will show “PLAYLIST is empty.”<br />
To position the pointer (*) use the up arrow [∧] or down arrow [∨]<br />
OR<br />
Press [LIST TOP] to go the first CLIP in the PLAYLIST.<br />
Press [LIST END] to go the last CLIP in the PLAYLIST.<br />
7 <strong>3000P</strong>-<strong>LPH</strong>, Playlist <strong>Playout</strong> <strong>System</strong>, <strong>Louth</strong> Philips Protocol
2) The screen displays “Use WHEEL or KEYPAD.”<br />
Turn the wheel clockwise to scroll forward through the list of available<br />
CLIP IDs.<br />
Turn the wheel counterclockwise to scroll back through the last 10 CLIP IDs<br />
previously viewed.<br />
OR<br />
Use the numeric keypad to directly enter a numeric CLIP ID.<br />
3) When the desired CLIP ID is displayed, press [ENTER] to add the clip to the<br />
PLAYLIST.<br />
4) The screen now displays “Enter Start Time.”<br />
Enter the start time with the numeric keypad<br />
OR<br />
Press [ENTER] to accept the default start time (00:00:00:00).<br />
Pressing [ESC] aborts adding a clip to the PLAYLIST.<br />
5) To repeat entry of the current CLIP ID:<br />
Press [REPEAT ENTRY]<br />
The screen now displays “Enter Start Time.”<br />
Enter the start time with the numeric keypad<br />
OR<br />
Press [ENTER] to accept the default start time (00:00:00:00).<br />
6) To delete an entry:<br />
Position the pointer (*) <strong>using</strong> the up arrow [∧] or down arrow [∨] at the clip to<br />
be deleted.<br />
Press [DEL]<br />
The screen displays “ENTER=Yes ESC=No”<br />
Press [ENTER] to delete.<br />
Press [ESC] to abort the delete.<br />
After deleting an entry, the pointer (*) will be positioned at the item above the<br />
deleted entry.<br />
7) To delete the entire PLAYLIST:<br />
Press [SHIFT] + [DELETE].<br />
The screen displays “ARE YOU SURE”<br />
Press [ENTER] to delete the entire PLAYLIST.<br />
Press [ESC] to abort the delete.<br />
8) Press [ESC] to exit EDITING the PLAYLIST.<br />
9) The [LIST PLAY] function will continue while editing a playlist.<br />
8 <strong>3000P</strong>-<strong>LPH</strong>, Playlist <strong>Playout</strong> <strong>System</strong>, <strong>Louth</strong> Philips Protocol
6. SETUP MENU<br />
a. Press [MENU].<br />
b. Rotate the Wheel to access MENU options:<br />
SET LOUTH ADDRESS<br />
SET FACTORY DEFAULTS<br />
CLEAR PLAYLIST<br />
Press [ENTER] to delete all entries in the PLAYLIST.<br />
Press [DEL] to abort clearing the PLAYLIST.<br />
ABOUT Displays Model, Version and Date Code of unit.<br />
9 <strong>3000P</strong>-<strong>LPH</strong>, Playlist <strong>Playout</strong> <strong>System</strong>, <strong>Louth</strong> Philips Protocol
7. SPECIFICATIONS<br />
Power:<br />
Size:<br />
Weight:<br />
90 VAC to 265 VAC adapter supplied with IEC connector<br />
(L” x W” x H”) 12” x 6” x 1.5” (front) 3.0” (rear)<br />
4 lbs.<br />
Rear Panel Connectors: VTR1, VTR2, VTR3, VTR4 (All DB9F)<br />
GPI<br />
(DBF15F)<br />
Power<br />
(DB9M)<br />
Auxiliary<br />
(DB9F)<br />
Display:<br />
Jog/Shuttle Wheel:<br />
Easy to read 2-line, back-lit LCD display<br />
(User adjustable contrast)<br />
With mechanical detents<br />
RS422 SERIAL CONNECTOR<br />
9-Pin D-Type, Female (DB9F)<br />
Pin # 1 Frame Ground<br />
2 Receive A <br />
3 Transmit B <br />
4 Transmit Common<br />
5 Spare<br />
6 Receive Common<br />
7 Receive B <br />
8 Transmit A <br />
9 Frame Ground<br />
POWER CONNECTOR<br />
9-Pin D-Type, Male (DB9M)<br />
Pin # 1 +5v DC<br />
2 +5v DC<br />
3 Ground<br />
4 +12 VDC<br />
5 –12 VDC<br />
6 +5 VDC<br />
7 Ground<br />
8 Ground<br />
9 Ground<br />
10 <strong>3000P</strong>-<strong>LPH</strong>, Playlist <strong>Playout</strong> <strong>System</strong>, <strong>Louth</strong> Philips Protocol
8. <strong>DNF</strong> CONTROLS LIMITED WARRANTY<br />
<strong>DNF</strong> <strong>Controls</strong> warrants its product to be free from defects in material and workmanship for a period of one<br />
(1) year from the date of sale to the original purchaser from <strong>DNF</strong> <strong>Controls</strong>.<br />
In order to enforce the rights under this warranty, the customer must first contact <strong>DNF</strong>’s Customer Support<br />
Department to afford the opportunity of identifying and fixing the problem without sending the unit in for<br />
repair. If <strong>DNF</strong>’s Customer Support Department cannot fix the problem, the customer will be issued a<br />
Returned Merchandise Authorization number (RMA). The customer will then ship the defective product<br />
prepaid to <strong>DNF</strong> <strong>Controls</strong> with the RMA number clearly indicated on the customer’s shipping document.<br />
The merchandise is to be shipped to:<br />
<strong>DNF</strong> <strong>Controls</strong><br />
12843 Foothill Blvd., Suite D<br />
Sylmar, CA 91342<br />
USA<br />
Failure to obtain a proper RMA number prior to returning the product may result in the return not being<br />
accepted, or in a charge for the required repair.<br />
<strong>DNF</strong> <strong>Controls</strong>, at its option, will repair or replace the defective unit. <strong>DNF</strong> <strong>Controls</strong> will return the unit<br />
prepaid to the customer. The method of shipment is at the discretion of <strong>DNF</strong> <strong>Controls</strong>, principally UPS<br />
Ground for shipments within the United States of America. Shipments to international customers will be<br />
sent via air. Should a customer require the product to be returned in a more expeditious manner, the return<br />
shipment will be billed to their freight account.<br />
This warranty will be considered null and void if accident, misuse, abuse, improper line voltage, fire, water,<br />
lightning or other acts of God damaged the product. All repair parts are to be supplied by <strong>DNF</strong> <strong>Controls</strong>,<br />
either directly or through its authorized dealer network. Similarly, any repair work not performed by either<br />
<strong>DNF</strong> <strong>Controls</strong> or its authorized dealer may void the warranty.<br />
After the warranty period has expired, <strong>DNF</strong> <strong>Controls</strong> offers repair services at prices listed in the <strong>DNF</strong><br />
<strong>Controls</strong> Price List. <strong>DNF</strong> <strong>Controls</strong> reserves the right to refuse repair of any unit outside the warranty<br />
period that is deemed non-repairable.<br />
<strong>DNF</strong> <strong>Controls</strong> shall not be liable for direct, indirect, incidental, consequential or other types of damage<br />
resulting from the use of the product.<br />
# # #<br />
11 <strong>3000P</strong>-<strong>LPH</strong>, Playlist <strong>Playout</strong> <strong>System</strong>, <strong>Louth</strong> Philips Protocol