MACH 130 FP Mains Voltage 230V / 120V - Dr. Mach
MACH 130 FP Mains Voltage 230V / 120V - Dr. Mach
MACH 130 FP Mains Voltage 230V / 120V - Dr. Mach

Create successful ePaper yourself
Turn your PDF publications into a flip-book with our unique Google optimized e-Paper software.
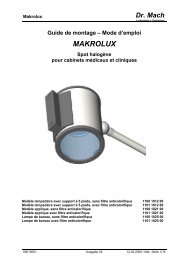
<strong>MACH</strong> <strong>130</strong> <strong>FP</strong> Wall model<br />
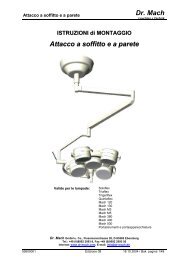
3.3. Mounting the lamp<br />
<strong>Dr</strong>. <strong>Mach</strong><br />
Lamps and Engineering<br />
When mounting the lamp and also at one-yearly intervals, a light coat of acid-free grease should be applied<br />
to the mounting journal and the journal groove F of the lamp, or possibly the already existing cardan bow.<br />
Caution:<br />
The lamp may only be dismounted (in reverse order to the mounting procedure) after the mounting<br />
safeguard has been positioned and screwed tight, as the arm is under spring tension.<br />
Element D<br />
Safeguard bushing<br />
• Loosen locking screw K using a cross screwdriver.<br />
• Disengage spring element D from the safeguard<br />
bushing using a screwdriver (by pushing in direction<br />
of the outer edge) and slide back the<br />
safeguard bushing.<br />
• Take out the segment and remove helmet L.<br />
• Push the lamp and the cardan bow into the bore<br />
of the spring arm, so that journal groove F is<br />
visible in slot E.<br />
• Insert the segment and slide the safeguard<br />
bushing downwards again as far as possible. Insert<br />
locking screw K (including lock washer) and<br />
screw tight.<br />
Then REMOVE MOUNTING SAFEGUARD in the<br />
articulated arm.<br />
• Unscrew cylinder screw H.<br />
• Take out the red safety angle G.<br />
To do so, carefully move the articulated arm<br />
upwards or downwards.<br />
Caution: Hold the arm, to avoid bouncing<br />
up!<br />
The mounting safeguard (called G in all<br />
mounting instructions) and the corresponding<br />
cylinder screw H must be kept carefully for<br />
maintaining and dismounting the lamp.<br />
59100002 Edition 07 05.06.2002 / Bak Page 6/25