GENUINE REAR SPOILER 1 3 4 2 - Manuale mazda
GENUINE REAR SPOILER 1 3 4 2 - Manuale mazda
GENUINE REAR SPOILER 1 3 4 2 - Manuale mazda

Create successful ePaper yourself
Turn your PDF publications into a flip-book with our unique Google optimized e-Paper software.
<strong>GENUINE</strong> <strong>REAR</strong> <strong>SPOILER</strong><br />
IMPORTANT POINTS IN PAINTING<br />
PART NAME: <strong>REAR</strong> <strong>SPOILER</strong><br />
PART NUMBER: 0000-8Y-H50/GHK1 V4 920/G44B V4 920<br />
VEHICLE: MAZDA6<br />
1<br />
PAINT AREAS<br />
SURFACE TREATMENT<br />
a : Paint same as body color<br />
b : No masking required<br />
b<br />
a<br />
a<br />
b b a<br />
2<br />
PAINT SPECIFICATION<br />
CAUTION<br />
• Paint characteristics vary according to paint type. Check manufacturer specifications<br />
before painting.<br />
• Use two-component urethane paint. (Main component: acrylic polyol, Curing agent:<br />
isocyanate)<br />
CAUTION<br />
• Do not use lacquer paints because their weatherproofing and adhesion characteristics<br />
are poor.<br />
• Dilute with the prescribed thinner before painting.<br />
• When painting, use a spray gun to apply the paint evenly.<br />
3<br />
4<br />
DRYING GUIDELINES<br />
60°C: Approx. 2 hours<br />
80°C: Approx. 1 hour<br />
Baking Time<br />
• Do not dry at temperatures above 80°C.<br />
• Refer to the instructions of the paint being used for details on paint viscosity, thickness,<br />
and drying instructions.<br />
HANDLING OF BAKED PAINT<br />
After baking, do not touch the painted product until it has cooled down completely.
<strong>GENUINE</strong><br />
<strong>REAR</strong> <strong>SPOILER</strong><br />
COMPONENT PARTS INSTALLATION MANUAL<br />
In order to maintain the optimum condition, read this manual carefully and familiarize<br />
yourself with this product after completing painting.<br />
CAUTION<br />
• The CAUTION symbols in this manual indicate safety precautions at the time of<br />
installation. Read the instruction carefully to prevent injuries or possible damage to<br />
your vehicle.<br />
CAUTION: Indicates a situation in which bodily injury or damage to the vehicle<br />
could result if the caution is ignored.<br />
• Do not modify the rear spoiler.<br />
• Do not install the rear spoiler in any way other than described in the following<br />
instructions.<br />
• If you have any questions about the use of the accessory, ask your Mazda dealer for<br />
proper advice before using it.<br />
• Mazda and its suppliers are not responsible for injuries, accidents, and damage to<br />
persons and property that arise from the failure of the dealer or installer to follow these<br />
instructions.<br />
1<br />
FINISHED IMAGES<br />
PART NAME: <strong>REAR</strong> <strong>SPOILER</strong><br />
PART NUMBER: 0000-8Y-H50<br />
GHK1 V4 920<br />
G44B V4 920<br />
VEHICLE: MAZDA6<br />
3 Double-sided tape 1<br />
6 Double-sided tape 4<br />
5 Double-sided tape 3<br />
5 Double-sided tape 3<br />
6 Double-sided tape 4<br />
7 Film hole cover<br />
2 Packing<br />
4 Double-sided tape 2<br />
7 Film hole cover<br />
2 Packing<br />
2 Packing<br />
2 Packing<br />
1
2<br />
REQUIRED PARTS (Check the following parts prior to installation)<br />
CAUTION<br />
• Check the chart shown below and make sure that no parts are missing.<br />
• Make sure all the component parts are free from dirt, scratches, or damages.<br />
1 Rear spoiler<br />
2 Packing<br />
3 Double-sided tape 1<br />
(Length:232 mm {9.1 in})<br />
Quantity 1<br />
4 Double-sided tape 2<br />
(Length: 45 mm {1.8 in})<br />
5 Double-sided tape 3<br />
(Length: 140 mm {5.5 in})<br />
Quantity 4<br />
6 Double-sided tape 4<br />
Quantity 1<br />
Quantity 2<br />
Quantity 8<br />
Quantity 2<br />
7 Film hole cover<br />
Quantity 2<br />
3<br />
INSTALLING PROCEDURE (Assembly after painting)<br />
Rear spoiler assembly<br />
1. Remove any oil or dirt on the back of the rear spoiler (attachment surface) with IPA (isopropyl alcohol).<br />
CAUTION<br />
• When installing the packing and protectors to the rear spoiler, always apply primer to the installation<br />
position on the rear spoiler beforehand.<br />
2. Peel off the paper backings of the double-sided tape in the order of 6→345, then attach them to the rear<br />
spoiler.<br />
3. Peel off the paper backings of the packing 2 and film hole cover 7, then attach them to the rear spoiler.<br />
3 Double-sided tape 1<br />
(Length: 232 mm {9.1 in})<br />
6 Double-sided tape 4<br />
5 Double-sided tape 3<br />
(Length: 140 mm {5.5 in})<br />
5 Double-sided tape 3<br />
(Length: 140 mm {5.5 in})<br />
6 Double-sided tape 4<br />
7 Film hole cover<br />
7 Film hole cover<br />
2 Packing<br />
2 Packing<br />
4 Double-sided tape 2<br />
(Length: 45 mm {1.8 in})<br />
2 Packing<br />
2 Packing<br />
34567: within scribe lines.<br />
2
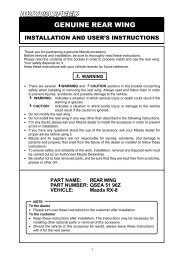
<strong>GENUINE</strong> <strong>REAR</strong> <strong>SPOILER</strong><br />
INSTALLATION AND USER’S INSTRUCTIONS<br />
Thank you for purchasing a genuine Mazda accessory.<br />
Before removal and installation, be sure to thoroughly read these instructions.<br />
Please read the contents of this booklet in order to properly install and use the rear<br />
spoiler. Your safety depends on it.<br />
Keep these instructions with your vehicle records for future reference.<br />
• There are several WARNING and CAUTION sections in this booklet concerning<br />
safety when installing or removing the rear spoiler. Always read and follow them in<br />
order to prevent injuries, accidents, and possible damage to the vehicle.<br />
WARNING: Indicates a situation in which serious injury or death could result if<br />
the warning is ignored.<br />
CAUTION: Indicates a situation in which bodily injury or damage to the vehicle<br />
could result if the caution is ignored.<br />
• For areas indicating the tightening torque in this instruction manual, tighten to the specified<br />
torque using a torque wrench. For areas in which the tightening torque is indicated inside<br />
parentheses ( ), the tightening torque is indicated as a reference value, however tightening<br />
using a torque wrench is not necessary<br />
• Do not modify the rear spoiler.<br />
• Do not install the rear spoiler in any way other than described in the following instructions.<br />
• If in any doubt, please ask your Mazda dealer to install the accessory in order to prevent errors<br />
in installation.<br />
• If you have any questions about the use of the accessory, ask your Mazda dealer for proper<br />
advice before using it.<br />
• Mazda and its suppliers are not responsible for injuries, accidents, and damage to persons and<br />
property that arise from the failure of the dealer or installer to follow these instructions.<br />
• To ensure safety and reliability of the work, installation, removal and disposal work must be<br />
carried out by an Authorized Mazda Dealership.<br />
• Be careful not to lose removed parts, and be sure that they are kept free from scratches, grease<br />
or other dirt.<br />
PART NAME:<br />
PART NUMBER:<br />
VEHICLE:<br />
WARNING<br />
<strong>REAR</strong> <strong>SPOILER</strong><br />
0000-8Y-H50<br />
GHK1 V4 920<br />
G44B V4 920<br />
MAZDA6<br />
NOTE<br />
To the dealer<br />
• Please turn over these instructions to the customer after installation.<br />
To the customer<br />
• Keep these instructions after installation. The instructions may be necessary<br />
for installing other optional parts or removal of this accessory.<br />
• Should the vehicle or this accessory be resold, always leave these instructions<br />
with it for the next owner.<br />
1
1. INSTALLATION VIEW<br />
Rear spoiler<br />
2. PARTS<br />
• Before installation, verify that the kit includes all the following parts and that they are free of dirt, scratches,<br />
or damage.<br />
Part Part name Qty Part Part name Qty Part Part name Qty<br />
Rear spoiler 1 Nut 4 Template 1<br />
Installation<br />
Instructions<br />
1<br />
2
3.BEFORE INSTALLATION<br />
• REQUIRED TOOLS<br />
☆Flathead screwdriver ☆Socket wrench (10 mm) ☆Fastener remover ☆Torque wrench ☆measure<br />
☆Electric drill (3 mm, 6 mm, 10 mm drill bits) ☆Round file ☆Punch ☆Utility knife ☆Scissors ☆Tape<br />
☆Soft, clean cloth ☆IPA (isopropyl alcohol) ☆white gasoline ☆Touch-up paint (Genuine product)<br />
WARNING<br />
Park the vehicle on a flat, level<br />
surface, set the selector lever<br />
to P (AT vehicles) or the shift<br />
lever to 1st or R (MT vehicles),<br />
apply the parking brake and<br />
block the wheels so that the<br />
vehicle does not move during<br />
installation.<br />
CAUTION<br />
Be sure to cover the vehicle<br />
body with protectors or mats to<br />
prevent stains, scratches and<br />
damage when<br />
removing/installing the vehicle<br />
parts<br />
Using improper tools may<br />
cause damage and or broken<br />
parts. Use the correct tool for<br />
the job.<br />
Wrap protective tape around<br />
screwdrivers and fastener<br />
remover tools to prevent<br />
scratching the vehicle.<br />
Put the removed parts and the<br />
parts in the kit on the<br />
protective sheet to prevent<br />
scratches.<br />
Advice<br />
Refer to the Workshop Manual<br />
for removal and installation of<br />
vehicle parts.<br />
Not following the procedures for<br />
removal/installation in the<br />
Workshop Manual could result<br />
in an accident or vehicle<br />
malfunction.<br />
3
4. VEHICLE PART REMOVAL<br />
Trunk lid trim<br />
Handle<br />
Trunk lid trim removal<br />
1. Remove the fasteners (13).<br />
2. Pull the handle outward and remove the trunk lid trim.<br />
Fastener<br />
Fastener<br />
5. <strong>REAR</strong> <strong>SPOILER</strong> INSTALLATION<br />
Rear spoiler installation preparation<br />
• Cover the rear spoiler with a clean cloth to prevent<br />
scratches or other damage.<br />
Soft, clean cloth<br />
Vehicle protection<br />
1. When drilling the trunk lid, cover the vehicle with a soft, clean<br />
cloth to prevent shavings from penetrating the trunk.<br />
Template1<br />
Body hole drilling<br />
1. Cut out the templates1, 2 with scissors along the cut lines.<br />
Template2 (LH)<br />
Template2 (RH)<br />
4
Tape<br />
Tape<br />
Mascot<br />
Align with trunk lid garnish<br />
<br />
Template1<br />
Align the edge of the<br />
template1 with the edge of<br />
the trunk lid garnish<br />
A<br />
A<br />
Template1<br />
Tape<br />
Tape<br />
Trunk lid<br />
2. Align template 1 with the mascot and trunk lid garnish, and<br />
secure the template with tape.<br />
• Make sure the template is not twisted or detached when<br />
affixing it to the body.<br />
• Make sure the template is in the center of the trunk lid when<br />
affixing it to the body.<br />
3. Tap drill hole marks with a punch in the crosshair marks on the<br />
rear spoiler installation templates (4 locations).<br />
• Before marking with a punch, verify again that the marked<br />
hole positions of the template is in the center of the trunk<br />
lid.<br />
• Do not punch the trunk lid, otherwise it may be deformed.<br />
Trunk lid garnish<br />
Adhesive tape<br />
10 MM<br />
Drill<br />
4. Peel off the template1.<br />
5. Wrap the drill bit with duct tape as shown in the figure.<br />
6. Set the drill speed to low.<br />
Drill bit<br />
(shoulder)<br />
Prevent overdrilling<br />
Drill<br />
(drill with low speed)<br />
• Always use a drill with a rotation speed adjustment,<br />
otherwise the trunk lid may deform.<br />
• Be careful when handling drills and other sharp objects.<br />
• To prevent scratching and overdrilling, wrap the drill bit with<br />
duct tape.<br />
Round file<br />
Touch-up<br />
paint<br />
7. With the drill bit pointed perpendicular to the trunk lid, drill a<br />
hole in the marked position in stages.<br />
Drill hole diameter: From 3 mm to 6 mm and then 10 mm<br />
diameter (1 location)<br />
8. Remove any metal burrs around the drilled hole with a round<br />
file.<br />
Burr<br />
Drilled hole<br />
• Make sure to remove burrs from the surface so that the<br />
surface of the trunk lid is smooth.<br />
9. Remove all shavings using an air compressor.<br />
• Completely remove drill filings from the trunk and cabin,<br />
otherwise they may cause abnormal noise.<br />
10. Degrease the trunk lid using IPA (isopropyl alcohol).<br />
11. Apply touch-up paint.<br />
12. Remove the soft cloth for the vehicle.<br />
5
Fold back tape<br />
backings outward<br />
Rear spoiler installation<br />
1. Fold the double-sided adhesive tape (13 locations) outward so<br />
that they can be removed easily.<br />
• Do not remove too much of the tape backing.<br />
Remove double-sided adhesive tape backings<br />
Remove double-sided adhesive tape backings<br />
Vehicle front<br />
Rear spoiler<br />
2. Hold both ends of the rear spoiler and align the rear spoiler<br />
screw positions with the installation hole (10 mm diameter) of<br />
the trunk lid and insert lightly.<br />
Trunk lid<br />
• Do not insert the rear spoiler screw positions 100% down<br />
into the installation hole.<br />
Otherwise, the double-sided adhesive tape on the backside<br />
of the rear spoiler will adhere to the trunk lid, and the<br />
installation position cannot be adjusted.<br />
Template2 (LH)<br />
Rear spoiler<br />
Template2 (RH)<br />
3. Align template2 with both ends of the trunk lid and rear spoiler,<br />
and adjust the height.<br />
Tape<br />
Align with<br />
trunk lid line.<br />
Template2 (RH)<br />
Align with garnish line.<br />
*The figure shows the right side,<br />
however, perform the same<br />
procedure for the left side.<br />
6
Mascot<br />
Rear spoiler<br />
4. Align the following clearances and height to determine the<br />
installation position.<br />
・ Make sure the clearance on the upper part and both sides of<br />
the rear spoiler and the mascot is even.<br />
• Make sure that the outward-folding double-sided adhesive<br />
tape (13 locations) does not get stuck on the trunk lid.<br />
Clearance is even.<br />
5. Peel off the template2.<br />
Vehicle<br />
front<br />
Press (2)<br />
Trunk lid<br />
Press (1)<br />
Press (2)<br />
6. Press in from the surface of the rear spoiler and install the<br />
rear spoiler to the trunk lid.<br />
• Press the rear spoiler in gently. If it is pressed in with<br />
excessive force, the trunk lid will deform making it difficult<br />
to install the rear spoiler.<br />
Rear spoiler<br />
7. Remove the double-sided adhesive tape backings from the<br />
3<br />
Rear spoiler<br />
2<br />
1<br />
2<br />
3<br />
rear spoiler in the direction of the arrows in the order of 1 to 3,<br />
and affix securely.<br />
• Perform the procedure while lifting up the rear spoiler from<br />
the trunk lid slightly so as not to tear the tape backing.<br />
• Do not remove the rear spoiler once it has been affixed to<br />
the accessory to prevent loss of adhesive strength.<br />
Remove tape backings<br />
8. Fully tighten the rear spoiler using the nuts (4).<br />
Nut tightening torque:<br />
3.9-6.8 Nm (40-69 kgf/cm, 35-60 in/lbf)<br />
• Tighten the nuts securely.<br />
Make sure to tighten to the specified torque. If tightened<br />
outside the specified torque, the rear spoiler could be<br />
damaged or fall off.<br />
Nut<br />
Trunk lid<br />
9. After installing the rear spoiler, install the trunk lid trim in the<br />
reverse order of removal.<br />
7
6. To the customer<br />
Heed the following cautions when handling (maintenance) the rear spoiler.<br />
• If gasoline, oil, engine coolant, or battery fluid adheres to the hard plastic parts, it will cause discoloration,<br />
stains, or damage. Wipe off immediately with a soft cloth.<br />
• Depending on the type of high pressure car washer used, the water for washing may be high temperature<br />
and/or under high pressure. Be careful when using pressurized water from a car washer nozzle. If the<br />
nozzle is too close or water pressure is applied for long periods, it may cause deformation or damage to the<br />
hard plastic parts.<br />
• Do not use car wax containing compound (polishing powder). Otherwise, the hard plastic parts could be<br />
damaged.<br />
• Do not use electric or air tools to apply wax or compound (polishing powder). Otherwise, friction heat will be<br />
generated causing deformation or damage to the hard plastic parts.<br />
8
Date , ,<br />
VIN<br />
Person in<br />
charge<br />
Checked<br />
Approved<br />
INSTALLATION<br />
INSPECTION<br />
SHEET<br />
MAZDA6<br />
Rear spoiler<br />
0000-8Y-H50<br />
GHK1 V4 920<br />
G44B V4 920<br />
Perform the following inspections<br />
1. Inspection items after installation<br />
Check<br />
• Verify the fitting between the vehicle part and the installed part, and inspect for damage or dirt.<br />
2. Vehicle parts reinstallation<br />
Inspected part<br />
Inspection<br />
item<br />
Inspection<br />
Check<br />
Trunk trim Rattling Inspect the trim for looseness or drop off.<br />
3. Installation of accessory, operation check<br />
Inspection<br />
Inspected part<br />
item<br />
Inspection<br />
Check<br />
Rear spoiler installation Looseness Inspect the installation area for looseness.<br />
The term of validity for this sheet : 3 year